cropper
update

Nasty Performance ~ 847-458-4858 

update
  • Blog Home
  • Categories
    • Motorcycle Maintenance
    • Riding Tips & Preps
    • Safety & Inspection
    • Customizations & Upgrades
    • DIY Motorcycle Repairs
    • Motocycle Audio Systems
    • Motocycle Seasonal Care & Storage
    • Engine, Electrical Performance
  • Bike Night
  • Nasty Performance Motorcycle Shop
April 03.2026
1 Minute Read

Your Spring Motorcycle Maintenance Checklist

Did you know? The majority of motorcycle breakdowns in the spring are caused by issues that could have been prevented with just 30 minutes of routine inspection. As the world thaws and the urge for the open road grows irresistible, taking the time for a spring motorcycle maintenance checklist is not just a good idea—it’s essential for a safe and thrilling riding season. This guide delivers everything you need to ride confidently from your first start, combining pro tips, key maintenance tasks, and the latest safety guidelines to get your bike in peak condition—before you twist the throttle for that first spring ride.

Start Your Spring Motorcycle Maintenance Checklist with This Surprising Fact

It might surprise you, but over 60% of motorcycle accidents related to mechanical failure stem from skipped maintenance checks after winter storage. Even riders who are vigilant about in-season upkeep can overlook hidden issues that develop while a bike sits idle—like corroded battery terminals, under-inflated tires, or brittle brake lines. That’s why a thorough spring motorcycle maintenance checklist isn’t just about keeping your engine purring; it’s about safeguarding your ride and, ultimately, your life. Whether you fiend for the thrill of the open road or value the serene peace of mind when everything works as it should, starting the season with a comprehensive maintenance check is non-negotiable. This guide will empower you to identify potential trouble spots and ensure your machine is in perfect working order, ready for miles of safe adventure ahead.

What You'll Learn: A Complete Spring Motorcycle Maintenance Checklist

  • How to perform a thorough motorcycle maintenance check before riding season
  • Key components every comprehensive maintenance checklist must cover
  • Tips directly from industry service manual guidelines for best results
  • Safety-critical steps for visual inspection and troubleshooting
  • Common mistakes riders make when preparing for the open road

Why a Spring Motorcycle Maintenance Checklist Matters

"Routine maintenance isn’t just about performance—it’s about rider safety and peace of mind before hitting the open road." – Certified Motorcycle Technician

Completing a spring motorcycle maintenance checklist is about more than boosting your motorcycle’s performance or extending its lifespan. The real priority is rider safety. Neglecting essential maintenance tasks can leave you vulnerable to avoidable accidents caused by factors like worn brake pads, low brake fluid, or cracked fuel lines. Regular, seasonal maintenance checks ensure every component—from your engine oil and battery terminals to your tires and brake lines—is ready to perform under pressure. This preparation grants you not only a smooth operation and optimal riding experience but also that indispensable peace of mind while you start the season. As you plan your first trip onto the open road, remember: your safety begins with your toolbox and a checklist.

As you work through your spring motorcycle maintenance checklist, it’s helpful to understand how seasonal changes can impact your bike’s performance and longevity. For a deeper dive into year-round care strategies and how to adapt your maintenance routine as the weather shifts, check out these essential seasonal bike care secrets every rider should know.

spring motorcycle maintenance checklist vibrant garage maintenance check photorealistic motorcyclists well-lit garage natural light

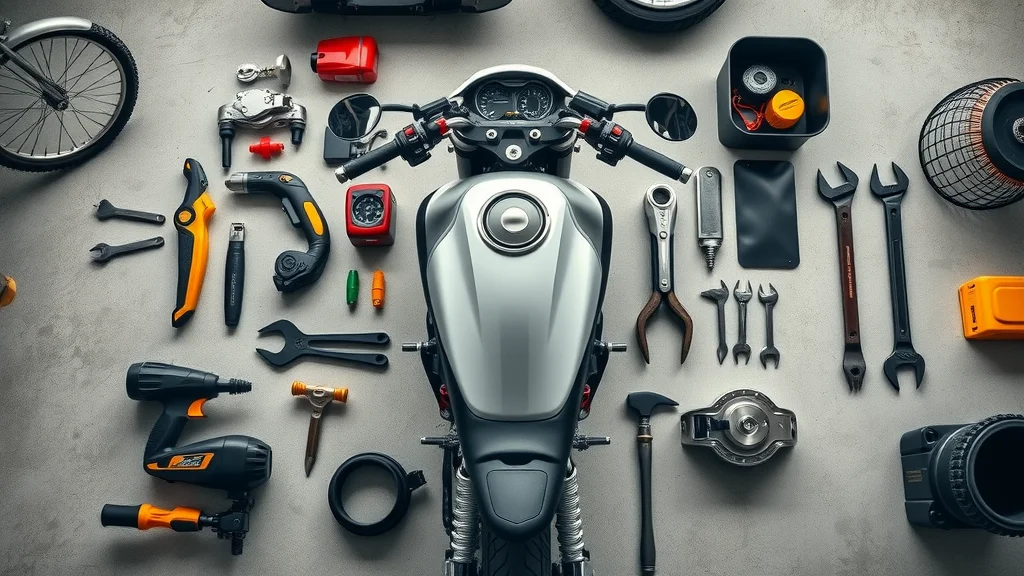
Essential Tools and Service Manual for Your Motorcycle Maintenance Checklist

Before you can tackle your spring motorcycle maintenance checklist, assemble the right tools and have your service manual at hand. The service manual contains detailed instructions specific to your motorcycle’s make and model, ensuring that every maintenance task—from an oil change to inspecting your clutch and throttle cables—is done correctly. A typical maintenance check requires basic yet crucial tools that empower you to perform the majority of inspections and minor repairs yourself—even if you’re not a professional mechanic.

  • Basic hand tools: sockets, wrenches, and screwdrivers, useful for removing panels, tightening bolts, and tackling most common fasteners
  • Tire pressure gauge and a multimeter, which help you verify precision in essential metrics like tire inflation and electrical system health
  • The official service manual for your specific motorcycle model, providing accurate maintenance schedules, torque specifications, and troubleshooting advice tailored to your bike

Equipping yourself with the right gear and authoritative information is the first step in effective motorcycle maintenance. With these essentials at your side, you’re set to handle everything your bike needs to thrive for the riding season.

Step-by-Step Spring Motorcycle Maintenance Checklist

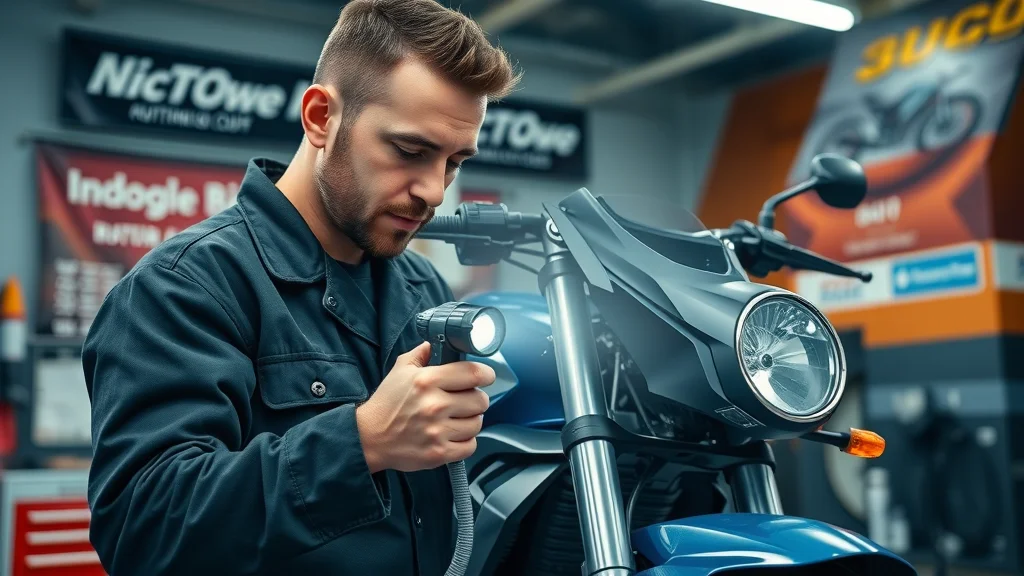
1. Begin with a Complete Visual Inspection

A thorough visual inspection is the foundation of every effective spring motorcycle maintenance checklist. This foundational step allows you to catch signs of wear, leaks, or damage before they morph into costly repairs or safety hazards. Start by carefully examining all visible components for cracked, brittle, or frayed rubber hoses, worn gaskets, or seepage points around the engine. Check under the bike for puddles or spots left from winter storage that might indicate an oil leak or other issue. Give special attention to the front and rear wheels, the drive belt or chain, and the condition of the brake lines. By methodically scanning every angle, you can identify trouble spots like loose fasteners, aging wiring, and even subtle paint bubbles that often signal underlying rust.

Spot-check your fuel lines and fuel filter for cracks or stiffness, as fuel system degradation is especially common after long periods of inactivity. The visual inspection prepares you to prioritize other critical tasks on your list—so take your time, use a flashlight for those hard-to-reach areas, and never underestimate the clarity of a fresh, unbiased look at your motorcycle’s current state. Remember to check your mirrors, controls, and footpegs as well while you’re at it! This extra diligence during the visual inspection translates directly to safety and confidence once you finally hit the open road.

motorcycle maintenance checklist visual inspection cracked hoses signs of wear driveway photorealistic detailed engine textures natural lighting

2. Batteries and Electrical System: Key Maintenance Check

  • Check battery terminals for signs of corrosion and test for proper voltage
  • Inspect all visible wires for fraying, loose connections, or insulation damage, replacing components as needed
  • Test functionality of lights (headlamp, turn signals, brake light), horn, and any electronic accessories

Your battery and electrical system are often overlooked components that can leave you stranded if not addressed. After winter storage, try starting your engine—if it’s slow to turn over, use a multimeter to test battery voltage and charge as specified in your service manual. Corroded battery terminals are a common culprit behind starting problems; clean them thoroughly using a wire brush and a baking soda solution. Don’t forget to examine your fuse box and ensure all fuses are appropriately rated and intact.

While checking the rest of the system, trace wires leading to your horn, signal lights, and brake light. Make sure you correct any brittle sheathing or exposed wires right away to prevent shorts or electrical fires. Function-test every bulb and electronic system. If you encounter dim or flickering lights, consider replacing bulbs or examining the wiring for deeper faults. Addressing electrical concerns now helps avoid headaches and ensures all safety systems are fully operational for the riding season.

3. Tires and Wheels: Foundation of Riding Season Safety

Worn or under-inflated tires compromise every aspect of riding—handling, traction, and most importantly, safety. Start your tire maintenance check with a careful visual inspection for cracks, bald spots, or embedded debris that might have worsened during winter storage. Using a tread depth gauge, measure the remaining tread; replace the tire if it’s below the minimum safe limit (usually 2/32 inch for most models). Don’t forget to check both the front and rear wheels—imbalances or damage can threaten your smooth operation on turns or under sudden braking.

Tire pressure is another critical metric on your spring motorcycle maintenance checklist. Under-inflated tires cause excessive heat buildup and poor fuel efficiency, while over-inflated ones reduce grip and comfort. Use a quality tire pressure gauge and consult your service manual for model-specific inflation requirements. Inspect the wheels for bent rims or out-of-round conditions and pay close attention to the valve stems, which can crack or dry out while stored. A proactive approach here not only helps prevent blowouts but guarantees that your first ride of the season feels as responsive and exhilarating as the last.

motorcycle maintenance tire inspection tread depth gauge riding season maintenance check photorealistic outdoor setting

4. Fluids and Filters: Motorcycle Maintenance Essentials

  • Change engine oil and oil filter for maximum engine health
  • Check brake fluid and coolant levels, topping up or flushing as specified by your manual
  • Inspect clutch and transmission fluids, ensuring lubricants are at the recommended levels
  • Replace or clean the air filter if dirty, worn, or clogged

Fluids and filters are the lifeblood of any motorcycle, and after a period of winter storage, every fluid deserves attention. An oil change is a staple for good motorcycle maintenance—old engine oil can develop acidic compounds and lose its lubricating qualities over time, risking engine wear and overheating. Don’t just drain and refill; replace the oil filter as well to ensure contaminants from previous seasons are fully eliminated. Check your brake fluid for clarity and contamination; murky fluid or low levels can impact brake performance and safety. Flush the brake lines if needed, especially if the bike showed any signs of reduced brake feel last season.

Coolant and transmission fluids often get forgotten, but their condition is vital for maintaining optimal engine temperature and smooth shifting. A quick inspection and top-up according to your maintenance schedule will keep these systems working order. The air filter should be checked as a clogged or dirty filter restricts airflow, reducing horsepower and efficiency—replace or clean as dictated by your service manual for maximum benefit.

5. Brakes, Chains, and Cables: Safety-First on Your Maintenance Checklist

  1. Inspect brake pads, rotors, and lines for thickness and wear, replacing brake pads if necessary; check the brake fluid in the reservoir and look for leaks along the brake lines
  2. Lubricate and tension your chain (or inspect your drive belt for cracks and tension), making sure it moves freely with no tight spots or excessive slack
  3. Check and adjust cable tension for clutch and throttle to ensure crisp response with no sticky or sluggish movement

The integrity of your braking and drive systems is the difference between smooth operation and danger. Even slightly worn brake pads or rotted brake lines can drastically extend stopping distances, especially in an emergency. Chains should be free of grit and lubricated per the maintenance schedule, while drive belts must be checked for nicks or gaps. Tighten or adjust as outlined in your service manual, and address any resistance or odd sounds that hint at deeper mechanical faults. Maintaining proper cable slack in the clutch and throttle—without excess play—ensures predictable control and quick response when split-second action is required out on the open road.

Routine maintenance of these systems prevents the most common breakdowns and unsafe riding conditions. Taking your time with this part of the spring motorcycle maintenance checklist helps ensure that every mile is not only enjoyable but also as secure as possible.

6. Suspension and Forks: Assess Before the Open Road

Suspension components like front forks and rear shocks take the brunt of every road imperfection; neglecting them can turn a pleasant ride into a bumpy, unpredictable ordeal. Start by inspecting for oil seepage or grime around the fork seals—a sign that a rebuild or replacement is in order. Compress the suspension and listen for squeaks, knocks, or sluggish rebound, which may indicate internal wear or inadequate lubrication. Check the condition of the rear shocks for rust or bending and make sure damping and rebound settings match your weight and riding style for optimal stability.

This is an area where your service manual can provide invaluable guidance. Detailed torque specifications and troubleshooting advice ensure you don’t overlook hidden faults. A smooth, well-tuned suspension doesn’t just improve comfort—it’s a crucial factor in maintaining safe control at high speeds and when cornering fast. If you discover anything out of the ordinary, or if you’re unsure about inspection results, consider bringing your bike to a professional mechanic before embarking on your first extended trip of the season.

motorcycle maintenance checklist suspension and fork inspection mechanic photorealistic workshop detail professional maintenance check

7. Air Filter and Final Visual Check

Don't overlook your air filter—the gateway between the outside environment and your engine. A dirty or clogged air filter reduces power and increases fuel consumption, while leaving your engine vulnerable to harmful debris. Remove the air filter, hold it up to the light, and replace or clean if it looks dark, clogged, or deteriorated—refer to your service manual for the correct method. Once you’ve completed all major maintenance tasks, walk around your bike one last time to perform a comprehensive visual inspection. Look for anything you might have missed, like loose fasteners, disconnected hoses, or unsafe modifications from seasons past. This final look serves as the last line of defense to ensure your motorcycle is fully prepped before your engine rumbles to life for the spring riding season.

By finishing strong and double-checking every element, you can hit the open road with full confidence in both your machine and your maintenance skills.

Spring Motorcycle Maintenance Checklist: Quick Reference Table

Maintenance Item Task Recommended Frequency
Visual Inspection Check for leaks, cracks, and damage Before each season
Tires & Wheels Inspect, check pressure and tread Monthly
Batteries Charge, clean terminals Seasonally
Fluids & Filters Replace as needed Seasonally or per manual
Brakes Check pads and fluids Every ride
Chain & Cables Lubricate, inspect 500 miles
Suspension & Forks Inspect for leaks and wear Annually
Air Filter Clean or replace 5,000 miles or as needed

spring motorcycle maintenance checklist workspace tools photorealistic top-down organized garage detailed maintenance essentials

Watch this step-by-step guide, featuring experienced mechanics and real-world demonstration on various motorcycle models. Each inspection task and service manual tip is shown in action—perfect for both novice and seasoned riders who want to see the full motorcycle maintenance checklist in motion.

Tips for a Safe Start to the Riding Season

  • Double-check your maintenance checklist before your first ride to confirm you haven’t missed any safety-critical areas
  • Take a test ride in a controlled area, such as an empty parking lot, to detect any hidden issues like unusual noises, vibration, or brake fade
  • Review your insurance and riding gear—make sure your motorcycle insurance is current and that your helmet and protective wear are in good condition

Common Mistakes Riders Make When Following a Spring Motorcycle Maintenance Checklist

  • Ignoring worn brake pads or tires due to assumed “just one more ride” mentality
  • Neglecting to replace or clean the air filter, reducing both engine performance and life
  • Skipping the service manual’s specific recommendations and relying on guesswork
  • Forgetting a final visual inspection—often the last step that catches missed details

By avoiding these common pitfalls and adhering closely to your checklist—with an emphasis on following your service manual and looking out for signs of wear—you’ll keep your ride safe, reliable, and ready for the open road.

Understand how to read, interpret, and apply key details from your motorcycle’s service manual. This video highlights critical sections, such as torque specifications, recommended maintenance intervals, and part diagrams, empowering you to handle your motorcycle maintenance with precision and confidence.

People Also Ask: Spring Motorcycle Maintenance Checklist Questions

How to prep a motorcycle for spring?

To prep your motorcycle for spring, begin with a detailed spring motorcycle maintenance checklist: perform a complete visual inspection for leaks or damage, change the engine oil and oil filter, check and top up all fluids (including brake fluid and coolant), inspect battery terminals, verify tire pressure and tread depth, lubricate the chain or drive belt, and ensure all lights and signals are functional. Don’t overlook cleaning the air filter and consulting your service manual for any model-specific requirements. Finish with a gentle test ride to verify everything is in working order before hitting the open road.

What is the 12 second rule for motorcycles?

The “12 second rule” refers to scanning ahead of your motorcycle approximately 12 seconds down the road to anticipate hazards, traffic changes, or obstacles. By maintaining this long-range visual awareness—especially during the early riding season when road debris and unpredictable situations are common—you give yourself ample time to brake, steer, or make adjustments. Practicing this rule enhances rider safety and reduces the likelihood of sudden, risky maneuvers.

What maintenance needs to be done on a motorcycle?

Key motorcycle maintenance tasks include changing engine oil and filters, checking and topping up fluids (brake, coolant, and transmission), inspecting and replacing air filters, adjusting and lubricating the chain or drive belt, checking brakes and brake pads for wear, maintaining proper tire pressure and tread, ensuring all lights and signals are working, and tightening fasteners. Always follow your motorcycle’s specific maintenance schedule as outlined in the service manual to ensure every critical item is covered.

How do I know if my motorcycle fork springs are bad?

Bad fork springs often cause excessive front-end dive under braking, poor rebound, or a rough ride over bumps. Look for oil leaks around fork seals, uneven tire wear, or an unusually harsh or soft feel in the suspension. Consult your service manual for recommended inspections and tests; if you notice any instability or hear odd noises during a bounce test, the fork springs or associated components may need to be serviced or replaced for safety and smooth operation.

Expert Quotes on Motorcycle Maintenance and Riding Safety

"Your motorcycle deserves a little extra attention before the riding season. Following the right maintenance checklist keeps your ride smooth and worry-free." – Local Bike Mechanic

Key Takeaways: Mastering the Spring Motorcycle Maintenance Checklist

  • Following a complete spring motorcycle maintenance checklist boosts safety and reliability
  • A thorough maintenance check and adherence to your service manual prevent costly surprises
  • Routine care helps you make the most of every riding season

FAQs About Spring Motorcycle Maintenance Checklists

  • How often should I do a spring motorcycle maintenance checklist?
    Perform a thorough maintenance checklist at the start of every riding season and follow regular maintenance intervals as outlined in your service manual throughout the year.
  • Can I do all maintenance myself or do I need a professional?
    Many maintenance tasks, such as oil changes, air filter cleaning, and visual inspections, can be done at home with basic tools and access to your service manual. For more complex repairs or if you’re unsure, trust a certified mechanic.
  • What is the most commonly missed item in spring checks?
    The air filter is often forgotten—riders overlook its impact on engine performance and only change it when problems arise. Regularly cleaning or replacing the air filter is crucial for reliability.
  • Does skipping a year of maintenance really matter?
    Absolutely—neglecting regular maintenance can lead to accelerated wear, safety risks, and costly breakdowns. Sticking to your maintenance schedule is essential for performance and peace of mind.

Ready for Riding Season? Call Nasty Performance Motorcycle Shop Today: 847-458-4858

Don’t leave your safety and riding adventure to chance. Complete your spring motorcycle maintenance checklist—or let our pros handle it for you. For professional inspections and expert service, call Nasty Performance Motorcycle Shop at 847-458-4858 and start your season right!

If you’re eager to take your motorcycle care to the next level and ensure your ride stays in peak condition all year long, there’s even more to discover. Explore the broader strategies and expert insights in Seasonal Bike Care Secrets Every Rider Must Know. This resource goes beyond spring prep, offering guidance on adapting your maintenance habits for every season, protecting your investment, and maximizing your bike’s performance no matter the weather. Dive in to unlock advanced tips and keep your motorcycle adventure-ready, mile after mile.

Motorcycle Maintenance

0 Comments

Write A Comment

*
*
Please complete the captcha to submit your comment.
Related Posts All Posts

How To Perform a Motorcycle Tune Up

Ever wondered if a simple routine could be the difference between your bike running smooth and stalling at the worst moment? A regular motorcycle tune up not only boosts your bike’s performance but also protects your investment, enhances fuel economy, and ensures safe riding every time you hit the road. This complete guide unlocks all the secrets you need to know—from essential tools and step-by-step processes to expert maintenance tips. Whether you’re a longtime rider or a new motorcycle owner, read on to master every aspect of keeping your bike running smoothly and reliably. Unlock the Secrets of a Motorcycle Tune Up: Why Routine Motorcycle Maintenance Matters Every motorcycle enthusiast wants their machine to deliver smooth power, crisp throttle response, and long-term reliability. But did you know the foundation of optimal performance and bike longevity lies in regular motorcycle maintenance? A thorough motorcycle tune up involves more than a quick oil change—it requires visual inspection, cleaning, and replacing key components such as the spark plug, air filter, and regular checks on engine oil and the chain. Routine tune ups not only maximize your motorcycle’s lifespan but also significantly reduce the chances of unexpected breakdowns, improve fuel efficiency, and keep your ride enjoyable. Skipping essential maintenance tasks might save some time now, but could cost you big in repairs and inconvenience later. By embracing a proactive approach, you support both your bike’s smooth power delivery and your own peace of mind, making every journey safer and more enjoyable. Motorcycle Tune Up: What You'll Learn in This Guide Step-by-step motorcycle tune up procedures Key components of motorcycle maintenance Expert tips for spark plug, air filter, and engine oil check How to maximize lifespan and performance Common mistakes and safety considerations Motorcycle Maintenance Tune Up Schedule Component Inspection Steps Replacement Interval Spark Plug Remove, inspect, clean or replace Every 6000-8000 miles Air Filter Remove, inspect, clean or replace Every 10,000 miles or as needed Engine Oil Drain, replace with manufacturer-recommended grade Every 3000-5000 miles Chain Inspect tension, clean, lubricate Every 500 miles or as necessary Battery Check voltage, clean terminals Twice per year What Does a Motorcycle Tune Up Include? (People Also Ask) Comprehensive Motorcycle Tune Up Checklist Inspecting and replacing spark plug Cleaning or replacing air filter Changing engine oil Lubricating and adjusting chain Checking brakes and tires Battery maintenance Inspecting cables and controls What does a motorcycle tune-up include? Answer: "A motorcycle tune up involves a systematic inspection and maintenance of various components, such as spark plugs, air filters, and engine oil, to ensure optimal performance and safety." When you perform a motorcycle tune up, you’re providing more than just basic care; you are following a detailed process that addresses the essential elements of a motorcycle maintenance routine. These steps go beyond just an oil level or a chain check. You’ll assess everything from the spark plug and air filters to brake pads and battery health, ensuring everything is in good condition for safe riding. Regular tuning directly leads to the bike running smoothly, improved fuel efficiency, and helps extend its longevity. Don’t neglect essential areas like the fuel lines and the fuel filter, as these contribute equally to the smooth power delivery and reliability you expect from your ride. Essential Tools and Safety Equipment for Effective Motorcycle Maintenance Getting your motorcycle tune up right always starts with the right equipment. Using proper tools not only makes the maintenance process easier but also protects vital bike parts from accidental damage. Whether you're conducting a spark plug check or swapping the air filter, a set of quality wrenches, screwdrivers, and safety gear ensures every task is done precisely. Professional mechanics and experienced riders always recommend completing every visual inspection with appropriate safety gloves and eye protection to prevent injuries or accidents. Preparing for regular motorcycle maintenance means more than gathering a handful of tools. Each tool ensures that essential components like brake pads, engine oil, and chain receive the care they need without causing unnecessary wear or safety risks. Keep your bench organized and all maintenance tasks straightforward, so your motorcycle is always ready for the road and delivering optimal performance. Motorcycle Tune Up Tools Checklist Wrenches and socket sets Screwdrivers Spark plug wrench Oil drain pan Funnel Safety gloves and eye protection Step 1: Inspect and Replace Spark Plug During Your Motorcycle Tune Up The spark plug is the heart of your motorcycle’s ignition system. Over time, spark plugs accumulate deposits, suffer from electrode wear, and lose their ability to deliver crisp sparks, undermining your bike’s smooth power and efficiency. Inspecting, cleaning, or replacing the spark plug during every motorcycle tune up keeps your engine firing on all cylinders, allowing for optimal combustion and reduced risk of misfires. Always follow your manufacturer’s recommended intervals for this task—usually every 6,000–8,000 miles—but check more often if your ride feels sluggish or the engine is hard to start. To inspect a spark plug: remove it using a spark plug wrench, examine for discoloration or heavy deposits, and check the electrode gap. If the electrode is worn or the ceramic insulator is cracked, a replacement is necessary. After fitting new or cleaned spark plugs, you’ll often notice faster starts and improved throttle response. Don't neglect this step—as essential as keeping oil level within spec or replacing the air filter, spark plug care is the key to your bike running smoothly mile after mile. Why Replacing or Cleaning Spark Plugs Is Crucial Improved ignition Better fuel efficiency Smoother ride "Neglecting spark plug maintenance can harm engine performance and fuel economy." Many riders underestimate the impact of a spark plug that’s past its prime. Persistent problems like slow starts, engine knock, or loss of power can often be traced back to worn or dirty spark plugs. Regularly cleaning or replacing these small yet essential components ensures reliable ignition and stable power delivery. In addition to fuel efficiency gains, addressing spark plug issues early can prevent bigger headaches like engine misfires or poor idle quality. While mastering the basics of a motorcycle tune up is crucial, it's equally important to adapt your maintenance routine to the changing seasons. For practical tips on how to keep your bike in peak condition year-round, check out these seasonal bike care secrets every rider must know. Step 2: Air Filter Inspection - Clean or Replace for Optimal Motorcycle Performance The air filter is your engine’s first line of defense against dust, dirt, and airborne contaminants. Over time, clogged air filters can choke off the flow of clean air, leading to reduced power, sluggish throttle response, and poor fuel economy. During any motorcycle tune up, always include an air filter inspection and replacement if needed. This simple step protects your engine, maximizes performance, and keeps your motorcycle running smoothly in all conditions. An air filter that goes unchecked may lead to dirt building up inside the engine, causing premature engine wear and higher maintenance costs in the long run. Learning to properly access, clean, or replace your motorcycle’s air filter is an easy win for optimal performance, giving you cleaner power and extending engine life. Make it a standard part of your motorcycle maintenance routine, especially if you ride in dusty or harsh conditions. Best Practices for Air Filter and Air Filters Service How to access and inspect the air filter Signs it's time to clean or replace an air filter OEM vs. aftermarket air filters comparison Accessing the air filter typically involves removing the seat or side panel. Once exposed, perform a visual inspection—check for excessive dust, deformities, or signs of oil/fuel contamination. If the air filter is clogged or misshapen, cleaning won’t be enough; you’ll need to replace it. Compare OEM with aftermarket options: OEM filters guarantee perfect fit for your bike model, while high-quality aftermarket air filters might offer improved airflow for performance upgrades. Always reinstall the filter carefully, ensuring airtight sealing to avoid engine damage. Adhering to the proper replacement interval (around every 10,000 miles or per the owner’s manual) prevents bigger issues like reduced power delivery and increased fuel consumption. Step 3: Motorcycle Tune Up Engine Oil Change Procedure Engine oil is the lifeblood of your motorcycle. It lubricates moving parts, dissipates heat, and carries away impurities. As miles accumulate, engine oil loses its viscosity and cleaning power, leading to possible engine damage if neglected. During any motorcycle tune up, draining and replacing engine oil—and checking the oil filter—ensures your bike’s engine operates at peak efficiency and is protected against wear and overheating. Routine oil change intervals, typically every 3,000–5,000 miles, are essential for long-term reliability and good condition of your motor. For the oil change, always warm up the engine slightly—the oil will flow better and carry away more debris. Use an oil drain pan to collect used oil, which must be disposed of properly to protect the environment. Choose the recommended grade of engine oil for your motorcycle model, as indicated in the owner’s manual. After topping up and ensuring the right oil level, double-check for any leaks before starting your next ride, so your motorcycle is both safe and ready to perform. Selecting and Replacing Motorcycle Engine Oil Draining old engine oil safely Choosing the correct engine oil grade Proper disposal of used oil Never underestimate the importance of using manufacturer-approved oil grades—synthetic, semi-synthetic, or mineral. Each works differently to shield engine parts and maintain optimal performance. Regular oil changes flush out damaging deposits and preserve the engine in good condition, while skipping this task can cause accelerated wear, reduced fuel economy, and even catastrophic failure. Remember to reset your oil change reminder or maintenance log so you’re always on schedule with your tune up routine. Step 4: Additional Motorcycle Maintenance Checks Besides the critical spark plug, air filter, and engine oil, several other motorcycle maintenance checks are essential for a thorough motorcycle tune up. Chain tension should be just right to avoid slipping or unnecessary wear, and regular lubrication keeps it running smoothly and quietly. Brakes, including brake pads and brake fluid, directly affect your safety—inspect them frequently for wear and top off or replace as needed. Don’t forget tire pressure, as underinflated tires not only reduce handling and increase fuel consumption but also pose a serious safety risk. Your routine tune up should also include a close inspection of all cables (clutch, throttle, brakes), checking for fractures, wear, or binding that could compromise smooth power delivery. Regularly care for your battery—clean terminals, check charge, and replace if needed—to prevent dreaded no-start situations. Keeping an eye on the electrical system and conducting regular visual inspections helps ensure your motorcycle is always in good condition and ready for every adventure. Routine Inspection for Motorcycle Tune Up Longevity Lubricating chains Checking tire pressure Inspecting brakes Battery care and electrical system checks Implementing these maintenance tasks in your tune up not only helps your motorcycle run optimally but can also save significant repair costs over time. By proactively assessing each component, you control your bike’s safety, performance, and cost of ownership—season after season, mile after mile. Frequently Asked Motorcycle Tune Up Questions (FAQs) How much does a tune-up on a motorcycle cost? Answer: "The cost of a motorcycle tune up can vary significantly depending on the model and the extent of maintenance required. Consulting a trusted motorcycle shop is recommended." Who is No. 1 bike? Answer: "The answer to 'Who is No. 1 bike?' often depends on personal preference, riding style, and brand reputation. Discuss with industry experts for tailored recommendations." How often should you do a tune-up on your motorcycle? Answer: "Most manufacturers recommend a motorcycle tune up every 6,000 to 10,000 miles, but always check your owner’s manual for specific intervals." Key Takeaways from Your Comprehensive Motorcycle Tune Up Guide Motorcycle tune up is essential for performance and safety Routine maintenance of spark plugs, air filter, and engine oil is critical Using the proper tools and following recommended schedules saves money and extends your motorcycle's lifespan Ready for Your Next Motorcycle Tune Up? Call Nasty Performance Motorcycle Shop Today: 847-458-4858 Get expert help with your motorcycle tune up—schedule your service for reliable, friendly support and keep your machine running smooth every season. If you’re ready to take your motorcycle care to the next level, don’t stop at the basics—explore how seasonal changes can impact your maintenance strategy. Understanding the nuances of bike care throughout the year can help you prevent issues before they arise and keep your ride performing at its best, no matter the weather. Discover expert advice and actionable tips in our guide to seasonal bike care secrets every rider must know. This resource is perfect for riders who want to stay ahead of the curve and ensure their motorcycle is always ready for the next adventure. Dive deeper and unlock the full potential of your bike with advanced, season-specific maintenance insights. Watch a hands-on, step-by-step demonstration by a pro mechanic, covering spark plug checks, air filter replacement, oil change, and chain maintenance—see every essential detail up close for a complete motorcycle maintenance guide.

Common Mistakes In Motorcycle Brake Pad Replacement

Did you know that over 35% of DIY brake pad replacements end up with follow-up repairs due to simple mistakes? While changing brake pads on your motorcycle can save you money and offer a sense of accomplishment, a single overlooked step could put your safety at risk. Understanding and avoiding brake pad replacement mistakes is not just about saving costs—it’s about ensuring every ride is safe, smooth, and reliable. Whether you're an experienced do-it-yourselfer or just starting out with DIY brake pad replacement, this comprehensive guide will help you sidestep common pitfalls and master the art of changing brake pads safely. Understanding Brake Pad Replacement Mistakes Overview of brake pad replacement mistakes and their consequences: Even the most enthusiastic DIY brake pad replacement can go awry if critical steps are skipped. Common mistakes like improper pad alignment, failing to fully retract caliper pistons, or mismatching brake pads can lead to uneven wear, poor braking performance, and even brake system failure. These errors may not only damage the braking system but could also put you and others on the road in danger. Mistakes during pad replacement can translate to costly repairs and jeopardize the braking system’s reliability. Importance of avoiding common mistake in DIY brake pad replacement: Safety should always be the top priority when tackling brake jobs. Simple oversights—like not cleaning caliper guide pins or using incompatible friction material—can lead to squealing brakes, uneven pedal feel, or danger in emergency stops. Knowing the most frequent brake pad replacement mistakes empowers you to avoid them from the outset, ensuring each changing brake job boosts your motorcycle’s overall performance and secures your peace of mind. What You'll Learn About Brake Pad Replacement Mistakes Identifying typical brake pad mistakes: Pinpoint the most frequent slip-ups that plague DIY brake pad replacement jobs. Why pad replacement precision matters: Understand how every detail in changing brake pads contributes to your motorcycle’s safety and performance. How to improve your DIY brake pad replacement process: Gain actionable advice so you avoid brake pad replacement mistakes on your next brake job. Why Attention to Brake Pad Replacement Mistakes is Critical Impact of brake pad replacement mistakes on your motorcycle’s safety and braking system: A single common mistake, such as failing to secure brake pads or neglecting to lubricate caliper guide pins, can compromise your entire braking system. DIY brake jobs done incorrectly may cause uneven wear, noisy brakes, or even lead to brake fluid leaks. Each part of the braking system relies on proper pad replacement procedures—overlooking one can reduce braking performance, extend stopping distances, and cause unpredictable pedal feel that threatens safe riding. A quote from a trusted mechanic discussing common mistake in brake pad jobs: "One overlooked step in a brake pad replacement can compromise your entire braking system. Always double-check every component before hitting the road." – Certified Motorcycle Technician Table: Overview of the Most Frequent Brake Pad Replacement Mistakes Common Mistake Impact on Braking System How to Avoid Estimated DIY Difficulty Rating Not Retracting Caliper Pistons Fully Prevents new pads from fitting correctly and causes uneven wear. Use a proper tool to compress pistons fully before installing new pads. Moderate Improper Brake Pad Positioning Results in brake noise, vibration, and loss of braking performance. Align pads carefully and ensure proper seating in the caliper. Easy Skipping Lubrication Leads to stiff caliper movement and squeaky brakes. Apply brake grease to caliper guide pins and backs of pads. Easy Mismatched Brake Pads Inconsistent wear, reduced effectiveness, and potential caliper damage. Verify compatibility and always install matching pad sets. Easy For those looking to take their maintenance skills further, understanding how seasonal changes can impact your motorcycle’s performance is just as important as mastering brake pad replacement. You can discover practical tips for year-round care in this guide to seasonal bike care secrets every rider must know, which complements your DIY brake work with broader maintenance strategies. Preparation Steps: Avoiding Brake Pad Replacement Mistakes Before You Start Gathering proper tools for DIY brake pad replacement: Before tackling any brake job, ensure you have all the right tools on hand. This typically includes a torque wrench, caliper tool, brake pad spreader, high-quality gloves, and cleaning products. Using proper tools reduces the risk of damaging lug nuts, caliper guide pins, or the brake pad itself. Be sure to lay out all necessary equipment on a clear, organized workspace to streamline your pad replacement and help you avoid common mistakes that can arise from being unprepared. Inspecting brake pads and braking system before pad replacement: Before starting your DIY brake pad replacement, carefully inspect the current pads, brake rotors, and calipers. Check for uneven wear or signs of brake fluid leakage, as these can indicate underlying braking system issues. Ensuring components are in good condition reduces the risk of new pad replacement mistakes and helps you address problems that could affect your brake job’s effectiveness. Checking compatibility of replacement brake pads: Not all brake pads are created equal. Confirm that your replacements match your motorcycle’s make, model, and braking system specifications. Using mismatched pads can lead to inconsistent braking, excessive wear of the brake rotor, and increased risk for future brake pad replacement mistakes—so double-check before installing. Step-by-Step Guide: Correct Brake Pad Replacement Safely elevate your motorcycle and remove the wheels. Loosen lug nuts and detach the caliper, taking care not to hang the brake by the hose. This avoids strain on the brake hose and prevents brake fluid leaks. Completely retract the caliper pistons using a proper caliper tool. Ensure there is enough clearance for the new brake pads—don't force the pads, as this can damage the piston or caliper guide pin. Remove the old brake pads and carefully clean the caliper, guide pin, and rotor surface. Use brake cleaner to eliminate debris and old lubricant for a smooth pad replacement. Align the new brake pads properly in the caliper, ensuring they fit flush against the contact surface. Double-check their position to avoid common mistakes like uneven wear or noise. Apply a high-quality brake lubricant to the caliper guide pins and pad backing plates. This step is vital for smooth operation and to prevent squealing. Reinstall the brake caliper and torque all bolts to manufacturer specifications. Secure all components and ensure the brake pad is properly seated. Pump the brake lever or pedal several times to restore proper brake pad contact and pedal feel before riding. Monitor the system for leaks or warning lights. Proper brake pad alignment and installation tips: Always ensure pads sit flush against the rotor and check for any gaps or misalignment. Improper positioning can lead to reduced braking system performance and uneven pad wear. Key braking system checks during brake pad replacement: Examine caliper movement, rotor condition, and brake fluid level after each step. Resolve any abnormalities before continuing your brake job. Common DIY Brake Pad Replacement Mistakes Not fully retracting caliper pistons: A frequent error in DIY brake pad replacement, this prevents new pads from fitting and causes the brake caliper to bind or rub against the rotor, leading to reduced performance and uneven wear. Improper brake pad positioning: Incorrectly aligned pads can cause contact surface issues, brake squeal, and inefficient stopping power. Careful alignment is crucial for optimal braking system function. Skipping brake pad lubrication steps: Not lubricating caliper guide pins or pad backs results in sticky movement and persistently noisy brakes. Mismatched brake pads: Installing the wrong type or unevenly worn pads can cause inconsistent pedal feel, faster deterioration, and even damage to the caliper or rotor. Brake Pad Replacement Mistakes and the 30 30 30 Rule Explanation of the 30 30 30 break-in rule and its relevance to DIY brake pad jobs: The 30 30 30 rule is a proven break-in method after brake pad replacement: complete 30 gradual stops from 30 mph, spacing each stop about 30 seconds apart. This process evenly beds new pads into your disc brakes while ensuring proper friction material transfer. How improper brake pad replacement can make it difficult to implement the 30 30 30 rule: If pads are mismatched, installed incorrectly, or not properly lubricated, the break-in phase—critical to maximizing pad and rotor life—will not be effective. Skipping steps increases the risk of uneven wear and brake rotor damage, making even the best break-in routine much less effective. Signs You've Made a Brake Pad Replacement Mistake Common symptoms after DIY brake pad replacement mistakes: If you hear squealing, grinding, feel a pulsing brake pedal, or notice inconsistent pedal feel, your brake job may have gone wrong. These warning signs often indicate issues like sticking caliper guide pins, misplaced brake pads, or uneven contact with the rotor. Braking system warning indications: Look out for dashboard warning lights, visible brake fluid leaks around the caliper, or excessive brake dust shortly after pad replacement. Ignoring these warning signals can accelerate disc brakes and rotor damage. When to revisit your pad replacement job: If you experience any of the above or hear grinding/scraping shortly after DIY brake pad replacement, stop riding and re-examine every step. It’s better to redo a brake job than risk your safety or compromise the braking system further. How to Fix Brake Pad Replacement Mistakes and Ensure Safety Safely lift the motorcycle and remove the wheel and caliper as you did initially. Retract caliper pistons fully using a proper tool to ensure room for fitting new pads. Thoroughly clean the caliper guide pins, pad slots, and brake rotor surface with approved brake cleaner. Carefully realign new brake pads, ensuring both sides are seated evenly on the contact surface. Apply the correct lubricant to caliper guide pins and pad backs to prevent squealing and binding. Torque all bolts to the manufacturer’s specs for a secure fit and check all components for proper installation. Pump the brake lever or brake pedal to restore system pressure and check for leaks before test riding. Ensuring braking system integrity after brake pad replacement: Always check brake pedal or lever feel, inspect for leaks, and confirm pads and calipers move freely. Address warning lights on your dash immediately to protect your disc brakes and overall braking performance. When to seek professional help after a bad DIY brake job: If repeated attempts result in spongy pedal feel, persistent noises, or leakage, consult a certified mechanic. Some pad replacement issues, like damaged brake rotors or a compromised braking system, require specific expertise and diagnostic equipment. Expert Quote on the Dangers of Overlooking Brake Pad Replacement Mistakes "One overlooked step in a brake pad replacement can compromise your entire braking system. Always double-check every component before hitting the road." – Certified Motorcycle Technician People Also Ask: Brake Pad Replacement Mistakes What are common mistakes when installing brake pads? Skipping lubrication of caliper guide pins and pad backs, not seating pads correctly in the caliper, and ignoring torque specifications are some of the most frequent errors. Missing these steps leads to brake noise, uneven wear, and poor braking system performance—issues avoidable with careful attention during your pad replacement. What is the 30 30 30 rule for brakes? The 30 30 30 rule describes the break-in process for new brake pads: perform 30 gradual stops from 30 mph, each spaced about 30 seconds apart. This bedding-in routine allows friction material to transfer properly and ensures even contact surface wear, maximizing pad replacement effectiveness and disc brakes longevity. Does Les Schwab bleed brakes? Les Schwab shops generally include brake bleeding service during brake pad replacement if necessary to maintain optimal braking system function. Always confirm with your service provider when booking a brake job. How much do brake pads cost for a Mazda CX-5? Brake pad costs for a Mazda CX-5 can vary by location and product. Always consult certified shops or your dealership for accurate pad replacement estimates. Essential Tools and Products to Prevent Brake Pad Replacement Mistakes Recommended equipment for DIY brake pad replacement: Ensure you have a reliable torque wrench, caliper piston tool, brake cleaner, quality gloves, and a jack stand. Having the right gear makes your pad replacement smoother and minimizes the risk of damaging the braking system. Top-rated lubricants and cleaning products for brake pads and braking system: Use silicones or high-temp disc brakes grease for guide pins, and an approved, non-oil-based brake cleaner for rotors and calipers to keep everything moving smoothly and cleanly. Checklist for successful pad replacement job: New, compatible brake pads Brake cleaner and high-temp grease Torque wrench and piston retractor Gloves and eye protection Detailed shop manual for your specific model FAQs: Brake Pad Replacement Mistakes Can I drive after a DIY brake pad replacement if I suspect a mistake? It is strongly recommended not to drive until you’ve identified and corrected any possible brake pad replacement mistakes. Continuing to ride may worsen damage or compromise your safety. Always double-check your work if anything seems off. What if my braking system feels spongy after pad replacement? A spongy brake pedal or lever often signals air in the brake lines or insufficient pad contact. Re-bleed your brakes carefully, check all pad and caliper alignments, and ensure no brake fluid leaks are present. Persistent issues require professional inspection. How often should brake pads be checked and replaced? Brake pads should be checked as part of every major motorcycle maintenance schedule or at least every 5,000-7,000 miles, depending on usage. Replace pads when friction material is below minimum thickness, or sooner if uneven wear or performance loss is detected. Key Takeaways to Avoid Brake Pad Replacement Mistakes Always double-check alignment after changing brake pads to ensure perfect seating and avoid uneven wear. Follow the 30 30 30 break-in procedure after every DIY brake pad replacement for optimal bedding and longevity. Don’t overlook the braking system inspection after pad replacement—catch issues before they become safety hazards. Conclusion: Mastering Brake Pad Replacement and Avoiding Mistakes To prevent brake pad replacement mistakes, follow every step with care, check and double-check your work, and don’t hesitate to review your brake job if anything feels off. Consistent practice and a focus on learning are key to mastering DIY brake pad replacement and ensuring safety every ride. Keep honing your skills—confident, mistake-free brake jobs are within every DIY mechanic’s reach! If you’re committed to keeping your motorcycle in peak condition, don’t stop at just the brakes. Expanding your knowledge to include seasonal maintenance can help you anticipate issues before they arise and extend the life of every component. Explore seasonal bike care secrets every rider must know for expert advice on preparing your bike for changing weather, optimizing performance, and ensuring safe rides all year long. By integrating these advanced care strategies with your brake maintenance routine, you’ll be equipped to handle both everyday upkeep and the unique challenges each season brings. Take the next step in your DIY journey and make your motorcycle maintenance truly comprehensive. Ready to Safely Replace Your Pads? Call Nasty Performance Motorcycle Shop Today: 847-458-4858

Common Mistakes with Motorcycle Tire Pressure

While understanding the basics of tire pressure is essential, many riders overlook the importance of adjusting their approach as the seasons change. For a deeper dive into how temperature shifts and seasonal factors can impact your motorcycle’s performance and tire health, explore our guide on seasonal bike care strategies every rider should know. This resource offers practical tips for adapting your maintenance routine year-round. If you’re ready to take your motorcycle maintenance to the next level, don’t stop at tire pressure. Expanding your knowledge of comprehensive bike care—especially as the seasons change—can dramatically improve your ride’s reliability, safety, and longevity. Discover expert insights on preparing your motorcycle for every climate, from winter storage to spring tune-ups, by visiting our in-depth article on seasonal bike care secrets. Investing in a holistic maintenance approach ensures you’re always ready for the road ahead, no matter what the weather brings.

Terms of Service

Privacy Policy

Core Modal Title

Sorry, no results found

You Might Find These Articles Interesting

T
Please Check Your Email
We Will Be Following Up Shortly
*
*
*