cropper
update

Nasty Performance ~ 847-458-4858 

update
  • Blog Home
  • Categories
    • Motorcycle Maintenance
    • Riding Tips & Preps
    • Safety & Inspection
    • Customizations & Upgrades
    • DIY Motorcycle Repairs
    • Motocycle Audio Systems
    • Motocycle Seasonal Care & Storage
    • Engine, Electrical Performance
  • Bike Night
  • Nasty Performance Motorcycle Shop
May 04.2026
1 Minute Read

Schedule for Performing Routine Motorcycle Maintenance

Did you know that regular adherence to a routine motorcycle maintenance schedule can help you avoid up to 70% of major breakdowns and extend your motorcycle’s lifespan dramatically? Establishing and following a routine maintenance schedule isn’t just for passionate enthusiasts—it’s a critical step for every rider who values performance, safety, and long-term savings. Whether you’re gearing up for your daily commute or planning a cross-country adventure, a disciplined approach to motorcycle maintenance ensures your bike is always ready for the road and running in top condition. Dive into this guide to maximize your motorcycle’s reliability and enjoy every mile with peace of mind.

Surprising Insights into the Importance of a Routine Motorcycle Maintenance Schedule

"Regular adherence to a routine motorcycle maintenance schedule can help avoid 70% of major breakdowns and extend your motorcycle's lifespan dramatically."

Understanding the direct impact of a routine motorcycle maintenance schedule on your bike’s longevity and your personal safety is essential for any rider. Too often, riders delay basic maintenance tasks, thinking they can address problems as they arise. However, ignoring simple daily or monthly checks can lead to expensive failures, safety risks, and extended downtime. The data makes it clear: a structured maintenance checklist not only improves performance but also safeguards your investment by catching wearable parts and safety issues before they become a hazard or a costly repair.

A surprising number of riders overlook maintaining proper tire pressure, oil levels, or checking their brake pads. The reality? These small tasks have the biggest cumulative effect on both performance and ride quality. By following a set schedule—organized around daily, weekly, monthly, and annual intervals—you’ll create a routine that’s realistic and highly effective in keeping your motorcycle in top condition.

Why Riders Can't Afford to Neglect a Motorcycle Maintenance Checklist

Skipping or ignoring a motorcycle maintenance checklist can have consequences far more bothersome than a little extra time in the garage. Failing to regularly check the drive chain, adjust belt tension, or inspect the air filter can create a perfect storm for breakdowns at the most inconvenient times. Worse, it can compromise your personal safety, as critical components like brake fluid or wheel bearings are often only checked during routine maintenance. Even tasks as basic as inspecting the tread depth on your front and rear tires or topping up fluids prevent small issues from escalating. Ultimately, a robust, frequently-reviewed maintenance checklist helps keep your ride performing at its best, providing confidence and comfort each time you hit the road.

routine motorcycle maintenance schedule modern motorcycle chain inspection in organized garage with maintenance tools

What You'll Learn in This Guide to Setting a Routine Motorcycle Maintenance Schedule

  • Key components of a comprehensive motorcycle maintenance checklist
  • Simple, scheduled motorcycle maintenance tasks for daily, weekly, monthly, and yearly intervals
  • Expert tips to maintain safety, maximize performance, and protect your investment

Understanding the Routine Motorcycle Maintenance Schedule Framework

A routine motorcycle maintenance schedule isn’t just a set of chores—it’s your blueprint for consistent performance and lasting reliability. This schedule breaks down essential maintenance tasks into manageable intervals that ensure your motorcycle is always in top condition. By learning how and when to perform simple checks and tasks, even beginner riders can confidently tackle motorcycle maintenance and save money on unnecessary repairs while maximizing the value of their bike.

Let’s explore the importance of having a defined maintenance checklist and how it enhances not just the lifespan of your bike but your overall peace of mind on every journey. This section outlines core areas—engine oil, brake pads, coolant, tire pressure, and more—alongside the role of yearly full service for truly comprehensive care. The following frameworks and checklists have been refined by experts, so you can spend less time worrying about breakdowns and more time enjoying the freedom of the open road.

What Is a Motorcycle Maintenance Checklist – And Why Is It Crucial?

A motorcycle maintenance checklist is your step-by-step reference for every critical task needed to keep your motorcycle ready for the road. It covers everything from routine inspections, oil changes, and safety inspections to major yearly maintenance. Having this list at hand ensures that no part of your maintenance schedule gets overlooked, whether it’s a visual examination of the chain, a quick look at your air filter, or ensuring brake fluid levels are within safe limits.

With maintenance tasks grouped by how often they need attention—daily, weekly, monthly, and yearly—it becomes much easier to manage and maintain your motorcycle in top condition. Riders who rely on a thorough checklist benefit from lower maintenance costs, fewer breakdowns, and smoother, safer journeys all season long. Even if you’re new to motorcycle maintenance, this approach helps you learn the best habits from the start and makes performing simple tasks less intimidating.

How the Routine Motorcycle Maintenance Schedule Enhances Performance and Safety

Consistent maintenance keeps your bike performing better, longer. Regular checks, like monitoring tire pressure and changing the oil, directly contribute to optimal handling, better fuel efficiency, and extended engine life. A well-maintained motorcycle is more responsive, feels smoother in transitions, and presents fewer surprises on the road. This not only protects your personal investment but also greatly reduces maintenance costs over the years.

Safety should always be the first priority for any rider. Staying disciplined with your routine motorcycle maintenance schedule reduces the risk of avoidable accidents and ensures that critical safety components—brake pads, lights, chain, and more—are never neglected. This comprehensive approach means you’re not only ready for the adventures ahead but also confident that you and your passengers are protected mile after mile.

Daily and Pre-Ride Motorcycle Maintenance Tasks Checklist

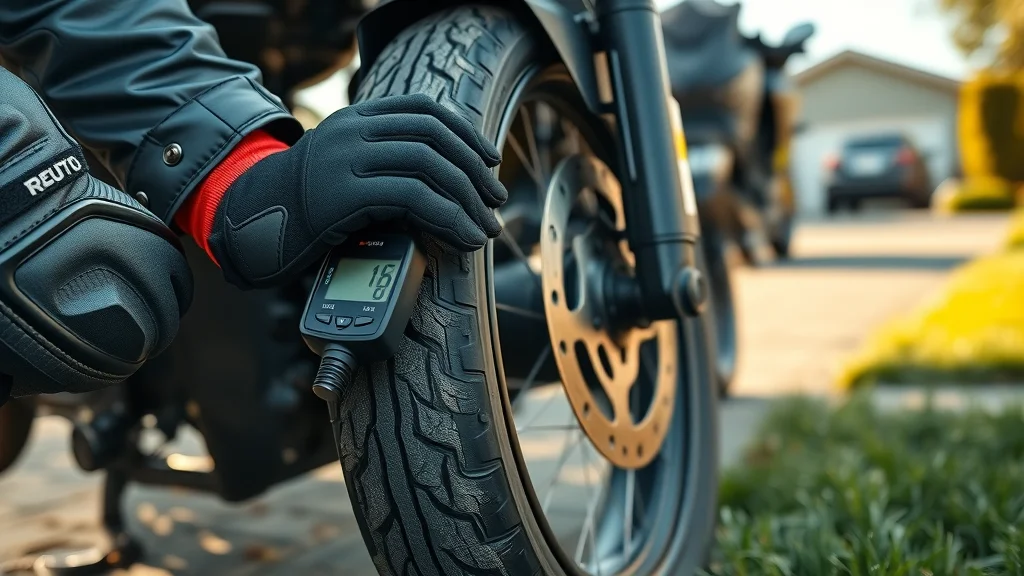
  1. Check tire pressure and condition before every ride
  2. Inspect lights, brakes, clutch, and controls
  3. Review chain/belt tension and lubrication

Taking a few minutes to complete daily or pre-ride checks adds up to major long-term benefits. Inspecting your tire pressure and tread helps you spot uneven wear or punctures before they put you at risk. Evaluating controls like the clutch, throttle, and brakes ensures responsive handling, while checking the drive chain or belt keeps your motorcycle in top shape. Incorporating these quick checks into your routine enables you to spot potential concerns and plan proper maintenance ahead of time, keeping you ready for the road with confidence.

Modern motorcycles are engineered for reliability, but only if they receive regular attention. By addressing these daily items, you help prevent sudden failures far from home and enjoy more efficient, hassle-free rides. Think of it as a quick “systems check”—one that catches tiny issues before they balloon into costly repairs. The best part? Most of these motorcycle maintenance checklist items are easy to perform, even for beginners, requiring just a few minutes and some basic tools.

For riders looking to go beyond the basics, understanding how seasonal changes affect your maintenance routine can make a significant difference. Discover practical tips for adapting your motorcycle care throughout the year in this guide to seasonal bike care secrets every rider must know, which complements your regular maintenance checklist with timely, weather-specific advice.

Tire Pressure, Tread, and Visual Inspections

Your tires are the only point of contact with the road, making their condition a top safety priority. Daily checks should include examining tread depth, looking for embedded debris, and confirming the pressure matches your manufacturer’s recommendation. Over- or under-inflated tires can reduce handling, increase stopping distances, and accelerate wear. Use a quality gauge for accuracy and check the condition of both the front and rear tires for uneven wear or sidewall cracks. Don’t overlook the wheels and valves, making sure they’re secure and in good repair. Keep an eye out for visible cues—like bulges, flat spots, or exposed cords—that may signal the need for immediate attention or a trip to your mechanic. Pair these tire checks with a quick visual inspection of your chain or belt and rear wheel bolts as part of your routine motorcycle maintenance schedule.

"A quick daily motorcycle maintenance inspection can detect early issues that prevent accidents and expensive repairs."

routine motorcycle maintenance schedule tire pressure inspection digital gauge on clean motorcycle tire outdoors

Weekly Routine Motorcycle Maintenance Schedule: Essential Checks

  • Clean and lubricate the chain or belt
  • Check coolant and brake fluid levels
  • Review signal lights and horn functionality

On a weekly basis, extend your checklist to include routine cleaning, fluid top-ups, and checks of less frequently used systems. Cleaning and lubricating the chain or belt prolongs drivetrain life and keeps ride performance consistent. Monitor your coolant and brake fluid, as these are crucial to engine longevity and braking power—two areas no rider should overlook. It’s also the perfect time to double-check all signal lights, the horn, and any accessory features. Making this a habit greatly supports the overall reliability of your motorcycle and ensures you’re always ready for the unexpected.

Weekly attention to these components helps spot leaks or damage early, address any odd noises, and keep your controls smooth. It also prevents smaller issues from growing during periods of heavy use or in varying weather conditions. Building these checks into your regular motorcycle maintenance routine makes each ride safer and lets you catch up on small fixes before they impact your enjoyment—or your wallet.

Detailed Maintenance Checklist for Weekly Tasks

Every week, dedicate a little time to more technical tasks that keep your motorcycle in top condition. Start with the drive chain: clean it thoroughly with a non-corrosive cleaner, inspect links for stiffness, and apply quality lubricant. Confirm proper belt tension if applicable, as this impacts power delivery from the engine to the rear wheel. Next, check coolant and brake fluid levels—these often get overlooked but are vital in maintaining consistent temperature and reliable stopping power.

Don’t forget about the smaller items: test turn signals, headlights, and brake lights for functionality, and give the horn a quick beep. Lastly, do a fast once-over of your bike; look for loose fasteners, check for fluid drips beneath the engine, and ensure all visible parts are in place. This step-by-step motorcycle maintenance checklist—paired with smart scheduling—helps you catch issues before they become headaches, maintain peak performance, and maximize your ride’s value year-round.

Monthly Routine Motorcycle Maintenance Tasks for Longevity

Monthly maintenance dives deeper into vital systems to provide lasting performance and protection. These tasks generally require more time and a bit of mechanical know-how but pay major dividends in longevity and reliability. Consistent monthly attention safeguards your engine, brakes, fluids, and cables, all of which work hard mile after mile. This is your opportunity to catch early wear, address small leaks, and ensure every component of your motorcycle remains in peak working order.

Incorporating this routine ensures your motorcycle stays healthy across seasons and different riding environments. Catching and resolving issues regularly not only extends the lifespan of components like the air filter, brake pads, and fluids, but it also helps reduce long-term maintenance costs and keeps your ride performing at its best. Ultimately, these monthly checks make a massive difference in keeping annual service and surprise repairs to a minimum.

Engine Oil Level and Oil Change Best Practices

The heart of monthly maintenance is checking engine oil levels and performing oil changes as needed. Removing old oil and replacing it with fresh oil keeps your engine free from harmful deposits and ensures smooth operation. Use the manufacturer’s recommended oil and never miss a change—the oil and filter are lifelines for your motorcycle’s powerplant. Inspect the oil for unusual color, debris, or burnt smell; these could indicate deeper issues that require professional attention. Always replace the oil filter along with the oil, ensuring contaminant-free lubrication for critical engine parts.

Routine oil changes also promote better fuel efficiency, keep the engine running cool, and contribute to maximum performance. Keep records of each change as part of your maintenance logbook—it’s a simple habit that helps you stay on top of your schedule and provides a valuable paper trail when it’s time to service your motorcycle or sell it in the future.

Inspect Brake Pads, Discs, and Cable Wear

Your monthly motorcycle maintenance checklist should include a thorough inspection of the front and rear brake pads, brake discs, and cables. Worn brake pads or unevenly worn discs can reduce stopping effectiveness and cause vibrations while braking. Check the pad thickness and look for grooves in the disc surface, which may indicate the need for replacement. Cables for the clutch and throttle deserve attention too; frayed or stretched cables can negatively affect control and should be lubricated or replaced as needed.

Neglecting these critical checks can lead to more expensive repairs or even safety hazards down the road. For best results, add a physical inspection of connectors, hoses, and indicator lights, making sure everything operates smoothly. Detailed monthly attention to these motorcycle maintenance tasks contributes to safer, smoother rides all season long. Not only does this approach help save money by avoiding larger component failures, but it also brings peace of mind every time you start your engine.

"Monthly attention to these motorcycle maintenance tasks contributes to safer, smoother rides all season long."

routine motorcycle maintenance schedule fresh oil change on modern motorcycle suburban driveway

Complete Yearly Maintenance: Full Service and Inspection for Motorcycles

No routine motorcycle maintenance schedule would be complete without annual service. This is the comprehensive “big picture” review and refresh of your entire motorcycle, covering advanced systems, wear items, and areas not usually touched during regular checks. Scheduling a yearly full service with a trusted technician ensures everything from the battery to the air filter and electrical systems is inspected and working as intended. It helps detect hidden problems, supports optimal performance, and guarantees your investment’s long-term health.

Yearly maintenance isn’t only about fixing problems; it’s about giving your motorcycle a clean bill of health. Comprehensive inspection, fluid replacement, and torque checks help your machine stay roadworthy and enjoyable well into the future. It’s also an opportunity to update your maintenance log, track component ages, and get professional input on riding habits that may affect various systems.

Comprehensive Yearly Maintenance Checklist for Peace of Mind

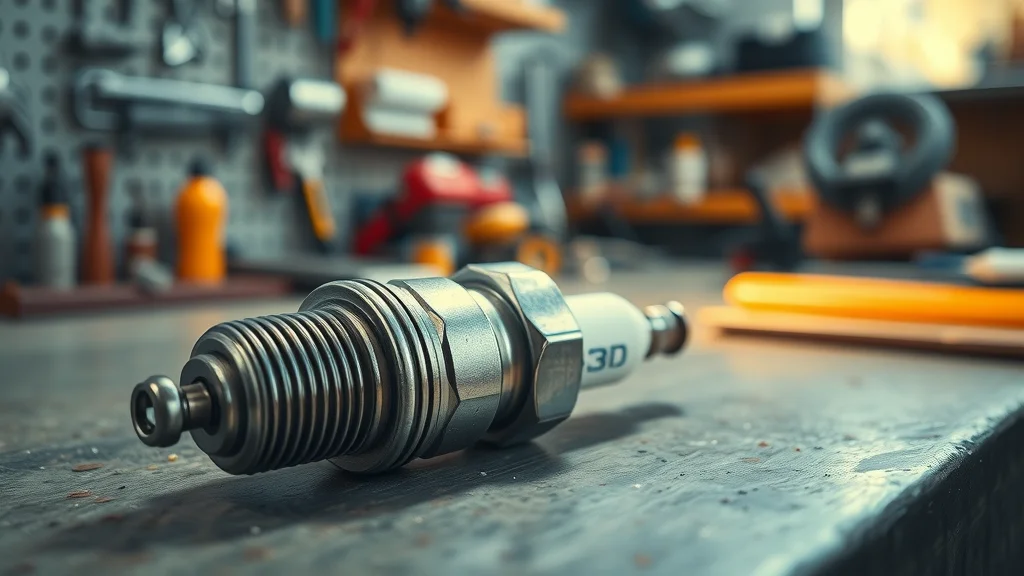
  • Replace spark plugs and air filters
  • Flush and renew fluids
  • Inspect and torque all fasteners
  • Battery health check

Key yearly tasks include swapping out worn spark plugs and the air filter for reliable combustion and efficient airflow. This is also the time to flush and replace engine, brake, and coolant fluids, preventing the buildup of contaminants and ensuring top condition. Your mechanic will inspect and torque every major fastener, checking that nothing has come loose—a common issue after a year’s worth of rides on rough roads.

The condition of your battery is also assessed, as old or undercharged batteries are a leading cause of mid-season breakdowns. Other details—like testing the wheel bearing or updating the rear wheel alignment—may be performed depending on your make and model. A complete yearly maintenance schedule ensures everything about your motorcycle is accounted for, from the most basic systems to the invisible connections beneath the tank. Don’t skip this step; it’s the best way to guarantee long-term confidence and trouble-free adventures.

Scheduling Your Motorcycle Full Service: When and Why It Matters

Your annual full service ideally takes place at least once every 12 months, no matter how few or many miles you’ve covered. Most riders choose to schedule yearly maintenance at the start or end of the main riding season, when weather is mild and shops have better availability. This keeps your machine prepared for whatever the calendar brings and avoids delays from surprise repairs during busy months.

By staying consistent—regardless of usage—you protect your investment against time and wear, not just miles. Whether you do some work yourself or leave all checks to a pro, never ignore that skip in the chain, hard starts, or odd noises. Yearly maintenance gives you and your mechanic the chance to address small concerns before they escalate, set new maintenance reminders, and enter the new season confident in your motorcycle’s performance and reliability.

routine motorcycle maintenance schedule full service inspection at professional workshop

How to Customize a Routine Motorcycle Maintenance Schedule for Your Bike

A great motorcycle maintenance schedule isn’t “one size fits all. ” While most motorcycles share core requirements, your riding style, environment, and specific manufacturer guidelines should shape how you approach your maintenance checklist. Urban commuters encounter different wear than high-mile touring bikes, and off-roaders have a unique list of parts and fluids to monitor. Crafting a personalized checklist means accounting for how, where, and how often you ride—ensuring your bike gets the care it truly needs.

Don’t hesitate to lean on your motorcycle’s owner’s manual, which details service intervals specific to your make and model. Add notes about local weather, storage conditions, and even past issues for future reference. The more tailored your maintenance strategy, the more effective and efficient your routine becomes—making every ride safer and extending your motorcycle’s lifespan.

Adapting Your Maintenance Checklist by Riding Style, Environment, and Manufacturer's Guidelines

If you ride in dusty environments, prioritize cleaning or replacing your air filter more frequently. For rain or cold climates, pay extra attention to fluid levels and inspect the battery more often. Long-distance riders may need to lubricate the chain and check the oil sooner than those sticking to city commutes. Manufacturer guidelines will list minimum intervals for oil change, engine oil inspection, and belt tension adjustment—always follow these as a baseline and adapt upward as needed. Keep in mind: intense riding shortens service intervals, while light or occasional use may lengthen them slightly. The key is observation and consistency; if your environment or style is especially hard on certain components, adjust your schedule to protect them accordingly.

Ultimately, riders who adapt their maintenance checklist based on these factors enjoy more reliable bikes, lower maintenance costs, and a personalized connection to their machine. Consult the manual, check forum recommendations, and be alert to your bike’s unique signals; these insights are your best guides for creating a customized, practical maintenance routine.

Leveraging a Maintenance Logbook for Better Outcomes

One of the most effective ways to stick to your routine motorcycle maintenance schedule is by keeping a detailed maintenance logbook. This doesn’t need to be complicated—it can be a simple notebook or a digital chart, but it should capture all service dates, parts replaced, observations, and scheduled future tasks. Reviewing your logbook before each ride makes performing simple checks second nature and lets you spot patterns that lead to proactive repairs rather than expensive surprises.

Maintaining a record helps track component age, warranty compliance, and provides valuable documentation if you ever sell your motorcycle. You don’t need to be a mechanic—consistency is what counts! Use sticky notes, calendar alerts, or dedicated apps if that works better for you. Your logbook will not only help save money through early detection, but also keeps you motivated to keep your bike in the best condition possible.

routine motorcycle maintenance schedule maintenance logbook updated at home workbench

Tables: Sample Routine Motorcycle Maintenance Schedule by Interval

Interval Maintenance Tasks Who Performs Notes
Daily/Pre-Ride Check tire pressure/tread; inspect lights, brakes, clutch, and controls; review chain/belt tension and lubrication Rider Quick inspection, 5–10 minutes before each ride
Weekly Clean and lubricate chain/belt; check coolant and brake fluid; test signal lights, horn Rider/DIY Best after cleaning; replace fluids if levels drop
Monthly Check engine oil and change as needed; inspect brake pads/discs; check clutch and throttle cables; clean air filter Rider/DIY Log all findings and changes
Yearly/Full Service Replace spark plugs, air filters; flush/renew fluids; battery health check; inspect/torque all fasteners; check all main systems Professional Mechanic Best at start/end of riding season; update maintenance log

Top 10 Expert Tips to Streamline Your Routine Motorcycle Maintenance Schedule

  1. Build maintenance into your riding routine
  2. Use reminders or calendar alerts
  3. Invest in quality tools and lubricants
  4. Join local or online motorcycle forums
  5. Consult your owner’s manual
  6. Schedule professional inspections annually
  7. Track service dates and observations
  8. Address warning signs immediately
  9. Practice safety at every step
  10. Keep a maintenance checklist on hand

People Also Ask: Common Questions About the Routine Motorcycle Maintenance Schedule

How often should a motorcycle be serviced?

Answer: Most motorcycles benefit from a maintenance checklist check every 500-1,000 miles or monthly, with yearly maintenance and full service once every 12 months as recommended.

What is the most important maintenance task for a motorcycle?

Answer: Regular oil changes and proper tire pressure checks are among the most critical motorcycle maintenance tasks for safety and engine longevity.

Can I follow one routine motorcycle maintenance schedule for different brands?

Answer: While some items are universal in a motorcycle maintenance checklist, always consult the manufacturer's recommendations for specifics on your make and model.

An instructional video showing a step-by-step demonstration of daily pre-ride and basic weekly motorcycle maintenance tasks, such as checking tire pressure, lubricating the chain, and reviewing key fluid levels, performed in a well-lit home garage setting for beginner to intermediate riders.

Frequently Asked Questions about Routine Motorcycle Maintenance Schedules

What are the signs that a motorcycle is overdue for routine maintenance?

Signs include difficulty starting, rough idling, unusual noises, reduced braking power, visible leaks, poor acceleration, or warning lights on the dash. If you notice any of these, it’s probably time to review your routine motorcycle maintenance schedule and address any missed items.

How is oil change frequency determined for motorcycles?

Oil change intervals depend on your bike’s make, model, riding style, and oil type. Most motorcycles require an oil and filter change every 2,000–5,000 miles or every 6 months, whichever comes first. Always check your owner’s manual for recommendations and adjust if your riding conditions are especially harsh.

Are motorcycle maintenance tasks easy for beginners to perform?

Many basic maintenance tasks—like checking tire pressure, inspecting brakes, and lubricating the chain—are straightforward and require only basic tools. With a clear checklist and a little practice, even beginners can handle most regular checks. For complex or advanced tasks, consulting a professional is always advised for safety and long-term reliability.

Key Takeaways: Making Your Routine Motorcycle Maintenance Schedule Work for You

  • Consistency is the foundation of effective motorcycle maintenance
  • Tailor your maintenance schedule and checklist to your bike and riding habits
  • Engage in yearly maintenance for long-term reliability and safety

Conclusion: Take the Next Step for Motorcycle Longevity

"A disciplined routine motorcycle maintenance schedule transforms riding from a hobby into a lifetime investment in safety and performance."

If you’re ready to elevate your motorcycle care beyond the essentials, consider exploring advanced strategies that align with the changing seasons and your unique riding habits. By integrating seasonal maintenance insights, you can proactively address challenges like temperature shifts, humidity, and storage, ensuring your bike remains in peak condition year-round. For a deeper dive into expert-level care and to unlock the secrets that experienced riders rely on, check out seasonal bike care secrets every rider must know. This resource will help you anticipate maintenance needs, adapt your schedule, and keep your motorcycle performing at its best—no matter what the weather brings.

Ready to establish your personal routine motorcycle maintenance schedule? Call Nasty Performance Motorcycle Shop Today: 847-458-4858

Motorcycle Maintenance

0 Comments

Write A Comment

*
*
Please complete the captcha to submit your comment.
Related Posts All Posts

Common Mistakes with Motorcycle Tire Pressure

While understanding the basics of tire pressure is essential, many riders overlook the importance of adjusting their approach as the seasons change. For a deeper dive into how temperature shifts and seasonal factors can impact your motorcycle’s performance and tire health, explore our guide on seasonal bike care strategies every rider should know. This resource offers practical tips for adapting your maintenance routine year-round. If you’re ready to take your motorcycle maintenance to the next level, don’t stop at tire pressure. Expanding your knowledge of comprehensive bike care—especially as the seasons change—can dramatically improve your ride’s reliability, safety, and longevity. Discover expert insights on preparing your motorcycle for every climate, from winter storage to spring tune-ups, by visiting our in-depth article on seasonal bike care secrets. Investing in a holistic maintenance approach ensures you’re always ready for the road ahead, no matter what the weather brings.

When To Conduct a Motorcycle Clutch Inspection

Did you know most unexpected breakdowns on the road can be traced back to neglected motorcycle clutch inspection? For riders, understanding when and how to check your clutch can mean the difference between a smooth cruise and being stranded unexpectedly. In this complete guide, we reveal why clutch inspection is an essential habit for every motorcycle owner, how to recognize early warning signs, and vital tips for maximizing your bike’s performance and safety. Unveiling the Importance of Motorcycle Clutch Inspection The motorcycle clutch is a vital component responsible for transferring power from the engine to the rear wheel, allowing smooth gear shifts and controlled acceleration. If overlooked, hidden clutch problems often escalate into serious mechanical issues and sudden breakdowns. A timely clutch inspection protects your investment, prevents costly repairs, and ensures the safety of you and your bike. Recognizing the importance of regular inspection is crucial. Clutch problems may begin subtly, with symptoms like a stiff clutch lever or odd vibrations. Many riders ignore these signs, only to face bigger problems later such as clutch slippage, sticking, or total loss of acceleration. By scheduling regular inspections and staying attentive to early warning signs, you greatly extend your clutch’s—and your bike’s—lifespan. "Did you know that neglecting regular motorcycle clutch inspection is one of the leading causes of unexpected breakdowns on the road?" What You'll Learn About Motorcycle Clutch Inspection The key signs indicating the need for a motorcycle clutch inspection Step-by-step process for conducting a clutch inspection How to identify clutch problems before they escalate When to involve a professional versus DIY Expert tips for optimizing clutch lever response and performance Understanding the Role of the Motorcycle Clutch The motorcycle clutch isn’t just a lever—it’s a sophisticated mechanism that manages the delicate transfer of engine power to the road, allowing smooth starts, effortless shifts, and controlled stops. Without the clutch, shifting gears or coming to a stop would be abrupt and potentially damaging. Understanding its role is the first step towards mastering clutch maintenance, helping you prevent clutch problems and optimize performance. Across all types of motorcycles, from dirt bikes to street bikes, the clutch assembly includes multiple crucial parts—clutch plates, friction plates, steel plates, clutch basket, pressure plate, clutch hub, and more. Each plays a pivotal role in the transfer of power and the ride quality. By grasping how the clutch works and recognizing how different components interact, riders become empowered to detect subtle issues before they evolve into major repairs. How the Motorcycle Clutch Functions The clutch operates by compressing or releasing clutch discs and friction plates between the clutch basket and pressure plate. When you pull the clutch lever, the plates separate, breaking the connection between the engine and rear wheel. This action allows you to change gears safely. When you release the lever, the plates re-engage, transmitting power again. Components such as the clutch hub, needle bearing, clutch spring, and clutch basket fingers must be in harmony for seamless operation. Any wear or warping of these parts may trigger issues like clutch drag (when the plates fail to fully disengage) or slippage (when friction plates fail to transfer full power). For hydraulic systems, the clutch’s operation depends on hydraulic fluid pressure. Both mechanical (cable) and hydraulic clutches require regular inspection to avoid progressive damage. Motorcycle Clutch Problems: Common Triggers and Impacts Clutch problems arise from several common sources. Worn clutch plates, warping due to excessive heat, poor cable adjustment, or contaminated hydraulic fluid can all lead to troublesome symptoms. Dirt bikes, for example, often suffer clutch wear from aggressive riding in off-road conditions, while street bikes may see clutch disc glazing from frequent stop-and-go traffic. The impacts of overlooked clutch issues are serious: reduced acceleration, strange noises during shifting, increased lever stiffness, and a slipping clutch that struggles under load. Over time, if the pressure plate and clutch hub are not inspected, you risk damaging the clutch basket or warping steel plates, leading to expensive repairs and compromised safety. Understanding these triggers is vital for effective inspection and preventative maintenance. Essential Timing: When To Conduct a Motorcycle Clutch Inspection Knowing when to conduct a motorcycle clutch inspection is as important as understanding how to perform one. Manufacturers generally recommend inspection intervals based on mileage and riding style, but attentive riders should always be alert to symptoms that demand immediate attention. Regular inspection ensures the clutch plate, friction plate, clutch discs, and related parts remain in proper working order, preserving both safety and motorcycle performance. Inspections aren’t just about distance traveled. They help identify subtle warning signs, prevent breakdowns, and can catch issues such as free play anomalies, cable tension problems, or the onset of rattling sounds. Monitoring your mileage and listening to your bike ensures you address problems before they escalate into larger, more costly repairs. Mileage-Based Motorcycle Clutch Inspection Intervals Most modern motorcycles benefit from a clutch inspection every 6,000 to 12,000 miles. However, your ideal interval varies depending on riding habits and bike type. Aggressive riders, racers, or those who commute frequently in heavy traffic often require more frequent inspections as clutch components wear faster. Dirt bikes may need checked every few months due to tougher conditions, while touring bikes typically have longer intervals. Always consult your owner’s manual for your motorcycle’s recommended service schedule. It’s best to err on the side of caution; if you notice symptoms like a spongy clutch lever, difficulty shifting, or changes in clutch engagement, conduct an inspection regardless of your last service date. Remember, a minor investment of time now can save you from a major repair bill later. Symptoms Suggesting Immediate Clutch Inspection Immediate inspection is warranted whenever you observe notable changes in clutch performance. Classic red flags include suddenly increased clutch lever travel, the presence of gear crunching, a feeling of the clutch slipping (where power delivery is inconsistent), or the emergence of rattling sounds near the clutch cover. Sticky or hard-to-pull levers, vibration under load, or visible clutch disc overheating are further warning signs that demand prompt attention. Pay attention to both how your bike rides and how it sounds. If a once-smooth shift now jerks, or you detect hesitation in power, these may indicate friction plate glazing, warped plates, or issues with the clutch basket or pressure plate. Swift diagnosis helps prevent further damage and ensures safer, more reliable rides. Comparison of Recommended Inspection Intervals by Motorcycle Type Motorcycle Type Recommended Inspection Interval Special Notes Standard/Commuter 6,000–8,000 miles Typical mixed-use conditions Dirt Bike/Off-Road Every 3–6 monthsor after every major ride Check more often due to harsher operating environments Sport Bike (Street) 8,000–10,000 miles More frequent for aggressive riders Touring/Cruiser 10,000–12,000 miles Less stress due to steady, long rides Custom/Performance Varies Inspect after tuning or track events How to Tell if Your Clutch is Bad on a Motorcycle Knowing how to identify a failing clutch can help you act fast and avoid being stranded. Here are common warning signs that indicate serious clutch problems: Difficulty shifting gears A spongy or tight clutch lever Slipping or sticking clutch Strange noises or vibrations Loss of acceleration When the clutch lever becomes hard to operate, or you feel the clutch fails to engage or disengage smoothly, it’s time to inspect for worn clutch plates, stretched cables, low hydraulic fluid, or warping in the pressure plate and clutch hub. Ignoring these problems may worsen wear on internal clutch discs, basket fingers, and may even damage the clutch basket itself. Always treat these symptoms as critical warnings to conduct immediate clutch inspection. What Does a Motorcycle Clutch Inspection Involve? A proper motorcycle clutch inspection consists of various steps, from general checks of the lever and cable to detailed examination of the clutch plates themselves. Both manual and hydraulic system motorcycles require careful assessment to catch issues early and maintain smooth clutch engagement. Inspectors begin by assessing free play at the clutch lever, cable adjustment, and inspecting for leaks or color change if the system is hydraulic. Next, they're looking for excessive play, unusual resistance, or changes in the feel of the lever—key indicators of internal clutch problems. A thorough inspection might include removing the clutch cover for a hands-on check of the clutch plates, friction plate, and basket. Preliminary Checks: Clutch Lever, Cable, and Fluid Start your clutch inspection by checking the free play at the clutch lever. There should be a small, but definite, amount of loose play—too much or too little indicates a need for cable adjustment. Check cable tension for signs of wear or fraying and lubricate as necessary. For bikes with hydraulic clutches, inspect the hydraulic fluid reservoir for proper levels and evidence of contamination or discoloration. Evaluate the smoothness of clutch lever movement. Any sponginess, excessive stiffness, or inconsistent resistance may signal deeper clutch problems. Don't forget to check for leaks in the hydraulic system, as low fluid or air contamination can drastically affect clutch engagement and performance. These preliminary checks set the stage for more detailed inspections if abnormalities are found. Step-by-Step Clutch Plate Inspection on a Motorcycle To check the health of your clutch plates and related components, you need basic tools, patience, and a methodical approach. Begin by ensuring your motorcycle is safely parked, turned off, and the engine is completely cool. Remove the clutch cover to access the clutch basket, pressure plate, clutch discs, and steel plates. Examine each clutch disc and friction plate for visible signs of wear, overheating (discoloration), warping, or grooves on the clutch basket fingers. Using a micrometer, measure the thickness of the plates and compare with manufacturer specifications—any plate thickness below spec means the component must be replaced. Note any uneven wear, chips, or signs of burnt friction surfaces which may indicate improper clutch spring tension or hydraulic problems. Reassemble carefully, ensuring the pressure plate and clutch hub are aligned and all components are torqued to the correct specs. How to Inspect Clutch Plates on a Motorcycle Here is a simplified outline for inspecting the clutch plates on your motorcycle. Always consult your owner’s manual for details specific to your model: Ensure the motorcycle is secured and cool Remove the clutch cover Examine clutch plates for wear, burning, or warping Measure plate thickness and compare to manufacturer specifications Reassemble with proper torque settings "Regular motorcycle clutch inspection helps riders avoid costly emergency repairs and ensures performance and safety on every ride." Top 5 Symptoms of a Bad Motorcycle Clutch Dragging clutch Clutch slippage under load Noisy operation during shifting Stiff or loose clutch lever Irregular clutch engagement If you encounter any of these symptoms, consider them urgent signals for a detailed clutch inspection. Address these issues before they lead to further damage of the clutch hub, basket, or pressure plate components. Expert Tips for Addressing Motorcycle Clutch Problems Handling clutch issues proactively is vital for every responsible rider. Here are actionable tips from seasoned professionals: First, establish a regular schedule for clutch lever and cable inspection. Lubricate moving parts regularly and monitor hydraulic fluid levels for any color or viscosity changes. Store your motorcycle properly and always allow the bike to warm up before demanding rides to prevent thermal shock and warping of the clutch discs and friction plate. When in doubt, consult a trusted mechanic familiar with your motorcycle type. When to Seek Professional Motorcycle Clutch Inspection DIY inspection can handle routine checks and maintenance, but certain issues—such as persistent clutch problems, rattling sounds, or apparent damage to the clutch basket or hub—require a trained eye. If you lack proper tools or are unsure about measurement specs, don’t hesitate to visit a reputable shop. Remember, clutch systems have little room for error, and improper inspection or assembly may worsen the problem. Seek professional inspection if you’re dealing with chronic slippage, noisy operation, excessive free play that cannot be adjusted out, or if you suspect hydraulic system leaks or contamination. It’s always better to be safe and seek help, especially with complex or performance motorcycles. Maintenance Best Practices for Preventing Clutch Problems Prevention is the best cure for clutch issues. Prioritize regular oil changes (especially for wet clutches), keep the cable and lever system free of debris, and follow manufacturer guidelines for clutch adjustment. Periodically check the basket fingers, pressure plate, and friction plate for scoring or grooves. In dry clutches, monitor dust buildup, since excess grime accelerates plate wear and clutch engagement issues. Riding habits also influence clutch longevity. Avoid riding the clutch unnecessarily (such as holding the lever at traffic lights), use smooth and deliberate gear shifts, and refrain from excessive aggressive acceleration. Proper storage and regular cleaning further extend clutch spring, clutch hub, and clutch basket lifespan, translating into smoother, more reliable performance. FAQs: Motorcycle Clutch Inspection and Clutch Problems How often should I inspect my motorcycle clutch? Most manufacturers suggest inspecting your motorcycle’s clutch every 6,000 to 12,000 miles, or more often for aggressive riding, harsh conditions, or older bikes. Always check your owner's manual for your specific model. Can I inspect the clutch myself, or should I go to a professional? Many preliminary checks (like free play and lever movement) and simple inspections can be done at home with basic tools. However, if you notice advanced symptoms like slippage, noise, or suspect internal wear, it’s best to consult a professional mechanic. What clutch problems are most common in modern motorcycles? The most common issues include worn or glazed friction plates, stretched cables, low or dirty hydraulic fluid, and warped steel plates or clutch basket fingers. Is clutch inspection different for dirt bikes versus street bikes? Yes—dirt bikes often require more frequent clutch inspections due to the harsher operating conditions and increased wear from aggressive off-road riding. Street and touring bikes may maintain longer intervals but require equal attention to detail. Key Takeaways from Your Motorcycle Clutch Inspection Timely inspections prolong clutch lifespan Recognizing early symptoms of clutch problems is critical DIY inspection is possible but professional help may be required for complex issues A well-maintained clutch lever ensures safety and smoother rides Contact Trusted Professionals for Your Next Motorcycle Clutch Inspection Ready to keep your bike running smoothly? Protect your investment and never compromise on safety—Call Nasty Performance Motorcycle Shop Today: 847-458-4858 "Protect your investment and never compromise on safety—Call Nasty Performance Motorcycle Shop Today: 847-458-4858" Conclusion: Proactive motorcycle clutch inspections guarantee safer, longer, and more enjoyable rides. Listen to your bike, follow inspection intervals, and trust professionals when in doubt for ultimate peace of mind. While understanding clutch inspection intervals is crucial, it's equally important to adapt your maintenance routine to the changing seasons. For practical advice on how weather and seasonal shifts can impact your bike’s performance and what steps you should take, explore these essential seasonal bike care secrets every rider should know. Mastering clutch inspection is just one part of keeping your motorcycle in peak condition year-round. To truly safeguard your ride and enjoy worry-free journeys, consider how comprehensive seasonal care can further enhance your bike’s reliability and longevity. Discover expert strategies for adapting your maintenance routine to every season and unlock advanced tips that go beyond the basics by visiting our in-depth guide on seasonal motorcycle care. Your next level of riding confidence starts with a holistic approach to maintenance.

Signs You Need Spark Plug Replacement on Your Motorcycle

Did you know that just one worn spark plug can cause your motorcycle’s fuel efficiency to drop by up to 30% and lead to unexpected breakdowns on the road? Unfortunately, many riders overlook simple, inexpensive motorcycle spark plug replacement—a maintenance task that’s absolutely critical for keeping your bike running smoothly, efficiently, and safely. In this guide, you’ll discover why paying attention to your spark plugs is one of the best ways to avoid frustration and costly repairs down the road. A Surprising Fact: The Crucial Role of Motorcycle Spark Plug Replacement While it might seem minor, the motorcycle spark plug is the unsung hero of your bike’s engine. It’s responsible for igniting the air-fuel mixture inside each cylinder, kickstarting powerful combustion and propelling you forward. Yet, most riders don’t realize that a worn or failing spark plug can transform a high-performance machine into a stuttering, temperamental shadow of itself. More alarming, motorcycle spark plug replacement is often overlooked in basic maintenance tasks and only addressed once problems like poor starting, engine misfires, or sluggish acceleration appear. Even modern EFI bikes aren’t immune—sophisticated electronics rely just as heavily on reliable spark plugs. Skipping timely replacement increases overall engine wear, jeopardizes the health of related components like the coil stick and plug wire, and could ultimately result in more extensive repairs. Recognizing the warning signs early and learning the basics of spark plug inspection and replacement can extend your bike’s lifespan, maximize performance, and save money in the long run. Why Motorcycle Spark Plug Replacement Should Never Be Overlooked Neglecting motorcycle spark plug replacement can set off a chain of problems that affect your bike, your wallet, and your safety. When a spark plug fails or starts to degrade, the entire process of combustion falters—causing your engine to run rough, emit strange noises, and even fail at critical moments. Poor spark plug maintenance can also mask underlying issues, like a clogged air filter or improper spark plug gap. Dirty or fouled spark plugs can strain your bike’s fuel delivery, particularly in gas tank systems and EFI bikes. This not only hinders your ride but accelerates wear to expensive parts such as the cylinder head, plug wires, and ground strap. Timely replacement and regular inspection are simple, effective ways to safeguard your investment and ensure every ride is as enjoyable and safe as possible. While spark plug health is vital, it’s just one aspect of keeping your motorcycle in top shape. For a comprehensive approach to maintenance, including how to adapt your care routine throughout the year, check out these seasonal bike care secrets every rider should know for practical tips that go beyond the basics. What You'll Learn About Motorcycle Spark Plug Replacement How to identify symptoms of failing motorcycle spark plugs Why regular motorcycle spark plug replacement is essential for performance Step-by-step methods to check and replace motorcycle spark plugs Expert tips for extending the life of your motorcycle spark plugs Understanding Motorcycle Spark Plug Replacement: What Are Motorcycle Spark Plugs? Motorcycle spark plugs are more than just simple parts—they are engineered to endure intense temperatures and provide a consistent spark at lightning speed with every turn of your engine. Placed on the cylinder head, each spark plug has a central center electrode, a threaded shell, and a precise spark plug gap set between the center and ground electrodes. This gap is where the magic happens: a high-voltage arc jumps, igniting the air-fuel mixture so the engine can run smoothly. Choosing the correct spark plug and keeping it in top condition directly impacts everything from fuel efficiency to engine longevity. Incorrect plug gap or poor installation can lead to misfires, weak combustion, or even damage to your bike’s engine management systems—especially in high-performance and modern EFI motorcycles. Learning how your spark plug functions is the first step to maintaining peak performance. Key Functions of a Motorcycle Spark Plug Ignition of the air-fuel mixture: Spark plugs create the spark necessary to ignite the compressed fuel-and-air blend in your bike’s engine. Maintaining engine efficiency: Consistent, reliable sparks ensure smooth engine operation, balanced fuel burn, and reduced emissions. Contribution to overall motorcycle performance: Well-maintained spark plugs reduce engine vibration, prevent stalling, and help deliver peak horsepower—all critical for a satisfying ride. The Importance of Proper Motorcycle Spark Plug Maintenance Regular motorcycle spark plug maintenance is a key factor in the longevity and power of your engine. Over time, combustion deposits, heat cycling, and improper installation can all impact the ability of a spark plug to transmit voltage efficiently. That’s why checking the plug’s condition—including the spark plug gap, color, and signs of wear—needs to be a routine maintenance practice for every rider. Not only does this help avoid engine trouble, but it also maximizes your investment by preventing unnecessary strain on other maintenance tasks—like air filters, plug boot, and coil stick. Frequent checks with a gap gauge or feeler gauge provide reassurance and ensure your spark plug’s plug gap is neither too wide nor too tight. Adhering to your bike’s service manual for motorcycle spark plug replacement intervals keeps your ride in top shape, reduces emissions, and can even improve your gas mileage—making it a good idea for all riders. Common Signs You Need Motorcycle Spark Plug Replacement Spotting the early warning signs can be the difference between a brisk morning ride and a frustrating day stranded by the roadside. The following symptoms indicate it’s time to check your motorcycle spark plugs and consider a timely replacement: Engine Misfires and Poor Performance If you feel your motorcycle jerking unexpectedly, hesitating under acceleration, or outright misfiring, a worn spark plug could be at fault. Misfires often occur when the plug gap is too wide or coated in carbon, preventing the spark from jumping reliably. This not only affects your motorcycle’s performance but also increases emissions, overworks crucial parts like the coil stick and plug wire, and can cause stubborn engine knock or ping. For both EFI bikes and carbureted engines, smooth power delivery relies on clean, well-gapped spark plugs. Ignoring these symptoms may lead to long-term harm for other sensitive components. Replacing motorcycle spark plugs as soon as misfires are noticed will restore lost power, smooth your ride, and prevent further issues down the line. Trouble Starting Your Motorcycle Difficulty starting your bike—especially in the morning or after long periods of storage—can signal failing motorcycle spark plugs. A weak, corroded, or dirty plug often struggles to ignite the fuel mix, resulting in long cranking times, multiple attempts to start, or complete failure to start. On modern EFI bikes, electronic systems may compensate slightly, but a faulty spark is still a primary culprit for unreliable startups. Another related sign is an engine that stalls immediately after starting or runs very rough until it warms up. Whether you ride a sportbike, cruiser, or a commuter, reliable spark plug performance is essential for consistent starting and safe operation. Decreased Fuel Efficiency Notice that your bike’s gas mileage has suddenly dropped or that you’re filling up more frequently? Decreased fuel efficiency is a classic sign of a spark plug past its prime. When a spark plug misfires or becomes inefficient due to a poor plug gap or carbon buildup, unburnt fuel gets wasted—leaving you with less distance per tank and more frequent stops at the pump. On EFI bikes in particular, sensors will try to compensate for poor combustion, but eventually, inefficient spark will still cost you at the gas station. Regular motorcycle spark plug replacement restores optimal fuel burn, improving economics and extending the life of other precious engine components. Don’t ignore this telltale symptom—it’s your bike’s way of asking for help. Unusual Engine Noises Linked to Motorcycle Spark Plugs Sharp popping, rough idling, or loud backfiring hurts more than just your ears—they’re also warnings that something is wrong with your spark plugs. Chronic fouling or an incorrect spark plug gap can disrupt the firing order and timing, producing clangs, bangs, and unpredictable power delivery. If you hear persistent noise changes after starting, accelerating, or at idle, an immediate inspection and spark plug change is a smart move. These sounds might also signal problems with the plug boots or plug wires, which should always be checked together with the spark plug itself. Early intervention preserves engine health and prevents inconvenient breakdowns. How to Inspect Motorcycle Spark Plugs Before Replacement What to look for when checking spark plug wear: Examine the ceramic insulator for cracks, chips, and discoloration. Carbon or oil deposits on the tip can indicate incomplete combustion or worn engine parts. Watch the ground electrode—excessive wear, melted edges, or a rounded tip means it’s time to replace. Understanding carbon deposits and residue: Carbon fouling appears as thick, sooty deposits on the plug’s tip, often the result of a rich fuel mixture, short trips, or a worn air filter. Oil residue points to internal oil leaks or worn piston rings, while a clean, tan or grayish tip signals good combustion. Color and gap inspection tips for motorcycle spark plug replacement: Always use a gap gauge to check the distance between the center and ground electrodes. Deviations from the manufacturer’s plug gap recommendation can prompt misfiring and reduced efficiency. Adjust carefully—never force or bend the ground strap excessively. Step-by-Step Motorcycle Spark Plug Replacement Guide Taking the leap to replace your own motorcycle spark plugs can feel intimidating, but with preparation and the right tools, it’s a straightforward maintenance task. Follow these essential steps: Tools and Safety Tips for Motorcycle Spark Plug Replacement Before you begin, gather the right equipment: Spark plug socket (sometimes called a plug socket) and compatible ratchet Gap gauge or feeler gauge for checking the plug gap Torque wrench (for proper installation torque) Gloves and safety glasses to protect your hands and eyes Compressed air or canned air to clear debris around the plug well Your bike’s service manual for specifications and procedures Work on a cool engine to avoid burns. Use compressed air to blow dirt away from the spark plug area—prevents debris from falling into the cylinder head when removing the plugs. Never work without gloves or eye protection; debris can dislodge quickly, especially in older bikes or those with recessed plugs. Always ensure a good connection with the plug boot and avoid overtightening the new spark plug—using a torque wrench is the best way to apply just the right pressure without damaging delicate threads or the cylinder head. Removing Old Motorcycle Spark Plugs 1. Disconnect the plug boot or coil stick gently (in modern EFI bikes). 2. Use a clean, dry cloth or canned air to clear dust and particles around the old plug. 3. Fit your spark plug socket over the plug and twist counterclockwise to unscrew. 4. Pull the plug out and observe its tip for deposits, oil, or abnormal wear. Grip the plug firmly but avoid using excessive force that could damage threads or the cylinder head. If you encounter resistance, add a small bit of penetrating oil and wait a few minutes before trying again. Be mindful of access to the plug—on some models, parts like the tank or fairings may need to be loosened or removed. Installing New Motorcycle Spark Plugs Correctly 1. Compare the new spark plug with the old to verify type, length, and thread pattern. 2. Use a gap gauge to check the gap. Gently bend the ground electrode if needed, following the specification in your bike’s service manual. 3. Thread the new spark plug by hand into the cylinder head—avoid cross-threading. 4. Once finger-tight, use the spark plug socket and torque wrench to snug the plug to the correct torque specification. 5. Reconnect the plug boot or coil stick, ensuring a solid connection. Don’t forget to inspect and clean plug wires or replace them if they show signs of wear. Double-check that all tools are removed from the work area before starting the engine. Finally, test start the bike—listen for smooth idle, and verify there are no engine warning lights or unusual noises. Expert Quotes on Motorcycle Spark Plug Replacement "Regular motorcycle spark plug replacement is critical for smooth rides and engine longevity. Neglecting this simple component can lead to costly repairs down the line." — Motorcycle Engine Specialist Motorcycle Spark Plug Replacement Maintenance Table Signs of Faulty Spark Plug Inspection Frequency Recommended Action Difficulty Starting Every 3,000 miles Replace if worn Rough Idling Every 5,000 miles Clean or replace Drop in Power Every 5,000 miles Inspect for carbon buildup List of Top Tips to Extend Motorcycle Spark Plug Life Use manufacturer-recommended motorcycle spark plugs Stick to regular maintenance intervals listed in your service manual Avoid short, infrequent trips—engines run best when fully warmed up Always check for proper plug gap and careful installation Watch: High-Resolution Motorcycle Spark Plug Replacement Walkthrough Video demonstration features a professional mechanic inspecting, removing, and installing spark plugs in a clean workshop with close-up detail and slow-motion highlights. See first-hand exactly how the process should look for your own bike. Motorcycle Spark Plug Replacement: FAQs How often should spark plugs be changed on a motorcycle? Most motorcycle manufacturers recommend changing spark plugs every 5,000 to 10,000 miles, but this interval can vary by model and riding style. Always refer to your owner’s manual for the exact schedule, and inspect motorcycle spark plugs regularly for early signs of wear. Which bike is most liked by girls? Bikes such as the Honda Activa, Royal Enfield Classic 350, and Yamaha Fascino are popular among women riders due to their approachable seat heights, ease of handling, and stylish design. Preferences can vary greatly—comfort and confidence often play the biggest roles. What is the most sold motorcycle of all time? The Honda Super Cub holds the record as the world’s most sold motorcycle, known for its reliability, outstanding fuel efficiency, and massive global presence. Is it easy to change a motorcycle spark plug? With the right tools, a little know-how, and proper safety precautions, changing a motorcycle spark plug is a manageable DIY task. Always follow your bike’s service manual, use a spark plug socket, and ensure the gap is set accurately for the best results. People Also Ask How often should spark plugs be changed on a motorcycle? Answer to: How often should spark plugs be changed on a motorcycle? For most street bikes, spark plugs should be inspected every 5,000 miles and replaced as needed—especially if you notice starting trouble, rough idling, or performance dips. For high-performance models or those under heavy use, check them more frequently. Which bike is most liked by girls? Answer to: Which bike is most liked by girls? The most liked bike among girls often includes user-friendly, lightweight scooters like Honda Activa or Yamaha Fascino, followed closely by style-conscious models such as the Royal Enfield Classic series. Comfort and ease of handling tend to guide choices for many female riders. What is the most sold motorcycle of all time? Answer to: What is the most sold motorcycle of all time? Globally, the Honda Super Cub is recognized as the top-selling motorcycle, beloved for its simplicity and dependability across generations of riders. Is it easy to change a motorcycle spark plug? Answer to: Is it easy to change a motorcycle spark plug? Yes—if you have basic mechanical skills and access to simple tools like a spark plug socket, gap gauge, and your bike’s service manual, replacing your spark plug is a practical DIY project for most owners. Key Takeaways for Motorcycle Spark Plug Replacement Recognize early warning signs of spark plug trouble Follow inspection and maintenance schedules consistently Always use the right tools and methods for replacement Don’t hesitate to seek expert help if unsure Ready for Your Motorcycle Spark Plug Replacement? Call Nasty Performance Motorcycle Shop Today: 847-458-4858 If you’re committed to keeping your motorcycle running at its best, don’t stop with spark plug maintenance alone. Expanding your knowledge of seasonal care can help you anticipate issues before they arise and ensure your bike is always ready for the road, no matter the weather. Discover expert strategies for year-round reliability and performance by exploring essential seasonal bike care tips. With the right approach, you’ll not only extend the life of your spark plugs but also protect every aspect of your ride for the long haul.

Terms of Service

Privacy Policy

Core Modal Title

Sorry, no results found

You Might Find These Articles Interesting

T
Please Check Your Email
We Will Be Following Up Shortly
*
*
*