


Did you know that one in three motorcycles suffering from engine overheating could have prevented the issue with regular motorcycle coolant flushing? Many riders overlook this simple maintenance task, yet it can be the difference between effortless rides and unexpected roadside breakdowns. In this comprehensive guide, you’ll uncover why proper coolant system care is crucial, learn to spot the signs your cooling system needs attention, and get step-by-step instructions to safely flush your motorcycle coolant—ensuring reliability for every journey.
Why Motorcycle Coolant Flushing Is Crucial for Your Cooling System
“Neglecting regular motorcycle coolant flushing can lead to overheating, costly repairs, and system failure—protect your cooling system with scheduled maintenance.” – Motorcycle Maintenance Expert
Keeping your motorcycle’s cooling system in prime condition should be a top priority for every rider. Regular motorcycle coolant flushing is critical because it removes old, contaminated coolant—and with it, any scale, corrosive deposits, or debris—helping prevent water pump and gasket failures. When motorcycle coolant isn't flushed out on time, the resulting buildup can reduce the efficiency of your radiator fan and impairs the boiling point stability, which raises the risk of engine overheating.
The coolant system is much more than a simple collection of hoses and fluids; it’s a lifeline that regulates temperature, preserves essential engine components, and keeps everything running at peak performance. Ignoring scheduled coolant changes places unnecessary strain on your reservoir tank and water pump. Flushing your coolant system at recommended intervals minimizes risks and ensures your bike’s performance stays uncompromised, so you can enjoy a smooth, worry-free experience every ride.
- Extend engine lifespan
- Prevent overheating in your cooling system
- Maintain peak engine performance
- Remove harmful deposits from the coolant system
What You'll Learn in This Motorcycle Coolant Flushing Guide
This article leaves no stone unturned for your motorcycle coolant flushing needs. Every rider, from DIY beginners to seasoned cruisers, will find actionable insights and real-world tips to keep your cooling system and coolant system running at their best. Each section dives deep, offering not just procedures but best practices honed by professionals, including how to select the ideal coolant types and avoid mistakes that could cost you in the long run.
- How motorcycle coolant flushing keeps your cooling system running efficiently
- Best practices for selecting and using distilled water and fresh coolant
- Step-by-step guide to flush the system
- Common mistakes to avoid during motorcycle coolant flushing
- Insights on coolant types suitable for motorcycles
As you focus on maintaining your motorcycle’s cooling system, it’s equally important to consider how seasonal changes can impact your bike’s overall health. For a deeper dive into preparing your motorcycle for different weather conditions and ensuring year-round reliability, explore these seasonal bike care strategies every rider should know.
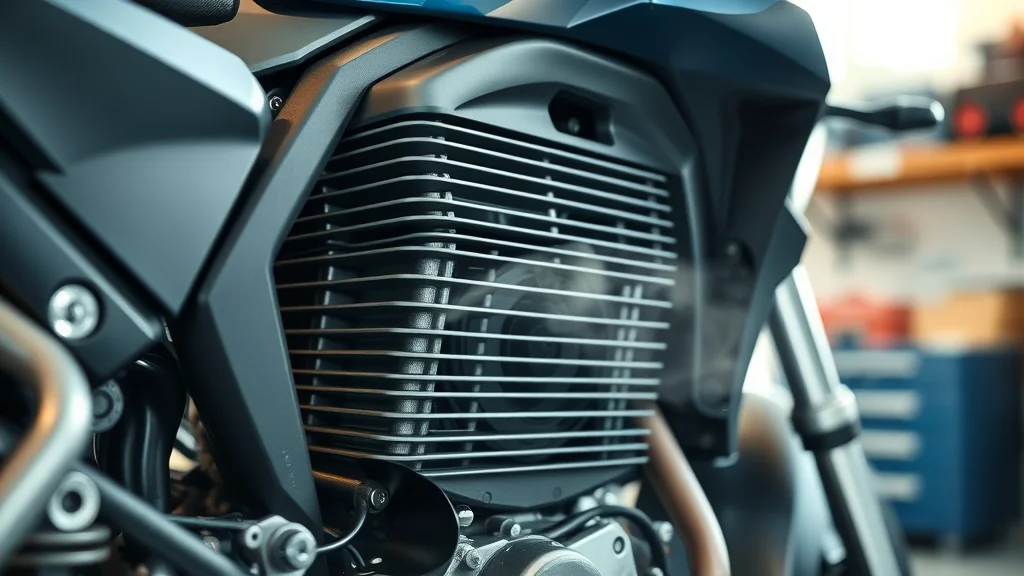
Understanding the Motorcycle Coolant System
How the Motorcycle Cooling System Works
The heart of your motorcycle’s engine health lies in the coolant system. This system is made up of several main components: the radiator, water pump, hoses, reservoir tank, thermostat, and radiator cap. The radiator absorbs and dissipates heat, while the water pump circulates coolant throughout the engine, drawing excess warmth away from critical moving parts. When running, the temperature gauge monitors heat levels, and the radiator fan kicks in if the heat rises too high—even on hot days in traffic.
Coolant is a special liquid blend—often a mixture of distilled water, ethylene glycol, or propylene glycol—that prevents freezing and boiling in the cooling system, maintaining the engine cool at all times. The filler neck is the access point for adding coolant, but it’s essential that only the recommended ratio of water and coolant is used. Regular flushing is necessary because, over time, even the best fluids break down and accumulate grime, lowering their effectiveness and putting your engine at risk of overheating or even major mechanical failure.
- Main components of the cooling system
- Role of coolant in temperature regulation
- Why flushing the system is necessary
Common Problems Prevented by Motorcycle Coolant Flushing
Routine motorcycle coolant flushing combats several common issues that can develop as your bike racks up miles. The most significant are corrosion and scale buildup. Contaminants in the old coolant slowly erode metal parts—particularly around the water pump, radiator core, and gasket seals. This corrosion can create leaks or blockages, hindering the coolant’s flow and causing the engine’s temperature to spike.
Failure to properly flush the system can also result in destructive buildup around the drain bolt and cause water pump or gasket failures. Small leaks or improper coolant type can lead to chronic overheating, forcing the engine to work harder to remain cool. Persistent issues here might even demand expensive repairs or replacement parts. By adopting a scheduled coolant maintenance routine, you’ll minimize the risk of dramatic mechanical breakdowns and preserve the life and performance of your ride.
- Corrosion and scale buildup
- Water pump and gasket failures
- Coolant leaks and overheating
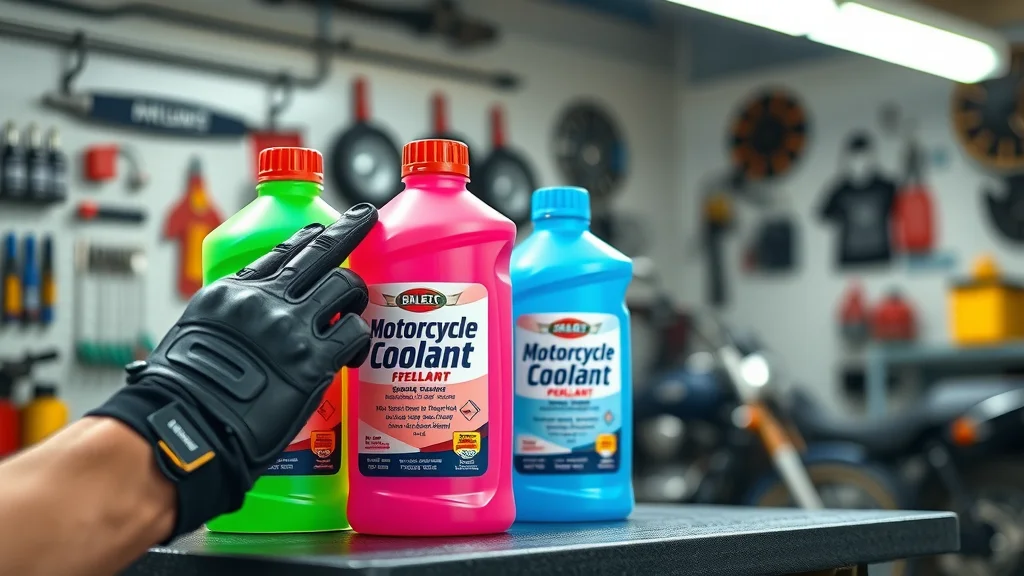
Coolant Types Explained for Motorcycle Coolant Flushing
Before you flush your system or reach for a bottle of fresh coolant, it’s vital to understand the range of coolant types available and which is right for your bike. Traditional coolants typically contain ethylene glycol and require regular replacement, while long-life modern coolants may be based on advanced formulas that protect against corrosion and maintain the correct boiling point. Premixed coolants are formulated with distilled water, making them ready to use out of the bottle, whereas concentrates must be diluted before use.
If you’re ever unsure whether to use water vs. premixed coolant, check your owner’s manual or consult with a mechanic. As a golden rule, never use tap water—it contains minerals that can cause scale deposits and degrade your radiator core. Distilled water, on the other hand, ensures cleanliness and compatibility. Always match your motorcycle’s requirements for coolant types, as using the wrong formula can lead to premature component wear or system blockage, endangering your cooling system.
- Differences between traditional and long-life coolants
- When to use water vs. premixed fresh coolant
- Choosing the right coolant type for your model
| Coolant Type | Features | Pros | Cons | Compatibility |
|---|---|---|---|---|
| Traditional Ethylene Glycol | Basic protection, requires mixing with distilled water | Cost-effective; widely available | Shorter lifespan; toxic | Most older and some modern bikes |
| Long-Life Coolant (OAT/HOAT) | Advanced corrosion inhibitors; pre-mixed or concentrate | Extended interval; less frequent changes | Higher cost; potential incompatibility | Most modern motorcycles |
| Propylene Glycol Based | Low toxicity, environmentally friendly | Safer for pets & kids; good performance | Higher price; not always OEM-approved | Check compatibility with your model |
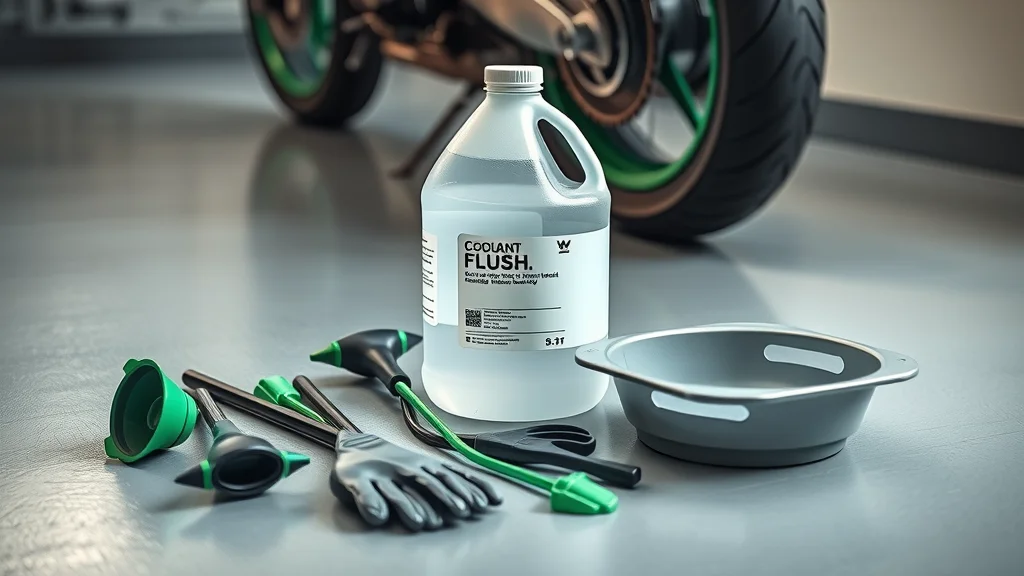
Essential Tools and Supplies for Flushing the System
Before you embark on your coolant system maintenance, gathering the right tools and supplies is crucial for a smooth, effective flush. Start with distilled water, the backbone for rinsing out contaminants from your bike’s cooling system. Never substitute tap water, as it introduces minerals that can scale up your system or reduce efficiency. Your choice of fresh coolant is equally important; opt for a type that matches your bike’s requirements for chemical protection and boiling point control. It pays to research whether your engine is better suited for ethylene glycol, propylene glycol, or a proprietary blend recommended by your motorcycle’s manufacturer.
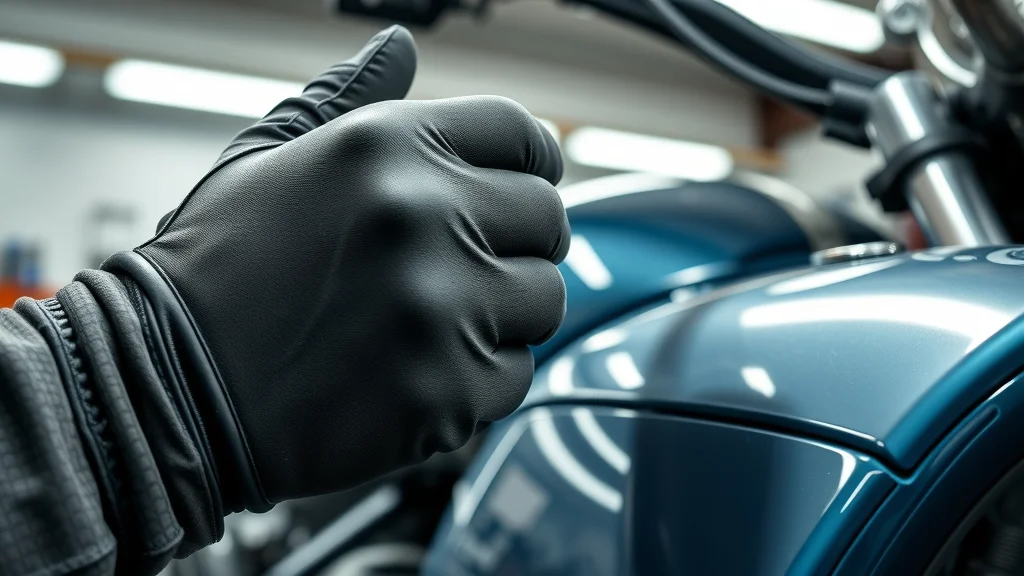
Having the right gear also means using clean funnels for pouring coolant and distilled water, a sturdy drain pan to catch old fluid, protective gloves, and safety glasses. Make sure you have access to the drain bolt or drain plug, and check that your garage floor is prepared to deal with any spills. Organizing your supplies keeps the job straightforward and minimizes the risk of missing a vital step or contaminating your coolant system during maintenance.
- Distilled water for rinsing
- Fresh coolant for refill
- Funnels, pans, and safety protection
Step-by-Step Motorcycle Coolant Flushing Process
Proper motorcycle coolant flushing involves a series of carefully executed steps to ensure your cooling system is spotless, free from harmful deposits, and ready for a fill of fresh coolant. Before starting, take your time to prepare, as safety and thoroughness are key.
Preparation: Ensuring Safety and Readiness
Let the engine cool completely before opening any part of the coolant system—the pressurized hot coolant can cause serious burns if released too soon. Park your bike on a level surface and make sure the ignition is off. Gather all your necessary tools: distilled water, the right fresh coolant for your motorcycle, funnels, a drain pan, and sturdy gloves. Keep a rag handy for small spills and a bin for used fluids. Double-check that all parts, including the drain bolt and filler neck, are easily accessible and the area is clean and free of clutter. This preparation paves the way for a safe, efficient flush of your cooling system.
- Let the cooling system cool down
- Gather the necessary tools and distilled water
Draining the Old Fluid from the Coolant System
First, access the drain bolt or drain plug, usually located at the lowest point on your cooling system—often on the water pump or near the bottom of the radiator. Place your drain pan directly underneath to catch the old coolant as it flows out. Remove the radiator cap to relieve any residual pressure and allow air in for a more complete drain. Carefully unscrew the drain bolt and let the old coolant run into the pan. Avoid skin contact and keep the fluid away from pets and children, as it’s toxic. Once draining is complete, inspect the radiator cap and the inside of the reservoir tank for residue or corrosion; these are early signs your coolant system needs close attention during the flush.
- Locating the drain bolt
- Safely disposing of used coolant
How to Flush the System Using Distilled Water
After draining, reinstall the drain bolt and pour distilled water into the radiator or reservoir tank up to the fill line. Replace the radiator cap and start the engine, letting it idle for several minutes so the water circulates, solubilizing any lingering contaminants. Turn the engine off, let it cool, and drain the distilled water from the system again. Repeat this process until the liquid draining out is clear—usually two or three flushes does the trick. This step ensures no old coolant, mineral buildup, or air bubbles remain, setting the stage for your new coolant to provide maximum protection.
- Pouring distilled water through the coolant system
- Flushing until the water runs clear
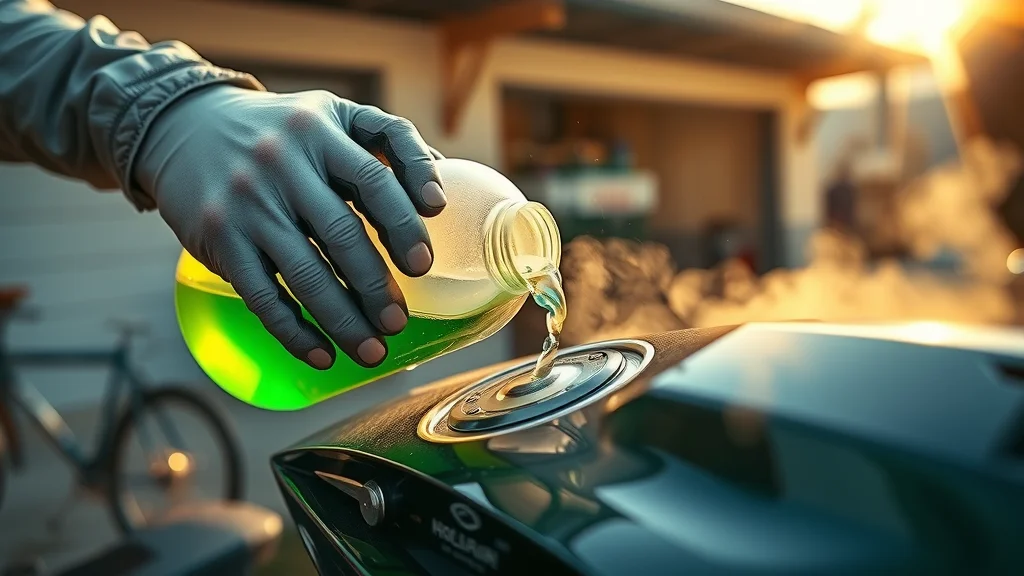
Refilling with Fresh Coolant and Bleeding the System
With the system fully flushed and the drain bolt back in place, slowly pour the recommended fresh coolant (matching type and concentration for your motorcycle model) into the filler neck until the coolant level reaches the fill line. Reinstall the radiator cap securely. Next, start the engine and let it idle to circulate the fresh coolant, periodically squeezing coolant hoses to help dislodge any remaining air bubbles trapped in the cooling system. To properly bleed the system, you may need to loosen the bleeder bolt or run the engine with the radiator cap off (if your manual allows; always check). Once the coolant system stops bubbling and the level stabilizes, top up as needed. This critical bleeding step prevents overheating and maintains the right boiling point for your engine.
- Selecting the right fresh coolant
- Bleeding air pockets from the cooling system
For those who want a visual overview, check out our step-by-step walkthrough covering draining, flushing, refilling, and bleeding the system. This demonstration highlights each stage with close-ups on hands, tools, and key components in a neutral garage setting.
Post-Flushing Checklist for Your Cooling System
After completing the flush, it’s essential to double-check your work to ensure the cooling system is leak-free and operating efficiently. Start by visually inspecting all hoses, the radiator cap, and connection points for leaks. Next, check the coolant level in the reservoir tank and add more coolant if it dips after a test ride. Run the engine and monitor the temperature gauge to ensure it stays within the safe range and that the radiator fan kicks in as needed. Keeping the system balanced helps prevent overheating and guarantees long-term engine protection.
- Checking for leaks in the coolant system
- Proper coolant level balance
- Verifying engine temperature stability
Mistakes to Avoid During Motorcycle Coolant Flushing
Even experienced riders can slip up during a coolant system flush. A major error is using tap water, which deposits minerals that degrade your radiator core and water pump over time—always opt for distilled water. Skipping the bleed step can leave dangerous air bubbles in your cooling system, disrupting heat transfer and inviting overheating. Another common pitfall is mixing incompatible coolant types; blending propylene glycol and ethylene glycol formulas can trigger chemical reactions that damage seals and passages in the coolant system. Take the time to research your model’s requirements, gather the right supplies, and follow each step without shortcuts to guarantee you get the longest possible life from your engine.
- Using tap water instead of distilled water
- Skipping system bleed steps
- Mixing incompatible coolant types
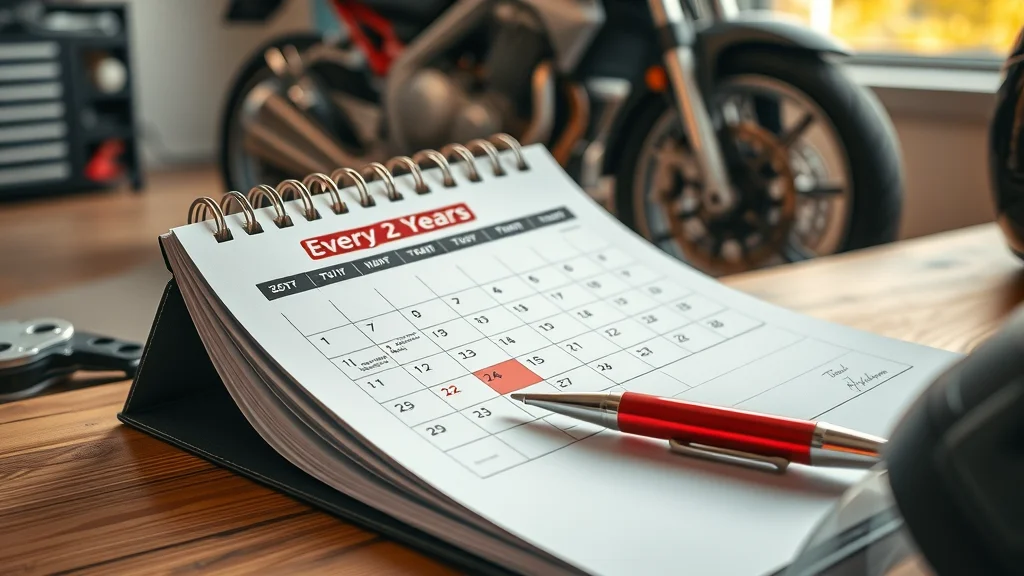
How Often Should You Perform Motorcycle Coolant Flushing?
“Regular coolant flushing, recommended every two years or as per your owner’s manual, prevents breakdowns and maximizes your engine’s reliability.” – Certified Motorcycle Mechanic
The ideal interval for motorcycle coolant flushing depends on your bike’s make, model, riding conditions, and manufacturer recommendations. For most motorcycles, experts suggest flushing the coolant every two years or after a set mileage—whichever comes first. Hard-use conditions, like frequent stop-and-go traffic, cold climates, or high-performance riding, may require more frequent attention. Look for signs like a rising temperature gauge, visible sediment in the coolant, or reduced radiator fan effectiveness as clues that your system needs service sooner. Checking your owner’s manual is vital, as some modern coolants are formulated for even longer service lives. Always keep track of your maintenance schedule to ensure maximum reliability.
- Factors affecting coolant change frequency
- Signs your motorcycle is due for flushing
People Also Ask About Motorcycle Coolant Flushing
Do you need to flush the coolant on a motorcycle?
Flushing the coolant system is necessary to remove contaminants and retain performance; neglect can lead to overheating and damage. Regular cleaning ensures the radiator cap, water pump, and filler neck are free of buildup, helping prevent costlier future repairs.
How much does a motorcycle coolant flush cost?
The cost varies depending on whether you do it yourself or use a shop and on your bike’s make and model; call for a precise quote. DIY flushes require basic supplies (distilled water and fresh coolant), while a full professional service often includes additional checks on the coolant system and cooling system integrity.
How do I flush motorcycle coolant?
Draining old coolant, flushing with distilled water, and refilling with fresh coolant are essential—refer to our detailed step-by-step process above. Make sure to bleed air bubbles thoroughly and always dispose of used fluids responsibly to protect your bike and the environment.
How often should you change the coolant in a motorcycle?
Most manufacturers advise a coolant flush every two years, but consult your manual or mechanic for specific intervals. Factors like riding environment, coolant types, and model recommendations may impact how often to service your system.
Still facing issues after a flush? Our troubleshooting video covers diagnosing persistent problems like coolant leaks, air bubble formation, or radiator fan failure after maintenance, ensuring you spot and solve any cooling system troubles fast.
FAQs About Motorcycle Coolant Flushing
-
Which coolant types are safe for my bike?
Always check the owner’s manual for approved coolant types, and only use those recommended for your engine materials and climate. -
Can I reuse coolant after flushing the system?
No, always replace old coolant with fresh coolant. Used fluids lose their effectiveness and may contain debris that harms the cooling system. -
What if my cooling system still overheats after flushing?
Check for leaks, thermostat issues, or trapped air bubbles. Persistent overheating requires a professional diagnosis—do not ignore the warning signs. -
Is flushing DIY or shop-only?
With the right instructions and tools, many riders can complete motorcycle coolant flushing at home. However, major issues or uncertainty may require a visit to the shop for safety.
Key Takeaways for Proper Motorcycle Coolant Flushing
- Never skip regular motorcycle coolant flushing
- Always use distilled water and fresh coolant
- Understanding your coolant system and cooling system ensures longevity
- Seek expert help if unsure about coolant types or procedures
Ready for Your Next Motorcycle Coolant Flushing?
“A well-maintained cooling system is the heart of your motorcycle’s reliability—make coolant flushing a regular habit.”
Call Nasty Performance Motorcycle Shop Today: 847-458-4858
Conclusion: Don’t let your next ride be interrupted by a minor oversight. Stay proactive with regular motorcycle coolant flushing, follow our expert-backed checklist, and enjoy peace of mind on every journey!
Maintaining your motorcycle’s cooling system is just one piece of the puzzle when it comes to long-term bike health and performance. If you’re ready to take your maintenance routine to the next level, discover how a holistic approach to seasonal care can protect your ride from the elements and keep it running smoothly all year long. Uncover expert advice and practical tips in our comprehensive guide to seasonal bike care secrets every rider must know. By integrating these strategies with your regular coolant flushing, you’ll ensure your motorcycle is always ready for the road—no matter what the season brings.


Write A Comment