Add Row
Add Element
cropper
update

Nasty Performance ~ 847-458-4858 

update
Add Element
  • Blog Home
  • Categories
    • Motorcycle Maintenance
    • Riding Tips & Preps
    • Safety & Inspection
    • Customizations & Upgrades
    • DIY Motorcycle Repairs
    • Motocycle Audio Systems
    • Motocycle Seasonal Care & Storage
    • Engine, Electrical Performance
  • Bike Night
  • Nasty Performance Motorcycle Shop
January 25.2026
1 Minute Read

Motorcycle Tire Replacement: When and How to Act Fast

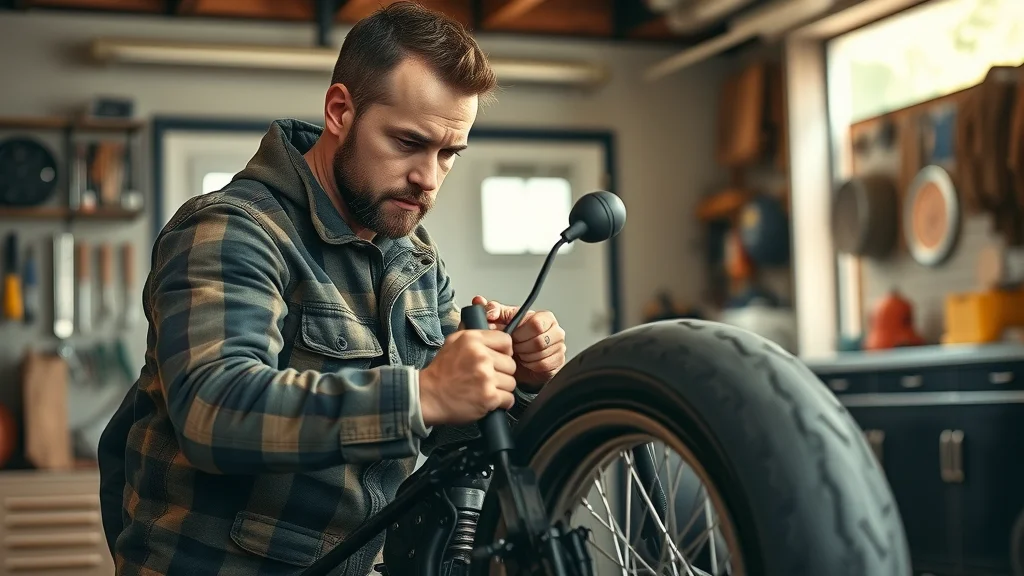
Ever wondered if waiting one more weekend before replacing your motorcycle tires could truly put your life at risk? Motorcycle tire replacement isn't just a routine maintenance task—it can be the difference between a routine ride and a disastrous accident. This guide cuts through the confusion, showing you when to replace your motorcycle tires, what signs to watch for, how much it should cost, and whether you can tackle it yourself or should trust a local shop. Read on to keep your rides safe, thrilling, and worry-free.

Why Motorcycle Tire Replacement Matters: The Risks of Delay

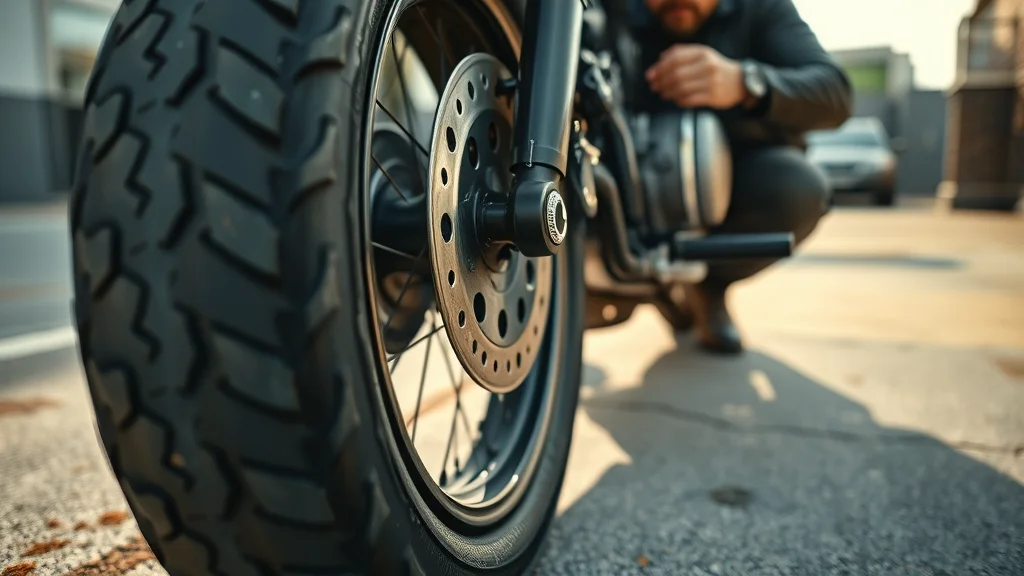
Procrastinating on motorcycle tire replacement may feel harmless, but it's one of the most dangerous judgments a rider can make. Worn-out motorcycle tires compromise your motorcycle's grip, handling, and braking ability, directly increasing your chances of losing control at speed or in a panic stop. Timely tire changes help reduce the risk of blowouts—especially on the rear tire, which handles most of your bike's power and acceleration—and can literally save lives in emergency situations.

The reality is, dangers often hide in plain sight. Even small patches of bald tread, light cracking, or unnoticed punctures can dramatically impact a tire's performance. When your motorcycle tires no longer provide safe traction, you're risking more than your own safety; your passengers and everyone else on the road are at stake. That's why understanding the urgency and warning signs of tire wear isn’t just technical know-how—it’s a critical safety measure for every rider.

"Ignoring worn motorcycle tires isn't just risky; it's potentially life-threatening. Every rider owes themselves—and everyone else on the road—the diligence of timely motorcycle tire replacement." – Industry Safety Expert

Motorcycle Tire Safety: Hidden Dangers of Worn Motorcycle Tires

The hidden dangers of worn motorcycle tires aren't always obvious to the untrained eye. Over time, tires lose their flexibility, leading to reduced grip on the road—especially in wet or unpredictable conditions. Cracks, dry rot, and minor punctures may not be visible at a glance, but each can make the tire more prone to failure. The rear tire, in particular, takes a significant pounding due to acceleration and load, making it a frequent culprit for subtle yet hazardous wear patterns.

Additionally, a worn motorcycle tire can cause vibration, reduce mileage, and even create uneven wear on your wheel bearings and suspension components. As the tread thins, water evacuation becomes less effective, leaving the tire susceptible to hydroplaning. Old, neglected tires can stiffen so much that they no longer provide the designed traction, especially during emergency braking. Regular tire inspections, both visual and by feel, should become a habitual part of your riding routine.

For a deeper dive into keeping your motorcycle in peak condition throughout the year, including how tire care fits into broader maintenance routines, check out these essential seasonal bike care secrets every rider should know. Integrating tire checks with other seasonal tasks can help you catch issues early and ride with confidence in any weather.

Crisp close-up of a worn motorcycle tire with concerned rider inspecting for motorcycle tire replacement issues

Rear Tire and Front Tire Concerns: Impact on Handling and Braking

Both the rear and front tires play distinct roles in a motorcycle’s stability and responsiveness. The rear tire is responsible for delivering power, undergoing the brunt of acceleration wear. If left unchecked, a worn rear tire can lead to poor traction during takeoff or corner exit, increasing the risk of fishtailing or unanticipated skidding. Meanwhile, the front tire manages steering and provides critical grip during braking. Even slight irregularities in the front tire’s surface can drastically impair your bike's steering accuracy and stopping distance.

Unaddressed tire wear on either wheel leads to unpredictable handling, delayed braking response, and an unsafe riding experience. As tire profiles flatten over time (especially notable on sport bike tread patterns), the bike's cornering behavior changes—making smooth, confident turns more difficult. This reinforces the need for regular evaluations of both tires, even if only one seems worn. Always treat unusual noises, wobbles, or changes in ride feel as urgent signals for tire replacement.

What You'll Learn About Motorcycle Tire Replacement

  • The critical signs that indicate a need for immediate motorcycle tire replacement

  • Cost factors and options for motorcycle tire replacement

  • DIY tips versus professional services for tire change

  • Essential tire size and type selection advice

  • Key maintenance strategies for longer-lasting motorcycle tires

The Telltale Signs: When to Replace Your Motorcycle Tires

Riders need to recognize telltale signs that it's time for motorcycle tire replacement. Tires communicate their status through subtle clues—if you know where to look. Ignoring these signals puts you and your bike at risk. When in doubt, always err on the side of caution, as timely replacements prevent dangerous failures and ensure maximum performance.

Let’s dive into the most important cues and behavioral changes that scream for a new set of motorcycle tires. Acting quickly on these warnings extends your bike’s life and keeps every ride as safe as possible, no matter the season.

Visual Cues for Motorcycle Tire Replacement

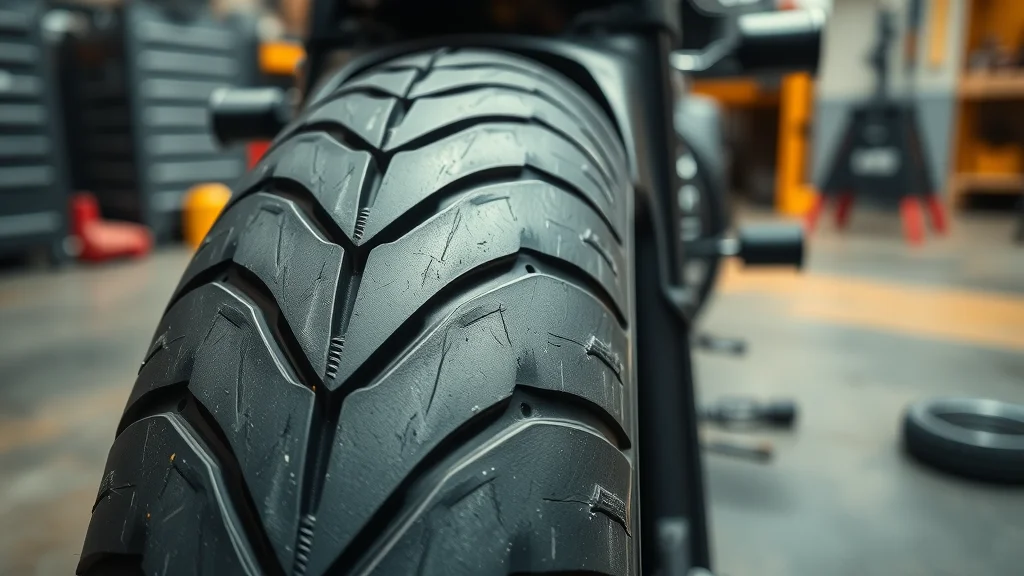
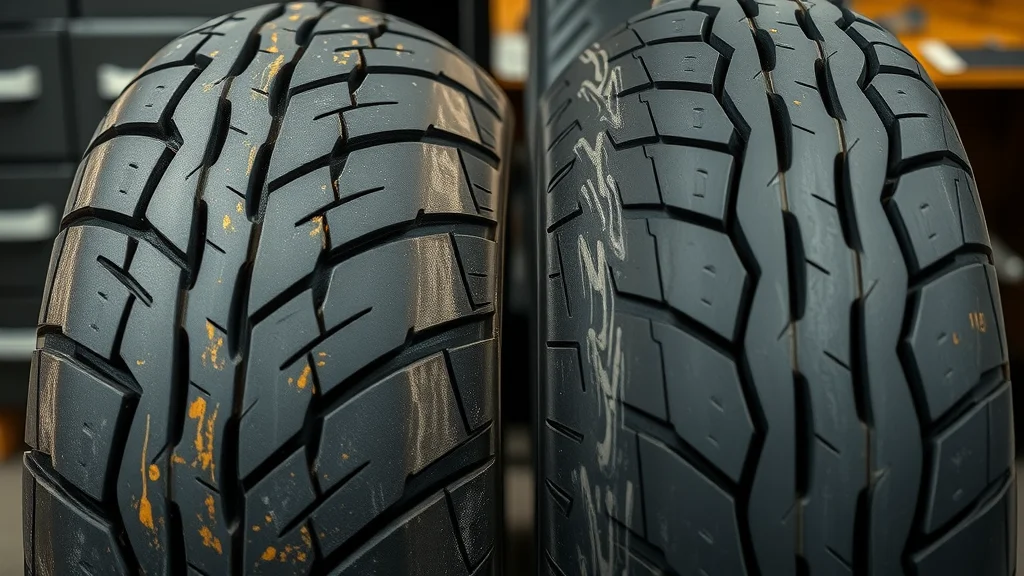
A visual inspection remains your first line of defense. Start by checking for tread wear indicators—small raised bars molded in the tire’s grooves. If the tread is flush with these bars, the tire is worn out. Keep a close eye out for cracking or splitting rubber along both the tread and sidewall. These cracks signal that the rubber has degraded, making the tire vulnerable to sudden failures. Flat spots—typically on the rear tire—indicate hard acceleration or emergency stops that have flattened the profile, often impacting stability.

Other signs include bulges from impact damage, or punctures that may not fully seal. If you notice any abnormality in the tire's surface (from subtle cuts to odd abrasions), replacement is the only safe response. Remember, just a few millimeters of rubber separates your motorcycle from the road. Always inspect tires in good light and check both the outer tread and side of the tire for hidden issues.

Detailed view of a motorcycle tire showing tread wear indicators and cracks for motorcycle tire replacement assessment
  • Tread wear indicators

  • Cracking/splitting rubber

  • Noticeable flat spots

  • Bulges or punctures

Performance Changes Requiring Immediate Motorcycle Tire Replacement

The way your motorcycle feels offers another layer of warning. Excessive vibrations at speed, especially in the handlebars or seat, might not come from the road—it could be unevenly worn motorcycle tires. Poor grip is another serious flag. If your bike feels slippery in corners, struggles for traction when accelerating, or seems unstable mid-turn, your tires are likely past their prime. These issues become especially pronounced on wet or slick roads.

Don’t ignore new or unusual noises coming from the tires—whining, thumping, or grinding can all point to failing materials or internal damage. If the bike’s handling suddenly deteriorates, such as vague steering from a front tire or “floaty” rear wheel sensation, it’s time to act fast. In any situation where the tire fails to provide predictable, confident response, schedule a replacement without delay.

Dynamic action shot of a rider experiencing tire issues and needing immediate motorcycle tire replacement
  • Vibrations

  • Poor grip

  • Unusual noises

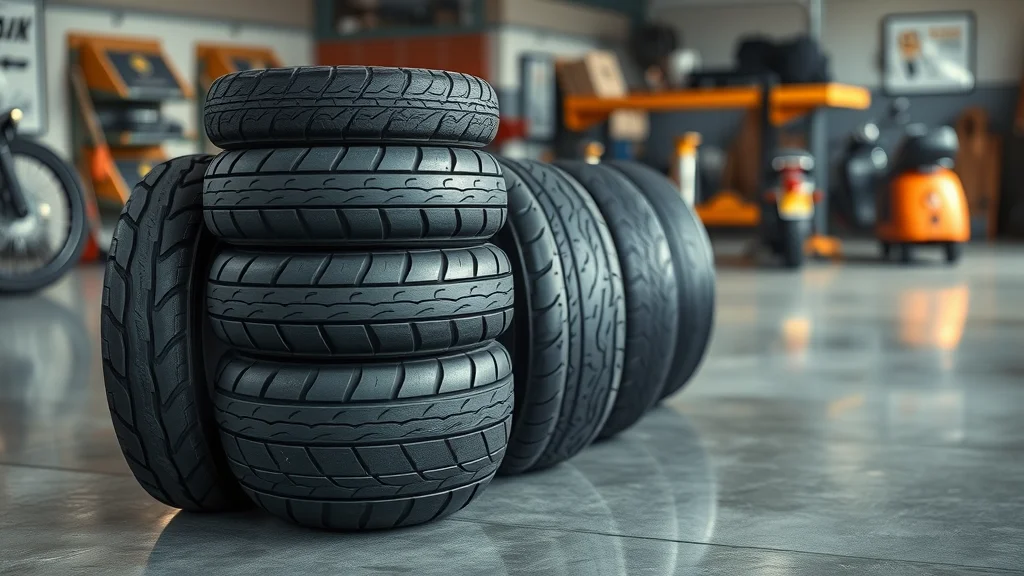
Understanding Motorcycle Tire Types and Tire Sizes

Not all motorcycle tires are created equal. Choosing the correct tire size and type isn’t just about performance—it's about safety and fit. The wrong tire can undermine handling, create clearance issues, or introduce unpredictable behavior during turns and braking. Factors such as your bike’s design, riding style, and road conditions all influence the best replacement choice.

Understanding the difference between radials, bias-ply, and specialty tires (like those for cruisers versus sport bikes) guarantees the tire matches your machine’s suspension and intended load. A reputable local shop will help guide this choice, but knowing the basics puts you in the driver’s seat when making this crucial decision.

Choosing the Correct Tire Size for Your Motorcycle

Start by referencing your owner's manual or the information on the swingarm decal. Look for numbers specifying width, aspect ratio, rim size, and construction (e.g., 180/55ZR17). Installing the wrong tire size can output issues ranging from improper contact patch to frame interference.

Modern motorcycles demand exact matches, and even minor deviations can result in a drastic change in cornering or braking. Whenever in doubt, consult your local shop or use online tools to match manufacturer recommendations. Keep in mind—sport bikes and touring bikes have different performance and durability needs; use the table below as a quick reference for common combinations.

Motorcycle Model

Recommended Tire Size

Best Tire Type

Sport Bike

180/55ZR17

Radial

Cruiser

150/80B16

Bias-ply

Touring

130/70R18

Touring Radial

Clean lineup of different motorcycle tire types and sizes in high-end garage for motorcycle tire replacement

How Motorcycle Tires Differ: Touring, Sport, Cruiser

Touring tires are engineered for durability, comfort, and the capacity to handle heavy loads. They tend to have deeper treads for all-weather grip and less aggressive profiles to promote longevity over hundreds of miles. Sport tires, on the other hand, are built for maximum traction and rapid heat-up, making them ideal for aggressive riding styles and sharp cornering, but with shorter lifespans.

Meanwhile, cruiser tires feature reinforced sidewalls and broad profiles, providing extra comfort over long journeys at moderate speeds. Understanding these differences means selecting a tire that complements your main riding demands and the bike’s engineering—ensuring you maximize safety, performance, and value every time you ride.

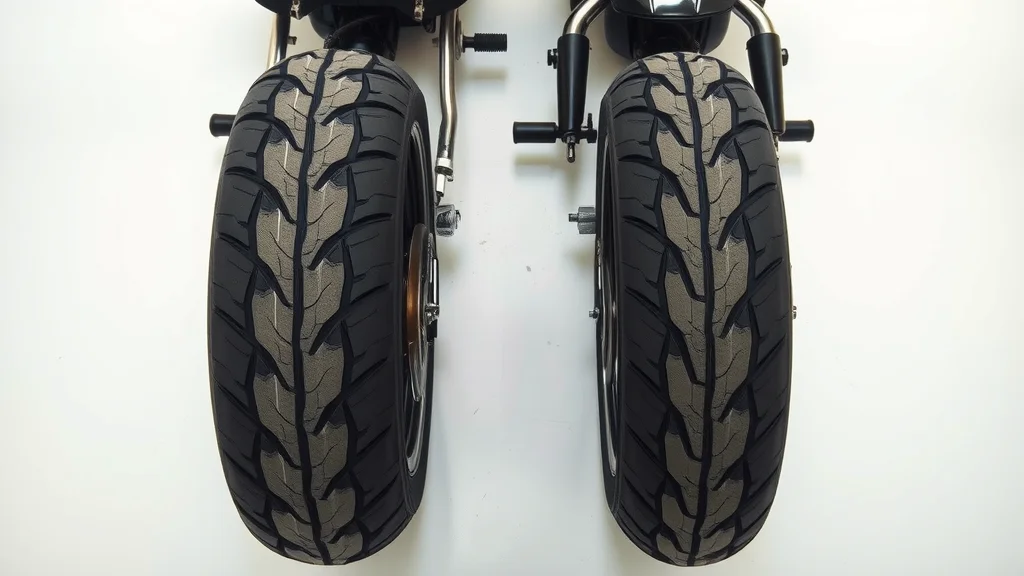
Rear Tire vs. Front Tire: Which One Needs Replacement First?

It's common to replace the rear tire more frequently, because it usually bears the brunt of acceleration and power delivery. Depending on your riding habits, the rear tire may wear out twice as quickly as the front. Aggressive acceleration, carrying passengers, or heavily loaded touring all strain the rear, quickly flattening its tread.

In contrast, the front tire wears slower, as it mainly manages steering and braking duties. However, don't be complacent: sharp or emergency braking maneuvers can quickly eat away at front tire tread, especially if you favor sporty rides. Ideally, inspect both tires together and never ignore uneven wear, since mismatched grip or profiles can cause erratic handling. Replace whichever tire shows significant wear—regardless of whether it’s the front or rear—rather than waiting for both to reach the end of their service life.

  • Typical wear patterns for the rear tire vs. front tire

  • How riding habits affect tire longevity

Direct overhead shot comparing rear and front motorcycle tires with visible tread wear patterns for motorcycle tire replacement

How Much Should It Cost to Replace a Motorcycle Tire?

The cost of motorcycle tire replacement can vary depending on whether you opt for DIY or professional servicing, the brand of tire chosen, and the complexity of your motorcycle’s wheels (spoke vs. cast, tubeless vs. tube-type). Shopping for deals and using an offer code can reduce expenses, but the most important factor is ensuring quality and safety throughout the tire change process.

Budget for the price of the tire itself (ranging from $80 to $300 per tire for most street bikes), plus labor costs (typically $40 to $100 per wheel if handled by a local shop). Some specialty models and dealership services may be higher, while discount retailers and member perks with RPM clubs or seasonal financing offers can provide savings.

Price Breakdown: Motorcycle Tire Cost and Labor

For a standard tire change at a local shop, expect to pay around $120–$400 total for a set of mid-grade tires, installed and balanced. Premium brands or unique tire sizes may increase costs, as will more complex wheel removal (on shaft-drive or sport touring bikes). If you use your own tire changer or attempt a DIY install, your only expense might be the tire, tire lube, rim protectors, and bead breaker.

Remember, labor rates vary depending on region, bike model, and whether you bring wheels off the bike or have the shop remove them. Some shops offer occasional perks for this product or financing offers. Ask ahead about any fees for recycling old tires or shop supplies. No matter your budget, never compromise on tire quality or professional balancing—it’s vital for both your safety and your ride quality.

"Expect labor costs for tire change to vary widely between DIY and professional motorcycle shops."

How to Find the Right Local Shop for Motorcycle Tire Replacement

Choosing the right local shop for motorcycle tire replacement makes the process smoother, safer, and often faster. Look for shops with certified technicians, clear policies on tire brands and sizes, and up-to-date tire changer equipment. Pay attention to their ratings and reviews—experienced, customer-friendly shops often offer guidance on the best tire options for your ride, as well as member perks, offer codes, or seasonal offers to make the job much easier on your wallet.

Ask if they can handle your specific tire (tubeless tire, bias-ply, sport touring, etc.), and whether they provide full balancing and alignment checks. Bring your old set or inquire about recycling programs, and make sure the shop uses proper rim protectors and tire lube on installation. Throughout the tire change, a skilled shop will also check for related issues, such as worn wheel bearings or valve stems, potentially saving you headaches—and extra trips—down the line.

Friendly local motorcycle shop for motorcycle tire replacement with welcoming staff and motorcycles outside

Can You Replace Motorcycle Tires Yourself?

While professional shops provide convenience and peace of mind, many seasoned riders successfully handle motorcycle tire replacement at home. You'll need the right tire changer tools—bead breaker, tire irons, rim protectors, a reliable air gauge, and plenty of patience. DIY saves on labor and lets you learn the ins and outs of your own machine, but it does demand attention to detail and adherence to correct procedures.

Be honest about your comfort level. A DIY tire change is possible for those handy with basic mechanical tasks, but improper mounting or balancing can compromise safety. For those considering DIY, follow each step closely and use recommended products (like tire lube) to ease both removal and installation. Always double-check tire seating and ensure air pressure and balance before riding. If you get stuck, don’t hesitate to ask for help from a local shop.

The Steps for DIY Motorcycle Tire Change

  1. Remove the wheel from your motorcycle

  2. Deflate and break the bead of the old tire

  3. Use tire changers or appropriate tools to remove the old tire

  4. Install and seat the new tire

  5. Inflate and balance the wheel

  6. Reinstall the wheel

Each step requires a blend of muscle, know-how, and careful technique. Proper tire lube is crucial for safely sliding the new tire into place, reducing the chance of pinched tubes or damaged rims. When inflating, observe the sidewalls for even seating and check alignment with reference marks. After reinstalling, take a slow test ride to confirm smoothness—any sudden vibrations or noises may indicate the need for adjustment.

Motivated DIY rider working on motorcycle tire replacement using tire lever in home garage

Pros and Cons of DIY vs. Professional Tire Change

DIY pros: Cost savings, flexible timing, learning opportunity, and satisfaction of mastering your own maintenance. You'll also control the process from start to finish and can use your tire changer and rim protectors for repeated savings over time.

DIY cons: Requires specialized tools, physical strength, and meticulous technique—mistakes can result in damaged wheels, pinched tubes, or unsafe installs.
Professional pros: Quick turnaround, expert inspection, state-of-the-art equipment, and peace of mind, often bundled with warranties or service guarantees.
Professional cons: Higher cost and dependency on the shop’s schedule. Regardless of your route, the key is prioritizing safety and following the correct method for both your motorcycle tires and wheels.

How Often Should You Change Your Tires on a Motorcycle?

Motorcycle tire life depends on riding style, tire type, environment, and care. Sport tires may need replacement as soon as 3,000 miles if ridden hard, while touring tires can last up to 12,000 miles. However, age is as significant as mileage. After 5 years, the rubber compounds degrade, even if tread looks adequate.

Always check the tire’s date of manufacture (usually found on the sidewall), and take environmental exposure—heat, sunlight, chemicals—into account. If your tire shows signs of aging (cracks, stiffness, fading), replace it regardless of distance ridden. When in doubt, ask your local shop for a safety assessment before your next big journey.

Mileage and Age Recommendations for Motorcycle Tire Replacement

No tire lasts forever. Most manufacturers recommend replacement at 5 to 6 years, irrespective of tread depth. Riders who use their motorcycles heavily—or put them through aggressive stops and starts—may find themselves replacing rear tires twice as often as front tires. Always factor in both distance and time since the last change when determining your service interval.

Remember, older rubber can hide dangerous dry rot or internal separation, creating hidden safety risks. For total peace of mind, set calendar reminders to check tire age along with observable wear, and consult your local shop for tire change best practices suited to your model and riding habits.

"No tire lasts forever; after 5 years, even little-used motorcycle tires can pose hidden safety risks."

Aging and new motorcycle tires side by side for motorcycle tire replacement inspection and date code comparison

Does Discount Tire Change Motorcycle Tires?

Many major tire chains, including Discount Tire, focus primarily on car and truck tires. While they may sell certain motorcycle tire brands online, most do not perform motorcycle tire replacement in-store. Always verify in advance before bringing your wheels in, as policies are subject to change and may vary depending on location.

If you need specialized service—from tire size selection to wheel balancing—a dedicated motorcycle shop remains the best choice. Here, you’ll gain access to tailored advice, expert tire changers, and staff who understand the details of motorcycle tires from date of manufacture to proper rim installation. If you're seeking offers, keep an eye out for seasonal financing offers or member perks with RPM programs at larger dealers.

What Major Chains Offer Motorcycle Tire Replacement Services

Some national motorcycle chains and specialty stores, such as Cycle Gear or RevZilla retail locations, offer in-store tire mounting and balancing. However, their capabilities may be limited to riders who bring “loose wheels” (wheels removed from the motorcycle). For full-service replacement—from removing wheels to final inspection—a local motorcycle shop or dealership is usually necessary.

These expert outlets typically have modern tire changers, bead breakers, and state-of-the-art rim protectors to safeguard your investment. They handle a full range of tire types: tubeless, bias-ply, or radial. Whenever possible, call ahead for current pricing, appointment availability, and any exclusive offer code incentives for your model or tire brand.

Busy tire store interior with attentive staff helping a customer select motorcycle tires

Benefits of Choosing a Specialized Motorcycle Shop

Specialized motorcycle shops are staffed by enthusiasts and trained professionals who ride and wrench, so they know the stakes. These shops bring deep experience in identifying not only correct tire size, but also the best tire type and load rating for your intended use. They have access to the latest tire changers and diagnostic tools, ensuring your motorcycle tire replacement is done right the first time.

Other key benefits: in-depth consultations, special order tires, and maintenance checks covering everything from rim to rear wheel and wheel bearing health. Many local shops build ongoing relationships, remembering your preferences and offering timely reminders for tire replacements, as well as unique perks and offer codes for loyal customers.

Motorcycle Tire Replacement at Your Local Shop: What to Expect

  1. Consultation and selection of appropriate tire size and type

  2. Professional tire change with tire changers

  3. Inspection for related issues and proper installation

From arrival to ride-off, expect a clear, customer-focused process. The shop staff will review your riding habits and suggest the right tire (for touring, sport, or cruiser motorcycles), confirm compatible sizing, and then use advanced tire changers and rim protectors to perform a safe, efficient swap. Once installed, the bike undergoes checks for balanced wheels, healthy bearings, and correct air pressure—and often a visual demonstration to show you the difference between your old and new setup.

Essential Motorcycle Tire Maintenance Tips Post-Replacement

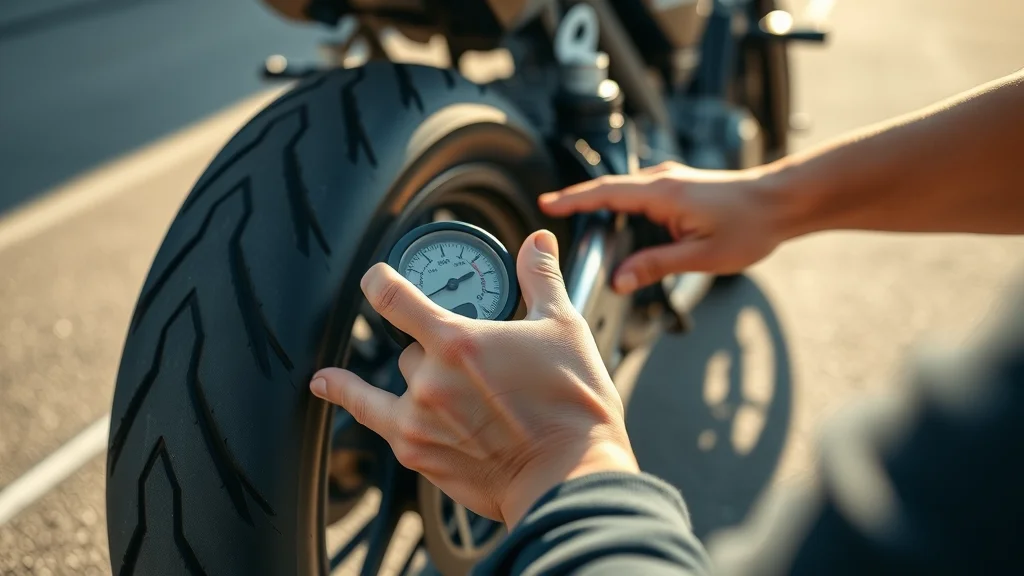
  • Regularly check air pressure

  • Inspect for damage or wear

  • Maintain proper alignment and balance

Post-replacement, a quick tire inspection before each ride is your best safety habit. Maintaining proper tire pressure protects your investment, maximizes grip, and extends tread life. If you ever notice uneven wear, a recurring drop in pressure, or new cuts after riding, consult your local shop right away—don't let small issues grow into dangerous problems.

Checking motorcycle tire air pressure with a digital gauge after tire replacement

Frequently Asked Questions About Motorcycle Tire Replacement

  • What signs show I need motorcycle tire replacement?

  • How to select the right motorcycle tires?

  • Is professional tire change worth the cost?

Key Takeaways for Safe and Reliable Motorcycle Tire Replacement

  • Never delay replacement when safety is at risk

  • Choose motorcycle tires suitable for your riding needs and tire size

  • Consult your local shop or trusted professional for guidance

Motorcycle Tire Replacement: Expert Video Guide

Watch a professionally shot, step-by-step video tutorial demonstrating the safe replacement of a motorcycle tire at a local repair shop. This guide covers close-ups of tire assessment, removal, installation, safety checks, and essential tips from an expert mechanic to keep you riding safely.

Motorcycle Tire Change Demonstration Video

In Conclusion: The Urgency and Essentials of Motorcycle Tire Replacement

"Swift motorcycle tire replacement can mean the difference between a close call and a catastrophic failure on the road."

Final Thoughts and Recommendations

Act promptly on warning signs, choose tires that suit your riding, and lean on professionals or reliable DIY techniques to ensure every ride is as safe and exhilarating as possible.

If you’re ready to take your motorcycle maintenance to the next level, don’t stop at tire replacement—explore how a holistic approach to seasonal care can extend the life of your bike and enhance every ride. Our guide to seasonal bike care secrets reveals expert strategies for prepping your motorcycle for changing weather, optimizing performance, and preventing costly surprises down the road. Dive in to discover advanced tips that go beyond the basics, and empower yourself to ride with confidence all year long.

Need Expert Motorcycle Tire Replacement? Call Nasty Performance Motorcycle Shop Today: 847-458-4858

Don’t gamble with worn tires—pro riders and newcomers alike trust Nasty Performance for reliable motorcycle tire replacement, expert advice, and outstanding local service!

People Also Ask: Motorcycle Tire Replacement

How much should it cost to replace a motorcycle tire?

Most motorcycle tire replacements range from $120–$400 total per set when using a professional local shop, depending on tire brand, bike type, and whether you need installation only or full wheel removal and balancing. Shopping for deals, using offer codes, or bringing your own loose wheels may save money. Always prioritize quality and proper fitting for maximum safety and value.

Can you replace motorcycle tires yourself?

Yes, riders with basic mechanical skills and proper tools (like a tire changer, bead breaker, tire irons, and air gauge) can replace motorcycle tires at home. Follow step-by-step instructions, use tire lube and rim protectors, and ensure correct balance before riding. If unsure or without equipment, professional shops are recommended for safe, reliable results.

How often should you change your tires on a motorcycle?

Replace motorcycle tires every 5–6 years regardless of mileage, or sooner if tread depth falls below wear indicators or you notice aging, cracks, or flat spots. Rear tires tend to wear faster due to increased traction demands—inspect both tires regularly and never delay replacement when safety could be compromised.

Does Discount Tire change motorcycle tires?

Discount Tire and similar national chains usually do not offer motorcycle tire replacement services at their stores, although they may sell motorcycle tires and accessories online. For installation, balancing, and complete safety checks, specialized local motorcycle shops are the preferred—and often only—option.

Motorcycle Maintenance

0 Comments

Write A Comment

*
*
Please complete the captcha to submit your comment.
Related Posts All Posts

Get Your Motorcycle Inspection for Spring

Did you know that a thorough motorcycle inspection for spring can prevent up to 40% of early season breakdowns? While many riders can’t wait to hit the open road as the weather warms, skipping your spring maintenance can mean trouble just when the season begins. This detailed guide not only reveals crucial steps you need for a safe riding season, but also highlights lesser-known checks that can make the difference between a smooth ride and a roadside mishap. Read on to discover how to keep your bike running in peak condition—all season long. Spring Motorcycle Inspection: Surprising Facts Every Rider Should Know Riders often underestimate the impact a seasonal maintenance check can have on their bike’s reliability and their own safety. The transition from winter storage to an active riding season brings hidden risks: fluids degrade, batteries lose charge, tires may develop flat spots or dry rot, and electrical connections can corrode. According to recent studies, up to 40% of early spring breakdowns could have been avoided with a proper motorcycle inspection for spring. This isn’t just routine motorcycle maintenance—it’s your passport to a trouble-free, exhilarating riding season on the open road. The main keyword to focus on: motorcycle inspection for spring. Including this in your annual prep ensures your maintenance checklist covers all areas. By adhering to a comprehensive approach—spanning fluids, brakes, battery care, tires, and controls—you drastically reduce the risk of losing control or facing a critical component failure. So, don’t just dust off your machine and go: take the time to run through a motorcycle maintenance checklist and experience the freedom of the road with peace of mind. Did You Know? Motorcycle Inspection for Spring Prevents 40% of Early Season Breakdowns What You’ll Learn in This Motorcycle Inspection for Spring Guide The complete motorcycle maintenance checklist for spring Step-by-step maintenance check processes Expert motorcycle maintenance advice for riding season When to perform a test ride after inspection Critical maintenance check items for a safe open road experience Why a Motorcycle Inspection for Spring is Crucial for Riding Season A comprehensive motorcycle inspection for spring is not just about checking boxes on a maintenance checklist—it’s about ensuring your safety and maximizing the joy of the riding season. After a period of winter storage, components like brake pads, air filter, spark plugs, and engine oil can deteriorate, leading to a higher risk of failures once you’re back on the open road. Proper motorcycle maintenance keeps you in control and guards against costly repairs or dangerous situations. Regular spring inspections also help riders catch early signs of damage or excessive wear, like abnormal tire pressure, leaking fluids, or electrical issues. Addressing these before hitting the road means you're far less likely to face sudden breakdowns or be caught unprepared. And let’s not forget: an annual maintenance check may also be a requirement for your insurance cover—ensuring that claims won’t be denied due to poor upkeep. "Regular spring inspections are your best defense against costly, dangerous failures later in the year." — Motorcycle Maintenance Expert As you work through your spring motorcycle inspection, it’s helpful to have a detailed maintenance checklist on hand to ensure you don’t overlook any critical steps. For a practical, step-by-step breakdown of essential tasks, check out these seasonal bike care secrets every rider must know—they offer actionable tips that complement your spring prep routine. Comprehensive Motorcycle Maintenance Checklist for Spring Visual inspection: frame, controls, stands Fluid levels: oil, brake fluid, coolant Check battery, tires, and brakes Inspect chain, belt, or shaft Test lights, horn, and electrical systems Inspection Item Recommended Action Engine Oil Replace if old/low Air Filter Clean or change Battery Charge or replace Spark Plugs Inspect and replace if needed Tires Check pressure/tread Maintenance Check: Step-by-Step Motorcycle Inspection for Spring Pre-Inspection After Winter Storage The first step of any effective motorcycle inspection for spring is to assess the effects of winter storage. Motorcycles left stationary for months are prone to developing issues that may not be immediately obvious. Carefully check for fluid leaks underneath the bike—these could signal degraded seals or worn gaskets. It’s equally important to examine all visible components for rust formation or corrosion, especially on brake lines and electrical connections, which are susceptible to moisture and temperature swings. Another critical maintenance check involves assessing the tires for signs of dry rot or flat spots—look for cracks along the sidewalls and uneven wear. These risks can jeopardize your grip and traction on the open road. By methodically performing these visual inspections, you’ll catch problems while they’re manageable and before they threaten both your ride and your safety. Use this step as the baseline for the full maintenance checklist to follow. Check for fluid leaks Assess for rust, corrosion, and tire dry rot Motorcycle Air Filter and Spark Plug Maintenance When considering your spring maintenance checklist, paying special attention to the air filter and spark plugs is essential. The air filter ensures your engine breathes cleanly and efficiently; if clogged with dust or moisture from winter storage, it can cause your bike to run unevenly or lose power. Remove the air filter according to your motorcycle’s manual, inspect it for visible dirt, and either clean or replace it based on its condition. This simple motorcycle maintenance step boosts performance and engine longevity. Spark plugs are the core of your engine's ignition system. Faulty plugs can lead to hard starts, backfiring, or even misfires out on the open road. Carefully inspect the spark plugs for wear—look for soot, oily residue, or worn electrodes. Replace spark plugs that show any signs of excessive wear, ensuring reliable ignition every time you start up for the new riding season. Remove and inspect air filter Clean or replace per motorcycle maintenance checklist Check spark plugs for wear Motorcycle Battery and Electrical System Spring Maintenance Check Charging, Connections, and Lights No motorcycle inspection for spring is complete without a thorough check of the battery and electrical system. A discharged or corroded battery is a top cause of breakdowns early in the riding season. Be sure to fully charge your battery before that first ride, and consider using a trickle charger during the off-season to prolong its life. Once charged, meticulously tighten all cable connections and scrutinize for corrosion or frayed wires—weak connections can cause your motorcycle’s powerful electronics to malfunction at the least convenient moment. Test all lights, indicators, and the horn to be certain your motorcycle is in proper working order. These are key not just for your safety, but for legal compliance as well. From brake lights to high beams, make sure everything is working properly before you set out. Minor electrical problems are usually easy fixes during routine maintenance and can make a major difference in preventing accidents and ensuring visibility on the open road. Fully charge battery before use Tighten all cable connections Test lights, indicators, and horn Tires and Brakes: Motorcycle Inspection for Spring and Riding Season Checking Tire Tread, Pressure, and Age Ensuring your tires are in good condition is non-negotiable for a safe and exhilarating riding season. Tire tread depth directly affects your bike’s grip and handling. Use a tread gauge to inspect for sufficient depth—shallow tread risks hydroplaning or slipping, especially on wet spring roads. Don’t forget to check for sidewall cracks or bubbles, as these are classic signs of excessive wear or dry rot, particularly after winter storage. Also, motorcycle tires have a lifespan—regardless of visible wear, replace any tire more than five years old to guarantee peak performance and safety. Maintaining correct air pressure is equally vital; under-inflated or over-inflated tires compromise handling, increase stopping distances, and could lead to losing control. Routinely check both front and rear tire pressures against your manufacturer’s specifications, and don’t overlook the valve stems or caps. This simple maintenance check can help you ride with confidence and extend your tire life—all a critical part of your motorcycle inspection for spring. Brake Pad and Brake Fluid Maintenance Checklist Brake systems are your primary defense against accidents, making their inspection a top priority during your spring maintenance check. Begin by inspecting both the brake pads and discs for signs of excessive wear or scoring. Thin brake pads or severely grooved discs mean reduced stopping power; replace them promptly to ensure your brake response remains razor-sharp. Assess the feel of both the front and rear brake levers—any sponginess or inconsistent response signals air in the brake lines or low brake fluid levels, demanding immediate attention. Next, check the condition and level of your brake fluid. Old or contaminated brake fluid can degrade performance and lead to dangerous situations. For peace of mind on the open road, replace brake fluid as recommended by your owner’s manual, and use only the correct type. Keeping your braking system in working order is central to safe riding, especially as spring traffic and unpredictable weather return. Inspect for sidewall cracks and tread depth Test brake lever/pedal feel Change brake fluid as needed Checking Fluids and Lubrication During Your Motorcycle Inspection for Spring Fluid checks are a crucial step in the motorcycle inspection for spring, ensuring your engine, transmission, and cooling system—all vital for reliable performance—are ready for action. Start with the engine oil: inspect the level and quality, and change it if it’s dark, gritty, or more than six months old. Fresh oil protects internal components from friction, overheating, and premature wear. Don’t forget transmission or gear oil for models that require it, and for liquid-cooled bikes, check coolant levels and condition. Low or dirty coolant can lead to overheating, putting your engine at high risk. A quick inspection of all visible hoses helps you spot leaks or cracks before they become major issues. Taking these proactive steps as part of your spring maintenance checklist helps keep your motorcycle in peak condition for a trouble-free riding season. Engine oil check and change Transmission/gear oil level Coolant check for liquid-cooled bikes Chain, Belt, and Shaft: Maintenance Checklist for Safe Riding Your motorcycle’s final drive system—chain, belt, or shaft—transfers engine power to the rear wheel. Neglecting this during a motorcycle inspection for spring could result in major breakdowns or even accidents on the open road. For chain-driven bikes, inspect for correct tension, adequate lubrication, and signs of rust or kinking. Clean and lube your chain according to your motorcycle maintenance checklist, using quality motorcycle chain lube, and adjust it for proper slack. Belt drives require you to check for cracks, fraying, or excessive stretching and adjust tension if needed. For shaft drives, make sure the final drive housing isn’t leaking and the fluid is clean and at the proper level. Rattles, whines, or clunks here are warning signs of excessive wear and should be addressed before the riding season kicks off. Regular maintenance checks in this area ensure reliable power transfer and a smoother, safer ride. Chain/belt tension & lubrication Look for abnormal wear or noise Inspect final drive housing (shaft bikes) Test Ride: Confirming Your Motorcycle Maintenance for Spring Success "Never skip the test ride — it’s your last chance to catch something you might have missed." — Certified Motorcycle Mechanic The final step in your motorcycle inspection for spring is the test ride—a crucial, often overlooked part of the process. Take your bike on a controlled, low-traffic route to ensure the engine, brakes, transmission, and controls respond as they should. Pay special attention to any unusual noises, vibrations, or handling issues—these can indicate overlooked problems even after the most diligent maintenance checklist. This practice run also allows you to feel the brakes’ bite, test throttle response, and confirm that all electrical accessories—lights, horn, indicators—are fully operational. Only after a successful test ride should you consider your motorcycle ready for the open road and the adventure of a new riding season. Remember, riding safety begins before you even leave the driveway. Safety Accessories & Gear: Preparing for the Open Road After Motorcycle Inspection Helmet, gloves, jacket inspection Reflectors and legal compliance As the final piece of the puzzle, inspect your riding gear. Your helmet should have no cracks or major scratches, the visor should be free from fogging or scratches that impair visibility, and all straps must be secure. Gloves and jackets require a check for tears or excessive wear, as this gear acts as your last defense in a slide or accident. Confirm all reflectors, tags, and lighting devices are attached and functional for legal compliance—your life may depend on being seen. Never compromise on motorcycle safety or skip this step, as even the best-maintained bike requires the right protective gear to ensure you’re riding in good condition. Seasonal Tips for a Confident Start to the Riding Season Start your season with a short ride, gradually increasing distance as confidence in your motorcycle’s working order grows. Keep the maintenance checklist handy throughout spring, and repeat quick checks before each ride. Store your insurance cover documents with your gear, be mindful of ever-changing spring road conditions, and ride alert—it’s the best way to guarantee more miles and safer journeys long into the season. People Also Ask About Motorcycle Inspection for Spring How to prepare a motorcycle for spring? A: Start with a motorcycle maintenance checklist that includes inspecting fluids, battery, tires, and brakes. Clean or replace the air filter, check spark plugs, and ensure all lights work. Run a test ride to confirm everything is functioning well before hitting the open road. What to check on a motorcycle after winter? A: Focus on the maintenance check after winter storage: look for leaks, corrosion, low battery, tire dryness, and ensure oil and brake fluid are at optimal levels. How often do motorcycles need to be inspected? A: A thorough motorcycle inspection is recommended at the start of every riding season, especially in spring. Regular monthly checks and before each long ride keep your bike in safe condition. What is the 4 second rule for motorcycles? A: The 4 second rule helps riders maintain a safe following distance. When the vehicle in front passes a landmark, count four seconds before you pass the same spot, giving ample reaction time in emergencies. Video Guide: Motorcycle Inspection for Spring Maintenance Checklist A well-produced video walkthrough showing a professional mechanic performing a complete spring motorcycle inspection in a bright, clean workshop. Features step-by-step demonstrations including tire checks, fluid top-ups, battery connection assessments, and a final test ride on a picturesque spring road. No text overlays. Cinematic, inviting, and brand-friendly style. Video Demonstration: Performing a Spring Motorcycle Maintenance Check Motorcycle Inspection for Spring: Key Takeaways for a Safe Riding Season Use a comprehensive maintenance checklist Perform scheduled maintenance checks after any winter storage Address all fluid, battery, tire, and safety gear concerns Never skip the spring test ride Frequently Asked Questions about Motorcycle Inspection for Spring Can I do my own motorcycle inspection for spring or should I visit a professional? Most riders with basic tools and a manufacturer’s manual can perform a thorough motorcycle inspection for spring themselves. However, if you’re a new rider or encounter issues like persistent leaks, odd noises, or electrical faults, a professional service is recommended for peace of mind and warranty safety. Are there special tips for new riders doing their first maintenance check? Yes. Take your time, consult your motorcycle maintenance checklist, and don’t hesitate to ask experienced riders or local mechanics for guidance. Start with visual checks, document what looks unusual, and double-check tire tread, air filter, and brake fluid levels before your first ride. How do I choose the right fluids for my bike? Always refer to your owner’s manual or consult a qualified mechanic. Use only manufacturer-recommended oils, brake fluids, and coolants—using the wrong type can cause damage or void your insurance cover or warranty. Ready for the Open Road? Schedule Your Motorcycle Inspection for Spring Now! "A little time spent on a motorcycle inspection for spring could be the best investment you make all year." Call Nasty Performance Motorcycle Shop Today: 847-458-4858 Conclusion: Take charge of your riding season by making motorcycle inspection for spring an annual tradition. With a proper maintenance checklist and a little time, you’ll hit the open road with confidence, comfort, and peace of mind. For riders who want to go beyond the basics and truly master year-round motorcycle care, there’s even more to discover. Expanding your knowledge of seasonal maintenance strategies can help you anticipate issues before they arise and keep your bike performing at its best in every climate. If you’re ready to elevate your maintenance routine and unlock expert-level tips for every season, explore seasonal bike care secrets every rider must know—it’s your next step toward a safer, smoother, and more enjoyable ride all year long.

Your Spring Motorcycle Maintenance Checklist

Did you know? The majority of motorcycle breakdowns in the spring are caused by issues that could have been prevented with just 30 minutes of routine inspection. As the world thaws and the urge for the open road grows irresistible, taking the time for a spring motorcycle maintenance checklist is not just a good idea—it’s essential for a safe and thrilling riding season. This guide delivers everything you need to ride confidently from your first start, combining pro tips, key maintenance tasks, and the latest safety guidelines to get your bike in peak condition—before you twist the throttle for that first spring ride. Start Your Spring Motorcycle Maintenance Checklist with This Surprising Fact It might surprise you, but over 60% of motorcycle accidents related to mechanical failure stem from skipped maintenance checks after winter storage. Even riders who are vigilant about in-season upkeep can overlook hidden issues that develop while a bike sits idle—like corroded battery terminals, under-inflated tires, or brittle brake lines. That’s why a thorough spring motorcycle maintenance checklist isn’t just about keeping your engine purring; it’s about safeguarding your ride and, ultimately, your life. Whether you fiend for the thrill of the open road or value the serene peace of mind when everything works as it should, starting the season with a comprehensive maintenance check is non-negotiable. This guide will empower you to identify potential trouble spots and ensure your machine is in perfect working order, ready for miles of safe adventure ahead. What You'll Learn: A Complete Spring Motorcycle Maintenance Checklist How to perform a thorough motorcycle maintenance check before riding season Key components every comprehensive maintenance checklist must cover Tips directly from industry service manual guidelines for best results Safety-critical steps for visual inspection and troubleshooting Common mistakes riders make when preparing for the open road Why a Spring Motorcycle Maintenance Checklist Matters "Routine maintenance isn’t just about performance—it’s about rider safety and peace of mind before hitting the open road." – Certified Motorcycle Technician Completing a spring motorcycle maintenance checklist is about more than boosting your motorcycle’s performance or extending its lifespan. The real priority is rider safety. Neglecting essential maintenance tasks can leave you vulnerable to avoidable accidents caused by factors like worn brake pads, low brake fluid, or cracked fuel lines. Regular, seasonal maintenance checks ensure every component—from your engine oil and battery terminals to your tires and brake lines—is ready to perform under pressure. This preparation grants you not only a smooth operation and optimal riding experience but also that indispensable peace of mind while you start the season. As you plan your first trip onto the open road, remember: your safety begins with your toolbox and a checklist. As you work through your spring motorcycle maintenance checklist, it’s helpful to understand how seasonal changes can impact your bike’s performance and longevity. For a deeper dive into year-round care strategies and how to adapt your maintenance routine as the weather shifts, check out these essential seasonal bike care secrets every rider should know. Essential Tools and Service Manual for Your Motorcycle Maintenance Checklist Before you can tackle your spring motorcycle maintenance checklist, assemble the right tools and have your service manual at hand. The service manual contains detailed instructions specific to your motorcycle’s make and model, ensuring that every maintenance task—from an oil change to inspecting your clutch and throttle cables—is done correctly. A typical maintenance check requires basic yet crucial tools that empower you to perform the majority of inspections and minor repairs yourself—even if you’re not a professional mechanic. Basic hand tools: sockets, wrenches, and screwdrivers, useful for removing panels, tightening bolts, and tackling most common fasteners Tire pressure gauge and a multimeter, which help you verify precision in essential metrics like tire inflation and electrical system health The official service manual for your specific motorcycle model, providing accurate maintenance schedules, torque specifications, and troubleshooting advice tailored to your bike Equipping yourself with the right gear and authoritative information is the first step in effective motorcycle maintenance. With these essentials at your side, you’re set to handle everything your bike needs to thrive for the riding season. Step-by-Step Spring Motorcycle Maintenance Checklist 1. Begin with a Complete Visual Inspection A thorough visual inspection is the foundation of every effective spring motorcycle maintenance checklist. This foundational step allows you to catch signs of wear, leaks, or damage before they morph into costly repairs or safety hazards. Start by carefully examining all visible components for cracked, brittle, or frayed rubber hoses, worn gaskets, or seepage points around the engine. Check under the bike for puddles or spots left from winter storage that might indicate an oil leak or other issue. Give special attention to the front and rear wheels, the drive belt or chain, and the condition of the brake lines. By methodically scanning every angle, you can identify trouble spots like loose fasteners, aging wiring, and even subtle paint bubbles that often signal underlying rust. Spot-check your fuel lines and fuel filter for cracks or stiffness, as fuel system degradation is especially common after long periods of inactivity. The visual inspection prepares you to prioritize other critical tasks on your list—so take your time, use a flashlight for those hard-to-reach areas, and never underestimate the clarity of a fresh, unbiased look at your motorcycle’s current state. Remember to check your mirrors, controls, and footpegs as well while you’re at it! This extra diligence during the visual inspection translates directly to safety and confidence once you finally hit the open road. 2. Batteries and Electrical System: Key Maintenance Check Check battery terminals for signs of corrosion and test for proper voltage Inspect all visible wires for fraying, loose connections, or insulation damage, replacing components as needed Test functionality of lights (headlamp, turn signals, brake light), horn, and any electronic accessories Your battery and electrical system are often overlooked components that can leave you stranded if not addressed. After winter storage, try starting your engine—if it’s slow to turn over, use a multimeter to test battery voltage and charge as specified in your service manual. Corroded battery terminals are a common culprit behind starting problems; clean them thoroughly using a wire brush and a baking soda solution. Don’t forget to examine your fuse box and ensure all fuses are appropriately rated and intact. While checking the rest of the system, trace wires leading to your horn, signal lights, and brake light. Make sure you correct any brittle sheathing or exposed wires right away to prevent shorts or electrical fires. Function-test every bulb and electronic system. If you encounter dim or flickering lights, consider replacing bulbs or examining the wiring for deeper faults. Addressing electrical concerns now helps avoid headaches and ensures all safety systems are fully operational for the riding season. 3. Tires and Wheels: Foundation of Riding Season Safety Worn or under-inflated tires compromise every aspect of riding—handling, traction, and most importantly, safety. Start your tire maintenance check with a careful visual inspection for cracks, bald spots, or embedded debris that might have worsened during winter storage. Using a tread depth gauge, measure the remaining tread; replace the tire if it’s below the minimum safe limit (usually 2/32 inch for most models). Don’t forget to check both the front and rear wheels—imbalances or damage can threaten your smooth operation on turns or under sudden braking. Tire pressure is another critical metric on your spring motorcycle maintenance checklist. Under-inflated tires cause excessive heat buildup and poor fuel efficiency, while over-inflated ones reduce grip and comfort. Use a quality tire pressure gauge and consult your service manual for model-specific inflation requirements. Inspect the wheels for bent rims or out-of-round conditions and pay close attention to the valve stems, which can crack or dry out while stored. A proactive approach here not only helps prevent blowouts but guarantees that your first ride of the season feels as responsive and exhilarating as the last. 4. Fluids and Filters: Motorcycle Maintenance Essentials Change engine oil and oil filter for maximum engine health Check brake fluid and coolant levels, topping up or flushing as specified by your manual Inspect clutch and transmission fluids, ensuring lubricants are at the recommended levels Replace or clean the air filter if dirty, worn, or clogged Fluids and filters are the lifeblood of any motorcycle, and after a period of winter storage, every fluid deserves attention. An oil change is a staple for good motorcycle maintenance—old engine oil can develop acidic compounds and lose its lubricating qualities over time, risking engine wear and overheating. Don’t just drain and refill; replace the oil filter as well to ensure contaminants from previous seasons are fully eliminated. Check your brake fluid for clarity and contamination; murky fluid or low levels can impact brake performance and safety. Flush the brake lines if needed, especially if the bike showed any signs of reduced brake feel last season. Coolant and transmission fluids often get forgotten, but their condition is vital for maintaining optimal engine temperature and smooth shifting. A quick inspection and top-up according to your maintenance schedule will keep these systems working order. The air filter should be checked as a clogged or dirty filter restricts airflow, reducing horsepower and efficiency—replace or clean as dictated by your service manual for maximum benefit. 5. Brakes, Chains, and Cables: Safety-First on Your Maintenance Checklist Inspect brake pads, rotors, and lines for thickness and wear, replacing brake pads if necessary; check the brake fluid in the reservoir and look for leaks along the brake lines Lubricate and tension your chain (or inspect your drive belt for cracks and tension), making sure it moves freely with no tight spots or excessive slack Check and adjust cable tension for clutch and throttle to ensure crisp response with no sticky or sluggish movement The integrity of your braking and drive systems is the difference between smooth operation and danger. Even slightly worn brake pads or rotted brake lines can drastically extend stopping distances, especially in an emergency. Chains should be free of grit and lubricated per the maintenance schedule, while drive belts must be checked for nicks or gaps. Tighten or adjust as outlined in your service manual, and address any resistance or odd sounds that hint at deeper mechanical faults. Maintaining proper cable slack in the clutch and throttle—without excess play—ensures predictable control and quick response when split-second action is required out on the open road. Routine maintenance of these systems prevents the most common breakdowns and unsafe riding conditions. Taking your time with this part of the spring motorcycle maintenance checklist helps ensure that every mile is not only enjoyable but also as secure as possible. 6. Suspension and Forks: Assess Before the Open Road Suspension components like front forks and rear shocks take the brunt of every road imperfection; neglecting them can turn a pleasant ride into a bumpy, unpredictable ordeal. Start by inspecting for oil seepage or grime around the fork seals—a sign that a rebuild or replacement is in order. Compress the suspension and listen for squeaks, knocks, or sluggish rebound, which may indicate internal wear or inadequate lubrication. Check the condition of the rear shocks for rust or bending and make sure damping and rebound settings match your weight and riding style for optimal stability. This is an area where your service manual can provide invaluable guidance. Detailed torque specifications and troubleshooting advice ensure you don’t overlook hidden faults. A smooth, well-tuned suspension doesn’t just improve comfort—it’s a crucial factor in maintaining safe control at high speeds and when cornering fast. If you discover anything out of the ordinary, or if you’re unsure about inspection results, consider bringing your bike to a professional mechanic before embarking on your first extended trip of the season. 7. Air Filter and Final Visual Check Don't overlook your air filter—the gateway between the outside environment and your engine. A dirty or clogged air filter reduces power and increases fuel consumption, while leaving your engine vulnerable to harmful debris. Remove the air filter, hold it up to the light, and replace or clean if it looks dark, clogged, or deteriorated—refer to your service manual for the correct method. Once you’ve completed all major maintenance tasks, walk around your bike one last time to perform a comprehensive visual inspection. Look for anything you might have missed, like loose fasteners, disconnected hoses, or unsafe modifications from seasons past. This final look serves as the last line of defense to ensure your motorcycle is fully prepped before your engine rumbles to life for the spring riding season. By finishing strong and double-checking every element, you can hit the open road with full confidence in both your machine and your maintenance skills. Spring Motorcycle Maintenance Checklist: Quick Reference Table Maintenance Item Task Recommended Frequency Visual Inspection Check for leaks, cracks, and damage Before each season Tires & Wheels Inspect, check pressure and tread Monthly Batteries Charge, clean terminals Seasonally Fluids & Filters Replace as needed Seasonally or per manual Brakes Check pads and fluids Every ride Chain & Cables Lubricate, inspect 500 miles Suspension & Forks Inspect for leaks and wear Annually Air Filter Clean or replace 5,000 miles or as needed Watch this step-by-step guide, featuring experienced mechanics and real-world demonstration on various motorcycle models. Each inspection task and service manual tip is shown in action—perfect for both novice and seasoned riders who want to see the full motorcycle maintenance checklist in motion. Tips for a Safe Start to the Riding Season Double-check your maintenance checklist before your first ride to confirm you haven’t missed any safety-critical areas Take a test ride in a controlled area, such as an empty parking lot, to detect any hidden issues like unusual noises, vibration, or brake fade Review your insurance and riding gear—make sure your motorcycle insurance is current and that your helmet and protective wear are in good condition Common Mistakes Riders Make When Following a Spring Motorcycle Maintenance Checklist Ignoring worn brake pads or tires due to assumed “just one more ride” mentality Neglecting to replace or clean the air filter, reducing both engine performance and life Skipping the service manual’s specific recommendations and relying on guesswork Forgetting a final visual inspection—often the last step that catches missed details By avoiding these common pitfalls and adhering closely to your checklist—with an emphasis on following your service manual and looking out for signs of wear—you’ll keep your ride safe, reliable, and ready for the open road. Understand how to read, interpret, and apply key details from your motorcycle’s service manual. This video highlights critical sections, such as torque specifications, recommended maintenance intervals, and part diagrams, empowering you to handle your motorcycle maintenance with precision and confidence. People Also Ask: Spring Motorcycle Maintenance Checklist Questions How to prep a motorcycle for spring? To prep your motorcycle for spring, begin with a detailed spring motorcycle maintenance checklist: perform a complete visual inspection for leaks or damage, change the engine oil and oil filter, check and top up all fluids (including brake fluid and coolant), inspect battery terminals, verify tire pressure and tread depth, lubricate the chain or drive belt, and ensure all lights and signals are functional. Don’t overlook cleaning the air filter and consulting your service manual for any model-specific requirements. Finish with a gentle test ride to verify everything is in working order before hitting the open road. What is the 12 second rule for motorcycles? The “12 second rule” refers to scanning ahead of your motorcycle approximately 12 seconds down the road to anticipate hazards, traffic changes, or obstacles. By maintaining this long-range visual awareness—especially during the early riding season when road debris and unpredictable situations are common—you give yourself ample time to brake, steer, or make adjustments. Practicing this rule enhances rider safety and reduces the likelihood of sudden, risky maneuvers. What maintenance needs to be done on a motorcycle? Key motorcycle maintenance tasks include changing engine oil and filters, checking and topping up fluids (brake, coolant, and transmission), inspecting and replacing air filters, adjusting and lubricating the chain or drive belt, checking brakes and brake pads for wear, maintaining proper tire pressure and tread, ensuring all lights and signals are working, and tightening fasteners. Always follow your motorcycle’s specific maintenance schedule as outlined in the service manual to ensure every critical item is covered. How do I know if my motorcycle fork springs are bad? Bad fork springs often cause excessive front-end dive under braking, poor rebound, or a rough ride over bumps. Look for oil leaks around fork seals, uneven tire wear, or an unusually harsh or soft feel in the suspension. Consult your service manual for recommended inspections and tests; if you notice any instability or hear odd noises during a bounce test, the fork springs or associated components may need to be serviced or replaced for safety and smooth operation. Expert Quotes on Motorcycle Maintenance and Riding Safety "Your motorcycle deserves a little extra attention before the riding season. Following the right maintenance checklist keeps your ride smooth and worry-free." – Local Bike Mechanic Key Takeaways: Mastering the Spring Motorcycle Maintenance Checklist Following a complete spring motorcycle maintenance checklist boosts safety and reliability A thorough maintenance check and adherence to your service manual prevent costly surprises Routine care helps you make the most of every riding season FAQs About Spring Motorcycle Maintenance Checklists How often should I do a spring motorcycle maintenance checklist? Perform a thorough maintenance checklist at the start of every riding season and follow regular maintenance intervals as outlined in your service manual throughout the year. Can I do all maintenance myself or do I need a professional? Many maintenance tasks, such as oil changes, air filter cleaning, and visual inspections, can be done at home with basic tools and access to your service manual. For more complex repairs or if you’re unsure, trust a certified mechanic. What is the most commonly missed item in spring checks? The air filter is often forgotten—riders overlook its impact on engine performance and only change it when problems arise. Regularly cleaning or replacing the air filter is crucial for reliability. Does skipping a year of maintenance really matter? Absolutely—neglecting regular maintenance can lead to accelerated wear, safety risks, and costly breakdowns. Sticking to your maintenance schedule is essential for performance and peace of mind. Ready for Riding Season? Call Nasty Performance Motorcycle Shop Today: 847-458-4858 Don’t leave your safety and riding adventure to chance. Complete your spring motorcycle maintenance checklist—or let our pros handle it for you. For professional inspections and expert service, call Nasty Performance Motorcycle Shop at 847-458-4858 and start your season right! If you’re eager to take your motorcycle care to the next level and ensure your ride stays in peak condition all year long, there’s even more to discover. Explore the broader strategies and expert insights in Seasonal Bike Care Secrets Every Rider Must Know. This resource goes beyond spring prep, offering guidance on adapting your maintenance habits for every season, protecting your investment, and maximizing your bike’s performance no matter the weather. Dive in to unlock advanced tips and keep your motorcycle adventure-ready, mile after mile.

Motorcycle Spring Tune-Up: Get Ready for the Ride of Your Life

Imagine starting your riding season confident your motorcycle won’t let you down. According to the Motorcycle Industry Council, over 80% of riders who perform a comprehensive motorcycle spring tune-up experience fewer roadside breakdowns during the riding season. Don’t leave your open road adventures to chance—proper spring motorcycle maintenance can mean the difference between a memorable ride and an unforeseen pit stop. This guide walks you through every step of the motorcycle spring tune-up process, so you’re ready to hit the open road safely and with peace of mind. Kickstart Your Riding Season: The Shocking Truth About Motorcycle Spring Tune-Up "According to the Motorcycle Industry Council, over 80% of riders who perform a comprehensive motorcycle spring tune-up experience fewer roadside breakdowns during the riding season." As the weather warms up and the roads beckon, getting your motorcycle ready with a spring tune-up isn’t just advisable—it’s essential. Your bike’s performance, reliability, and your own safety depend on starting the season with a thorough maintenance check. Riders who consistently perform a motorcycle spring tune-up report smoother rides, fewer interruptions, and avoid the common frustrations that plague those who neglect their bikes after winter storage. By focusing on a maintenance checklist—covering everything from tire pressure to spark plugs—riders can eliminate surprises and maximize every journey. It's not just about the thrill of the open road; it's about ensuring every mile is worry-free. This section will present the realities, the facts, and the best practices so you can make this riding season exceptional. While a spring tune-up is crucial, many riders overlook the importance of adapting their maintenance routine to the unique challenges of each season. For a deeper dive into how to keep your bike in peak condition year-round, check out these seasonal bike care secrets every rider should know—they offer practical tips that complement your spring preparations and help extend your motorcycle’s longevity. What You'll Learn in This Motorcycle Spring Tune-Up Guide Essential steps in a motorcycle spring tune-up for riding season preparation Comprehensive motorcycle maintenance checklist and common maintenance tasks Expert tips on air filter, spark plugs, and suspension adjustments How to conduct an effective maintenance check and safeguard your spring motorcycle Best practices to maximize performance and safety on the open road Understanding the Importance of Motorcycle Spring Tune-Up for Riding Season Why Motorcycle Maintenance Matters: Safety, Longevity, and Performance Motorcycle maintenance isn’t just a box to check; it’s a proactive approach to protect your investment and, more critically, your wellbeing. When you perform diligent motorcycle maintenance at the start of the riding season, you ensure that all components—from brakes to drive chains—are in optimal working order. This means your bike responds quickly, handles predictably, and you reduce the risk of breakdowns or, worse, accidents. Even a simple maintenance checklist can reveal hidden issues like worn brake pads, low brake fluid, or cracks in fuel lines that could become hazardous once you hit the open road. By staying vigilant, you extend the life of your motorcycle, improve fuel efficiency, and enjoy each mile with confidence during the spring motorcycle season. Routine motorcycle maintenance also impacts your wallet in the long run. Small issues such as dirty air filters, slightly loose drive chains, or unbalanced wheels can cause undue wear on your engine, suspension, and tires, leading to unexpected (and expensive) repairs down the road. Remember to check your bike’s major systems: a quick maintenance check on spark plugs, suspension, and battery health can prevent interruptions to your riding season. Riding gear also benefits from inspection—ensuring your helmet, gloves, and protective clothing are intact. In short, a little preventative care through a motorcycle spring tune-up goes a long way toward an enjoyable, hassle-free season. Common Issues Prevented by Thorough Maintenance Check A thorough maintenance check during your motorcycle spring tune-up helps you catch potential surprises before they become dangerous problems. For instance, tire flat spots from winter storage, weakened brake pads, or stale fuel in the gas tank can cause major headaches—or worse, safety hazards—if left unaddressed. Checking the air filter is critical, as debris or blockages reduce engine performance. Similarly, corroded battery connections or frayed control cables can lead to electrical failures, leaving you stranded. Unattended suspension issues or traction problems—often due to overlooked tire pressure or tread depth—can dramatically impact handling on the open road. By performing a complete motorcycle maintenance checklist at the season’s start, you also prevent minor nuisances like weak brake lights, leaky brake lines, or insufficient oil levels from turning into larger, costlier repairs. This diligent approach makes each ride this riding season not only safer but also more pleasurable, knowing your bike is in prime condition. Motorcycle Maintenance Checklist: Must-Do Tasks for Spring Motorcycle Preparation Visual inspection (tires, frame, chain, and bodywork) Fluid levels (oil, coolant, brake, and clutch) Electrical system: battery and lighting Control cables and levers Brakes and suspension Spring Motorcycle Maintenance Checklist with Estimated Time and Tools Needed Task Estimated Time Tools Needed Check Tire Pressure & Tread 10 minutes Tire gauge, flashlight Inspect & Lubricate Chain 15 minutes Chain brush, lubricant, rags Change Oil & Replace Oil Filter 30 minutes Socket set, oil pan, new filter Check Brake Pads & Fluid 15 minutes Wrenches, fluid tester, gloves Test Battery and Lights 10 minutes Multimeter Inspect Air Filter 15 minutes Screwdrivers, new filter (if needed) Suspension Adjustment 20 minutes Wrenches, measuring tape Step-by-Step Motorcycle Spring Tune-Up: Detailed Maintenance Check Inspecting and Replacing the Air Filter During Your Motorcycle Spring Tune-Up The air filter is a critical yet often overlooked component during spring motorcycle maintenance. After months in winter storage, dust and debris can clog the air filter, restricting airflow and reducing engine performance and fuel economy. Start by locating the air filter housing—typically under the seat or a side panel. Gently remove it for inspection. If you notice heavy dirt accumulation, tears, or oil contamination, it’s time to replace the filter with a new one that matches your model’s specifications. For reusable filters, cleaning per the manufacturer’s instructions is sufficient—just make sure it’s thoroughly dry before reinstalling. A clean air filter ensures optimal engine combustion, allowing your bike to breathe freely and deliver peak performance during the riding season. Ignoring air filter maintenance could lead to sluggish acceleration, poor mileage, and even long-term engine damage, making this step indispensable in your motorcycle spring tune-up. Spark Plug and Spark Plugs Check: Ensuring Reliable Ignition Reliable ignition is paramount, and nothing affects it more than healthy spark plugs. Over time, spark plugs collect carbon deposits, erode at the electrodes, and may even crack—especially after winter storage. During your comprehensive motorcycle maintenance check, remove each spark plug and inspect its tip. Look for ash, oil, or excessive blackening, which indicates it’s time for a replacement. Using a feeler gauge, check and adjust the gap on new spark plugs to ensure precise ignition. Replacing old or fouled spark plugs guarantees smooth startups and consistent power delivery, so you aren’t left with a stalling bike on the open road. For peace of mind, consider swapping all spark plugs at the beginning of the riding season. Experts also recommend an anti-seize compound on the threads to facilitate future removals. Integrating spark plug inspection into your motorcycle maintenance checklist will safeguard against rough idling and misfires throughout your spring motorcycle adventures. Oil Change and Fluid Replacement in Spring Motorcycle Maintenance Fluids are the lifeblood of your bike, and changing your oil is one of the most crucial spring motorcycle maintenance tasks. Oil degrades over time—especially when your bike sits idle during winter storage—collecting moisture, acids, and particulates. Begin by warming up your engine to thin the oil, then drain it completely from the sump. Replace the oil filter to ensure no contaminants linger before filling with fresh, high-quality oil suitable for your bike’s specifications. Don’t overlook other fluid systems: inspect and top up coolant levels to avoid overheating, check brake fluid for clarity and level (replace if murky or old), and test clutch fluid if applicable. Neglecting fluids invites corrosion, impairs lubrication, and risks catastrophic failures just as the riding season begins. Proper fluid replacement is a hallmark of responsible motorcycle maintenance, directly impacting not just performance but rider safety for all your spring adventures. Checking Tire Pressure, Tread, and Wheel Suspension Tires connect you to the road, making them a central focus of every motorcycle maintenance checklist. Start with air pressure: refer to the owner’s manual for recommended PSI and use a quality tire gauge to check both front and rear tires. Low air pressure can affect handling and speed premature tire wear, while overinflation may reduce traction, especially in changing spring weather conditions. Next, examine tread depth using a tread gauge or the “penny test”—insufficient tread compromises grip, especially on wet or silt-covered roads common in early spring. Don’t skip a careful look for cracks, bald patches, or flat spots (a common byproduct of winter storage). Lastly, test wheel suspension by pressing down on the handlebars and rear of the motorcycle; watch for smooth rebound and listen for unusual noises. Any resistance, oil leaks, or uneven damping in the suspension system warrant immediate attention to ensure a safe, stable ride as you embrace the open road. Adjusting and Lubricating the Chain The drive chain is responsible for transferring engine power to the rear wheel, and its condition directly affects your bike’s performance during the riding season. Begin with a visual inspection: look for signs of kinks, excessive slack, rust, or dry spots. Rotate the rear wheel and measure deflection at the chain’s midpoint; adjust the tension using your manufacturer-specified guidelines—too tight, and you risk premature bearing wear; too loose, and the chain may skip or derail. After adjustment, thoroughly clean the chain using a chain brush and apply a suitable lubricant. This preventive maintenance helps avoid costly repairs and keeps acceleration smooth. Include the chain check in every spring motorcycle maintenance session, ensuring both safety and optimal power delivery. Regular adjustment and lubrication also complement other motorcycle maintenance tasks by reducing component stress and extending chain life. Getting Your Motorcycle Suspension Ready for the Riding Season How to Perform a Suspension Maintenance Check The suspension system dictates how your motorcycle handles bumps, corners, and uneven pavement—a critical factor in rider safety and comfort during the open road season. Start with a visual inspection for oil leaks near shocks or forks, and check bushings and seals for signs of damage or wear. Next, compress and rebound the suspension by applying weight to the bike—smooth, resistance-free movement is a good sign; harsh compression or noisy rebounds often signal issues that need addressing. Ensure both front and rear shocks are adjusted according to your riding weight and style. Refer to your owner’s manual for preload, damping, and rebound settings, and use measuring tools to verify correct sag. Suspension maintenance is a nuanced motorcycle maintenance task, but when performed correctly, it dramatically improves tire contact, braking, and general bike control—making every ride smoother and safer throughout the spring motorcycle season. Upgrading Springs and Adjusting Suspension Settings Advanced riders or those carrying extra weight (such as passengers or luggage) may benefit from upgrading to progressive or performance springs. Modern shocks offer a range of adjustability—and springtime is the perfect opportunity to dial in your settings. Use a spanner wrench or the provided tools to adjust preload, damping, and compression (if your model supports it). Write down baseline settings and make incremental adjustments based on road feel and handling feedback. Suspension improvements can reduce fatigue on long rides and help prevent loss of control over rough terrain. If you notice uneven tire wear, persistent bottoming, or excessive bounce, consider professional service. Regardless of your skill level, include suspension tuning in all spring motorcycle maintenance routines for maximum safety and comfort as you launch into the new riding season. Preparing for the Open Road: Spring Motorcycle Riding Tips Pre-ride checks before every trip Adapting to changing spring weather Practicing the 4 second rule and other safe riding techniques Your first ride after a winter hiatus deserves both excitement and careful attention. Conduct a quick pre-ride check every time—inspect tire pressure, brakes, lights, and signals, and ensure your riding gear (especially helmet and gloves) fits correctly and is damage-free. Spring weather can be unpredictable: be prepared for cool mornings, warm afternoons, or sudden spring showers, and adjust your speed and following distance to suit road conditions. Most importantly, put safety first by employing the “4 second rule”: allow at least four seconds’ distance between your bike and the vehicle in front to give yourself ample time to react. Reacclimate gradually—don’t start with the longest or most challenging rides. By following these spring motorcycle tips, you’ll not only keep yourself safe but also ensure the riding season begins on a high note, filled with memorable journeys along the open road. People Also Ask: Essential Motorcycle Spring Tune-Up Questions Answered What does a motorcycle tune-up consist of? A motorcycle tune-up typically includes a comprehensive maintenance check and covers essential systems: oil and fluid changes, air filter inspection or replacement, spark plugs assessment, adjustment and lubrication of the drive chain, full brake inspection (pads, lines, and fluid), and checking tire pressure and tread. It should also involve battery testing, lighting and electrical system check, and visual scan for any obvious signs of damage or wear. A tune-up ensures that your bike is in working order, maximizing performance, safety, and longevity for a smooth riding season. How to prep a motorcycle for spring? To prep a motorcycle for spring, begin by inspecting and charging the battery with a trickle charger if necessary, draining any stale fuel and checking the gas tank for residue, and replacing engine oil and filter. Move onto visual and tactile checks for flat spots, tire air pressure, and tread depth. Inspect fluid systems (coolant, brake fluid, clutch), examine brake pads and lines, and ensure lights and signals work properly. Clean or replace the air filter, check the drive chain for proper tension and lubrication, and test all controls (levers, cables). Finish by reviewing riding gear and confirming your motorcycle insurance is up to date—then you’re ready and safe to hit the open road. What is the 4 second rule for motorcycles? The “4 second rule” is a safe following distance guideline for motorcyclists. It means you should keep at least four seconds of space between your motorcycle and the vehicle ahead. To measure, choose a stationary point and start counting when the vehicle in front passes it—your front tire should pass four seconds later. This gap gives you enough time to react to sudden stops, road hazards, or changing conditions, especially at higher speeds or during the unpredictable spring motorcycle riding season. It’s a simple yet effective component of safe riding technique. Do I need to tune my motorcycle suspension? Yes—tuning your suspension is recommended, especially at the start of the riding season or after winter storage. Suspension settings directly affect how your motorcycle handles, brakes, and absorbs road irregularities. Whether it's adjusting preload, damping, or changing springs, a suspension check ensures comfort, stability, and safety. Riders who carry extra weight or seek improved performance should fine-tune their settings or consider upgrades as part of their motorcycle maintenance checklist. Properly tuned suspension delivers the smooth, predictable ride that makes spring motorcycle adventures enjoyable and secure. Motorcycle Spring Tune-Up FAQs How often should you conduct a motorcycle spring tune-up? At minimum, a full tune-up should be performed at the beginning of every riding season. If you ride year-round or cover high mileage, additional checks every few thousand miles are ideal. What tools are needed for a comprehensive motorcycle maintenance checklist? Basic toolkit includes socket set, wrenches, screwdrivers, tire pressure gauge, chain brush and lube, oil pan, multimeter, and service manual. Advanced tasks may require a torque wrench, feeler gauge, or specialized suspension tools. Are there signs your spring motorcycle needs immediate repairs? Yes—look for slow starts, flickering lights, odd engine noises, spongy brakes, fluid leaks, uneven tire wear, or any dashboard warning indicators. Prompt repairs keep your season smooth and safe. Can beginners handle spring motorcycle maintenance, or should they consult professionals? Many basic tasks are beginner-friendly with a good manual and patience; however, complex repairs or high-performance bikes often require professional service to guarantee safety and optimal results. Key Takeaways: Maximize Your Riding Season with a Motorcycle Spring Tune-Up Consistent motorcycle maintenance boosts performance and safety Follow a thorough maintenance checklist for reliable riding season readiness Spring motorcycle care prevents costly breakdowns during open road adventures Professional tune-ups can add value for complex or high-performance bikes Ready for the Ride? Call Nasty Performance Motorcycle Shop Today: 847-458-4858 Don’t let hidden issues curb your adventure. Book your professional motorcycle spring tune-up at Nasty Performance Motorcycle Shop—your safest ticket to a worry-free riding season! As you gear up for an unforgettable riding season, remember that spring maintenance is just the beginning of a year-round commitment to your bike’s health and your own safety. If you’re eager to take your motorcycle care to the next level, explore our expert guide on seasonal bike care strategies for every rider. You’ll discover advanced tips for adapting your maintenance routine to changing weather, storage, and riding demands—ensuring your machine stays in top shape no matter the season. Dive deeper and empower yourself with knowledge that keeps you ahead of the curve, mile after mile.

Terms of Service

Privacy Policy

Core Modal Title

Sorry, no results found

You Might Find These Articles Interesting

T
Please Check Your Email
We Will Be Following Up Shortly
*
*
*