Add Row
Add Element
cropper
update

Nasty Performance ~ 847-458-4858 

update
Add Element
  • Blog Home
  • Categories
    • Motorcycle Maintenance
    • Riding Tips & Preps
    • Safety & Inspection
    • Customizations & Upgrades
    • DIY Motorcycle Repairs
    • Motocycle Audio Systems
    • Motocycle Seasonal Care & Storage
    • Engine, Electrical Performance
  • Bike Night
  • Nasty Performance Motorcycle Shop
March 07.2026
1 Minute Read

Motorcycle Maintenance Explained: Fluids, Filters, and Fine-Tuning

Did you know that nearly 40% of motorcycle breakdowns are caused by overlooked routine maintenance? Even the most modern motorcycle can suffer catastrophic failures if regular upkeep is ignored. Whether you’re a daily commuter or a weekend road warrior, understanding motorcycle maintenance explained is the first step toward a safer, smoother, and more enjoyable ride. This guide brings you all you need to know—practical advice, essential service intervals, step-by-step tasks, and expert-backed insights—to help you master the art of motorcycle maintenance and keep your bike performing in top condition.

Shocking Statistics: Why Motorcycle Maintenance Explained Matters More Than Ever

"Neglecting routine maintenance leads to nearly 40% of breakdowns—underscoring the importance of understanding motorcycle maintenance schedules and key maintenance tasks." – Industry Expert

motorcycle maintenance explained: Engaged owner inspecting a well-maintained bike in a modern garage, photorealistic, detailed lighting and organized space

The numbers don’t lie: failing to follow a maintenance schedule is one of the leading causes of sudden, and often expensive, motorcycle problems. As technology evolves, motorcycles become more sophisticated—but their need for consistent, thorough care increases. From brake pads to tire pressure, even small oversights can have big consequences for safety, efficiency, and reliability. Knowing the basics of motorcycle maintenance explained helps you avoid these pitfalls and enjoy a longer, safer riding life. With modern motorcycles offering advanced features, taking shortcuts on oil changes or neglecting air filters doesn’t just hurt performance—it can lead to permanent engine or brake system damage. A well-structured maintenance routine is your ticket to peace of mind, on both scenic routes and high-stress commutes.

What You'll Learn in This Guide to Motorcycle Maintenance Explained

  • Foundational principles of motorcycle maintenance explained

  • Critical fluids, filters, and their service intervals

  • Practical step-by-step maintenance tasks

  • Seasonal and advanced care tips for longevity

Understanding Motorcycle Maintenance Explained: The Essentials

What is motorcycle maintenance explained: Key definitions and scope

motorcycle maintenance explained: Clean close-up of motorcycle air filter, oil can, spark plug, and chain on a workbench, high-detail macro

Motorcycle maintenance explained covers all the essential checks, service tasks, and proactive measures needed to keep your bike in prime condition. This includes regular oil changes, brake system checks, chain and sprocket adjustments, and air filter maintenance. Think of it as an ongoing process—everything you do to ensure every part, from battery terminals to the valve clearance, stays within manufacturer specs and delivers reliable, safe performance. A good routine isn’t just for serious riders on track days but for every owner who wants confidence in handling, power delivery, and fuel efficiency. Motorcycle maintenance explained isn’t complicated when broken down into manageable tasks, but neglecting these basics can quickly lead to bigger problems and unwanted repair bills.

Why motorcycle maintenance explained is essential for safety and performance

Safety isn’t optional. Following a consistent maintenance schedule helps avoid unexpected breakdowns, brake system failures, or dangerous issues with tire pressure and tread depth. Regular inspections and services—like changing the oil, checking brake fluid, or replacing the air filter—directly improve the way your motorcycle responds, runs, and protects you on the road. Good maintenance also means your motorcycle is more fuel-efficient, operates smoothly even on long touring rides or after a cold winter storage, and holds higher resale value. By making motorcycle maintenance explained a priority, you’re investing in reliability, performance, and—most importantly—your safety.

Overview of motorcycle maintenance schedule and standard service intervals

Every motorcycle comes with a recommended maintenance schedule laid out by the manufacturer. These guidelines highlight service intervals for vital checks—like oil change, brake system assessments, tire pressure, and chain and sprocket adjustments—ensuring each part is in good condition. Adhering to these intervals keeps your ride reliable, extends the lifespan of major components, and helps prevent corrosion and undue wear. Here’s a snapshot of the most important service tasks and how often they should be performed:

Maintenance Task

Service Interval

Key Benefits

Oil Change

Every 3,000-6,000 miles

Engine longevity

Tire Pressure

Every ride

Safety & efficiency

Air Filter

Every 6,000 miles

Engine performance

Brake System

Every 4,000 miles

Stopping power

Chain and Sprocket

Every 500 miles

Smooth transmission

As you develop your own maintenance plan, it’s helpful to see how these intervals and tasks fit into a real-world routine. For a practical breakdown of how to tailor your checklist and keep your bike running smoothly, check out our guide on seasonal bike care secrets every rider must know, which covers essential steps for year-round reliability.

Motorcycle Maintenance Schedule: How to Build a Custom Maintenance Plan

Understanding manufacturer’s maintenance schedule recommendations

motorcycle maintenance explained: Owner reviewing motorcycle maintenance checklist in bright, organized garage, photorealistic

Your first step in mastering motorcycle maintenance explained is understanding your bike’s manufacturer guidelines. These recommendations are tailored to the design and engineering of your specific model—covering everything from valve clearance adjustments to recommended intervals for motor oil changes or brake pad inspections. Sticking to these intervals—often listed right in your owner’s manual—ensures that every system gets the attention it requires for safe, consistent operation. For modern motorcycles, these schedules address innovations like electronic fuel injection and smart electronics, which may need dealer-level diagnostics. Using this manual as your baseline ensures that you never skip essential checks, especially on critical systems like the brake system or electrical system components.

Adapting service intervals for your riding style and environment

While manufacturer service intervals are a crucial starting point, motorcycle maintenance explained means personalizing your plan to match how and where you ride. Are you tackling rough commutes, enjoying high-speed track days, or navigating rain and off-road conditions? Intense use and harsh weather demand tighter schedules—think more frequent oil and air filter changes or chain lubrication. Short trips or extended winter storage can create unique challenges, like moisture in the engine oil or risk of battery drain. Understanding your habits helps you adapt intervals, catch problems before they start, and keep your brake system, chain and sprockets, and other vital parts in good condition all year round.

Motorcycle maintenance tasks: Creating a checklist for consistency

Consistency is key to effective motorcycle maintenance explained. Developing a maintenance checklist and sticking to it helps you keep track of both routine and seasonal tasks. Monthly oil inspections, quarterly brake system checks, and a regular chain and sprocket lubrication routine form the backbone of smart upkeep. By breaking down maintenance into manageable chunks, you minimize room for error and lengthen your motorcycle’s lifespan—plus, you’re less likely to skip critical steps before a big ride or after a period of winter storage. Below is a sample checklist for reference:

  • Monthly engine oil inspection

  • Quarterly brake system check

  • Chain lubrication schedule

Fluids in Focus: Motorcycle Maintenance Explained for Oil, Coolant & Brake Fluid

Oil change: Types, tools, and motorcycle oil change intervals

motorcycle maintenance explained: Mechanic in black gloves removing oil filter below lifted motorcycle, detailed, photorealistic

One of the cornerstones of motorcycle maintenance explained is understanding oil changes. Engine oil keeps internal parts lubricated and prevents premature wear, especially after hard use or track days. Choosing the right motor oil (synthetic vs. conventional) depends on your motorcycle type and how aggressively you ride. Basic tools include a wrench, oil drain pan, and a fresh oil filter. Most bikes require an oil change every 3,000 to 6,000 miles—but riding in extreme weather or heavy traffic may call for shorter intervals. Regularly changing the oil maintains engine performance, prevents overheating, and removes contaminants that can harm precision parts.

Checking, topping, and replacing coolant as part of routine motorcycle maintenance

Coolant prevents engine overheating and damage from temperature extremes—a crucial but often overlooked part of motorcycle maintenance explained. Checking coolant levels is easy: inspect the reservoir and look for signs of leaks or low volume. Top up with the correct coolant mix if needed, and flush and replace it per your manufacturer’s recommended service interval. Neglecting this fluid can cause overheating, head gasket failures, or even warped cylinders. Motorcycles that experience frequent stop-and-go traffic, hot climates, or pre-track day tune-ups need more vigilant coolant checks for optimal reliability.

Brake system inspection: Fluid levels, quality, and service intervals

Your brake system is only as good as its maintenance. Checking brake fluid levels and clarity should be a standard part of your routine. Low or dirty brake fluid not only reduces braking power but can damage brake lines and brake pads. Most bikes require a full brake fluid replacement every 4,000 miles or at least once a year. Don’t forget to monitor brake pads for wear and check the brake system hoses for cracks, leaks, or other failures. Strong brakes are vital for safe stops and keeping your bike street-legal and track day ready.

"Regularly checking all fluids isn't just good practice—it’s the lifeblood of an optimized motorcycle maintenance schedule."

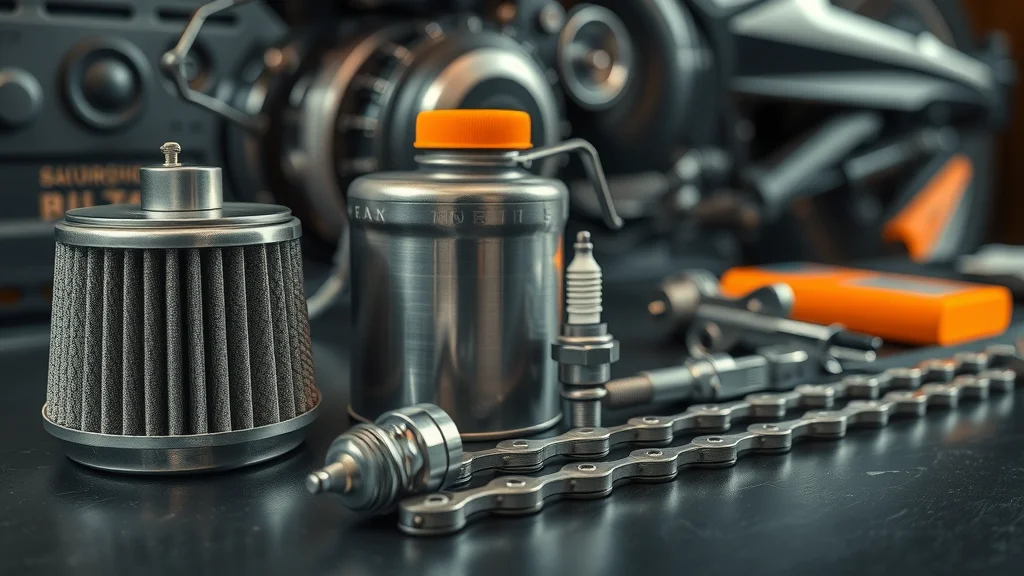
Filters Explained: Motorcycle Air Filter, Oil Filter & Their Maintenance

Motorcycle air filter explained: Types, maintenance, and replacement intervals

motorcycle maintenance explained: Mechanic removing dusty air filter in filter-lined workshop, photorealistic

The air filter is crucial in keeping dirt, dust, and debris out of your engine. There are different types—paper, foam, or cotton—each with unique cleaning and replacement rules. If you ride in dusty conditions, check your air filter more often than the typical 6,000-mile service interval. Routine inspection ensures clean airflow and optimum fuel efficiency. Removing a dirty filter and either cleaning or replacing it is fast and affordable—and pays off in extended engine life and reliable throttle response. Poor air filter maintenance can lead to costly repairs, lower fuel economy, and reduced performance, especially on high-compression or modern motorcycles.

Oil filter basics and how to coordinate with your oil change schedule

The oil filter removes contaminants from the engine oil, protecting bearings, and gears. Changing the oil filter should always go hand-in-hand with an oil change—never reuse an old filter when adding fresh oil. Most oil filters are inexpensive, and installing a new one is a simple process with the right filter wrench. Skipping this step puts clean oil at risk of contamination from residual grit and metal particles, which can accelerate engine wear. Always follow the manufacturer’s oil filter and oil change schedule for your motorcycle’s model, and track when each service is done for best long-term engine health.

When and how to inspect, clean, or replace filters (step-by-step list)

Filters are the unsung heroes of motorcycle maintenance explained, and should be inspected regularly—even between full service intervals. Here’s a quick process to ensure your air and oil filters are always in good condition:

  1. Locate the filter

  2. Assess condition

  3. Clean or replace as needed

Make inspection part of your monthly visual inspection routine—especially before a long ride, after winter storage, or any time you notice reduced performance. Clean filters as instructed in your manual, and always use recommended products and methods.

Fine-Tuning Basics: Motorcycle Maintenance Explained in Practice

Essential motorcycle maintenance tasks: Adjusting chain and sprocket for performance

motorcycle maintenance explained: Rider tightening motorcycle chain with torque wrench on driveway, chain and sprocket visible, photorealistic

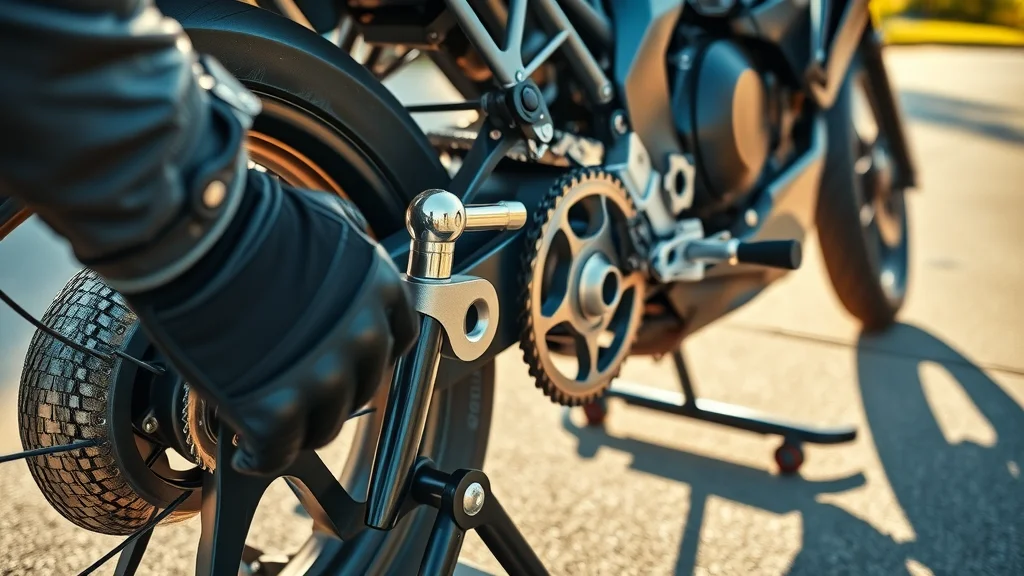
Keeping your chain and sprocket in top shape is key for a smooth, efficient ride—especially if you want consistent power delivery and minimum wear. Regular chain lubrication and adjustment prevent skipping, abnormal noises, and undue stress on the rear shock or transmission. Checking and adjusting chain slack should be done every 500 miles or as recommended in your maintenance schedule. Inspect the chain and sprockets for visible wear, rust, or stiff links, and replace if you see significant damage. A properly adjusted drive chain also helps prevent corrosion, extends component life, and improves safety by reducing the likelihood of chain failure on the road.

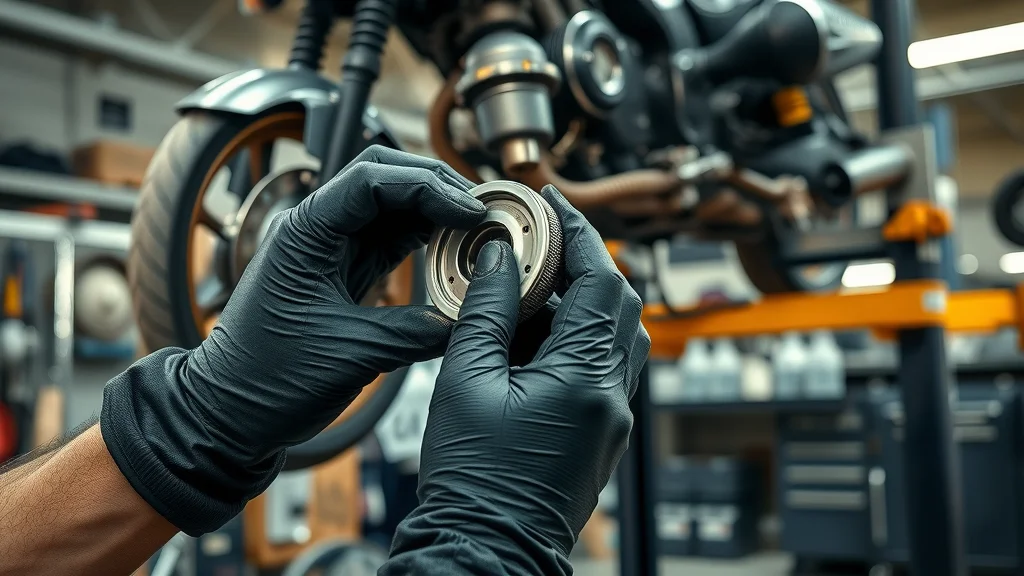
Inspecting electrical system for reliability and consistent power delivery

The electrical system of modern motorcycles includes the battery, starter, lighting, and various electronic controls. Regular inspections are vital to avoid midsummer breakdowns or cold-weather no-starts. Clean battery terminals, check wiring for corrosion or looseness, and test lighting frequently. If warning lights appear on the dashboard, don’t ignore them—the electrical system is complex and directly impacts starting, engine performance, and even electronic safety aids. Keep your system in good condition to support all components, from simple bulbs to advanced rider aids.

Tire pressure: How, when, and why to check for safety and lifespan

motorcycle maintenance explained: Rider checking sport motorcycle tire pressure with digital gauge in driveway, crisp detail

Proper tire pressure impacts everything—from handling to fuel efficiency and tread depth wear. Always check tire pressure before every ride, using a reliable gauge. Tires that are over- or under-inflated affect braking, cornering, and may shorten tire lifespan significantly. Keeping an eye on tread depth ensures your tires offer maximum grip, especially during wet weather or emergency stops. Include tire inspection in your pre-ride checklist and be proactive about replacements. Don’t forget to check for embedded debris or cracks in the sidewall as part of your overall motorcycle maintenance explained routine.

Seasonal Motorcycle Maintenance Explained: Preparing for Winter Storage & More

Pre-storage maintenance essentials for winter storage

motorcycle maintenance explained: Motorcycle covered and connected to battery tender in cozy winter garage, snow outside window, photorealistic

Prepping your motorcycle for winter storage is among the most important seasonal maintenance tasks. Start by changing the oil and top off the fuel with a stabilizer to prevent corrosion. If possible, remove and keep the battery on a timer-based tender. Lubricate all moving parts to prevent rust and moisture damage, and make sure the bike is covered with a soft, breathable fabric. This comprehensive care keeps your motorcycle in good condition, prevents damage from condensation or freezing temperatures, and ensures a reliable start when riding season returns.

Off-season service intervals: Preventing long-term damage

During storage or off-season periods, certain service intervals should still be observed to avoid costly damage. Rotate the tires periodically, check and maintain tire pressure, and periodically inspect the chain and sprockets for corrosion. It’s wise to start and idle the engine occasionally—if recommended by your manufacturer—to circulate oil and keep seals lubricated. Off-season attention to the brake system, electrical system, and key fluids makes for a trouble-free spring awakening and helps extend both the safety and life span of your ride.

Checklist: Key maintenance tasks before and after storage

  • Stabilize fuel

  • Battery tender hookup

  • Lubricate moving parts

  • Cover motorcycle properly

Use this checklist before storing your motorcycle for winter, and again before rolling it back out for the new season. Attention to these details minimizes post-storage surprises and ensures the riding season starts smoothly.

Advanced Motorcycle Maintenance Explained: Diagnosing & Fixing Common Issues

Interpreting warning lights & electrical system faults

motorcycle maintenance explained: Hi-tech close-up of motorcycle dashboard with glowing digital warning lights, night low light, photorealistic

Advanced motorcycle maintenance explained includes knowing how to interpret warning lights and diagnose electrical faults. Most modern motorcycles feature error codes or illuminated warnings for specific issues—ranging from low brake fluid to ABS or traction control problems. When a light appears, consult your owner’s manual for recommended action. Simple solutions could include topping up fluids or tightening battery terminals, but persistent issues may require diagnostics from a service pro. Never ignore persistent dashboard lights; prompt attention can prevent major repairs and keep your ride safe and roadworthy.

Troubleshooting abnormal sounds and ride feel

Your senses are powerful tools in motorcycle maintenance explained. Unusual noises—clicks, rattles, or grinding—may point to problems with the chain, worn brake pads, wheel bearings, or rear shock issues. Rough handling could signal low tire pressure, loose steering head bearings, or problems with your suspension setup. Whenever you notice something off about your motorcycle’s feel, conduct a visual inspection right away. Early troubleshooting can prevent small issues from growing into major breakdowns, save you on costly repairs, and extend the lifespan of every component.

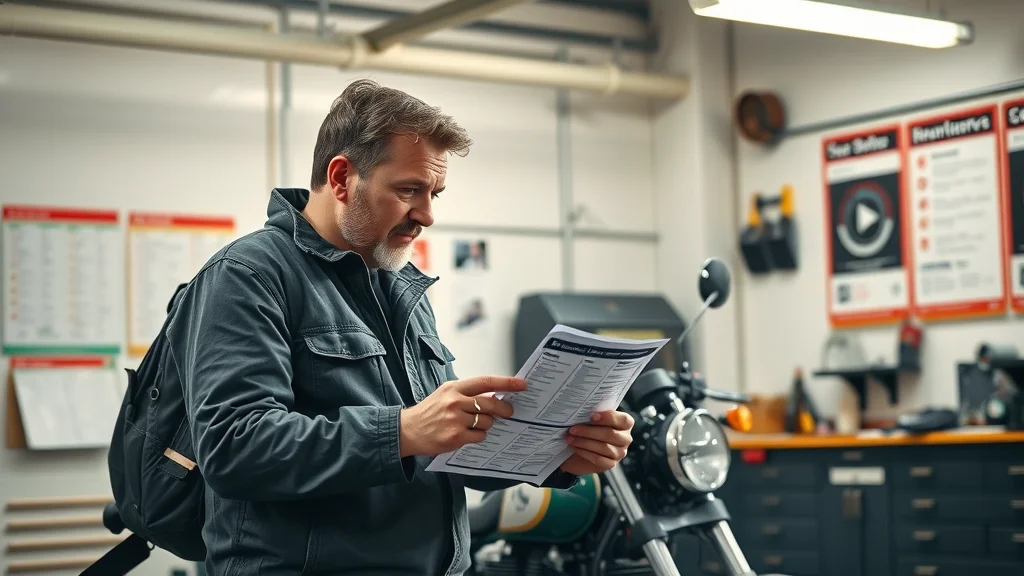
Knowing when to consult professional service for your motorcycle maintenance schedule

While many routine tasks can be handled at home, some issues—like complex electrical system diagnostics, valve clearance adjustments, or tracking down persistent leaks—are best left to professionals. Adhering to your maintenance schedule means recognizing your limits and seeking help when tasks exceed your skill or toolset. A quality motorcycle shop can handle advanced repairs, provide professional inspections before long trips or track days, and offer seasonal care advice. When in doubt, ask an expert to preserve safety and maintain your bike’s value.

People Also Ask: Motorcycle Maintenance Explained

What is basic maintenance on a motorcycle?

Answer: Basic maintenance on a motorcycle includes regular oil changes, tire pressure checks, chain lubrication, brake inspection, and air filter cleaning. Following a maintenance schedule ensures safe and reliable performance.

What is the 12 second rule on a motorcycle?

Answer: The 12 second rule is a safety guideline in motorcycle maintenance explained, teaching riders to look 12 seconds ahead to anticipate hazards and adjustments, improving safety on the road.

What does 2 fingers up mean on a motorcycle?

Answer: The '2 fingers up' gesture is a sign of camaraderie among motorcyclists, symbolizing 'keep both wheels on the ground.' It’s about respect and prudent motorcycle maintenance explained through safe riding.

What is rule number 5 for motorcycles?

Answer: Rule number 5 typically refers to 'ride your own ride,' which encourages riders to maintain their own pace, prioritize safety, and stick to personalized motorcycle maintenance schedules.

Motorcycle Maintenance Explained: Summary Table for Key Service Intervals

System/Part

What to Check

Recommended Service Interval

Engine Oil

Level, quality

3,000–6,000 miles

Air Filter

Cleanliness

6,000 miles

Brake Fluid

Level, clarity

4,000 miles

Tire Pressure

PSI

Before every ride

Chain & Sprocket

Tension, lubrication

500 miles

Video Resource

Watch: A step-by-step cinematic video tutorial of a professional mechanic performing a motorcycle oil change in a clean, modern workshop. This video demonstrates oil drain, filter replacement, fluid top-up, and proper safety gear usage, filmed with smooth camera movements, crisp focus, and natural light.

Key Takeaways: Motorcycle Maintenance Explained at a Glance

  • Regularly following a proper motorcycle maintenance schedule maximizes safety and lifespan

  • Fluids and filters must be checked at recommended service intervals

  • Seasonal care, such as winter storage, is essential for bike longevity

  • Adapting maintenance tasks to your riding habits ensures reliability

Frequently Asked Questions: Motorcycle Maintenance Explained

  • How often should I perform routine motorcycle maintenance explained tasks?

  • What are the risks of ignoring the maintenance schedule?

  • Which fluids and filters are most critical for my model?

  • Why is tire pressure monitoring emphasized in motorcycle maintenance explained?

  • How can I improve my personal service intervals?

Ready to Ride with Confidence? Call Nasty Performance Motorcycle Shop Today: 847-458-4858

Conclusion: A solid motorcycle maintenance routine is your best investment in safety, reliability, and riding enjoyment—start today for a worry-free tomorrow!

If you’re ready to take your motorcycle care to the next level, don’t stop here. Explore our in-depth article on seasonal bike care secrets every rider must know for expert strategies on protecting your ride through every climate and riding season. You’ll discover advanced tips for winterizing, prepping for spring, and maintaining peak performance year-round. Whether you’re a new rider or a seasoned enthusiast, these insights will help you build a maintenance routine that adapts to your lifestyle and keeps your motorcycle in top shape, no matter what the road—or weather—throws your way.

Motorcycle Maintenance

0 Comments

Write A Comment

*
*
Related Posts All Posts

Expert Motorcycle Maintenance Services Near You: What to Expect

Did you know that riders who rely on expert motorcycle maintenance services are up to 60% less likely to experience a breakdown? Investing in the right repair shop not only keeps your bike running smoothly, but can also save you significant money, stress, and time on the road. If you’d like peace of mind every time you ride, exploring professional maintenance could be more important than you think."According to industry research, regular expert motorcycle maintenance services can reduce breakdowns by up to 60%." – Motorcycle Mechanics AssociationStartling Facts: Why Expert Motorcycle Maintenance Services MatterWhen it comes to the safety, performance, and longevity of your motorcycle, there’s simply no substitute for professional attention. Expert motorcycle maintenance services are the single best way to prevent surprise breakdowns, extend the life of your bike, and enjoy every ride with confidence. A quality repair shop goes beyond just fixing visible issues—they spot hidden problems, use cutting-edge diagnostic tools, and have years of experience with both routine maintenance and complex repair.Relying on skilled technicians at a certified motorcycle repair shop brings you the added advantage of free estimates, access to genuine replacement parts, and the peace of mind knowing your investment is protected. Regular maintenance not only keeps your motorcycle running smoothly but also helps to reduce the risk of costly repairs. Whether you ride a sport bike for fun or depend on your motorcycle for your daily commute, entrusting your machine to expert hands ensures you’re always ready to get back on the road safely and efficiently.What You'll Learn in This Guide to Expert Motorcycle Maintenance ServicesKey benefits of choosing expert motorcycle maintenance servicesWhat differentiates an expert motorcycle repair shopTypical maintenance and repair services offeredHow to find trusted motorcycle maintenance near youAnswers to common motorcycle maintenance questionsAs you consider the importance of professional care, it’s also helpful to understand how seasonal changes can impact your motorcycle’s performance and maintenance needs. For practical tips on keeping your bike in peak condition year-round, check out these seasonal bike care secrets every rider should know.Understanding the Essentials: What Are Expert Motorcycle Maintenance Services?Expert motorcycle maintenance services are comprehensive service solutions that cover everything from routine tune-ups to complex repair service for all types of motorcycles. Unlike basic DIY fixes or quick lube stops, professional maintenance dives deep—offering precise diagnostics, certified repair services, and performance upgrades tailored for your bike’s make and model. At a reputable motorcycle repair shop, the technicians provide a full inspection at every visit to ensure nothing is missed, checking brakes, electrical systems, fluids, tires, and more.Good maintenance and repair go hand in hand with preventive checks that help you avoid breakdowns and extend your motorcycle’s lifespan. Whether you’re an urban rider navigating the streets in Fort Worth or a long-distance enthusiast with vintage motorcycles, professional care is crucial. Skilled specialists not only detect and resolve minor issues before they escalate into major, costly repairs but are also trained in complex repairs and customizations to suit your riding style. When you choose expert maintenance, you gain more than simple fixes—you invest in the reliability and safety of every journey.The Role of Motorcycle Repair and Maintenance for Optimal PerformanceMotorcycle repair and maintenance aren’t just about fixing what’s broken—they’re proactive strategies that keep your bike running smoothly and efficiently at all times. Expert maintenance services include regular oil changes, thorough brake inspections, checking the electrical system, and evaluating suspension components. This attention to detail means fewer unexpected breakdowns and better overall performance no matter how many miles you put on your motorcycle.By scheduling routine maintenance at a trusted cycle shop or service center, you minimize wear and tear on engine parts and moving components. These expert checks are particularly important for owners of high-performance bikes or those who depend on their motorcycle for everyday transportation. With the help of skilled technicians, you’ll notice fuel efficiency improvements, smoother shifting, and a more reliable ride—qualities every motorcyclist values on the road.How a Motorcycle Repair Shop Ensures Longevity and SafetyThe longevity and safety of your motorcycle rest in the hands of a dedicated motorcycle repair shop. These repair shops are equipped with advanced diagnostic tools, enabling mechanics to spot early warning signs long before they turn into safety hazards or require expensive, complex repairs. Only certified and experienced technicians are entrusted with your bike, ensuring a high level of quality service throughout every stage, from initial inspection to final handover.Beyond repairs, a professional repair shop also ensures proper record keeping for maintenance history and service intervals, which is especially valuable for vintage motorcycles or those under manufacturer warranty. Whether it’s routine maintenance or a complex repair, these technicians have the expertise needed to replace worn components, suggest performance upgrades, and keep you safe on every ride. Their goal: keep your motorcycle running smoothly and protect you from unexpected failures that could leave you stranded or unsafe.Benefits of Using Expert Motorcycle Maintenance ServicesEnhanced performance and reliabilityProfessional diagnostics and repairsTimely maintenance reduces costly repairsAccess to genuine parts and performance upgradesChoosing expert motorcycle maintenance services carries far-reaching benefits. You gain peace of mind from knowing skilled professionals are maintaining your vehicle, using original parts, and leveraging years of experience in both maintenance and repair. Enhanced reliability means fewer breakdowns, less stress, and more uninterrupted riding time. Timely maintenance and repair service also help you avoid the financial sting of major issues that could have been caught earlier. Most notable, however, is the access to genuine parts and expert advice on performance upgrades, so your sport bike—or any type of motorcycle—performs at its absolute best for years to come.Key Services Offered by a Motorcycle Repair ShopA top-tier motorcycle repair shop offers a full spectrum of maintenance and repair services, catering to every rider’s need. These facilities are designed to handle everything from a simple tune-up to complex repairs and custom performance upgrades. At a quality service center, you’ll find technicians who can seamlessly transition from routine maintenance to complex repair tasks for modern and vintage machines alike.Here’s a look at some services you can expect from an expert motorcycle maintenance provider:Routine Motorcycle Maintenance and InspectionRoutine motorcycle maintenance is the foundation of a safe, high-performing ride. This category covers oil changes, fluid checks, brake inspections, chain adjustment, tire pressure monitoring, and overall safety audits. Skilled technicians provide detailed inspections, identifying not just the obvious but also the subtle indicators of wear or potential failure. These services, when performed routinely, help catch issues before they escalate to costly or dangerous levels—a level of care that distinguishes expert maintenance from DIY approaches.Whether you’re scheduling a seasonal check-up or preparing for a cross-country road trip, regular visits to a reputable cycle shop will keep your motorcycle running smoothly. Many service centers offer free estimates, and it’s not uncommon for certain shops to provide special promotions or bundled packages that make maintenance more affordable and convenient.Comprehensive Motorcycle Repair ServicesExpert motorcycle repair shops are fully equipped to handle everything from minor adjustments to complex repairs. Their services include electrical troubleshooting, engine rebuilds, clutch and transmission repair, exhaust system replacement, and more. These shops employ certified mechanics with years of experience across a variety of motorcycle brands and models—key when handling nuanced issues that require specialized skills.Whether you need help with a modern sport bike or vintage motorcycles, the best repair shop will stand by their work with transparent pricing, warranties, and a clear explanation of what’s needed. Many shops offer free estimates for major repairs, ensuring there are no surprises and giving you control over your investment. This transparency sets the tone for high-quality service you can trust, no matter the challenge your motorcycle presents.Specialized Performance Upgrades and CustomizationsIf you want to take your machine to the next level, expert maintenance shops also provide specialized performance upgrades and customizations. This can range from suspension and braking enhancements to exhaust upgrades, ECU tuning, and even custom aesthetic work. A professional repair shop understands the intricacies of every modification and how it impacts both performance and safety.Performance upgrades aren’t just for racing enthusiasts. Everyday riders benefit from improvements in ergonomics, visibility, and power delivery. A reputable motorcycle shop offers guidance on what changes best suit your riding habits and local regulations, ensuring compliance as well as exhilaration. If you’d like a personalized service plan, just give us a call to discuss upgrade options tailored for your motorcycle and goals.Expert Motorcycle Maintenance Services Process: From Booking to CompletionStages of Expert Motorcycle Maintenance ServicesBookingInitial InspectionService DeliveryQuality CheckFinal HandoverSchedule online or phone appointmentComprehensive assessment by techniciansThorough maintenance and necessary repairsRigorous testing and final inspectionKeys returned, summary review, and next stepsThe journey of expert motorcycle maintenance services begins with a simple booking—often available online, by phone, or even as a mobile service in some regions. The process moves swiftly to an initial inspection, where your bike is examined for visible and hidden issues using advanced diagnostics. Your chosen service center then delivers comprehensive repairs and maintenance, addressing everything from routine maintenance to complex repairs. A final quality check ensures that every service detail is performed to the highest standard before the key handover. Many shops offer a clear summary and suggest next steps, giving you everything you need to keep your motorcycle running smoothly after you leave the shop.Take a virtual walk-through of a modern motorcycle repair shop—see skilled technicians in action, advanced diagnostic tools, customer lounges, and the seamless workflow that gets riders back on the road quickly and safely.What Sets an Expert Motorcycle Repair Shop Apart?Certified and experienced mechanicsState-of-the-art diagnostic equipmentTransparent pricing and clear communicationCustomer-focused service guaranteesNot all motorcycle shops are created equal. At a true expert motorcycle repair shop, you’ll find certified mechanics with years of experience—ensuring quality service for everything from vintage motorcycles to modern sport bikes. These shops invest in state-of-the-art diagnostics, so issues are caught and resolved faster and more accurately than ever before. Transparency is a core value, with free estimates and up-front discussion of all repair service and associated costs.Just as important is a strong customer focus. The very best motorcycle repair shops offer service guarantees, priority scheduling, and clear communication throughout the entire process. Their ultimate goal is to deliver a stress-free, rewarding experience that keeps your bike safe and your trust earned for the long haul.Tips for Finding the Best Expert Motorcycle Maintenance Services Near YouCheck online reviews for local motorcycle repair shopsVerify professional certifications and affiliationsCompare service packages and repair service guaranteesAsk about experience with your specific motorcycle modelTo locate the best expert motorcycle maintenance services near you, start by reading reviews from riders in your area—platforms like Google and Yelp provide firsthand insight into a shop’s professionalism and customer satisfaction. Confirm that any service center or repair shop you consider employs technicians with industry certifications, such as those from the Motorcycle Mechanics Association or manufacturers themselves.Don’t hesitate to call for free estimates or to request specific information about service packages and guarantees on complex repairs. It’s wise to seek a shop that has years of experience, especially working on your exact motorcycle model. Lastly, a reputable shop will be transparent with pricing, offer detailed maintenance records, and keep you informed at every stage—qualities that truly set the best apart from the rest.Hear from real riders and see how expert motorcycle maintenance services go above and beyond expectations, making each visit to the local cycle shop an exceptional experience.People Also Ask: FAQs About Expert Motorcycle Maintenance ServicesWhat is the 12 second rule on a motorcycle?Understanding the 12 Second Rule for Riding SafetyThe 12 second rule is a safety concept urging riders to scan the road ahead at least 12 seconds in advance of their current position. This allows for ample reaction time to potential obstacles, changing traffic lights, or hazards. By incorporating this rule into every ride, and combining it with motorcycles that are regularly serviced at a trusted repair shop, you significantly boost your odds of staying safe and making proactive adjustments—not reactive ones—to changing road conditions.How to find a good motorcycle mechanic?Steps to Identifying Trustworthy Expert Motorcycle Maintenance ServicesLook for mechanics who work out of established, well-reviewed repair shops and have professional certifications or many years of experience. Trusted shops should offer free estimates, clear service guarantees, and transparent communication. Always verify that technicians provide detailed maintenance and repair records for your motorcycle, and don’t hesitate to give us a call for advice or referrals. A cycle shop with a long-standing reputation and positive feedback from riders like you is the best choice for peace of mind.How much is a full service on a motorbike?Average Costs for Comprehensive Motorcycle Maintenance and Repair ServicesThe price for a full motorcycle service varies depending on your location, model, and whether it’s routine maintenance or a complex repair. On average, expect to pay between $150 and $400 for comprehensive maintenance at most repair shops, with premium or high-performance upgrades costing more. Always ask for a free estimate before work begins to avoid surprises, and keep in mind that investing in expert service now can prevent more expensive repairs in the future.What is rule number 5 for motorcycles?Explaining Rule Number 5 in Motorcycle MaintenanceRule number 5 often references “always be prepared for the unexpected”—especially when it comes to motorcycle maintenance and repairs. This means never putting off regular inspections, ensuring routine schedules are followed, and keeping a trusted repair shop’s number handy. When in doubt, a quick call to your local expert can address both minor and complex repairs before they become problems. This rule reinforces the philosophy that regular maintenance services are essential for every safe, enjoyable ride.Frequently Asked Questions About Expert Motorcycle Maintenance ServicesHow often should I schedule expert motorcycle maintenance services?Most experts recommend a maintenance check every 3,000–6,000 miles or at least once a season, depending on how and where you ride.Can a motorcycle repair shop handle both minor and major repairs?Yes, reputable repair shops employ skilled technicians with years of experience who can service everything from basic oil changes to complex engine repairs.What should I bring to my repair shop appointment?Bring your owner’s manual, any recent service records, a list of current issues, and your questions regarding maintenance or performance upgrades.Are performance upgrades included in expert maintenance services?Many expert repair shops offer performance upgrades as additional services. Consult your technician to discuss the best options for your make and riding goals.Key Takeaways from Choosing Expert Motorcycle Maintenance ServicesProfessional care extends the life and safety of your motorcycleTrust certified motorcycle repair shops for high-quality workRegular expert motorcycle maintenance services prevent unexpected failuresReady for Reliable Performance?"Don’t leave your motorcycle’s health to chance. Choose expertise to ensure every ride is smooth and secure."Call Nasty Performance Motorcycle Shop Today: 847-458-4858Experience the difference that only true experts provide. Give us a call today, and let’s keep your motorcycle in top condition for every adventure ahead.If you’re ready to take your motorcycle care to the next level, don’t stop at routine maintenance—explore how proactive, seasonal strategies can further protect your investment and enhance your riding experience. Our guide on seasonal bike care secrets every rider must know reveals expert insights for adapting your maintenance routine to changing weather and road conditions. By combining professional service with smart, timely adjustments, you’ll enjoy greater reliability and performance all year long. Discover how a few extra steps each season can make a lasting difference in your bike’s longevity and your confidence on the road.

How to Clean an Old-School Motorcycle Carburetor Like a Pro

Did you know nearly 35% of old school motorcycle performance problems are caused by neglected carburetor cleaning? Despite being one of the simplest maintenance tasks, most classic bike owners overlook it—and they pay the price in sluggish rides and unreliable starts. Whether you’re restoring a vintage Janus Motorcycle, tuning up a Harley Davidson, or keeping your Super Cub in peak condition, mastering carburetor cleaning is the secret to experiencing your machine’s modern classic power as it was meant to be. This guide walks you through every step, mixing timeless wisdom with professional technique, so your bike runs as smoothly as it did years ago.Riding the Legacy: Why Old School Motorcycle Maintenance MattersMaintaining an old school motorcycle isn’t just about mechanical reliability—it’s about preserving a cultural legacy of modern classic engineering and iconic style. The heart of every café racer, desert sled, or vintage-inspired sport bike lies in its meticulously crafted components, with the carburetor playing a starring role. Regular cleaning ensures these beautiful machines remain fun to ride and easy to ride, delivering the kind of thrilling to ride performance that defines the classic line. Ignoring such fundamental upkeep can lead to frustrating problems and costly repairs, reducing both the bike’s collectability and the rider’s enjoyment. Investing time into the details, from disc brake inspection to testing lb ft of torque, guarantees your motorcycle retains its classic design and vintage style allure for years to come.What You'll Learn About Old School Motorcycle Carburetor CleaningThe essential tools and supplies for old school motorcycle carburetor cleaningStep-by-step process to professionally clean and reassemble your carburetorClassic models—like Janus Motorcycle, Indian Motorcycle, and the Super Cub—and their unique carburetor considerationsExpert tips for optimal performance and longevityWhat is an Old School Motorcycle? Exploring Modern Classic and Vintage AppealOld school motorcycles stand at the crossroads of mechanical artistry and timeless adventure. Unlike modern sport bikes equipped with electronic traction control and complicated fuel injection systems, old school motorcycles, like the iconic Janus Motorcycle or the legendary Harley Davidson, maintain a hands-on approach. These bikes are revered for their upright parallel or flat twin engine configurations, classic design elements, and a vintage style that makes every ride feel like a trip down memory lane. Collecting and riding these machines, whether it’s an original café racer or a utilitarian Super Cub, is about honoring mechanical simplicity and the joys of DIY maintenance. Over the years, models such as the Indian Motorcycle and Janus Motorcycles have become symbols of enduring quality and beautiful machine aesthetics, making them highly sought-after by collectors and riders alike.The Difference Between Old School and Modern Classic MotorcyclesUnderstanding the distinctions between old school bikes and modern classics is crucial for both restoration and maintenance. While old school motorcycles are defined by carbureted engines, minimalist technology, and hands-on mechanics, modern classic motorcycles combine old-school style with contemporary engineering—think fuel injection, improved suspension, and disc brakes. For example, Janus Motorcycle is renowned for hand-crafted, small-batch production that maintains vintage charm, whereas Indian Motorcycle and Harley Davidson's modern lines embrace updated tech without sacrificing the classic look. Both styles remain beautiful machines, but owners must pay close attention to the requirements of their chosen model. Whether you prefer the parallel twin of a café racer or the flat twin of a desert sled, knowing what sets your motorcycle apart ensures it receives the care—and fun to ride performance—it deserves.Notable Classic Models: From Janus Motorcycles to Harley DavidsonSome motorcycles have set the standard for what we call “old school” today. The Janus Motorcycle offers a truly unique vintage experience, hand-assembled using classic engineering principles. Indian Motorcycle stands as an American legend, celebrated for its original café racer silhouette and thunderous lb ft of torque. The Honda Super Cub, meanwhile, continues to charm riders with its easy-to-ride, reliable nature—accounting for more units sold than any other motorcycle in history. Harley Davidson remains a household name known for both its vertical twin and v-twin engine bikes, offering a blend of modern classic and pure old-school appeal. Each model boasts distinct engine configurations, carburetor setups, and collectability, shaping the nostalgia and popularity of vintage motorcycle ownership over the years.Comparison Table: Janus Motorcycle vs. Indian Motorcycle vs. Super Cub vs. Harley DavidsonModelYear ReleasedKey FeaturesCarburetor TypeCollectabilityJanus Motorcycle2011Hand-built, small business, cafe racer lookClassic Slide CarburetorHigh (Custom-built, limited run)Indian Motorcycle1901Flat twin/vertical twin, high lb ft of torqueMechanical CarburetorVery High (Historic, original cafe racer lineage)Super Cub1958Iconic design, easy to ride, extremely reliableCV CarburetorHigh (Most produced motorcycle ever)Harley Davidson1903V-twin, sport pro heritage, beautiful machineBendix or CV CarburetorVery High (Collector favorite, iconic style)Why Carburetor Cleaning Matters for Your Old School Motorcycle’s PerformanceThe carburetor is the beating heart of your old school motorcycle—it mixes fuel and air so your engine delivers peak lb ft of torque, robust acceleration, and that classic sound. But dirt, varnish, and debris can easily clog this crucial system, causing poor starts, sluggish throttle, and even a loss of that fun to ride experience. For treasured models like Continental GT and twin engine café racers, regular cleaning prevents expensive repairs and keeps your vintage bike thrilling to ride. Moreover, a clean carburetor improves fuel efficiency, reduces emissions, and preserves the original café racer personality that made these motorcycles easy to ride and admired for their classic design. Taking carb care seriously means honoring the legacy of your machine and enjoying beautiful machine performance for years to come.The Role of the Carburetor in Vintage MotorcyclesIn old school motorcycles, the carburetor is more than a mechanical component; it’s an emblem of analog precision and simplicity. Before modern fuel injection and traction control systems, skilled riders—and tuners—depended on meticulous carburetor adjustment to achieve the right engine configuration for varied riding positions, environments, and riding styles. A well-maintained carb not only preserves the iconic style and classic line of Indian Motorcycles and Janus Motorcycles, but it also grants riders access to reliable powerbands and strong ft of torque. For popular models spanning from the upright parallel engines of Super Cub to the powerful vertical twin layout of Harley Davidson classic bikes, carburetor tuning and cleaning remain a must for anyone looking to restore or preserve their motorcycle’s original performance and charm.Essential Tools & Supplies for Cleaning Your Old School Motorcycle CarburetorQuality results require quality tools—and cleaning an old school motorcycle carburetor is no exception. Whether you’re working on a Janus Motorcycle, Indian Motorcycle, Harley Davidson, or the reliable Super Cub, assemble a comprehensive kit to tackle carbon buildup and residue. A dedicated carburetor cleaner spray dissolves deposits inside narrow jets, while a compressed air canister ensures passages are free of obstructions. Screwdrivers and soft brushes are vital for gentle disassembly and cleaning, especially for delicate gasket and O-ring surfaces common on classic engines. Safety gloves protect you from solvents, and acquiring model-specific gasket and O-ring kits is vital for expert reassembly, particularly for Harley Davidson and Continental GT bikes. Investing in professional-grade supplies tailored to your motorcycle’s unique needs not only safeguards intricate parts but also maximizes restoration outcomes for these beautiful machines.Carburetor cleaner sprayScrewdrivers and soft brushesCompressed air canisterGasket and O-ring kits for Harley Davidson and Continental GT modelsSafety gloves"Janus motorcycles, for example, feature unique carburetors. Cleanliness here is crucial—especially for riders looking for that authentic old school motorcycle feel," notes a technician at Nasty Performance.Step-by-Step Guide: Cleaning Your Old School Motorcycle Carburetor Like a ProPreparation: Removing and Disassembling the CarburetorBefore beginning, ensure your motorcycle is on stable ground and fueled off. Carefully remove the seat and tank, exposing the carburetor. Take photos during each step—these visuals are invaluable during reassembly. Unscrew mounting brackets and gently disconnect fuel lines, throttle cables, and choke linkages. For Janus Motorcycles and Super Cub models, pay special attention to unique fastener types and mounting configurations. Once freed, bring the carburetor to your workbench. Using soft brushes and screwdrivers, remove the float bowl, main jet, pilot jet, and float itself. Place all loose components in a labeled tray to prevent confusion—especially with classic models where part symmetry can be misleading. By working methodically, you protect delicate parts from damage and ensure a smooth, frustration-free reassembly later on.Deep Cleaning Techniques for Twin Engine and Super Cub ModelsStart by liberally applying carburetor cleaner spray to every metal component, especially where stubborn varnish and fuel residue accumulate. Use small, soft brushes to gently dislodge carbon deposits, being extra attentive to the tiny passageways in Super Cub carburetors. Compressed air ensures passages are clear, crucial for optimal air/fuel mixture—if not thoroughly cleaned, even a beautiful machine like a Janus Motorcycle can suffer idle problems or stalling. For twin engine bikes or multi-carb setups (as seen on classic Harley Davidson and Indian Motorcycles), soak parts in a dedicated ultrasonic cleaner for best results; this technology vibrates residue away without risking delicate surfaces. Focus on gaskets and O-rings, checking for wear or cracks. Replace them with new kits designed for your model to prevent leaks after reassembly. Attention to detail now guarantees reliability and keeps your ride fun to ride for many more years.Troubleshooting: Common Issues in Old School Motorcycle CarburetorsAfter cleaning, inspect each part for wear. Common culprits—warped float bowls, blocked jets, or cracked O-rings—can lead to erratic fuel flow, loss of lb ft torque, and unpredictable throttle response. For Super Cub and twin engine café racer setups, ensure the float moves freely and all jets are completely clear. Persistent overflow, hot starting difficulties, or rough idle can often be traced to debris still lodged in passageways or misaligned floats. If your Harley Davidson or Janus Motorcycle hesitates at speed, consider the possibility of air leaks on carb intake boots or improperly seated O-rings. Don’t be tempted to reuse old gaskets—investing in new, model-specific replacements ensures your carburetor is airtight and running like new. Careful troubleshooting and reinspection prevent repeat issues and help your vintage ride stay beautiful and easy to ride.Reassembly & Post-Cleaning Steps: Ensuring Optimal Performance on Modern Classic BikesTesting air/fuel mixtureTuning for different models (Harley Davidson, Janus Motorcycles, Indian Motorcycle)Once all parts are clean and dry, carefully reassemble the carburetor by reversing your disassembly steps. Replace worn O-rings and gaskets as you go. Before reinstalling, set the float height using model-specific specs—incorrect settings can sabotage even the best cleaning job. After refitting the carburetor to your motorcycle, tighten all clamps and ensure throttle/choke linkages work smoothly. Fill the tank with fresh fuel and start the engine. Test the air/fuel mixture screw—adjust until idle is smooth and response is sharp. For Harley Davidson and Janus Motorcycles, tuning may vary by model, so refer to specifications or consult your manual. Listen for smooth operation and consistent idle; these are signs your cleaning has restored optimal performance. By investing care in these finishing touches, your old school motorcycle will deliver the iconic, fun to ride experience it was built for—every time you turn the key.Expert Tips for Maintaining Your Old School Motorcycle’s Carburetor"Routine upkeep transforms your classic motorcycle from a weekend relic to a reliable ride," says classic bike restorer Alex Long.Monthly cleaning checklist for vintage motorcyclesLong-term storage tips for old school motorcycle carbsTo make carburetor care second nature, adopt a monthly cleaning routine. Begin by visually inspecting for leaks and residue, especially around gaskets. Run the engine and listen for irregular idle or delayed throttle—these often signal dirt or air leaks. On a quarterly basis, remove and clean jets, and adjust mixture screws for optimal running. For long-term storage, always drain the fuel from the carburetor and tank—a critical step for a sport pro machine or beautiful machine like a Continental GT. Fogging the engine, applying light oil to internal carb surfaces, and storing your motorcycle in a dry, climate-controlled environment prevent rust and ensure a smooth restart after months of rest. By following these simple, proactive steps, you’ll spend less time troubleshooting and more time experiencing the iconic style and thrilling performance your old school motorcycle was built to deliver.Old School Motorcycle Carburetor Cleaning: Product Reviews & Purchasing GuideBest Carb Cleaner Brands for Old School MotorcyclesChoosing the right cleaner can make a world of difference, especially when you’re restoring unique carburetor types as found in Janus Motorcycles, Indian Motorcycle, or Honda Super Cub. Top recommended brands among classic bike enthusiasts include Berryman Chem-Dip, known for its strong solvent action, and Gumout Carburetor Cleaner, praised for its fast-acting spray. Liquid Wrench and CRC Carb & Choke Cleaners are also highly rated for their compatibility with older gasket materials and their ability to remove varnish from delicate carburetor settings. For twin engine setups, investing in an ultrasonic cleaner is worthwhile, as it provides deep, residue-free cleaning with minimal risk. Always use products recommended by small business restoration shops or model-specific forums for the best outcome.Tools and Kits: From Janus Motorcycles to Indian MotorcycleA comprehensive cleaning kit goes beyond just a can of cleaner. Look for sets that include precision screwdrivers, soft nylon and brass brushes, and an assortment of picks for cleaning stubborn jets. Replacement gasket and O-ring kits specifically for Harley Davidson, Continental GT, and Janus models are widely available online or through classic motorcycle specialist shops. Additionally, a small parts tray and magnetic mat prevent loss of screws and springs during disassembly. When in doubt, opt for tools used by professional shops like Nasty Performance, as their experience with classic line and sport bike restoration ensures you have everything required for a successful, stress-free cleaning session.People Also Ask: Old School Motorcycle FAQsWhat are old school motorcycles called?Old school motorcycles are often called “modern classics,” “vintage motorcycles,” “retro bikes,” or simply “classic motorcycles.” Popular examples include Indian Motorcycle, Janus Motorcycles, Harley Davidson, and Honda Super Cub.What is the most classic motorcycle?The most classic motorcycles often cited by enthusiasts are the Harley Davidson Knucklehead, Indian Chief, Honda Super Cub, and the Royal Enfield Continental GT. Each of these models exemplifies the appeal and influence of old school motorcycles.What is the 1% rule on motorcycles?The “1% rule” refers to the notion that 99% of motorcyclists are law-abiding citizens, while 1% are “outlaws”—a term that originated following statements by the American Motorcyclist Association. It is a concept tied closely to motorcycle club culture, especially among old school motorcycle communities.What is the best vintage motorcycle to buy?The best vintage motorcycle to buy depends on your needs, but favorites include the Honda Super Cub for reliability, Indian Scout for historical value, and Janus Motorcycles for custom, small-batch craftsmanship. Harley Davidson and Royal Enfield Continental GT also remain sought-after models for old school motorcycle enthusiasts.Key Takeaways: Cleaning and Maintaining Your Old School Motorcycle CarburetorRegular cleaning preserves value and performance of your old school motorcycleChoose tools and cleaners suited for classic enginesFollow model-specific guidance for best resultsFrequently Asked Questions About Old School Motorcycle CarburetorsHow often should I clean my old school motorcycle carburetor?For optimal performance, clean your carburetor every 3,000–5,000 miles or at the start and end of the riding season. If you notice poor idle or hard starts, clean immediately.Can improper cleaning damage my classic motorcycle?Yes, using harsh chemicals or metal tools carelessly can strip delicate passages, damage soft gaskets, or cause leaks. Always use gentle brushes and model-appropriate cleaners.What are signs of carburetor clogging in Janus Motorcycles or Indian Motorcycle models?Common signs include rough idle, sputtering, fuel overflow, poor throttle response, and a decrease in easy to ride feeling or acceleration. Address promptly for safe, reliable riding.Conclusion: Experience the Thrill of Riding and Restoring an Old School MotorcycleWith the right tools, techniques, and routine care, every old school motorcycle owner can enjoy reliable, exhilarating rides that preserve timeless style and legacy.Call Nasty Performance Motorcycle Shop Today: 847-458-4858Ready to restore or upgrade your classic motorcycle? Call Nasty Performance Motorcycle Shop at 847-458-4858 for expert advice, carburetor repair, and premium parts tailored to your old school bike.

Motorcycle Maintenance Guide for Beginners: What You Need to Know

There’s nothing quite like the freedom of the open road on two wheels—but that sense of adventure comes with responsibility. As a new rider, learning to maintain your own motorcycle is both a rite of passage and a ticket to safer, more enjoyable rides. Imagine cruising under a sunny sky, each part of your bike humming in harmony because you took the time to learn its care. This motorcycle maintenance guide for beginners delivers the confidence and capability to keep your ride running smoothly—starting now.Start Your Journey: Why Every Rider Needs a Motorcycle Maintenance Guide for BeginnersThe road calls to every rider, but staying safe and enjoying each ride depends on how well you know your machine. For beginners, a motorcycle maintenance guide for beginners is more than just a collection of tips—it’s your first layer of protection, ensuring your motorcycle remains reliable and safe. Learning the basics of motorcycle maintenance sparks a sense of ownership, keeps repair costs down, and connects you more deeply to your bike’s mechanics. This guide is designed to help you master essential maintenance tasks and build a strong foundation, so you’re safe on the road and prepared for any journey that lies ahead."Maintaining your bike isn't just about performance—it’s about freedom and safety on the open road."What You'll Learn from This Motorcycle Maintenance Guide for BeginnersFoundational motorcycle maintenance tasks every beginner can masterHow proper tire pressure, air filter, and chain upkeep extends your bike's lifeEssential checks and troubleshooting techniquesUnderstanding Motorcycle Maintenance: The BasicsWhy Is Regular Motorcycle Maintenance Important for Beginners?Getting started with the basics of motorcycle maintenance leads to enormous long-term benefits. Routine inspections and following your bike maintenance schedule help you identify potential problems before they become serious—and expensive—issues. New riders often underestimate how quickly signs of wear can surface, from brake pads thinning to tire pressure dropping. Regular attention to maintenance tasks boosts both performance and rider safety, ensuring your machine is always in working order.Understanding these maintenance tasks also makes troubleshooting much easier. If your motorcycle won’t start or feels “off,” being able to check your oil, tire pressure, and battery terminals empowers you to fix small problems quickly. Most importantly, a habit of double check —whether that’s for fluid levels or the condition of moving parts—means you’re less likely to be caught off-guard, making calamity far less likely when you least expect it.As you build your maintenance routine, it's helpful to understand how seasonal changes can impact your motorcycle's condition and the specific care it requires. For a deeper dive into preparing your bike for different weather conditions and maximizing its longevity year-round, check out these seasonal bike care secrets every rider must know.Motorcycle Maintenance Guide for Beginners: Safety FirstSafety is the foundation of every great ride. This motorcycle maintenance guide for beginners puts safety at the forefront by breaking down each key component check and why it matters. For starters, properly maintained brake pads and brake fluid offer peace of mind when you need to stop quickly, while regular checks on tire pressure and tread depth keep handling sharp in all road conditions. Always follow instructions in your motorcycle’s service manual and pay attention to the manufacturer’s guidance for each maintenance task.Neglecting routine tasks not only shortens your bike’s life, but can also put you and others at risk. Remember, most safety issues are preventable with simple habit-building: always check your tire pressure, check your oil, and inspect your brakes before each ride. These habits reinforce safe riding and keep you confident wherever your wheels may take you.Essential Tools Needed for Your Motorcycle Maintenance GuideHaving the right tools makes any maintenance task simpler and safer for beginners. You don’t need fancy professional gear—just a well-stocked kit. Start with a socket set for bolts and adjustments, a torque wrench for precise tightening, and a motorcycle stand to safely elevate your bike, especially the rear wheel. A chain brush makes cleaning your chain and sprocket straightforward, and pliers come in handy for various tweaks and fixes.Socket setTorque wrenchMotorcycle standChain brushPliersWhile these are core tools, always consult your motorcycle’s service manual for any model-specific needs. Having reliable tools not only helps in executing maintenance tasks but also builds your confidence as you develop your mechanical skills and knowledge.Motorcycle Maintenance Guide for Beginners: Pre-Ride ChecksVisual Inspection: Tires, Frame, and Fluid LeaksEvery ride should start with a hands-on visual inspection. Examine your tires—look for uneven wear, cuts, or embedded objects. Tire pressure is critical, so check your tire pressure against your service manual’s recommended range before each ride. Inspect the frame for cracks, rust, or bends. Small leaks under your motorcycle often mean it’s time to check your oil filter or fluid levels. If you spot any drops or stains, double check the source and address it before riding.Don’t overlook your fluid reservoirs either: brake fluid, coolant, and engine oil all need to be topped off and inspected. Spotting a drop in any of these could hint at a slow leak or component issue. Taking the time for this pre-ride ritual supports your bike maintenance and keeps your journey safe and worry-free.Understanding Tire Pressure and Its SignificanceYour tire pressure directly impacts how your motorcycle handles—it affects grip, stopping power, and the overall lifespan of your tires. Too low, and your tires wear unevenly or heat up dangerously on long rides. Too high, and you lose valuable traction. The manufacturer’s recommendations found in your manual or on the swingarm sticker are your best guide for maintaining optimal tire pressure.Regularly checking tire pressure should be as routine as fastening up your helmet. Most tire pressure gauges are easy to use and portable. Make a habit of checking before every ride—especially when temperatures fluctuate—so you never lose control due to under-inflated or over-inflated tires. Proper care helps you avoid unnecessary wear and keeps your ride feeling just right.Step-by-Step Guide: Checking Tire Pressure for BeginnersStart with cold tires for an accurate reading. Unscrew the valve cap, press your gauge firmly onto the valve, and note the reading.Compare it to the recommended PSI (pounds per square inch) in your service manual.If the level is low, use an air compressor to fill the tire. If it’s too high, gently release air with your gauge until it matches the target pressure.Repeat for front and rear tires, then double check each for leaks or damage before replacing the valve caps.Monitoring Lights, Controls, and ElectronicsFunctioning electrical systems keep you visible and safe on the road. Test your headlights, tail lights, brake lights, and turn signals—making sure bulbs illuminate brightly and blink at the correct intervals. Don’t ignore warning lights on your dashboard; they often signal low oil levels, battery issues, or urgent maintenance needs.Move on to controls: ensure the throttle turns smoothly, the clutch engages properly, and all switches are responsive. Electronics, like the horn and starter, should respond promptly when activated. Keeping these systems in working order means you’re ready for any ride—whether it's around town or out on an open highway.Motorcycle Maintenance Guide for Beginners: Engine CareChecking and Changing OilOil is the lifeblood of your engine. For peak performance, regularly check your oil level and clarity with the dipstick or sight glass. If the oil appears dark or gritty, it’s time for an oil change, following your motorcycle’s maintenance schedule for intervals. Always replace the oil filter as well—dirty filters let contaminants harm your engine.Changing oil is straightforward: warm up the engine, place a pan beneath the drain bolt, and carefully remove it. Allow oil to drain completely, then replace the bolt and swap out the oil filter. Fill with fresh oil, run the engine briefly, then double check the oil level and add as needed. Routine oil changes protect your engine from wear, overheating, and costly breakdowns.Inspecting and Replacing Air FiltersYour air filter keeps grit and debris from entering the engine. Over time, air filters become clogged, starving your motorcycle of air and causing poor performance, sluggish starts, or increased fuel use. Check your air filter at regular intervals or as recommended in your service manual—and replace sooner if you ride often in dusty or urban environments.A clean air filter boosts horsepower, improves fuel efficiency, and helps your motorcycle run smoothly every day. If you notice your bike running rough or hear unusual engine sounds, inspecting or changing the filter is a quick way to restore normal operation. Follow your manual for exact locations and requirements for your specific model.How to Properly Clean and Replace an Air FilterRemove your seat and locate the air filter casing as detailed in your service manual.Carefully take out the filter. If it’s reusable foam or cotton, clean with the recommended cleaner—otherwise, dispose and replace with a new filter.Let it dry completely before reinstalling, assuring a snug fit to block dirt and debris.Reassemble the airbox and seat, ensuring all components are securely fastened.Motorcycle Maintenance: Battery Upkeep and Charging TipsMotorcycle batteries demand attention, especially if you store the bike through winter or infrequently ride. Inspect for corrosion around your battery terminals, and clean as needed. If your starter sounds weak, check voltage with a multimeter and recharge or replace the battery if necessary.Keeping battery terminals free of corrosion and checking electrolyte levels (if applicable) helps prevent electrical faults. For longer storage, use a smart charger or tender to maintain battery health and extend its life—saving you from the frustration of a motorcycle that won’t start on a beautiful riding day.Chain and Sprocket Care in Motorcycle Maintenance Guide for BeginnersCleaning, Lubricating, and Adjusting Chain and SprocketYour chain and sprocket transfer power from the engine to the rear wheel. Clean, lubricated, and properly tensioned chains operate smoothly, extend sprocket life, and reduce risk of breakdowns or accidents. For everyday riders, aim to chain clean every 500 miles (or after riding in the rain). Use a dedicated chain brush to remove built-up grime, then apply motorcycle-specific lubricant to the chain.Adjusting chain tension is crucial. A too-tight chain can damage bearings and moving parts, while a loose one can slip off unexpectedly. Your service manual specifies the best slack for your model. Routine care of your chain and sprocket underscores all good bike maintenance habits and keeps your ride feeling strong and responsive.Cleaning frequencyLubrication typesChain tensioning basicsBrakes and Suspension: Motorcycle Maintenance Guide for BeginnersInspecting Brake Pads and FluidSafe stopping power comes from healthy brake pads and fresh brake fluid. Begin every inspection by checking your brake pad thickness—worn pads can damage brake discs and severely lengthen stopping distances. Look for grooves, cracks, or uneven wear, and replace brake pads if they look thin or damaged.Check brake fluid levels and color in the master cylinder reservoir. If fluid appears dark or murky, or if it’s below the minimum line, flush and refill per your service manual. Inspect visible sections of brake lines for cracks, bulges, or leaks. Consistent brake maintenance ensures you’re always in control—no surprises at the next red light.Suspension Checks: What to Look ForA well-checked suspension means smoother rides and safer handling. Examine your fork tubes for signs of oil leakage or pitting, and double check the rear shocks for compression and rebound. Wiggle the handlebars with your front wheel off the ground; excess play or knocking could indicate the need for bearing or bushing replacements.If your ride feels excessively bouncy, bottom-out over bumps, or “wanders” during turns, schedule a more detailed suspension inspection or service. Suspension health ensures tires stay firmly on the road and absorbs the worst road imperfections, giving you confidence every time you twist the throttle.Long-Term Motorcycle Maintenance Guide for BeginnersSeasonal Motorcycle Storage TipsPutting your bike away for the winter or after a long trip? Correct storage techniques prevent costly repairs and corroded components. Wash and dry your bike to remove road salts and dirt, lubricate all moving parts, and fill your tank with fuel stabilizer to prevent gumming. Disconnect or remove the battery, and keep it on a smart charger to preserve its life. Cover your motorcycle with a breathable, fitted cover to protect from moisture and dust.Store your motorcycle in a dry, well-ventilated area away from harsh sunlight or freezing temperatures. Bundle your riding gear, keep maintenance tools nearby, and give your motorcycle a quick visual check every few weeks. These habits make spring startups effortless and undramatic.Regular Service Intervals and Record KeepingA detailed maintenance log enhances your bike maintenance practices and provides dealers or mechanics with a clear history for resale or troubleshooting. Use your service manual to set reminders for oil changes, chain and sprocket care, brake pad replacements, and air filter checks. Recording mileage and what maintenance tasks you completed empowers you to spot trends, plan repairs, and avoid costly surprises.TaskRecommended IntervalOil ChangeEvery 3,000 milesChain MaintenanceEvery 500 milesBrake InspectionMonthlyAir Filter ReplacementAnnually or 12,000 milesTire Pressure CheckBefore Every RideCommon Mistakes in a Motorcycle Maintenance Guide for Beginners and How to Avoid ThemNeglecting regular tire pressure checksSkipping air filter replacementsImproper chain and sprocket careIgnoring brake wearThese mistakes can turn minor maintenance tasks into major problems. Regular attention to each step in this motorcycle maintenance guide for beginners ensures your safety, maximizes performance, and saves money on avoidable repairs."A little regular attention now can save you from expensive repairs later."People Also Ask: Key Motorcycle Maintenance QuestionsWhat is the 2 4 12 second rule on a motorcycle?Answer: The 2-4-12 second rule refers to safe following distances and hazard detection—2 seconds for immediate following distance, 4 seconds for potential hazards ahead, and 12 seconds for scanning your path and anticipating traffic movements.How to do basic maintenance on a motorcycle?Answer: Basic motorcycle maintenance includes checking tire pressure, oil and fluid levels, inspecting lights, cleaning and lubricating the chain, ensuring brakes function, and regular air filter care. Always follow your motorcycle's maintenance schedule.What is rule number 5 for motorcycles?Answer: 'Rule number 5' is commonly interpreted as always keeping your focus and attention on the road, practicing defensive riding at all times to minimize risk.What does 2 fingers up mean on a motorcycle?Answer: A gesture of camaraderie, '2 fingers up' is a traditional motorcycle wave to acknowledge fellow riders and share safe travels.Frequently Asked Questions: Motorcycle Maintenance Guide for BeginnersHow often should a beginner perform motorcycle maintenance? Most maintenance tasks like tire pressure checks, fluid level inspections, and visual checks should be done before every ride. Full services—such as oil changes, chain cleaning, and air filter replacements—should be performed according to your manual (typically every few hundred to a couple thousand miles).What is the first thing to check when troubleshooting a motorcycle? Start with basics: battery health, fuel availability, and correct fluid levels. Check the kill switch and ensure all electronics function. If the bike still doesn’t start, review your service manual for next steps.How do I know when to replace my air filter or brake pads? Replace air filters when they appear dirty, clogged, or as recommended by the manual. Brake pads should be swapped out when thickness falls below 2-3mm or you experience decreased stopping power.Key Takeaways from This Motorcycle Maintenance Guide for BeginnersStart with routine safety checks: tire pressure, brakes, fluid levelsMaintain a clean chain and regularly replace air filtersKeep detailed maintenance records to prolong the life of your bikeReady to Ride? Connect with the Experts"Trust your motorcycle maintenance to passionate professionals—every mile matters."Call Nasty Performance Motorcycle Shop Today: 847-458-4858Conclusion: Consistent, simple motorcycle maintenance helps every beginner become a more confident, safer, and happier rider.Motorcycle maintenance is a journey that evolves as you gain experience and confidence. If you’re ready to take your skills to the next level, exploring advanced care strategies and learning how to adapt your maintenance routine for every season can make a world of difference in your bike’s performance and reliability. Discover expert tips on protecting your motorcycle through temperature swings, rain, and storage periods by visiting our comprehensive guide on seasonal bike care secrets every rider must know. With the right knowledge, you’ll be prepared for every mile—no matter what the weather brings. Keep building your expertise and enjoy the ride with confidence all year long.

Terms of Service

Privacy Policy

Core Modal Title

Sorry, no results found

You Might Find These Articles Interesting

T
Please Check Your Email
We Will Be Following Up Shortly
*
*
*