Nasty Performance ~ 847-458-4858 

  • Blog Home
  • Categories
    • Motorcycle Maintenance
    • Riding Tips & Preps
    • Safety & Inspection
    • Customizations & Upgrades
    • DIY Motorcycle Repairs
    • Motocycle Audio Systems
    • Motocycle Seasonal Care & Storage
    • Engine, Electrical Performance
  • Bike Night
  • Nasty Performance Motorcycle Shop
June 01.2026
1 Minute Read

Signs You Need Spark Plug Replacement on Your Motorcycle

Did you know that just one worn spark plug can cause your motorcycle’s fuel efficiency to drop by up to 30% and lead to unexpected breakdowns on the road? Unfortunately, many riders overlook simple, inexpensive motorcycle spark plug replacement—a maintenance task that’s absolutely critical for keeping your bike running smoothly, efficiently, and safely. In this guide, you’ll discover why paying attention to your spark plugs is one of the best ways to avoid frustration and costly repairs down the road.

A Surprising Fact: The Crucial Role of Motorcycle Spark Plug Replacement

While it might seem minor, the motorcycle spark plug is the unsung hero of your bike’s engine. It’s responsible for igniting the air-fuel mixture inside each cylinder, kickstarting powerful combustion and propelling you forward. Yet, most riders don’t realize that a worn or failing spark plug can transform a high-performance machine into a stuttering, temperamental shadow of itself. More alarming, motorcycle spark plug replacement is often overlooked in basic maintenance tasks and only addressed once problems like poor starting, engine misfires, or sluggish acceleration appear.

Even modern EFI bikes aren’t immune—sophisticated electronics rely just as heavily on reliable spark plugs. Skipping timely replacement increases overall engine wear, jeopardizes the health of related components like the coil stick and plug wire, and could ultimately result in more extensive repairs. Recognizing the warning signs early and learning the basics of spark plug inspection and replacement can extend your bike’s lifespan, maximize performance, and save money in the long run.
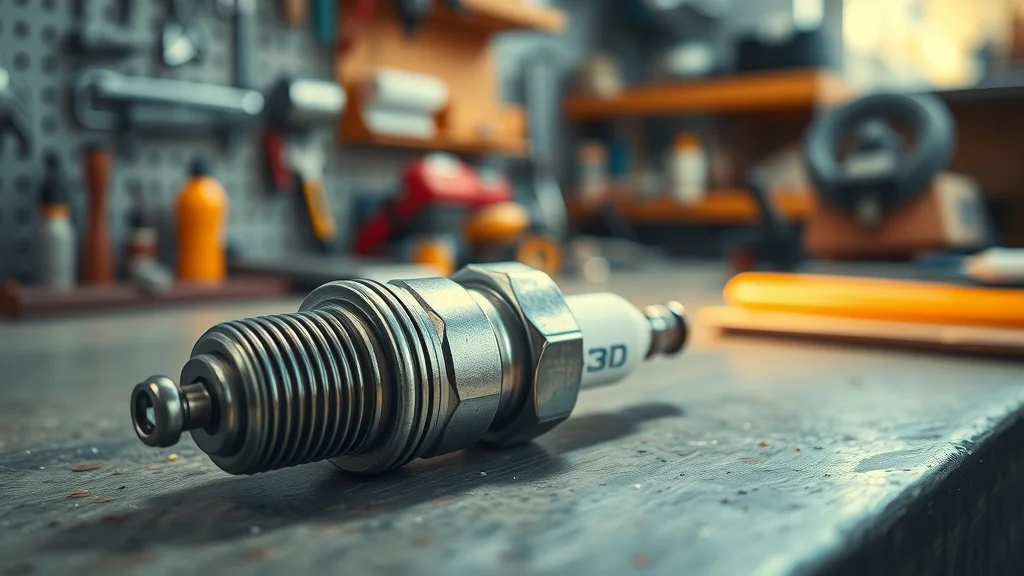
Vivid close-up of a shiny new motorcycle spark plug—motorcycle spark plug replacement, neutral, on a mechanic’s bench, tools background, natural daylight, ultra-realistic

Why Motorcycle Spark Plug Replacement Should Never Be Overlooked

Neglecting motorcycle spark plug replacement can set off a chain of problems that affect your bike, your wallet, and your safety. When a spark plug fails or starts to degrade, the entire process of combustion falters—causing your engine to run rough, emit strange noises, and even fail at critical moments.

Poor spark plug maintenance can also mask underlying issues, like a clogged air filter or improper spark plug gap. Dirty or fouled spark plugs can strain your bike’s fuel delivery, particularly in gas tank systems and EFI bikes. This not only hinders your ride but accelerates wear to expensive parts such as the cylinder head, plug wires, and ground strap. Timely replacement and regular inspection are simple, effective ways to safeguard your investment and ensure every ride is as enjoyable and safe as possible.

While spark plug health is vital, it’s just one aspect of keeping your motorcycle in top shape. For a comprehensive approach to maintenance, including how to adapt your care routine throughout the year, check out these seasonal bike care secrets every rider should know for practical tips that go beyond the basics.

What You'll Learn About Motorcycle Spark Plug Replacement

  • How to identify symptoms of failing motorcycle spark plugs
  • Why regular motorcycle spark plug replacement is essential for performance
  • Step-by-step methods to check and replace motorcycle spark plugs
  • Expert tips for extending the life of your motorcycle spark plugs

Understanding Motorcycle Spark Plug Replacement: What Are Motorcycle Spark Plugs?

Motorcycle spark plugs are more than just simple parts—they are engineered to endure intense temperatures and provide a consistent spark at lightning speed with every turn of your engine. Placed on the cylinder head, each spark plug has a central center electrode, a threaded shell, and a precise spark plug gap set between the center and ground electrodes. This gap is where the magic happens: a high-voltage arc jumps, igniting the air-fuel mixture so the engine can run smoothly.

Choosing the correct spark plug and keeping it in top condition directly impacts everything from fuel efficiency to engine longevity. Incorrect plug gap or poor installation can lead to misfires, weak combustion, or even damage to your bike’s engine management systems—especially in high-performance and modern EFI motorcycles. Learning how your spark plug functions is the first step to maintaining peak performance.

Key Functions of a Motorcycle Spark Plug

  • Ignition of the air-fuel mixture: Spark plugs create the spark necessary to ignite the compressed fuel-and-air blend in your bike’s engine.
  • Maintaining engine efficiency: Consistent, reliable sparks ensure smooth engine operation, balanced fuel burn, and reduced emissions.
  • Contribution to overall motorcycle performance: Well-maintained spark plugs reduce engine vibration, prevent stalling, and help deliver peak horsepower—all critical for a satisfying ride.
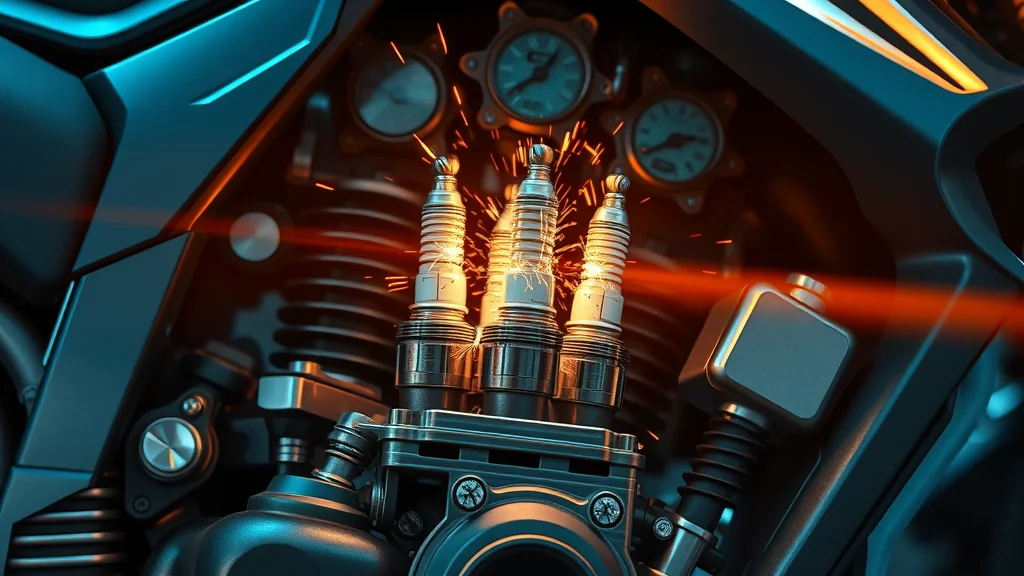
Dynamic illustration of a motorcycle engine cutaway showing spark plugs in action—spark plug igniting air-fuel mixture, photorealistic, electric blues and oranges

The Importance of Proper Motorcycle Spark Plug Maintenance

Regular motorcycle spark plug maintenance is a key factor in the longevity and power of your engine. Over time, combustion deposits, heat cycling, and improper installation can all impact the ability of a spark plug to transmit voltage efficiently. That’s why checking the plug’s condition—including the spark plug gap, color, and signs of wear—needs to be a routine maintenance practice for every rider. Not only does this help avoid engine trouble, but it also maximizes your investment by preventing unnecessary strain on other maintenance tasks—like air filters, plug boot, and coil stick.

Frequent checks with a gap gauge or feeler gauge provide reassurance and ensure your spark plug’s plug gap is neither too wide nor too tight. Adhering to your bike’s service manual for motorcycle spark plug replacement intervals keeps your ride in top shape, reduces emissions, and can even improve your gas mileage—making it a good idea for all riders.

Common Signs You Need Motorcycle Spark Plug Replacement

Spotting the early warning signs can be the difference between a brisk morning ride and a frustrating day stranded by the roadside. The following symptoms indicate it’s time to check your motorcycle spark plugs and consider a timely replacement:

Engine Misfires and Poor Performance

If you feel your motorcycle jerking unexpectedly, hesitating under acceleration, or outright misfiring, a worn spark plug could be at fault. Misfires often occur when the plug gap is too wide or coated in carbon, preventing the spark from jumping reliably. This not only affects your motorcycle’s performance but also increases emissions, overworks crucial parts like the coil stick and plug wire, and can cause stubborn engine knock or ping. For both EFI bikes and carbureted engines, smooth power delivery relies on clean, well-gapped spark plugs.

Ignoring these symptoms may lead to long-term harm for other sensitive components. Replacing motorcycle spark plugs as soon as misfires are noticed will restore lost power, smooth your ride, and prevent further issues down the line.

Trouble Starting Your Motorcycle

Difficulty starting your bike—especially in the morning or after long periods of storage—can signal failing motorcycle spark plugs. A weak, corroded, or dirty plug often struggles to ignite the fuel mix, resulting in long cranking times, multiple attempts to start, or complete failure to start. On modern EFI bikes, electronic systems may compensate slightly, but a faulty spark is still a primary culprit for unreliable startups.

Another related sign is an engine that stalls immediately after starting or runs very rough until it warms up. Whether you ride a sportbike, cruiser, or a commuter, reliable spark plug performance is essential for consistent starting and safe operation.

Decreased Fuel Efficiency

Notice that your bike’s gas mileage has suddenly dropped or that you’re filling up more frequently? Decreased fuel efficiency is a classic sign of a spark plug past its prime. When a spark plug misfires or becomes inefficient due to a poor plug gap or carbon buildup, unburnt fuel gets wasted—leaving you with less distance per tank and more frequent stops at the pump. On EFI bikes in particular, sensors will try to compensate for poor combustion, but eventually, inefficient spark will still cost you at the gas station.

Regular motorcycle spark plug replacement restores optimal fuel burn, improving economics and extending the life of other precious engine components. Don’t ignore this telltale symptom—it’s your bike’s way of asking for help.

Frustrated motorcyclist in riding gear trying to start their motorcycle—trouble starting due to spark plug issues, realistic sunrise driveway scene

Unusual Engine Noises Linked to Motorcycle Spark Plugs

Sharp popping, rough idling, or loud backfiring hurts more than just your ears—they’re also warnings that something is wrong with your spark plugs. Chronic fouling or an incorrect spark plug gap can disrupt the firing order and timing, producing clangs, bangs, and unpredictable power delivery. If you hear persistent noise changes after starting, accelerating, or at idle, an immediate inspection and spark plug change is a smart move.

These sounds might also signal problems with the plug boots or plug wires, which should always be checked together with the spark plug itself. Early intervention preserves engine health and prevents inconvenient breakdowns.

How to Inspect Motorcycle Spark Plugs Before Replacement

  • What to look for when checking spark plug wear: Examine the ceramic insulator for cracks, chips, and discoloration. Carbon or oil deposits on the tip can indicate incomplete combustion or worn engine parts. Watch the ground electrode—excessive wear, melted edges, or a rounded tip means it’s time to replace.
  • Understanding carbon deposits and residue: Carbon fouling appears as thick, sooty deposits on the plug’s tip, often the result of a rich fuel mixture, short trips, or a worn air filter. Oil residue points to internal oil leaks or worn piston rings, while a clean, tan or grayish tip signals good combustion.
  • Color and gap inspection tips for motorcycle spark plug replacement: Always use a gap gauge to check the distance between the center and ground electrodes. Deviations from the manufacturer’s plug gap recommendation can prompt misfiring and reduced efficiency. Adjust carefully—never force or bend the ground strap excessively.
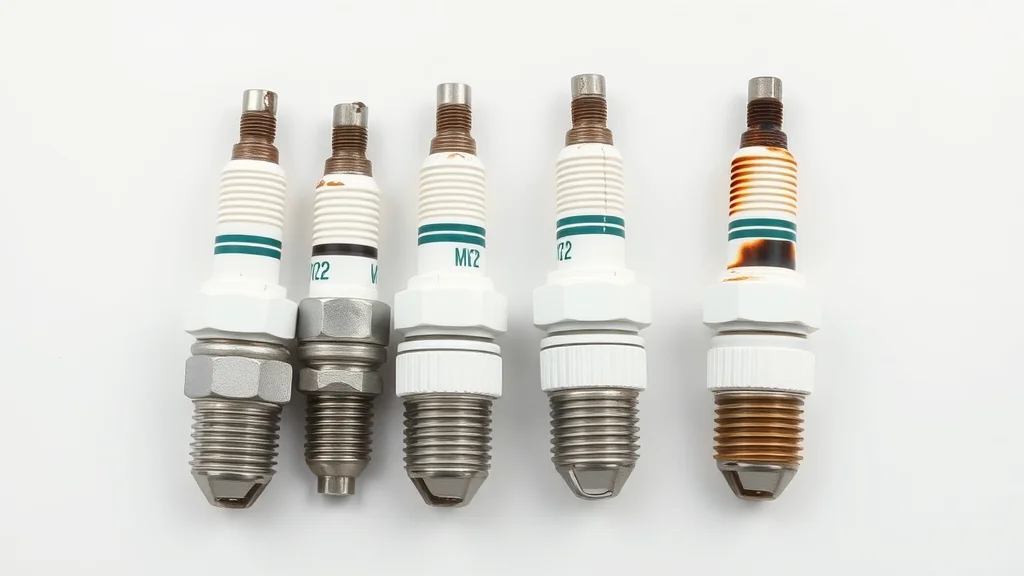
Used motorcycle spark plugs showing various wear patterns—inspection for replacement, close-up macro photo

Step-by-Step Motorcycle Spark Plug Replacement Guide

Taking the leap to replace your own motorcycle spark plugs can feel intimidating, but with preparation and the right tools, it’s a straightforward maintenance task. Follow these essential steps:

Tools and Safety Tips for Motorcycle Spark Plug Replacement

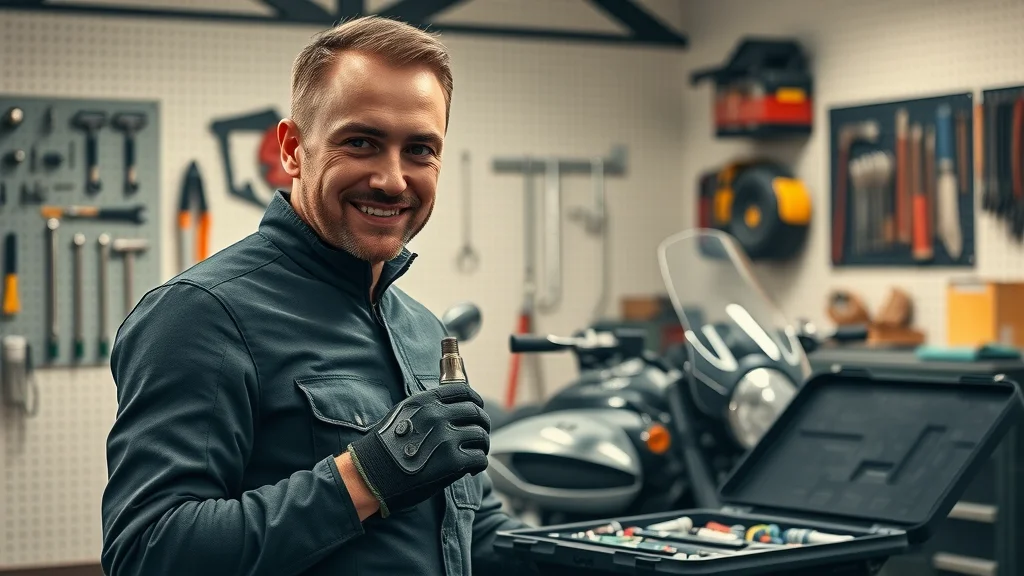
Before you begin, gather the right equipment: Spark plug socket (sometimes called a plug socket) and compatible ratchet Gap gauge or feeler gauge for checking the plug gap Torque wrench (for proper installation torque) Gloves and safety glasses to protect your hands and eyes Compressed air or canned air to clear debris around the plug well Your bike’s service manual for specifications and procedures Work on a cool engine to avoid burns. Use compressed air to blow dirt away from the spark plug area—prevents debris from falling into the cylinder head when removing the plugs. Never work without gloves or eye protection; debris can dislodge quickly, especially in older bikes or those with recessed plugs.

Always ensure a good connection with the plug boot and avoid overtightening the new spark plug—using a torque wrench is the best way to apply just the right pressure without damaging delicate threads or the cylinder head.
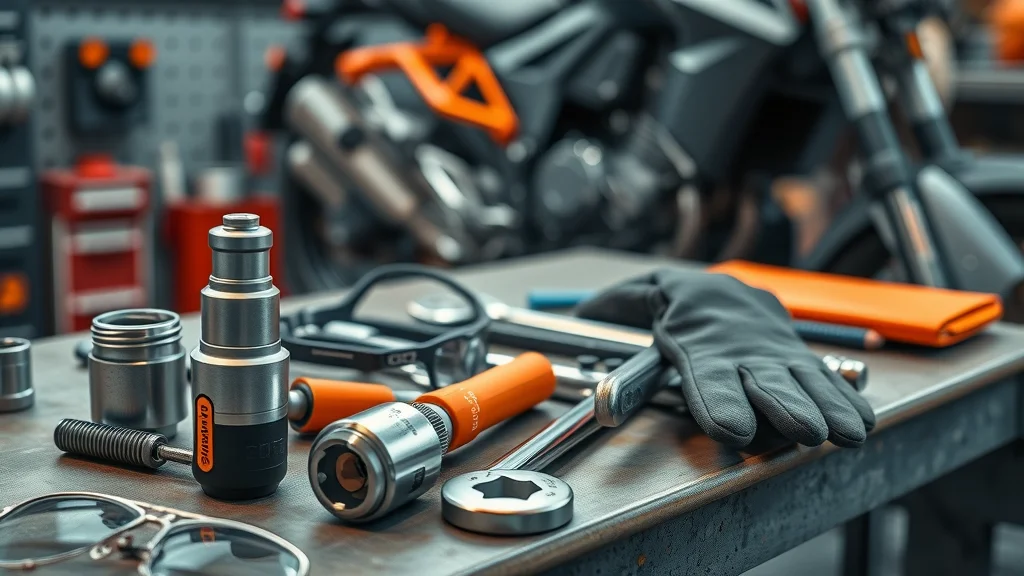
Organized mechanic’s toolkit with spark plug socket, ratchet, gloves, and safety glasses—motorcycle spark plug replacement, tools neatly arranged

Removing Old Motorcycle Spark Plugs

1. Disconnect the plug boot or coil stick gently (in modern EFI bikes). 2. Use a clean, dry cloth or canned air to clear dust and particles around the old plug. 3. Fit your spark plug socket over the plug and twist counterclockwise to unscrew. 4. Pull the plug out and observe its tip for deposits, oil, or abnormal wear.

Grip the plug firmly but avoid using excessive force that could damage threads or the cylinder head. If you encounter resistance, add a small bit of penetrating oil and wait a few minutes before trying again. Be mindful of access to the plug—on some models, parts like the tank or fairings may need to be loosened or removed.

Installing New Motorcycle Spark Plugs Correctly

1. Compare the new spark plug with the old to verify type, length, and thread pattern. 2. Use a gap gauge to check the gap. Gently bend the ground electrode if needed, following the specification in your bike’s service manual. 3. Thread the new spark plug by hand into the cylinder head—avoid cross-threading. 4. Once finger-tight, use the spark plug socket and torque wrench to snug the plug to the correct torque specification. 5. Reconnect the plug boot or coil stick, ensuring a solid connection.

Don’t forget to inspect and clean plug wires or replace them if they show signs of wear. Double-check that all tools are removed from the work area before starting the engine. Finally, test start the bike—listen for smooth idle, and verify there are no engine warning lights or unusual noises.

Expert Quotes on Motorcycle Spark Plug Replacement

"Regular motorcycle spark plug replacement is critical for smooth rides and engine longevity. Neglecting this simple component can lead to costly repairs down the line." — Motorcycle Engine Specialist

Motorcycle Spark Plug Replacement Maintenance Table

Signs of Faulty Spark Plug Inspection Frequency Recommended Action
Difficulty Starting Every 3,000 miles Replace if worn
Rough Idling Every 5,000 miles Clean or replace
Drop in Power Every 5,000 miles Inspect for carbon buildup

List of Top Tips to Extend Motorcycle Spark Plug Life

  • Use manufacturer-recommended motorcycle spark plugs
  • Stick to regular maintenance intervals listed in your service manual
  • Avoid short, infrequent trips—engines run best when fully warmed up
  • Always check for proper plug gap and careful installation
Watch: High-Resolution Motorcycle Spark Plug Replacement Walkthrough
Video demonstration features a professional mechanic inspecting, removing, and installing spark plugs in a clean workshop with close-up detail and slow-motion highlights. See first-hand exactly how the process should look for your own bike.

Motorcycle Spark Plug Replacement: FAQs

How often should spark plugs be changed on a motorcycle?

Most motorcycle manufacturers recommend changing spark plugs every 5,000 to 10,000 miles, but this interval can vary by model and riding style. Always refer to your owner’s manual for the exact schedule, and inspect motorcycle spark plugs regularly for early signs of wear.

Which bike is most liked by girls?

Bikes such as the Honda Activa, Royal Enfield Classic 350, and Yamaha Fascino are popular among women riders due to their approachable seat heights, ease of handling, and stylish design. Preferences can vary greatly—comfort and confidence often play the biggest roles.

What is the most sold motorcycle of all time?

The Honda Super Cub holds the record as the world’s most sold motorcycle, known for its reliability, outstanding fuel efficiency, and massive global presence.

Is it easy to change a motorcycle spark plug?

With the right tools, a little know-how, and proper safety precautions, changing a motorcycle spark plug is a manageable DIY task. Always follow your bike’s service manual, use a spark plug socket, and ensure the gap is set accurately for the best results.

People Also Ask

How often should spark plugs be changed on a motorcycle?

Answer to: How often should spark plugs be changed on a motorcycle?

For most street bikes, spark plugs should be inspected every 5,000 miles and replaced as needed—especially if you notice starting trouble, rough idling, or performance dips. For high-performance models or those under heavy use, check them more frequently.

Which bike is most liked by girls?

Answer to: Which bike is most liked by girls?

The most liked bike among girls often includes user-friendly, lightweight scooters like Honda Activa or Yamaha Fascino, followed closely by style-conscious models such as the Royal Enfield Classic series. Comfort and ease of handling tend to guide choices for many female riders.

What is the most sold motorcycle of all time?

Answer to: What is the most sold motorcycle of all time?

Globally, the Honda Super Cub is recognized as the top-selling motorcycle, beloved for its simplicity and dependability across generations of riders.

Is it easy to change a motorcycle spark plug?

Answer to: Is it easy to change a motorcycle spark plug?

Yes—if you have basic mechanical skills and access to simple tools like a spark plug socket, gap gauge, and your bike’s service manual, replacing your spark plug is a practical DIY project for most owners.

Key Takeaways for Motorcycle Spark Plug Replacement

  • Recognize early warning signs of spark plug trouble
  • Follow inspection and maintenance schedules consistently
  • Always use the right tools and methods for replacement
  • Don’t hesitate to seek expert help if unsure

Ready for Your Motorcycle Spark Plug Replacement?
Welcoming motorcycle repair shop exterior—bikes parked, mechanic waving, sunny day, photorealistic storefront

Call Nasty Performance Motorcycle Shop Today: 847-458-4858

If you’re committed to keeping your motorcycle running at its best, don’t stop with spark plug maintenance alone. Expanding your knowledge of seasonal care can help you anticipate issues before they arise and ensure your bike is always ready for the road, no matter the weather. Discover expert strategies for year-round reliability and performance by exploring essential seasonal bike care tips. With the right approach, you’ll not only extend the life of your spark plugs but also protect every aspect of your ride for the long haul.

Motorcycle Maintenance

0 Comments

Write A Comment

*
*
Please complete the captcha to submit your comment.
Related Posts All Posts

Signs Your Motorcycle Needs Suspension Tuning

Did you know that studies show improper suspension tuning can contribute to nearly 30% of motorcycle handling-related accidents? Most riders focus on power and tires, but fail to recognize early signs that their motorcycle suspension needs tuning—a silent factor that could transform your ride’s safety and comfort. This comprehensive guide brings you everything you need to spot, diagnose, and address suspension issues, ensuring your motorcycle suspension setup is truly set correctly for every journey. Why Motorcycle Suspension Tuning Matters Motorcycle suspension tuning isn't just a performance upgrade—it's a core safety requirement. The suspension setup on your bike controls how the motorcycle responds to the road, manages weight transfer during acceleration and braking, and supports both comfort and stability while you ride. Many riders overlook the complexity of adjusting suspension, assuming the factory settings will suit every scenario or riding style—this can’t be further from the truth. Factory suspension set configurations are intentionally generic, intended for an average weight and street bike usage profile. But your suspension setup needs to match your body weight, preferred riding style, and even changing cargo or passenger loads. When your motorcycle suspension is not tuned for your actual riding conditions, you risk not just discomfort but potential danger: poor traction, unpredictable handling, and increased risk of sudden instability in critical moments. Suspensions are not a “set and forget” element—attentive tuning means improved safety, better control, and a more enjoyable ride every time you hit the road. The Impact of Motorcycle Suspension on Safety and Comfort An optimally tuned suspension acts like a shock absorber for every aspect of your ride—it helps your front end and rear shock maintain tire contact, absorb road imperfections, and manage cornering forces. If your front fork is set incorrectly, you might experience a harsh ride or excessive front end dive, undermining confidence and precision. The rear shock, meanwhile, counteracts the bumps that could throw off your balance or cause your rear tire to lose grip. Together, front and rear suspension components are the difference between a ride that feels grounded and controlled or one that feels unstable and unpredictable. Poor motorcycle suspension tuning not only reduces comfort—leading to fatigue and less enjoyable journeys—but it can also directly compromise safety through loss of control, especially under heavy braking or aggressive maneuvering. When correctly set, suspension improves handling, maximizes your tire’s lifespan, and ensures rider confidence, making every ride not just smoother, but genuinely safer. What You'll Learn About Motorcycle Suspension Tuning Key signs your motorcycle needs suspension tuning The roles of front end, front fork, and rear shock How to perform or request a suspension setup Answers to common questions on motorcycle suspension tuning Startling Facts: Motorcycle Suspension Tuning and Its Overlooked Importance Motorcycle riders often invest in high-performance tires or exhaust systems but neglect the motorcycle suspension—a key link between the bike and the road. "Many riders underestimate how significantly proper suspension tuning affects both handling and safety. " In reality, a poorly tuned suspension setup can overshadow the benefits of even the best tires or brakes, and improper adjusting suspension can lead to unpredictable handling, especially on rough or unfamiliar roads. While understanding the signs of suspension issues is crucial, it's equally important to recognize how seasonal changes can impact your bike's overall performance. For practical advice on keeping your motorcycle in top shape throughout the year, explore these essential seasonal bike care secrets every rider should know. Recognizing the Signs: When Your Motorcycle Needs Suspension Tuning So, how can you tell when it’s time to check your motorcycle suspension setup? Listening to your bike is the first and most important step. Certain symptoms show up long before more serious mechanical problems emerge. Recognizing these early warnings will keep your suspension set within the ideal range and ensure every component—from the front fork to the rear shock—works in harmony for a confident ride. Riders who learn to spot trouble with the front end or preload adjuster become proactive in their maintenance, often catching small issues before they become expensive or dangerous. The key is to notice how the motorcycle reacts in different scenarios: braking, hitting bumps, or entering a curve. If your bike behaves unpredictably, don’t ignore it—it’s time for a closer look at your suspension setup. Symptoms of Poor Motorcycle Suspension Excessive nose dive during braking Harsh ride over bumps Bottoming out on rough roads Instability in corners These symptoms are telltale signs that your suspension set may not be reacting as it should. Excessive nose dive, for example, indicates weakness in the front fork or incorrect preload set, while a harsh ride signals that damping or compression and rebound settings are off. Bottoming out—when the suspension fully compresses and hits its limit—often points to a low spring rate or insufficient preload, affecting both front and rear. Instability in corners can suggest your front end or rear shock is not set correctly, putting both comfort and control at risk. Front End and Front Fork Issues The front end of your motorcycle—including the front fork and fork legs—bears a significant load, especially during braking and cornering. When the front fork isn’t set correctly, several problems become apparent. You may feel the front wheel chatter or skip over bumps, or the fork may bottom out (“fork bottom”) over sharp impacts, indicating weak springs or inadequate dampening. Issues within the front end can be subtle, such as vague steering or unexpected instability, particularly when the suspension fully extends after a heavy bump. This can result from incorrect static sag—the amount the suspension compresses under the bike’s weight—or worn fork oil, which reduces smoothness and control. Riders should check for oil leaks and ensure the front fork moves cleanly throughout its travel, as sticky or inconsistent motion can indicate critical maintenance is needed. Rear Shock Warning Signs The rear shock is responsible for maintaining contact and control at the rear tire, especially through turns and when carrying extra weight. When the rear shock is worn or out of adjustment, you’ll notice symptoms like excessive squat during acceleration, a bouncy ride over bumps, or the rear end feeling loose and unpredictable. Bottoming out at the rear is a red flag that the preload or spring rate is too low, or damping is not set correctly. On the other hand, if the ride feels harsh or the rear tire skips over bumps, this could result from excessive preload or inappropriate compression and rebound settings. Inspection of the shock for oil leaks and checking the preload adjuster offers clues about the health of your rear suspension setup. Unresponsive Preload Adjuster Problems Most modern motorcycles feature preload adjusters for quick setup. If these become unresponsive or difficult to turn, the problem could run deeper. A seized or stuck preload adjuster could indicate internal rust, worn threads, or insufficient lubrication—all of which threaten the precision of your suspension set and can quickly lead to uneven or unsafe handling. Regularly inspect the adjuster for smoothness and ensure settings can be made with basic tools. If the preload adjuster won’t move despite proper technique, don’t apply excessive force—this is a sign to consult a professional, as forcing the mechanism can damage critical internal components of the front fork or rear shock. How to Check Motorcycle Suspension Setup Routine inspection of your motorcycle suspension ensures you identify problems before they impact safety or ride quality. Performing these checks yourself helps develop a “feel” for your bike and encourages a proactive approach to maintenance. Suspension on your bike should be checked when you notice changes in handling, before and after changing loads (like adding a passenger), or at set service intervals. Remember, even small changes in tire pressure, cargo, or riding style can impact how the suspension behaves. Never neglect regular assessment—check front and rear sag, watch out for oil leaks, inspect the action of your forks and shock, and record your preferred suspension setup settings for quick reference in the future. Step-by-Step: Inspecting Your Front Fork Begin with the motorcycle upright and fully extended—this “unloaded” position is your starting point. Gently press down on the front end, feeling for smooth and consistent movement in the front fork. If you hear squeaks, feel sticky spots, or notice oil residue near the seals, immediate attention is required. Measure the static sag by comparing the length of the fork when fully extended to where it sits under the bike’s weight; this helps determine if your spring rate is within the ideal range. Don’t forget to test fork rebound by compressing and releasing—the fork should return smoothly without bouncing. Check the tightness of every bolt, especially around the axle and triple clamps. If the fork bottom tube shows scuffs or oil, this can indicate worn seals or improper setup. Working through these steps helps you catch early warning signs and maintain a balanced, responsive front end ride. Dialing in the Correct Rear Shock Settings The rear shock is adjusted for both preload and damping. Using a spanner wrench, turn the preload collar so the bike’s static sag sits in the recommended range for your weight and riding style (often around 30–35mm for street bikes). Adjusting suspension settings too far from this range may lead to a harsh ride or too much travel, causing the rear end to feel loose or unpredictable. Next, fine-tune the rebound and compression adjustments to ensure the shock absorbs bumps without causing a pogo effect. Adjust these settings incrementally—a quarter or half turn at a time—then test ride to feel the results. Make note of each change, so you have a precise log of what feels best for your suspension setup. Common Motorcycle Suspension Issues vs. Ideal Suspension Feel Common Motorcycle Suspension Issues vs. Ideal Suspension Feel Symptom Possible Cause Suggested Action Nose dive under braking Weak front fork springs Adjust preload / upgrade springs Harsh over bumps Incorrect damping Tune damping or service suspension Bottoms out Low preload/rear shock Adjust preload / check shock Common Misconceptions About Motorcycle Suspension Tuning Many riders believe that motorcycle suspension tuning is only for professional racers or highly technical enthusiasts. In fact, every motorcycle owner benefits from regular suspension checks and adjustments. "Suspension setup is not just for racers—every rider benefits from proper tuning. " Another myth is that factory settings don’t need adjusting. However, manufacturers set up suspensions for “average” riders, and rarely do these generic setups match your unique riding style, weight, and local road conditions. Neglecting suspension setup can degrade both safety and riding pleasure—regular adjusting suspension is essential maintenance, not just an optional upgrade. Professional vs. DIY: Adjusting Suspension and Suspension Setup There’s a balance between performing basic motorcycle suspension adjustments at home and knowing when to consult the pros. Setting static sag, adjusting basic preload, and minor damping tweaks are manageable for most riders, requiring only a few tools and attention to detail. However, advanced tasks like rebuilding shocks, replacing fork oil, or diagnosing persistent instability should always be left to experienced professionals to ensure safety and proper component performance. Deciding when to trust your own skills versus seeking expert help hinges on the complexity of the issue, available tools, and your mechanical confidence. When in doubt, consulting a suspension specialist prevents expensive mistakes and ensures your suspension fully serves its purpose—connecting you securely to the road. When to Seek Expert Suspension Tuning If you’ve adjusted preload or damping and still encounter instability, excessive wear, or leaks, it’s time to see a qualified technician. Expert tuners possess tools such as dynamometers, precise measuring equipment, and a wealth of experience diagnosing subtle ride issues. Tasks like custom spring selection, full suspension rebuilds, and detailed damping adjustments are best left to those with specialized knowledge, ensuring your bike’s front and rear suspensions are perfectly matched and set correctly. Basic DIY Motorcycle Suspension Adjustments Many adjustments—including setting static sag and minor tweaks to the preload adjuster—can be performed at home. Start by referencing your owner’s manual, ensuring your bike is upright and stabilized before making changes. Use proper tools to avoid damaging components. Gradually adjust preload, compression, and rebound—testing after each turn—until you reach a suspension setup that feels balanced both front and rear. Don't forget to logically document every modification—keep notes of original settings and changes made, so you can easily return to a known good starting point if the results aren’t as expected. If your bike behaves erratically after an adjustment, or the suspension remains unresponsive, revisiting a professional may be necessary. Frequently Asked Questions on Motorcycle Suspension Tuning How often should motorcycle suspension be tuned? Inspect your motorcycle suspension every 6,000–12,000 miles, or anytime you notice a change in handling, add a frequent passenger, or adjust riding style. Regular inspection helps catch problems early and keeps your suspension set within safe limits. What are the most common signs my motorcycle suspension needs adjustment? Look for excessive nose-dive under braking, harshness over bumps, rear end bottoming out, or loss of composure in corners. These symptoms suggest your front fork or rear shock needs attention. Does rider weight affect suspension setup? Absolutely. Your personal and cargo weight directly impacts static sag and spring performance, requiring adjustments to maintain stability and comfort. Heavier or lighter riders must always set sag accordingly for both front and rear. Can improper motorcycle suspension tuning cause damage? Yes—a poorly tuned suspension accelerates wear on tires and bushings, increases fatigue on components, and can compromise safety in emergency scenarios by failing to keep the front wheel and rear tire in consistent contact with the road. People Also Ask: Motorcycle Suspension Tuning What happens if motorcycle suspension is not tuned properly? A motorcycle with untuned suspension can feel unstable, handle poorly, and put both comfort and safety at risk. How do I know if I need to adjust my motorcycle suspension? Watch for symptoms such as instability in turns, excessive bounce, or discomfort over bumps—these are key indicators your motorcycle suspension tuning is required. Is it difficult to perform motorcycle suspension tuning on my own? Basic adjustments are manageable for most riders—with the right tools and guides, simple tuning can be done DIY, but complex tuning should be handled by professionals. Key Takeaways for Motorcycle Suspension Tuning Proper motorcycle suspension tuning enhances safety and ride quality Regular inspection identifies suspension setup issues early Both front fork and rear shock play crucial roles Professional guidance is recommended for complex tuning Take the Next Step: Ensure Your Motorcycle Suspension Is Tuned Right Mastering your motorcycle’s suspension is just one part of a comprehensive maintenance routine that keeps your ride safe and enjoyable all year long. If you’re ready to elevate your bike care beyond the basics, consider how seasonal factors—from temperature swings to road conditions—can influence your maintenance priorities. For a deeper dive into holistic motorcycle upkeep and to uncover expert strategies for every riding season, check out the full guide on seasonal bike care secrets every rider must know. Expanding your knowledge in this area will help you anticipate issues before they arise and ensure your motorcycle performs at its best, no matter the time of year. Call Nasty Performance Motorcycle Shop Today: 847-458-4858

Step-By-Step DIY Motorcycle Maintenance Tips

Did you know? Skipping just one routine motorcycle maintenance task can increase your risk of breakdown or accident by up to 50%. While performance is important, your safety and the longevity of your bike depend on mastering the basics of motorcycle maintenance tips. Unlocking Motorcycle Longevity: Why Motorcycle Maintenance Tips Matter "Motorcycle maintenance isn’t just about performance, it’s about safety and extending the life of your machine." Every rider wants their bike to be safe and enjoyable for as long as possible. With regular motorcycle maintenance tips, you don’t just preserve how your bike looks and runs—you protect yourself, others, and your wallet from costly repairs. Proper care means catching issues before they become serious, whether you ride every day or only for long rides. Staying proactive ensures that each maintenance task—from checking tire pressure to inspecting brake pads—keeps your motorcycle running smoothly, optimizes fuel efficiency, and maintains stopping power every time you hit the brakes. It all starts with understanding why regular maintenance matters and committing to a simple routine that fits into your lifestyle. Ignoring basic maintenance tasks can have a domino effect. For example, something as small as letting your tire pressure drop can affect handling, reduce tread depth, and impact your stopping power. Skipping oil changes can harm the engine, while neglecting the chain and sprocket can leave you stranded on a long ride. By prioritizing these essential maintenance tasks, you gain peace of mind and extend your bike's lifespan, so you’re ready for more adventures on the open road. Surprising Facts That Highlight the Importance of Motorcycle Maintenance Tips You might be surprised to learn that over 60% of breakdowns on the road are due to small, preventable issues. For instance, improperly maintained brake pads or chains account for a significant percentage of loss-of-control incidents. It’s also worth noting that a clogged air filter can drop engine power and speed by up to 10%, not only hurting your bike’s performance but also its resilience on long rides. These facts highlight how implementing a few sensible motorcycle maintenance tips can make the difference between a safe, exhilarating ride, and dealing with frustrating repairs or safety hazards. Many seasoned riders swear by maintenance checklists, claiming their bikes run better and last longer when they regularly check oil levels, tire pressure, and fluid levels. Even small maintenance tasks like cleaning battery terminals or inspecting lights can profoundly affect reliability. Staying on top of the basics puts you firmly in the driver’s seat—never leaving your biking fate to chance. For a more detailed breakdown of each maintenance step and additional hands-on advice, you might find this step-by-step bike servicing guide helpful. It covers practical servicing routines that complement the essential tips outlined here. What You’ll Learn: Mastering Motorcycle Maintenance Tips The most crucial motorcycle maintenance tasks every rider should know Step-by-step breakdowns for essential maintenance items: brake pads, tire pressure, chain and sprocket, air filter, and oil change Real-world insights that keep you—and your ride—safe Frequently asked questions about motorcycle maintenance tips Core Maintenance Tasks: The Foundation of Effective Motorcycle Maintenance Tips The heart of effective motorcycle care is a solid routine of regular maintenance tasks. By learning and sticking to these basics, you ensure your bike remains running smoothly, whether you use it for short trips or long rides. Prioritizing these checks boosts your confidence and reinforces safety for every journey. Essential motorcycle maintenance jobs include checking and adjusting tire pressure, inspecting and replacing brake pads, cleaning and lubricating the chain and sprocket, maintaining the air filter, and performing oil changes on schedule. Each one plays a vital role in transferring power from the engine to the wheels, maintaining stopping power, and maximizing overall efficiency. Consider this your maintenance blueprint: structure your checks according to frequency and use the right tools for best results. Consistency is key. Even a simple weekly look at tire pressure or a monthly brake pad inspection goes a long way toward keeping your bike in top shape. Use this table as your quick reference for routine motorcycle care. Routine Motorcycle Maintenance: Scheduling and Priority Maintenance Task Frequency Tools Needed Tire Pressure Weekly Tire Gauge Brake Pad Inspection Monthly Wrench, Allen Key Chain and Sprocket Weekly Lubricant, Brush Air Filter Check Monthly Screwdriver Oil Change As Specified Oil Pan, Wrench Inspecting and Adjusting Tire Pressure: Motorcycle Maintenance Tips for Safer Rides One of the easiest yet most overlooked motorcycle maintenance tips is managing tire pressure. Correct tire pressure ensures a safe, smooth ride, potent stopping power, and peak fuel efficiency. Whether it’s your first bike or you’re prepping for a long ride, checking tire pressure should be a non-negotiable part of your routine. An under-inflated tire risks overheating and blowouts, while over-inflation reduces grip, especially in wet conditions. Make it a habit to check your tire pressure weekly or before any big trip—using a reliable pressure gauge for accuracy. Never wait for visible signs of trouble. Addressing issues early prevents uneven wear and preserves tread depth, critical for safe handling. Invest a few moments in this step, and you’re rewarded with better control and less chance of being sidelined by unexpected flats or poor performance. Remember, when your tires are properly inflated, the rest of your motorcycle’s systems can function to their full potential. Step 1: How to Check and Adjust Tire Pressure Correctly Why accurate tire pressure matters: It affects stopping power, extends tire life, and boosts fuel efficiency. Signs of under-inflation or over-inflation: Uneven tread depth, wobbling, sluggish handling, or uneven tire wear. Steps for using a tire pressure gauge effectively: Always check when tires are cold. Remove the valve cap, position the gauge onto the stem, and get a quick read. Adjust pressure as needed to match your owner’s manual recommendations. Don’t forget to replace the cap! Brake Pad & Brake Pads: Motorcycle Maintenance Tips for Maximum Stopping Power When it comes to safe riding, few maintenance tasks are as vital as ensuring your brake pads are up to standard. The state of your brake pads directly impacts your bike’s stopping power, especially during emergencies or at high speeds. Regularly inspecting your motorcycle brake system prevents the kind of unexpected failures that can lead to dangerous situations. Even if your rides are mostly short and sweet or you love the thrill of long rides, always check your brake for wear, warping, or reduced performance. To keep your stopping power in peak condition, don’t ignore unusual sounds, increased stopping distances, or a spongy brake lever feel. These are strong indicators that your brake pads—or the entire brake system—need attention. Always use the recommended tools for DIY maintenance and don’t hesitate to replace worn, thin, or cracked pads. It’s a small step that offers massive peace of mind every time you need to stop suddenly or tackle sharp curves. Step 2: Inspecting Brake Pads and Maintaining Braking Efficiency Visual signs your brake pads need attention: Look for thinning material, deep grooves, uneven wear, or squealing sounds during braking. Tools required for basic brake pad maintenance: Most jobs need a wrench or Allen key, gloves, and a good lighting source. Tips for ensuring peak stopping power: Always clean the caliper area when inspecting or changing pads, and never touch pad surfaces with bare hands to prevent contamination. Cleaning and Lubricating Your Chain and Sprocket: Motorcycle Maintenance Tips to Boost Lifespan Your chain and sprocket are responsible for transferring power from the engine to the wheels—making their upkeep a must in your motorcycle maintenance tips routine. If your chain is too tight or loose, or if dirt and rust take hold, your bike won’t perform at its best, and you risk accelerated wear or even mechanical failure. Frequent chain cleaning and lubrication, paired with proper tensioning, keep everything running smoothly and help avoid those annoying squeaks, jumps, or dangerous chain breaks. A clean, properly lubricated chain provides smooth power delivery and keeps your rides safe and enjoyable. Look for buildup, rust, or sagging as clear signals it’s time for attention. Following a careful maintenance schedule boosts overall bike lifespan and makes every ride feel effortless—whether you’re dealing with city commutes or countryside adventures. Step 3: Care Essentials for Optimal Chain and Sprocket Health Indications your chain needs cleaning and lubrication: Presence of dirt, rust, kinks, noise or visible slack in the chain. How to properly tension and lubricate the chain: Use the bike’s center stand if possible, clean the chain using a suitable brush and degreaser, spin the rear tire, and check slack according to the manual. Lubricate evenly along the length—wipe off excess to prevent dust attraction. Importance of sprocket condition in overall motorcycle maintenance: Worn teeth or misalignment impact the whole drive system—if you notice hooked, chipped, or thinning sprocket teeth, it’s time to replace them. Air Filter Maintenance: Critical Motorcycle Maintenance Tips for Engine Performance The air filter is the gatekeeper of a healthy engine, keeping dust, debris, and impurities away from your motorcycle’s heart. A dirty air filter can suffocate performance—resulting in rough running, poor fuel efficiency, and even damage over time. That’s why every list of smart motorcycle maintenance tips always includes checking, cleaning, or replacing your air filter regularly, especially if you frequently ride on dusty roads. Keeping your air filter clean not only protects the engine but also optimizes airflow for maximum combustion power. If your bike feels sluggish, takes several tries to start, or emits more smoke than usual, an air filter check should be your priority. Doing this yourself is straightforward and saves you trips to the mechanic—just follow these simple care instructions for reliable performance in any season. Step 4: How to Inspect, Clean, and Replace Your Air Filter Warning signs your air filter is clogged: Reduced acceleration, black smoke, increased fuel use, or visible dirt on the filter element. DIY cleaning and replacement tips: Remove the filter cover with a screwdriver, gently tap out loose debris, or wash if reusable. If it’s paper and clogged, install a new one—always use the type recommended for your motorcycle. How a well-maintained air filter protects your engine: It ensures proper air-fuel mix for combustion, prevents abrasive debris from entering cylinders, and increases overall engine lifespan. Motorcycle Oil Change: Step-By-Step Motorcycle Maintenance Tips Changing your bike’s oil is an indispensable motorcycle maintenance task that keeps your engine lubricated and running quietly. Regular oil changes ensure moving parts don’t wear prematurely, reduce engine heat, and help catch early signs of trouble like metal shavings or discoloration. Whether you use mineral or synthetic oils, following your manufacturer’s schedule for oil changes is critical to get the most out of every engine revolution. Learning how to change your own oil saves money and gives you control over the quality and cleanliness of what’s inside your engine. With the right tools and a little patience, you can make oil changes a quick, mess-free routine that pays major dividends—especially if you love taking long rides. Always check the oil level after filling, and dispose of old oil responsibly to protect the environment as well as your driveway. Step 5: Performing an Efficient Oil Change at Home How to recognize when it’s time for an oil change: Look for darker color, decreased oil level, unusual engine noise, or exceeding the recommended mileage interval. Choosing the right oil for your motorcycle: Refer to the owner’s manual—different engines require different weights and oil types (mineral vs. synthetic). Environmental tips for oil disposal: Never pour old oil down drains; store it in a sealed container and deliver to an approved recycling center. Beyond the Basics: Preventive Motorcycle Maintenance Tips Inspecting brake and clutch levers for smooth action and minimal play Checking all warning lights for proper function before each ride Monitoring coolant and fluid levels (including brake fluid and coolant level) to prevent overheating or system damage Inspecting suspension and bearings for signs of wear or excessive movement Expert Quotes: Insights on Motorcycle Maintenance Tips "Neglecting simple maintenance tasks can lead to costly repairs and compromised safety. Always check your motorcycle maintenance tasks schedule." — Leading Motorcycle Mechanic Essential Motorcycle Maintenance Tips Checklist Inspect tire pressure before each ride Regularly inspect and replace brake pads as needed Clean and lubricate chain and sprocket once a week Check and replace air filter regularly Change oil as per manufacturer guidelines Visually inspect all cables, lights, and levers Monitor fluid levels for brakes and coolant People Also Ask: Motorcycle Maintenance Tips What is the 4 second rule on a motorcycle? Understanding and Applying the 4 Second Rule for Motorcycle Safety The 4-second rule is a widely recommended following distance for motorcyclists. When riding behind another vehicle, choose a fixed point on the road—once the car ahead passes it, count four full seconds. If you reach the point before finishing the count, you’re too close and should increase your distance. This rule allows enough time to react to sudden stops, potholes, or unexpected obstacles, providing a safe buffer for both long rides and city traffic. Consistently applying this rule can significantly reduce your risk of rear-end collisions and is considered essential for safe, enjoyable riding. What is the most important maintenance on a motorcycle? Breaking Down the Most Important Motorcycle Maintenance Tip Every Rider Should Know While every maintenance task matters, regularly checking and adjusting tire pressure stands out as perhaps the most crucial. Proper tire pressure impacts handling, braking, fuel efficiency, and overall safety. Without correctly inflated tires, even the best-maintained engine or brakes can’t deliver optimal performance. By making tire pressure checks a non-negotiable routine—especially before long rides—you keep your bike in top shape and support every other component, from suspension to brakes and beyond. What does 2 fingers up mean on a motorcycle? Decoding the Motorcycle Hand Gestures: Two Fingers Up Explained When a motorcyclist flashes two fingers up—usually angled downwards—it’s a gesture of camaraderie and respect among riders. This hand signal is a way to say, “stay safe and enjoy the ride,” similar to waving but tailored to motorcycle culture. The gesture reinforces a sense of community on the road, reminding everyone to ride responsibly and take care of their machines with the same attention to detail recommended in all these motorcycle maintenance tips. Which bike is most liked by girls? Popular Motorcycle Models Among Female Riders Female riders often prefer motorcycles that combine manageable size, comfort, and approachable power delivery. Some popular models include the Honda Rebel, Kawasaki Ninja 400, Yamaha MT-03, and Royal Enfield Meteor. These bikes are well-regarded for their friendly ergonomics, lightweight frames, and ease of handling, making them great for newcomers or those who want confidence in city riding or on long rides. Ultimately, personal taste, comfort, and fit trump model—always choose a bike that empowers you and fits your riding style. Frequently Asked Questions About Motorcycle Maintenance Tips How often should I check my tire pressure? At least once a week, or before every long ride, using a reliable tire pressure gauge. What are the signs of worn-out brake pads? Squealing noise, thinning pad material, increased stopping distance, or visible grooves and scoring on the pad surface. How do I know if my chain is too loose or tight? Consult your owner’s manual for the recommended slack; a chain that sags too much, makes noise, or jumps off the sprocket needs attention. When should I replace my air filter? Every 10,000–15,000 miles for most bikes, or sooner in dusty conditions. Replace immediately if it appears dirty, torn, or obstructed. What’s the difference between mineral and synthetic oils for motorcycles? Mineral oils are suitable for older engines or less demanding use, while synthetic oils offer better protection, longer change intervals, and enhanced performance in modern or high-output engines. Key Takeaways: Motorcycle Maintenance Tips for Every Rider Regular motorcycle maintenance ensures safety and peak performance Key steps include tire pressure checks, brake pad care, chain and sprocket lubrication, air filter maintenance, and timely oil changes Staying proactive with motorcycle maintenance tips keeps you on the road longer If you’re passionate about keeping your motorcycle in peak condition, there’s always more to discover beyond the basics. For those interested in the unique challenges and rewards of maintaining older bikes, our classic vintage motorcycle maintenance tips offer expert strategies tailored to timeless machines. Exploring these advanced insights can help you master both modern and vintage rides, ensuring every journey is smooth, safe, and full of confidence. Take your maintenance skills to the next level and enjoy the satisfaction that comes from truly understanding your motorcycle inside and out. Ready to Elevate Your Ride? "Call Nasty Performance Motorcycle Shop Today: 847-458-4858 for expert guidance and top-tier motorcycle maintenance!"

How To Perform a Motorcycle Tune Up

Ever wondered if a simple routine could be the difference between your bike running smooth and stalling at the worst moment? A regular motorcycle tune up not only boosts your bike’s performance but also protects your investment, enhances fuel economy, and ensures safe riding every time you hit the road. This complete guide unlocks all the secrets you need to know—from essential tools and step-by-step processes to expert maintenance tips. Whether you’re a longtime rider or a new motorcycle owner, read on to master every aspect of keeping your bike running smoothly and reliably. Unlock the Secrets of a Motorcycle Tune Up: Why Routine Motorcycle Maintenance Matters Every motorcycle enthusiast wants their machine to deliver smooth power, crisp throttle response, and long-term reliability. But did you know the foundation of optimal performance and bike longevity lies in regular motorcycle maintenance? A thorough motorcycle tune up involves more than a quick oil change—it requires visual inspection, cleaning, and replacing key components such as the spark plug, air filter, and regular checks on engine oil and the chain. Routine tune ups not only maximize your motorcycle’s lifespan but also significantly reduce the chances of unexpected breakdowns, improve fuel efficiency, and keep your ride enjoyable. Skipping essential maintenance tasks might save some time now, but could cost you big in repairs and inconvenience later. By embracing a proactive approach, you support both your bike’s smooth power delivery and your own peace of mind, making every journey safer and more enjoyable. Motorcycle Tune Up: What You'll Learn in This Guide Step-by-step motorcycle tune up procedures Key components of motorcycle maintenance Expert tips for spark plug, air filter, and engine oil check How to maximize lifespan and performance Common mistakes and safety considerations Motorcycle Maintenance Tune Up Schedule Component Inspection Steps Replacement Interval Spark Plug Remove, inspect, clean or replace Every 6000-8000 miles Air Filter Remove, inspect, clean or replace Every 10,000 miles or as needed Engine Oil Drain, replace with manufacturer-recommended grade Every 3000-5000 miles Chain Inspect tension, clean, lubricate Every 500 miles or as necessary Battery Check voltage, clean terminals Twice per year What Does a Motorcycle Tune Up Include? (People Also Ask) Comprehensive Motorcycle Tune Up Checklist Inspecting and replacing spark plug Cleaning or replacing air filter Changing engine oil Lubricating and adjusting chain Checking brakes and tires Battery maintenance Inspecting cables and controls What does a motorcycle tune-up include? Answer: "A motorcycle tune up involves a systematic inspection and maintenance of various components, such as spark plugs, air filters, and engine oil, to ensure optimal performance and safety." When you perform a motorcycle tune up, you’re providing more than just basic care; you are following a detailed process that addresses the essential elements of a motorcycle maintenance routine. These steps go beyond just an oil level or a chain check. You’ll assess everything from the spark plug and air filters to brake pads and battery health, ensuring everything is in good condition for safe riding. Regular tuning directly leads to the bike running smoothly, improved fuel efficiency, and helps extend its longevity. Don’t neglect essential areas like the fuel lines and the fuel filter, as these contribute equally to the smooth power delivery and reliability you expect from your ride. Essential Tools and Safety Equipment for Effective Motorcycle Maintenance Getting your motorcycle tune up right always starts with the right equipment. Using proper tools not only makes the maintenance process easier but also protects vital bike parts from accidental damage. Whether you're conducting a spark plug check or swapping the air filter, a set of quality wrenches, screwdrivers, and safety gear ensures every task is done precisely. Professional mechanics and experienced riders always recommend completing every visual inspection with appropriate safety gloves and eye protection to prevent injuries or accidents. Preparing for regular motorcycle maintenance means more than gathering a handful of tools. Each tool ensures that essential components like brake pads, engine oil, and chain receive the care they need without causing unnecessary wear or safety risks. Keep your bench organized and all maintenance tasks straightforward, so your motorcycle is always ready for the road and delivering optimal performance. Motorcycle Tune Up Tools Checklist Wrenches and socket sets Screwdrivers Spark plug wrench Oil drain pan Funnel Safety gloves and eye protection Step 1: Inspect and Replace Spark Plug During Your Motorcycle Tune Up The spark plug is the heart of your motorcycle’s ignition system. Over time, spark plugs accumulate deposits, suffer from electrode wear, and lose their ability to deliver crisp sparks, undermining your bike’s smooth power and efficiency. Inspecting, cleaning, or replacing the spark plug during every motorcycle tune up keeps your engine firing on all cylinders, allowing for optimal combustion and reduced risk of misfires. Always follow your manufacturer’s recommended intervals for this task—usually every 6,000–8,000 miles—but check more often if your ride feels sluggish or the engine is hard to start. To inspect a spark plug: remove it using a spark plug wrench, examine for discoloration or heavy deposits, and check the electrode gap. If the electrode is worn or the ceramic insulator is cracked, a replacement is necessary. After fitting new or cleaned spark plugs, you’ll often notice faster starts and improved throttle response. Don't neglect this step—as essential as keeping oil level within spec or replacing the air filter, spark plug care is the key to your bike running smoothly mile after mile. Why Replacing or Cleaning Spark Plugs Is Crucial Improved ignition Better fuel efficiency Smoother ride "Neglecting spark plug maintenance can harm engine performance and fuel economy." Many riders underestimate the impact of a spark plug that’s past its prime. Persistent problems like slow starts, engine knock, or loss of power can often be traced back to worn or dirty spark plugs. Regularly cleaning or replacing these small yet essential components ensures reliable ignition and stable power delivery. In addition to fuel efficiency gains, addressing spark plug issues early can prevent bigger headaches like engine misfires or poor idle quality. While mastering the basics of a motorcycle tune up is crucial, it's equally important to adapt your maintenance routine to the changing seasons. For practical tips on how to keep your bike in peak condition year-round, check out these seasonal bike care secrets every rider must know. Step 2: Air Filter Inspection - Clean or Replace for Optimal Motorcycle Performance The air filter is your engine’s first line of defense against dust, dirt, and airborne contaminants. Over time, clogged air filters can choke off the flow of clean air, leading to reduced power, sluggish throttle response, and poor fuel economy. During any motorcycle tune up, always include an air filter inspection and replacement if needed. This simple step protects your engine, maximizes performance, and keeps your motorcycle running smoothly in all conditions. An air filter that goes unchecked may lead to dirt building up inside the engine, causing premature engine wear and higher maintenance costs in the long run. Learning to properly access, clean, or replace your motorcycle’s air filter is an easy win for optimal performance, giving you cleaner power and extending engine life. Make it a standard part of your motorcycle maintenance routine, especially if you ride in dusty or harsh conditions. Best Practices for Air Filter and Air Filters Service How to access and inspect the air filter Signs it's time to clean or replace an air filter OEM vs. aftermarket air filters comparison Accessing the air filter typically involves removing the seat or side panel. Once exposed, perform a visual inspection—check for excessive dust, deformities, or signs of oil/fuel contamination. If the air filter is clogged or misshapen, cleaning won’t be enough; you’ll need to replace it. Compare OEM with aftermarket options: OEM filters guarantee perfect fit for your bike model, while high-quality aftermarket air filters might offer improved airflow for performance upgrades. Always reinstall the filter carefully, ensuring airtight sealing to avoid engine damage. Adhering to the proper replacement interval (around every 10,000 miles or per the owner’s manual) prevents bigger issues like reduced power delivery and increased fuel consumption. Step 3: Motorcycle Tune Up Engine Oil Change Procedure Engine oil is the lifeblood of your motorcycle. It lubricates moving parts, dissipates heat, and carries away impurities. As miles accumulate, engine oil loses its viscosity and cleaning power, leading to possible engine damage if neglected. During any motorcycle tune up, draining and replacing engine oil—and checking the oil filter—ensures your bike’s engine operates at peak efficiency and is protected against wear and overheating. Routine oil change intervals, typically every 3,000–5,000 miles, are essential for long-term reliability and good condition of your motor. For the oil change, always warm up the engine slightly—the oil will flow better and carry away more debris. Use an oil drain pan to collect used oil, which must be disposed of properly to protect the environment. Choose the recommended grade of engine oil for your motorcycle model, as indicated in the owner’s manual. After topping up and ensuring the right oil level, double-check for any leaks before starting your next ride, so your motorcycle is both safe and ready to perform. Selecting and Replacing Motorcycle Engine Oil Draining old engine oil safely Choosing the correct engine oil grade Proper disposal of used oil Never underestimate the importance of using manufacturer-approved oil grades—synthetic, semi-synthetic, or mineral. Each works differently to shield engine parts and maintain optimal performance. Regular oil changes flush out damaging deposits and preserve the engine in good condition, while skipping this task can cause accelerated wear, reduced fuel economy, and even catastrophic failure. Remember to reset your oil change reminder or maintenance log so you’re always on schedule with your tune up routine. Step 4: Additional Motorcycle Maintenance Checks Besides the critical spark plug, air filter, and engine oil, several other motorcycle maintenance checks are essential for a thorough motorcycle tune up. Chain tension should be just right to avoid slipping or unnecessary wear, and regular lubrication keeps it running smoothly and quietly. Brakes, including brake pads and brake fluid, directly affect your safety—inspect them frequently for wear and top off or replace as needed. Don’t forget tire pressure, as underinflated tires not only reduce handling and increase fuel consumption but also pose a serious safety risk. Your routine tune up should also include a close inspection of all cables (clutch, throttle, brakes), checking for fractures, wear, or binding that could compromise smooth power delivery. Regularly care for your battery—clean terminals, check charge, and replace if needed—to prevent dreaded no-start situations. Keeping an eye on the electrical system and conducting regular visual inspections helps ensure your motorcycle is always in good condition and ready for every adventure. Routine Inspection for Motorcycle Tune Up Longevity Lubricating chains Checking tire pressure Inspecting brakes Battery care and electrical system checks Implementing these maintenance tasks in your tune up not only helps your motorcycle run optimally but can also save significant repair costs over time. By proactively assessing each component, you control your bike’s safety, performance, and cost of ownership—season after season, mile after mile. Frequently Asked Motorcycle Tune Up Questions (FAQs) How much does a tune-up on a motorcycle cost? Answer: "The cost of a motorcycle tune up can vary significantly depending on the model and the extent of maintenance required. Consulting a trusted motorcycle shop is recommended." Who is No. 1 bike? Answer: "The answer to 'Who is No. 1 bike?' often depends on personal preference, riding style, and brand reputation. Discuss with industry experts for tailored recommendations." How often should you do a tune-up on your motorcycle? Answer: "Most manufacturers recommend a motorcycle tune up every 6,000 to 10,000 miles, but always check your owner’s manual for specific intervals." Key Takeaways from Your Comprehensive Motorcycle Tune Up Guide Motorcycle tune up is essential for performance and safety Routine maintenance of spark plugs, air filter, and engine oil is critical Using the proper tools and following recommended schedules saves money and extends your motorcycle's lifespan Ready for Your Next Motorcycle Tune Up? Call Nasty Performance Motorcycle Shop Today: 847-458-4858 Get expert help with your motorcycle tune up—schedule your service for reliable, friendly support and keep your machine running smooth every season. If you’re ready to take your motorcycle care to the next level, don’t stop at the basics—explore how seasonal changes can impact your maintenance strategy. Understanding the nuances of bike care throughout the year can help you prevent issues before they arise and keep your ride performing at its best, no matter the weather. Discover expert advice and actionable tips in our guide to seasonal bike care secrets every rider must know. This resource is perfect for riders who want to stay ahead of the curve and ensure their motorcycle is always ready for the next adventure. Dive deeper and unlock the full potential of your bike with advanced, season-specific maintenance insights. Watch a hands-on, step-by-step demonstration by a pro mechanic, covering spark plug checks, air filter replacement, oil change, and chain maintenance—see every essential detail up close for a complete motorcycle maintenance guide.

© 2025 Nasty Performance All Rights Reserved. 2035 S. Eastwood Dr., Woodstock, IL 60098 . Contact Us . Terms of Service . Privacy Policy

eyJjb21wYW55IjoiTmFzdHkgUGVyZm9ybWFuY2UiLCJhZGRyZXNzIjoiMjAzNSBTLiBFYXN0d29vZCBEci4iLCJjaXR5IjoiV29vZHN0b2NrIiwic3RhdGUiOiJJTCIsInppcCI6IjYwMDk4IiwiZW1haWwiOiJuYXRlQG5hc3R5cGVyZm9ybWFuY2UuY29tIiwidG9zIjoiUEhBK1BITjBjbTl1Wno0OFpXMCtWMmhsYmlCNWIzVWdjMmxuYmkxcGJpQjNhWFJvSUhWekxDQjViM1VnWVhKbElHZHBkbWx1WnladVluTndPeUI1YjNWeUlIQmxjbTFwYzNOcGIyNGdZVzVrSUdOdmJuTmxiblFnZEc4Z2MyVnVaQ0I1YjNVZ1pXMWhhV3dnWVc1a0wyOXlJRk5OVXlCMFpYaDBJRzFsYzNOaFoyVnpMaUJDZVNCamFHVmphMmx1WnlCMGFHVWdWR1Z5YlhNZ1lXNWtJRU52Ym1ScGRHbHZibk1nWW05NElHRnVaQ0JpZVNCemFXZHVhVzVuSUdsdUlIbHZkU0JoZFhSdmJXRjBhV05oYkd4NUlHTnZibVpwY20wZ2RHaGhkQ0I1YjNVZ1lXTmpaWEIwSUdGc2JDQjBaWEp0Y3lCcGJpQjBhR2x6SUdGbmNtVmxiV1Z1ZEM0OEwyVnRQand2YzNSeWIyNW5Qand2Y0Q0S0NqeHdQanhoSUdoeVpXWTlJbWgwZEhBNkx5OTNkM2N1WjI5dloyeGxMbU52YlNJK2FIUjBjRG92TDNkM2R5NW5iMjluYkdVdVkyOXRQQzloUGp3dmNENEtDanh3UGladVluTndPend2Y0Q0S0NqeHdQanh6ZEhKdmJtYytVMFZTVmtsRFJUd3ZjM1J5YjI1blBqd3ZjRDRLQ2p4d1BsZGxJSEJ5YjNacFpHVWdZU0J6WlhKMmFXTmxJSFJvWVhRZ1kzVnljbVZ1ZEd4NUlHRnNiRzkzY3lCNWIzVWdkRzhnY21WalpXbDJaU0J5WlhGMVpYTjBjeUJtYjNJZ1ptVmxaR0poWTJzc0lHTnZiWEJoYm5rZ2FXNW1iM0p0WVhScGIyNHNJSEJ5YjIxdmRHbHZibUZzSUdsdVptOXliV0YwYVc5dUxDQmpiMjF3WVc1NUlHRnNaWEowY3l3Z1kyOTFjRzl1Y3l3Z1pHbHpZMjkxYm5SeklHRnVaQ0J2ZEdobGNpQnViM1JwWm1sallYUnBiMjV6SUhSdklIbHZkWElnWlcxaGFXd2dZV1JrY21WemN5QmhibVF2YjNJZ1kyVnNiSFZzWVhJZ2NHaHZibVVnYjNJZ1pHVjJhV05sTGlCWmIzVWdkVzVrWlhKemRHRnVaQ0JoYm1RZ1lXZHlaV1VnZEdoaGRDQjBhR1VnVTJWeWRtbGpaU0JwY3lCd2NtOTJhV1JsWkNBbWNYVnZkRHRCVXkxSlV5WnhkVzkwT3lCaGJtUWdkR2hoZENCM1pTQmhjM04xYldVZ2JtOGdjbVZ6Y0c5dWMybGlhV3hwZEhrZ1ptOXlJSFJvWlNCMGFXMWxiR2x1WlhOekxDQmtaV3hsZEdsdmJpd2diV2x6TFdSbGJHbDJaWEo1SUc5eUlHWmhhV3gxY21VZ2RHOGdjM1J2Y21VZ1lXNTVJSFZ6WlhJZ1kyOXRiWFZ1YVdOaGRHbHZibk1nYjNJZ2NHVnljMjl1WVd4cGVtRjBhVzl1SUhObGRIUnBibWR6TGp3dmNENEtDanh3UGxsdmRTQmhjbVVnY21WemNHOXVjMmxpYkdVZ1ptOXlJRzlpZEdGcGJtbHVaeUJoWTJObGMzTWdkRzhnZEdobElGTmxjblpwWTJVZ1lXNWtJSFJvWVhRZ1lXTmpaWE56SUcxaGVTQnBiblp2YkhabElIUm9hWEprSUhCaGNuUjVJR1psWlhNZ0tITjFZMmdnWVhNZ1UwMVRJSFJsZUhRZ2JXVnpjMkZuWlhNc0lFbHVkR1Z5Ym1WMElITmxjblpwWTJVZ2NISnZkbWxrWlhJZ2IzSWdZMlZzYkhWc1lYSWdZV2x5ZEdsdFpTQmphR0Z5WjJWektTNGdXVzkxSUdGeVpTQnlaWE53YjI1emFXSnNaU0JtYjNJZ2RHaHZjMlVnWm1WbGN5d2dhVzVqYkhWa2FXNW5JSFJvYjNObElHWmxaWE1nWVhOemIyTnBZWFJsWkNCM2FYUm9JSFJvWlNCa2FYTndiR0Y1SUc5eUlHUmxiR2wyWlhKNUlHOW1JR1ZoWTJnZ1UwMVRJSFJsZUhRZ2JXVnpjMkZuWlNCelpXNTBJSFJ2SUhsdmRTQmllU0IxY3k0Z1NXNGdZV1JrYVhScGIyNHNJSGx2ZFNCdGRYTjBJSEJ5YjNacFpHVWdZVzVrSUdGeVpTQnlaWE53YjI1emFXSnNaU0JtYjNJZ1lXeHNJR1Z4ZFdsd2JXVnVkQ0J1WldObGMzTmhjbmtnZEc4Z1lXTmpaWE56SUhSb1pTQlRaWEoyYVdObElHRnVaQ0J5WldObGFYWmxJSFJvWlNCVFRWTWdkR1Y0ZENCdFpYTnpZV2RsY3k0Z1YyVWdaRzhnYm05MElHTm9ZWEpuWlNCaGJua2dabVZsY3lCbWIzSWdaR1ZzYVhabGNua2diMllnWlcxaGFXd2diM0lnVTAxVExpQlVhR2x6SUdseklHRWdabkpsWlNCelpYSjJhV05sSUhCeWIzWnBaR1ZrSUdKNUlIVnpMaUJJYjNkbGRtVnlMQ0J3YkdWaGMyVWdZMmhsWTJzZ2QybDBhQ0I1YjNWeUlHbHVkR1Z5Ym1WMElITmxjblpwWTJVZ2NISnZkbWxrWlhJZ1lXNWtJR05sYkd4MWJHRnlJR05oY25KcFpYSWdabTl5SUdGdWVTQmphR0Z5WjJWeklIUm9ZWFFnYldGNUlHbHVZM1Z5SUdGeklHRWdjbVZ6ZFd4MElHWnliMjBnY21WalpXbDJhVzVuSUdWdFlXbHNJR0Z1WkNCVFRWTWdkR1Y0ZENCdFpYTnpZV2RsY3lCMGFHRjBJSGRsSUdSbGJHbDJaWElnZFhCdmJpQjViM1Z5SUc5d2RDMXBiaUJoYm1RZ2NtVm5hWE4wY21GMGFXOXVJSGRwZEdnZ2IzVnlJR1Z0WVdsc0lHRnVaQ0JUVFZNZ2MyVnlkbWxqWlhNdUlGbHZkU0JqWVc0Z1kyRnVZMlZzSUdGMElHRnVlU0IwYVcxbExpQktkWE4wSUhSbGVIUWdKbkYxYjNRN1UxUlBVQ1p4ZFc5ME95QjBieVp1WW5Od096eG9hV2RvYkdsbmFIUWdZMnhoYzNNOUltTnZiWEJoYm5sVFRWTlFhRzl1WlZWd1pHRjBaU0krYm5Wc2JEd3ZhR2xuYUd4cFoyaDBQaTRnUVdaMFpYSWdlVzkxSUhObGJtUWdkR2hsSUZOTlV5QnRaWE56WVdkbElDWnhkVzkwTzFOVVQxQW1jWFZ2ZERzZ2RHOGdkWE1zSUhkbElIZHBiR3dnYzJWdVpDQjViM1VnWVc0Z1UwMVRJRzFsYzNOaFoyVWdkRzhnWTI5dVptbHliU0IwYUdGMElIbHZkU0JvWVhabElHSmxaVzRnZFc1emRXSnpZM0pwWW1Wa0xpQkJablJsY2lCMGFHbHpMQ0I1YjNVZ2QybHNiQ0J1YnlCc2IyNW5aWElnY21WalpXbDJaU0JUVFZNZ2JXVnpjMkZuWlhNZ1puSnZiU0IxY3k0OEwzQStDZ284Y0Q0OGMzUnliMjVuUGxsUFZWSWdVa1ZIU1ZOVVVrRlVTVTlPSUU5Q1RFbEhRVlJKVDA1VFBDOXpkSEp2Ym1jK1BDOXdQZ29LUEhBK1NXNGdZMjl1YzJsa1pYSmhkR2x2YmlCdlppQjViM1Z5SUhWelpTQnZaaUIwYUdVZ1UyVnlkbWxqWlN3Z2VXOTFJR0ZuY21WbElIUnZPand2Y0Q0S0NqeHZiRDRLQ1R4c2FUNXdjbTkyYVdSbElIUnlkV1VzSUdGalkzVnlZWFJsTENCamRYSnlaVzUwSUdGdVpDQmpiMjF3YkdWMFpTQnBibVp2Y20xaGRHbHZiaUJoWW05MWRDQjViM1Z5YzJWc1ppQmhjeUJ3Y205dGNIUmxaQ0JpZVNCMGFHVWdVMlZ5ZG1salpTWWpNems3Y3lCeVpXZHBjM1J5WVhScGIyNGdabTl5YlNBb2MzVmphQ0JwYm1admNtMWhkR2x2YmlCaVpXbHVaeUIwYUdVZ0puRjFiM1E3VW1WbmFYTjBjbUYwYVc5dUlFUmhkR0VtY1hWdmREc3BJR0Z1WkR3dmJHaytDZ2s4YkdrK2JXRnBiblJoYVc0Z1lXNWtJSEJ5YjIxd2RHeDVJSFZ3WkdGMFpTQjBhR1VnVW1WbmFYTjBjbUYwYVc5dUlFUmhkR0VnZEc4Z2EyVmxjQ0JwZENCMGNuVmxMQ0JoWTJOMWNtRjBaU3dnWTNWeWNtVnVkQ0JoYm1RZ1kyOXRjR3hsZEdVdUlFbG1JSGx2ZFNCd2NtOTJhV1JsSUdGdWVTQnBibVp2Y20xaGRHbHZiaUIwYUdGMElHbHpJSFZ1ZEhKMVpTd2dhVzVoWTJOMWNtRjBaU3dnYm05MElHTjFjbkpsYm5RZ2IzSWdhVzVqYjIxd2JHVjBaU3dnYjNJZ2QyVWdhR0YyWlNCeVpXRnpiMjVoWW14bElHZHliM1Z1WkhNZ2RHOGdjM1Z6Y0dWamRDQjBhR0YwSUhOMVkyZ2dhVzVtYjNKdFlYUnBiMjRnYVhNZ2RXNTBjblZsTENCcGJtRmpZM1Z5WVhSbExDQnViM1FnWTNWeWNtVnVkQ0J2Y2lCcGJtTnZiWEJzWlhSbExDQjNaU0JvWVhabElIUm9aU0J5YVdkb2RDQjBieUJ6ZFhOd1pXNWtJRzl5SUR4emRISnZibWMrUEhOd1lXNGdjM1I1YkdVOUltTnZiRzl5T2lOR1JqQXdNREE3SWo1MFpYSnRhVzVoZEdVZ2VXOTFjaUJoWTJOdmRXNTBMM0J5YjJacGJHVWdZVzVrSUhKbFpuVnpaU0JoYm5rZ1lXNWtJR0ZzYkNCamRYSnlaVzUwSUc5eUlHWjFkSFZ5WlNCMWMyVWdiMllnZEdobElGTmxjblpwWTJVZ0tHOXlJR0Z1ZVNCd2IzSjBhVzl1SUhSb1pYSmxiMllwTGp3dmMzQmhiajQ4TDNOMGNtOXVaejQ4TDJ4cFBnbzhMMjlzUGdvS1BIQStKbTVpYzNBN1BDOXdQZ284YUdsbmFHeHBaMmgwSUdOc1lYTnpQU0pqYjIxd1lXNTVUbUZ0WlZWd1pHRjBaU0krVG1GemRIa2dVR1Z5Wm05eWJXRnVZMlU4TDJocFoyaHNhV2RvZEQ0OFluSWdMejRLUEdocFoyaHNhV2RvZENCamJHRnpjejBpWTI5dGNHRnVlVUZrWkhKbGMzTlZjR1JoZEdVaVBqSXdNelVnVXk0Z1JXRnpkSGR2YjJRZ1JISXVMQ0JYYjI5a2MzUnZZMnNzSUVsTUlEWXdNRGs0UEM5b2FXZG9iR2xuYUhRK1BHSnlJQzgrQ2p4b2FXZG9iR2xuYUhRZ1kyeGhjM005SW1OdmJYQmhibmxRYUc5dVpWVndaR0YwWlNJK0tEZzBOeWtnTkRVNExUUTROVGc4TDJocFoyaHNhV2RvZEQ0OFluSWdMejRLUEdocFoyaHNhV2RvZENCamJHRnpjejBpWTI5dGNHRnVlVVZ0WVdsc1ZYQmtZWFJsSWo1dVlYUmxRRzVoYzNSNWNHVnlabTl5YldGdVkyVXVZMjl0UEM5b2FXZG9iR2xuYUhRKyIsInByaXZhY3kiOiJQSEErUEhOMGNtOXVaejVRVWtsV1FVTlpQQzl6ZEhKdmJtYytQQzl3UGdvS1BIQStQSE4wY205dVp6NVVhR1VnYVc1bWIzSnRZWFJwYjI0Z2NISnZkbWxrWldRZ1pIVnlhVzVuSUhSb2FYTWdjbVZuYVhOMGNtRjBhVzl1SUdseklHdGxjSFFnY0hKcGRtRjBaU0JoYm1RZ1kyOXVabWxrWlc1MGFXRnNMQ0JoYm1RZ2QybHNiQ0J1WlhabGNpQmlaU0JrYVhOMGNtbGlkWFJsWkN3Z1kyOXdhV1ZrTENCemIyeGtMQ0IwY21Ga1pXUWdiM0lnY0c5emRHVmtJR2x1SUdGdWVTQjNZWGtzSUhOb1lYQmxJRzl5SUdadmNtMHVJRlJvYVhNZ2FYTWdiM1Z5SUdkMVlYSmhiblJsWlM0OEwzTjBjbTl1Wno0OEwzQStDZ284Y0Q0OGMzUnliMjVuUGtsT1JFVk5Ua2xVV1R3dmMzUnliMjVuUGp3dmNENEtDanh3UGp4bGJUNVpiM1VnWVdkeVpXVWdkRzhnYVc1a1pXMXVhV1o1SUdGdVpDQm9iMnhrSUhWekxDQmhibVFnYVhSeklITjFZbk5wWkdsaGNtbGxjeXdnWVdabWFXeHBZWFJsY3l3Z2IyWm1hV05sY25Nc0lHRm5aVzUwY3l3Z1kyOHRZbkpoYm1SbGNuTWdiM0lnYjNSb1pYSWdjR0Z5ZEc1bGNuTXNJR0Z1WkNCbGJYQnNiM2xsWlhNc0lHaGhjbTFzWlhOeklHWnliMjBnWVc1NUlHTnNZV2x0SUc5eUlHUmxiV0Z1WkN3Z2FXNWpiSFZrYVc1bklISmxZWE52Ym1GaWJHVWdZWFIwYjNKdVpYbHpKaU16T1RzZ1ptVmxjeXdnYldGa1pTQmllU0JoYm5rZ2RHaHBjbVFnY0dGeWRIa2daSFZsSUhSdklHOXlJR0Z5YVhOcGJtY2diM1YwSUc5bUlFTnZiblJsYm5RZ2VXOTFJSEpsWTJWcGRtVXNJSE4xWW0xcGRDd2djbVZ3Ykhrc0lIQnZjM1FzSUhSeVlXNXpiV2wwSUc5eUlHMWhhMlVnWVhaaGFXeGhZbXhsSUhSb2NtOTFaMmdnZEdobElGTmxjblpwWTJVc0lIbHZkWElnZFhObElHOW1JSFJvWlNCVFpYSjJhV05sTENCNWIzVnlJR052Ym01bFkzUnBiMjRnZEc4Z2RHaGxJRk5sY25acFkyVXNJSGx2ZFhJZ2RtbHZiR0YwYVc5dUlHOW1JSFJvWlNCVVQxTXNJRzl5SUhsdmRYSWdkbWx2YkdGMGFXOXVJRzltSUdGdWVTQnlhV2RvZEhNZ2IyWWdZVzV2ZEdobGNpNDhMMlZ0UGp3dmNENEtDanh3UGp4emRISnZibWMrUkVsVFEweEJTVTFGVWlCUFJpQlhRVkpTUVU1VVNVVlRQQzl6ZEhKdmJtYytQQzl3UGdvS1BIQStQSE4wY205dVp6NVpUMVVnUlZoUVVrVlRVMHhaSUZWT1JFVlNVMVJCVGtRZ1FVNUVJRUZIVWtWRklGUklRVlE2UEM5emRISnZibWMrUEM5d1Bnb0tQRzlzUGdvSlBHeHBQbGxQVlZJZ1ZWTkZJRTlHSUZSSVJTQlRSVkpXU1VORklFbFRJRUZVSUZsUFZWSWdVMDlNUlNCU1NWTkxMaUJVU0VVZ1UwVlNWa2xEUlNCSlV5QlFVazlXU1VSRlJDQlBUaUJCVGlBbWNYVnZkRHRCVXlCSlV5WnhkVzkwT3lCQlRrUWdKbkYxYjNRN1FWTWdRVlpCU1V4QlFreEZKbkYxYjNRN0lFSkJVMGxUTGlBc0xpQkJUa1FnVlZNc0lFbFVKaU16T1R0VElFTlZVMVJQVFVWU1V5d2dSVmhRVWtWVFUweFpJRVJKVTBOTVFVbE5VeUJCVEV3Z1YwRlNVa0ZPVkVsRlV5QlBSaUJCVGxrZ1MwbE9SQ3dnVjBoRlZFaEZVaUJGV0ZCU1JWTlRJRTlTSUVsTlVFeEpSVVFzSUVsT1EweFZSRWxPUnl3Z1FsVlVJRTVQVkNCTVNVMUpWRVZFSUZSUElGUklSU0JKVFZCTVNVVkVJRmRCVWxKQlRsUkpSVk1nVDBZZ1RVVlNRMGhCVGxSQlFrbE1TVlJaTENCR1NWUk9SVk5USUVaUFVpQkJJRkJCVWxSSlExVk1RVklnVUZWU1VFOVRSU0JCVGtRZ1RrOU9MVWxPUmxKSlRrZEZUVVZPVkM0OEwyeHBQZ29KUEd4cFBrMUJTMFZUSUU1UElGZEJVbEpCVGxSWklGUklRVlFnS0drcElGUklSU0JUUlZKV1NVTkZJRmRKVEV3Z1RVVkZWQ0JaVDFWU0lGSkZVVlZKVWtWTlJVNVVVeXdnS0dscEtTQlVTRVVnVTBWU1ZrbERSU0JYU1V4TUlFSkZJRlZPU1U1VVJWSlNWVkJVUlVRc0lGUkpUVVZNV1N3Z1UwVkRWVkpGTENCUFVpQkZVbEpQVWkxR1VrVkZMQ0FvYVdscEtTQlVTRVVnVWtWVFZVeFVVeUJVU0VGVUlFMUJXU0JDUlNCUFFsUkJTVTVGUkNCR1VrOU5JRlJJUlNCVlUwVWdUMFlnVkVoRklGTkZVbFpKUTBVZ1YwbE1UQ0JDUlNCQlEwTlZVa0ZVUlNCUFVpQlNSVXhKUVVKTVJTd2dRVTVFSUNocGRpa2dRVTVaSUVWU1VrOVNVeUJKVGlCVVNFVWdVMDlHVkZkQlVrVWdWMGxNVENCQ1JTQkRUMUpTUlVOVVJVUXVQQzlzYVQ0S0NUeHNhVDVCVGxrZ1RVRlVSVkpKUVV3Z1JFOVhUa3hQUVVSRlJDQlBVaUJQVkVoRlVsZEpVMFVnVDBKVVFVbE9SVVFnVkVoU1QxVkhTQ0JVU0VVZ1ZWTkZJRTlHSUZSSVJTQlRSVkpXU1VORklFbFRJRVJQVGtVZ1FWUWdXVTlWVWlCUFYwNGdSRWxUUTFKRlZFbFBUaUJCVGtRZ1VrbFRTeUJCVGtRZ1ZFaEJWQ0JaVDFVZ1YwbE1UQ0JDUlNCVFQweEZURmtnVWtWVFVFOU9VMGxDVEVVZ1JrOVNJRUZPV1NCRVFVMUJSMFVnVkU4Z1dVOVZVaUJEVDAxUVZWUkZVaUJUV1ZOVVJVMGdUMUlnVEU5VFV5QlBSaUJFUVZSQklGUklRVlFnVWtWVFZVeFVVeUJHVWs5TklGUklSU0JFVDFkT1RFOUJSQ0JQUmlCQlRsa2dVMVZEU0NCTlFWUkZVa2xCVEM0OEwyeHBQZ29KUEd4cFBrNVBJRUZFVmtsRFJTQlBVaUJKVGtaUFVrMUJWRWxQVGl3Z1YwaEZWRWhGVWlCUFVrRk1JRTlTSUZkU1NWUlVSVTRzSUU5Q1ZFRkpUa1ZFSUVKWklGbFBWU0JHVWs5TklFOVNJRlJJVWs5VlIwZ2dUMUlnUmxKUFRTQlVTRVVnVTBWU1ZrbERSU0JUU0VGTVRDQkRVa1ZCVkVVZ1FVNVpJRmRCVWxKQlRsUlpJRTVQVkNCRldGQlNSVk5UVEZrZ1UxUkJWRVZFSUVsT0lGUklSU0JVVDFNdVBDOXNhVDRLUEM5dmJENEtDanh3UGp4emRISnZibWMrVEVsTlNWUkJWRWxQVGlCUFJpQk1TVUZDU1V4SlZGazhMM04wY205dVp6NDhMM0ErQ2dvOGNENVpUMVVnUlZoUVVrVlRVMHhaSUZWT1JFVlNVMVJCVGtRZ1FVNUVJRUZIVWtWRklGUklRVlFnUVU1RUlGTklRVXhNSUU1UFZDQkNSU0JNU1VGQ1RFVWdSazlTSUVGT1dTQkVTVkpGUTFRc0lFbE9SRWxTUlVOVUxDQkpUa05KUkVWT1ZFRk1MQ0JUVUVWRFNVRk1MQ0JEVDA1VFJWRlZSVTVVU1VGTUlFOVNJRVZZUlUxUVRFRlNXU0JFUVUxQlIwVlRMQ0JKVGtOTVZVUkpUa2NnUWxWVUlFNVBWQ0JNU1UxSlZFVkVJRlJQTENCRVFVMUJSMFZUSUVaUFVpQk1UMU5USUU5R0lGQlNUMFpKVkZNc0lFZFBUMFJYU1V4TUxDQlZVMFVzSUVSQlZFRWdUMUlnVDFSSVJWSWdTVTVVUVU1SFNVSk1SU0JNVDFOVFJWTWdLRVZXUlU0Z1NVWWdTRUZUSUVKRlJVNGdRVVJXU1ZORlJDQlBSaUJVU0VVZ1VFOVRVMGxDU1V4SlZGa2dUMFlnVTFWRFNDQkVRVTFCUjBWVEtTd2dVa1ZUVlV4VVNVNUhJRVpTVDAwNlBDOXdQZ29LUEc5c1Bnb0pQR3hwUGxSSVJTQlZVMFVnVDFJZ1ZFaEZJRWxPUVVKSlRFbFVXU0JVVHlCVlUwVWdWRWhGSUZORlVsWkpRMFU3UEM5c2FUNEtDVHhzYVQ1VVNFVWdRMDlUVkNCUFJpQlFVazlEVlZKRlRVVk9WQ0JQUmlCVFZVSlRWRWxVVlZSRklFZFBUMFJUSUVGT1JDQlRSVkpXU1VORlV5QlNSVk5WVEZSSlRrY2dSbEpQVFNCQlRsa2dSMDlQUkZNc0lFUkJWRUVzSUVsT1JrOVNUVUZVU1U5T0lFOVNJRk5GVWxaSlEwVlRJRkJWVWtOSVFWTkZSQ0JQVWlCUFFsUkJTVTVGUkNCUFVpQk5SVk5UUVVkRlV5QlNSVU5GU1ZaRlJDQlBVaUJVVWtGT1UwRkRWRWxQVGxNZ1JVNVVSVkpGUkNCSlRsUlBJRlJJVWs5VlIwZ2dUMUlnUmxKUFRTQlVTRVVnVTBWU1ZrbERSVHM4TDJ4cFBnb0pQR3hwUGxWT1FWVlVTRTlTU1ZwRlJDQkJRME5GVTFNZ1ZFOGdUMUlnUVV4VVJWSkJWRWxQVGlCUFJpQlpUMVZTSUZSU1FVNVRUVWxUVTBsUFRsTWdUMUlnUkVGVVFUczhMMnhwUGdvSlBHeHBQbE5VUVZSRlRVVk9WRk1nVDFJZ1EwOU9SRlZEVkNCUFJpQkJUbGtnVkVoSlVrUWdVRUZTVkZrZ1QwNGdWRWhGSUZORlVsWkpRMFU3SUU5U1BDOXNhVDRLQ1R4c2FUNUJUbGtnVDFSSVJWSWdUVUZVVkVWU0lGSkZURUZVU1U1SElGUlBJRlJJUlNCVFJWSldTVU5GTGp3dmJHaytDand2YjJ3K0NnbzhjRDQ4ZFQ1Q2VTQnlaV2RwYzNSbGNtbHVaeUJoYm1RZ2MzVmljMk55YVdKcGJtY2dkRzhnYjNWeUlHVnRZV2xzSUdGdVpDQlRUVk1nYzJWeWRtbGpaU3dnWW5rZ2IzQjBMV2x1TENCdmJteHBibVVnY21WbmFYTjBjbUYwYVc5dUlHOXlJR0o1SUdacGJHeHBibWNnYjNWMElHRWdZMkZ5WkN3Z0puRjFiM1E3ZVc5MUlHRm5jbVZsSUhSdklIUm9aWE5sSUZSRlVrMVRJRTlHSUZORlVsWkpRMFVtY1hWdmREc2dZVzVrSUhsdmRTQmhZMnR1YjNkc1pXUm5aU0JoYm1RZ2RXNWtaWEp6ZEdGdVpDQjBhR1VnWVdKdmRtVWdkR1Z5YlhNZ2IyWWdjMlZ5ZG1salpTQnZkWFJzYVc1bFpDQmhibVFnWkdWMFlXbHNaV1FnWm05eUlIbHZkU0IwYjJSaGVTNDhMM1UrUEM5d1Bnb0tQSEErSm01aWMzQTdQQzl3UGdvOGFHbG5hR3hwWjJoMElHTnNZWE56UFNKamIyMXdZVzU1VG1GdFpWVndaR0YwWlNJK1RtRnpkSGtnVUdWeVptOXliV0Z1WTJVOEwyaHBaMmhzYVdkb2RENDhZbklnTHo0S1BHaHBaMmhzYVdkb2RDQmpiR0Z6Y3owaVkyOXRjR0Z1ZVVGa1pISmxjM05WY0dSaGRHVWlQakl3TXpVZ1V5NGdSV0Z6ZEhkdmIyUWdSSEl1TENCWGIyOWtjM1J2WTJzc0lFbE1JRFl3TURrNFBDOW9hV2RvYkdsbmFIUStQR0p5SUM4K0NqeG9hV2RvYkdsbmFIUWdZMnhoYzNNOUltTnZiWEJoYm5sUWFHOXVaVlZ3WkdGMFpTSStLRGcwTnlrZ05EVTRMVFE0TlRnOEwyaHBaMmhzYVdkb2RENDhZbklnTHo0S1BHaHBaMmhzYVdkb2RDQmpiR0Z6Y3owaVkyOXRjR0Z1ZVVWdFlXbHNWWEJrWVhSbElqNXVZWFJsUUc1aGMzUjVjR1Z5Wm05eWJXRnVZMlV1WTI5dFBDOW9hV2RvYkdsbmFIUSsifQ==

Terms of Service

Privacy Policy

Core Modal Title

Sorry, no results found

You Might Find These Articles Interesting

T
Please Check Your Email
We Will Be Following Up Shortly
*
*
*