cropper
update

Nasty Performance ~ 847-458-4858 

update
  • Blog Home
  • Categories
    • Motorcycle Maintenance
    • Riding Tips & Preps
    • Safety & Inspection
    • Customizations & Upgrades
    • DIY Motorcycle Repairs
    • Motocycle Audio Systems
    • Motocycle Seasonal Care & Storage
    • Engine, Electrical Performance
  • Bike Night
  • Nasty Performance Motorcycle Shop
March 23.2026
1 Minute Read

Motorcycle Chain and Sprocket Replacement Done Right—Don’t Delay

Did you know that failing to replace your motorcycle chain and sprocket on time can increase your risk of an accident by nearly 40%? Having a worn chain or sprockets isn’t just about losing power—it’s a matter of keeping you safe, on the road, and out of harm’s way. In this guide, we’ll unpack the risks, reveal what careful maintenance really looks like, and provide a reliable step-by-step approach so you can ride with confidence.

Startling Facts: The Importance of Timely Motorcycle Chain and Sprocket Replacement

When it comes to motorcycle chain and sprocket replacement, riders often underestimate just how much these vital components influence both safety and performance. Studies reveal that a neglected sprocket and chain system not only increases the possibility of catastrophic failure but also makes your daily commute or weekend adventure much riskier. Chains wear invisibly over time, and even standard chains from top brands can stretch or break if ignored, leading to sudden loss of power transmission or, worse, potential lock-up of the rear wheel at high speed.

Regularly maintaining these parts isn’t just recommended; it’s essential for all types of riders, from casual road bike enthusiasts to long-distance touring fans. If you’re relying solely on your regular ride-feel or only lubed your chain occasionally, you might be missing hidden signs of wear that could escalate repair costs. Beyond performance degradation, delaying chain replacement means you’re risking both your investment—and your wellbeing—on every ride.

Dramatic close-up of a weathered motorcycle chain and worn sprocket, showing a rider inspecting for damage with a toolbox nearby, perfect for highlighting dangers of delayed motorcycle chain and sprocket replacement

Why Delaying Chain Replacement Compromises Safety and Performance

Delaying motorcycle chain and sprocket replacement is one of the most common—and dangerous—maintenance mistakes motorcyclists can make. As chains wear, their fit on both the front and rear sprockets becomes loose and irregular, causing skipping, jerky acceleration, and an increased likelihood of chain slippage. This not only reduces your ability to control the bike but can also place undue stress on the transmission and wheel assembly, leading to even more extensive repairs.

Especially on performance bikes, the use of quality chain and sprocket sets from top brands ensures smoother power delivery, extending the integrity of the rear wheel and associated drive components. Neglecting to address chain and sprocket wear promptly can compromise your stopping distance, affect the functionality of both rear sprockets and front sprockets, and escalate labor costs due to additional repair needs. Ultimately, staying proactive helps you avoid these hazards and keeps your ride running at its safest and most efficient.

"A worn chain and sprocket system can increase accident risk by up to 40%. Regular maintenance isn't just a matter of performance—it’s a matter of safety." – Industry Safety Association

For riders looking to further enhance their maintenance routine, understanding the nuances of seasonal motorcycle care can make a significant difference in the longevity and reliability of your chain and sprocket system. Adapting your approach as weather and riding conditions change helps prevent premature wear and keeps your bike performing at its best year-round.

What You'll Learn About Motorcycle Chain and Sprocket Replacement

  • The risks of neglecting chain and sprocket maintenance
  • The step-by-step process for quality chain replacement
  • How to choose the right chain and sprocket set
  • Cost factors and replacement intervals
  • Expert tips for extending component lifespan

Clean organized array of new motorcycle chains and sprockets laid out before installation, demonstrating quality choices in chain and sprocket replacement

Understanding Motorcycle Chain and Sprocket Replacement: What’s Involved?

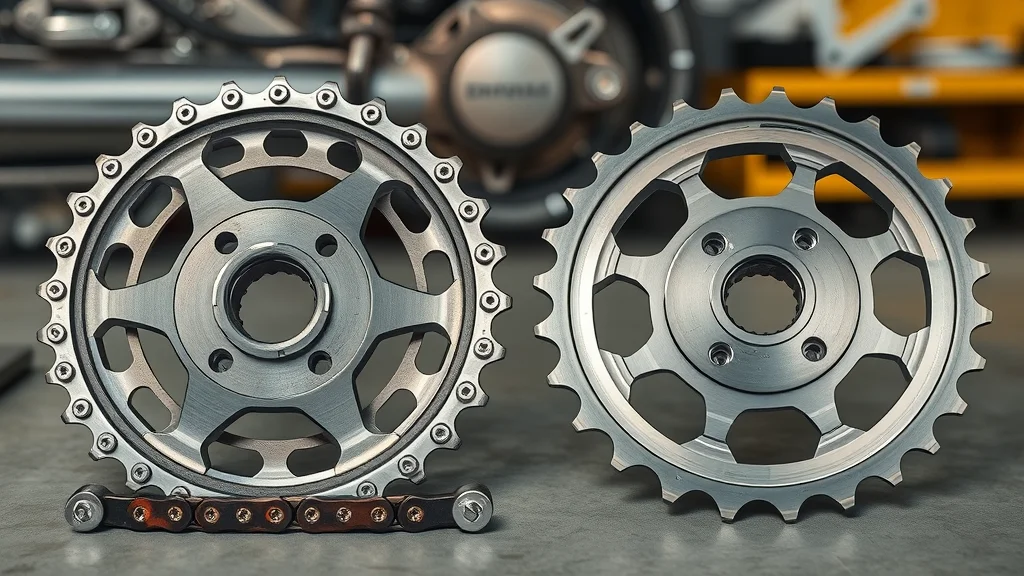
The process of motorcycle chain and sprocket replacement involves more than just swapping out old parts; it’s about restoring your bike’s power transmission efficiency and safeguarding your ride. High-quality chains—whether ring chains, sealed chains, or standard chains—work in tandem with well-machined front and rear sprockets to deliver power from the engine to the rear wheel smoothly and reliably. When one component wears out, it usually impacts the entire system, highlighting the necessity of inspecting and maintaining your full setup.

Chain replacement procedures also require specific tools, like a chain breaker and accurate measurement devices, to ensure proper length and secure installation of the master link. If any part of this system falters, it can have a cascading effect on your motorcycle’s drive and braking systems, amplifying risks and potential repair expenses. Proper alignment, tensioning, and lubrication after installation are non-negotiable steps that every rider should prioritize.

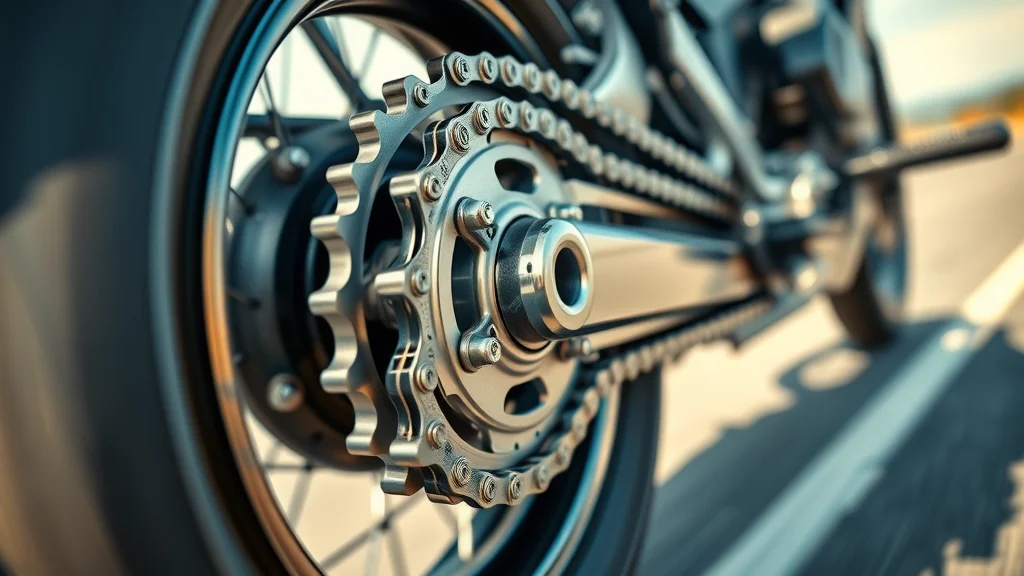
How the Chain and Sprocket System Works in Motorcycles

The motorcycle’s chain and sprocket system is the direct link between your engine and the pavement. The engine’s crankshaft turns the front sprocket, transferring motion through the chain to rotate the rear sprocket connected to the rear wheel. This simple yet robust system is the backbone of power transmission on most motorcycles, with chain and sprocket quality dictating both subtle ride characteristics and hard acceleration bursts.

Different chains—such as O-ring, X-ring, and standard chains—are manufactured to meet various riding styles. Top brands design their ring chains to resist dirt and wear, while aluminum sprockets and steel rear sprockets appeal to riders looking for performance or longevity. No matter your preference, an efficient sprocket and chain setup translates engine output directly into road movement, making maintenance a top priority.

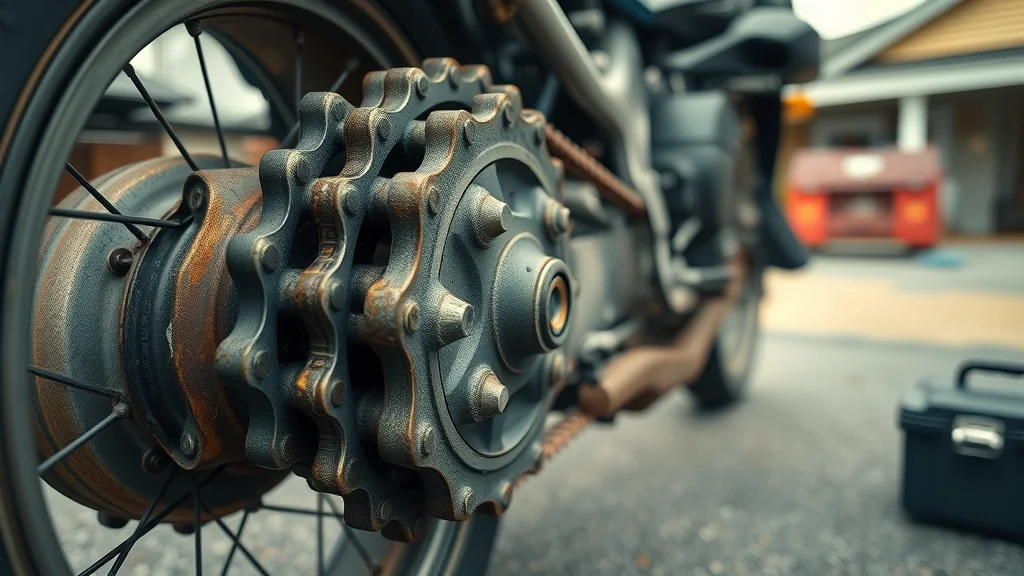
Recognizing Signs You Need Motorcycle Chain and Sprocket Replacement

Detecting early signs of chain and sprocket wear is crucial for all riders, including those with high-end or basic chain systems. Obvious warning signs include excessive chain stretching, rust or corrosion, stiff links, uneven wear patterns on the rear sprocket teeth, and a chain that has frequent tension adjustments but still feels loose. You might also notice increased vibration, noise during acceleration, or a visible mismatch in the alignment of the front and rear sprockets.

Additionally, if you find that your sealed chains are losing their lubrication quickly, or notice cues such as missing sprocket teeth or inconsistent chain slack around the rear wheel, it’s time for prompt inspection and possible replacement. Having this knowledge can save you from unexpected breakdowns and reduce long-term labor cost by preventing collateral damage.

Comparative detail of old and new motorcycle sprockets and chains side-by-side, clearly highlighting wear, rust, and the need for chain replacement

The Difference Between Chain Replacement and Full Sprocket and Chain Service

While it can be tempting to simply replace just the chain or a single component, complete chain and sprocket replacement is the industry standard for a reason. Chains wear into the specific teeth shapes of both the front and rear sprockets. Replacing only one part, such as a basic chain on severely worn aluminum sprockets, will result in premature wear, loss of tension, or even immediate failure under load.

Investing in a full sprocket and chain service means removing both front and rear sprockets along with the old chain, then installing a brand new, compatible set chosen for your specific riding style and bike model. This comprehensive approach leads to a smoother, safer ride, more accurate tensioning, and significantly extends the lifespan of every component involved in your motorcycle’s power train.

Why Quality Chain and Sprocket Replacement Matters

Opting for a quality chain and sprocket replacement isn’t just about stretching service intervals—it’s about ensuring the reliability of your entire drive mechanism. A well-chosen, top brand chain provides better resistance to environmental wear, ensures smoother engagement with both front and rear sprockets, and helps maintain consistent tension, reducing the risk of sudden failure or chain slippage during aggressive riding or long commutes.

Top brands engineer their ring chains and sprockets not only for longevity but also for precise fit and minimal stretch, even under strenuous loads. By choosing a reputable set and ensuring quality installation, you directly reduce future maintenance costs, avoid expensive breakdowns, and retain the full power and feel of your original road bike experience. Investing upfront leads to long-term peace of mind—saving time, effort, and money in the long haul.

How a Quality Chain Prevents Premature Wear and Costly Damage

Quality chains, such as those found in sealed chains and those utilizing master links from top brands, provide an additional line of defense against contamination, moisture, and mechanical wear. These advanced designs help distribute load evenly across each link and tooth on both front and rear sprockets, ensuring greater power transmission efficiency and minimizing strain on your rear wheel hub, bearings, and swingarm.

Poorly made chains or mismatched sprockets introduce excess slack, uneven wear, and even risk shearing the master link, possibly causing a catastrophic chain failure. Choosing a quality chain that’s matched to your road bike’s specifications dramatically reduces ring chains’ wear, lowers long-term labor costs on replacements, and preserves the accuracy of your drivetrain. Ultimately, it’s the key to a reliable, confidence-inspiring ride.

Vivid close-up of a new, high-performance motorcycle chain in motion illustrating the benefit of proper quality chain and sprocket replacement

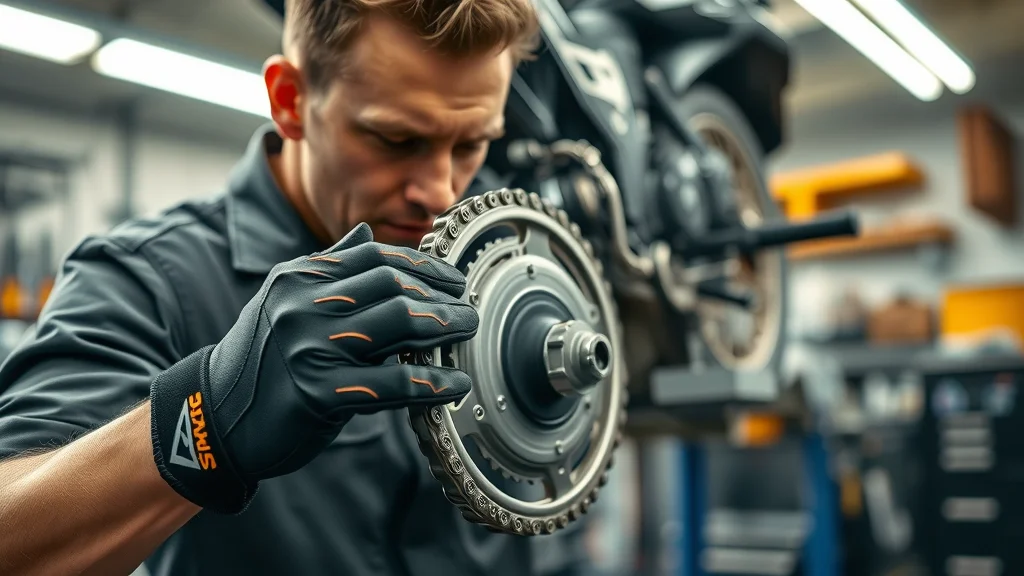
Step-by-Step Guide: Motorcycle Chain and Sprocket Replacement Procedure

  • Inspect existing sprocket and chain
  • Remove old chain and sprockets
  • Install quality chain and sprocket kit
  • Ensure proper alignment and tension
  • Lubrication and post-installation check

Start by placing your motorcycle on a secure lift or stand, ensuring the rear wheel is free to rotate. Next, closely inspect the front and rear sprockets for missing teeth, cupping, or visible grooves. Use a chain breaker to safely remove the old chain, then unbolt and carefully remove both sprockets, being mindful of their orientation and hardware. Compare the condition of your old parts against new components; this often highlights how much vital performance you may have lost.

Install the new front and rear sprockets, tightening to manufacturer specifications. Feed the new quality chain through, using a new master link. Before securing the chain, double-check alignment—uneven installation here is a common mistake and leads to excessive chains wear and labor costs down the road. Adjust the tension per your road bike’s manual, rotate the rear wheel several times to confirm smooth operation, and finish with thorough lubrication to ensure a long service life.

Focused image of a motorcycle mechanic adjusting chain tension during installation as part of a careful motorcycle chain and sprocket replacement

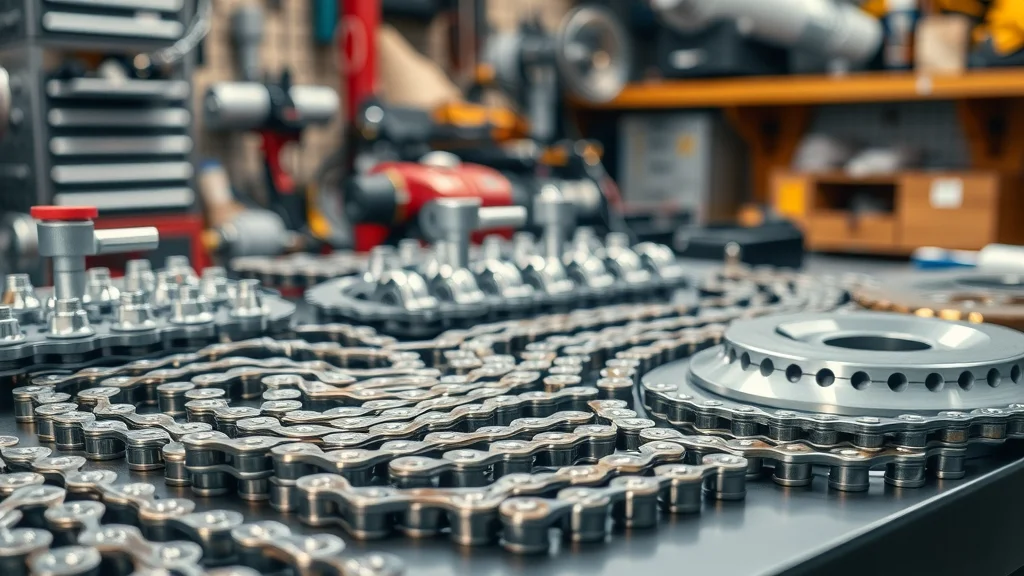
Choosing the Right Chain and Sprocket Set for Your Motorcycle

Your choice of chain and sprocket set has a direct impact on riding style, performance, and durability. For everyday commuters, robust sealed chains from top brands provide long-term reliability and protection from dirt and salt, while sport or track riders might prefer lighter aluminum sprockets paired with high-strength ring chains for ultimate response and reduced unsprung weight. Consult your bike’s product description, paying attention to recommended front and rear sprocket tooth counts and standard chain sizes for your model.

OEM (Original Equipment Manufacturer) sets are always a safe choice, providing exact fit and proven compatibility. However, many reputable aftermarket options also offer enhanced features like reduced friction, longer-lasting coatings, or even perks for this product such as lifetime warranty or day shipping support. Match your selection to your needs—whether better acceleration from your road bike, or maximum longevity for touring—ensuring both your wallet and performance are satisfied.

OEM vs Aftermarket: Which Chain Replacement Offers Better Value?

OEM chain and sprocket kits guarantee a perfect fit and have passed strict durability testing standards, making them a preferred option for those who don’t want to gamble with compatibility or reliability. However, some riders find that aftermarket sets—especially those from top brands with expert engineering—can surpass OEM performance at a similar or even lower labor cost. Aftermarket parts often include premium materials like hardened steel or aluminum sprockets, specialized coatings, and lighter designs for enhanced acceleration or less drivetrain drag.

Weigh value propositions based not just on the initial price but also on installation convenience, expected lifespan, labor costs, and the warranty or member perks that might come bundled. Ultimately, the best option is the set that matches your riding style, usage, and maintenance habits while fitting your budget.

Comparative setup of OEM and aftermarket motorcycle chains and sprockets—displaying different build qualities and finishes for informed chain replacement choice

Finding a Quality Chain for Your Riding Style and Bike Model

Choosing a quality chain is more than simply picking a top brand from a shelf. You need to balance your bike model’s mechanical requirements with your preferred riding style, regular road conditions, and maintenance discipline. Sport and performance bikes may benefit from lightweight, high-tensile ring chains and aluminum sprockets, while heavy touring or cruiser bikes require heavier-duty options made to endure long miles with minimal wear.

If you’re unsure where to start, consult with a trusted mechanic or refer to ratings and feedback on sealed chains and sprockets that fit your motorcycle’s product description. Remember: investing in a high-end chain and sprocket set now will pay dividends in reliability, decreased labor costs, and fewer headaches down the road—especially for those who ride year-round or over diverse terrains.

"Choose the best quality chain and sprocket set you can afford. Cutting corners now can mean higher costs—and bigger headaches—down the road." – Master Technician, Nasty Performance

Proper Maintenance After Motorcycle Chain and Sprocket Replacement

  1. Routine lubrication tips
  2. Regular tension checks for your new chain
  3. Visual inspection schedules
  4. Spotting early warning signs

After completing a motorcycle chain and sprocket replacement, adopting an effective maintenance routine is essential to maximize longevity and minimize labor costs in the future. Begin by lubricating the new chain with a premium, manufacturer-recommended chain lube. For most sealed chains, lubrication should occur every 400-600 miles, or after every wet ride, ensuring all surfaces—including the master link and side plates—are thoroughly coated but not overly saturated.

Regularly inspect chain tension—referencing your owner’s manual—and use precision tools for consistency. Over-tight or loose chains not only accelerate wear on rear sprockets and the rear wheel hub but can also introduce dangerous handling issues. Schedule visual checks for stretching, stiff links, or sprocket tooth damage every few hundred miles and always before long trips, as early detection is the key to preventing escalating road bike repair costs.

Proactive rider maintaining a motorcycle chain using spray lubricant, a vital step after motorcycle chain and sprocket replacement for longevity

Cost Breakdown: Motorcycle Chain and Sprocket Replacement

Service Average Cost
Chain Replacement $120 – $300
Sprocket Replacement $70 – $220
Complete Set (Parts + Labor) $180 – $450

The labor cost for a standard chain replacement varies based on your bike model, the complexity of your drivetrain, and local shop rates. While DIY replacement may save on direct labor costs, investing in professional installation ensures the correct use of a chain breaker, proper tensioning, and alignment. Keep in mind that premium or specialty chain and sprocket sets can climb higher in price, especially for advanced road bikes or motorcycles requiring sealed chains and lightweight aluminum sprockets.

Waiting too long to address chain and sprocket wear often inflates repair bills, as skipping scheduled maintenance or ignoring early warning signs can result in collateral damage to your rear wheel bearings, swingarm sliders, or even compromised power transmission components.

People Also Ask: Motorcycle Chain and Sprocket Replacement FAQs

How much does it cost to have your chain replaced on a motorcycle?

Chain replacement typically ranges from $120 to $300, depending on motorcycle make and labor rates. Combined chain and sprocket replacement can be more.

How often should I change the chain and sprocket on my motorcycle?

Replacement intervals depend on riding conditions and bike model, but most manufacturers recommend every 15,000 to 20,000 miles, or when signs of wear appear.

Do you need to change sprockets with a chain motorcycle?

It’s best practice to replace the sprockets whenever replacing the chain, as worn sprockets will prematurely wear out the new chain.

How much does a chain for a motorcycle cost?

Replacement chains typically cost between $25 and $150, depending on quality and bike type. Higher-end models for sport or touring bikes may cost more.

Common Mistakes to Avoid in Motorcycle Chain and Sprocket Replacement

  • Ignoring sprocket wear during chain replacement
  • Installing non-quality chain brands
  • Improper alignment and sub-optimal chain tension
  • Neglecting lubrication after installation

Overlooking signs of wear on both the front sprocket and rear sprockets often leads to premature failure, even when using a top brand chain. Subpar chain brands not designed for your specific bike model or riding style can break unexpectedly, causing increased labor costs and potential safety issues. Always ensure chain alignment using a reputable chain breaker, checking both visual and measured tolerances before securing the master link. Finally, neglecting post-installation lubrication is the fastest way to wear out even sealed or premium ring chains, making it a vital but often forgotten final step.

Concerned mechanic examining a misaligned motorcycle chain, highlighting a common and costly mistake in chain and sprocket replacement

Key Takeaways: Motorcycle Chain and Sprocket Replacement Tips

  • Never delay chain and sprocket replacement—risk and costs only increase
  • Invest in a quality chain and compatible sprockets
  • Follow a regular maintenance schedule

Conclusion: Prioritize Motorcycle Chain and Sprocket Replacement for Safe Riding

Don’t risk your ride—ensure regular motorcycle chain and sprocket replacement for optimal safety and performance.

Inspirational motorcyclist confidently riding on a well-maintained bike in scenic countryside, symbolizing the benefits of timely motorcycle chain and sprocket replacement

Get Expert Help: Schedule Your Motorcycle Chain and Sprocket Replacement Today

Ready to get the job done right and keep riding safely? Call Nasty Performance Motorcycle Shop Today: 847-458-4858—our experts are here to help you with every step, from diagnosis to premium installation and personalized maintenance plans.

Maintaining your motorcycle’s chain and sprocket is just one piece of the puzzle when it comes to keeping your ride in peak condition. If you’re ready to take your bike care to the next level, explore our comprehensive guide on seasonal bike care secrets every rider must know. You’ll discover expert strategies for adapting your maintenance routine to changing weather, protecting your investment, and ensuring smooth performance all year long. Dive deeper into advanced tips and unlock the confidence that comes from a truly well-maintained motorcycle—your next adventure starts with the right knowledge.

Motorcycle Maintenance

0 Comments

Write A Comment

*
*
Please complete the captcha to submit your comment.
Related Posts All Posts

Common Mistakes In Motorcycle Brake Pad Replacement

Did you know that over 35% of DIY brake pad replacements end up with follow-up repairs due to simple mistakes? While changing brake pads on your motorcycle can save you money and offer a sense of accomplishment, a single overlooked step could put your safety at risk. Understanding and avoiding brake pad replacement mistakes is not just about saving costs—it’s about ensuring every ride is safe, smooth, and reliable. Whether you're an experienced do-it-yourselfer or just starting out with DIY brake pad replacement, this comprehensive guide will help you sidestep common pitfalls and master the art of changing brake pads safely. Understanding Brake Pad Replacement Mistakes Overview of brake pad replacement mistakes and their consequences: Even the most enthusiastic DIY brake pad replacement can go awry if critical steps are skipped. Common mistakes like improper pad alignment, failing to fully retract caliper pistons, or mismatching brake pads can lead to uneven wear, poor braking performance, and even brake system failure. These errors may not only damage the braking system but could also put you and others on the road in danger. Mistakes during pad replacement can translate to costly repairs and jeopardize the braking system’s reliability. Importance of avoiding common mistake in DIY brake pad replacement: Safety should always be the top priority when tackling brake jobs. Simple oversights—like not cleaning caliper guide pins or using incompatible friction material—can lead to squealing brakes, uneven pedal feel, or danger in emergency stops. Knowing the most frequent brake pad replacement mistakes empowers you to avoid them from the outset, ensuring each changing brake job boosts your motorcycle’s overall performance and secures your peace of mind. What You'll Learn About Brake Pad Replacement Mistakes Identifying typical brake pad mistakes: Pinpoint the most frequent slip-ups that plague DIY brake pad replacement jobs. Why pad replacement precision matters: Understand how every detail in changing brake pads contributes to your motorcycle’s safety and performance. How to improve your DIY brake pad replacement process: Gain actionable advice so you avoid brake pad replacement mistakes on your next brake job. Why Attention to Brake Pad Replacement Mistakes is Critical Impact of brake pad replacement mistakes on your motorcycle’s safety and braking system: A single common mistake, such as failing to secure brake pads or neglecting to lubricate caliper guide pins, can compromise your entire braking system. DIY brake jobs done incorrectly may cause uneven wear, noisy brakes, or even lead to brake fluid leaks. Each part of the braking system relies on proper pad replacement procedures—overlooking one can reduce braking performance, extend stopping distances, and cause unpredictable pedal feel that threatens safe riding. A quote from a trusted mechanic discussing common mistake in brake pad jobs: "One overlooked step in a brake pad replacement can compromise your entire braking system. Always double-check every component before hitting the road." – Certified Motorcycle Technician Table: Overview of the Most Frequent Brake Pad Replacement Mistakes Common Mistake Impact on Braking System How to Avoid Estimated DIY Difficulty Rating Not Retracting Caliper Pistons Fully Prevents new pads from fitting correctly and causes uneven wear. Use a proper tool to compress pistons fully before installing new pads. Moderate Improper Brake Pad Positioning Results in brake noise, vibration, and loss of braking performance. Align pads carefully and ensure proper seating in the caliper. Easy Skipping Lubrication Leads to stiff caliper movement and squeaky brakes. Apply brake grease to caliper guide pins and backs of pads. Easy Mismatched Brake Pads Inconsistent wear, reduced effectiveness, and potential caliper damage. Verify compatibility and always install matching pad sets. Easy For those looking to take their maintenance skills further, understanding how seasonal changes can impact your motorcycle’s performance is just as important as mastering brake pad replacement. You can discover practical tips for year-round care in this guide to seasonal bike care secrets every rider must know, which complements your DIY brake work with broader maintenance strategies. Preparation Steps: Avoiding Brake Pad Replacement Mistakes Before You Start Gathering proper tools for DIY brake pad replacement: Before tackling any brake job, ensure you have all the right tools on hand. This typically includes a torque wrench, caliper tool, brake pad spreader, high-quality gloves, and cleaning products. Using proper tools reduces the risk of damaging lug nuts, caliper guide pins, or the brake pad itself. Be sure to lay out all necessary equipment on a clear, organized workspace to streamline your pad replacement and help you avoid common mistakes that can arise from being unprepared. Inspecting brake pads and braking system before pad replacement: Before starting your DIY brake pad replacement, carefully inspect the current pads, brake rotors, and calipers. Check for uneven wear or signs of brake fluid leakage, as these can indicate underlying braking system issues. Ensuring components are in good condition reduces the risk of new pad replacement mistakes and helps you address problems that could affect your brake job’s effectiveness. Checking compatibility of replacement brake pads: Not all brake pads are created equal. Confirm that your replacements match your motorcycle’s make, model, and braking system specifications. Using mismatched pads can lead to inconsistent braking, excessive wear of the brake rotor, and increased risk for future brake pad replacement mistakes—so double-check before installing. Step-by-Step Guide: Correct Brake Pad Replacement Safely elevate your motorcycle and remove the wheels. Loosen lug nuts and detach the caliper, taking care not to hang the brake by the hose. This avoids strain on the brake hose and prevents brake fluid leaks. Completely retract the caliper pistons using a proper caliper tool. Ensure there is enough clearance for the new brake pads—don't force the pads, as this can damage the piston or caliper guide pin. Remove the old brake pads and carefully clean the caliper, guide pin, and rotor surface. Use brake cleaner to eliminate debris and old lubricant for a smooth pad replacement. Align the new brake pads properly in the caliper, ensuring they fit flush against the contact surface. Double-check their position to avoid common mistakes like uneven wear or noise. Apply a high-quality brake lubricant to the caliper guide pins and pad backing plates. This step is vital for smooth operation and to prevent squealing. Reinstall the brake caliper and torque all bolts to manufacturer specifications. Secure all components and ensure the brake pad is properly seated. Pump the brake lever or pedal several times to restore proper brake pad contact and pedal feel before riding. Monitor the system for leaks or warning lights. Proper brake pad alignment and installation tips: Always ensure pads sit flush against the rotor and check for any gaps or misalignment. Improper positioning can lead to reduced braking system performance and uneven pad wear. Key braking system checks during brake pad replacement: Examine caliper movement, rotor condition, and brake fluid level after each step. Resolve any abnormalities before continuing your brake job. Common DIY Brake Pad Replacement Mistakes Not fully retracting caliper pistons: A frequent error in DIY brake pad replacement, this prevents new pads from fitting and causes the brake caliper to bind or rub against the rotor, leading to reduced performance and uneven wear. Improper brake pad positioning: Incorrectly aligned pads can cause contact surface issues, brake squeal, and inefficient stopping power. Careful alignment is crucial for optimal braking system function. Skipping brake pad lubrication steps: Not lubricating caliper guide pins or pad backs results in sticky movement and persistently noisy brakes. Mismatched brake pads: Installing the wrong type or unevenly worn pads can cause inconsistent pedal feel, faster deterioration, and even damage to the caliper or rotor. Brake Pad Replacement Mistakes and the 30 30 30 Rule Explanation of the 30 30 30 break-in rule and its relevance to DIY brake pad jobs: The 30 30 30 rule is a proven break-in method after brake pad replacement: complete 30 gradual stops from 30 mph, spacing each stop about 30 seconds apart. This process evenly beds new pads into your disc brakes while ensuring proper friction material transfer. How improper brake pad replacement can make it difficult to implement the 30 30 30 rule: If pads are mismatched, installed incorrectly, or not properly lubricated, the break-in phase—critical to maximizing pad and rotor life—will not be effective. Skipping steps increases the risk of uneven wear and brake rotor damage, making even the best break-in routine much less effective. Signs You've Made a Brake Pad Replacement Mistake Common symptoms after DIY brake pad replacement mistakes: If you hear squealing, grinding, feel a pulsing brake pedal, or notice inconsistent pedal feel, your brake job may have gone wrong. These warning signs often indicate issues like sticking caliper guide pins, misplaced brake pads, or uneven contact with the rotor. Braking system warning indications: Look out for dashboard warning lights, visible brake fluid leaks around the caliper, or excessive brake dust shortly after pad replacement. Ignoring these warning signals can accelerate disc brakes and rotor damage. When to revisit your pad replacement job: If you experience any of the above or hear grinding/scraping shortly after DIY brake pad replacement, stop riding and re-examine every step. It’s better to redo a brake job than risk your safety or compromise the braking system further. How to Fix Brake Pad Replacement Mistakes and Ensure Safety Safely lift the motorcycle and remove the wheel and caliper as you did initially. Retract caliper pistons fully using a proper tool to ensure room for fitting new pads. Thoroughly clean the caliper guide pins, pad slots, and brake rotor surface with approved brake cleaner. Carefully realign new brake pads, ensuring both sides are seated evenly on the contact surface. Apply the correct lubricant to caliper guide pins and pad backs to prevent squealing and binding. Torque all bolts to the manufacturer’s specs for a secure fit and check all components for proper installation. Pump the brake lever or brake pedal to restore system pressure and check for leaks before test riding. Ensuring braking system integrity after brake pad replacement: Always check brake pedal or lever feel, inspect for leaks, and confirm pads and calipers move freely. Address warning lights on your dash immediately to protect your disc brakes and overall braking performance. When to seek professional help after a bad DIY brake job: If repeated attempts result in spongy pedal feel, persistent noises, or leakage, consult a certified mechanic. Some pad replacement issues, like damaged brake rotors or a compromised braking system, require specific expertise and diagnostic equipment. Expert Quote on the Dangers of Overlooking Brake Pad Replacement Mistakes "One overlooked step in a brake pad replacement can compromise your entire braking system. Always double-check every component before hitting the road." – Certified Motorcycle Technician People Also Ask: Brake Pad Replacement Mistakes What are common mistakes when installing brake pads? Skipping lubrication of caliper guide pins and pad backs, not seating pads correctly in the caliper, and ignoring torque specifications are some of the most frequent errors. Missing these steps leads to brake noise, uneven wear, and poor braking system performance—issues avoidable with careful attention during your pad replacement. What is the 30 30 30 rule for brakes? The 30 30 30 rule describes the break-in process for new brake pads: perform 30 gradual stops from 30 mph, each spaced about 30 seconds apart. This bedding-in routine allows friction material to transfer properly and ensures even contact surface wear, maximizing pad replacement effectiveness and disc brakes longevity. Does Les Schwab bleed brakes? Les Schwab shops generally include brake bleeding service during brake pad replacement if necessary to maintain optimal braking system function. Always confirm with your service provider when booking a brake job. How much do brake pads cost for a Mazda CX-5? Brake pad costs for a Mazda CX-5 can vary by location and product. Always consult certified shops or your dealership for accurate pad replacement estimates. Essential Tools and Products to Prevent Brake Pad Replacement Mistakes Recommended equipment for DIY brake pad replacement: Ensure you have a reliable torque wrench, caliper piston tool, brake cleaner, quality gloves, and a jack stand. Having the right gear makes your pad replacement smoother and minimizes the risk of damaging the braking system. Top-rated lubricants and cleaning products for brake pads and braking system: Use silicones or high-temp disc brakes grease for guide pins, and an approved, non-oil-based brake cleaner for rotors and calipers to keep everything moving smoothly and cleanly. Checklist for successful pad replacement job: New, compatible brake pads Brake cleaner and high-temp grease Torque wrench and piston retractor Gloves and eye protection Detailed shop manual for your specific model FAQs: Brake Pad Replacement Mistakes Can I drive after a DIY brake pad replacement if I suspect a mistake? It is strongly recommended not to drive until you’ve identified and corrected any possible brake pad replacement mistakes. Continuing to ride may worsen damage or compromise your safety. Always double-check your work if anything seems off. What if my braking system feels spongy after pad replacement? A spongy brake pedal or lever often signals air in the brake lines or insufficient pad contact. Re-bleed your brakes carefully, check all pad and caliper alignments, and ensure no brake fluid leaks are present. Persistent issues require professional inspection. How often should brake pads be checked and replaced? Brake pads should be checked as part of every major motorcycle maintenance schedule or at least every 5,000-7,000 miles, depending on usage. Replace pads when friction material is below minimum thickness, or sooner if uneven wear or performance loss is detected. Key Takeaways to Avoid Brake Pad Replacement Mistakes Always double-check alignment after changing brake pads to ensure perfect seating and avoid uneven wear. Follow the 30 30 30 break-in procedure after every DIY brake pad replacement for optimal bedding and longevity. Don’t overlook the braking system inspection after pad replacement—catch issues before they become safety hazards. Conclusion: Mastering Brake Pad Replacement and Avoiding Mistakes To prevent brake pad replacement mistakes, follow every step with care, check and double-check your work, and don’t hesitate to review your brake job if anything feels off. Consistent practice and a focus on learning are key to mastering DIY brake pad replacement and ensuring safety every ride. Keep honing your skills—confident, mistake-free brake jobs are within every DIY mechanic’s reach! If you’re committed to keeping your motorcycle in peak condition, don’t stop at just the brakes. Expanding your knowledge to include seasonal maintenance can help you anticipate issues before they arise and extend the life of every component. Explore seasonal bike care secrets every rider must know for expert advice on preparing your bike for changing weather, optimizing performance, and ensuring safe rides all year long. By integrating these advanced care strategies with your brake maintenance routine, you’ll be equipped to handle both everyday upkeep and the unique challenges each season brings. Take the next step in your DIY journey and make your motorcycle maintenance truly comprehensive. Ready to Safely Replace Your Pads? Call Nasty Performance Motorcycle Shop Today: 847-458-4858

Common Mistakes with Motorcycle Tire Pressure

While understanding the basics of tire pressure is essential, many riders overlook the importance of adjusting their approach as the seasons change. For a deeper dive into how temperature shifts and seasonal factors can impact your motorcycle’s performance and tire health, explore our guide on seasonal bike care strategies every rider should know. This resource offers practical tips for adapting your maintenance routine year-round. If you’re ready to take your motorcycle maintenance to the next level, don’t stop at tire pressure. Expanding your knowledge of comprehensive bike care—especially as the seasons change—can dramatically improve your ride’s reliability, safety, and longevity. Discover expert insights on preparing your motorcycle for every climate, from winter storage to spring tune-ups, by visiting our in-depth article on seasonal bike care secrets. Investing in a holistic maintenance approach ensures you’re always ready for the road ahead, no matter what the weather brings.

When To Conduct a Motorcycle Clutch Inspection

Did you know most unexpected breakdowns on the road can be traced back to neglected motorcycle clutch inspection? For riders, understanding when and how to check your clutch can mean the difference between a smooth cruise and being stranded unexpectedly. In this complete guide, we reveal why clutch inspection is an essential habit for every motorcycle owner, how to recognize early warning signs, and vital tips for maximizing your bike’s performance and safety. Unveiling the Importance of Motorcycle Clutch Inspection The motorcycle clutch is a vital component responsible for transferring power from the engine to the rear wheel, allowing smooth gear shifts and controlled acceleration. If overlooked, hidden clutch problems often escalate into serious mechanical issues and sudden breakdowns. A timely clutch inspection protects your investment, prevents costly repairs, and ensures the safety of you and your bike. Recognizing the importance of regular inspection is crucial. Clutch problems may begin subtly, with symptoms like a stiff clutch lever or odd vibrations. Many riders ignore these signs, only to face bigger problems later such as clutch slippage, sticking, or total loss of acceleration. By scheduling regular inspections and staying attentive to early warning signs, you greatly extend your clutch’s—and your bike’s—lifespan. "Did you know that neglecting regular motorcycle clutch inspection is one of the leading causes of unexpected breakdowns on the road?" What You'll Learn About Motorcycle Clutch Inspection The key signs indicating the need for a motorcycle clutch inspection Step-by-step process for conducting a clutch inspection How to identify clutch problems before they escalate When to involve a professional versus DIY Expert tips for optimizing clutch lever response and performance Understanding the Role of the Motorcycle Clutch The motorcycle clutch isn’t just a lever—it’s a sophisticated mechanism that manages the delicate transfer of engine power to the road, allowing smooth starts, effortless shifts, and controlled stops. Without the clutch, shifting gears or coming to a stop would be abrupt and potentially damaging. Understanding its role is the first step towards mastering clutch maintenance, helping you prevent clutch problems and optimize performance. Across all types of motorcycles, from dirt bikes to street bikes, the clutch assembly includes multiple crucial parts—clutch plates, friction plates, steel plates, clutch basket, pressure plate, clutch hub, and more. Each plays a pivotal role in the transfer of power and the ride quality. By grasping how the clutch works and recognizing how different components interact, riders become empowered to detect subtle issues before they evolve into major repairs. How the Motorcycle Clutch Functions The clutch operates by compressing or releasing clutch discs and friction plates between the clutch basket and pressure plate. When you pull the clutch lever, the plates separate, breaking the connection between the engine and rear wheel. This action allows you to change gears safely. When you release the lever, the plates re-engage, transmitting power again. Components such as the clutch hub, needle bearing, clutch spring, and clutch basket fingers must be in harmony for seamless operation. Any wear or warping of these parts may trigger issues like clutch drag (when the plates fail to fully disengage) or slippage (when friction plates fail to transfer full power). For hydraulic systems, the clutch’s operation depends on hydraulic fluid pressure. Both mechanical (cable) and hydraulic clutches require regular inspection to avoid progressive damage. Motorcycle Clutch Problems: Common Triggers and Impacts Clutch problems arise from several common sources. Worn clutch plates, warping due to excessive heat, poor cable adjustment, or contaminated hydraulic fluid can all lead to troublesome symptoms. Dirt bikes, for example, often suffer clutch wear from aggressive riding in off-road conditions, while street bikes may see clutch disc glazing from frequent stop-and-go traffic. The impacts of overlooked clutch issues are serious: reduced acceleration, strange noises during shifting, increased lever stiffness, and a slipping clutch that struggles under load. Over time, if the pressure plate and clutch hub are not inspected, you risk damaging the clutch basket or warping steel plates, leading to expensive repairs and compromised safety. Understanding these triggers is vital for effective inspection and preventative maintenance. Essential Timing: When To Conduct a Motorcycle Clutch Inspection Knowing when to conduct a motorcycle clutch inspection is as important as understanding how to perform one. Manufacturers generally recommend inspection intervals based on mileage and riding style, but attentive riders should always be alert to symptoms that demand immediate attention. Regular inspection ensures the clutch plate, friction plate, clutch discs, and related parts remain in proper working order, preserving both safety and motorcycle performance. Inspections aren’t just about distance traveled. They help identify subtle warning signs, prevent breakdowns, and can catch issues such as free play anomalies, cable tension problems, or the onset of rattling sounds. Monitoring your mileage and listening to your bike ensures you address problems before they escalate into larger, more costly repairs. Mileage-Based Motorcycle Clutch Inspection Intervals Most modern motorcycles benefit from a clutch inspection every 6,000 to 12,000 miles. However, your ideal interval varies depending on riding habits and bike type. Aggressive riders, racers, or those who commute frequently in heavy traffic often require more frequent inspections as clutch components wear faster. Dirt bikes may need checked every few months due to tougher conditions, while touring bikes typically have longer intervals. Always consult your owner’s manual for your motorcycle’s recommended service schedule. It’s best to err on the side of caution; if you notice symptoms like a spongy clutch lever, difficulty shifting, or changes in clutch engagement, conduct an inspection regardless of your last service date. Remember, a minor investment of time now can save you from a major repair bill later. Symptoms Suggesting Immediate Clutch Inspection Immediate inspection is warranted whenever you observe notable changes in clutch performance. Classic red flags include suddenly increased clutch lever travel, the presence of gear crunching, a feeling of the clutch slipping (where power delivery is inconsistent), or the emergence of rattling sounds near the clutch cover. Sticky or hard-to-pull levers, vibration under load, or visible clutch disc overheating are further warning signs that demand prompt attention. Pay attention to both how your bike rides and how it sounds. If a once-smooth shift now jerks, or you detect hesitation in power, these may indicate friction plate glazing, warped plates, or issues with the clutch basket or pressure plate. Swift diagnosis helps prevent further damage and ensures safer, more reliable rides. Comparison of Recommended Inspection Intervals by Motorcycle Type Motorcycle Type Recommended Inspection Interval Special Notes Standard/Commuter 6,000–8,000 miles Typical mixed-use conditions Dirt Bike/Off-Road Every 3–6 monthsor after every major ride Check more often due to harsher operating environments Sport Bike (Street) 8,000–10,000 miles More frequent for aggressive riders Touring/Cruiser 10,000–12,000 miles Less stress due to steady, long rides Custom/Performance Varies Inspect after tuning or track events How to Tell if Your Clutch is Bad on a Motorcycle Knowing how to identify a failing clutch can help you act fast and avoid being stranded. Here are common warning signs that indicate serious clutch problems: Difficulty shifting gears A spongy or tight clutch lever Slipping or sticking clutch Strange noises or vibrations Loss of acceleration When the clutch lever becomes hard to operate, or you feel the clutch fails to engage or disengage smoothly, it’s time to inspect for worn clutch plates, stretched cables, low hydraulic fluid, or warping in the pressure plate and clutch hub. Ignoring these problems may worsen wear on internal clutch discs, basket fingers, and may even damage the clutch basket itself. Always treat these symptoms as critical warnings to conduct immediate clutch inspection. What Does a Motorcycle Clutch Inspection Involve? A proper motorcycle clutch inspection consists of various steps, from general checks of the lever and cable to detailed examination of the clutch plates themselves. Both manual and hydraulic system motorcycles require careful assessment to catch issues early and maintain smooth clutch engagement. Inspectors begin by assessing free play at the clutch lever, cable adjustment, and inspecting for leaks or color change if the system is hydraulic. Next, they're looking for excessive play, unusual resistance, or changes in the feel of the lever—key indicators of internal clutch problems. A thorough inspection might include removing the clutch cover for a hands-on check of the clutch plates, friction plate, and basket. Preliminary Checks: Clutch Lever, Cable, and Fluid Start your clutch inspection by checking the free play at the clutch lever. There should be a small, but definite, amount of loose play—too much or too little indicates a need for cable adjustment. Check cable tension for signs of wear or fraying and lubricate as necessary. For bikes with hydraulic clutches, inspect the hydraulic fluid reservoir for proper levels and evidence of contamination or discoloration. Evaluate the smoothness of clutch lever movement. Any sponginess, excessive stiffness, or inconsistent resistance may signal deeper clutch problems. Don't forget to check for leaks in the hydraulic system, as low fluid or air contamination can drastically affect clutch engagement and performance. These preliminary checks set the stage for more detailed inspections if abnormalities are found. Step-by-Step Clutch Plate Inspection on a Motorcycle To check the health of your clutch plates and related components, you need basic tools, patience, and a methodical approach. Begin by ensuring your motorcycle is safely parked, turned off, and the engine is completely cool. Remove the clutch cover to access the clutch basket, pressure plate, clutch discs, and steel plates. Examine each clutch disc and friction plate for visible signs of wear, overheating (discoloration), warping, or grooves on the clutch basket fingers. Using a micrometer, measure the thickness of the plates and compare with manufacturer specifications—any plate thickness below spec means the component must be replaced. Note any uneven wear, chips, or signs of burnt friction surfaces which may indicate improper clutch spring tension or hydraulic problems. Reassemble carefully, ensuring the pressure plate and clutch hub are aligned and all components are torqued to the correct specs. How to Inspect Clutch Plates on a Motorcycle Here is a simplified outline for inspecting the clutch plates on your motorcycle. Always consult your owner’s manual for details specific to your model: Ensure the motorcycle is secured and cool Remove the clutch cover Examine clutch plates for wear, burning, or warping Measure plate thickness and compare to manufacturer specifications Reassemble with proper torque settings "Regular motorcycle clutch inspection helps riders avoid costly emergency repairs and ensures performance and safety on every ride." Top 5 Symptoms of a Bad Motorcycle Clutch Dragging clutch Clutch slippage under load Noisy operation during shifting Stiff or loose clutch lever Irregular clutch engagement If you encounter any of these symptoms, consider them urgent signals for a detailed clutch inspection. Address these issues before they lead to further damage of the clutch hub, basket, or pressure plate components. Expert Tips for Addressing Motorcycle Clutch Problems Handling clutch issues proactively is vital for every responsible rider. Here are actionable tips from seasoned professionals: First, establish a regular schedule for clutch lever and cable inspection. Lubricate moving parts regularly and monitor hydraulic fluid levels for any color or viscosity changes. Store your motorcycle properly and always allow the bike to warm up before demanding rides to prevent thermal shock and warping of the clutch discs and friction plate. When in doubt, consult a trusted mechanic familiar with your motorcycle type. When to Seek Professional Motorcycle Clutch Inspection DIY inspection can handle routine checks and maintenance, but certain issues—such as persistent clutch problems, rattling sounds, or apparent damage to the clutch basket or hub—require a trained eye. If you lack proper tools or are unsure about measurement specs, don’t hesitate to visit a reputable shop. Remember, clutch systems have little room for error, and improper inspection or assembly may worsen the problem. Seek professional inspection if you’re dealing with chronic slippage, noisy operation, excessive free play that cannot be adjusted out, or if you suspect hydraulic system leaks or contamination. It’s always better to be safe and seek help, especially with complex or performance motorcycles. Maintenance Best Practices for Preventing Clutch Problems Prevention is the best cure for clutch issues. Prioritize regular oil changes (especially for wet clutches), keep the cable and lever system free of debris, and follow manufacturer guidelines for clutch adjustment. Periodically check the basket fingers, pressure plate, and friction plate for scoring or grooves. In dry clutches, monitor dust buildup, since excess grime accelerates plate wear and clutch engagement issues. Riding habits also influence clutch longevity. Avoid riding the clutch unnecessarily (such as holding the lever at traffic lights), use smooth and deliberate gear shifts, and refrain from excessive aggressive acceleration. Proper storage and regular cleaning further extend clutch spring, clutch hub, and clutch basket lifespan, translating into smoother, more reliable performance. FAQs: Motorcycle Clutch Inspection and Clutch Problems How often should I inspect my motorcycle clutch? Most manufacturers suggest inspecting your motorcycle’s clutch every 6,000 to 12,000 miles, or more often for aggressive riding, harsh conditions, or older bikes. Always check your owner's manual for your specific model. Can I inspect the clutch myself, or should I go to a professional? Many preliminary checks (like free play and lever movement) and simple inspections can be done at home with basic tools. However, if you notice advanced symptoms like slippage, noise, or suspect internal wear, it’s best to consult a professional mechanic. What clutch problems are most common in modern motorcycles? The most common issues include worn or glazed friction plates, stretched cables, low or dirty hydraulic fluid, and warped steel plates or clutch basket fingers. Is clutch inspection different for dirt bikes versus street bikes? Yes—dirt bikes often require more frequent clutch inspections due to the harsher operating conditions and increased wear from aggressive off-road riding. Street and touring bikes may maintain longer intervals but require equal attention to detail. Key Takeaways from Your Motorcycle Clutch Inspection Timely inspections prolong clutch lifespan Recognizing early symptoms of clutch problems is critical DIY inspection is possible but professional help may be required for complex issues A well-maintained clutch lever ensures safety and smoother rides Contact Trusted Professionals for Your Next Motorcycle Clutch Inspection Ready to keep your bike running smoothly? Protect your investment and never compromise on safety—Call Nasty Performance Motorcycle Shop Today: 847-458-4858 "Protect your investment and never compromise on safety—Call Nasty Performance Motorcycle Shop Today: 847-458-4858" Conclusion: Proactive motorcycle clutch inspections guarantee safer, longer, and more enjoyable rides. Listen to your bike, follow inspection intervals, and trust professionals when in doubt for ultimate peace of mind. While understanding clutch inspection intervals is crucial, it's equally important to adapt your maintenance routine to the changing seasons. For practical advice on how weather and seasonal shifts can impact your bike’s performance and what steps you should take, explore these essential seasonal bike care secrets every rider should know. Mastering clutch inspection is just one part of keeping your motorcycle in peak condition year-round. To truly safeguard your ride and enjoy worry-free journeys, consider how comprehensive seasonal care can further enhance your bike’s reliability and longevity. Discover expert strategies for adapting your maintenance routine to every season and unlock advanced tips that go beyond the basics by visiting our in-depth guide on seasonal motorcycle care. Your next level of riding confidence starts with a holistic approach to maintenance.

Terms of Service

Privacy Policy

Core Modal Title

Sorry, no results found

You Might Find These Articles Interesting

T
Please Check Your Email
We Will Be Following Up Shortly
*
*
*