
Did you know that over 30% of roadside motorcycle breakdowns are caused by neglected chain and sprocket maintenance? One worn cog can ruin your whole ride—sometimes in an instant. Don’t gamble with your safety or your bike’s performance. In this comprehensive guide, you’ll learn how regular motorcycle chain and sprocket replacement can save you from catastrophic breakdowns and expensive repairs.
When was the last time you checked your motorcycle chain or looked closely at your rear sprocket? If you aren’t sure, keep reading. We’ll reveal the crucial signs of wear, expert maintenance tips, and step-by-step replacement strategies—no technical jargon required.
Every 8,000 Miles? The Surprising Truth About Motorcycle Chain and Sprocket Replacement
Many riders believe that motorcycle chain and sprocket replacement is only needed at high mileage. The truth? Some chains and sprockets wear out faster than others—sometimes much sooner than you think. While service manuals may suggest intervals of 15,000-20,000 miles, factors like aggressive riding, weather exposure, infrequent chain lube, and regular dirt or road riding can quickly shorten that lifespan.
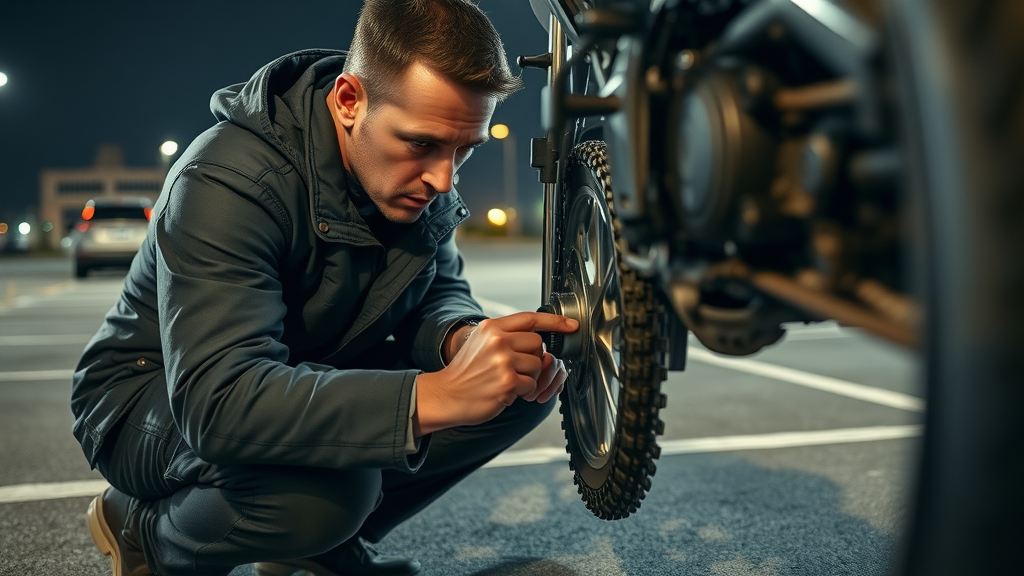
You don’t have to guess when it’s time to replace your chain and sprocket. Instead, pay attention to key warning signs , such as unusual noises, visible sprocket wear or rust on the master link, and sudden changes in chain tension. Rear wheel performance is directly tied to your chain’s condition, with slack, skipping, or uneven movement putting you at risk for dangerous rear wheel lock-up or costly rear tire damage. By following the practical steps and checks outlined below, you’ll know exactly when to install a new motorcycle chain, swap the master link, and replace worn rear or front sprockets.
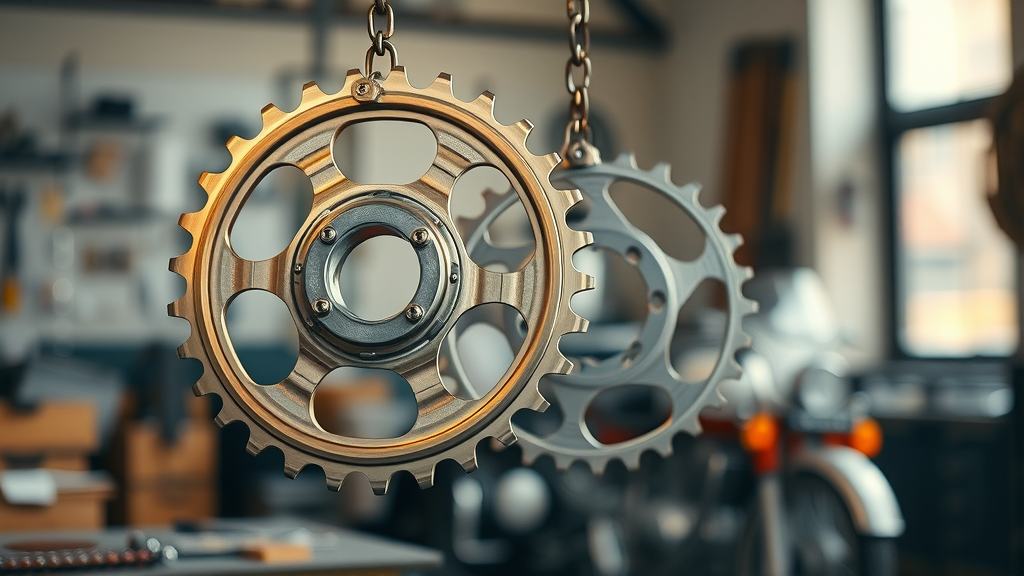
Signs that your motorcycle chain and sprocket need replacement
The crucial connection between rear wheel performance and chain and sprockets
Practical, step-by-step guidance on how to replace your motorcycle chain, sprocket, and master link
The risks of ignoring worn sprocket and chain systems
Tips to maximize chain lifespan
Expert answers to the most common sprocket and chain replacement questions
Why Timely Motorcycle Chain and Sprocket Replacement Matters for Rider Safety and Bike Performance
"Did you know that a worn motorcycle chain can snap without warning, causing catastrophic rear wheel lock-up and severe accidents? Preventative maintenance is not optional—it’s essential."
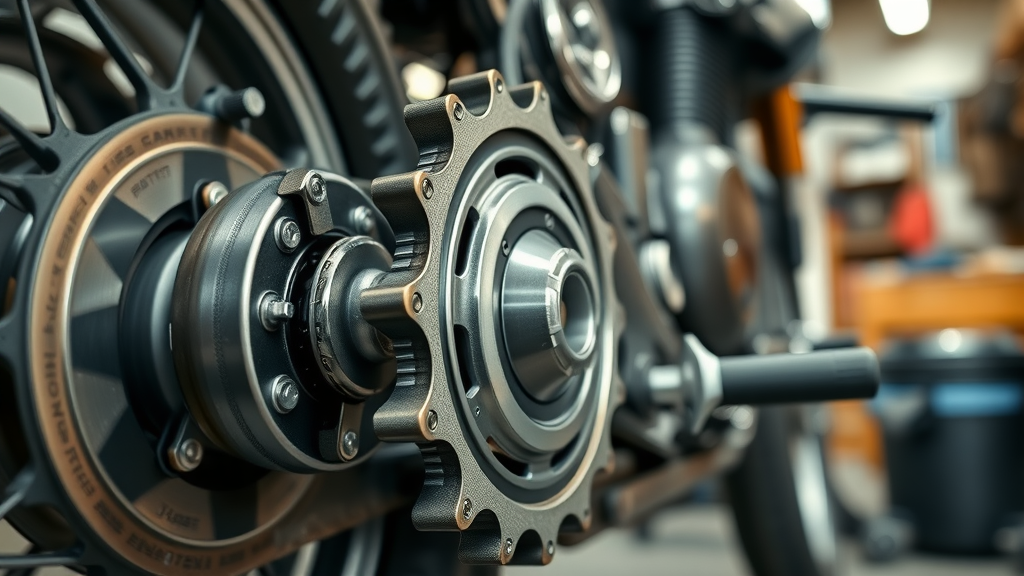
A motorcycle’s chain and sprockets do more than simply transfer power from the engine to the rear wheel. They’re safety-critical parts; neglecting them can result in a snapped chain—which may jam the rear sprocket and instantly seize your rear wheel. On both road bikes and dirt bikes, this mechanical failure often leads to loss of control, high repair costs, or even an accident. Regular inspection, correct chain tension, and prompt motorcycle chain and sprocket replacement keep your ride smooth, safe, and reliable.
Wear doesn’t appear overnight. Gradually, sprocket teeth can become pointed, the chain may start skipping, and corrosion can damage the master link. If you can’t recall your last replacement or chain lube application, it’s a good idea to check these items before your next ride. Rear axle alignment and rear tire health are also impacted by chains and sprockets—if these systems fail, it can compromise your entire motorbike.
Top Signs Your Motorcycle Chain and Sprockets Need Replacement Now
Wondering which symptoms demand immediate action? Unusual noises like rattling or grinding while riding could mean your motorcycle chain is worn or the sprocket teeth have become misshapen. You might also notice inconsistent chain tension , fluctuating between tight and loose as you rotate the rear wheel—an indicator of both chain and sprocket wear.
If your chain keeps skipping or jumps over the sprocket unexpectedly, or if you spot visible wear marks, rust, or a damaged master link, don’t postpone a replacement. Difficulty maintaining chain adjustment or continually finding slack in your bike chain after repeated tightening points to deeper issues. Failure to address these warning signs can lead to sudden chain failure, potentially damaging the rear sprocket, rear axle, or causing rear wheel lock-up.
Unusual noises while riding (rattling, grinding)
Noticeable slack or inconsistent chain tension
Visible wear on sprocket and chain teeth
Difficulty maintaining chain adjustment
Master link corrosion or damage
Chain skipping or jumping over sprocket
Understanding the Impact of Chain Tension and Rear Wheel Alignment on Motorcycle Chain and Sprocket Replacement
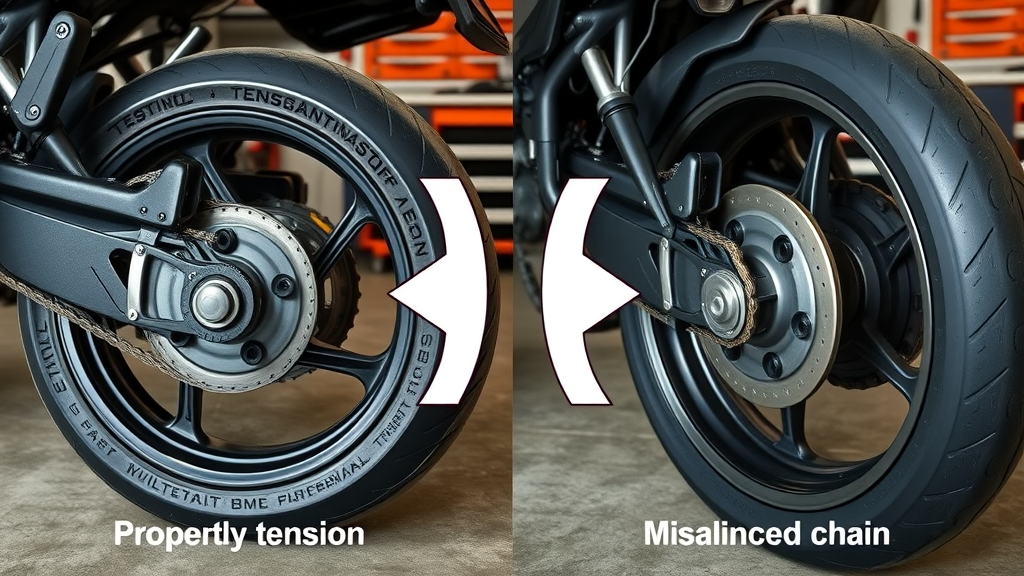
Chain tension directly impacts the longevity of your motorcycle chain and sprockets. If your chain is too tight, it creates excessive wear on both the front and rear sprocket, leading to premature failure, excessive chain wear, and performance issues. Likewise, a loose chain can jump, skip, or even come off entirely. Regularly check tension as your service manual prescribes—usually with the rear wheel off the ground and chain at its slackest point.
Rear wheel alignment is another critical factor—not only for ride comfort but for the health of your chain and sprocket. A misaligned rear wheel often causes uneven wear: you may notice the chain "walking" to one side, uneven sprocket teeth, or half a tooth of wear along one edge. The alignment marks on your rear axle and swingarm should match when viewed from both sides. Misalignment strains the master link and can cause the system to wear out much faster, forcing you to replace chains, sprockets, or even the rear axle long before necessary.
How Incorrect Chain Tension Damages Your Sprocket and Chain
Improper chain tension—whether too slack or too tight—can inflict serious harm on your sprocket and chain. If too tight, the chain exerts continuous pressure on the rear sprocket and front sprocket, rapidly wearing down the sprocket teeth and increasing friction. This not only accelerates chain wear, but also puts stress on the rear axle and possibly the transmission output shaft. Conversely, a chain that's too loose is prone to skipping teeth, leading to uneven wear patterns known as "hooked" sprocket teeth.
The effects of poor chain tension ripple throughout your drivetrain. Excessive slack causes chain slapping, contributing to noisy operation and possible chain slippage over the sprocket. Over time, this not only damages your motorcycle chain and sprockets but can also jar your rear wheel, impairing handling. By maintaining manufacturer-recommended chain tension, you maximize the service life of your entire system—saving money and ensuring a smoother ride.
Rear Wheel Misalignment: The Hidden Factor Behind Premature Motorcycle Chain Wear
A misaligned rear wheel does more than cause steering issues—it also destroys chains and sprockets. When the alignment is off, the chain travels at an angle, causing uneven and accelerated wear across the sprocket teeth. This stress is particularly harsh on the master link and often results in chain sl—side plate elongation or bending. If you consistently need to readjust chain tension more on one side of the rear axle than the other, misalignment is usually the culprit.
To check for correct alignment, compare the markings on each side of the rear axle. You can also use a straightedge or a purpose-built alignment tool along the front and rear sprockets to confirm the chain runs in a perfectly straight line. Correcting rear wheel misalignment not only prolongs the life of your motorcycle chain and sprockets but also makes your bike safer and more predictable on both straightaways and curves.
Comparison of Symptoms: Healthy vs. Worn Out Chain and Sprockets |
||
Feature |
Healthy Motorcycle Chain |
Worn Sprocket and Chain |
|---|---|---|
Chain Tension |
Consistent, moderate |
Loose or tight sections |
Sprocket Teeth |
Clean, symmetrical |
Hooked, pointed, or worn |
Master Link |
Smooth, sturdy |
Rusty, loose, or missing clip |
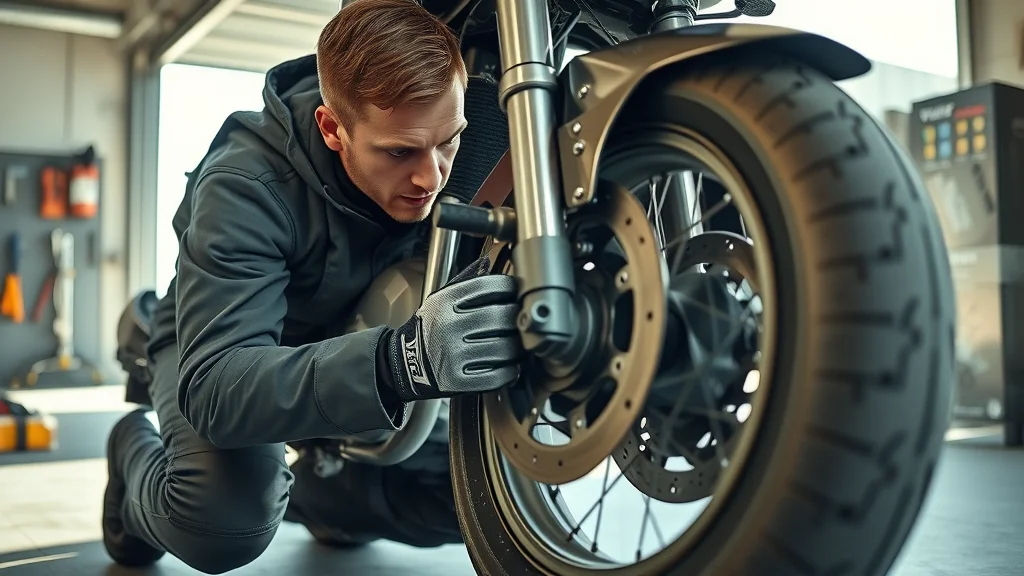
Step-by-Step Motorcycle Chain and Sprocket Replacement Guide
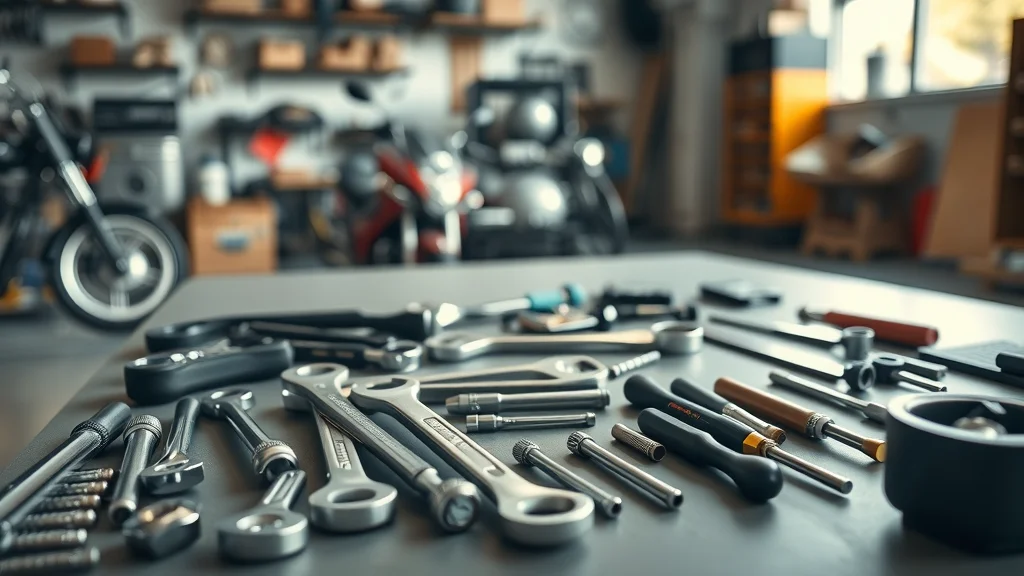
Prepare your tools and safety equipment
Support the rear wheel securely
Loosen chain adjusters and remove chain master link
Remove old sprocket and chain from rear wheel hub and front sprocket
Inspect components for additional wear
Install new sprocket and chain
Set correct chain tension and align rear wheel
Secure new master link and double-check installation
Replacing the motorcycle chain and sprocket begins with quality preparation. Gather needed tools—typically a wrench set, pliers, chain breaker, and a torque wrench for your axle nut and locking nut. Safely raise the rear tire so it spins freely (a paddock stand is ideal) and consult your service manual for model-specific tips. Begin by loosening the chain adjuster bolts on the rear axle, then remove the master link (usually with pliers) to release the chain.
Next, unbolt the front and rear sprockets and slide the old chain and sprockets out. Inspect all parts for signs of excessive wear or hidden damage, especially the master link, sprocket teeth, and chain side plates. Install the new sprocket and thread in the new motorcycle chain, then connect it with a new master link. Adjust chain tension per your bike’s manual—too tight or slack will accelerate wear. Finally, double-check rear wheel alignment, tighten the axle nut, and apply an even coating of chain lube to finish the job.
Watch a professional mechanic walk you through each step of motorcycle chain and sprocket replacement , highlighting essential safety checks and best practices for every major bike model.
When Should You Replace Sprockets with Your Motorcycle Chain?
The best practice is to replace your sprocket whenever you replace the chain. This approach ensures both components wear in together, maximizing longevity and performance across your motorcycle’s drivetrain. Using a new chain on old sprockets (or vice versa) may cause premature chain wear, chain skipping, and even damage to your rear or front sprocket teeth. Regular replacement helps prevent the headaches of mismatched wear and saves your rear wheel assembly from future failures.
The Interdependence of Sprocket and Chain: Why It's Best to Replace Them Together
Chains and sprockets naturally develop matching wear patterns as they rotate thousands of times over the life of your bike. But introducing a new chain to a worn rear sprocket allows old, misshapen teeth to prematurely "stretch" and damage the fresh links. This means the chain may develop slack more rapidly, and sprocket wear will accelerate. It’s not just a good idea —it’s essential to change both at once if you want to avoid doubled labor and expense later.
Likewise, fitting a new rear sprocket without swapping out an old, stretched chain will wear your new part out quickly. Always buy chain and sprocket sets designed to work together and approved for your motorcycle make and model.
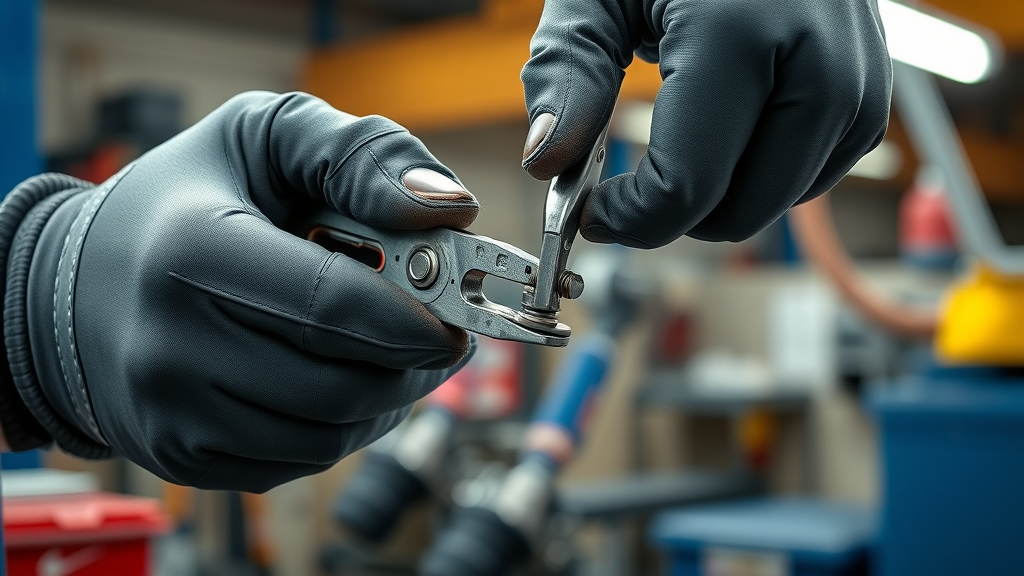
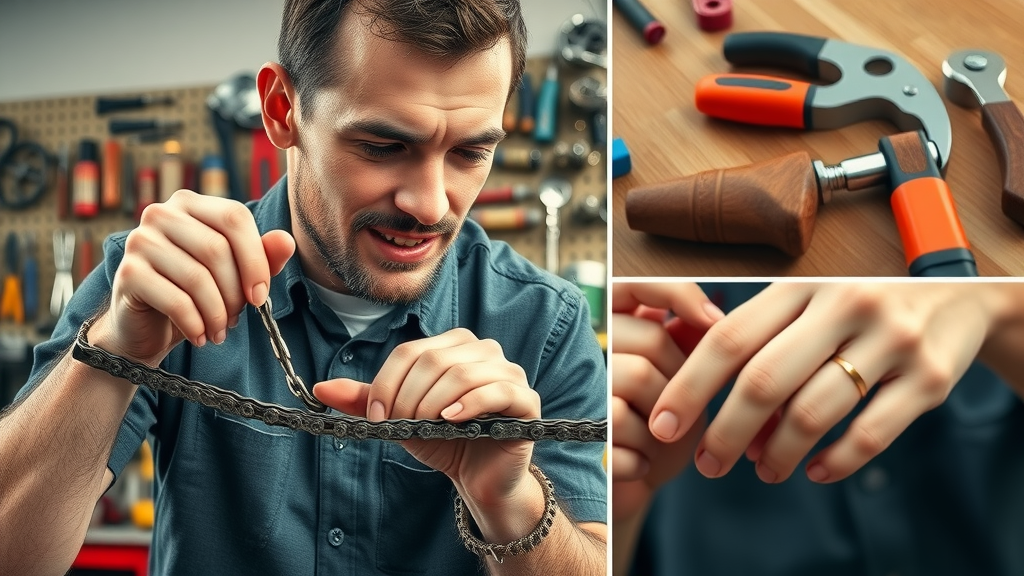
Motorcycle Chain Master Link Types & How to Install Them Safely
The master link is the critical connector securing the ends of your motorcycle chain. Master links come in rivet or clip types. Rivet master links require special tools and offer a stronger, more tamper-proof connection—recommended for high-power or sporty road bikes. Clip-style master links are easier for DIY home mechanics to replace but must be installed in the correct orientation (open end trailing!) to prevent disconnection under load.
Regardless of the link type, clean the surrounding chain thoroughly before installation, and apply a fresh coat of chain lube. Installing the master link incorrectly is one of the leading reasons for sudden chain failures and can cause extensive sprocket and chain damage.
Follow along with a visual guide showing the safe and correct way to assemble a rivet and clip master link, plus top mistakes to avoid for long-lasting performance.
Choosing the Best Motorcycle Chain—40 vs. 420 Chain Explained
Knowing whether a 40 or 420 chain is right for your bike hinges on its typical use and manufacturer specifications. The 40 chain is the heavier-duty option, designed for larger displacement bikes and frequent high-torque scenarios. These chains have a bigger pitch size, making them perfect for powerful motorcycles or hard-ridden dirt bikes.
The 420 chain, by comparison, is slightly thinner and lighter, suitable for smaller bikes, scooters, or casual road bikes. It delivers reliable performance while being easier to handle and change for most home mechanics. For durability and reliability, always double-check your service manual’s recommendations before choosing the right size!
40 vs. 420 Chain Comparison |
||
Feature |
40 Chain |
420 Chain |
|---|---|---|
Pitch Size |
Larger |
Smaller |
Common Use |
Heavy-duty bikes |
Light/medium bikes |
Durability |
High |
Good |
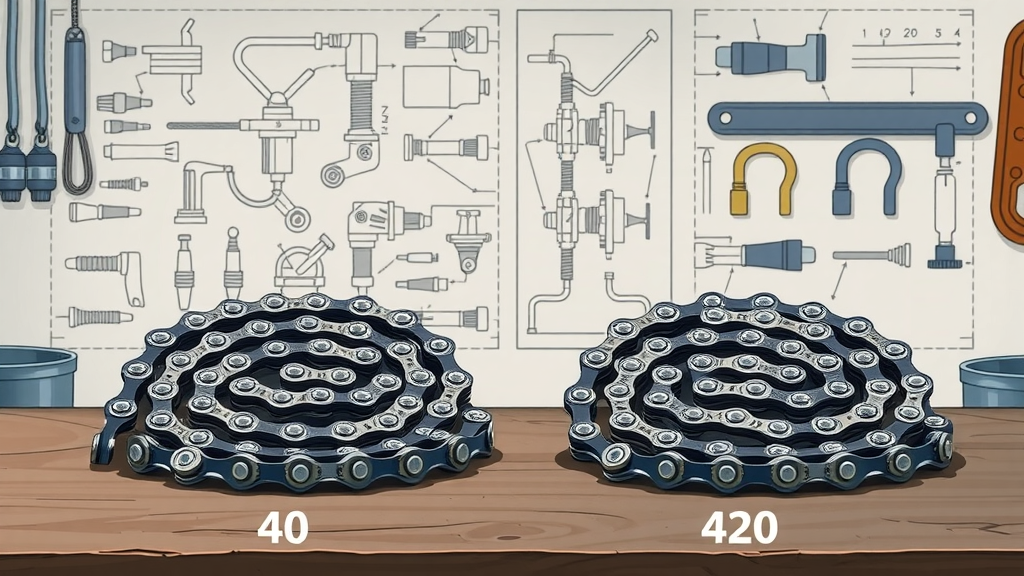
See a direct comparison of chain sizes on different motorcycle types, and learn which chain will best suit your riding style and road conditions.
People Also Ask About Motorcycle Chain and Sprocket Replacement
How often should I change the chain and sprocket on my motorcycle?
Most manufacturers recommend motorcycle chain and sprocket replacement every 15,000–20,000 miles, but regular inspection is crucial due to riding styles and maintenance routines.
Should you replace sprockets with a motorcycle chain?
Yes, replacing sprockets whenever you replace your motorcycle chain ensures equal wear and optimal performance, preventing premature failure.
Is it difficult to change the sprocket and chain on a motorcycle?
For most home mechanics, motorcycle chain and sprocket replacement is a moderate challenge—requiring basic tools, mechanical knowledge, and careful attention to reassembly and chain tension.
Is a 40 or 420 chain better?
A 40 chain is heavier and best suited for more powerful motorcycles due to its strength, while a 420 chain is lighter for smaller bikes and casual riding.
Frequently Asked Questions on Motorcycle Chain and Sprocket Replacement
Can I replace just the chain instead of both? Replacing only the chain while keeping worn sprockets often leads to rapid chain wear and premature failure. It's best to replace chains and sprockets together for consistent, lasting results.
What tools are needed for sprocket and chain replacement? Basic requirements include a wrench set, torque wrench for the axle nut, pliers (for the master link), and a chain breaker tool. Always check your service manual for additional instructions or specialty tools recommended for your exact model.
How does weather affect motorcycle chain lifespan? Wet, muddy, or salty riding conditions accelerate chain and sprocket wear by washing away chain lube and causing rust or corrosion—especially on the master link. Rinse, dry, and relubricate your chain after every ride in harsh weather to maximize longevity.
How do I know if I need to replace the master link? Check the master link for visible signs of corrosion, looseness, or a missing clip. Any damage warrants immediate replacement to avoid risk of chain failure and unexpected breakdowns.
Expert Advice: Maximizing the Lifespan of Your Motorcycle Chain and Sprocket

Keep your motorcycle chain lubricated every 300-500 miles to minimize friction and prevent rust.
Inspect chain tension and alignment monthly —small adjustments can stave off major repairs.
Clean chain and sprockets after riding in wet or dirty conditions for best performance and long life.
Replace master link at the first sign of wear or corrosion as a proactive safety measure.
Use quality parts approved for your bike’s make and model , as specified by your service manual, for the safest, most efficient operation.
Ready for Smooth, Safe Rides? Book Your Motorcycle Chain and Sprocket Replacement Now
"Don’t risk your safety or your machine. Call Nasty Performance Motorcycle Shop Today: 847-458-4858."
Actionable steps: Inspect your motorcycle chain and sprockets, maintain optimal chain tension, replace both parts together, and keep up with regular lubrication for reliable rides.
Call Nasty Performance Motorcycle Repair Shop Today: 847-458-4858
Regular maintenance of your motorcycle’s chain and sprockets is crucial for ensuring optimal performance and safety. The article “Motorcycle Chain & Sprocket Maintenance Tips” from Harley-Davidson provides comprehensive guidance on inspecting and maintaining these components, including how to identify signs of wear and the importance of regular lubrication. ( harley-davidson.com ) Additionally, “How to Replace Your Motorcycle Chain and Sprockets” by Cycle World offers a detailed, step-by-step tutorial on the replacement process, highlighting necessary tools and potential pitfalls to avoid. ( cycleworld.com ) If you’re serious about maintaining your motorcycle’s drivetrain, these resources will equip you with the knowledge and techniques needed for effective upkeep.

Write A Comment