cropper
update

Nasty Performance ~ 847-458-4858 

update
  • Blog Home
  • Categories
    • Motorcycle Maintenance
    • Riding Tips & Preps
    • Safety & Inspection
    • Customizations & Upgrades
    • DIY Motorcycle Repairs
    • Motocycle Audio Systems
    • Motocycle Seasonal Care & Storage
    • Engine, Electrical Performance
  • Bike Night
  • Nasty Performance Motorcycle Shop
February 23.2026
1 Minute Read

How Often Should You Schedule Motorcycle Maintenance?

Did you know that skipping just one scheduled maintenance can double your risk of a roadside breakdown? For riders, missing a motorcycle maintenance schedule doesn’t just threaten performance—it can quietly undermine your safety every time you hit the road. In this comprehensive guide, you’ll discover why sticking to a regular maintenance checklist is your best investment in both your peace of mind and your bike’s long-term health. Whether you ride a vintage cruiser or a high-performance sport bike, understanding and following the proper service intervals will help you save money, prevent expensive repairs, and enjoy safer, smoother trips—every time.

Startling Facts: Why You Need to Schedule Motorcycle Maintenance Regularly

Every year, thousands of riders find themselves stranded on the side of the road because they ignored simple maintenance tasks or put their maintenance schedule off too long. Research from leading motorcycle safety organizations shows that nearly 40% of avoidable motorcycle breakdowns are due to skipped routine care. That’s not just about inconvenience—it’s about putting your safety and wallet at risk.

Motorcycles are precision machines; from the oil change to checking your final drive, routine motorcycle maintenance helps prevent small issues from snowballing into costly or dangerous problems. A proactive motorcycle maintenance schedule ensures your brakes, tires, chain, fluid levels, and electrical systems are always in top shape. Remember, even the best rider can’t predict a hidden mechanical fault. But a well-followed maintenance checklist can stop trouble before it starts. Whether you’re prepping for a track day, daily commute, or a weekend ride, sticking to a service interval means you’re ready for anything—while also saving big on expensive repairs down the road.
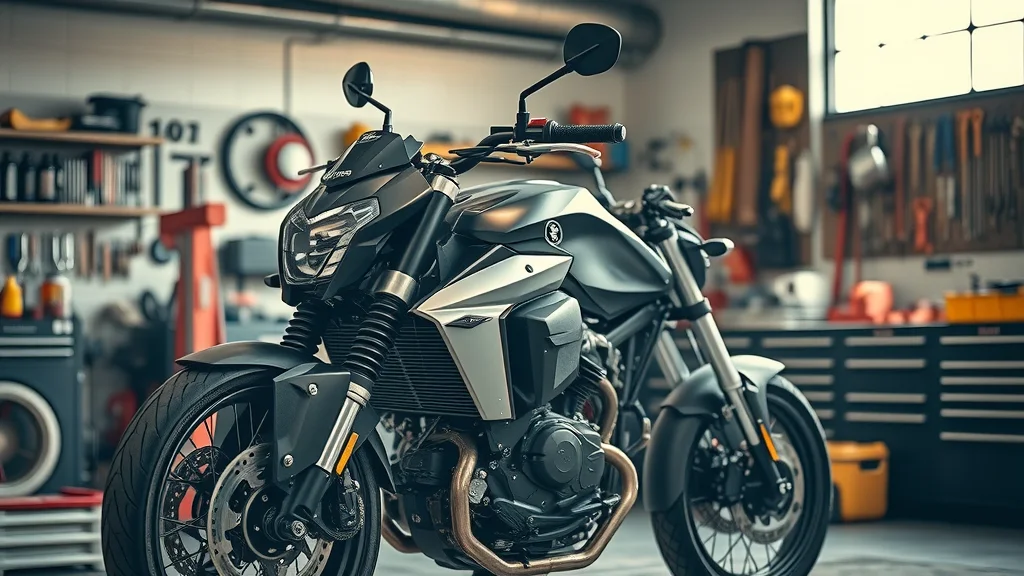
Modern motorcycle parked for inspection with tools in a well-lit workshop, schedule motorcycle maintenance

Understanding the Risks of Ignoring Your Motorcycle Maintenance Schedule

Neglecting a proper motorcycle maintenance schedule doesn’t just hurt your bike—it can directly affect your safety and finances. Forgetting an oil change or skipping a final drive inspection can gradually wear out essential components. Over time, problems like degraded motor oil, uneven tire wear, or fading brake fluid can lead to expensive repairs or dangerous situations like brake failure or tire blowouts.

Many riders underestimate how fast minor lapses add up. One missed service interval could lead to unexpected breakdowns during a long road trip or at the worst possible moment, like a busy intersection or a rainy night. Even a simple maintenance task like checking tire pressure or lubricating the chain offers vital protection. By following a set maintenance schedule, you ensure every ride is as safe and reliable as the last.

To further enhance your maintenance routine, it's helpful to understand how seasonal changes can impact your bike's needs. For practical tips on adapting your care throughout the year, explore these essential seasonal bike care secrets every rider should know.

What You'll Learn About Motorcycle Maintenance Schedules

  • The optimal frequency to schedule motorcycle maintenance

  • Key service intervals and what they include

  • How to follow a maintenance checklist

  • The costs and long-term savings of adherence

  • Answers to common safety and etiquette questions
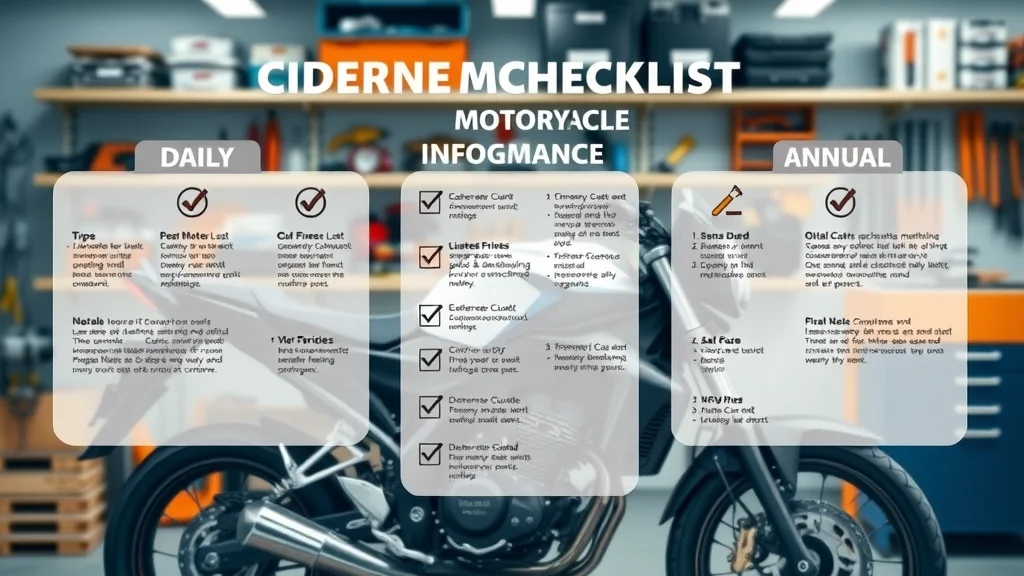
Infographics showing motorcycle maintenance checklist and schedules, including daily, weekly, monthly, and annual tasks, maintenance checklist

What Is a Motorcycle Maintenance Schedule?

A motorcycle maintenance schedule is a structured plan that outlines when to perform essential maintenance tasks on your bike—based on time, mileage, or riding conditions. It’s your bike’s personalized calendar for staying in optimal condition. Maintenance schedules are usually provided by the manufacturer in your owner’s manual, breaking down exactly when to do routine checks, oil changes, or major services.

The right schedule doesn’t just help you stay organized; it maximizes your motorcycle’s safety, reliability, and value. Whether you own a touring bike, daily commuter, or off-road dirt bike, adhering to an official maintenance checklist minimizes wear, extends your bike’s life, and keeps performance at its peak. Think of your schedule as a roadmap to stress-free riding—not another chore.

Defining Service Intervals and Maintenance Schedules for Motorcycles

Service intervals refer to the time or mileage markers that signal when a specific maintenance task should be done—often every 600, 3,000, or 6,000 miles, or at monthly or yearly stages. These key benchmarks help ensure you’re not missing critical inspections, fluid changes, or parts replacements. A well-designed maintenance schedule will also account for unique riding conditions, like frequent track days or extreme climates, adjusting intervals as needed. Most modern bikes come with a digital or paper log so you can easily track what’s due and when.

"A strict maintenance schedule is the backbone of motorcycle safety and performance." - Leading Industry Expert

Understanding Motorcycle Service Intervals and Service Interval Recommendations

Knowing the right service intervals is crucial to keeping your motorcycle in top shape. Every manufacturer sets recommended maintenance intervals for key components—from the first oil change through valve service and beyond. Following these intervals not only provides peace of mind but minimizes the risk of premature wear or sudden breakdowns.

Most bikes use a combination of time-based (like monthly or yearly) and mileage-based service guidelines. Modifying your maintenance schedule for particularly harsh environments, high mileage, or specialized use (such as dirt biking or frequent commuting) is sometimes necessary. Sticking to the right service interval for your model helps prevent skipped tasks and ensures your ride is always ready for the next adventure.

Typical Service Intervals: Daily, Weekly, Monthly, and Annual Maintenance Tasks

Let’s break down a typical motorcycle maintenance schedule by time and mileage. Consistent attention at each interval helps catch problems early—before they become major service headaches. Daily tasks often include visual checks and fluid levels. Weekly and monthly intervals add inspections like tires, brakes, and chain or belt. Annual or major mileage benchmarks (3,000, 6,000, 12,000 miles) require more comprehensive work, such as oil changes, valve service, and thorough system inspections.

Remember, a good time to check your schedule is before the riding season or after a rigorous track day. Some riders rely on smartphone apps, while others prefer classic pen-and-paper logs or manufacturer booklets. The goal: never let routine care slip—and never get caught off-guard by costly repairs or dangerous equipment failures.

Table: Common Motorcycle Maintenance Schedule Intervals (Daily, Weekly, Mileage-Based Tasks)

Interval

Maintenance Tasks

Daily

Visual check of tires, lights, chain, brakes, and fluid leaks

Weekly

Check tire pressure and wear, inspect brake fluid, chain/belt, and controls

Monthly or Every 500 Miles

Oil level check, lubricate chain, adjust clutch and throttle, inspect final drive

3,000 – 6,000 Miles

Oil change, air filter inspection, spark plugs, brake system check, coolant check

12,000 Miles (or Annual)

Comprehensive service: valve service, major system check, wheel bearings, replace fluids as needed

Essential Components of a Motorcycle Maintenance Checklist

A well-designed maintenance checklist makes sure no critical step is missed during any maintenance session. It’s more than just a reminder for your next oil change; it’s a structured guide for checking every system that keeps your bike running smoothly and safely. Start with the basics—engine, brakes, tires, electrical—and expand for your specific make and model. A robust motorcycle maintenance schedule incorporates all these elements and more, providing full coverage for regular and major service needs.

Following a checklist boosts rider confidence, whether you’re prepping for a cross-country ride or a routine trip to the store. Skipping even a single component, like adjusting the chain or checking the final drive, can lead to annoying—or downright dangerous—surprises. From novice to seasoned pro, every rider benefits from having a comprehensive, up-to-date maintenance checklist at hand.

Breakdown of Key Maintenance Tasks on a Maintenance Checklist

Here are the non-negotiable maintenance tasks every reliable maintenance checklist should include:

  • Oil Change

  • Checking Tire Pressure and Wear

  • Inspecting Final Drive

  • Brake System Examination

  • Chain, Belt, or Shaft Maintenance

  • Fluid Level Assessment

Make it a point to check your owner’s manual for any additional tasks, such as spark plugs or valve service, which may be model-specific. If you ride in dirty, dusty, or wet conditions, more frequent attention to parts like the air filter and chain and sprocket is wise. Consistency is the key to keeping your machine in top shape and avoiding expensive repairs down the line.

Major Services vs. Routine Motorcycle Maintenance
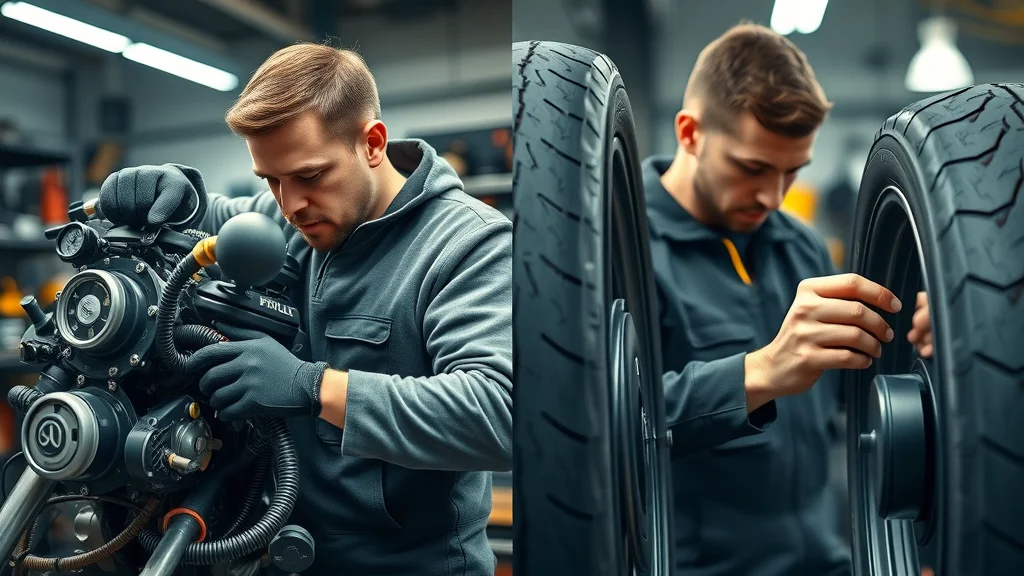
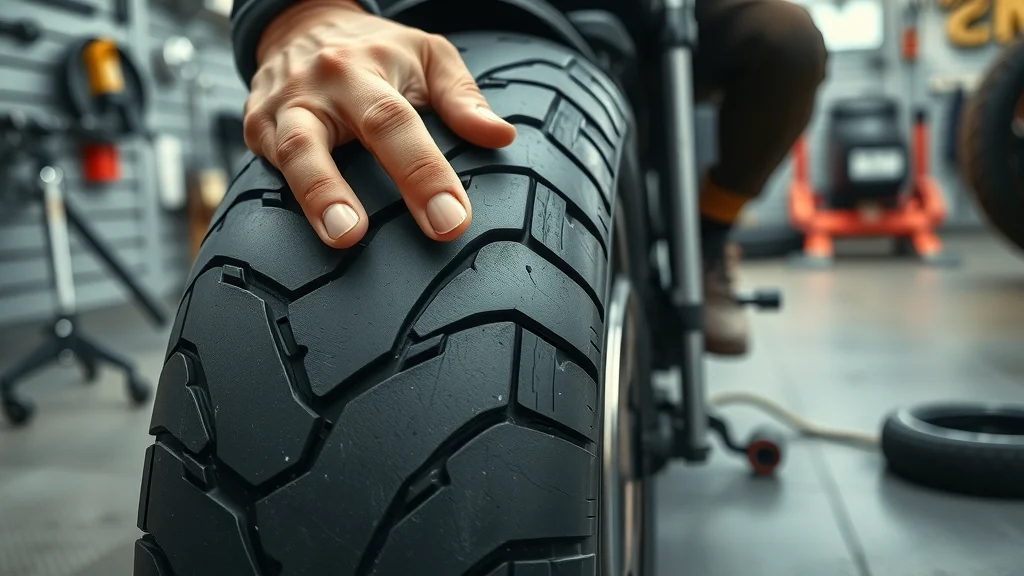
Mechanic performing major and routine motorcycle maintenance tasks in shop, major service vs routine maintenance

Not all motorcycle maintenance tasks are created equal. Routine maintenance includes basic but critical jobs such as an oil change, chain lubrication, and brake fluid top-off. These tasks are easy to schedule and help prevent small issues from growing. On the other hand, major services involve more complicated and less frequent tasks like a full valve service, in-depth electrical testing, or major part replacements.

Knowing when to transition from routine care to major service is essential. Ignoring major intervals can result in expensive repairs or sudden failures—right when you least expect it! Every rider should familiarize themselves with both sides of the maintenance schedule to avoid missing critical service intervals.

Understanding When to Schedule Major Service and Comprehensive Motorcycle Maintenance

Typically, major service is recommended every 12,000 to 20,000 miles or annually—whichever comes first. This includes crucial tasks like valve clearance checks, replacement of wheel bearing grease, and inspection of the entire final drive system. If you put heavy mileage on your bike, ride in severe climates, or frequently tackle track days, you may need to move up your service interval.

The best practice is to read your owner’s manual closely and use a digital or printed log to track all your service intervals. If in doubt, consult a trusted service department—they can help you avoid expensive surprises that stem from pushing off a major service for too long.

Factors Affecting Your Motorcycle Maintenance Schedule

No two riders are alike, and neither are their maintenance schedules. Several factors impact how often you should schedule motorcycle maintenance—starting with your riding habits. Aggressive acceleration, hard braking, and frequent highway or track use can accelerate wear and reduce the safe service interval for many parts.

Climate plays a big role too; hot summers, salty winters, or constant rain can all shorten the lifespan of critical components. Additionally, your total mileage, type of motorcycle (dirt bike versus cruiser), and even whether you use OEM or aftermarket parts affect your maintenance schedule. Always defer to manufacturer guidelines as your baseline, then make real-world adjustments as needed for your unique situation.

Riding Habits, Climate, Mileage, and Manufacturer Guidelines

For riders in dusty or wet environments, air filter and chain service should be performed more frequently. If you only use your motorcycle on weekends or for short trips, your oil may last longer, but tires can age and dry out in storage. For high-mileage commuters or adventure riders, increase inspection frequency for components like the final drive, chain, brakes, and suspension.

Manufacturer recommendations should always be the starting point—but smart riders learn to adapt, staying alert to how their unique patterns of use impact maintenance needs. If in doubt, schedule a checkup sooner rather than later: the cost of a quick look is far less than an unexpected failure in the middle of a long ride.

How to Create Your Personalized Motorcycle Maintenance Schedule

Motorcycle owner logging schedule motorcycle maintenance on tablet in home garage

Building your own motorcycle maintenance schedule means taking the manufacturer’s baseline and customizing it to suit your riding style, climate, and mileage. Start by recording every oil change, tire check, brake service, and major repair. Use a simple chart, printable checklist, or one of many digital apps designed for riders.

Consistency and record-keeping are the real secrets to a worry-free ride. Establish reminders for regular tasks, book appointments for major services ahead of time, and don’t wait for something to go wrong before checking your final drive or brake lines. By staying proactive, you’ll keep small problems from becoming big ones and ensure your motorcycle is always road-ready.

Leveraging Maintenance Checklists and Service Interval Guidance

A well-constructed maintenance checklist guides you through each service interval and ensures you never miss important steps. Cross-reference your checklist with your owner’s manual for the most accurate and up-to-date recommendations. For complex tasks, like valve service or electronic diagnosis, don’t hesitate to bring in a professional.

Modern digital solutions, such as maintenance tracking apps, provide notifications and suggestions tailored to your exact make and model. Leverage these technologies to build healthy habits and guarantee you’re always on top of your motorcycle maintenance schedule. The more organized your records, the more peace of mind you’ll have each time you start your engine.

Watch as a rider demonstrates logging routine motorcycle maintenance in a digital checklist app, checks the tire pressure and oil level, then finishes with a smile.

People Also Ask: Common Questions About Motorcycle Maintenance

What maintenance needs to be done on a motorcycle?

Answer: Regular tasks include oil change, checking the brakes, inspecting the final drive, maintaining tires, lubricating the chain, and following your motorcycle maintenance schedule.

Professional mechanic performing maintenance schedule task on motorcycle brakes

What is the 12 second rule on a motorcycle?

Answer: The 12 second rule is a safety guideline for motorcycle riders to scan ahead 12 seconds to spot hazards early, syncing with a proactive maintenance schedule to prevent surprises on the road.

How much does a full service on a motorcycle cost?

Answer: A full motorcycle service varies but averages between $200 and $800, depending on your maintenance schedule requirements and the vehicle's age and model.

What does 2 fingers up mean on a motorcycle?

Answer: It is a traditional biker wave signifying respect and camaraderie, complementing the culture of shared safety and regular maintenance schedule adherence.

FAQs About Scheduling Motorcycle Maintenance

  • How often should you schedule motorcycle maintenance for different bike models?

  • Are there digital tools to track your motorcycle maintenance schedule?

  • Can skipping one oil change hurt your maintenance schedule?

Key Takeaways: Optimizing Your Motorcycle Maintenance Schedule

  • Follow the recommended service intervals for your specific motorcycle.

  • Use a reliable maintenance checklist to stay organized.

  • Scheduling motorcycle maintenance prevents costly repairs and ensures safety.

Conclusion: Why Regularly Scheduling Motorcycle Maintenance Is Critical

Stay Safe and Extend the Life of Your Bike by Following a Proven Maintenance Schedule

Well-maintained motorcycle on scenic open road, schedule motorcycle maintenance for safety and longevity

In summary, a solid motorcycle maintenance schedule is your ticket to worry-free riding, lower costs, and a longer bike life. Don’t gamble with safety—book your schedule motorcycle maintenance today!

If you’re ready to take your motorcycle care to the next level, consider how seasonal changes can influence your maintenance priorities. From prepping your bike for winter storage to ensuring peak performance during summer rides, understanding the nuances of year-round upkeep can make all the difference. Discover expert strategies and insider tips in Seasonal Bike Care Secrets Every Rider Must Know. This resource will help you anticipate challenges before they arise and keep your ride in top condition, no matter the season. Elevate your maintenance game and enjoy every mile with confidence.

Ready to Book? Call Nasty Performance Motorcycle Shop Today: 847-458-4858

Safety & Inspection

0 Comments

Write A Comment

*
*
Please complete the captcha to submit your comment.
Related Posts All Posts

Step-by-Step Guide to Motorcycle Accident Prevention That Works

Did you know? According to the National Highway Traffic Safety Administration, motorcycle riders are 29 times more likely to die in a crash than passenger car occupants. While riding a motorcycle brings an undeniable sense of freedom and excitement, it also comes with significant risks that demand respect, preparation, and expertise. In this comprehensive step-by-step guide to motorcycle accident prevention, we’ll uncover safety tips, strategies, and expert habits proven to keep riders safer on every journey—whether you’re a new enthusiast or an experienced road veteran. Why Follow a Step-by-Step Guide to Motorcycle Accident Prevention? Staying safe on two wheels requires far more than simply following the speed limit or wearing a helmet. Motorcycle safety is built on comprehensive preparation, understanding risk factors, and adopting a disciplined approach to every ride. A step-by-step guide to motorcycle accident prevention helps motorcycle riders systematically address each critical aspect of safety, ensuring nothing is left to chance or forgotten in the rush of the open road. By following a purposeful structure, motorcycle riders are empowered to reduce the risk of both minor incidents and serious motorcycle crashes, ultimately keeping roads safe for everyone. From learning proper motorcycle riding habits to understanding the most common causes of motorcycle accidents, utilizing a guidance-driven approach transforms casual habits into life-saving routines. Committing to these steps is essential for both personal protection and the collective safety of our communities, as every well-prepared rider contributes to accident reduction on roads shared with cars and trucks. Let’s explore what you’ll gain from this guide and take confident steps together towards smarter, safer motorcycling. Discovering essential motorcycle safety habits Understanding common causes of motorcycle accidents Learning practical safety tips for every motorcycle rider Applying a systematic approach to accident prevention What You'll Learn in This Step-by-Step Guide to Motorcycle Accident Prevention This educational guide is designed to help every motorcycle rider master accident prevention with practical, actionable steps. Whether you’re planning your first motorcycle ride or you’re a seasoned rider seeking a safety refresher, the content below will enhance your confidence on the road. It’s more than a collection of general safety tips—it’s a roadmap to making every ride safer, smarter, and more enjoyable. Prepare to deepen your understanding, sharpen your riding skills, and discover why proper gear, preparation, and training are pivotal in motorcycle safety. Core motorcycle accident prevention strategies How to enhance motorcycle safety through gear and practice The most effective safety tips for every motorcycle ride Expert insights for both novice and experienced motorcycle riders Opening Perspectives: Startling Motorcycle Accident Facts You Need to Know "Motorcycle accidents, while less frequent than car accidents, can result in severe injuries due to the lack of protection. Understanding this risk is the first step in motorcycle safety." – Motorcycle Safety Foundation Trainer Despite advances in technology and the increased visibility of motorcycles on today’s roads, motorcycle accidents remain a serious concern. Unlike in a car or truck, a motorcycle rider is more exposed and has less margin for error in incidents involving evasive maneuvers, collisions, or loss of control. According to traffic crash data from the national highway safety authorities, fatality rates in motorcycle crashes have remained considerably higher than those for other types of motor vehicles. Typical causes include improper lane changes, ignored turn signals, and unsafe speeds. These facts highlight the critical importance of being proactive and informed—a goal that this step-by-step guide to motorcycle accident prevention aims to achieve. Recognizing the unique risks associated with motorcycle riding is empowering. By understanding these statistics and the common scenarios leading to motorcycle accidents, both new and experienced riders can take meaningful steps to reduce the risk, prioritize safety, and share the road responsibly. In addition to mastering accident prevention techniques, it's important to remember that regular maintenance and seasonal care play a crucial role in keeping your motorcycle safe and reliable. For practical advice on how to protect your bike year-round, check out these seasonal bike care secrets every rider should know to ensure your ride is always in top condition. Step 1: Motorcycle Rider Preparation and Attitude Building the Right Mindset for Motorcycle Safety Effective motorcycle riding starts long before the engine turns over. The safest motorcycle riders cultivate a mindset that prioritizes caution, anticipation, and respect for the unpredictability of the open road. Rather than viewing safety tips as tedious, experienced riders recognize that these habits keep them focused and in control, no matter the distance or destination. Motorcycle accident prevention is less about luck and more about preparation and awareness—qualities that are developed, not inherited. Always approach each motorcycle ride with a plan: Know your route, the current weather conditions, and your own mental and physical state. If you’re tired, distracted, or agitated, riding a motorcycle becomes significantly more dangerous. Training your mindset means remaining alert to risks, treating other drivers and riders with respect, and refusing to take unnecessary chances. By embedding these attitudes in your routine, you actively help reduce the risk of becoming another motorcycle accident statistic. Performing Pre-Ride Motorcycle Safety Checks Preparation is not only mental—it’s deeply mechanical. Before every motorcycle ride, make a habit of conducting a thorough pre-ride safety check. Start by examining your tires: Ensure proper pressure and look for wear or embedded objects. Check fluid levels (oil, brake, coolant) to maintain engine health and braking performance. Test turn signals, brake lights, and headlights to guarantee visibility to others on the road. Verify that your brakes feel responsive and that your chain or belt is secure. Most states require motorcycle riders to maintain their bikes in safe, roadworthy condition. Routine checks are a vital safety tip that can prevent breakdowns, loss of control, or dangerous situations in traffic. By treating this step as non-negotiable, you’ll increase your confidence, minimize the risk of an unexpected motorcycle crash, and set the tone for a responsible, enjoyable ride. Step 2: Essential Motorcycle Gear for Accident Prevention Choosing the best helmet for motorcycle crash protection Selecting proper motorcycle gear for safety The importance of visibility for motorcycle riders Wearing the right motorcycle gear is one of the most effective ways to reduce injuries in the event of a motorcycle accident. Despite motorcycle helmet laws in many states, not all riders fully appreciate the critical protection provided by modern safety gear. Every motorcycle ride presents unpredictable risks—from loose gravel and sudden rain to distracted drivers—so investing in high-quality, certified gear is essential. A certified helmet meeting DOT or ECE standards remains your most important piece of gear, protecting against catastrophic head injuries in a motorcycle crash. Jackets with CE-approved armor safeguard your torso from abrasion and impact, while gloves—especially those with reinforced palms—help prevent hand injuries in a fall. Over-the-ankle boots not only protect the feet and ankles but also provide support during sharp maneuvers. For added visibility, choose gear with reflective material to stay noticeable during night rides or low-visibility conditions. Below is a table summarizing the purposes and standards for each essential item: Purpose Gear Type Safety Standard Head Protection Helmet DOT/ECE Torso Abrasion & Impact Jacket CE Approved Hand Protection Gloves Reinforced Palm Foot & Ankle Protection Boots Over-Ankle Coverage Step 3: Mastering Safe Motorcycle Riding Techniques Understanding Speed Limits and Their Role in Motorcycle Accident Prevention Speed limits are established to maximize safety for all road users, including motorcycle riders. Riding above the speed limit—even if just by a few miles per hour—drastically increases your risk of a motorcycle crash and reduces your ability to react to hazards such as sudden lane changes or unexpected debris. Respecting the speed limit also allows better control on curves and corners, which are common areas for single-vehicle motorcycle accidents. Maintaining a controlled speed on your motorcycle ride is vital for your own safety and that of others. Remember, it’s easier to avoid a collision, change direction, or stop suddenly when traveling at the posted speed. As an added safety tip, regularly scan the area ahead for changes in the speed limit, and be mindful that wet or slippery roads often call for speeds well below posted limits for safe operation. How to Handle Corners, Intersections, and Hazards on Every Motorcycle Ride Motorcycle crashes often occur at intersections and on sharp corners, places where cars and trucks may overlook the presence of a motorcycle rider. To reduce risk, anticipate the actions of other motorists, approach bends and intersections with caution, and remember that speed must decrease before entering a curve—not during the turn. Always be prepared to brake smoothly and use both brakes when needed for maximum stability. Hazards such as potholes, oil, gravel, or wet leaves can turn a routine maneuver into a dangerous one. Wherever possible, choose your line through a corner to maximize your sight distance and avoid unexpected obstacles. At intersections, ensure your intentions are clear by using turn signals early and making eye contact with drivers. The safest motorcycle riders actively assume they may not be seen, doubling down on visibility and caution at every crossing. Defensive Riding: Sharing the Road Safely Defensive riding is the art of anticipating the mistakes of others and having a plan to respond. Motorcycle operators are especially vulnerable to the blind spots of cars and trucks, so position yourself where you are most visible and never assume another driver can see you. Practice the “4 second rule” by maintaining at least four seconds’ distance between you and the vehicle in front, giving you more time to react to sudden stops or obstacles. To share the road effectively, never ride aggressively or weave through traffic. Use reflective material and bright gear to increase visibility, always use turn signals, and scan for movement in mirrors and side streets. By adopting a defensive posture, you not only protect yourself from unpredictable traffic crashes but also foster a safer environment for fellow riders and motorists alike. Step 4: Preparing for Adverse Conditions and Unexpected Motorcycle Accidents Techniques for riding a motorcycle in wet or low-visibility conditions Responding to emergency situations and near-accidents The value of ongoing motorcycle safety training for every rider Riding a motorcycle in adverse conditions—such as rain, fog, or icy roads—demands heightened skill and preparation. Slow down and increase your following distance even further when traction is reduced, and avoid sudden throttle changes, hard braking, or abrupt steering. Use your headlight and gear with reflective material to stay visible and navigate curves with as little lean as possible. When visibility drops, assume nearby drivers may not see you until you’re directly in their line of vision. Emergency situations such as unexpected stops or near-accidents require clear-headed, practiced responses. Experienced riders often attend ongoing motorcycle safety training to refine their skills in evasive maneuvers and quick stops. Regular rider education classes also introduce riders to new safety technologies, updated laws, and best practices—a worthwhile investment for anyone who values prevention over recovery. Remember, riding smart today could save your life tomorrow. Step 5: The Role of Motorcycle Insurance in Accident Prevention How motorcycle insurance supports accident recovery Understanding what motorcycle insurance covers Why every motorcycle rider needs proper coverage While riding skills and protective motorcycle gear dramatically lower injury risks, no amount of preparation can guarantee absolute safety on every motorcycle ride. Motorcycle insurance is your financial safety net, supporting accident recovery when the unexpected happens. Comprehensive motorcycle insurance policies cover medical expenses, bike repairs, and even liability if you’re involved in an accident with another motor vehicle. Some policies also protect against theft, vandalism, and uninsured drivers. Choosing the right coverage goes beyond fulfilling state legal requirements. The best insurance policies are tailored to your riding style, covering not just the basics, but also providing peace of mind on every journey. Having robust motorcycle insurance means you can focus on riding with confidence, knowing that you’re protected if the worst occurs. Insurance is not just a safety tip—it’s an integral part of any responsible motorcycle accident prevention plan. Watch this footage compilation to see accident prevention strategies in real-world situations: observe pre-ride safety checks, defensive city riding, proper gear choices, and wet-road handling. Both new and experienced riders demonstrate how even small habits make a significant difference in real-life scenarios. Essential Motorcycle Accident Safety Tips Recap Always perform a pre-ride safety check Wear certified motorcycle gear at all times Adhere to speed limits and road rules Maintain a defensive riding posture Stay updated with regular motorcycle safety training People Also Ask: Step-by-Step Guide to Motorcycle Accident Prevention What are the steps in the accident prevention process? Preparation and mindset Wearing proper motorcycle gear Practicing safe riding techniques Training for adverse conditions Securing motorcycle insurance What does 2 fingers down mean to bikers? The '2 fingers down' gesture is a sign of motorcycle rider respect, often meaning 'stay safe' or 'keep two wheels on the ground.' What is the 4 second rule on a motorcycle? The 4 second rule helps motorcycle riders maintain safe following distance, allowing more time to react to hazards. What are the 5 safety tips for motorcycle riders? Always wear protective gear Stay visible at all times Obey speed limits Avoid distractions Take regular motorcycle safety courses Key Takeaways: Mastering Motorcycle Accident Prevention A step-by-step approach dramatically enhances motorcycle safety Preparation, knowledge, and the right gear are essential Defensive techniques and ongoing education can prevent most motorcycle accidents Frequently Asked Questions About Motorcycle Accident Prevention How often should you service your motorcycle for safety? It’s best to follow the manufacturer’s recommended service schedule—usually every 3,000 to 5,000 miles or every six months, whichever comes first. Regular checks of tires, brakes, fluids, and lights before each ride also enhance motorcycle safety. What is the best motorcycle gear for accident prevention? The best motorcycle gear includes a DOT/ECE-certified helmet, CE-armored jacket and pants, reinforced gloves, and boots with over-ankle coverage. Gear with reflective elements increases visibility and provides superior protection in the event of a crash. Can motorcycle insurance lower accident-related costs? Yes, motorcycle insurance covers repairs, medical bills, and liability, significantly reducing your financial burden after an accident. Comprehensive coverage often includes theft, weather damage, and uninsured/underinsured motorist protection. What training courses are recommended for motorcycle riders? New riders should complete a certified Motorcycle Safety Foundation (MSF) course. Experienced riders can benefit from advanced skills courses and periodic refresher sessions to keep their motorcycle accident prevention knowledge current. Speak to Experts About Motorcycle Accident Prevention "Don’t leave your safety to chance. Every ride is safer with preparation—and expert advice can make all the difference." Ready to improve your motorcycle accident prevention plan? Call Nasty Performance Motorcycle Shop Today: 847-458-4858 Every journey starts with preparation—master accident prevention today, and keep every motorcycle ride safe for tomorrow. Motorcycle safety is a lifelong commitment, and the most prepared riders know that prevention extends beyond the basics. If you’re ready to take your riding experience to the next level, consider exploring advanced maintenance and care strategies that adapt to every season. By staying proactive with your bike’s upkeep, you’ll not only enhance performance but also reinforce the safety habits outlined in this guide. Discover how seasonal adjustments can make a difference by visiting our resource on seasonal bike care secrets every rider must know—and keep your motorcycle adventure safe, smooth, and enjoyable all year long.

How to Check Motorcycle Fluid Levels Like a Pro

Do you really know how to check motorcycle fluid levels, or are you trusting luck with your engine’s health? Let’s challenge what you think you know—and make sure you’re not missing a simple step that could save your ride. Are You Confident in How to Check Motorcycle Fluid Levels? When was the last time you checked your motorcycle oil or glanced at the inspection window to verify fluid levels? Even experienced riders sometimes miss the signs of low engine oil level, leading to possible engine damage or compromised safety out on the road. How to check motorcycle fluid levels is a skill that every rider, new or seasoned, should master. This guide provides practical, easy-to-follow instructions that ensure you’re getting an accurate oil reading—no guessing, no assuming, just confident maintenance. By understanding how to use the sight glass or dip stick, and by knowing what to look for in your motorcycle engine oil, you guarantee your ride always runs at peak performance. Most modern motorcycles are equipped with simple tools for checking oil, coolant, and brake fluids, but knowing exactly when and how to check them is what sets a pro apart from a weekend rider. This article gives you the step-by-step approach, including when and how often to perform regular checks, so your next full riding season is as smooth as possible. The essential motorcycle fluids and their roles Step-by-step instructions for checking engine oil, coolant, and brake fluid When and how often you should inspect fluid levels Expert tips on avoiding common mistakes while checking motorcycle oil and other fluids Tools and tips from industry professionals Essential Motorcycle Fluids Comparison Fluid Type Function Signs of Low Level Checking Method Engine Oil Lubricates motorcycle engine Unusual noises, overheating Inspection window/dipstick Coolant Regulates motorcycle engine temp. Overheating, low reservoir Reservoir mark Brake Fluid Enables responsive braking Spongy brakes, warning light Reservoir window Understanding Why You Should Check Motorcycle Fluid Levels Regularly Maintaining the correct engine oil and fluid levels in your bike is more than just routine—it's the difference between a perfectly tuned machine and expensive motorcycle engine repairs. Your motorcycle engine depends on engine oil to reduce friction, absorb heat, and keep all the moving parts running smoothly. If even one fluid is running low, you risk severe wear or a total breakdown, especially on longer rides where high temperatures and stress are common. The oil level, visible via the inspection window or dip stick, must always sit within the designated range for optimum performance. Low fluid means your engine oil can't lubricate or cool your parts adequately, potentially leading to overheating or bearing failures. Similarly, low coolant or brake fluid levels can trigger spongy brakes, overheating, and even a loss of control. Recognizing these signs early and performing regular checks are essential to keeping your motorcycle engine in top shape. "Neglecting to check your motorcycle’s oil level and other fluids can turn a simple ride into an expensive repair." — Certified Motorcycle Technician Step-by-Step Guide: How to Check Motorcycle Fluid Levels Accurately How to Check Engine Oil: Using the Inspection Window and Dipstick Properly checking your motorcycle engine oil is simple but requires attention to detail. Begin by letting the motorcycle engine run briefly so the oil circulates—this ensures an accurate oil reading. After a few minutes, turn the bike off and let it cool so the engine oil sits evenly throughout the sight glass. With your bike level (not leaning on its kickstand), locate the inspection window or dipstick, usually found around the lower side of the engine. If using the sight glass, check that the oil line sits between the 'min' and 'max' marks. The oil should be clear, not cloudy, and shouldn’t have an unusual smell—both are signs of contamination. For bikes with a dip stick, remove it, wipe it clean, reinsert, then pull it out again to check the oil reading against the marks. This ensures an accurate reading and helps catch any issues before they escalate. Remember, always replace the cap securely after checking. For riders looking to take their maintenance skills further, understanding the nuances of seasonal care can make a significant difference in your bike’s longevity. Discover practical strategies for adapting your fluid checks and overall maintenance to changing weather in this guide to seasonal bike care secrets. Warm up the motorcycle engine briefly, then let it cool. Place the bike upright—not just on the kickstand—for accurate oil level reading. Locate the inspection window or dipstick as shown in your motorcycle manual. Observe engine oil in the inspection window, ensuring the oil level is between marks. If using a dipstick, wipe, insert, remove, and check motorcycle oil level against marks. Checking Motorcycle Coolant and Brake Fluid Levels While engine oil gets the most attention, your motorcycle engine relies equally on coolant for temperature control and brake fluid for responsive, safe stops. To check coolant levels, find the reservoir and inspect the level in relation to the 'min' and 'max' lines, always with the engine cool to avoid burns or pressure spray. Brake fluid level can be checked through a sight glass or reservoir window; the fluid should always rise above the minimum line for safe braking. Never mix fluid types—even if brands seem similar, differences in chemical composition can harm seals or the motorcycle engine itself. And always check for leaks beneath your bike or around hoses after checking fluids; a sudden drop in level usually means a gasket or line needs immediate attention. Keeping up with these quick inspections helps catch little problems before they become emergencies. Find the coolant reservoir and compare fluid against 'min'/'max' marks Inspect the brake fluid reservoir window; fluid should be above the minimum line Never mix different types of motorcycle fluids Check motorcycle for leaks "Checking your motorcycle’s fluids is the fastest way to catch small problems before they become big ones." Pro Tips for How to Check Motorcycle Fluid Levels Checking motorcycle fluids isn’t just about topping off what's low—it's about consistent, detail-oriented habits that make all the difference. Always inspect motorcycle oil with your bike on a level surface to guarantee an accurate oil reading. Choose proper lighting, whether in your garage or at a shop, so you can clearly see sight glasses and fluid levels. Pay attention to oil color and smell—dirty or burned oil signals it’s time for a change or there’s a deeper issue with your motorcycle engine oil. After checking, double-check that all filler caps are tightened and sealed to prevent leaks and contamination. Make checking your motorcycle’s engine oil, coolant, and brake fluid part of your pre-ride routine, especially before long road trips or full riding seasons. Regular checks not only extend the life of your engine but help you develop a deeper familiarity with your bike, so you’ll notice if something feels or looks off even before problems escalate. Always inspect motorcycle engine oil on a level surface Use proper lighting to see inspection windows Replace caps securely after checking motorcycle oil or brake fluid Inspect oil color and scent for signs of contamination Schedule regular checks before long rides People Also Ask: Key Motorcycle Fluid Questions Answered What is the 4 second rule on a motorcycle? The 4 second rule means keeping enough distance from the vehicle in front of you so you have a four-second reaction window in case they stop suddenly. This keeps both you and your motorcycle engine safe from sudden stops or accidents. Do you check motorcycle oil on kickstand or straight up? Always check motorcycle oil with the bike upright and level, not on the kickstand. This ensures an accurate reading with the inspection window or dipstick for precise engine oil measurement. How to tell if motorcycle oil is low? Check the engine oil level using the inspection window or dipstick. If the oil level is below the minimum mark or no oil is visible, top up immediately and investigate for possible motorcycle engine leaks or issues. Do you check your motorcycle oil hot or cold? Refer to your owner's manual, but generally, let the motorcycle engine warm up, then sit for a few minutes to cool. This will help you accurately check motorcycle oil level and avoid misleading readings. FAQs: Common Questions About How to Check Motorcycle Fluid Levels What are the signs of bad motorcycle engine oil? How often should I check motorcycle oil levels? Can I use car oil for motorcycle engine oil? What do I do if fluid levels are frequently low? Is it safe to ride a motorcycle with low brake fluid? Essential Takeaways for Checking Motorcycle Fluid Levels Like a Pro Consistent checks extend your motorcycle engine life Always use the correct type and amount of each fluid Never overlook signs of leaking or low levels When in doubt, consult a certified motorcycle technician Ready for Expert Motorcycle Service? Call Nasty Performance Motorcycle Shop Today: 847-458-4858 Conclusion: Smart riders check motorcycle fluid levels often, use the right methods, and act on issues early—keeping your engine purring and your rides safe. If you’re ready to elevate your motorcycle maintenance routine, don’t stop at fluid checks—consider how seasonal changes can impact your bike’s performance and longevity. From prepping for winter storage to optimizing for summer rides, there are expert strategies that go beyond the basics. Explore seasonal bike care secrets every rider must know to unlock advanced tips that keep your motorcycle running smoothly all year long. Taking these extra steps ensures you’re not just maintaining your bike, but truly protecting your investment and riding with confidence in every season.

Master How to Perform Motorcycle Safety During Group Rides Now

Did you know? According to recent rider data, group motorcycle rides see far fewer incidents when all riders follow established safety protocols and use clear hand signals. These simple precautions can make all the difference between a safe and enjoyable group ride or a potentially hazardous one. Whether you’re a seasoned rider or new to riding in a group, this comprehensive guide will empower you to master how to perform motorcycle safety during group rides—from ride prep and etiquette to mastering hand signals and planning unforgettable journeys. Let’s ride safe, together! Understanding Motorcycle Safety During Group Rides: Why It Matters Group motorcycle rides create a shared experience unlike any solo journey, but they also come with unique challenges that demand attention to safety. Knowing how to perform motorcycle safety during group rides is essential to prevent confusion, reduce risks, and ensure everyone has a fun, incident-free outing. When you’re riding in a group, riders rely on one another—not just for camaraderie, but also for clear communication, predictable maneuvers, and mutual respect. From open highways to winding scenic routes, every group ride brings together riders with different skills and styles. This makes following essential tips and safety protocols even more important. The right formation, use of universal hand signals, and understanding each person’s role keeps everyone safe and alert. Accidents can happen quickly if even one rider isn’t up to speed with group riding etiquette, making it clear why consistent and proactive safety measures are critical for a safe and enjoyable group motorcycle ride. Startling Facts About Motorcycle Group Rides and Safety While the thrill of hitting the road with friends is undeniable, startle-worthy statistics highlight the importance of proper safety measures. Experienced riders agree that most group motorcycle ride mishaps occur from simple miscommunications or breaking formation. Something as basic as a missed hand signal or failing to maintain a proper staggered formation can result in dangerous close calls. This is precisely why understanding common rules and protocols—like the 4 second rule or using universally recognized hand signals—can minimize incidents. These practices not only keep riders safe, they enhance the overall motorcycling experience for everyone involved. What You'll Learn About How to Perform Motorcycle Safety During Group Rides The fundamental principles of group motorcycle ride safety Key hand signals every rider must know Planning and organizing a safe and enjoyable group ride Essentials for effective group riding etiquette Essential Tips: How to Perform Motorcycle Safety During Group Rides Pre-ride checklist for group motorcycle rides Roles and responsibilities in group motorcycle riding Staggered versus single file formation Keeping communication clear with hand signals The foundation of every safe group ride begins before anyone starts their engines. A thorough pre-ride checklist includes checking your bike’s tires, lights, oil levels, and fuel, as well as ensuring every rider has the right gear and emergency contacts saved on their cell phone. Assign roles—like lead, sweep, and mid-pack riders—before you hit the open road. Always confirm the chosen formation (staggered for most situations; single file for narrow roads or challenging conditions) and make sure everyone understands the ride’s route and planned fuel stops. Clear communication is key—literally. Use agreed-upon hand signals to share directions, alerts, or stops while riding. This prevents confusion, keeps every rider informed, and allows the group to adjust smoothly to changes on the road. Whether you’re on a touring model motorcycle or a nimble sport bike, following these foundational steps ensures a safe and enjoyable group motorcycle ride for everyone involved. In addition to mastering group riding protocols, it's important to remember that your motorcycle’s condition plays a crucial role in overall safety. For practical advice on keeping your bike in peak shape throughout the year, check out these seasonal bike care secrets every rider must know—a resource that complements your group ride preparation and helps prevent mechanical surprises on the road. Table: Common Hand Signals for Group Motorcycle Riding Signal Meaning When to Use Left arm straight out Left turn Turning left at intersection or exit Left arm bent up at elbow Right turn Turning right at intersection or exit Left arm bent down at elbow Stop Stopping or slowing rapidly Pointing with finger Hazard in roadway Road debris, pothole, or animal up ahead Fist in the air Single file Tight roads, bridges, or construction zones Left hand waving up and down Slow down Traffic congestion or approaching speed change Group Ride Planning: Achieving Safe and Enjoyable Motorcycle Rides Effective Route Selection for Group Motorcycle Rides Careful planning is the first ingredient for a safe and enjoyable group motorcycle experience. Selecting a scenic route tailored for your group—one that matches everyone’s skill levels and preferred ride duration—prevents fatigue and maximizes fun. Avoid busy highways when possible, opting instead for well-maintained rural roads or scenic byways dotted with stops for rest, food, or photo ops. Consider weather forecasts, road conditions, and possible construction zones so all riders can focus on enjoying the journey, not navigating surprises. Share route details—including key turns, fuel stops, and emergency contacts—before the ride. Make sure everyone knows the plan, including options for regrouping if someone falls behind or an unexpected situation arises. The more precise your route and contingency plans, the smoother your group motorcycle ride will be, and the easier it is to keep every rider engaged and safe. Pre-ride Meetings and Safety Briefings A pre-ride meeting is a must for any group ride. Gather all riders before departing and review the planned route, scheduled stops, and safety protocols. This is the time to go over the pre-ride checklist, remind everyone to bring essentials like rain gear or a fully charged cell phone, and confirm everyone understands the hand signal protocols. Discuss potential hazards for the day—like traffic construction, loose gravel, or changing weather—so nobody is caught off guard. Use the briefing to build camaraderie and address any rider questions or concerns. It’s also an opportunity for experienced riders to share wisdom with newer group members, reinforcing roles and expectations for each position in the ride lineup. A strong pre-ride briefing builds trust and helps foster a confident, cooperative atmosphere that carries through the entire journey. Assigning Positions and Understanding the Sweep and Lead Roles Assigning defined positions is central to group motorcycle ride safety. Typically, the most experienced rider takes the lead to set the pace, choose safe paths, and initiate hand signals for the rest of the group. The sweep (or tail gunner) takes up the rear to monitor the group, assist with issues, and make sure no one gets left behind. Riders of varying experience levels should be placed in the center of the formation for added support and guidance. Understanding your position isn’t just about placement; it’s about responsibility. The lead must stay constantly alert for road changes, communicate frequently, and ensure the group maintains a safe and controlled flow. The sweep keeps a watchful eye, relays problems to the lead if needed, and is usually equipped to help in emergencies. With clear lead and sweep roles, every group member knows where to look for cues, minimizing confusion and creating a seamless, safe group ride experience. Communication in Motorcycle Group Riding: Mastering Hand Signals and Non-Verbal Cues Hand Signal Protocols for Group Motorcycle Ride Safety Clear and universal communication is the linchpin of group motorcycle riding. While verbal cues aren’t possible on the move, hand signals are critical for transmitting information quickly and safely across the group. Every rider should know the standard set of hand signals—such as those used for turns, slowing down, pointing out hazards, or changing formation. Designate one set of signals before the ride to prevent confusion and ensure all group members are on the same page. Practice your hand signals during slow-speed maneuvers or pre-ride meetings. The group’s lead initiates the signal, which is passed down the line to ensure everyone receives the message, even if the group is long or spread out. Frequent review and hands-on practice make this process second nature, keeping all riders aware and ready to adapt as the ride progresses. Maintaining Awareness and Visual Contact While Riding in a Group Besides hand signals, non-verbal communication plays a massive role in group riding. Maintaining constant visual contact with the riders ahead and behind—using mirrors and frequent shoulder checks—prevents gaps, reduces risk of separation, and keeps everyone together. Non-verbal cues, such as subtle head nods or shifting lanes, can alert the group to changes or hazards even before a formal signal is sent. Riders must stay alert, scanning for brake lights, tire movements, and hand signals from those in front or behind. Avoid distractions such as fiddling with a cell phone or music device, and always keep your eyes forward on the road ahead. The more attentive the group, the quicker the response to unexpected changes—improving overall safety for every motorcycle group ride. Watch this quick video demonstration of a group motorcycle ride in action: see staggered formation, hand signals, pre-ride guidelines, and how effective lead/sweep roles keep everyone riding safe—and having a blast! People Also Ask: How to Perform Motorcycle Safety During Group Rides What is the 1% rule in motorcycles? Explanation of the 1% rule in motorcycle group riding culture and its relevance to safety and etiquette. The “1% rule” refers to a cultural notion within the motorcycle community that only 1% of riders engage in outlaw or reckless behavior—meaning the vast majority (99%) ride responsibly. In group motorcycle rides, this principle reinforces the importance of following safety and etiquette guidelines, respecting traffic rules, and looking out for fellow riders. While the term often applies to social identity among motorcyclists, it highlights the expectation that group riding should always prioritize safety, not risky or aggressive behavior. What does 2 fingers down mean to bikers? Overview of common biker gestures, specifically 2 fingers down, and how it applies during group motorcycle rides. The “2 fingers down” gesture—where a rider casually extends their index and middle finger toward the road—signals respect and safe riding to fellow motorcyclists. It’s a non-verbal way of saying “ride safe” and wishing good fortune. During group motorcycle rides, this gesture helps build camaraderie and reminds everyone to keep safety top of mind. It’s one of many unspoken ways riders support each other, especially when passing other groups or fellow bikers out on the open road. What procedure should motorcyclists follow when riding in groups? Step-by-step guidance for motorcyclists on group ride procedures to optimize motorcycle safety. For safe group ride execution, always start with a pre-ride checklist, then organize a safety briefing covering the route, expected stops, and hand signal protocols. Assign experienced riders to the lead and sweep roles, and ensure newer riders have support nearby in the middle. Adopt a staggered formation for most roads, switching to single file when necessary. Use hand signals consistently and communicate any hazards immediately down the line. Schedule regular stops for fuel and rest and regroup if the team gets separated. Foster an environment where everyone feels confident voicing questions or concerns, ensuring the entire group is always ride-ready. What is the 4 second rule on a motorcycle? Explanation of the 4 second rule and its application in maintaining safe distances during group motorcycle riding. The 4 second rule is a universal safe-following guideline for both solo and group motorcycle rides. It suggests leaving at least four seconds of distance between you and the rider (or vehicle) in front of you. Pick a fixed point on the road ahead; when the rider in front passes it, count “one-thousand-one, one-thousand-two, one-thousand-three, one-thousand-four. ” If you pass that spot before you finish, you’re following too closely! This rule gives plenty of time for reaction and stops, ensuring safety for everyone when riding in a group. Expert Quotes on How to Perform Motorcycle Safety During Group Rides “Consistent communication and clear roles are the backbone of every safe and enjoyable group motorcycle ride.” — Motorcycle Safety Foundation Key Takeaways for Motorcycle Safety During Group Rides Always follow established group riding protocols Use hand signals to communicate clearly Respect fellow riders and the lead/sweep structure Stay alert and maintain proper formation FAQs: How to Perform Motorcycle Safety During Group Rides Can new riders participate in group motorcycle rides safely? Absolutely. With proper pre-ride briefings, support from experienced riders, and everyone adhering to group riding protocols, new riders can quickly adapt and contribute to a safe and enjoyable motorcycle group ride. Place newer riders in the center of the formation for added visibility and guidance, and encourage an open environment for questions and feedback throughout the ride. What equipment is essential for group riding safety? Every rider should wear a DOT-approved helmet, gloves, boots, and protective riding gear. Carry a cell phone for emergencies, basic first aid kit, rain gear, and enough water for longer rides. Make sure your motorcycle is in top working condition by following a comprehensive pre-ride checklist, and bring tools or tire repair kits for unexpected issues on the road. How often should hand signal training be revisited? Hand signal protocols should be reviewed before every group ride. Even experienced riders benefit from regular practice, especially when riding with new group members or unfamiliar faces. Incorporating signal review into pre-ride meetings ensures all riders communicate clearly and are prepared to respond quickly in any situation. Conclusion: Ensuring Safe and Enjoyable Motorcycle Riding in Groups Final Thoughts on Mastering How to Perform Motorcycle Safety During Group Rides Mastering how to perform motorcycle safety during group rides transforms every outing into a safe and rewarding adventure. Armed with the right knowledge, clear communication, and respect for your fellow riders, you’ll enjoy every mile with confidence, camaraderie, and peace of mind. If you’re ready to take your group riding experience to the next level, consider how ongoing bike maintenance and seasonal care can further enhance your safety and enjoyment. Exploring expert strategies for year-round motorcycle upkeep not only extends the life of your ride but also ensures you’re always prepared for whatever the road brings. For deeper insights and advanced tips, discover the essential seasonal bike care secrets every rider must know—your next step toward mastering both group riding and motorcycle longevity. Call Nasty Performance Motorcycle Shop Today: 847-458-4858

Terms of Service

Privacy Policy

Core Modal Title

Sorry, no results found

You Might Find These Articles Interesting

T
Please Check Your Email
We Will Be Following Up Shortly
*
*
*