cropper
update

Nasty Performance ~ 847-458-4858 

update
  • Blog Home
  • Categories
    • Motorcycle Maintenance
    • Riding Tips & Preps
    • Safety & Inspection
    • Customizations & Upgrades
    • DIY Motorcycle Repairs
    • Motocycle Audio Systems
    • Motocycle Seasonal Care & Storage
    • Engine, Electrical Performance
  • Bike Night
  • Nasty Performance Motorcycle Shop
April 04.2026
1 Minute Read

Get Your Motorcycle Inspection for Spring

Did you know that a thorough motorcycle inspection for spring can prevent up to 40% of early season breakdowns? While many riders can’t wait to hit the open road as the weather warms, skipping your spring maintenance can mean trouble just when the season begins. This detailed guide not only reveals crucial steps you need for a safe riding season, but also highlights lesser-known checks that can make the difference between a smooth ride and a roadside mishap. Read on to discover how to keep your bike running in peak condition—all season long.

Spring Motorcycle Inspection: Surprising Facts Every Rider Should Know

Riders often underestimate the impact a seasonal maintenance check can have on their bike’s reliability and their own safety. The transition from winter storage to an active riding season brings hidden risks: fluids degrade, batteries lose charge, tires may develop flat spots or dry rot, and electrical connections can corrode. According to recent studies, up to 40% of early spring breakdowns could have been avoided with a proper motorcycle inspection for spring. This isn’t just routine motorcycle maintenance—it’s your passport to a trouble-free, exhilarating riding season on the open road.

The main keyword to focus on: motorcycle inspection for spring. Including this in your annual prep ensures your maintenance checklist covers all areas. By adhering to a comprehensive approach—spanning fluids, brakes, battery care, tires, and controls—you drastically reduce the risk of losing control or facing a critical component failure. So, don’t just dust off your machine and go: take the time to run through a motorcycle maintenance checklist and experience the freedom of the road with peace of mind.

Did You Know? Motorcycle Inspection for Spring Prevents 40% of Early Season Breakdowns

motorcycle inspection for spring modern motorcycle being inspected in a sunlit garage with mechanic and tools

What You’ll Learn in This Motorcycle Inspection for Spring Guide

  • The complete motorcycle maintenance checklist for spring
  • Step-by-step maintenance check processes
  • Expert motorcycle maintenance advice for riding season
  • When to perform a test ride after inspection
  • Critical maintenance check items for a safe open road experience

Why a Motorcycle Inspection for Spring is Crucial for Riding Season

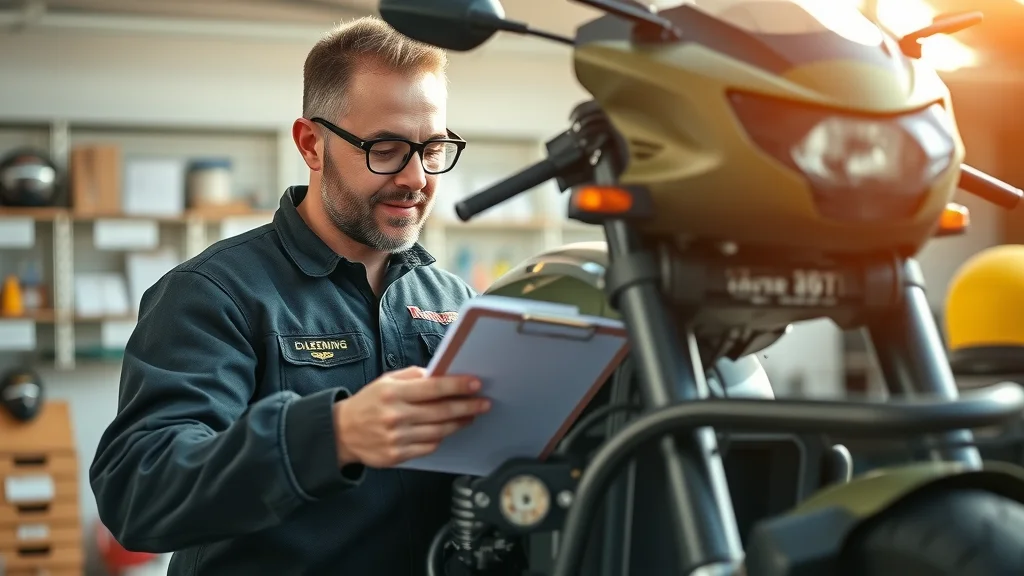
A comprehensive motorcycle inspection for spring is not just about checking boxes on a maintenance checklist—it’s about ensuring your safety and maximizing the joy of the riding season. After a period of winter storage, components like brake pads, air filter, spark plugs, and engine oil can deteriorate, leading to a higher risk of failures once you’re back on the open road. Proper motorcycle maintenance keeps you in control and guards against costly repairs or dangerous situations.

Regular spring inspections also help riders catch early signs of damage or excessive wear, like abnormal tire pressure, leaking fluids, or electrical issues. Addressing these before hitting the road means you're far less likely to face sudden breakdowns or be caught unprepared. And let’s not forget: an annual maintenance check may also be a requirement for your insurance cover—ensuring that claims won’t be denied due to poor upkeep.

"Regular spring inspections are your best defense against costly, dangerous failures later in the year." — Motorcycle Maintenance Expert

As you work through your spring motorcycle inspection, it’s helpful to have a detailed maintenance checklist on hand to ensure you don’t overlook any critical steps. For a practical, step-by-step breakdown of essential tasks, check out these seasonal bike care secrets every rider must know—they offer actionable tips that complement your spring prep routine.

Comprehensive Motorcycle Maintenance Checklist for Spring

  • Visual inspection: frame, controls, stands
  • Fluid levels: oil, brake fluid, coolant
  • Check battery, tires, and brakes
  • Inspect chain, belt, or shaft
  • Test lights, horn, and electrical systems
Inspection Item Recommended Action
Engine Oil Replace if old/low
Air Filter Clean or change
Battery Charge or replace
Spark Plugs Inspect and replace if needed
Tires Check pressure/tread

Maintenance Check: Step-by-Step Motorcycle Inspection for Spring

Pre-Inspection After Winter Storage

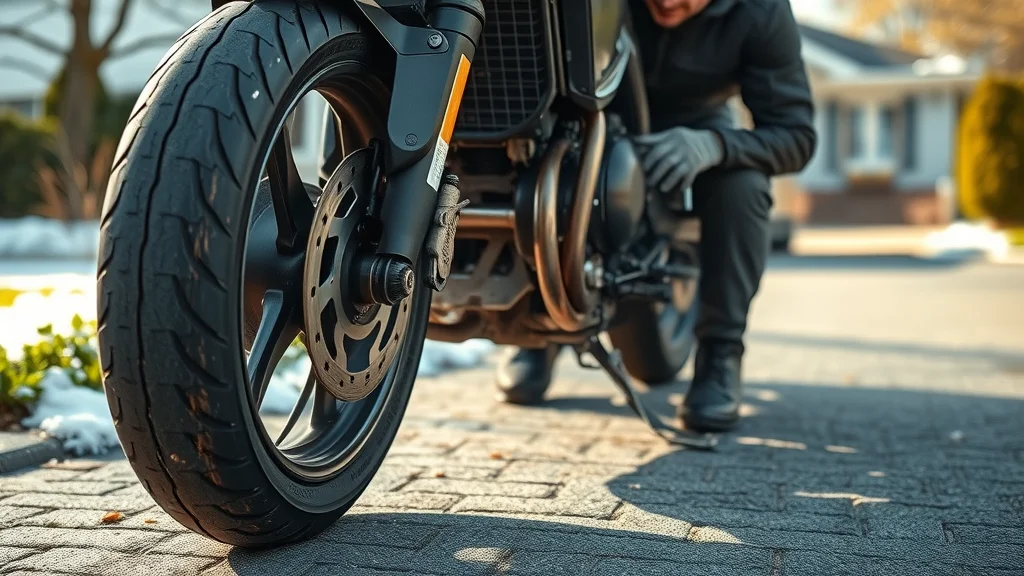
The first step of any effective motorcycle inspection for spring is to assess the effects of winter storage. Motorcycles left stationary for months are prone to developing issues that may not be immediately obvious. Carefully check for fluid leaks underneath the bike—these could signal degraded seals or worn gaskets. It’s equally important to examine all visible components for rust formation or corrosion, especially on brake lines and electrical connections, which are susceptible to moisture and temperature swings.

Another critical maintenance check involves assessing the tires for signs of dry rot or flat spots—look for cracks along the sidewalls and uneven wear. These risks can jeopardize your grip and traction on the open road. By methodically performing these visual inspections, you’ll catch problems while they’re manageable and before they threaten both your ride and your safety. Use this step as the baseline for the full maintenance checklist to follow.

  • Check for fluid leaks
  • Assess for rust, corrosion, and tire dry rot

motorcycle inspection for spring motorcycle with visible signs of winter storage, tires, oxidation, and fluid drips

Motorcycle Air Filter and Spark Plug Maintenance

When considering your spring maintenance checklist, paying special attention to the air filter and spark plugs is essential. The air filter ensures your engine breathes cleanly and efficiently; if clogged with dust or moisture from winter storage, it can cause your bike to run unevenly or lose power. Remove the air filter according to your motorcycle’s manual, inspect it for visible dirt, and either clean or replace it based on its condition. This simple motorcycle maintenance step boosts performance and engine longevity.

Spark plugs are the core of your engine's ignition system. Faulty plugs can lead to hard starts, backfiring, or even misfires out on the open road. Carefully inspect the spark plugs for wear—look for soot, oily residue, or worn electrodes. Replace spark plugs that show any signs of excessive wear, ensuring reliable ignition every time you start up for the new riding season.

  • Remove and inspect air filter
  • Clean or replace per motorcycle maintenance checklist
  • Check spark plugs for wear

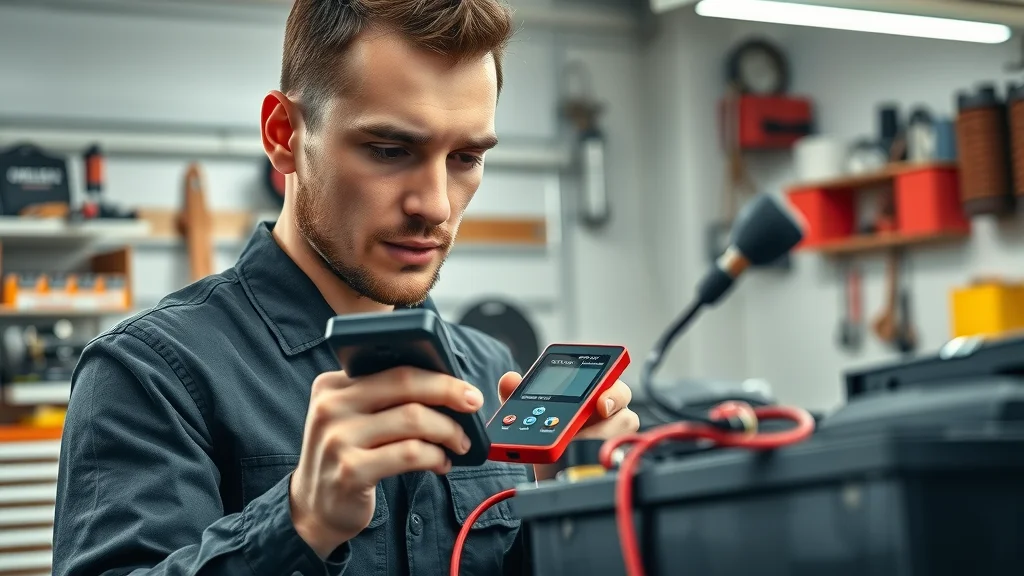
Motorcycle Battery and Electrical System Spring Maintenance Check

Charging, Connections, and Lights

No motorcycle inspection for spring is complete without a thorough check of the battery and electrical system. A discharged or corroded battery is a top cause of breakdowns early in the riding season. Be sure to fully charge your battery before that first ride, and consider using a trickle charger during the off-season to prolong its life. Once charged, meticulously tighten all cable connections and scrutinize for corrosion or frayed wires—weak connections can cause your motorcycle’s powerful electronics to malfunction at the least convenient moment.

Test all lights, indicators, and the horn to be certain your motorcycle is in proper working order. These are key not just for your safety, but for legal compliance as well. From brake lights to high beams, make sure everything is working properly before you set out. Minor electrical problems are usually easy fixes during routine maintenance and can make a major difference in preventing accidents and ensuring visibility on the open road.

  • Fully charge battery before use
  • Tighten all cable connections
  • Test lights, indicators, and horn

motorcycle battery spring maintenance check battery tester focus cables, connections, red and black wires

Tires and Brakes: Motorcycle Inspection for Spring and Riding Season

Checking Tire Tread, Pressure, and Age

Ensuring your tires are in good condition is non-negotiable for a safe and exhilarating riding season. Tire tread depth directly affects your bike’s grip and handling. Use a tread gauge to inspect for sufficient depth—shallow tread risks hydroplaning or slipping, especially on wet spring roads. Don’t forget to check for sidewall cracks or bubbles, as these are classic signs of excessive wear or dry rot, particularly after winter storage. Also, motorcycle tires have a lifespan—regardless of visible wear, replace any tire more than five years old to guarantee peak performance and safety.

Maintaining correct air pressure is equally vital; under-inflated or over-inflated tires compromise handling, increase stopping distances, and could lead to losing control. Routinely check both front and rear tire pressures against your manufacturer’s specifications, and don’t overlook the valve stems or caps. This simple maintenance check can help you ride with confidence and extend your tire life—all a critical part of your motorcycle inspection for spring.

checking tire tread motorcycle inspection for spring tire gauge depth driveway blooming flowers

Brake Pad and Brake Fluid Maintenance Checklist

Brake systems are your primary defense against accidents, making their inspection a top priority during your spring maintenance check. Begin by inspecting both the brake pads and discs for signs of excessive wear or scoring. Thin brake pads or severely grooved discs mean reduced stopping power; replace them promptly to ensure your brake response remains razor-sharp. Assess the feel of both the front and rear brake levers—any sponginess or inconsistent response signals air in the brake lines or low brake fluid levels, demanding immediate attention.

Next, check the condition and level of your brake fluid. Old or contaminated brake fluid can degrade performance and lead to dangerous situations. For peace of mind on the open road, replace brake fluid as recommended by your owner’s manual, and use only the correct type. Keeping your braking system in working order is central to safe riding, especially as spring traffic and unpredictable weather return.

  • Inspect for sidewall cracks and tread depth
  • Test brake lever/pedal feel
  • Change brake fluid as needed

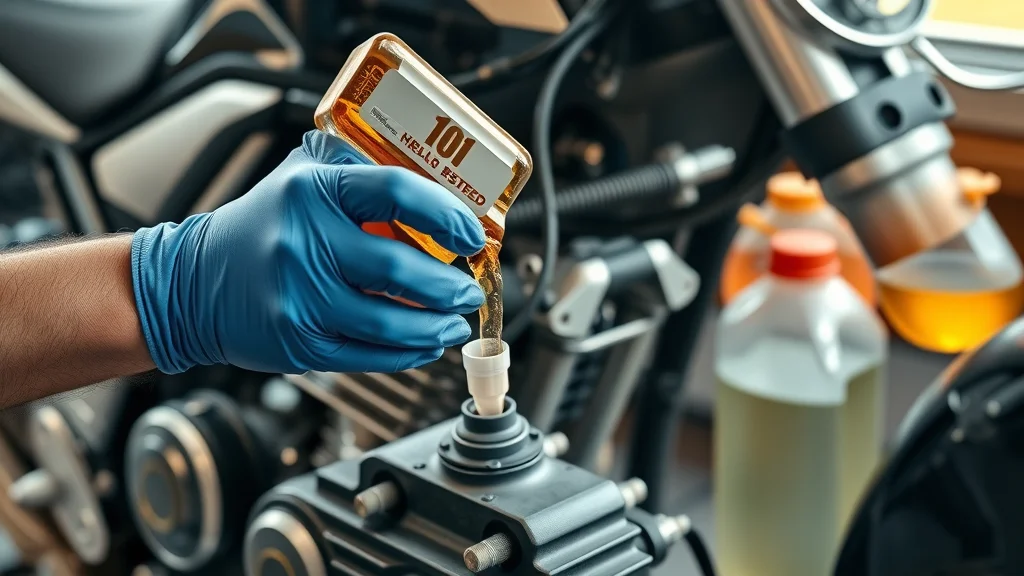
Checking Fluids and Lubrication During Your Motorcycle Inspection for Spring

Fluid checks are a crucial step in the motorcycle inspection for spring, ensuring your engine, transmission, and cooling system—all vital for reliable performance—are ready for action. Start with the engine oil: inspect the level and quality, and change it if it’s dark, gritty, or more than six months old. Fresh oil protects internal components from friction, overheating, and premature wear.

Don’t forget transmission or gear oil for models that require it, and for liquid-cooled bikes, check coolant levels and condition. Low or dirty coolant can lead to overheating, putting your engine at high risk. A quick inspection of all visible hoses helps you spot leaks or cracks before they become major issues. Taking these proactive steps as part of your spring maintenance checklist helps keep your motorcycle in peak condition for a trouble-free riding season.

  • Engine oil check and change
  • Transmission/gear oil level
  • Coolant check for liquid-cooled bikes

engine oil check motorcycle inspection for spring fresh oil gloves dipstick poured in shop

Chain, Belt, and Shaft: Maintenance Checklist for Safe Riding

Your motorcycle’s final drive system—chain, belt, or shaft—transfers engine power to the rear wheel. Neglecting this during a motorcycle inspection for spring could result in major breakdowns or even accidents on the open road. For chain-driven bikes, inspect for correct tension, adequate lubrication, and signs of rust or kinking. Clean and lube your chain according to your motorcycle maintenance checklist, using quality motorcycle chain lube, and adjust it for proper slack.

Belt drives require you to check for cracks, fraying, or excessive stretching and adjust tension if needed. For shaft drives, make sure the final drive housing isn’t leaking and the fluid is clean and at the proper level. Rattles, whines, or clunks here are warning signs of excessive wear and should be addressed before the riding season kicks off. Regular maintenance checks in this area ensure reliable power transfer and a smoother, safer ride.

  • Chain/belt tension & lubrication
  • Look for abnormal wear or noise
  • Inspect final drive housing (shaft bikes)

Test Ride: Confirming Your Motorcycle Maintenance for Spring Success

"Never skip the test ride — it’s your last chance to catch something you might have missed." — Certified Motorcycle Mechanic

The final step in your motorcycle inspection for spring is the test ride—a crucial, often overlooked part of the process. Take your bike on a controlled, low-traffic route to ensure the engine, brakes, transmission, and controls respond as they should. Pay special attention to any unusual noises, vibrations, or handling issues—these can indicate overlooked problems even after the most diligent maintenance checklist.

This practice run also allows you to feel the brakes’ bite, test throttle response, and confirm that all electrical accessories—lights, horn, indicators—are fully operational. Only after a successful test ride should you consider your motorcycle ready for the open road and the adventure of a new riding season. Remember, riding safety begins before you even leave the driveway.

spring test ride motorcycle maintenance winding country road confident rider new season

Safety Accessories & Gear: Preparing for the Open Road After Motorcycle Inspection

  • Helmet, gloves, jacket inspection
  • Reflectors and legal compliance

As the final piece of the puzzle, inspect your riding gear. Your helmet should have no cracks or major scratches, the visor should be free from fogging or scratches that impair visibility, and all straps must be secure. Gloves and jackets require a check for tears or excessive wear, as this gear acts as your last defense in a slide or accident. Confirm all reflectors, tags, and lighting devices are attached and functional for legal compliance—your life may depend on being seen. Never compromise on motorcycle safety or skip this step, as even the best-maintained bike requires the right protective gear to ensure you’re riding in good condition.

Seasonal Tips for a Confident Start to the Riding Season

Start your season with a short ride, gradually increasing distance as confidence in your motorcycle’s working order grows. Keep the maintenance checklist handy throughout spring, and repeat quick checks before each ride. Store your insurance cover documents with your gear, be mindful of ever-changing spring road conditions, and ride alert—it’s the best way to guarantee more miles and safer journeys long into the season.

People Also Ask About Motorcycle Inspection for Spring

How to prepare a motorcycle for spring?

A: Start with a motorcycle maintenance checklist that includes inspecting fluids, battery, tires, and brakes. Clean or replace the air filter, check spark plugs, and ensure all lights work. Run a test ride to confirm everything is functioning well before hitting the open road.

What to check on a motorcycle after winter?

A: Focus on the maintenance check after winter storage: look for leaks, corrosion, low battery, tire dryness, and ensure oil and brake fluid are at optimal levels.

How often do motorcycles need to be inspected?

A: A thorough motorcycle inspection is recommended at the start of every riding season, especially in spring. Regular monthly checks and before each long ride keep your bike in safe condition.

What is the 4 second rule for motorcycles?

A: The 4 second rule helps riders maintain a safe following distance. When the vehicle in front passes a landmark, count four seconds before you pass the same spot, giving ample reaction time in emergencies.

Video Guide: Motorcycle Inspection for Spring Maintenance Checklist

A well-produced video walkthrough showing a professional mechanic performing a complete spring motorcycle inspection in a bright, clean workshop. Features step-by-step demonstrations including tire checks, fluid top-ups, battery connection assessments, and a final test ride on a picturesque spring road. No text overlays. Cinematic, inviting, and brand-friendly style.

Video Demonstration: Performing a Spring Motorcycle Maintenance Check

Motorcycle Inspection for Spring: Key Takeaways for a Safe Riding Season

  • Use a comprehensive maintenance checklist
  • Perform scheduled maintenance checks after any winter storage
  • Address all fluid, battery, tire, and safety gear concerns
  • Never skip the spring test ride

Frequently Asked Questions about Motorcycle Inspection for Spring

  • Can I do my own motorcycle inspection for spring or should I visit a professional?
  • Most riders with basic tools and a manufacturer’s manual can perform a thorough motorcycle inspection for spring themselves. However, if you’re a new rider or encounter issues like persistent leaks, odd noises, or electrical faults, a professional service is recommended for peace of mind and warranty safety.

  • Are there special tips for new riders doing their first maintenance check?
  • Yes. Take your time, consult your motorcycle maintenance checklist, and don’t hesitate to ask experienced riders or local mechanics for guidance. Start with visual checks, document what looks unusual, and double-check tire tread, air filter, and brake fluid levels before your first ride.

  • How do I choose the right fluids for my bike?
  • Always refer to your owner’s manual or consult a qualified mechanic. Use only manufacturer-recommended oils, brake fluids, and coolants—using the wrong type can cause damage or void your insurance cover or warranty.

Ready for the Open Road? Schedule Your Motorcycle Inspection for Spring Now!

"A little time spent on a motorcycle inspection for spring could be the best investment you make all year."

Call Nasty Performance Motorcycle Shop Today: 847-458-4858

Conclusion: Take charge of your riding season by making motorcycle inspection for spring an annual tradition. With a proper maintenance checklist and a little time, you’ll hit the open road with confidence, comfort, and peace of mind.

For riders who want to go beyond the basics and truly master year-round motorcycle care, there’s even more to discover. Expanding your knowledge of seasonal maintenance strategies can help you anticipate issues before they arise and keep your bike performing at its best in every climate. If you’re ready to elevate your maintenance routine and unlock expert-level tips for every season, explore seasonal bike care secrets every rider must know—it’s your next step toward a safer, smoother, and more enjoyable ride all year long.

Motorcycle Maintenance

0 Comments

Write A Comment

*
*
Please complete the captcha to submit your comment.
Related Posts All Posts

Expert Tips for Motorcycle Coolant Flushing

Did you know that one in three motorcycles suffering from engine overheating could have prevented the issue with regular motorcycle coolant flushing? Many riders overlook this simple maintenance task, yet it can be the difference between effortless rides and unexpected roadside breakdowns. In this comprehensive guide, you’ll uncover why proper coolant system care is crucial, learn to spot the signs your cooling system needs attention, and get step-by-step instructions to safely flush your motorcycle coolant—ensuring reliability for every journey. Why Motorcycle Coolant Flushing Is Crucial for Your Cooling System “Neglecting regular motorcycle coolant flushing can lead to overheating, costly repairs, and system failure—protect your cooling system with scheduled maintenance.” – Motorcycle Maintenance Expert Keeping your motorcycle’s cooling system in prime condition should be a top priority for every rider. Regular motorcycle coolant flushing is critical because it removes old, contaminated coolant—and with it, any scale, corrosive deposits, or debris—helping prevent water pump and gasket failures. When motorcycle coolant isn't flushed out on time, the resulting buildup can reduce the efficiency of your radiator fan and impairs the boiling point stability, which raises the risk of engine overheating. The coolant system is much more than a simple collection of hoses and fluids; it’s a lifeline that regulates temperature, preserves essential engine components, and keeps everything running at peak performance. Ignoring scheduled coolant changes places unnecessary strain on your reservoir tank and water pump. Flushing your coolant system at recommended intervals minimizes risks and ensures your bike’s performance stays uncompromised, so you can enjoy a smooth, worry-free experience every ride. Extend engine lifespan Prevent overheating in your cooling system Maintain peak engine performance Remove harmful deposits from the coolant system What You'll Learn in This Motorcycle Coolant Flushing Guide This article leaves no stone unturned for your motorcycle coolant flushing needs. Every rider, from DIY beginners to seasoned cruisers, will find actionable insights and real-world tips to keep your cooling system and coolant system running at their best. Each section dives deep, offering not just procedures but best practices honed by professionals, including how to select the ideal coolant types and avoid mistakes that could cost you in the long run. How motorcycle coolant flushing keeps your cooling system running efficiently Best practices for selecting and using distilled water and fresh coolant Step-by-step guide to flush the system Common mistakes to avoid during motorcycle coolant flushing Insights on coolant types suitable for motorcycles As you focus on maintaining your motorcycle’s cooling system, it’s equally important to consider how seasonal changes can impact your bike’s overall health. For a deeper dive into preparing your motorcycle for different weather conditions and ensuring year-round reliability, explore these seasonal bike care strategies every rider should know. Understanding the Motorcycle Coolant System How the Motorcycle Cooling System Works The heart of your motorcycle’s engine health lies in the coolant system. This system is made up of several main components: the radiator, water pump, hoses, reservoir tank, thermostat, and radiator cap. The radiator absorbs and dissipates heat, while the water pump circulates coolant throughout the engine, drawing excess warmth away from critical moving parts. When running, the temperature gauge monitors heat levels, and the radiator fan kicks in if the heat rises too high—even on hot days in traffic. Coolant is a special liquid blend—often a mixture of distilled water, ethylene glycol, or propylene glycol—that prevents freezing and boiling in the cooling system, maintaining the engine cool at all times. The filler neck is the access point for adding coolant, but it’s essential that only the recommended ratio of water and coolant is used. Regular flushing is necessary because, over time, even the best fluids break down and accumulate grime, lowering their effectiveness and putting your engine at risk of overheating or even major mechanical failure. Main components of the cooling system Role of coolant in temperature regulation Why flushing the system is necessary Common Problems Prevented by Motorcycle Coolant Flushing Routine motorcycle coolant flushing combats several common issues that can develop as your bike racks up miles. The most significant are corrosion and scale buildup. Contaminants in the old coolant slowly erode metal parts—particularly around the water pump, radiator core, and gasket seals. This corrosion can create leaks or blockages, hindering the coolant’s flow and causing the engine’s temperature to spike. Failure to properly flush the system can also result in destructive buildup around the drain bolt and cause water pump or gasket failures. Small leaks or improper coolant type can lead to chronic overheating, forcing the engine to work harder to remain cool. Persistent issues here might even demand expensive repairs or replacement parts. By adopting a scheduled coolant maintenance routine, you’ll minimize the risk of dramatic mechanical breakdowns and preserve the life and performance of your ride. Corrosion and scale buildup Water pump and gasket failures Coolant leaks and overheating Coolant Types Explained for Motorcycle Coolant Flushing Before you flush your system or reach for a bottle of fresh coolant, it’s vital to understand the range of coolant types available and which is right for your bike. Traditional coolants typically contain ethylene glycol and require regular replacement, while long-life modern coolants may be based on advanced formulas that protect against corrosion and maintain the correct boiling point. Premixed coolants are formulated with distilled water, making them ready to use out of the bottle, whereas concentrates must be diluted before use. If you’re ever unsure whether to use water vs. premixed coolant, check your owner’s manual or consult with a mechanic. As a golden rule, never use tap water—it contains minerals that can cause scale deposits and degrade your radiator core. Distilled water, on the other hand, ensures cleanliness and compatibility. Always match your motorcycle’s requirements for coolant types, as using the wrong formula can lead to premature component wear or system blockage, endangering your cooling system. Differences between traditional and long-life coolants When to use water vs. premixed fresh coolant Choosing the right coolant type for your model Comparison of Popular Motorcycle Coolant Types Coolant Type Features Pros Cons Compatibility Traditional Ethylene Glycol Basic protection, requires mixing with distilled water Cost-effective; widely available Shorter lifespan; toxic Most older and some modern bikes Long-Life Coolant (OAT/HOAT) Advanced corrosion inhibitors; pre-mixed or concentrate Extended interval; less frequent changes Higher cost; potential incompatibility Most modern motorcycles Propylene Glycol Based Low toxicity, environmentally friendly Safer for pets & kids; good performance Higher price; not always OEM-approved Check compatibility with your model Essential Tools and Supplies for Flushing the System Before you embark on your coolant system maintenance, gathering the right tools and supplies is crucial for a smooth, effective flush. Start with distilled water, the backbone for rinsing out contaminants from your bike’s cooling system. Never substitute tap water, as it introduces minerals that can scale up your system or reduce efficiency. Your choice of fresh coolant is equally important; opt for a type that matches your bike’s requirements for chemical protection and boiling point control. It pays to research whether your engine is better suited for ethylene glycol, propylene glycol, or a proprietary blend recommended by your motorcycle’s manufacturer. Having the right gear also means using clean funnels for pouring coolant and distilled water, a sturdy drain pan to catch old fluid, protective gloves, and safety glasses. Make sure you have access to the drain bolt or drain plug, and check that your garage floor is prepared to deal with any spills. Organizing your supplies keeps the job straightforward and minimizes the risk of missing a vital step or contaminating your coolant system during maintenance. Distilled water for rinsing Fresh coolant for refill Funnels, pans, and safety protection Step-by-Step Motorcycle Coolant Flushing Process Proper motorcycle coolant flushing involves a series of carefully executed steps to ensure your cooling system is spotless, free from harmful deposits, and ready for a fill of fresh coolant. Before starting, take your time to prepare, as safety and thoroughness are key. Preparation: Ensuring Safety and Readiness Let the engine cool completely before opening any part of the coolant system—the pressurized hot coolant can cause serious burns if released too soon. Park your bike on a level surface and make sure the ignition is off. Gather all your necessary tools: distilled water, the right fresh coolant for your motorcycle, funnels, a drain pan, and sturdy gloves. Keep a rag handy for small spills and a bin for used fluids. Double-check that all parts, including the drain bolt and filler neck, are easily accessible and the area is clean and free of clutter. This preparation paves the way for a safe, efficient flush of your cooling system. Let the cooling system cool down Gather the necessary tools and distilled water Draining the Old Fluid from the Coolant System First, access the drain bolt or drain plug, usually located at the lowest point on your cooling system—often on the water pump or near the bottom of the radiator. Place your drain pan directly underneath to catch the old coolant as it flows out. Remove the radiator cap to relieve any residual pressure and allow air in for a more complete drain. Carefully unscrew the drain bolt and let the old coolant run into the pan. Avoid skin contact and keep the fluid away from pets and children, as it’s toxic. Once draining is complete, inspect the radiator cap and the inside of the reservoir tank for residue or corrosion; these are early signs your coolant system needs close attention during the flush. Locating the drain bolt Safely disposing of used coolant How to Flush the System Using Distilled Water After draining, reinstall the drain bolt and pour distilled water into the radiator or reservoir tank up to the fill line. Replace the radiator cap and start the engine, letting it idle for several minutes so the water circulates, solubilizing any lingering contaminants. Turn the engine off, let it cool, and drain the distilled water from the system again. Repeat this process until the liquid draining out is clear—usually two or three flushes does the trick. This step ensures no old coolant, mineral buildup, or air bubbles remain, setting the stage for your new coolant to provide maximum protection. Pouring distilled water through the coolant system Flushing until the water runs clear Refilling with Fresh Coolant and Bleeding the System With the system fully flushed and the drain bolt back in place, slowly pour the recommended fresh coolant (matching type and concentration for your motorcycle model) into the filler neck until the coolant level reaches the fill line. Reinstall the radiator cap securely. Next, start the engine and let it idle to circulate the fresh coolant, periodically squeezing coolant hoses to help dislodge any remaining air bubbles trapped in the cooling system. To properly bleed the system, you may need to loosen the bleeder bolt or run the engine with the radiator cap off (if your manual allows; always check). Once the coolant system stops bubbling and the level stabilizes, top up as needed. This critical bleeding step prevents overheating and maintains the right boiling point for your engine. Selecting the right fresh coolant Bleeding air pockets from the cooling system For those who want a visual overview, check out our step-by-step walkthrough covering draining, flushing, refilling, and bleeding the system. This demonstration highlights each stage with close-ups on hands, tools, and key components in a neutral garage setting. Post-Flushing Checklist for Your Cooling System After completing the flush, it’s essential to double-check your work to ensure the cooling system is leak-free and operating efficiently. Start by visually inspecting all hoses, the radiator cap, and connection points for leaks. Next, check the coolant level in the reservoir tank and add more coolant if it dips after a test ride. Run the engine and monitor the temperature gauge to ensure it stays within the safe range and that the radiator fan kicks in as needed. Keeping the system balanced helps prevent overheating and guarantees long-term engine protection. Checking for leaks in the coolant system Proper coolant level balance Verifying engine temperature stability Mistakes to Avoid During Motorcycle Coolant Flushing Even experienced riders can slip up during a coolant system flush. A major error is using tap water, which deposits minerals that degrade your radiator core and water pump over time—always opt for distilled water. Skipping the bleed step can leave dangerous air bubbles in your cooling system, disrupting heat transfer and inviting overheating. Another common pitfall is mixing incompatible coolant types; blending propylene glycol and ethylene glycol formulas can trigger chemical reactions that damage seals and passages in the coolant system. Take the time to research your model’s requirements, gather the right supplies, and follow each step without shortcuts to guarantee you get the longest possible life from your engine. Using tap water instead of distilled water Skipping system bleed steps Mixing incompatible coolant types How Often Should You Perform Motorcycle Coolant Flushing? “Regular coolant flushing, recommended every two years or as per your owner’s manual, prevents breakdowns and maximizes your engine’s reliability.” – Certified Motorcycle Mechanic The ideal interval for motorcycle coolant flushing depends on your bike’s make, model, riding conditions, and manufacturer recommendations. For most motorcycles, experts suggest flushing the coolant every two years or after a set mileage—whichever comes first. Hard-use conditions, like frequent stop-and-go traffic, cold climates, or high-performance riding, may require more frequent attention. Look for signs like a rising temperature gauge, visible sediment in the coolant, or reduced radiator fan effectiveness as clues that your system needs service sooner. Checking your owner’s manual is vital, as some modern coolants are formulated for even longer service lives. Always keep track of your maintenance schedule to ensure maximum reliability. Factors affecting coolant change frequency Signs your motorcycle is due for flushing People Also Ask About Motorcycle Coolant Flushing Do you need to flush the coolant on a motorcycle? Flushing the coolant system is necessary to remove contaminants and retain performance; neglect can lead to overheating and damage. Regular cleaning ensures the radiator cap, water pump, and filler neck are free of buildup, helping prevent costlier future repairs. How much does a motorcycle coolant flush cost? The cost varies depending on whether you do it yourself or use a shop and on your bike’s make and model; call for a precise quote. DIY flushes require basic supplies (distilled water and fresh coolant), while a full professional service often includes additional checks on the coolant system and cooling system integrity. How do I flush motorcycle coolant? Draining old coolant, flushing with distilled water, and refilling with fresh coolant are essential—refer to our detailed step-by-step process above. Make sure to bleed air bubbles thoroughly and always dispose of used fluids responsibly to protect your bike and the environment. How often should you change the coolant in a motorcycle? Most manufacturers advise a coolant flush every two years, but consult your manual or mechanic for specific intervals. Factors like riding environment, coolant types, and model recommendations may impact how often to service your system. Still facing issues after a flush? Our troubleshooting video covers diagnosing persistent problems like coolant leaks, air bubble formation, or radiator fan failure after maintenance, ensuring you spot and solve any cooling system troubles fast. FAQs About Motorcycle Coolant Flushing Which coolant types are safe for my bike? Always check the owner’s manual for approved coolant types, and only use those recommended for your engine materials and climate. Can I reuse coolant after flushing the system? No, always replace old coolant with fresh coolant. Used fluids lose their effectiveness and may contain debris that harms the cooling system. What if my cooling system still overheats after flushing? Check for leaks, thermostat issues, or trapped air bubbles. Persistent overheating requires a professional diagnosis—do not ignore the warning signs. Is flushing DIY or shop-only? With the right instructions and tools, many riders can complete motorcycle coolant flushing at home. However, major issues or uncertainty may require a visit to the shop for safety. Key Takeaways for Proper Motorcycle Coolant Flushing Never skip regular motorcycle coolant flushing Always use distilled water and fresh coolant Understanding your coolant system and cooling system ensures longevity Seek expert help if unsure about coolant types or procedures Ready for Your Next Motorcycle Coolant Flushing? “A well-maintained cooling system is the heart of your motorcycle’s reliability—make coolant flushing a regular habit.” Call Nasty Performance Motorcycle Shop Today: 847-458-4858 Conclusion: Don’t let your next ride be interrupted by a minor oversight. Stay proactive with regular motorcycle coolant flushing, follow our expert-backed checklist, and enjoy peace of mind on every journey! Maintaining your motorcycle’s cooling system is just one piece of the puzzle when it comes to long-term bike health and performance. If you’re ready to take your maintenance routine to the next level, discover how a holistic approach to seasonal care can protect your ride from the elements and keep it running smoothly all year long. Uncover expert advice and practical tips in our comprehensive guide to seasonal bike care secrets every rider must know. By integrating these strategies with your regular coolant flushing, you’ll ensure your motorcycle is always ready for the road—no matter what the season brings.

Tips on Performing Preventive Motorcycle Maintenance

Did you know? According to industry experts, over 70% of unexpected motorcycle breakdowns result from neglecting simple preventive maintenance tasks. Staying ahead with scheduled checks not only boosts your safety, but ensures every ride of the season is both reliable and exhilarating. This guide unpacks every critical step, tip, and pro secret for mastering preventive motorcycle maintenance and keeping your bike in peak condition for the long haul. Why Preventive Motorcycle Maintenance Matters: The Road to Reliability If you’ve ever felt the anxiety of being stranded by the side of the road or faced a last-minute cancellation due to mechanical trouble, you already understand the value of regular, preventive motorcycle maintenance. Routine tasks like checking tire pressure, monitoring the engine oil, and performing brake inspections are crucial to detect issues early before they escalate into costly repairs or compromise your safety. Preventive maintenance goes far beyond simple fixes; it establishes a consistent maintenance routine that helps you easily identify wear or damage and avoid accidents associated with neglected components. Unlike emergency repairs, preventive motorcycle maintenance gives you the power to keep your machine ready for the road at all times. By regularly following a comprehensive motorcycle maintenance checklist, you ensure every ride is safe, enjoyable, and free of unwelcome surprises. Remember: a little time spent on regular inspections can save you from major headaches and expenses later. This foundation is the secret behind long-lasting, reliable motorcycles and the reason so many riders swear by consistent upkeep. Don’t wait for those warning signs—proactivity pays off every time. "A well-maintained motorcycle isn’t just safer; it delivers a smoother, more enjoyable ride every time you hit the road." – Nasty Performance Motorcycle Shop What You'll Learn About Preventive Motorcycle Maintenance Essential preventive motorcycle maintenance tasks every rider should know How to create and follow a complete motorcycle maintenance checklist Common mistakes in preventative maintenance and how to avoid them Expert-approved motorcycle maintenance tips for long-term bike health Understanding Preventive Motorcycle Maintenance: The Basics Defining Preventive Motorcycle Maintenance and Its Importance Preventive motorcycle maintenance involves proactively servicing and inspecting your motorcycle at routine intervals to prevent breakdowns, identify issues early, and extend your bike’s life. Essential tasks include regular engine oil changes, brake pad checks, tire inspections, drive chain lubrication, and seasonal system overviews. Compared to reactive fixes—which address problems after they become severe—preventive maintenance allows you to pay attention to early warning signs like wear and tear or unusual noises before they cause significant damage or a sudden failure. Staying on top of preventive tasks keeps your motorcycle in top condition, ready whenever you are. Incorporating these practices into your regular routine reduces the risk of unexpected failures and extends the longevity of vital components. By monitoring fluids, examining parts for signs of damage, and documenting your maintenance history, you gain peace of mind and keep repair costs down over the long term. Preventive motorcycle maintenance isn’t just about fixing; it’s about anticipating and safeguarding your riding experience, so you get the best performance every time you hit the open road. For riders looking to deepen their understanding of how preventive care can help avoid expensive repairs, exploring additional strategies can be invaluable. You might find it helpful to review this detailed guide on preventive motorcycle maintenance to dodge costly repairs, which covers practical steps to keep your bike running smoothly and your repair bills in check. Preventative Maintenance vs. Reactive Repairs: Key Differences The biggest advantage of preventative maintenance over reactive repairs lies in its proactive approach. While reactive repairs address problems after something goes wrong—such as a worn brake pad leading to brake failure—preventive maintenance identifies and resolves issues during scheduled intervals, offering a smarter and safer alternative. This practice means you seldom have to deal with breakdowns, unexpected downtime, or costly emergency repairs. On the contrary, missed preventative checks can lead to escalating problems and a greater risk of accidents or excessive wear on expensive parts. By practicing timely inspections and fluid changes, you ensure all systems remain reliable and your motorcycle in top condition. Adopting this approach also helps preserve your motorcycle’s resale value while supporting longer, trouble-free adventures. In short, investing time into preventive motorcycle maintenance is the best way to avoid the stress and expense that come with fixing preventable issues, guaranteeing that your rides are consistently smooth and memorable. Creating a Motorcycle Maintenance Checklist: Step-By-Step Approach An effective motorcycle maintenance checklist is your roadmap to keeping your ride in peak form. By breaking down tasks according to mileage, season, and frequency, a checklist helps you stay organized, reinforces good habits, and ensures essential jobs never slip through the cracks. Begin by reviewing your owner’s manual for manufacturer-recommended intervals and supplement with common-sense checks, such as visual inspections for dry rot, signs of wear, and proper oil and filter changes. Logging completed tasks helps identify recurring issues early, reinforces your maintenance routine, and even supports lower motorcycle insurance premiums by demonstrating consistent care. This structured method makes sure you never skip a crucial step, reducing the risk of costly oversights. Periodically review your checklist to account for environmental factors, such as frequent wet conditions that require extra chain lubrication or extended storage where battery care is vital. When in doubt, consulting a professional mechanic or using a sample maintenance checklist (like the one below) will provide a solid starting point for most riders, whether you’re a daily commuter or only ride on weekends. Sample Motorcycle Maintenance Checklist Task Recommended Frequency Check tire pressure Before every ride Lubricate chain Every 500 miles Inspect brakes Every 1,000 miles Change engine oil Every 3,000-5,000 miles Replace air filter Every 10,000 miles or yearly Essential Preventive Motorcycle Maintenance Tasks Checking and Changing Engine Oil: Preventative Maintenance Must The heart of every great maintenance checklist is regular engine oil care. Engine oil lubricates internal moving parts, reduces friction, and carries heat away from vital areas. Over time, oil degrades, collects contaminants, and loses its protective properties, putting your engine at risk of accelerated wear or catastrophic failure. To avoid these issues, check your oil level before each ride, paying attention to oil color and clarity. Change your oil and oil filter at the intervals recommended by your owner’s manual—usually every 3,000–5,000 miles—using manufacturer-approved products for your specific motorcycle. Skipping oil changes or using the wrong oil can result in increased wear and tear, reduced performance, and long-term engine damage. Prioritize this preventative maintenance step to keep your motorcycle in top condition and ready for every adventure. For best results, always warm up your engine before draining old oil. This helps contaminants flow out more easily. Don’t forget to properly dispose of old oil and install a fresh filter during each change. Regular oil maintenance keeps your bike running smoother, quieter, and more efficiently while minimizing unforeseen breakdowns and extending your engine’s life. Tire Care, Pressure, and Tread Inspection in Motorcycle Maintenance Your tires are the only connection between you and the road, making their care critical to both safety and performance. Begin every ride by checking tire pressure with an accurate gauge, and adjust per the manufacturer’s specs—under-inflated or over-inflated tires can severely affect handling. Next, inspect the tread for signs of wear, dry rot (cracking), or embedded debris. Bald or damaged tires not only reduce traction but put you at risk for blowouts, especially at high speeds or in wet weather. Always replace tires that show signs of excessive wear, dry rot, or bulging. Don’t overlook sidewalls and valve stems in your visual inspection; both should be free of cuts, punctures, or signs of long-term wear and tear. By prioritizing tire care in your motorcycle maintenance routine, you ensure every journey starts with a reliable foundation, preventing abrupt issues and providing the grip and stability essential for safe riding. Incorporate a test ride after every tire change or significant pressure adjustment, listening and feeling for unusual vibrations or excessive play. This final check guarantees you’re ready for the road and have addressed any mounting or alignment problems before they develop into dangerous situations. Chain, Sprockets, and Lubrication: An Ongoing Maintenance Checklist The drive chain and sprockets experience constant stress and are critical to your motorcycle’s performance. Without regular care, chains lose lubrication, stretch, or develop tight spots, leading to premature wear or even dangerous failures. Make it a habit to visually inspect your drive chain before each ride, looking for rust, stiff links, or signs of damage. Proper chain slack should match the owner’s manual guidelines; excessive play can reduce power delivery or allow chain derailment. Lubricate your chain every 500 miles, or more frequently after wet rides. Use a motorcycle-specific chain lube and inspect the sprockets for hooked or worn teeth every 1,000 miles. Neglecting these elements in your preventative maintenance plan can lead to expensive repairs, compromised safety, and reduced efficiency. A well-lubricated, tensioned drive chain maximizes performance, supports smoother shifting, and minimizes wear on related components, ensuring a longer-lasting drivetrain. Brake Inspection and Fluid Checks in Preventive Motorcycle Maintenance Your brake system is essential for responsive and safe riding. Regularly inspect brake pad and disc thickness for signs of wear, replacing brake pads if they fall below the manufacturer’s minimum specification. Examine brake lines for cracks, leaks, or other signs of damage. Pay close attention to the color and level of brake fluid—old, dark, or contaminated fluid can result in decreased braking performance and even failure. A good maintenance checklist includes checking your brakes every 1,000 miles and replacing brake fluid as recommended—usually every one to two years—to maintain optimal stopping power. After service, a test ride (with light braking) ensures your adjustments provide full, reliable performance. Riders who stay on top of preventative maintenance for brakes can avoid dangerous situations and keep their motorcycles in top condition for years to come. Establishing a routine for brake maintenance catches issues early, from worn components to fluid-related concerns, and ensures you have the immediate stopping power needed for every ride, no matter the distance or conditions. Beyond the Basics: Advanced Preventive Motorcycle Maintenance Electrical System and Battery Maintenance Checklist Today’s motorcycles are more dependent than ever on reliable electrical systems. To keep your battery, lights, and electronics functioning flawlessly, perform periodic visual inspections of wiring harnesses for wear or damage, and clean battery terminals to prevent corrosion. Check that all lighting—headlights, turn indicators, brake lights—operates correctly before each ride, and ensure no flickering or intermittent failures occur. Battery health is vital, especially after storage or during cold seasons. Test your battery with a voltmeter and ensure it maintains a full charge; if it fails to hold a charge after reconditioning, replace it. In addition, keep an eye out for blown fuses, weak starter sounds, or any wiring showing signs of fraying. These steps make electrical issues less likely and guarantee that your high-tech systems remain trouble-free for the long time you own your motorcycle. Advanced regular maintenance of your electrical system means smoother starts, consistent performance of all digital and analog instruments, and a lower risk of being caught off-guard by a dead battery in the middle of nowhere. This critical area often goes overlooked, so add it to your ongoing maintenance checklist to cover all bases. Suspension and Steering Checks for Preventative Maintenance Your suspension and steering assemblies are responsible for stability, comfort, and handling. Start with a visual inspection for leaks at fork seals or shock absorbers and check for signs of excessive play or wear in the bearings and pivot points. Pay attention to changes in handling, such as wobbling, uneven tire wear, or pulling to one side. Over time, lubricants in the steering and suspension can degrade, potentially leading to a rougher ride or loss of control. Consult your motorcycle’s manual for proper settings and adjustment intervals. Annual maintenance should include fresh fluid in the front forks and examination of rear suspension components. These systems require careful adjustment to match your riding style, load, and road conditions. Keeping your suspension and steering systems in peak condition will not only extend their lifespan but keep your motorcycle nimble, safe, and enjoyable through every curve and straightaway. Common Preventive Motorcycle Maintenance Mistakes and How to Avoid Them Overlooking the maintenance checklist steps Using incorrect fluids or lubricants Ignoring manufacturer preventative maintenance intervals Forgetting seasonal maintenance tasks Skipping test rides after servicing Even experienced riders fall into common traps that can compromise their bike’s health. Forgetting a motorcycle maintenance checklist step (like lubricating the chain or changing brake fluid), using non-recommended products, or ignoring seasonal preparation lead to bigger issues down the road. Always double-check manufacturer guidelines, mark your calendar for preventative maintenance intervals, and stay consistent—your motorcycle and wallet will benefit. Never skip a post-service test ride to detect issues early, ensuring your adjustments provide the intended safety and performance improvements at every stage. Ultimately, preventive motorcycle maintenance is about intention and attention—investing a little effort now can save a lot of hassle, expense, and risk later. If in doubt, get guidance from professionals or follow comprehensive checklists used by trusted shops for best results. Watch: People Also Ask: Preventive Motorcycle Maintenance FAQs What is the preventive maintenance of a motorcycle? Preventive motorcycle maintenance involves performing regular checks and servicing tasks, such as oil changes, brake inspections, and tire pressure monitoring, to ensure your bike operates safely and efficiently while reducing the risk of unexpected breakdowns. What is the 4 second rule on a motorcycle? The 4 second rule is a safety principle recommending motorcyclists maintain at least four seconds of distance between their bike and the vehicle ahead, providing ample time to react to sudden stops or obstacles. Which bike is most liked by girls? Preferences vary widely, but lightweight, stylish, and easy-to-handle motorcycles—such as cruisers and entry-level sport bikes—are commonly favored among women for comfort and manageability. What does 2 fingers up mean on a motorcycle? The '2 fingers up' gesture is a popular motorcyclist greeting, symbolizing camaraderie and respect between riders on the road. Pro Tips From Professionals: Preventive Motorcycle Maintenance Best Practices Regular use of a motorcycle maintenance checklist prolongs lifespan Consult your owner's manual for preventative maintenance intervals Keep a log of every maintenance task completed Never skip tire, oil, or brake inspections Incorporate visual and auditory checks after every ride "Preventive motorcycle maintenance is your first line of defense against costly repairs and dangerous failures." – Shop Mechanic Key Takeaways: Performing Effective Preventive Motorcycle Maintenance Preventive motorcycle maintenance boosts bike safety and longevity Following a regular maintenance checklist prevents common failures Even minor proactive repairs save time and money in the long run Ready to Ride? Schedule Your Preventive Motorcycle Maintenance Service with Experts Your motorcycle deserves the best care—don’t wait until there's a problem. Call Nasty Performance Motorcycle Shop today: 847-458-4858 to book your preventive maintenance and enjoy every ride with confidence! If you’re eager to take your motorcycle care to the next level, there’s always more to discover about keeping your ride in optimal shape. Delving into broader strategies for preventive maintenance can help you anticipate issues before they arise and truly maximize your bike’s performance and longevity. For a comprehensive perspective on how proactive upkeep can save you from unexpected expenses and keep your adventures on track, explore our in-depth article on preventive motorcycle maintenance to dodge costly repairs. It’s the perfect next step for riders who want to stay ahead of the curve and enjoy worry-free journeys for years to come.

Schedule for Performing Routine Motorcycle Maintenance

Did you know that regular adherence to a routine motorcycle maintenance schedule can help you avoid up to 70% of major breakdowns and extend your motorcycle’s lifespan dramatically? Establishing and following a routine maintenance schedule isn’t just for passionate enthusiasts—it’s a critical step for every rider who values performance, safety, and long-term savings. Whether you’re gearing up for your daily commute or planning a cross-country adventure, a disciplined approach to motorcycle maintenance ensures your bike is always ready for the road and running in top condition. Dive into this guide to maximize your motorcycle’s reliability and enjoy every mile with peace of mind. Surprising Insights into the Importance of a Routine Motorcycle Maintenance Schedule "Regular adherence to a routine motorcycle maintenance schedule can help avoid 70% of major breakdowns and extend your motorcycle's lifespan dramatically." Understanding the direct impact of a routine motorcycle maintenance schedule on your bike’s longevity and your personal safety is essential for any rider. Too often, riders delay basic maintenance tasks, thinking they can address problems as they arise. However, ignoring simple daily or monthly checks can lead to expensive failures, safety risks, and extended downtime. The data makes it clear: a structured maintenance checklist not only improves performance but also safeguards your investment by catching wearable parts and safety issues before they become a hazard or a costly repair. A surprising number of riders overlook maintaining proper tire pressure, oil levels, or checking their brake pads. The reality? These small tasks have the biggest cumulative effect on both performance and ride quality. By following a set schedule—organized around daily, weekly, monthly, and annual intervals—you’ll create a routine that’s realistic and highly effective in keeping your motorcycle in top condition. Why Riders Can't Afford to Neglect a Motorcycle Maintenance Checklist Skipping or ignoring a motorcycle maintenance checklist can have consequences far more bothersome than a little extra time in the garage. Failing to regularly check the drive chain, adjust belt tension, or inspect the air filter can create a perfect storm for breakdowns at the most inconvenient times. Worse, it can compromise your personal safety, as critical components like brake fluid or wheel bearings are often only checked during routine maintenance. Even tasks as basic as inspecting the tread depth on your front and rear tires or topping up fluids prevent small issues from escalating. Ultimately, a robust, frequently-reviewed maintenance checklist helps keep your ride performing at its best, providing confidence and comfort each time you hit the road. What You'll Learn in This Guide to Setting a Routine Motorcycle Maintenance Schedule Key components of a comprehensive motorcycle maintenance checklist Simple, scheduled motorcycle maintenance tasks for daily, weekly, monthly, and yearly intervals Expert tips to maintain safety, maximize performance, and protect your investment Understanding the Routine Motorcycle Maintenance Schedule Framework A routine motorcycle maintenance schedule isn’t just a set of chores—it’s your blueprint for consistent performance and lasting reliability. This schedule breaks down essential maintenance tasks into manageable intervals that ensure your motorcycle is always in top condition. By learning how and when to perform simple checks and tasks, even beginner riders can confidently tackle motorcycle maintenance and save money on unnecessary repairs while maximizing the value of their bike. Let’s explore the importance of having a defined maintenance checklist and how it enhances not just the lifespan of your bike but your overall peace of mind on every journey. This section outlines core areas—engine oil, brake pads, coolant, tire pressure, and more—alongside the role of yearly full service for truly comprehensive care. The following frameworks and checklists have been refined by experts, so you can spend less time worrying about breakdowns and more time enjoying the freedom of the open road. What Is a Motorcycle Maintenance Checklist – And Why Is It Crucial? A motorcycle maintenance checklist is your step-by-step reference for every critical task needed to keep your motorcycle ready for the road. It covers everything from routine inspections, oil changes, and safety inspections to major yearly maintenance. Having this list at hand ensures that no part of your maintenance schedule gets overlooked, whether it’s a visual examination of the chain, a quick look at your air filter, or ensuring brake fluid levels are within safe limits. With maintenance tasks grouped by how often they need attention—daily, weekly, monthly, and yearly—it becomes much easier to manage and maintain your motorcycle in top condition. Riders who rely on a thorough checklist benefit from lower maintenance costs, fewer breakdowns, and smoother, safer journeys all season long. Even if you’re new to motorcycle maintenance, this approach helps you learn the best habits from the start and makes performing simple tasks less intimidating. How the Routine Motorcycle Maintenance Schedule Enhances Performance and Safety Consistent maintenance keeps your bike performing better, longer. Regular checks, like monitoring tire pressure and changing the oil, directly contribute to optimal handling, better fuel efficiency, and extended engine life. A well-maintained motorcycle is more responsive, feels smoother in transitions, and presents fewer surprises on the road. This not only protects your personal investment but also greatly reduces maintenance costs over the years. Safety should always be the first priority for any rider. Staying disciplined with your routine motorcycle maintenance schedule reduces the risk of avoidable accidents and ensures that critical safety components—brake pads, lights, chain, and more—are never neglected. This comprehensive approach means you’re not only ready for the adventures ahead but also confident that you and your passengers are protected mile after mile. Daily and Pre-Ride Motorcycle Maintenance Tasks Checklist Check tire pressure and condition before every ride Inspect lights, brakes, clutch, and controls Review chain/belt tension and lubrication Taking a few minutes to complete daily or pre-ride checks adds up to major long-term benefits. Inspecting your tire pressure and tread helps you spot uneven wear or punctures before they put you at risk. Evaluating controls like the clutch, throttle, and brakes ensures responsive handling, while checking the drive chain or belt keeps your motorcycle in top shape. Incorporating these quick checks into your routine enables you to spot potential concerns and plan proper maintenance ahead of time, keeping you ready for the road with confidence. Modern motorcycles are engineered for reliability, but only if they receive regular attention. By addressing these daily items, you help prevent sudden failures far from home and enjoy more efficient, hassle-free rides. Think of it as a quick “systems check”—one that catches tiny issues before they balloon into costly repairs. The best part? Most of these motorcycle maintenance checklist items are easy to perform, even for beginners, requiring just a few minutes and some basic tools. For riders looking to go beyond the basics, understanding how seasonal changes affect your maintenance routine can make a significant difference. Discover practical tips for adapting your motorcycle care throughout the year in this guide to seasonal bike care secrets every rider must know, which complements your regular maintenance checklist with timely, weather-specific advice. Tire Pressure, Tread, and Visual Inspections Your tires are the only point of contact with the road, making their condition a top safety priority. Daily checks should include examining tread depth, looking for embedded debris, and confirming the pressure matches your manufacturer’s recommendation. Over- or under-inflated tires can reduce handling, increase stopping distances, and accelerate wear. Use a quality gauge for accuracy and check the condition of both the front and rear tires for uneven wear or sidewall cracks. Don’t overlook the wheels and valves, making sure they’re secure and in good repair. Keep an eye out for visible cues—like bulges, flat spots, or exposed cords—that may signal the need for immediate attention or a trip to your mechanic. Pair these tire checks with a quick visual inspection of your chain or belt and rear wheel bolts as part of your routine motorcycle maintenance schedule. "A quick daily motorcycle maintenance inspection can detect early issues that prevent accidents and expensive repairs." Weekly Routine Motorcycle Maintenance Schedule: Essential Checks Clean and lubricate the chain or belt Check coolant and brake fluid levels Review signal lights and horn functionality On a weekly basis, extend your checklist to include routine cleaning, fluid top-ups, and checks of less frequently used systems. Cleaning and lubricating the chain or belt prolongs drivetrain life and keeps ride performance consistent. Monitor your coolant and brake fluid, as these are crucial to engine longevity and braking power—two areas no rider should overlook. It’s also the perfect time to double-check all signal lights, the horn, and any accessory features. Making this a habit greatly supports the overall reliability of your motorcycle and ensures you’re always ready for the unexpected. Weekly attention to these components helps spot leaks or damage early, address any odd noises, and keep your controls smooth. It also prevents smaller issues from growing during periods of heavy use or in varying weather conditions. Building these checks into your regular motorcycle maintenance routine makes each ride safer and lets you catch up on small fixes before they impact your enjoyment—or your wallet. Detailed Maintenance Checklist for Weekly Tasks Every week, dedicate a little time to more technical tasks that keep your motorcycle in top condition. Start with the drive chain: clean it thoroughly with a non-corrosive cleaner, inspect links for stiffness, and apply quality lubricant. Confirm proper belt tension if applicable, as this impacts power delivery from the engine to the rear wheel. Next, check coolant and brake fluid levels—these often get overlooked but are vital in maintaining consistent temperature and reliable stopping power. Don’t forget about the smaller items: test turn signals, headlights, and brake lights for functionality, and give the horn a quick beep. Lastly, do a fast once-over of your bike; look for loose fasteners, check for fluid drips beneath the engine, and ensure all visible parts are in place. This step-by-step motorcycle maintenance checklist—paired with smart scheduling—helps you catch issues before they become headaches, maintain peak performance, and maximize your ride’s value year-round. Monthly Routine Motorcycle Maintenance Tasks for Longevity Monthly maintenance dives deeper into vital systems to provide lasting performance and protection. These tasks generally require more time and a bit of mechanical know-how but pay major dividends in longevity and reliability. Consistent monthly attention safeguards your engine, brakes, fluids, and cables, all of which work hard mile after mile. This is your opportunity to catch early wear, address small leaks, and ensure every component of your motorcycle remains in peak working order. Incorporating this routine ensures your motorcycle stays healthy across seasons and different riding environments. Catching and resolving issues regularly not only extends the lifespan of components like the air filter, brake pads, and fluids, but it also helps reduce long-term maintenance costs and keeps your ride performing at its best. Ultimately, these monthly checks make a massive difference in keeping annual service and surprise repairs to a minimum. Engine Oil Level and Oil Change Best Practices The heart of monthly maintenance is checking engine oil levels and performing oil changes as needed. Removing old oil and replacing it with fresh oil keeps your engine free from harmful deposits and ensures smooth operation. Use the manufacturer’s recommended oil and never miss a change—the oil and filter are lifelines for your motorcycle’s powerplant. Inspect the oil for unusual color, debris, or burnt smell; these could indicate deeper issues that require professional attention. Always replace the oil filter along with the oil, ensuring contaminant-free lubrication for critical engine parts. Routine oil changes also promote better fuel efficiency, keep the engine running cool, and contribute to maximum performance. Keep records of each change as part of your maintenance logbook—it’s a simple habit that helps you stay on top of your schedule and provides a valuable paper trail when it’s time to service your motorcycle or sell it in the future. Inspect Brake Pads, Discs, and Cable Wear Your monthly motorcycle maintenance checklist should include a thorough inspection of the front and rear brake pads, brake discs, and cables. Worn brake pads or unevenly worn discs can reduce stopping effectiveness and cause vibrations while braking. Check the pad thickness and look for grooves in the disc surface, which may indicate the need for replacement. Cables for the clutch and throttle deserve attention too; frayed or stretched cables can negatively affect control and should be lubricated or replaced as needed. Neglecting these critical checks can lead to more expensive repairs or even safety hazards down the road. For best results, add a physical inspection of connectors, hoses, and indicator lights, making sure everything operates smoothly. Detailed monthly attention to these motorcycle maintenance tasks contributes to safer, smoother rides all season long. Not only does this approach help save money by avoiding larger component failures, but it also brings peace of mind every time you start your engine. "Monthly attention to these motorcycle maintenance tasks contributes to safer, smoother rides all season long." Complete Yearly Maintenance: Full Service and Inspection for Motorcycles No routine motorcycle maintenance schedule would be complete without annual service. This is the comprehensive “big picture” review and refresh of your entire motorcycle, covering advanced systems, wear items, and areas not usually touched during regular checks. Scheduling a yearly full service with a trusted technician ensures everything from the battery to the air filter and electrical systems is inspected and working as intended. It helps detect hidden problems, supports optimal performance, and guarantees your investment’s long-term health. Yearly maintenance isn’t only about fixing problems; it’s about giving your motorcycle a clean bill of health. Comprehensive inspection, fluid replacement, and torque checks help your machine stay roadworthy and enjoyable well into the future. It’s also an opportunity to update your maintenance log, track component ages, and get professional input on riding habits that may affect various systems. Comprehensive Yearly Maintenance Checklist for Peace of Mind Replace spark plugs and air filters Flush and renew fluids Inspect and torque all fasteners Battery health check Key yearly tasks include swapping out worn spark plugs and the air filter for reliable combustion and efficient airflow. This is also the time to flush and replace engine, brake, and coolant fluids, preventing the buildup of contaminants and ensuring top condition. Your mechanic will inspect and torque every major fastener, checking that nothing has come loose—a common issue after a year’s worth of rides on rough roads. The condition of your battery is also assessed, as old or undercharged batteries are a leading cause of mid-season breakdowns. Other details—like testing the wheel bearing or updating the rear wheel alignment—may be performed depending on your make and model. A complete yearly maintenance schedule ensures everything about your motorcycle is accounted for, from the most basic systems to the invisible connections beneath the tank. Don’t skip this step; it’s the best way to guarantee long-term confidence and trouble-free adventures. Scheduling Your Motorcycle Full Service: When and Why It Matters Your annual full service ideally takes place at least once every 12 months, no matter how few or many miles you’ve covered. Most riders choose to schedule yearly maintenance at the start or end of the main riding season, when weather is mild and shops have better availability. This keeps your machine prepared for whatever the calendar brings and avoids delays from surprise repairs during busy months. By staying consistent—regardless of usage—you protect your investment against time and wear, not just miles. Whether you do some work yourself or leave all checks to a pro, never ignore that skip in the chain, hard starts, or odd noises. Yearly maintenance gives you and your mechanic the chance to address small concerns before they escalate, set new maintenance reminders, and enter the new season confident in your motorcycle’s performance and reliability. How to Customize a Routine Motorcycle Maintenance Schedule for Your Bike A great motorcycle maintenance schedule isn’t “one size fits all. ” While most motorcycles share core requirements, your riding style, environment, and specific manufacturer guidelines should shape how you approach your maintenance checklist. Urban commuters encounter different wear than high-mile touring bikes, and off-roaders have a unique list of parts and fluids to monitor. Crafting a personalized checklist means accounting for how, where, and how often you ride—ensuring your bike gets the care it truly needs. Don’t hesitate to lean on your motorcycle’s owner’s manual, which details service intervals specific to your make and model. Add notes about local weather, storage conditions, and even past issues for future reference. The more tailored your maintenance strategy, the more effective and efficient your routine becomes—making every ride safer and extending your motorcycle’s lifespan. Adapting Your Maintenance Checklist by Riding Style, Environment, and Manufacturer's Guidelines If you ride in dusty environments, prioritize cleaning or replacing your air filter more frequently. For rain or cold climates, pay extra attention to fluid levels and inspect the battery more often. Long-distance riders may need to lubricate the chain and check the oil sooner than those sticking to city commutes. Manufacturer guidelines will list minimum intervals for oil change, engine oil inspection, and belt tension adjustment—always follow these as a baseline and adapt upward as needed. Keep in mind: intense riding shortens service intervals, while light or occasional use may lengthen them slightly. The key is observation and consistency; if your environment or style is especially hard on certain components, adjust your schedule to protect them accordingly. Ultimately, riders who adapt their maintenance checklist based on these factors enjoy more reliable bikes, lower maintenance costs, and a personalized connection to their machine. Consult the manual, check forum recommendations, and be alert to your bike’s unique signals; these insights are your best guides for creating a customized, practical maintenance routine. Leveraging a Maintenance Logbook for Better Outcomes One of the most effective ways to stick to your routine motorcycle maintenance schedule is by keeping a detailed maintenance logbook. This doesn’t need to be complicated—it can be a simple notebook or a digital chart, but it should capture all service dates, parts replaced, observations, and scheduled future tasks. Reviewing your logbook before each ride makes performing simple checks second nature and lets you spot patterns that lead to proactive repairs rather than expensive surprises. Maintaining a record helps track component age, warranty compliance, and provides valuable documentation if you ever sell your motorcycle. You don’t need to be a mechanic—consistency is what counts! Use sticky notes, calendar alerts, or dedicated apps if that works better for you. Your logbook will not only help save money through early detection, but also keeps you motivated to keep your bike in the best condition possible. Tables: Sample Routine Motorcycle Maintenance Schedule by Interval Interval Maintenance Tasks Who Performs Notes Daily/Pre-Ride Check tire pressure/tread; inspect lights, brakes, clutch, and controls; review chain/belt tension and lubrication Rider Quick inspection, 5–10 minutes before each ride Weekly Clean and lubricate chain/belt; check coolant and brake fluid; test signal lights, horn Rider/DIY Best after cleaning; replace fluids if levels drop Monthly Check engine oil and change as needed; inspect brake pads/discs; check clutch and throttle cables; clean air filter Rider/DIY Log all findings and changes Yearly/Full Service Replace spark plugs, air filters; flush/renew fluids; battery health check; inspect/torque all fasteners; check all main systems Professional Mechanic Best at start/end of riding season; update maintenance log Top 10 Expert Tips to Streamline Your Routine Motorcycle Maintenance Schedule Build maintenance into your riding routine Use reminders or calendar alerts Invest in quality tools and lubricants Join local or online motorcycle forums Consult your owner’s manual Schedule professional inspections annually Track service dates and observations Address warning signs immediately Practice safety at every step Keep a maintenance checklist on hand People Also Ask: Common Questions About the Routine Motorcycle Maintenance Schedule How often should a motorcycle be serviced? Answer: Most motorcycles benefit from a maintenance checklist check every 500-1,000 miles or monthly, with yearly maintenance and full service once every 12 months as recommended. What is the most important maintenance task for a motorcycle? Answer: Regular oil changes and proper tire pressure checks are among the most critical motorcycle maintenance tasks for safety and engine longevity. Can I follow one routine motorcycle maintenance schedule for different brands? Answer: While some items are universal in a motorcycle maintenance checklist, always consult the manufacturer's recommendations for specifics on your make and model. An instructional video showing a step-by-step demonstration of daily pre-ride and basic weekly motorcycle maintenance tasks, such as checking tire pressure, lubricating the chain, and reviewing key fluid levels, performed in a well-lit home garage setting for beginner to intermediate riders. Frequently Asked Questions about Routine Motorcycle Maintenance Schedules What are the signs that a motorcycle is overdue for routine maintenance? Signs include difficulty starting, rough idling, unusual noises, reduced braking power, visible leaks, poor acceleration, or warning lights on the dash. If you notice any of these, it’s probably time to review your routine motorcycle maintenance schedule and address any missed items. How is oil change frequency determined for motorcycles? Oil change intervals depend on your bike’s make, model, riding style, and oil type. Most motorcycles require an oil and filter change every 2,000–5,000 miles or every 6 months, whichever comes first. Always check your owner’s manual for recommendations and adjust if your riding conditions are especially harsh. Are motorcycle maintenance tasks easy for beginners to perform? Many basic maintenance tasks—like checking tire pressure, inspecting brakes, and lubricating the chain—are straightforward and require only basic tools. With a clear checklist and a little practice, even beginners can handle most regular checks. For complex or advanced tasks, consulting a professional is always advised for safety and long-term reliability. Key Takeaways: Making Your Routine Motorcycle Maintenance Schedule Work for You Consistency is the foundation of effective motorcycle maintenance Tailor your maintenance schedule and checklist to your bike and riding habits Engage in yearly maintenance for long-term reliability and safety Conclusion: Take the Next Step for Motorcycle Longevity "A disciplined routine motorcycle maintenance schedule transforms riding from a hobby into a lifetime investment in safety and performance." If you’re ready to elevate your motorcycle care beyond the essentials, consider exploring advanced strategies that align with the changing seasons and your unique riding habits. By integrating seasonal maintenance insights, you can proactively address challenges like temperature shifts, humidity, and storage, ensuring your bike remains in peak condition year-round. For a deeper dive into expert-level care and to unlock the secrets that experienced riders rely on, check out seasonal bike care secrets every rider must know. This resource will help you anticipate maintenance needs, adapt your schedule, and keep your motorcycle performing at its best—no matter what the weather brings. Ready to establish your personal routine motorcycle maintenance schedule? Call Nasty Performance Motorcycle Shop Today: 847-458-4858

Terms of Service

Privacy Policy

Core Modal Title

Sorry, no results found

You Might Find These Articles Interesting

T
Please Check Your Email
We Will Be Following Up Shortly
*
*
*