Add Row
Add Element
cropper
update

Nasty Performance ~ 847-458-4858 

update
Add Element
  • Blog Home
  • Categories
    • Motorcycle Maintenance
    • Riding Tips & Preps
    • Safety & Inspection
    • Customizations & Upgrades
    • DIY Motorcycle Repairs
    • Motocycle Audio Systems
    • Motocycle Seasonal Care & Storage
    • Engine, Electrical Performance
  • Bike Night
  • Nasty Performance Motorcycle Shop
February 24.2026
1 Minute Read

Winter Motorcycle Tire Pressure Tips You Need Now

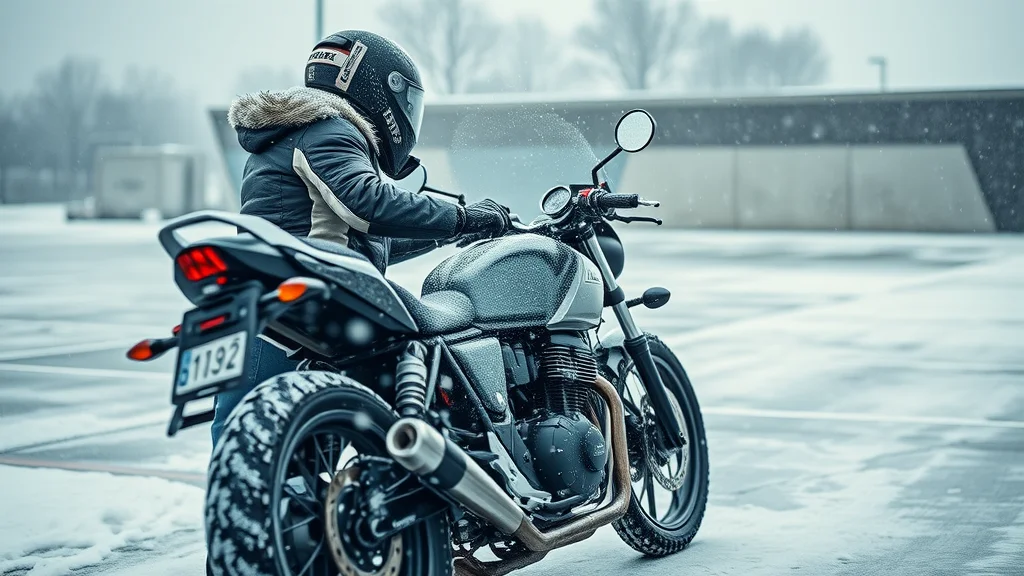
Are you risking your safety every time you ride in cold weather just because of what you think you know about motorcycle tire pressure? Winter riding isn’t just about layering up and watching for ice—it starts with the rubber that meets the road. Most riders don’t realize how dramatically cold weather affects their motorcycle tires, and even fewer know the difference a few psi can make to grip, safety, and confidence on icy streets. This article unpacks winter motorcycle tire pressure tips you need now, so you’ll never second-guess your tire gauge again.

Crisp winter motorcycle on a frosty morning road — rider focused and alert, crouched beside their bike checking tire pressure with a gauge, styled as photorealistic, set in a suburban street lightly dusted with snow, featuring a hint of visible breath in the cold air, rendered with sharp depth of field, detailed textures on the tire and clothing, emphasized with cool blue and white tones, under overcast diffuse winter lighting, captured as if shot with a 50mm lens for realism and intimacy.

Are You Making These Winter Motorcycle Tire Pressure Mistakes?

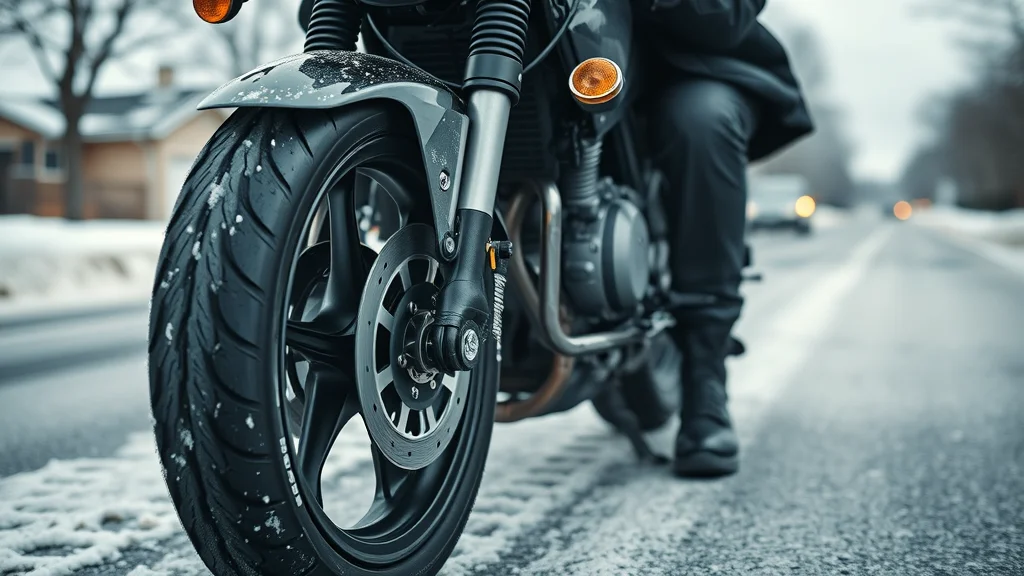
As temperatures drop, the rules for tire pressure and motorcycle tires change. Yet, many riders still rely on routines from warmer months or, worse, follow myths that could compromise safety on every ride in cold weather. The most common mistake is failing to account for the natural decrease in air pressure as the temperature falls—meaning your tires may be underinflated even if they were perfect on a sunny day. Other errors include sticking to summer psi recommendations, ignoring tire warmers and neglecting to adjust checks for frequent freeze-thaw cycles. Even a minor slip in attention can shrink your tires’ road grip—reducing the contact patch—and ruin handling just when you need precision most. Are you certain your tire pressure is at the correct level for cold weather rides? This essential guide brings clarity so you can stay safe—no matter what winter throws your way.

Correct tire pressure is the foundation for optimal performance and safety. Underinflated tires in winter months can cause excess flexing, uneven wear, and diminish the essential traction needed on slippery or icy roads. Overinflated tires are equally dangerous, as they reduce contact with the road, making slips and slides more likely during your next road trip. Knowing how cold weather affects your tire, using tire warmers when necessary, and keeping a close eye on tire pressure is essential for maintaining confidence and control whenever you ride in cold.

For riders interested in a deeper dive into the technical side of tire care, exploring additional resources can help you fine-tune your approach. While this article focuses on winter-specific strategies, you can find more comprehensive maintenance advice and updates at Nasty Performance’s main page, which covers a range of motorcycle performance topics.

What You'll Learn About Winter Motorcycle Tire Pressure Tips

  • How to accurately adjust tire pressure for cold weather

  • Impact of temperature on motorcycle tire safety

  • Expert strategies for keeping your motorcycle tires performing in winter

  • Answers to popular questions about winter motorcycle tire pressure

Understanding Tire Pressure: The Foundation of Safe Winter Riding

When it comes to motorcycle safety—especially in cold weather—the conversation must begin with tire pressure. Tires are designed to perform within specific pressure ranges, and these ranges are not static. As colder ambient temperature sets in, your motorcycle tire’s pressure drops, sometimes by as much as one psi for every 10°F decrease. It’s not simply a matter of comfort; it’s about ensuring the tire maintains the proper contact patch with the road for optimal grip and stability. Ignoring tire pressure means shorter tread lifespan, unpredictable handling, and a higher risk of slipping, particularly on frosty or snowy surfaces. Whether you’re prepping for a daily commute or a winter road trip, understanding the science of tire pressure is essential for maintaining both control and safety when you ride in cold weather.

It’s also worth noting that winter motorcycle tires and motorcycle tyres, whether Michelin Power, Power Rain, or Power Supermoto, all rely on pressure to “build heat” and create the traction needed for safe riding. Even the best cold tire can’t perform if it’s not inflated to the correct pressure, as the tire will flex excessively and not generate enough warmth to grip the road. The right tire pressure does more than avoid flats—it allows you to adapt instantly to changing road conditions, helping prevent tragic slides when facing icy patches or sudden snow. The foundation of your winter safety starts right at your motorcycle’s contact patch, making proactive tire pressure checks a non-negotiable habit for every winter rider.

Why Tire Pressure Matters in Cold Weather

Tire pressure isn't just about keeping your tires round—it's about survival on winter roads. In cold weather, air contracts, causing both motorcycle tires and motorcycle tyres to lose pressure naturally, even if there’s no visible leak. This is why a tire that felt fine last week may suddenly feel sluggish or wobbly after a cold snap. Lower tire pressure reduces the size of the all-important contact patch, making your bike more prone to slips and less responsive to steering. On winter-wet surfaces and icy spots, having your tires at the correct level is essential for maintaining control and maximizing grip, especially during sudden maneuvers or hard braking. Underinflated tires flex more, producing heat excessively at the edges while keeping the tread cold—an unsafe mix that can cause anything from rapid wear to outright failure during a challenging ride in cold.

Even high-performance motorcycle tires like the Michelin Power Rain or Power Supermoto cannot compensate for poor tire maintenance; these tires are designed to operate within a particular pressure, especially when the mercury drops. Overinflated tires are equally problematic: the contact patch shrinks, and tire warmers can only do so much to keep your tires sticky on cold streets. If you want to stay safe on winter’s unpredictable roads, the first step is adopting the discipline of checking and adjusting your tire pressure before every ride, never after. That way, you’re always prepared for the conditions ahead.

Informative winter tire pressure demonstration — mature motorcyclist wearing gloves and winter gear, visually highlighting a tire gauge pressed to a motorcycle tire’s valve stem, styled as photorealistic, set against a garage backdrop with cold-weather gear visible, featuring faint wisps of condensation and the soft glow of overhead fluorescent shop lights, rendered with detailed focus on the hands, tread, and gauge, palette of muted grays, blues, and blacks, under cool white fluorescent lighting, shot as if with a 35mm lens at close range.

How Motorcycle Tire Pressure Changes in Winter

The physics of tire pressure in winter is both simple and critical. For every 10-degree Fahrenheit drop in ambient temperature, a motorcycle tire can lose 1 psi—meaning a morning cold snap can turn your perfectly set tire into an underperformer. This seemingly minor change dramatically affects how well your motorcycle tires grip the road, especially when moisture or ice is present. Many riders don’t realize that after parking their bike overnight in sub-freezing temperatures, even a brand-new cold tire needs a pressure check. Relying on summer pressure values and skipping these checks leads to underinflated tires, which reduce response during evasive maneuvers, slow your reaction on power rain, and make it harder to “build heat” for secure winter handling. Your ideal range for winter isn’t guesswork—it’s a calculated adjustment that must happen every time you ride in cold.

If you ride on high-end brands like Michelin Power, Michelin Power Rain, or Power Supermoto, understand that their engineering is tuned for maintaining stability at the correct pressure. When the pressure drops below spec, these tires can’t perform at their best. If the pressure is too low, you’ll see increased flexing and temperature gradients in the tire, while too high shrinks the contact patch—both scenarios put your safety at risk. That’s why it’s essential for maintaining peace of mind to use a reliable gauge, measure before every ride in cold weather, and adjust up by 1–2 psi from your summer baseline if needed—always referencing the manufacturer’s latest guidance for your specific motorcycle and tire type.

Comparing Motorcycle Tires vs. Motorcycle Tyres: What’s the Difference?

When discussing motorcycle tire versus motorcycle tyres, we're often looking at regional differences—“tire” in American English and “tyre” in British English. But regardless of spelling, every rider, whether in the UK or US, faces the same winter challenges: both motorcycle tires and tyres must be checked and adjusted for pressure as temperatures drop. Brands such as Michelin Power, Power Rain, and Power Supermoto have both “tire” and “tyre” options depending on location, but manufacturer recommendations for winter settings are nearly universal. It’s less about vocabulary and more about understanding when, how, and why your tires/tyres need different care during the winter months.

European (motorcycle tyres) and American (motorcycle tires) models may have slight differences in construction, but both rely on correct pressure for safe winter operation. Whether you’re using a tire gauge marked in psi or a tyre gauge marked in bar, the principles for checking, inflating, and maintaining your tires remain constant—especially for optimal performance in cold weather. The key takeaway? Don’t get caught in a terminology trap or assume EU and US recommendations differ widely. The science behind tire/tyre inflation is universal: accurate, timely pressure checks are your front line in winter riding safety, no matter what you call them.

Essential Winter Motorcycle Tire Pressure Tips

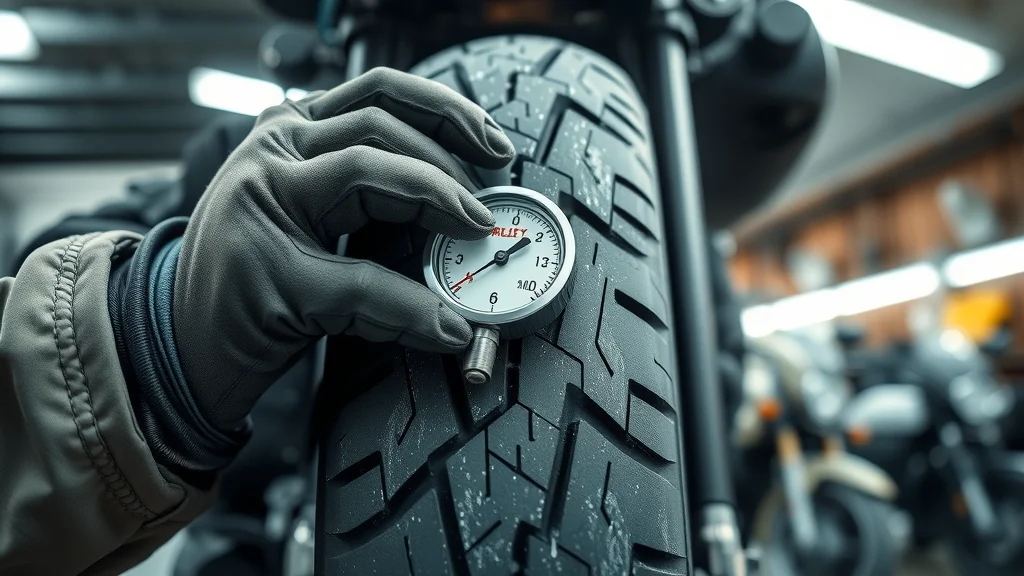
Staying safe on winter roads starts with your tires. As conditions change, so must your tire care routine. These essential winter motorcycle tire pressure tips are designed to help you adapt, excel, and stay safe under any circumstances. Begin by checking your tire pressure while the tires are cold—straight out of the storage area or garage is best. Use a high-quality tire pressure gauge for accuracy, as even small differences can translate to substantial grip reduction on the road. Don’t just rely on the visual appearance or a quick thumb press; invest in a digital or analog gauge you trust. A common error is ignoring the front tire—ensure both front and rear receive equal attention, as each plays a unique role during winter braking and cornering. This habit is especially crucial for those using specialized Michelin Power tires or planning a cold-weather road trip.

Next, understand that cold tire conditions fluctuate through the season. Use tire warmers where practical—including tire warmer blankets or pit-style tire warmers—especially if your ride starts in a cold garage or after prolonged parking. These devices bring the tires up to operational temperature gently and safely, ensuring the optimal contact patch is achieved from the start of your ride. Not every street rider needs race-grade tire warmers in winter months, but for long-distance riding or track use in cold conditions, they can be invaluable. Remember: optimal performance is always linked to keeping your tire pressure in the manufacturer’s recommended window—adjust up by 1–2 psi only if specified, and always check both when cold and after a short ride on power supermoto or Michelin power supermoto compounds for comparison.

Adapting Tire Pressure for Cold Weather Rides

Riding in cold weather isn’t as simple as inflating to the summer standard and hoping for the best. In fact, winter motorcycle tire pressure tips demand more oversight and adaptation than any other time of year. Begin by measuring your tire pressure before every ride—preferably when the tires are still cold and have not had a chance to warm up from movement or the use of tire warmers. Cold air contracts, reducing the pressure inside your tires by approximately 1 psi for every 10°F the temperature drops. If you set your pressure for a sunny day, that reading could leave you underinflated hours later as temperatures plummet. To offset this, consider adding 1–2 psi above your baseline—always in accordance with your motorcycle tire manufacturer’s recommendations. This adjustment keeps the pressure within the correct level as the tires warm up during a ride (or if tire warmers are used), but isn’t so high as to shrink your contact patch or make the ride harsh.

Experienced riders preparing for a winter road trip often also “pre-heat” their wheels using tire warmers or adjust their inflations schedules to track rolling temperature changes more closely. Remember, tire warmers help to mitigate the loss of pressure from ambient temperature changes and enable the tire to “build heat” and approach the optimal performance range even before you roll out of your storage area. So, whether you’re using Michelin Power Rain, Power Supermoto, or any street-legal winter tire, adapt your strategy: test before each journey, tweak with the conditions, and never hesitate to adjust your settings mid-season.

Dynamic action shot — motorcycle rider gearing up for a cold-weather ride, checking the tires while surrounded by falling snowflakes, styled as photorealistic, set at the edge of a snowy parking lot with visible breath vapor, featuring gently drifting snow, tire steam, and detailed cold-weather motorcycle gear, rendered with high clarity and crisp details, using a palette of icy blues, grays, and soft whites, under natural muted daylight, as if photographed with a 28mm wide-angle lens for environmental context.

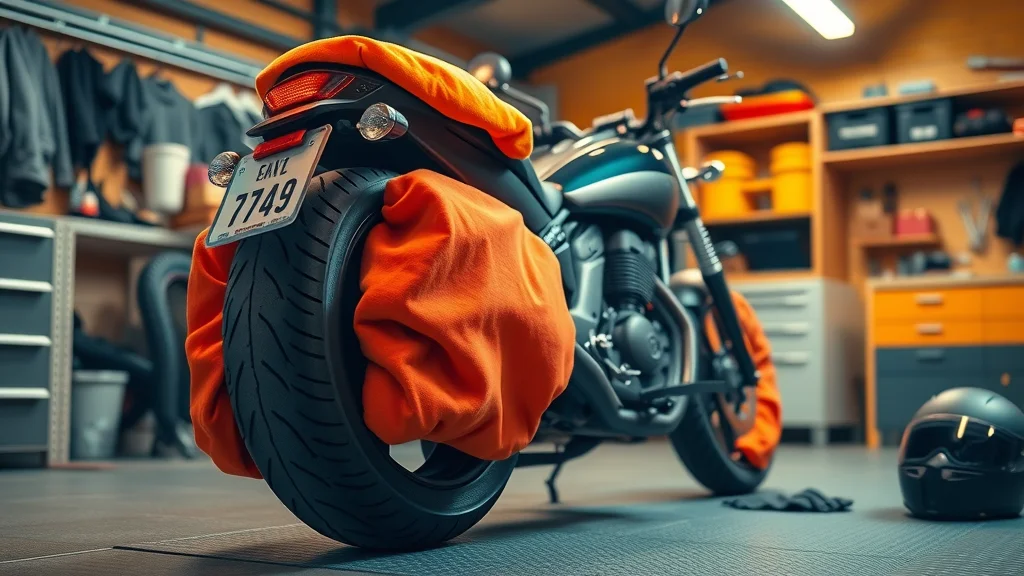
Using a Tire Warmer and Tire Warmers Effectively

Tire warmers are a game changer in winter riding, particularly when you need your motorcycle tire to perform from the moment you start moving. Think of tire warmers as essential for maintaining the correct pressure under cold conditions. Race-inspired but increasingly common among winter enthusiasts, tire warmers wrap around your motorcycle tires, gently heating them to the correct level so pressures remain stable and the rubber remains pliable on cold pavement. Always confirm your settings before attaching warmers: if you overinflate, the heat can push pressures too high; if you start underinflated, the warmers may not achieve the necessary correction. For consistent results, let your tires warm for at least 30–45 minutes, occasionally checking with an accurate tire pressure gauge for optimal performance. This helps ensure that your ride in cold weather begins with both confidence and control.

Even if you don’t use tire warmers on every ride, they’re invaluable for pre-ride preparation, reducing the stress of cold tire starts, and ensuring your motorcycle tire’s contact patch is appropriate. Some high-performance street tires, like the Michelin Power Supermoto, Michelin Power Rain, and specific motorcycle tyres built for winter racing, are engineered to accept tire warmers—to “build heat” rapidly without excessive flexing or risk of overheating. Ultimately, tire warmers don’t replace the importance of regular tire pressure checks but complement them, especially for riders who demand every advantage in unpredictable winter months.

Modern garage setting — motorcycle with bright orange tire warmers wrapped snugly around wheels, no people visible, showing gentle steam rising from the tires, styled as photorealistic, set in an organized, warmly lit workshop with clean surfaces, featuring subtle winter props like gloves and helmet nearby, rendered with a focus on texture (the tires and fabric of warmers), warm yellow-orange glow complemented by cool blue accents, illuminated by soft overhead LEDs, captured with a 24mm lens for a wide, clear perspective.

Checking and Adjusting Motorcycle Tires Regularly

The most important winter motorcycle tire pressure tip is simple: check your tires more often than you think necessary, especially when the temperature fluctuates daily. Regular checks should be your first line of defense against all winter hazards. Use a reliable, calibrated gauge to check both front tire and rear tire pressures before every ride, especially after any overnight cold conditions. Don’t just rely on a quick squeeze or visual inspection; subtle underinflation is impossible to spot without proper tools. Also, include checks halfway through longer trips—changes in altitude or sudden snow can further impact your readings. When adjusting pressure, always do so with tires at rest in the storage area or out of direct sun or wind—never immediately after riding or using a tire warmer, as the heat will skew your results.

This discipline is especially critical when using advanced motorcycle tires or specialty winter motorcycle tyres like the Michelin Power or Power Rain. Over time, even the best tire will show signs of inconsistent wear and unpredictable handling if pressure isn’t monitored closely. If you take only one thing from this guide: proactive, frequent checks and timely pressure adjustments are essential for maintaining tire integrity, maximizing both lifespan and performance throughout the winter months.

Expert-Recommended Tire Pressure Ranges for Winter Motorcycle Tires

Comparison of Recommended Tire Pressures for Different Temperatures and Brands

Tire Brand/Model

Recommended Pressure (Summer, psi)

Winter Adjustment (+1-2 psi)*

Notes

Michelin Power Rain

32 (front) / 34 (rear)

33–34 / 35–36

+2 psi for cold weather & wet conditions

Michelin Power Supermoto

30 (front) / 32 (rear)

31–32 / 33–34

Check manufacturer for pressure if using tire warmers

Bridgestone Battlax Winter

32 (front) / 36 (rear)

33 / 37–38

Never exceed maximum sidewall rating

Pirelli Angel GT

33 (front) / 36 (rear)

34–35 / 37–38

Monitor frequently during freezing cycles

*Always refer to your specific motorcycle’s owner manual and check with your tire manufacturer before making final adjustments. Use these values only as a starting guideline.

Must-Know Techniques: How to Maintain Optimal Winter Motorcycle Tire Pressure

  • Checking motorcycle tire pressures weekly

  • Investing in reliable tire pressure gauges

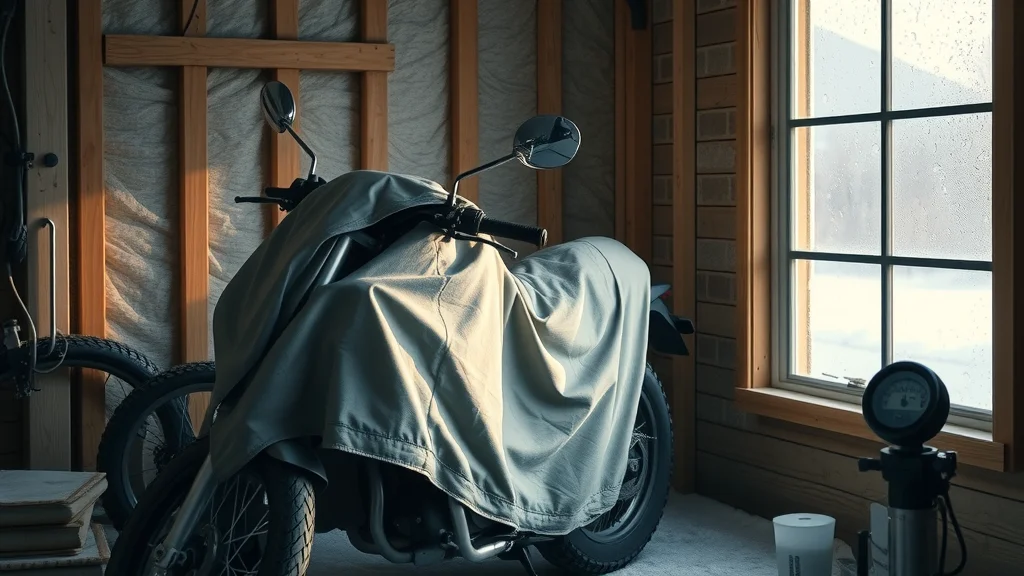
  • Storing your motorcycle away from extreme cold

  • Utilizing tire warmers when necessary

These core techniques will help ensure your motorcycle tires for winter always stay within the correct level—no matter how cold it gets. Weekly checks are just the start: make it a habit, not a chore, and gear up with the best digital or analog tire pressure gauges for accuracy, even in chilly garages. If you must leave your bike outside, cover it with a breathable fabric and keep tires off ice or freezing concrete. Using a storage area with some insulation or a light source can greatly reduce psi losses overnight. And never hesitate to use tire warmers or even a gentle room heater before early morning rides—the goal is to keep your tire pliable and pressure stable before venturing into the cold.

Staying consistent with these checks will also help you spot early warnings of underinflation, uneven wear, or unusual handling—all signs that winter has already begun affecting your tires. With so much riding on your motorcycle tires for winter, a little discipline pays major dividends in both safety and enjoyment, keeping your adventures on two wheels smooth and secure throughout the season.

Cozy winter motorcycle storage scene — bike covered with breathable fabric near a window with frosted glass, motorcycle tires visible, nearby a hi-tech digital tire pressure gauge, styled as photorealistic, set inside a home garage or shed with visible insulation, featuring gentle sunlight filtering in and highlighting the condensation on the window, precise detail throughout, palette of warm neutrals mixed with cool blues from exterior reflection, illuminated with soft natural and ambient light, taken with a 35mm lens for a homey feel.

Common Myths and Facts About Winter Motorcycle Tire Pressure

"Many riders underestimate how much cold weather can reduce tire pressure—and how dangerous riding with underinflated motorcycle tires can be during winter months." – Leading Motorcycle Safety Expert

Several misconceptions persist around winter motorcycle tire pressure. Many riders believe that the pressures listed on sidewalls or in owner’s manuals remain unchanged, but this overlooks the impact of ambient temperature. Others think that tire warmers are only for race use, though more street riders are adopting them in winter to build heat quickly for their daily commute. One persistent myth is that a small visual difference in tire shape is harmless—when in fact, a drop of just 2 psi can cut grip by over 10% in cold conditions.

The truth is, both overinflation and underinflation in winter months bring risks. Overinflated motorcycle tires reduce your contact patch, heightening the risk of a slip on ice or frost. Underinflated tires flex more, remain colder, and wear unpredictably, risking sudden loss of air or control. Knowing the facts—especially around cold weather impacts—helps you filter dangerous advice and reinforce safer riding habits every winter.

People Also Ask About Winter Motorcycle Tire Pressure Tips

What is the 7 7 rule for winter tires?

The 7 7 rule refers to considering winter tires when temperature drops below 7°C (44.6°F) and ensuring that your tire tread depth remains at least 7 millimeters for optimal grip on icy and snowy roads, crucial for motorcycle safety.

Is 40 psi too much for winter tires?

Yes, 40 psi is generally considered too high for winter motorcycle tires, as excessive pressure can reduce traction and potentially increase wear in cold conditions. Refer to your motorcycle’s manual for manufacturer-recommended tire pressure guidelines.

What is the 10/20 rule for motorcycle tire pressure?

The 10/20 rule suggests a 10% to 20% increase in tire pressure during winter to offset pressure drops from colder temperatures, but always verify with your motorcycle manufacturer and check using accurate gauges.

Is 40 psi too high for motorcycle tires?

For most motorcycle tires, 40 psi is higher than the standard recommended levels. Overinflating can compromise handling and grip, especially in winter. Always adhere to the tire manufacturer’s specified pressure range.

Winter Motorcycle Tire Pressure Tips in Action: Step-by-Step Video Guide

FAQs on Winter Motorcycle Tire Pressure Tips

  • How often should you check motorcycle tire pressure in the winter?
    Check tire pressure at least weekly, and always before every ride. Drops in temperature can cause rapid changes, so regular checks are essential for safety.

  • Are tire warmers useful for street motorcycles during winter?
    They can be very helpful for bringing tires up to operational temperature and ensuring consistent grip, especially before long rides or in freezing conditions, though race-grade equipment isn't necessary for light use.

  • What are signs of underinflated motorcycle tires in cold weather?
    Common signs include sluggish handling, excessive flexing, uneven tire wear, lower ride height, visible tire flattening, and a lack of confidence in turns. Always verify these suspicions with a reliable gauge.

Key Takeaways from Winter Motorcycle Tire Pressure Tips

  • Regularly check tire pressure before every winter ride

  • Avoid over- or under-inflation by referencing manufacturer specs

  • Cold weather significantly affects motorcycle tires, always prepare ahead

  • Use proper tire warmers if necessary for maximum safety

Final Thoughts: Prioritize Your Safety with Proper Winter Motorcycle Tire Pressure Tips

Don’t leave your safety to chance—master these winter motorcycle tire pressure tips and make smart preparation your winter riding tradition.

If you’re ready to take your winter riding expertise to the next level, there’s always more to discover about motorcycle performance and seasonal maintenance. The world of motorcycle care is constantly evolving, and staying informed is key to both safety and enjoyment. For broader insights, updates, and advanced strategies that go beyond tire pressure—such as optimizing your entire bike for winter or exploring the latest in performance upgrades—be sure to visit Nasty Performance’s resource hub. Your next breakthrough in winter riding confidence could be just a click away.

For expert advice and winter motorcycle tire inspections, Call Nasty Performance Motorcycle Shop Today: 847-458-4858

DIY Motorcycle Repairs

0 Comments

Write A Comment

*
*
Related Posts All Posts

Top 10 DIY Motorcycle Maintenance Tips You Can Do at Home

Ever wondered if your motorcycle is really as road-ready as you think it is? Most riders trust their bikes to perform smoothly, but are you missing out on simple DIY motorcycle maintenance tips that could make all the difference? In this guide, we’ll reveal practical, step-by-step strategies that will empower you to keep your motorcycle in top shape—without the need for a professional mechanic. Whether you’re a seasoned motorcyclist or a weekend rider, these essential maintenance tasks will extend your bike’s lifespan, boost fuel efficiency, and keep you safe on every journey.Are You Overlooking These Essential DIY Motorcycle Maintenance Tips?When it comes to diy motorcycle maintenance tips, many riders stick to the basics and assume their motorcycles are healthy as long as they start reliably. But overlooking crucial maintenance tasks such as checking tire pressure, monitoring brake pads, and keeping the chain and sprocket clean can lead to costly repairs—or worse, road accidents. By mastering essential motorcycle maintenance tasks at home, you not only save money but also gain peace of mind knowing your ride is safe and performing at its best for every mile.Modern motorcycle maintenance goes beyond oil changes. It covers everything from checking your tire’s tread depth and valve stems to inspecting battery terminals and adjusting fluid levels. By paying attention to these practical tips and understanding how and why each task matters, you’ll prevent unexpected breakdowns, improve your bike’s fuel efficiency, and increase its overall lifespan. Start prioritizing proactive care today, and you’ll notice smoother rides and fewer headaches in your journey as a motorcyclist.Discover How Simple Maintenance Tasks Can Keep Your Motorcycle Running SmoothlyYou don’t need an advanced degree in motorcycle mechanics or a garage full of specific tools to get started with effective DIY motorcycle maintenance tips. With just a little time each month and a commitment to understanding your motorcycle’s needs, anyone can keep their machine running at optimal performance. Simple practices—like keeping an eye on your tire pressure, cleaning your chain and sprockets, and regularly checking your fluids—ensure you stay ahead of wear and tear. Embracing these habits today means you’ll spend more time riding and less time resolving preventable issues. If you want a more detailed walkthrough for each maintenance task, check out this step-by-step DIY motorcycle maintenance guide for actionable instructions and extra pro tips.What You'll Learn from This Guide on DIY Motorcycle Maintenance TipsThe importance of regular motorcycle maintenanceStep-by-step DIY motorcycle maintenance tipsHow to identify and perform essential maintenance tasksCommon mistakes to avoid in home motorcycle maintenanceExpert insights for safe and effective DIY careTable: DIY Motorcycle Maintenance ChecklistMaintenance TaskFrequencyTools NeededEstimated TimeCheck Tire PressureWeekly / Before Each RideDigital Tire Gauge, Air Pump5 minInspect & Clean Chain and SprocketEvery 500 milesChain Cleaner, Brush, Lube, Rear Stand15 minReplace or Clean Air FilterEvery 3,000-6,000 milesBasic Tools, Replacement Filter20 minPerform Oil ChangeEvery 3,000 miles or per manualWrenches, Oil, Oil Filter, Oil Pan30 minTop Up FluidsMonthlyCoolant, Brake Fluid, Funnel10 minBattery InspectionQuarterlyMultimeter, Brush, Wrench10 minBrake System ChecksMonthlyWrenches, Brake Fluid15 minLighting & Electrical CheckMonthlySpare Bulbs, Screwdrivers10 minFastener & Bolt ChecksMonthlyTorque Wrench, Socket Set10 minCleaning & ProtectionAs needed / MonthlySoap, Sponge, Wax, Covers20 minWhy DIY Motorcycle Maintenance Matters for Longevity and SafetyEmbracing DIY motorcycle maintenance tips is more than an exercise in cost savings—it’s about keeping you and your bike safe on the road. When you take time to inspect and update your motorcycle’s vital components, you’re investing in its longevity and your own peace of mind. Routine maintenance tasks like oil changes, chain lubrication, and air filter swaps keep your motorcycle operating efficiently, minimize the risk of sudden breakdowns, and enhance overall performance. Riders who consistently maintain their bikes enjoy longer intervals between major repairs and improved fuel efficiency.Neglecting basic maintenance can lead to issues such as reduced brake performance, slipping chains, overheating engines, or premature tire wear. These problems don’t just damage your motorcycle—they increase the risk of accidents and leave you stranded when you least expect it. By using these practical DIY motorcycle maintenance tips, you empower yourself to spot signs of wear early and prevent costly, hazardous issues before they arise."Regular self-maintenance not only extends your motorcycle's lifespan but significantly reduces unexpected breakdowns on the road."DIY Motorcycle Maintenance Tips #1: Check and Adjust Tire PressureThe tire pressure of your motorcycle plays a pivotal role in handling, safety, and fuel efficiency. Incorrect tire pressure can affect your bike’s grip on the road, reduce its responsiveness, and cause uneven wear patterns that shorten the tire’s life. Adhering to recommended tire pressure levels—listed in your service manual or on your bike’s swingarm sticker—helps keep your motorcycle in top shape for every ride. Before heading out, always check your tire pressure with a digital gauge and inflate them as needed. This simple step not only increases safety but helps you avoid costly tire replacements due to preventable damage.Spotting signs of under-inflation or over-inflation early is essential. Under-inflated tires can make your motorcycle harder to maneuver, cause increased heat buildup, and wear out the tire shoulders quickly. Over-inflated tires, on the other hand, reduce the contact patch, compromise grip, and accelerate center-tread wear. Always inspect your tires for visible damage or low tread depth, and keep an eye on valve stem conditions to prevent air leaks. Following these DIY motorcycle maintenance tips can make a significant impact on your ride’s comfort and safety.Tire Pressure: Importance, Methods, and ToolsHow to check tire pressure: Use a reliable digital tire gauge on cold tires, compare against manufacturer specs, and adjust as necessary.Optimal tire pressure ranges for different motorcycles: Sport bikes, cruisers, and adventure motorcycles often have different recommended PSI—check your manual for exact numbers.Signs of under-inflation or over-inflation: Watch for uneven tread wear, sluggish handling, or increased vibration while riding.DIY Motorcycle Maintenance Tips #2: Inspect and Clean the Chain and SprocketChain and sprocket maintenance are among the most overlooked yet crucial DIY motorcycle maintenance tips. A properly lubricated and tensioned chain ensures smooth power delivery, maximizes efficiency, and dramatically extends the life of both components. Clean your chain and sprocket every 500 miles or after wet rides to remove dirt and grime that can cause premature wear. Using a rear stand makes the job easier and allows you to spin the rear wheel freely for thorough cleaning. Lubrication at regular intervals keeps the chain running silently and reduces friction loss, which can negatively impact performance and fuel consumption.Keeping your chain’s tension in the optimal range—not too tight or too loose—is key to avoiding unnecessary strain on the transmission and subsequent damage. Use your motorcycle’s service manual to locate the correct adjustment settings and check for signs of wear, such as kinks, rust, or elongation. Regular inspection also includes examining the sprockets for sharp, hooked, or missing teeth—indicating it’s time for a replacement. Mastering this maintenance task not only safeguards your chain and sprocket but also ensures your overall motorcycle maintenance routine is solid.Step-by-Step Guide to Chain and Sprocket MaintenanceHow to clean the chain and sprocket: Use chain cleaner, a stiff brush, and a clean rag, then finish with an approved chain lubricant.Lubrication intervals: Lubricate every 500 miles or after riding in wet or dirty conditions.Tension adjustment techniques: Use a torque wrench and check your manual for correct slack measurements—avoid running your chain too tight or too loose.DIY Motorcycle Maintenance Tips #3: Replace or Clean the Air FilterYour motorcycle’s air filter is responsible for keeping dust and debris out of your engine, providing the clean airflow needed for efficient combustion and optimal performance. Over time, a clogged or dirty air filter can choke your engine, reducing power, increasing fuel consumption, and eventually causing unnecessary engine wear. By including the air filter in your DIY motorcycle maintenance tips, you ensure your bike continues to run smoothly and reliably.To check the air filter, consult your service manual for its location and recommended maintenance intervals—they often vary depending on riding conditions. Signs of a dirty air filter include hard starting, reduced acceleration, or black smoke from the exhaust. Many filters can be cleaned with compressed air or replaced easily with basic tools. Always replace the filter sooner if you mostly ride on dusty roads or in frequent stop-and-go traffic. Staying on top of this maintenance task is a simple yet impactful way to protect your engine and enjoy every ride to its fullest.Air Filter: Key to Reliable Motorcycle PerformanceIdentifying signs of a dirty air filter: Look for significant color changes, excess dust, or visible blockages in the filter material.How to access, clean, or replace your air filter: Most filters are under the seat or fuel tank—remove covers, inspect, and clean or swap out the filter.Recommended frequency of air filter maintenance: Check and clean/replacement every 3,000-6,000 miles; more often in challenging environments.DIY Motorcycle Maintenance Tips #4: Perform Regular Oil ChangesRegular oil changes are the heartbeat of any motorcycle maintenance schedule. Engine oil lubricates moving parts, cools the engine, and captures debris—fresh oil is key for fighting wear, ensuring smooth operation, and prolonging engine life. Many manufacturers recommend changing the oil every 3,000 miles, but always check your manual for specific guidelines based on your bike’s make and model. Skipping oil changes leads to sludge buildup in the oil filter, inferior lubrication, and costly repairs down the line.Doing a DIY oil change at home involves draining the old oil, replacing the oil filter, and refilling your engine with the correct grade of oil. Opt for oils and oil filters designed for your engine, and if you ride in extreme climates or challenging conditions, consider more frequent changes. Checking oil quality and level regularly can help you spot early signs of contamination or leaks, saving you headaches and potentially expensive repairs. Staying consistent with this essential maintenance task will keep your engine performing at its best, every time.Oil Change: Essential Motorcycle Maintenance Tasks ExplainedHow to check oil quality and level: Warm up your engine, use the dipstick or sight glass, and check for dark, gritty, or low oil levels.Steps to change the oil: Remove the oil drain bolt with a wrench, let oil drain into a pan, replace the oil filter, and refill with fresh oil to the correct level.Choosing the right oil for your motorcycle: Refer to your service manual for viscosity recommendations and look for oils that match your climate and engine type.DIY Motorcycle Maintenance Tips #5: Inspect and Top Up FluidsBeyond oil, your motorcycle relies on several critical fluids to function: coolant, brake fluid, clutch fluid, and sometimes fork oil. Routinely checking these fluids is a must-do DIY motorcycle maintenance tip, especially as fluctuating levels or contamination can signal underlying issues. Coolant helps manage engine temperature, while proper brake and clutch fluid levels are vital for safe operation and responsive controls. Inspect fluid reservoirs at least monthly, and always use the correct type as instructed in your service manual.Symptoms of fluid problems include odd noises, soft brake levers, overheating, or visible leaks under your parked motorcycle. Keep an eye on the radiator cap and all hose connections for cracks, and be sure to top up or flush out fluids according to the maintenance schedule. Preventing fluid-related failures is simple and keeps every ride secure and enjoyable.Which Fluids to Check and How OftenCoolant level and quality: Inspect reservoir levels monthly. Replace old, dirty, or low coolant as specified in your manual.Brake and clutch fluid checks: Keep fluid at the max fill line; replace if discolored or after two years to prevent corrosion and maintain braking strength.Symptoms of fluid leaks: Look for puddles under your bike, spongy levers, or drops in reservoir levels—signs it’s time for a closer inspection.DIY Motorcycle Maintenance Tips #6: Battery Inspection and MaintenanceYour motorcycle's battery is at the heart of its electrical system: a weak or failing battery leads to starting troubles and unpredictable electrical issues. Periodic battery inspection is vital in your diy motorcycle maintenance tips routine. Key signs of battery wear or failure include dimming lights, slow engine cranking, or corroded battery terminals. Keep the terminals clean and connections tight to ensure steady, reliable starting power.Use a multimeter to check voltage—12.6 volts or higher when fully charged is ideal. If you see persistent starting issues despite regular maintenance, it may be time for a replacement. For added battery longevity, use a battery tender when storing your bike for weeks on end. Taking these simple steps ensures your ride is always ready when you are.DIY Battery Care to Prevent Starting ProblemsSigns of battery wear or failure: Dimming dash lights, clicking noises when starting, or visible corrosion.Cleaning terminals and connections: Use a wire brush and a mix of baking soda and water on terminals to remove corrosion and improve contacts.When to replace your motorcycle battery: After 3-5 years, or any time capacity fails to hold, consider swapping out for a new unit.Watch this hands-on visual guide for step-by-step instructions on checking and adjusting tire pressure and performing chain maintenance. See proper techniques in a realistic home garage setting and learn key tips to keep your ride smooth and safe.DIY Motorcycle Maintenance Tips #7: Brake System ChecksThe effectiveness of your brakes is non-negotiable for rider safety. Part of every solid diy motorcycle maintenance tips checklist is a monthly brake system inspection, which includes brake pads, rotors, and brake lines. Examine brake pad thickness regularly—pads should be replaced before they reach the wear indicator groove to ensure maximum stopping power. Worn, thin, or cracked brake pads reduce braking ability and increase risk of accidents on the road.Scan your rotors for warping, scoring, or excessive rust—any of which can hamper performance and mean a replacement is due. Inspect brake fluid levels, look for leaks around brake lines, and check for spongy or slow-reacting levers. Address issues immediately by tightening loose bolts and bleeding brake fluid if needed. Keeping your brake system in prime condition guarantees every ride is as safe as possible.How to Inspect Pads, Rotors, and Brake LinesWarning signs your brakes need attention: Squealing, grinding noises, longer stopping distances, or mushy levers.Tools and methods for at-home brake maintenance: Use a flashlight, metric wrenches, and a caliper tool for checking pad thickness and rotor condition.DIY Motorcycle Maintenance Tips #8: Lighting and Electrical System InspectionReliable motorcycle lighting isn’t just for legality—it’s crucial for visibility and road safety. Make a habit of testing your headlights, tail/brake lights, and indicators using your ignition switch. Faulty bulbs or inconsistent light signals can leave you vulnerable to accidents, especially in low-visibility conditions. Part of effective DIY motorcycle maintenance tips is checking fuses and diagnosing any unexpected electrical faults quickly for peace of mind.If you find any bulbs out-of-order or dim, replace them with new ones of the correct rating as recommended in your service manual. Use a multimeter to determine if problems lie within the wiring or fuses when lights flicker or fail. Consistent attention to your bike’s electrical components keeps your motorcycle road-legal and protects you during night or bad weather rides.Keep Your Motorcycle Safe and Legal with Proper LightingTesting headlights, brake lights, and indicators: Switch on each light in turn, observing for immediate, bright response.Diagnosing electrical faults: Trace wiring back from fault points, check fuses, relays, and look for corrosion or loose connectors.Replacing bulbs and fuses: Always use matching wattage/voltage bulbs, handle fuses with insulated tools to avoid shock.DIY Motorcycle Maintenance Tips #9: Fastener and Bolt ChecksMotorcycle fasteners—including critical bolts keeping everything from the handlebars to the rear wheel secure—must be checked regularly to prevent dangerous loosening over time. Vibrations from the engine and road travel can cause these parts to work themselves loose, posing serious risks. Using a torque wrench, refer to your service manual for correct torque specifications and tighten all accessible bolts. Pay special attention to areas prone to loosening, such as brake calipers, exhaust mounts, and handlebar clamps.This often-overlooked maintenance task offers huge safety dividends and prevents small issues from growing into expensive repairs. Make a checklist of key fasteners for your particular bike—cross-reference with your manufacturer’s recommendations for peace of mind. Regular fastener checks ensure your motorcycle stays structurally sound and ready for every adventure.Avoid Accidents by Tightening Critical FastenersWhich fasteners to check regularly: Handlebar clamps, brake and clutch levers, engine mount bolts, axle nuts, and exhaust fasteners.Proper torque specifications: Always use your service manual for exact figures and use a torque wrench for accuracy.Common spots for loose bolts: Rear stand pivot, brake caliper mounts, and footpeg brackets are frequent culprits.DIY Motorcycle Maintenance Tips #10: Cleaning and Protecting Your MotorcycleA clean motorcycle is more than just a point of pride—it’s part of a crucial maintenance routine. Washing your bike regularly removes corrosive dirt, oil, and road salt that can degrade paint, chrome, and critical moving parts. Incorporating cleaning into your DIY motorcycle maintenance tips not only keeps your bike looking sharp but protects your investment over time. Use gentle motorcycle soaps, microfiber rags, and always dry thoroughly to prevent water spotting and rust.Waxing and applying protective sprays safeguard against weather and UV, keeping your finishes and fasteners in top condition. If you’re putting your motorcycle into storage, follow steps like filling the fuel tank (with stabilizer), cleaning the chain, and covering the bike in a dry, sheltered space. These simple actions ensure your motorcycle emerges from storage ready for action, without costly surprises.Best Practices for Washing, Waxing, and StoringRecommended cleaning products: Use non-corrosive, motorcycle-specific soaps and polishes for all surfaces.Corrosion prevention methods: Apply wax or corrosion-prevention sprays to exposed metal surfaces; lubricate moving parts after washing.Long-term storage preparation: Fill the tank, add stabilizer, disconnect battery, and lift tires to avoid flat spots.Watch our comprehensive step-by-step video showing every essential maintenance task—from tire checks to oil changes—in a realistic home garage environment. Perfect for beginners and seasoned riders alike seeking DIY confidence.People Also Ask: DIY Motorcycle Maintenance TipsWhat is the 12 second rule on a motorcycle?Answer: The 12 second rule on a motorcycle encourages riders to scan ahead at least 12 seconds on the road to anticipate hazards and react in time, promoting safer riding habits as part of routine motorcycle maintenance.What is rule number 5 for motorcycles?Answer: Rule number 5 often refers to maintaining a safe following distance and being prepared for sudden stops, critical for motorcycle maintenance safety and accident prevention.How to properly maintain your motorcycle?Answer: Proper motorcycle maintenance includes following DIY motorcycle maintenance tips such as regular inspections, oil changes, chain lubrication, tire checks, brake evaluations, and keeping your bike clean and protected.Is it better to store a motorcycle with a full or empty tank?Answer: Experts recommend storing your motorcycle with a full tank of fuel treated with a stabilizer to prevent condensation and corrosion during storage, a best practice in motorcycle maintenance.Frequently Asked Questions about DIY Motorcycle Maintenance TipsHow often should I perform basic motorcycle maintenance tasks at home?Routine maintenance like tire pressure and chain checks should be done weekly or before each ride, while oil changes and air filter replacements are typically every 3,000-6,000 miles. Follow your maintenance schedule for best results.What are the signs my motorcycle needs immediate maintenance?Warning signs include unusual noises, slow starting, leaking fluids, poor braking, acceleration issues, or flickering lights. Address these promptly to avoid major breakdowns.Can beginners safely follow these DIY motorcycle maintenance tips?Absolutely. Many basic maintenance tasks are straightforward with common tools and careful reference to the service manual. Take your time and double-check your work for safety.What tools do I need for basic motorcycle maintenance?Essential tools include a digital tire pressure gauge, socket and wrench set, chain brush, oil pan, screwdriver, multimeter, and a torque wrench. Refer to your manual for any specific tools required for your bike.Key Takeaways on DIY Motorcycle Maintenance TipsProper DIY motorcycle maintenance tips increase safety and bike longevityEssential tasks include tire pressure, chain care, oil changes, and fluid checksConsistent maintenance prevents breakdowns and costly repairsDIY motorcycle maintenance saves money and empowers ridersReady for Professional Help? Call Nasty Performance Motorcycle Shop Today: 847-458-4858Take charge of your bike’s health using these actionable DIY motorcycle maintenance tips—and ride with confidence every time you hit the road.For riders looking to deepen their knowledge and take their maintenance skills to the next level, exploring more comprehensive resources can make a real difference. By expanding your understanding of both routine and advanced care, you’ll be better equipped to handle unexpected issues and keep your motorcycle performing at its peak. Discover additional strategies, expert advice, and advanced troubleshooting by visiting our in-depth collection of motorcycle maintenance insights—your next breakthrough in DIY mastery could be just a click away.

Top Places to Find Vintage Motorcycle Parts for Sale Online and Locally

Did you know the global vintage motorcycle market is projected to grow at over 7% annually through 2028? With an explosion of nostalgia and restoration fever, vintage motorcycle parts have become more sought-after than ever before. Whether you're restoring a classic Honda CB, searching for rare Harley OEM components, or chasing the thrill of finding the perfect spare part for your jet ski or Suzuki moto project, the marketplace has evolved. From eBay storefronts with free shipping to in-person treasure hunts at swap meets or local salvage yards, this comprehensive guide reveals every strategic move you need to make smart, confident purchases and keep your prized ride on the road.Unlocking the Market for Vintage Motorcycle Parts: Surprising Trends & StatsThe rise in value and demand for vintage motorcycle parts has pushed this once-niche market into the limelight. As more classic bikes, from consolidated motor spares to specialized parts for classic motor models, are being restored worldwide, the need for authentic spare parts and experienced service is climbing fast. According to market analysts, the sector’s projected 7% annual growth means that a growing segment of hobbyists, collectors, and professional restorers are actively scouring both online and local sources for quality parts. Whether you’re chasing hard-to-find parts for a specialty and no longer manufactured classic, or simply want genuine spare parts with free shipping guarantees, you’re not alone in this search.Enthusiasts are increasingly turning to online marketplaces like eBay store listings or niche specialty retailers such as Sons of Speed, where they can compare a large selection of vintage motorcycle spare parts with buyer protection and easy returns. These platforms offer not only a wide inventory of classic motorcycle parts but also vetted seller reviews, ensuring you get the very best. Locally, motorcycle shows, swap meets, and dedicated salvage yards remain hotspots, providing the chance to inspect parts in person and negotiate prices. The trend toward authenticity, provenance, and trusted seller ratings is driving smarter purchasing decisions, making it more accessible than ever for hobbyists and restorers to revive classic motor legends.Why Demand for Vintage Motorcycle Parts Is Higher Than EverThere’s a perfect storm converging—rising classic motorcycle values, passionate bikers seeking nostalgia, and a surge of interest in personal restoration projects have all combined to fuel unprecedented demand for vintage motorcycle parts. As more classic models reach “collectible” status, original parts become both rarer and more valuable, pushing buyers to tap every resource, from modern e-commerce giants to hyper-local salvage operations. Online, platforms like eBay store and specialty shops like Sons of Speed are responding by offering large selections of hard-to-find parts, competitive prices, and even free shipping to entice restoration fans."Did you know the global vintage motorcycle market is projected to grow at over 7% annually through 2028? This surge is fueling an unprecedented demand for spare parts and restoration supplies."Simultaneously, vintage events, swap meets, and local dealers are turning into vibrant ecosystems where collectors, shop owners, and enthusiasts can find everything from Harley OEM spare parts to Suzuki moto carburetors. Market trends show buyers are now smarter—digging into seller ratings, authenticity guarantees, and compatibility checks before making a commitment. In this competitive environment, knowing where to look and how to verify what you’re buying are the keys to restoring or upgrading every classic ride with confidence and value.What You'll Learn about Vintage Motorcycle PartsThe best online and local sources for vintage motorcycle partsKey tips for securing authentic spare partsWhere to find reliable motorcycle parts with free shippingHow to verify parts, prices, and seller reputationsComprehensive Guide: Where to Buy Vintage Motorcycle Parts OnlineFinding the right vintage motorcycle parts online can feel overwhelming given the vast array of stores, forums, and marketplaces. However, several standout options regularly surface in enthusiast circles and offer a mix of quality, price transparency, and buyer protection. One of the best starting points is the eBay store, which consolidates parts for classic, Harley OEM, and even niche specialty and no longer produced models, all in one place. Meanwhile, lovers of rare or antique motorcycles praise specialty retailers like Sons of Speed, whose expertise and curated catalogues cater to the discerning collector or builder. Whether you value fast shipping, excellent service, or the assurances of easy returns and verified authenticity, the online landscape is robust.Key buying strategies include leveraging free shipping filters, researching seller credentials, and comparing compatibility information—especially when hunting for parts that fit intricate models like Honda CB or consolidated motor spares. Additionally, don’t overlook the forums and community groups where time-tested advice and leads on rare finds are often shared. Knowing how to validate what you see online is crucial—scrutinize detailed photos, request provenance documents for high-value items, and always check for seller ratings before clicking ‘Buy Now’.eBay Storefronts: A Hub for Vintage Motorcycle Parts with Free Shipping OptionsNavigating top-rated eBay stores for vintage motorcycle spare parts: eBay has become a goldmine for classic motor fans, hosting a large selection of motorcycle parts for brands ranging from Harley OEM to Suzuki moto. Many eBay store sellers now specialize in vintage motorcycle parts, offering detailed listings that note compatibility, quality part condition, and clear price points. Pro tip: Look for PowerSellers with a record of excellent service and consolidated motor spares, as these shops often offer a broader roster of rare parts for classic motorcycles.Leveraging 'free shipping' filters for cost-effective buying: One of the biggest perks when shopping the eBay store is the prevalence of free shipping on qualified orders. Filtering your searches to prioritize sellers offering free shipping not only controls costs but can get your parts to you faster. Combine this with the ability to view parts in stock, consolidated by condition and location, and you have one of the most user-friendly buying experiences available for vintage parts.Buyer protection, seller ratings, and authenticity verification: Unlike many small online forums or standalone shops, eBay guarantees some buyer protection for all purchases. Before finalizing any sale, read through seller ratings and check for reviews. Look for listings that provide extensive images, manufacturer stamps, or any mention of Robin Bova's endorsement—a name synonymous with vintage authenticity. Many reputable sellers will offer easy returns or parts pro verification to ensure quality and satisfaction.Specialized Vintage Motorcycle Parts Stores OnlineComparing dedicated shops: classic parts dealers, restoration experts: Beyond eBay store options, a handful of specialty retailers have built strong reputations for their expertise in spare parts for classic motorcycles. Stores like Sons of Speed and similar niche brands concentrate on rare, specialty and no longer manufactured components—ideal for those chasing authenticity or embarking on award-winning restorations. Their sales teams often offer personalized support for Harley OEM requests or specific parts for classic and jet ski models.Highlight: Sons of Speed and similar niche brands: Sons of Speed is the go-to name for many collectors and restorers. Their catalog is known for an impressive selection of vintage motorcycle spares, knowledgeable staff, and practical guidance on fit, provenance, and condition. This brand—and others—inspire trust by providing extensive documentation and clear pricing, making them a solid “call to order” resource for those unwilling to compromise.Reviews, return policies, and pricing structures: Always weigh the value of easy returns and solid return policies—especially when buying sight unseen. Check individual store reviews (visit website for testimonials) and verify if they ship worldwide or offer free shipping on certain orders. Pricing can vary between large online marketplaces and specialty shops due to inventory rarity and quality controls, so always compare before purchasing.Store NameTypeShipping PolicyReputationNoteseBay StoreMarketplaceFree shipping optionsHighWide inventory, powersellers, buyer protectionSons of SpeedSpecialty RetailerPaid/free shippingSpecializedFocus on rare & antique parts, expert supportLocating Vintage Motorcycle Parts LocallySometimes the best finds are closer than you think. While the internet has revolutionized the search for vintage motorcycle parts, nothing compares to examining a spare part in person—and perhaps striking up a conversation with a knowledgeable dealer or fellow collector. Local sources such as motorcycle salvage yards, independent spare parts dealers, and classic motorcycle events continue to supply a robust pipeline of authentic components. By shopping locally, you gain the advantage of authenticity verification, direct negotiation, and instant ownership—no waiting for shipping or wrestling with returns.Many classic motor enthusiasts also discover entire communities at regional swap meets, show-and-shine events, or through specialty salvage outlets offering everything from consolidated motor spares to Harley OEM and suzuki moto treasures. Building trust and relationships with local sources not only increases your chances of finding rare or discontinued parts for classic projects, but can yield pro tips, referrals, or bulk deal pricing. If you need quality parts in a hurry or want to negotiate on price and condition, local hunts are a timeless solution.Motorcycle Salvage Yards and Local Spare Parts DealersBenefits of shopping at local motorcycle parts salvage yards: Salvage yards allow buyers to touch, inspect, and often negotiate on spare parts before making a purchase. If you’re restoring a classic Honda CB or on the hunt for Harley OEM or jet ski specialty parts, these outlets frequently specialize in hard-to-find inventory and offer the unique advantage of hands-on authentication.How to inspect and authenticate vintage motorcycle spare parts in person: Begin by examining each item for original manufacturer stamps, part numbers, and overall finish. Speak directly with mechanics or shop owners to establish provenance, and when possible, cross-check item details with online sources or community forums for spare parts for classic or consolidated motor bikes. Look for signs of excessive wear or poor-quality aftermarket parts, and don’t hesitate to ask about the store’s easy returns policy.Key questions to ask local sellers:What is the part’s provenance and manufacturer (e.g., Suzuki moto, Harley OEM)?Can you provide compatibility details, especially for uncommon/all-specialty and no longer produced models?Do you offer a quality part guarantee or support for parts pro installation?Is there an in-store return or exchange policy for vintage or consolidated motor spares?Classic Motorcycle Shows, Meets, and Swap MeetsFinding vintage motorcycle parts at local events: Motorbike events, swap meets, and annual motorcycle shows are legendary for unique finds and face-to-face networking. Sellers, collectors, and restoration experts gather, offering everything from Harley OEM and Honda CB spares to rare consolidated motor spares for classic motorcycles.Networking with sellers and collectors: In-person events are a goldmine for building relationships and locating specialty spare parts. Exchange contact details with reputable dealers, compare notes on availability or price trends, and be ready for deals only available off-market.Tips for price negotiation and condition assessment: Always inspect parts for authenticity (use manufacturer markings) and ask about prior ownership or restoration details. Be friendly yet assertive in negotiating prices—knowledge and preparation usually yield better deals in this tight-knit community. Don’t be afraid to walk away if a part’s condition or provenance seems questionable.Key Considerations When Shopping for Vintage Motorcycle PartsVerifying authenticity of vintage motorcycle parts: Scrutinize each spare part for manufacturer stamps, serial numbers, and specific distinguishing marks. For rare or high-dollar items, ask the seller for documentation of provenance, Robin Bova endorsements, or Wadsworth Award credentials to ensure authenticity and protect your investment.Understanding compatibility with specific motorcycle models: Always cross-check compatibility details, particularly for specialty and no longer manufactured classic motor models. Confirming fit ahead of purchase prevents costly mistakes—especially when dealing with unique Harley OEM, Honda CB, or consolidated motor spares.Comparing prices across online and local sources: Don’t settle for the first offer—leverage the large selection available on both eBay store and specialty retailers, while using in-person visits to gauge fair price ranges for vintage motorcycle parts. Free shipping, easy returns, and seller ratings can all impact the true value of your transaction.Checking seller credentials and buyer feedback: Whether shopping via marketplace, specialty store, or swap meet, always research seller backgrounds and buyer reviews. Ratings and testimonials (visit website if available) are your best indicators of reliability and service quality.Watch: A step-by-step guide video: How to authenticate vintage motorcycle parts and avoid common pitfalls when buying online or locally.People Also Ask: Essential Questions About Vintage Motorcycle PartsHow can you tell if a vintage motorcycle part is authentic?Authentic vintage motorcycle parts will typically feature clear manufacturer stamps, unique part numbers, and consistent finish quality that reproductions often lack. If you’re buying something high-value or historically significant, ask the seller to provide provenance documentation or a certificate of authenticity. For trusted purchases, prioritize sellers or outlets that have Robin Bova’s approval or Wadsworth Award mentions—they’re top signals of a genuine, quality part."Examining manufacturer stamps, part numbers, and finish quality are key indicators of genuine vintage motorcycle parts. For high-value items, request provenance or certification."Where is the best place to buy vintage motorcycle parts online?The best destinations for vintage motorcycle parts online are those with a proven track record and robust buyer protection, like the eBay store and specialty retailers such as Sons of Speed. Both offer a wide and reliable selection of motorcycle parts—with large inventory, consolidated shipping options, and the assurance of comprehensive customer service and reviews. Niche forums dedicated to particular brands like Honda CB or classic Harley OEM also serve as great resources for rare or discontinued spare parts."For selection and buyer protection, eBay and specialized retailers like Sons of Speed or niche forums are top picks for vintage motorcycle parts shopping online."FAQs About Vintage Motorcycle PartsWhat’s the average price range for vintage motorcycle spare parts?Pricing can vary widely based on rarity, condition, and source—expect common parts to start around $25–$50, with rare or specialty items easily reaching several hundred dollars. Shopping via eBay store or specialty retailers like Sons of Speed gives access to consolidated inventories and price comparisons for Harley OEM, Honda CB, and consolidated motor spares.Can you return vintage motorcycle parts if they’re not authentic?Most reputable online sellers—especially eBay store merchants and quality-focused specialty shops—offer easy returns if parts are misrepresented or found not to be authentic. Always check the store’s or seller’s policies before committing. For local purchases, clarify return terms up front and get agreements in writing if possible.Is free shipping common on vintage motorcycle parts orders?Free shipping is now a frequent perk on many larger online platforms, particularly on qualifying eBay store purchases and select specialty retailers. Take care to factor shipping costs into your total price, and use the ‘free shipping’ filters to maximize your savings while sourcing spare parts for classic projects.Are reproduction parts a good option for restorations?While original parts are ideal for authenticity and value—especially in award-winning restorations—high-quality reproduction parts can be a smart alternative when originals are unavailable or impractically expensive. Always confirm the fit and specifications and buy from reputable sellers offering guarantees and reviews.Key Takeaways: Getting the Most from Your Vintage Motorcycle Parts SearchStart by researching seller reputations and part compatibilityTake advantage of free shipping when availableInspect parts carefully, whether online or locallyPrioritize trusted outlets for rare and valuable itemsConclusion: Secure High-Quality Vintage Motorcycle Parts with ConfidenceWith market demand stronger than ever, use these strategies to secure the very best vintage motorcycle parts—online or locally—for your next restoration or upgrade project.Call Nasty Performance Motorcycle Shop Today: 847-458-4858

Basic Motorcycle Repairs You Can Master Today

"Have you ever wondered why some riders never get stranded? Discover the essential basic motorcycle repairs anyone can learn—and keep your ride trouble-free." Ever found yourself miles from home, wishing you’d known how to fix that simple rattle or jumpstart your own bike? Basic motorcycle repairs aren’t just for professional mechanics—they’re practical skills any rider can master. This comprehensive guide breaks down essential motorcycle maintenance, offering you step-by-step clarity, major cost savings, and invaluable peace of mind for every mile ahead. Read on to learn to troubleshoot, tune, and transform your ride—and say goodbye to roadside surprises for good. Understand common misconceptions about motorcycle repair Master a comprehensive checklist of repair tasks Follow practical tutorials for air filters, drive chains, batteries, and brakes Discover expert insights and video resources Start a maintenance schedule to maximize your bike’s lifespan Understanding Basic Motorcycle Repairs: Why Every Rider Should Master Motorcycle Maintenance Common misconceptions and realities about basic motorcycle repairs Practical examples: How mastering motorcycle maintenance can save time, money, and stress on the road Overview of essential motorcycle repair tasks every rider can handle Motorcycle maintenance is often seen as a daunting task reserved for the mechanically gifted, but this is a misconception that keeps many riders from enjoying their bike to the fullest. The reality is, most basic motorcycle repairs—like checking your tire pressure, replacing your air filter, or adjusting your drive chain—can be easily learned and executed with a little guidance. By demystifying these tasks, any rider can build confidence, minimize risk, and extend the life of their machine. Mastering basic motorcycle repairs doesn’t just save money; it prevents unexpected breakdowns and reduces stress on the road. For example, knowing how to jumpstart a dead battery or replace brake pads quickly can mean the difference between a minor delay and being stranded for hours. These are not just mechanical skills but practical life skills for anyone who loves to ride. Every rider should familiarize themselves with key maintenance task such as inspecting their air filter, lubricating the drive chain, and keeping tabs on brake pads. Not only do these ensure your motorcycle functions properly, but they put control and safety firmly back in the rider’s hands. In the next sections, we’ll break down common repair tasks, highlighting how simple set routines can make moto life smoother and more enjoyable for all interests and personal activity on this service. DIY vs. Professional Motorcycle Repair: Cost, Time, and Skills Comparison Task DIY Cost Pro Cost DIY Time Pro Time Skill Needed Air Filter Replacement $10–$30 $50–$100 15 min ~30 min Beginner Drive Chain Lube/Adjust $15–$25 $40–$90 20 min 30 min Beginner Brake Pad Replacement $25–$50 $100–$250 45 min 60 min Intermediate Oil and Oil Filter Change $25–$60 $70–$150 45 min 60 min Beginner/Intermediate Comprehensive Checklist: Basic Motorcycle Repairs for Effective Motorcycle Maintenance Step-by-step guide: Inspecting and replacing your air filter Drive chain cleaning, inspection, and lubrication for optimal performance Battery checks: Signs of wear and jumpstarting guidance Essential brake maintenance: Pad wear and rotor inspection Tire pressure and tread depth: The fundamentals of motorcycle safety Performing basic motorcycle repairs starts with a reliable checklist. Begin by inspecting and replacing your air filter every 5,000–10,000 miles or sooner in dusty conditions. A clogged air filter can reduce fuel efficiency and hinder engine performance. To replace, locate your airbox—usually under the seat—remove the old filter, and fit the new one in its place, referencing your motorcycle’s service manual for details. Regular inspection prevents surprise power drops or stalling. Drive chain maintenance is another essential task. It involves cleaning with a chain-specific degreaser, lubricating with quality chainspray, and checking for proper slack. Drive chain tension that’s too loose or tight can lead to premature wear or dangerous riding conditions. Adjust as needed, and always inspect for abnormal noise or rust. Weak or flat batteries are a leading cause of roadside breakdowns. As part of your routine motorcycle maintenance, check your battery for corrosion, swelling, or leaks. If your bike struggles to start or lights flicker, check the voltage. Should you need to jumpstart, connect cables to the correct terminals—positive first—and consult your service manual to avoid electrical system damage. Good battery care ensures your ride starts up reliably every time. Essential brake pad maintenance keeps you safe. Check the brake lever feel and inspect brake pads and rotors for wear every 2,000–3,000 miles. Replace worn brake pads if thickness is below factory specs. Don’t overlook brake fluid levels during your checks—they ensure consistent stopping power. Tire pressure and tread depth are foundational to motorcycle safety. Check your tire pressures before each ride and adjust to match the manufacturer’s recommendations, factoring in passenger or luggage loads. Inspect tread wear and sidewall condition; replace tires with excessive wear, cracks, or visible cords. How Often Should You Perform Key Motorcycle Maintenance Tasks? Task Frequency Air Filter Inspection Every 5,000–10,000 miles Drive Chain Lube & Adjustment Every 500 miles or after wet rides Battery Check Monthly Brake Pad Inspection Every 2,000–3,000 miles Tire Pressure & Tread Before each ride Oil & Oil Filter Change Every 3,000–5,000 miles The Air Filter: A Simple Yet Critical Basic Motorcycle Repair Task Signs Your Motorcycle Air Filter Needs Attention Decreased fuel efficiency or sluggish acceleration DIY instructions: Accessing, inspecting, and replacing your air filter A clean air filter is vital for optimal engine performance—a clogged one can severely restrict airflow, causing sluggish acceleration, rough idling, and poor fuel economy. Riders might notice their bike isn’t as punchy, or perhaps the rear wheel feels less responsive when accelerating. If you’re seeing more exhaust smoke or hearing the engine struggle, it’s time for an inspection. To inspect your air filter, locate the airbox, usually beneath your seat or side cover. Remove necessary bolts and open the airbox to access the filter. Compare the old filter to a new one—you’ll instantly see the difference in color and debris. Swap in a new filter if it looks dirty, damaged, or if mileage since the last swap exceeds the recommended interval. Always check your service manual for specific guidance related to your make moto model. "A clean air filter is the unsung hero of consistent motorcycle performance." Drive Chain Motorcycle Maintenance: Key to Smooth Rides Proper Drive Chain Lubrication and Adjustment When and how to lubricate your motorcycle drive chain How to check drive chain slack and avoid premature wear Troubleshooting unusual noises and common drive chain issues The drive chain transmits all the engine’s power to the rear wheel, making it a major part you cannot ignore. Lubricate your motorcycle’s drive chain every 300–600 miles, or after every wet ride. Use a quality chain lubricant, applying it to the clean chain while slowly rotating the rear wheel in neutral. This ensures full coverage and reduces friction, extend chain life, and keep rides smooth. Check the drive chain slack by measuring the vertical movement mid-way between the front and rear sprockets. Most bikes require 20–30mm of movement, but always consult your service manual for the exact number. Too-tight or too-loose chain tension leads to rapid sprocket and chain wear, and can even affect handling and cause the chain to jump off during a ride. If you hear clicking, grinding, or clunking noises from the chain area, stop and inspect immediately. Clean off excess debris, check for stiff links or kinks, and lubricate again. Addressing drive chain issues early is a basic motorcycle repair that’s quick, yet crucial for long rides and minimizing future repair costs or breakdowns. Preventing Common Motorcycle Maintenance Problems with Basic Motorcycle Repairs Reducing the risk of breakdowns with routine checks Spotting common motorcycle repair red flags early Importance of regular motorcycle maintenance for long-term value Routine motorcycle maintenance is the single best way to avoid the inconvenience and expense of unexpected breakdowns. Simple weekly checks—like scanning for leaks, monitoring tire pressure, or ensuring the brake lever feels right—help you catch issues before they turn serious. Early intervention can prevent minor problems such as chain slack or low brake fluid from escalating into bigger, more costly repairs that impact your bike’s long-term value. Common red flags include spongy brakes, abnormal noises from the drive chain, fluctuating tire pressures, or rapid decline in fuel efficiency. These can often be traced back to basic maintenance issues explained in this notice, such as dirty air filters, low brake pad material, or neglected oil changes—each a quick, manageable fix with regular attention. Doing your due diligence reduces wear-and-tear and supports the purposes explained for safe, confident biking. The true value in regular motorcycle maintenance lies in its ability to maximize your motorcycle’s lifespan and resale value. Well-looked after bikes not only offer better performance but command higher resale prices—something every rider can appreciate, regardless of personal aspects or interests and personal activity on this service. Basic Motorcycle Repairs Cost Guide: How Much Should You Expect to Spend? Average Motorcycle Repair and Maintenance Costs: DIY vs. Professional Repair Task DIY Cost Professional Cost Air Filter Replacement $10–$30 $50–$100 Drive Chain Maintenance $15–$25 $40–$90 Brake Pad Replacement $25–$50 $100–$250 Tire Repair $15–$40 $40–$120 Factors influencing motorcycle repair costs: parts, labor, and region The cost of basic motorcycle repairs varies according to the task, your bike’s model, and your location. DIYers can save significantly—sometimes hundreds per year—by simply changing their own air filter or tightening a chain. Professional labor rates add to your expense, especially in urban areas where shop fees are higher. Parts costs are typically stable, though specialty bikes may require unique or expensive components. Other factors influencing cost include the need for specialized tools, time involved, and the type of replacement parts chosen (OEM vs aftermarket). Regular maintenance can prevent large, unexpected bills, and many riders find the cost of a simple set of hand tools pays for itself after just a couple of maintenance task weekends. "Simple fixes like changing an air filter or tightening a chain can save you hundreds over a year." Safety First: Essential Tips Before Attempting Any Basic Motorcycle Repairs Must-have safety gear and preparation steps When to DIY and when to call a professional for motorcycle repair Setting up your workspace for efficient motorcycle maintenance Before you get your hands dirty with basic motorcycle repairs , safety should be your top priority. Always work in a well-ventilated, brightly lit area with your motorcycle securely placed on a stand. Make sure to wear the right gear: gloves, safety goggles, a sturdy jacket, and, if needed, a helmet to protect your head from accidental bumps on low ceilings or overhead tools. Lay out your tools within arm’s reach, and keep a fire extinguisher handy—especially when dealing with fuel or oil changes. Know when to DIY and when to call in a pro. Regular maintenance task like brake pad or air filter replacement are suitable for most beginners, but complex issues involving your engine, major part replacement, or advanced electronics—like diagnostics or resetting electronic sensors—should be left to certified service professionals. If you encounter a repair you’re unfamiliar with, refer to YouTube videos or your service manual, but don’t hesitate to seek help if in doubt. Doing so prevents costly mistakes and keeps you safe. Finally, set up your workspace for efficiency. Use a clean, flat surface; organize parts in trays to prevent losing small screws or washers; and keep all documentation handy, such as your service manual and receipts for support of the purposes explained in your records. Well-prepared spaces boost confidence and make moto maintenance a ritual you enjoy, not dread. Video Tutorial: Basic Motorcycle Repairs Every Beginner Should Know Step-by-step oil change demonstration Air filter replacement video guide Sometimes the best way to learn basic motorcycle repairs is by watching them in action. There are countless YouTube videos from mechanics and manufacturers demonstrating step-by-step processes—like oil changes and air filter swaps. These videos show exactly where to find each major part, how to safely drain fluids, and detailed tips to avoid making mistakes beginners often encounter. An oil change is an essential maintenance task, and watching an actual demonstration ensures you won’t miss details like replacing the oil filter, properly re-tightening the drain plug, or recycling old fluids. For air filter replacement, many tube videos walk you through removing fairings, accessing the airbox, and visually checking for dirt and debris, reinforcing what you’ve learned from your service manual. Bookmark a few trusted channels for future reference—they’re invaluable for personal aspects of learning and building long-term repair confidence. Expert Insights: Motorcycle Maintenance Quotes From Seasoned Mechanics "The best tool is knowledge—learn the basics, and you’ll ride further." "Routine checks prevent 90% of all major motorcycle repair headaches." Troubleshooting Basic Motorcycle Repairs: Quick Fixes for Common Issues Dead battery? Jumpstarting your motorcycle safely Loose chain? How to tighten on the go Flat tire? Patching basics every rider should know Many common issues can be resolved quickly with a little know-how. If you have a dead battery , first double-check that the kill switch and ignition are in the correct position. If the battery is still flat, use a portable jump-starter or jumper cables connected to another battery—always connect positive to positive, negative to a clean, grounded metal part, and never let the clamps touch. Once started, run the bike for at least 20 minutes to top off the charge. A loose drive chain can be tightened roadside with basic motorcycle repair tools. Using your bike’s tool kit, loosen the rear axle nut and adjust the tension bolts until the proper chain slack is achieved—typically between 20-30mm. Remember to keep the wheel aligned by referencing the markings on both swingarm sides. Re-tighten the axle nut before riding off. For flat tires , a plug kit or patch is a lifesaver. Find the puncture, pull out the object, and insert the plug following kit instructions. Inflate the tire to the correct pressure and monitor for leaks. Always seek a permanent fix or replacement tire as soon as possible, but a roadside patch keeps you moving until then. These steps support activity on this service by giving every rider the power to function properly and maintain their interests and personal safety. Essential Tools and Supplies for Basic Motorcycle Repairs Top tools for home motorcycle repair: What every toolkit needs Consumables: Lubricants, cleaners, and essential spare parts Where to source affordable, high-quality motorcycle maintenance supplies No rider can carry out basic motorcycle repairs without a reliable set of tools and supplies. Every home toolkit should include metric wrenches, sockets, screwdrivers, pliers, tire pressure gauge, chain tool, and a torque wrench. Quality tools not only make each maintenance task easier but prevent damage to delicate fasteners and major bike components. For the essentials, choose brands recommended by your bike’s service manual or local mechanic. Keep a stock of consumables, including chain lubricants, wheel bearing grease, brake fluid, and replacement bulbs. Spare parts like an extra air filter, spark plugs, and fuses are also handy for quick fixes. These minor investments save time in the long run and equip you to handle those quick-fix repairs confidently. To save money, look for supplies at trusted online retailers, local dealerships, or specialized motorcycle part stores. Many suppliers offer bundles for beginners that match your make and model, ensuring compatibility. Researching online forums and watching youtube videos for product reviews is a great way to ensure you’re getting the best quality for your needs and personal activity on this service. Developing a Habit: Setting a Motorcycle Maintenance Schedule How often should you check your motorcycle for repairs? Sample monthly and seasonal motorcycle maintenance timelines Tracking repairs and predicting future maintenance needs Building a maintenance routine is just as important as learning any single basic motorcycle repair . At a minimum, complete a visual inspection before each ride, check chain tension, and tire pressure weekly, and review brake pads and fluid monthly. Schedule a thorough service task—such as oil filter and air filter replacements—every season or per your manufacturer’s service manual. Sample timeline: Weekly : Chain lube and check, tire pressures, lights, controls. Monthly : Battery, brake pad thickness, steering head bearings, and coolant. Seasonal/Semi-Annual : Full fluid change, detailed air filter and spark plug inspection. Following a set schedule and documenting repairs helps you spot recurring issues, avoid neglect, and maximize the long-term performance and safety of your motorcycle—your key to enjoyable, trouble-free miles ahead. Beyond the Basics: When Advanced Motorcycle Repair Is Necessary Signs you need a professional mechanic Understanding modern diagnostics and electronic repairs While basic motorcycle repairs empower every rider, some situations call for a trained professional. Warning signs like persistent engine knocking, major fluid leaks, dashboard warning lights, or electrical malfunctions require diagnostic tools and expertise beyond most home toolkits. As motorcycles become more electronic and computer-controlled, tasks like ECU diagnostics and advanced sensor resets are best handled at a dealership or certified shop. If you’re unsure about a repair task, unable to find guidance in your service manual, or the issue involves a major part (like the rear wheel, engine internals, or brake system hydraulics), it’s wise to seek professional help. Modern diagnostic scanners can pinpoint problems quickly and ensure your motorcycle continues to function properly, reducing risk and supporting the purposes explained for long-term value. Motorcycle Maintenance Myths: Separating Fact from Fiction in Basic Motorcycle Repairs Common myths that cost riders time and money Fact-based maintenance tips for safer, longer rides Don’t let common myths undermine your motorcycle maintenance routine. For example, it’s a misconception that you should only change oil once per season—modern engines and stop/start riding demand more frequent service. Another myth is that chain maintenance isn’t needed on modern bikes; in reality, even sealed chains lose lubrication over time. Your bike’s maintenance task recommendations aren’t just for warranty—they’re essential for performance and safety. Always check the brake pads after wet rides, never ignore engine warning lights, and use only approved brake fluid and lubricants for your make moto and personal aspects of riding. Fact-based research from your service manual and trusted tube videos will keep your ride in peak condition, free from costly mistakes. Video Guide: How to Perform a Thorough Motorcycle Maintenance Check Pre-ride inspection checklist in action Tools and fast fixes demonstration Watching a youtube video demonstration of a pre-ride inspection is a fantastic way to see the basics in action. These guides walk you through checking tire pressure, operating all lights, testing the brake lever, and listening for odd noises—ensuring nothing is missed before you roll out. Fast fix demonstrations, like topping off brake fluid or adjusting levers, bring theory to life. Keep a list of your favorite repair and maintenance tube videos bookmarked for recurring reference. They reinforce service manual instructions and show the little details that turn you from a beginner to a confident do-it-yourselfer, supporting your interests and personal motorcycle maintenance activity on this service. People Also Ask: What is basic maintenance on a motorcycle? Basic motorcycle maintenance includes checking and replacing the air filter, maintaining the drive chain, ensuring proper tire pressure, inspecting brake pads, and regular oil changes. These fundamental repairs prevent breakdowns and extend the life of your motorcycle. People Also Ask: What is the 12 second rule on a motorcycle? The 12 second rule is a safety principle urging riders to scan the road 12 seconds ahead, giving ample time to react to obstacles or changes in traffic. While not a repair per se, it’s crucial knowledge for safe motorcycle riding and accident prevention. People Also Ask: What is the common maintenance problem on a motorcycle? The most common motorcycle maintenance problems include worn chains, dirty or clogged air filters, low tire pressure, and brake pad wear. These issues can be quickly addressed through basic motorcycle repairs. People Also Ask: How much does it usually cost to fix a motorcycle? Motorcycle repair costs vary based on the task. Simple maintenance like air filter replacement or chain lubrication can be inexpensive, often under $50 if done yourself, while complex repairs such as engine work may cost hundreds. Learning basic motorcycle repairs can drastically reduce these expenses. Resources: Where to Learn More About Basic Motorcycle Repairs Recommended books, forums, and online videos for motorcycle maintenance Top courses and workshops for advancing your motorcycle repair skills Expand your knowledge beyond this guide by diving into reputable books such as The Essential Guide to Motorcycle Maintenance or participating in forums like ADVrider and Reddit’s r/Motorcycles. For practical learning, enroll in community college workshops, manufacturer-sponsored classes, or browse video platforms for hands-on demonstrations. These resources support the purposes explained and help tailor your learning to your interests and personal goals. Frequently Asked Questions About Basic Motorcycle Repairs How can I tell if my motorcycle needs a repair? Are basic motorcycle repairs difficult for beginners? What are the risks if I neglect regular motorcycle maintenance? Which brands offer the best resources for basic repairs? How can I tell if my motorcycle needs a repair? Look for signs such as poor acceleration, hard starting, unusual noises, spongy brakes, or leaking fluids. Stay alert for warning indicators on your dash and consult your service manual for any unfamiliar symptom. Are basic motorcycle repairs difficult for beginners? Most basic repairs are accessible with a little patience, the right tools, and step-by-step guidance. Start with simple sets like chain cleaning or brake pad checks and grow your confidence over time. What are the risks if I neglect regular motorcycle maintenance? Skipping basic tasks can lead to dangerous breakdowns, decreased performance, larger repair bills, and lower resale value. Consistent maintenance keeps you safe and preserves your investment. Which brands offer the best resources for basic repairs? Yamaha, Honda, and Harley-Davidson provide excellent service manuals and online tutorials. Many reputable aftermarket brands also offer great learning materials. Maximize Your Motorcycle's Lifespan Through Basic Motorcycle Repairs The long-term financial and safety benefits of mastering motorcycle maintenance By building basic motorcycle repair skills and following regular maintenance schedules, you boost safety, cut costs, and get more years out of your ride—so you can enjoy every journey with confidence and peace of mind. Your Next Step: Schedule Service or Ask a Mechanic About Basic Motorcycle Repairs Ready to take action? For expert advice or service, Call Us Today: 847-458-4858 Start your motorcycle maintenance journey today: review your owner’s manual, equip your toolkit, and commit to a monthly check-up schedule for a safer, longer-lasting ride! To further enhance your understanding of essential motorcycle maintenance, consider exploring the following resources: “Beginner’s Guide to Motorcycle Maintenance” : This comprehensive guide offers a regular maintenance schedule, detailing daily, weekly, monthly, and seasonal checks to keep your bike running smoothly. ( hobbybiker.com ) “Essential Basic Motorcycle Mechanic Skills for Every Rider” : This article delves into diagnosing common issues, basic repair techniques, and preventive care, empowering riders to handle routine maintenance tasks confidently. ( twowheeltribe.com ) By incorporating these insights into your routine, you’ll not only enhance your mechanical skills but also ensure a safer and more enjoyable riding experience.

Terms of Service

Privacy Policy

Core Modal Title

Sorry, no results found

You Might Find These Articles Interesting

T
Please Check Your Email
We Will Be Following Up Shortly
*
*
*