Add Row
Add Element
cropper
update

Nasty Performance ~ 847-458-4858 

update
Add Element
  • Blog Home
  • Categories
    • Motorcycle Maintenance
    • Riding Tips & Preps
    • Safety & Inspection
    • Customizations & Upgrades
    • DIY Motorcycle Repairs
    • Motocycle Audio Systems
    • Motocycle Seasonal Care & Storage
    • Engine, Electrical Performance
  • Bike Night
  • Nasty Performance Motorcycle Shop
April 16.2026
1 Minute Read

Vintage Motorcycle Restoration: How to Find the Right Shop

Did you know the market for vintage motorcycles has grown over 35% in the past decade? If you’ve ever dreamed of riding or owning a freshly restored classic bike, you’re far from alone. The passion for vintage motorcycles—those timeless Honda CBs, Moto Guzzis, Janus Motorcycles, and Triumph classics—has sparked a nationwide revival, with more specialty shops than ever offering restoration services. But when it comes to vintage motorcycle restoration, how do you separate true craftspeople from hobbyists? Read on to find out how to choose the right shop, avoid common pitfalls, and make your classic motorcycle project a roaring success.

An Unconventional Truth: The Modern Vintage Motorcycle Restoration Craze

"Did you know the market for vintage motorcycles has grown over 35% in the past decade?" — Motorcycle Industry Council

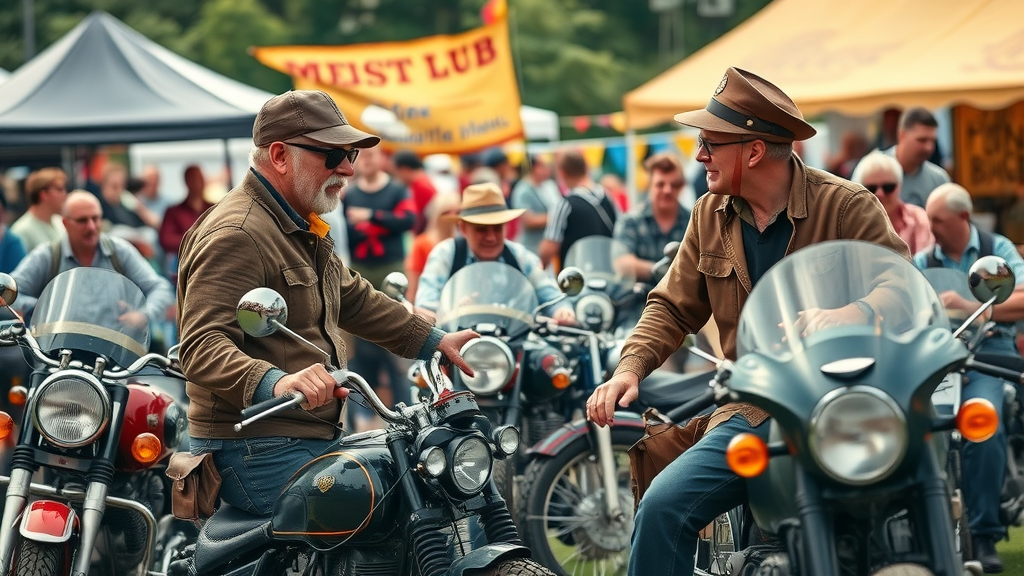
The world of vintage motorcycle restoration isn’t just about nostalgia; it’s a vibrant scene fueled by innovation and a deep appreciation for motorcycle history. With the value of classic bikes like Moto Guzzi, Honda CB, and Janus Motorcycles steadily climbing, more riders and collectors are investing in restoration than ever before. This spike can be seen at every bike show, from small town events to industry titans like AMA Vintage Motorcycle Days—a mecca for classic motorcycle brands enthusiasts.

These days, it’s not unusual to spot a pristine Moto Guzzi or a hand-built Janus Motorcycle at your local bike show, each a testament to the skill and passion of modern restoration shops. But with this boom in interest comes the challenge: how do you pick the right shop—not just the nearest one, but the best? Read on to find out why expertise, reputation, and parts access matter now more than ever in the vintage motorcycle market.

vintage motorcycle restoration shop gleaming chrome classic, vibrant restored vintage motorcycle front angle, brick workshop background, natural daylight, highly detailed, reflections on metal surfaces

What You'll Learn About Vintage Motorcycle Restoration

  • How to identify a reputable vintage motorcycle restoration shop near you

  • The top motorcycle brands dominating the vintage restoration scene

  • Common pitfalls when restoring vintage motorcycles

  • Insider tips on costs and timelines for classic motorcycle projects

Understanding the Appeal of Vintage Motorcycles

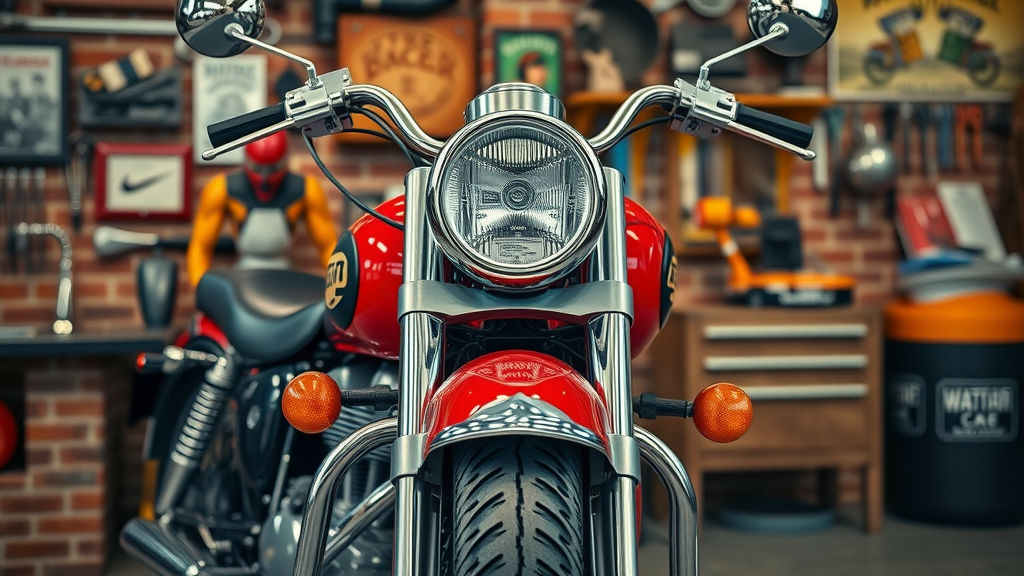
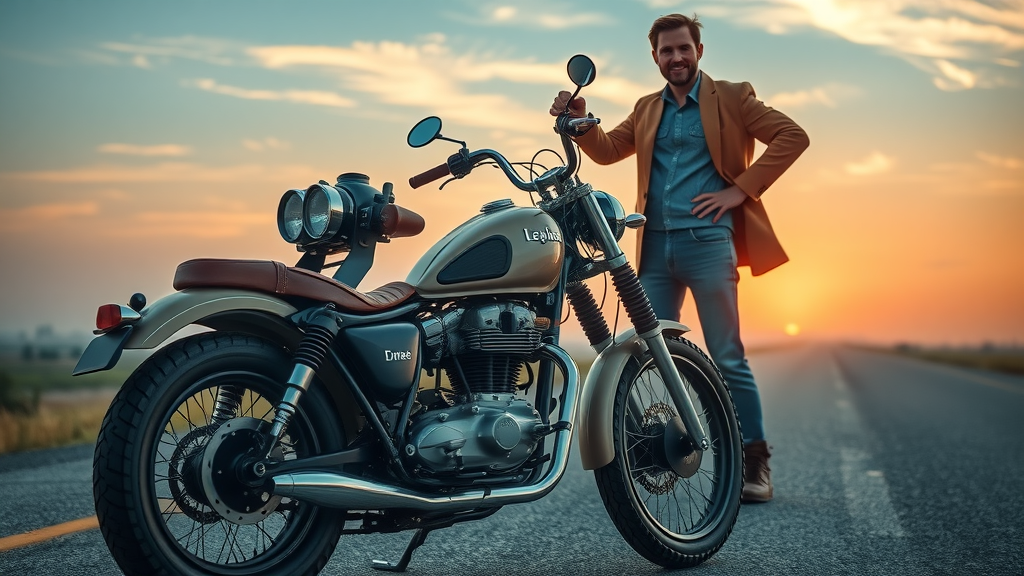
It’s easy to fall under the spell of a perfectly restored vintage motorcycle. The thrum of an old Moto Guzzi, the glint of a Honda CB tank, the bespoke curves of a Janus Motorcycle—each tells a unique story. This passion stretches across generations. Classic models aren’t just collectibles; they’re rolling time capsules that speak to a motorcycle brand’s innovation, heritage, and cultural impact. In a world dominated by tech-laden machines, vintage motorcycles offer an analog purity and a direct connection to the spirit of motorcycling’s golden era.

Collectors and riders find meaning in these machines—from hunting Japanese bikes online to seeking out the elusive parts for classic Triumph or Harley Davidson models. Vintage motorcycles invite you to experience the blend of art, engineering, and personal history, whether you’re admiring rare finds at motorcycle days or sharing stories at a small business bike show. That’s why restoring such a motorcycle make isn’t just about preserving history; it’s about reliving and reviving it.

Why Vintage Motorcycles Like Moto Guzzi and Janus Motorcycle Capture Hearts

There’s something irresistibly special about the Moto Guzzi V-twin’s rumble or the precision-made charm of a Janus Motorcycle. These storied brands embody the craftsmanship, quirks, and adventure spirit of their eras. Moto Guzzi is renowned for its Italian panache—unmistakable lines and a mighty engine—while Janus stands out for blending modern vintage craftsmanship with classic design cues, appealing to both purists and newcomers.

Honda CB models, meanwhile, win affection for their reliability and friendly, timeless styling. Whether you’re drawn to an iconic Mach III or a humble Yamaha from the golden Japanese bikes era, these motorcycles stir something deep—an urge to ride, restore, and preserve. Vintage motorcycle days and festivals are proof: communities bond over a shared reverence for rare paint colors, the sound of a carburetor rebuild, and the thrill of authentic vintage models firing up for the first time in decades.

vintage motorcycle, elegant Moto Guzzi, nostalgic expression, scenic road, soft-focus countryside, realistic reflections on chrome

How Vintage Motorcycle Days Inspire Collectors

Events like Vintage Motorcycle Days and the AMA Vintage Motorcycle Days draw thousands of collectors, mechanics, and aficionados. These gatherings are more than just bike shows; they’re living museums—places where new generations discover the charm of classic Honda CBs, Triumph motorcycles, or the boutique artistry of Janus Motorcycles. For many, a trip to these events is what sparks a restoration journey, connecting them with experienced shops, a wealth of rare parts, and a supportive community of enthusiasts.

Such experiences not only highlight the variety and legacy of popular motorcycle brands but offer learning opportunities for every step—from choosing the right project bike to understanding restoration challenges like paint matching, engine rebuilds, or electrical gremlins. These events foster the appreciation (and sometimes obsession) that drives collectors to seek out the most reputable shops, eager to see their two-wheeled dreams revived.

Key Factors When Choosing a Vintage Motorcycle Restoration Shop

Selecting a vintage motorcycle restoration shop isn’t as simple as picking the closest option on a map. With classic motorcycles—especially those from celebrated brands like Honda CB, Moto Guzzi, and Janus Motorcycles—the expertise and resources of your chosen shop make all the difference. The best restoration shops combine decades of technical know-how with a deep respect for motorcycle heritage and attention to detail. Here are essential factors to help you make the right decision.

  1. Proven expertise with iconic motorcycle brands: Look for a shop that has successfully completed restorations on your specific motorcycle brand. Whether it’s a Mach III from the golden Japanese bikes era or a classic Triumph motorcycle, hands-on experience matters.

  2. Knowledge of specialized makes like Honda CB and Janus Motorcycles: Modern shops should be comfortable working with both popular motorcycle models and rare boutique brands, including sourcing or fabricating custom components when necessary.

  3. Transparent pricing and clear communication: A reputable shop will provide written estimates, explain the scope of work, and keep you informed of any changes in timeline or cost—an essential for a successful partnership.

  4. Access to rare vintage motorcycle parts: Restoration often requires hunting down rare spares, NOS (new old stock) parts, or even recreating components. The best shops have the network and know-how to tackle any challenge.

vintage motorcycle, modern restoration workshop, technicians examining vintage motorcycle parts, organized shop, spare parts on shelves, detailed environment

Popular Motorcycle Brands in Vintage Motorcycle Restoration

Not all vintage motorcycles are created equal, and neither are their restoration challenges. Some brands stand out for their community, supply chain, or specific quirks—which is why many shops focus on makes like Moto Guzzi, Honda CB, Janus Motorcycles, and Triumph. If you own an older motorcycle or are searching for a project bike online, understanding these differences is key to setting realistic expectations for parts sourcing, timelines, and costs.

Motorcycle Brand

Unique Features

Restoration Challenges

Moto Guzzi

Classic V-twins, Italian design

Parts sourcing, electrical issues

Honda CB

Reliable engines, timeless styling

Original paint, carburetor rebuild

Janus Motorcycles

Modern vintage craftsmanship

Custom components, tuning

Triumph

British heritage, parallel-twin engines

Original parts, engine rebuild

What Sets a Great Vintage Motorcycle Restoration Shop Apart?

"Attention to detail is everything when bringing a classic motorcycle back to life." — Local Restorer

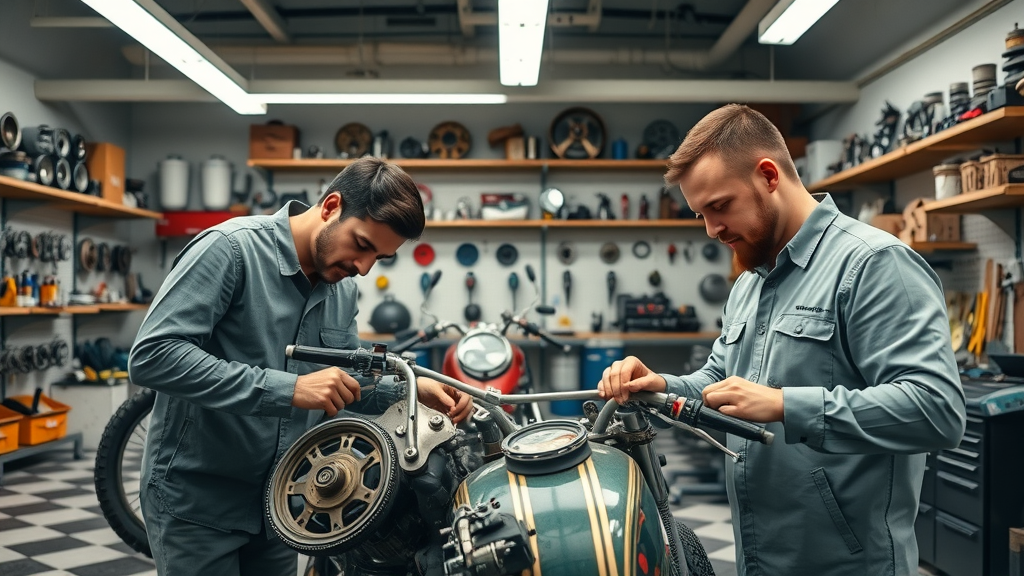
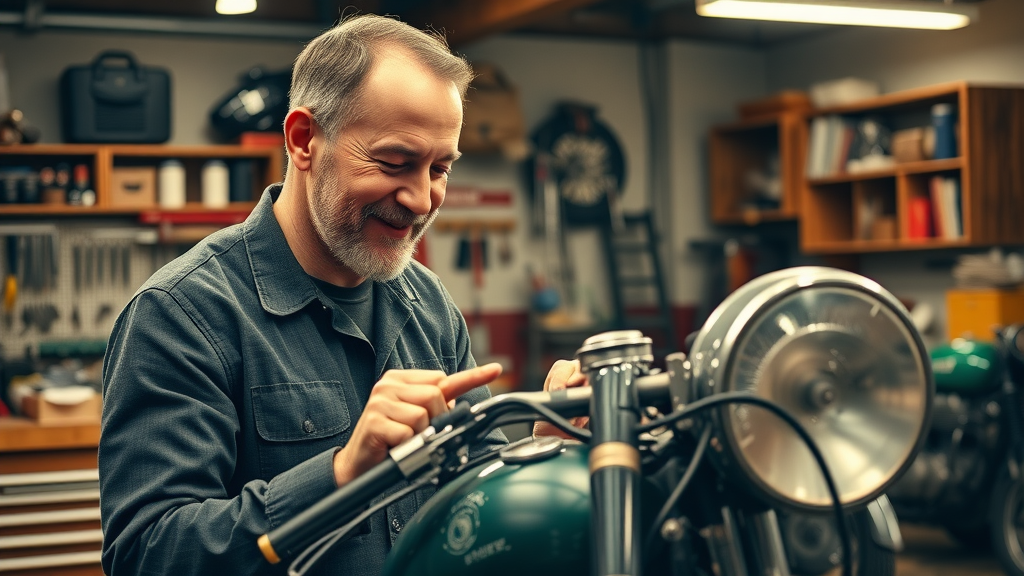
The difference between an average and an exceptional vintage motorcycle restoration shop lies in a relentless focus on craftsmanship. Great shops treat every project—not just the headline-grabbing motorcycle brands—with the same dedication as their personal passion projects. Transparent communication, photo documentation, and regular updates are standard. The best shops also stand behind their work with clear warranties and responsive post-restoration support, earning long-term loyalty from the vintage models community.

Facilities packed with period-correct tools, access to rare bikes and networks like the Motorcycle Mechanics Institute, and collaborative relationships with vintage motorcycle days organizers are strong signs you’ve found a standout shop. Ultimately, attention to the small details—perfect paint, period-correct wiring, or original fasteners—elevates a restoration from good to legendary.

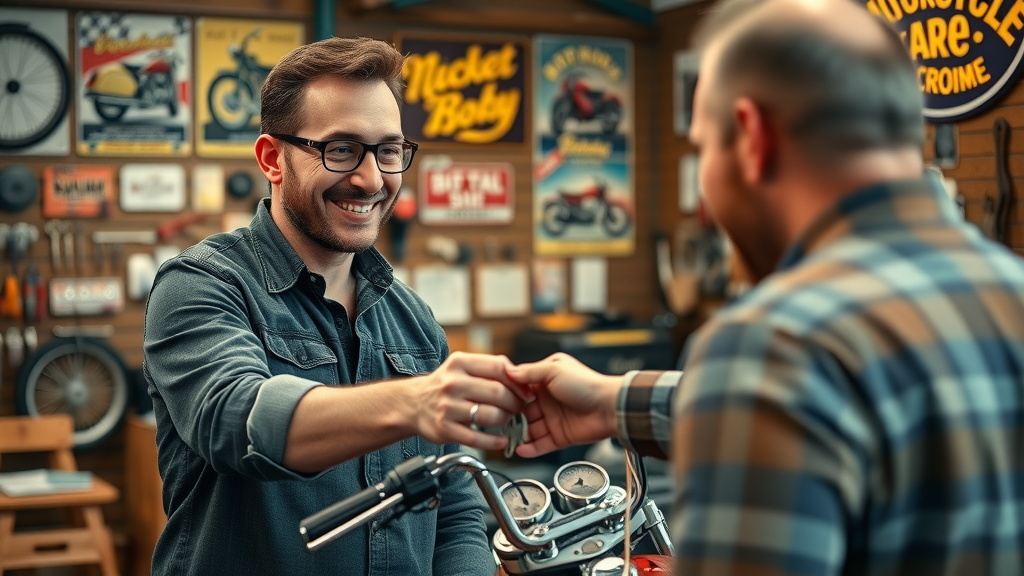
Verified Reviews and Customer Testimonies

In today’s connected world, word-of-mouth and online reviews are gold. Start your search with shops boasting verified testimonials—ideally from owners of classic Honda CB, Moto Guzzi, or Janus motorcycles. Look for details: Did previous clients praise the shop’s transparency? Was the project finished on time? Does the shop showcase bike show wins or events like AMA Vintage Motorcycle Days? The most reputable shops can provide references, photo galleries, and sometimes even let you talk with previous customers. Read on to find out which questions you should always ask before committing.

Customer reviews also highlight a shop’s range—can they handle diverse motorcycle brands, from staple Japanese bikes to rare European models? Are clients happy with post-restoration support and parts access? Your best tool is a shop with a proven track record, not just glitzy marketing.

vintage motorcycle restoration, shop owner handing keys to satisfied customer, welcoming workshop, classic bike posters, detailed toolwalls

Shop Facilities and Equipment for Vintage Motorcycles

Walk into any top-tier vintage motorcycle shop, and you’ll notice the difference: professional lifts, climate-controlled parts storage, shelves lined with rare parts, and technicians who clearly take pride in their craft. Many even partner with trade organizations like the Motorcycle Mechanics Institute or are title sponsors at local motorcycle days events. These investments reflect a shop’s commitment to getting every detail right, from engine internals to original stickers.

Ask potential restorers to give you a tour. A cluttered work space, lack of documentation, or outdated equipment are red flags. On the flip side, shops that welcome you in, show you past projects, and invite you to upcoming bike shows or vintage motorcycle days are usually the ones who value long-term relationships and word-of-mouth referrals. This is where classic motorcycles become tomorrow’s legends.

Top Tips for a Successful Vintage Motorcycle Restoration

  • Set clear goals for your vintage motorcycle project: Do you want a concours-quality showpiece, or a rider you’ll enjoy on weekends? Decide before starting!

  • Work with shops experienced in classic motorcycle brands: Shops specializing in your make/model will be better equipped for rare sourcing, documentation, and unique restoration challenges.

  • Learn about events like Vintage Motorcycle Days: These festivals aren’t just fun—they’re perfect for networking, finding parts, and validating the quality of a would-be restorer’s work.

  • Ask about warranties and post-restoration support: Top shops will stand behind their work. Support after delivery is a must, especially for hard-to-find parts or tuning needs.

vintage motorcycles, classic motorcycle rally, owners in period-appropriate gear, festival background, restored motorcycles, energetic gathering

People Also Ask About Vintage Motorcycles

What is the best vintage motorcycle to buy?

The best vintage motorcycle largely depends on your personal taste, budget, and intended use. For reliability and ease of parts, the Honda CB series is hard to beat—their reputation for smooth engines and straightforward maintenance is legendary. If heritage and Italian style appeal to you, Moto Guzzi’s V-twins are a classic choice. For American muscle, vintage Harley Davidsons are iconic. Boutique makes like Janus Motorcycles offer modern reliability with old-school charm for collectors who want something unique on motorcycle days or bike shows.

What is the 1% rule on motorcycles?

The "1% rule" refers to a distinction made by some law enforcement and motorcycle groups regarding outlaw motorcycle clubs—essentially suggesting that only 1% of motorcycle riders belong to clubs operating outside the law. For most vintage motorcycle collectors and enthusiasts, this rule is irrelevant. The vintage models scene is defined by camaraderie, history, and safe enjoyment, not by the rebellious image of the past.

What is considered vintage for motorcycles?

Generally, a vintage motorcycle is one that’s at least 25 to 30 years old, though definitions can vary by bike show or insurance provider. Classic events like AMA Vintage Motorcycle Days often have their own criteria. The important thing is that “vintage” means more than just age—it’s about the era, design, and historical impact of the motorcycle make and brand.

What is the 12 second rule on a motorcycle?

The 12-second rule is a safety guideline suggesting riders scan at least 12 seconds ahead of their current position to anticipate hazards. While not specific to vintage motorcycles, it’s especially important when riding older bikes that might require longer stopping distances or more attention to mechanical quirks.

Expert Insights: Avoiding Common Pitfalls in Vintage Motorcycle Restoration

"Patience and research will save you thousands on your vintage motorcycle project." — Restoration Expert

Restoring any vintage motorcycle demands more than just enthusiasm—it takes discipline, patience, and lots of homework. One of the biggest pitfalls is rushing the process or trying to cut costs with cheap parts or labor. Always invest in quality parts—NOS or well-vetted reproductions—for critical components. And don’t be seduced by bargain motorcycles online; lower upfront costs often mask expensive underlying issues like rusted frames, missing documents, or unobtainable components.

Another common trap is underestimating the skills needed. Even if you’re handy, complex engine work or period-correct wiring is best left to professionals with experience across a variety of motorcycle brands—especially if you’re tackling a rare Janus motorcycle or a finicky Mach III. Your mantra? Trust but verify. Request detailed photos, ask for documentation, and check for mechanics institute affiliations. Doing so will help secure a result that’s both beautiful and reliable.

FAQs: Vintage Motorcycle Restoration Near Me

  • How much does it typically cost to restore a vintage motorcycle?
    Prices vary widely. A basic refresh for a reliable motorcycle brand like Honda CB might start at $3,000-$5,000, while full restorations on rare or custom bikes (think Janus motorcycles or Moto Guzzi) can reach $15,000 or more.

  • Are there specialized shops for different motorcycle brands?
    Yes. The best restoration shops often focus on specific makes—Honda, Moto Guzzi, Janus motorcycles, Triumph—because expertise and access to authentic parts vary by brand.

  • What timeline should I expect for a full restoration?
    Timelines range from a few months for common models to more than a year for rare or complex projects. Communicate clearly with your shop and request progress updates at key milestones.

  • How do I verify the authenticity of vintage motorcycle parts?
    Work only with reputable shops and suppliers. Ask for proof of provenance for rare parts, and request photos or documentation from previous builds to ensure you’re getting genuine components.

Key Takeaways: Finding the Right Vintage Motorcycle Restoration Shop

  • Research shop reputations and specialties in motorcycle brands

  • Prioritize open communication and written estimates

  • Understand the scope of work for your vintage motorcycle restoration

  • Never rush the process—quality takes time

vintage motorcycle restoration, restored motorcycle ready for road, proud owner scenic open road, sunrise, highly detailed, rich blue and orange hues

Conclusion: Begin Your Vintage Motorcycle Restoration Adventure

Restoring a vintage motorcycle is as much about the journey as the destination—choose wisely, work with passionate pros, and enjoy every mile!

Ready to Restore? Call Nasty Performance Motorcycle Shop Today: 847-458-4858

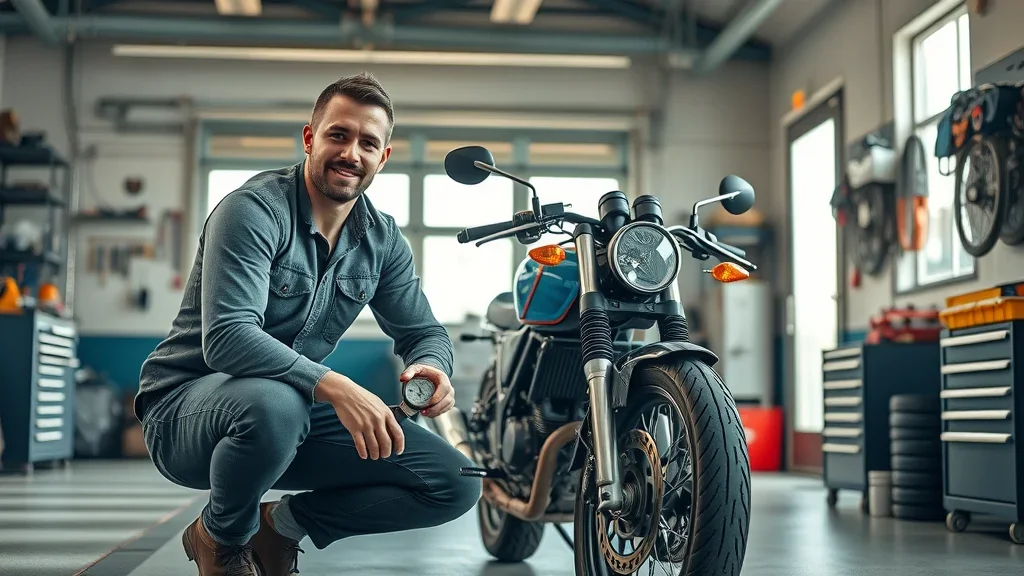
Tour a vintage motorcycle restoration shop as mechanics bring classic bikes back to life—watch the expert process, see rare bikes, and get inspired for your next project.

See side-by-side comparisons of beautifully restored Moto Guzzi, Honda CB, and Janus Motorcycles—hear their engines, explore unique features, and get expert insights into the restoration process.

DIY Motorcycle Repairs

0 Comments

Write A Comment

*
*
Please complete the captcha to submit your comment.
Related Posts All Posts

Winter Motorcycle Tire Pressure Tips You Need Now

Are you risking your safety every time you ride in cold weather just because of what you think you know about motorcycle tire pressure? Winter riding isn’t just about layering up and watching for ice—it starts with the rubber that meets the road. Most riders don’t realize how dramatically cold weather affects their motorcycle tires, and even fewer know the difference a few psi can make to grip, safety, and confidence on icy streets. This article unpacks winter motorcycle tire pressure tips you need now, so you’ll never second-guess your tire gauge again.Are You Making These Winter Motorcycle Tire Pressure Mistakes?As temperatures drop, the rules for tire pressure and motorcycle tires change. Yet, many riders still rely on routines from warmer months or, worse, follow myths that could compromise safety on every ride in cold weather. The most common mistake is failing to account for the natural decrease in air pressure as the temperature falls—meaning your tires may be underinflated even if they were perfect on a sunny day. Other errors include sticking to summer psi recommendations, ignoring tire warmers and neglecting to adjust checks for frequent freeze-thaw cycles. Even a minor slip in attention can shrink your tires’ road grip—reducing the contact patch—and ruin handling just when you need precision most. Are you certain your tire pressure is at the correct level for cold weather rides? This essential guide brings clarity so you can stay safe—no matter what winter throws your way.Correct tire pressure is the foundation for optimal performance and safety. Underinflated tires in winter months can cause excess flexing, uneven wear, and diminish the essential traction needed on slippery or icy roads. Overinflated tires are equally dangerous, as they reduce contact with the road, making slips and slides more likely during your next road trip. Knowing how cold weather affects your tire, using tire warmers when necessary, and keeping a close eye on tire pressure is essential for maintaining confidence and control whenever you ride in cold.For riders interested in a deeper dive into the technical side of tire care, exploring additional resources can help you fine-tune your approach. While this article focuses on winter-specific strategies, you can find more comprehensive maintenance advice and updates at Nasty Performance’s main page, which covers a range of motorcycle performance topics.What You'll Learn About Winter Motorcycle Tire Pressure TipsHow to accurately adjust tire pressure for cold weatherImpact of temperature on motorcycle tire safetyExpert strategies for keeping your motorcycle tires performing in winterAnswers to popular questions about winter motorcycle tire pressureUnderstanding Tire Pressure: The Foundation of Safe Winter RidingWhen it comes to motorcycle safety—especially in cold weather—the conversation must begin with tire pressure. Tires are designed to perform within specific pressure ranges, and these ranges are not static. As colder ambient temperature sets in, your motorcycle tire’s pressure drops, sometimes by as much as one psi for every 10°F decrease. It’s not simply a matter of comfort; it’s about ensuring the tire maintains the proper contact patch with the road for optimal grip and stability. Ignoring tire pressure means shorter tread lifespan, unpredictable handling, and a higher risk of slipping, particularly on frosty or snowy surfaces. Whether you’re prepping for a daily commute or a winter road trip, understanding the science of tire pressure is essential for maintaining both control and safety when you ride in cold weather.It’s also worth noting that winter motorcycle tires and motorcycle tyres, whether Michelin Power, Power Rain, or Power Supermoto, all rely on pressure to “build heat” and create the traction needed for safe riding. Even the best cold tire can’t perform if it’s not inflated to the correct pressure, as the tire will flex excessively and not generate enough warmth to grip the road. The right tire pressure does more than avoid flats—it allows you to adapt instantly to changing road conditions, helping prevent tragic slides when facing icy patches or sudden snow. The foundation of your winter safety starts right at your motorcycle’s contact patch, making proactive tire pressure checks a non-negotiable habit for every winter rider.Why Tire Pressure Matters in Cold WeatherTire pressure isn't just about keeping your tires round—it's about survival on winter roads. In cold weather, air contracts, causing both motorcycle tires and motorcycle tyres to lose pressure naturally, even if there’s no visible leak. This is why a tire that felt fine last week may suddenly feel sluggish or wobbly after a cold snap. Lower tire pressure reduces the size of the all-important contact patch, making your bike more prone to slips and less responsive to steering. On winter-wet surfaces and icy spots, having your tires at the correct level is essential for maintaining control and maximizing grip, especially during sudden maneuvers or hard braking. Underinflated tires flex more, producing heat excessively at the edges while keeping the tread cold—an unsafe mix that can cause anything from rapid wear to outright failure during a challenging ride in cold.Even high-performance motorcycle tires like the Michelin Power Rain or Power Supermoto cannot compensate for poor tire maintenance; these tires are designed to operate within a particular pressure, especially when the mercury drops. Overinflated tires are equally problematic: the contact patch shrinks, and tire warmers can only do so much to keep your tires sticky on cold streets. If you want to stay safe on winter’s unpredictable roads, the first step is adopting the discipline of checking and adjusting your tire pressure before every ride, never after. That way, you’re always prepared for the conditions ahead.How Motorcycle Tire Pressure Changes in WinterThe physics of tire pressure in winter is both simple and critical. For every 10-degree Fahrenheit drop in ambient temperature, a motorcycle tire can lose 1 psi—meaning a morning cold snap can turn your perfectly set tire into an underperformer. This seemingly minor change dramatically affects how well your motorcycle tires grip the road, especially when moisture or ice is present. Many riders don’t realize that after parking their bike overnight in sub-freezing temperatures, even a brand-new cold tire needs a pressure check. Relying on summer pressure values and skipping these checks leads to underinflated tires, which reduce response during evasive maneuvers, slow your reaction on power rain, and make it harder to “build heat” for secure winter handling. Your ideal range for winter isn’t guesswork—it’s a calculated adjustment that must happen every time you ride in cold.If you ride on high-end brands like Michelin Power, Michelin Power Rain, or Power Supermoto, understand that their engineering is tuned for maintaining stability at the correct pressure. When the pressure drops below spec, these tires can’t perform at their best. If the pressure is too low, you’ll see increased flexing and temperature gradients in the tire, while too high shrinks the contact patch—both scenarios put your safety at risk. That’s why it’s essential for maintaining peace of mind to use a reliable gauge, measure before every ride in cold weather, and adjust up by 1–2 psi from your summer baseline if needed—always referencing the manufacturer’s latest guidance for your specific motorcycle and tire type.Comparing Motorcycle Tires vs. Motorcycle Tyres: What’s the Difference?When discussing motorcycle tire versus motorcycle tyres, we're often looking at regional differences—“tire” in American English and “tyre” in British English. But regardless of spelling, every rider, whether in the UK or US, faces the same winter challenges: both motorcycle tires and tyres must be checked and adjusted for pressure as temperatures drop. Brands such as Michelin Power, Power Rain, and Power Supermoto have both “tire” and “tyre” options depending on location, but manufacturer recommendations for winter settings are nearly universal. It’s less about vocabulary and more about understanding when, how, and why your tires/tyres need different care during the winter months.European (motorcycle tyres) and American (motorcycle tires) models may have slight differences in construction, but both rely on correct pressure for safe winter operation. Whether you’re using a tire gauge marked in psi or a tyre gauge marked in bar, the principles for checking, inflating, and maintaining your tires remain constant—especially for optimal performance in cold weather. The key takeaway? Don’t get caught in a terminology trap or assume EU and US recommendations differ widely. The science behind tire/tyre inflation is universal: accurate, timely pressure checks are your front line in winter riding safety, no matter what you call them.Essential Winter Motorcycle Tire Pressure TipsStaying safe on winter roads starts with your tires. As conditions change, so must your tire care routine. These essential winter motorcycle tire pressure tips are designed to help you adapt, excel, and stay safe under any circumstances. Begin by checking your tire pressure while the tires are cold—straight out of the storage area or garage is best. Use a high-quality tire pressure gauge for accuracy, as even small differences can translate to substantial grip reduction on the road. Don’t just rely on the visual appearance or a quick thumb press; invest in a digital or analog gauge you trust. A common error is ignoring the front tire—ensure both front and rear receive equal attention, as each plays a unique role during winter braking and cornering. This habit is especially crucial for those using specialized Michelin Power tires or planning a cold-weather road trip.Next, understand that cold tire conditions fluctuate through the season. Use tire warmers where practical—including tire warmer blankets or pit-style tire warmers—especially if your ride starts in a cold garage or after prolonged parking. These devices bring the tires up to operational temperature gently and safely, ensuring the optimal contact patch is achieved from the start of your ride. Not every street rider needs race-grade tire warmers in winter months, but for long-distance riding or track use in cold conditions, they can be invaluable. Remember: optimal performance is always linked to keeping your tire pressure in the manufacturer’s recommended window—adjust up by 1–2 psi only if specified, and always check both when cold and after a short ride on power supermoto or Michelin power supermoto compounds for comparison.Adapting Tire Pressure for Cold Weather RidesRiding in cold weather isn’t as simple as inflating to the summer standard and hoping for the best. In fact, winter motorcycle tire pressure tips demand more oversight and adaptation than any other time of year. Begin by measuring your tire pressure before every ride—preferably when the tires are still cold and have not had a chance to warm up from movement or the use of tire warmers. Cold air contracts, reducing the pressure inside your tires by approximately 1 psi for every 10°F the temperature drops. If you set your pressure for a sunny day, that reading could leave you underinflated hours later as temperatures plummet. To offset this, consider adding 1–2 psi above your baseline—always in accordance with your motorcycle tire manufacturer’s recommendations. This adjustment keeps the pressure within the correct level as the tires warm up during a ride (or if tire warmers are used), but isn’t so high as to shrink your contact patch or make the ride harsh.Experienced riders preparing for a winter road trip often also “pre-heat” their wheels using tire warmers or adjust their inflations schedules to track rolling temperature changes more closely. Remember, tire warmers help to mitigate the loss of pressure from ambient temperature changes and enable the tire to “build heat” and approach the optimal performance range even before you roll out of your storage area. So, whether you’re using Michelin Power Rain, Power Supermoto, or any street-legal winter tire, adapt your strategy: test before each journey, tweak with the conditions, and never hesitate to adjust your settings mid-season.Using a Tire Warmer and Tire Warmers EffectivelyTire warmers are a game changer in winter riding, particularly when you need your motorcycle tire to perform from the moment you start moving. Think of tire warmers as essential for maintaining the correct pressure under cold conditions. Race-inspired but increasingly common among winter enthusiasts, tire warmers wrap around your motorcycle tires, gently heating them to the correct level so pressures remain stable and the rubber remains pliable on cold pavement. Always confirm your settings before attaching warmers: if you overinflate, the heat can push pressures too high; if you start underinflated, the warmers may not achieve the necessary correction. For consistent results, let your tires warm for at least 30–45 minutes, occasionally checking with an accurate tire pressure gauge for optimal performance. This helps ensure that your ride in cold weather begins with both confidence and control.Even if you don’t use tire warmers on every ride, they’re invaluable for pre-ride preparation, reducing the stress of cold tire starts, and ensuring your motorcycle tire’s contact patch is appropriate. Some high-performance street tires, like the Michelin Power Supermoto, Michelin Power Rain, and specific motorcycle tyres built for winter racing, are engineered to accept tire warmers—to “build heat” rapidly without excessive flexing or risk of overheating. Ultimately, tire warmers don’t replace the importance of regular tire pressure checks but complement them, especially for riders who demand every advantage in unpredictable winter months.Checking and Adjusting Motorcycle Tires RegularlyThe most important winter motorcycle tire pressure tip is simple: check your tires more often than you think necessary, especially when the temperature fluctuates daily. Regular checks should be your first line of defense against all winter hazards. Use a reliable, calibrated gauge to check both front tire and rear tire pressures before every ride, especially after any overnight cold conditions. Don’t just rely on a quick squeeze or visual inspection; subtle underinflation is impossible to spot without proper tools. Also, include checks halfway through longer trips—changes in altitude or sudden snow can further impact your readings. When adjusting pressure, always do so with tires at rest in the storage area or out of direct sun or wind—never immediately after riding or using a tire warmer, as the heat will skew your results.This discipline is especially critical when using advanced motorcycle tires or specialty winter motorcycle tyres like the Michelin Power or Power Rain. Over time, even the best tire will show signs of inconsistent wear and unpredictable handling if pressure isn’t monitored closely. If you take only one thing from this guide: proactive, frequent checks and timely pressure adjustments are essential for maintaining tire integrity, maximizing both lifespan and performance throughout the winter months.Expert-Recommended Tire Pressure Ranges for Winter Motorcycle TiresComparison of Recommended Tire Pressures for Different Temperatures and BrandsTire Brand/ModelRecommended Pressure (Summer, psi)Winter Adjustment (+1-2 psi)*NotesMichelin Power Rain32 (front) / 34 (rear)33–34 / 35–36+2 psi for cold weather & wet conditionsMichelin Power Supermoto30 (front) / 32 (rear)31–32 / 33–34Check manufacturer for pressure if using tire warmersBridgestone Battlax Winter32 (front) / 36 (rear)33 / 37–38Never exceed maximum sidewall ratingPirelli Angel GT33 (front) / 36 (rear)34–35 / 37–38Monitor frequently during freezing cycles*Always refer to your specific motorcycle’s owner manual and check with your tire manufacturer before making final adjustments. Use these values only as a starting guideline.Must-Know Techniques: How to Maintain Optimal Winter Motorcycle Tire PressureChecking motorcycle tire pressures weeklyInvesting in reliable tire pressure gaugesStoring your motorcycle away from extreme coldUtilizing tire warmers when necessaryThese core techniques will help ensure your motorcycle tires for winter always stay within the correct level—no matter how cold it gets. Weekly checks are just the start: make it a habit, not a chore, and gear up with the best digital or analog tire pressure gauges for accuracy, even in chilly garages. If you must leave your bike outside, cover it with a breathable fabric and keep tires off ice or freezing concrete. Using a storage area with some insulation or a light source can greatly reduce psi losses overnight. And never hesitate to use tire warmers or even a gentle room heater before early morning rides—the goal is to keep your tire pliable and pressure stable before venturing into the cold.Staying consistent with these checks will also help you spot early warnings of underinflation, uneven wear, or unusual handling—all signs that winter has already begun affecting your tires. With so much riding on your motorcycle tires for winter, a little discipline pays major dividends in both safety and enjoyment, keeping your adventures on two wheels smooth and secure throughout the season.Common Myths and Facts About Winter Motorcycle Tire Pressure"Many riders underestimate how much cold weather can reduce tire pressure—and how dangerous riding with underinflated motorcycle tires can be during winter months." – Leading Motorcycle Safety ExpertSeveral misconceptions persist around winter motorcycle tire pressure. Many riders believe that the pressures listed on sidewalls or in owner’s manuals remain unchanged, but this overlooks the impact of ambient temperature. Others think that tire warmers are only for race use, though more street riders are adopting them in winter to build heat quickly for their daily commute. One persistent myth is that a small visual difference in tire shape is harmless—when in fact, a drop of just 2 psi can cut grip by over 10% in cold conditions.The truth is, both overinflation and underinflation in winter months bring risks. Overinflated motorcycle tires reduce your contact patch, heightening the risk of a slip on ice or frost. Underinflated tires flex more, remain colder, and wear unpredictably, risking sudden loss of air or control. Knowing the facts—especially around cold weather impacts—helps you filter dangerous advice and reinforce safer riding habits every winter.People Also Ask About Winter Motorcycle Tire Pressure TipsWhat is the 7 7 rule for winter tires?The 7 7 rule refers to considering winter tires when temperature drops below 7°C (44.6°F) and ensuring that your tire tread depth remains at least 7 millimeters for optimal grip on icy and snowy roads, crucial for motorcycle safety.Is 40 psi too much for winter tires?Yes, 40 psi is generally considered too high for winter motorcycle tires, as excessive pressure can reduce traction and potentially increase wear in cold conditions. Refer to your motorcycle’s manual for manufacturer-recommended tire pressure guidelines.What is the 10/20 rule for motorcycle tire pressure?The 10/20 rule suggests a 10% to 20% increase in tire pressure during winter to offset pressure drops from colder temperatures, but always verify with your motorcycle manufacturer and check using accurate gauges.Is 40 psi too high for motorcycle tires?For most motorcycle tires, 40 psi is higher than the standard recommended levels. Overinflating can compromise handling and grip, especially in winter. Always adhere to the tire manufacturer’s specified pressure range.Winter Motorcycle Tire Pressure Tips in Action: Step-by-Step Video GuideFAQs on Winter Motorcycle Tire Pressure TipsHow often should you check motorcycle tire pressure in the winter?Check tire pressure at least weekly, and always before every ride. Drops in temperature can cause rapid changes, so regular checks are essential for safety.Are tire warmers useful for street motorcycles during winter?They can be very helpful for bringing tires up to operational temperature and ensuring consistent grip, especially before long rides or in freezing conditions, though race-grade equipment isn't necessary for light use.What are signs of underinflated motorcycle tires in cold weather?Common signs include sluggish handling, excessive flexing, uneven tire wear, lower ride height, visible tire flattening, and a lack of confidence in turns. Always verify these suspicions with a reliable gauge.Key Takeaways from Winter Motorcycle Tire Pressure TipsRegularly check tire pressure before every winter rideAvoid over- or under-inflation by referencing manufacturer specsCold weather significantly affects motorcycle tires, always prepare aheadUse proper tire warmers if necessary for maximum safetyFinal Thoughts: Prioritize Your Safety with Proper Winter Motorcycle Tire Pressure TipsDon’t leave your safety to chance—master these winter motorcycle tire pressure tips and make smart preparation your winter riding tradition.If you’re ready to take your winter riding expertise to the next level, there’s always more to discover about motorcycle performance and seasonal maintenance. The world of motorcycle care is constantly evolving, and staying informed is key to both safety and enjoyment. For broader insights, updates, and advanced strategies that go beyond tire pressure—such as optimizing your entire bike for winter or exploring the latest in performance upgrades—be sure to visit Nasty Performance’s resource hub. Your next breakthrough in winter riding confidence could be just a click away.For expert advice and winter motorcycle tire inspections, Call Nasty Performance Motorcycle Shop Today: 847-458-4858

Top 10 DIY Motorcycle Maintenance Tips You Can Do at Home

Ever wondered if your motorcycle is really as road-ready as you think it is? Most riders trust their bikes to perform smoothly, but are you missing out on simple DIY motorcycle maintenance tips that could make all the difference? In this guide, we’ll reveal practical, step-by-step strategies that will empower you to keep your motorcycle in top shape—without the need for a professional mechanic. Whether you’re a seasoned motorcyclist or a weekend rider, these essential maintenance tasks will extend your bike’s lifespan, boost fuel efficiency, and keep you safe on every journey.Are You Overlooking These Essential DIY Motorcycle Maintenance Tips?When it comes to diy motorcycle maintenance tips, many riders stick to the basics and assume their motorcycles are healthy as long as they start reliably. But overlooking crucial maintenance tasks such as checking tire pressure, monitoring brake pads, and keeping the chain and sprocket clean can lead to costly repairs—or worse, road accidents. By mastering essential motorcycle maintenance tasks at home, you not only save money but also gain peace of mind knowing your ride is safe and performing at its best for every mile.Modern motorcycle maintenance goes beyond oil changes. It covers everything from checking your tire’s tread depth and valve stems to inspecting battery terminals and adjusting fluid levels. By paying attention to these practical tips and understanding how and why each task matters, you’ll prevent unexpected breakdowns, improve your bike’s fuel efficiency, and increase its overall lifespan. Start prioritizing proactive care today, and you’ll notice smoother rides and fewer headaches in your journey as a motorcyclist.Discover How Simple Maintenance Tasks Can Keep Your Motorcycle Running SmoothlyYou don’t need an advanced degree in motorcycle mechanics or a garage full of specific tools to get started with effective DIY motorcycle maintenance tips. With just a little time each month and a commitment to understanding your motorcycle’s needs, anyone can keep their machine running at optimal performance. Simple practices—like keeping an eye on your tire pressure, cleaning your chain and sprockets, and regularly checking your fluids—ensure you stay ahead of wear and tear. Embracing these habits today means you’ll spend more time riding and less time resolving preventable issues. If you want a more detailed walkthrough for each maintenance task, check out this step-by-step DIY motorcycle maintenance guide for actionable instructions and extra pro tips.What You'll Learn from This Guide on DIY Motorcycle Maintenance TipsThe importance of regular motorcycle maintenanceStep-by-step DIY motorcycle maintenance tipsHow to identify and perform essential maintenance tasksCommon mistakes to avoid in home motorcycle maintenanceExpert insights for safe and effective DIY careTable: DIY Motorcycle Maintenance ChecklistMaintenance TaskFrequencyTools NeededEstimated TimeCheck Tire PressureWeekly / Before Each RideDigital Tire Gauge, Air Pump5 minInspect & Clean Chain and SprocketEvery 500 milesChain Cleaner, Brush, Lube, Rear Stand15 minReplace or Clean Air FilterEvery 3,000-6,000 milesBasic Tools, Replacement Filter20 minPerform Oil ChangeEvery 3,000 miles or per manualWrenches, Oil, Oil Filter, Oil Pan30 minTop Up FluidsMonthlyCoolant, Brake Fluid, Funnel10 minBattery InspectionQuarterlyMultimeter, Brush, Wrench10 minBrake System ChecksMonthlyWrenches, Brake Fluid15 minLighting & Electrical CheckMonthlySpare Bulbs, Screwdrivers10 minFastener & Bolt ChecksMonthlyTorque Wrench, Socket Set10 minCleaning & ProtectionAs needed / MonthlySoap, Sponge, Wax, Covers20 minWhy DIY Motorcycle Maintenance Matters for Longevity and SafetyEmbracing DIY motorcycle maintenance tips is more than an exercise in cost savings—it’s about keeping you and your bike safe on the road. When you take time to inspect and update your motorcycle’s vital components, you’re investing in its longevity and your own peace of mind. Routine maintenance tasks like oil changes, chain lubrication, and air filter swaps keep your motorcycle operating efficiently, minimize the risk of sudden breakdowns, and enhance overall performance. Riders who consistently maintain their bikes enjoy longer intervals between major repairs and improved fuel efficiency.Neglecting basic maintenance can lead to issues such as reduced brake performance, slipping chains, overheating engines, or premature tire wear. These problems don’t just damage your motorcycle—they increase the risk of accidents and leave you stranded when you least expect it. By using these practical DIY motorcycle maintenance tips, you empower yourself to spot signs of wear early and prevent costly, hazardous issues before they arise."Regular self-maintenance not only extends your motorcycle's lifespan but significantly reduces unexpected breakdowns on the road."DIY Motorcycle Maintenance Tips #1: Check and Adjust Tire PressureThe tire pressure of your motorcycle plays a pivotal role in handling, safety, and fuel efficiency. Incorrect tire pressure can affect your bike’s grip on the road, reduce its responsiveness, and cause uneven wear patterns that shorten the tire’s life. Adhering to recommended tire pressure levels—listed in your service manual or on your bike’s swingarm sticker—helps keep your motorcycle in top shape for every ride. Before heading out, always check your tire pressure with a digital gauge and inflate them as needed. This simple step not only increases safety but helps you avoid costly tire replacements due to preventable damage.Spotting signs of under-inflation or over-inflation early is essential. Under-inflated tires can make your motorcycle harder to maneuver, cause increased heat buildup, and wear out the tire shoulders quickly. Over-inflated tires, on the other hand, reduce the contact patch, compromise grip, and accelerate center-tread wear. Always inspect your tires for visible damage or low tread depth, and keep an eye on valve stem conditions to prevent air leaks. Following these DIY motorcycle maintenance tips can make a significant impact on your ride’s comfort and safety.Tire Pressure: Importance, Methods, and ToolsHow to check tire pressure: Use a reliable digital tire gauge on cold tires, compare against manufacturer specs, and adjust as necessary.Optimal tire pressure ranges for different motorcycles: Sport bikes, cruisers, and adventure motorcycles often have different recommended PSI—check your manual for exact numbers.Signs of under-inflation or over-inflation: Watch for uneven tread wear, sluggish handling, or increased vibration while riding.DIY Motorcycle Maintenance Tips #2: Inspect and Clean the Chain and SprocketChain and sprocket maintenance are among the most overlooked yet crucial DIY motorcycle maintenance tips. A properly lubricated and tensioned chain ensures smooth power delivery, maximizes efficiency, and dramatically extends the life of both components. Clean your chain and sprocket every 500 miles or after wet rides to remove dirt and grime that can cause premature wear. Using a rear stand makes the job easier and allows you to spin the rear wheel freely for thorough cleaning. Lubrication at regular intervals keeps the chain running silently and reduces friction loss, which can negatively impact performance and fuel consumption.Keeping your chain’s tension in the optimal range—not too tight or too loose—is key to avoiding unnecessary strain on the transmission and subsequent damage. Use your motorcycle’s service manual to locate the correct adjustment settings and check for signs of wear, such as kinks, rust, or elongation. Regular inspection also includes examining the sprockets for sharp, hooked, or missing teeth—indicating it’s time for a replacement. Mastering this maintenance task not only safeguards your chain and sprocket but also ensures your overall motorcycle maintenance routine is solid.Step-by-Step Guide to Chain and Sprocket MaintenanceHow to clean the chain and sprocket: Use chain cleaner, a stiff brush, and a clean rag, then finish with an approved chain lubricant.Lubrication intervals: Lubricate every 500 miles or after riding in wet or dirty conditions.Tension adjustment techniques: Use a torque wrench and check your manual for correct slack measurements—avoid running your chain too tight or too loose.DIY Motorcycle Maintenance Tips #3: Replace or Clean the Air FilterYour motorcycle’s air filter is responsible for keeping dust and debris out of your engine, providing the clean airflow needed for efficient combustion and optimal performance. Over time, a clogged or dirty air filter can choke your engine, reducing power, increasing fuel consumption, and eventually causing unnecessary engine wear. By including the air filter in your DIY motorcycle maintenance tips, you ensure your bike continues to run smoothly and reliably.To check the air filter, consult your service manual for its location and recommended maintenance intervals—they often vary depending on riding conditions. Signs of a dirty air filter include hard starting, reduced acceleration, or black smoke from the exhaust. Many filters can be cleaned with compressed air or replaced easily with basic tools. Always replace the filter sooner if you mostly ride on dusty roads or in frequent stop-and-go traffic. Staying on top of this maintenance task is a simple yet impactful way to protect your engine and enjoy every ride to its fullest.Air Filter: Key to Reliable Motorcycle PerformanceIdentifying signs of a dirty air filter: Look for significant color changes, excess dust, or visible blockages in the filter material.How to access, clean, or replace your air filter: Most filters are under the seat or fuel tank—remove covers, inspect, and clean or swap out the filter.Recommended frequency of air filter maintenance: Check and clean/replacement every 3,000-6,000 miles; more often in challenging environments.DIY Motorcycle Maintenance Tips #4: Perform Regular Oil ChangesRegular oil changes are the heartbeat of any motorcycle maintenance schedule. Engine oil lubricates moving parts, cools the engine, and captures debris—fresh oil is key for fighting wear, ensuring smooth operation, and prolonging engine life. Many manufacturers recommend changing the oil every 3,000 miles, but always check your manual for specific guidelines based on your bike’s make and model. Skipping oil changes leads to sludge buildup in the oil filter, inferior lubrication, and costly repairs down the line.Doing a DIY oil change at home involves draining the old oil, replacing the oil filter, and refilling your engine with the correct grade of oil. Opt for oils and oil filters designed for your engine, and if you ride in extreme climates or challenging conditions, consider more frequent changes. Checking oil quality and level regularly can help you spot early signs of contamination or leaks, saving you headaches and potentially expensive repairs. Staying consistent with this essential maintenance task will keep your engine performing at its best, every time.Oil Change: Essential Motorcycle Maintenance Tasks ExplainedHow to check oil quality and level: Warm up your engine, use the dipstick or sight glass, and check for dark, gritty, or low oil levels.Steps to change the oil: Remove the oil drain bolt with a wrench, let oil drain into a pan, replace the oil filter, and refill with fresh oil to the correct level.Choosing the right oil for your motorcycle: Refer to your service manual for viscosity recommendations and look for oils that match your climate and engine type.DIY Motorcycle Maintenance Tips #5: Inspect and Top Up FluidsBeyond oil, your motorcycle relies on several critical fluids to function: coolant, brake fluid, clutch fluid, and sometimes fork oil. Routinely checking these fluids is a must-do DIY motorcycle maintenance tip, especially as fluctuating levels or contamination can signal underlying issues. Coolant helps manage engine temperature, while proper brake and clutch fluid levels are vital for safe operation and responsive controls. Inspect fluid reservoirs at least monthly, and always use the correct type as instructed in your service manual.Symptoms of fluid problems include odd noises, soft brake levers, overheating, or visible leaks under your parked motorcycle. Keep an eye on the radiator cap and all hose connections for cracks, and be sure to top up or flush out fluids according to the maintenance schedule. Preventing fluid-related failures is simple and keeps every ride secure and enjoyable.Which Fluids to Check and How OftenCoolant level and quality: Inspect reservoir levels monthly. Replace old, dirty, or low coolant as specified in your manual.Brake and clutch fluid checks: Keep fluid at the max fill line; replace if discolored or after two years to prevent corrosion and maintain braking strength.Symptoms of fluid leaks: Look for puddles under your bike, spongy levers, or drops in reservoir levels—signs it’s time for a closer inspection.DIY Motorcycle Maintenance Tips #6: Battery Inspection and MaintenanceYour motorcycle's battery is at the heart of its electrical system: a weak or failing battery leads to starting troubles and unpredictable electrical issues. Periodic battery inspection is vital in your diy motorcycle maintenance tips routine. Key signs of battery wear or failure include dimming lights, slow engine cranking, or corroded battery terminals. Keep the terminals clean and connections tight to ensure steady, reliable starting power.Use a multimeter to check voltage—12.6 volts or higher when fully charged is ideal. If you see persistent starting issues despite regular maintenance, it may be time for a replacement. For added battery longevity, use a battery tender when storing your bike for weeks on end. Taking these simple steps ensures your ride is always ready when you are.DIY Battery Care to Prevent Starting ProblemsSigns of battery wear or failure: Dimming dash lights, clicking noises when starting, or visible corrosion.Cleaning terminals and connections: Use a wire brush and a mix of baking soda and water on terminals to remove corrosion and improve contacts.When to replace your motorcycle battery: After 3-5 years, or any time capacity fails to hold, consider swapping out for a new unit.Watch this hands-on visual guide for step-by-step instructions on checking and adjusting tire pressure and performing chain maintenance. See proper techniques in a realistic home garage setting and learn key tips to keep your ride smooth and safe.DIY Motorcycle Maintenance Tips #7: Brake System ChecksThe effectiveness of your brakes is non-negotiable for rider safety. Part of every solid diy motorcycle maintenance tips checklist is a monthly brake system inspection, which includes brake pads, rotors, and brake lines. Examine brake pad thickness regularly—pads should be replaced before they reach the wear indicator groove to ensure maximum stopping power. Worn, thin, or cracked brake pads reduce braking ability and increase risk of accidents on the road.Scan your rotors for warping, scoring, or excessive rust—any of which can hamper performance and mean a replacement is due. Inspect brake fluid levels, look for leaks around brake lines, and check for spongy or slow-reacting levers. Address issues immediately by tightening loose bolts and bleeding brake fluid if needed. Keeping your brake system in prime condition guarantees every ride is as safe as possible.How to Inspect Pads, Rotors, and Brake LinesWarning signs your brakes need attention: Squealing, grinding noises, longer stopping distances, or mushy levers.Tools and methods for at-home brake maintenance: Use a flashlight, metric wrenches, and a caliper tool for checking pad thickness and rotor condition.DIY Motorcycle Maintenance Tips #8: Lighting and Electrical System InspectionReliable motorcycle lighting isn’t just for legality—it’s crucial for visibility and road safety. Make a habit of testing your headlights, tail/brake lights, and indicators using your ignition switch. Faulty bulbs or inconsistent light signals can leave you vulnerable to accidents, especially in low-visibility conditions. Part of effective DIY motorcycle maintenance tips is checking fuses and diagnosing any unexpected electrical faults quickly for peace of mind.If you find any bulbs out-of-order or dim, replace them with new ones of the correct rating as recommended in your service manual. Use a multimeter to determine if problems lie within the wiring or fuses when lights flicker or fail. Consistent attention to your bike’s electrical components keeps your motorcycle road-legal and protects you during night or bad weather rides.Keep Your Motorcycle Safe and Legal with Proper LightingTesting headlights, brake lights, and indicators: Switch on each light in turn, observing for immediate, bright response.Diagnosing electrical faults: Trace wiring back from fault points, check fuses, relays, and look for corrosion or loose connectors.Replacing bulbs and fuses: Always use matching wattage/voltage bulbs, handle fuses with insulated tools to avoid shock.DIY Motorcycle Maintenance Tips #9: Fastener and Bolt ChecksMotorcycle fasteners—including critical bolts keeping everything from the handlebars to the rear wheel secure—must be checked regularly to prevent dangerous loosening over time. Vibrations from the engine and road travel can cause these parts to work themselves loose, posing serious risks. Using a torque wrench, refer to your service manual for correct torque specifications and tighten all accessible bolts. Pay special attention to areas prone to loosening, such as brake calipers, exhaust mounts, and handlebar clamps.This often-overlooked maintenance task offers huge safety dividends and prevents small issues from growing into expensive repairs. Make a checklist of key fasteners for your particular bike—cross-reference with your manufacturer’s recommendations for peace of mind. Regular fastener checks ensure your motorcycle stays structurally sound and ready for every adventure.Avoid Accidents by Tightening Critical FastenersWhich fasteners to check regularly: Handlebar clamps, brake and clutch levers, engine mount bolts, axle nuts, and exhaust fasteners.Proper torque specifications: Always use your service manual for exact figures and use a torque wrench for accuracy.Common spots for loose bolts: Rear stand pivot, brake caliper mounts, and footpeg brackets are frequent culprits.DIY Motorcycle Maintenance Tips #10: Cleaning and Protecting Your MotorcycleA clean motorcycle is more than just a point of pride—it’s part of a crucial maintenance routine. Washing your bike regularly removes corrosive dirt, oil, and road salt that can degrade paint, chrome, and critical moving parts. Incorporating cleaning into your DIY motorcycle maintenance tips not only keeps your bike looking sharp but protects your investment over time. Use gentle motorcycle soaps, microfiber rags, and always dry thoroughly to prevent water spotting and rust.Waxing and applying protective sprays safeguard against weather and UV, keeping your finishes and fasteners in top condition. If you’re putting your motorcycle into storage, follow steps like filling the fuel tank (with stabilizer), cleaning the chain, and covering the bike in a dry, sheltered space. These simple actions ensure your motorcycle emerges from storage ready for action, without costly surprises.Best Practices for Washing, Waxing, and StoringRecommended cleaning products: Use non-corrosive, motorcycle-specific soaps and polishes for all surfaces.Corrosion prevention methods: Apply wax or corrosion-prevention sprays to exposed metal surfaces; lubricate moving parts after washing.Long-term storage preparation: Fill the tank, add stabilizer, disconnect battery, and lift tires to avoid flat spots.Watch our comprehensive step-by-step video showing every essential maintenance task—from tire checks to oil changes—in a realistic home garage environment. Perfect for beginners and seasoned riders alike seeking DIY confidence.People Also Ask: DIY Motorcycle Maintenance TipsWhat is the 12 second rule on a motorcycle?Answer: The 12 second rule on a motorcycle encourages riders to scan ahead at least 12 seconds on the road to anticipate hazards and react in time, promoting safer riding habits as part of routine motorcycle maintenance.What is rule number 5 for motorcycles?Answer: Rule number 5 often refers to maintaining a safe following distance and being prepared for sudden stops, critical for motorcycle maintenance safety and accident prevention.How to properly maintain your motorcycle?Answer: Proper motorcycle maintenance includes following DIY motorcycle maintenance tips such as regular inspections, oil changes, chain lubrication, tire checks, brake evaluations, and keeping your bike clean and protected.Is it better to store a motorcycle with a full or empty tank?Answer: Experts recommend storing your motorcycle with a full tank of fuel treated with a stabilizer to prevent condensation and corrosion during storage, a best practice in motorcycle maintenance.Frequently Asked Questions about DIY Motorcycle Maintenance TipsHow often should I perform basic motorcycle maintenance tasks at home?Routine maintenance like tire pressure and chain checks should be done weekly or before each ride, while oil changes and air filter replacements are typically every 3,000-6,000 miles. Follow your maintenance schedule for best results.What are the signs my motorcycle needs immediate maintenance?Warning signs include unusual noises, slow starting, leaking fluids, poor braking, acceleration issues, or flickering lights. Address these promptly to avoid major breakdowns.Can beginners safely follow these DIY motorcycle maintenance tips?Absolutely. Many basic maintenance tasks are straightforward with common tools and careful reference to the service manual. Take your time and double-check your work for safety.What tools do I need for basic motorcycle maintenance?Essential tools include a digital tire pressure gauge, socket and wrench set, chain brush, oil pan, screwdriver, multimeter, and a torque wrench. Refer to your manual for any specific tools required for your bike.Key Takeaways on DIY Motorcycle Maintenance TipsProper DIY motorcycle maintenance tips increase safety and bike longevityEssential tasks include tire pressure, chain care, oil changes, and fluid checksConsistent maintenance prevents breakdowns and costly repairsDIY motorcycle maintenance saves money and empowers ridersReady for Professional Help? Call Nasty Performance Motorcycle Shop Today: 847-458-4858Take charge of your bike’s health using these actionable DIY motorcycle maintenance tips—and ride with confidence every time you hit the road.For riders looking to deepen their knowledge and take their maintenance skills to the next level, exploring more comprehensive resources can make a real difference. By expanding your understanding of both routine and advanced care, you’ll be better equipped to handle unexpected issues and keep your motorcycle performing at its peak. Discover additional strategies, expert advice, and advanced troubleshooting by visiting our in-depth collection of motorcycle maintenance insights—your next breakthrough in DIY mastery could be just a click away.

Top Places to Find Vintage Motorcycle Parts for Sale Online and Locally

Did you know the global vintage motorcycle market is projected to grow at over 7% annually through 2028? With an explosion of nostalgia and restoration fever, vintage motorcycle parts have become more sought-after than ever before. Whether you're restoring a classic Honda CB, searching for rare Harley OEM components, or chasing the thrill of finding the perfect spare part for your jet ski or Suzuki moto project, the marketplace has evolved. From eBay storefronts with free shipping to in-person treasure hunts at swap meets or local salvage yards, this comprehensive guide reveals every strategic move you need to make smart, confident purchases and keep your prized ride on the road.Unlocking the Market for Vintage Motorcycle Parts: Surprising Trends & StatsThe rise in value and demand for vintage motorcycle parts has pushed this once-niche market into the limelight. As more classic bikes, from consolidated motor spares to specialized parts for classic motor models, are being restored worldwide, the need for authentic spare parts and experienced service is climbing fast. According to market analysts, the sector’s projected 7% annual growth means that a growing segment of hobbyists, collectors, and professional restorers are actively scouring both online and local sources for quality parts. Whether you’re chasing hard-to-find parts for a specialty and no longer manufactured classic, or simply want genuine spare parts with free shipping guarantees, you’re not alone in this search.Enthusiasts are increasingly turning to online marketplaces like eBay store listings or niche specialty retailers such as Sons of Speed, where they can compare a large selection of vintage motorcycle spare parts with buyer protection and easy returns. These platforms offer not only a wide inventory of classic motorcycle parts but also vetted seller reviews, ensuring you get the very best. Locally, motorcycle shows, swap meets, and dedicated salvage yards remain hotspots, providing the chance to inspect parts in person and negotiate prices. The trend toward authenticity, provenance, and trusted seller ratings is driving smarter purchasing decisions, making it more accessible than ever for hobbyists and restorers to revive classic motor legends.Why Demand for Vintage Motorcycle Parts Is Higher Than EverThere’s a perfect storm converging—rising classic motorcycle values, passionate bikers seeking nostalgia, and a surge of interest in personal restoration projects have all combined to fuel unprecedented demand for vintage motorcycle parts. As more classic models reach “collectible” status, original parts become both rarer and more valuable, pushing buyers to tap every resource, from modern e-commerce giants to hyper-local salvage operations. Online, platforms like eBay store and specialty shops like Sons of Speed are responding by offering large selections of hard-to-find parts, competitive prices, and even free shipping to entice restoration fans."Did you know the global vintage motorcycle market is projected to grow at over 7% annually through 2028? This surge is fueling an unprecedented demand for spare parts and restoration supplies."Simultaneously, vintage events, swap meets, and local dealers are turning into vibrant ecosystems where collectors, shop owners, and enthusiasts can find everything from Harley OEM spare parts to Suzuki moto carburetors. Market trends show buyers are now smarter—digging into seller ratings, authenticity guarantees, and compatibility checks before making a commitment. In this competitive environment, knowing where to look and how to verify what you’re buying are the keys to restoring or upgrading every classic ride with confidence and value.What You'll Learn about Vintage Motorcycle PartsThe best online and local sources for vintage motorcycle partsKey tips for securing authentic spare partsWhere to find reliable motorcycle parts with free shippingHow to verify parts, prices, and seller reputationsComprehensive Guide: Where to Buy Vintage Motorcycle Parts OnlineFinding the right vintage motorcycle parts online can feel overwhelming given the vast array of stores, forums, and marketplaces. However, several standout options regularly surface in enthusiast circles and offer a mix of quality, price transparency, and buyer protection. One of the best starting points is the eBay store, which consolidates parts for classic, Harley OEM, and even niche specialty and no longer produced models, all in one place. Meanwhile, lovers of rare or antique motorcycles praise specialty retailers like Sons of Speed, whose expertise and curated catalogues cater to the discerning collector or builder. Whether you value fast shipping, excellent service, or the assurances of easy returns and verified authenticity, the online landscape is robust.Key buying strategies include leveraging free shipping filters, researching seller credentials, and comparing compatibility information—especially when hunting for parts that fit intricate models like Honda CB or consolidated motor spares. Additionally, don’t overlook the forums and community groups where time-tested advice and leads on rare finds are often shared. Knowing how to validate what you see online is crucial—scrutinize detailed photos, request provenance documents for high-value items, and always check for seller ratings before clicking ‘Buy Now’.eBay Storefronts: A Hub for Vintage Motorcycle Parts with Free Shipping OptionsNavigating top-rated eBay stores for vintage motorcycle spare parts: eBay has become a goldmine for classic motor fans, hosting a large selection of motorcycle parts for brands ranging from Harley OEM to Suzuki moto. Many eBay store sellers now specialize in vintage motorcycle parts, offering detailed listings that note compatibility, quality part condition, and clear price points. Pro tip: Look for PowerSellers with a record of excellent service and consolidated motor spares, as these shops often offer a broader roster of rare parts for classic motorcycles.Leveraging 'free shipping' filters for cost-effective buying: One of the biggest perks when shopping the eBay store is the prevalence of free shipping on qualified orders. Filtering your searches to prioritize sellers offering free shipping not only controls costs but can get your parts to you faster. Combine this with the ability to view parts in stock, consolidated by condition and location, and you have one of the most user-friendly buying experiences available for vintage parts.Buyer protection, seller ratings, and authenticity verification: Unlike many small online forums or standalone shops, eBay guarantees some buyer protection for all purchases. Before finalizing any sale, read through seller ratings and check for reviews. Look for listings that provide extensive images, manufacturer stamps, or any mention of Robin Bova's endorsement—a name synonymous with vintage authenticity. Many reputable sellers will offer easy returns or parts pro verification to ensure quality and satisfaction.Specialized Vintage Motorcycle Parts Stores OnlineComparing dedicated shops: classic parts dealers, restoration experts: Beyond eBay store options, a handful of specialty retailers have built strong reputations for their expertise in spare parts for classic motorcycles. Stores like Sons of Speed and similar niche brands concentrate on rare, specialty and no longer manufactured components—ideal for those chasing authenticity or embarking on award-winning restorations. Their sales teams often offer personalized support for Harley OEM requests or specific parts for classic and jet ski models.Highlight: Sons of Speed and similar niche brands: Sons of Speed is the go-to name for many collectors and restorers. Their catalog is known for an impressive selection of vintage motorcycle spares, knowledgeable staff, and practical guidance on fit, provenance, and condition. This brand—and others—inspire trust by providing extensive documentation and clear pricing, making them a solid “call to order” resource for those unwilling to compromise.Reviews, return policies, and pricing structures: Always weigh the value of easy returns and solid return policies—especially when buying sight unseen. Check individual store reviews (visit website for testimonials) and verify if they ship worldwide or offer free shipping on certain orders. Pricing can vary between large online marketplaces and specialty shops due to inventory rarity and quality controls, so always compare before purchasing.Store NameTypeShipping PolicyReputationNoteseBay StoreMarketplaceFree shipping optionsHighWide inventory, powersellers, buyer protectionSons of SpeedSpecialty RetailerPaid/free shippingSpecializedFocus on rare & antique parts, expert supportLocating Vintage Motorcycle Parts LocallySometimes the best finds are closer than you think. While the internet has revolutionized the search for vintage motorcycle parts, nothing compares to examining a spare part in person—and perhaps striking up a conversation with a knowledgeable dealer or fellow collector. Local sources such as motorcycle salvage yards, independent spare parts dealers, and classic motorcycle events continue to supply a robust pipeline of authentic components. By shopping locally, you gain the advantage of authenticity verification, direct negotiation, and instant ownership—no waiting for shipping or wrestling with returns.Many classic motor enthusiasts also discover entire communities at regional swap meets, show-and-shine events, or through specialty salvage outlets offering everything from consolidated motor spares to Harley OEM and suzuki moto treasures. Building trust and relationships with local sources not only increases your chances of finding rare or discontinued parts for classic projects, but can yield pro tips, referrals, or bulk deal pricing. If you need quality parts in a hurry or want to negotiate on price and condition, local hunts are a timeless solution.Motorcycle Salvage Yards and Local Spare Parts DealersBenefits of shopping at local motorcycle parts salvage yards: Salvage yards allow buyers to touch, inspect, and often negotiate on spare parts before making a purchase. If you’re restoring a classic Honda CB or on the hunt for Harley OEM or jet ski specialty parts, these outlets frequently specialize in hard-to-find inventory and offer the unique advantage of hands-on authentication.How to inspect and authenticate vintage motorcycle spare parts in person: Begin by examining each item for original manufacturer stamps, part numbers, and overall finish. Speak directly with mechanics or shop owners to establish provenance, and when possible, cross-check item details with online sources or community forums for spare parts for classic or consolidated motor bikes. Look for signs of excessive wear or poor-quality aftermarket parts, and don’t hesitate to ask about the store’s easy returns policy.Key questions to ask local sellers:What is the part’s provenance and manufacturer (e.g., Suzuki moto, Harley OEM)?Can you provide compatibility details, especially for uncommon/all-specialty and no longer produced models?Do you offer a quality part guarantee or support for parts pro installation?Is there an in-store return or exchange policy for vintage or consolidated motor spares?Classic Motorcycle Shows, Meets, and Swap MeetsFinding vintage motorcycle parts at local events: Motorbike events, swap meets, and annual motorcycle shows are legendary for unique finds and face-to-face networking. Sellers, collectors, and restoration experts gather, offering everything from Harley OEM and Honda CB spares to rare consolidated motor spares for classic motorcycles.Networking with sellers and collectors: In-person events are a goldmine for building relationships and locating specialty spare parts. Exchange contact details with reputable dealers, compare notes on availability or price trends, and be ready for deals only available off-market.Tips for price negotiation and condition assessment: Always inspect parts for authenticity (use manufacturer markings) and ask about prior ownership or restoration details. Be friendly yet assertive in negotiating prices—knowledge and preparation usually yield better deals in this tight-knit community. Don’t be afraid to walk away if a part’s condition or provenance seems questionable.Key Considerations When Shopping for Vintage Motorcycle PartsVerifying authenticity of vintage motorcycle parts: Scrutinize each spare part for manufacturer stamps, serial numbers, and specific distinguishing marks. For rare or high-dollar items, ask the seller for documentation of provenance, Robin Bova endorsements, or Wadsworth Award credentials to ensure authenticity and protect your investment.Understanding compatibility with specific motorcycle models: Always cross-check compatibility details, particularly for specialty and no longer manufactured classic motor models. Confirming fit ahead of purchase prevents costly mistakes—especially when dealing with unique Harley OEM, Honda CB, or consolidated motor spares.Comparing prices across online and local sources: Don’t settle for the first offer—leverage the large selection available on both eBay store and specialty retailers, while using in-person visits to gauge fair price ranges for vintage motorcycle parts. Free shipping, easy returns, and seller ratings can all impact the true value of your transaction.Checking seller credentials and buyer feedback: Whether shopping via marketplace, specialty store, or swap meet, always research seller backgrounds and buyer reviews. Ratings and testimonials (visit website if available) are your best indicators of reliability and service quality.Watch: A step-by-step guide video: How to authenticate vintage motorcycle parts and avoid common pitfalls when buying online or locally.People Also Ask: Essential Questions About Vintage Motorcycle PartsHow can you tell if a vintage motorcycle part is authentic?Authentic vintage motorcycle parts will typically feature clear manufacturer stamps, unique part numbers, and consistent finish quality that reproductions often lack. If you’re buying something high-value or historically significant, ask the seller to provide provenance documentation or a certificate of authenticity. For trusted purchases, prioritize sellers or outlets that have Robin Bova’s approval or Wadsworth Award mentions—they’re top signals of a genuine, quality part."Examining manufacturer stamps, part numbers, and finish quality are key indicators of genuine vintage motorcycle parts. For high-value items, request provenance or certification."Where is the best place to buy vintage motorcycle parts online?The best destinations for vintage motorcycle parts online are those with a proven track record and robust buyer protection, like the eBay store and specialty retailers such as Sons of Speed. Both offer a wide and reliable selection of motorcycle parts—with large inventory, consolidated shipping options, and the assurance of comprehensive customer service and reviews. Niche forums dedicated to particular brands like Honda CB or classic Harley OEM also serve as great resources for rare or discontinued spare parts."For selection and buyer protection, eBay and specialized retailers like Sons of Speed or niche forums are top picks for vintage motorcycle parts shopping online."FAQs About Vintage Motorcycle PartsWhat’s the average price range for vintage motorcycle spare parts?Pricing can vary widely based on rarity, condition, and source—expect common parts to start around $25–$50, with rare or specialty items easily reaching several hundred dollars. Shopping via eBay store or specialty retailers like Sons of Speed gives access to consolidated inventories and price comparisons for Harley OEM, Honda CB, and consolidated motor spares.Can you return vintage motorcycle parts if they’re not authentic?Most reputable online sellers—especially eBay store merchants and quality-focused specialty shops—offer easy returns if parts are misrepresented or found not to be authentic. Always check the store’s or seller’s policies before committing. For local purchases, clarify return terms up front and get agreements in writing if possible.Is free shipping common on vintage motorcycle parts orders?Free shipping is now a frequent perk on many larger online platforms, particularly on qualifying eBay store purchases and select specialty retailers. Take care to factor shipping costs into your total price, and use the ‘free shipping’ filters to maximize your savings while sourcing spare parts for classic projects.Are reproduction parts a good option for restorations?While original parts are ideal for authenticity and value—especially in award-winning restorations—high-quality reproduction parts can be a smart alternative when originals are unavailable or impractically expensive. Always confirm the fit and specifications and buy from reputable sellers offering guarantees and reviews.Key Takeaways: Getting the Most from Your Vintage Motorcycle Parts SearchStart by researching seller reputations and part compatibilityTake advantage of free shipping when availableInspect parts carefully, whether online or locallyPrioritize trusted outlets for rare and valuable itemsConclusion: Secure High-Quality Vintage Motorcycle Parts with ConfidenceWith market demand stronger than ever, use these strategies to secure the very best vintage motorcycle parts—online or locally—for your next restoration or upgrade project.Call Nasty Performance Motorcycle Shop Today: 847-458-4858

Terms of Service

Privacy Policy

Core Modal Title

Sorry, no results found

You Might Find These Articles Interesting

T
Please Check Your Email
We Will Be Following Up Shortly
*
*
*