cropper
update

Nasty Performance ~ 847-458-4858 

update
  • Blog Home
  • Categories
    • Motorcycle Maintenance
    • Riding Tips & Preps
    • Safety & Inspection
    • Customizations & Upgrades
    • DIY Motorcycle Repairs
    • Motocycle Audio Systems
    • Motocycle Seasonal Care & Storage
    • Engine, Electrical Performance
  • Bike Night
  • Nasty Performance Motorcycle Shop
April 23.2026
1 Minute Read

Local Motorcycle Suspension Repair: Smooth Rides Start Here

Did you know that nearly 80% of handling and comfort issues with motorcycles are linked directly to the suspension system? This surprising fact underlines why local motorcycle suspension repair is not just about smoother rides—it’s about your safety and your bike’s long-term health. Whether you’re a daily commuter, a weekend dirt bike enthusiast, or own a modern bike built for speed, the quality of your suspension service can drastically change your riding experience. In this comprehensive guide, we’ll show you why choosing a trusted local shop for motorcycle suspension repairs is the best investment for your ride, your wallet, and your confidence on the road.

Modern motorcycle shop interior with a mechanic inspecting bike suspension for local motorcycle suspension repair

Unlocking the Importance of Local Motorcycle Suspension Repair

Motorcycle suspension is the backbone of a comfortable and safe ride, yet it’s often overlooked until bumps, squeaks, or instability become impossible to ignore. Local motorcycle suspension repair ensures that all critical internal components of your suspension system—from the fork tube to the rear shock—receive the professional attention required for optimal performance. Skilled technicians at local shops offer a wide range of services tailored to your specific bike, riding style, and even your usual terrain.

With local expertise, you benefit from fast turnaround times, face-to-face consultations, and customized suspension service for your modern bike or dirt bike. Most importantly, a thorough inspection and repair of your bike suspension not only restores ride quality but significantly reduces the risk of accidents caused by worn or damaged internal parts. Investing in regular, professional suspension services locally can prolong your bike’s life, enhance safety, and match your riding style and terrain to the highest quality standards.

Startling Facts: Why Suspension Service Matters More Than You Think

It’s easy to assume your motorcycle’s sluggish handling or rough ride is just “part of the experience,” but statistics paint a different story. Studies show that poorly maintained motorcycle suspension is responsible for a wide range of preventable incidents, from minor handling flaws to serious crashes. Fork tube and shock performance degrade with as few as 20,000 hours of riding if not properly serviced. Moreover, dirt bike and off-road motorcycle riders are especially vulnerable to issues like leaking fork seals, sticky shocks, and dangerous spring rates when regular suspension services are neglected.

Not all suspension problems are immediately visible. Hidden wear and tear on the internal components, deteriorated seals, or incorrect suspension tuning for your riding style can slip by unnoticed—until they become costly or even dangerous. This is why partnering with a dedicated local shop for motorcycle suspension service is the best way to ensure safety, maximize ride quality, and avoid unexpected repair bills. Local professionals can diagnose, repair, and even provide custom valving to match your riding style and terrain.

For riders who want to keep their bikes performing at their best, understanding the importance of seasonal maintenance is just as crucial as regular suspension checks. Discover practical tips for year-round care in this guide to seasonal bike care secrets every rider must know, which complements your suspension upkeep routine.

What You’ll Learn About Local Motorcycle Suspension Repair

  • Key features and benefits of professional bike suspension repairs near you

  • Overview of dirt bike suspension and fork tube maintenance

  • Expected costs and service timelines for local motorcycle suspension repair

  • How to compare local shops and choose the best for your needs

  • Maintenance tips to prolong the life of your motorcycle suspension

Understanding Motorcycle Suspension: Components, Function, and Importance

Cutaway diagram with a technician highlighting components for bike suspension and fork tube in local motorcycle suspension repair

Breaking Down the Bike Suspension System: From Fork Tubes to Shocks

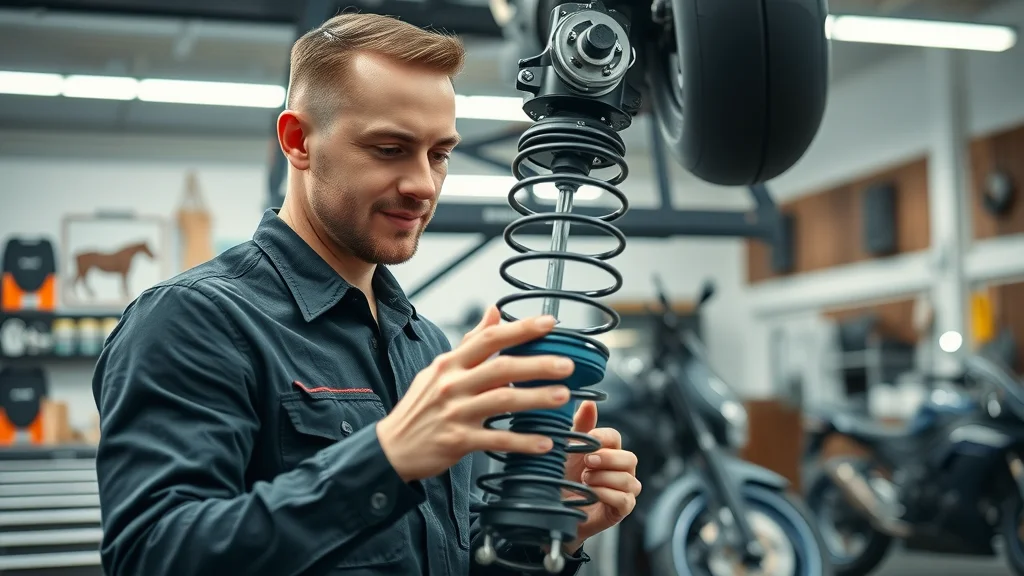
Every motorcycle suspension system is made up of key components—most notably the fork tube, rear shocks, and a series of internal parts that work harmoniously to absorb shocks and maintain stability over a wide range of riding conditions. The fork tube manages the front end’s up and down movement, allowing the front wheel to track smoothly over uneven ground. In the rear, the shock absorber and spring support load, dampen oscillations, and help maintain tire contact, which is critical for control.

Each component—from fork seals to shock dampers—must be kept in optimal condition for the system to work flawlessly. Local motorcycle suspension repair services inspect every piece for wear, corrosion, and leaks, replacing or tuning parts to match your riding style and desired spring rates. Whether you ride a modern bike or a nimble dirt bike, understanding these elements is the first step toward better control and safer, smoother rides.

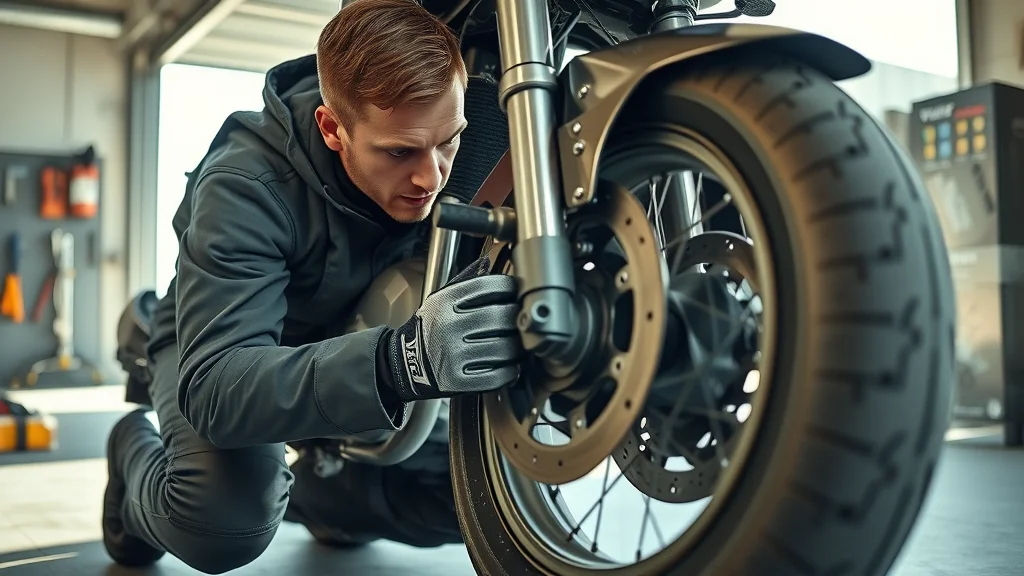
How Suspension Service Influences Safety and Ride Quality

Your bike’s ability to handle corners, absorb bumps, and maintain firmness under acceleration and braking depends entirely on the health of the suspension system. Worn fork tubes or underperforming shocks can cause increased stopping distances, vague steering, and even mid-corner instability. Regular suspension service ensures forks and shocks retain their original damping and spring rate, which not only boosts ride quality but also sharpens your responsiveness to road conditions.

Beyond comfort, a high-functioning suspension system is the cornerstone of motorcycle safety. It keeps tires glued to the ground, minimizes risk during emergency maneuvers, and makes sure all other bike systems perform as designed. Investing in local motorcycle suspension repair is more than maintenance—it’s peace of mind every time you ride.

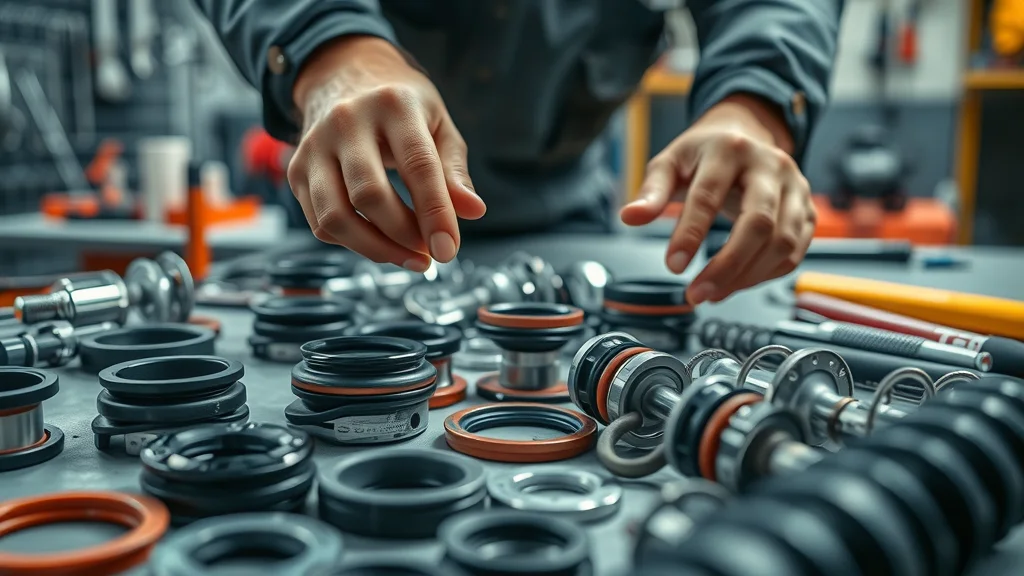
Types of Local Motorcycle Suspension Repair Services

  • Standard motorcycle suspension service packages

  • Custom suspension services for dirt bike and off-road motorcycles

  • Fork tube rebuilding and shock repair

  • Motorcycle suspension tuning for weight and riding style

Watch a professional mechanic demonstrate expert local motorcycle suspension repair—including draining fork oil, seal replacement, and checking shock dampening.

Comparing Costs: Local Motorcycle Suspension Repair Price Table

Service

Average Cost

Service Inclusions

Typical Timeframe

Fork Tube Rebuild

$250 - $400

Seal replacement, cleaning

1–2 days

Shock Rebuild

$200 - $350

Damping, spring adjustment

1–2 days

Full Suspension Service

$400 - $700

Complete inspection, replacement

2–4 days

Local shops often offer a wide range of suspension service options, allowing you to balance cost, time, and scope. Whether you need a simple fork service or a complete front and rear suspension overhaul, local motorcycle suspension repair delivers not just transparency but also rapid turnaround, saving you both downtime and money versus shipping your parts out.

How to Select the Right Local Motorcycle Suspension Repair Shop

Local motorcycle repair shop technician with a customer discussing local motorcycle suspension repair
  • Check for certifications and reviews

  • Ask about motorcycle suspension expertise

  • Request detailed suspension service quotes

  • Evaluate customer service responsiveness

“A well-maintained bike suspension is the secret to both safety and performance on the road.”

Start by reviewing online feedback from fellow riders to gauge customer satisfaction and pinpoint strengths or concerns about a shop’s suspension services. Certifications, such as factory training and brand-specific expertise, serve as proof that your bike—whether a high-performance dirt bike or a modern bike—will receive the best possible care. Ask about their process for custom valving, tuning, and handling of unique riding styles and terrain. Finally, an upfront estimate and responsive service signal a repair shop’s commitment to transparency, quality, and your safety.

Remember, the best local motorcycle suspension repair shop is one that’s dedicated to providing personalized care, swift service, and clearly understands the ins and outs of your specific suspension component needs.

Spotlight: Top Local Shops for Motorcycle Suspension Repair

Customer Reviews and Success Stories

Satisfied motorcycle riders showing appreciation for local motorcycle suspension repair outside a shop

Riders everywhere rave about the improvement a quality local motorcycle suspension repair brings to their bikes. One customer describes, "After my fork tube rebuild at my neighborhood shop, my daily commute felt like gliding on fresh asphalt—no more shudders or squirms over bumps!" Another happy dirt bike rider shares, "The custom suspension tuning totally matched my riding style and terrain. Now my jumps are smoother, and my confidence is sky-high."

Local shops also shine in offering a wide range of suspension upgrades, from fine-tuned shock service for off-road adventures to regular fork service for modern bikes. Customers appreciate face-to-face interactions, clear communication, and a willingness to use aftermarket or custom parts, ensuring the service matches the rider’s specific needs. These success stories reveal one common thread: high-quality bike suspension repairs equal safer, more enjoyable, and more predictable riding—all thanks to skilled local technicians!

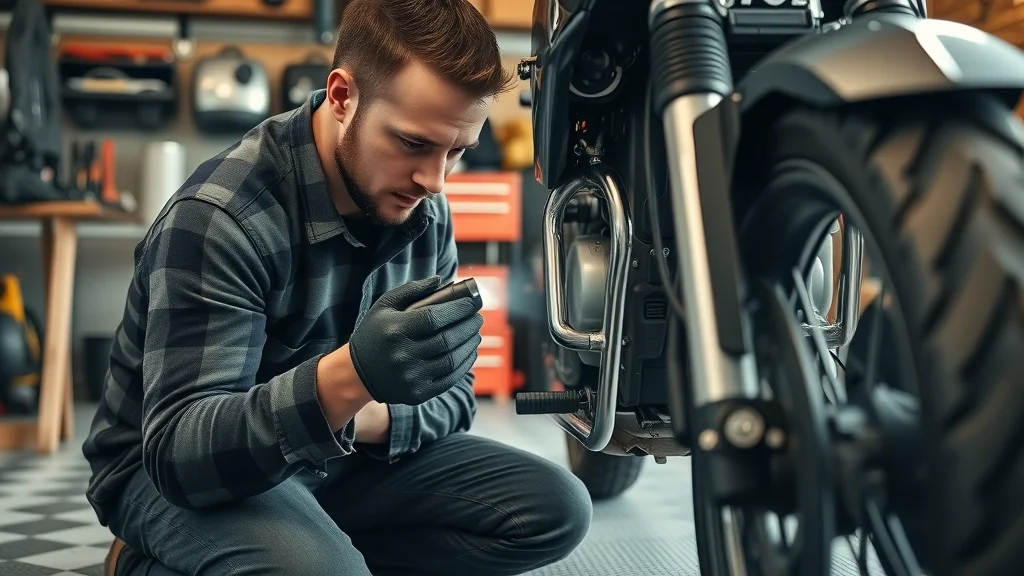
Signs You Need Local Motorcycle Suspension Repair Immediately

  • Unusual noises or feelings from shocks or fork tubes

  • Sticky or leaking oil around the fork or shock

  • Noticeable dip in ride comfort or handling

  • Visible damage or corrosion on bike suspension components

Don’t wait for obvious breakdowns or dangerous handling quirks before visiting your local shop. Squeaks, excessive bouncing, leaks, or corroded components are all strong indicators that your bike suspension is overdue for an expert suspension service. Fork and shock issues escalate quickly if left unchecked, often resulting in steeper repair bills or even accidents. If you recognize any of these issues, book a local motorcycle suspension repair fast—it’s your safest, smartest move.

Quote: Real Riders Share Why Prompt Suspension Service Matters

“After putting off my fork service for months, I nearly lost control on a gravel bend. Repairing my local motorcycle suspension brought my confidence—and my bike—back to life.”

Real-world experiences like these highlight why regular suspension services are nonnegotiable for serious and casual riders alike. Procrastinating on repairs can turn small, affordable fixes into expensive (and potentially hazardous) emergencies.

Preventive Maintenance: Extending the Life of Your Motorcycle Suspension

DIY motorcycle owner inspecting fork tube during routine bike suspension maintenance
  • Regular inspection schedules

  • Simple DIY checks for fork tube and shock health

  • When to seek professional suspension service

The best way to avoid sudden and costly local motorcycle suspension repair is by practicing preventive maintenance. Set an inspection schedule—ideally every 6,000 to 10,000 miles, or as recommended by your manufacturer. Simple at-home checks include squeezing the front and rear suspension, feeling for excessive play, and checking for visible oil leaks or corrosion. For dirt bike and off-road enthusiasts, thorough post-race and post-ride inspections are a must due to the high stress on suspension components.

If you notice anything unusual—sticky movement, leaking fluids, or odd noises—schedule a suspension service with your trusted local shop. Pro-level suspension tuning can extend the life of your components, match your riding style, and keep every mile smooth and safe.

Watch this step-by-step guide to easy preventive checks for bike suspension longevity and peak performance.

People Also Ask: Local Motorcycle Suspension Repair Questions Answered

Hands sorting motorcycle suspension parts like fork tube seals and shock absorbers for local motorcycle suspension repair

How much does it cost to get motorcycle forks rebuilt?

On average, motorcycle fork rebuilding as part of local motorcycle suspension repair ranges from $250–$400 depending on model and shop rates. This includes parts, labor, and oil.

Local shops typically factor in both labor and parts, so you get a transparent, all-in estimate. The specific cost may vary with your motorcycle’s brand, condition, and whether you’re including upgrades such as custom valving or aftermarket spring rates. Check with your local shop for a precise quote tailored to your bike suspension needs.

What is the life expectancy of a motorcycle suspension?

Most motorcycle suspension systems last 20,000–30,000 miles or more with regular maintenance; usage, riding style, and servicing frequency influence longevity.

If your dirt bike or modern bike tackles rough roads, races, or off-road terrain, you’ll want more frequent suspension service. Keeping a detailed log of riding hours and service history is the best way to maximize the life expectancy of your suspension system.

How much does it cost to have a shock rebuilt?

A typical shock rebuild in a local motorcycle suspension repair shop costs $200–$350, including seal, oil, and spring checks.

Shock service usually involves disassembling the shock, cleaning or replacing seals, inspecting the spring, and ensuring internal parts are in peak condition. A full shock performance evaluation is vital for ensuring a comfortable ride and matching your riding style and terrain.

Can motorcycle forks be repaired?

Yes, many issues with motorcycle forks can be repaired locally—especially for leaks, seals, or minor bends—simplifying local motorcycle suspension repair.

Skilled technicians can often fix a wide range of fork tube problems, including seal leaks and minor deformations, without the need for expensive full replacements. This keeps suspension repair costs down and gets you back on your bike faster.

Local Motorcycle Suspension Repair FAQs

  • How often should I service my motorcycle suspension?

  • What should I do if my dirt bike suspension feels too soft?

  • Can I bring aftermarket parts for my bike suspension service?

  • Is local suspension repair faster than sending my parts away?

Answers:
Motorcycle suspension should typically be serviced every 10,000–15,000 miles or at least once a year. If your dirt bike suspension feels too soft, ask your local shop about custom valving or spring rate upgrades to enhance performance. Most local motorcycle suspension repair centers allow the use of quality aftermarket parts, though it’s wise to ask in advance. Repairing locally is almost always faster, saving you weeks compared to shipping parts to distant service centers.

Key Takeaways on Local Motorcycle Suspension Repair

  • Professional local motorcycle suspension repair boosts safety and smoothness.

  • Comparing local suspension services saves money and time.

  • Preventive maintenance keeps repair costs low and extends lifespan.

Ready for a Smoother Ride? Call Nasty Performance Motorcycle Shop Today: 847-458-4858

Don’t compromise on safety or performance. Trust your local motorcycle suspension repair experts and call Nasty Performance Motorcycle Shop today at 847-458-4858 for the highest quality service and a ride you’ll love.

As you focus on keeping your suspension in top shape, remember that comprehensive motorcycle care goes beyond just one system. If you’re interested in elevating your maintenance routine and ensuring your bike is ready for every season, explore our expert advice on seasonal bike care strategies. These insights will help you anticipate weather-related challenges, protect your investment, and enjoy peak performance year-round. Take the next step in your riding journey by combining professional suspension service with smart, seasonal upkeep—your bike (and your future self) will thank you.

Motorcycle Maintenance

0 Comments

Write A Comment

*
*
Please complete the captcha to submit your comment.
Related Posts All Posts

Signs You Need Spark Plug Replacement on Your Motorcycle

Did you know that just one worn spark plug can cause your motorcycle’s fuel efficiency to drop by up to 30% and lead to unexpected breakdowns on the road? Unfortunately, many riders overlook simple, inexpensive motorcycle spark plug replacement—a maintenance task that’s absolutely critical for keeping your bike running smoothly, efficiently, and safely. In this guide, you’ll discover why paying attention to your spark plugs is one of the best ways to avoid frustration and costly repairs down the road. A Surprising Fact: The Crucial Role of Motorcycle Spark Plug Replacement While it might seem minor, the motorcycle spark plug is the unsung hero of your bike’s engine. It’s responsible for igniting the air-fuel mixture inside each cylinder, kickstarting powerful combustion and propelling you forward. Yet, most riders don’t realize that a worn or failing spark plug can transform a high-performance machine into a stuttering, temperamental shadow of itself. More alarming, motorcycle spark plug replacement is often overlooked in basic maintenance tasks and only addressed once problems like poor starting, engine misfires, or sluggish acceleration appear. Even modern EFI bikes aren’t immune—sophisticated electronics rely just as heavily on reliable spark plugs. Skipping timely replacement increases overall engine wear, jeopardizes the health of related components like the coil stick and plug wire, and could ultimately result in more extensive repairs. Recognizing the warning signs early and learning the basics of spark plug inspection and replacement can extend your bike’s lifespan, maximize performance, and save money in the long run. Why Motorcycle Spark Plug Replacement Should Never Be Overlooked Neglecting motorcycle spark plug replacement can set off a chain of problems that affect your bike, your wallet, and your safety. When a spark plug fails or starts to degrade, the entire process of combustion falters—causing your engine to run rough, emit strange noises, and even fail at critical moments. Poor spark plug maintenance can also mask underlying issues, like a clogged air filter or improper spark plug gap. Dirty or fouled spark plugs can strain your bike’s fuel delivery, particularly in gas tank systems and EFI bikes. This not only hinders your ride but accelerates wear to expensive parts such as the cylinder head, plug wires, and ground strap. Timely replacement and regular inspection are simple, effective ways to safeguard your investment and ensure every ride is as enjoyable and safe as possible. While spark plug health is vital, it’s just one aspect of keeping your motorcycle in top shape. For a comprehensive approach to maintenance, including how to adapt your care routine throughout the year, check out these seasonal bike care secrets every rider should know for practical tips that go beyond the basics. What You'll Learn About Motorcycle Spark Plug Replacement How to identify symptoms of failing motorcycle spark plugs Why regular motorcycle spark plug replacement is essential for performance Step-by-step methods to check and replace motorcycle spark plugs Expert tips for extending the life of your motorcycle spark plugs Understanding Motorcycle Spark Plug Replacement: What Are Motorcycle Spark Plugs? Motorcycle spark plugs are more than just simple parts—they are engineered to endure intense temperatures and provide a consistent spark at lightning speed with every turn of your engine. Placed on the cylinder head, each spark plug has a central center electrode, a threaded shell, and a precise spark plug gap set between the center and ground electrodes. This gap is where the magic happens: a high-voltage arc jumps, igniting the air-fuel mixture so the engine can run smoothly. Choosing the correct spark plug and keeping it in top condition directly impacts everything from fuel efficiency to engine longevity. Incorrect plug gap or poor installation can lead to misfires, weak combustion, or even damage to your bike’s engine management systems—especially in high-performance and modern EFI motorcycles. Learning how your spark plug functions is the first step to maintaining peak performance. Key Functions of a Motorcycle Spark Plug Ignition of the air-fuel mixture: Spark plugs create the spark necessary to ignite the compressed fuel-and-air blend in your bike’s engine. Maintaining engine efficiency: Consistent, reliable sparks ensure smooth engine operation, balanced fuel burn, and reduced emissions. Contribution to overall motorcycle performance: Well-maintained spark plugs reduce engine vibration, prevent stalling, and help deliver peak horsepower—all critical for a satisfying ride. The Importance of Proper Motorcycle Spark Plug Maintenance Regular motorcycle spark plug maintenance is a key factor in the longevity and power of your engine. Over time, combustion deposits, heat cycling, and improper installation can all impact the ability of a spark plug to transmit voltage efficiently. That’s why checking the plug’s condition—including the spark plug gap, color, and signs of wear—needs to be a routine maintenance practice for every rider. Not only does this help avoid engine trouble, but it also maximizes your investment by preventing unnecessary strain on other maintenance tasks—like air filters, plug boot, and coil stick. Frequent checks with a gap gauge or feeler gauge provide reassurance and ensure your spark plug’s plug gap is neither too wide nor too tight. Adhering to your bike’s service manual for motorcycle spark plug replacement intervals keeps your ride in top shape, reduces emissions, and can even improve your gas mileage—making it a good idea for all riders. Common Signs You Need Motorcycle Spark Plug Replacement Spotting the early warning signs can be the difference between a brisk morning ride and a frustrating day stranded by the roadside. The following symptoms indicate it’s time to check your motorcycle spark plugs and consider a timely replacement: Engine Misfires and Poor Performance If you feel your motorcycle jerking unexpectedly, hesitating under acceleration, or outright misfiring, a worn spark plug could be at fault. Misfires often occur when the plug gap is too wide or coated in carbon, preventing the spark from jumping reliably. This not only affects your motorcycle’s performance but also increases emissions, overworks crucial parts like the coil stick and plug wire, and can cause stubborn engine knock or ping. For both EFI bikes and carbureted engines, smooth power delivery relies on clean, well-gapped spark plugs. Ignoring these symptoms may lead to long-term harm for other sensitive components. Replacing motorcycle spark plugs as soon as misfires are noticed will restore lost power, smooth your ride, and prevent further issues down the line. Trouble Starting Your Motorcycle Difficulty starting your bike—especially in the morning or after long periods of storage—can signal failing motorcycle spark plugs. A weak, corroded, or dirty plug often struggles to ignite the fuel mix, resulting in long cranking times, multiple attempts to start, or complete failure to start. On modern EFI bikes, electronic systems may compensate slightly, but a faulty spark is still a primary culprit for unreliable startups. Another related sign is an engine that stalls immediately after starting or runs very rough until it warms up. Whether you ride a sportbike, cruiser, or a commuter, reliable spark plug performance is essential for consistent starting and safe operation. Decreased Fuel Efficiency Notice that your bike’s gas mileage has suddenly dropped or that you’re filling up more frequently? Decreased fuel efficiency is a classic sign of a spark plug past its prime. When a spark plug misfires or becomes inefficient due to a poor plug gap or carbon buildup, unburnt fuel gets wasted—leaving you with less distance per tank and more frequent stops at the pump. On EFI bikes in particular, sensors will try to compensate for poor combustion, but eventually, inefficient spark will still cost you at the gas station. Regular motorcycle spark plug replacement restores optimal fuel burn, improving economics and extending the life of other precious engine components. Don’t ignore this telltale symptom—it’s your bike’s way of asking for help. Unusual Engine Noises Linked to Motorcycle Spark Plugs Sharp popping, rough idling, or loud backfiring hurts more than just your ears—they’re also warnings that something is wrong with your spark plugs. Chronic fouling or an incorrect spark plug gap can disrupt the firing order and timing, producing clangs, bangs, and unpredictable power delivery. If you hear persistent noise changes after starting, accelerating, or at idle, an immediate inspection and spark plug change is a smart move. These sounds might also signal problems with the plug boots or plug wires, which should always be checked together with the spark plug itself. Early intervention preserves engine health and prevents inconvenient breakdowns. How to Inspect Motorcycle Spark Plugs Before Replacement What to look for when checking spark plug wear: Examine the ceramic insulator for cracks, chips, and discoloration. Carbon or oil deposits on the tip can indicate incomplete combustion or worn engine parts. Watch the ground electrode—excessive wear, melted edges, or a rounded tip means it’s time to replace. Understanding carbon deposits and residue: Carbon fouling appears as thick, sooty deposits on the plug’s tip, often the result of a rich fuel mixture, short trips, or a worn air filter. Oil residue points to internal oil leaks or worn piston rings, while a clean, tan or grayish tip signals good combustion. Color and gap inspection tips for motorcycle spark plug replacement: Always use a gap gauge to check the distance between the center and ground electrodes. Deviations from the manufacturer’s plug gap recommendation can prompt misfiring and reduced efficiency. Adjust carefully—never force or bend the ground strap excessively. Step-by-Step Motorcycle Spark Plug Replacement Guide Taking the leap to replace your own motorcycle spark plugs can feel intimidating, but with preparation and the right tools, it’s a straightforward maintenance task. Follow these essential steps: Tools and Safety Tips for Motorcycle Spark Plug Replacement Before you begin, gather the right equipment: Spark plug socket (sometimes called a plug socket) and compatible ratchet Gap gauge or feeler gauge for checking the plug gap Torque wrench (for proper installation torque) Gloves and safety glasses to protect your hands and eyes Compressed air or canned air to clear debris around the plug well Your bike’s service manual for specifications and procedures Work on a cool engine to avoid burns. Use compressed air to blow dirt away from the spark plug area—prevents debris from falling into the cylinder head when removing the plugs. Never work without gloves or eye protection; debris can dislodge quickly, especially in older bikes or those with recessed plugs. Always ensure a good connection with the plug boot and avoid overtightening the new spark plug—using a torque wrench is the best way to apply just the right pressure without damaging delicate threads or the cylinder head. Removing Old Motorcycle Spark Plugs 1. Disconnect the plug boot or coil stick gently (in modern EFI bikes). 2. Use a clean, dry cloth or canned air to clear dust and particles around the old plug. 3. Fit your spark plug socket over the plug and twist counterclockwise to unscrew. 4. Pull the plug out and observe its tip for deposits, oil, or abnormal wear. Grip the plug firmly but avoid using excessive force that could damage threads or the cylinder head. If you encounter resistance, add a small bit of penetrating oil and wait a few minutes before trying again. Be mindful of access to the plug—on some models, parts like the tank or fairings may need to be loosened or removed. Installing New Motorcycle Spark Plugs Correctly 1. Compare the new spark plug with the old to verify type, length, and thread pattern. 2. Use a gap gauge to check the gap. Gently bend the ground electrode if needed, following the specification in your bike’s service manual. 3. Thread the new spark plug by hand into the cylinder head—avoid cross-threading. 4. Once finger-tight, use the spark plug socket and torque wrench to snug the plug to the correct torque specification. 5. Reconnect the plug boot or coil stick, ensuring a solid connection. Don’t forget to inspect and clean plug wires or replace them if they show signs of wear. Double-check that all tools are removed from the work area before starting the engine. Finally, test start the bike—listen for smooth idle, and verify there are no engine warning lights or unusual noises. Expert Quotes on Motorcycle Spark Plug Replacement "Regular motorcycle spark plug replacement is critical for smooth rides and engine longevity. Neglecting this simple component can lead to costly repairs down the line." — Motorcycle Engine Specialist Motorcycle Spark Plug Replacement Maintenance Table Signs of Faulty Spark Plug Inspection Frequency Recommended Action Difficulty Starting Every 3,000 miles Replace if worn Rough Idling Every 5,000 miles Clean or replace Drop in Power Every 5,000 miles Inspect for carbon buildup List of Top Tips to Extend Motorcycle Spark Plug Life Use manufacturer-recommended motorcycle spark plugs Stick to regular maintenance intervals listed in your service manual Avoid short, infrequent trips—engines run best when fully warmed up Always check for proper plug gap and careful installation Watch: High-Resolution Motorcycle Spark Plug Replacement Walkthrough Video demonstration features a professional mechanic inspecting, removing, and installing spark plugs in a clean workshop with close-up detail and slow-motion highlights. See first-hand exactly how the process should look for your own bike. Motorcycle Spark Plug Replacement: FAQs How often should spark plugs be changed on a motorcycle? Most motorcycle manufacturers recommend changing spark plugs every 5,000 to 10,000 miles, but this interval can vary by model and riding style. Always refer to your owner’s manual for the exact schedule, and inspect motorcycle spark plugs regularly for early signs of wear. Which bike is most liked by girls? Bikes such as the Honda Activa, Royal Enfield Classic 350, and Yamaha Fascino are popular among women riders due to their approachable seat heights, ease of handling, and stylish design. Preferences can vary greatly—comfort and confidence often play the biggest roles. What is the most sold motorcycle of all time? The Honda Super Cub holds the record as the world’s most sold motorcycle, known for its reliability, outstanding fuel efficiency, and massive global presence. Is it easy to change a motorcycle spark plug? With the right tools, a little know-how, and proper safety precautions, changing a motorcycle spark plug is a manageable DIY task. Always follow your bike’s service manual, use a spark plug socket, and ensure the gap is set accurately for the best results. People Also Ask How often should spark plugs be changed on a motorcycle? Answer to: How often should spark plugs be changed on a motorcycle? For most street bikes, spark plugs should be inspected every 5,000 miles and replaced as needed—especially if you notice starting trouble, rough idling, or performance dips. For high-performance models or those under heavy use, check them more frequently. Which bike is most liked by girls? Answer to: Which bike is most liked by girls? The most liked bike among girls often includes user-friendly, lightweight scooters like Honda Activa or Yamaha Fascino, followed closely by style-conscious models such as the Royal Enfield Classic series. Comfort and ease of handling tend to guide choices for many female riders. What is the most sold motorcycle of all time? Answer to: What is the most sold motorcycle of all time? Globally, the Honda Super Cub is recognized as the top-selling motorcycle, beloved for its simplicity and dependability across generations of riders. Is it easy to change a motorcycle spark plug? Answer to: Is it easy to change a motorcycle spark plug? Yes—if you have basic mechanical skills and access to simple tools like a spark plug socket, gap gauge, and your bike’s service manual, replacing your spark plug is a practical DIY project for most owners. Key Takeaways for Motorcycle Spark Plug Replacement Recognize early warning signs of spark plug trouble Follow inspection and maintenance schedules consistently Always use the right tools and methods for replacement Don’t hesitate to seek expert help if unsure Ready for Your Motorcycle Spark Plug Replacement? Call Nasty Performance Motorcycle Shop Today: 847-458-4858 If you’re committed to keeping your motorcycle running at its best, don’t stop with spark plug maintenance alone. Expanding your knowledge of seasonal care can help you anticipate issues before they arise and ensure your bike is always ready for the road, no matter the weather. Discover expert strategies for year-round reliability and performance by exploring essential seasonal bike care tips. With the right approach, you’ll not only extend the life of your spark plugs but also protect every aspect of your ride for the long haul.

Step-By-Step Motorcycle Brake Pad Replacement

Ever wondered if your brakes would protect you in a split second— or could worn pads put your ride and safety at risk? This in-depth guide on motorcycle brake pad replacement takes out the guesswork, helping riders of all experience levels understand, diagnose, and tackle brake pad issues before they compromise safety. We’ll cover every critical step, from signs of wear to pro tips on installing new pads, so your motorcycle brake system performs at its best every time you hit the road. Why Motorcycle Brake Pad Replacement Is Critical for Rider Safety Neglecting to replace worn brake pads can compromise your motorcycle’s most vital safety feature: reliable stopping power. Motorcycle brake pad replacement is not just a routine maintenance task; it’s a lifesaver that ensures your brake system operates effectively whenever you squeeze that brake lever. Old or degraded brake pads reduce friction material, causing increased stopping distances and a less progressive feel, which can be a critical risk in emergencies. Regular pad replacement keeps your braking predictable, especially in sudden or hazardous conditions. Modern motorcycles rely on a precise combination of brake caliper, pads, and rotors, all working in harmony to deliver strong and controllable deceleration. If your brake pads are thin or contaminated, the caliper piston must travel further and harder to press the pad against the disc, potentially overheating components and damaging the rotor. Worn-out pads could cause metal-to-metal contact, destroying rotor surfaces and leading to costly repairs. For both new and seasoned riders, keeping up with brake pad replacements can make the difference between a close call and a crash. “Your motorcycle brake pads are the front line of your safety—learn the signs before you ride.” – Industry Expert The Role of Motorcycle Brake Pads in Safe Riding At the core of every dependable motorcycle brake job lies the humble brake pad. Each pad consists of a friction material bonded onto a metal backing plate, designed to press against your brake disc when the brake lever or pedal is applied. This friction is what allows your motorcycle brake system to slow or stop the bike safely and smoothly. Pads suited to your riding conditions—whether organic pads for daily commutes or sintered pads for high-performance needs—determine not only your stopping distance, but also the progressive feel and control of your brakes. Functioning as the critical interface in your brake caliper, the brake pads must absorb heat and dissipate energy efficiently. Over time, the friction material wears down, reducing effectiveness, especially as contaminants from the road or worn hardware decrease performance. For every type of motorcycle brake system, keeping a sharp eye on pad thickness and wear not only saves money down the road but makes each ride safer, ensuring your ability to stop when it matters most. Warning Signs: When to Consider Motorcycle Brake Pad Replacement Knowing the warning signs of worn pads can prevent damage to your motorcycle brake caliper and rotor. If you hear a squealing, screeching, or grinding noise during braking, it’s likely the brake pad friction material is low and the wear indicator is contacting the rotor. A reduced brake lever response, increased stopping distances, or a spongy feel to the lever or pedal signal that your pads could be too thin to perform effectively. Visual inspection is just as important—look for grooves, cracks, or discoloration on the pads and surface of the rotor. If you see uneven pad wear or oil and debris embedded within the friction material, it’s time for an immediate pad replacement. Ignoring these symptoms could lead to a more expensive brake job or dangerous loss of stopping power while riding. What You'll Learn About Motorcycle Brake Pad Replacement Fundamentals of how brake pads work in your motorcycle brake system Necessary tools and preferred safety gear for handling brake pads A comprehensive motorcycle brake pad replacement process Inspection tips to prolong your motorcycle brake pads’ lifespan Common mistakes to avoid during motorcycle brake pad replacement Essential Tools and Safety Gear for Motorcycle Brake Pad Replacement Basic toolkit: wrenches, screwdrivers, pliers Jack or motorcycle lift for stable access Protective gloves and eyewear Brake cleaner and lint-free cloths for brake pad handling Tools/Supplies Function Wrenches Removing caliper bolts Brake Cleaner Decontaminating rotor and pads Gloves, Eye Protection Safety during brake pad replacement Step-By-Step Motorcycle Brake Pad Replacement Process 1. Preparing to Replace Your Motorcycle Brake Pads Preparation is an essential step before starting any motorcycle brake pad replacement job. Park your motorcycle on a stable, level surface and use a jack or motorcycle lift to secure it upright. Gather your basic toolkit — including the necessary wrenches or sockets for your specific bike, screwdrivers, pliers, and a can of brake cleaner. Don’t forget to wear protective gloves and safety eyewear to prevent injuries from debris, brake fluid, or metallic dust. Place lint-free cloths nearby for cleaning the caliper, rotor, and your hands as you work. Before removing any parts, consult your motorcycle’s manual for instructions specific to your make and model. Identify the brake caliper and confirm the correct pad type: sintered pads, semi-sintered, or organic pads may differ in installation. Taking site photos of the assembly beforehand (just like a photo by Ari Henning or other mechanic pros) can help you reassemble everything correctly later. Efficient preparation is the backbone of a safe, successful brake pad replacement. 2. Removing Old Brake Pads Safely After setting up, locate your brake caliper and remove the caliper bolts with the appropriate wrench. Support the caliper so it doesn’t stress the brake line (never let it dangle from the hose). Carefully extract the retaining pin or spring plate—pay attention to the order and orientation, as this retaining hardware must go back exactly as found to ensure proper performance. Once pins are clear, slide the old brake pads out, noting their position relative to the caliper piston and retaining bracket. It’s crucial not to damage the caliper piston or seals in this process. If your bike has a master cylinder with a reservoir cap, open the cap slightly to relieve pressure but avoid introducing debris. As you remove the worn pads, look for uneven wear, embedded grit, or loss of friction material. Using a brake cleaner and a cloth, wipe the inside of the caliper and ensure all areas are free of dust and contamination. Removing old pads methodically prevents damage to the caliper pistons and makes fitting the new pads more straightforward. 3. Inspecting Your Motorcycle Brake and Brake Pads With the old brake pads out, take time to closely examine the friction material, wear indicators, and any defects. Compare the used pads with new replacements, looking for thinning, cracking, or heat discoloration—these are signs the pads have exceeded their lifespan and may have compromised the rotor’s surface. Inspect the caliper piston for smooth extension and retracting movement; consider carefully cleaning the caliper to remove built-up grime. Assess the brake disc or rotor for grooves, scoring, or blue spots that suggest overheating. Check the retaining hardware and ensure all parts, like threaded pins or spring plates, are undamaged. Confirm that fluid level in the master cylinder is adequate but never overfilled; this is especially important when compressing caliper pistons to create space for thicker, new pads. An attentive inspection not only prolongs the life of your new pads but also enhances your motorcycle brake system’s reliability. 4. Installing New Motorcycle Brake Pads Correctly Before fitting new brake pads, double-check for cleanliness—any grease or dirt on pad surfaces can impair friction or lead to noise. Compress the caliper piston gently using a pad spreader, C-clamp, or the old pad and a large flat screwdriver. Align new pads as per your earlier site photo or manual, ensuring the friction material faces the rotor and that all shims or spring plates are in place. Slide new pads into the caliper, reinstall the retaining pin or threaded pin, and torque all bolts to manufacturer specifications. Reattach the caliper to the mounting bracket, again using factory torque settings—improper installation could reduce braking performance and create a serious hazard. Confirm that the brake lever moves freely and returns smoothly after each squeeze. This care guarantees your fresh pads settle in correctly, maximizing stopping power. As you work through the brake pad replacement process, it's also important to consider how seasonal changes can impact your motorcycle's braking performance and overall maintenance needs. For practical advice on adapting your care routine throughout the year, check out these seasonal bike care secrets every rider must know to keep your ride in top condition no matter the weather. 5. Testing Your Brake Pads After Installation After brake pad replacement, it’s essential to bed in your new pads to achieve optimal braking performance and avoid brake fade. Reinstall the wheel if removed, and before your first ride, pump the brake lever several times to bring the pads into contact with the rotor, checking for proper resistance. Roll the bike forward and engage the brakes gently to ensure the caliper engages smoothly. On your test ride, follow the 30 30 30 rule: accelerate to 30 mph, apply the brakes moderately 30 times, allowing at least 30 seconds between stops for cooling. This process helps embed the new friction material onto the rotor for consistent, progressive feel. Monitor the system for any noise, sponginess, or vibration. Address issues immediately, as overlooked installation errors can lead to brake job failure or pad and rotor damage. Motorcycle Brake Pads Maintenance Tips and Longevity How frequent checks maximize your brake pad lifespan Tips for preventing premature motorcycle brake pad wear Best practices for cleaning and maintaining your brake pads Frequent inspections—at least every 5,000 miles or before long trips—are crucial for maximizing the durability of your motorcycle brake pads. Check pad thickness and the surface for embedded debris. Cleaning the caliper and rotor during each brake job or tire change keeps your brake system free of contaminants that can shorten pad life. Avoid harsh braking whenever possible, as aggressive use generates heat and can speed up wear. Select pads best suited for your riding style and environment: organic pads offer quieter braking and smoother feel in urban settings, while sintered pads or semi sintered pads excel in high-load or sport scenarios. Always handle pads with clean gloves to prevent oils from contacting the friction material. Maintain proper fluid levels, check retaining hardware for corrosion, and ensure the caliper piston operates freely for longer brake component life. People Also Ask: Your Motorcycle Brake Pad Replacement Questions How often should I change motorcycle brake pads? Motorcycle brake pad lifespans vary—inspect every 5,000 to 10,000 miles or as your motorcycle brake manufacturer recommends. What is the 30 30 30 rule for brakes? This refers to gently applying your new brake pads at 30 mph, for 30 times, letting them cool for 30 seconds between each use to bed them properly. Are motorcycle brake pads easy to change? With proper tools and guidance, motorcycle brake pad replacement is manageable for most riders with basic mechanical skills. Does O'Reilly's carry motorcycle brake pads? Some O'Reilly Auto Parts locations may stock motorcycle brake pads, but check specific store availability or consult a motorcycle-specific retailer. Common Mistakes to Avoid During Motorcycle Brake Pad Replacement Neglecting to properly torque caliper bolts after working with brake pads Touching the surface of new brake pads with greasy hands Failing to inspect rotors and caliper condition along with motorcycle brake pads Mistake Impact Improper installation Reduced braking performance Ignoring pad wear indicators Potential safety hazard Skipping rotor inspection May damage new brake pads Key Takeaways for Motorcycle Brake Pad Replacement Routine motorcycle brake pad checks safeguard your safety Correct motorcycle brake pad replacement ensures peak performance Always follow manufacturer guidelines during any brake pad replacement FAQs: Further Insights on Motorcycle Brake Pad Replacement How do I know if my motorcycle brake pads need replacing? Check your brake pads for thinning friction material, squealing noises, or longer stopping distances. If the pad thickness is less than 2–3 mm or you notice uneven wear, it's time for a replacement. What are the signs of worn motorcycle brake pads? Common signs include squeaking or grinding noises while braking, a spongy or unresponsive brake lever, vibration during braking, or visible metal on the pad surface. Any of these signals mean immediate attention is required to maintain safe braking performance. Can worn brake pads damage other motorcycle brake components? Yes, riding with worn pads can lead to metal-on-metal contact, damaging the rotor and potentially the brake caliper piston. This can result in much higher repair costs and safety risks. Should I replace front and rear motorcycle brake pads at the same time? Not always—check each set independently. Pads may wear differently based on riding style and braking habits. Replace them as needed, but always inspect both front and rear during maintenance. Contact the Experts for Motorcycle Brake Pad Replacement Call Nasty Performance Motorcycle Shop Today: 847-458-4858 Don’t leave your safety to chance—get your motorcycle brake pads checked or replaced by trusted professionals. Ride safe! Mastering brake pad replacement is a vital skill for every rider, but true motorcycle care goes beyond just the brakes. If you’re ready to elevate your maintenance routine and protect your investment year-round, discover how proactive seasonal care can make a difference. Explore essential seasonal bike care strategies that help you anticipate issues before they arise, extend the life of your components, and ensure your motorcycle is always ready for the next adventure. Take the next step in your maintenance journey and unlock the secrets to confident, all-season riding.

Expert Tips for Motorcycle Coolant Flushing

Did you know that one in three motorcycles suffering from engine overheating could have prevented the issue with regular motorcycle coolant flushing? Many riders overlook this simple maintenance task, yet it can be the difference between effortless rides and unexpected roadside breakdowns. In this comprehensive guide, you’ll uncover why proper coolant system care is crucial, learn to spot the signs your cooling system needs attention, and get step-by-step instructions to safely flush your motorcycle coolant—ensuring reliability for every journey. Why Motorcycle Coolant Flushing Is Crucial for Your Cooling System “Neglecting regular motorcycle coolant flushing can lead to overheating, costly repairs, and system failure—protect your cooling system with scheduled maintenance.” – Motorcycle Maintenance Expert Keeping your motorcycle’s cooling system in prime condition should be a top priority for every rider. Regular motorcycle coolant flushing is critical because it removes old, contaminated coolant—and with it, any scale, corrosive deposits, or debris—helping prevent water pump and gasket failures. When motorcycle coolant isn't flushed out on time, the resulting buildup can reduce the efficiency of your radiator fan and impairs the boiling point stability, which raises the risk of engine overheating. The coolant system is much more than a simple collection of hoses and fluids; it’s a lifeline that regulates temperature, preserves essential engine components, and keeps everything running at peak performance. Ignoring scheduled coolant changes places unnecessary strain on your reservoir tank and water pump. Flushing your coolant system at recommended intervals minimizes risks and ensures your bike’s performance stays uncompromised, so you can enjoy a smooth, worry-free experience every ride. Extend engine lifespan Prevent overheating in your cooling system Maintain peak engine performance Remove harmful deposits from the coolant system What You'll Learn in This Motorcycle Coolant Flushing Guide This article leaves no stone unturned for your motorcycle coolant flushing needs. Every rider, from DIY beginners to seasoned cruisers, will find actionable insights and real-world tips to keep your cooling system and coolant system running at their best. Each section dives deep, offering not just procedures but best practices honed by professionals, including how to select the ideal coolant types and avoid mistakes that could cost you in the long run. How motorcycle coolant flushing keeps your cooling system running efficiently Best practices for selecting and using distilled water and fresh coolant Step-by-step guide to flush the system Common mistakes to avoid during motorcycle coolant flushing Insights on coolant types suitable for motorcycles As you focus on maintaining your motorcycle’s cooling system, it’s equally important to consider how seasonal changes can impact your bike’s overall health. For a deeper dive into preparing your motorcycle for different weather conditions and ensuring year-round reliability, explore these seasonal bike care strategies every rider should know. Understanding the Motorcycle Coolant System How the Motorcycle Cooling System Works The heart of your motorcycle’s engine health lies in the coolant system. This system is made up of several main components: the radiator, water pump, hoses, reservoir tank, thermostat, and radiator cap. The radiator absorbs and dissipates heat, while the water pump circulates coolant throughout the engine, drawing excess warmth away from critical moving parts. When running, the temperature gauge monitors heat levels, and the radiator fan kicks in if the heat rises too high—even on hot days in traffic. Coolant is a special liquid blend—often a mixture of distilled water, ethylene glycol, or propylene glycol—that prevents freezing and boiling in the cooling system, maintaining the engine cool at all times. The filler neck is the access point for adding coolant, but it’s essential that only the recommended ratio of water and coolant is used. Regular flushing is necessary because, over time, even the best fluids break down and accumulate grime, lowering their effectiveness and putting your engine at risk of overheating or even major mechanical failure. Main components of the cooling system Role of coolant in temperature regulation Why flushing the system is necessary Common Problems Prevented by Motorcycle Coolant Flushing Routine motorcycle coolant flushing combats several common issues that can develop as your bike racks up miles. The most significant are corrosion and scale buildup. Contaminants in the old coolant slowly erode metal parts—particularly around the water pump, radiator core, and gasket seals. This corrosion can create leaks or blockages, hindering the coolant’s flow and causing the engine’s temperature to spike. Failure to properly flush the system can also result in destructive buildup around the drain bolt and cause water pump or gasket failures. Small leaks or improper coolant type can lead to chronic overheating, forcing the engine to work harder to remain cool. Persistent issues here might even demand expensive repairs or replacement parts. By adopting a scheduled coolant maintenance routine, you’ll minimize the risk of dramatic mechanical breakdowns and preserve the life and performance of your ride. Corrosion and scale buildup Water pump and gasket failures Coolant leaks and overheating Coolant Types Explained for Motorcycle Coolant Flushing Before you flush your system or reach for a bottle of fresh coolant, it’s vital to understand the range of coolant types available and which is right for your bike. Traditional coolants typically contain ethylene glycol and require regular replacement, while long-life modern coolants may be based on advanced formulas that protect against corrosion and maintain the correct boiling point. Premixed coolants are formulated with distilled water, making them ready to use out of the bottle, whereas concentrates must be diluted before use. If you’re ever unsure whether to use water vs. premixed coolant, check your owner’s manual or consult with a mechanic. As a golden rule, never use tap water—it contains minerals that can cause scale deposits and degrade your radiator core. Distilled water, on the other hand, ensures cleanliness and compatibility. Always match your motorcycle’s requirements for coolant types, as using the wrong formula can lead to premature component wear or system blockage, endangering your cooling system. Differences between traditional and long-life coolants When to use water vs. premixed fresh coolant Choosing the right coolant type for your model Comparison of Popular Motorcycle Coolant Types Coolant Type Features Pros Cons Compatibility Traditional Ethylene Glycol Basic protection, requires mixing with distilled water Cost-effective; widely available Shorter lifespan; toxic Most older and some modern bikes Long-Life Coolant (OAT/HOAT) Advanced corrosion inhibitors; pre-mixed or concentrate Extended interval; less frequent changes Higher cost; potential incompatibility Most modern motorcycles Propylene Glycol Based Low toxicity, environmentally friendly Safer for pets & kids; good performance Higher price; not always OEM-approved Check compatibility with your model Essential Tools and Supplies for Flushing the System Before you embark on your coolant system maintenance, gathering the right tools and supplies is crucial for a smooth, effective flush. Start with distilled water, the backbone for rinsing out contaminants from your bike’s cooling system. Never substitute tap water, as it introduces minerals that can scale up your system or reduce efficiency. Your choice of fresh coolant is equally important; opt for a type that matches your bike’s requirements for chemical protection and boiling point control. It pays to research whether your engine is better suited for ethylene glycol, propylene glycol, or a proprietary blend recommended by your motorcycle’s manufacturer. Having the right gear also means using clean funnels for pouring coolant and distilled water, a sturdy drain pan to catch old fluid, protective gloves, and safety glasses. Make sure you have access to the drain bolt or drain plug, and check that your garage floor is prepared to deal with any spills. Organizing your supplies keeps the job straightforward and minimizes the risk of missing a vital step or contaminating your coolant system during maintenance. Distilled water for rinsing Fresh coolant for refill Funnels, pans, and safety protection Step-by-Step Motorcycle Coolant Flushing Process Proper motorcycle coolant flushing involves a series of carefully executed steps to ensure your cooling system is spotless, free from harmful deposits, and ready for a fill of fresh coolant. Before starting, take your time to prepare, as safety and thoroughness are key. Preparation: Ensuring Safety and Readiness Let the engine cool completely before opening any part of the coolant system—the pressurized hot coolant can cause serious burns if released too soon. Park your bike on a level surface and make sure the ignition is off. Gather all your necessary tools: distilled water, the right fresh coolant for your motorcycle, funnels, a drain pan, and sturdy gloves. Keep a rag handy for small spills and a bin for used fluids. Double-check that all parts, including the drain bolt and filler neck, are easily accessible and the area is clean and free of clutter. This preparation paves the way for a safe, efficient flush of your cooling system. Let the cooling system cool down Gather the necessary tools and distilled water Draining the Old Fluid from the Coolant System First, access the drain bolt or drain plug, usually located at the lowest point on your cooling system—often on the water pump or near the bottom of the radiator. Place your drain pan directly underneath to catch the old coolant as it flows out. Remove the radiator cap to relieve any residual pressure and allow air in for a more complete drain. Carefully unscrew the drain bolt and let the old coolant run into the pan. Avoid skin contact and keep the fluid away from pets and children, as it’s toxic. Once draining is complete, inspect the radiator cap and the inside of the reservoir tank for residue or corrosion; these are early signs your coolant system needs close attention during the flush. Locating the drain bolt Safely disposing of used coolant How to Flush the System Using Distilled Water After draining, reinstall the drain bolt and pour distilled water into the radiator or reservoir tank up to the fill line. Replace the radiator cap and start the engine, letting it idle for several minutes so the water circulates, solubilizing any lingering contaminants. Turn the engine off, let it cool, and drain the distilled water from the system again. Repeat this process until the liquid draining out is clear—usually two or three flushes does the trick. This step ensures no old coolant, mineral buildup, or air bubbles remain, setting the stage for your new coolant to provide maximum protection. Pouring distilled water through the coolant system Flushing until the water runs clear Refilling with Fresh Coolant and Bleeding the System With the system fully flushed and the drain bolt back in place, slowly pour the recommended fresh coolant (matching type and concentration for your motorcycle model) into the filler neck until the coolant level reaches the fill line. Reinstall the radiator cap securely. Next, start the engine and let it idle to circulate the fresh coolant, periodically squeezing coolant hoses to help dislodge any remaining air bubbles trapped in the cooling system. To properly bleed the system, you may need to loosen the bleeder bolt or run the engine with the radiator cap off (if your manual allows; always check). Once the coolant system stops bubbling and the level stabilizes, top up as needed. This critical bleeding step prevents overheating and maintains the right boiling point for your engine. Selecting the right fresh coolant Bleeding air pockets from the cooling system For those who want a visual overview, check out our step-by-step walkthrough covering draining, flushing, refilling, and bleeding the system. This demonstration highlights each stage with close-ups on hands, tools, and key components in a neutral garage setting. Post-Flushing Checklist for Your Cooling System After completing the flush, it’s essential to double-check your work to ensure the cooling system is leak-free and operating efficiently. Start by visually inspecting all hoses, the radiator cap, and connection points for leaks. Next, check the coolant level in the reservoir tank and add more coolant if it dips after a test ride. Run the engine and monitor the temperature gauge to ensure it stays within the safe range and that the radiator fan kicks in as needed. Keeping the system balanced helps prevent overheating and guarantees long-term engine protection. Checking for leaks in the coolant system Proper coolant level balance Verifying engine temperature stability Mistakes to Avoid During Motorcycle Coolant Flushing Even experienced riders can slip up during a coolant system flush. A major error is using tap water, which deposits minerals that degrade your radiator core and water pump over time—always opt for distilled water. Skipping the bleed step can leave dangerous air bubbles in your cooling system, disrupting heat transfer and inviting overheating. Another common pitfall is mixing incompatible coolant types; blending propylene glycol and ethylene glycol formulas can trigger chemical reactions that damage seals and passages in the coolant system. Take the time to research your model’s requirements, gather the right supplies, and follow each step without shortcuts to guarantee you get the longest possible life from your engine. Using tap water instead of distilled water Skipping system bleed steps Mixing incompatible coolant types How Often Should You Perform Motorcycle Coolant Flushing? “Regular coolant flushing, recommended every two years or as per your owner’s manual, prevents breakdowns and maximizes your engine’s reliability.” – Certified Motorcycle Mechanic The ideal interval for motorcycle coolant flushing depends on your bike’s make, model, riding conditions, and manufacturer recommendations. For most motorcycles, experts suggest flushing the coolant every two years or after a set mileage—whichever comes first. Hard-use conditions, like frequent stop-and-go traffic, cold climates, or high-performance riding, may require more frequent attention. Look for signs like a rising temperature gauge, visible sediment in the coolant, or reduced radiator fan effectiveness as clues that your system needs service sooner. Checking your owner’s manual is vital, as some modern coolants are formulated for even longer service lives. Always keep track of your maintenance schedule to ensure maximum reliability. Factors affecting coolant change frequency Signs your motorcycle is due for flushing People Also Ask About Motorcycle Coolant Flushing Do you need to flush the coolant on a motorcycle? Flushing the coolant system is necessary to remove contaminants and retain performance; neglect can lead to overheating and damage. Regular cleaning ensures the radiator cap, water pump, and filler neck are free of buildup, helping prevent costlier future repairs. How much does a motorcycle coolant flush cost? The cost varies depending on whether you do it yourself or use a shop and on your bike’s make and model; call for a precise quote. DIY flushes require basic supplies (distilled water and fresh coolant), while a full professional service often includes additional checks on the coolant system and cooling system integrity. How do I flush motorcycle coolant? Draining old coolant, flushing with distilled water, and refilling with fresh coolant are essential—refer to our detailed step-by-step process above. Make sure to bleed air bubbles thoroughly and always dispose of used fluids responsibly to protect your bike and the environment. How often should you change the coolant in a motorcycle? Most manufacturers advise a coolant flush every two years, but consult your manual or mechanic for specific intervals. Factors like riding environment, coolant types, and model recommendations may impact how often to service your system. Still facing issues after a flush? Our troubleshooting video covers diagnosing persistent problems like coolant leaks, air bubble formation, or radiator fan failure after maintenance, ensuring you spot and solve any cooling system troubles fast. FAQs About Motorcycle Coolant Flushing Which coolant types are safe for my bike? Always check the owner’s manual for approved coolant types, and only use those recommended for your engine materials and climate. Can I reuse coolant after flushing the system? No, always replace old coolant with fresh coolant. Used fluids lose their effectiveness and may contain debris that harms the cooling system. What if my cooling system still overheats after flushing? Check for leaks, thermostat issues, or trapped air bubbles. Persistent overheating requires a professional diagnosis—do not ignore the warning signs. Is flushing DIY or shop-only? With the right instructions and tools, many riders can complete motorcycle coolant flushing at home. However, major issues or uncertainty may require a visit to the shop for safety. Key Takeaways for Proper Motorcycle Coolant Flushing Never skip regular motorcycle coolant flushing Always use distilled water and fresh coolant Understanding your coolant system and cooling system ensures longevity Seek expert help if unsure about coolant types or procedures Ready for Your Next Motorcycle Coolant Flushing? “A well-maintained cooling system is the heart of your motorcycle’s reliability—make coolant flushing a regular habit.” Call Nasty Performance Motorcycle Shop Today: 847-458-4858 Conclusion: Don’t let your next ride be interrupted by a minor oversight. Stay proactive with regular motorcycle coolant flushing, follow our expert-backed checklist, and enjoy peace of mind on every journey! Maintaining your motorcycle’s cooling system is just one piece of the puzzle when it comes to long-term bike health and performance. If you’re ready to take your maintenance routine to the next level, discover how a holistic approach to seasonal care can protect your ride from the elements and keep it running smoothly all year long. Uncover expert advice and practical tips in our comprehensive guide to seasonal bike care secrets every rider must know. By integrating these strategies with your regular coolant flushing, you’ll ensure your motorcycle is always ready for the road—no matter what the season brings.

Terms of Service

Privacy Policy

Core Modal Title

Sorry, no results found

You Might Find These Articles Interesting

T
Please Check Your Email
We Will Be Following Up Shortly
*
*
*