Add Row
Add Element
cropper
update

Nasty Performance ~ 847-458-4858 

update
Add Element
  • Blog Home
  • Categories
    • Motorcycle Maintenance
    • Riding Tips & Preps
    • Safety & Inspection
    • Customizations & Upgrades
    • DIY Motorcycle Repairs
    • Motocycle Audio Systems
    • Motocycle Seasonal Care & Storage
    • Engine, Electrical Performance
  • Bike Night
  • Nasty Performance Motorcycle Shop
January 20.2026
1 Minute Read

Restore Performance with Motorcycle Carburetor Cleaning Service

Did you know that up to 80% of motorcycle performance issues are directly related to a clogged or dirty carburetor? Whether your bike struggles to start, idles rough, or lacks the responsive punch it once had, the culprit is often lurking within your carburetor. If you want a solution that transforms your ride—from frustrating engine stutters to silky-smooth acceleration—a professional motorcycle carburetor cleaning service is your first and best step. This detailed guide will show precisely why cleaning your motorcycle carb is the ultimate way to restore top-tier engine performance.

Unlock Optimal Power: Why Motorcycle Carburetor Cleaning Service Matters

  • Startling Statistic: Did you know that up to 80% of motorcycle performance issues are directly related to a clogged or dirty carburetor?

For most riders, peak engine performance is non-negotiable. But if your bike’s throttle feels sluggish or you’re constantly dealing with hard starts, the hidden problem often lies in a neglected carburetor. Motorcycle carburetor cleaning service goes far beyond surface cleaning—it's the intricate process that ensures your motorcycle carb delivers the exact air-fuel mixture your engine craves. Dirt, varnish, and buildup in pilot jets, needle valves, and fuel lines can choke performance, cause fuel economy dips, and even damage sensitive rubber parts. Routine professional cleaning eliminates internal blockages, optimizing gas flow and restoring that crisp, powerful response you expect from your ride.

In fact, poor responsiveness, excess emissions, and rough idling are all clear warning signs that your carburetor needs expert attention. A proper motorcycle carburetor cleaning isn’t just about getting your engine started—it’s about ensuring safe, reliable rides and extending your engine’s lifespan. As fuel system deposits build up over time, only specialized ultrasonic equipment and skilled hands can tackle the stubborn gunk and finely tuned passages of the modern carb. Don’t leave your performance to chance; trust in proven cleaning methods to keep your bike’s heartbeat strong.

Clean vintage motorcycle engine with shiny, well-maintained carburetor, motorcycle carburetor cleaning service outdoors, crisp silver-blue color, mechanic hand adjusting, photorealistic texture, garage tools blurred in background

What You'll Learn About Motorcycle Carburetor Cleaning Service

  • What is included in professional motorcycle carburetor cleaning service

  • How motorcycle carburetor cleaning service restores performance

  • When and why your motorcycle carb needs cleaning

  • Cost, benefits, and frequently asked questions

  • Comparing DIY vs. professional motorcycle carburetor cleaning

Every rider deserves to understand what goes into a motorcycle carburetor cleaning service, why it’s essential, and how it can help avoid costly repairs down the road. In this article, you’ll uncover everything from the critical features of a pro-grade service, the technology used (like ultrasonic and sonic cleaners), to the advantages over generic carb cleaner sprays. We’ll break down expert insights so you know exactly when your motorcycle carb needs attention, how often to clean the carburetor, and what you should expect to pay at a reasonable price—including the difference between single and multi-carb setups.

We’ll also provide an honest look at DIY vs. professional servicing, plus real testimonials direct from our customers at Nasty Performance. Whether you own an older small engine carb or a high-performance sportbike, these tips will help every rider make smarter decisions for their interests and personal maintenance style.

For those interested in keeping their motorcycle in top shape throughout the year, understanding seasonal maintenance routines can be just as crucial as carburetor care. Discover practical strategies for protecting your bike in every season by exploring essential seasonal bike care secrets every rider should know.

Understanding Motorcycle Carburetor Cleaning Service: Features and Process

What Happens During a Motorcycle Carburetor Cleaning Service

  • Visual inspection of motorcycle carb

  • Disassembly and ultrasonic cleaning

  • Jet and passage clearing

  • Reassembly and synchronization

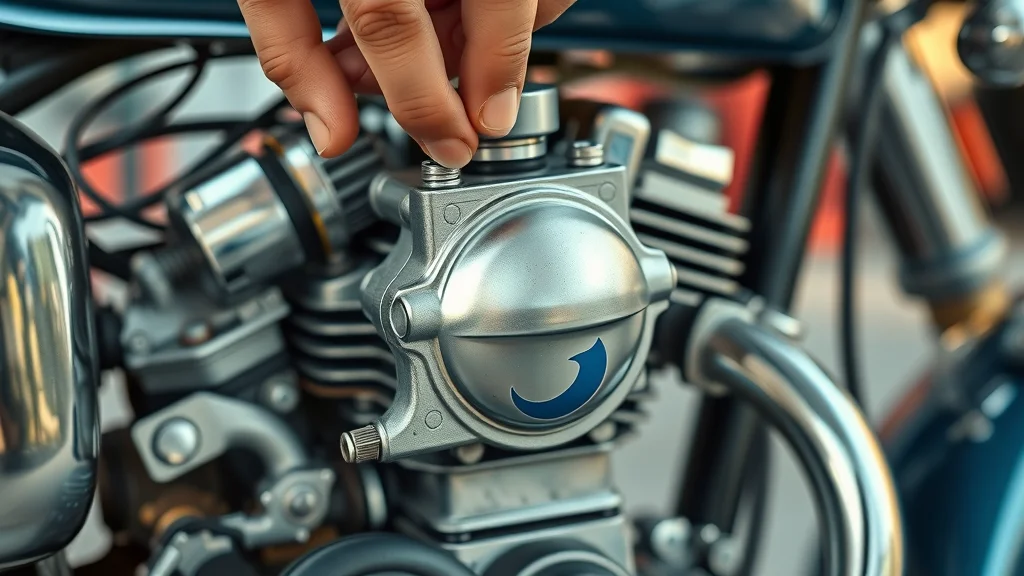
When you book a motorcycle carburetor cleaning service, professional attention starts with a visual inspection, checking for leaks, worn rubber parts, and evidence of dirty carburetors or clogged jets. An experienced technician then carefully removes and disassembles the motorcycle carb, noting each jet, needle valve, and pilot jet. Using high-powered ultrasonic or sonic cleaners, the service eliminates internal residues burned into metal surfaces, especially in the intricate passages and around the needle valve seat.

After cleaning and bench inspection, every passage is cleared with compressed air or specific carb cleaner solutions. Reassembly is performed with meticulous attention to detail, ensuring the correct placement of needle valves, gas tank connections, and fuel lines. The finished cleaning includes synchronization (for multi-carb systems) so each cylinder receives an even mixture. This process returns your engine carb to its original glory—ensuring consistent starts, smoother idle, reduced emissions, and a marked improvement in overall engine performance, all in support of your interests and personal riding enjoyment.

Professional motorcycle mechanic performing carburetor cleaning service, disassembling motorcycle carb on workbench, photorealistic modern workshop, detailed engine carb components, organized tools

Key Features of Our Motorcycle Carburetor Cleaning Service

  • Expert technicians

  • Genuine parts

  • Fast turnaround

Our motorcycle carburetor cleaning service at Nasty Performance is powered by expert technicians who know small engine carb systems down to the last spring and seating ring. Every job is completed using industry-approved, genuine parts, ensuring the highest standards of safety and durability. We take pride in minimizing turnaround time—your motorcycle won’t sit idle for days. Instead, with a typical service taking just 1–2 hours, you’ll be back on the road quickly, with peace of mind that the job was done right.

A clean motorcycle carburetor is the heartbeat of a high-performing bike. – Lead Technician, Nasty Performance Motorcycle Shop

We acknowledge that your motorcycle is a valuable investment. Our service isn’t just about the cleaning—it’s about professional diagnostics, replacing worn gaskets or needle valve seat components, and ensuring your bike is truly ride-ready. Professional attention, fast service, and genuine parts make all the difference when it comes to reliable engine performance.

Top Benefits of Motorcycle Carburetor Cleaning Service

  • Restored throttle response

  • Improved fuel efficiency

  • Longer engine life

  • Smoother idle and starts

  • Reduced emissions

Routine motorcycle carburetor cleaning service provides a stack of immediate and long-term advantages. Firstly, it restores lively throttle response, letting you enjoy crisp, powerful acceleration on demand. You’ll also experience substantial improvements in fuel efficiency—the right air-fuel mixture reduces wasted gas and helps your engine performance stay consistent, mile after mile. Clean jets, passages, and a properly adjusted needle valve ensure your engine’s internal parts don’t have to fight gummed-up deposits, leading to a longer lifespan for every vital component.

What about cold starts and idling hiccups? A clean carb guarantees easy starts and stable idle, dramatically reducing annoying engine stalls and the frustration of multiple attempts just to get going. Most importantly, professional service supports better emission control. By preventing fuel leaks, misfires, and improper combustion, your bike runs cleaner—helping both your health and the environment. These benefits far outweigh the minor cost of regular cleaning and set you up for thousands of miles of worry-free riding, fully in support of the purposes explained by experienced riders and technicians alike.

Modern sport motorcycle on open road illustrating improved performance after carburetor cleaning service, vibrant color, rider enjoying smooth acceleration, photorealistic, scenic background

When Is Motorcycle Carburetor Cleaning Service Needed? Common Signs and Recommendations

  • Poor acceleration

  • Hard starts

  • Engine stalling

  • Backfiring or sputtering

  • Unusual fuel consumption

Wondering when to clean the carburetor? If your motorcycle carb starts showing signs of lagging power, hard starts, or odd sounds—like popping or backfiring—it’s likely overdue for service. These symptoms typically indicate blocked pilot jets, compromised needle valves, or deposits interfering with fuel line flow and the valve seat. Even subtle changes, such as an unexpected increase in fuel consumption, can signal partial blockages and dirt inside your motorcycle carburetor.

Stalling, stumbling acceleration, or the need to constantly adjust your throttle to keep the engine running all point toward dirty internal carb parts. If your gas tank has sat unused for extended periods, varnish and plug formation are inevitable, stressing the need for a deep chemical and sonic cleaner bath. For bikes stored each winter, a professional cleaning service is the best way to eliminate gum and debris from the fuel system and restore performance without risking damage to sensitive components or rubber seals.

How Often Should Motorcycle Carburetor Be Cleaned?

Regular motorcycle carburetor cleaning is recommended every 6,000–10,000 miles, depending on riding conditions and fuel quality.

The recommended interval for a motorcycle carburetor cleaning service usually falls between every 6,000 and 10,000 miles. However, the actual timeline may depend on factors like fuel quality, frequency of use, and storage methods. If your riding interests and personal habits include long periods with the bike in storage, or if you use lower-quality gas, it’s smart to err on the side of caution and schedule a cleaning sooner.

Remember, waiting for issues to appear might seem cost-savvy, but dirty carburetors can cause expensive engine damage, lead to excessive wear on your needle valve seat and pilot jets, and even require full rebuilds if neglected. Regular carb cleaning ensures your engine carb stays healthy, your throttle is always responsive, and your fuel consumption remains efficient. This proactive approach saves time, frustration, and money in the long run while supporting your bike’s performance and reliability.

Motorcycle dashboard and odometer showing mid-range mileage, an indicator of when to schedule carburetor cleaning service, rider’s hand on throttle, photorealistic focus, soft evening light

Cost of Motorcycle Carburetor Cleaning Service: Value for Your Investment

Service options

Estimated Price Range

Single carb cleaning

$70 – $120

Multi-carb cleaning

$120 – $250

Add-on tuning

$40 – $80

Ultrasonic deep clean

$50 – $100 extra

Pricing for a professional motorcycle carburetor cleaning service can be based on the number of carbs, level of cleaning needed, and whether extras like add-on tuning are required. For most modern and classic motorcycles, a single carburetor cleaning falls in the reasonable price range of $70–$120. Multi-carb setups—common in high-performance or vintage bikes—cost more, reflecting the added labor to clean and synchronize each unit. Deep ultrasonic cleaning, vital for tackling severe deposits or after extended storage, carries an additional charge, as does in-depth adjustment and tuning.

This investment pays dividends in smoother rides, better fuel economy, and avoiding high repair costs that come from neglect. Always ask for a detailed breakdown so there are no surprises, and make sure your chosen shop uses genuine parts, especially when replacing needle valves, valve seats, and rubber gaskets. Trustworthy service shops will have set turnaround times and transparent forms you submit for tracking work and warranty coverage, as explained in this notice.

Professional vs. DIY Motorcycle Carburetor Cleaning Service: Pros and Cons

Aspect

Professional Service

DIY

Skill level

Expert

Intermediate

Tools needed

Specialized

Basic

Time required

1–2 hours

3–5 hours+

Warranty

Yes

No

When deciding between a professional motorcycle carburetor cleaning service and DIY, carefully weigh your interests and personal experience. Professionals bring years of technical training, the right chemicals (sonic cleaner, ultrasonic baths), and tools such as carb synchronizers that ensure your fuel line, pilot jets, and needle valves are precisely cleaned and set. Fast turnaround and warranty coverage mean peace of mind—and no stress if something goes awry.

DIY is an option for handy riders with the right instructions and patience, but common pitfalls include damaging rubber parts, improper cleaning of the valve seat, or missing residual gunk that only professional sonic cleaner technology can remove. Unless your activity on this service is born from lots of prior experience, entrusting your engine carb and performance to the pros is often the smartest and safest way forward, as your information about your activity will show a marked improvement post-service.

Split image: Professional mechanic using advanced tools vs. hobbyist with basic tools, both cleaning motorcycle carburetors, photorealistic, workshop and garage background

How the Motorcycle Carburetor Cleaning Service Works at Nasty Performance

  • Step 1: Inspection

  • Step 2: Carburetor removal

  • Step 3: Disassembly and cleaning

  • Step 4: Reassembly and adjustment

  • Step 5: Testing and final diagnostics

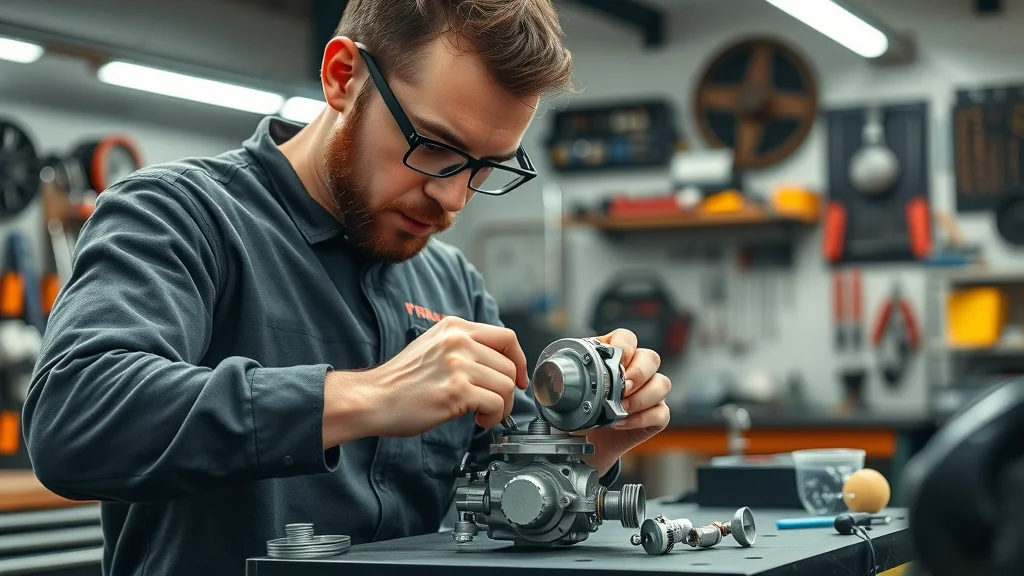
At Nasty Performance, every motorcycle carburetor cleaning service follows a proven workflow: We begin with a full inspection of the motorcycle carb and fuel system, identifying all symptoms and potential issues. Next, the carburetor is gently removed and disassembled by a skilled mechanic, with each jet, needle valve, and rubber seal catalogued for cleaned restoration. We use both ultrasonic and brake cleaner methods to ensure every internal surface and fuel passage is immaculate before careful reassembly.

Our specialists replace worn needle valve seat components as needed and set all jets and adjustments to manufacturer specs. Finally, post-cleaning, your engine carb undergoes comprehensive testing—measuring idle quality, throttle response, and emissions—so when you pick up your bike, it’s running at peak efficiency. Our commitment: trustworthy results, timely turnaround, and clear, informative forms you submit for post-service support.

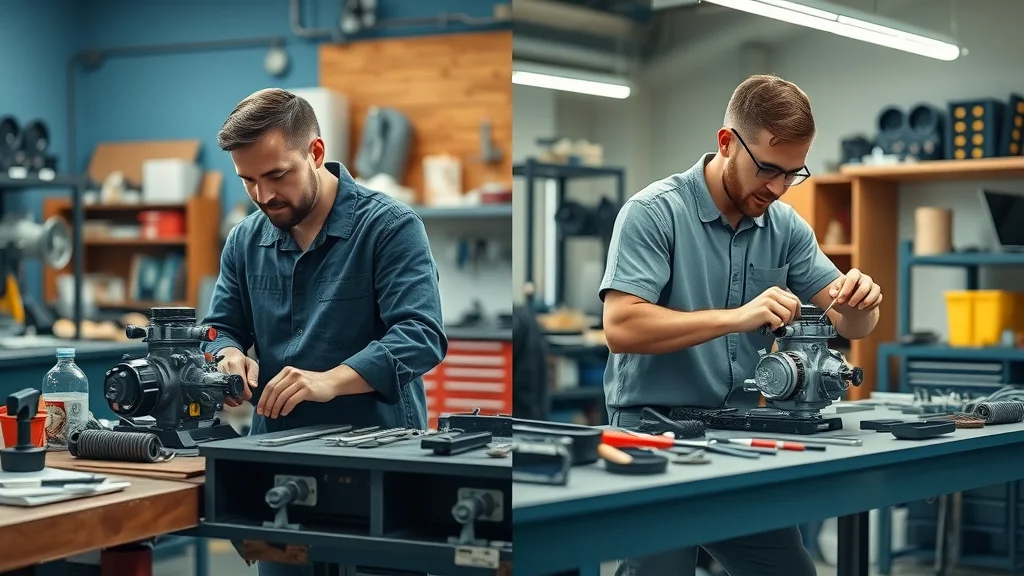
Watch our pro mechanic at Nasty Performance perform each step of the motorcycle carburetor cleaning service—inspection, removal, ultrasonic cleaning, reassembly, and engine testing—in a modern, organized workshop. See up-close why riders trust our expertise!

Customer Testimonials and Reviews for Motorcycle Carburetor Cleaning Service

"I noticed immediate throttle improvement after a motorcycle carburetor cleaning service at Nasty Performance!" – Satisfied Customer

Our customers often share glowing feedback after seeing the difference a comprehensive cleaning makes. Riders consistently mention smoother idle, easier starts, and restored fuel economy as immediate post-service benefits. These results demonstrate our support of the purposes explained throughout this guide—that regular carb maintenance is vital for every engine carb and for those who care about the longevity of their machines.

People Also Ask: Motorcycle Carburetor Cleaning Service

How much does it cost to have motorcycle carbs cleaned?

  • The cost for motorcycle carburetor cleaning service typically ranges from $70 to $250 depending on the number of carbs and level of cleaning required. Additional tuning or parts may incur extra costs.

How hard is it to clean a carburetor on a motorcycle?

  • Cleaning a motorcycle carburetor can be a challenging task, especially for multi-carb setups. It requires time, patience, and precision. Professional motorcycle carburetor cleaning services ensure thoroughness and avoid common DIY pitfalls.

How often does a motorcycle carburetor need to be cleaned?

  • On average, a motorcycle carburetor should be cleaned every 6,000–10,000 miles or whenever symptoms such as hard starting or poor performance arise.

Can you clean motorcycle carbs without removing them?

  • While some products claim to clean motorcycle carburetors without removal, the most effective motorcycle carburetor cleaning service involves disassembly and deep cleaning to access all buildup.

Comprehensive Motorcycle Carburetor Cleaning FAQ

  • Can dirty carbs damage your engine?

  • How long does a motorcycle carburetor cleaning service take?

  • Does cleaning the motorcycle carb improve fuel economy?

  • Is ultrasonic cleaning necessary?

Question

Short Answer

Can dirty carbs damage your engine?

Yes, it can lead to lean running and overheating.

How long does service take?

Typically 1–3 hours depending on the model.

Does cleaning the carburetor improve fuel economy?

Yes, it restores proper fuel flow.

Is ultrasonic cleaning necessary?

For severe buildup, it’s highly recommended.

Still have more questions? Call our experts at Nasty Performance—you’ll get trustworthy answers tailored to your bike and riding habits!

Key Takeaways: Motorcycle Carburetor Cleaning Service Essentials

  • Motorcycle carburetor cleaning service is vital for engine performance

  • Scheduled maintenance prevents costly repairs

  • Professional service provides the most reliable results

Satisfied motorcycle owner outside Nasty Performance Shop giving thumbs up to mechanic, clean engine visible, warm sunlight, photorealistic, autumn ambiance

Ready to Book? Call Nasty Performance Motorcycle Shop Today: 847-458-4858

Your engine deserves the best—schedule your motorcycle carburetor cleaning service and feel the instant difference. Call Nasty Performance Motorcycle Shop now at 847-458-4858 to restore your ride’s power and reliability!

Conclusion: Restore your motorcycle’s performance and ensure peak engine health with professional carburetor cleaning. Choose timely service, real expertise, and proven results—your next smooth ride starts here.

If you’re committed to keeping your motorcycle running at its best, don’t stop with carburetor maintenance alone. Proactive care throughout the year can make a world of difference in your bike’s longevity and reliability. For a deeper dive into expert tips on preparing your motorcycle for every season, check out these seasonal bike care secrets every rider must know. You’ll discover advanced strategies for storage, cleaning, and preventative maintenance that go hand-in-hand with a clean carburetor—ensuring your ride is always ready for the road ahead.

Engine, Electrical Performance

0 Comments

Write A Comment

*
*
Please complete the captcha to submit your comment.
Related Posts All Posts

Rev Up with Motorcycle Dyno Tuning: What You Need to Know

Ready to unlock up to 15% more horsepower from your motorcycle? Professional motorcycle dyno tuning isn’t reserved for the racetrack; it’s a critical service that transforms both smooth street rides and white-knuckle sport bikes. With expert calibration and real-time adjustments, dyno tuning uses science—not guesswork—to give you more bang for your buck every time you hit the throttle. Dive into this comprehensive guide and discover why smart riders everywhere demand more performance, reliability, and customized power from dyno tuning. Unlocking Motorcycle Performance: The Power of Motorcycle Dyno Tuning Did you know that professional motorcycle dyno tuning can boost your bike’s horsepower by up to 15%? Discover how dyno tuning transforms both street and race machines through science, precision, and expert calibration. Motorcycle dyno tuning optimizes your engine’s potential, improves throttle response, and safeguards engine health, making it a critical service for enthusiasts seeking maximum value and performance. Motorcycle dyno tuning is more than a buzzword—it’s the science-backed method for extracting every ounce of performance and reliability from your two-wheeled machine. Whether you ride a fuel injected or carbureted motorcycle, this real-time process measures your bike’s true horsepower and torque output—no more guessing or estimation. By using sophisticated equipment like a dynojet dyno , certified technicians customize your air/fuel ratios, ignition timing, and ECU parameters for your riding style, modifications, and goals. This expertise ensures not just maximum power , but also optimal throttle response and protection against potential engine damage—a perfect blend for riders demanding more excitement and peace of mind. What Motorcycle Dyno Tuning Delivers: Core Benefits and Value Maximized horsepower and torque Consistent fuel mapping for fuel injected bikes Cleaner throttle response and smoother acceleration Detection of engine or tuning issues before damage can occur Tailored setup for unique riding styles and modifications “Dyno tuning is not just about chasing numbers—it’s about unlocking the ideal balance of power, responsiveness, and reliability for every rider.” – Nasty Performance Technician When you invest in motorcycle dyno tuning , you’re investing in a total transformation of your bike’s dynamics. Maximized horsepower and torque mean not only better top-end speed, but also impressive mid-range punch and low-end grunt. For today’s fuel injected bikes, precise, consistent fuel mapping ensures each cylinder is firing at its best, regardless of modifications like a full exhaust or upgraded intake. The result? Smoother throttle response, cleaner acceleration, and tangible improvements every time you twist the grip. More importantly, a dyno tune allows expert technicians to detect hidden issues before they turn into costly repairs—catching fuel ratio imbalances, misfiring, or warning signs in spark plugs . These adjustments can save your engine from premature wear or catastrophic failure, delivering not just performance but long-term value and peace of mind. How Motorcycle Dyno Tuning Works: The Process Step by Step What is Dyno Tuning and Why is it Crucial? Overview of dyno tuning and the science behind measuring horsepower and torque Real-time analysis of air/fuel ratios, RPMs, and speed At its core, dyno tuning is about establishing a scientific baseline by measuring your bike’s output in a controlled environment. A specialized dynamometer—like the industry-standard dynojet dyno —engages the rear wheel and creates resistance while your bike goes through ramp runs and steady state tests. The dyno captures vital information: horsepower, torque, RPMs, air/fuel ratio , and even exhaust gas signatures. This objective data replaces outdated tuning-by-ear methods, making it the foundation for every precision adjustment that follows. Technicians use this detailed feedback to evaluate how your bike performs at wide open throttle as well as in everyday riding situations. Whether your ride is a high-strung sport bike or a daily commuter, dyno tuning highlights not just peak numbers, but also weaknesses in your current setup—missing horsepower, lean or rich fuel ratios , or uneven power delivery. This is the foundation for tailoring a tune that matches your personal interests and riding goals down to the finest detail. The Motorcycle Dyno Tuning Process Broken Down Initial assessment and safety check Baseline dyno run Air/fuel ratio and ECU adjustments Custom mapping and power optimization Final dyno reading and results report Typical Steps in Motorcycle Dyno Tuning Description Duration (Approx.) Initial Assessment Review bike condition, modifications, and goals. 15-30 min Baseline Dyno Run Capture stock performance data using ramp run and steady state tests. 15-20 min ECU & Air/Fuel Adjustment Live analysis and adjustment of fuel ratios and ignition timing. 30-60 min Custom Mapping Develop map tailored to modifications and rider preferences. 30-60 min Final Run & Review Confirm results, print power/torque graphs, check diagnostics. 15-30 min Comparison of baseline vs. tuned performance graphs The full cycle of motorcycle dyno tuning starts with assessing your bike and goals, whether it’s about maximizing your bang for your buck or adapting to a new full exhaust system . After confirming your bike is in good condition , technicians perform a baseline test and then make those all-important ECU flash and fuel ratio updates. Finally, you receive a side-by-side comparison: Click to see graph of your ride’s journey from stock to tuned! ECU Flash and Fuel Injected Motorcycle Dyno Services The Link Between Dyno Tuning, ECU Flash, and Fuel Injected Systems Importance of customized ECU flash for modern motorcycles How dyno tuning integrates with fuel injected engine mapping Achieving specific modulation in throttle responsiveness and power curves “A custom ECU flash through dyno tuning is the smartest upgrade you can make to your fuel injected motorcycle.” – Industry Expert Modern bikes—especially fuel injected and electronically controlled models—benefit most from marrying ECU flash services with precision dyno tuning . Unlike out-of-the-box settings that try to serve every rider, a custom flash lets you tweak parameters like traction control, RPM limiters, and throttle-by-wire systems . This dynamic synergy means you don’t just modify a component; you optimize the way every part of your bike works together under real-world data and riding conditions. For those with performance upgrades (think: full exhaust , air filters, cams), a custom ECU flash is critical. It lets you recalibrate your ride for those changes, correcting fuel and ignition maps so you avoid lean fuel ratios and ensure smooth wider open throttle transitions. The result? A bike that adapts perfectly to your personal interests —whether that’s daily city commutes or track-day domination. Unlocks specialized features: Traction control, RPM limiters, and throttle-by-wire adjustments Provides a dynamic solution for aftermarket installations (exhaust, air filters, cams) Choosing an ECU flash as part of your motorcycle dyno tuning package means your bike's engine management is truly tailor-made . It's not just about turning up the numbers—it’s about ensuring every service can be based on your specific hardware, riding style, and goals. This approach ensures maximum performance and more bang for your buck , while also safeguarding engine reliability . Comparing Motorcycle Dyno Tuning vs. Traditional Tuning Methods Real-time measurement vs estimation Benefits of precision tuning for both standard and performance motorcycles Method Precision Customization Typical Results Cost Comparison Dyno Tuning High (live data capture, steady state & ramp run) Extensive (custom maps, ecu flash, performance mods) 10-15% power gain, smoother throttle, engine diagnostics $$–$$$ Traditional (Carburetor/Manual) Low to Medium (rely on feel, trial & error) Limited (standard jetting, less suited for fuel injected) Minor gains, risk of imbalances, slower adjustments $–$$ A major advantage of modern motorcycle dyno tuning is the ability to perform real-time measurements versus the old-school method of tuning by “feel” or estimation. Computerized dynos, especially when paired with technicians trained in ecu flash modifications, capture precise snapshots of your engine’s performance across wide open and variable throttle settings. This delivers the kind of accuracy necessary to tune a motorcycle for both everyday reliability and race-ready power—the kind of results that older methods simply can’t provide. Whether your machine is a basic stock bike or a heavily modified sport bike , the precision and customization of dyno tuning means you’re not leaving performance—or engine health—to chance. It's the essential step for unlocking both value and performance in every ride. Motorcycle Dyno Tuning: When, Why & How Often Should You Get It? How aftermarket upgrades or modifications call for fresh dyno tuning Suggested intervals, even for stock engines, to maintain peak performance Signs your motorcycle needs dyno tuning: symptoms and red flags The timing of motorcycle dyno tuning is critical for ongoing engine health and performance. Every time you make significant changes—like adding a full exhaust , swapping air filters, adjusting cams, or even after a major overhaul—a dyno session realigns your engine’s parameters for the new setup. But even if you ride a stock bike , periodic dyno services (every 6,000–10,000 miles) help maintain your bike in good condition , prevent premature wear, and catch issues before they become costly. Red flags that it might be time for a tune include rough idle , unexpected loss of power , unusual fuel consumption , or uneven spark plug readings . Don’t ignore them—making adjustments sooner with a professional dyno tune helps your motorcycle run smoother and keeps you riding safely. What to Expect at a Professional Motorcycle Dyno Tuning Session Assessment of bike and owner goals Consultation about modifications, fuel system, and riding style Overview of time, cost, and what results to anticipate Service Component Description Estimated Price (USD) Initial Consultation Discuss mods, owner goals, and diagnosis $50–$100 Full Dyno Tune (Fuel Injected) Full mapping, ecu flash , power optimization $300–$600 Dyno Run Only Performance report, no tuning $80–$150 Aftermarket Part Setup Setup for exhaust, air filters, or cams included in map Included or +$50–$150 Expect your first session to start with a thorough check of your motorcycle’s current condition, spark plug readings, exhaust system , and any forms you submit prior. A trained expert will then cycle your bike through a ramp run or steady state ramping, making real-time ECU and fuel ratio adjustments as needed. Finally, you’ll leave with a performance report, custom map, and expert advice for keeping your bike at its best. Key Motorcycle Dyno Tuning Features: What Sets Premium Services Apart Factory-trained technicians and dyno-certified experts Usage of high-end dynamometer equipment Customized maps and comprehensive aftercare support What separates a standard dyno tune from a premium experience? It starts with factory-trained technicians —people who not only understand the science of power your motorcycle but also bring years of hands-on experience with brands like robin winzell and the finest tuning tools in the industry. Top shops invest in state-of-the-art dynojet dyno setups, laptop-linked monitors, and digital interface platforms. Premium services go further by offering ongoing aftercare: comprehensive diagnostics, custom power maps for routine checkups, and support of the purposes for different riding modes. That means peace of mind—knowing your motorcycle is optimized for months, not just the next ride. List of Essential Questions Before Booking Motorcycle Dyno Tuning Is the dyno shop experienced with your make and model? What types of dyno readings (horsepower, torque) are provided? Do they offer ecu flash and fuel injected tuning as standard? Is a custom map included in the cost? Before you contact our service or give us a call , make sure the shop is equipped to handle not just basic ramp run tests but also advanced services like ecu flash and fuel injected mapping. Ask if they provide detailed horsepower and torque graphs (so you can click to see graph ), and whether a custom tune is tailored—not just “off the shelf.” Don’t hesitate to ask about their experience with your exact model, especially if you’ve invested in unique modifications or ride a less common brand. The right answers will help you get the best bang for your buck . Reviewing Motorcycle Dyno Tuning Results: What Does the Dyno Say? Interpreting post-tuning power graphs Understanding how horsepower gains reflect on the street or track Double-checking smoothness, torque curve improvements, and diagnostics The most exciting moment after a dyno tune is seeing your results. Post-session, you’ll receive detailed performance graphs that document horsepower, torque, and fuel ratio numbers—both before and after tuning. These figures are more than stats—they reveal engine health, improvements in torque delivery, response at wide open throttle, and smoothness throughout the RPM range. Savvy riders and experts alike will click to see graph not just for bragging rights, but to catch nuances in the powerband and clutch system. Whether you’re prepping for another ramp run or tracking hundreds of miles as a gold member , the proof lies in the ride: Your tuned results show up as faster launches, effortless cruising, and maximum performance with reliable safety built in. Expert Tips: Maximizing the Effectiveness of Motorcycle Dyno Tuning Ideal preparation steps before your session Best practices for break-in after tuning How to maintain top performance month after month To get the most out of your motorcycle dyno tuning session, start with prep: Ensure spark plugs are fresh, oil and filters (air and fuel) are clean, and your bike is in good condition . Bring notes about your interests and personal riding style, so the technician can tailor the tune (especially important if you use a power commander or similar device). After tuning, follow the expert’s recommended break-in period. Warm up thoroughly for the first few rides and avoid sustained wide open throttle until all systems settle. Regular post-tuning checkups—especially after long trips, modifications, or extended storage—will keep your bike in peak condition, mile after mile. FAQ Section: Motorcycle Dyno Tuning Questions Answered Is dyno tuning worth it for a motorcycle? Dyno tuning offers validated gains, extended engine life, and tailored riding experience for every budget and rider type. Absolutely. A professional dyno tune unlocks not only measurable power and throttle response but also customizes your bike to your exact use case—be it road, track, or all-day touring. With real-world, steady state data and expert ecu flash adjustments, it’s an investment that pays off in reliability, peace of mind, and true performance. How often should you dyno tune a motorcycle? Every 6,000-10,000 miles or after significant modifications, depending on usage and engine setup. Plan for dyno tuning every 6,000–10,000 miles, or whenever you install major upgrades like a full exhaust system , remap your ECU, or overhaul the fueling system. Regular checks help your bike stay optimized for changing conditions and mileage. How much HP does dyno tuning add? A typical dyno tune can add 5-15% more horsepower, with more noticeable gains on performance bikes or after major upgrades. While results vary, most riders see a 5–15% bump in horsepower with a quality dyno tune , especially when paired with upgrades like performance intakes, fuel injected systems, or ecu flash programming. Gains are even more pronounced on modified or sport bike setups. What does a dyno do for a motorcycle? A dyno provides precise, real-world measurement and tuning of engine output, air/fuel ratios, and performance for customized optimization. A dynamometer tests your bike’s output just like on the road—measuring horsepower, torque, RPM, and fuel ratio at different loads, capturing real-time performance data. This allows expert techs to tune a motorcycle for optimal safety, response, and efficiency, whether it’s fuel injected or carbureted . Motorcycle Dyno Tuning Success Stories & Case Studies Before-and-after examples: Stock vs. tuned comparisons Customer testimonials on throttle response and rideability The proof is in the ride! Customers love the immediate difference after dyno tuning : Naeem, a touring rider, reported his stock bike felt “like a new machine,” with far better acceleration and smoothness. Another client, Lucas, had his sport bike tuned with full exhaust and ecu flash—he gained 12% in peak horsepower and said throttle control was “lighter and faster everywhere.” From stock exhaust setups to high-performance upgrades, real-world riders consistently describe better throttle feel, more stable cruising, and long-term engine health. The right dyno tune delivers more than a number—it creates a better relationship between rider and machine. Walkthrough of live dyno session, with expert explanations and real-time data analysis (Insert video here) Conclusion Ready for more performance and reliability from your motorcycle? Call Nasty Performance Motorcycle Shop Today: 847-458-4858 and book your dyno tuning session to experience custom results first-hand! To further enhance your understanding of motorcycle dyno tuning, consider exploring the following resources: “Motorcycle Dyno Tuning: Unleash Maximum Performance!” ( motorcycleguidelines.com ) This article provides a comprehensive overview of the dyno tuning process, detailing each step from pre-dyno inspection to performance fine-tuning. It also addresses frequently asked questions, such as the cost of a dyno tune and its benefits for motorcycle performance. “Dyno Tuning Motorcycles - How does it work and why is it important?” ( woolichracing.com ) This resource explains the mechanics of dynamometers and their role in measuring torque and power. It emphasizes the importance of dyno testing, especially after installing aftermarket components, to ensure optimal air-fuel ratios and prevent potential engine damage. If you’re serious about optimizing your motorcycle’s performance, these resources will provide valuable insights into the benefits and processes of dyno tuning.

Motorcycle Battery Charging Tips

Did you know that up to 40% of motorcycles suffer early battery failure due to poor charging habits? If you’re one of the many riders who’ve experienced a dead battery miles from home, it’s time to upgrade your know-how. In this comprehensive guide, you’ll unlock the essential motorcycle battery charging tips that not only save money but keep your ride charged and ready, ride after ride. Surprising Facts About Motorcycle Battery Charging Tips "Up to 40% of motorcycles suffer early battery failure due to poor charging habits—mastering motorcycle battery charging tips can save you time and costs." Motorcycle batteries are vital to your ride’s reliability, yet charging mistakes remain common. Many riders unknowingly reduce their battery life—sometimes by years—simply by using an improper battery charger or neglecting periodic battery charge checks. The truth is, adopting safe and correct motorcycle battery charging tips isn’t just about immediate function; it’s an investment in your motorcycle’s electrical system and long-term performance. By using a compatible battery charger and following proper safety precautions—like connecting the positive terminal and negative terminal correctly—you dramatically reduce your risk of a dead battery and electrical faults. Let's dive into the facts and learn how to protect your investment. What You'll Learn: Essential Motorcycle Battery Charging Tips The safest and most effective motorcycle battery charging tips How to use a battery charger and maintain battery charge Differences among various motorcycle battery types, including AGM motorcycle batteries Proper handling of positive terminal and negative terminal connections Step-by-step guidance on charging your motorcycle battery Troubleshooting common issues with motorcycle batteries Understanding Your Motorcycle Battery Every motorcycle relies on a reliable battery to start the engine, power essential electronics, and keep you safe on the road. Yet, not all batteries are created equal. Understanding your motorcycle battery is the first step toward effective battery charge management, maximum battery life, and hassle-free rides. Knowing your battery type—whether it's a conventional lead acid, AGM motorcycle battery, or advanced lithium model—affects how you charge, maintain, and select the right battery charger. With varying needs for electrolyte solution management, cycling, and charge rate, picking suitable battery chargers and understanding your battery’s electrical energy requirements keeps you from suffering premature failure or costly mistakes down the road. Most modern motorcycles use either flooded lead acid batteries, AGM batteries (Absorbed Glass Mat), or lithium-ion options. Conventional lead acid batteries are cost-effective but require more frequent maintenance and precise charging techniques, while AGM motorcycle options last longer and offer greater resistance to vibration, though they need a special charger and proper safety precautions. Knowing what battery you have is essential: using the wrong charging method or exceeding the correct voltages can shorten battery life, risk damage to your bike’s electrical system, or leave you stranded. Let’s look closer at how each major battery type differs and what that means for charging your motorcycle battery. Common Motorcycle Battery Types: Lead Acid, AGM Motorcycle, and More Motorcycle batteries come in various battery types, each with unique advantages and maintenance requirements. The most common are flooded lead acid (conventional battery), AGM motorcycle batteries, and increasingly, lithium-ion. Lead acid batteries rely on an electrolyte solution and require periodic top-ups with distilled water, as well as close attention to charge rate and cycle. AGM motorcycle batteries, on the other hand, utilize a fiberglass mat that absorbs the electrolyte, making them more resistant to leaks and vibration but needing a charger designed specifically for AGM batteries to avoid overcharging or undercharging. Lithium-ion motorcycle batteries offer lightweight convenience and rapid charging but may not be compatible with all charging systems unless a special charger is used. Each battery type dictates a specific approach for battery charge and affects your choice of battery charger. For example, charging a lead acid battery with too high a current can cause excessive gassing and even explosions if open flames are involved, while AGM batteries need a slower, controlled charge for best results. Battery terminals—specifically the positive terminal and negative terminal—must always be connected in the correct sequence to avoid sparking and ensure your bike’s electrical energy is used safely. Use the following table for an easy reference to pros and cons, charging tips, and ideal charger types. Comparison Table: Battery Types, Pros, Cons, and Ideal Charging Tips Battery Type Pros Cons Ideal Charging Tips Lead Acid (Flooded) Low cost, widely available, easy to service Needs regular maintenance, risk of leaks & spills Charge slowly, check electrolyte solution; avoid overcharging AGM Motorcycle Battery Maintenance-free, vibration-resistant, longer lifespan More expensive, sensitive to overcharging Use a charger designed for AGM; never exceed 14.4V, ensure automatic shutoff feature Lithium-Ion Very lightweight, fast charging, retains charge well Higher initial cost, requires special charger, sensitive to temperature Charge only with compatible smart charger; avoid deep discharges How Battery Charge Impacts Motorcycle Performance Maintaining the correct battery charge plays a crucial role in your motorcycle’s overall performance. A well-charged battery delivers consistent electrical energy to your bike’s starter, lights, fuel injection, and onboard electronics. If the battery charge dips too low, starting can become unreliable, lights may dim, and sensitive electronics in your motorcycle’s electrical system could be at risk. In the worst cases, a low or dead battery leaves your motorcycle stranded, often at the most inconvenient times. Beyond just starting power, a healthy motorcycle battery supports stable voltage to the electrical system and reduces strain on alternators and regulators. Regularly monitoring battery charge—even during off-season storage—helps you avoid surprises and ensures your bike is ready to go when the weather improves. Following motorcycle battery charging tips—like partial charging (the 80-20 rule), using a smart charger, and not exceeding the recommended voltage—translates directly to better battery life, fewer breakdowns, and smoother rides all year long. For riders looking to keep their bikes in peak condition throughout the year, integrating smart battery care with broader seasonal maintenance routines can make a significant difference. Discover more practical strategies for protecting your motorcycle during every season in this essential guide to seasonal bike care. Fundamentals of Motorcycle Battery Charging Tips Why following proven motorcycle battery charging tips prevents premature battery failure Effect of proper battery charge on motorcycle longevity How to identify when to use a battery charger The basics of effective battery charging come down to a few key principles: always match your battery charger to your battery type, regularly monitor the health and charge of your motorcycle battery, and don’t overlook safety precautions. These battery charging tips help extend battery life while preventing accidental damage to your motorcycle’s electrical system or even personal injury. One surprisingly common cause of battery failure is leaving a battery partially discharged over time, which allows sulfation to build up inside lead acid batteries—dramatically shortening its useful life. Proper battery charge is also vital for maximizing your motorcycle’s longevity. The battery doesn’t just start the engine; it buffers electrical energy for all critical circuits, from engine management to navigation and communication. By understanding and applying essential motorcycle battery charging tips, such as never charging an AGM battery with a conventional battery charger, and testing battery voltage with a multimeter routinely, you can catch issues early and avoid the need for emergency service. If your motorcycle sits unused for weeks, it's wise to connect a smart charger with an automatic shutoff feature to maintain the correct voltage and prevent a dead battery. Choosing the Right Battery Charger for Motorcycle Battery Charging Tips Not all battery chargers are created equal, and using the wrong kind on your motorcycle battery can cause irreversible damage. Today’s market includes a wide range of battery chargers—from basic manual units to advanced smart chargers designed for each battery type. The most effective motorcycle battery charging tips always stress using a charger that matches your specific battery type, whether that’s a conventional lead acid, AGM motorcycle, or lithium-ion battery. Manual chargers can work well for conventional battery types if the user is attentive but lack features like an automatic shutoff, which can lead to overcharging. In contrast, a smart charger is a modern solution, automatically adjusting voltage and current and shutting off or switching to maintenance mode when the battery is fully charged. When selecting a battery charger, always check for compatibility flags—many models identify if they're suitable for use with AGM motorcycle batteries, and some come with dedicated settings for deep-cycle or lithium options. Look for features such as polarity protection to avoid damage from reversed positive terminal and negative terminal connections, short circuit protection, and overcharge safeguards. Today's best chargers are easy to use, quick to connect, and help ensure each battery charge is precise and safe. Selecting Safe and Suitable Battery Chargers The foundation of reliable motorcycle battery charging is a good charger. Never use a car battery charger or a generic charging device on your motorcycle battery unless it’s specifically marked as compatible. Car chargers may supply too much current for small motorcycle batteries, risking overheating, damage to battery terminals, or even explosions—especially in the presence of open flames or poor ventilation. Choose a charger designed for motorcycles with an appropriate charging rate (typically 1–3 amps for most standard batteries) and suited to the battery type in your bike, whether it’s lead acid, AGM, or lithium variety. Before making a purchase, confirm that your battery charger includes features like an automatic shutoff feature, trickle mode for maintenance charging, and compatibility labels for AGM motorcycle batteries or specialty lithium units. A dedicated smart charger is usually worth the investment, providing peace of mind by preventing overcharging and constantly adjusting output for maximum battery life. Avoid using makeshift solutions; sticking to proven products ensures your battery charge remains within optimal parameters for safety and performance. Automatic vs Manual Battery Chargers: Which Is Better? When deciding between automatic and manual battery chargers, consider both convenience and safety. Manual chargers require user intervention to monitor battery charge and stop the process when complete. While they offer simplicity for experienced users, the risk of overcharging is high if you forget to disconnect, leading to shortened battery life or even critical battery failure—particularly true with sensitive AGM motorcycle batteries. On the other hand, automatic battery chargers (or smart chargers) use sensors to detect battery charge level, automatically switch to trickle mode, and even shut off when the battery is fully charged. This hands-off approach not only protects against overcharging, but also means less time spent worrying about your battery’s health. For most riders—especially those storing motorcycles for the winter or only riding occasionally—a smart charger is highly recommended. The automatic shutoff feature, safety safeguards, and compatibility with various battery types make it the easiest way to keep a motorcycle battery charged safely and efficiently. Whether you choose a smart or manual model, always double-check manufacturer guidance to avoid damaging your battery or risking faults in the electrical system. How to Charge Your Motorcycle Battery: Step-by-Step Guide Charging your motorcycle battery correctly not only extends its life but ensures consistent performance every time you ride. This step-by-step guide covers essential safety precautions, the right way to connect the positive terminal and negative terminal, and how to monitor the battery charge throughout the process. By following these proven motorcycle battery charging tips, you’ll avoid common mistakes that lead to battery failure or electrical system faults. Whether you are working with a conventional lead acid unit, an AGM motorcycle battery, or even a modern lithium-ion option, always read your manufacturer’s manual before starting. Ensuring compatibility between your battery type and chosen battery charger is the foundation for a safe, successful charge. If in doubt about what type of battery you have or the proper procedure to follow, consult a motorcycle technician or contact a professional shop for guidance before proceeding. Safety Precautions for Charging Your Motorcycle Battery Before you begin charging your motorcycle battery, ensure you are working in a well-ventilated area, away from open flames or sparks, as hydrogen gas released during charging can be flammable. Always wear protective gloves and eye protection to safeguard against accidental acid splashes, especially if you are working with acid batteries or lead acid models. Never lean directly over the battery during charging in case pressure builds up inside the casing. Additionally, inspect your battery terminals for corrosion and secure all connections before initiating battery charge—this reduces electrical resistance and prevents accidental sparking. Take note of your surroundings and eliminate clutter. Keep flammable materials away from the battery charging area, and do not smoke or use any electrical appliance that could generate a spark nearby. Safety precautions also include ensuring the battery charger is unplugged before connecting to the battery terminals and using the charger only as instructed by the manufacturer. Following these steps keeps you and your motorcycle’s electrical system safe and maximizes the success of your battery charge. Proper Connection of Positive Terminal and Negative Terminal One fundamental tip for charging your motorcycle battery is the correct order of connecting the charger leads. Always connect the positive terminal (usually marked with a “+” or red cover) first before attaching the negative terminal (marked with a “-” or black cover). By doing this, you reduce the risk of accidental sparking and possible short circuits that can damage sensitive electronics in your motorcycle’s electrical system. The connection should be secure but not overtightened, to avoid stripping the battery terminal threads or risking a loose connection that could generate excess heat. When disconnecting after battery charge is complete, reverse the order: remove the negative terminal first, then the positive terminal. If your charger is equipped with an automatic shutoff feature, verify charging has ended before detaching cables. For the best results with AGM motorcycle batteries and other sensitive units, always use a smart charger with polarity protection, which prevents damage if the leads are connected in the wrong order. This practice is especially important for riders using advanced electronic systems or custom wiring modifications, where a voltage spike could trigger costly repairs. Monitoring Battery Charge and Battery Charge Completion A key battery charging tip is to continuously monitor your battery’s charging progress. Most smart chargers come with LED indicators or digital displays showing charge status and battery voltage. Check periodically to ensure the charger hasn’t encountered an error and that the battery temperature remains stable. For conventional lead acid and AGM batteries, a slow and steady battery charge is best; rapid charging or using a high-amperage battery charger not intended for motorcycles can cause overheating, swelling, or irreversible capacity loss. Once your battery charger signals that the battery is fully charged, disconnect the charger leads in the correct order and inspect the battery for any signs of leaks, swelling, or odd smells before reinstalling it in your motorcycle. It’s a smart practice to check the voltage with a multimeter: for most lead acid and AGM motorcycle batteries, a full charge should register between 12.6V and 12.8V. Properly monitoring battery charge during and after the process assures you can ride with confidence, knowing your electrical system is receiving stable, reliable power. AGM Motorcycle Batteries: Special Charging Tips Unique traits of AGM motorcycle batteries Optimal charging voltages for AGM motorcycle batteries Common mistakes when charging AGM motorcycle batteries AGM motorcycle batteries have rapidly become the preferred battery type for many modern bikes, thanks to their maintenance-free operation, ability to withstand vibrations, and resistance to leakage. However, AGM batteries also require special charging precautions that go beyond standard motorcycle battery charging tips. These units are highly sensitive to overcharging and can suffer permanent capacity loss or swelling if charged with a conventional battery charger. Always use a dedicated smart charger designed for AGM batteries, which carefully regulates voltage and current to prevent damage. When charging, never exceed 14.4 volts, and always follow the manufacturer’s recommendations. Many riders make the mistake of using generic or car chargers without an automatic shutoff feature, risking catastrophic battery failure. For best results, connect the positive terminal and negative terminal using insulated clips, double-check the voltage setting of your charger, and never attempt to "jump-start" an AGM battery with high amperage—a mistake that can immediately ruin battery life and void warranties. Regular voltage checks and adhering to the 80-20 rule (keeping the charge between 20% and 80% of capacity) helps maximize performance and lifespan. Common Motorcycle Battery Charging Tips and Maintenance Checklist Regularly inspect battery terminals for corrosion Ensure your battery charger matches your battery type Follow safety precautions during every charge Schedule routine testing of battery charge Keeping your motorcycle battery in top condition is about more than just occasional charging—regular inspection and maintenance are essential. Begin each season by inspecting battery terminals for corrosion, which appears as white or greenish residue around the positive terminal and negative terminal. Corrosion builds up quickly in humid environments or when batteries are left partially discharged, and it disrupts the flow of electrical energy, causing weak starts or unreliable performance. Clean terminals with a mixture of baking soda and water using a stiff brush, and reapply terminal protectant to slow future buildup. Make it a habit to check that your battery charger is compatible with your battery type each time you connect for a battery charge, especially if you own more than one charger or use borrowed equipment. Following established safety precautions ensures every charging cycle is safe, both for you and your motorcycle’s electrical system. Lastly, routine voltage tests with a multimeter—both before rides and after parking for extended periods—alert you to declining battery health, allowing proactive action before a dead battery can ruin your plans. People Also Ask—Expert Answers to Your Motorcycle Battery Charging Questions What's the best way to charge a motorcycle battery? A: The best way to charge a motorcycle battery is by using a compatible battery charger with automatic shut-off features. Always connect the positive terminal before the negative terminal, and never exceed recommended voltages, especially for AGM motorcycle batteries. What is the 80 20 rule for charging batteries? A: The 80-20 rule for battery charge recommends charging only up to 80% and discharging no lower than 20% to optimize battery life and prevent stress, especially relevant for AGM motorcycle batteries. Is it okay to charge a motorcycle battery while still connected? A: Charging your motorcycle battery while still connected can be safe if you use a smart battery charger and follow proper safety precautions, protecting sensitive electronics and maintaining battery integrity. How long should a motorcycle battery hold its charge? A: A fully charged motorcycle battery should retain its charge for several weeks to a couple of months, depending on battery type, age, and temperature. Frequently Asked Questions about Motorcycle Battery Charging Tips How often should I charge my motorcycle battery? For motorcycles ridden regularly, charge monthly or whenever voltage falls below 12.4V. For seasonal storage, maintain with a smart charger or check monthly. Can I use a car charger on my motorcycle battery? No, unless specifically designed for motorcycles. Car chargers risk overcharging and damaging smaller motorcycle batteries. Why do AGM motorcycle batteries need special charging? AGM batteries are sensitive to overcharging and require precisely regulated voltage, which smart chargers provide. How do I test the battery charge level accurately? Use a digital multimeter to check voltage: 12.6–12.8V is healthy for most lead acid and AGM batteries. Key Takeaways: Motorcycle Battery Charging Tips for Long-Term Performance Always use manufacturer-recommended battery chargers Monitor both positive and negative terminal connections during charging Frequent battery charge and maintenance lengthens lifespan AGM motorcycle batteries require specialized care Next Steps: Keep Your Motorcycle Battery in Top Shape "Call Nasty Performance Motorcycle Shop Today: 847-458-4858 for expert advice on motorcycle battery charging tips and premium service." Stay charged, ride smart—apply these expert motorcycle battery charging tips and enjoy hassle-free performance on every journey. As you put these battery charging strategies into practice, remember that true motorcycle reliability comes from a holistic approach to care. From battery health to seasonal storage, every detail matters in keeping your ride ready for adventure. If you’re eager to elevate your maintenance routine and uncover more ways to protect your investment year-round, explore the top seasonal bike care secrets every rider should know. This resource is packed with actionable insights that go beyond the battery, helping you master every aspect of motorcycle upkeep for lasting performance and peace of mind.

Motorcycle Carburetor Cleaning Service: Fix Rough Idles Fast

Did you know that over 80% of motorcycle performance problems—especially on sports bikes—are caused by neglected carburetor maintenance? That rough idle stealing away your fun could be a clogged carb just waiting for some expert attention. A professional motorcycle carburetor cleaning service goes far beyond what spray-in-a-can carb clean products can do, restoring crisp throttle, smoother idling, and the thrill of a responsive ride. If your ride hesitates, stalls, or struggles to start, don’t miss these crucial insights that could have you back on the road—fast! What You'll Learn About Motorcycle Carburetor Cleaning Service The importance of a professional motorcycle carburetor cleaning service for peak performance and reliability Common symptoms that reveal dirty carbs on your high-revving sports bike An overview of the carb clean and rebuild service process—what you actually get for your investment Price breakdowns and what to expect from reputable professional services Why Motorcycle Carburetor Cleaning Service Matters: A Surprising Fact Did you know that over 80% of motorcycle performance issues—especially on sports bikes—are linked to neglected carburetor maintenance? A professional motorcycle carburetor cleaning service can drastically improve power, acceleration, and fuel efficiency. If your motorcycle stumbles at idle, struggles at high RPMs, or simply won’t fire up till warm, the culprit is often a dirty or unbalanced carburetor. Today's sports bikes and even dedicated track machines like the Ducati Panigale rely on intricate fuel delivery, and even a small amount of buildup can sabotage performance. Avoid unnecessary part replacements, repeated "tank slappers" from unpredictable power delivery, and enjoy safer, more reliable rides with timely expert carb service. For riders interested in a deeper dive into the step-by-step process and best practices for keeping your motorcycle’s carburetor in top shape, our detailed guide on motorcycle carburetor cleaning techniques covers everything from disassembly to reassembly, ensuring you understand what goes into a thorough service. Carb Clean and Rebuild Service: Key Features & Benefits Deep ultrasonic carburetor cleaning for motorcycles, breaking down even the most stubborn deposits in critical passages Precision carb synchronization and tuning for sports bike models—matched to factory base settings for maximum efficiency and power Carburetor rebuild service with OEM-grade or superior replacement components for dependable operation Immediate benefits: sharper throttle response, reduced fuel line vapor lock, improved economy, and glass-smooth idling even on cold starts "A proper motorcycle carburetor cleaning service is crucial for reliable road performance—especially for high-revving sports bikes." — Lead Mechanic at Nasty Performance Motorcycle Shop How Hard Is It to Clean a Carburetor on a Motorcycle? Cleaning a motorcycle carburetor isn’t just a matter of spraying some cleaner and calling it done. Even experienced DIYers can miss the hidden internal passages or jets, especially in multi-carb racks found on sports and sport bike models like the Ducati Panigale. Many home attempts, using basic tools from places like Harbor Freight, fall short when it comes to precision cleaning and reassembly. Proper service involves total disassembly, professional ultrasonic cleaning, part inspection, and precise reassembly to set to factory base settings. For complex setups, especially multi-carb sports bikes, a professional motorcycle carburetor cleaning service is key to lasting reliability and performance. A clean package from trusted bike service providers is always a better bet than “bolt on and fire” shortcuts. How Often Does a Motorcycle Carburetor Need to Be Cleaned? Most manufacturers, particularly for high-performance sports bikes, recommend a thorough motorcycle carburetor cleaning service every 12,000 to 15,000 miles. However, bikes that sit for long periods, run with old fuel, or experience rough idles, hesitation, or backfiring should have their carbs inspected sooner. Regular service with clean package services helps prevent the “steals away our fun” scenarios caused by sluggish throttle or persistent stalling. Professional bike service programs often send friendly dept sms txt reminders for scheduled maintenance or offer package services like those popular in Fullerton, CA sport bike shops. Carburetor Cleaning Intervals by Motorcycle Type Motorcycle Type Recommended Cleaning Interval Symptoms of Dirty Carb Sports Bike Every 12,000 miles Rough idle, hesitation, reduced throttle response Cruiser Every 15,000 miles Poor acceleration, stalling Tourer Every 13,000 miles Backfiring, hard starting Can You Clean a Motorcycle Carburetor Without Removing It? While there are many surface cleaning sprays and quick-fix additives on the market, they usually can’t reach the crucial internal passages, jets, and emulsifier tubes—areas most likely to be blocked on sports bikes. True carb clean package services require removing the carburetor from the engine, complete disassembly, and cleaning every component in a specialized ultrasonic tank. This process ensures all obstructed fuel line paths and airways are restored. A quick spray might clear some debris temporarily, but only a full rebuild service ensures long-term smooth operation and eliminates recurring poor idle or throttle issues. What’s Included in a Full Carb Clean and Rebuild Service? Complete disassembly of all carburetor(s) from your bike Ultrasonic cleaning of jets, venturi, float bowls, and all passages Inspection and replacement of worn or compromised parts using OEM or upgraded components Precise adjustment and synchronization of multi-carb assemblies for smooth, consistent throttle response—especially vital for high-performance sports bike models How Much Does It Cost to Get Carbs Balanced? On average, carburetor balancing will cost between $100 and $300, depending on the type of motorcycle and the complexity of its carburetor setup. For multi-carb sports bikes or rare models like the Ducati Panigale, the price may trend towards the higher end, especially if additional diagnostic services or replacement parts are required. Many reputable bike service shops offer our complete rebuild and carb clean package services, which include balancing, ultrasonic cleaning, carb reassembly, and synchronization. Always ask about turnaround time and whether your chosen service shop includes carb balancing as part of their clean package; it’s the difference between “just clean” and truly performance-ready carbs back on your bike at a reasonable price. What Are the Most Common Signs You Need a Carb Clean or Rebuild Service? Rough idle and frequent stalling, even after bike is till warm Significantly decreased throttle response, especially under load Loss of power at high RPMs—noticeable when accelerating hard on sports bikes Hard starting after the bike has been sitting or between short rides Excessive fuel odor or visible smoke from the exhaust, suggesting fuel line issues or stuck float Frequently Asked Questions About Motorcycle Carburetor Cleaning Service Can I use additives instead of a carburetor cleaning service? While fuel additives may help break down minor varnish in the fuel line or tank, they are rarely effective for blocked jets or internal passages. Professional carburetor cleaning is necessary for a true fresh start. How long does the service take for a sports bike? A complete carb clean and rebuild service usually takes one to two business days, depending on bike complexity and parts availability. Shop sms txt or dept sms will often notify you when ready for pickup. Does a carburetor cleaning service improve fuel efficiency? Absolutely! Clean, synchronized carbs ensure precise fuel and air delivery, resulting in better economy and less risk of running rich or lean. Will cleaning the carb fix all rough idle issues? Carburetor cleaning solves most rough idle symptoms, especially those tied to fueling. However, issues with wheel bearings, ignition, or external fuel line clogs may also require attention. A trustworthy bike service shop will diagnose root causes during the clean package inspection. Key Takeaways: Why Choose a Professional Motorcycle Carburetor Cleaning Service Professional carburetor cleaning services extend your engine’s lifespan by preventing unnecessary wear and costly repairs down the road Specialized sports bike service ensures factory-level tuning and optimal performance, exactly as intended for models like the Ducati Panigale A full carb clean and rebuild service addresses the root causes of poor running—not just the symptoms—ensuring you get the most from every ride Ready to Fix Rough Idles? Call Nasty Performance Motorcycle Shop Today: 847-458-4858 Your ride deserves to run at its best! For ultra-fast turnaround time, proven results, and expert service online or in shop, call Nasty Performance Motorcycle Shop now at 847-458-4858 and ask for our carb clean package services. Don’t let carb problems steal away your fun—stop struggling till warm and get your carbs back on track with certified pros. If you’re committed to keeping your motorcycle in peak condition year-round, don’t stop at carburetor care. Discover essential strategies for every season in our comprehensive resource, Seasonal Bike Care Secrets Every Rider Must Know. From prepping for winter storage to maximizing summer performance, these expert tips will help you avoid common pitfalls and extend the life of your ride. Take your maintenance routine to the next level and ensure your bike is always ready for the road, no matter the weather.

Terms of Service

Privacy Policy

Core Modal Title

Sorry, no results found

You Might Find These Articles Interesting

T
Please Check Your Email
We Will Be Following Up Shortly
*
*
*