cropper
update

Nasty Performance ~ 847-458-4858 

update
  • Blog Home
  • Categories
    • Motorcycle Maintenance
    • Riding Tips & Preps
    • Safety & Inspection
    • Customizations & Upgrades
    • DIY Motorcycle Repairs
    • Motocycle Audio Systems
    • Motocycle Seasonal Care & Storage
    • Engine, Electrical Performance
  • Bike Night
  • Nasty Performance Motorcycle Shop
April 29.2026
1 Minute Read

Motorcycle Engine Diagnostics: Spot Problems Before They Cost

Did you know that nearly 40% of expensive motorcycle repairs could be avoided with early motorcycle engine diagnostics? That’s not just wallet-sparing news—it’s crucial for the long-term health of your ride. Imagine cutting your service bills in half, sidestepping sudden breakdowns, and riding with the peace of mind that every potential issue is caught before it spirals. In this comprehensive guide, we’ll show you how modern diagnostic tools and systems empower you to stay ahead of engine trouble, save time and money by buying the right scan tool, and ensure top-tier performance for your motorcycle. Whether you’re a casual rider or a performance enthusiast, the insights you’ll find here can be the turning point for your bike’s longevity and your peace of mind.

modern sport motorcycle engine diagnostics scan tool in use

The Critical Role of Motorcycle Engine Diagnostics in Preventative Maintenance

  • Did you know that 40% of costly motorcycle repairs could have been prevented by early motorcycle engine diagnostics? Learn why embracing diagnostic tool advances can save both your engine and your wallet.

Motorcycle engine diagnostics serve as the cornerstone for preventative motorcycle maintenance. By leveraging a motorcycle scan tool or dedicated diagnostic tool , you achieve far more than simple yet essential engine checks—these systems actively safeguard your ride from hidden faults and abrupt failures. Today’s diagnostic systems are designed to catch problems such as faulty throttle valves, battery test failures, and even elusive fault codes that standard inspections might miss. With regular use, you’re not only investing in safety and performance but also protecting your wallet from the financial stress of major repairs.

Early detection is vital. If your motorcycle starts displaying minor irregularities—a faint vibration, a blinking check engine light, or drops in throttle performance—these could be warning signals accessible only through proper engine diagnostics. Incorporating motorcycle diagnostic tools as part of your regular maintenance routine transforms engine management from reactive troubleshooting to proactive protection, reducing repair frequency and supporting a longer engine lifespan.

Why Are Motorcycle Engine Diagnostics Essential for Every Rider?

  • Prevent unexpected breakdowns using motorcycle diagnostic tools

  • Detect issues early with a reliable diagnostic system

  • Ensure safety and performance in all motorcycle brands

No matter the type or brand of motorcycle—be it classic cruisers, race-ready sport bikes, or European brands—having access to reliable motorcycle scan tools is a game changer. Not only do they minimize risk on the road but also provide tailored insights through fault code readings, battery test results, and live performance data. The right tools work across a variety of motorcycle brands and systems like ABS or ECU, ensuring universal coverage. Simply put, motorcycle engine diagnostics are your best ally for smarter, safer, and more affordable riding.

group of motorcycle riders discussing motorcycle scan tools and diagnostics

Understanding Motorcycle Engine Diagnostics: How Modern Diagnostic Tools and Systems Work

  • What You'll Learn:

  • How motorcycle engine diagnostics operate

  • The types of motorcycle scan tools available

  • Key features of a good motorcycle diagnostic tool

  • How modern scan tools connect to your motorcycle

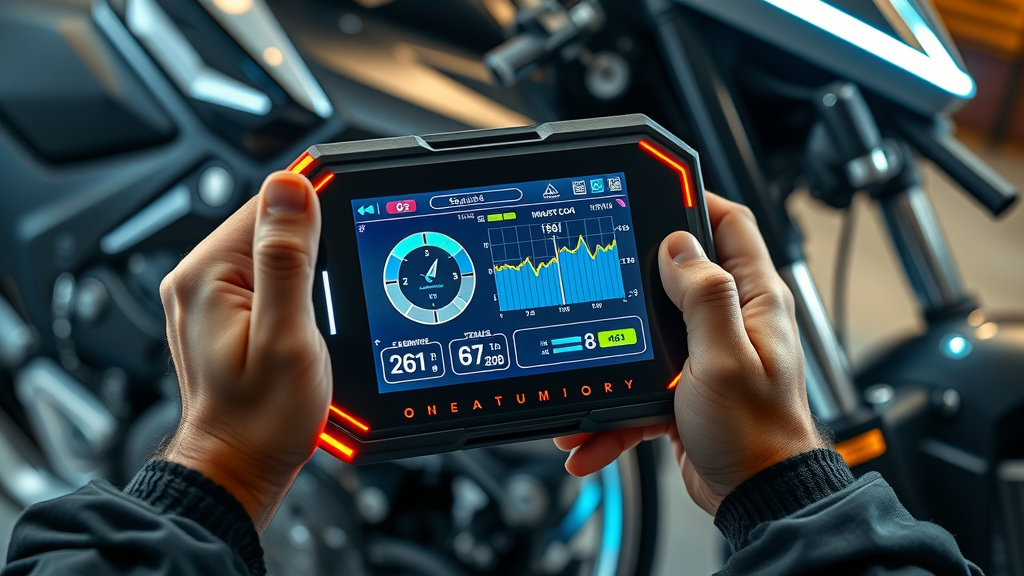
Motorcycle engine diagnostics have advanced remarkably, thanks to technological leaps in scan tools and diagnostic systems. At their core, diagnostic tools interact directly with your bike’s onboard computer, pulling real-time data and identifying hidden issues via detailed fault codes. These can include anything from a battery test outcome to throttle valve calibration errors—critical data for preempting engine distress.

Modern motorcycle diagnostic tools range from plug-and-play OBD scanners to advanced wireless scan tools with Bluetooth and WiFi connectivity, often compatible across most major motorcycle brands. These tools don’t just read codes; they also clear them, provide software updates, and offer advanced diagnostics for systems like ABS, traction control, and even emissions. By connecting to your bike’s diagnostic port, these scan tools provide mechanics and riders alike access to a trove of detailed information, preventing costly repairs and downtime by facilitating prompt, informed action.

Types of Motorcycle Scan Tools and Diagnostic Systems: Choosing the Right Fit

  • Onboard diagnostic system options

  • Portable motorcycle diagnostic tools and scan tool choices

  • Wireless vs. wired OBD scanners

  • Compatibility across motorcycle brands

When it comes to motorcycle scan tools , your options break down into three main categories:

  1. Onboard Diagnostic Systems —Integrated systems in modern motorcycles that monitor engine health and trigger warning lights when issues arise. These are brand-specific and offer baseline diagnostics.

  2. Portable Diagnostic Tools —These compact devices can be used anywhere, including at home or while traveling. They include both wired and wireless OBD scanners. Wired tools are reliable, while wireless versions offer more freedom and app connectivity for live data monitoring.

  3. Professional Diagnostic Systems —These advanced systems offer the most in-depth analysis and are standard in service shops. They provide comprehensive compatibility, clear and advanced diagnostics, and often come with regular software updates to support a variety of motorcycle brands, including European brands, classic bikes, and the latest sport models.

Choosing the right motorcycle diagnostic tool comes down to your needs: portability, depth of analysis, compatibility with your bike’s brand, and the ability to receive ongoing software updates. Remember, buying this single diagnostic tool could mean years of reliable performance checks, saving money by buying the right tool upfront.

Comparison Table: Popular Motorcycle Scan Tools, Features, and Prices

Scan Tool

Key Features

Compatibility

Price Range

Software Updates

ANcel Official MotoScan Pro

Covers ABS, ECU, reset features, includes unlimited software updates

Most major motorcycle brands, including European brands

$149-$249

Free Updates

OBDLink MX+ Wireless

Wireless OBD scanner, battery test, real-time data, app support

Variety of motorcycle brands
(check model/year)

$119-$179

App-based Updates

Autel MotoDiag Elite

Advanced diagnostics, supports multiple systems, high-speed fault code reading

Wide compatibility, especially Honda/Yamaha/Kawasaki

$229-$349

Annual Paid Updates

Single Brand Scanner

Engine and ABS diagnostics for one motorcycle brand

Single motorcycle brand only

$79-$129

N/A

motorcycle diagnostic tool scan tool in use by mechanic with data graphs

Top Signs You Need Motorcycle Engine Diagnostics: Spotting Issues Before They Escalate

  • Unusual sounds or vibrations

  • Check engine light and fault code meanings

  • Battery test results and warning signs

  • Throttle valve irregularities

  • Sudden drops in performance

Unusual changes in your motorcycle—strange noises, irregular vibrations, or a flickering check engine light—should never be ignored. These are often the earliest indicators that your motorcycle diagnostic system is picking up hidden engine issues, such as worn throttle valves, declining battery health, or misfiring cylinders. A proper scan tool translates these warning signals into actionable fault codes.

Battery test results from a reliable motorcycle scan tool can detect low voltage, charging faults, and impending battery failure long before your ride won’t start. Similarly, a diagnostic system can analyze throttle valve inconsistencies—which manifest as uneven idling or sluggish throttle response—helping you adjust or repair before it compounds into a costly rebuild. Ignoring these early warning signs means risking an expensive overhaul, loss of performance, or even a dangerous engine shutdown on the road.

"Ignoring warning signs today can mean an expensive rebuild tomorrow. Motorcycle engine diagnostics turn warning lights into actionable insights."

Comparing DIY Motorcycle Scan Tools vs. Professional Diagnostic Tool Services

  • Pros and cons of at-home OBD scanners

  • Why professional diagnostic systems offer deeper insights

  • Understanding motorcycle scan tool limitations

DIY OBD scanners offer motorcycle owners the convenience of running diagnostic tests at home. These portable scan tools are user-friendly and typically compatible with several major motorcycle brands. Their primary benefits include affordability, immediate access to fault code readings, and basic battery test results—ideal for spotting simple issues and saving money by buying a single tool for multiple uses. However, their abilities are limited to general codes and may not provide advanced diagnostics for complex systems like ABS, traction control, or deeper electronic modules.

On the other hand, professional diagnostic systems deliver comprehensive, brand-wide compatibility, unfettered access to manufacturer fault codes, and advanced functions. These systems are regularly updated, feature advanced diagnostics for all key motorcycle systems, and include unlimited software updates to remain current as new models emerge. While the investment is higher, so is the insight—making them the preferred option for service providers and serious riders seeking full visibility into their bike’s health. The core difference? Professional systems simply see (and solve) more than any at-home scan tool can.

split scene motorcycle owner DIY scan tool mechanic professional diagnostic tool

The Motorcycle Engine Diagnostics Process: From Fault Code to Solution

  • Step-by-step guide: Running a motorcycle diag scan

  • Interpreting fault codes

  • Battery test and electronic diagnostics

  • Using advanced diagnostic systems for in-depth analysis

The process of running motorcycle engine diagnostics begins with connecting your motorcycle scan tool or OBD scanner to the diagnostic port, usually located beneath the seat or near the battery compartment. Once connected, turn the ignition to the ‘on’ position and follow the scan tool’s prompts. Within seconds, it reads and displays any stored fault codes , often indicating issues like throttle valve irregularities, failed battery tests, or electrical faults.

Interpreting these codes is crucial. Most diagnostic systems provide a code reference or link to a database—some even include multilingual support and instant troubleshooting tips. For deeper insights, especially on advanced systems like ABS, fuel injection, or immobilizer errors, advanced diagnostic modules in professional scan tools are invaluable. These allow mechanics and riders to check real-time engine data, run a full battery test, and even recalibrate electronics when repairs are made. With motorcycle engine diagnostics , what was once a mysterious check engine light transforms into a transparent, step-by-step journey from problem identification to solution.

Watch: How to Perform Motorcycle Engine Diagnostics with a Scan Tool

Real Benefits of Routine Motorcycle Engine Diagnostics and Using the Best Diagnostic Tools

  • Peace of mind with preventative diagnostics

  • Longer engine lifespan

  • Better resale value by maintaining motorcycle health

  • Enhanced safety through early detection

Incorporating routine motorcycle engine diagnostics protects your investment in several ways. Preventative scans catch small faults before they evolve into major repairs, ensuring your bike runs smoother for longer. A well-maintained engine not only grants you peace of mind—it increases the resale value of your motorcycle, with maintenance records demonstrating meticulous care to future buyers.

Advanced diagnostic systems provide unparalleled safety benefits as well. Early detection of battery test failures or throttle valve inconsistencies can prevent dangerous situations on the road. By leveraging the latest motorcycle scan tools—whether for routine battery tests, interpreting fault codes, or full electronic checks—riders and mechanics alike can ensure the highest standard of performance and safety. Make diagnostics part of your regular maintenance routine for years of worry-free riding and financial savings.

happy motorcycle owner holding diagnostic tool printout after engine diagnostics

People Also Ask: Motorcycle Engine Diagnostics FAQs

Can you run a diagnostic test on a motorcycle?

  • Yes, most modern motorcycles are equipped with a diagnostic system or port. You can use an OBD scanner or a dedicated motorcycle diagnostic tool to run a diagnostic test and read any fault codes.

Most motorcycles manufactured within the last decade now include an integrated diagnostic system or a standardized OBD port for easy access. By connecting a compatible OBD scanner or motorcycle diagnostic tool, you can quickly scan your engine for fault codes and uncover even subtle issues that may not yet trigger a warning light. This process is fast, reliable, and requires minimal technical skill for basic code reading and troubleshooting.

How to check engine codes on a motorcycle?

  • Connect a motorcycle scan tool or OBD scanner to your bike’s diagnostic port. The scan tool will read and display engine codes, allowing you to diagnose specific issues.

To check engine codes, locate your bike’s diagnostic port (often under the seat) and securely plug in your scan tool. Power on both the bike and the tool, then follow the prompts to read fault codes from the motorcycle’s diagnostic system. These codes highlight the specific nature and location of any issue, which you can then research in your owner’s manual or an online database to determine potential repairs or next steps.

Can you OBD scan a motorcycle?

  • Many motorcycles support OBD scanning with compatible scan tools. Always verify compatibility based on your motorcycle’s brand and year before selecting a tool.

OBD scanning is available on many modern motorcycles, especially those with emissions systems compatible with standardized OBD protocols. It’s vital to choose a motorcycle scan tool listed as compatible with your specific brand and year. Some scan tools are universal, while others may be tailored for single brand or European brands specifically. Always consult the tool’s specification and your motorcycle’s documentation before purchase or use.

How to check motorcycle engine health?

  • Routine motorcycle engine diagnostics, including battery tests, monitoring throttle valve function, and scanning for fault codes, are essential to assess engine condition. Professional diagnostic systems provide comprehensive insights.

Comprehensively checking your engine’s health involves more than looking for warning lights. A combination of battery tests, throttle valve monitoring, and a full scan of the engine control unit with a motorcycle diagnostic tool provides a holistic view of your motorcycle’s condition. For the most detailed results, advanced diagnostic systems used by professionals offer insights into all active riding systems, electronics, and fault history—empowering you to make informed maintenance decisions and safeguard your ride.

Frequently Asked Questions About Motorcycle Engine Diagnostics

  • What is the difference between a motorcycle diagnostic tool and a standard OBD scanner?

  • How often should I run motorcycle engine diagnostics?

  • Can I use the same scan tool for different motorcycle brands?

  • What should I do if my motorcycle diagnostic system shows a serious fault code?

  • Are advanced diagnostic systems necessary for modern motorcycles?

  1. Difference between diagnostic tools and OBD scanners: While both devices are used to scan for fault codes, motorcycle diagnostic tools are tailored for bikes, often supporting advanced functions like ABS and brand-specific electronics, while standard OBD scanners may offer only basic code reading for single brand or universal models.

  2. Frequency of diagnostics: It is recommended to perform engine diagnostics during regular maintenance intervals, before and after long rides, or whenever the check engine light appears.

  3. Scan tool compatibility: Many modern motorcycle scan tools are multi-brand compatible, but always check the manufacturer’s list or update policy to confirm—especially for European brands or newer models.

  4. Serious fault code procedure: If a serious fault code appears, avoid riding and consult a professional mechanic or utilize advanced diagnostic systems to further analyze and repair the issue immediately for safety and to avoid costly damage.

  5. Necessity for advanced diagnostics: For modern motorcycles with extensive electronic systems, advanced diagnostics are essential for accurate, timely maintenance and repairs. These systems provide the most comprehensive view of engine performance and potential faults.

motorcycle mechanic offering diagnostic tool advice at service counter

Take the Next Step: Protect Your Ride and Your Wallet

  • Don’t wait for a costly engine repair. Schedule a motorcycle engine diagnostics test with Nasty Performance Motorcycle Shop. Call us now at 847-458-4858 for expert service, professional diagnostic tools, and peace of mind.

Video Demonstration: Expert Walkthrough of a Motorcycle Diagnostic System in Action

Act now: Integrate regular motorcycle engine diagnostics into your maintenance routine, leverage advanced diagnostic tools, and Call Nasty Performance Motorcycle Shop today at 847-458-4858 to safeguard your motorcycle and avoid unnecessary repair costs.

To further enhance your understanding of motorcycle engine diagnostics, consider exploring the following resources:

  • Comprehensive Guide to Motorcycle Engine Diagnostics Techniques : This article delves into essential diagnostic tools and equipment, providing a step-by-step process for identifying common engine issues such as fuel system malfunctions, ignition problems, and electrical system failures. ( twowheeltribe.com )

  • Unlocking Efficiency: The Importance of Motorcycle Diagnostics : This piece emphasizes the significance of regular diagnostics in maintaining optimal motorcycle performance, highlighting common tools like OBD scanners and multimeters, and discussing their roles in effective maintenance. ( wheelsandwisdom.com )

By consulting these resources, you’ll gain deeper insights into the tools and techniques essential for proactive motorcycle maintenance, ensuring your ride remains in peak condition.

Engine, Electrical Performance

0 Comments

Write A Comment

*
*
Please complete the captcha to submit your comment.
Related Posts All Posts

Custom Motorcycle Engine Tuning That Transforms Your Ride

Did you know that with custom motorcycle engine tuning , riders can experience up to a 15% increase in horsepower over stock? Whether you’re looking for mind-blowing acceleration, seamless throttle response, or next-level fuel efficiency, engine tuning could be the game-changer you’ve been searching for. Today’s advanced tuning options, like Power Commander , dyno tuning , and ECU adjustments , have redefined what’s possible for every motorcycle enthusiast. Dive into our detailed guide and discover how tuning can unlock the full potential of your bike! A New Era for Riders: How Custom Motorcycle Engine Tuning Delivers Performance If you want your motorcycle engine to deliver its full potential, custom tuning is the key. Modern motorcyclists value both raw power and refined control, and custom tuning allows for both. By precisely managing air fuel mixtures, ignition timing , and fuel delivery, custom tuning transforms an ordinary ride into an exhilarating experience. But it’s not just about straight-line speed—enhanced throttle response and optimal fuel efficiency make every journey smoother, regardless of whether you’re city riding or tearing up the open road. Practical examples are everywhere: A stock engine with a power commander and proper dyno tuning can see not only a boost in horsepower , but also reduced engine wear due to more efficient fuel mixture combustion. Similarly, ECU tuning offers advanced control over the engine management system, ensuring that modifications to exhaust systems or air filters are fully optimized. Riders often seek these solutions for improved performance tires grip, or to match specific goals—whether that’s track dominance or backroad bliss. Custom motorcycle engine tuning sets a new benchmark for a thrilling, safe, and reliable ride. What’s inside this guide to custom motorcycle engine tuning: Discover recent breakthroughs in power command and power commander systems Learn top reasons for dyno tuning and ECU tuning Explore tuning options for various motorcycle engines Compare costs, horsepower gains, and real-world results Unpacking Custom Motorcycle Engine Tuning: The Why, What, and How Understanding Custom Motorcycle Engine Tuning and Its Impact Custom motorcycle engine tuning goes much deeper than generic adjustments. By reshaping fuel maps, modifying fuel and ignition settings , and integrating high-tech solutions like the Power Commander, tuning fundamentally alters how your motorcycle engine performs. Enthusiasts and casual riders alike report marked changes: engines run cooler, throttle feels crisp, and acceleration is instant. Carefully calibrated air/fuel ratios reduce excessive wear on internal components and improve overall durability—making tuning not just about speed but longevity, too. Strategic tuning can also address unique use cases. For example, a rider who frequently switches between track days and daily commuting may have their engine tuned for two different performance modes. With today’s ECU tuning and advanced fuel controllers, switching between maps for city fuel efficiency or weekend power delivery is as easy as toggling a button. The result is a tailored riding experience that simply can’t be matched by a stock engine . Ultimately, custom tuning is about achieving a perfect harmony between engine output, reliability, and personal preference. Whether you’re chasing peak power or refined rideability, the impact is immediate—and transformative. Comparing Power Commander, Commander Tuning, and Dyno Tuning Options Power Command and Power Commander tuning devices are well-known for their plug-and-play capability and the wide range of maps they support. These solutions allow riders to fine-tune ignition timing and fuel ratio with remarkable accuracy. Commander tuning leverages dyno data to create custom fuel and ignition maps, ensuring that every modification—from high-flow air filters to aftermarket exhausts—delivers optimal results, without risking lean or rich mixtures that could harm your engine. Dyno tuning takes things a step further by using a dynamometer to measure real-time engine output. Technicians analyze the power curve, adjust fueling, and dial in the setup for unmatched acceleration and throttle precision. This data-driven approach is especially critical for high-compression or turbo engines, where every fraction of a percent in fuel mixture or ignition settings matters to maintain both power and reliability. The result? Your motorcycle delivers exactly the performance you’ve dreamed of—with the reliability needed for the real world. When combining power commander modules with a professional dyno session, riders benefit from the best of both worlds: accessible tuning options and precise, individualized performance mapping. This synergy ensures your bike not only feels different—it truly is different. The Role of ECU Tuning in Modern Motorcycle Engines ECU tuning has become a state-of-the-art solution for maximizing the performance of your motorcycle. Unlike piggyback units or mechanical tweaks, direct ECU programming enables technicians to control every parameter: fuel ratio , ignition timing, throttle sensitivity, and more. This opens up the possibility to custom-tailor your bike to specific modifications, like performance exhaust or upgraded air filters, making sure your engine operates at peak efficiency and power. Modern motorcycle engines are highly sensitive to sensor data—temperature, pressure, RPM, and throttle input all feed into the ECU, which decides how much fuel and ignition advance to provide at every moment. Through careful ECU tuning, pros can safely push these parameters, unlocking hidden horsepower and torque while often improving fuel economy . It’s effective for everything from mild street bikes to all-out racing machines. The combination of advanced diagnostics, real-time sensor monitoring, and analytical software makes ECU tuning one of the most powerful tools for ensuring your bike operates flawlessly in any riding condition. Whether you’re chasing lap times or just want a motorcycle that adapts perfectly to your riding style, ECU tuning makes a world of difference. Power Command and Power Commander: Unlocking Your Motorcycle Engine’s Potential How Power Commander Products Evolve Motorcycle Engine Tuning The Power Commander family of products has revolutionized the way riders approach motorcycle engine tuning. Unlike basic fuel controllers, Power Commander modules integrate seamlessly with your OEM wiring, allowing precise adjustments to air fuel and ignition timing for each cylinder in real time. This fine control is essential for extracting the maximum power, efficiency, and reliability from both stock engines and heavily modified builds. One of the main benefits is the ability to upload custom maps that reflect your bike’s setup—whether you have a high-flow air filter , full performance exhaust system , or upgraded performance tires. Riders can select pre-built maps designed for specific mods, or take it further by working with a tuning shop to create bespoke fuel and ignition settings. The result is a dramatic improvement in throttle response, smoother power delivery, and protection against detonation or lean operation. As engine technologies evolve, Power Commander remains the go-to tuning option for those who want affordable, user-friendly solutions that don’t require invasive modifications to the factory ECU or wiring harness. When used correctly, this tool ensures your engine is waking up—not wearing out. Commander Tuning Techniques and Power Commander Tuning for Performance With commander tuning , the transformation is easy yet impactful. Professional tuning shops use dyno data and advanced software to build custom maps for air fuel delivery and fuel and ignition settings . This is especially important when installing performance parts; a new exhaust system or intake often needs accompanying adjustments so the engine doesn’t run too rich or lean, which could harm your motor. These adjustments ensure the performance of your motorcycle is not only improved but also sustained over the long run. Leveraging power commander tuning also means you gain the flexibility to revert to stock settings if needed, or to experiment with different riding profiles. For track days, you might want an aggressive map that emphasizes power, while daily commuting may benefit from a map tuned for smoother fuel delivery and optimal fuel efficiency . This adaptability is a hallmark of today’s commander tuning options. Ultimately, power commander tuning grants unparalleled control, letting you optimize your bike for your unique riding style, environment, and performance aspirations. Dyno Tuning and ECU Tuning: Optimizing Motorcycle Engine Efficiency Why Dyno Tuning Is Essential for Accurate Motorcycle Engine Tuning Dyno tuning is the gold standard for anyone serious about their motorcycle engine’s performance. The dyno not only measures power and torque at the wheels but also pinpoints inefficiencies in your current fuel or ignition settings . By running the bike at different RPMs and throttle positions, technicians generate real-world data representing the actual demands placed on your engine. This leads to optimal refinement of the fuel mixture , ensuring maximum horsepower, longevity, and safety. During dyno tuning, adjustments are made in real-time, and the impact of changes is instantly visible on digital dashboards. This level of feedback is simply not possible through “seat of the pants” tuning, particularly with today’s complex engines. Dyno data also drives the customization of maps loaded into power commander or directly into the ECU, providing a precise fit for each machine. The result is a riding experience that’s uniquely yours, with tangible gains in both performance and peace of mind. For the enthusiast who values data-driven results and wants to ensure their motorcycle engine is always at its best, dyno tuning is an indispensable tuning option that delivers real, measurable results every time. Advantages of ECU Tuning over Traditional Tuning Options While devices like the Power Commander offer plug-and-play simplicity, ECU tuning unlocks the next level of performance. By directly programming the engine’s brain, tuners can alter nearly every aspect of operation, from the fuel ratio to advanced ignition parameters. This granular control means modifications such as high-lift cams, forced induction, or significantly altered compression ratios can be managed safely and efficiently. ECU tuning enhances compatibility with modern rider aids—like traction control, ride-by-wire, and quick-shifting. This seamless integration is difficult, if not impossible, with external modules. The advantage is clear: ECU tuning future-proofs your bike, ensures compatibility with ongoing upgrades, and provides professional riders and enthusiasts with race-ready flexibility for the street or the track. In summary, for advanced setups, ECU tuning is often the ultimate tuning option—unlocking results that go beyond the capabilities of most add-on modules, increasing both peak horsepower and all-around fuel efficiency . Tuning Options: Which Approach Is Right for Your Motorcycle Engine? A Side-by-Side Comparison: Power Command, Power Commander, and Dyno Tuning The ideal tuning option for your motorcycle depends on your unique needs, budget, and goals. Power Command units are perfect for straightforward installations, giving you reliable performance improvements with minimal downtime. Power Commander modules provide deeper customization and map-switching capability, suitable for riders who frequently upgrade their engines or want to adapt their setup seasonally. Dyno tuning is essential for those seeking optimal accuracy, especially after substantial mods like changes to the exhaust system or aggressive cam profiles. Pairing these options together—such as installing a power commander followed by a professional dyno session—offers the benefits of personalization and scientific performance verification. Meanwhile, ECU tuning is often the preferred choice for late-model bikes with sophisticated electronics, allowing for in-depth control over every engine function. Whatever path you choose, investing in custom motorcycle engine tuning ensures your bike is optimized for your specific goals , delivering more power, efficiency, and enjoyment every ride. Tuning Options Comparison Table Feature Power Command Power Commander Dyno Tuning ECU Tuning Stock Installation Ease Plug & Play Plug & Play Requires Specialist Requires Specialist N/A (As delivered) Custom Mapping Limited Extensive Complete Full Control None Real-Time Adjustments Some Yes Yes (on dyno) Yes (advanced) No Horsepower Gains Moderate High Maximized Maximized Standard Price Range $$ $$$ $$$+ $$$+ Included Best For Basic Upgrades Modded Bikes Custom Builds Race/Modern Bikes Everyday Use Real-World Results: Benefits and Outcomes of Custom Motorcycle Engine Tuning Key improvements from custom motorcycle engine tuning: Increased horsepower and torque Smoother throttle responses Enhanced fuel efficiency Reduced engine heat and wear "After installing a power commander and opting for dyno tuning, my ride feels completely transformed. The power delivery is instant and the ride is smoother than ever." – Satisfied Customer Cost, Value, and Return on Investment for Custom Motorcycle Engine Tuning Breakdown of Custom Motorcycle Engine Tuning Costs The cost of custom motorcycle engine tuning can vary widely depending on the chosen tuning option, type of motorcycle, and the modifications involved. Basic power command devices typically range from $200-$400, while power commander modules with advanced features might cost $350-$600. Dyno tuning sessions usually range from $300-$500, sometimes including custom mapping. Comprehensive ECU tuning services can be $400-$800+ depending on complexity. Premium shops may also offer packages or seasonal discounts, often bundled with free shipping on select aftermarket parts. Remember, these costs often include expert installation, configuration, and post-tuning validation rides to ensure your bike’s new setup meets expectations. While the upfront expense may seem substantial, the gains in power, throttle response , and reliability make custom tuning a smart investment for any serious rider. It’s always a good idea to ask about aftercare and support, as reputable shops will offer follow-ups or adjustments in case your riding style or environment changes. Proper tuning does more than enhance your ride—it protects your investment, too. Evaluating Horsepower Gains and Long-Term Value One of the best measurements of a successful custom motorcycle engine tuning is real-world horsepower gains. Even modestly tuned motorcycles can gain 5-10 additional horsepower, while heavily modified or high-performance builds may see increases of 15% or more. Dyno charts and before-and-after rides provide clear evidence of these improvements. Even more valuable is the enhanced smoothness, reduced engine stress, and fuel savings enjoyed over thousands of miles. The long-term value is significant: a well-tuned engine runs cooler, lasts longer, and requires less frequent major overhauls. For riders who plan to keep their bikes for years or rack up serious mileage, the return on investment quickly outweighs the upfront cost. The boost in day-to-day excitement and confidence is just the icing on the cake. Ultimately, comprehensive tuning is about more than chasing peak numbers—it’s about building a motorcycle that perfectly fits your ambitions and outperforms its stock engine counterpart in every way. What Custom Motorcycle Engine Tuning Services Include Typical service features: Complete diagnostic checks Custom power commander or ECU map installation Dyno tuning session Performance validation rides Aftercare support Frequently Asked Questions About Custom Motorcycle Engine Tuning How much does it cost to tune a motorcycle engine? The average cost ranges from $300 for a basic power command setup to $600 or more for advanced dyno tuning and ECU tuning . The final price depends on the complexity of your modifications and the experience of the tuning shop. Some services include aftercare or follow-up adjustments, so be sure to clarify what’s included in your chosen package. Can you tune a motorcycle engine? Absolutely! Modern motorcycles can be tuned using plug-in modules like the power commander , ECU reprogramming, or dyno-based adjustments. Whether you want to accommodate an upgraded air filter , exhaust system , or chase more power, there are tuning options available for nearly every make and model. How much HP does a tune add to a motorcycle? The horsepower gains from tuning vary based on your motorcycle engine and modifications. Typical increases are between 5-15%, but some setups can exceed that—especially when dyno or ECU tuning is combined with a high-performance air filter , fuel mixture improvements, and exhaust upgrades. Results are always greater when tuning follows substantial hardware changes. Is it worth tuning a motorcycle? For any rider seeking extra power, smoother throttle response, and better fuel efficiency , custom tuning is a worthwhile investment. A tuned bike offers an entirely different riding experience; plus, optimized fuel and ignition settings can prevent engine damage and extend longevity—making tuning a smart choice for long-term enjoyment and reliability. Watch: Behind the Scenes – Dyno Tuning for Custom Motorcycle Engines (Video 1/2) See the Difference: Power Commander Installation Demo (Video 2/2) Top Reasons to Choose Professional Custom Motorcycle Engine Tuning Services Precision optimization by experienced technicians Access to advanced dyno tuning and ECU tuning equipment Personalized tuning maps for your motorcycle engine Measurable horsepower and efficiency gains Ongoing support and expertise Ready for a Transformed Ride? Contact our Custom Motorcycle Engine Tuning Experts Today Don’t settle for a mediocre ride—optimize your bike for ultimate performance, efficiency, and enjoyment. Call Nasty Performance Motorcycle Shop Today: 847-458-4858 and unlock your motorcycle’s true potential. Our expert team is standing by to answer questions, provide recommendations, and help you schedule your custom tuning session. Take control of your riding experience: choose custom motorcycle engine tuning and turn every ride into an adventure. For advice, setups, or questions— feel free to contact our experts and get started now! To further enhance your understanding of custom motorcycle engine tuning, consider exploring the following resources: “Tuning and Modifying Motorcycle Engine Management Systems: A Comprehensive Guide” ( motorcyclehorizon.com ) This guide delves into the intricacies of engine management systems, offering insights into fuel mapping, ignition timing, and the benefits of dyno testing. “12 ECU Tuning Tips for Peak Motorcycle Performance” ( thefasttune.com ) This article provides practical advice on selecting tuning software, interpreting engine data, and maintaining optimal air-fuel ratios to achieve peak performance. If you’re serious about optimizing your motorcycle’s performance, these resources will provide valuable insights and techniques to help you achieve your goals.

Rev Up with Motorcycle Dyno Tuning: What You Need to Know

Ready to unlock up to 15% more horsepower from your motorcycle? Professional motorcycle dyno tuning isn’t reserved for the racetrack; it’s a critical service that transforms both smooth street rides and white-knuckle sport bikes. With expert calibration and real-time adjustments, dyno tuning uses science—not guesswork—to give you more bang for your buck every time you hit the throttle. Dive into this comprehensive guide and discover why smart riders everywhere demand more performance, reliability, and customized power from dyno tuning. Unlocking Motorcycle Performance: The Power of Motorcycle Dyno Tuning Did you know that professional motorcycle dyno tuning can boost your bike’s horsepower by up to 15%? Discover how dyno tuning transforms both street and race machines through science, precision, and expert calibration. Motorcycle dyno tuning optimizes your engine’s potential, improves throttle response, and safeguards engine health, making it a critical service for enthusiasts seeking maximum value and performance. Motorcycle dyno tuning is more than a buzzword—it’s the science-backed method for extracting every ounce of performance and reliability from your two-wheeled machine. Whether you ride a fuel injected or carbureted motorcycle, this real-time process measures your bike’s true horsepower and torque output—no more guessing or estimation. By using sophisticated equipment like a dynojet dyno , certified technicians customize your air/fuel ratios, ignition timing, and ECU parameters for your riding style, modifications, and goals. This expertise ensures not just maximum power , but also optimal throttle response and protection against potential engine damage—a perfect blend for riders demanding more excitement and peace of mind. What Motorcycle Dyno Tuning Delivers: Core Benefits and Value Maximized horsepower and torque Consistent fuel mapping for fuel injected bikes Cleaner throttle response and smoother acceleration Detection of engine or tuning issues before damage can occur Tailored setup for unique riding styles and modifications “Dyno tuning is not just about chasing numbers—it’s about unlocking the ideal balance of power, responsiveness, and reliability for every rider.” – Nasty Performance Technician When you invest in motorcycle dyno tuning , you’re investing in a total transformation of your bike’s dynamics. Maximized horsepower and torque mean not only better top-end speed, but also impressive mid-range punch and low-end grunt. For today’s fuel injected bikes, precise, consistent fuel mapping ensures each cylinder is firing at its best, regardless of modifications like a full exhaust or upgraded intake. The result? Smoother throttle response, cleaner acceleration, and tangible improvements every time you twist the grip. More importantly, a dyno tune allows expert technicians to detect hidden issues before they turn into costly repairs—catching fuel ratio imbalances, misfiring, or warning signs in spark plugs . These adjustments can save your engine from premature wear or catastrophic failure, delivering not just performance but long-term value and peace of mind. How Motorcycle Dyno Tuning Works: The Process Step by Step What is Dyno Tuning and Why is it Crucial? Overview of dyno tuning and the science behind measuring horsepower and torque Real-time analysis of air/fuel ratios, RPMs, and speed At its core, dyno tuning is about establishing a scientific baseline by measuring your bike’s output in a controlled environment. A specialized dynamometer—like the industry-standard dynojet dyno —engages the rear wheel and creates resistance while your bike goes through ramp runs and steady state tests. The dyno captures vital information: horsepower, torque, RPMs, air/fuel ratio , and even exhaust gas signatures. This objective data replaces outdated tuning-by-ear methods, making it the foundation for every precision adjustment that follows. Technicians use this detailed feedback to evaluate how your bike performs at wide open throttle as well as in everyday riding situations. Whether your ride is a high-strung sport bike or a daily commuter, dyno tuning highlights not just peak numbers, but also weaknesses in your current setup—missing horsepower, lean or rich fuel ratios , or uneven power delivery. This is the foundation for tailoring a tune that matches your personal interests and riding goals down to the finest detail. The Motorcycle Dyno Tuning Process Broken Down Initial assessment and safety check Baseline dyno run Air/fuel ratio and ECU adjustments Custom mapping and power optimization Final dyno reading and results report Typical Steps in Motorcycle Dyno Tuning Description Duration (Approx.) Initial Assessment Review bike condition, modifications, and goals. 15-30 min Baseline Dyno Run Capture stock performance data using ramp run and steady state tests. 15-20 min ECU & Air/Fuel Adjustment Live analysis and adjustment of fuel ratios and ignition timing. 30-60 min Custom Mapping Develop map tailored to modifications and rider preferences. 30-60 min Final Run & Review Confirm results, print power/torque graphs, check diagnostics. 15-30 min Comparison of baseline vs. tuned performance graphs The full cycle of motorcycle dyno tuning starts with assessing your bike and goals, whether it’s about maximizing your bang for your buck or adapting to a new full exhaust system . After confirming your bike is in good condition , technicians perform a baseline test and then make those all-important ECU flash and fuel ratio updates. Finally, you receive a side-by-side comparison: Click to see graph of your ride’s journey from stock to tuned! ECU Flash and Fuel Injected Motorcycle Dyno Services The Link Between Dyno Tuning, ECU Flash, and Fuel Injected Systems Importance of customized ECU flash for modern motorcycles How dyno tuning integrates with fuel injected engine mapping Achieving specific modulation in throttle responsiveness and power curves “A custom ECU flash through dyno tuning is the smartest upgrade you can make to your fuel injected motorcycle.” – Industry Expert Modern bikes—especially fuel injected and electronically controlled models—benefit most from marrying ECU flash services with precision dyno tuning . Unlike out-of-the-box settings that try to serve every rider, a custom flash lets you tweak parameters like traction control, RPM limiters, and throttle-by-wire systems . This dynamic synergy means you don’t just modify a component; you optimize the way every part of your bike works together under real-world data and riding conditions. For those with performance upgrades (think: full exhaust , air filters, cams), a custom ECU flash is critical. It lets you recalibrate your ride for those changes, correcting fuel and ignition maps so you avoid lean fuel ratios and ensure smooth wider open throttle transitions. The result? A bike that adapts perfectly to your personal interests —whether that’s daily city commutes or track-day domination. Unlocks specialized features: Traction control, RPM limiters, and throttle-by-wire adjustments Provides a dynamic solution for aftermarket installations (exhaust, air filters, cams) Choosing an ECU flash as part of your motorcycle dyno tuning package means your bike's engine management is truly tailor-made . It's not just about turning up the numbers—it’s about ensuring every service can be based on your specific hardware, riding style, and goals. This approach ensures maximum performance and more bang for your buck , while also safeguarding engine reliability . Comparing Motorcycle Dyno Tuning vs. Traditional Tuning Methods Real-time measurement vs estimation Benefits of precision tuning for both standard and performance motorcycles Method Precision Customization Typical Results Cost Comparison Dyno Tuning High (live data capture, steady state & ramp run) Extensive (custom maps, ecu flash, performance mods) 10-15% power gain, smoother throttle, engine diagnostics $$–$$$ Traditional (Carburetor/Manual) Low to Medium (rely on feel, trial & error) Limited (standard jetting, less suited for fuel injected) Minor gains, risk of imbalances, slower adjustments $–$$ A major advantage of modern motorcycle dyno tuning is the ability to perform real-time measurements versus the old-school method of tuning by “feel” or estimation. Computerized dynos, especially when paired with technicians trained in ecu flash modifications, capture precise snapshots of your engine’s performance across wide open and variable throttle settings. This delivers the kind of accuracy necessary to tune a motorcycle for both everyday reliability and race-ready power—the kind of results that older methods simply can’t provide. Whether your machine is a basic stock bike or a heavily modified sport bike , the precision and customization of dyno tuning means you’re not leaving performance—or engine health—to chance. It's the essential step for unlocking both value and performance in every ride. Motorcycle Dyno Tuning: When, Why & How Often Should You Get It? How aftermarket upgrades or modifications call for fresh dyno tuning Suggested intervals, even for stock engines, to maintain peak performance Signs your motorcycle needs dyno tuning: symptoms and red flags The timing of motorcycle dyno tuning is critical for ongoing engine health and performance. Every time you make significant changes—like adding a full exhaust , swapping air filters, adjusting cams, or even after a major overhaul—a dyno session realigns your engine’s parameters for the new setup. But even if you ride a stock bike , periodic dyno services (every 6,000–10,000 miles) help maintain your bike in good condition , prevent premature wear, and catch issues before they become costly. Red flags that it might be time for a tune include rough idle , unexpected loss of power , unusual fuel consumption , or uneven spark plug readings . Don’t ignore them—making adjustments sooner with a professional dyno tune helps your motorcycle run smoother and keeps you riding safely. What to Expect at a Professional Motorcycle Dyno Tuning Session Assessment of bike and owner goals Consultation about modifications, fuel system, and riding style Overview of time, cost, and what results to anticipate Service Component Description Estimated Price (USD) Initial Consultation Discuss mods, owner goals, and diagnosis $50–$100 Full Dyno Tune (Fuel Injected) Full mapping, ecu flash , power optimization $300–$600 Dyno Run Only Performance report, no tuning $80–$150 Aftermarket Part Setup Setup for exhaust, air filters, or cams included in map Included or +$50–$150 Expect your first session to start with a thorough check of your motorcycle’s current condition, spark plug readings, exhaust system , and any forms you submit prior. A trained expert will then cycle your bike through a ramp run or steady state ramping, making real-time ECU and fuel ratio adjustments as needed. Finally, you’ll leave with a performance report, custom map, and expert advice for keeping your bike at its best. Key Motorcycle Dyno Tuning Features: What Sets Premium Services Apart Factory-trained technicians and dyno-certified experts Usage of high-end dynamometer equipment Customized maps and comprehensive aftercare support What separates a standard dyno tune from a premium experience? It starts with factory-trained technicians —people who not only understand the science of power your motorcycle but also bring years of hands-on experience with brands like robin winzell and the finest tuning tools in the industry. Top shops invest in state-of-the-art dynojet dyno setups, laptop-linked monitors, and digital interface platforms. Premium services go further by offering ongoing aftercare: comprehensive diagnostics, custom power maps for routine checkups, and support of the purposes for different riding modes. That means peace of mind—knowing your motorcycle is optimized for months, not just the next ride. List of Essential Questions Before Booking Motorcycle Dyno Tuning Is the dyno shop experienced with your make and model? What types of dyno readings (horsepower, torque) are provided? Do they offer ecu flash and fuel injected tuning as standard? Is a custom map included in the cost? Before you contact our service or give us a call , make sure the shop is equipped to handle not just basic ramp run tests but also advanced services like ecu flash and fuel injected mapping. Ask if they provide detailed horsepower and torque graphs (so you can click to see graph ), and whether a custom tune is tailored—not just “off the shelf.” Don’t hesitate to ask about their experience with your exact model, especially if you’ve invested in unique modifications or ride a less common brand. The right answers will help you get the best bang for your buck . Reviewing Motorcycle Dyno Tuning Results: What Does the Dyno Say? Interpreting post-tuning power graphs Understanding how horsepower gains reflect on the street or track Double-checking smoothness, torque curve improvements, and diagnostics The most exciting moment after a dyno tune is seeing your results. Post-session, you’ll receive detailed performance graphs that document horsepower, torque, and fuel ratio numbers—both before and after tuning. These figures are more than stats—they reveal engine health, improvements in torque delivery, response at wide open throttle, and smoothness throughout the RPM range. Savvy riders and experts alike will click to see graph not just for bragging rights, but to catch nuances in the powerband and clutch system. Whether you’re prepping for another ramp run or tracking hundreds of miles as a gold member , the proof lies in the ride: Your tuned results show up as faster launches, effortless cruising, and maximum performance with reliable safety built in. Expert Tips: Maximizing the Effectiveness of Motorcycle Dyno Tuning Ideal preparation steps before your session Best practices for break-in after tuning How to maintain top performance month after month To get the most out of your motorcycle dyno tuning session, start with prep: Ensure spark plugs are fresh, oil and filters (air and fuel) are clean, and your bike is in good condition . Bring notes about your interests and personal riding style, so the technician can tailor the tune (especially important if you use a power commander or similar device). After tuning, follow the expert’s recommended break-in period. Warm up thoroughly for the first few rides and avoid sustained wide open throttle until all systems settle. Regular post-tuning checkups—especially after long trips, modifications, or extended storage—will keep your bike in peak condition, mile after mile. FAQ Section: Motorcycle Dyno Tuning Questions Answered Is dyno tuning worth it for a motorcycle? Dyno tuning offers validated gains, extended engine life, and tailored riding experience for every budget and rider type. Absolutely. A professional dyno tune unlocks not only measurable power and throttle response but also customizes your bike to your exact use case—be it road, track, or all-day touring. With real-world, steady state data and expert ecu flash adjustments, it’s an investment that pays off in reliability, peace of mind, and true performance. How often should you dyno tune a motorcycle? Every 6,000-10,000 miles or after significant modifications, depending on usage and engine setup. Plan for dyno tuning every 6,000–10,000 miles, or whenever you install major upgrades like a full exhaust system , remap your ECU, or overhaul the fueling system. Regular checks help your bike stay optimized for changing conditions and mileage. How much HP does dyno tuning add? A typical dyno tune can add 5-15% more horsepower, with more noticeable gains on performance bikes or after major upgrades. While results vary, most riders see a 5–15% bump in horsepower with a quality dyno tune , especially when paired with upgrades like performance intakes, fuel injected systems, or ecu flash programming. Gains are even more pronounced on modified or sport bike setups. What does a dyno do for a motorcycle? A dyno provides precise, real-world measurement and tuning of engine output, air/fuel ratios, and performance for customized optimization. A dynamometer tests your bike’s output just like on the road—measuring horsepower, torque, RPM, and fuel ratio at different loads, capturing real-time performance data. This allows expert techs to tune a motorcycle for optimal safety, response, and efficiency, whether it’s fuel injected or carbureted . Motorcycle Dyno Tuning Success Stories & Case Studies Before-and-after examples: Stock vs. tuned comparisons Customer testimonials on throttle response and rideability The proof is in the ride! Customers love the immediate difference after dyno tuning : Naeem, a touring rider, reported his stock bike felt “like a new machine,” with far better acceleration and smoothness. Another client, Lucas, had his sport bike tuned with full exhaust and ecu flash—he gained 12% in peak horsepower and said throttle control was “lighter and faster everywhere.” From stock exhaust setups to high-performance upgrades, real-world riders consistently describe better throttle feel, more stable cruising, and long-term engine health. The right dyno tune delivers more than a number—it creates a better relationship between rider and machine. Walkthrough of live dyno session, with expert explanations and real-time data analysis (Insert video here) Conclusion Ready for more performance and reliability from your motorcycle? Call Nasty Performance Motorcycle Shop Today: 847-458-4858 and book your dyno tuning session to experience custom results first-hand! To further enhance your understanding of motorcycle dyno tuning, consider exploring the following resources: “Motorcycle Dyno Tuning: Unleash Maximum Performance!” ( motorcycleguidelines.com ) This article provides a comprehensive overview of the dyno tuning process, detailing each step from pre-dyno inspection to performance fine-tuning. It also addresses frequently asked questions, such as the cost of a dyno tune and its benefits for motorcycle performance. “Dyno Tuning Motorcycles - How does it work and why is it important?” ( woolichracing.com ) This resource explains the mechanics of dynamometers and their role in measuring torque and power. It emphasizes the importance of dyno testing, especially after installing aftermarket components, to ensure optimal air-fuel ratios and prevent potential engine damage. If you’re serious about optimizing your motorcycle’s performance, these resources will provide valuable insights into the benefits and processes of dyno tuning.

Motorcycle Battery Charging Tips

Did you know that up to 40% of motorcycles suffer early battery failure due to poor charging habits? If you’re one of the many riders who’ve experienced a dead battery miles from home, it’s time to upgrade your know-how. In this comprehensive guide, you’ll unlock the essential motorcycle battery charging tips that not only save money but keep your ride charged and ready, ride after ride. Surprising Facts About Motorcycle Battery Charging Tips "Up to 40% of motorcycles suffer early battery failure due to poor charging habits—mastering motorcycle battery charging tips can save you time and costs." Motorcycle batteries are vital to your ride’s reliability, yet charging mistakes remain common. Many riders unknowingly reduce their battery life—sometimes by years—simply by using an improper battery charger or neglecting periodic battery charge checks. The truth is, adopting safe and correct motorcycle battery charging tips isn’t just about immediate function; it’s an investment in your motorcycle’s electrical system and long-term performance. By using a compatible battery charger and following proper safety precautions—like connecting the positive terminal and negative terminal correctly—you dramatically reduce your risk of a dead battery and electrical faults. Let's dive into the facts and learn how to protect your investment. What You'll Learn: Essential Motorcycle Battery Charging Tips The safest and most effective motorcycle battery charging tips How to use a battery charger and maintain battery charge Differences among various motorcycle battery types, including AGM motorcycle batteries Proper handling of positive terminal and negative terminal connections Step-by-step guidance on charging your motorcycle battery Troubleshooting common issues with motorcycle batteries Understanding Your Motorcycle Battery Every motorcycle relies on a reliable battery to start the engine, power essential electronics, and keep you safe on the road. Yet, not all batteries are created equal. Understanding your motorcycle battery is the first step toward effective battery charge management, maximum battery life, and hassle-free rides. Knowing your battery type—whether it's a conventional lead acid, AGM motorcycle battery, or advanced lithium model—affects how you charge, maintain, and select the right battery charger. With varying needs for electrolyte solution management, cycling, and charge rate, picking suitable battery chargers and understanding your battery’s electrical energy requirements keeps you from suffering premature failure or costly mistakes down the road. Most modern motorcycles use either flooded lead acid batteries, AGM batteries (Absorbed Glass Mat), or lithium-ion options. Conventional lead acid batteries are cost-effective but require more frequent maintenance and precise charging techniques, while AGM motorcycle options last longer and offer greater resistance to vibration, though they need a special charger and proper safety precautions. Knowing what battery you have is essential: using the wrong charging method or exceeding the correct voltages can shorten battery life, risk damage to your bike’s electrical system, or leave you stranded. Let’s look closer at how each major battery type differs and what that means for charging your motorcycle battery. Common Motorcycle Battery Types: Lead Acid, AGM Motorcycle, and More Motorcycle batteries come in various battery types, each with unique advantages and maintenance requirements. The most common are flooded lead acid (conventional battery), AGM motorcycle batteries, and increasingly, lithium-ion. Lead acid batteries rely on an electrolyte solution and require periodic top-ups with distilled water, as well as close attention to charge rate and cycle. AGM motorcycle batteries, on the other hand, utilize a fiberglass mat that absorbs the electrolyte, making them more resistant to leaks and vibration but needing a charger designed specifically for AGM batteries to avoid overcharging or undercharging. Lithium-ion motorcycle batteries offer lightweight convenience and rapid charging but may not be compatible with all charging systems unless a special charger is used. Each battery type dictates a specific approach for battery charge and affects your choice of battery charger. For example, charging a lead acid battery with too high a current can cause excessive gassing and even explosions if open flames are involved, while AGM batteries need a slower, controlled charge for best results. Battery terminals—specifically the positive terminal and negative terminal—must always be connected in the correct sequence to avoid sparking and ensure your bike’s electrical energy is used safely. Use the following table for an easy reference to pros and cons, charging tips, and ideal charger types. Comparison Table: Battery Types, Pros, Cons, and Ideal Charging Tips Battery Type Pros Cons Ideal Charging Tips Lead Acid (Flooded) Low cost, widely available, easy to service Needs regular maintenance, risk of leaks & spills Charge slowly, check electrolyte solution; avoid overcharging AGM Motorcycle Battery Maintenance-free, vibration-resistant, longer lifespan More expensive, sensitive to overcharging Use a charger designed for AGM; never exceed 14.4V, ensure automatic shutoff feature Lithium-Ion Very lightweight, fast charging, retains charge well Higher initial cost, requires special charger, sensitive to temperature Charge only with compatible smart charger; avoid deep discharges How Battery Charge Impacts Motorcycle Performance Maintaining the correct battery charge plays a crucial role in your motorcycle’s overall performance. A well-charged battery delivers consistent electrical energy to your bike’s starter, lights, fuel injection, and onboard electronics. If the battery charge dips too low, starting can become unreliable, lights may dim, and sensitive electronics in your motorcycle’s electrical system could be at risk. In the worst cases, a low or dead battery leaves your motorcycle stranded, often at the most inconvenient times. Beyond just starting power, a healthy motorcycle battery supports stable voltage to the electrical system and reduces strain on alternators and regulators. Regularly monitoring battery charge—even during off-season storage—helps you avoid surprises and ensures your bike is ready to go when the weather improves. Following motorcycle battery charging tips—like partial charging (the 80-20 rule), using a smart charger, and not exceeding the recommended voltage—translates directly to better battery life, fewer breakdowns, and smoother rides all year long. For riders looking to keep their bikes in peak condition throughout the year, integrating smart battery care with broader seasonal maintenance routines can make a significant difference. Discover more practical strategies for protecting your motorcycle during every season in this essential guide to seasonal bike care. Fundamentals of Motorcycle Battery Charging Tips Why following proven motorcycle battery charging tips prevents premature battery failure Effect of proper battery charge on motorcycle longevity How to identify when to use a battery charger The basics of effective battery charging come down to a few key principles: always match your battery charger to your battery type, regularly monitor the health and charge of your motorcycle battery, and don’t overlook safety precautions. These battery charging tips help extend battery life while preventing accidental damage to your motorcycle’s electrical system or even personal injury. One surprisingly common cause of battery failure is leaving a battery partially discharged over time, which allows sulfation to build up inside lead acid batteries—dramatically shortening its useful life. Proper battery charge is also vital for maximizing your motorcycle’s longevity. The battery doesn’t just start the engine; it buffers electrical energy for all critical circuits, from engine management to navigation and communication. By understanding and applying essential motorcycle battery charging tips, such as never charging an AGM battery with a conventional battery charger, and testing battery voltage with a multimeter routinely, you can catch issues early and avoid the need for emergency service. If your motorcycle sits unused for weeks, it's wise to connect a smart charger with an automatic shutoff feature to maintain the correct voltage and prevent a dead battery. Choosing the Right Battery Charger for Motorcycle Battery Charging Tips Not all battery chargers are created equal, and using the wrong kind on your motorcycle battery can cause irreversible damage. Today’s market includes a wide range of battery chargers—from basic manual units to advanced smart chargers designed for each battery type. The most effective motorcycle battery charging tips always stress using a charger that matches your specific battery type, whether that’s a conventional lead acid, AGM motorcycle, or lithium-ion battery. Manual chargers can work well for conventional battery types if the user is attentive but lack features like an automatic shutoff, which can lead to overcharging. In contrast, a smart charger is a modern solution, automatically adjusting voltage and current and shutting off or switching to maintenance mode when the battery is fully charged. When selecting a battery charger, always check for compatibility flags—many models identify if they're suitable for use with AGM motorcycle batteries, and some come with dedicated settings for deep-cycle or lithium options. Look for features such as polarity protection to avoid damage from reversed positive terminal and negative terminal connections, short circuit protection, and overcharge safeguards. Today's best chargers are easy to use, quick to connect, and help ensure each battery charge is precise and safe. Selecting Safe and Suitable Battery Chargers The foundation of reliable motorcycle battery charging is a good charger. Never use a car battery charger or a generic charging device on your motorcycle battery unless it’s specifically marked as compatible. Car chargers may supply too much current for small motorcycle batteries, risking overheating, damage to battery terminals, or even explosions—especially in the presence of open flames or poor ventilation. Choose a charger designed for motorcycles with an appropriate charging rate (typically 1–3 amps for most standard batteries) and suited to the battery type in your bike, whether it’s lead acid, AGM, or lithium variety. Before making a purchase, confirm that your battery charger includes features like an automatic shutoff feature, trickle mode for maintenance charging, and compatibility labels for AGM motorcycle batteries or specialty lithium units. A dedicated smart charger is usually worth the investment, providing peace of mind by preventing overcharging and constantly adjusting output for maximum battery life. Avoid using makeshift solutions; sticking to proven products ensures your battery charge remains within optimal parameters for safety and performance. Automatic vs Manual Battery Chargers: Which Is Better? When deciding between automatic and manual battery chargers, consider both convenience and safety. Manual chargers require user intervention to monitor battery charge and stop the process when complete. While they offer simplicity for experienced users, the risk of overcharging is high if you forget to disconnect, leading to shortened battery life or even critical battery failure—particularly true with sensitive AGM motorcycle batteries. On the other hand, automatic battery chargers (or smart chargers) use sensors to detect battery charge level, automatically switch to trickle mode, and even shut off when the battery is fully charged. This hands-off approach not only protects against overcharging, but also means less time spent worrying about your battery’s health. For most riders—especially those storing motorcycles for the winter or only riding occasionally—a smart charger is highly recommended. The automatic shutoff feature, safety safeguards, and compatibility with various battery types make it the easiest way to keep a motorcycle battery charged safely and efficiently. Whether you choose a smart or manual model, always double-check manufacturer guidance to avoid damaging your battery or risking faults in the electrical system. How to Charge Your Motorcycle Battery: Step-by-Step Guide Charging your motorcycle battery correctly not only extends its life but ensures consistent performance every time you ride. This step-by-step guide covers essential safety precautions, the right way to connect the positive terminal and negative terminal, and how to monitor the battery charge throughout the process. By following these proven motorcycle battery charging tips, you’ll avoid common mistakes that lead to battery failure or electrical system faults. Whether you are working with a conventional lead acid unit, an AGM motorcycle battery, or even a modern lithium-ion option, always read your manufacturer’s manual before starting. Ensuring compatibility between your battery type and chosen battery charger is the foundation for a safe, successful charge. If in doubt about what type of battery you have or the proper procedure to follow, consult a motorcycle technician or contact a professional shop for guidance before proceeding. Safety Precautions for Charging Your Motorcycle Battery Before you begin charging your motorcycle battery, ensure you are working in a well-ventilated area, away from open flames or sparks, as hydrogen gas released during charging can be flammable. Always wear protective gloves and eye protection to safeguard against accidental acid splashes, especially if you are working with acid batteries or lead acid models. Never lean directly over the battery during charging in case pressure builds up inside the casing. Additionally, inspect your battery terminals for corrosion and secure all connections before initiating battery charge—this reduces electrical resistance and prevents accidental sparking. Take note of your surroundings and eliminate clutter. Keep flammable materials away from the battery charging area, and do not smoke or use any electrical appliance that could generate a spark nearby. Safety precautions also include ensuring the battery charger is unplugged before connecting to the battery terminals and using the charger only as instructed by the manufacturer. Following these steps keeps you and your motorcycle’s electrical system safe and maximizes the success of your battery charge. Proper Connection of Positive Terminal and Negative Terminal One fundamental tip for charging your motorcycle battery is the correct order of connecting the charger leads. Always connect the positive terminal (usually marked with a “+” or red cover) first before attaching the negative terminal (marked with a “-” or black cover). By doing this, you reduce the risk of accidental sparking and possible short circuits that can damage sensitive electronics in your motorcycle’s electrical system. The connection should be secure but not overtightened, to avoid stripping the battery terminal threads or risking a loose connection that could generate excess heat. When disconnecting after battery charge is complete, reverse the order: remove the negative terminal first, then the positive terminal. If your charger is equipped with an automatic shutoff feature, verify charging has ended before detaching cables. For the best results with AGM motorcycle batteries and other sensitive units, always use a smart charger with polarity protection, which prevents damage if the leads are connected in the wrong order. This practice is especially important for riders using advanced electronic systems or custom wiring modifications, where a voltage spike could trigger costly repairs. Monitoring Battery Charge and Battery Charge Completion A key battery charging tip is to continuously monitor your battery’s charging progress. Most smart chargers come with LED indicators or digital displays showing charge status and battery voltage. Check periodically to ensure the charger hasn’t encountered an error and that the battery temperature remains stable. For conventional lead acid and AGM batteries, a slow and steady battery charge is best; rapid charging or using a high-amperage battery charger not intended for motorcycles can cause overheating, swelling, or irreversible capacity loss. Once your battery charger signals that the battery is fully charged, disconnect the charger leads in the correct order and inspect the battery for any signs of leaks, swelling, or odd smells before reinstalling it in your motorcycle. It’s a smart practice to check the voltage with a multimeter: for most lead acid and AGM motorcycle batteries, a full charge should register between 12.6V and 12.8V. Properly monitoring battery charge during and after the process assures you can ride with confidence, knowing your electrical system is receiving stable, reliable power. AGM Motorcycle Batteries: Special Charging Tips Unique traits of AGM motorcycle batteries Optimal charging voltages for AGM motorcycle batteries Common mistakes when charging AGM motorcycle batteries AGM motorcycle batteries have rapidly become the preferred battery type for many modern bikes, thanks to their maintenance-free operation, ability to withstand vibrations, and resistance to leakage. However, AGM batteries also require special charging precautions that go beyond standard motorcycle battery charging tips. These units are highly sensitive to overcharging and can suffer permanent capacity loss or swelling if charged with a conventional battery charger. Always use a dedicated smart charger designed for AGM batteries, which carefully regulates voltage and current to prevent damage. When charging, never exceed 14.4 volts, and always follow the manufacturer’s recommendations. Many riders make the mistake of using generic or car chargers without an automatic shutoff feature, risking catastrophic battery failure. For best results, connect the positive terminal and negative terminal using insulated clips, double-check the voltage setting of your charger, and never attempt to "jump-start" an AGM battery with high amperage—a mistake that can immediately ruin battery life and void warranties. Regular voltage checks and adhering to the 80-20 rule (keeping the charge between 20% and 80% of capacity) helps maximize performance and lifespan. Common Motorcycle Battery Charging Tips and Maintenance Checklist Regularly inspect battery terminals for corrosion Ensure your battery charger matches your battery type Follow safety precautions during every charge Schedule routine testing of battery charge Keeping your motorcycle battery in top condition is about more than just occasional charging—regular inspection and maintenance are essential. Begin each season by inspecting battery terminals for corrosion, which appears as white or greenish residue around the positive terminal and negative terminal. Corrosion builds up quickly in humid environments or when batteries are left partially discharged, and it disrupts the flow of electrical energy, causing weak starts or unreliable performance. Clean terminals with a mixture of baking soda and water using a stiff brush, and reapply terminal protectant to slow future buildup. Make it a habit to check that your battery charger is compatible with your battery type each time you connect for a battery charge, especially if you own more than one charger or use borrowed equipment. Following established safety precautions ensures every charging cycle is safe, both for you and your motorcycle’s electrical system. Lastly, routine voltage tests with a multimeter—both before rides and after parking for extended periods—alert you to declining battery health, allowing proactive action before a dead battery can ruin your plans. People Also Ask—Expert Answers to Your Motorcycle Battery Charging Questions What's the best way to charge a motorcycle battery? A: The best way to charge a motorcycle battery is by using a compatible battery charger with automatic shut-off features. Always connect the positive terminal before the negative terminal, and never exceed recommended voltages, especially for AGM motorcycle batteries. What is the 80 20 rule for charging batteries? A: The 80-20 rule for battery charge recommends charging only up to 80% and discharging no lower than 20% to optimize battery life and prevent stress, especially relevant for AGM motorcycle batteries. Is it okay to charge a motorcycle battery while still connected? A: Charging your motorcycle battery while still connected can be safe if you use a smart battery charger and follow proper safety precautions, protecting sensitive electronics and maintaining battery integrity. How long should a motorcycle battery hold its charge? A: A fully charged motorcycle battery should retain its charge for several weeks to a couple of months, depending on battery type, age, and temperature. Frequently Asked Questions about Motorcycle Battery Charging Tips How often should I charge my motorcycle battery? For motorcycles ridden regularly, charge monthly or whenever voltage falls below 12.4V. For seasonal storage, maintain with a smart charger or check monthly. Can I use a car charger on my motorcycle battery? No, unless specifically designed for motorcycles. Car chargers risk overcharging and damaging smaller motorcycle batteries. Why do AGM motorcycle batteries need special charging? AGM batteries are sensitive to overcharging and require precisely regulated voltage, which smart chargers provide. How do I test the battery charge level accurately? Use a digital multimeter to check voltage: 12.6–12.8V is healthy for most lead acid and AGM batteries. Key Takeaways: Motorcycle Battery Charging Tips for Long-Term Performance Always use manufacturer-recommended battery chargers Monitor both positive and negative terminal connections during charging Frequent battery charge and maintenance lengthens lifespan AGM motorcycle batteries require specialized care Next Steps: Keep Your Motorcycle Battery in Top Shape "Call Nasty Performance Motorcycle Shop Today: 847-458-4858 for expert advice on motorcycle battery charging tips and premium service." Stay charged, ride smart—apply these expert motorcycle battery charging tips and enjoy hassle-free performance on every journey. As you put these battery charging strategies into practice, remember that true motorcycle reliability comes from a holistic approach to care. From battery health to seasonal storage, every detail matters in keeping your ride ready for adventure. If you’re eager to elevate your maintenance routine and uncover more ways to protect your investment year-round, explore the top seasonal bike care secrets every rider should know. This resource is packed with actionable insights that go beyond the battery, helping you master every aspect of motorcycle upkeep for lasting performance and peace of mind.

Terms of Service

Privacy Policy

Core Modal Title

Sorry, no results found

You Might Find These Articles Interesting

T
Please Check Your Email
We Will Be Following Up Shortly
*
*
*