Add Row
Add Element
cropper
update

Nasty Performance ~ 847-458-4858 

update
Add Element
  • Blog Home
  • Categories
    • Motorcycle Maintenance
    • Riding Tips & Preps
    • Safety & Inspection
    • Customizations & Upgrades
    • DIY Motorcycle Repairs
    • Motocycle Audio Systems
    • Motocycle Seasonal Care & Storage
    • Engine, Electrical Performance
  • Bike Night
  • Nasty Performance Motorcycle Shop
April 05.2026
1 Minute Read

Motorcycle Battery Charging Tips

Did you know that up to 40% of motorcycles suffer early battery failure due to poor charging habits? If you’re one of the many riders who’ve experienced a dead battery miles from home, it’s time to upgrade your know-how. In this comprehensive guide, you’ll unlock the essential motorcycle battery charging tips that not only save money but keep your ride charged and ready, ride after ride.

Surprising Facts About Motorcycle Battery Charging Tips

"Up to 40% of motorcycles suffer early battery failure due to poor charging habits—mastering motorcycle battery charging tips can save you time and costs."

Motorcycle batteries are vital to your ride’s reliability, yet charging mistakes remain common. Many riders unknowingly reduce their battery life—sometimes by years—simply by using an improper battery charger or neglecting periodic battery charge checks. The truth is, adopting safe and correct motorcycle battery charging tips isn’t just about immediate function; it’s an investment in your motorcycle’s electrical system and long-term performance. By using a compatible battery charger and following proper safety precautions—like connecting the positive terminal and negative terminal correctly—you dramatically reduce your risk of a dead battery and electrical faults. Let's dive into the facts and learn how to protect your investment.

motorcycle battery charging tips: motorcycle on a stand in a clean modern garage, rider inspecting battery area with charger connected, realistic detail, tools in background, natural daylight

What You'll Learn: Essential Motorcycle Battery Charging Tips

  • The safest and most effective motorcycle battery charging tips
  • How to use a battery charger and maintain battery charge
  • Differences among various motorcycle battery types, including AGM motorcycle batteries
  • Proper handling of positive terminal and negative terminal connections
  • Step-by-step guidance on charging your motorcycle battery
  • Troubleshooting common issues with motorcycle batteries

Understanding Your Motorcycle Battery

Every motorcycle relies on a reliable battery to start the engine, power essential electronics, and keep you safe on the road. Yet, not all batteries are created equal. Understanding your motorcycle battery is the first step toward effective battery charge management, maximum battery life, and hassle-free rides. Knowing your battery type—whether it's a conventional lead acid, AGM motorcycle battery, or advanced lithium model—affects how you charge, maintain, and select the right battery charger. With varying needs for electrolyte solution management, cycling, and charge rate, picking suitable battery chargers and understanding your battery’s electrical energy requirements keeps you from suffering premature failure or costly mistakes down the road.

Most modern motorcycles use either flooded lead acid batteries, AGM batteries (Absorbed Glass Mat), or lithium-ion options. Conventional lead acid batteries are cost-effective but require more frequent maintenance and precise charging techniques, while AGM motorcycle options last longer and offer greater resistance to vibration, though they need a special charger and proper safety precautions. Knowing what battery you have is essential: using the wrong charging method or exceeding the correct voltages can shorten battery life, risk damage to your bike’s electrical system, or leave you stranded. Let’s look closer at how each major battery type differs and what that means for charging your motorcycle battery.

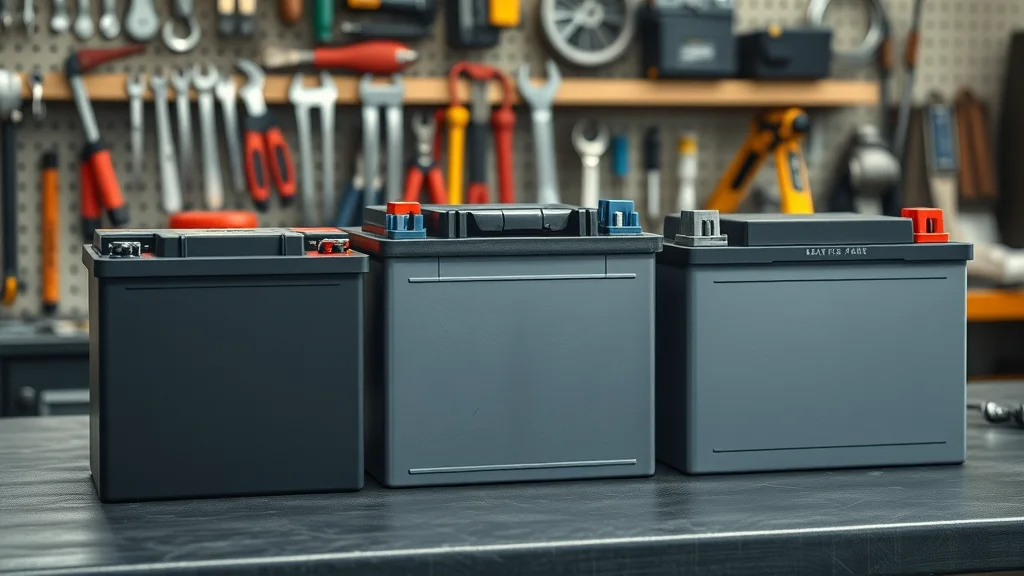
Common Motorcycle Battery Types: Lead Acid, AGM Motorcycle, and More

Motorcycle batteries come in various battery types, each with unique advantages and maintenance requirements. The most common are flooded lead acid (conventional battery), AGM motorcycle batteries, and increasingly, lithium-ion. Lead acid batteries rely on an electrolyte solution and require periodic top-ups with distilled water, as well as close attention to charge rate and cycle. AGM motorcycle batteries, on the other hand, utilize a fiberglass mat that absorbs the electrolyte, making them more resistant to leaks and vibration but needing a charger designed specifically for AGM batteries to avoid overcharging or undercharging. Lithium-ion motorcycle batteries offer lightweight convenience and rapid charging but may not be compatible with all charging systems unless a special charger is used.

Each battery type dictates a specific approach for battery charge and affects your choice of battery charger. For example, charging a lead acid battery with too high a current can cause excessive gassing and even explosions if open flames are involved, while AGM batteries need a slower, controlled charge for best results. Battery terminals—specifically the positive terminal and negative terminal—must always be connected in the correct sequence to avoid sparking and ensure your bike’s electrical energy is used safely. Use the following table for an easy reference to pros and cons, charging tips, and ideal charger types.

Comparison Table: Battery Types, Pros, Cons, and Ideal Charging Tips
Battery Type Pros Cons Ideal Charging Tips
Lead Acid (Flooded) Low cost, widely available, easy to service Needs regular maintenance, risk of leaks & spills Charge slowly, check electrolyte solution; avoid overcharging
AGM Motorcycle Battery Maintenance-free, vibration-resistant, longer lifespan More expensive, sensitive to overcharging Use a charger designed for AGM; never exceed 14.4V, ensure automatic shutoff feature
Lithium-Ion Very lightweight, fast charging, retains charge well Higher initial cost, requires special charger, sensitive to temperature Charge only with compatible smart charger; avoid deep discharges

motorcycle battery charging tips: close-up of lead acid, AGM, and lithium motorcycle batteries on workbench, highlighting casing and size differences, photorealistic, workshop background

How Battery Charge Impacts Motorcycle Performance

Maintaining the correct battery charge plays a crucial role in your motorcycle’s overall performance. A well-charged battery delivers consistent electrical energy to your bike’s starter, lights, fuel injection, and onboard electronics. If the battery charge dips too low, starting can become unreliable, lights may dim, and sensitive electronics in your motorcycle’s electrical system could be at risk. In the worst cases, a low or dead battery leaves your motorcycle stranded, often at the most inconvenient times.

Beyond just starting power, a healthy motorcycle battery supports stable voltage to the electrical system and reduces strain on alternators and regulators. Regularly monitoring battery charge—even during off-season storage—helps you avoid surprises and ensures your bike is ready to go when the weather improves. Following motorcycle battery charging tips—like partial charging (the 80-20 rule), using a smart charger, and not exceeding the recommended voltage—translates directly to better battery life, fewer breakdowns, and smoother rides all year long.

For riders looking to keep their bikes in peak condition throughout the year, integrating smart battery care with broader seasonal maintenance routines can make a significant difference. Discover more practical strategies for protecting your motorcycle during every season in this essential guide to seasonal bike care.

Fundamentals of Motorcycle Battery Charging Tips

  • Why following proven motorcycle battery charging tips prevents premature battery failure
  • Effect of proper battery charge on motorcycle longevity
  • How to identify when to use a battery charger

The basics of effective battery charging come down to a few key principles: always match your battery charger to your battery type, regularly monitor the health and charge of your motorcycle battery, and don’t overlook safety precautions. These battery charging tips help extend battery life while preventing accidental damage to your motorcycle’s electrical system or even personal injury. One surprisingly common cause of battery failure is leaving a battery partially discharged over time, which allows sulfation to build up inside lead acid batteries—dramatically shortening its useful life.

Proper battery charge is also vital for maximizing your motorcycle’s longevity. The battery doesn’t just start the engine; it buffers electrical energy for all critical circuits, from engine management to navigation and communication. By understanding and applying essential motorcycle battery charging tips, such as never charging an AGM battery with a conventional battery charger, and testing battery voltage with a multimeter routinely, you can catch issues early and avoid the need for emergency service. If your motorcycle sits unused for weeks, it's wise to connect a smart charger with an automatic shutoff feature to maintain the correct voltage and prevent a dead battery.

Choosing the Right Battery Charger for Motorcycle Battery Charging Tips

Not all battery chargers are created equal, and using the wrong kind on your motorcycle battery can cause irreversible damage. Today’s market includes a wide range of battery chargers—from basic manual units to advanced smart chargers designed for each battery type. The most effective motorcycle battery charging tips always stress using a charger that matches your specific battery type, whether that’s a conventional lead acid, AGM motorcycle, or lithium-ion battery. Manual chargers can work well for conventional battery types if the user is attentive but lack features like an automatic shutoff, which can lead to overcharging. In contrast, a smart charger is a modern solution, automatically adjusting voltage and current and shutting off or switching to maintenance mode when the battery is fully charged.

When selecting a battery charger, always check for compatibility flags—many models identify if they're suitable for use with AGM motorcycle batteries, and some come with dedicated settings for deep-cycle or lithium options. Look for features such as polarity protection to avoid damage from reversed positive terminal and negative terminal connections, short circuit protection, and overcharge safeguards. Today's best chargers are easy to use, quick to connect, and help ensure each battery charge is precise and safe.

Selecting Safe and Suitable Battery Chargers

The foundation of reliable motorcycle battery charging is a good charger. Never use a car battery charger or a generic charging device on your motorcycle battery unless it’s specifically marked as compatible. Car chargers may supply too much current for small motorcycle batteries, risking overheating, damage to battery terminals, or even explosions—especially in the presence of open flames or poor ventilation. Choose a charger designed for motorcycles with an appropriate charging rate (typically 1–3 amps for most standard batteries) and suited to the battery type in your bike, whether it’s lead acid, AGM, or lithium variety.

Before making a purchase, confirm that your battery charger includes features like an automatic shutoff feature, trickle mode for maintenance charging, and compatibility labels for AGM motorcycle batteries or specialty lithium units. A dedicated smart charger is usually worth the investment, providing peace of mind by preventing overcharging and constantly adjusting output for maximum battery life. Avoid using makeshift solutions; sticking to proven products ensures your battery charge remains within optimal parameters for safety and performance.

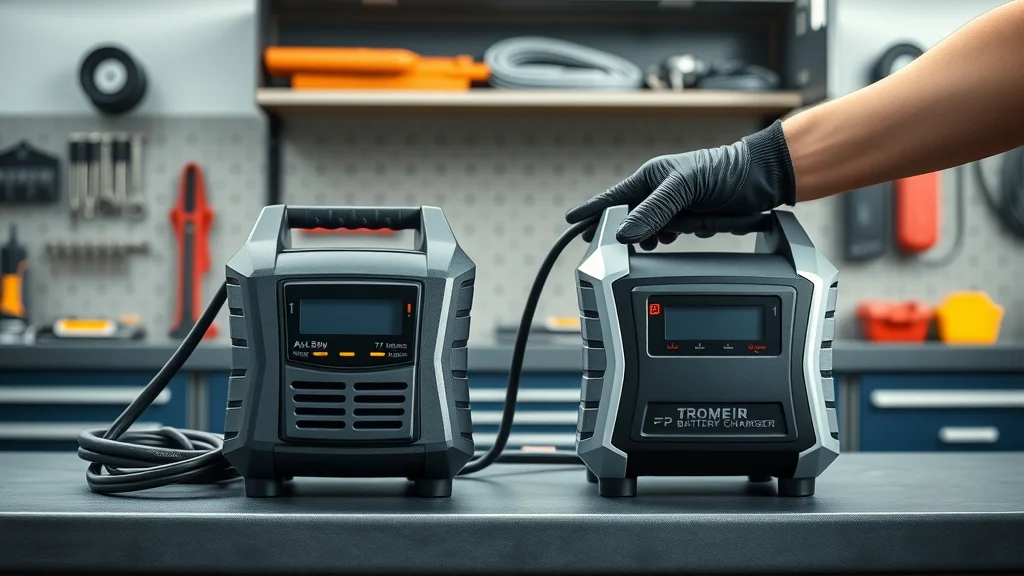
Automatic vs Manual Battery Chargers: Which Is Better?

When deciding between automatic and manual battery chargers, consider both convenience and safety. Manual chargers require user intervention to monitor battery charge and stop the process when complete. While they offer simplicity for experienced users, the risk of overcharging is high if you forget to disconnect, leading to shortened battery life or even critical battery failure—particularly true with sensitive AGM motorcycle batteries. On the other hand, automatic battery chargers (or smart chargers) use sensors to detect battery charge level, automatically switch to trickle mode, and even shut off when the battery is fully charged. This hands-off approach not only protects against overcharging, but also means less time spent worrying about your battery’s health.

For most riders—especially those storing motorcycles for the winter or only riding occasionally—a smart charger is highly recommended. The automatic shutoff feature, safety safeguards, and compatibility with various battery types make it the easiest way to keep a motorcycle battery charged safely and efficiently. Whether you choose a smart or manual model, always double-check manufacturer guidance to avoid damaging your battery or risking faults in the electrical system.

motorcycle battery charging tips: display of automatic and manual motorcycle battery chargers on workbench, technician hand in protective glove holding each, comparison in workshop setting

How to Charge Your Motorcycle Battery: Step-by-Step Guide

Charging your motorcycle battery correctly not only extends its life but ensures consistent performance every time you ride. This step-by-step guide covers essential safety precautions, the right way to connect the positive terminal and negative terminal, and how to monitor the battery charge throughout the process. By following these proven motorcycle battery charging tips, you’ll avoid common mistakes that lead to battery failure or electrical system faults.

Whether you are working with a conventional lead acid unit, an AGM motorcycle battery, or even a modern lithium-ion option, always read your manufacturer’s manual before starting. Ensuring compatibility between your battery type and chosen battery charger is the foundation for a safe, successful charge. If in doubt about what type of battery you have or the proper procedure to follow, consult a motorcycle technician or contact a professional shop for guidance before proceeding.

Safety Precautions for Charging Your Motorcycle Battery

Before you begin charging your motorcycle battery, ensure you are working in a well-ventilated area, away from open flames or sparks, as hydrogen gas released during charging can be flammable. Always wear protective gloves and eye protection to safeguard against accidental acid splashes, especially if you are working with acid batteries or lead acid models. Never lean directly over the battery during charging in case pressure builds up inside the casing. Additionally, inspect your battery terminals for corrosion and secure all connections before initiating battery charge—this reduces electrical resistance and prevents accidental sparking.

Take note of your surroundings and eliminate clutter. Keep flammable materials away from the battery charging area, and do not smoke or use any electrical appliance that could generate a spark nearby. Safety precautions also include ensuring the battery charger is unplugged before connecting to the battery terminals and using the charger only as instructed by the manufacturer. Following these steps keeps you and your motorcycle’s electrical system safe and maximizes the success of your battery charge.

Proper Connection of Positive Terminal and Negative Terminal

One fundamental tip for charging your motorcycle battery is the correct order of connecting the charger leads. Always connect the positive terminal (usually marked with a “+” or red cover) first before attaching the negative terminal (marked with a “-” or black cover). By doing this, you reduce the risk of accidental sparking and possible short circuits that can damage sensitive electronics in your motorcycle’s electrical system. The connection should be secure but not overtightened, to avoid stripping the battery terminal threads or risking a loose connection that could generate excess heat.

When disconnecting after battery charge is complete, reverse the order: remove the negative terminal first, then the positive terminal. If your charger is equipped with an automatic shutoff feature, verify charging has ended before detaching cables. For the best results with AGM motorcycle batteries and other sensitive units, always use a smart charger with polarity protection, which prevents damage if the leads are connected in the wrong order. This practice is especially important for riders using advanced electronic systems or custom wiring modifications, where a voltage spike could trigger costly repairs.

Monitoring Battery Charge and Battery Charge Completion

A key battery charging tip is to continuously monitor your battery’s charging progress. Most smart chargers come with LED indicators or digital displays showing charge status and battery voltage. Check periodically to ensure the charger hasn’t encountered an error and that the battery temperature remains stable. For conventional lead acid and AGM batteries, a slow and steady battery charge is best; rapid charging or using a high-amperage battery charger not intended for motorcycles can cause overheating, swelling, or irreversible capacity loss.

Once your battery charger signals that the battery is fully charged, disconnect the charger leads in the correct order and inspect the battery for any signs of leaks, swelling, or odd smells before reinstalling it in your motorcycle. It’s a smart practice to check the voltage with a multimeter: for most lead acid and AGM motorcycle batteries, a full charge should register between 12.6V and 12.8V. Properly monitoring battery charge during and after the process assures you can ride with confidence, knowing your electrical system is receiving stable, reliable power.

AGM Motorcycle Batteries: Special Charging Tips

  • Unique traits of AGM motorcycle batteries
  • Optimal charging voltages for AGM motorcycle batteries
  • Common mistakes when charging AGM motorcycle batteries

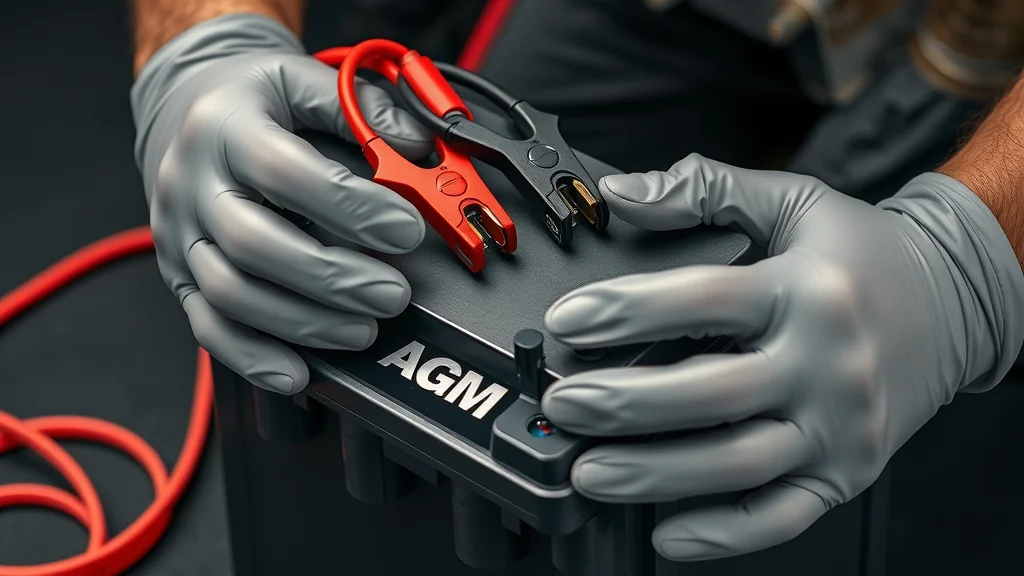
AGM motorcycle batteries have rapidly become the preferred battery type for many modern bikes, thanks to their maintenance-free operation, ability to withstand vibrations, and resistance to leakage. However, AGM batteries also require special charging precautions that go beyond standard motorcycle battery charging tips. These units are highly sensitive to overcharging and can suffer permanent capacity loss or swelling if charged with a conventional battery charger. Always use a dedicated smart charger designed for AGM batteries, which carefully regulates voltage and current to prevent damage.

When charging, never exceed 14.4 volts, and always follow the manufacturer’s recommendations. Many riders make the mistake of using generic or car chargers without an automatic shutoff feature, risking catastrophic battery failure. For best results, connect the positive terminal and negative terminal using insulated clips, double-check the voltage setting of your charger, and never attempt to "jump-start" an AGM battery with high amperage—a mistake that can immediately ruin battery life and void warranties. Regular voltage checks and adhering to the 80-20 rule (keeping the charge between 20% and 80% of capacity) helps maximize performance and lifespan.

agm motorcycle battery charging tips: close-up of gloved hands connecting charger clips to AGM motorcycle battery positive and negative terminals, photorealistic, workshop surface

Common Motorcycle Battery Charging Tips and Maintenance Checklist

  • Regularly inspect battery terminals for corrosion
  • Ensure your battery charger matches your battery type
  • Follow safety precautions during every charge
  • Schedule routine testing of battery charge

Keeping your motorcycle battery in top condition is about more than just occasional charging—regular inspection and maintenance are essential. Begin each season by inspecting battery terminals for corrosion, which appears as white or greenish residue around the positive terminal and negative terminal. Corrosion builds up quickly in humid environments or when batteries are left partially discharged, and it disrupts the flow of electrical energy, causing weak starts or unreliable performance. Clean terminals with a mixture of baking soda and water using a stiff brush, and reapply terminal protectant to slow future buildup.

Make it a habit to check that your battery charger is compatible with your battery type each time you connect for a battery charge, especially if you own more than one charger or use borrowed equipment. Following established safety precautions ensures every charging cycle is safe, both for you and your motorcycle’s electrical system. Lastly, routine voltage tests with a multimeter—both before rides and after parking for extended periods—alert you to declining battery health, allowing proactive action before a dead battery can ruin your plans.

motorcycle battery charging tips: owner inspecting battery terminals for corrosion, pointing with one hand and holding flashlight, open seat in sunlight, clear focus on terminal area

People Also Ask—Expert Answers to Your Motorcycle Battery Charging Questions

What's the best way to charge a motorcycle battery?

A: The best way to charge a motorcycle battery is by using a compatible battery charger with automatic shut-off features. Always connect the positive terminal before the negative terminal, and never exceed recommended voltages, especially for AGM motorcycle batteries.

What is the 80 20 rule for charging batteries?

A: The 80-20 rule for battery charge recommends charging only up to 80% and discharging no lower than 20% to optimize battery life and prevent stress, especially relevant for AGM motorcycle batteries.

Is it okay to charge a motorcycle battery while still connected?

A: Charging your motorcycle battery while still connected can be safe if you use a smart battery charger and follow proper safety precautions, protecting sensitive electronics and maintaining battery integrity.

How long should a motorcycle battery hold its charge?

A: A fully charged motorcycle battery should retain its charge for several weeks to a couple of months, depending on battery type, age, and temperature.

Frequently Asked Questions about Motorcycle Battery Charging Tips

  • How often should I charge my motorcycle battery? For motorcycles ridden regularly, charge monthly or whenever voltage falls below 12.4V. For seasonal storage, maintain with a smart charger or check monthly.
  • Can I use a car charger on my motorcycle battery? No, unless specifically designed for motorcycles. Car chargers risk overcharging and damaging smaller motorcycle batteries.
  • Why do AGM motorcycle batteries need special charging? AGM batteries are sensitive to overcharging and require precisely regulated voltage, which smart chargers provide.
  • How do I test the battery charge level accurately? Use a digital multimeter to check voltage: 12.6–12.8V is healthy for most lead acid and AGM batteries.

Key Takeaways: Motorcycle Battery Charging Tips for Long-Term Performance

  • Always use manufacturer-recommended battery chargers
  • Monitor both positive and negative terminal connections during charging
  • Frequent battery charge and maintenance lengthens lifespan
  • AGM motorcycle batteries require specialized care

motorcycle battery charging tips: well-maintained bike, open seat with healthy battery, rider giving thumbs-up, greenery background, photorealistic, natural daylight

Next Steps: Keep Your Motorcycle Battery in Top Shape

"Call Nasty Performance Motorcycle Shop Today: 847-458-4858 for expert advice on motorcycle battery charging tips and premium service."

Stay charged, ride smart—apply these expert motorcycle battery charging tips and enjoy hassle-free performance on every journey.

As you put these battery charging strategies into practice, remember that true motorcycle reliability comes from a holistic approach to care. From battery health to seasonal storage, every detail matters in keeping your ride ready for adventure. If you’re eager to elevate your maintenance routine and uncover more ways to protect your investment year-round, explore the top seasonal bike care secrets every rider should know. This resource is packed with actionable insights that go beyond the battery, helping you master every aspect of motorcycle upkeep for lasting performance and peace of mind.

Engine, Electrical Performance

0 Comments

Write A Comment

*
*
Please complete the captcha to submit your comment.
Related Posts All Posts

Motorcycle Carburetor Cleaning Service: Fix Rough Idles Fast

Did you know that over 80% of motorcycle performance problems—especially on sports bikes—are caused by neglected carburetor maintenance? That rough idle stealing away your fun could be a clogged carb just waiting for some expert attention. A professional motorcycle carburetor cleaning service goes far beyond what spray-in-a-can carb clean products can do, restoring crisp throttle, smoother idling, and the thrill of a responsive ride. If your ride hesitates, stalls, or struggles to start, don’t miss these crucial insights that could have you back on the road—fast! What You'll Learn About Motorcycle Carburetor Cleaning Service The importance of a professional motorcycle carburetor cleaning service for peak performance and reliability Common symptoms that reveal dirty carbs on your high-revving sports bike An overview of the carb clean and rebuild service process—what you actually get for your investment Price breakdowns and what to expect from reputable professional services Why Motorcycle Carburetor Cleaning Service Matters: A Surprising Fact Did you know that over 80% of motorcycle performance issues—especially on sports bikes—are linked to neglected carburetor maintenance? A professional motorcycle carburetor cleaning service can drastically improve power, acceleration, and fuel efficiency. If your motorcycle stumbles at idle, struggles at high RPMs, or simply won’t fire up till warm, the culprit is often a dirty or unbalanced carburetor. Today's sports bikes and even dedicated track machines like the Ducati Panigale rely on intricate fuel delivery, and even a small amount of buildup can sabotage performance. Avoid unnecessary part replacements, repeated "tank slappers" from unpredictable power delivery, and enjoy safer, more reliable rides with timely expert carb service. For riders interested in a deeper dive into the step-by-step process and best practices for keeping your motorcycle’s carburetor in top shape, our detailed guide on motorcycle carburetor cleaning techniques covers everything from disassembly to reassembly, ensuring you understand what goes into a thorough service. Carb Clean and Rebuild Service: Key Features & Benefits Deep ultrasonic carburetor cleaning for motorcycles, breaking down even the most stubborn deposits in critical passages Precision carb synchronization and tuning for sports bike models—matched to factory base settings for maximum efficiency and power Carburetor rebuild service with OEM-grade or superior replacement components for dependable operation Immediate benefits: sharper throttle response, reduced fuel line vapor lock, improved economy, and glass-smooth idling even on cold starts "A proper motorcycle carburetor cleaning service is crucial for reliable road performance—especially for high-revving sports bikes." — Lead Mechanic at Nasty Performance Motorcycle Shop How Hard Is It to Clean a Carburetor on a Motorcycle? Cleaning a motorcycle carburetor isn’t just a matter of spraying some cleaner and calling it done. Even experienced DIYers can miss the hidden internal passages or jets, especially in multi-carb racks found on sports and sport bike models like the Ducati Panigale. Many home attempts, using basic tools from places like Harbor Freight, fall short when it comes to precision cleaning and reassembly. Proper service involves total disassembly, professional ultrasonic cleaning, part inspection, and precise reassembly to set to factory base settings. For complex setups, especially multi-carb sports bikes, a professional motorcycle carburetor cleaning service is key to lasting reliability and performance. A clean package from trusted bike service providers is always a better bet than “bolt on and fire” shortcuts. How Often Does a Motorcycle Carburetor Need to Be Cleaned? Most manufacturers, particularly for high-performance sports bikes, recommend a thorough motorcycle carburetor cleaning service every 12,000 to 15,000 miles. However, bikes that sit for long periods, run with old fuel, or experience rough idles, hesitation, or backfiring should have their carbs inspected sooner. Regular service with clean package services helps prevent the “steals away our fun” scenarios caused by sluggish throttle or persistent stalling. Professional bike service programs often send friendly dept sms txt reminders for scheduled maintenance or offer package services like those popular in Fullerton, CA sport bike shops. Carburetor Cleaning Intervals by Motorcycle Type Motorcycle Type Recommended Cleaning Interval Symptoms of Dirty Carb Sports Bike Every 12,000 miles Rough idle, hesitation, reduced throttle response Cruiser Every 15,000 miles Poor acceleration, stalling Tourer Every 13,000 miles Backfiring, hard starting Can You Clean a Motorcycle Carburetor Without Removing It? While there are many surface cleaning sprays and quick-fix additives on the market, they usually can’t reach the crucial internal passages, jets, and emulsifier tubes—areas most likely to be blocked on sports bikes. True carb clean package services require removing the carburetor from the engine, complete disassembly, and cleaning every component in a specialized ultrasonic tank. This process ensures all obstructed fuel line paths and airways are restored. A quick spray might clear some debris temporarily, but only a full rebuild service ensures long-term smooth operation and eliminates recurring poor idle or throttle issues. What’s Included in a Full Carb Clean and Rebuild Service? Complete disassembly of all carburetor(s) from your bike Ultrasonic cleaning of jets, venturi, float bowls, and all passages Inspection and replacement of worn or compromised parts using OEM or upgraded components Precise adjustment and synchronization of multi-carb assemblies for smooth, consistent throttle response—especially vital for high-performance sports bike models How Much Does It Cost to Get Carbs Balanced? On average, carburetor balancing will cost between $100 and $300, depending on the type of motorcycle and the complexity of its carburetor setup. For multi-carb sports bikes or rare models like the Ducati Panigale, the price may trend towards the higher end, especially if additional diagnostic services or replacement parts are required. Many reputable bike service shops offer our complete rebuild and carb clean package services, which include balancing, ultrasonic cleaning, carb reassembly, and synchronization. Always ask about turnaround time and whether your chosen service shop includes carb balancing as part of their clean package; it’s the difference between “just clean” and truly performance-ready carbs back on your bike at a reasonable price. What Are the Most Common Signs You Need a Carb Clean or Rebuild Service? Rough idle and frequent stalling, even after bike is till warm Significantly decreased throttle response, especially under load Loss of power at high RPMs—noticeable when accelerating hard on sports bikes Hard starting after the bike has been sitting or between short rides Excessive fuel odor or visible smoke from the exhaust, suggesting fuel line issues or stuck float Frequently Asked Questions About Motorcycle Carburetor Cleaning Service Can I use additives instead of a carburetor cleaning service? While fuel additives may help break down minor varnish in the fuel line or tank, they are rarely effective for blocked jets or internal passages. Professional carburetor cleaning is necessary for a true fresh start. How long does the service take for a sports bike? A complete carb clean and rebuild service usually takes one to two business days, depending on bike complexity and parts availability. Shop sms txt or dept sms will often notify you when ready for pickup. Does a carburetor cleaning service improve fuel efficiency? Absolutely! Clean, synchronized carbs ensure precise fuel and air delivery, resulting in better economy and less risk of running rich or lean. Will cleaning the carb fix all rough idle issues? Carburetor cleaning solves most rough idle symptoms, especially those tied to fueling. However, issues with wheel bearings, ignition, or external fuel line clogs may also require attention. A trustworthy bike service shop will diagnose root causes during the clean package inspection. Key Takeaways: Why Choose a Professional Motorcycle Carburetor Cleaning Service Professional carburetor cleaning services extend your engine’s lifespan by preventing unnecessary wear and costly repairs down the road Specialized sports bike service ensures factory-level tuning and optimal performance, exactly as intended for models like the Ducati Panigale A full carb clean and rebuild service addresses the root causes of poor running—not just the symptoms—ensuring you get the most from every ride Ready to Fix Rough Idles? Call Nasty Performance Motorcycle Shop Today: 847-458-4858 Your ride deserves to run at its best! For ultra-fast turnaround time, proven results, and expert service online or in shop, call Nasty Performance Motorcycle Shop now at 847-458-4858 and ask for our carb clean package services. Don’t let carb problems steal away your fun—stop struggling till warm and get your carbs back on track with certified pros. If you’re committed to keeping your motorcycle in peak condition year-round, don’t stop at carburetor care. Discover essential strategies for every season in our comprehensive resource, Seasonal Bike Care Secrets Every Rider Must Know. From prepping for winter storage to maximizing summer performance, these expert tips will help you avoid common pitfalls and extend the life of your ride. Take your maintenance routine to the next level and ensure your bike is always ready for the road, no matter the weather.

Motorcycle Battery Testing and Replacement—Avoid Dead Starts Now

Did you know that over 40% of motorcycle breakdowns are caused by battery failure? There’s nothing more frustrating than gearing up for a ride, pressing the ignition, and hearing…nothing. Motorcycle battery testing and replacement is your insurance against these dead starts and inconvenient roadside delays. This guide will uncover practical methods to keep your cycle battery in optimal shape, how to get free battery testing, and which replacement options offer the best value. Stay ahead with proven strategies for reliable starts and peace of mind on every ride. Why Motorcycle Battery Testing and Replacement Is Essential: Surprising Stats and Uncommon Facts Battery issues are the leading cause of non-accidental motorcycle breakdowns, and recent data shows that a shocking 40% of motorcycles are stranded due to a weak or dead battery. Overlooking regular battery testing can not only leave you stranded but also trigger costly repairs for your entire charging system. With modern bikes drawing ever more current for accessories like heated grips, GPS, and advanced electronics, the strain on your cycle battery is at an all-time high. Implementing a regular testing and replacement routine is crucial—especially if you rely on your motorcycle for commuting, touring, or even occasional weekend adventures. "Did you know that over 40% of motorcycle breakdowns are caused by battery failure?" Uncommon facts? Some batteries, even when they seem to crank an engine, may not be providing enough consistent power for reliable operation. A load test or voltage check is your best defense—quick checks at home or via a free battery test at a retailer can prevent worse headaches. Also, new high-performance batteries can last twice as long as traditional lead-acid types, turning a small upfront investment into long-term savings and peace of mind. What You'll Learn About Motorcycle Battery Testing and Replacement Key signs a motorcycle battery is failing How to perform a motorcycle battery test When replacement is necessary Comparison of top replacement motorcycle batteries Where to get free battery tests FAQs on maintenance and longevity Motorcycle Battery Types Explained Understanding battery types is crucial for effective motorcycle battery testing and replacement. Choosing the right model ensures your cycle battery matches your riding needs, bike requirements, and climate extremes. While all motorcycle batteries power the same basic functions—starting the engine and running electrical accessories—their inner construction differs significantly, affecting performance, battery life, and required maintenance. Modern motorcycles often come equipped with AGM (Absorbed Glass Mat) batteries, but alternatives like lithium offer compelling advantages as well as unique maintenance considerations that directly impact how you approach battery testing and replacement. Each battery’s chemistry influences how it withstands vibration, temperature swings, and deep discharges. Some batteries, such as advanced lithium models, feature increased cycle durability and rapid charging, but require compatible chargers and careful voltage management. Knowing the construction and typical symptoms of battery fatigue will streamline the testing and replacement process, ensuring you select the best option for reliable starts and extended service life. When considering which battery type best suits your motorcycle and riding habits, it's also helpful to understand how seasonal changes can impact battery performance and maintenance routines. For a detailed look at preparing your bike for different weather conditions, check out these seasonal bike care secrets every rider should know. Standard Lead-Acid vs AGM vs Lithium—Which Motorcycle Battery Is Best? Cycle battery construction: Lead-acid batteries feature simple design and affordable costs, while AGMs add fiberglass mat separators for better vibration resistance. Lithium batteries, the latest innovation, are ultra-light and use advanced cell chemistry for maximum performance. Advantages and disadvantages: Lead-acid is tried and true but heavier and more prone to spills. AGM offers sealed, maintenance-free convenience but can be pricier. Lithium weighs the least and handles deep cycling well, but can be more sensitive to temperature and demands careful charging. Common lifespans: Lead-acid batteries generally last two to four years, AGM three to five, and lithium can reach up to five or even seven years with proper care and battery testing. "Choosing the right motorcycle battery depends on your bike, climate, and usage." Battery Testing: How to Test Your Motorcycle Battery for Performance and Health Regular battery testing is the cornerstone of avoiding a dead battery and unplanned breakdowns. Conducting periodic tests—especially before and after long periods of storage—can reveal early signs of a weak or failing battery. The most reliable testing methods combine visual inspection, digital multimeter voltage tests, load testing, and routine checks on battery charging efficiency. These easy DIY steps empower every rider to spot issues before they turn costly, while also extending the battery life of your cycle battery. For accurate health assessment, consider pairing your voltage and load test results with regular professional battery tests at automotive retailers or your local motorcycle shop. Proper battery testing also helps catch hidden issues in your motorcycle's charging system, such as a faulty regulator or stator, helping you address causes—not just symptoms—of power loss. Whether you ride daily or weekly, integrating a quick check during routine maintenance can help you ride with confidence, knowing your electrical system is in top shape. Battery Test Steps—DIY Motorcycle Battery Testing Guide Visual inspection for corrosion and leaks: Check for any buildup on terminals, cracked casings, or visible fluid leaks. Corroded connections are a common cause of battery sensitivity and difficulty in starting the engine. Voltage measurements using a multimeter: With the bike off, set a multimeter to DC volts and measure across the terminals. A fully charged 12V battery should read at least 12.6 volts. Anything below 12.4V may signal a weak or failing battery. Battery testing via load test procedures: Use a load tester for a more accurate battery test—this simulates the starter motor’s current draw and exposes batteries that cannot hold a charge under stress. Battery charging checks: After load testing, charge the battery and retest. Persistent low readings mean it’s time to replace your motorcycle battery rather than risk a dead start. Free Battery Test and Professional Services for Motorcycle Batteries A free battery test is an effective, no-pressure way to assess your motorcycle battery’s condition. Major auto retailers and select motorcycle shops offer these tests, using professional-grade diagnostic equipment. The process is quick—often finished in under 10 minutes—and covers both voltage and load test protocols, so you get a clear picture of your battery’s state before making replacement decisions. Riders often overlook these battery services, yet they are vital for preventing being stranded by a weak or failing battery. These checks also help evaluate your entire charging system and can extend battery life with timely, targeted maintenance. Next time you notice sluggish starts or dim headlights, visit a reputable retailer for a free battery test—it’s a small investment of time that could save you a lot of trouble. Where to Get a Free Battery Test—Motorcycle Shops and Auto Retailers Many leading stores and local motorcycle shops now provide free battery testing as part of their standard customer service. Here’s a comparison of common options: Location Battery Services Offered Pros Cons AutoZone Free battery test, charging, and replacement Quick check, no appointment needed, national reach May have longer wait times at busy locations Nasty Performance Free battery test, expert installation, performance batteries Specialized motorcycle expertise, tailored recommendations Limited to Chicagoland area O’Reilly Auto Parts Free battery test and installation Convenient locations, full load test Limited selection of premium motorcycle batteries Independent Motorcycle Shops Battery diagnostics, free battery test with repair Personalized service, experienced techs Availability and pricing varies by shop "A free battery test can reveal hidden battery issues before they leave you stranded." Signs You Need Motorcycle Battery Replacement Recognizing when it’s time to replace your motorcycle battery is vital for avoiding no-start situations and protecting your electrical system. Most motorcycle batteries display clear warning signs before failure, but riders often overlook them. Ignoring these red flags leads not only to a dead battery but also to more severe issues across your charging and starting system. If you’re unsure whether you need a replacement, combine regular battery testing with the symptoms below; quick action at the first sign of trouble can save your upcoming ride and wallet. Routine performance checks and observations during rides can help you spot emerging battery problems—addressing them before they impact starting the engine or other critical functions. Let’s break down the key indicators that your cycle battery is on its last legs and may no longer hold a charge reliably. Common Symptoms of a Failing Motorcycle Battery Dimming headlights and slow cranking, even after a full battery charge, suggest your battery cannot sustain the energy required for modern lighting and starter motors—classic signs of a failing battery. Clicking noises or failed starts are warning signals: if you only hear a click but your engine doesn’t turn over, your cycle battery likely lacks the current needed for ignition. Irregular electrical performance, such as flickering displays or intermittent accessory function, points to internal battery degradation that a voltage test or load tester can confirm. Battery test results below threshold or an inability to hold a charge during load testing are the final cues that it’s time to replace your motorcycle battery before it leaves you stranded. Step-by-Step Guide to Motorcycle Battery Replacement Once battery testing confirms your cycle battery is weak or unable to hold a charge, prompt battery replacement is essential. Handling this process safely increases the lifespan of your new battery and safeguards your electrical system from unnecessary wear. Knowing how to remove, replace, and dispose of your old battery correctly also ensures compliance with environmental regulations, and prevents accidental acid spills or electrical shorts. Proper battery replacement should be part of every rider’s toolkit—whether you rely on your own skills or prefer a trusted motorcycle shop for the job. Let’s break down each critical step in the process, from safety protocols to final charging procedures. How to Safely Remove and Replace Your Motorcycle Battery Battery removal precautions: Always wear gloves and safety glasses before you start. Turn off the ignition, disconnect the negative cable first, then the positive to prevent accidental shorts. Carefully remove any securing brackets or rubber straps. Disposal guidelines for old batteries: Old batteries are toxic; recycle them at an authorized facility or return to a retailer offering battery services. Never dispose of a cycle battery with municipal trash, as both acid and lead can harm the environment. Installation and battery charging after replacement: Place the new battery in the tray, secure it, and connect the positive cable first, then negative. Always check voltage levels and charge according to the manufacturer’s recommendations before starting the engine. Top Motorcycle Batteries for Reliable Performance Choosing the best replacement ensures reliable cold starts, reduced maintenance, and full compatibility with your motorcycle’s charging system. Modern motorcycle batteries for 2024 span several chemistries, sizes, and capacities, so a direct comparison helps you select the right one for your needs. Whether you ride a heavy cruiser, a nimble sportbike, or a dirt-focused adventure machine, the right battery can make or break your riding experience and confidence in every start. This comparison covers value, features, user ratings, and warranty support—key aspects when investing in a new cycle battery. Understanding your options helps you make an informed buying decision so you can ride with confidence for years to come. Motorcycle Battery Reviews: Best Replacement Options in 2024 Model Features Price Range Warranty Life Expectancy Yuasa YTX14-BS (AGM) Maintenance-free, spill-proof, high CCA $89–$120 12 months 3–5 years Shorai LFX14 (Lithium) Ultra-lightweight, fast charging, deep cycling $140–$200 36 months 4–7 years Duraboost DB16AL-A2 (Lead-Acid) Traditional flooded, budget-friendly $50–$70 6 months 2–4 years Antigravity AG-1201 (Lithium) Re-start technology, compact, high CCA $160–$220 36 months 4–7 years Motorcycle batteries for different makes: Ensure compatibility with your specific make and model. Where to buy replacement motorcycle batteries: Reputable motorcycle shops and online merchants offer genuine products and installation support. Review highlights and user ratings: Read real-world reviews; Yuasa and Shorai routinely score 4.5+ stars for reliability and longevity. Motorcycle Battery Maintenance to Prevent Dead Starts Regular maintenance is your best defense against a dead battery and sudden ride interruptions. Following a few battery charging and storage tips extends battery life, boosts performance, and reduces the risk of being left stranded. Proactive riders schedule periodic testing, maintain optimal charge levels, and ensure their battery remains healthy throughout the season. With newer charger technology and smart monitoring, these tasks have never been easier or more effective. Relying on routine quick checks—especially before a ride or after long-term storage—ensures your cycle battery is always ready to start the engine. Use the guidelines below to keep your battery in peak health and ready for whatever the road throws your way. Battery Charging and Storage Tips Optimal charging intervals: Use a smart charger to maintain charge, especially if your bike sits idle for weeks. Charge after every long ride or once monthly during off-season. Seasonal storage guidelines: Disconnect your battery and store it on a maintenance charger in a dry, temperature-stable area over winter or long periods without riding. Battery testing intervals: Schedule a regular battery test every three to six months—combine a quick check at home with periodic free battery testing at your local retailer. Preventing battery discharge: Shut off all accessories and headlights before parking, and avoid repeated short trips that don’t allow your charging system to fully recharge your battery. People Also Ask: Expert Answers on Motorcycle Battery Testing and Replacement Does AutoZone test motorcycle batteries? AutoZone offers free battery tests for most motorcycle batteries. Simply bring your battery or motorcycle to a participating location for a quick and professional battery test to assess its health. How to test if a motorcycle battery is good? To test if a motorcycle battery is good, use a multimeter to check voltage levels and perform a load test. A healthy 12V battery should show at least 12.6V fully charged and hold voltage under load. How do I know if my motorcycle battery needs replacing? Common signs include slow engine cranking, dim lights, failure to hold a charge, and poor battery test results. How often should a motorcycle battery be replaced? Most motorcycle batteries last between 2 and 5 years. Factors like battery type, usage, and maintenance can affect replacement intervals. Motorcycle Battery Testing and Replacement FAQs How do I dispose of an old motorcycle battery? What is the warranty on replacement motorcycle batteries? Can I upgrade battery type for better performance? Key Takeaways for Motorcycle Battery Testing and Replacement Regular battery testing and free battery test options can save you from unexpected breakdowns. Choosing the right motorcycle battery and maintaining it ensures longevity and performance. Prompt replacement prevents costly damage to your motorcycle’s electrical system. While mastering battery testing and replacement is essential for every rider, true reliability comes from a holistic approach to motorcycle care. If you’re ready to take your maintenance routine to the next level, explore our comprehensive guide on seasonal bike care strategies. Discover how proactive checks, timely adjustments, and expert tips can keep your motorcycle performing at its best through every season. By integrating these advanced care techniques, you’ll not only prevent dead starts but also extend the life of every component on your ride. Make your next journey smoother and more enjoyable—start building your year-round maintenance plan today. Ready for Reliable Starts? Never get stranded by a dead battery. Call Nasty Performance Motorcycle Shop today at 847-458-4858 for free battery testing and quality motorcycle battery replacement options.

Unlock Performance with Expert Motorcycle Engine Tuning Services

Did you know? A professionally tuned motorcycle engine can boost horsepower by up to 20%, transforming your ride from an everyday stock bike into a powerhouse that feels at home both on winding roads and on the track. If you’re searching for ways to get more performance and more bang for your buck, understanding motorcycle engine tuning services could be your game changer. This guide unpacks everything you need to know—from essential techniques like dyno tuning and ECU flash to choosing the right professional shop—so you can unleash your motorcycle’s full potential and enjoy a smoother, safer, and more exhilarating ride. Startling Facts: Why Motorcycle Engine Tuning Services Are Essential for Peak Performance Whether you own a super sport machine, a custom cruiser, or a touring bike, the difference between a stock bike and a professionally tuned motorcycle is night and day. Recent data shows that motorcycle engine tuning services not only enhance raw performance (think acceleration and top speed), but also improve efficiency, lifespan, and even fuel economy when performed by expert technicians. Many riders think routine maintenance is enough, yet research suggests that engines not custom-tuned via techniques like dyno tuning and ECU flashing could be operating below optimal levels—leaving hidden power and smoother throttle response on the table. The process behind motorcycle engine tuning services is more scientific than ever: technicians use advanced diagnostics to dynamically adjust fuel maps, ignition timing, and even electronic controls. With packages that range from a basic dyno session to comprehensive ECU flash and mechanical upgrades, every rider can tailor their machine for their riding style and needs. As more owners demand maximum value, tuning professionals have become the go-to experts for unlocking a bike’s true capability, offering not just thrills, but better reliability and safety as well. What You'll Learn About Motorcycle Engine Tuning Services Discover the benefits of professional motorcycle engine tuning services Understand key processes like dyno tuning, ECU flash, and ECU flashing Learn how to evaluate the value and safety of tuning services Compare costs and performance gains Understanding Motorcycle Engine Tuning Services: Features, Benefits, and Value What Are Motorcycle Engine Tuning Services? Motorcycle engine tuning services refer to a spectrum of adjustments and optimizations performed by professional shops to maximize the performance, efficiency, and reliability of your motorcycle’s engine. This isn’t just about squeezing out the most power—a key aspect is achieving a finely calibrated balance that suits how and where you ride. Services may range from simple air/fuel ratio tweaks in a stock bike to comprehensive upgrades using dyno tuning equipment and sophisticated software for ECU flashing. In a professional setting, the process begins with a thorough diagnostic evaluation to identify any bottlenecks or areas where the bike’s computer (ECU) may be holding back its true potential. By using high-tech gear and expert analysis, tuners create a customized plan—sometimes even matching your specific bike vrs or aftermarket modifications. The goal is always clear: deliver performance and more bang for your buck while safeguarding engine health and longevity. Key Benefits of Professional Engine Tuning The main appeal of motorcycle engine tuning services lies in unlocking hidden horsepower and improving engine response. Experienced shops using dyno tuning and ECU flashing can tailor your bike's performance attributes far beyond what a stock bike and factory settings offer. Benefits include sharper throttle response, optimized power delivery, and improved riding comfort. Whether you crave the adrenaline of a super sport ride or the smooth roll-on of a touring bike, tuning can be customized to your preferences. Additionally, properly executed performance tuning enhances fuel efficiency and prolongs engine life. By addressing harmful lean/rich mixtures, excessive rev limits, or inefficient ignition timing, tuners reduce long-term wear and help you avoid costly repairs. And because top tuning pros are often red seal certified or possess specialized mechanical credentials, peace of mind comes standard—your engine is in knowledgeable hands committed to safe, sustainable performance. If you're interested in finding a reputable shop to handle your next upgrade, you can explore more about locating expert motorcycle engine tuning services near you for tailored advice and local options. For a deeper dive, check out this guide to discovering expert motorcycle engine tuning services in your area. Performance Tuning: Boosting Power, Efficiency, and Lifespan Simply put, performance tuning is an investment in your riding future. Riders who use expert motorcycle engine tuning services often see horsepower gains of 5–20%, with smoother torque curves and more predictable/uniform throttle behavior. Techniques like ECU flash or comprehensive dyno tuning can even address unique local factors—such as elevation or climate—providing optimal performance tailored to how and where you ride. Beyond more raw power, professional tuning ensures your motorcycle's systems operate harmoniously. This reduces the risk of engine knock, overheating, or excessive wear—issues that are common when “DIY tuning” tools are applied incorrectly. In summary, professional engine tuning equals more adventure, fewer mechanical headaches, and bigger returns on your motorcycle investment. Core Techniques in Motorcycle Engine Tuning Services Dyno Tuning for Motorcycles: How It Works Dyno tuning is the cornerstone of modern motorcycle engine tuning services. The process involves placing your bike on a rolling dynamometer (dyno), where its wheels spin while technicians monitor vital statistics in real-time. Sensors track horsepower, torque, air/fuel ratio, and exhaust gases, generating performance graphs that reveal inefficiencies and potential for improvement—think “click to see graph” precision. Armed with this data, tuners make precise adjustments to fuel injection, ignition maps, and even secondary air systems, optimizing every relevant parameter. Unlike “garage tuning” or generic mapping solutions, a professional dyno session is tailored to your bike’s unique mechanical setup, including any modifications like exhaust swaps or air filter upgrades. Whether it’s a super sport or a touring bike, the tuner’s goal is to apply the tune—fine-tuning for the intended usage, rider weight, and terrain. The end result? A ride that feels instantly more responsive and enjoyable, with every ounce of its power focused where you want it. ECU Flash & ECU Flashing: The Digital Edge Electronic Control Unit (ECU) flashing represents the digital side of motorcycle performance upgrades. When your motorcycle leaves the factory as a stock bike, its ECU is programmed conservatively to meet global standards and emissions regulations—often leaving untapped potential. ECU flash or ECU flashing services rewrite these control maps, raising parameters like RPM limits, throttle sensitivity, and fuel delivery. Reliable professionals use specialized tools and software to back up your existing maps, then upload custom calibrations developed on the dyno. This means the adjustments are uniquely designed for your bike—whether that involves unleashing extra power on a super sport model or delivering smoother power on a daily commuter. One word of caution: ECU flashing should only be performed by shops that regularly do work on your bike’s make and model, as improper programming could compromise safety or reliability. Step-by-Step: The Motorcycle Engine Tuning Process Diagnostic evaluation: Experts perform a comprehensive scan to assess your engine’s health, sensor data, and stored error codes, so any issues can be resolved before tuning begins. Custom dyno tuning session: Your bike is run on the dyno to measure baseline performance and tailor settings based on real-world data. ECU flash or ECU flashing as needed: The tuner uploads custom mappings, optimizing key parameters and often storing the original settings as a backup in local storage. Post-tuning performance testing: Technicians re-test the bike, “apply the tune” under simulated riding conditions, and ensure all systems work harmoniously—delivering both performance and more bang for your buck. Choosing the Right Motorcycle Engine Tuning Service: What to Look For Qualifications and Experience of Tuning Professionals Not all motorcycle engine tuning services are created equal. The most reputable shops employ red seal certified or otherwise credentialed technicians, often with extensive manufacturer training or a performance background. Expertise with your specific bike—be it a super sport, touring, or adventure machine—ensures that diagnostics, dyno runs, and ECU flashing are executed flawlessly, minimizing risk and maximizing results. Don’t hesitate to ask for proof of certifications, recent customer reviews, or examples of “stock bike vrs tuned bike” graphs. A trustworthy tuner will welcome your inquiries, explain every adjustment, and offer guidance for ongoing maintenance after tuning. Remember, a “too good to be true” tuning price may signal inexperience or shortcuts—choose expertise and thoroughness over bargain deals. Expert Quotes: Perspectives on Motorcycle Engine Tuning Services "Dyno tuning and ECU flashing can transform your bike's behavior on and off the track." – Leading Industry Specialist Comparing Packages & Prices: Motorcycle Engine Tuning Services Cost Breakdown Typical Pricing for Dyno Tuning and Other Services Service Average Price Range Included Features Dyno Tuning $250 - $500 Performance Analysis, Air/Fuel Optimization ECU Flash $300 - $600 Rev Limit Adjustments, Custom Maps Full Performance Tuning Package $600 - $1500 Dyno + ECU + Mechanical Tuning Choosing the right tuning package depends on your goals: a basic dyno tune is ideal if you want a safe, noticeable power bump with expert consultation. Mid-range options—combining dyno tuning with ECU flashing—provide the “digital edge,” unlocking even more of your bike’s potential while customizing ride feel. Full-service/performance tuning is recommended for riders who demand top results or own heavily modified motorcycles. Note that tuning price does not usually include repairs for existing mechanical issues found during diagnosis, so it’s wise to clarify with your selected shop beforehand. In this behind-the-scenes look, follow a motorcycle through each step of a professional tuning session: from initial diagnostics and dyno testing to ECU flash uploads and before/after throttle response comparisons. Watch technicians “apply the tune” in real time and see firsthand how regularly do work and advanced analytics deliver performance and more bang for your buck. People Also Ask: Answers to Key Questions About Motorcycle Engine Tuning Services How much does it cost to have a motorcycle tuned? The cost for motorcycle engine tuning services typically ranges from $250 for basic dyno tuning up to over $1500 for full-service performance packages including ECU flash or ECU flashing. Pricing may vary depending on your bike model, tuning complexity, and your chosen shop’s reputation in the intermountain tuning scene. While initial cost may seem high, investing in expert tuning can prevent costly repairs and ensure much more bang for your buck over time. How much HP does a tune add to a motorcycle? Depending on your bike’s engine, modifications, and your choice of motorcycle engine tuning services, a professional tune can add between 5% and 20% more horsepower. For instance, a stock bike may see gains of 7–15 hp after a dyno session and ECU flash on a super sport model, with even greater benefits for bikes equipped with aftermarket exhausts or high-flow filters. Always ask your tuner for “click to see graph” results before and after—the improvement is often dramatic. Is motorcycle tuning safe for the engine? Yes, motorcycle engine tuning services performed by reputable professionals using dyno tuning and ECU flashing are generally safe. In many cases, they can even extend your engine’s life by correcting lean/rich fuel mixtures and optimizing critical parameters. However, note that tuning carried out by inexperienced shops or using generic flash tools without real-world data could introduce risk—ongoing professional support is crucial for safety and reliability. How much does a dyno tune typically cost? Most dyno tuning costs for motorcycles fall in the $250 to $500 range. Cost depends on bike type, tuning complexity, and shop experience. Shops that regularly do work on your specific bike vrs or model may offer added value, including pre/post “click to see graph” analysis and warranty on adjustments made. Always confirm what’s included before booking. FAQs: Get More Answers About Motorcycle Engine Tuning Services Can I tune my motorcycle myself with ECU flash tools? While DIY ECU flash tools are available, they carry significant risk unless you have advanced expertise and access to accurate baselines. For reliable results and engine safety, professional motorcycle engine tuning services are strongly recommended. How often should motorcycle engine tuning services be performed? Most bikes benefit from re-tuning whenever major modifications are made (exhaust, intake), or every 10,000–20,000 miles if ridden in harsh conditions. Ask your tuning professional for personalized advice based on your bike’s history. Will tuning my motorcycle impact warranty coverage? It depends. Some manufacturers may void engine/drivetrain warranties if non-factory tuning is detected. Always consult your dealer and tuning shop about your specific situation before scheduling ECU flashing or dyno services. Can motorcycle engine tuning services improve fuel economy? Yes. Optimized tuning can improve fuel efficiency, especially in cases where the stock bike runs rich or lean from the factory. The result is smoother running and potentially lower fuel costs. Key Takeaways from Professional Motorcycle Engine Tuning Services Motorcycle engine tuning services offer tangible performance and efficiency upgrades Services like dyno tuning and ECU flashing are best performed by experts Investing in comprehensive performance tuning can deliver both power increases and long-term engine reliability Conclusion: Elevate Your Ride with Professional Motorcycle Engine Tuning Services Upgrade your motorcycle’s performance, power, and reliability with expert motorcycle engine tuning services. Call Nasty Performance Motorcycle Shop Today: 847-458-4858 Ready to take your next step toward a more responsive and exhilarating ride? For those who want to go beyond the basics, learning how to identify the best local experts can make all the difference in your tuning results and long-term satisfaction. Discover how to connect with trusted professionals and get personalized recommendations by exploring our comprehensive resource on finding expert motorcycle engine tuning services near you. This guide will help you make informed decisions, maximize your investment, and ensure your motorcycle delivers peak performance every time you hit the road. Dive deeper and unlock the full potential of your machine with the right support and advanced tuning strategies.

Terms of Service

Privacy Policy

Core Modal Title

Sorry, no results found

You Might Find These Articles Interesting

T
Please Check Your Email
We Will Be Following Up Shortly
*
*
*