Nasty Performance ~ 847-458-4858 

  • Blog Home
  • Categories
    • Motorcycle Maintenance
    • Riding Tips & Preps
    • Safety & Inspection
    • Customizations & Upgrades
    • DIY Motorcycle Repairs
    • Motocycle Audio Systems
    • Motocycle Seasonal Care & Storage
    • Engine, Electrical Performance
  • Bike Night
  • Nasty Performance Motorcycle Shop
August 20.2026
1 Minute Read

Master this Step-by-Step Guide to Motorcycle Cornering Techniques Now

Did you know? According to industry experts, improper motorcycle cornering is among the leading contributors to preventable road accidents—mastery can be the difference between confidence and catastrophe. Unlocking the secrets of the art of cornering not only sharpens your skills but also boosts your safety on the road and enjoyment with every ride. If you're ready to elevate your cornering skills, this step-by-step guide to motorcycle cornering techniques is your best starting point.

Unveiling the Art of Cornering: Why a Step-by-Step Guide to Motorcycle Cornering Techniques Is Essential

Motorcycle cornering is more than just leaning into a curve—it's a craft that blends physics, instinct, and precise control. Whether you’re a seasoned motorcycle enthusiast or a beginner just exploring the basics, understanding the step-by-step guide to motorcycle cornering techniques is critical for refining your motorcycle turning technique. Every turn presents a new challenge. When you master the art of cornering, you gain the confidence to navigate corners with agility, maintain a smooth line, and facilitate smooth steering through every bend.

Giving the steering command at the right moment, maintaining a smooth speed, and adjusting your body position can mean the difference between a perfect corner and a near miss. Riders who follow a structured approach often notice that they can carry more speed safely and maintain stability even in challenging road conditions. Improving your cornering skills is not just about speed—it's about control, awareness, and enjoying every twist and turn on your route.

"According to industry experts, improper motorcycle cornering is among the leading contributors to preventable road accidents—mastery can be the difference between confidence and catastrophe."

What You'll Learn in This Step-by-Step Guide to Motorcycle Cornering Techniques

  • Understanding motorcycle turning technique fundamentals
  • Mastering body position and throttle control
  • Improving tire pressure management for optimal turning
  • Step-by-step instruction for safe and confident motorcycle turning
  • Critical dos and don’ts of motorcycle cornering

Understanding the Foundations: Motorcycle Turning Technique and the Physics Behind Motorcycle Cornering

The Role of Gravity and Balance in Effective Motorcycle Turning

To appreciate the art of cornering, start with the basics: gravity and balance. As you enter a turn, your motorcycle leans inward to counteract the forces pushing you outward, maintaining contact with the road and ensuring stability and control. This balance is foundational to every motorcycle turning technique. By aligning your center of gravity with the intended trajectory and resisting the urge to fight momentum, you help maintain a smooth path through the corner. Proper body movements, such as placing the balls of your feet on the foot pegs and keeping your weight lower, make the bike more responsive to your inputs and boost the contact patch your tire has with the pavement.

Understanding balance and gravity is not just theoretical—it's the real-world basis of every safe and effective turn. Advanced riders make subtle adjustments with every curve, shifting weight, and giving the steering command precisely when needed. This foundational knowledge ensures that every technique you practice has a solid base, reducing risks and improving your overall mastery of motorcycle cornering.
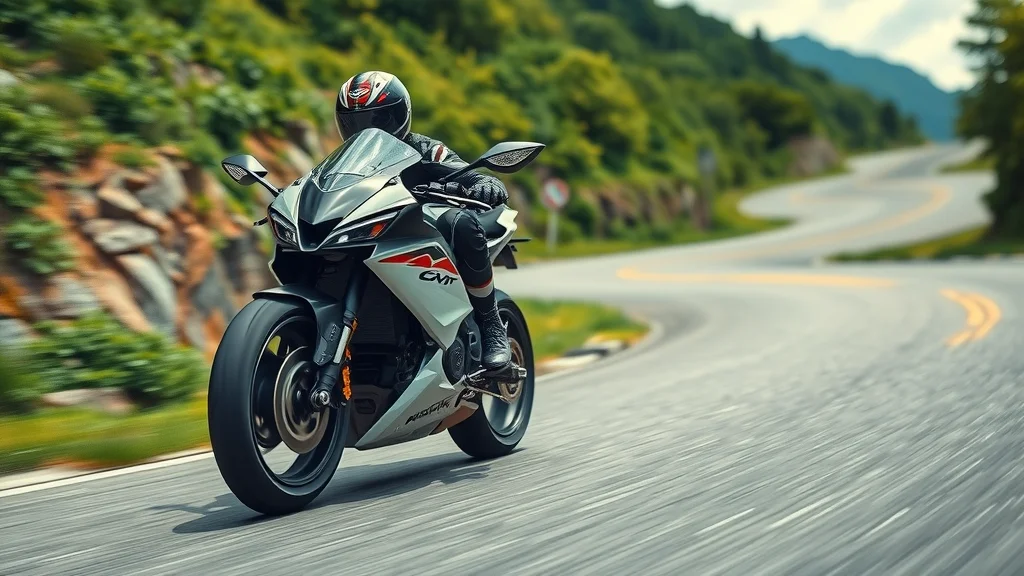
step-by-step guide to motorcycle cornering techniques - Dynamic sport motorcycle rider leaning into a smooth curve demonstrating proper motorcycle turning technique on a winding mountain road

How Mastering the Art of Cornering Boosts Confidence

The journey to mastering the art of motorcycle cornering goes beyond following instructions—it's about cultivating confidence. Each moment spent refining your turning technique on winding roads or closed courses builds trust in yourself and your bike. Mastery comes from knowing how your inputs—steering, throttle, or body position—directly impact the motorcycle’s response.

When riders are confident, they naturally give the steering command without hesitation, maintain a smooth line through the turn, and make real-time adjustments if the road surface changes. This confidence translates to a more enjoyable ride, as you’re able to navigate corners with less anxiety and more focus. As you progress, you'll notice that your ability to remain calm under pressure also improves your safety on the road, turning every challenging curve into an opportunity to shine.

As you continue to refine your cornering skills, it's important to remember that the condition of your motorcycle plays a significant role in your performance and safety. For a deeper dive into keeping your bike in peak shape throughout the year, check out these seasonal bike care secrets every rider must know—they offer practical maintenance tips that complement your riding technique.

Step 1: Preparing Your Motorcycle—Tire Pressure and Pre-Ride Inspection

Importance of Tire Pressure in the Step-by-Step Guide to Motorcycle Cornering Techniques

Before you even think about tackling curves, it’s crucial to set the stage for success. Tire pressure is a key factor in every step-by-step guide to motorcycle cornering techniques. Properly inflated tires ensure a maximum contact patch with the road, helping the bike respond predictably when leaned over. Too little pressure risks squirmy, unpredictable handling, while too much reduces grip—both compromising your safety on the road. Regularly calibrate your pressure to the manufacturer's spec, and remember that environmental changes like temperature and load (e. g. , a passenger or added luggage) can affect optimum tire pressure.

The right tire pressure aids stability and helps maintain the feedback every rider relies on. Smooth steering inputs are easier when your tires adhere properly to the road, significantly impacting your ability to give the correct steering command and maintain control during sudden maneuvers or on varied surfaces. This simple step not only supports your cornering skills but also extends the lifespan of your tires.

Essential Pre-Cornering Motorcycle Checks

Safety always starts before you even roll out of the driveway. Developing an inspection routine helps avoid surprises mid-corner. Begin with a thorough check of your motorcycle’s tires—look for any visible damage, wear, or debris lodged in the treads. Next, inspect your brake system, making sure pads have enough material, and the braking action feels strong and responsive. Don’t forget to confirm fluid levels—oil, brake fluid, and coolant—are within safe limits.

A simple list to remember before every ride includes:

  • Check tire pressure and condition
  • Inspect brakes
  • Ensure fluid levels

Well-maintained components help maintain a smooth ride and facilitate seamless motorcycle turning whenever you need it—especially when your focus should be on perfecting your technique, not worrying about your bike’s reliability.
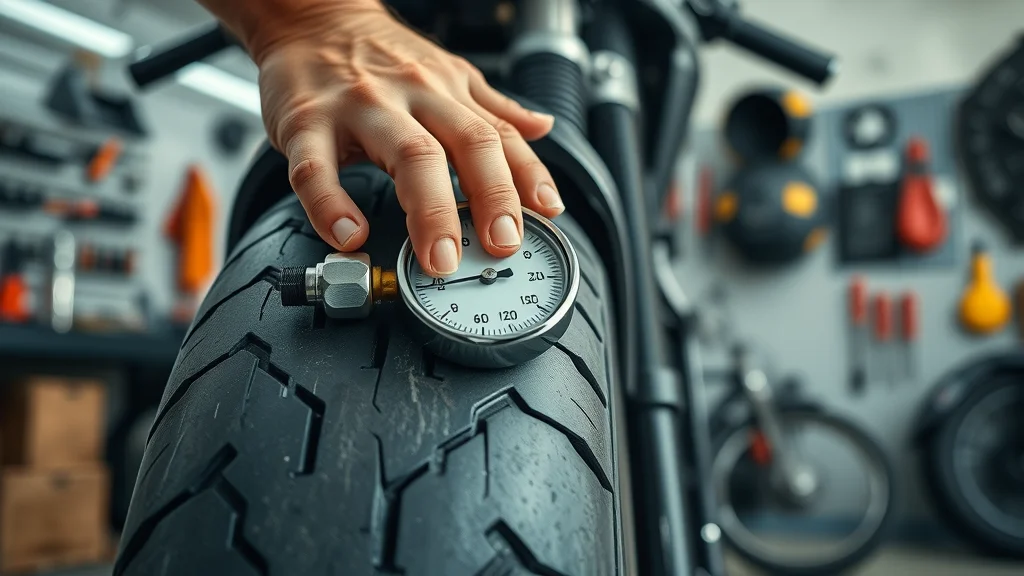
tire pressure - Close-up of hands checking motorcycle tire pressure with a gauge before executing motorcycle cornering techniques

Step 2: Body Position—A Key Element in Motorcycle Turning Techniques

Correct Body Position for Improved Cornering Skills

Body position is at the heart of advanced motorcycle turning technique. A proper body position sets the stage for safe, predictable, and confident cornering. The key is to shift your weight in harmony with the motorcycle, reducing load on the tires as you lean into a curve. As you approach the turn, keep your head level with the horizon and direct your eyes toward your steering point or the exit of the corner—never down at the road. Your inside arm should be relaxed, and your outside knee pressed gently against the fuel tank, maximizing grip and stability.

When you adjust your seating, consider placing the balls of your feet on the pegs, which allows subtle weight changes to be transferred efficiently. With your upper body leaning slightly into the turn but your lower body secured, the motorcycle can rotate beneath you unrestricted, improving traction and helps maintain stability. Many pro riders also recommend keeping your chin in line with the mirrors or bars, which makes it easier to predict and react to the motorcycle's lean angle. Over time, practicing these small adjustments will facilitate smooth transitions and boost your ability to navigate corners at a confident pace.
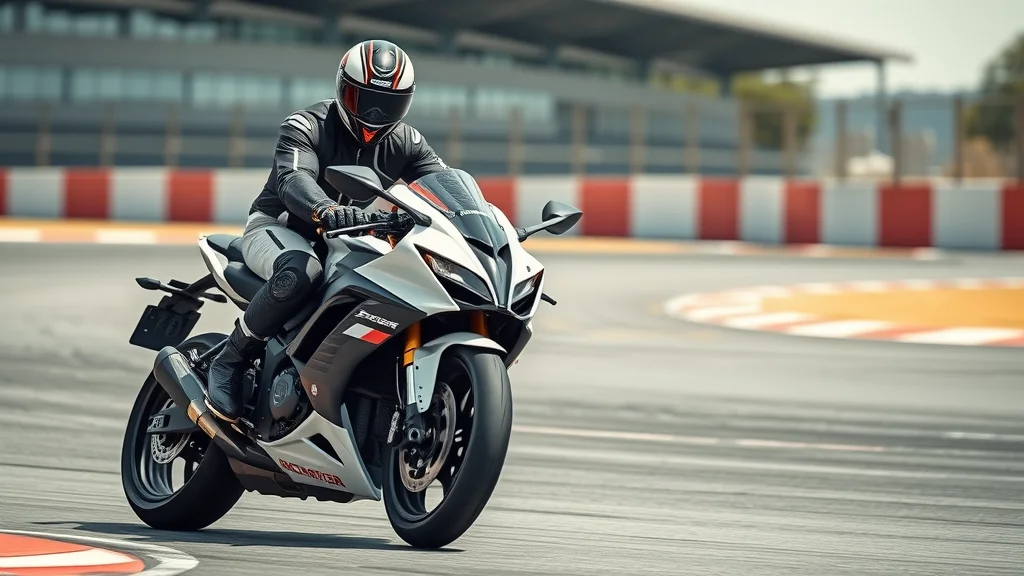
body position - Motorcycle rider demonstrating correct body position for safe motorcycle turning technique

Common Body Positioning Mistakes in Motorcycle Turning

New riders often underestimate the power of a well-timed weight shift during a corner, but missteps with body position can dramatically reduce your control. Common mistakes include keeping your body too upright while the bike leans, gripping the bars too tightly, or failing to look through the corner. These errors not only disrupt balance but also limit your ability to give the right steering command, especially in tighter turns.

Another frequent pitfall is sitting too far back on the seat or neglecting seat covers that provide needed grip. When your position doesn’t match the bike’s movement, you put extra stress on your wrists and can trigger unintended steering, which disrupts the smoothness of your turn. Always be mindful of situational awareness—if you catch yourself tensing up, take a deep breath, relax your grip, and realign your gaze with the intended exit. Mastering these fundamentals means fewer surprises and a stronger foundation for advanced motorcycle turning technique.

Comparison: Beginner vs. Advanced Body Position in Different Corner Types
Corner Type Beginner Advanced
Gentle Sweeper Upright torso, minimal weight shift, eyes straight ahead Leans with bike, inside shoulder forward, gaze follows exit
Tight U-turn Hesitant body movement, stiff arms, limited lean Active shifting of waist, relaxed arms, confident lean angle
Chicane/S-curve Slow reactions, late gaze movement, inconsistent balance Smoothly transitions body side-to-side, anticipates steering point

Step 3: Throttle Control—Smooth Operation for Mastering the Art of Cornering

Throttle Control Techniques for Safe Motorcycle Turning

A cornerstone of any step-by-step guide to motorcycle cornering techniques is learning how to blend throttle control with body position and steering input. As you transition from braking into a lean, maintain a light, steady throttle—not abrupt or aggressive. This smooth application helps keep weight evenly distributed between the front and rear tires, which in turn keeps the chassis balanced and gives the greatest scope for stable motorcycle turning.

Advanced riders often use a gentle roll-on at the apex, allowing the engine to facilitate smooth acceleration while exiting the corner. This technique is essential: it anchors the rear of the bike without unsettling the front end, providing a locked-in sensation as the motorcycle follows your intended line. Avoid abrupt changes, as these can shift your balance and decrease contact with the road, leading to unstable or compromised handling. Consistent practice ingrains this behavior until it becomes second nature, giving you confidence for every curve.

Using Throttle to Stabilize the Motorcycle During Cornering

Throttle isn’t just about powering out of a corner—it’s a tool for regulating balance. As you lean, a constant or slightly increasing throttle stabilizes the chassis, helping the suspension settle smoothly. When you roll off too much or chop the throttle suddenly, weight shifts forward, compressing the forks and potentially unsettling the steering. Learning when and how to gradually increase speed during and after the apex is a mark of mastering the art of cornering.

On a track day or twisty back road, practice modulating the throttle in conjunction with light counter-steering. This not only maintains a smooth riding experience but also prepares your body and mind to respond to sudden changes—a skill vital for emergency situations. Consistency in throttle control builds muscle memory, which is invaluable as you tackle increasingly complex bends and roads.
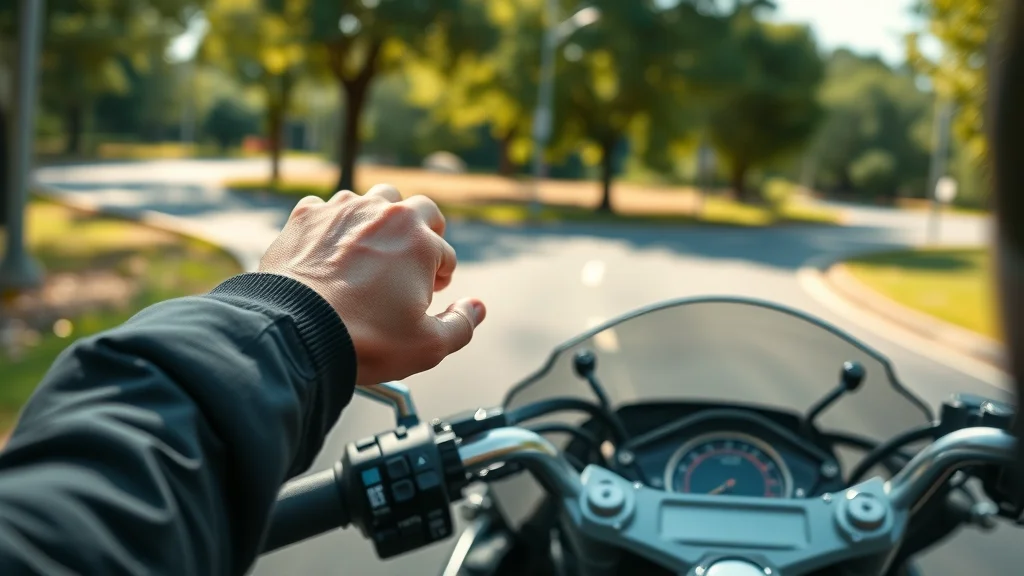
throttle control - Motorcycle rider demonstrating smooth throttle control while executing motorcycle turning techniques

Step 4: The Cornering Sequence—The Complete Step-by-Step Guide to Motorcycle Cornering Techniques

  • Approach: Positioning and speed control
  • Entry: Initiate lean with proper turning technique
  • Apex: Maintain balance and throttle control
  • Exit: Upright and accelerate smoothly

Let’s tie all elements together with a full cornering cycle. Begin with the approach: scan for hazards and set a proper speed ahead of the turn. Your positioning should provide a clear view of your steering point and leave room for adjustments. As you initiate the entry, give a precise steering command while leaning into the curve; your movement should be subtle and in sync with the motorcycle.

At the apex—the turn’s tightest point—maintain balance by focusing on body position and a gentle, steady throttle. This holds the line and prevents the bike from running wide. Finally, as you exit, begin to straighten the bars, return the motorcycle upright, and gradually increase throttle to accelerate out of the turn safely. Practicing this sequence builds trust in your motorcycle turning technique and enhances your overall cornering skills, no matter the road ahead.
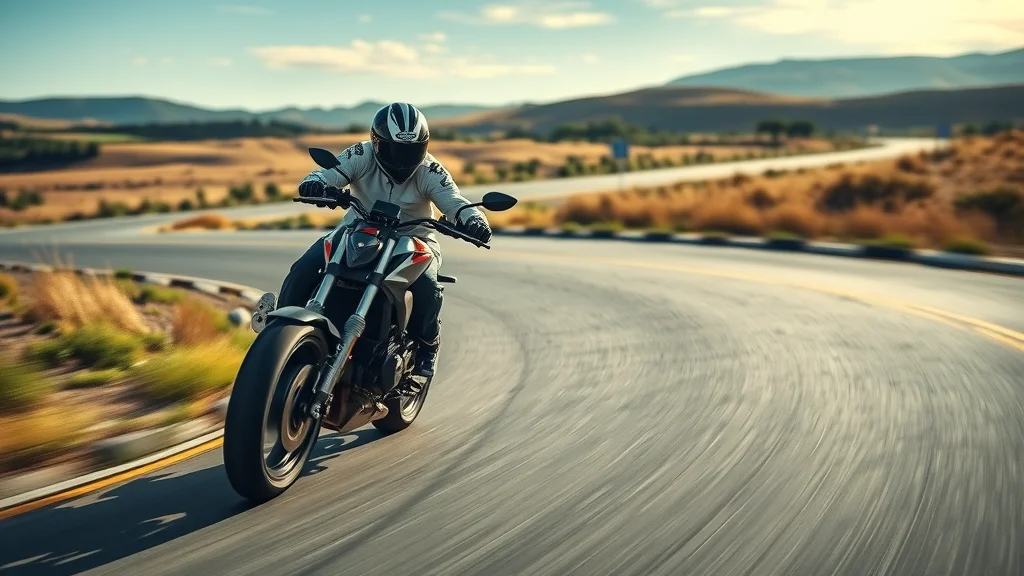
motorcycle turning technique - Professional motorcycle rider progressing through approach, lean, apex, and exit phases of a corner

Special Situations: Adapting the Step-by-Step Guide to Motorcycle Cornering Techniques for Wet Roads and Obstacles

Modifying Motorcycle Turning Techniques in Low Grip Conditions

Challenging weather or road surfaces—like rain, gravel, or oil spots—demand an extra layer of finesse. In low grip scenarios, the art of cornering requires you to be deliberate and conservative in your movements. Reduce cornering speed and avoid sudden inputs; give the steering command much earlier, and opt for a wider line if possible to maximize tire contact with the road. Smooth and consistent throttle control is your friend here—any abrupt change risks losing traction.

When conditions are slick, stay upright as much as possible, minimize lean angles, and remember to keep your body position relaxed. It helps to use seat covers with extra grip and always wear proper gear to mitigate slips. This approach lets you navigate corners and obstacles with greater confidence, even when the pavement is unpredictable.
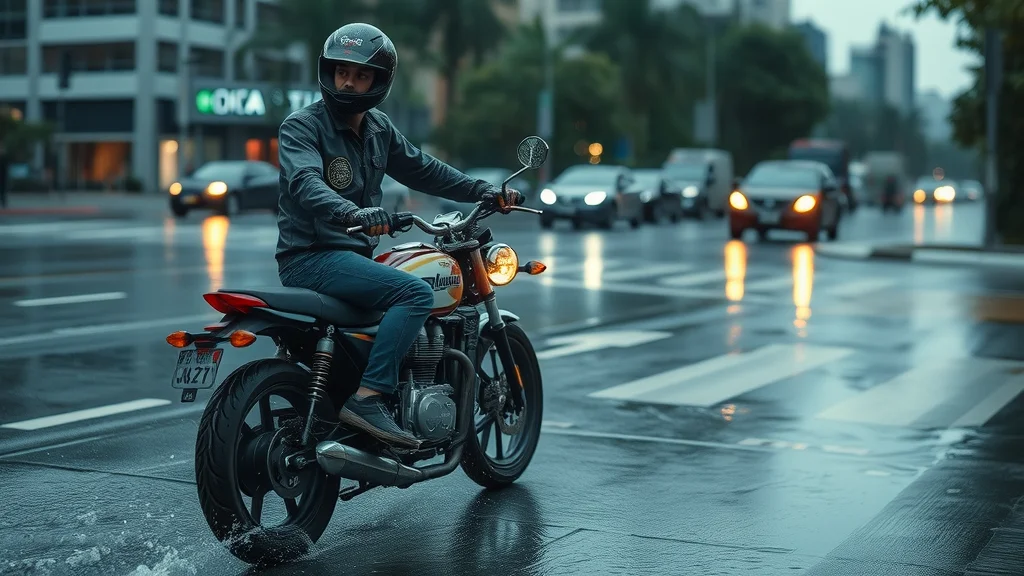
motorcycle turning technique - Motorcycle cornering technique in wet road conditions, rider maintaining caution amid slick surfaces

Counter-Steering and Advanced Cornering Skills in Emergencies

The principle of counter-steering is powerful in emergencies. When you need to avoid an obstacle, give a gentle push on the bar in the direction you want to go (push right to go right), quickly changing the bike’s trajectory. Practicing this advanced motorcycle turning technique on open roads helps ingrain an instinctive reaction for urgent maneuvers. Remember, being ready to shift your weight, maintain a smooth grip, and apply the right steering command all contribute to rapid, stable line changes.

Never underestimate the importance of ongoing drills that reinforce emergency skills. As you develop confidence with standard turns, periodically simulate obstacles or interfere with the path to test your response. This proactive approach is what sets experienced riders apart, allowing you to maintain safety on the road and recover from the unexpected with poise.

People Also Ask: Step-by-Step Guide to Motorcycle Cornering Techniques

[[paa]]

Answers to Common Questions

What is the single most important factor for safe cornering? Maintaining proper body position and throttle control are crucial. By aligning your body with the bike and applying smooth throttle, you maximize tire grip and reduce risk of instability, making every turn predictable and secure.

Should I brake while leaned over in a corner? Ideally, most braking should be done before entering the turn. Braking while leaned over can upset the bike’s balance, but if necessary, use gentle rear brake pressure and avoid abrupt inputs to prevent loss of grip.

How can beginners get better at giving the steering command? Practice looking through the turn, relaxing your grip, and gently counter-steering. These habits make giving the correct steering command more natural, even for new riders.

Common Mistakes to Avoid: Developing Better Motorcycle Turning Technique

  • Over-braking in the corner
  • Looking down instead of ahead
  • Improper body position
  • Ignoring tire pressure or surface changes

Each of these errors can disrupt your motorcycle turning technique and undermine your progress. Focus on smooth inputs, maintain awareness of your surroundings (especially changing road surfaces), and keep your posture in check whenever cornering. Emphasize pre-ride inspections and ongoing self-review to steadily improve your skills and avoid these common pitfalls.

Expert Insights: Mastering the Art of Motorcycle Cornering

"Each ride is an opportunity—never underestimate the value of incremental gains in cornering skills."

Mastering the art of cornering doesn't happen overnight. It’s a process that involves repeated practice, review, and a willingness to adapt. Even small improvements—fine-tuning your throttle control or adjusting your body position by an inch—lead to major breakthroughs over time. Take every ride as a learning opportunity, and your self-confidence and riding precision will grow in parallel.

FAQs: Step-by-Step Guide to Motorcycle Cornering Techniques

  • How does tire pressure specifically affect motorcycle cornering?
    Optimum tire pressure improves the tire's contact with the road, giving you predictable grip and smoother steering response mid-corner. Too high or low pressure makes the bike harder to handle and can trigger instability.
  • What drills can improve body position in real-time?
    Parking lot slow-speed turns, figure-eights, and practicing line of sight through cones are excellent drills. Focus on shifting your weight, maintaining a relaxed grip, and using visual targets to set your steering point.
  • Is there an ideal speed for most corners?
    There’s no universal answer since corner speed depends on the radius, visibility, road conditions, and your own skill level. Always set your speed ahead of time, give the proper steering command on entry, and never ride beyond your comfort zone.

Key Takeaways for Mastering the Art of Motorcycle Cornering

  • Preparation and practice make all the difference
  • Body position and throttle control complement each other
  • Consistent review and adaptation improve motorcycle turning techniques

If you’re committed to becoming a more skilled and confident rider, remember that mastering cornering is just one part of the journey. Expanding your knowledge about comprehensive motorcycle care can further enhance your safety, performance, and riding enjoyment in every season. For advanced tips on keeping your bike in optimal condition—no matter the weather—explore the full guide on seasonal bike care secrets every rider must know. By combining expert riding techniques with proactive maintenance, you’ll be ready to tackle any road with assurance and style.
Ready to Put These Step-by-Step Motorcycle Cornering Techniques into Action?

Call Nasty Performance Motorcycle Shop Today: 847-458-4858

Riding Tips & Preps

0 Comments

Write A Comment

*
*
Please complete the captcha to submit your comment.
Related Posts All Posts

Stop Exhaustion: Your Guide to Motorcycle Riding Fatigue

Ever wondered why you feel drained after a motorcycle ride—even if you’re loving every second? Could fatigue on your next ride put your safety at risk? Dive in and discover how to overcome fatigue on motorcycle rides for good. What You'll Learn in This Guide to Motorcycle Riding Fatigue Understand the leading causes of fatigue on motorcycle rides Learn how to overcome fatigue on motorcycle trips with effective strategies Discover safety techniques to manage fatigue for both short and long journeys Are You Suffering From Motorcycle Riding Fatigue? Recognizing the Signs If you frequently finish your journeys feeling more worn out than refreshed, you might be suffering from motorcycle riding fatigue—a challenge every enthusiastic rider eventually faces. Fatigue on motorcycle rides can creep in quietly, yet its effects can compromise your focus, slow your reaction time, and ultimately risk your safety. Common signs include drooping eyelids, difficulty concentrating, muscle soreness, and a general sense of lethargy. These symptoms don’t just appear on marathon tours; even a fun afternoon spin can leave your energy levels sapped. Recognizing these warning signs is a crucial step in effective fatigue management. If you notice yourself yawning, stretching your legs and restlessly shifting your body position, or catching yourself daydreaming instead of focusing on the road, it’s time to act. Restlessness, irritability, and delayed response to hazards are other red flags. The truth is, both your body and mind are tested during a long ride, especially when battling wind noise, weather changes, or uncomfortable gear. Monitoring your physical and mental state can prevent minor fatigue from turning into a major risk on the open road. The Science of Fatigue on Motorcycle Rides: Causes and Effects Fatigue on motorcycle rides isn’t just about feeling tired—it’s a complex blend of physical and mental exhaustion. Unlike driving a car, riding a motorcycle is physically demanding, requiring constant engagement of your body and mind. Factors such as dehydration, improper nutrition, poor sleep the night before (skipping on a good night’s rest), wind noise, and even the type of helmet you wear (like a face helmet or open face) all play a role. Environmental conditions—such as hot sun or cold rain—can drain your energy levels faster than anticipated during a full day on the road. Long-term fatigue can build gradually, manifesting as aching muscles, mental fog, and a noticeable dip in alertness. In contrast, short-term symptoms may include feeling drowsy or unfocused after just a few hours. Both forms of fatigue make it harder to make quick decisions—potentially turning small mistakes into critical errors. For riders tackling motorcycle tours or dual sport adventures, knowing the science behind fatigue can help you anticipate the toll it takes—enabling smarter choices that prioritize motorcycle safety for every journey. Physical and Mental Fatigue on Motorcycle Rides: What Every Rider Must Know Common contributors to fatigue on motorcycle journeys: dehydration, lack of rest, nutritional deficits, excessive wind noise, awkward body position, and improper gear. Short-term vs. long-term symptoms and risks: short rides may bring on yawning and mental lapses, while extended or repeated rides result in sore joints, persistent tiredness, and increased risk of falling asleep at the handlebars. Physical fatigue happens as your muscles, particularly in your arms, legs and rest of your core, work to stabilize your motorcycle and absorb road vibrations. Over time, even experienced riders find their energy levels plummeting if they ignore signs like cramping or tingling limbs—both of which point to decreased blood flow and exhaustion. Equally important, mental fatigue builds from constant vigilance, sensory overload, and monotony—often made worse by open highway stretches without much change in scenery. Understanding these different fatigue sources is essential for crafting a strategy that goes beyond simple rest stops. Whether you ride a dual sport for fun or rely on your bike for daily commutes, smart fatigue management starts with self-awareness, a well-chosen face helmet, and a commitment to balancing physical effort with mindful mental breaks. While managing fatigue is crucial for every ride, it's equally important to consider how seasonal changes can impact your motorcycle's performance and your comfort on the road. For practical advice on keeping your bike in top shape throughout the year, explore these seasonal bike care secrets every rider should know to ensure both you and your machine are ready for any journey. Core Strategies to Overcome Fatigue on Motorcycle Rides Hydration and nutrition tips to manage fatigue Best pre-ride planning habits to prevent exhaustion Essential gear for minimizing fatigue on motorcycle trips Overcoming fatigue on motorcycle rides requires an intentional approach. Hydration and nutrition are foundational—the body and mind need regular water and consistent food intake to maintain energy levels. Pack healthy snacks (like trail mix, fruit, or lean protein bars) and water, consuming them at every break. Steer clear of relying solely on caffeine, which can spike and then crash your energy, leaving you more tired halfway through your ride. Equally important is pre-ride planning. Start with a good night’s rest, review your route to anticipate challenging sections, and schedule regular stops at least every 60–90 minutes. Adjust your body position and stretch often to prevent cramps and maintain blood flow—critical for avoiding soreness on longer motorcycle tours. The right gear, from a comfortable helmet (face helmet or otherwise) to padded gloves and well-fitted riding boots, can also make a significant difference by reducing strain and buffering wind noise that contributes to mental fatigue. Building these habits will boost your resilience and help you finish even the most intense long ride feeling strong. Mental Fatigue on Motorcycle Journeys: Staying Sharp and Alert Cognitive techniques to stay awake and alert Managing distraction and focus over long rides "Mental fatigue is just as dangerous as physical exhaustion—plan breaks and stay mindful." Mental fatigue often sneaks up on riders, particularly during uneventful highway stretches or after hours of sensory bombardment. To stay awake and prevent mental burnout, incorporate deliberate cognitive strategies. Play mental games—such as periodically scanning mirrors or identifying road signs that start with that letter—or break up your route with varied scenery whenever possible. Practicing mindfulness, such as focusing on your breath or noting specific sounds, keeps your brain engaged and wards off the dangers of autopilot riding. Distractions like mobile devices, prolonged thoughts about work, or even the persistent discomfort from an ill-fitting open face helmet can undermine your attention. To stay sharp, establish a routine of mental check-ins during rest stops, ensuring you’re present, alert, and ready for changing road conditions. Set reminders to reassess both your physical energy level and mental focus—especially crucial on full day motorcycle tours or group rides. Actively managing your state of mind is a non-negotiable part of safe, enjoyable riding for the long haul. Managing Fatigue on Motorcycle Adventures: Proactive Solutions Creating an effective rest schedule Signs it’s time to pull over to prevent suffering from motorcycle fatigue Overcoming fatigue with stretching and movement tips Planning your breaks before hitting the road is a proactive tactic essential for reducing fatigue on motorcycle rides. Schedule a stop every hour or at least every 70–90 minutes—regardless of how you feel in the moment. During each break, hydrate, eat a small snack, check your route, and most importantly, move: stretch your arms, legs, and neck to combat stiffness and improve blood flow. This habit minimizes the risk of soreness and keeps your body and mind aligned for the journey ahead. Learn to recognize the specific signs that it’s time to pull over: persistent yawning, blurred vision, nodding off for split seconds, or delayed reaction to traffic. Don’t push through fatigue—doing so greatly increases your risk of mistakes. Instead, use rest stops as opportunities to regroup mentally. Even a short walk or change of scenery can refresh your focus. Incorporating a variety of movement into your ride—such as standing on the pegs or wiggling toes in your boots—helps maintain alertness and comfort, ensuring you finish strong rather than suffering from motorcycle fatigue. Pro Rider Tactics: How to Overcome Fatigue on Motorcycle Rides Expert insights on the most effective ways to manage fatigue Personal routines from seasoned riders "Before a long ride, I review the route and schedule stops every hour to reduce fatigue." – Experienced Tour Rider Top riders consistently deploy proven routines to overcome fatigue on motorcycle rides. One fundamental habit is adjusting your schedule based on personal stamina and the demands of your journey. Seasoned motorcyclists routinely stretch both before setting out and at every break. The best riders also keep lightweight, moisture-wicking gear on hand for temperature regulation, and they use earplugs to minimize wind noise, a major contributor to mental fatigue during high-speed stretches. Many pros favor a pre-ride ritual—reviewing the route, checking bike ergonomics, and setting reminders to monitor energy levels. Some riders keep checklists to fine-tune their body position during the ride, while others swap out open face or dual sport helmets for the one that offers the best balance of comfort and noise protection. Ultimately, building a personalized fatigue management plan, inspired by the routines of experts, allows you to tailor your approach for every motorcycle tour, whether you’re out for a weekend or a full day trek. Table: Quick Reference—Guide to Motorcycle Riding Fatigue & Best Practices Symptom Prevention Tip When to Take Action Drowsiness Increase hydration, plan breaks The moment drowsiness hits Mental fog Take a mindfulness or focus break Every 90 minutes Sore muscles Adjust position/stretch every hour At first sign of discomfort Lack of concentration Try cognitive exercises, rest Before risky situations Lists of Must-Do Habits to Manage and Overcome Fatigue on Motorcycle Rides Do: Schedule frequent breaks to stay awake and refreshed Do: Check your bike ergonomics for comfort and posture Don't: Ignore early signs of fatigue—act immediately Don't: Rely solely on caffeine to overcome fatigue People Also Ask: Key Questions About Managing Fatigue on Motorcycle Rides What is the 1% rule in motorcycles? The 1% rule is often quoted in motorcycle culture, referring to riders who operate outside mainstream safety norms. For fatigue management and motorcycle safety, don’t gamble with the odds—choose to be among the 99% who prioritize rest and alertness, which dramatically reduces risk of suffering from motorcycle riding fatigue and related incidents. How should you manage fatigue when riding a motorcycle? Start with a good night’s sleep and proper hydration. During the ride, stop for breaks every hour, stretch, drink water, have a healthy snack, and reassess your energy levels. Avoid pushing through exhaustion; if you experience symptoms—like nodding off, sore muscles, or mental fog—pull over immediately. This proactive approach, used by veteran riders on long rides and motorcycle tours, is your best defense against both mental and physical fatigue on motorcycle rides. What is the 2 4 12 second rule on a motorcycle? This safety rule helps you maintain optimal focus and avoid mental fatigue by ensuring you always scan 2, 4, and 12 seconds ahead on the road for obstacles, changes in traffic, and hazards. Regularly applying the 2 4 12 second rule not only sharpens awareness during a full day ride but also significantly decreases the chances of surprise lapses due to mind wandering. What does 2 fingers down mean to bikers? When riders flash “2 fingers down,” it’s a universal sign of respect and camaraderie, especially on group rides. More than a friendly gesture, it also serves as a subtle check-in—encouraging others to acknowledge their alertness and readiness. In the context of fatigue, this signal is a reminder to look out for each other and stay aware of everyone’s energy and focus during shared motorcycle rides. Frequently Asked Questions (FAQs) About Guide to Motorcycle Riding Fatigue How often should I take breaks to overcome fatigue on motorcycle trips? It’s best to stop every 60–90 minutes, regardless of how you feel. This prevents both mental and physical fatigue from building up. Frequent stops keep your body alert, restore blood flow, and clear your mind—especially important for long rides. What are early warning signs of suffering from motorcycle fatigue? Common signs include yawning, loss of concentration, sore or tingling muscles, and frequent shifting in your seat. If you notice any of these, it’s crucial to take action before fatigue on motorcycle rides becomes a real hazard. Are there specific foods and drinks to help manage fatigue on motorcycle journeys? Yes—focus on water, electrolyte-rich drinks, protein bars, nuts, and fruit. Avoid processed foods high in sugar and simple carbs, which cause spikes and crashes in energy levels. Hydration and balanced nutrition are your allies for overcoming fatigue on motorcycle adventures. Key Takeaways From This Guide to Motorcycle Riding Fatigue Proactive fatigue management is essential for safety on all motorcycle rides Both mental and physical fatigue require attention—don’t neglect either Use expert strategies to overcome fatigue and make every ride enjoyable If you’re committed to staying energized and safe on every ride, remember that fatigue management is just one piece of the puzzle. Proactive care for your motorcycle—especially as seasons change—can further enhance your comfort, performance, and peace of mind on the road. For a deeper dive into year-round maintenance strategies that complement your fatigue-fighting habits, check out the comprehensive guide to seasonal bike care secrets every rider must know. By combining smart self-care with expert bike maintenance, you’ll be ready to tackle any adventure with confidence and control. Stay Energized—Contact the Experts Call Nasty Performance Motorcycle Shop Today: 847-458-4858

Beginner’s Guide to Riding in Hot Weather Without Heat Stress

Did you know that the human body can lose as much as 1. 5 liters of water per hour while cycling in the heat, potentially turning a hot day out into a dangerous health emergency? Extreme heat doesn’t just make you sweat—it can stealthily sap your focus, dull reaction time, and leave you open to heat stress or even heat stroke. This comprehensive beginner’s guide to riding in hot weather uncovers how to stay cool, ride safely, and outsmart the hottest conditions to ensure every mile remains enjoyable and safe. Riding in Hot Weather: Why It’s Different and How to Prepare Riding in hot weather is more than just a challenge—it’s a test of preparation, knowledge, and respect for your limits. Unlike cooler conditions, hot weather riding places extra stress on both your body and your gear. The fierce sun, sweltering air, and rising pavement temperatures can quickly turn an enjoyable ride into a risky one if you're unprepared. High humidity slows your body's ability to cool down through sweat, raising your core temperature, increasing heart rate, and paving the way for heat exhaustion and heat stroke. This means you’ll need to approach each ride with new strategies, not just your usual routine. Let this guide arm you with tools, tips, and real-life tactics to beat heat stress and keep every adventure safe and rewarding. Whether you’re commuting, tackling a century, or planning a motorcycle ride on a hot day, knowing how to anticipate risks, monitor your body, and adjust your approach makes all the difference. Practical insights here show you how simple changes—like planning frequent breaks, wearing ventilated gear, and choosing the right hydration strategy—add up to a safer, more enjoyable experience. Embrace these lessons, and riding in hot weather becomes an opportunity, not a setback. What You’ll Learn How hot weather impacts riding comfort and safety Recognizing signs of heat exhaustion and heat stroke Gear and hydration tips for cycling in the heat Real-life strategies to stay cool and reduce heat stress on the road While preparing for hot weather rides, it's also wise to consider how seasonal changes affect your bike’s performance and longevity. For a deeper dive into essential maintenance tips that keep your ride in top shape year-round, check out these seasonal bike care secrets every rider should know. Understanding Heat Stress for Riders: The Real Risks Heat stress is a silent adversary on any hot weather ride, often developing before you even realize it’s happening. The line between discomfort and danger can blur quickly—especially as your core temperature rises and dehydration sets in. Heat exhaustion is usually the first stage, triggered by fluid and salt loss. Symptoms like dizziness, nausea, heavy sweating, and confusion should never be ignored, as they’re warning signs that your body is struggling. If conditions worsen or no action is taken, heat stroke can develop—a true medical emergency with symptoms such as flushed skin, lack of sweating, rapid pulse, and altered mental state. Recognizing these cues early and acting fast is a fundamental skill every rider needs. This beginner’s guide to riding in hot weather details clear differences between heat exhaustion and heat stroke and explains what to do at every stage. Whether you’re cycling in the heat, riding in hot weather, or simply trying to stay cool on a summer road trip, your health always comes first. Being aware of risk factors like high humidity, intense sun, full riding gear, and lack of shaded breaks gives you the tools to ride safely and avoid riding into danger. Condition Symptoms What to Do Outcomes Heat Exhaustion Heavy sweating, weakness, dizziness, headache, nausea, cool/clammy skin, rapid pulse Stop riding; move to shade; drink water or electrolyte drink; use ice cubes or wet cloths; monitor symptoms Often resolves with quick response; can develop into heat stroke if untreated Heat Stroke Hot, dry/flushed skin; confusion; no sweating; rapid, strong pulse; high body temperature Call emergency services (911); immediate cooling (shade, cold packs); do not give fluids if unconscious Life-threatening; needs urgent medical attention “Temperature extremes are not just uncomfortable—they can quietly sabotage your physical performance and become dangerous if you’re unprepared.” Cycling in the Heat: The Science Behind Heat Stress What Happens to Your Body During Weather Riding When you head out cycling in the heat, your body launches into protective mode to keep cool. As the temperature rises, so does your heart rate, pumping blood to the skin where sweat evaporates to dissipate heat. But in hot weather, humidity or intense sun can overwhelm this natural cooling system. Sweat production increases, but if you don’t replenish fluids and electrolytes, dehydration sets in—leading to higher core temperatures and sluggish performance. The result? Your reaction time slows, decision-making suffers, and risk of heat exhaustion and heat stroke skyrockets. Even a short ride can turn dangerous if you don’t respect what your body is telling you. It’s a common challenge for beginners and experienced riders alike: the first warning sign may just be mild fatigue or a dry mouth, but the true threat is often invisible until it’s severe. That’s why understanding how your body copes—and sometimes fails—in hot weather is key to every safe and enjoyable ride. Common Triggers for Heat Exhaustion and Heat Stroke There are several classic triggers for heat stress during weather riding. Direct exposure to the sun for prolonged periods, riding in the hottest hours, neglecting hydration, or donning full, non-breathable gear can tip you over the edge. Riders often underestimate the added risk from reflective roads, which boost the temperature around your body even further. The back of your neck and other exposed areas are especially vulnerable, and once your body’s cooling mechanisms are overwhelmed, core temperature rises dangerously. Additional factors—like a high intensity pace, inadequate shade stops, and heavy clothing—can make even a moderate day feel like extreme heat. Understanding these common triggers helps you not only plan better, but also recognize early warning signs and act before things get dangerous. Essential Pre-Ride Planning from the Beginner’s Guide to Riding in Hot Weather Reviewing Weather Riding Alerts and Heat Index Before every ride in hot weather, it’s critical to check local weather riding alerts and the heat index—a measure that combines temperature and humidity to gauge what the air actually ‘feels like. ’ Even on a breezy morning, a soaring heat index can turn a ride into a health risk. Seasoned cyclists know to adapt plans to shifting conditions, sometimes rescheduling to the early evening or dawn when temperatures are safer. Failing to monitor these alerts can mean riding right into extreme heat and stacking the odds against your safety and comfort. Checklist – What to Prepare Before High-Temperature Rides Monitor forecast, heat index, and weather alerts Plan a shaded route with frequent breaks Charge your phone and map rest stops Pack an electrolyte-rich hydration pack Choose lightweight, ventilated gear Apply sunscreen and bring backup sunglasses Let someone know your route and estimated return time Understanding „How Hot Is Too Hot for Riding?“ There’s no single number for “too hot,” but a heat index above 90°F (32°C) should have every rider on high alert. If the forecast calls for excessive heat warnings or UV levels are extreme, it’s best to avoid riding or switch plans to a cooler part of the day. Pushing through hot weather not only feels uncomfortable—it can lead to irreversible health risks. Heat sensitivity is personal: factors like age, fitness, and medical history can change your risk. When in doubt, err on the side of caution and prioritize your health, not your mileage goals. “Respect the forecast—riding your motorcycle in extreme heat isn’t only about comfort but about long-term health and safety.” Smart Gear Choices for Riding in Hot Weather Protective vs. Breathable: What to Wear When Cycling in the Heat Choosing what to wear is a balancing act between safety and staying comfortable. Breathable, ventilated gear is your best friend in hot weather. Mesh fabrics and moisture-wicking layers keep airflow moving and sweat evaporating, reducing your risk of overheating. However, don’t sacrifice protection: even on a hot day, proper padding makes the difference between a close call and a serious road rash. For motorcycle rides, look for lightweight jackets with ventilation panels and built-in armor, and always opt for eye protection to guard against sun glare and debris when cycling in the heat. The right gear lets you stay cool and ride safely, no matter how high the mercury climbs. Consider switching to lighter gloves, ventilated shoes, and bandanas for the back of your neck, all engineered to beat the heat while keeping you protected from wind and road hazards. Selecting Hot Weather Helmets, Jackets, and Gloves The right helmet can mean the difference between a miserable and a refreshing ride. Seek out models with multiple vents and moisture-wicking internal liners. For gloves, lightweight designs with perforations or mesh backs allow your hands to breathe. When it comes to jackets, look for those designed specifically for weather riding, offering protective armor while maximizing airflow. Don’t forget reflective details—they help keep you visible in the scorching midday sun or early evening light. For motorcycle riders, mesh jackets with armor, short-cuff gloves, and summer-rated boots keep safety high and heat at bay. Always try before you buy; fit and comfort are essential, as pinching or tight clothing increases sweat and discomfort. Investing in dedicated hot weather gear prepares you not just for today’s ride, but for every warm day ahead. Innovative Accessories to Stay Cool Simple accessories can make dramatic differences in comfort and performance during hot weather riding. Cooling towels, evaporative bandanas, and vented balaclavas offer targeted relief for exposed areas like the back of your neck. Keep a small pack of ice cubes or a cold gel insert handy for rest stops. Hydration packs with insulated tubes help ensure a chilly drink is always at hand, and handlebar-mounted fans provide added airflow for those tackling extreme heat conditions. Technology also plays a role: smart watches now feature core temperature and heart rate tracking to alert you to early warning signs of heat stress before symptoms worsen. Even simple tweaks—like choosing lighter helmet colors, or swapping in more airy gear—can help you stay cool and focused. Prioritize gear that keeps sweat moving off your skin and supports your body’s natural cooling efforts. Hydration and Nutrition: Top Fueling Tactics for Cycling in the Heat How to Stay Hydrated: Water, Electrolytes, and Timing Hydration is your top defense against heat stress. Always start a ride well-hydrated and continue to stay hydrated by sipping water every 15-20 minutes, not just when thirsty. For rides over an hour in the heat, consider drinks formulated with electrolytes to replace the salts lost in sweat. This maintains a balanced heart rate and helps prevent muscle cramps and heat exhaustion. Timing matters: pre-hydrate before the ride, keep a bottle accessible while on the move, and replenish fluids as soon as you finish. Many athletes swear by using a hydration pack—these make it easier to sip frequently, allowing your focus to stay on the road, not your thirst. Avoid sugary drinks and caffeine, as they can accelerate dehydration. Mastering smart hydration is essential for every successful ride, whether you’re cycling in the heat or riding in hot weather on your motorcycle. Quick List: Best Drinks and Snacks for Weather Riding Electrolyte sports drinks (low sugar) Cold water (consider adding ice cubes for refreshment) Coconut water (natural electrolytes) Bananas, pretzels, or trail mix for sustained energy Energy gels or chews with added sodium and potassium Product Type Best Features Hydration Pack Hands-free water carrier Easy access, large capacity, keeps water cold Electrolyte Tablets Additive for water bottles Customizable, lightweight, easy to pack Coconut Water Natural drink Supplies potassium, low sugar, refreshing Sports Drink Bottle or powder Optimized salt/sugar blend, many flavors Warning Signs: Early Symptoms of Heat Exhaustion Recognizing early warning signs of heat exhaustion can stop a crisis before it begins. Watch for heavy sweating, muscle cramps, paleness, dizziness, headache, nausea, or a rapid but weak pulse. Feeling lightheaded, having trouble focusing, or noticing a drop in physical or mental energy means it’s time to take a break and cool down. Ignoring these symptoms invites further risk—once heat stress progresses, the threshold for recovery decreases dramatically, especially during prolonged rides in the heat. If you notice these signs, don’t hesitate: seek shade, begin hydration, and apply cool compresses to exposed areas. Your body is telling you it’s time to stop and recover—listen and avoid riding back into danger. On-the-Road Tactics: Staying Cool, Alert, and Safe Scheduling Frequent Breaks and Shade Stops One of the golden rules from every beginner’s guide to riding in hot weather: schedule frequent breaks. Never push through without pausing and assessing how you feel. At every opportunity, stop in shaded areas, remove your helmet, and soak a cloth in cool water for your face and the back of your neck. These shade stops lower core temperature, help keep heart rate steady, and allow you to hydrate effectively. Smart riders incorporate pre-identified rest stops into their route, turning breaks from a chore into a strategic advantage. On particularly hot days, even five extra minutes every hour can tip the scales toward safety, helping you stay cool and ride safely through the summer months. Bring a small snack for these pauses to maintain energy and support ongoing hydration. Adjusting Your Pace for Extreme Heat Even experienced cyclists need to slow down in extreme heat. A reduced pace lowers your risk of overheating, giving your body time to adapt and sweat more efficiently. Save hard efforts for cooler conditions—conserve energy for emergencies. The best riders know that skill is not just speed, but smart adaptation to conditions. If you find your heart rate is unusually high, or sense you’re overheating, ease off, shift to lower gears, and focus on smooth, steady pedaling. Adaptability separates riders who finish strong from those who face heat stress mid-ride. Remain aware of early warning signs and err on the side of caution: there’s no such thing as “too slow” when your health is on the line. Top 5 Techniques to Beat Heat Stress While Riding Start early or late—avoid midday sun Use ventilated gear and light colors Hydrate before, during, and after the ride Schedule frequent breaks in the shade Apply sunscreen and use cooling accessories Recognizing and Responding to Heat Stroke and Heat Exhaustion First Aid Steps for Riders Suffering from Heat Stress If you or a fellow rider shows signs of heat exhaustion or heat stroke during a ride, it’s critical to respond immediately. Move to a shaded area and remove excess gear to help cool the body quickly. Provide cool water or an electrolyte drink only if the person is conscious and able to drink. Apply wet towels or ice cubes to the neck, armpits, and wrists—these exposed areas help lower core temperature. Monitor closely; if symptoms progress to confusion, seizures, or unconsciousness, call for emergency help right away. Never leave a rider with severe symptoms alone, and avoid riding further until they have recovered. The first five minutes can mean the difference between a safe recovery and a life-threatening emergency when dealing with heat stress on the road. “Knowing what to do in the first five minutes can save a life—yours or a fellow rider’s.” Special Considerations for Motorcycle Riders: Adapting Your Beginner’s Guide to Riding in Hot Weather Unique Gear and Habits for Riding Your Motorcycle in Hot Weather Motorcycle riding in hot weather comes with its own set of hazards and solutions. Protective gear is non-negotiable—yet the wrong choice can trap heat and increase your risk of heat stress. Opt for mesh jackets with integrated armor, lightweight gloves, moisture-wicking base layers, and ventilated boots. Always wear full eye protection for glare and debris. Fill a hydration pack before every ride; it allows you to stay hydrated without removing your helmet or stopping. Don’t forget to check tire pressure, as extreme heat can impact performance on the road and increase the likelihood of road rash if you go down. The best motorcycle riders know to plan stops every 45-60 minutes, swapping sweaty gear for fresh items if possible. Wear a cooling neck wrap or invest in an airflow helmet to enhance comfort during even the hottest rides. The 4-Second Rule on a Motorcycle: Explained On a motorcycle ride—especially in hot weather—maintaining a safe distance from vehicles ahead is essential. The 4-second rule helps ensure enough stopping distance, giving you time to react if something unexpected occurs. Simply pick a roadside marker and count four seconds from when the vehicle ahead passes it; if you reach the marker before finishing the count, slow down and increase your gap. This is particularly important in extreme heat when fatigue, evaporation, and slowed reaction time increase the risk of collisions or losing control. Adopting the 4-second rule is a cornerstone of safe weather riding for beginners and seasoned bikers alike. People Also Ask: Weather Riding FAQs What Does 2 Fingers Down Mean to Bikers? When you see bikers flashing two fingers down, they’re giving a respectful nod to fellow riders: it means “ride safely” or “keep the rubber side down. ” It’s a friendly gesture promoting unity and reminding riders everywhere to look out for one another, especially during risky conditions like riding in hot weather or challenging environments. What is the 1% Rule in Motorcycles? The 1% rule refers to the idea that 99% of motorcyclists are law-abiding citizens, while the remaining 1% belong to outlaw clubs. For new or casual riders, it’s mostly historical context—it’s not a code to live by, but rather a term that sometimes surfaces in motorcycle culture. As a beginner, focus on positive community, safety, and responsible riding. How Hot is Too Hot for Riding? Most experts agree that a heat index above 90°F (32°C) is when you should reconsider or significantly modify your riding plans. If you’re feeling the effects—dizzy, overheated, or fatigued—it’s already too hot for your body. Listen to your internal cues, monitor local advisories, and remember that safety trumps any personal record or destination. What is the 4 Second Rule on a Motorcycle? The 4-second rule is all about safe following distance: count to four as the vehicle in front of you passes a fixed point. This helps compensate for increased reaction time due to fatigue, distractions, or adverse conditions—like hot weather. Stick to this habit for a safer motorcycle ride year-round. Beginner’s Guide to Riding in Hot Weather: Quick Key Takeaways Plan ahead: check weather, gear up appropriately Stay hydrated and listen to your body Know the signs of heat stress Adapt your riding habits for extreme heat Never underestimate the risk—err on the side of caution Frequently Asked Questions for the Beginner’s Guide to Riding in Hot Weather How do you cool down quickly during a ride? Take off excess gear, find shade, apply a cool wet cloth or ice cubes to the back of your neck and wrists, and sip cool water. Let your body’s core temperature stabilize before resuming. Is mesh gear safe in a crash? Mesh gear can offer effective ventilation, but ensure it also has abrasion resistance and integrated armor for protection comparable to traditional gear. Always buy quality from reputable brands. What foods should you avoid before riding in the heat? Steer clear of heavy, high-fat foods and excessive sugar before a ride. Focus on easy-to-digest snacks like fruit or trail mix that provide quick energy without slowing you down. Can dehydration affect concentration while riding? Yes. Even mild dehydration can dull your focus, slow reaction time, and increase the risk of mistakes or road rash. Make hydration a top priority during any warm-weather or hot day ride. Summing Up the Beginner’s Guide to Riding in Hot Weather Without Heat Stress “Every accomplished rider started as a beginner—mastering hot weather riding ensures your journeys are safe, comfortable, and memorable.” Ready to stay cool and ride safely? Call Nasty Performance Motorcycle Shop Today: 847-458-4858 If you’re committed to making every ride safe and enjoyable, don’t stop with just hot weather strategies. Expanding your knowledge to include year-round bike care can help you avoid unexpected breakdowns and keep your machine running smoothly through every season. Discover expert advice and practical tips in Seasonal Bike Care Secrets Every Rider Must Know—your next step toward mastering both the road and your ride, no matter what the weather brings.

How to Prepare for Motorcycle Riding for Beginners: Get Road-Ready

Imagine the sun on your back, the rumble of the engine beneath you, and the freedom of the open road just a throttle away. If you’re dreaming about your first ride, know this—every expert started as a beginner, fueled by excitement and a touch of nerves. Preparing for your journey is more than learning to twist the throttle; it’s about transforming anticipation into confidence, ensuring every ride is as safe as it is exhilarating. In this guide, you’ll discover every step on how to prepare for motorcycle riding for beginners, arming you with knowledge, skills, and peace of mind before you ever hit the road. Embarking on Your Motorcycle Journey: The First Steps in How to Prepare for Motorcycle Riding for Beginners Starting your journey into the world of motorcycles is a thrilling yet crucial decision. The moment you decide to learn to ride, your focus should be on building a strong and safe foundation. Understanding motorcycle safety, practicing proper riding habits, and equipping yourself with the correct gear are all vital in this process. This guide answers the most pressing questions and walks you through the steps you need to take to become ride-ready, including familiarization with motorcycle basics, enrolling in a basic rider or riding academy course, and performing essential safety checks. Whether you're motivated by the thrill of the ride or the promise of adventure, the commitment to learning the fundamentals ensures not just fun, but also safety on every journey. "The excitement of hitting the open road for the first time is matched only by the responsibility that comes with mastering motorcycle safety and skill." With this balanced mindset, every new rider gives themselves a head start. Remember, the road ahead is long—preparation is what turns the journey into a lifetime of memorable adventures. What You'll Learn in This Guide to How to Prepare for Motorcycle Riding for Beginners Fundamental riding skills every beginner needs Essential gear and safety checks Navigating the basic rider course and riding academy options Key habits for road awareness and confidence By the end of this guide, you’ll have a comprehensive understanding of how to prepare physically, mentally, and practically—empowering you to approach your first ride with confidence and clarity. Understanding Motorcycle Basics: Building Your Knowledge Foundation Familiarize Yourself with Motorcycle Controls and Functions Before your first ride, it's essential to understand every part of your motorcycle. The clutch lever is typically located on the left side of the handlebar. It allows you to change gears smoothly, a core skill in learning to ride safely. The front brake and brake lever are on the right side of the handlebar, with the rear brake pedal operated by your right foot. The foot peg provides support for your feet, usually with your left foot shifting gears and your right operating the rear brake. Familiarize yourself with instrument panels, including the low beam headlights, turn signals, speedometer, and the kill switch used to quickly stop the engine. Learning how these parts interact and practicing their use makes the riding process smoother and safer. A quick coach tip: Spend time with your motorcycle, get comfortable with the placement of every lever and button, and rehearse reaching each control with your eyes closed. Learning How to Start the Bike: Step-by-Step for Beginners Starting your motorcycle is a ritual every beginner needs to master. First, mount the bike from the left side, holding onto the handlebars for stability. Insert the key and ensure the kill switch is in the “run” position on the right-hand side of the handlebar. Squeeze the clutch lever with your left hand, and with the bike in neutral, press the starter button. As you start the bike, keep the left foot on the ground for balance and the right foot ready near the rear brake. After the engine starts, keep your eyes on the instrument panel to check for warning lights or improper engine speed. Practice the motions of pull the clutch, shift into gear, and release the clutch slowly while rolling on the throttle. Mastering this step not only gives you confidence but also creates a safe foundation before riding out onto the street. Choosing the Right Motorcycle and Gear for Beginners Selecting a Starter Bike: Features and Popular Models Selecting your first motorcycle is about matching your needs, physical size, and comfort level. Lightweight bikes with a modest engine speed (generally 250cc–500cc) are ideal for beginners. Popular options often come with upright seating positions for better control, manageable weight for easy maneuvering, and a seat height that lets you rest both feet (especially your left foot) flat on the ground. Look for starter bikes that feature simple controls and responsive front and rear brakes. Ask to sit on several models; check the reach to the clutch lever, \foot peg\ placement, and the ease of activating the turn signal or starter button. Brands like Honda, Kawasaki, and Yamaha offer award-winning starter models built for comfort and reliability. Remember, the right fit inspires confidence and makes adapting to basic rider techniques much smoother. Must-Have Safety Gear: Helmet, Jacket, Gloves, and More No matter how gentle your first roads may seem, high-quality safety gear is your best investment for long-term motorcycle safety. A DOT-approved helmet is non-negotiable, providing essential protection for your most vulnerable area. Pair it with a jacket featuring armor in the shoulders and elbows, gloves that allow you to properly grip the handlebars and brake lever, and over-the-ankle boots to protect your left side and right from unexpected falls. Opt for protective pants or riding jeans reinforced with Kevlar. High-visibility adds another layer of safety, making you more noticeable in traffic when practicing the 4 second rule. Remember, every piece of gear not only minimizes injury but also boosts your confidence, letting you focus on refining basic riding skills. DOT/ECE-approved full-face or modular helmet Armored motorcycle jacket (textile or leather) Motorcycle gloves with knuckle and palm protection Riding-specific boots; ankle-high with good grip Padded riding pants or kevlar-reinforced jeans Reflective vest or high-visibility accents Enrolling in a Riding Academy or Basic Rider Course Benefits of Basic Rider and Riding Academy Courses Taking a basic rider or riding academy course provides much more than just a confidence boost—it offers hands-on experience under the guidance of certified instructors. You’ll learn foundational skills such as starting, stopping, turning, and shifting gears safely. Courses often include practical instruction on the use of the clutch lever, operating the brake lever and front brake, and the significance of the kill switch and side of the handlebar controls. Many states grant a completion document for those who successfully complete the training, which can count toward your motorcycle license or motorcycle endorsement. Some insurers even offer a discount on insurance after certification. But one of the biggest gains is the safe, supportive environment, where mistakes are learning opportunities and every range day is designed to build your riding confidence step by step. As you focus on building your foundational skills and safety habits, it's also important to consider how seasonal changes can impact your riding experience. For practical tips on keeping your motorcycle in top shape throughout the year, check out these seasonal bike care secrets every rider must know—a valuable resource for both new and experienced riders. What to Expect in the Basic eCourse and Hands-On Training A well-structured basic ecourse lays the groundwork before you set foot in the practice lot. The classroom session focuses on traffic laws, situational awareness, and basic motorcycle mechanics—key principles for learning to ride. After absorbing these fundamentals online or in person, you’ll take part in range day, translating theory to real-world skills. Here, you’ll practice starting the bike, clutch control, using both brakes, negotiating slow-speed maneuvers, and executing emergency stops, all with close coaching. The coach tip is to approach each step with patience; mastering basic skills on the range translates to preparedness and calm in busy traffic. Most courses wrap up with an evaluation—passing earns you a course completion certificate, a crucial step toward your training or licensing journey. Pre-Ride Safety Checks: Yourself and Your Motorcycle Inspecting Tire Pressure, Brakes, and Lights A safe rider always checks their bike before heading out—no exceptions. Start by assessing the tire pressure with a gauge, ensuring both tires align with the manufacturer’s recommended PSI. Inspect tread for wear and check for any embedded debris. Examine both the front and rear brake components: ensure the brake lever is smooth and the rear brake pedal is responsive, with no lag. Test the low beam headlights, brake lights, and all turn signals. Walk around your bike, listening for unusual sounds, and look for any fluid leaks beneath. Properly working controls and lights are crucial for both your safety and visibility—never skip this step, even if you’re riding for a short distance. Make it a habit, and you’ll dramatically reduce the chance of preventable accidents. Preparing Mentally: Focus, Calm, and Mindset Riding a motorcycle isn’t just a physical skill—it’s a test of mental readiness. Before every ride, take a brief moment to clear your mind of distractions. Remind yourself of your basic rider training, breathing slowly to center your focus. Visualize the route, gaps in traffic, and your reactions under different scenarios. Being mindful of your emotional state is just as important as inspecting your brake lever or checking your tire pressure. If you’re feeling anxious, take a few minutes to calm your nerves or delay your ride. Riding with a clear, confident mindset keeps you alert for unexpected hazards and sharpens your ability to make quick, effective decisions. Always be honest about your readiness, as the right mindset can be your best defense on the road. Mastering Motorcycle Riding Techniques for Beginners Starting, Stopping, and Turning: Fundamentals for How to Prepare for Motorcycle Riding for Beginners Applying what you’ve learned during range day is crucial for real-world scenarios. Always start the bike on a flat, stable surface, feet on the pegs and both hands controlling the handlebars. Begin by pulling the clutch lever, shifting into first gear, and slowly releasing the clutch while gently rolling on the throttle. Smooth throttle and brake control are essential for stability, especially at low speeds. To stop, progressively use both front and rear brakes; apply the front brake lever first, then the rear brake, coming to a controlled halt. Turning involves smooth lean and throttle application, with your eyes focused on your exit point. Give yourself room to practice these maneuvers in a spacious, empty lot, and keep repetition at the heart of your routine—a tried-and-true coach tip for all beginners. Understanding the 4 Second Rule and Safe Following Distances Spacing on the road keeps you safe, and the 4 second rule is your best ally. Select a stationary object ahead and start counting as the vehicle in front passes it; you should reach that object after four seconds. This buffer lets you react to sudden stops, debris, or changing conditions—a critical skill for motorcycle safety. Mastering both the front brake and rear brake means you can slow or stop with confidence even if surprises arise. Always factor weather, lighting, and traffic levels into your distance, and never rush this part of the learning curve. Building muscle memory for safe stopping is as much a part of how to prepare for motorcycle riding for beginners as learning to start the bike. "Taking the time to master the basics now paves the way for a lifetime of enjoyable and safe riding experiences." Road Awareness and Traffic Strategies Reading Traffic, Blind Spots, and Defensive Riding Defensive riding is about anticipating, not just reacting. Read traffic ahead of you, constantly checking mirrors and keeping an eye on blind spots. Situational awareness lets you identify potential dangers—like merging vehicles or sudden stops—before they impact you. Adjust your lane position to stay visible and never linger alongside other vehicles in their blind spots. Use your turn signals and low beams to be more noticeable. Always plan your escapes: if traffic stops suddenly, which direction can you swerve safely? Practice these habits so they become second nature, and remember, a defensive mindset lies at the heart of every safe rider’s basic rider skills. What Does 2 Fingers Down Mean to Bikers? When you see fellow riders flash “two fingers down” as they pass, that’s the universal biker salute—a gesture of camaraderie, respect, and a shared commitment to the values of the motorcycle community. It’s a way to say, “Be safe, ride free,” and is recognized worldwide by seasoned and beginner riders alike. As you learn to ride, you’ll realize riding isn’t just about mastering controls or following the 4 second rule; it’s about joining a supportive family on the open road. Building Confidence: Practice Routines for Beginners Practice mounting and dismounting safely from the left side of the bike. Warm up with basic throttle and clutch exercises. Set up cones or markers for slow-speed weaving to enhance balance. Repeat starting and stopping drills, focusing on smooth use of front and rear brakes. Incorporate tight turns and figure-eights for handling control. Practice scanning for hazards and checking blind spots in a calm area before venturing out. Consistent repetition of these routines turns skills into automatic habits, empowering you to tackle every new ride with growing assurance. Common Questions About Beginner Motorcycle Riding What is the 1% Rule in Motorcycles? The “1% rule” refers to a term used in the motorcycle world describing outlaw biker clubs—one percent of riders who operate outside the law. For beginners and most motorcycle riders, this is simply trivia. The majority of riders are law-abiding, safety-conscious, and take pride in responsible riding. As a beginner, focus on joining the 99% who make safety, respect, and community their top priorities. Which Bike is Most Liked By Girls? The most liked bike by girls varies, but beginner-friendly options often top the list. Factors like lightweight design, comfortable seat height, and easy-to-manage controls (especially clutch and brake levers) are crucial. Popular choices among female riders include the Honda Rebel 300, Kawasaki Ninja 400, and Yamaha YZF-R3. The best bike is the one that feels right for your build, style, and confidence—never choose based solely on trends. FAQs on How to Prepare for Motorcycle Riding for Beginners Do I need a license before taking a basic rider course? Most riding academies and basic rider courses do not require a motorcycle license before you enroll. In fact, these courses are often a gateway toward obtaining your learner’s permit or motorcycle endorsement—for both beginners and those upgrading their skills. How long does it take to get comfortable riding a motorcycle? Comfort comes from consistent practice and gradual progress. Most beginners start feeling confident after several range days and a few weeks of focused riding practice. Everyone’s pace is unique—don’t rush; prioritize mastering each skill before moving on. What is a good beginner practice area? An empty parking lot, quiet suburban street, or dedicated training lot is ideal for new riders. These locations allow you to practice without traffic pressure, focusing on managing the clutch, brake, throttle, and mastering your basic maneuvers in a low-stress environment. Key Takeaways: How to Prepare for Motorcycle Riding for Beginners Master the basics: Know your bike controls and starting procedures. Invest in high-quality, protective riding gear. Complete a basic rider or riding academy course. Perform safety and mindset checks before every ride. Practice foundational skills and defensive riding regularly. Embrace a community-focused, safety-first attitude. A Table Comparing Basic Rider Courses vs. Riding Academies Feature Basic Rider Course Riding Academy Duration 2–3 days (varies) 2–5 days (includes extra classroom or range time) Certification Provided Yes, upon successful completion(counts toward license/endorsement) Yes, plus possible additional endorsement preparation Skills Covered Starting, stopping, turning, basic safety, emergency maneuvers All basic skills plus advanced tips, group riding, defensive strategies Feeling Ready? Your Next Step in Becoming a Skilled Rider "Every ride begins with preparation. Let your readiness define your journey." The most important lesson in how to prepare for motorcycle riding for beginners is that every skill and habit you build today shapes your future on two wheels—a journey where safety, practice, and mindset turn uncertainty into the joy of the open road. As you continue to grow as a rider, remember that preparation is just the beginning. For those looking to deepen their knowledge and keep their motorcycle performing at its best in every season, explore our comprehensive guide on seasonal bike care secrets every rider must know. This resource will help you anticipate maintenance needs, adapt your riding habits, and ensure your bike is always ready for the road ahead—no matter the weather or time of year. Ready to hit the road? Call Nasty Performance Motorcycle Shop Today: 847-458-4858

© 2026 Nasty Performance All Rights Reserved. 2035 S. Eastwood Dr., Woodstock, IL 60098 . Contact Us . Terms of Service . Privacy Policy

eyJjb21wYW55IjoiTmFzdHkgUGVyZm9ybWFuY2UiLCJhZGRyZXNzIjoiMjAzNSBTLiBFYXN0d29vZCBEci4iLCJjaXR5IjoiV29vZHN0b2NrIiwic3RhdGUiOiJJTCIsInppcCI6IjYwMDk4IiwiZW1haWwiOiJuYXRlQG5hc3R5cGVyZm9ybWFuY2UuY29tIiwidG9zIjoiUEhBK1BITjBjbTl1Wno0OFpXMCtWMmhsYmlCNWIzVWdjMmxuYmkxcGJpQjNhWFJvSUhWekxDQjViM1VnWVhKbElHZHBkbWx1WnladVluTndPeUI1YjNWeUlIQmxjbTFwYzNOcGIyNGdZVzVrSUdOdmJuTmxiblFnZEc4Z2MyVnVaQ0I1YjNVZ1pXMWhhV3dnWVc1a0wyOXlJRk5OVXlCMFpYaDBJRzFsYzNOaFoyVnpMaUJDZVNCamFHVmphMmx1WnlCMGFHVWdWR1Z5YlhNZ1lXNWtJRU52Ym1ScGRHbHZibk1nWW05NElHRnVaQ0JpZVNCemFXZHVhVzVuSUdsdUlIbHZkU0JoZFhSdmJXRjBhV05oYkd4NUlHTnZibVpwY20wZ2RHaGhkQ0I1YjNVZ1lXTmpaWEIwSUdGc2JDQjBaWEp0Y3lCcGJpQjBhR2x6SUdGbmNtVmxiV1Z1ZEM0OEwyVnRQand2YzNSeWIyNW5Qand2Y0Q0S0NqeHdQanhoSUdoeVpXWTlJbWgwZEhBNkx5OTNkM2N1WjI5dloyeGxMbU52YlNJK2FIUjBjRG92TDNkM2R5NW5iMjluYkdVdVkyOXRQQzloUGp3dmNENEtDanh3UGladVluTndPend2Y0Q0S0NqeHdQanh6ZEhKdmJtYytVMFZTVmtsRFJUd3ZjM1J5YjI1blBqd3ZjRDRLQ2p4d1BsZGxJSEJ5YjNacFpHVWdZU0J6WlhKMmFXTmxJSFJvWVhRZ1kzVnljbVZ1ZEd4NUlHRnNiRzkzY3lCNWIzVWdkRzhnY21WalpXbDJaU0J5WlhGMVpYTjBjeUJtYjNJZ1ptVmxaR0poWTJzc0lHTnZiWEJoYm5rZ2FXNW1iM0p0WVhScGIyNHNJSEJ5YjIxdmRHbHZibUZzSUdsdVptOXliV0YwYVc5dUxDQmpiMjF3WVc1NUlHRnNaWEowY3l3Z1kyOTFjRzl1Y3l3Z1pHbHpZMjkxYm5SeklHRnVaQ0J2ZEdobGNpQnViM1JwWm1sallYUnBiMjV6SUhSdklIbHZkWElnWlcxaGFXd2dZV1JrY21WemN5QmhibVF2YjNJZ1kyVnNiSFZzWVhJZ2NHaHZibVVnYjNJZ1pHVjJhV05sTGlCWmIzVWdkVzVrWlhKemRHRnVaQ0JoYm1RZ1lXZHlaV1VnZEdoaGRDQjBhR1VnVTJWeWRtbGpaU0JwY3lCd2NtOTJhV1JsWkNBbWNYVnZkRHRCVXkxSlV5WnhkVzkwT3lCaGJtUWdkR2hoZENCM1pTQmhjM04xYldVZ2JtOGdjbVZ6Y0c5dWMybGlhV3hwZEhrZ1ptOXlJSFJvWlNCMGFXMWxiR2x1WlhOekxDQmtaV3hsZEdsdmJpd2diV2x6TFdSbGJHbDJaWEo1SUc5eUlHWmhhV3gxY21VZ2RHOGdjM1J2Y21VZ1lXNTVJSFZ6WlhJZ1kyOXRiWFZ1YVdOaGRHbHZibk1nYjNJZ2NHVnljMjl1WVd4cGVtRjBhVzl1SUhObGRIUnBibWR6TGp3dmNENEtDanh3UGxsdmRTQmhjbVVnY21WemNHOXVjMmxpYkdVZ1ptOXlJRzlpZEdGcGJtbHVaeUJoWTJObGMzTWdkRzhnZEdobElGTmxjblpwWTJVZ1lXNWtJSFJvWVhRZ1lXTmpaWE56SUcxaGVTQnBiblp2YkhabElIUm9hWEprSUhCaGNuUjVJR1psWlhNZ0tITjFZMmdnWVhNZ1UwMVRJSFJsZUhRZ2JXVnpjMkZuWlhNc0lFbHVkR1Z5Ym1WMElITmxjblpwWTJVZ2NISnZkbWxrWlhJZ2IzSWdZMlZzYkhWc1lYSWdZV2x5ZEdsdFpTQmphR0Z5WjJWektTNGdXVzkxSUdGeVpTQnlaWE53YjI1emFXSnNaU0JtYjNJZ2RHaHZjMlVnWm1WbGN5d2dhVzVqYkhWa2FXNW5JSFJvYjNObElHWmxaWE1nWVhOemIyTnBZWFJsWkNCM2FYUm9JSFJvWlNCa2FYTndiR0Y1SUc5eUlHUmxiR2wyWlhKNUlHOW1JR1ZoWTJnZ1UwMVRJSFJsZUhRZ2JXVnpjMkZuWlNCelpXNTBJSFJ2SUhsdmRTQmllU0IxY3k0Z1NXNGdZV1JrYVhScGIyNHNJSGx2ZFNCdGRYTjBJSEJ5YjNacFpHVWdZVzVrSUdGeVpTQnlaWE53YjI1emFXSnNaU0JtYjNJZ1lXeHNJR1Z4ZFdsd2JXVnVkQ0J1WldObGMzTmhjbmtnZEc4Z1lXTmpaWE56SUhSb1pTQlRaWEoyYVdObElHRnVaQ0J5WldObGFYWmxJSFJvWlNCVFRWTWdkR1Y0ZENCdFpYTnpZV2RsY3k0Z1YyVWdaRzhnYm05MElHTm9ZWEpuWlNCaGJua2dabVZsY3lCbWIzSWdaR1ZzYVhabGNua2diMllnWlcxaGFXd2diM0lnVTAxVExpQlVhR2x6SUdseklHRWdabkpsWlNCelpYSjJhV05sSUhCeWIzWnBaR1ZrSUdKNUlIVnpMaUJJYjNkbGRtVnlMQ0J3YkdWaGMyVWdZMmhsWTJzZ2QybDBhQ0I1YjNWeUlHbHVkR1Z5Ym1WMElITmxjblpwWTJVZ2NISnZkbWxrWlhJZ1lXNWtJR05sYkd4MWJHRnlJR05oY25KcFpYSWdabTl5SUdGdWVTQmphR0Z5WjJWeklIUm9ZWFFnYldGNUlHbHVZM1Z5SUdGeklHRWdjbVZ6ZFd4MElHWnliMjBnY21WalpXbDJhVzVuSUdWdFlXbHNJR0Z1WkNCVFRWTWdkR1Y0ZENCdFpYTnpZV2RsY3lCMGFHRjBJSGRsSUdSbGJHbDJaWElnZFhCdmJpQjViM1Z5SUc5d2RDMXBiaUJoYm1RZ2NtVm5hWE4wY21GMGFXOXVJSGRwZEdnZ2IzVnlJR1Z0WVdsc0lHRnVaQ0JUVFZNZ2MyVnlkbWxqWlhNdUlGbHZkU0JqWVc0Z1kyRnVZMlZzSUdGMElHRnVlU0IwYVcxbExpQktkWE4wSUhSbGVIUWdKbkYxYjNRN1UxUlBVQ1p4ZFc5ME95QjBieVp1WW5Od096eG9hV2RvYkdsbmFIUWdZMnhoYzNNOUltTnZiWEJoYm5sVFRWTlFhRzl1WlZWd1pHRjBaU0krYm5Wc2JEd3ZhR2xuYUd4cFoyaDBQaTRnUVdaMFpYSWdlVzkxSUhObGJtUWdkR2hsSUZOTlV5QnRaWE56WVdkbElDWnhkVzkwTzFOVVQxQW1jWFZ2ZERzZ2RHOGdkWE1zSUhkbElIZHBiR3dnYzJWdVpDQjViM1VnWVc0Z1UwMVRJRzFsYzNOaFoyVWdkRzhnWTI5dVptbHliU0IwYUdGMElIbHZkU0JvWVhabElHSmxaVzRnZFc1emRXSnpZM0pwWW1Wa0xpQkJablJsY2lCMGFHbHpMQ0I1YjNVZ2QybHNiQ0J1YnlCc2IyNW5aWElnY21WalpXbDJaU0JUVFZNZ2JXVnpjMkZuWlhNZ1puSnZiU0IxY3k0OEwzQStDZ284Y0Q0OGMzUnliMjVuUGxsUFZWSWdVa1ZIU1ZOVVVrRlVTVTlPSUU5Q1RFbEhRVlJKVDA1VFBDOXpkSEp2Ym1jK1BDOXdQZ29LUEhBK1NXNGdZMjl1YzJsa1pYSmhkR2x2YmlCdlppQjViM1Z5SUhWelpTQnZaaUIwYUdVZ1UyVnlkbWxqWlN3Z2VXOTFJR0ZuY21WbElIUnZPand2Y0Q0S0NqeHZiRDRLQ1R4c2FUNXdjbTkyYVdSbElIUnlkV1VzSUdGalkzVnlZWFJsTENCamRYSnlaVzUwSUdGdVpDQmpiMjF3YkdWMFpTQnBibVp2Y20xaGRHbHZiaUJoWW05MWRDQjViM1Z5YzJWc1ppQmhjeUJ3Y205dGNIUmxaQ0JpZVNCMGFHVWdVMlZ5ZG1salpTWWpNems3Y3lCeVpXZHBjM1J5WVhScGIyNGdabTl5YlNBb2MzVmphQ0JwYm1admNtMWhkR2x2YmlCaVpXbHVaeUIwYUdVZ0puRjFiM1E3VW1WbmFYTjBjbUYwYVc5dUlFUmhkR0VtY1hWdmREc3BJR0Z1WkR3dmJHaytDZ2s4YkdrK2JXRnBiblJoYVc0Z1lXNWtJSEJ5YjIxd2RHeDVJSFZ3WkdGMFpTQjBhR1VnVW1WbmFYTjBjbUYwYVc5dUlFUmhkR0VnZEc4Z2EyVmxjQ0JwZENCMGNuVmxMQ0JoWTJOMWNtRjBaU3dnWTNWeWNtVnVkQ0JoYm1RZ1kyOXRjR3hsZEdVdUlFbG1JSGx2ZFNCd2NtOTJhV1JsSUdGdWVTQnBibVp2Y20xaGRHbHZiaUIwYUdGMElHbHpJSFZ1ZEhKMVpTd2dhVzVoWTJOMWNtRjBaU3dnYm05MElHTjFjbkpsYm5RZ2IzSWdhVzVqYjIxd2JHVjBaU3dnYjNJZ2QyVWdhR0YyWlNCeVpXRnpiMjVoWW14bElHZHliM1Z1WkhNZ2RHOGdjM1Z6Y0dWamRDQjBhR0YwSUhOMVkyZ2dhVzVtYjNKdFlYUnBiMjRnYVhNZ2RXNTBjblZsTENCcGJtRmpZM1Z5WVhSbExDQnViM1FnWTNWeWNtVnVkQ0J2Y2lCcGJtTnZiWEJzWlhSbExDQjNaU0JvWVhabElIUm9aU0J5YVdkb2RDQjBieUJ6ZFhOd1pXNWtJRzl5SUR4emRISnZibWMrUEhOd1lXNGdjM1I1YkdVOUltTnZiRzl5T2lOR1JqQXdNREE3SWo1MFpYSnRhVzVoZEdVZ2VXOTFjaUJoWTJOdmRXNTBMM0J5YjJacGJHVWdZVzVrSUhKbFpuVnpaU0JoYm5rZ1lXNWtJR0ZzYkNCamRYSnlaVzUwSUc5eUlHWjFkSFZ5WlNCMWMyVWdiMllnZEdobElGTmxjblpwWTJVZ0tHOXlJR0Z1ZVNCd2IzSjBhVzl1SUhSb1pYSmxiMllwTGp3dmMzQmhiajQ4TDNOMGNtOXVaejQ4TDJ4cFBnbzhMMjlzUGdvS1BIQStKbTVpYzNBN1BDOXdQZ284YUdsbmFHeHBaMmgwSUdOc1lYTnpQU0pqYjIxd1lXNTVUbUZ0WlZWd1pHRjBaU0krVG1GemRIa2dVR1Z5Wm05eWJXRnVZMlU4TDJocFoyaHNhV2RvZEQ0OFluSWdMejRLUEdocFoyaHNhV2RvZENCamJHRnpjejBpWTI5dGNHRnVlVUZrWkhKbGMzTlZjR1JoZEdVaVBqSXdNelVnVXk0Z1JXRnpkSGR2YjJRZ1JISXVMQ0JYYjI5a2MzUnZZMnNzSUVsTUlEWXdNRGs0UEM5b2FXZG9iR2xuYUhRK1BHSnlJQzgrQ2p4b2FXZG9iR2xuYUhRZ1kyeGhjM005SW1OdmJYQmhibmxRYUc5dVpWVndaR0YwWlNJK0tEZzBOeWtnTkRVNExUUTROVGc4TDJocFoyaHNhV2RvZEQ0OFluSWdMejRLUEdocFoyaHNhV2RvZENCamJHRnpjejBpWTI5dGNHRnVlVVZ0WVdsc1ZYQmtZWFJsSWo1dVlYUmxRRzVoYzNSNWNHVnlabTl5YldGdVkyVXVZMjl0UEM5b2FXZG9iR2xuYUhRKyIsInByaXZhY3kiOiJQSEErUEhOMGNtOXVaejVRVWtsV1FVTlpQQzl6ZEhKdmJtYytQQzl3UGdvS1BIQStQSE4wY205dVp6NVVhR1VnYVc1bWIzSnRZWFJwYjI0Z2NISnZkbWxrWldRZ1pIVnlhVzVuSUhSb2FYTWdjbVZuYVhOMGNtRjBhVzl1SUdseklHdGxjSFFnY0hKcGRtRjBaU0JoYm1RZ1kyOXVabWxrWlc1MGFXRnNMQ0JoYm1RZ2QybHNiQ0J1WlhabGNpQmlaU0JrYVhOMGNtbGlkWFJsWkN3Z1kyOXdhV1ZrTENCemIyeGtMQ0IwY21Ga1pXUWdiM0lnY0c5emRHVmtJR2x1SUdGdWVTQjNZWGtzSUhOb1lYQmxJRzl5SUdadmNtMHVJRlJvYVhNZ2FYTWdiM1Z5SUdkMVlYSmhiblJsWlM0OEwzTjBjbTl1Wno0OEwzQStDZ284Y0Q0OGMzUnliMjVuUGtsT1JFVk5Ua2xVV1R3dmMzUnliMjVuUGp3dmNENEtDanh3UGp4bGJUNVpiM1VnWVdkeVpXVWdkRzhnYVc1a1pXMXVhV1o1SUdGdVpDQm9iMnhrSUhWekxDQmhibVFnYVhSeklITjFZbk5wWkdsaGNtbGxjeXdnWVdabWFXeHBZWFJsY3l3Z2IyWm1hV05sY25Nc0lHRm5aVzUwY3l3Z1kyOHRZbkpoYm1SbGNuTWdiM0lnYjNSb1pYSWdjR0Z5ZEc1bGNuTXNJR0Z1WkNCbGJYQnNiM2xsWlhNc0lHaGhjbTFzWlhOeklHWnliMjBnWVc1NUlHTnNZV2x0SUc5eUlHUmxiV0Z1WkN3Z2FXNWpiSFZrYVc1bklISmxZWE52Ym1GaWJHVWdZWFIwYjNKdVpYbHpKaU16T1RzZ1ptVmxjeXdnYldGa1pTQmllU0JoYm5rZ2RHaHBjbVFnY0dGeWRIa2daSFZsSUhSdklHOXlJR0Z5YVhOcGJtY2diM1YwSUc5bUlFTnZiblJsYm5RZ2VXOTFJSEpsWTJWcGRtVXNJSE4xWW0xcGRDd2djbVZ3Ykhrc0lIQnZjM1FzSUhSeVlXNXpiV2wwSUc5eUlHMWhhMlVnWVhaaGFXeGhZbXhsSUhSb2NtOTFaMmdnZEdobElGTmxjblpwWTJVc0lIbHZkWElnZFhObElHOW1JSFJvWlNCVFpYSjJhV05sTENCNWIzVnlJR052Ym01bFkzUnBiMjRnZEc4Z2RHaGxJRk5sY25acFkyVXNJSGx2ZFhJZ2RtbHZiR0YwYVc5dUlHOW1JSFJvWlNCVVQxTXNJRzl5SUhsdmRYSWdkbWx2YkdGMGFXOXVJRzltSUdGdWVTQnlhV2RvZEhNZ2IyWWdZVzV2ZEdobGNpNDhMMlZ0UGp3dmNENEtDanh3UGp4emRISnZibWMrUkVsVFEweEJTVTFGVWlCUFJpQlhRVkpTUVU1VVNVVlRQQzl6ZEhKdmJtYytQQzl3UGdvS1BIQStQSE4wY205dVp6NVpUMVVnUlZoUVVrVlRVMHhaSUZWT1JFVlNVMVJCVGtRZ1FVNUVJRUZIVWtWRklGUklRVlE2UEM5emRISnZibWMrUEM5d1Bnb0tQRzlzUGdvSlBHeHBQbGxQVlZJZ1ZWTkZJRTlHSUZSSVJTQlRSVkpXU1VORklFbFRJRUZVSUZsUFZWSWdVMDlNUlNCU1NWTkxMaUJVU0VVZ1UwVlNWa2xEUlNCSlV5QlFVazlXU1VSRlJDQlBUaUJCVGlBbWNYVnZkRHRCVXlCSlV5WnhkVzkwT3lCQlRrUWdKbkYxYjNRN1FWTWdRVlpCU1V4QlFreEZKbkYxYjNRN0lFSkJVMGxUTGlBc0xpQkJUa1FnVlZNc0lFbFVKaU16T1R0VElFTlZVMVJQVFVWU1V5d2dSVmhRVWtWVFUweFpJRVJKVTBOTVFVbE5VeUJCVEV3Z1YwRlNVa0ZPVkVsRlV5QlBSaUJCVGxrZ1MwbE9SQ3dnVjBoRlZFaEZVaUJGV0ZCU1JWTlRJRTlTSUVsTlVFeEpSVVFzSUVsT1EweFZSRWxPUnl3Z1FsVlVJRTVQVkNCTVNVMUpWRVZFSUZSUElGUklSU0JKVFZCTVNVVkVJRmRCVWxKQlRsUkpSVk1nVDBZZ1RVVlNRMGhCVGxSQlFrbE1TVlJaTENCR1NWUk9SVk5USUVaUFVpQkJJRkJCVWxSSlExVk1RVklnVUZWU1VFOVRSU0JCVGtRZ1RrOU9MVWxPUmxKSlRrZEZUVVZPVkM0OEwyeHBQZ29KUEd4cFBrMUJTMFZUSUU1UElGZEJVbEpCVGxSWklGUklRVlFnS0drcElGUklSU0JUUlZKV1NVTkZJRmRKVEV3Z1RVVkZWQ0JaVDFWU0lGSkZVVlZKVWtWTlJVNVVVeXdnS0dscEtTQlVTRVVnVTBWU1ZrbERSU0JYU1V4TUlFSkZJRlZPU1U1VVJWSlNWVkJVUlVRc0lGUkpUVVZNV1N3Z1UwVkRWVkpGTENCUFVpQkZVbEpQVWkxR1VrVkZMQ0FvYVdscEtTQlVTRVVnVWtWVFZVeFVVeUJVU0VGVUlFMUJXU0JDUlNCUFFsUkJTVTVGUkNCR1VrOU5JRlJJUlNCVlUwVWdUMFlnVkVoRklGTkZVbFpKUTBVZ1YwbE1UQ0JDUlNCQlEwTlZVa0ZVUlNCUFVpQlNSVXhKUVVKTVJTd2dRVTVFSUNocGRpa2dRVTVaSUVWU1VrOVNVeUJKVGlCVVNFVWdVMDlHVkZkQlVrVWdWMGxNVENCQ1JTQkRUMUpTUlVOVVJVUXVQQzlzYVQ0S0NUeHNhVDVCVGxrZ1RVRlVSVkpKUVV3Z1JFOVhUa3hQUVVSRlJDQlBVaUJQVkVoRlVsZEpVMFVnVDBKVVFVbE9SVVFnVkVoU1QxVkhTQ0JVU0VVZ1ZWTkZJRTlHSUZSSVJTQlRSVkpXU1VORklFbFRJRVJQVGtVZ1FWUWdXVTlWVWlCUFYwNGdSRWxUUTFKRlZFbFBUaUJCVGtRZ1VrbFRTeUJCVGtRZ1ZFaEJWQ0JaVDFVZ1YwbE1UQ0JDUlNCVFQweEZURmtnVWtWVFVFOU9VMGxDVEVVZ1JrOVNJRUZPV1NCRVFVMUJSMFVnVkU4Z1dVOVZVaUJEVDAxUVZWUkZVaUJUV1ZOVVJVMGdUMUlnVEU5VFV5QlBSaUJFUVZSQklGUklRVlFnVWtWVFZVeFVVeUJHVWs5TklGUklSU0JFVDFkT1RFOUJSQ0JQUmlCQlRsa2dVMVZEU0NCTlFWUkZVa2xCVEM0OEwyeHBQZ29KUEd4cFBrNVBJRUZFVmtsRFJTQlBVaUJKVGtaUFVrMUJWRWxQVGl3Z1YwaEZWRWhGVWlCUFVrRk1JRTlTSUZkU1NWUlVSVTRzSUU5Q1ZFRkpUa1ZFSUVKWklGbFBWU0JHVWs5TklFOVNJRlJJVWs5VlIwZ2dUMUlnUmxKUFRTQlVTRVVnVTBWU1ZrbERSU0JUU0VGTVRDQkRVa1ZCVkVVZ1FVNVpJRmRCVWxKQlRsUlpJRTVQVkNCRldGQlNSVk5UVEZrZ1UxUkJWRVZFSUVsT0lGUklSU0JVVDFNdVBDOXNhVDRLUEM5dmJENEtDanh3UGp4emRISnZibWMrVEVsTlNWUkJWRWxQVGlCUFJpQk1TVUZDU1V4SlZGazhMM04wY205dVp6NDhMM0ErQ2dvOGNENVpUMVVnUlZoUVVrVlRVMHhaSUZWT1JFVlNVMVJCVGtRZ1FVNUVJRUZIVWtWRklGUklRVlFnUVU1RUlGTklRVXhNSUU1UFZDQkNSU0JNU1VGQ1RFVWdSazlTSUVGT1dTQkVTVkpGUTFRc0lFbE9SRWxTUlVOVUxDQkpUa05KUkVWT1ZFRk1MQ0JUVUVWRFNVRk1MQ0JEVDA1VFJWRlZSVTVVU1VGTUlFOVNJRVZZUlUxUVRFRlNXU0JFUVUxQlIwVlRMQ0JKVGtOTVZVUkpUa2NnUWxWVUlFNVBWQ0JNU1UxSlZFVkVJRlJQTENCRVFVMUJSMFZUSUVaUFVpQk1UMU5USUU5R0lGQlNUMFpKVkZNc0lFZFBUMFJYU1V4TUxDQlZVMFVzSUVSQlZFRWdUMUlnVDFSSVJWSWdTVTVVUVU1SFNVSk1SU0JNVDFOVFJWTWdLRVZXUlU0Z1NVWWdTRUZUSUVKRlJVNGdRVVJXU1ZORlJDQlBSaUJVU0VVZ1VFOVRVMGxDU1V4SlZGa2dUMFlnVTFWRFNDQkVRVTFCUjBWVEtTd2dVa1ZUVlV4VVNVNUhJRVpTVDAwNlBDOXdQZ29LUEc5c1Bnb0pQR3hwUGxSSVJTQlZVMFVnVDFJZ1ZFaEZJRWxPUVVKSlRFbFVXU0JVVHlCVlUwVWdWRWhGSUZORlVsWkpRMFU3UEM5c2FUNEtDVHhzYVQ1VVNFVWdRMDlUVkNCUFJpQlFVazlEVlZKRlRVVk9WQ0JQUmlCVFZVSlRWRWxVVlZSRklFZFBUMFJUSUVGT1JDQlRSVkpXU1VORlV5QlNSVk5WVEZSSlRrY2dSbEpQVFNCQlRsa2dSMDlQUkZNc0lFUkJWRUVzSUVsT1JrOVNUVUZVU1U5T0lFOVNJRk5GVWxaSlEwVlRJRkJWVWtOSVFWTkZSQ0JQVWlCUFFsUkJTVTVGUkNCUFVpQk5SVk5UUVVkRlV5QlNSVU5GU1ZaRlJDQlBVaUJVVWtGT1UwRkRWRWxQVGxNZ1JVNVVSVkpGUkNCSlRsUlBJRlJJVWs5VlIwZ2dUMUlnUmxKUFRTQlVTRVVnVTBWU1ZrbERSVHM4TDJ4cFBnb0pQR3hwUGxWT1FWVlVTRTlTU1ZwRlJDQkJRME5GVTFNZ1ZFOGdUMUlnUVV4VVJWSkJWRWxQVGlCUFJpQlpUMVZTSUZSU1FVNVRUVWxUVTBsUFRsTWdUMUlnUkVGVVFUczhMMnhwUGdvSlBHeHBQbE5VUVZSRlRVVk9WRk1nVDFJZ1EwOU9SRlZEVkNCUFJpQkJUbGtnVkVoSlVrUWdVRUZTVkZrZ1QwNGdWRWhGSUZORlVsWkpRMFU3SUU5U1BDOXNhVDRLQ1R4c2FUNUJUbGtnVDFSSVJWSWdUVUZVVkVWU0lGSkZURUZVU1U1SElGUlBJRlJJUlNCVFJWSldTVU5GTGp3dmJHaytDand2YjJ3K0NnbzhjRDQ4ZFQ1Q2VTQnlaV2RwYzNSbGNtbHVaeUJoYm1RZ2MzVmljMk55YVdKcGJtY2dkRzhnYjNWeUlHVnRZV2xzSUdGdVpDQlRUVk1nYzJWeWRtbGpaU3dnWW5rZ2IzQjBMV2x1TENCdmJteHBibVVnY21WbmFYTjBjbUYwYVc5dUlHOXlJR0o1SUdacGJHeHBibWNnYjNWMElHRWdZMkZ5WkN3Z0puRjFiM1E3ZVc5MUlHRm5jbVZsSUhSdklIUm9aWE5sSUZSRlVrMVRJRTlHSUZORlVsWkpRMFVtY1hWdmREc2dZVzVrSUhsdmRTQmhZMnR1YjNkc1pXUm5aU0JoYm1RZ2RXNWtaWEp6ZEdGdVpDQjBhR1VnWVdKdmRtVWdkR1Z5YlhNZ2IyWWdjMlZ5ZG1salpTQnZkWFJzYVc1bFpDQmhibVFnWkdWMFlXbHNaV1FnWm05eUlIbHZkU0IwYjJSaGVTNDhMM1UrUEM5d1Bnb0tQSEErSm01aWMzQTdQQzl3UGdvOGFHbG5hR3hwWjJoMElHTnNZWE56UFNKamIyMXdZVzU1VG1GdFpWVndaR0YwWlNJK1RtRnpkSGtnVUdWeVptOXliV0Z1WTJVOEwyaHBaMmhzYVdkb2RENDhZbklnTHo0S1BHaHBaMmhzYVdkb2RDQmpiR0Z6Y3owaVkyOXRjR0Z1ZVVGa1pISmxjM05WY0dSaGRHVWlQakl3TXpVZ1V5NGdSV0Z6ZEhkdmIyUWdSSEl1TENCWGIyOWtjM1J2WTJzc0lFbE1JRFl3TURrNFBDOW9hV2RvYkdsbmFIUStQR0p5SUM4K0NqeG9hV2RvYkdsbmFIUWdZMnhoYzNNOUltTnZiWEJoYm5sUWFHOXVaVlZ3WkdGMFpTSStLRGcwTnlrZ05EVTRMVFE0TlRnOEwyaHBaMmhzYVdkb2RENDhZbklnTHo0S1BHaHBaMmhzYVdkb2RDQmpiR0Z6Y3owaVkyOXRjR0Z1ZVVWdFlXbHNWWEJrWVhSbElqNXVZWFJsUUc1aGMzUjVjR1Z5Wm05eWJXRnVZMlV1WTI5dFBDOW9hV2RvYkdsbmFIUSsifQ==

Terms of Service

Privacy Policy

Core Modal Title

Sorry, no results found

You Might Find These Articles Interesting

T
Please Check Your Email
We Will Be Following Up Shortly
*
*
*