Add Row
Add Element
cropper
update

Nasty Performance ~ 847-458-4858 

update
Add Element
  • Blog Home
  • Categories
    • Motorcycle Maintenance
    • Riding Tips & Preps
    • Safety & Inspection
    • Customizations & Upgrades
    • DIY Motorcycle Repairs
    • Motocycle Audio Systems
    • Motocycle Seasonal Care & Storage
    • Engine, Electrical Performance
  • Bike Night
  • Nasty Performance Motorcycle Shop
November 18.2025
1 Minute Read

How to Prep Motorcycle for Spring: Essential Tips Inside

Did you know? Most motorcycle breakdowns in the spring are caused by issues that start with neglected winter storage. Before you head out for your first ride of the spring riding season, it’s crucial to understand how proper motorcycle maintenance after winter can make or break your upcoming adventures. This guide gives you the essential steps on how to prep motorcycle for spring, so you can enjoy every mile ahead with total confidence and safety.

Startling Fact: Most Motorcycle Breakdowns in Spring Result from Neglected Winter Storage

Spring is when the open road calls to every rider, but it’s also the season when shops see a spike in repairs due to overlooked winter storage issues. Failing to address common post-winter problems not only risks your ride’s performance but could compromise your safety. More than 60% of shops report that the majority of their spring service jobs stem from simple issues like dead motorcycle batteries, stale gas in the gas tank, flat spots on tires from poor positioning, or overlooked brake pad wear. Proper spring motorcycle maintenance is not just about extending your bike’s life—it is about ensuring your personal safety and avoiding avoidable headaches. Starting the season with a thorough maintenance check—from fluids to brake pads and beyond—gives you peace of mind and maximizes the thrill of every spring ride.

A motorcycle prepped for spring after winter storage, owner gently dusting off in a garage—how to prep motorcycle for spring

Why Proper Motorcycle Maintenance After Winter Storage is Crucial for a Safe Riding Season

After months in storage, even the best-kept motorcycles require a careful maintenance checklist before returning to the road. Fluids settle or degrade, the brake pads can harden or rust, and your gas tank may have accumulated moisture or old fuel. All these factors increase the risk of mechanical failure, braking inefficiency, or engine trouble during spring riding. In fact, skipping essential steps—like checking the battery, inspecting brake lines, or reviewing your service manual—can leave you stranded or, worse, put you in harm’s way.

When each maintenance check is navigated with care, you’re not just prepping your machine—you’re safeguarding your entire riding season. Routine post-storage maintenance leads to improved responsiveness, better fuel economy, and lower repair costs throughout the year. Make a commitment to thorough motorcycle maintenance and enjoy your spring riding with confidence.

What You'll Learn: Your Complete Guide to How to Prep Motorcycle for Spring

  • Understand the must-do motorcycle maintenance checklist for spring
  • Gain expert tips for effective maintenance checks from service manuals
  • Learn about brake pads, gas tank care, and post-storage inspection
  • Find out how to ensure your motorcycle is road-ready for spring riding
  • Discover key FAQs and answer PAA questions on prepping motorcycles

Spring Motorcycle Maintenance Checklist: Your Roadmap to a Safe Riding Season

For a truly safe start to your spring riding, follow a thorough maintenance checklist designed for post-winter motorcycle maintenance. Each of these points—including brake pads, the gas tank, and referencing the service manual—ensures your bike is ready to hit the road with nothing left to chance.

Comprehensive Spring Motorcycle Maintenance Checklist
Maintenance Check Brake Pads Gas Tank Service Manual Reference Action Needed
Battery Charge/Test Check brake pad for movement during test Inspect for fuel stability Locate battery care section Charge or replace battery as needed
Fluid Levels (Oil, Coolant, Brake Fluid) Examine for wear/replace if below spec Check for rust or deposits Fluid types and intervals Change or top-up fluids, schedule oil change
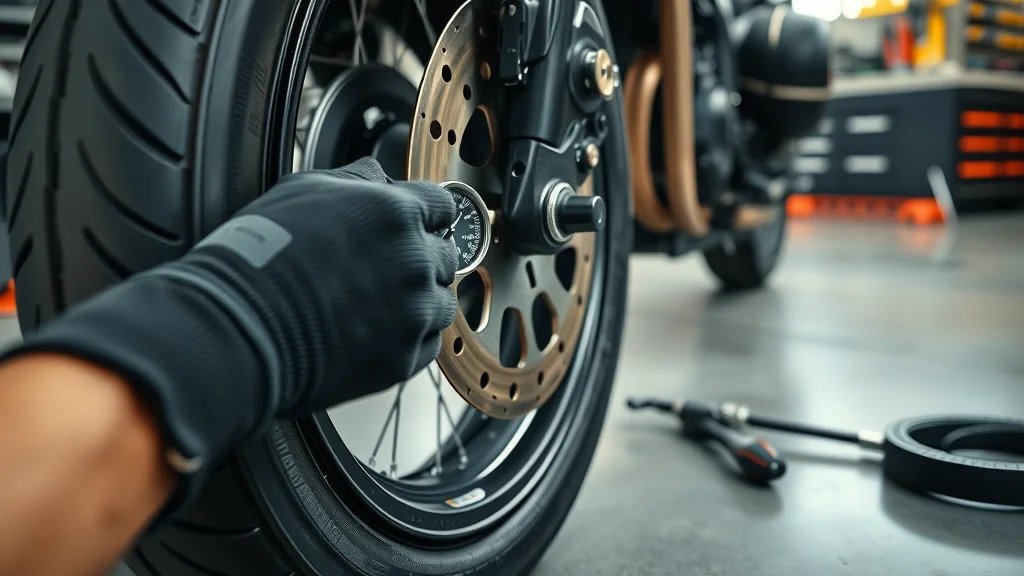
Tire Pressure & Tread Inspect for uneven pad wear Ensure fuel lines clear Tire inspection guidelines Inflate, repair, or replace tires as needed
Chain/Sprocket Check rear brake engagement N/A Lubrication points listed Clean and lubricate chain, adjust slack

Inspecting Your Motorcycle: Key Maintenance Checks Before Spring Riding

Before the first test ride, investing time in a thorough inspection can prevent minor issues from ballooning into breakdowns. Start by reviewing your motorcycle battery—check the charge and, if necessary, recharge or replace it. Move on to examine all essential fluids. Check your oil, coolant, and brake fluid levels based on your specific service manual instructions, and replace any that appear dirty or have reached their mileage interval.

Next, inspect your tires for tire pressure and look for cracks, flat spots, or excessive wear on the tread. This time of year, neglected tires can mean unsafe handling as soon as the temperatures and speeds increase. Don’t forget to check moving parts—including the drive chain, clutch and throttle cables, and brake lines. Lubricate or adjust as needed according to your manufacturer’s service manual. Following this maintenance checklist, you’re laying the groundwork for safer, trouble-free rides right from the start of the spring riding season.

For riders looking to go even deeper with their seasonal maintenance, exploring additional strategies can make a big difference. You might find it helpful to review the seasonal bike care secrets every rider must know for more tactical tips on keeping your motorcycle in peak condition throughout the year.

Checking motorcycle tire pressure during spring maintenance check—closeup, mechanic with gauge, how to prep motorcycle for spring

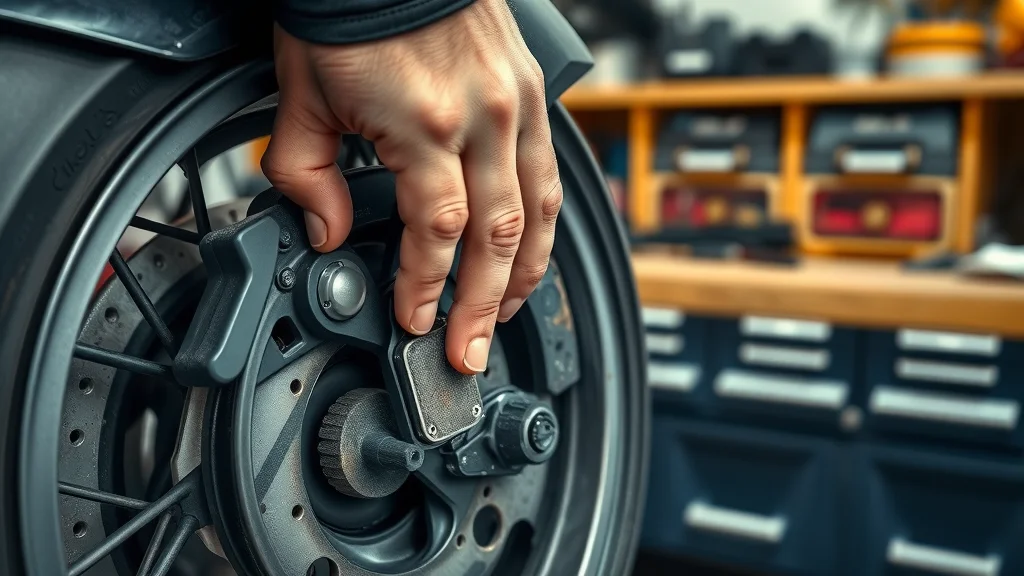
How to Check and Replace Brake Pads for Optimal Motorcycle Maintenance

Properly functioning brake pads are a non-negotiable for motorcycle safety. After being idle through winter storage, your brake pad material can become compromised. Start your inspection by examining both the front and rear brake pads for excessive wear, thinning, or glazing. Many service manuals provide visual thickness indicators—if the pad thickness is at or below the minimum, it's time to replace them. While at it, inspect the brake line or brake lines for any signs of cracking or leaking. Pay close attention to the brake lever response and the engagement of both front and rear brakes during every test ride.

If your brake pads need replacing, follow the step-by-step guide in your service manual. Typically, this involves removing the relevant caliper, extracting the old pad, and carefully inserting a new one—matching both size and type. Reassemble and pump the brake lever to restore hydraulic pressure before your spring test ride. Remember to check brake fluid levels after replacing pads, as worn pads can affect overall system performance. Doing this thoroughly now can significantly reduce the risk of accidents and give you confidence for the whole riding season.

"Ignoring your brake pads after winter can increase your stopping distance by up to 30%, putting you at risk for spring accidents." — Certified Motorcycle Mechanic

A rider replacing brake pads during spring maintenance, essential check for motorcycle safety and maintenance checklist

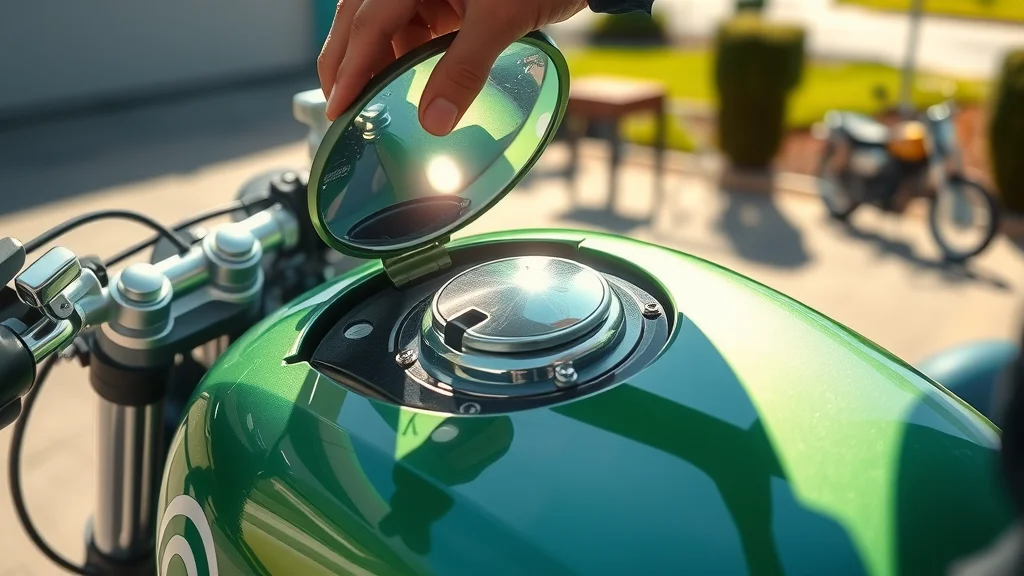
Inspecting the Gas Tank: Preventing Common Post-Winter Problems

Your gas tank, after winter storage, can become a breeding ground for condensation, rust, or stale fuel. Open the fuel tank cap and visually inspect for any signs of moisture, rust spots, or residue. The presence of old fuel—especially if you didn’t use a stabilizer before storage—can clog your fuel filter and result in poor running or engine hesitation. If the fuel smells sour, drain and refill with fresh gasoline. This step, along with inspecting the tank’s interior, will help prevent unwanted engine problems across the spring.

Don’t forget to check the fuel lines for any cracks or leaks, as rubber and plastic can degrade over time in fluctuating temperatures. A quick verification of your service manual will highlight your specific model’s procedure for proper gas tank inspection, care, and cleaning. Addressing gas tank issues now ensures smoother throttle response, efficient fuel use, and a longer engine life during the coming riding season.

Inspecting inside a motorcycle gas tank for spring maintenance—how to prep motorcycle for spring

Referencing Your Service Manual: Step-by-Step Maintenance Checklist for Spring

Your motorcycle’s service manual is the single most authoritative guide for model-specific maintenance. Referencing the correct sections during your spring prep ensures each maintenance check is performed to factory specs. The manual will list exact fluid capacities, recommended types and brands of consumables (like oil and air filter), step-by-step instructions for adjusting clutch and throttle cables, and even the torque specs for critical fasteners. Skipping this resource often leads to costly errors or missed problems that only reveal themselves at speed. By following the service manual closely, you’re setting yourself up for a safe and reliable spring riding experience, and you’ll be better prepared to address maintenance concerns swiftly in the future, too.

Create a habit each season of cross-referencing your inspection and maintenance checklist with your manual. If you can’t find your physical copy, most manufacturers provide PDF versions for download—keeping one on your phone ensures you’ll always have expert guidance at hand, even while working in the garage.

Addressing Issues After Winter Storage: Prepare for Spring Riding

Some motorcycles develop issues during winter storage that aren’t obvious until a thorough maintenance check or the first test ride. Common concerns include dried-out fluid seals, weakened brake pads, corroded drive chain, or sticky controls. Addressing these problems—rather than ignoring them—will prevent small annoyances from developing into major failures during active spring riding.

Following up with corrective maintenance, such as changing the oil, replacing the air filter or fuel filter, and tightening bolts, is time well spent. Even if you’re pressed for time, prioritize inspecting the front and rear brake systems, checking tire condition, and changing any fluids that look even slightly compromised. Your peace of mind and safety are worth the extra effort before you hit the road for your first ride.

Fluids, Filters, and Tires: Start Your Maintenance Check Strong

Begin your spring refresh with the essentials: fluids, filters, and tires. Drain and refill engine oil if it wasn’t changed before winter, and inspect coolant and brake fluid for clarity or contaminants. Check your air filter for signs of dirt or rodent nests—a clogged air or fuel filter will zap your performance before your first test ride. Tire condition is another priority: ensure pressures are at manufacturer spec and look for signs of dry rot, uneven tread wear, or sidewall cracks. Replace tires at the first hint of unsafe tread, as spring riding often means damp or debris-covered roads, and compromised tires directly affect your stopping distance and handling.

If you recently changed fluids based on mileage or before storage, visually inspect their condition anyway; sometimes older fluids degrade simply from sitting in the cold, especially brake fluid and coolant, which can absorb moisture over time. A few proactive changes now save major hassle and expense later this riding season.

Safety Systems: From Brake Pads to Lights — Don’t Miss a Step

Safety checks go hand-in-hand with springtime motorcycle maintenance. Beyond the critical inspection of brake pads and lines, test the brake lever for smooth operation, and see that all bulbs (headlights, taillights, indicators) light up bright and clear. Sometimes, bulbs or fuses can fail over a long winter, and a non-functioning light is an easy ticket—or worse, a risk you don’t want to take. If your service manual lists a checklist, follow each point dutifully, and do not ignore the clutch and throttle responsiveness—hesitation or stiffness here can signal cables needing lubrication or replacement.

Take a lap around your bike, reviewing every visible nut, fastener, and cover, ensuring nothing’s come loose with time. Confirm mirrors are tight and properly adjusted. Only then can you feel confident your safety systems are 100% reliable for when you hit the road after winter.

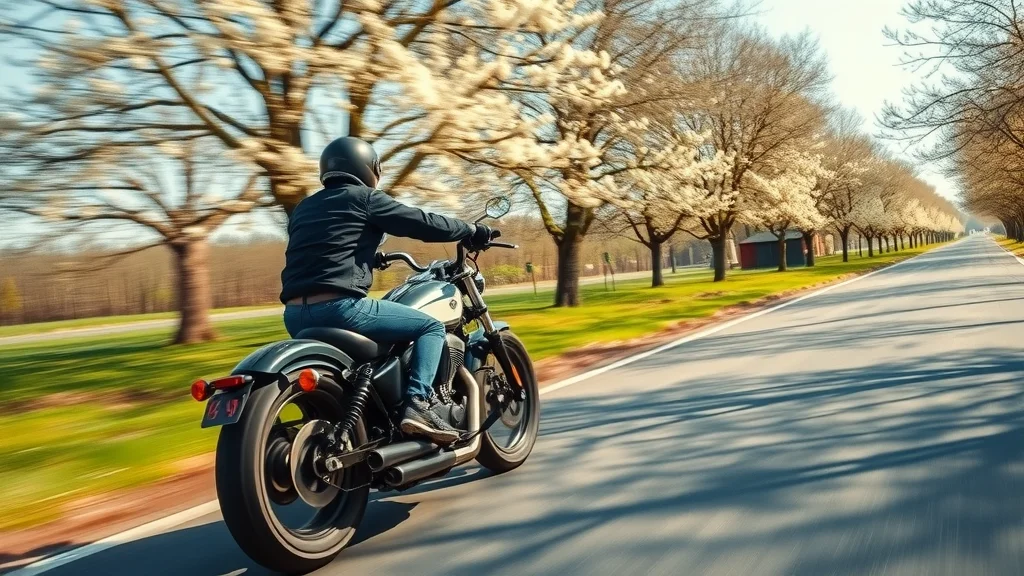
Test Ride: Confirming Your Motorcycle Is Ready for Spring Riding

The culminating step of your how to prep motorcycle for spring routine is the test ride. This is where you observe the results of your hard work in real road conditions and catch anything your garage inspection might have missed. Choose an open, familiar route—preferably with a variety of speeds and gentle stops. Pay close attention to throttle response, braking sharpness, steering feel, vibration, and any unusual noises. Evaluate performance, making extra mental notes about the clutch, throttle smoothness, and how the front and rear brakes respond when coming to a full stop.

Don’t rush this first test. Give each system a few tries. If you notice hesitation, odd sounds, vibrations, or the feel of the controls isn’t quite right, take the bike back to the garage and repeat your inspection of the affected systems. This rigorous approach can uncover hidden issues with brake pads, tire pressure, or lingering debris in the gas tank or fuel system. Only after passing this real-world test can you confidently launch into a full riding season of spring riding.

A rider enjoying their spring motorcycle test ride after proper maintenance check—blooming trees, clear road, how to prep motorcycle for spring

Checklist for Your First Spring Test Ride & Performance Evaluation

  • Begin with a gentle warm-up ride at low speed
  • Check engine response and idle for smoothness
  • Test throttle and brake lever feel separately
  • Apply front and rear brakes at several speeds
  • Listen for knocks or rattles from suspension and engine
  • Verify indicator and brake light visibility in sunlight
  • Inspect tires again after ride for newly visible wear

Diagnosing Unusual Noises or Handling Issues After Maintenance

Not all issues become obvious in static inspection—some only reveal themselves during or after your test ride. Listen carefully for new or persistent noises: metallic scraping may point to poorly fitted brake pads or debris in the pads themselves; clunks or wobbles could indicate loose fasteners or play in the suspension. If you notice a mushy or unresponsive brake lever, immediately stop to check fluid levels and search for possible air leaks along the brake line.

Handling tweaks are equally important—if the bike feels heavy in corners or slow to respond, tire issues, incorrect pressures, or feathered tread could be the culprit. Vibration at speed may mean the drive chain needs tensioning, or the wheels should be balanced. Return to your service manual for troubleshooting guides, and always err on the side of caution: address any anomaly you discover before committing to daily spring rides. This approach ensures your safety and optimal performance throughout the season.

People Also Ask: Key Questions on How to Prep Motorcycle for Spring

What is the 2 4 12 second rule on a motorcycle?

The 2-4-12 second rule is a vital principle in motorcycle safety. It means you should scan 2 seconds ahead for immediate risks, 4 seconds for possible threats in your path, and 12 seconds to assess the broader road environment. This mental checklist helps you anticipate dangers, improve your response time, and keep you safer during spring riding, especially when roads may have changed after the winter months.

How to prep your bike for spring?

To properly prep your bike for spring, follow a comprehensive motorcycle maintenance checklist: charge or replace your battery, check your oil and coolant, inspect and replace brake pads as needed, review your gas tank for old or tainted fuel, ensure correct tire pressure and tread depth, lubricate chain and cables, and review your service manual for any model-specific steps. After thorough checks, perform a gentle test ride to confirm all systems operate safely and smoothly.

What is rule 5 motorcycle?

“Rule 5” in the motorcycle community commonly refers to the tongue-in-cheek advice: “Harden the [rider] up!” However, for practical spring prep, always prioritize your maintenance check—don’t cut corners on safety or inspection protocols. Trust your service manual for guidelines, and take spring maintenance seriously for the best and safest riding season possible.

How cold does 40 degrees feel on a motorcycle?

At 40°F while riding a motorcycle, wind chill makes it feel significantly colder—often like the low 30s or even upper 20s (Fahrenheit). Without proper gear and preparation, hypothermia and numbness can set in quickly, especially at highway speeds. For spring riding, layer appropriately, wear windproof gloves, and make sure your motorcycle maintenance is done to avoid any breakdowns or roadside stops in chilly weather.

FAQs on How to Prep Motorcycle for Spring

  • Do I need to change my motorcycle oil every spring?
    Yes. Even if you didn’t ride during winter, condensation can collect in your engine, making a fresh oil change essential for engine protection and longevity.
  • Is tire replacement necessary or just inflation?
    Check tire condition first—if there’s cracking, flat spots, or excessive wear, replace immediately instead of just inflating. Safe tire pressure is crucial, but the tire’s physical integrity matters most.
  • Should I consult my service manual for every maintenance check?
    Absolutely. Your service manual ensures each task is done correctly and identifies specs unique to your make and model—never skip it.
  • Can I skip the battery check if it was new last year?
    No. Even a new battery can drain or sulfate in winter storage. Always check charge levels and connections before spring riding.
  • What’s the quickest maintenance checklist for experienced riders?
    Battery charge, fresh oil and coolant, brake pad and tire inspection, lights check, chain lubrication, and a short test ride before hitting the open road.

Key Takeaways: How to Prep Motorcycle for Spring and Enjoy a Safe Riding Season

  • A thorough spring maintenance check reduces breakdown risk and maximizes safety
  • Following a detailed maintenance checklist—inclusive of brake pads, gas tank, and reference to service manual—ensures peak performance for the riding season
  • Don’t overlook battery, fluids, and tire health after winter storage
  • Always test ride carefully before regular spring riding

Ready to Hit the Road? Ensure Professional Motorcycle Maintenance By Calling Nasty Performance Motorcycle Shop Today: 847-458-4858

If you want peace of mind and expert service for the ultimate spring riding experience, call Nasty Performance Motorcycle Shop at 847-458-4858. Trust the pros to prepare your bike for every adventure!

Conclusion: Secure a Head Start for Spring Riding Season with Thorough Motorcycle Maintenance

By following these how to prep motorcycle for spring steps, you set yourself up for a safe, exhilarating, and worry-free riding season. Make maintenance your first ride—every spring.

As you continue to refine your maintenance routine and seek out new ways to protect your investment, consider broadening your knowledge with expert advice on year-round care. For a deeper dive into strategies that keep your motorcycle performing at its best in every season, explore the comprehensive insights in Seasonal Bike Care Secrets Every Rider Must Know. This resource is packed with advanced tips and proven techniques to help you ride with confidence, no matter what the calendar says.

Motocycle Seasonal Care & Storage

Write A Comment

*
*
Related Posts All Posts

Pre-Winter Motorcycle Inspection: Don’t Ride Into Trouble

Startling Fact: Did you know that neglecting a pre-winter motorcycle inspection puts more than 30% of bikes at risk for preventable winter breakdowns and expensive repairs? Don't let preventable problems strand you on the side of the road—learn what it takes to keep your bike ready for action, even after a long winter. Before winter weather sets in, smart riders focus on safety, protection, and preparation. This guide equips you with all the knowledge and steps required for a comprehensive pre-winter motorcycle inspection . Whether you ride occasionally or daily, following these insights will ensure your bike is ready for winter storage and the open road when spring returns. What You’ll Learn: This article covers the crucial checks, common mistakes, expert recommendations, key differences between inspection types, and actionable steps for professional and DIY winter readiness. Dive in to safeguard your motorcycle—and your riding experience—this winter. Why a Pre-Winter Motorcycle Inspection is Non-Negotiable A successful riding season doesn't end when the temperature drops. Instead, it marks the beginning of a different responsibility: ensuring your motorcycle safety and performance through a pre-winter motorcycle inspection . Riders often underestimate how moisture, salt, and cold can damage vital components while a bike is sitting in storage. Without proactive care, you'll be left repairing your bike and risking safety as soon as winter ends. Routine winter storage is only half the battle—the other half is preparation. Keeping your bike in top shape means addressing minor issues before they worsen. A thorough pre-winter inspection isn't just about preserving your investment; it’s about reducing expensive post-winter repairs, ensuring a smooth spring startup, and ultimately protecting yourself on every ride, all winter and beyond. Startling Stats: The Risks of Skipping a Pre-Winter Motorcycle Inspection Winter brings an unforgiving mix of cold, moisture, and road chemicals. According to the National Highway Traffic Safety Administration , over 30% of winter motorcycle incidents are preventable with proper pre-winter motorcycle inspection and maintenance . Skipping these essential checks leads to issues such as fouled spark plugs, corroded brake pads and lines, failing batteries, and degraded engine oil—all of which jeopardize your safety and wallet. Preemptive action is not just advised, it's critical. "According to the National Highway Traffic Safety Administration, over 30% of winter motorcycle incidents are preventable with proper pre-winter motorcycle inspection and maintenance." Comprehensive Pre-Winter Motorcycle Inspection: What Every Rider Should Know Every rider, whether a weekend adventurer or daily commuter, must treat a pre-winter motorcycle inspection as non-optional. Here’s how you cover all the essentials, prevent breakdowns, and reduce risks before winter storage: Step-by-step process for thorough inspection: Start with a safety check—test brake lights, turn signals, and horn. Inspect tire pressure and tread for embedded objects. Test battery voltage using a multimeter or trickle charger, clean terminals, and secure connections. Clean and lubricate chains, check for signs of wear on cables and controls, then examine the engine oil and transmission fluid for proper levels and contamination. Benefits of consistent inspection: Riders enjoying the open road in spring find that regular pre-winter checks save money, avoid post-storage repairs, enable faster startups, and nearly eliminate early-season mishaps stemming from overlooked issues. Most overlooked areas: Spark plugs (often neglected, causing rough starts), old brake fluid that absorbs moisture, worn brake pads, and failing batteries. Overlooking these not only shortens your bike’s life but can lead to dangerous lapses in the braking system and overall motorcycle safety. Winter Storage Preparation: Protect Your Motorcycle for the Season Winter storage is not merely parking your motorcycle until the weather improves. It’s a structured process that ensures your bike is ready to roll when spring arrives. Effective storage preparation starts with a diligent pre-winter motorcycle inspection. This seamless transition protects your motorcycle tires, prevents rust on brake pads and calipers, averts battery drain, and maintains essential fluids in working order. By integrating inspection with storage readiness, riders prevent problems caused by sitting in storage, such as degraded engine oil or unsafe brake fluid, ensuring a safer and smoother start come spring. Choosing the right storage location is also critical. Garages, professional winter storage units, or other dry, climate-stable environments prevent condensation and corrosion affecting the brake system, spark plugs, and electrical components. Covering your motorcycle keeps dust, moisture, and contaminants at bay. Checklist: How Proper Winter Storage Relates to Pre-Winter Motorcycle Inspection Cleaning your motorcycle before storage removes salt or road grime that can cause corrosion and damage, especially on brake pads and mechanical joints. Covering the bike isn’t just for aesthetics—moisture and dust can reach sensitive engine oil seals, electrical connectors, and spark plug caps. Stabilizing fuel and topping off all fluids is crucial. Sitting in storage can degrade fuel, leading to tough startups, clogged injectors or carburetors, and potential costly engine repairs—all preventable with this critical step. Winter Storage Preparation Task Why it Matters Pre-Winter Motorcycle Inspection Impact Clean & cover motorcycle Prevent corrosion Reduces post-winter repair costs Fill gas tank, add stabilizer Prevents fuel breakdown Ensures smooth spring startup Spark Plug and Spark Plugs: Critical Checks in Pre-Winter Motorcycle Inspection Spark plugs are the heart of consistent engine starts and performance. Incomplete combustion, hard starting, or rough idling can be traced back to overlooked spark plug maintenance. As part of your pre-winter motorcycle inspection , examine and replace spark plugs if needed—worn or fouled plugs produce weak sparks and compromise engine oil efficiency. Checking spark plugs also gives clues about potential air/fuel mixture problems or oil leaks, allowing preventive action before you experience major issues in winter or spring. Most riders forget to include spark plug cleaning, testing, and replacement within their safety check. Your bike's health depends on reliable ignition. A fresh set of spark plugs can be the difference between a rewarding open road adventure and the frustration of a stranded cold start after sitting in storage. Always inspect not just one, but all spark plugs, to make sure your bike is ready for safe winter riding or hibernation. How to Inspect, Clean and Replace Spark Plug(s) Begin by removing the spark plug cap and using the correct socket to extract each spark plug. Examine electrode color: tan or light gray means healthy combustion, while dark or oily deposits signal engine problems or poor air-fuel mixture. Clean gently with a wire brush and plug cleaner as needed. If there are worn or eroded electrodes, replace with the manufacturer-recommended spark plug model. Apply a dab of dielectric grease to the inside of the plug boot to prevent moisture intrusion during winter storage. Always check gap settings before installation to ensure proper ignition when spring returns. Test spark plug resistance using a multimeter for internal faults. Reinstall the spark plugs with correct torque to avoid thread damage. After everything is secure, reconnect the plug caps, then run your engine briefly to ensure all cylinders fire properly. Don’t forget to record spark plug inspection details on your checklist for reference—this habit simplifies troubleshooting and seasonal maintenance significantly. "A single faulty spark plug can compromise your bike’s performance throughout the winter. Always include spark plugs in your pre-winter motorcycle inspection." The Importance of Fuel Stabilizer in Pre-Winter Motorcycle Inspection Leaving untreated fuel in your tank during winter storage is unsafe for your engine. Unstabilized gasoline oxidizes and forms varnish in carburetors, injectors, and lines, leading to hard or impossible starts and potential engine leaks in spring. Integrating fuel stabilizer as part of your pre-winter motorcycle inspection is a proven step for ensuring your motorcycle is always ready—even after months of sitting in storage. Fuel stabilizers prevent gasoline from degrading and breaking down, keeping injectors and spark plugs free of carbon buildup. Using the right product extends your engine’s life and preserves smooth performance when you're ready to hit the open road once more. Selecting and Using Fuel Stabilizer to Prevent Fuel System Damage Signs your fuel needs stabilizer: If you plan to let your motorcycle sit for 30 days or longer, or you notice inconsistent starting, hesitation, or the smell of varnished fuel in the spring, stabilizer is non-negotiable. Step-by-step instructions: Fill the gas tank nearly full (leaving space for expansion). Add the recommended amount of fuel stabilizer, then run the engine for five minutes to distribute treated fuel throughout the system, including the carburetor, injectors, and lines. This last action is essential to protect your fuel system during the entire winter storage period. Check the Brake System: Safety First in Pre-Winter Motorcycle Inspection Your braking system is your bike’s main safety net. Before the cold sets in, a pre-winter motorcycle inspection requires you to evaluate both brake pads and fluid. Moisture can enter brake lines over time, and rubber seals may dry out or corrode. Testing front and rear levers, checking for consistent lever feel, and examining pads for minimum thickness ensures you have functional, reliable stopping power on those chilly late-season rides and first trips after winter storage. Neglected brake systems can lead to unsafe performance, costly repairs, and dangerous conditions. Riders should also examine the brake light operation, ensuring it activates with light lever or pedal pressure. Consistent inspection both before and after winter guarantees motorcycle safety and minimizes the risk of emergency repairs or failures during crucial moments. How to Examine Brake Pads, Fluid, and Functionality Before Winter Start by visually checking both front and rear brake pads for wear. Replace if the friction material is at or below the minimum thickness recommended by the manufacturer. Inspect for uneven wear, cracks, or embedded objects. Next, check brake fluid: the fluid should be clear, not dark or murky. If it’s been more than two years, or you detect contamination, a full flush and refill is crucial. Top off fluid with the correct DOT-spec recommended for your model. Squeeze brake levers firmly and hold; the lever should feel solid and not spongy (a sign of air or moisture in the line). Confirm that your brake light activates with any lever or pedal movement. Don’t forget the emergency or parking brake if equipped. Record findings and fluid change dates in your inspection log. This comprehensive approach to brakes protects you, your investment, and keeps your bike ready for the road at any time. Why You Should Change Your Oil as Part of Pre-Winter Motorcycle Inspection Old oil contains combustion byproducts and contaminants that, left unchecked during winter storage, can cause internal corrosion and degrade engine seals. As you wrap up your pre-winter motorcycle inspection , always include an oil change. Fresh engine oil protects moving parts, maintains viscosity, and eases engine startups that will otherwise tax an engine after months in cold storage. Some riders mistakenly think “the oil just sits” during storage, but acids continue to break down components inside the engine. This step is not just a best practice—it's endorsed by major manufacturers, the Motorcycle Safety Foundation, and seasoned riding communities worldwide. Guidelines for Oil Change: Protecting Your Engine All Winter Use the manufacturer-recommended engine oil type and capacity. Warm up the engine to help contaminants suspend before draining, ensuring a full flush. Replace the oil filter to stop trapped dirt from circulating back into your fresh oil. Check for leaks after filling and run the engine for two minutes to coat internal parts in clean oil. Record the type and date of the change in your maintenance log. This process guarantees your motorcycle safety is not compromised and your engine is preserved for smooth running after sitting in storage. For extra protection, consider using premium oil filters and add a fuel stabilizer for comprehensive winter readiness. This holistic approach shields your investment, ensures proper lubrication, and sets the foundation for a long, trouble-free riding season come spring. Essential Pre-Winter Motorcycle Inspection Checklist Inspect tire tread and air pressure with a precise pressure gauge Test battery strength and clean battery terminals Change your oil and oil filter Check the brake system—pads, fluid, levers, light Clean and inspect spark plug(s) Top off fuel and add fuel stabilizer Examine all cables and controls for signs of wear Lubricate all moving parts Secure your chosen winter storage location Record all inspection findings for quick spring reference Watch: Step-by-Step Pre-Winter Motorcycle Inspection Tutorial Common Mistakes to Avoid in Pre-Winter Motorcycle Inspection Forgetting spark plug maintenance—leading to poor ignitions and rough starts Neglecting battery checks or forgetting to install a trickle charger—resulting in a dead battery come spring Skipping fuel stabilizer—leads to fuel breakdown and costly injector or carburetor issues Overlooking brake system inspection—compromising safety and leading to expensive repairs Missing oil change deadlines—risking internal corrosion while the bike is sitting in storage Expert Recommendations: Pre-Winter Motorcycle Inspection Best Practices Following best practices makes all the difference for motorcycle safety and performance all year round. Experts and organizations, including the Motorcycle Safety Foundation, urge riders to conduct a full inspection using a repeatable checklist. Keep all maintenance records, service your bike at recommended intervals, and never overlook basics like air pressure, brake fluid levels, or spark plug condition. Store your motorcycle in a stable, moisture-free environment, use high-quality lubricants and stabilizers, and make a habit of visually checking your motorcycle at least every other week during storage. Consistency and attention to detail extend your bike’s lifespan, preserve its value, and keep your ride enjoyable winter after winter. "Consistent pre-winter motorcycle inspection can extend the lifespan of your bike and ensure your safety year-round." How to Prepare Your Motorcycle for Winter? Detailed Steps for Complete Winter Prep Begin by washing and fully drying the motorcycle; even small moisture pockets can corrode brake pads, bolts, or engine components during prolonged storage. Clean and lubricate the chain or shaft drive, then apply protectant spray to exposed metal surfaces. Check and top off all essential fluids—engine oil, brake fluid, coolant, and windshield washer fluid where applicable. Inflate tires to the recommended air pressure and consider elevating the frame or using paddock stands to prevent flat spots. Remove the battery if storing in unheated garages—keep it on a trickle charger indoors. Cover the bike with a breathable, fitted cover; never use plastic tarps. Most importantly, finish with a comprehensive checklist, ensuring no step is overlooked. Secure your storage area, and your bike is ready for winter—protected against the elements and sitting in storage safely. What is a Motorcycle Pre-Trip Inspection? Differences Between Pre-Trip and Pre-Winter Motorcycle Inspection A motorcycle pre-trip inspection focuses on immediate ride-readiness: checking tire pressure, brakes, lights, and controls before each ride. In contrast, a pre-winter motorcycle inspection is comprehensive, preparing a bike for extended inactivity. It prioritizes fuel system protection with stabilizer, changing oil and filters, examining and replacing spark plugs as needed, and preparing for winter storage conditions. While both inspections cover vital safety systems, they differ in detail and seasonal purpose. The pre-trip check is short and ride-centric; the pre-winter check is thorough, preventive, and designed to minimize damage during sitting in storage. Complete both inspections routinely for best motorcycle safety outcomes. What to Check on a Motorcycle After Winter? Post-Winter Safety Inspection Checklist After winter storage, a full safety check is essential before hitting the open road. Start with tires—look for flat spots, cracks, or embedded debris, and check tire pressure. Test the battery’s voltage and ensure it holds a charge; reinstall it if removed. Verify brake pads and fluid levels, test levers for firmness, and confirm lights and turn signals function. Change the oil if you missed it pre-storage, or check for leaks under the bike. Inspect spark plugs for fouling, and run the engine slowly at first to circulate fluids evenly. Examine all cables and controls for free operation, lubricate as needed, and conduct a brief test ride in a safe environment to ensure everything is working order. Document findings and address any concerns before long-distance trips. Does California Require a Motorcycle Inspection? State-Specific Motorcycle Inspection Laws In California, there is currently no annual motorcycle inspection program similar to those found in some eastern states. However, the state does enforce emission standards and safety mandates for motorcycles, especially for those changing ownership or registering from out of state. Riders are still responsible for maintaining their motorcycles in safe working order: functioning brake lights, correct tire pressure, visible turn signals, clear brake fluid, and up-to-date safety equipment. Always check local DMV requirements if selling, buying, or moving with a motorcycle in California. While pre-winter motorcycle inspection isn’t mandated, it’s considered a best practice for rider safety and compliance. Frequently Asked Questions (FAQs) How often should a pre-winter motorcycle inspection be performed? Perform a thorough inspection every year before your bike is sitting in storage for winter. If riding during winter, check essentials after every major temperature change. What are the most important components to check? Always assess brakes, oil, spark plugs, tires, battery, and ensure fluid levels and controls are in working order. Is pre-winter motorcycle inspection necessary if using indoor storage? Yes—indoor storage reduces weather risk, but fuel, oil, and spark plugs are still at risk for degradation. Inspection preserves your bike regardless of storage location. Can I do a pre-winter motorcycle inspection myself or should I hire a professional? Most riders can perform basic checks with guidance, but professionals ensure that nothing critical is missed, especially with newer technology or if unsure about your mechanical skills. Summary of Pre-Winter Motorcycle Inspection: Key Takeaways for Riders Never skip a thorough pre-winter motorcycle inspection each season Prioritize brake, oil, spark plugs, and fuel stabilizer checks for optimal performance Proper winter storage preparation is integral for long-lasting motorcycle health Maintaining a comprehensive checklist makes future inspections faster and easier Watch: Customer Testimonial: Positive Experiences with Pre-Winter Motorcycle Inspection Contact Professionals for Pre-Winter Motorcycle Inspection Assistance If you want peace of mind and expert coverage for your pre-winter motorcycle inspection , call your local certified shop. Seasoned professionals can spot issues that even experienced riders often miss and guarantee that your bike is ready for safe riding, reliable winter storage, and prompt spring revival. "Prepared riders are safe riders: Don’t risk winter riding mishaps by skipping a pre-winter motorcycle inspection. Book your service before the first storm." Call Nasty Performance Motorcycle Shop Today: 847-458-4858 Actionable Step: Make the call or book your inspection before winter hits. Professional care today means no nasty surprises tomorrow. To enhance your understanding of pre-winter motorcycle inspections, consider exploring the following resources: “Motorcycle Inspection: How to Get Your Bike Ready for Spring” by Nationwide provides a comprehensive guide on post-winter motorcycle inspections, detailing essential checks and maintenance tasks to ensure your bike is road-ready after storage. ( blog.nationwide.com ) “Motorcycle Pre-Ride Checklist” by RevZilla offers a detailed pre-ride inspection checklist, emphasizing the importance of regular maintenance and safety checks before each ride. ( revzilla.com ) These articles offer valuable insights into maintaining your motorcycle’s performance and safety through thorough inspections and maintenance routines. Call Nasty Performance Motorcycle Shop Today: 847-458-4858

Expert Advice You Need on Motorcycle Battery Care in Winter

Is your motorcycle ready for winter, or will freezing temperatures leave you stranded with a dead battery? Motorcycle enthusiasts often underestimate the toll cold weather can take on a cycle battery, but neglecting winter care doesn’t just risk a “battery died” scenario—it can shorten your battery’s lifespan by years. This guide delivers actionable, expert advice on motorcycle battery care in winter, ensuring your pride and joy is always ready to ride when the snow melts.Understanding Motorcycle Battery Challenges in Cold Weather: Why Expert Advice on Motorcycle Battery Care in Winter MattersAs winter sets in, understanding the unique challenges your motorcycle battery faces becomes crucial. Cold weather dramatically slows the battery’s chemical reactions, reducing its ability to provide a strong start when you need it most. Moreover, motorcycles parked for extended periods without proper battery maintenance often suffer discharge, leading to the frustration of a flat battery come spring. When temperatures plunge, the risk of a dead battery isn’t just higher—it’s nearly guaranteed without the right preparation.Expert advice on motorcycle battery care in winter sheds light on how to combat these issues. From preserving battery charge to minimizing wear and tear on moving parts, this guidance is not just for seasoned riders but anyone who wants to maximize battery lifespan and safeguard their investment. In the sections ahead, we explain the “why” behind essential winter storage steps so you’re always in control, no matter the weather outside.If your motorcycle is your year-round companion or your summer joy, cold weather shouldn’t be the end of your riding season. Equipping yourself with correct cycle battery care knowledge ensures you’re protecting your bike—and your wallet—against costly surprises brought on by freezing temperatures. With our expertise, your battery will be ready to ride when you are.What You’ll Gain from This Guide on Expert Advice on Motorcycle Battery Care in WinterIn-depth knowledge of motorcycle battery and cycle battery basicsSteps for cold weather preparation and winter storageBest practices for battery maintenance during winterPro tips for maximizing battery charge and battery lifespanMyths and facts about using trickle chargersCycle Battery Basics: How Your Motorcycle Battery Operates in WinterThe science behind your motorcycle battery is simple, but the way it reacts to winter is anything but. During cold months, the chemical process essential for generating battery charge slows down. This affects not only your bike’s ability to start but also its whole electrical system, including critical moving parts and the fuel system.When temperatures drop, the resistance inside your cycle battery increases, meaning your starter motor demands more power for the same job. A partially discharged battery risks “sulphation,” a build-up on battery plates that can permanently reduce battery performance. Regularly check your battery’s state and make sure it’s fully charged before storing or attempting to start your motorcycle.By understanding the core of how your motorcycle battery functions in cold weather and the impact of storage habits, you’ll be better prepared to avoid the dreaded “battery died” season. This knowledge empowers you to take proactive steps in preserving your battery’s health and ensures your ride is ready for any condition.Motorcycle Battery Types and Their Response to Cold WeatherThere are two major types of motorcycle batteries to consider— lead-acid and lithium-ion. Lead-acid batteries, common in most motorcycles, are reliable but particularly susceptible to cold weather. Their electrolyte can freeze at low charge levels, making them prone to damage or total failure during winter months. In contrast, lithium-ion batteries are lighter, maintain higher battery charge, and offer a better cold-weather performance, but they are not immune to temperature fluctuations.Cold weather issues aren’t just about a slow start; batteries left in freezing temperatures risk permanent chemical breakdown. For both types, storage practices are paramount. Lithium-ion batteries may hold voltage better, but extended periods of non-use without proper charging—like using a battery tender or smart charger—will still leave you with a flat battery when you’re ready to ride again.Understanding how your specific cycle battery responds to winter conditions helps tailor your battery care approach. Whether you’re working with a classic lead-acid unit or a modern lithium-ion, proactive maintenance and informed storage remain the best defense against battery failure in harsh weather.Lead-Acid vs. Lithium-Ion cycle battery performanceCommon cold weather issues for motorcycle batteriesImpact of freezing temperatures on battery chargeWinter Storage Preparation: Expert Advice on Motorcycle Battery Care in WinterPrepping your motorcycle for winter storage is about more than simply covering your ride. Start by disconnecting and removing the cycle battery—this prevents unwanted “parasitic drain” on its charge. Remember to wear gloves and use insulated tools to avoid accidental shorts. If you leave the battery connected during the winter months, you risk coming back to a flat or damaged battery, especially in freezing conditions.Cleaning battery terminals and inspecting for corrosion is critical. Corroded terminals reduce battery charge flow, interfere with the starting process, and can impact the performance of all moving parts that rely on a consistent power supply. After cleaning, store your battery in a dry place with minimal temperature fluctuation. Bonus tip: Store it on a wooden shelf rather than concrete to prevent cold transfer and excess discharge.For long winter storage, employ a maintenance charger—preferably a smart charger or trickle charger. This keeps your fully charged battery topped off without risk of overcharging. Neglecting these key steps can mean facing corrosion, capacity loss, and unnecessary expense when you’re ready to ride in spring.How to properly disconnect and remove the motorcycle batteryCleaning terminals and inspecting for corrosionStorage tips to prevent battery dischargeBest Practices for Winter Motorcycle Battery StorageStepActionWhy It Matters1Remove battery from the bikePrevents parasitic drain2Store in a temperature-controlled areaReduces risk of freezing3Keep battery on a trickle chargerMaintains optimal charge4Inspect for leaks before reinstallingEnsures safety and performanceCold Weather Effects: How Freezing Temperatures Impact Motorcycle Battery LifeFreezing temperatures pose one of the greatest threats to motorcycle battery longevity. At freezing points, the cold slows the natural chemical reaction needed for power, making it significantly harder to start your motorcycle. This is compounded if your cycle battery is not fully charged before winter storage, as partially charged batteries freeze at higher temperatures, leading to irreparable internal damage.Beyond difficulty in starting, cold weather can also mean increased “self-discharge”—even when disconnected, motorcycle batteries will lose charge over time. If left unchecked, a discharged battery not only refuses to start your motorcycle but can also suffer structural changes that permanently reduce its health. For riders without garage storage or those in colder climates, storing the battery indoors in a dry place is recommended to protect your bike and battery performance.Battery charge issues are just the tip of the iceberg. Prolonged cold storage without maintenance can lead to the dreaded “battery died” situation. Vigilance and regular checks can help you avoid the hassle of a jump start or outright replacement, saving money and frustration when those first sunny, ready-to-ride days return."Up to 60% of motorcycle battery failures are caused by winter neglect. Proper winter storage and battery maintenance can double your battery’s lifespan." – Leading motorcycle technicianMust-Do Battery Maintenance for Winter: Expert Advice for All RidersProactive battery maintenance separates hassle-free starts from heartache in winter months. Begin with a regular inspection of your cycle battery—look for signs of bulging, corrosion, dusty terminals, or leaks. These are early warning indicators that your battery health may be at risk. Even if you have not experienced a battery died incident in the past, winter can be especially harsh if you ignore these warning signs.If your battery is slow to crank or the voltage falls below 12.6V, it might be time to invest in a replacement before you need a jump start. Keeping a fully charged battery is essential whether you’re removing the battery for storage or leaving it in the bike with a smart charger attached. Regular monthly recharges using a maintenance charger or battery tender are key for both lead-acid and lithium-ion units.Safety is paramount when charging or handling a battery. Always use a designated motorcycle battery charger—never swap in a car charger, as it could damage your bike’s sensitive electronics. Storage should be done in a dry place away from metal tools or objects that could short the terminals. By adopting simple maintenance routines, you’ll extend battery life and be ready to ride whenever the urge strikes.Routine inspection of cycle battery and moving partsSigns your motorcycle battery needs replacementTips for safe battery charge and storageProlonging Battery Charge: Motorcycle Battery Charger and Trickle Charger Myths ExposedThere’s a lot of myth-busting when it comes to winter battery charging. Some riders believe a trickle charger left on all winter can overcharge a battery. In reality, modern maintenance chargers and battery tenders use microprocessors to detect when the battery is full, automatically dropping to a float mode to maintain optimal charge. This technology protects your cycle battery, even during extended period storage.Knowing how often to charge your motorcycle battery in winter depends on type and storage conditions. For example, lead-acid batteries benefit from a week-long maintenance charge each month if not kept on a float charger, while lithium-ion units typically require less frequent attention—but still regular checks. Understanding the distinction between a float charger (which maintains steady voltage), a trickle charger (low, constant current), and a smart charger (which adjusts and monitors charging cycles) is essential for safe and effective care.If you’ll be away for a prolonged period, it’s wise to disconnect or remove the battery entirely, storing it in a temperature-regulated, dry place. This avoids self-discharge and preserves battery health. Don’t be tempted by quick “jump start” fixes; consistently following expert advice is the only real way to solve the problem of premature battery aging.How often to charge your motorcycle battery in winterDifference between float charger, trickle charger, and smart chargerWhen to disconnect or remove the battery entirelyQuick List: Top Dos and Don’ts for Expert Motorcycle Battery Care in WinterDO store your cycle battery fully chargedDO use a designated motorcycle battery chargerDON’T leave the battery exposed to freezing conditionsDON’T ignore regular battery maintenance checksPeople Also AskWhat to do with a motorcycle battery during winter?The best approach is to remove the battery from your motorcycle, clean the terminals, and store it in a temperature-controlled, dry place. Attach a smart charger or battery tender to maintain optimal charge, and inspect it monthly during the winter months to ensure the battery’s health. This safeguards your cycle battery from cold weather harm and guarantees a ready-to-ride setup in spring.Should I take my battery out of my motorcycle in the winter?Yes, most experts recommend removing the battery before long-term winter storage. This prevents parasitic drain, corrosion from condensation, and damage from freezing temperatures. Once removed, store the battery on a wooden or plastic surface (never concrete) in a dry, sheltered environment, with a maintenance charger connected if possible.How to prevent your battery from dying in the winter?To prevent winter battery death, keep the battery fully charged, use a battery tender or smart charger, and store it in a place free from dramatic temperature changes. Regularly check the voltage, maintain clean terminals, and avoid leaving the battery connected to your motorcycle for extended periods without use.Can I leave a trickle charger on my battery all winter?With a modern smart trickle charger or battery tender, it is safe to leave your charger connected all winter. These devices stop charging when the battery is full and resume only when needed, preventing overcharging and maintaining the correct battery charge for long-term storage.Video Guide: Step-by-Step Motorcycle Battery Removal and Winter StorageFor visual learners and hands-on riders, follow our detailed video walkthrough on removing your motorcycle battery safely and preparing it for winter storage. This guide highlights the tools required, safe handling methods, and inspection tips to keep your cycle battery protected through the coldest months. Watch and practice each technique to master your winter battery care routine.In addition to text-based instructions, the video demonstrates best practices for disconnecting cables, preventing corrosion, and storing your battery in a dry place. Ensuring that you properly disconnect the battery before storage is key to avoiding electrical shorts and accidental drain during the winter months.With these insights, you gain peace of mind—knowing your motorcycle battery is in top condition all winter long. Be sure to consult this and other reputable winter motorcycle care resources as part of your seasonal maintenance plan.Video Demonstration: Using a Motorcycle Battery Charger Effectively in Cold WeatherCharging a motorcycle battery in cold weather requires specific steps for safety and efficiency. This video demonstration covers how to set up a smart charger or battery tender, identify the correct terminals, and check the battery’s voltage both before and after charging. These steps ensure you aren’t just putting power back in the battery, but actually restoring and maintaining its performance.You’ll also see how to spot early signs of battery deterioration—such as slower charge acceptance or visible swelling—allowing you to address issues long before you have to jump start a dead battery. The demonstration offers insights that make battery maintenance a straightforward part of your winter routine.Finally, the video reviews safe storage setups—such as shelving in a temperature-controlled, dry place —and highlights why proper charging beats short-term fixes. Having a reliable source of battery advice for winter is invaluable for every rider.Expert Answers to Frequently Asked Questions on Motorcycle Battery Care in WinterHow often should I check my cycle battery during storage? Ideally, inspect and test your motorcycle battery once per month while it’s in winter storage. This helps detect voltage drops or corrosion problems before they become severe, and allows you to intervene early to preserve your battery’s charge and health.Can I use my car battery charger on a motorcycle battery? No, car battery chargers often output higher currents that can overwhelm a motorcycle battery and damage delicate moving parts of your bike’s electrical system. Always use a charger specifically designed for motorcycle batteries, preferably a modern smart charger.What signs indicate a failing motorcycle battery in cold weather? Common warnings include slow cranking, dim lights, clicking noise during start attempts, swollen or cracked battery casing, and voltage readings below manufacturer specifications. If you observe these symptoms, test or replace your battery before it fails completely.Summary: Key Takeaways on Expert Advice for Motorcycle Battery Care in WinterProper winter storage prevents most cycle battery failures.Routine battery maintenance is critical for longevity.Implement expert advice for reliable cold weather starts.Keep Your Motor Running: Apply Expert Advice on Motorcycle Battery Care in WinterTake action now—follow these expert battery care tips, conduct regular winter maintenance, and use the right chargers so your motorcycle is always ready to ride at the first sign of spring.To enhance your understanding of motorcycle battery care during winter, consider exploring the following resources:“Essential Winter Storage Guide for Powersports Batteries” : This guide offers comprehensive tips on maintaining your motorcycle battery during the colder months, including the importance of using a battery maintainer and storing the battery in ideal conditions to prevent damage. ( yuasabatteries.com )“Motorcycle Winter Storage Tips: Prevent Rust and Battery Drain on Your Motorcycle” : This article provides practical advice on preventing rust and battery drain during winter storage, emphasizing the significance of cleaning your motorcycle thoroughly and using a battery tender to maintain optimal charge levels. ( kwatshmoto.com )By consulting these resources, you’ll gain valuable insights into effective winter storage practices, ensuring your motorcycle remains in top condition and ready for the riding season ahead.

Seasonal Motorcycle Tune-Up Services to Keep You Riding Smooth

Did you know that over 70% of motorcycle breakdowns during peak riding season are due to skipped routine maintenance checks? Many riders overlook the crucial role that seasonal motorcycle tune-up services play in keeping their bikes reliable, safe, and performing at their best. Whether you’re hitting the open road in spring, prepping for summer adventures, or storing your bike during winter months, understanding the value of timely maintenance can mean the difference between carefree cruising and costly roadside woes. In this guide, you’ll discover exactly why a seasonal tune-up should never be missed and how to keep your motorcycle in top shape year-round.Why Seasonal Motorcycle Tune-Up Services Matter: Surprising Industry FactsAccording to the Motorcycle Industry Council, regular maintenance reduces breakdown risk by up to 60% and significantly increases rider safety.Studies show that over 55% of riders who experienced a mechanical failure admitted to neglecting scheduled maintenance check routines.Motorcycle insurance claims for preventable repairs climb by 35% during peak riding season, emphasizing the financial impact of skipped routine maintenance.“Neglecting regular seasonal tune-up services can lead to unexpected breakdowns and costly repairs.” — Industry ExpertBenefits of powersports vehicle tune-ups: Improved reliability, extended bike lifespan, and optimal performance throughout the year.The vital role of maintenance check routines: Early detection of wear and tear, safer rides, and reduced long-term maintenance costs.What You'll Learn in This Guide to Seasonal Motorcycle Tune-Up ServicesHow seasonal motorcycle tune-up services keep your bike in top shape all yearWhat’s included in a comprehensive maintenance checklistTips to maximize riding performance, fuel efficiency, and safety on the open roadSeasonal Motorcycle Tune-Up Services Overview: Routine Maintenance for Peak PerformanceSeasonal motorcycle tune-up services are more than just an oil change or cursory glance at your bike. These services combine a thorough maintenance check of all critical systems, keeping your powersports vehicle in the best working order for every riding season. Whether you’re a weekend explorer or a daily commuter, enlisting skilled technicians to inspect, adjust, and service your motorcycle ensures optimal performance and safety. Each tune-up addresses seasonal challenges—think temperature shifts affecting tire pressure, or winter months that require careful prepping and storing your bike.Professional routine maintenance involves inspecting everything from the air filter and spark plugs to fuel lines and brake fluid. Compared to DIY or one-time fixes, using certified maintenance services guarantees nothing is missed—including overlooked electrical issues or hidden brake pad wear. Plus, a structured motorcycle maintenance checklist covers details unique to your model and riding style, reducing the risks of breakdowns on the open road.For riders looking to go beyond the basics, understanding the nuances of seasonal care can make a significant difference. If you want to dive deeper into practical strategies for keeping your bike in peak condition throughout the year, explore these essential seasonal bike care secrets every rider should know for actionable tips and expert insights.Key Features of Professional Motorcycle MaintenanceDetailed seasonal motorcycle maintenance checklist: Covers oil change, tire inspection, air filter replacement, brake fluid, spark plug review, and more.Maintenance services for all powersports vehicle types: Sport bikes, cruisers, touring motorcycles, and off-road vehicles are all catered for by trained technicians equipped to handle different maintenance needs.Comparison of Routine Maintenance vs. One-Time FixesAspectRoutine MaintenanceOne-Time FixesFrequencyScheduled seasonally or by mileageAs needed after a problem occursScopeComprehensive maintenance checklist covering all systemsLimited to specific issue onlyOutcomePrevents breakdowns, improves reliabilityRepairs symptoms, potential underlying issues remainCostPredictable, can lower long-term expensesOften higher due to emergency repairs and unscheduled downtimeEssential Steps of a Seasonal Motorcycle Maintenance ChecklistStep-by-step inspection of all major components: brakes, tires, lights, fuel system, and more.Air filter and fluid level checks to ensure your motorcycle is ready for changing weather and road conditions.Maintenance check scope tailored to each season: spring cleaning, summer performance prep, autumn inspections, and winter storage procedures.How a Maintenance Checklist Supports Long-Term ReliabilityA well-structured motorcycle maintenance checklist is the cornerstone of long-term reliability for your powersports vehicle. Each step of the checklist—such as tire pressure checks, spark plug inspections, and oil changes—not only resolves immediate issues but also uncovers potential trouble before it disrupts your plans. For example, replacing the air filter as part of a seasonal tune-up keeps the engine running efficiently, reduces emissions, and prolongs the life of your motorcycle.By committing to scheduled maintenance check routines, riders benefit from proactive care that prevents deterioration caused by weather, temperature, and road conditions. This results in a smoother, safer ride and helps maintain optimal performance through every season. Importantly, diligent use of these checklists supports a higher resale value, longer lifespan, and lower out-of-pocket expenses by catching small issues before they become expensive repairs.Powersports Vehicle Tune-Ups: What Makes Seasonal Motorcycle Services Stand OutMotorcycle-specific maintenance check routines target vulnerabilities unique to powersports vehicles, such as chain tension, suspension components, and electrical systems.Specialist tools and diagnostic equipment ensure that your motorcycle’s fuel lines, ignition, and electronic systems remain in top shape, unlike basic one-size-fits-all auto care.Top Benefits of Routine Seasonal Motorcycle Tune-Up ServicesEnhanced safety on the open road with well-functioning brakes, tires, and lights.Increased fuel efficiency from a clean air filter and properly tuned engine.Prolonged bike lifespan, keeping your favorite ride running smoothly for many seasons.1. Reduced risk of unexpected breakdowns2. Improved engine power and throttle response3. Maximized tire traction and safety4. Better mileage with each gas tank fill-up5. Peace of mind for every riding seasonHow Maintenance Check Services Keep Your Bike in Top ShapeStep-by-step tune-up includes: oil change, tire pressure and tread inspection, brake pad and brake fluid check, chain lubrication and adjustment, air filter replacement, spark plug service, battery load test, and detailed fuel system review.Watch:How to Choose the Best Seasonal Motorcycle Tune-Up Service ProviderAsk about technician certifications and experience with your specific powersports vehicle or motorcycle model.Compare maintenance checklist coverage: Ensure they include brake pad checks, fuel lines, oil changes, electrical diagnostics, and tire safety.Inquire about service guarantees, part warranties, and digital reports for every maintenance check.Seasonal Motorcycle Tune-Up Services Pricing: What to ExpectAverage Seasonal Motorcycle Tune-Up Costs by Service TypeService TypeEstimated Cost RangeIncluded Checklist ItemsBasic Seasonal Maintenance$120 – $180Oil change, air filter, tire pressure, brake inspectionComprehensive Tune-Up$250 – $350All basic items plus fuel system, chain/belt, electrical check, spark plugsElite Full-Service (Major Brands)$400+Includes storage prep, diagnostic scan, custom performance checksReal Reviews: Customer Experiences with Seasonal Motorcycle Tune-Up Services“After my seasonal tune-up, my motorcycle feels brand new! Highly recommend routine maintenance.” – Satisfied CustomerCustomers praise the professionalism and thoroughness of seasonal motorcycle tune-up services, noting smoother rides and reduced incidents on the open road.Highlights include timely brake pad replacements, accurate tire inspections that ensure your tires are road-ready, and friendly, knowledgeable staff who keep your bike running smoothly.People Also Ask: Your Seasonal Motorcycle Tune-Up Questions AnsweredHow much does it cost to do a tune-up on a motorcycle?The price for seasonal motorcycle tune-up services typically ranges from $120 to $400, depending on the depth of the maintenance checklist and your motorcycle’s needs. Factors such as bike model, service location, and specific services requested (like air filter and spark plug replacement) will influence final cost. Higher-priced packages may include comprehensive diagnostics and specialized adjustments, ensuring your motorcycle is ready for the open road each season.What is the 12 second rule for motorcycles?The “12 second rule” suggests that riders should always scan the road ahead to where they’ll be in 12 seconds. This safety rule offers enough time to react to traffic or obstacles and is a vital part of your overall safe riding routine. Incorporating this mindset during your maintenance check ensures your bike is also proactively equipped for sudden stops or quick maneuvers, bridging maintenance with smart riding practices.How often should a motorcycle be tuned up?It’s recommended to schedule a seasonal tune-up at least twice a year—typically before and after peak riding season—or every 4,000 to 6,000 miles, whichever comes first. Always refer to your manufacturer’s motorcycle maintenance checklist for specific intervals, and increase frequency if you ride in harsh conditions or store your motorcycle during winter months.What does a motorcycle tune-up consist of?A standard motorcycle tune-up as part of seasonal motorcycle tune-up services covers oil and filter changes, air filter replacement, tire pressure and tread checks, brake pad and fluid review, chain and belt adjustments, spark plug inspection, battery and electrical system tests, and topping all fluid levels. This ensures all systems are in proper working order and minimizes the risk of unexpected issues during the riding season.Frequently Asked Questions About Seasonal Motorcycle Tune-Up ServicesDo I need a tune-up if my bike seems to be running smoothly? Yes—routine maintenance uncovers hidden issues before they cause breakdowns or expensive repairs.What if I store my motorcycle during the winter months? End-of-season checks prepare your gas tank, battery (possible trickle charge), and fluids for storage, ensuring the bike returns to top shape in spring.How do I know if my current maintenance services are comprehensive? Ask for a detailed maintenance checklist and review that all key systems—brakes, tires, fluids, air filter, and electrical—are included.Key Takeaways: Why Seasonal Motorcycle Tune-Up Services Matter for Every RiderSummary of benefits: Greater safety, improved performance, longer bike life, and fewer unplanned repair bills.Checklist for booking your next tune-up: Choose skilled technicians, review their maintenance checklist, ask about specialized powersports vehicle experience, and verify service guarantees.How maintenance services keep your ride in top shape: Comprehensive checks prevent issues and keep your motorcycle ready for the open road—no matter the season.Ready to Ride? Schedule Your Seasonal Motorcycle Tune-Up Service TodayCall or visit Nasty Performance Motorcycle Shop to book your next maintenance check and ensure your bike runs smoothly year-round.Contact: 847-458-4858Location: [Insert Nasty Performance Motorcycle Shop address here]"Call Nasty Performance Motorcycle Shop Today: 847-458-4858"As you continue to prioritize your motorcycle’s health, remember that mastering seasonal tune-ups is just one part of a comprehensive care routine. For a broader perspective on year-round bike maintenance, including storage tips, weatherproofing, and advanced riding strategies, check out the full guide on seasonal bike care secrets every rider must know. This resource will help you anticipate challenges before they arise and keep your ride performing at its best, no matter the season. Take your motorcycle care to the next level and enjoy the confidence that comes with true riding preparedness.Taking the time for seasonal motorcycle tune-up services not only keeps your powersports vehicle in perfect condition but ensures every ride is safe and unforgettable—start your tune-up today and enjoy every mile!

Terms of Service

Privacy Policy

Core Modal Title

Sorry, no results found

You Might Find These Articles Interesting

T
Please Check Your Email
We Will Be Following Up Shortly
*
*
*