


Startling Fact: Did you know that neglecting a pre-winter motorcycle inspection puts more than 30% of bikes at risk for preventable winter breakdowns and expensive repairs? Don't let preventable problems strand you on the side of the road—learn what it takes to keep your bike ready for action, even after a long winter.
Before winter weather sets in, smart riders focus on safety, protection, and preparation. This guide equips you with all the knowledge and steps required for a comprehensive pre-winter motorcycle inspection . Whether you ride occasionally or daily, following these insights will ensure your bike is ready for winter storage and the open road when spring returns.
What You’ll Learn: This article covers the crucial checks, common mistakes, expert recommendations, key differences between inspection types, and actionable steps for professional and DIY winter readiness. Dive in to safeguard your motorcycle—and your riding experience—this winter.
Why a Pre-Winter Motorcycle Inspection is Non-Negotiable
A successful riding season doesn't end when the temperature drops. Instead, it marks the beginning of a different responsibility: ensuring your motorcycle safety and performance through a pre-winter motorcycle inspection . Riders often underestimate how moisture, salt, and cold can damage vital components while a bike is sitting in storage. Without proactive care, you'll be left repairing your bike and risking safety as soon as winter ends.
Routine winter storage is only half the battle—the other half is preparation. Keeping your bike in top shape means addressing minor issues before they worsen. A thorough pre-winter inspection isn't just about preserving your investment; it’s about reducing expensive post-winter repairs, ensuring a smooth spring startup, and ultimately protecting yourself on every ride, all winter and beyond.
Startling Stats: The Risks of Skipping a Pre-Winter Motorcycle Inspection
Winter brings an unforgiving mix of cold, moisture, and road chemicals. According to the National Highway Traffic Safety Administration , over 30% of winter motorcycle incidents are preventable with proper pre-winter motorcycle inspection and maintenance . Skipping these essential checks leads to issues such as fouled spark plugs, corroded brake pads and lines, failing batteries, and degraded engine oil—all of which jeopardize your safety and wallet. Preemptive action is not just advised, it's critical.
"According to the National Highway Traffic Safety Administration, over 30% of winter motorcycle incidents are preventable with proper pre-winter motorcycle inspection and maintenance."
Comprehensive Pre-Winter Motorcycle Inspection: What Every Rider Should Know
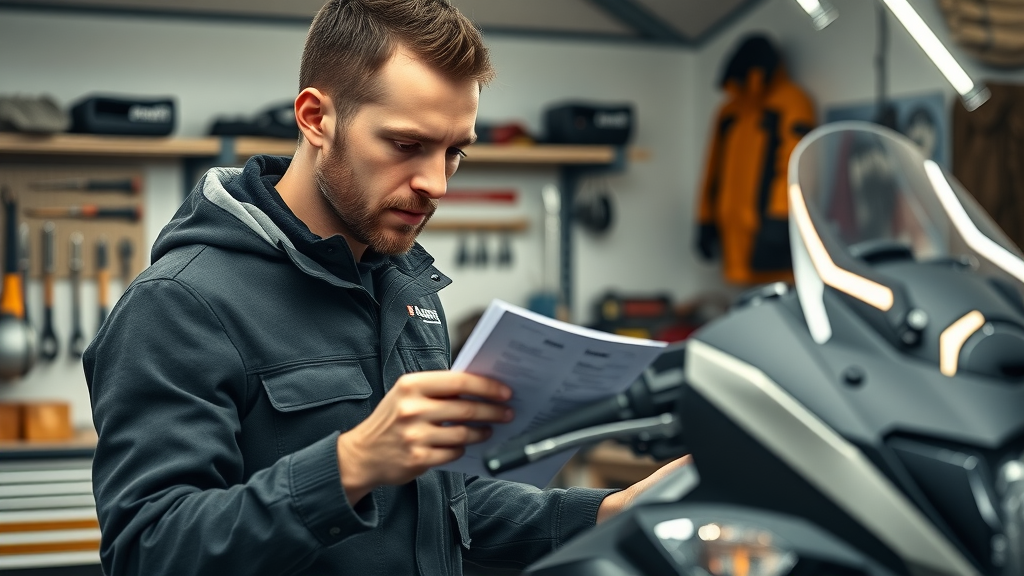
Every rider, whether a weekend adventurer or daily commuter, must treat a pre-winter motorcycle inspection as non-optional. Here’s how you cover all the essentials, prevent breakdowns, and reduce risks before winter storage:
-
Step-by-step process for thorough inspection: Start with a safety check—test brake lights, turn signals, and horn. Inspect tire pressure and tread for embedded objects. Test battery voltage using a multimeter or trickle charger, clean terminals, and secure connections. Clean and lubricate chains, check for signs of wear on cables and controls, then examine the engine oil and transmission fluid for proper levels and contamination.
-
Benefits of consistent inspection: Riders enjoying the open road in spring find that regular pre-winter checks save money, avoid post-storage repairs, enable faster startups, and nearly eliminate early-season mishaps stemming from overlooked issues.
-
Most overlooked areas: Spark plugs (often neglected, causing rough starts), old brake fluid that absorbs moisture, worn brake pads, and failing batteries. Overlooking these not only shortens your bike’s life but can lead to dangerous lapses in the braking system and overall motorcycle safety.
Winter Storage Preparation: Protect Your Motorcycle for the Season
Winter storage is not merely parking your motorcycle until the weather improves. It’s a structured process that ensures your bike is ready to roll when spring arrives. Effective storage preparation starts with a diligent pre-winter motorcycle inspection. This seamless transition protects your motorcycle tires, prevents rust on brake pads and calipers, averts battery drain, and maintains essential fluids in working order. By integrating inspection with storage readiness, riders prevent problems caused by sitting in storage, such as degraded engine oil or unsafe brake fluid, ensuring a safer and smoother start come spring.
Choosing the right storage location is also critical. Garages, professional winter storage units, or other dry, climate-stable environments prevent condensation and corrosion affecting the brake system, spark plugs, and electrical components. Covering your motorcycle keeps dust, moisture, and contaminants at bay.
Checklist: How Proper Winter Storage Relates to Pre-Winter Motorcycle Inspection
-
Cleaning your motorcycle before storage removes salt or road grime that can cause corrosion and damage, especially on brake pads and mechanical joints.
-
Covering the bike isn’t just for aesthetics—moisture and dust can reach sensitive engine oil seals, electrical connectors, and spark plug caps.
-
Stabilizing fuel and topping off all fluids is crucial. Sitting in storage can degrade fuel, leading to tough startups, clogged injectors or carburetors, and potential costly engine repairs—all preventable with this critical step.

|
|
|
Winter Storage Preparation |
|
Task |
Why it Matters |
Pre-Winter Motorcycle Inspection Impact |
|---|---|---|
|
Clean & cover motorcycle |
Prevent corrosion |
Reduces post-winter repair costs |
|
Fill gas tank, add stabilizer |
Prevents fuel breakdown |
Ensures smooth spring startup |
Spark Plug and Spark Plugs: Critical Checks in Pre-Winter Motorcycle Inspection
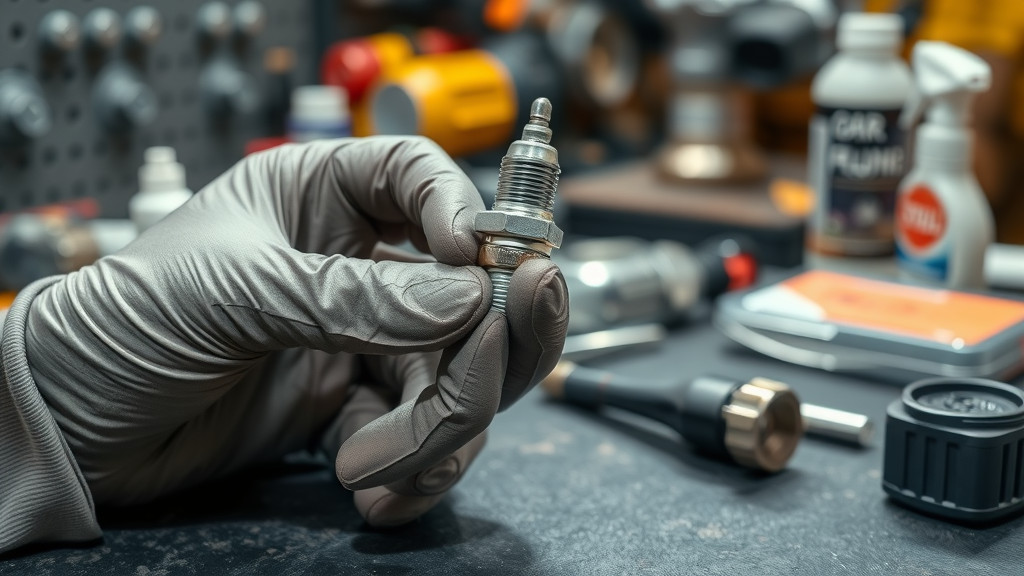
Spark plugs are the heart of consistent engine starts and performance. Incomplete combustion, hard starting, or rough idling can be traced back to overlooked spark plug maintenance. As part of your pre-winter motorcycle inspection , examine and replace spark plugs if needed—worn or fouled plugs produce weak sparks and compromise engine oil efficiency. Checking spark plugs also gives clues about potential air/fuel mixture problems or oil leaks, allowing preventive action before you experience major issues in winter or spring.
Most riders forget to include spark plug cleaning, testing, and replacement within their safety check. Your bike's health depends on reliable ignition. A fresh set of spark plugs can be the difference between a rewarding open road adventure and the frustration of a stranded cold start after sitting in storage. Always inspect not just one, but all spark plugs, to make sure your bike is ready for safe winter riding or hibernation.
How to Inspect, Clean and Replace Spark Plug(s)
Begin by removing the spark plug cap and using the correct socket to extract each spark plug. Examine electrode color: tan or light gray means healthy combustion, while dark or oily deposits signal engine problems or poor air-fuel mixture. Clean gently with a wire brush and plug cleaner as needed. If there are worn or eroded electrodes, replace with the manufacturer-recommended spark plug model. Apply a dab of dielectric grease to the inside of the plug boot to prevent moisture intrusion during winter storage. Always check gap settings before installation to ensure proper ignition when spring returns.
Test spark plug resistance using a multimeter for internal faults. Reinstall the spark plugs with correct torque to avoid thread damage. After everything is secure, reconnect the plug caps, then run your engine briefly to ensure all cylinders fire properly. Don’t forget to record spark plug inspection details on your checklist for reference—this habit simplifies troubleshooting and seasonal maintenance significantly.
"A single faulty spark plug can compromise your bike’s performance throughout the winter. Always include spark plugs in your pre-winter motorcycle inspection."
The Importance of Fuel Stabilizer in Pre-Winter Motorcycle Inspection
Leaving untreated fuel in your tank during winter storage is unsafe for your engine. Unstabilized gasoline oxidizes and forms varnish in carburetors, injectors, and lines, leading to hard or impossible starts and potential engine leaks in spring. Integrating fuel stabilizer as part of your pre-winter motorcycle inspection is a proven step for ensuring your motorcycle is always ready—even after months of sitting in storage.
Fuel stabilizers prevent gasoline from degrading and breaking down, keeping injectors and spark plugs free of carbon buildup. Using the right product extends your engine’s life and preserves smooth performance when you're ready to hit the open road once more.
Selecting and Using Fuel Stabilizer to Prevent Fuel System Damage
-
Signs your fuel needs stabilizer: If you plan to let your motorcycle sit for 30 days or longer, or you notice inconsistent starting, hesitation, or the smell of varnished fuel in the spring, stabilizer is non-negotiable.
-
Step-by-step instructions: Fill the gas tank nearly full (leaving space for expansion). Add the recommended amount of fuel stabilizer, then run the engine for five minutes to distribute treated fuel throughout the system, including the carburetor, injectors, and lines. This last action is essential to protect your fuel system during the entire winter storage period.
Check the Brake System: Safety First in Pre-Winter Motorcycle Inspection
Your braking system is your bike’s main safety net. Before the cold sets in, a pre-winter motorcycle inspection requires you to evaluate both brake pads and fluid. Moisture can enter brake lines over time, and rubber seals may dry out or corrode. Testing front and rear levers, checking for consistent lever feel, and examining pads for minimum thickness ensures you have functional, reliable stopping power on those chilly late-season rides and first trips after winter storage.
Neglected brake systems can lead to unsafe performance, costly repairs, and dangerous conditions. Riders should also examine the brake light operation, ensuring it activates with light lever or pedal pressure. Consistent inspection both before and after winter guarantees motorcycle safety and minimizes the risk of emergency repairs or failures during crucial moments.

How to Examine Brake Pads, Fluid, and Functionality Before Winter
Start by visually checking both front and rear brake pads for wear. Replace if the friction material is at or below the minimum thickness recommended by the manufacturer. Inspect for uneven wear, cracks, or embedded objects. Next, check brake fluid: the fluid should be clear, not dark or murky. If it’s been more than two years, or you detect contamination, a full flush and refill is crucial. Top off fluid with the correct DOT-spec recommended for your model.
Squeeze brake levers firmly and hold; the lever should feel solid and not spongy (a sign of air or moisture in the line). Confirm that your brake light activates with any lever or pedal movement. Don’t forget the emergency or parking brake if equipped. Record findings and fluid change dates in your inspection log. This comprehensive approach to brakes protects you, your investment, and keeps your bike ready for the road at any time.
Why You Should Change Your Oil as Part of Pre-Winter Motorcycle Inspection
Old oil contains combustion byproducts and contaminants that, left unchecked during winter storage, can cause internal corrosion and degrade engine seals. As you wrap up your pre-winter motorcycle inspection , always include an oil change. Fresh engine oil protects moving parts, maintains viscosity, and eases engine startups that will otherwise tax an engine after months in cold storage.
Some riders mistakenly think “the oil just sits” during storage, but acids continue to break down components inside the engine. This step is not just a best practice—it's endorsed by major manufacturers, the Motorcycle Safety Foundation, and seasoned riding communities worldwide.
Guidelines for Oil Change: Protecting Your Engine All Winter
Use the manufacturer-recommended engine oil type and capacity. Warm up the engine to help contaminants suspend before draining, ensuring a full flush. Replace the oil filter to stop trapped dirt from circulating back into your fresh oil. Check for leaks after filling and run the engine for two minutes to coat internal parts in clean oil. Record the type and date of the change in your maintenance log. This process guarantees your motorcycle safety is not compromised and your engine is preserved for smooth running after sitting in storage.
For extra protection, consider using premium oil filters and add a fuel stabilizer for comprehensive winter readiness. This holistic approach shields your investment, ensures proper lubrication, and sets the foundation for a long, trouble-free riding season come spring.
Essential Pre-Winter Motorcycle Inspection Checklist
-
Inspect tire tread and air pressure with a precise pressure gauge
-
Test battery strength and clean battery terminals
-
Change your oil and oil filter
-
Check the brake system—pads, fluid, levers, light
-
Clean and inspect spark plug(s)
-
Top off fuel and add fuel stabilizer
-
Examine all cables and controls for signs of wear
-
Lubricate all moving parts
-
Secure your chosen winter storage location
-
Record all inspection findings for quick spring reference
Watch: Step-by-Step Pre-Winter Motorcycle Inspection Tutorial
Common Mistakes to Avoid in Pre-Winter Motorcycle Inspection
-
Forgetting spark plug maintenance—leading to poor ignitions and rough starts
-
Neglecting battery checks or forgetting to install a trickle charger—resulting in a dead battery come spring
-
Skipping fuel stabilizer—leads to fuel breakdown and costly injector or carburetor issues
-
Overlooking brake system inspection—compromising safety and leading to expensive repairs
-
Missing oil change deadlines—risking internal corrosion while the bike is sitting in storage
Expert Recommendations: Pre-Winter Motorcycle Inspection Best Practices
Following best practices makes all the difference for motorcycle safety and performance all year round. Experts and organizations, including the Motorcycle Safety Foundation, urge riders to conduct a full inspection using a repeatable checklist. Keep all maintenance records, service your bike at recommended intervals, and never overlook basics like air pressure, brake fluid levels, or spark plug condition.
Store your motorcycle in a stable, moisture-free environment, use high-quality lubricants and stabilizers, and make a habit of visually checking your motorcycle at least every other week during storage. Consistency and attention to detail extend your bike’s lifespan, preserve its value, and keep your ride enjoyable winter after winter.
"Consistent pre-winter motorcycle inspection can extend the lifespan of your bike and ensure your safety year-round."
How to Prepare Your Motorcycle for Winter?
Detailed Steps for Complete Winter Prep
Begin by washing and fully drying the motorcycle; even small moisture pockets can corrode brake pads, bolts, or engine components during prolonged storage. Clean and lubricate the chain or shaft drive, then apply protectant spray to exposed metal surfaces. Check and top off all essential fluids—engine oil, brake fluid, coolant, and windshield washer fluid where applicable.
Inflate tires to the recommended air pressure and consider elevating the frame or using paddock stands to prevent flat spots. Remove the battery if storing in unheated garages—keep it on a trickle charger indoors. Cover the bike with a breathable, fitted cover; never use plastic tarps. Most importantly, finish with a comprehensive checklist, ensuring no step is overlooked. Secure your storage area, and your bike is ready for winter—protected against the elements and sitting in storage safely.

What is a Motorcycle Pre-Trip Inspection?
Differences Between Pre-Trip and Pre-Winter Motorcycle Inspection
A motorcycle pre-trip inspection focuses on immediate ride-readiness: checking tire pressure, brakes, lights, and controls before each ride. In contrast, a pre-winter motorcycle inspection is comprehensive, preparing a bike for extended inactivity. It prioritizes fuel system protection with stabilizer, changing oil and filters, examining and replacing spark plugs as needed, and preparing for winter storage conditions.
While both inspections cover vital safety systems, they differ in detail and seasonal purpose. The pre-trip check is short and ride-centric; the pre-winter check is thorough, preventive, and designed to minimize damage during sitting in storage. Complete both inspections routinely for best motorcycle safety outcomes.
What to Check on a Motorcycle After Winter?
Post-Winter Safety Inspection Checklist
After winter storage, a full safety check is essential before hitting the open road. Start with tires—look for flat spots, cracks, or embedded debris, and check tire pressure. Test the battery’s voltage and ensure it holds a charge; reinstall it if removed. Verify brake pads and fluid levels, test levers for firmness, and confirm lights and turn signals function.
Change the oil if you missed it pre-storage, or check for leaks under the bike. Inspect spark plugs for fouling, and run the engine slowly at first to circulate fluids evenly. Examine all cables and controls for free operation, lubricate as needed, and conduct a brief test ride in a safe environment to ensure everything is working order. Document findings and address any concerns before long-distance trips.
Does California Require a Motorcycle Inspection?
State-Specific Motorcycle Inspection Laws
In California, there is currently no annual motorcycle inspection program similar to those found in some eastern states. However, the state does enforce emission standards and safety mandates for motorcycles, especially for those changing ownership or registering from out of state. Riders are still responsible for maintaining their motorcycles in safe working order: functioning brake lights, correct tire pressure, visible turn signals, clear brake fluid, and up-to-date safety equipment.
Always check local DMV requirements if selling, buying, or moving with a motorcycle in California. While pre-winter motorcycle inspection isn’t mandated, it’s considered a best practice for rider safety and compliance.
Frequently Asked Questions (FAQs)
-
How often should a pre-winter motorcycle inspection be performed?
Perform a thorough inspection every year before your bike is sitting in storage for winter. If riding during winter, check essentials after every major temperature change. -
What are the most important components to check?
Always assess brakes, oil, spark plugs, tires, battery, and ensure fluid levels and controls are in working order. -
Is pre-winter motorcycle inspection necessary if using indoor storage?
Yes—indoor storage reduces weather risk, but fuel, oil, and spark plugs are still at risk for degradation. Inspection preserves your bike regardless of storage location. -
Can I do a pre-winter motorcycle inspection myself or should I hire a professional?
Most riders can perform basic checks with guidance, but professionals ensure that nothing critical is missed, especially with newer technology or if unsure about your mechanical skills.
Summary of Pre-Winter Motorcycle Inspection: Key Takeaways for Riders
-
Never skip a thorough pre-winter motorcycle inspection each season
-
Prioritize brake, oil, spark plugs, and fuel stabilizer checks for optimal performance
-
Proper winter storage preparation is integral for long-lasting motorcycle health
-
Maintaining a comprehensive checklist makes future inspections faster and easier
Watch: Customer Testimonial: Positive Experiences with Pre-Winter Motorcycle Inspection
Contact Professionals for Pre-Winter Motorcycle Inspection Assistance
If you want peace of mind and expert coverage for your pre-winter motorcycle inspection , call your local certified shop. Seasoned professionals can spot issues that even experienced riders often miss and guarantee that your bike is ready for safe riding, reliable winter storage, and prompt spring revival.
"Prepared riders are safe riders: Don’t risk winter riding mishaps by skipping a pre-winter motorcycle inspection. Book your service before the first storm."
Call Nasty Performance Motorcycle Shop Today: 847-458-4858
Actionable Step: Make the call or book your inspection before winter hits. Professional care today means no nasty surprises tomorrow.
To enhance your understanding of pre-winter motorcycle inspections, consider exploring the following resources:
-
“Motorcycle Inspection: How to Get Your Bike Ready for Spring” by Nationwide provides a comprehensive guide on post-winter motorcycle inspections, detailing essential checks and maintenance tasks to ensure your bike is road-ready after storage. ( blog.nationwide.com )
-
“Motorcycle Pre-Ride Checklist” by RevZilla offers a detailed pre-ride inspection checklist, emphasizing the importance of regular maintenance and safety checks before each ride. ( revzilla.com )
These articles offer valuable insights into maintaining your motorcycle’s performance and safety through thorough inspections and maintenance routines.


Write A Comment