Nasty Performance ~ 847-458-4858 

  • Blog Home
  • Categories
    • Motorcycle Maintenance
    • Riding Tips & Preps
    • Safety & Inspection
    • Customizations & Upgrades
    • DIY Motorcycle Repairs
    • Motocycle Audio Systems
    • Motocycle Seasonal Care & Storage
    • Engine, Electrical Performance
  • Bike Night
  • Nasty Performance Motorcycle Shop
January 14.2026
1 Minute Read

Get Fast, Reliable Local Motorcycle Suspension Repair Now

Did you know? Most motorcycle accidents caused by handling issues are directly linked to neglected suspension maintenance—yet over 60% of riders don’t service their bike suspension as recommended. Don’t gamble with your safety or ride quality! This guide will help you unlock smoother handling, sharper control, and safer rides through expert local motorcycle suspension repair. Whether you ride a dirt bike, mountain bike, or street machine, discovering the right local shop could mean the difference between a hair-raising moment and a confident ride.

Startling Facts: Why Local Motorcycle Suspension Repair Matters

Local motorcycle suspension repair isn’t just a maintenance task—it’s a direct investment in your safety and bike’s performance. Recent studies highlight that well-maintained suspension systems reduce accident risk and improve handling by up to 50% for both street and off-road bikes. Your motorcycle or mountain bike’s suspension system undergoes immense stress every mile, absorbing shocks, maintaining traction, and ensuring comfort even on rugged terrain. Neglecting fork tube inspection, oil changes, and shock service can lead to poor cornering, excess bounce, and even sudden component failure.

What sets professional local repair apart is immediate access to certified suspension experts who understand the specific needs of your dirt bike, mountain bike, or street machine. Local shops offer a wide range of suspension services—from routine fork service to advanced suspension tuning and custom valving—tailored to your riding style and terrain. With personalized attention, transparent pricing, and faster turnaround, choosing a trusted local provider ensures your ride is always optimized for performance, safety, and comfort—no matter where the road or trail leads.
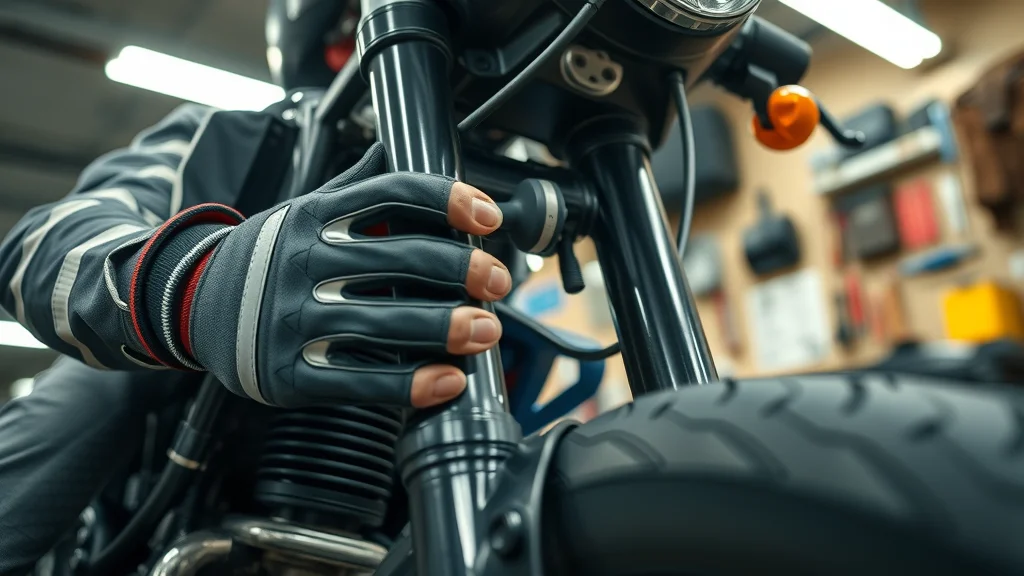
motorcycle suspension inspection by local repair expert, gloved hands examining fork tube - local motorcycle suspension repair

What You’ll Learn in This Guide to Local Motorcycle Suspension Repair

  • How to identify when you need local motorcycle suspension repair

  • The full range of suspension services available near you

  • Understanding pricing, features, and the value of professional repairs

  • Expert insights on motorcycle suspension, suspension tuning, and performance upgrades

  • Frequently asked questions about local motorcycle suspension repair

Understanding Local Motorcycle Suspension Repair: Features & Benefits

Key Features of Professional Suspension Service

  • Comprehensive suspension service and diagnostics

  • Suspension tuning and setup for road, dirt bike, and mountain bike models

  • Fork tube inspection and servicing

  • Use of high-quality components specifically for motorcycle suspension

When you choose a professional local motorcycle suspension repair shop, you benefit from services that go far beyond a basic adjustment. Specialists employ the highest quality tools and replacement parts, conducting a detailed fork tube inspection to catch early signs of wear, leaks, or internal component failure. Suspension service for modern bikes also includes computerized diagnostics, ensuring that both fork and shock settings are perfectly matched to your riding style and terrain. With highly trained technicians, you get tailored suspension tuning for mountain bike suspension or dirt bike suspension, guaranteeing a setup that matches your expectations for handling, comfort, and longevity.

From shock service to in-depth fork service, these experts can address both visible issues—such as oil leaks—and the less obvious, like compromised internal parts or inconsistent spring rate. This attention to detail gives you a ride that feels precise, controlled, and ready for any challenge. Professional suspension shops often offer a wide range of services, including upgrades like custom valving or improved dampers, enhancing your bike suspension’s shock performance and ensuring you get the most hours of riding between services.

As you explore the benefits of professional suspension service, it's also important to consider how seasonal changes can impact your bike's performance and maintenance needs. For practical tips on keeping your ride in top shape year-round, check out these seasonal bike care secrets every rider should know.

Core Benefits of Expert Local Motorcycle Suspension Repair

  • Enhanced handling and overall stability

  • Increased shock absorption and comfort

  • Extended suspension and bike lifespan

  • Improved safety for all types of bikes, including mountain bikes and dirt bikes

The core benefit of working with local experts is a dramatic improvement in the way your motorcycle or mountain bike responds to the road or trail. Enhanced shock absorption makes daily commutes and long rides less fatiguing and much safer. By extending the lifespan of suspension components and preventing premature wear, you save on costly replacements while also avoiding dangerous riding situations. Shops dedicated to providing top-notch suspension services use their expertise in fork and shock repairs to ensure that every rider, from casual cyclists to dirt bike enthusiasts, experiences a noticeable upgrade in ride quality and overall safety. With regular maintenance, you also protect your frame, wheels, and tires against unnecessary strain caused by faulty suspension systems.

Whether you enjoy spirited cornering, high-adrenaline dirt tracks, or rough mountain trails, an expertly tuned suspension matched to your riding style is the foundation of a great experience. Local providers ensure your needs are met quickly, reliably, and with a personal touch missing from far-off online services.

cheerful technician performing precise front motorcycle suspension adjustment - local motorcycle suspension repair

Suspension Services Offered: Complete Guide to Local Motorcycle Suspension Repair

Routine Suspension Service for All Motorcycle Types

  • Periodic fork tube and shock maintenance

  • Bike suspension adjustment and oil changes

Routine suspension service is vital for the long-term health and performance of any motorcycle, dirt bike, or mountain bike. This includes scheduled fork tube maintenance—such as cleaning, lubrication, and seal replacement—to prevent leaks and maintain consistent damping. Regular oil changes keep the internal components operating at peak efficiency, while periodic shock service ensures stable ride quality and prevents loss of control caused by worn or contaminated fluid. These steps are essential for maximizing comfort and extending the life of your bike suspension system, no matter how many hours of riding you log each season.

By having your bike suspension serviced locally, you gain peace of mind knowing that every internal part—from springs to dampers—is inspected and replaced as needed. Suspension experts can tailor adjustments to your riding style, making sure sag, rebound, and compression settings perfectly match your expectations. This is especially important if you often switch between solo and passenger rides or alternate between pavement and off-road terrain.

Advanced Suspension Tuning and Customization

  • Suspension tuning for track, off-road, and touring bikes

  • MTB suspension upgrades and modifications

Advanced suspension tuning goes beyond factory specs, allowing riders to unlock superior performance for racing, touring, or technical mountain bike trails. Local motorcycle shops offer expert setup for spring rate, sag, and damping—giving you a bespoke bike suspension that handles precisely how you want. MTB suspension upgrades are also available, including internally adjustable dampers, custom valving, and performance components sourced for specific bike models.

Suspension experts at reputable local shops tap into years of experience working with dirt bike and mountain bike suspension, using advanced tools to dial in your ride settings. Whether you’re seeking better grip in corners, extra stability for off-road jumps, or a smoother ride for endurance touring, professional modification and tuning services are essential. Ask your suspension expert about tailor-made upgrades and track-proven tuning programs that can transform your ordinary motorcycle into an extraordinary performer—ready for every challenge and all types of terrain.

Targeted Mountain Bike Suspension & Dirt Bike Solutions

  • Mountain bike suspension overhauls

  • Dirt bike suspension setup and precision tuning

If you’re an enthusiast tackling tough trails on a mountain bike or ripping through dirt tracks on a dirt bike, your suspension system needs specialized care. Local shops skilled in mountain bike suspension and dirt bike suspension offer full diagnostic checks, repair overhauls, and complete upgrades for shock absorbers, fork tubes, and other critical components. This level of attention ensures you get unrivaled grip, maximum shock absorption, and precise control over jumps and unpredictable surfaces.

Targeted solutions include everything from MTB suspension cleaning and oil changes to precision dirt bike suspension tuning designed for aggressive riding styles and ever-changing track conditions. Whether you ride competitively or recreationally, these focused services protect your investment, keep your ride consistent, and help prevent catastrophic failures that could end a race—or worse, cause an accident.
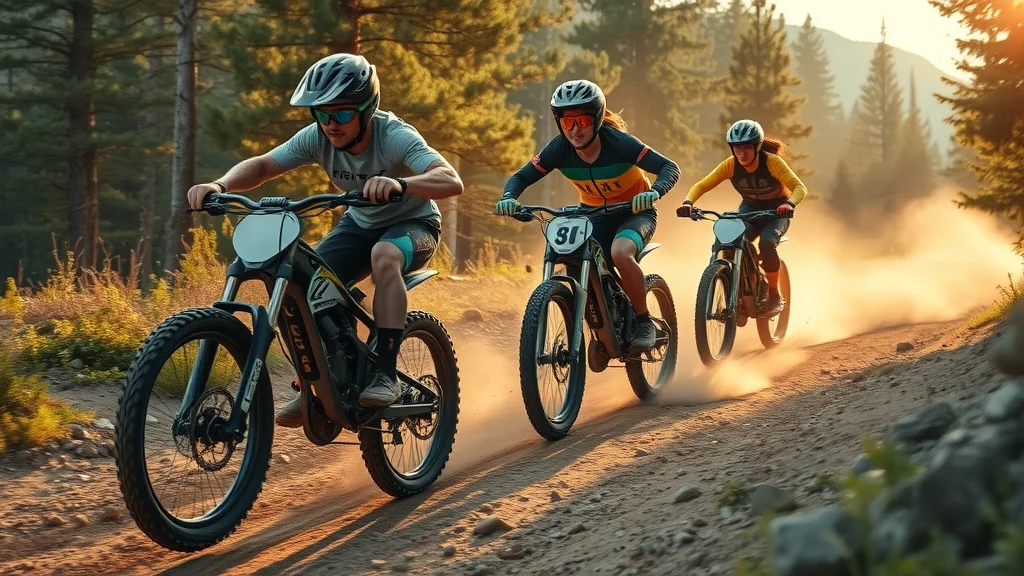
mountain and dirt bike riders on rugged trail, upgraded suspension parts - mountain bike suspension repair

Table: Comparing Local Motorcycle Suspension Repair Services

Service

Standard Inclusions

Typical Price Range

Fork Tube Service

Seal replacement, oil change

$100 - $200

Shock Rebuild

Full teardown, inspection

$150 - $300

Suspension Tuning

Sag, damping, spring setup

$75 - $150

MTB Suspension Service

Cleaning, adjustment

$80 - $180

Complete Overhaul

All-inclusive suspension service

$250 - $500

How Local Motorcycle Suspension Repair Improves Performance & Safety

  • Boosts cornering and road grip on street bikes and mountain bikes

  • Prevents premature tire wear and frame damage

  • Reduces risk of accidents due to unpredictable handling

  • Ensures reliability for both daily commutes and racing scenarios

Properly serviced local motorcycle suspension repair leads directly to better responsiveness in corners, increased road grip, and smoother rides across all surfaces. This isn’t just about comfort—well-tuned suspension systems help avoid premature tire wear and frame damage, saving you money while extending the entire bike’s lifespan. By working with local experts, you reduce the risk of unpredictable handling that can cause accidents, especially during high-speed maneuvers or wet conditions. Suspension service performed by a trained technician means every detail, from correct spring rate to ideal oil viscosity, is matched to both your biking style and local roads or trails.

"A professionally serviced motorcycle suspension can make the difference between a close call and a catastrophe on the road." – Expert Technician, Nasty Performance Motorcycle Shop

Whether your passion is racing, off-road adventures, or simply enjoying reliable daily commutes, routine suspension service is the foundation of consistent, confident, and safe rides. Don’t settle for less than top-tier, local expertise on your next bike suspension tune-up.
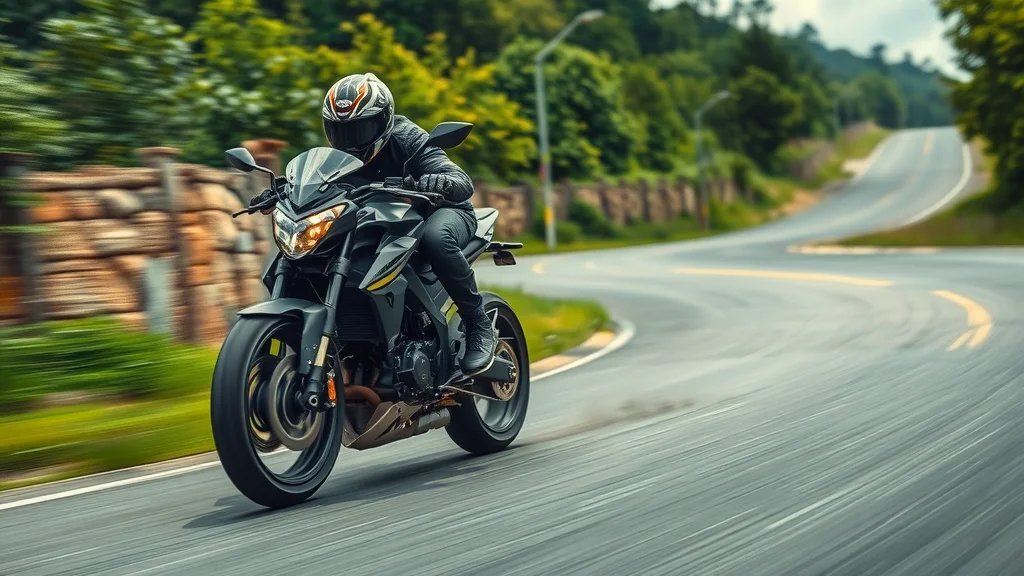
motorcycle road test, rider cornering with perfect suspension grip - motorcycle suspension tuning

Local Expertise: Why Choose a Trusted Local Motorcycle Suspension Repair Shop?

Benefits of Choosing Specialized Local Shops

  • Personalized suspension tuning based on your riding style

  • Access to certified experts in motorcycle, dirt bike, and mountain bike suspension

  • Faster turnaround times and onsite support

Selecting a proven local motorcycle suspension repair shop gives you an edge that mass-market chains and online kits can’t match. These shops offer truly personalized suspension service, considering not only your make and model but your riding style, terrain preferences, and even local weather. Experienced professionals provide in-depth consultations, quickly diagnosing problems and suggesting the best upgrades or repairs—from mountain bike suspension rebuilds to dirt bike shock service. Certified experts stay up-to-date with the latest suspension tuning technology and parts, giving you maximum value and reliability.

Local providers also boast much faster turnaround times—often with same-day or next-day service—and provide ongoing onsite support for adjustments, questions, or emergencies. This relationship-based care ensures that your bike stays finely tuned year-round, with all work guaranteed and records kept for future reference. For riders serious about performance, safety, and value, partnering with a nearby shop is the smartest way to protect your investment and maximize your enjoyment on every ride.
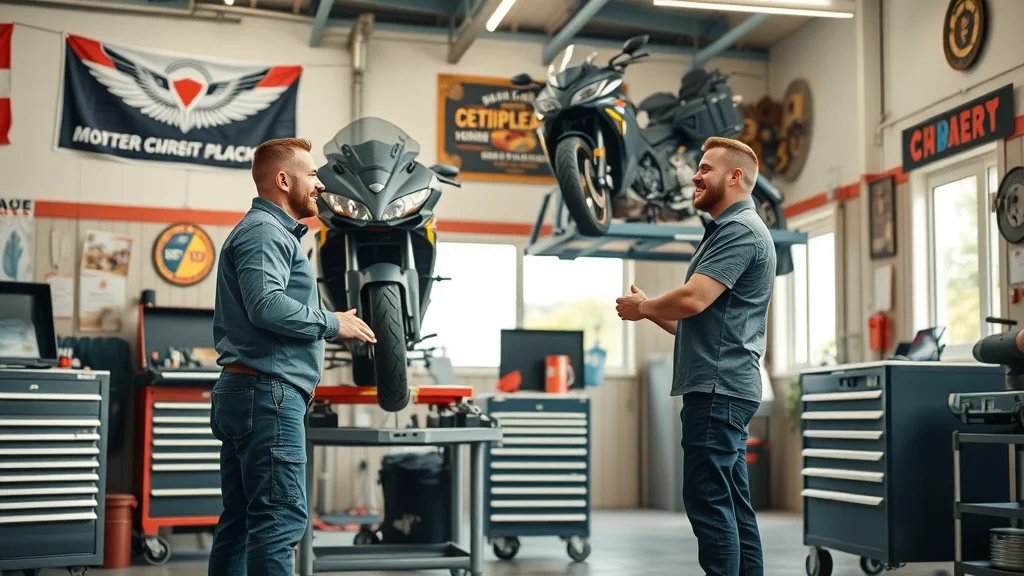
friendly local garage technician greeting customer, motorcycle on service lift - local motorcycle suspension repair expert

How to Identify When You Need Local Motorcycle Suspension Repair

  • Noticeable decline in bike handling or comfort

  • Visible oil leaks around fork tubes or shocks

  • Clunking, bottoming out, or excess bounce

  • Poor cornering performance, especially at speed

Your bike’s suspension system will often tell you when service is needed—if you know the warning signs. If you’ve noticed a decline in handling, an uncomfortable or bouncy ride, or visible oil leaks around the fork tube or shocks, it’s time to visit a local motorcycle suspension repair expert. Other red flags include clunking noises, bottoming out over bumps, and a loss of confidence in high-speed cornering, especially on variable terrain. Ignoring these symptoms puts not only your comfort at risk, but your safety as well.

By addressing issues as soon as they emerge, you can prevent costly breakdowns and ride quality problems down the road. A quick inspection by a certified local specialist can uncover worn bushings, leaking seals, or misaligned internal parts—often repairable in a single visit. Nothing compares to expertly-performed, proactive suspension service when it comes to keeping your motorcycle, mountain bike, or dirt bike running at its best.

Customer Reviews: Real Experiences with Local Motorcycle Suspension Repair

"After my local motorcycle suspension repair, my dirt bike handled like new. The tuning was spot on!" – Satisfied Customer

"Mountain bike suspension service at the shop was fast, affordable, and exceeded my expectations." – Local MTB Rider

Riders from all backgrounds rave about the difference that expert local service makes. Many report immediate handling improvements—smoother rides, more predictable responses, and fewer aches after long stints in the saddle. These testimonials reinforce why local shops remain the top choice for bike suspension repair, dirt bike upgrades, and mountain bike suspension overhauls. Thanks to attention to detail and a commitment to quality, these shops regularly outperform generic repair centers and online solutions.

Local riders also appreciate the transparency in pricing and repair timelines, noting that they often get back on their bikes far sooner than expected. With positive experiences spanning regular suspension service to advanced performance tuning, customer satisfaction remains a hallmark of the best local motorcycle suspension repair shops.

Get a closer look at how true professionals approach motorcycle suspension service in this real-world demo—see every step from fork disassembly to meticulous assembly, and listen as a certified technician explains each critical process during the service.

People Also Ask: Key Questions About Local Motorcycle Suspension Repair

What is the life expectancy of a motorcycle suspension?

The life expectancy of a motorcycle suspension system largely depends on the type of riding, terrain, and how diligently you keep up with suspension service. Generally, with routine fork and shock maintenance, a motorcycle suspension can last between 20,000 and 40,000 miles. However, regular inspection and timely service of internal components—especially after hours of riding in challenging conditions—can significantly extend this lifespan.

How much does it cost to have a shock rebuilt?

The typical cost for a shock rebuild at a local motorcycle suspension repair shop is around $150 to $300. This price includes a full teardown, inspection of internal parts, replacement of seals, and a fluid change. Choosing a shop that uses the highest quality replacement parts and skilled technicians means your shock performance and ride quality will last, offering unbeatable value in the long run.

How much does it cost to have dirt bike suspension done?

Dirt bike suspension work varies, but expect to pay between $100 and $350 depending on the scope of service. Routine fork and shock maintenance starts on the lower end, while full overhauls or custom suspension tuning—especially for competitive or off-road bikes—may cost more. It’s always worth a discussion with your local suspension expert to match your riding style and terrain for best performance.

How much does a suspension setup cost?

A proper suspension setup, including detailed sag, damping, and spring rate adjustments, generally falls in the $75 to $150 range. Custom tuning and upgrades may increase this cost, but the expert attention and improved handling are well worth the investment, especially if you want to match your ride perfectly to your style and local conditions.

FAQs: Everything Else About Local Motorcycle Suspension Repair

  • How often should I service my motorcycle suspension?
    As a rule of thumb, you should have your motorcycle suspension serviced every 10,000 miles or at least once a year—more frequently if you ride in challenging conditions or participate in off-road/mountain bike events.

  • What are the signs of failing suspension components?
    Look for oil leaks, unusual noises, loss of handling, excessive bounce, or poor braking. These are clear signals that your fork or shock needs immediate attention.

  • Is it necessary to tune suspension for solo vs. passenger riding?
    Absolutely. Adjusting your bike suspension for different loads ensures optimal comfort, handling, and safety whether riding alone or with a passenger.

  • Can mountain bike suspension be serviced at motorcycle shops?
    Many local motorcycle suspension shops offer MTB suspension service and tuning, especially those with technicians experienced in mountain bike suspension systems.

  • Does local motorcycle suspension repair improve resale value?
    Yes, a well-maintained suspension system is a major selling point and can increase your bike’s resale value by ensuring safety and comfort for the next owner.
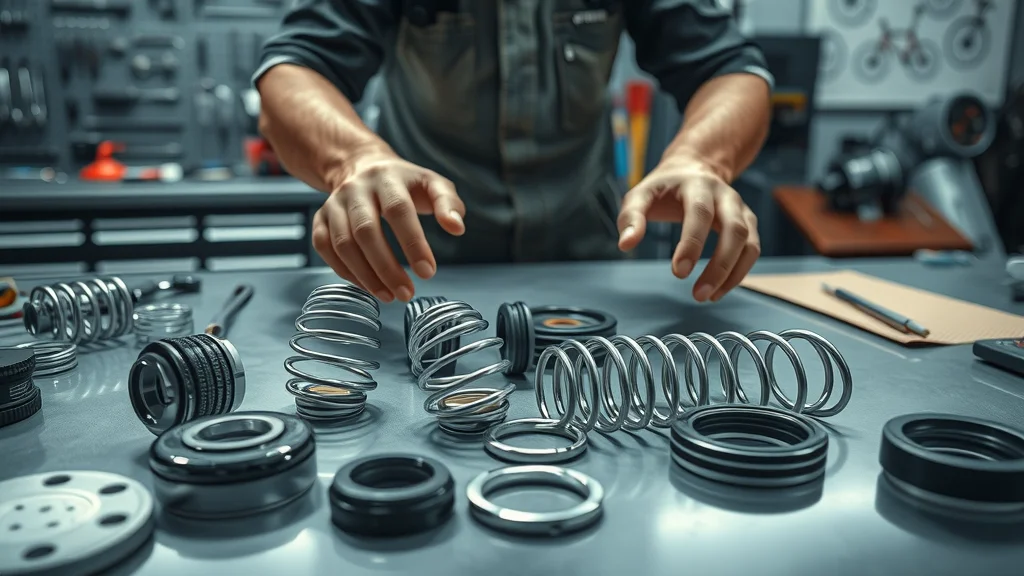
technician’s hands, clean new suspension parts laid out on organized bench - bike suspension service

Watch local experts break down advanced suspension tuning strategies for motorcycles, dirt bikes, and mountain bikes. Learn insider tips that will help you get the most out of every ride—straight from the professionals at Nasty Performance Motorcycle Shop.

Key Takeaways: Why Prioritize Local Motorcycle Suspension Repair Now

  • Professional local motorcycle suspension repair reduces accident risk

  • Routine suspension service enhances ride quality and safety

  • Local expertise ensures fast and reliable results

  • Investing in suspension tuning saves money long-term

Ready to Ride Safer and Smoother? Call Nasty Performance Motorcycle Shop Today: 847-458-4858

Conclusion: Don’t wait for a suspension failure to compromise your safety or ride quality. Contact a trusted local motorcycle suspension repair expert now—and experience the difference professional care makes for every journey.

For riders who want to go beyond suspension and truly master year-round bike performance, there’s even more to discover. Explore how proactive seasonal maintenance can protect your investment, boost reliability, and keep your motorcycle or mountain bike running at its best in any weather. Dive into the essential strategies outlined in Seasonal Bike Care Secrets Every Rider Must Know and take your maintenance routine to the next level. Your next adventure deserves a bike that’s ready for anything—start building that confidence today.
Motorcycle Maintenance

0 Comments

Write A Comment

*
*
Please complete the captcha to submit your comment.
Related Posts All Posts

Checklist Guide To Your Motorcycle Inspection

Did you know? According to recent studies, nearly 75% of preventable motorcycle breakdowns are linked to skipped or rushed inspections. A proper checklist guide to motorcycle inspection doesn’t just prevent headaches—it can be the difference between a safe, smooth ride and being stranded on the roadside. Whether you’re a daily commuter or a weekend warrior, this essential guide unlocks the secrets of keeping your motorcycle in peak condition, ensuring every ride begins and ends with total peace of mind. In this comprehensive resource, you'll discover simple, actionable steps and expert tips to maximize safety and performance—covering everything from tire pressure to fluid levels and the electrical system. Unlocking Road Safety: Why You Need a Checklist Guide to Motorcycle Inspection Skipping your motorcycle’s inspection checklist isn’t just risky—it’s the quickest path to unexpected hazards and costly repairs that can threaten your safety and your wallet. Every ride introduces new challenges: changing weather, varying road conditions, and natural wear and tear. The checklist guide to motorcycle inspection is your roadmap for surfacing dangers and fixing minor issues before they become major headaches. Keeping up with regular inspections ensures your machine’s fuel system, fluid levels, tire pressure, and electrical system stay within safe operating ranges. This not only extends the life of your motorcycle but also maximizes every moment on the road with minimal interruptions or concerns. By following a detailed inspection checklist, you make safety a habit rather than an afterthought. You’ll spot worn brake pads before they affect stopping distance, detect low engine oil or leaky fork seals before performance drops, and fix minor electrical faults before they leave you without lights or turn signals in traffic. Whether riding solo or with a group, using a checklist provides peace of mind and helps ensure your motorcycle is always ready for your next adventure—which means fewer surprises, lower maintenance costs, and confidence every time you roll out of the driveway. What You'll Learn in This Comprehensive Checklist Guide to Motorcycle Inspection The key steps in a thorough motorcycle inspection checklist How to assess your motorcycle’s fuel system, fluid levels, and electrical system Expert tips to maximize safety and performance Answers to the most common inspection checklist questions The Importance of a Motorcycle Inspection Checklist "A proactive checklist guide to motorcycle inspection is the first line of defense against unexpected hazards and costly repairs." – Motorcycle Safety Expert Your motorcycle is a complex machine, and every component plays a critical role in your safety and performance on the road. A structured inspection checklist puts you in control. With a systematic approach, you decrease the risk of missed warning signs—such as oil leaks, worn brake pads, or faulty fuel caps—that can reduce efficiency or endanger your ride. Routinely walking through the critical steps means you’re consistently riding a machine in peak condition. Regular motorcycle inspections are not just a preventative measure—they protect your investment and ensure your piece of mind. By spotting and addressing issues early, you help extend the life of your motorcycle, avoid costly repairs caused by neglect, and ride confidently knowing that every critical component is operating safely. This checklist is as much about protecting yourself and your passengers as it is about getting the most enjoyment and reliability out of every ride. As you work through your motorcycle inspection checklist, it's also important to consider how seasonal changes can impact your bike's condition and maintenance needs. For practical advice on adapting your inspection routine throughout the year, explore these seasonal bike care secrets every rider should know to keep your motorcycle performing at its best in any weather. Before You Begin: Preparation for Your Motorcycle Inspection Checklist Gather your inspection tools and owner's manual Find a well-lit, level workspace Review safety gear requirements Preparation is the key to an efficient motorcycle inspection checklist. Begin by collecting all necessary tools—including a tire pressure gauge, a flashlight, a set of wrenches, and your motorcycle’s owner’s manual. The manual is a key reference for manufacturer specifications, such as recommended tire pressure (PSI), fluid levels, and maintenance intervals. Choose a flat, well-lit area—preferably indoors or in a shaded location to prevent sunlight glare. Adequate lighting helps spot signs of wear, oil leaks, and subtle damage. Put on basic safety gear such as gloves and protective eyewear, especially when working around batteries, engine oil, or moving parts. Double-check that your motorcycle is securely on its center or side stand before beginning your assessment. Starting with a clean, organized workspace not only boosts inspection accuracy but makes the process much more efficient and enjoyable. Full Motorcycle Inspection Checklist Table Inspection Area Recommended Checks Suggested Actions if Issues Found Fuel System Check fuel lines, connectors, fuel cap & filter for leaks or damage Replace damaged lines; tighten/replace cap; consult mechanic for leaks Fluid Levels Assess oil, brake fluid, coolant levels; check for signs of contamination Top-up or replace fluids; flush system if contaminated Tire Pressure & Condition Use gauge to measure tire pressure; inspect for punctures, tread depth, wear Inflate to correct PSI; replace tires with worn tread or deformities Electrical System Test headlights, taillights, turn signals, horn, battery terminals Replace bulbs; clean battery terminals; repair faults Brakes Inspect brake pads/discs; check lever/pedal feel and brake light function Replace worn pads/discs; address unresponsive brakes or lights Chain/Sprockets Examine tension, lubrication, wear on chain & sprockets Adjust tension; lubricate; replace worn components Other Safety Features Check mirrors, fasteners, reflectors, controls for operation & tightness Tighten, align, or replace as needed Step 1: Fuel System – Your First Stop on the Motorcycle Inspection Checklist Inspect for visible leaks or damage Check fuel lines and connectors Ensure gas cap and filter are functioning properly The fuel system is the life source of your motorcycle’s engine. Begin every inspection checklist with a visual sweep for leaks, especially around fuel lines, connectors, and near the fuel cap. Even minor leaks can cause dangerous situations—from fire hazards to power loss. Pay close attention to any wet spots, fuel odor, or discoloration on or under the tank and around the lines. If you detect a leak or cracked hose, replace it immediately or consult a professional, as these can escalate quickly. Next, verify the integrity and fit of your gas cap and fuel filter. A faulty fuel cap can lead to fuel evaporation, contaminants entering the tank, or failure of emission control systems. Remove the cap and look for signs of damage to the seal, check that it fits securely, and ensure the filter is free of blockages or buildup. Finally, with the engine cold, gently wiggle the fuel lines to ensure all connections are tight but flexible. Completing this step means your motorcycle starts strong, wastes no fuel, and keeps contaminants out—forming the solid foundation for a safe, reliable ride every time. Step 2: Fluid Levels – Crucial Checks for Motorcycle Longevity Check oil, coolant, and brake fluid levels Inspect for fluid contamination Top-up or replace fluids as necessary Fluid levels are vital for engine health, cooling, and braking power. Start by checking your engine oil, ensuring the motorcycle is cool and upright. Look for the proper level between MIN and MAX, and pay attention to oil color—dark or gritty oil may signal it’s time for a change or there may be contamination. Next, inspect the coolant reservoir, if applicable, making sure levels are consistent and the fluid is clear (not cloudy or rusty). Low or dirty coolant can quickly lead to overheating and engine damage. Brake fluid is another essential check—examine both front and rear reservoirs. Fluid should be within the marked lines and free of dark color or floating particles. If you spot a drop in level, address it immediately, as leaks may point to bigger problems in the braking system. Always use the correct fluid type per your manual. Regularly topping off or changing fluids increases the lifespan and reliability of your motorcycle, granting peace of mind across thousands of miles. Step 3: Tire Pressure and Condition – A Must-Have in Your Inspection Checklist Monitor tire pressure with a reliable gauge Check for punctures, wear, or deformities Ensure tires are within manufacturer's recommended PSI Maintaining tire pressure and tracking tire condition are two of the most crucial aspects of any inspection checklist. Under-inflated or over-inflated tires compromise handling, braking, and overall safety. Use a quality gauge—preferably digital—for accuracy; consult the owner’s manual or sidewall for the right PSI for both front and rear tires. Record your readings each check to track even subtle drops that might indicate a small leak. Examine both tires for punctures, cracks, foreign objects, and irregular wear patterns. Inspect tread depth to ensure it meets legal minimums and provides enough traction for wet or slippery conditions. Look for bulges or sidewall damage—signs of internal failures that demand immediate replacement. Keeping tire pressure and tread within manufacturer specs ensures proper contact with the road, boosts fuel efficiency, and helps you ride with confidence no matter the journey ahead. Step 4: Assessing the Electrical System – Stay Powered Up Test headlights, taillights, and turn signals Check battery terminals for corrosion Evaluate horn and gauge functionality Your motorcycle’s electrical system manages everything from ignition to lighting and safety alerts. Begin by switching on the ignition and checking each light—headlights (high and low beam), taillights, brake light, and turn signals. Confirm all bulbs are operating and produce maximum visibility, as faulty signals or dim lighting can increase your accident risk on the road. Examine the battery terminals for corrosion (white powdery residue) and ensure connections are tight but not over-torqued. Corrosion can hinder starting and charging; clean terminals with a suitable brush and protect with anti-corrosion gel. Next, sound the horn and check that all gauges—speedometer, tachometer, temperature, and warning lights—respond as expected. An overlooked electrical system failure can leave you stranded or invisible, so always make this a priority on your inspection checklist. Step 5: Brakes, Chains, and Final Inspection Checklist Details Inspect brake pads, discs, and performance Examine chain tension and lubrication Look over all fasteners and safety features The braking system is essential for control and stopping power. Test lever and pedal resistance to feel for sponginess—if present, check brake fluid level and look for air in the lines or worn brake pads. Examine all visible components, including discs and rotors, for grooves, warping, or signs of wear. Don’t forget to verify brake lights illuminate with light pressure to either lever or pedal, ensuring responsive performance in traffic. Next, move to the chain and sprocket system. Rotate the wheel and check chain tension—there should be minimal slack but still enough movement per the manual for proper tension. Inspect for dry links, dirt, or visible signs of wear, and apply quality lubricant as needed. Lastly, walk around the bike to confirm fasteners (bolts, nuts, safety pins) are secure and that all mirrors, reflectors, and controls are fully operational. This double-check is the final barrier against surprises—providing a thorough, all-encompassing inspection routine for every rider. People Also Ask: Motorcycle Inspection Checklist What should be included in a motorcycle inspection checklist? A comprehensive motorcycle inspection checklist covers the fuel system, fluid levels (engine oil, coolant, and brake fluid), tire pressure and tread depth, electrical system (lights, signals, horn), braking components (pads, discs, fluid level), chain and sprocket condition, and all safety features such as mirrors, controls, and reflectors. The goal is to ensure no critical component is overlooked, maximizing both safety and performance with every ride. How often should I perform a motorcycle inspection? Perform a basic walk-around inspection before every ride for top safety and reliability. For more detailed checks involving fluid levels, brake pads, and chain tension, a weekly or bi-weekly cadence is recommended. Schedule a complete, in-depth inspection at least monthly or after long trips. Regular inspection helps you catch early signs of wear, oil leaks, or dropping fluid levels before they develop into major concerns. Why is a motorcycle inspection checklist important? An inspection checklist is essential because it organizes your maintenance routine, helping you to identify and resolve small issues—like worn brake pads or low tire pressure—before they become dangerous on the road. It’s the simplest way to ensure your motorcycle operates in peak condition and that you always ride with confidence and total peace of mind. Can I perform a motorcycle inspection myself? Yes, with a clear and structured checklist guide to motorcycle inspection, most riders can independently perform all basic checks outlined here. Having your owner’s manual at hand helps you reference manufacturer specs and acceptable ranges. For advanced repairs or if you detect unusual noises, consistent leaks, or signs of severe wear, seek help from a certified mechanic to ensure both safety and proper intervention. Expert Tips for Motorcycle Inspection: Go Beyond the Basics Document your inspections for reference Replace worn parts immediately Seek expert help for suspected complex issues Go the extra mile beyond the standard motorcycle inspection checklist by keeping a simple log or digital record of each inspection. Tracking changes in tire pressure, fluid levels, or component wear helps identify patterns and potential failures before they occur. When you spot signs of wear—from thinning brake pads to minor oil leaks—replace affected parts without delay to avoid reduced safety and performance. If you come across persistent electrical problems, unusual noises, or fluid contamination, don’t hesitate to consult a professional for a complete assessment. Staying proactive today saves time, money, and worry tomorrow. Frequently Asked Questions About Motorcycle Inspection Checklists Which fluids are most critical to inspect regularly? Are there seasonal differences in inspection procedures? When should I seek a certified inspection? Which fluids are most critical to inspect regularly? - The most important fluids are engine oil, brake fluid (front and rear), and coolant if your motorcycle is water-cooled. Regularly checking for proper levels and contamination can prevent engine damage, brake failure, and overheating incidents. Are there seasonal differences in inspection procedures? - Yes. In colder months, pay closer attention to battery charge, tire pressure changes, and fluid viscosity. During summer, monitor tire condition, coolant levels, and brake fluid closely due to increased heat and potential for rapid wear. When should I seek a certified inspection? - Consult a professional if you detect severe leaks, electrical failures, persistent unusual noises, ongoing fluid loss, or after a crash. Annual certified inspections are also smart for maximizing the life and safety of your motorcycle. Key Takeaways: The Ultimate Checklist Guide to Motorcycle Inspection A structured motorcycle inspection checklist keeps you safe Focus on fuel system, fluid levels, tire pressure, and electrical system for reliable rides Expert insights and checklists simplify your routine inspection tasks Ready for a Safer Ride? Schedule Professional Inspection Help Today! Don’t take chances with your safety or your ride. If you need expert eyes or want more confidence before your next adventure, Call Nasty Performance Motorcycle Shop Today: 847-458-4858 and ride with confidence! Mastering your motorcycle inspection checklist is just the beginning of a safer, more enjoyable riding experience. To truly protect your investment and adapt to every season, consider expanding your knowledge with expert strategies for year-round bike care. Discover how to prepare your motorcycle for changing weather, prevent seasonal wear, and keep your ride in top shape by exploring essential seasonal bike care tips. Elevate your maintenance routine and ensure every journey is as smooth and reliable as possible—no matter what the forecast brings.

Cost Of Motorcycle Brake Pad Replacement

Did you know that worn motorcycle brake pads can increase your stopping distance by over 50%—sometimes enough to mean the difference between a safe ride and a catastrophe? When you start thinking about the cost of motorcycle brake pad replacement, it’s not just about dollars and cents. It’s about making a critical investment in your own safety on the road. In this comprehensive guide, we’ll break down what goes into that cost, how to spot when it’s time for new pads, and how your choices (from DIY to professional brake jobs) affect both your wallet and your peace of mind. Startling Fact: Why the Cost of Motorcycle Brake Pad Replacement Matters for Safety "Did you know worn brake pads can drastically increase your bike’s stopping distance? Replacing brake pads isn’t just a cost—it’s an investment in your safety." It's easy to overlook brake maintenance as just another vehicle expense, but consider this: the cost of motorcycle brake pad replacement directly ties to your safety every time you squeeze that lever or press the pedal. Even the most advanced motorcycles rely on regular brake jobs and timely brake pad swaps to ensure effective, predictable stopping power. Braking is a critical system—failure or inefficiency can be the root cause of severe accidents. As a rider, choosing to replace pads before they’re dangerously thin isn’t an optional upgrade; it’s a responsibility to yourself and those who share the road with you. Brake system health is non-negotiable for any safe ride. So, why does cost matter so much? The reality is, brake pad technology and modern motorcycle designs are advancing quickly. This means the materials, fitting procedures, and even related services (like rotor checks or brake fluid flushes) can vary widely in price. Understanding what you’re paying for—and when to invest in pro brake repair or a DIY approach—will help you protect your investment, ride with confidence, and prevent expensive repairs down the line. What You'll Learn About the Cost of Motorcycle Brake Pad Replacement Key factors influencing the cost of motorcycle brake pad replacement Differences between front and rear brake pad replacement DIY brake pad vs. professional repair approaches Lifespan of brake pads and ideal replacement intervals Understanding the Cost of Motorcycle Brake Pad Replacement Knowing the cost of motorcycle brake pad replacement means more than just looking up prices online. There are wide-ranging factors that impact what you’ll actually pay—from the brake pads themselves to the intricacies of your bike’s brake system. In this section, we’ll explore the key influencers that determine both the ballpark and specific figures you might encounter. This understanding helps you recognize where you can save, where skimping is risky, and how to plan for routine motorcycle maintenance that keeps your ride reliable and efficient. Whether you’re preparing for your first brake job or simply want to extend the life of your current system, it’s vital to know what drives these costs. By unpacking these details, you’ll be able to make informed decisions—whether weighing DIY brake pad swaps, considering a professional repair, or budgeting ahead for preventative care. For riders interested in maximizing the lifespan of their brake pads and ensuring optimal performance, understanding the nuances of seasonal maintenance can make a significant difference. You might find it helpful to explore essential seasonal bike care strategies that complement your brake system upkeep and help prevent unexpected wear. Factors That Affect the Cost of Motorcycle Brake Pad Replacement Type and quality of brake pads: Organic pads, sintered pads, or ceramic, each offers different braking characteristics and longevity, influencing purchase price and replacement frequency. Motorcycle model and brake system design: High-performance bikes or those with advanced brake rotors or ABS can require special pads and more intricate installation. Labor costs and shop rates: Professional repair prices vary, dependent on local market rates and whether extra services—such as brake system inspection or brake fluid change—are included. Included services: Sometimes, a brake job comes bundled with a full brake system inspection, rotor resurfacing, or other perks, impacting the cost’s bottom line. The quality of the parts chosen is crucial as well. Opting for premium pads may cost more upfront, but they can extend the life of both your brake pads and rotors, reducing the frequency of future brake repair. Some shops offer member perks, such as discounted labor or expedited day shipping—these can affect the total you’ll pay. The information these cookies (cost and service details) provide is essential for making smart, safe decisions as you drive your vehicle for years to come. Comparison Table: Cost of Motorcycle Brake Pad Replacement Across Common Motorcycles Motorcycle Type Front Pads (Parts Only) Rear Pads (Parts Only) Labor (Per Axle) Additional Services (Fluid, Rotor Inspection) Sportbike High—Performance; Premium Material High—Performance; Premium Material Medium to High Often Included Cruiser Standard/OEM Equivalent Standard/OEM Equivalent Medium Optional Touring Bike Premium; Extended Wear Premium; Extended Wear High (Complex Brake System) Often Included Standard/Commuter Basic/Aftermarket Basic/Aftermarket Low to Medium Optional Front vs. Rear Brake Pad Replacement: Cost Considerations The cost of motorcycle brake pad replacement often depends on whether you need to replace the front or rear pads—or both. The front brake pads generally do more of the stopping, meaning they may need to be replaced more frequently and with higher grade materials. Because of the increased stopping force, these pads can be larger and, for high-performance or newer motorcycle models, incorporate current technology for added safety. The installation of front brake pads can also be more labor-intensive, especially if a full brake system check or brake rotor service is recommended during your brake job. Rear brake pads, by comparison, typically wear more slowly due to their lesser role in most stops and are usually simpler and less expensive to replace. However, if neglect causes rear pads to wear through, repair costs can escalate fast—especially if damage to the brake rotor or caliper occurs. It’s wise to budget for both front and rear replacements at regular intervals, checking for member perks (like combo discounts) if you opt for full replacements or a multi-axle brake job at once. The Role of Brake System Health in Replacement Cost Your entire brake system health influences the cost and frequency of brake pad replacement. A healthy brake system—kept in top condition through regular fluid flushes and inspections—helps extend the life of your brake pads and prevents expensive repairs like needing brake rotors redone to current technology standards. Neglect, on the other hand, can lead to issues such as uneven pad wear, grooved rotors, or even brake system failure, greatly increasing both risk and expense. Many professional shops include multi-point checks of your brake system when handling a brake job, such as inspecting the quality of the parts, brake fluid condition, caliper movement, and more. Regularly flushing your brake fluid and keeping an eye on warning signs (like squealing or grinding sounds, pulsing brake levers, or increased stopping distance) can lower your ball park idea of repair costs. Investing in proper maintenance—before problems become critical—keeps both your costs and your risk down over the lifespan of your bike. DIY Brake Pad Replacement vs. Professional Repair When facing the cost of motorcycle brake pad replacement, riders often weigh doing a diy brake swap against booking a professional repair. Both have distinct pros and cons—cost savings versus peace of mind, and the value of hands-on knowledge versus the assurance of expert diagnostics. In this section, we’ll look at what you need to know, from required tools and skillsets to the benefits that come from having a trained technician handle your brakes. Whether you’re mechanically inclined and ready to id like to buy parts and get your hands dirty, or you prefer to leave critical systems to the pros, understanding both approaches will help you make an informed, safe decision when your next brake job is due. When a DIY Brake Job Makes Sense Tools and materials required for DIY brake pads replacement Skills and risks involved in DIY brake repair Performing a diy brake pad replacement can be extremely rewarding and often leads to cost savings on labor, but only if you have the tools, parts, and the confidence to follow every step meticulously. You’ll need a set of quality brake pads, a torque wrench, proper sockets or Allen keys, gloves, a jack or motorcycle stand, and (for many bikes) a way to compress the caliper pistons. Some might also need brake fluid for a quick bleed if lines are opened. A DIY job is best suited to riders familiar with their motorcycle’s brake system—understanding both the mechanics of removal and the importance of correctly bedding-in new pads afterward. Mistakes can result in unsafe installations: improper pad seating, forgotten bolts, or even damage to the brake rotor. If you’re diligent, follow manufacturer directions, and feel comfortable handling potential risks, DIY can be a great way to get to know your machine and save on the total cost of motorcycle brake pad replacement. Benefits of Choosing Professional Brake Repair Expertise in diagnosing entire brake system Warranties and guarantees on brake jobs Reduced risk of installation errors Choosing professional repair for your motorcycle brakes provides real advantages—beyond simply having someone else do the heavy lifting. Experienced technicians not only replace the brake pads, but they inspect the brake system as a whole: from calipers and rotors, to brake fluid levels and potential early warning signs of wear you might miss. They’ll often use the latest diagnostic tools to ensure your setup is redone to current technology standards. Professional brake jobs also come with warranties or guarantees, providing peace of mind if any issues arise soon after replacement. Most importantly, expert hands reduce the already low risk of installation errors that can compromise your bike’s safety. Being able to rely on a shop’s reputation (and in some cases, member perks or perks for this product) means your investment in the cost of motorcycle brake pad replacement directly correlates to the safety and longevity of your ride. People Also Ask: Cost of Motorcycle Brake Pad Replacement How much does it cost to replace motorcycle brakes? The cost of motorcycle brake pad replacement varies widely depending on your motorcycle’s make, the quality of the parts, and whether you go the DIY or professional repair route. For a ball park idea, basic brake pads for standard bikes may be less expensive, but sport and touring bikes—especially those equipped with advanced brake systems—often require premium pads and more labor. If additional repairs or rotor replacements are needed (due to excessive wear or damage), the price can jump significantly. To get a more precise ball park idea for your specific motorcycle, always consult your owner’s manual and a trusted local mechanic for a detailed estimate that covers both front and rear pads, labor, and any necessary brake system inspections. What is the 30 30 30 rule for brakes? The 30 30 30 rule is a practical guideline for bedding-in new brake pads on your motorcycle. It suggests performing 30 stops from 30 mph, leaving 30 seconds between each stop. This process helps ensure your new brake pads mate properly to the rotors, ensuring optimal performance and longevity. Following this break-in method can extend the life of both pads and rotors, reducing the frequency of future brake jobs. It’s always wise to check your motorcycle’s service manual for any make-specific advice and be cautious while the new pads are bedding in, as initial stopping power may be reduced. Does O'Reilly's carry motorcycle brake pads? Major automotive parts retailers such as O'Reilly's may stock certain brake pads for popular motorcycle models, but their selection can be limited compared to specialized motorcycle shops or online sources. If you have a mainstream motorcycle and are looking for convenience or fast day shipping, checking inventory or calling ahead is recommended. Riders with niche or performance motorcycles often find a broader selection and higher-quality choices by shopping at dedicated motorcycle parts dealers or through service centers. Always verify that the pads you’re considering are compatible with your exact make, model, and year to ensure safe and proper fitment. How often should brake pads be replaced on a motorcycle? The interval for replacing brake pads varies depending on riding style, terrain, and the quality of the brake pads themselves. On average, many riders find it necessary to replace pads every 10,000 to 20,000 miles, but aggressive use or regular city riding with lots of stops can wear pads faster. It’s wise to perform visual inspections regularly—if you see that the friction material is 2mm (about the thickness of a nickel) or less, or hear squealing or feel a decrease in stopping power, it’s time to replace. Keep a maintenance log and consider periodically replacing the brake fluid as well—this helps extend the life of your entire brake system and ensures consistent, safe performance. FAQs: Cost of Motorcycle Brake Pad Replacement How can I recognize worn brake pads? Look for a thin brake pad lining (under 2mm), audible squealing or grinding noises, decreased braking performance, or a pulsing brake lever/pedal. Uneven wear or scoring on the rotor can be signs of overdue replacement. What are signs of a failing brake system? Signs include spongy or unresponsive brakes, fluid leaks near the wheels, a brake warning light, longer stopping distances, or a vibrating brake lever. Address these issues promptly for safety. Are premium brake pads worth the higher cost? Premium pads can extend the life of both pads and rotors, improve stopping power, and reduce brake dust. For aggressive riders, heavy bikes, or frequent commuters, they can mean longer intervals between replacements and improved safety. Can regular maintenance lower my brake repair expenses? Absolutely. Routine inspections, replacing pads before they’re dangerously worn, regularly flushing brake fluid, and keeping rotors in good shape can all lower the long-term cost of motorcycle brake pad replacement and keep your system running smoothly. Key Takeaways for the Cost of Motorcycle Brake Pad Replacement Understanding the core factors behind brake pad replacement cost Knowing when to opt for professional brake repair Importance of timely brake pad and brake system maintenance Staying proactive with your motorcycle’s brake maintenance is just one piece of the puzzle for safe, enjoyable riding all year long. If you’re looking to elevate your bike care routine and prevent costly surprises, consider diving into the broader world of seasonal bike care secrets. These expert tips will help you adapt your maintenance strategy to changing weather and riding conditions, ensuring your motorcycle performs at its best no matter the season. By integrating these advanced care techniques, you’ll not only extend the life of your brake pads but also enhance the overall reliability and safety of your ride. Take the next step in your maintenance journey and discover how a holistic approach can make every mile smoother and more secure. Ready for a Brake Job? Get Expert Help with Your Next Motorcycle Brake Pad Replacement Don’t leave your safety to chance—if you’re due for brake work, call Nasty Performance Motorcycle Shop today: 847-458-4858 for professional advice, honest estimates, and top-notch service.

Expert Tips For Motorcycle Maintenance Tools

Did you know: Over 80% of motorcycle breakdowns could be prevented with the right maintenance tools and regular care — yet most riders lack even the basic essentials in their kit. Upgrading your motorcycle maintenance tools isn’t just about quick repairs; it’s about riding with confidence, safety, and extending the life of your bike. Ready to unlock a smoother ride? Dive in and discover the secrets that even seasoned riders often overlook about shop kits, tool kits, and essential motorcycle tools. Unlocking Better Motorcycle Care: Surprising Facts About Motorcycle Maintenance Tools Investing in high-quality motorcycle maintenance tools is more than a convenience—it’s a smart strategy for every rider. The reality is, seemingly ordinary tasks like tightening bolts or checking tire pressure with the right torque wrench or tire pressure gauge can make the difference between a safe trip and a sudden breakdown. Many riders underestimate how essential it is to have a reliable tool kit or shop kit tailored specifically for motorcycles; generic tools just don’t cut it when precision matters. Surprisingly, even experienced riders sometimes overlook critical items like bead breakers or hex keys, which play key roles in maintenance tasks such as tire changes and small adjustments. The effectiveness of your routine is only as strong as your maintenance tool selection. Did you know that using an accurate torque wrench dramatically reduces the risk of stripping threads or overtightening essential fasteners? It’s these fine details—having the right size, the right type, and the right quality of motorcycle tools—that enable preventative care and save money long-term. Understanding the full capabilities of modern shop kits and maintenance tools empowers you to avoid costly shop visits and take pride in DIY motorcycle maintenance. When assembling your toolkit, it's helpful to start with the basics and build up from there. For a practical breakdown of the fundamental gear every rider should carry, check out this guide on basic motorcycle tools you can’t ride without. It covers the must-have items that form the foundation of any reliable maintenance kit. The Role of a Quality Motorcycle Tool Kit in Preventing Breakdowns A thoughtfully chosen motorcycle tool kit is an investment in peace of mind, helping you handle routine maintenance and unexpected repairs with confidence. When you’re equipped with reliable tools—whether it’s a torque wrench for ensuring nuts are tightened to manufacturer specs, or a good set of hex keys for accessing tight spaces—you reduce the risk of major component failure while riding. Reliable kits often include box end and open end wrenches, key sets, and other essentials specifically designed for motorcycle maintenance tasks, not just generic automotive repairs. Skipping on quality or failing to inspect your tool kit before a long trip can leave you stranded. A well-stocked kit empowers you not only to prevent minor issues from turning into emergencies, but also to perform routine work—like adjusting your chain, tightening loose fasteners, or swapping out an oil filter—without hunting for missing tools. These collectively help extend your motorcycle’s lifespan, maintain peak performance, and even retain your investment’s value. Especially for those who enjoy wrenching at home, assembling a kit tailored to your model and preferred maintenance tasks will prove indispensable. And as motorcycle technology advances, tool kits are evolving to include more specialized items such as bead breakers, tire pressure gauges, and multi-drive size adaptors—making them practical for both amateur and experienced mechanics alike. What You'll Learn About Motorcycle Maintenance Tools Essential features of must-have motorcycle tools and tool kits Expert insights into the benefits of using proper maintenance tools How to choose and maintain shop kits for long-term reliability Comprehensive comparison and reviews of top motorcycle maintenance tools on the market Best Motorcycle Maintenance Tools: Tool Kits, Motorcycle Tools, and More Why a Comprehensive Motorcycle Tool Kit Matters A comprehensive motorcycle tool kit is the linchpin of every home shop and professional garage. Why? Because motorcycle maintenance often requires a blend of specialized tools and versatile equipment—think precision torque wrenches, combination wrenches, and hex keys—that ensure safe and accurate repairs on the go or at home. Unlike piecing together a set of tools one by one, a curated kit ensures you have every essential at hand. Not only does this streamline your workflow, but it also helps you avoid the frustration of missing a crucial tool mid-job. Specific tools, such as bead breakers for tire changes or a compact pressure gauge for tire maintenance, might not be part of a standard home toolbox but are necessary for effective motorcycle care. By investing in a quality shop kit, you’ll have the confidence to tackle both simple and complex maintenance tasks—from checking your drain plug to replacing an oil filter. Comprehensive motorcycle tool kits often come with sturdy cases for organization, durable construction for longevity, and compatibility with most major motorcycle brands. With such a kit, you can handle immediate fixes and plan regular maintenance, giving you the perks of faster day shipping on replacement parts and extending the value of your ride. Top Rated Motorcycle Tools for Every Maintenance Task Some motorcycle maintenance tools rise above the rest due to their ingenuity and reliability. The torque wrench and its variants—such as click, beam, or digital torque wrenches—are essential for tightening bolts to precise specifications, reducing the chance of damaging threads or compromising safety. Hex keys (also known as Allen keys) and key sets are invaluable for a variety of adjustments, offering access to tight spaces on virtually every motorcycle model. A well-crafted combination wrench set—open end or box end—simplifies everything from handlebar adjustments to brake repairs. Don’t overlook the tire pressure gauge and bead breakers. These are non-negotiables for anyone serious about motorcycle safety and comfort, as proper tire pressure affects handling, tire life, and even fuel efficiency. Oil filter wrenches make changing engine oil straightforward and mess-free, protecting your engine from premature wear. Finally, for riders seeking to take on more complex maintenance, a sturdy motorcycle lift will make accessing every component safer and more convenient, ensuring you can perform in-depth inspections and repairs with the tools and equipment you have at home. Critical Motorcycle Maintenance Tools Every Rider Needs Torque wrench and torque wrenches: For precise tightening, maintaining safety standards without over-tightening bolts. Combination wrench and combination wrenches: Versatile must-haves to handle a wide range of bolt and nut sizes, including box end and open end wrenches for hard-to-reach places. Hex keys and hex key sets: Essential for adjusting components and accessing tight spaces, providing leverage for both minor and major adjustments. Tire pressure gauge and pressure gauge: For monitoring tire health, ensuring correct tire pressure for optimal grip and safety. Bead breakers: Crucial for changing or repairing tires, breaking the bead seal to easily remove the tire from the rim. Oil filter wrenches: Designed for simplifying oil changes, allowing you to easily remove or install oil filters without damage. Motorcycle lift: Provides safer and easier access to your motorcycle, raising it off the ground for maintenance or repairs. How To Choose Reliable Motorcycle Maintenance Tools and Shop Kits Comparing Shop Kits: Features, Benefits, And Use Cases Choosing the best motorcycle maintenance tools and shop kits involves more than just picking what looks good in the store. Consider the types of maintenance tasks you’ll regularly tackle. Are you an occasional rider needing a basic key set, or a dedicated enthusiast wanting a full-service shop kit? Look at the range of tools included, like multiple drive sizes, specialty wrenches, reliable hex keys, and heavy-duty tire pressure gauges. Durability and organization should also top your list; the strongest kit is only as dependable as its weakest tool or its ability to help you keep track of every piece. It’s worth noting that a good set of motorcycle tools is made from rugged materials—chromoly steel, hardened alloys, or corrosion-resistant finishes—for long-term reliability. Kits often differ in the number of combination wrenches, torque wrenches, and specialty tools provided. Some shop kits even come with perks like member perks for this product, fast day shipping, or unique storage solutions that make them especially appealing to home mechanics. Analyze how the inclusions compare to your actual needs—there’s no point investing in tools you’ll never use, but scrimping on quality could leave you ill-equipped at the worst moment. Comparison Table: Motorcycle Maintenance Tool Kits Brand Key Tools Included Notable Features Suitability ProWrench Pro Kit Torque wrench, hex key set, tire pressure gauge, oil filter wrench Lifetime warranty, all tools made with chromoly steel, organized case Best for enthusiasts and seasoned home mechanics QuickFix Essential Shop Kit Combination wrenches, hex keys, bead breaker, pressure gauge Color-coded handles, compact storage box, fits most brands Ideal for beginners and riders with limited workspace EliteRider Maintenance Set Open and box end wrenches, hex keys, torque wrench, tire levers Anti-slip grips, corrosion-resistant, various drive sizes Great for professionals and riders who demand premium quality Expert Quote: The Importance of Investing in Quality Motorcycle Tools “A well-selected motorcycle maintenance tool kit is more than just equipment—it’s peace of mind for every rider.” Must-Have Motorcycle Maintenance Tools For Home Shops Essential motorcycle tools for DIY maintenance: Start with the basics like torque wrenches, hex keys, and combination wrenches; add bead breakers, tire gauges, and oil filter wrenches as you grow in skill and ambition. Benefits of assembling your own maintenance kit: Tailoring your kit to the unique requirements of your motorcycle model ensures you’re never stuck without the tool you need for an urgent maintenance task. Budget vs. premium maintenance tools: what truly matters: Investing in higher-quality, durable tools may cost more up front, but they’re less likely to fail when you need them most, ultimately saving you money and hassle in the long run. Pro Tips: How to Organize and Store Your Motorcycle Maintenance Tools The best way to keep your motorcycle maintenance tools ready is by establishing an efficient organizational system. Start with a wall-mounted toolbox or pegboard, as these allow for quick access and easy visibility of all your tools. Arrange frequently used items—such as torque wrenches, key sets, and tire pressure gauges—close at hand, while specialty items like bead breakers and oil filter wrenches can be stored nearby. Clear labels are invaluable, helping you quickly identify sizes and drive types without trawling through drawers. Regularly clean and inspect your tools; even the best torque wrench won’t perform if it’s corroded or gummed up with old oil. Allocate a dedicated space in your workshop where your tool kit can stay organized. If your shop kits come with hard cases or trays, make a habit of returning each tool to its slot after use to prevent misplacement. For riders on the go, consider a compact travel pouch for must-have tools. Remember, well-organized tools not only speed up maintenance tasks but also prevent accidental loss and save money—eliminating those last-minute store runs when something’s missing or broken. Keeping your motorcycle tools in prime condition is a simple but often overlooked form of preventative care that pays off every time you wrench on your bike. People Also Ask: Motorcycle Maintenance Tools What are the best motorcycle maintenance tools for beginners? For beginners, the ideal motorcycle maintenance tools include a sturdy torque wrench, a comprehensive hex key set, a pair of combination wrenches (both box end and open end), and a reliable tire pressure gauge. These basics enable you to perform essential maintenance tasks like bolt checks, chain adjustments, and tire safety checks with ease. It’s a good idea to invest in a starter tool kit or shop kit that combines all these elements for convenience and value. Expanding over time with bead breakers, oil filter wrenches, and a motorcycle lift will support more advanced repairs as your skills improve. How often should I update my motorcycle tool kit? You should inspect and consider updating your motorcycle tool kit at least once a year or whenever you notice signs of tool wear such as rust, loss of grip, or decreased accuracy (especially for torque wrenches and pressure gauges). Upgrading is also wise when you acquire a new motorcycle model that requires different drive sizes or specialty tools. Regular updates ensure you’re always prepared and never caught off guard by a missing or worn-out maintenance tool. What is included in a typical motorcycle shop kit? A standard motorcycle shop kit typically features essential items like torque wrenches, a set of combination wrenches, varied hex keys, a tire pressure gauge, and specialized tools such as bead breakers and oil filter wrenches. Advanced shop kits might also come with a motorcycle lift, various drive sizes, extra extensions, and organized cases or racks. Always check the included list to confirm the kit matches your maintenance needs and suits your motorcycle’s specifications. FAQs About Motorcycle Maintenance Tools Are expensive motorcycle tools worth the investment? Typically, yes. Expensive tools are made from higher-quality materials, offer precision, last longer, and help prevent damage to your bike. They can save you money over time by reducing tool replacements and potential repair costs. How can I tell if my maintenance tool needs replacement? Replace maintenance tools that show signs of corrosion, chipping, slipping, or inaccurate readings—especially on torque wrenches and pressure gauges. Regular inspection extends both tool and motorcycle life. Is it better to buy a pre-assembled shop kit or build one myself? Pre-assembled shop kits are great for convenience and beginners, while building your own lets you select only what you truly need for your bike or maintenance habits. Many riders use a mix: buy a starter kit and add tools as needed. Key Takeaways on Motorcycle Maintenance Tools and Kits A well-equipped tool kit enhances maintenance and safety. Frequent upkeep with the right tools extends motorcycle life. Choosing quality maintenance tools saves money long-term. Organized tools ease regular motorcycle maintenance work. Ready for Hassle-Free Maintenance? Contact Us Today Call Nasty Performance Motorcycle Shop Today: 847-458-4858 Conclusion: Investing in the right motorcycle maintenance tools today ensures smoother rides, safer journeys, and a worry-free maintenance experience for years to come. Take action now for peace of mind on your next adventure! If you’re eager to take your motorcycle maintenance skills even further, consider exploring the broader landscape of essential tools and strategies that every rider should know. By deepening your understanding of the basic motorcycle tools you can’t ride without, you’ll be better equipped to handle unexpected challenges and keep your bike in top condition. Whether you’re a weekend warrior or a daily commuter, mastering the fundamentals is the first step toward advanced DIY care and long-term riding confidence. Dive into more expert advice and discover how the right tools can transform your maintenance routine into a rewarding, hassle-free experience.

© 2025 Nasty Performance All Rights Reserved. 2035 S. Eastwood Dr., Woodstock, IL 60098 . Contact Us . Terms of Service . Privacy Policy

eyJjb21wYW55IjoiTmFzdHkgUGVyZm9ybWFuY2UiLCJhZGRyZXNzIjoiMjAzNSBTLiBFYXN0d29vZCBEci4iLCJjaXR5IjoiV29vZHN0b2NrIiwic3RhdGUiOiJJTCIsInppcCI6IjYwMDk4IiwiZW1haWwiOiJuYXRlQG5hc3R5cGVyZm9ybWFuY2UuY29tIiwidG9zIjoiUEhBK1BITjBjbTl1Wno0OFpXMCtWMmhsYmlCNWIzVWdjMmxuYmkxcGJpQjNhWFJvSUhWekxDQjViM1VnWVhKbElHZHBkbWx1WnladVluTndPeUI1YjNWeUlIQmxjbTFwYzNOcGIyNGdZVzVrSUdOdmJuTmxiblFnZEc4Z2MyVnVaQ0I1YjNVZ1pXMWhhV3dnWVc1a0wyOXlJRk5OVXlCMFpYaDBJRzFsYzNOaFoyVnpMaUJDZVNCamFHVmphMmx1WnlCMGFHVWdWR1Z5YlhNZ1lXNWtJRU52Ym1ScGRHbHZibk1nWW05NElHRnVaQ0JpZVNCemFXZHVhVzVuSUdsdUlIbHZkU0JoZFhSdmJXRjBhV05oYkd4NUlHTnZibVpwY20wZ2RHaGhkQ0I1YjNVZ1lXTmpaWEIwSUdGc2JDQjBaWEp0Y3lCcGJpQjBhR2x6SUdGbmNtVmxiV1Z1ZEM0OEwyVnRQand2YzNSeWIyNW5Qand2Y0Q0S0NqeHdQanhoSUdoeVpXWTlJbWgwZEhBNkx5OTNkM2N1WjI5dloyeGxMbU52YlNJK2FIUjBjRG92TDNkM2R5NW5iMjluYkdVdVkyOXRQQzloUGp3dmNENEtDanh3UGladVluTndPend2Y0Q0S0NqeHdQanh6ZEhKdmJtYytVMFZTVmtsRFJUd3ZjM1J5YjI1blBqd3ZjRDRLQ2p4d1BsZGxJSEJ5YjNacFpHVWdZU0J6WlhKMmFXTmxJSFJvWVhRZ1kzVnljbVZ1ZEd4NUlHRnNiRzkzY3lCNWIzVWdkRzhnY21WalpXbDJaU0J5WlhGMVpYTjBjeUJtYjNJZ1ptVmxaR0poWTJzc0lHTnZiWEJoYm5rZ2FXNW1iM0p0WVhScGIyNHNJSEJ5YjIxdmRHbHZibUZzSUdsdVptOXliV0YwYVc5dUxDQmpiMjF3WVc1NUlHRnNaWEowY3l3Z1kyOTFjRzl1Y3l3Z1pHbHpZMjkxYm5SeklHRnVaQ0J2ZEdobGNpQnViM1JwWm1sallYUnBiMjV6SUhSdklIbHZkWElnWlcxaGFXd2dZV1JrY21WemN5QmhibVF2YjNJZ1kyVnNiSFZzWVhJZ2NHaHZibVVnYjNJZ1pHVjJhV05sTGlCWmIzVWdkVzVrWlhKemRHRnVaQ0JoYm1RZ1lXZHlaV1VnZEdoaGRDQjBhR1VnVTJWeWRtbGpaU0JwY3lCd2NtOTJhV1JsWkNBbWNYVnZkRHRCVXkxSlV5WnhkVzkwT3lCaGJtUWdkR2hoZENCM1pTQmhjM04xYldVZ2JtOGdjbVZ6Y0c5dWMybGlhV3hwZEhrZ1ptOXlJSFJvWlNCMGFXMWxiR2x1WlhOekxDQmtaV3hsZEdsdmJpd2diV2x6TFdSbGJHbDJaWEo1SUc5eUlHWmhhV3gxY21VZ2RHOGdjM1J2Y21VZ1lXNTVJSFZ6WlhJZ1kyOXRiWFZ1YVdOaGRHbHZibk1nYjNJZ2NHVnljMjl1WVd4cGVtRjBhVzl1SUhObGRIUnBibWR6TGp3dmNENEtDanh3UGxsdmRTQmhjbVVnY21WemNHOXVjMmxpYkdVZ1ptOXlJRzlpZEdGcGJtbHVaeUJoWTJObGMzTWdkRzhnZEdobElGTmxjblpwWTJVZ1lXNWtJSFJvWVhRZ1lXTmpaWE56SUcxaGVTQnBiblp2YkhabElIUm9hWEprSUhCaGNuUjVJR1psWlhNZ0tITjFZMmdnWVhNZ1UwMVRJSFJsZUhRZ2JXVnpjMkZuWlhNc0lFbHVkR1Z5Ym1WMElITmxjblpwWTJVZ2NISnZkbWxrWlhJZ2IzSWdZMlZzYkhWc1lYSWdZV2x5ZEdsdFpTQmphR0Z5WjJWektTNGdXVzkxSUdGeVpTQnlaWE53YjI1emFXSnNaU0JtYjNJZ2RHaHZjMlVnWm1WbGN5d2dhVzVqYkhWa2FXNW5JSFJvYjNObElHWmxaWE1nWVhOemIyTnBZWFJsWkNCM2FYUm9JSFJvWlNCa2FYTndiR0Y1SUc5eUlHUmxiR2wyWlhKNUlHOW1JR1ZoWTJnZ1UwMVRJSFJsZUhRZ2JXVnpjMkZuWlNCelpXNTBJSFJ2SUhsdmRTQmllU0IxY3k0Z1NXNGdZV1JrYVhScGIyNHNJSGx2ZFNCdGRYTjBJSEJ5YjNacFpHVWdZVzVrSUdGeVpTQnlaWE53YjI1emFXSnNaU0JtYjNJZ1lXeHNJR1Z4ZFdsd2JXVnVkQ0J1WldObGMzTmhjbmtnZEc4Z1lXTmpaWE56SUhSb1pTQlRaWEoyYVdObElHRnVaQ0J5WldObGFYWmxJSFJvWlNCVFRWTWdkR1Y0ZENCdFpYTnpZV2RsY3k0Z1YyVWdaRzhnYm05MElHTm9ZWEpuWlNCaGJua2dabVZsY3lCbWIzSWdaR1ZzYVhabGNua2diMllnWlcxaGFXd2diM0lnVTAxVExpQlVhR2x6SUdseklHRWdabkpsWlNCelpYSjJhV05sSUhCeWIzWnBaR1ZrSUdKNUlIVnpMaUJJYjNkbGRtVnlMQ0J3YkdWaGMyVWdZMmhsWTJzZ2QybDBhQ0I1YjNWeUlHbHVkR1Z5Ym1WMElITmxjblpwWTJVZ2NISnZkbWxrWlhJZ1lXNWtJR05sYkd4MWJHRnlJR05oY25KcFpYSWdabTl5SUdGdWVTQmphR0Z5WjJWeklIUm9ZWFFnYldGNUlHbHVZM1Z5SUdGeklHRWdjbVZ6ZFd4MElHWnliMjBnY21WalpXbDJhVzVuSUdWdFlXbHNJR0Z1WkNCVFRWTWdkR1Y0ZENCdFpYTnpZV2RsY3lCMGFHRjBJSGRsSUdSbGJHbDJaWElnZFhCdmJpQjViM1Z5SUc5d2RDMXBiaUJoYm1RZ2NtVm5hWE4wY21GMGFXOXVJSGRwZEdnZ2IzVnlJR1Z0WVdsc0lHRnVaQ0JUVFZNZ2MyVnlkbWxqWlhNdUlGbHZkU0JqWVc0Z1kyRnVZMlZzSUdGMElHRnVlU0IwYVcxbExpQktkWE4wSUhSbGVIUWdKbkYxYjNRN1UxUlBVQ1p4ZFc5ME95QjBieVp1WW5Od096eG9hV2RvYkdsbmFIUWdZMnhoYzNNOUltTnZiWEJoYm5sVFRWTlFhRzl1WlZWd1pHRjBaU0krYm5Wc2JEd3ZhR2xuYUd4cFoyaDBQaTRnUVdaMFpYSWdlVzkxSUhObGJtUWdkR2hsSUZOTlV5QnRaWE56WVdkbElDWnhkVzkwTzFOVVQxQW1jWFZ2ZERzZ2RHOGdkWE1zSUhkbElIZHBiR3dnYzJWdVpDQjViM1VnWVc0Z1UwMVRJRzFsYzNOaFoyVWdkRzhnWTI5dVptbHliU0IwYUdGMElIbHZkU0JvWVhabElHSmxaVzRnZFc1emRXSnpZM0pwWW1Wa0xpQkJablJsY2lCMGFHbHpMQ0I1YjNVZ2QybHNiQ0J1YnlCc2IyNW5aWElnY21WalpXbDJaU0JUVFZNZ2JXVnpjMkZuWlhNZ1puSnZiU0IxY3k0OEwzQStDZ284Y0Q0OGMzUnliMjVuUGxsUFZWSWdVa1ZIU1ZOVVVrRlVTVTlPSUU5Q1RFbEhRVlJKVDA1VFBDOXpkSEp2Ym1jK1BDOXdQZ29LUEhBK1NXNGdZMjl1YzJsa1pYSmhkR2x2YmlCdlppQjViM1Z5SUhWelpTQnZaaUIwYUdVZ1UyVnlkbWxqWlN3Z2VXOTFJR0ZuY21WbElIUnZPand2Y0Q0S0NqeHZiRDRLQ1R4c2FUNXdjbTkyYVdSbElIUnlkV1VzSUdGalkzVnlZWFJsTENCamRYSnlaVzUwSUdGdVpDQmpiMjF3YkdWMFpTQnBibVp2Y20xaGRHbHZiaUJoWW05MWRDQjViM1Z5YzJWc1ppQmhjeUJ3Y205dGNIUmxaQ0JpZVNCMGFHVWdVMlZ5ZG1salpTWWpNems3Y3lCeVpXZHBjM1J5WVhScGIyNGdabTl5YlNBb2MzVmphQ0JwYm1admNtMWhkR2x2YmlCaVpXbHVaeUIwYUdVZ0puRjFiM1E3VW1WbmFYTjBjbUYwYVc5dUlFUmhkR0VtY1hWdmREc3BJR0Z1WkR3dmJHaytDZ2s4YkdrK2JXRnBiblJoYVc0Z1lXNWtJSEJ5YjIxd2RHeDVJSFZ3WkdGMFpTQjBhR1VnVW1WbmFYTjBjbUYwYVc5dUlFUmhkR0VnZEc4Z2EyVmxjQ0JwZENCMGNuVmxMQ0JoWTJOMWNtRjBaU3dnWTNWeWNtVnVkQ0JoYm1RZ1kyOXRjR3hsZEdVdUlFbG1JSGx2ZFNCd2NtOTJhV1JsSUdGdWVTQnBibVp2Y20xaGRHbHZiaUIwYUdGMElHbHpJSFZ1ZEhKMVpTd2dhVzVoWTJOMWNtRjBaU3dnYm05MElHTjFjbkpsYm5RZ2IzSWdhVzVqYjIxd2JHVjBaU3dnYjNJZ2QyVWdhR0YyWlNCeVpXRnpiMjVoWW14bElHZHliM1Z1WkhNZ2RHOGdjM1Z6Y0dWamRDQjBhR0YwSUhOMVkyZ2dhVzVtYjNKdFlYUnBiMjRnYVhNZ2RXNTBjblZsTENCcGJtRmpZM1Z5WVhSbExDQnViM1FnWTNWeWNtVnVkQ0J2Y2lCcGJtTnZiWEJzWlhSbExDQjNaU0JvWVhabElIUm9aU0J5YVdkb2RDQjBieUJ6ZFhOd1pXNWtJRzl5SUR4emRISnZibWMrUEhOd1lXNGdjM1I1YkdVOUltTnZiRzl5T2lOR1JqQXdNREE3SWo1MFpYSnRhVzVoZEdVZ2VXOTFjaUJoWTJOdmRXNTBMM0J5YjJacGJHVWdZVzVrSUhKbFpuVnpaU0JoYm5rZ1lXNWtJR0ZzYkNCamRYSnlaVzUwSUc5eUlHWjFkSFZ5WlNCMWMyVWdiMllnZEdobElGTmxjblpwWTJVZ0tHOXlJR0Z1ZVNCd2IzSjBhVzl1SUhSb1pYSmxiMllwTGp3dmMzQmhiajQ4TDNOMGNtOXVaejQ4TDJ4cFBnbzhMMjlzUGdvS1BIQStKbTVpYzNBN1BDOXdQZ284YUdsbmFHeHBaMmgwSUdOc1lYTnpQU0pqYjIxd1lXNTVUbUZ0WlZWd1pHRjBaU0krVG1GemRIa2dVR1Z5Wm05eWJXRnVZMlU4TDJocFoyaHNhV2RvZEQ0OFluSWdMejRLUEdocFoyaHNhV2RvZENCamJHRnpjejBpWTI5dGNHRnVlVUZrWkhKbGMzTlZjR1JoZEdVaVBqSXdNelVnVXk0Z1JXRnpkSGR2YjJRZ1JISXVMQ0JYYjI5a2MzUnZZMnNzSUVsTUlEWXdNRGs0UEM5b2FXZG9iR2xuYUhRK1BHSnlJQzgrQ2p4b2FXZG9iR2xuYUhRZ1kyeGhjM005SW1OdmJYQmhibmxRYUc5dVpWVndaR0YwWlNJK0tEZzBOeWtnTkRVNExUUTROVGc4TDJocFoyaHNhV2RvZEQ0OFluSWdMejRLUEdocFoyaHNhV2RvZENCamJHRnpjejBpWTI5dGNHRnVlVVZ0WVdsc1ZYQmtZWFJsSWo1dVlYUmxRRzVoYzNSNWNHVnlabTl5YldGdVkyVXVZMjl0UEM5b2FXZG9iR2xuYUhRKyIsInByaXZhY3kiOiJQSEErUEhOMGNtOXVaejVRVWtsV1FVTlpQQzl6ZEhKdmJtYytQQzl3UGdvS1BIQStQSE4wY205dVp6NVVhR1VnYVc1bWIzSnRZWFJwYjI0Z2NISnZkbWxrWldRZ1pIVnlhVzVuSUhSb2FYTWdjbVZuYVhOMGNtRjBhVzl1SUdseklHdGxjSFFnY0hKcGRtRjBaU0JoYm1RZ1kyOXVabWxrWlc1MGFXRnNMQ0JoYm1RZ2QybHNiQ0J1WlhabGNpQmlaU0JrYVhOMGNtbGlkWFJsWkN3Z1kyOXdhV1ZrTENCemIyeGtMQ0IwY21Ga1pXUWdiM0lnY0c5emRHVmtJR2x1SUdGdWVTQjNZWGtzSUhOb1lYQmxJRzl5SUdadmNtMHVJRlJvYVhNZ2FYTWdiM1Z5SUdkMVlYSmhiblJsWlM0OEwzTjBjbTl1Wno0OEwzQStDZ284Y0Q0OGMzUnliMjVuUGtsT1JFVk5Ua2xVV1R3dmMzUnliMjVuUGp3dmNENEtDanh3UGp4bGJUNVpiM1VnWVdkeVpXVWdkRzhnYVc1a1pXMXVhV1o1SUdGdVpDQm9iMnhrSUhWekxDQmhibVFnYVhSeklITjFZbk5wWkdsaGNtbGxjeXdnWVdabWFXeHBZWFJsY3l3Z2IyWm1hV05sY25Nc0lHRm5aVzUwY3l3Z1kyOHRZbkpoYm1SbGNuTWdiM0lnYjNSb1pYSWdjR0Z5ZEc1bGNuTXNJR0Z1WkNCbGJYQnNiM2xsWlhNc0lHaGhjbTFzWlhOeklHWnliMjBnWVc1NUlHTnNZV2x0SUc5eUlHUmxiV0Z1WkN3Z2FXNWpiSFZrYVc1bklISmxZWE52Ym1GaWJHVWdZWFIwYjNKdVpYbHpKaU16T1RzZ1ptVmxjeXdnYldGa1pTQmllU0JoYm5rZ2RHaHBjbVFnY0dGeWRIa2daSFZsSUhSdklHOXlJR0Z5YVhOcGJtY2diM1YwSUc5bUlFTnZiblJsYm5RZ2VXOTFJSEpsWTJWcGRtVXNJSE4xWW0xcGRDd2djbVZ3Ykhrc0lIQnZjM1FzSUhSeVlXNXpiV2wwSUc5eUlHMWhhMlVnWVhaaGFXeGhZbXhsSUhSb2NtOTFaMmdnZEdobElGTmxjblpwWTJVc0lIbHZkWElnZFhObElHOW1JSFJvWlNCVFpYSjJhV05sTENCNWIzVnlJR052Ym01bFkzUnBiMjRnZEc4Z2RHaGxJRk5sY25acFkyVXNJSGx2ZFhJZ2RtbHZiR0YwYVc5dUlHOW1JSFJvWlNCVVQxTXNJRzl5SUhsdmRYSWdkbWx2YkdGMGFXOXVJRzltSUdGdWVTQnlhV2RvZEhNZ2IyWWdZVzV2ZEdobGNpNDhMMlZ0UGp3dmNENEtDanh3UGp4emRISnZibWMrUkVsVFEweEJTVTFGVWlCUFJpQlhRVkpTUVU1VVNVVlRQQzl6ZEhKdmJtYytQQzl3UGdvS1BIQStQSE4wY205dVp6NVpUMVVnUlZoUVVrVlRVMHhaSUZWT1JFVlNVMVJCVGtRZ1FVNUVJRUZIVWtWRklGUklRVlE2UEM5emRISnZibWMrUEM5d1Bnb0tQRzlzUGdvSlBHeHBQbGxQVlZJZ1ZWTkZJRTlHSUZSSVJTQlRSVkpXU1VORklFbFRJRUZVSUZsUFZWSWdVMDlNUlNCU1NWTkxMaUJVU0VVZ1UwVlNWa2xEUlNCSlV5QlFVazlXU1VSRlJDQlBUaUJCVGlBbWNYVnZkRHRCVXlCSlV5WnhkVzkwT3lCQlRrUWdKbkYxYjNRN1FWTWdRVlpCU1V4QlFreEZKbkYxYjNRN0lFSkJVMGxUTGlBc0xpQkJUa1FnVlZNc0lFbFVKaU16T1R0VElFTlZVMVJQVFVWU1V5d2dSVmhRVWtWVFUweFpJRVJKVTBOTVFVbE5VeUJCVEV3Z1YwRlNVa0ZPVkVsRlV5QlBSaUJCVGxrZ1MwbE9SQ3dnVjBoRlZFaEZVaUJGV0ZCU1JWTlRJRTlTSUVsTlVFeEpSVVFzSUVsT1EweFZSRWxPUnl3Z1FsVlVJRTVQVkNCTVNVMUpWRVZFSUZSUElGUklSU0JKVFZCTVNVVkVJRmRCVWxKQlRsUkpSVk1nVDBZZ1RVVlNRMGhCVGxSQlFrbE1TVlJaTENCR1NWUk9SVk5USUVaUFVpQkJJRkJCVWxSSlExVk1RVklnVUZWU1VFOVRSU0JCVGtRZ1RrOU9MVWxPUmxKSlRrZEZUVVZPVkM0OEwyeHBQZ29KUEd4cFBrMUJTMFZUSUU1UElGZEJVbEpCVGxSWklGUklRVlFnS0drcElGUklSU0JUUlZKV1NVTkZJRmRKVEV3Z1RVVkZWQ0JaVDFWU0lGSkZVVlZKVWtWTlJVNVVVeXdnS0dscEtTQlVTRVVnVTBWU1ZrbERSU0JYU1V4TUlFSkZJRlZPU1U1VVJWSlNWVkJVUlVRc0lGUkpUVVZNV1N3Z1UwVkRWVkpGTENCUFVpQkZVbEpQVWkxR1VrVkZMQ0FvYVdscEtTQlVTRVVnVWtWVFZVeFVVeUJVU0VGVUlFMUJXU0JDUlNCUFFsUkJTVTVGUkNCR1VrOU5JRlJJUlNCVlUwVWdUMFlnVkVoRklGTkZVbFpKUTBVZ1YwbE1UQ0JDUlNCQlEwTlZVa0ZVUlNCUFVpQlNSVXhKUVVKTVJTd2dRVTVFSUNocGRpa2dRVTVaSUVWU1VrOVNVeUJKVGlCVVNFVWdVMDlHVkZkQlVrVWdWMGxNVENCQ1JTQkRUMUpTUlVOVVJVUXVQQzlzYVQ0S0NUeHNhVDVCVGxrZ1RVRlVSVkpKUVV3Z1JFOVhUa3hQUVVSRlJDQlBVaUJQVkVoRlVsZEpVMFVnVDBKVVFVbE9SVVFnVkVoU1QxVkhTQ0JVU0VVZ1ZWTkZJRTlHSUZSSVJTQlRSVkpXU1VORklFbFRJRVJQVGtVZ1FWUWdXVTlWVWlCUFYwNGdSRWxUUTFKRlZFbFBUaUJCVGtRZ1VrbFRTeUJCVGtRZ1ZFaEJWQ0JaVDFVZ1YwbE1UQ0JDUlNCVFQweEZURmtnVWtWVFVFOU9VMGxDVEVVZ1JrOVNJRUZPV1NCRVFVMUJSMFVnVkU4Z1dVOVZVaUJEVDAxUVZWUkZVaUJUV1ZOVVJVMGdUMUlnVEU5VFV5QlBSaUJFUVZSQklGUklRVlFnVWtWVFZVeFVVeUJHVWs5TklGUklSU0JFVDFkT1RFOUJSQ0JQUmlCQlRsa2dVMVZEU0NCTlFWUkZVa2xCVEM0OEwyeHBQZ29KUEd4cFBrNVBJRUZFVmtsRFJTQlBVaUJKVGtaUFVrMUJWRWxQVGl3Z1YwaEZWRWhGVWlCUFVrRk1JRTlTSUZkU1NWUlVSVTRzSUU5Q1ZFRkpUa1ZFSUVKWklGbFBWU0JHVWs5TklFOVNJRlJJVWs5VlIwZ2dUMUlnUmxKUFRTQlVTRVVnVTBWU1ZrbERSU0JUU0VGTVRDQkRVa1ZCVkVVZ1FVNVpJRmRCVWxKQlRsUlpJRTVQVkNCRldGQlNSVk5UVEZrZ1UxUkJWRVZFSUVsT0lGUklSU0JVVDFNdVBDOXNhVDRLUEM5dmJENEtDanh3UGp4emRISnZibWMrVEVsTlNWUkJWRWxQVGlCUFJpQk1TVUZDU1V4SlZGazhMM04wY205dVp6NDhMM0ErQ2dvOGNENVpUMVVnUlZoUVVrVlRVMHhaSUZWT1JFVlNVMVJCVGtRZ1FVNUVJRUZIVWtWRklGUklRVlFnUVU1RUlGTklRVXhNSUU1UFZDQkNSU0JNU1VGQ1RFVWdSazlTSUVGT1dTQkVTVkpGUTFRc0lFbE9SRWxTUlVOVUxDQkpUa05KUkVWT1ZFRk1MQ0JUVUVWRFNVRk1MQ0JEVDA1VFJWRlZSVTVVU1VGTUlFOVNJRVZZUlUxUVRFRlNXU0JFUVUxQlIwVlRMQ0JKVGtOTVZVUkpUa2NnUWxWVUlFNVBWQ0JNU1UxSlZFVkVJRlJQTENCRVFVMUJSMFZUSUVaUFVpQk1UMU5USUU5R0lGQlNUMFpKVkZNc0lFZFBUMFJYU1V4TUxDQlZVMFVzSUVSQlZFRWdUMUlnVDFSSVJWSWdTVTVVUVU1SFNVSk1SU0JNVDFOVFJWTWdLRVZXUlU0Z1NVWWdTRUZUSUVKRlJVNGdRVVJXU1ZORlJDQlBSaUJVU0VVZ1VFOVRVMGxDU1V4SlZGa2dUMFlnVTFWRFNDQkVRVTFCUjBWVEtTd2dVa1ZUVlV4VVNVNUhJRVpTVDAwNlBDOXdQZ29LUEc5c1Bnb0pQR3hwUGxSSVJTQlZVMFVnVDFJZ1ZFaEZJRWxPUVVKSlRFbFVXU0JVVHlCVlUwVWdWRWhGSUZORlVsWkpRMFU3UEM5c2FUNEtDVHhzYVQ1VVNFVWdRMDlUVkNCUFJpQlFVazlEVlZKRlRVVk9WQ0JQUmlCVFZVSlRWRWxVVlZSRklFZFBUMFJUSUVGT1JDQlRSVkpXU1VORlV5QlNSVk5WVEZSSlRrY2dSbEpQVFNCQlRsa2dSMDlQUkZNc0lFUkJWRUVzSUVsT1JrOVNUVUZVU1U5T0lFOVNJRk5GVWxaSlEwVlRJRkJWVWtOSVFWTkZSQ0JQVWlCUFFsUkJTVTVGUkNCUFVpQk5SVk5UUVVkRlV5QlNSVU5GU1ZaRlJDQlBVaUJVVWtGT1UwRkRWRWxQVGxNZ1JVNVVSVkpGUkNCSlRsUlBJRlJJVWs5VlIwZ2dUMUlnUmxKUFRTQlVTRVVnVTBWU1ZrbERSVHM4TDJ4cFBnb0pQR3hwUGxWT1FWVlVTRTlTU1ZwRlJDQkJRME5GVTFNZ1ZFOGdUMUlnUVV4VVJWSkJWRWxQVGlCUFJpQlpUMVZTSUZSU1FVNVRUVWxUVTBsUFRsTWdUMUlnUkVGVVFUczhMMnhwUGdvSlBHeHBQbE5VUVZSRlRVVk9WRk1nVDFJZ1EwOU9SRlZEVkNCUFJpQkJUbGtnVkVoSlVrUWdVRUZTVkZrZ1QwNGdWRWhGSUZORlVsWkpRMFU3SUU5U1BDOXNhVDRLQ1R4c2FUNUJUbGtnVDFSSVJWSWdUVUZVVkVWU0lGSkZURUZVU1U1SElGUlBJRlJJUlNCVFJWSldTVU5GTGp3dmJHaytDand2YjJ3K0NnbzhjRDQ4ZFQ1Q2VTQnlaV2RwYzNSbGNtbHVaeUJoYm1RZ2MzVmljMk55YVdKcGJtY2dkRzhnYjNWeUlHVnRZV2xzSUdGdVpDQlRUVk1nYzJWeWRtbGpaU3dnWW5rZ2IzQjBMV2x1TENCdmJteHBibVVnY21WbmFYTjBjbUYwYVc5dUlHOXlJR0o1SUdacGJHeHBibWNnYjNWMElHRWdZMkZ5WkN3Z0puRjFiM1E3ZVc5MUlHRm5jbVZsSUhSdklIUm9aWE5sSUZSRlVrMVRJRTlHSUZORlVsWkpRMFVtY1hWdmREc2dZVzVrSUhsdmRTQmhZMnR1YjNkc1pXUm5aU0JoYm1RZ2RXNWtaWEp6ZEdGdVpDQjBhR1VnWVdKdmRtVWdkR1Z5YlhNZ2IyWWdjMlZ5ZG1salpTQnZkWFJzYVc1bFpDQmhibVFnWkdWMFlXbHNaV1FnWm05eUlIbHZkU0IwYjJSaGVTNDhMM1UrUEM5d1Bnb0tQSEErSm01aWMzQTdQQzl3UGdvOGFHbG5hR3hwWjJoMElHTnNZWE56UFNKamIyMXdZVzU1VG1GdFpWVndaR0YwWlNJK1RtRnpkSGtnVUdWeVptOXliV0Z1WTJVOEwyaHBaMmhzYVdkb2RENDhZbklnTHo0S1BHaHBaMmhzYVdkb2RDQmpiR0Z6Y3owaVkyOXRjR0Z1ZVVGa1pISmxjM05WY0dSaGRHVWlQakl3TXpVZ1V5NGdSV0Z6ZEhkdmIyUWdSSEl1TENCWGIyOWtjM1J2WTJzc0lFbE1JRFl3TURrNFBDOW9hV2RvYkdsbmFIUStQR0p5SUM4K0NqeG9hV2RvYkdsbmFIUWdZMnhoYzNNOUltTnZiWEJoYm5sUWFHOXVaVlZ3WkdGMFpTSStLRGcwTnlrZ05EVTRMVFE0TlRnOEwyaHBaMmhzYVdkb2RENDhZbklnTHo0S1BHaHBaMmhzYVdkb2RDQmpiR0Z6Y3owaVkyOXRjR0Z1ZVVWdFlXbHNWWEJrWVhSbElqNXVZWFJsUUc1aGMzUjVjR1Z5Wm05eWJXRnVZMlV1WTI5dFBDOW9hV2RvYkdsbmFIUSsifQ==

Terms of Service

Privacy Policy

Core Modal Title

Sorry, no results found

You Might Find These Articles Interesting

T
Please Check Your Email
We Will Be Following Up Shortly
*
*
*