Nasty Performance ~ 847-458-4858 

  • Blog Home
  • Categories
    • Motorcycle Maintenance
    • Riding Tips & Preps
    • Safety & Inspection
    • Customizations & Upgrades
    • DIY Motorcycle Repairs
    • Motocycle Audio Systems
    • Motocycle Seasonal Care & Storage
    • Engine, Electrical Performance
  • Bike Night
  • Nasty Performance Motorcycle Shop
July 13.2026
1 Minute Read

Signs Your Motorcycle Needs Suspension Tuning

Did you know that studies show improper suspension tuning can contribute to nearly 30% of motorcycle handling-related accidents? Most riders focus on power and tires, but fail to recognize early signs that their motorcycle suspension needs tuning—a silent factor that could transform your ride’s safety and comfort. This comprehensive guide brings you everything you need to spot, diagnose, and address suspension issues, ensuring your motorcycle suspension setup is truly set correctly for every journey.

Why Motorcycle Suspension Tuning Matters

Motorcycle suspension tuning isn't just a performance upgrade—it's a core safety requirement. The suspension setup on your bike controls how the motorcycle responds to the road, manages weight transfer during acceleration and braking, and supports both comfort and stability while you ride. Many riders overlook the complexity of adjusting suspension, assuming the factory settings will suit every scenario or riding style—this can’t be further from the truth.

Factory suspension set configurations are intentionally generic, intended for an average weight and street bike usage profile. But your suspension setup needs to match your body weight, preferred riding style, and even changing cargo or passenger loads. When your motorcycle suspension is not tuned for your actual riding conditions, you risk not just discomfort but potential danger: poor traction, unpredictable handling, and increased risk of sudden instability in critical moments. Suspensions are not a “set and forget” element—attentive tuning means improved safety, better control, and a more enjoyable ride every time you hit the road.

The Impact of Motorcycle Suspension on Safety and Comfort

An optimally tuned suspension acts like a shock absorber for every aspect of your ride—it helps your front end and rear shock maintain tire contact, absorb road imperfections, and manage cornering forces. If your front fork is set incorrectly, you might experience a harsh ride or excessive front end dive, undermining confidence and precision. The rear shock, meanwhile, counteracts the bumps that could throw off your balance or cause your rear tire to lose grip. Together, front and rear suspension components are the difference between a ride that feels grounded and controlled or one that feels unstable and unpredictable.

Poor motorcycle suspension tuning not only reduces comfort—leading to fatigue and less enjoyable journeys—but it can also directly compromise safety through loss of control, especially under heavy braking or aggressive maneuvering. When correctly set, suspension improves handling, maximizes your tire’s lifespan, and ensures rider confidence, making every ride not just smoother, but genuinely safer.

Dynamic motorcycle riding scene, emphasizing motorcycle suspension tuning, with a motorcyclist confidently leaning into a curve on a modern sport bike under golden hour lighting

What You'll Learn About Motorcycle Suspension Tuning

  • Key signs your motorcycle needs suspension tuning
  • The roles of front end, front fork, and rear shock
  • How to perform or request a suspension setup
  • Answers to common questions on motorcycle suspension tuning

Startling Facts: Motorcycle Suspension Tuning and Its Overlooked Importance

Motorcycle riders often invest in high-performance tires or exhaust systems but neglect the motorcycle suspension—a key link between the bike and the road. "Many riders underestimate how significantly proper suspension tuning affects both handling and safety. " In reality, a poorly tuned suspension setup can overshadow the benefits of even the best tires or brakes, and improper adjusting suspension can lead to unpredictable handling, especially on rough or unfamiliar roads.

While understanding the signs of suspension issues is crucial, it's equally important to recognize how seasonal changes can impact your bike's overall performance. For practical advice on keeping your motorcycle in top shape throughout the year, explore these essential seasonal bike care secrets every rider should know.

Recognizing the Signs: When Your Motorcycle Needs Suspension Tuning

So, how can you tell when it’s time to check your motorcycle suspension setup? Listening to your bike is the first and most important step. Certain symptoms show up long before more serious mechanical problems emerge. Recognizing these early warnings will keep your suspension set within the ideal range and ensure every component—from the front fork to the rear shock—works in harmony for a confident ride.

Riders who learn to spot trouble with the front end or preload adjuster become proactive in their maintenance, often catching small issues before they become expensive or dangerous. The key is to notice how the motorcycle reacts in different scenarios: braking, hitting bumps, or entering a curve. If your bike behaves unpredictably, don’t ignore it—it’s time for a closer look at your suspension setup.

Symptoms of Poor Motorcycle Suspension

  • Excessive nose dive during braking
  • Harsh ride over bumps
  • Bottoming out on rough roads
  • Instability in corners

These symptoms are telltale signs that your suspension set may not be reacting as it should. Excessive nose dive, for example, indicates weakness in the front fork or incorrect preload set, while a harsh ride signals that damping or compression and rebound settings are off. Bottoming out—when the suspension fully compresses and hits its limit—often points to a low spring rate or insufficient preload, affecting both front and rear. Instability in corners can suggest your front end or rear shock is not set correctly, putting both comfort and control at risk.

Concerned rider checks motorcycle front fork for suspension tuning issues; focus on fork caps, modern riding gear, in well-lit garage

Front End and Front Fork Issues

The front end of your motorcycle—including the front fork and fork legs—bears a significant load, especially during braking and cornering. When the front fork isn’t set correctly, several problems become apparent. You may feel the front wheel chatter or skip over bumps, or the fork may bottom out (“fork bottom”) over sharp impacts, indicating weak springs or inadequate dampening.

Issues within the front end can be subtle, such as vague steering or unexpected instability, particularly when the suspension fully extends after a heavy bump. This can result from incorrect static sag—the amount the suspension compresses under the bike’s weight—or worn fork oil, which reduces smoothness and control. Riders should check for oil leaks and ensure the front fork moves cleanly throughout its travel, as sticky or inconsistent motion can indicate critical maintenance is needed.

Rear Shock Warning Signs

The rear shock is responsible for maintaining contact and control at the rear tire, especially through turns and when carrying extra weight. When the rear shock is worn or out of adjustment, you’ll notice symptoms like excessive squat during acceleration, a bouncy ride over bumps, or the rear end feeling loose and unpredictable.

Bottoming out at the rear is a red flag that the preload or spring rate is too low, or damping is not set correctly. On the other hand, if the ride feels harsh or the rear tire skips over bumps, this could result from excessive preload or inappropriate compression and rebound settings. Inspection of the shock for oil leaks and checking the preload adjuster offers clues about the health of your rear suspension setup.
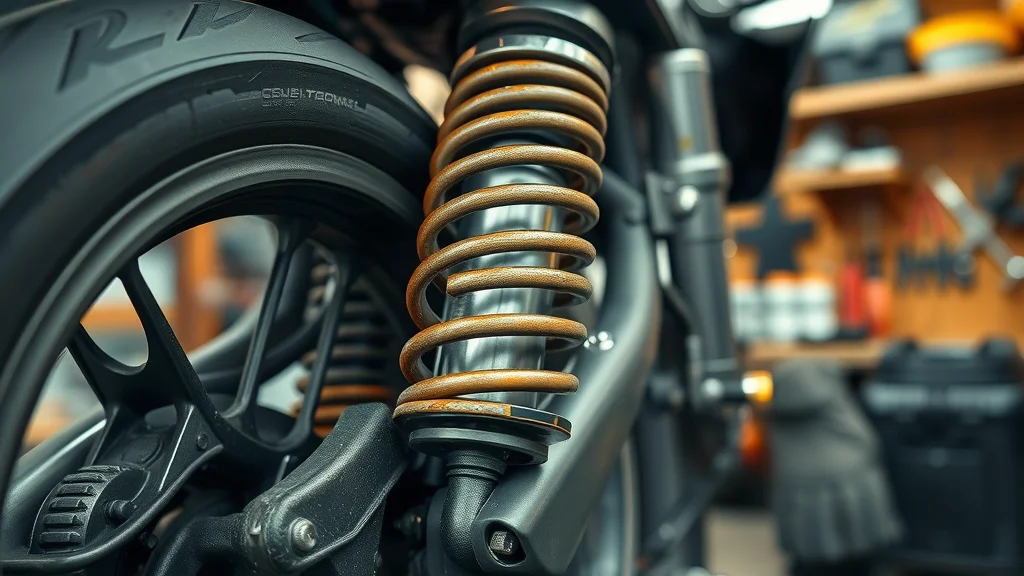
Close-up detail of motorcycle rear shock absorber showing signs needing suspension tuning in a workshop setting

Unresponsive Preload Adjuster Problems

Most modern motorcycles feature preload adjusters for quick setup. If these become unresponsive or difficult to turn, the problem could run deeper. A seized or stuck preload adjuster could indicate internal rust, worn threads, or insufficient lubrication—all of which threaten the precision of your suspension set and can quickly lead to uneven or unsafe handling.

Regularly inspect the adjuster for smoothness and ensure settings can be made with basic tools. If the preload adjuster won’t move despite proper technique, don’t apply excessive force—this is a sign to consult a professional, as forcing the mechanism can damage critical internal components of the front fork or rear shock.

How to Check Motorcycle Suspension Setup

Routine inspection of your motorcycle suspension ensures you identify problems before they impact safety or ride quality. Performing these checks yourself helps develop a “feel” for your bike and encourages a proactive approach to maintenance. Suspension on your bike should be checked when you notice changes in handling, before and after changing loads (like adding a passenger), or at set service intervals.

Remember, even small changes in tire pressure, cargo, or riding style can impact how the suspension behaves. Never neglect regular assessment—check front and rear sag, watch out for oil leaks, inspect the action of your forks and shock, and record your preferred suspension setup settings for quick reference in the future.

Step-by-Step: Inspecting Your Front Fork

Begin with the motorcycle upright and fully extended—this “unloaded” position is your starting point. Gently press down on the front end, feeling for smooth and consistent movement in the front fork. If you hear squeaks, feel sticky spots, or notice oil residue near the seals, immediate attention is required. Measure the static sag by comparing the length of the fork when fully extended to where it sits under the bike’s weight; this helps determine if your spring rate is within the ideal range. Don’t forget to test fork rebound by compressing and releasing—the fork should return smoothly without bouncing.

Check the tightness of every bolt, especially around the axle and triple clamps. If the fork bottom tube shows scuffs or oil, this can indicate worn seals or improper setup. Working through these steps helps you catch early warning signs and maintain a balanced, responsive front end ride.

Dialing in the Correct Rear Shock Settings

The rear shock is adjusted for both preload and damping. Using a spanner wrench, turn the preload collar so the bike’s static sag sits in the recommended range for your weight and riding style (often around 30–35mm for street bikes). Adjusting suspension settings too far from this range may lead to a harsh ride or too much travel, causing the rear end to feel loose or unpredictable.

Next, fine-tune the rebound and compression adjustments to ensure the shock absorbs bumps without causing a pogo effect. Adjust these settings incrementally—a quarter or half turn at a time—then test ride to feel the results. Make note of each change, so you have a precise log of what feels best for your suspension setup.
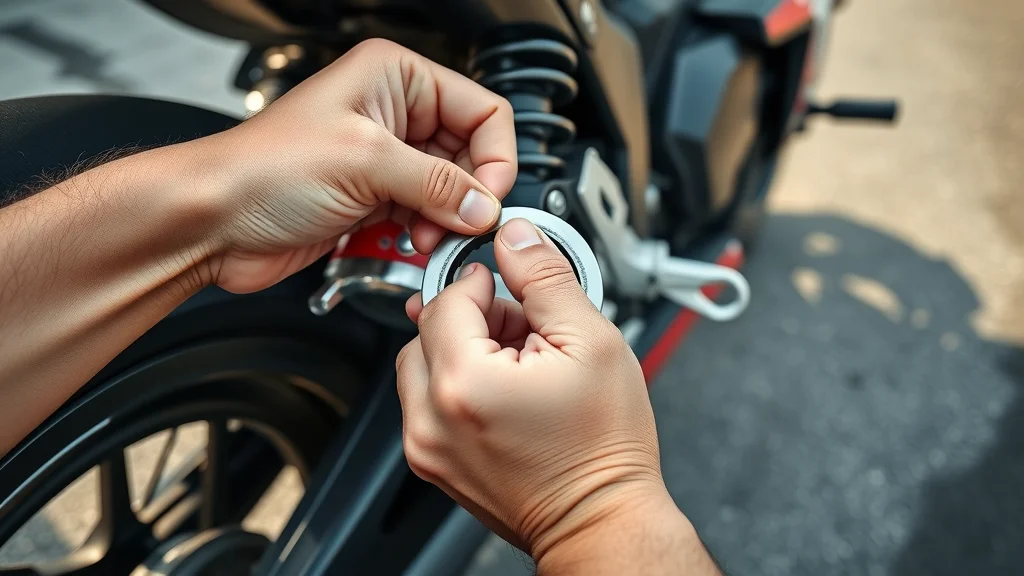
Hands adjusting preload collar on motorcycle rear shock for proper suspension tuning with clear focus on adjuster, close-up detail

Common Motorcycle Suspension Issues vs. Ideal Suspension Feel

Common Motorcycle Suspension Issues vs. Ideal Suspension Feel
Symptom Possible Cause Suggested Action
Nose dive under braking Weak front fork springs Adjust preload / upgrade springs
Harsh over bumps Incorrect damping Tune damping or service suspension
Bottoms out Low preload/rear shock Adjust preload / check shock

Common Misconceptions About Motorcycle Suspension Tuning

Many riders believe that motorcycle suspension tuning is only for professional racers or highly technical enthusiasts. In fact, every motorcycle owner benefits from regular suspension checks and adjustments. "Suspension setup is not just for racers—every rider benefits from proper tuning. " Another myth is that factory settings don’t need adjusting. However, manufacturers set up suspensions for “average” riders, and rarely do these generic setups match your unique riding style, weight, and local road conditions. Neglecting suspension setup can degrade both safety and riding pleasure—regular adjusting suspension is essential maintenance, not just an optional upgrade.

Professional vs. DIY: Adjusting Suspension and Suspension Setup

There’s a balance between performing basic motorcycle suspension adjustments at home and knowing when to consult the pros. Setting static sag, adjusting basic preload, and minor damping tweaks are manageable for most riders, requiring only a few tools and attention to detail. However, advanced tasks like rebuilding shocks, replacing fork oil, or diagnosing persistent instability should always be left to experienced professionals to ensure safety and proper component performance.

Deciding when to trust your own skills versus seeking expert help hinges on the complexity of the issue, available tools, and your mechanical confidence. When in doubt, consulting a suspension specialist prevents expensive mistakes and ensures your suspension fully serves its purpose—connecting you securely to the road.

When to Seek Expert Suspension Tuning

If you’ve adjusted preload or damping and still encounter instability, excessive wear, or leaks, it’s time to see a qualified technician. Expert tuners possess tools such as dynamometers, precise measuring equipment, and a wealth of experience diagnosing subtle ride issues. Tasks like custom spring selection, full suspension rebuilds, and detailed damping adjustments are best left to those with specialized knowledge, ensuring your bike’s front and rear suspensions are perfectly matched and set correctly.
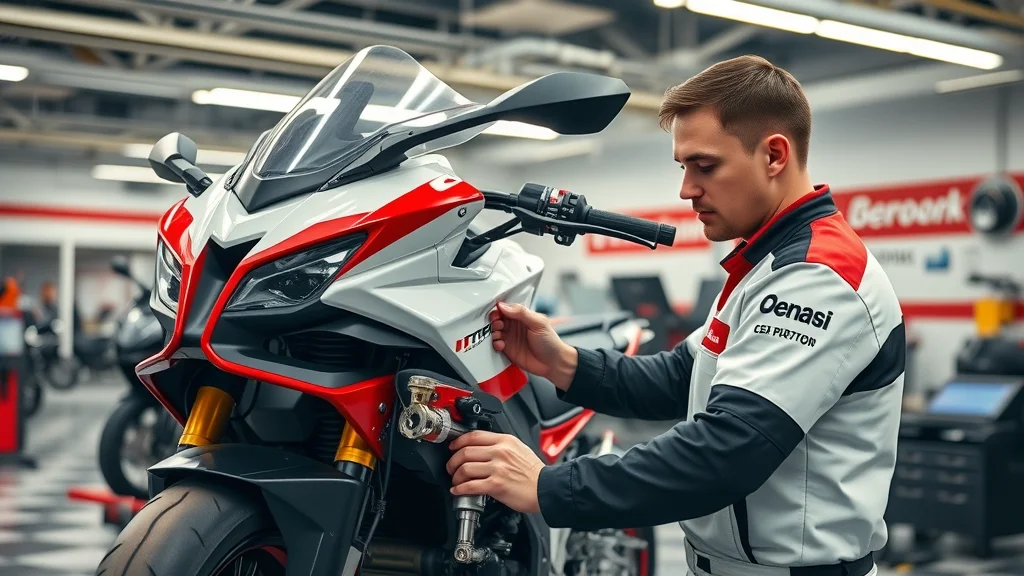
Expert motorcycle technician adjusts suspension in a professional workshop for optimal suspension setup

Basic DIY Motorcycle Suspension Adjustments

Many adjustments—including setting static sag and minor tweaks to the preload adjuster—can be performed at home. Start by referencing your owner’s manual, ensuring your bike is upright and stabilized before making changes. Use proper tools to avoid damaging components. Gradually adjust preload, compression, and rebound—testing after each turn—until you reach a suspension setup that feels balanced both front and rear.

Don't forget to logically document every modification—keep notes of original settings and changes made, so you can easily return to a known good starting point if the results aren’t as expected. If your bike behaves erratically after an adjustment, or the suspension remains unresponsive, revisiting a professional may be necessary.

Frequently Asked Questions on Motorcycle Suspension Tuning

  • How often should motorcycle suspension be tuned?
    Inspect your motorcycle suspension every 6,000–12,000 miles, or anytime you notice a change in handling, add a frequent passenger, or adjust riding style. Regular inspection helps catch problems early and keeps your suspension set within safe limits.
  • What are the most common signs my motorcycle suspension needs adjustment?
    Look for excessive nose-dive under braking, harshness over bumps, rear end bottoming out, or loss of composure in corners. These symptoms suggest your front fork or rear shock needs attention.
  • Does rider weight affect suspension setup?
    Absolutely. Your personal and cargo weight directly impacts static sag and spring performance, requiring adjustments to maintain stability and comfort. Heavier or lighter riders must always set sag accordingly for both front and rear.
  • Can improper motorcycle suspension tuning cause damage?
    Yes—a poorly tuned suspension accelerates wear on tires and bushings, increases fatigue on components, and can compromise safety in emergency scenarios by failing to keep the front wheel and rear tire in consistent contact with the road.

People Also Ask: Motorcycle Suspension Tuning

What happens if motorcycle suspension is not tuned properly?

A motorcycle with untuned suspension can feel unstable, handle poorly, and put both comfort and safety at risk.

How do I know if I need to adjust my motorcycle suspension?

Watch for symptoms such as instability in turns, excessive bounce, or discomfort over bumps—these are key indicators your motorcycle suspension tuning is required.

Is it difficult to perform motorcycle suspension tuning on my own?

Basic adjustments are manageable for most riders—with the right tools and guides, simple tuning can be done DIY, but complex tuning should be handled by professionals.

Key Takeaways for Motorcycle Suspension Tuning

  • Proper motorcycle suspension tuning enhances safety and ride quality
  • Regular inspection identifies suspension setup issues early
  • Both front fork and rear shock play crucial roles
  • Professional guidance is recommended for complex tuning

Take the Next Step: Ensure Your Motorcycle Suspension Is Tuned Right

Mastering your motorcycle’s suspension is just one part of a comprehensive maintenance routine that keeps your ride safe and enjoyable all year long. If you’re ready to elevate your bike care beyond the basics, consider how seasonal factors—from temperature swings to road conditions—can influence your maintenance priorities. For a deeper dive into holistic motorcycle upkeep and to uncover expert strategies for every riding season, check out the full guide on seasonal bike care secrets every rider must know. Expanding your knowledge in this area will help you anticipate issues before they arise and ensure your motorcycle performs at its best, no matter the time of year.


Call Nasty Performance Motorcycle Shop Today: 847-458-4858

Motorcycle Maintenance

0 Comments

Write A Comment

*
*
Please complete the captcha to submit your comment.
Related Posts All Posts

Tips on When to Conduct Your Motorcycle Lubrication Maintenance

Did you know that a staggering amount of motorcycle breakdowns are easily preventable? Regular, well-timed motorcycle lubrication maintenance doesn’t just keep your ride smooth—it’s your best defense against costly repairs and sudden mechanical failures. Neglecting something as simple as chain cleaning or brake lever lubrication can shorten the life of your motorcycle by thousands of miles. In this comprehensive guide, you'll uncover expert tips, techniques, and schedules that will have your bike running cleaner, quieter, and longer, whether you’re a daily commuter, a weekend adventurer, or a first-time bike owner. Startling Facts: Why Motorcycle Lubrication Maintenance is More Important Than You Think “Over 60% of motorcycle breakdowns are preventable with regular lubrication maintenance.” — Motorcycle Maintenance Institute Motorcycle lubrication maintenance is a crucial, yet often overlooked, aspect of keeping your bike in top-notch condition. Many riders underestimate the impact of proper lubrication, but failing to clean and lubricate essential components—like your motorcycle chain, brake levers, and pivot points—can dramatically increase the chances of breakdowns, accelerated wear, and compromised safety. The act of lubricating your motorcycle isn’t just about avoiding squeaks; it’s about ensuring every journey is safe and enjoyable. Problems like increased friction, damage to rubber seals, and difficulty in operating the brake lever or clutch cable can arise when these moving parts are left dry or contaminated. A properly maintained lubrication routine extends the life of your motorcycle, saves money on repairs, and enhances riding performance. Ignoring these maintenance tasks leads to noisy, stiff parts and mounting internal damage. With modern machines featuring sealed chains and high-viscosity index motorcycle oils, not following regular cleaning and lubrication intervals could cost you more in the long run. Knowing when—and how—to maintain your bike’s moving parts can make the difference between a reliable ride and an untimely breakdown. What You’ll Learn About Motorcycle Lubrication Maintenance How to identify optimal lubrication intervals The key motorcycle parts requiring lubrication Proper techniques for motorcycle chain cleaning Common mistakes to avoid when performing motorcycle lubrication maintenance Understanding the Basics: What Is Motorcycle Lubrication Maintenance? Defining Motorcycle Lubrication Maintenance Motorcycle lubrication maintenance involves regularly cleaning, inspecting, and lubricating all the moving parts of your motorcycle that are prone to friction, wear, or corrosion. This includes the drive chain, pivot points, brake levers, and any other fittings or components that move or rotate. Keeping these parts lubricated reduces metal-to-metal contact, prevents grime from damaging rubber seals, and helps your motorcycle operate efficiently. Lubrication maintenance is not a one-time task; it requires a proactive, routine approach tailored to your riding conditions. For many riders, the focus is on the motorcycle chain—a key transfer point for engine power. However, maintenance goes beyond chain lube and chain cleaning. Components like the clutch cable, brake lever, and various pivot points also demand attention. Lubricating your motorcycle helps to ward off rust, preserve rubber seals, and maintain optimal performance. This comprehensive approach means moving parts won’t seize, and your motorcycle remains responsive and safe, mile after mile. While understanding the basics is essential, mastering the correct cleaning and lubrication process for your motorcycle chain can make a significant difference in performance and longevity. For a detailed, step-by-step approach to effective chain cleaning and lubrication, explore our guide on seasonal bike care secrets every rider must know, which covers practical maintenance routines tailored to changing weather and riding conditions. Importance of Lubrication for Motorcycle Chains and Moving Parts The motorcycle chain is responsible for transferring power from the engine to the rear wheel, making it a central element in your bike’s motion. If left unlubricated or dirty, the chain and sprocket can experience accelerated wear, decreased efficiency, and even catastrophic failure. Proper chain lube forms a protective barrier against dirt and water, keeping the drive chain operating smoothly. In addition, pivot points and brake levers require attention to ensure that every movement is effortless and that the rubber seals within these areas do not degrade prematurely. Effective lubrication reduces the risks associated with friction, heat accumulation, and corrosion. It therefore extends the life of your motorcycle’s drive chain and critical moving parts. Riding in varied weather conditions—rain, dust, or extreme heat—puts even more stress on these components, making a regular lubrication schedule essential for lasting performance and safe operation. Common Lubricants Used in Motorcycle Maintenance The best lubricant for motorcycle lubrication maintenance depends on the specific application. For motorcycle chains, use a chain-specific lube formulated to withstand high loads and resist fling-off. For sealed chains, opt for a lube that protects O-rings or X-rings without degrading the rubber seals. Multipurpose grease is excellent for pivot points like levers, kickstands, and foot controls as it stays in place and provides enduring protection. Light oils are well-suited for brake levers, clutch cables, and small linkages where a quick, thin, penetrating lubrication is needed. Avoid heavy motor oils or incompatible lubricants that may cause accumulation of debris or premature wear. Signs It’s Time for Motorcycle Lubrication Maintenance Recognizing Dry or Noisy Motorcycle Chains One of the most obvious indicators that your motorcycle needs lubrication maintenance is a dry or noisy motorcycle chain. If you hear squeaks, rattles, or harsh grinding sounds while riding, the lack of lubrication or debris buildup is likely the culprit. A clean and lubed chain should operate almost silently and smoothly. Inspect visually for dullness, rust, or signs of stretching on the drive chain. When the chain’s color changes from a fresh, metallic sheen to a brown or rusty hue, or when visible grime builds up, it’s time to clean and lubricate it. Regularly inspect for leaks or residue near rubber seals, which may also indicate the need for immediate action. Don’t ignore sudden changes in the noise or feel of your chain. Neglecting these warning signs can lead to excessive wear not only on the chain but on the sprockets and transmission as well. For sealed chains, extra caution is needed, as old lubricant and dirt trapped under the seals can cause unseen damage if left untreated. Stiff Pivot Points and Brake Lever Issues Pivot points and brake levers are essential for safe, responsive control. If you notice increased stiffness or a “sticky” sensation when operating the brake lever or clutch cable, or if the return action feels sluggish, lubrication is necessary. A dry or corroded pivot point can restrict proper movement, making these controls unreliable. Watch for a gritty, rough feeling when you squeeze the brake or clutch lever, as this means moving parts are no longer lubricated and friction is increasing. Consistent, effortless movement ensures that safety mechanisms work when you need them—especially in high-stress situations. Stiffness in these controls can also point to a buildup of old grease, dust, or incompatible lubricant. Make sure to refresh with the proper motorcycle oil or multipurpose grease, and regularly check these parts during every maintenance session. Addressing these symptoms early will extend the life of your pivot points and keep overall motorcycle handling sharp. Performance Changes and Increased Friction Another warning: reduced performance and increased friction throughout the bike, whether it’s in acceleration, braking, or responsiveness. If you notice that the motorcycle feels sluggish, doesn’t accelerate smoothly, or if you feel vibrations and dragging from the drive chain or moving parts, your lubrication maintenance may be overdue. The amount of wear can accumulate quickly—especially if you ride in wet, dusty, or urban environments where grime and debris abound. Changes in how the motorcycle chain rests on the sprockets—a loose or uneven fit, skipping, or binding—is a sign of neglect. Regular lubrication isn’t just about prevention; it’s about restoring the joy of riding and the safety margin you expect from your machine. Key Areas for Motorcycle Lubrication Maintenance Motorcycle Chain: Why Regular Chain Cleaning and Lubrication Are Essential No component is more crucial than your motorcycle chain, which must be cleaned and lubricated at regular intervals. If left dirty, sand and grime act as abrasives on rollers and sprocket teeth, quickly eroding metal parts and damaging the rubber seals in sealed chains. An unserviced chain loses flexibility and can snap or derail, posing significant danger. Chain cleaning should always precede lubrication so that debris doesn’t become trapped beneath fresh chain lube. Whether your motorcycle uses a sealed or unsealed chain, always use a specified chain cleaner, a quality chain brush, and finish with a high-viscosity chain lube. Chains on off-road bikes and motorcycles ridden in wet or gritty environments may require even more frequent cleaning and lubrication. If your bike has a center stand, use it to fully rotate the drive chain for easier cleaning and inspection. Staying consistent with chain cleaning and lube can dramatically extend the life of your motorcycle, improve throttle response, and prevent premature wear on the drivetrain components. Pivot Point Maintenance: Ensuring Smooth Movement Pivot points are the moving hinges that enable handlebars, levers, pedals, and other components to function effortlessly. Each pivot—whether it's for the clutch lever, brake pedal, gear shifter, or kickstand—should be cleaned and greased regularly using multipurpose grease or copper grease, as indicated in your manual. Lubrication prevents these high-wear areas from seizing, rusting, or developing a loose, rattling feel. For best results, fully rotate the levers and pedals as you apply lubricant, ensuring the grease reaches all contact points. Neglecting these areas leads to increased effort to operate controls and risks unexpected part failures. If a pivot point develops play or a squeaking noise, it’s a clear call for immediate maintenance. Always clean old or contaminated grease before adding new, as layering can attract excess dirt. Brake Lever Lubrication: Preventing Sticks and Slips Your brake lever is a vital safety mechanism and must always perform smoothly. Lubricating the brake lever’s pivot pin and engagement surfaces with a drop of light oil or appropriate lubricant helps keep the mechanism responsive and reduces stickiness, particularly in demanding conditions. Be careful: applying too much oil or getting lubricant near the brake pads can compromise braking ability. Before applying lubricant, clean the area thoroughly to remove any old oil, grime, or dust. If your brake lever feels gritty or resists movement, inspect for wear and lubricate as per manufacturer recommendations. Consistent brake lever maintenance ensures reliability and keeps your ride safe and precise during every stop. Additional Fittings and Components to Clean and Lube Beyond the chain and pivot points, there are several other components worth your attention: the clutch cable, throttle linkage, kickstand, foot pegs, and even helmet locks can all benefit from periodic lubrication. Focus on areas where movement creates friction or where water is likely to cause rust. Use light oil for cables and throttle linkages for rapid penetration, while heavier greases are suitable for metal-on-metal pivots or joints that absorb significant stress. Particular care should be given to rubber seals on fitting components and sealed chains to prevent drying and cracking. Each maintenance task—no matter how small—contributes to the overall health and reliability of your motorcycle, helping you avoid unpleasant surprises on your next ride. How Often Should You Perform Motorcycle Lubrication Maintenance? “Follow the maintenance schedule in your owner’s manual, but inspect your chain and moving parts more frequently under harsh riding conditions.” — Certified Motorcycle Technician Your ideal motorcycle lubrication maintenance schedule depends on how, where, and how often you ride. As a general rule, clean and lubricate your motorcycle chain every 500 miles or after riding in rain, mud, or dusty conditions. Harsh climates, city commuting, or off-road adventures demand more frequent inspections and maintenance sessions, as contaminants build up quickly. For pivot points and brake levers, inspect and lubricate every month, or more frequently if you notice stiffness or sticking. Creating a regular schedule and sticking to it is the best way to maximize the life of your motorcycle and ensure safe, enjoyable performance. Always refer to your owner’s manual for manufacturer-specific lubrication intervals, as some motorcycles with sealed chains or high-quality parts may require less frequent servicing than others. Still, regular hands-on inspections give you early warning signs—like noise, resistance, or dirt buildup—allowing you to address maintenance tasks as soon as necessary. Consistency is your ally in preventing both minor nuisances and major mechanical failures. Step-by-Step Guide: Clean and Lubricate Your Motorcycle Chain Gather the right tools and products Chain clean: Steps for effective motorcycle chain cleaning Techniques to clean and lube the chain for optimal performance Safety practices when handling cleaning agents 1. Gather the right tools and products. You’ll need a chain cleaner or degreaser, a chain brush or soft bristle brush, clean rags, and an appropriate chain lube that matches your chain and riding conditions. 2. Chain clean: Steps for effective motorcycle chain cleaning. Put your motorcycle on its center stand or rear paddock stand to fully rotate the drive chain. Spray the chain cleaner along the entire length, let it soak for a few minutes, then scrub the chain thoroughly with the brush to remove dirt, mud, and old lube. Wipe off all debris with a clean rag. 3. Techniques to clean and lube the chain for optimal performance. Once the chain is dry, rotate the rear wheel and apply fresh chain lube evenly along the inside of the chain, ensuring the lubricant penetrates all rollers and links. Avoid over-lubricating, as excess lube attracts dust and dirt. 4. Safety practices when handling cleaning agents. Always wear gloves, work in a well-ventilated area, and ensure that cleaning agents or chain lube do not contact rubber seals, tires, or braking surfaces. Dispose of used rags and chemicals responsibly. Pivot Point and Brake Lever Lubrication Techniques Identifying Critical Pivot Points Locating the critical pivot points on your motorcycle will ensure you don’t miss essential areas requiring lubrication maintenance. These usually include the clutch and brake levers, gear shifter, kickstand, rear suspension linkages, and foot controls. When inspecting, look for metal-on-metal movement—these are the areas that experience the most friction. Any visible play, squeak, or rough action is a sign to clean and add fresh lubrication. Reference your owner’s manual to confirm which pivot points require multipurpose grease and which may benefit from a lighter oil. Regular attention to these spots helps ensure smooth operation, improves the response of your drive chain, and prevents unnecessary wear or mechanical noise. Proper Process for Lubricating Brake Levers To lubricate your brake lever for optimal performance, first remove any accumulated dust or dirt with a clean cloth. Use a fine-tipped oiler or dropper bottle to place a drop or two of light oil directly onto the lever’s pivot pin and return spring. Exercise the lever several times to distribute the oil, then wipe away any excess to avoid attracting dust. Take care not to get oil on the brake pads, as this will reduce stopping power. For motorcycles with cable-actuated brakes or clutches, apply a small amount of lube directly inside the cable’s housing too. This keeps the cable moving freely and extends its lifespan. Check for smooth, consistent movement after each application—if stiffness persists, inspect for kinks or frays and address any deeper issues before resuming use. Recommended Products for Motorcycle Lubrication Maintenance When choosing lubricants for motorcycle lubrication maintenance, it’s crucial to use products formulated specifically for motorcycles. Opt for chain lubes labeled for O-ring or X-ring sealed chains if your bike uses them. For pivot points, multipurpose or copper grease provides strong metal protection without running or dripping. Light silicone sprays or light machine oils are perfect for cables, brake levers, and small linkages. Consult your owner’s manual or a certified technician if in doubt about compatibility—using the wrong product can damage rubber seals or cause excessive buildup of dirt and contaminants. Always avoid using general-purpose greases or thick motor oils for parts that demand specialized lubrication. Common Mistakes in Motorcycle Lubrication Maintenance (And How to Avoid Them) Over-lubricating the motorcycle chain: Excessive lube attracts dirt, creating abrasive paste that wears chain and sprocket faster. Using incorrect lubricants: Incompatible oils or greases can destroy rubber seals and reduce chain life. Neglecting chain cleaning before lubrication: Applying fresh lube to dirty chain traps grime inside, causing corrosion and extra wear. Ignoring pivot points and brake levers: These hidden areas are just as vital as the chain for safe handling and control. Failing to clean and lube all necessary components: Overlooking cables, side stands, and linkages can lead to seized or unresponsive parts. Motorcycle Lubrication Maintenance Tips for All Seasons Adjusting Lubrication Maintenance Schedules for Weather Riding conditions affect how often and how thoroughly you perform motorcycle lubrication maintenance. In wet or muddy weather, chains and pivot points need attention more frequently, since water and debris quickly wash away lubricants and accelerate wear. In hot, dry climates, dust and sand can act as abrasives, so regular cleaning and relubrication are necessary to protect rubber seals and sealed chains. Always inspect moving parts after riding in extreme weather, and adjust your routine to account for seasonal changes. Maintaining consistent lubrication during winter layups or humid summer months is key for extending the life of your motorcycle’s components and ensuring a reliable ride year-round. Protecting the Motorcycle Chain in Wet or Dusty Environments In wet, muddy, or dusty conditions, your motorcycle chain is more susceptible to dirt ingress and the loss of chain lube. After rides in such environments, perform a thorough chain clean to remove contaminants, then reapply the proper lubricant as soon as the chain dries. Sealed chains (O- or X-ring) require extra scrutiny since abrasive particles can find their way past compromised rubber seals. Certain products, such as chain lubes with water-repellent properties, offer added protection in adverse environments. Consider covering your chain with a guard if your motorcycle design permits and avoiding rides in deep water or thick dust whenever practical. Storing Your Motorcycle: Pre- and Post-Storage Lubrication Maintenance If you’re storing your motorcycle for any extended period, always perform a complete lubrication maintenance routine beforehand. Clean your chain, lubricate pivot points, cables, and the brake lever, and ensure all moving parts are well-protected from moisture and oxidation. When taking your bike out of storage, repeat this process—check for dried or contaminated lubricant, rust, or grime that may have accumulated while resting. A few minutes’ care before and after storage prevents costly damage and sets you up for a season of trouble-free riding. Table: Maintenance Checklist for Motorcycle Lubrication Component Recommended Interval Key Lubricant Type Special Notes Motorcycle Chain Every 500 miles or after rain Chain-specific lube Inspect for wear Pivot Points Monthly Multipurpose grease Clean before lubing Brake Levers Monthly Light oil Avoid excess oil on pads People Also Ask: Motorcycle Lubrication Maintenance Questions How often should I lube my motorcycle? Answer to How often should I lube my motorcycle? You should lube your chain every 500 miles, or more often if you’ve been riding in wet or dirty conditions. Always inspect more frequently if you notice noise, stiffness, or visible dirt buildup. In addition to the chain, all pivot points and brake levers should be lubricated monthly, with adjustments made for harsh environments or intensive use. Is it okay to put WD-40 on a motorcycle chain? Answer to Is it okay to put WD-40 on a motorcycle chain? WD-40 can be used for initial cleaning of the chain, but it's not a suitable chain lube for most motorcycles—especially those with sealed chains. It tends to wash away too quickly and can degrade the rubber seals. Always use a dedicated motorcycle chain lubricant compatible with your bike’s chain type. How long can a motorcycle sit without being driven? Answer to How long can a motorcycle sit without being driven? A motorcycle can sit unused for several weeks provided it’s been properly cleaned and lubricated beforehand. However, if left for longer periods, parts may start to corrode or become dry, so perform a full lubrication maintenance routine before and after any lengthy storage. Always check for signs of rust, dryness, or stiffness before your first ride after storage. What to lubricate on a motorcycle? Answer to What to lubricate on a motorcycle? Key areas to lubricate include the motorcycle chain, pivot points (like the gear shifter, brake pedal, and levers), brake levers, clutch cable, throttle linkage, kickstand, and foot controls. Refer to your owner’s manual for additional recommended lubrication points and be consistent with your regimen to guarantee safe, efficient operation on every ride. Frequently Asked Questions (FAQs) on Motorcycle Lubrication Maintenance What happens if I skip motorcycle lubrication maintenance? Does the type of chain affect lubricant choice? Can over-lubricating motorcycle chains cause problems? Do new motorcycles require immediate lubrication maintenance? Watch this practical how-to video demonstrating the entire process of cleaning and lubricating your motorcycle chain, pivot points, and brake levers. You'll see every step up close, learn safety best practices, and discover which tools and products are recommended—all shot in a modern garage for easy-to-follow instructions. This video highlights the most frequent chain cleaning mistakes, demonstrates how to spot them, and provides quick fixes to ensure your chain and drive components remain in optimal condition. Key Takeaways: Motorcycle Lubrication Maintenance Best Practices Regular motorcycle lubrication maintenance prevents wear and breakdowns Clean and lubrication are essential for chain, pivot points, and brake levers Always use recommended lubricants for motorcycle chains and moving parts Develop a consistent lubrication maintenance routine for safety and longevity Ready for Expert Motorcycle Lubrication Maintenance? Don’t leave your motorcycle’s health to chance. Call Nasty Performance Motorcycle Shop Today: 847-458-4858 Take action today—stick to a regular motorcycle lubrication maintenance routine and your ride will thank you with years of smooth, reliable service and safer journeys! If you’re ready to elevate your motorcycle care beyond the basics, consider how seasonal changes can impact every aspect of your maintenance routine. From protecting your bike during winter storage to optimizing performance in the summer heat, understanding the nuances of seasonal bike care will help you anticipate challenges and keep your motorcycle in peak condition year-round. Dive into our expert insights for advanced strategies and discover how a proactive approach can make every ride smoother, safer, and more enjoyable—no matter the season.

How To Perform Motorcycle Battery Maintenance

Did you know that nearly 50% of motorcycle breakdowns are caused by battery issues? Proper motorcycle battery maintenance can be the factor that keeps you cruising confidently instead of stranded on the side of the road. Protecting your motorcycle’s power source is about more than just saving money — it’s about ensuring reliability, longevity, and ultimately, your safety. This comprehensive guide unpacks everything you need to know for optimal motorcycle battery health: practical techniques, expert insights, and industry best practices that help prevent battery failure and maximize your riding experience. "Did you know that nearly 50% of motorcycle breakdowns are caused by battery issues? Discover how proper motorcycle battery maintenance can keep you on the road and out of the shop." Why Motorcycle Battery Maintenance is Essential For any rider, maintaining a motorcycle battery is fundamental to a smooth, uninterrupted journey. Whether you’re a weekend enthusiast or a daily commuter, neglecting your battery can result in unexpected breakdowns, costly repairs, and even the risk of being stranded far from help. In fact, batteries typically fail not due to age alone, but because of a lack of regular maintenance or improper care. By performing routine checks and learning a few key battery maintenance tips, you not only help prevent premature battery failure but also ensure your motorcycle battery delivers consistent performance ride after ride. Motorcycle batteries are unique to power sport vehicles, and their demands differ markedly from those in a car battery. They are smaller, often subject to more vibration, and supply the electrical connection vital to every ignition and accessory system on your bike. Good motorcycle battery maintenance means more than just an occasional glance—it involves checking the battery regularly, keeping terminals clean, ensuring a healthy charge, and tracking the fluid level to avoid battery acid issues. This approach protects your investment and gives you the confidence that your motorcycle is always ready to perform. What You'll Learn About Motorcycle Battery Maintenance How to inspect and check the battery for optimal battery life Steps to ensure your motorcycle battery stays charged and reliable Prevention tips for common battery failure issues Best practices on fluid level checks and top-ups Expert maintenance tips from in-industry professionals Understanding Your Motorcycle Battery: Types and Functions Before diving into battery maintenance, it’s important to understand that not all motorcycle batteries are created equal. The type of battery you have will dictate your approach to regular maintenance and determine how often you’ll need to check the battery or top up its fluid. Motorcycle batteries, similar to their car battery counterparts, are designed for compact spaces but must consistently provide enough power for ignition, lighting, and on-board electronics. Understanding battery types and their core functions helps prevent dead battery frustrations and extends battery life. In addition to powering the ignition, a motorcycle battery serves as the central electrical connection for your power sport machine. Proper maintenance ensures a steady, fully charged battery that can withstand a variety of conditions, from summer heat to winter storage. By familiarizing yourself with battery types and their unique maintenance needs, you’ll be prepared to tackle the practical steps needed for optimal condition and reliability on every ride. Common Types of Motorcycle Battery Motorcycle batteries fall into three primary categories: lead-acid, AGM (Absorbed Glass Mat), and lithium-ion. Lead-acid batteries are traditional, dependable, and require routine fluid checks to maintain the correct battery acid and electrolyte level. AGM batteries are maintenance-free, sealed batteries that resist vibration and hold a charge longer, reducing the risk of battery failure. Lithium-ion batteries are lightweight, deliver higher performance, and boast a longer battery life, but require dedicated chargers and protective monitoring systems. Each battery type offers different maintenance tips and requirements. While lead-acid and AGM batteries are more common in older and midrange motorcycles, lithium-ion batteries are increasingly used in modern bikes. Regardless of type, inspecting and understanding your specific battery can help you achieve a fully charged system, prevent dead battery issues, and ensure all electrical components function seamlessly. For riders interested in a more comprehensive approach to seasonal upkeep, exploring essential seasonal bike care strategies can further enhance your motorcycle’s reliability throughout the year. Key Functions in Motorcycle Battery Performance The performance of your motorcycle battery is rooted in its core functions: storing electrical energy, supplying starting current to the engine, and powering lights and accessories. Without proper care, any motorcycle battery can become a weak point for your machine, causing disruptions in electrical connection or, worse, total battery failure. Battery maintenance directly improves these functions by ensuring the battery’s terminals remain corrosion-free, keeping it fully charged, and managing the electrolyte level—each of which boosts reliability and extends battery life. Moreover, modern motorcycles come with advanced electronics that place even more stress on the battery. This means keeping your motorcycle battery in good working order is vital for the bike’s computer, lighting systems, and additional accessories. If you want to avoid unexpected breakdowns, taking a proactive approach to battery maintenance isn’t optional—it’s essential to maximizing your motorcycle’s electrical performance while minimizing the risks of battery failure. Comparison of Motorcycle Battery Types and Their Maintenance Needs Battery Type Maintenance Required Common Features Lead-Acid Regular fluid level checks, terminal cleaning, avoid over-discharging Affordable, moderate lifespan, requires distilled water top-ups AGM (Absorbed Glass Mat) Minimal, keep fully charged, check for physical damage Maintenance-free, better vibration resistance, sealed design Lithium-Ion Monitor charge with compatible charger, inspect BMS (Battery Management System) Lightweight, high performance, longer battery life, higher cost Step-By-Step Motorcycle Battery Maintenance Guide Safety Precautions When Performing Battery Maintenance Removing and Installing a Motorcycle Battery How to Check the Battery for Signs of Wear, Corrosion, and Age Cleaning Terminals and Cables Checking Battery Voltage and Keeping Your Battery Charged Motorcycle battery maintenance begins with safety. Always wear gloves and safety glasses, and work in a well-ventilated area to protect yourself from battery acid or fumes. Start by switching off the ignition and disconnecting the negative cable first, which helps prevent accidental electrical connection. When removing the battery, carefully loosen hold-down brackets or straps and gently lift it from its compartment. Be mindful of the battery’s orientation—incorrect installation can damage both the battery and your vehicle’s wiring. Once the battery is out, check the battery for signs of corrosion, cracks, swelling, or discoloration—indicators that it might be time for a replacement. Cleaning terminals is a must: use a wire brush to remove corrosion, and apply a dielectric grease to help ensure optimal connection and prevent future build-up. This simple proactive move can significantly extend battery life and minimize the risk of unexpected breakdowns caused by a poor or unstable contact between the terminals and cables. Finally, use a multimeter to check battery voltage. For best results, motorcycle batteries should register between 12. 6 and 13. 2 volts when fully charged. If your reading is lower, charge the battery using an approved battery charger to restore a healthy charge and keep the battery in optimal condition. Checking Fluid Level and Ensuring Proper Battery Life The fluid level in a lead-acid battery plays a crucial role in battery life. If the fluid drops too low, parts of the lead plates inside can become exposed to air, resulting in permanent loss of capacity, decreased starting power, and shortened battery life. To maintain a good working battery, always check the fluid level (electrolyte) at regular intervals, especially during the riding season or after long storage periods. A fully charged battery reduces sulfation, the primary cause of battery failure in motorcycle batteries. Always use distilled water for top-ups—regular tap water introduces contaminants that can reduce battery efficiency and lead to early failure. Check the fluid level with the battery upright and on a flat surface; each cell should be filled to the designated marker. If unsure, consult your motorcycle’s manual for cell locations and safe inspection methods. Keeping your battery topped up helps prevent harmful sulfation, especially in high-demand power sport applications, and ensures your motorcycle starts every time you hit the starter. Steps to Check the Battery Fluid Level Begin by removing your motorcycle seat or battery cover, ensuring the bike is safely parked and turned off. Identify the battery cells—most lead-acid units have clear markings or caps. Use a clean screwdriver to gently pry open the caps, keeping an eye out for any spilled battery acid. Look for liquid covering the lead plates; if the fluid level is below the indicator, top up with distilled water only. Replace the caps securely and wipe away any excess—a spill could corrode surrounding metal or electrical components. Always inspect for bubbles or discoloration, which may suggest internal battery issues or damage. Consistent checking and maintenance protect your battery from drying out or failing prematurely. This simple, routine check can significantly extend the life of your motorcycle battery, maintain a healthy charge, and decrease the odds of battery failure when you least expect it during your next ride. How Fluid Levels Affect Motorcycle Battery Maintenance The impact of correct fluid levels on motorcycle battery maintenance cannot be overstated. Insufficient electrolyte—or fluid—results in an imbalanced chemical reaction, reducing your battery’s ability to maintain a charge or deliver consistent starting power. Letting the fluid level drop too low can expose the plates, cause sulfation, and create a dead battery scenario. On the flip side, overfilling the cells can lead to acid leaks and corrosion of battery terminals, cables, or adjacent bike components, ultimately affecting your battery’s overall health and reliability. Checking and maintaining the right fluid level ensures your motorcycle battery delivers peak performance throughout its entire lifespan. This attention to detail is the difference between a battery that lasts one season and one that powers through for years in optimal condition. It’s a small but powerful step in any rider’s battery maintenance routine, helping you avoid the hassles of battery failure and frequent replacements. Top Battery Maintenance Tips for Motorcycles Schedule Regular Inspections to Prevent Battery Failure Best Times to Keep Your Battery Charged How to Store Your Motorcycle Battery Correctly Signs It’s Time for Battery Replacement Embracing a proactive approach toward motorcycle battery maintenance makes all the difference between a reliable ride and being stuck with a dead battery. Schedule regular inspections—at least once a month during riding season. This helps prevent issues like corrosion, damaged terminals, or low fluid level, all of which can lead to early battery failure. Make checking your battery a habit, similar to checking tire pressure or oil levels, as it ensures your system is always ready for the demands of the road. Maintaining a fully charged battery is most important during long periods of inactivity—cold winter months or vacation time. Connect your bike to a smart battery maintainer, which keeps the electrical system in optimal condition without the risk of overcharging. When storing your motorcycle, always keep the battery in a cool, dry place, ideally indoors. Signs of battery failure, such as slow cranking, dim lights, or frequent jump-starts, are clear calls for replacement. Address these early to avoid the risk of being caught off guard on your next ride. "Consistent battery maintenance prevents many sudden breakdowns. Treat your motorcycle battery as essential to your ride as gasoline." People Also Ask: Common Motorcycle Battery Maintenance Questions How to maintain your motorcycle battery? Answer: Motorcycle battery maintenance involves regular inspections, keeping terminals clean, checking fluid levels, and ensuring the battery stays charged especially during long periods of inactivity. What is the 20/80 rule in battery? Answer: The 20/80 rule refers to maintaining your battery between 20% and 80% charge wherever possible to extend overall battery life and reduce battery failure risks. Is it okay to leave a battery maintainer on all the time? Answer: Yes, modern smart battery maintainers are designed for long-term use and will prevent battery overcharging or damage. They keep motorcycle batteries charged during extended storage. How long can a motorcycle battery sit unused? Answer: A motorcycle battery can typically sit unused for up to two months, but regular checks and use of a battery maintainer are recommended to prevent battery failure or decreased battery life. FAQ: Additional Motorcycle Battery Maintenance Queries How often should I check my motorcycle battery’s fluid level? What are signs of a failing battery? Is it safe to jump-start a motorcycle battery? How does temperature impact battery life? Key Takeaways for Effective Motorcycle Battery Maintenance Prompt motorcycle battery maintenance extends battery life, maximizes reliability, and prevents costly breakdowns. Regularly check the battery, keep it charged, and pay attention to warning signs of battery failure. Conclusion: Master Motorcycle Battery Maintenance for Worry-Free Riding Staying on top of your motorcycle battery maintenance routine ensures safe, stress-free rides and a reliable machine every time you turn the key. If you’re ready to take your motorcycle care to the next level, don’t stop at battery maintenance. Discover how a holistic approach to seasonal bike care can protect every aspect of your ride, from performance to longevity. Dive into seasonal bike care secrets every rider must know for expert tips on preparing your motorcycle for changing weather, storage, and optimal year-round performance. By expanding your maintenance routine, you’ll enjoy smoother rides, fewer surprises, and the confidence that comes from a well-cared-for machine—no matter the season. For Expert Motorcycle Battery Maintenance, Call Nasty Performance Motorcycle Shop Today: 847-458-4858

Checklist Guide To Your Motorcycle Inspection

Did you know? According to recent studies, nearly 75% of preventable motorcycle breakdowns are linked to skipped or rushed inspections. A proper checklist guide to motorcycle inspection doesn’t just prevent headaches—it can be the difference between a safe, smooth ride and being stranded on the roadside. Whether you’re a daily commuter or a weekend warrior, this essential guide unlocks the secrets of keeping your motorcycle in peak condition, ensuring every ride begins and ends with total peace of mind. In this comprehensive resource, you'll discover simple, actionable steps and expert tips to maximize safety and performance—covering everything from tire pressure to fluid levels and the electrical system. Unlocking Road Safety: Why You Need a Checklist Guide to Motorcycle Inspection Skipping your motorcycle’s inspection checklist isn’t just risky—it’s the quickest path to unexpected hazards and costly repairs that can threaten your safety and your wallet. Every ride introduces new challenges: changing weather, varying road conditions, and natural wear and tear. The checklist guide to motorcycle inspection is your roadmap for surfacing dangers and fixing minor issues before they become major headaches. Keeping up with regular inspections ensures your machine’s fuel system, fluid levels, tire pressure, and electrical system stay within safe operating ranges. This not only extends the life of your motorcycle but also maximizes every moment on the road with minimal interruptions or concerns. By following a detailed inspection checklist, you make safety a habit rather than an afterthought. You’ll spot worn brake pads before they affect stopping distance, detect low engine oil or leaky fork seals before performance drops, and fix minor electrical faults before they leave you without lights or turn signals in traffic. Whether riding solo or with a group, using a checklist provides peace of mind and helps ensure your motorcycle is always ready for your next adventure—which means fewer surprises, lower maintenance costs, and confidence every time you roll out of the driveway. What You'll Learn in This Comprehensive Checklist Guide to Motorcycle Inspection The key steps in a thorough motorcycle inspection checklist How to assess your motorcycle’s fuel system, fluid levels, and electrical system Expert tips to maximize safety and performance Answers to the most common inspection checklist questions The Importance of a Motorcycle Inspection Checklist "A proactive checklist guide to motorcycle inspection is the first line of defense against unexpected hazards and costly repairs." – Motorcycle Safety Expert Your motorcycle is a complex machine, and every component plays a critical role in your safety and performance on the road. A structured inspection checklist puts you in control. With a systematic approach, you decrease the risk of missed warning signs—such as oil leaks, worn brake pads, or faulty fuel caps—that can reduce efficiency or endanger your ride. Routinely walking through the critical steps means you’re consistently riding a machine in peak condition. Regular motorcycle inspections are not just a preventative measure—they protect your investment and ensure your piece of mind. By spotting and addressing issues early, you help extend the life of your motorcycle, avoid costly repairs caused by neglect, and ride confidently knowing that every critical component is operating safely. This checklist is as much about protecting yourself and your passengers as it is about getting the most enjoyment and reliability out of every ride. As you work through your motorcycle inspection checklist, it's also important to consider how seasonal changes can impact your bike's condition and maintenance needs. For practical advice on adapting your inspection routine throughout the year, explore these seasonal bike care secrets every rider should know to keep your motorcycle performing at its best in any weather. Before You Begin: Preparation for Your Motorcycle Inspection Checklist Gather your inspection tools and owner's manual Find a well-lit, level workspace Review safety gear requirements Preparation is the key to an efficient motorcycle inspection checklist. Begin by collecting all necessary tools—including a tire pressure gauge, a flashlight, a set of wrenches, and your motorcycle’s owner’s manual. The manual is a key reference for manufacturer specifications, such as recommended tire pressure (PSI), fluid levels, and maintenance intervals. Choose a flat, well-lit area—preferably indoors or in a shaded location to prevent sunlight glare. Adequate lighting helps spot signs of wear, oil leaks, and subtle damage. Put on basic safety gear such as gloves and protective eyewear, especially when working around batteries, engine oil, or moving parts. Double-check that your motorcycle is securely on its center or side stand before beginning your assessment. Starting with a clean, organized workspace not only boosts inspection accuracy but makes the process much more efficient and enjoyable. Full Motorcycle Inspection Checklist Table Inspection Area Recommended Checks Suggested Actions if Issues Found Fuel System Check fuel lines, connectors, fuel cap & filter for leaks or damage Replace damaged lines; tighten/replace cap; consult mechanic for leaks Fluid Levels Assess oil, brake fluid, coolant levels; check for signs of contamination Top-up or replace fluids; flush system if contaminated Tire Pressure & Condition Use gauge to measure tire pressure; inspect for punctures, tread depth, wear Inflate to correct PSI; replace tires with worn tread or deformities Electrical System Test headlights, taillights, turn signals, horn, battery terminals Replace bulbs; clean battery terminals; repair faults Brakes Inspect brake pads/discs; check lever/pedal feel and brake light function Replace worn pads/discs; address unresponsive brakes or lights Chain/Sprockets Examine tension, lubrication, wear on chain & sprockets Adjust tension; lubricate; replace worn components Other Safety Features Check mirrors, fasteners, reflectors, controls for operation & tightness Tighten, align, or replace as needed Step 1: Fuel System – Your First Stop on the Motorcycle Inspection Checklist Inspect for visible leaks or damage Check fuel lines and connectors Ensure gas cap and filter are functioning properly The fuel system is the life source of your motorcycle’s engine. Begin every inspection checklist with a visual sweep for leaks, especially around fuel lines, connectors, and near the fuel cap. Even minor leaks can cause dangerous situations—from fire hazards to power loss. Pay close attention to any wet spots, fuel odor, or discoloration on or under the tank and around the lines. If you detect a leak or cracked hose, replace it immediately or consult a professional, as these can escalate quickly. Next, verify the integrity and fit of your gas cap and fuel filter. A faulty fuel cap can lead to fuel evaporation, contaminants entering the tank, or failure of emission control systems. Remove the cap and look for signs of damage to the seal, check that it fits securely, and ensure the filter is free of blockages or buildup. Finally, with the engine cold, gently wiggle the fuel lines to ensure all connections are tight but flexible. Completing this step means your motorcycle starts strong, wastes no fuel, and keeps contaminants out—forming the solid foundation for a safe, reliable ride every time. Step 2: Fluid Levels – Crucial Checks for Motorcycle Longevity Check oil, coolant, and brake fluid levels Inspect for fluid contamination Top-up or replace fluids as necessary Fluid levels are vital for engine health, cooling, and braking power. Start by checking your engine oil, ensuring the motorcycle is cool and upright. Look for the proper level between MIN and MAX, and pay attention to oil color—dark or gritty oil may signal it’s time for a change or there may be contamination. Next, inspect the coolant reservoir, if applicable, making sure levels are consistent and the fluid is clear (not cloudy or rusty). Low or dirty coolant can quickly lead to overheating and engine damage. Brake fluid is another essential check—examine both front and rear reservoirs. Fluid should be within the marked lines and free of dark color or floating particles. If you spot a drop in level, address it immediately, as leaks may point to bigger problems in the braking system. Always use the correct fluid type per your manual. Regularly topping off or changing fluids increases the lifespan and reliability of your motorcycle, granting peace of mind across thousands of miles. Step 3: Tire Pressure and Condition – A Must-Have in Your Inspection Checklist Monitor tire pressure with a reliable gauge Check for punctures, wear, or deformities Ensure tires are within manufacturer's recommended PSI Maintaining tire pressure and tracking tire condition are two of the most crucial aspects of any inspection checklist. Under-inflated or over-inflated tires compromise handling, braking, and overall safety. Use a quality gauge—preferably digital—for accuracy; consult the owner’s manual or sidewall for the right PSI for both front and rear tires. Record your readings each check to track even subtle drops that might indicate a small leak. Examine both tires for punctures, cracks, foreign objects, and irregular wear patterns. Inspect tread depth to ensure it meets legal minimums and provides enough traction for wet or slippery conditions. Look for bulges or sidewall damage—signs of internal failures that demand immediate replacement. Keeping tire pressure and tread within manufacturer specs ensures proper contact with the road, boosts fuel efficiency, and helps you ride with confidence no matter the journey ahead. Step 4: Assessing the Electrical System – Stay Powered Up Test headlights, taillights, and turn signals Check battery terminals for corrosion Evaluate horn and gauge functionality Your motorcycle’s electrical system manages everything from ignition to lighting and safety alerts. Begin by switching on the ignition and checking each light—headlights (high and low beam), taillights, brake light, and turn signals. Confirm all bulbs are operating and produce maximum visibility, as faulty signals or dim lighting can increase your accident risk on the road. Examine the battery terminals for corrosion (white powdery residue) and ensure connections are tight but not over-torqued. Corrosion can hinder starting and charging; clean terminals with a suitable brush and protect with anti-corrosion gel. Next, sound the horn and check that all gauges—speedometer, tachometer, temperature, and warning lights—respond as expected. An overlooked electrical system failure can leave you stranded or invisible, so always make this a priority on your inspection checklist. Step 5: Brakes, Chains, and Final Inspection Checklist Details Inspect brake pads, discs, and performance Examine chain tension and lubrication Look over all fasteners and safety features The braking system is essential for control and stopping power. Test lever and pedal resistance to feel for sponginess—if present, check brake fluid level and look for air in the lines or worn brake pads. Examine all visible components, including discs and rotors, for grooves, warping, or signs of wear. Don’t forget to verify brake lights illuminate with light pressure to either lever or pedal, ensuring responsive performance in traffic. Next, move to the chain and sprocket system. Rotate the wheel and check chain tension—there should be minimal slack but still enough movement per the manual for proper tension. Inspect for dry links, dirt, or visible signs of wear, and apply quality lubricant as needed. Lastly, walk around the bike to confirm fasteners (bolts, nuts, safety pins) are secure and that all mirrors, reflectors, and controls are fully operational. This double-check is the final barrier against surprises—providing a thorough, all-encompassing inspection routine for every rider. People Also Ask: Motorcycle Inspection Checklist What should be included in a motorcycle inspection checklist? A comprehensive motorcycle inspection checklist covers the fuel system, fluid levels (engine oil, coolant, and brake fluid), tire pressure and tread depth, electrical system (lights, signals, horn), braking components (pads, discs, fluid level), chain and sprocket condition, and all safety features such as mirrors, controls, and reflectors. The goal is to ensure no critical component is overlooked, maximizing both safety and performance with every ride. How often should I perform a motorcycle inspection? Perform a basic walk-around inspection before every ride for top safety and reliability. For more detailed checks involving fluid levels, brake pads, and chain tension, a weekly or bi-weekly cadence is recommended. Schedule a complete, in-depth inspection at least monthly or after long trips. Regular inspection helps you catch early signs of wear, oil leaks, or dropping fluid levels before they develop into major concerns. Why is a motorcycle inspection checklist important? An inspection checklist is essential because it organizes your maintenance routine, helping you to identify and resolve small issues—like worn brake pads or low tire pressure—before they become dangerous on the road. It’s the simplest way to ensure your motorcycle operates in peak condition and that you always ride with confidence and total peace of mind. Can I perform a motorcycle inspection myself? Yes, with a clear and structured checklist guide to motorcycle inspection, most riders can independently perform all basic checks outlined here. Having your owner’s manual at hand helps you reference manufacturer specs and acceptable ranges. For advanced repairs or if you detect unusual noises, consistent leaks, or signs of severe wear, seek help from a certified mechanic to ensure both safety and proper intervention. Expert Tips for Motorcycle Inspection: Go Beyond the Basics Document your inspections for reference Replace worn parts immediately Seek expert help for suspected complex issues Go the extra mile beyond the standard motorcycle inspection checklist by keeping a simple log or digital record of each inspection. Tracking changes in tire pressure, fluid levels, or component wear helps identify patterns and potential failures before they occur. When you spot signs of wear—from thinning brake pads to minor oil leaks—replace affected parts without delay to avoid reduced safety and performance. If you come across persistent electrical problems, unusual noises, or fluid contamination, don’t hesitate to consult a professional for a complete assessment. Staying proactive today saves time, money, and worry tomorrow. Frequently Asked Questions About Motorcycle Inspection Checklists Which fluids are most critical to inspect regularly? Are there seasonal differences in inspection procedures? When should I seek a certified inspection? Which fluids are most critical to inspect regularly? - The most important fluids are engine oil, brake fluid (front and rear), and coolant if your motorcycle is water-cooled. Regularly checking for proper levels and contamination can prevent engine damage, brake failure, and overheating incidents. Are there seasonal differences in inspection procedures? - Yes. In colder months, pay closer attention to battery charge, tire pressure changes, and fluid viscosity. During summer, monitor tire condition, coolant levels, and brake fluid closely due to increased heat and potential for rapid wear. When should I seek a certified inspection? - Consult a professional if you detect severe leaks, electrical failures, persistent unusual noises, ongoing fluid loss, or after a crash. Annual certified inspections are also smart for maximizing the life and safety of your motorcycle. Key Takeaways: The Ultimate Checklist Guide to Motorcycle Inspection A structured motorcycle inspection checklist keeps you safe Focus on fuel system, fluid levels, tire pressure, and electrical system for reliable rides Expert insights and checklists simplify your routine inspection tasks Ready for a Safer Ride? Schedule Professional Inspection Help Today! Don’t take chances with your safety or your ride. If you need expert eyes or want more confidence before your next adventure, Call Nasty Performance Motorcycle Shop Today: 847-458-4858 and ride with confidence! Mastering your motorcycle inspection checklist is just the beginning of a safer, more enjoyable riding experience. To truly protect your investment and adapt to every season, consider expanding your knowledge with expert strategies for year-round bike care. Discover how to prepare your motorcycle for changing weather, prevent seasonal wear, and keep your ride in top shape by exploring essential seasonal bike care tips. Elevate your maintenance routine and ensure every journey is as smooth and reliable as possible—no matter what the forecast brings.

© 2026 Nasty Performance All Rights Reserved. 2035 S. Eastwood Dr., Woodstock, IL 60098 . Contact Us . Terms of Service . Privacy Policy

eyJjb21wYW55IjoiTmFzdHkgUGVyZm9ybWFuY2UiLCJhZGRyZXNzIjoiMjAzNSBTLiBFYXN0d29vZCBEci4iLCJjaXR5IjoiV29vZHN0b2NrIiwic3RhdGUiOiJJTCIsInppcCI6IjYwMDk4IiwiZW1haWwiOiJuYXRlQG5hc3R5cGVyZm9ybWFuY2UuY29tIiwidG9zIjoiUEhBK1BITjBjbTl1Wno0OFpXMCtWMmhsYmlCNWIzVWdjMmxuYmkxcGJpQjNhWFJvSUhWekxDQjViM1VnWVhKbElHZHBkbWx1WnladVluTndPeUI1YjNWeUlIQmxjbTFwYzNOcGIyNGdZVzVrSUdOdmJuTmxiblFnZEc4Z2MyVnVaQ0I1YjNVZ1pXMWhhV3dnWVc1a0wyOXlJRk5OVXlCMFpYaDBJRzFsYzNOaFoyVnpMaUJDZVNCamFHVmphMmx1WnlCMGFHVWdWR1Z5YlhNZ1lXNWtJRU52Ym1ScGRHbHZibk1nWW05NElHRnVaQ0JpZVNCemFXZHVhVzVuSUdsdUlIbHZkU0JoZFhSdmJXRjBhV05oYkd4NUlHTnZibVpwY20wZ2RHaGhkQ0I1YjNVZ1lXTmpaWEIwSUdGc2JDQjBaWEp0Y3lCcGJpQjBhR2x6SUdGbmNtVmxiV1Z1ZEM0OEwyVnRQand2YzNSeWIyNW5Qand2Y0Q0S0NqeHdQanhoSUdoeVpXWTlJbWgwZEhBNkx5OTNkM2N1WjI5dloyeGxMbU52YlNJK2FIUjBjRG92TDNkM2R5NW5iMjluYkdVdVkyOXRQQzloUGp3dmNENEtDanh3UGladVluTndPend2Y0Q0S0NqeHdQanh6ZEhKdmJtYytVMFZTVmtsRFJUd3ZjM1J5YjI1blBqd3ZjRDRLQ2p4d1BsZGxJSEJ5YjNacFpHVWdZU0J6WlhKMmFXTmxJSFJvWVhRZ1kzVnljbVZ1ZEd4NUlHRnNiRzkzY3lCNWIzVWdkRzhnY21WalpXbDJaU0J5WlhGMVpYTjBjeUJtYjNJZ1ptVmxaR0poWTJzc0lHTnZiWEJoYm5rZ2FXNW1iM0p0WVhScGIyNHNJSEJ5YjIxdmRHbHZibUZzSUdsdVptOXliV0YwYVc5dUxDQmpiMjF3WVc1NUlHRnNaWEowY3l3Z1kyOTFjRzl1Y3l3Z1pHbHpZMjkxYm5SeklHRnVaQ0J2ZEdobGNpQnViM1JwWm1sallYUnBiMjV6SUhSdklIbHZkWElnWlcxaGFXd2dZV1JrY21WemN5QmhibVF2YjNJZ1kyVnNiSFZzWVhJZ2NHaHZibVVnYjNJZ1pHVjJhV05sTGlCWmIzVWdkVzVrWlhKemRHRnVaQ0JoYm1RZ1lXZHlaV1VnZEdoaGRDQjBhR1VnVTJWeWRtbGpaU0JwY3lCd2NtOTJhV1JsWkNBbWNYVnZkRHRCVXkxSlV5WnhkVzkwT3lCaGJtUWdkR2hoZENCM1pTQmhjM04xYldVZ2JtOGdjbVZ6Y0c5dWMybGlhV3hwZEhrZ1ptOXlJSFJvWlNCMGFXMWxiR2x1WlhOekxDQmtaV3hsZEdsdmJpd2diV2x6TFdSbGJHbDJaWEo1SUc5eUlHWmhhV3gxY21VZ2RHOGdjM1J2Y21VZ1lXNTVJSFZ6WlhJZ1kyOXRiWFZ1YVdOaGRHbHZibk1nYjNJZ2NHVnljMjl1WVd4cGVtRjBhVzl1SUhObGRIUnBibWR6TGp3dmNENEtDanh3UGxsdmRTQmhjbVVnY21WemNHOXVjMmxpYkdVZ1ptOXlJRzlpZEdGcGJtbHVaeUJoWTJObGMzTWdkRzhnZEdobElGTmxjblpwWTJVZ1lXNWtJSFJvWVhRZ1lXTmpaWE56SUcxaGVTQnBiblp2YkhabElIUm9hWEprSUhCaGNuUjVJR1psWlhNZ0tITjFZMmdnWVhNZ1UwMVRJSFJsZUhRZ2JXVnpjMkZuWlhNc0lFbHVkR1Z5Ym1WMElITmxjblpwWTJVZ2NISnZkbWxrWlhJZ2IzSWdZMlZzYkhWc1lYSWdZV2x5ZEdsdFpTQmphR0Z5WjJWektTNGdXVzkxSUdGeVpTQnlaWE53YjI1emFXSnNaU0JtYjNJZ2RHaHZjMlVnWm1WbGN5d2dhVzVqYkhWa2FXNW5JSFJvYjNObElHWmxaWE1nWVhOemIyTnBZWFJsWkNCM2FYUm9JSFJvWlNCa2FYTndiR0Y1SUc5eUlHUmxiR2wyWlhKNUlHOW1JR1ZoWTJnZ1UwMVRJSFJsZUhRZ2JXVnpjMkZuWlNCelpXNTBJSFJ2SUhsdmRTQmllU0IxY3k0Z1NXNGdZV1JrYVhScGIyNHNJSGx2ZFNCdGRYTjBJSEJ5YjNacFpHVWdZVzVrSUdGeVpTQnlaWE53YjI1emFXSnNaU0JtYjNJZ1lXeHNJR1Z4ZFdsd2JXVnVkQ0J1WldObGMzTmhjbmtnZEc4Z1lXTmpaWE56SUhSb1pTQlRaWEoyYVdObElHRnVaQ0J5WldObGFYWmxJSFJvWlNCVFRWTWdkR1Y0ZENCdFpYTnpZV2RsY3k0Z1YyVWdaRzhnYm05MElHTm9ZWEpuWlNCaGJua2dabVZsY3lCbWIzSWdaR1ZzYVhabGNua2diMllnWlcxaGFXd2diM0lnVTAxVExpQlVhR2x6SUdseklHRWdabkpsWlNCelpYSjJhV05sSUhCeWIzWnBaR1ZrSUdKNUlIVnpMaUJJYjNkbGRtVnlMQ0J3YkdWaGMyVWdZMmhsWTJzZ2QybDBhQ0I1YjNWeUlHbHVkR1Z5Ym1WMElITmxjblpwWTJVZ2NISnZkbWxrWlhJZ1lXNWtJR05sYkd4MWJHRnlJR05oY25KcFpYSWdabTl5SUdGdWVTQmphR0Z5WjJWeklIUm9ZWFFnYldGNUlHbHVZM1Z5SUdGeklHRWdjbVZ6ZFd4MElHWnliMjBnY21WalpXbDJhVzVuSUdWdFlXbHNJR0Z1WkNCVFRWTWdkR1Y0ZENCdFpYTnpZV2RsY3lCMGFHRjBJSGRsSUdSbGJHbDJaWElnZFhCdmJpQjViM1Z5SUc5d2RDMXBiaUJoYm1RZ2NtVm5hWE4wY21GMGFXOXVJSGRwZEdnZ2IzVnlJR1Z0WVdsc0lHRnVaQ0JUVFZNZ2MyVnlkbWxqWlhNdUlGbHZkU0JqWVc0Z1kyRnVZMlZzSUdGMElHRnVlU0IwYVcxbExpQktkWE4wSUhSbGVIUWdKbkYxYjNRN1UxUlBVQ1p4ZFc5ME95QjBieVp1WW5Od096eG9hV2RvYkdsbmFIUWdZMnhoYzNNOUltTnZiWEJoYm5sVFRWTlFhRzl1WlZWd1pHRjBaU0krYm5Wc2JEd3ZhR2xuYUd4cFoyaDBQaTRnUVdaMFpYSWdlVzkxSUhObGJtUWdkR2hsSUZOTlV5QnRaWE56WVdkbElDWnhkVzkwTzFOVVQxQW1jWFZ2ZERzZ2RHOGdkWE1zSUhkbElIZHBiR3dnYzJWdVpDQjViM1VnWVc0Z1UwMVRJRzFsYzNOaFoyVWdkRzhnWTI5dVptbHliU0IwYUdGMElIbHZkU0JvWVhabElHSmxaVzRnZFc1emRXSnpZM0pwWW1Wa0xpQkJablJsY2lCMGFHbHpMQ0I1YjNVZ2QybHNiQ0J1YnlCc2IyNW5aWElnY21WalpXbDJaU0JUVFZNZ2JXVnpjMkZuWlhNZ1puSnZiU0IxY3k0OEwzQStDZ284Y0Q0OGMzUnliMjVuUGxsUFZWSWdVa1ZIU1ZOVVVrRlVTVTlPSUU5Q1RFbEhRVlJKVDA1VFBDOXpkSEp2Ym1jK1BDOXdQZ29LUEhBK1NXNGdZMjl1YzJsa1pYSmhkR2x2YmlCdlppQjViM1Z5SUhWelpTQnZaaUIwYUdVZ1UyVnlkbWxqWlN3Z2VXOTFJR0ZuY21WbElIUnZPand2Y0Q0S0NqeHZiRDRLQ1R4c2FUNXdjbTkyYVdSbElIUnlkV1VzSUdGalkzVnlZWFJsTENCamRYSnlaVzUwSUdGdVpDQmpiMjF3YkdWMFpTQnBibVp2Y20xaGRHbHZiaUJoWW05MWRDQjViM1Z5YzJWc1ppQmhjeUJ3Y205dGNIUmxaQ0JpZVNCMGFHVWdVMlZ5ZG1salpTWWpNems3Y3lCeVpXZHBjM1J5WVhScGIyNGdabTl5YlNBb2MzVmphQ0JwYm1admNtMWhkR2x2YmlCaVpXbHVaeUIwYUdVZ0puRjFiM1E3VW1WbmFYTjBjbUYwYVc5dUlFUmhkR0VtY1hWdmREc3BJR0Z1WkR3dmJHaytDZ2s4YkdrK2JXRnBiblJoYVc0Z1lXNWtJSEJ5YjIxd2RHeDVJSFZ3WkdGMFpTQjBhR1VnVW1WbmFYTjBjbUYwYVc5dUlFUmhkR0VnZEc4Z2EyVmxjQ0JwZENCMGNuVmxMQ0JoWTJOMWNtRjBaU3dnWTNWeWNtVnVkQ0JoYm1RZ1kyOXRjR3hsZEdVdUlFbG1JSGx2ZFNCd2NtOTJhV1JsSUdGdWVTQnBibVp2Y20xaGRHbHZiaUIwYUdGMElHbHpJSFZ1ZEhKMVpTd2dhVzVoWTJOMWNtRjBaU3dnYm05MElHTjFjbkpsYm5RZ2IzSWdhVzVqYjIxd2JHVjBaU3dnYjNJZ2QyVWdhR0YyWlNCeVpXRnpiMjVoWW14bElHZHliM1Z1WkhNZ2RHOGdjM1Z6Y0dWamRDQjBhR0YwSUhOMVkyZ2dhVzVtYjNKdFlYUnBiMjRnYVhNZ2RXNTBjblZsTENCcGJtRmpZM1Z5WVhSbExDQnViM1FnWTNWeWNtVnVkQ0J2Y2lCcGJtTnZiWEJzWlhSbExDQjNaU0JvWVhabElIUm9aU0J5YVdkb2RDQjBieUJ6ZFhOd1pXNWtJRzl5SUR4emRISnZibWMrUEhOd1lXNGdjM1I1YkdVOUltTnZiRzl5T2lOR1JqQXdNREE3SWo1MFpYSnRhVzVoZEdVZ2VXOTFjaUJoWTJOdmRXNTBMM0J5YjJacGJHVWdZVzVrSUhKbFpuVnpaU0JoYm5rZ1lXNWtJR0ZzYkNCamRYSnlaVzUwSUc5eUlHWjFkSFZ5WlNCMWMyVWdiMllnZEdobElGTmxjblpwWTJVZ0tHOXlJR0Z1ZVNCd2IzSjBhVzl1SUhSb1pYSmxiMllwTGp3dmMzQmhiajQ4TDNOMGNtOXVaejQ4TDJ4cFBnbzhMMjlzUGdvS1BIQStKbTVpYzNBN1BDOXdQZ284YUdsbmFHeHBaMmgwSUdOc1lYTnpQU0pqYjIxd1lXNTVUbUZ0WlZWd1pHRjBaU0krVG1GemRIa2dVR1Z5Wm05eWJXRnVZMlU4TDJocFoyaHNhV2RvZEQ0OFluSWdMejRLUEdocFoyaHNhV2RvZENCamJHRnpjejBpWTI5dGNHRnVlVUZrWkhKbGMzTlZjR1JoZEdVaVBqSXdNelVnVXk0Z1JXRnpkSGR2YjJRZ1JISXVMQ0JYYjI5a2MzUnZZMnNzSUVsTUlEWXdNRGs0UEM5b2FXZG9iR2xuYUhRK1BHSnlJQzgrQ2p4b2FXZG9iR2xuYUhRZ1kyeGhjM005SW1OdmJYQmhibmxRYUc5dVpWVndaR0YwWlNJK0tEZzBOeWtnTkRVNExUUTROVGc4TDJocFoyaHNhV2RvZEQ0OFluSWdMejRLUEdocFoyaHNhV2RvZENCamJHRnpjejBpWTI5dGNHRnVlVVZ0WVdsc1ZYQmtZWFJsSWo1dVlYUmxRRzVoYzNSNWNHVnlabTl5YldGdVkyVXVZMjl0UEM5b2FXZG9iR2xuYUhRKyIsInByaXZhY3kiOiJQSEErUEhOMGNtOXVaejVRVWtsV1FVTlpQQzl6ZEhKdmJtYytQQzl3UGdvS1BIQStQSE4wY205dVp6NVVhR1VnYVc1bWIzSnRZWFJwYjI0Z2NISnZkbWxrWldRZ1pIVnlhVzVuSUhSb2FYTWdjbVZuYVhOMGNtRjBhVzl1SUdseklHdGxjSFFnY0hKcGRtRjBaU0JoYm1RZ1kyOXVabWxrWlc1MGFXRnNMQ0JoYm1RZ2QybHNiQ0J1WlhabGNpQmlaU0JrYVhOMGNtbGlkWFJsWkN3Z1kyOXdhV1ZrTENCemIyeGtMQ0IwY21Ga1pXUWdiM0lnY0c5emRHVmtJR2x1SUdGdWVTQjNZWGtzSUhOb1lYQmxJRzl5SUdadmNtMHVJRlJvYVhNZ2FYTWdiM1Z5SUdkMVlYSmhiblJsWlM0OEwzTjBjbTl1Wno0OEwzQStDZ284Y0Q0OGMzUnliMjVuUGtsT1JFVk5Ua2xVV1R3dmMzUnliMjVuUGp3dmNENEtDanh3UGp4bGJUNVpiM1VnWVdkeVpXVWdkRzhnYVc1a1pXMXVhV1o1SUdGdVpDQm9iMnhrSUhWekxDQmhibVFnYVhSeklITjFZbk5wWkdsaGNtbGxjeXdnWVdabWFXeHBZWFJsY3l3Z2IyWm1hV05sY25Nc0lHRm5aVzUwY3l3Z1kyOHRZbkpoYm1SbGNuTWdiM0lnYjNSb1pYSWdjR0Z5ZEc1bGNuTXNJR0Z1WkNCbGJYQnNiM2xsWlhNc0lHaGhjbTFzWlhOeklHWnliMjBnWVc1NUlHTnNZV2x0SUc5eUlHUmxiV0Z1WkN3Z2FXNWpiSFZrYVc1bklISmxZWE52Ym1GaWJHVWdZWFIwYjNKdVpYbHpKaU16T1RzZ1ptVmxjeXdnYldGa1pTQmllU0JoYm5rZ2RHaHBjbVFnY0dGeWRIa2daSFZsSUhSdklHOXlJR0Z5YVhOcGJtY2diM1YwSUc5bUlFTnZiblJsYm5RZ2VXOTFJSEpsWTJWcGRtVXNJSE4xWW0xcGRDd2djbVZ3Ykhrc0lIQnZjM1FzSUhSeVlXNXpiV2wwSUc5eUlHMWhhMlVnWVhaaGFXeGhZbXhsSUhSb2NtOTFaMmdnZEdobElGTmxjblpwWTJVc0lIbHZkWElnZFhObElHOW1JSFJvWlNCVFpYSjJhV05sTENCNWIzVnlJR052Ym01bFkzUnBiMjRnZEc4Z2RHaGxJRk5sY25acFkyVXNJSGx2ZFhJZ2RtbHZiR0YwYVc5dUlHOW1JSFJvWlNCVVQxTXNJRzl5SUhsdmRYSWdkbWx2YkdGMGFXOXVJRzltSUdGdWVTQnlhV2RvZEhNZ2IyWWdZVzV2ZEdobGNpNDhMMlZ0UGp3dmNENEtDanh3UGp4emRISnZibWMrUkVsVFEweEJTVTFGVWlCUFJpQlhRVkpTUVU1VVNVVlRQQzl6ZEhKdmJtYytQQzl3UGdvS1BIQStQSE4wY205dVp6NVpUMVVnUlZoUVVrVlRVMHhaSUZWT1JFVlNVMVJCVGtRZ1FVNUVJRUZIVWtWRklGUklRVlE2UEM5emRISnZibWMrUEM5d1Bnb0tQRzlzUGdvSlBHeHBQbGxQVlZJZ1ZWTkZJRTlHSUZSSVJTQlRSVkpXU1VORklFbFRJRUZVSUZsUFZWSWdVMDlNUlNCU1NWTkxMaUJVU0VVZ1UwVlNWa2xEUlNCSlV5QlFVazlXU1VSRlJDQlBUaUJCVGlBbWNYVnZkRHRCVXlCSlV5WnhkVzkwT3lCQlRrUWdKbkYxYjNRN1FWTWdRVlpCU1V4QlFreEZKbkYxYjNRN0lFSkJVMGxUTGlBc0xpQkJUa1FnVlZNc0lFbFVKaU16T1R0VElFTlZVMVJQVFVWU1V5d2dSVmhRVWtWVFUweFpJRVJKVTBOTVFVbE5VeUJCVEV3Z1YwRlNVa0ZPVkVsRlV5QlBSaUJCVGxrZ1MwbE9SQ3dnVjBoRlZFaEZVaUJGV0ZCU1JWTlRJRTlTSUVsTlVFeEpSVVFzSUVsT1EweFZSRWxPUnl3Z1FsVlVJRTVQVkNCTVNVMUpWRVZFSUZSUElGUklSU0JKVFZCTVNVVkVJRmRCVWxKQlRsUkpSVk1nVDBZZ1RVVlNRMGhCVGxSQlFrbE1TVlJaTENCR1NWUk9SVk5USUVaUFVpQkJJRkJCVWxSSlExVk1RVklnVUZWU1VFOVRSU0JCVGtRZ1RrOU9MVWxPUmxKSlRrZEZUVVZPVkM0OEwyeHBQZ29KUEd4cFBrMUJTMFZUSUU1UElGZEJVbEpCVGxSWklGUklRVlFnS0drcElGUklSU0JUUlZKV1NVTkZJRmRKVEV3Z1RVVkZWQ0JaVDFWU0lGSkZVVlZKVWtWTlJVNVVVeXdnS0dscEtTQlVTRVVnVTBWU1ZrbERSU0JYU1V4TUlFSkZJRlZPU1U1VVJWSlNWVkJVUlVRc0lGUkpUVVZNV1N3Z1UwVkRWVkpGTENCUFVpQkZVbEpQVWkxR1VrVkZMQ0FvYVdscEtTQlVTRVVnVWtWVFZVeFVVeUJVU0VGVUlFMUJXU0JDUlNCUFFsUkJTVTVGUkNCR1VrOU5JRlJJUlNCVlUwVWdUMFlnVkVoRklGTkZVbFpKUTBVZ1YwbE1UQ0JDUlNCQlEwTlZVa0ZVUlNCUFVpQlNSVXhKUVVKTVJTd2dRVTVFSUNocGRpa2dRVTVaSUVWU1VrOVNVeUJKVGlCVVNFVWdVMDlHVkZkQlVrVWdWMGxNVENCQ1JTQkRUMUpTUlVOVVJVUXVQQzlzYVQ0S0NUeHNhVDVCVGxrZ1RVRlVSVkpKUVV3Z1JFOVhUa3hQUVVSRlJDQlBVaUJQVkVoRlVsZEpVMFVnVDBKVVFVbE9SVVFnVkVoU1QxVkhTQ0JVU0VVZ1ZWTkZJRTlHSUZSSVJTQlRSVkpXU1VORklFbFRJRVJQVGtVZ1FWUWdXVTlWVWlCUFYwNGdSRWxUUTFKRlZFbFBUaUJCVGtRZ1VrbFRTeUJCVGtRZ1ZFaEJWQ0JaVDFVZ1YwbE1UQ0JDUlNCVFQweEZURmtnVWtWVFVFOU9VMGxDVEVVZ1JrOVNJRUZPV1NCRVFVMUJSMFVnVkU4Z1dVOVZVaUJEVDAxUVZWUkZVaUJUV1ZOVVJVMGdUMUlnVEU5VFV5QlBSaUJFUVZSQklGUklRVlFnVWtWVFZVeFVVeUJHVWs5TklGUklSU0JFVDFkT1RFOUJSQ0JQUmlCQlRsa2dVMVZEU0NCTlFWUkZVa2xCVEM0OEwyeHBQZ29KUEd4cFBrNVBJRUZFVmtsRFJTQlBVaUJKVGtaUFVrMUJWRWxQVGl3Z1YwaEZWRWhGVWlCUFVrRk1JRTlTSUZkU1NWUlVSVTRzSUU5Q1ZFRkpUa1ZFSUVKWklGbFBWU0JHVWs5TklFOVNJRlJJVWs5VlIwZ2dUMUlnUmxKUFRTQlVTRVVnVTBWU1ZrbERSU0JUU0VGTVRDQkRVa1ZCVkVVZ1FVNVpJRmRCVWxKQlRsUlpJRTVQVkNCRldGQlNSVk5UVEZrZ1UxUkJWRVZFSUVsT0lGUklSU0JVVDFNdVBDOXNhVDRLUEM5dmJENEtDanh3UGp4emRISnZibWMrVEVsTlNWUkJWRWxQVGlCUFJpQk1TVUZDU1V4SlZGazhMM04wY205dVp6NDhMM0ErQ2dvOGNENVpUMVVnUlZoUVVrVlRVMHhaSUZWT1JFVlNVMVJCVGtRZ1FVNUVJRUZIVWtWRklGUklRVlFnUVU1RUlGTklRVXhNSUU1UFZDQkNSU0JNU1VGQ1RFVWdSazlTSUVGT1dTQkVTVkpGUTFRc0lFbE9SRWxTUlVOVUxDQkpUa05KUkVWT1ZFRk1MQ0JUVUVWRFNVRk1MQ0JEVDA1VFJWRlZSVTVVU1VGTUlFOVNJRVZZUlUxUVRFRlNXU0JFUVUxQlIwVlRMQ0JKVGtOTVZVUkpUa2NnUWxWVUlFNVBWQ0JNU1UxSlZFVkVJRlJQTENCRVFVMUJSMFZUSUVaUFVpQk1UMU5USUU5R0lGQlNUMFpKVkZNc0lFZFBUMFJYU1V4TUxDQlZVMFVzSUVSQlZFRWdUMUlnVDFSSVJWSWdTVTVVUVU1SFNVSk1SU0JNVDFOVFJWTWdLRVZXUlU0Z1NVWWdTRUZUSUVKRlJVNGdRVVJXU1ZORlJDQlBSaUJVU0VVZ1VFOVRVMGxDU1V4SlZGa2dUMFlnVTFWRFNDQkVRVTFCUjBWVEtTd2dVa1ZUVlV4VVNVNUhJRVpTVDAwNlBDOXdQZ29LUEc5c1Bnb0pQR3hwUGxSSVJTQlZVMFVnVDFJZ1ZFaEZJRWxPUVVKSlRFbFVXU0JVVHlCVlUwVWdWRWhGSUZORlVsWkpRMFU3UEM5c2FUNEtDVHhzYVQ1VVNFVWdRMDlUVkNCUFJpQlFVazlEVlZKRlRVVk9WQ0JQUmlCVFZVSlRWRWxVVlZSRklFZFBUMFJUSUVGT1JDQlRSVkpXU1VORlV5QlNSVk5WVEZSSlRrY2dSbEpQVFNCQlRsa2dSMDlQUkZNc0lFUkJWRUVzSUVsT1JrOVNUVUZVU1U5T0lFOVNJRk5GVWxaSlEwVlRJRkJWVWtOSVFWTkZSQ0JQVWlCUFFsUkJTVTVGUkNCUFVpQk5SVk5UUVVkRlV5QlNSVU5GU1ZaRlJDQlBVaUJVVWtGT1UwRkRWRWxQVGxNZ1JVNVVSVkpGUkNCSlRsUlBJRlJJVWs5VlIwZ2dUMUlnUmxKUFRTQlVTRVVnVTBWU1ZrbERSVHM4TDJ4cFBnb0pQR3hwUGxWT1FWVlVTRTlTU1ZwRlJDQkJRME5GVTFNZ1ZFOGdUMUlnUVV4VVJWSkJWRWxQVGlCUFJpQlpUMVZTSUZSU1FVNVRUVWxUVTBsUFRsTWdUMUlnUkVGVVFUczhMMnhwUGdvSlBHeHBQbE5VUVZSRlRVVk9WRk1nVDFJZ1EwOU9SRlZEVkNCUFJpQkJUbGtnVkVoSlVrUWdVRUZTVkZrZ1QwNGdWRWhGSUZORlVsWkpRMFU3SUU5U1BDOXNhVDRLQ1R4c2FUNUJUbGtnVDFSSVJWSWdUVUZVVkVWU0lGSkZURUZVU1U1SElGUlBJRlJJUlNCVFJWSldTVU5GTGp3dmJHaytDand2YjJ3K0NnbzhjRDQ4ZFQ1Q2VTQnlaV2RwYzNSbGNtbHVaeUJoYm1RZ2MzVmljMk55YVdKcGJtY2dkRzhnYjNWeUlHVnRZV2xzSUdGdVpDQlRUVk1nYzJWeWRtbGpaU3dnWW5rZ2IzQjBMV2x1TENCdmJteHBibVVnY21WbmFYTjBjbUYwYVc5dUlHOXlJR0o1SUdacGJHeHBibWNnYjNWMElHRWdZMkZ5WkN3Z0puRjFiM1E3ZVc5MUlHRm5jbVZsSUhSdklIUm9aWE5sSUZSRlVrMVRJRTlHSUZORlVsWkpRMFVtY1hWdmREc2dZVzVrSUhsdmRTQmhZMnR1YjNkc1pXUm5aU0JoYm1RZ2RXNWtaWEp6ZEdGdVpDQjBhR1VnWVdKdmRtVWdkR1Z5YlhNZ2IyWWdjMlZ5ZG1salpTQnZkWFJzYVc1bFpDQmhibVFnWkdWMFlXbHNaV1FnWm05eUlIbHZkU0IwYjJSaGVTNDhMM1UrUEM5d1Bnb0tQSEErSm01aWMzQTdQQzl3UGdvOGFHbG5hR3hwWjJoMElHTnNZWE56UFNKamIyMXdZVzU1VG1GdFpWVndaR0YwWlNJK1RtRnpkSGtnVUdWeVptOXliV0Z1WTJVOEwyaHBaMmhzYVdkb2RENDhZbklnTHo0S1BHaHBaMmhzYVdkb2RDQmpiR0Z6Y3owaVkyOXRjR0Z1ZVVGa1pISmxjM05WY0dSaGRHVWlQakl3TXpVZ1V5NGdSV0Z6ZEhkdmIyUWdSSEl1TENCWGIyOWtjM1J2WTJzc0lFbE1JRFl3TURrNFBDOW9hV2RvYkdsbmFIUStQR0p5SUM4K0NqeG9hV2RvYkdsbmFIUWdZMnhoYzNNOUltTnZiWEJoYm5sUWFHOXVaVlZ3WkdGMFpTSStLRGcwTnlrZ05EVTRMVFE0TlRnOEwyaHBaMmhzYVdkb2RENDhZbklnTHo0S1BHaHBaMmhzYVdkb2RDQmpiR0Z6Y3owaVkyOXRjR0Z1ZVVWdFlXbHNWWEJrWVhSbElqNXVZWFJsUUc1aGMzUjVjR1Z5Wm05eWJXRnVZMlV1WTI5dFBDOW9hV2RvYkdsbmFIUSsifQ==

Terms of Service

Privacy Policy

Core Modal Title

Sorry, no results found

You Might Find These Articles Interesting

T
Please Check Your Email
We Will Be Following Up Shortly
*
*
*