


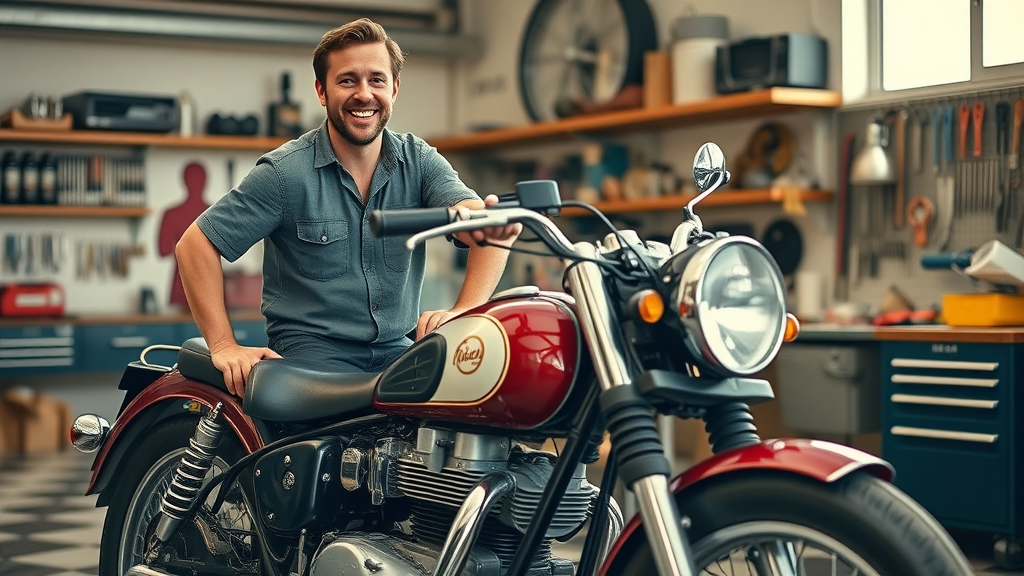
Did you know that over 65% of vintage motorcycles end up with preventable mechanical failures due to irregular maintenance? Vintage bike ownership isn’t just about style; it’s about responsibility. This comprehensive guide pulls back the curtain on classic bike maintenance, showing you how proper care not only extends your ride’s life, but also preserves its value and reliability. Whether you’re a seasoned collector or a weekend enthusiast, learning smart classic motorcycle upkeep is the secret to enjoying every journey – and many more to come.
Opening Insights: Why Classic Bike Maintenance Matters
"Did you know that over 65% of vintage motorcycles end up with preventable mechanical failures due to irregular maintenance?" – Industry Survey 2022
Unveiling the Importance of Classic Bike Maintenance
Classic bike maintenance is more than a routine—it's the heartbeat of vintage motorcycle ownership. These machines, crafted with steel frames and timeless engineering, demand regular attention to their moving parts to keep them running in good condition. Without a proactive approach to bike maintenance, even the best vintage bikes are vulnerable to chain wear, brake failure, and electrical issues. Road bikes and classic motorcycles are distinct in their construction, requiring extra diligence in lubrication, fastener checks, and system diagnostics. With the right care, every ride not only evokes nostalgia but also guarantees a safe and smooth performance, minimizing the risk of roadside breakdowns that could jeopardize both safety and investment.
When you treat classic motorcycle maintenance as a ritual rather than a chore, you’ll discover that these bikes reward you with a unique sense of accomplishment and reliability. It’s not simply a matter of keeping the engine running; it’s about ensuring the authenticity, value, and history of your vintage bike remain intact. Paying attention to detail—whether it's the integrity of your bottom bracket or the tension in your chain—pays dividends in time saved and memories made. Embrace the preventive mindset, and your classic or vintage motorcycle will thank you with every turn of the wheel.
Classic Motorcycle Longevity and Reliability
Preserving the reliability of a classic motorcycle depends on a structured classic bike maintenance schedule. Older motorcycles were engineered for longevity, but only thrive if given regular inspections and authentic parts. Ensuring that everything from the drive train to the bar tape is in top condition prevents the common pitfalls seen in neglected vintage motorcycles, such as oil leaks, electrical gremlins, and corrosion on bare metal parts. A disciplined approach not only extends the lifespan of your beloved vintage bike but also keeps it performing at its peak, mile after memorable mile.
No matter the age or make, vintage bikes rely on their owners for attentive bike maintenance. Negligence accelerates chain wear, devalues classic steel frames, and leads to costly restoration efforts. By following proactive maintenance routines and using period-correct components, you reinforce your motorcycle’s unique character and keep its legendary spirit alive for future generations.
What You'll Learn in This Classic Bike Maintenance Guide
Comprehensive breakdown of vintage motorcycle upkeep
Expert recommendations for classic motorcycle preservation
Step-by-step classic bike maintenance checklists
Identification and troubleshooting common issues in vintage bikes
Understanding the Classic Bike: What Sets Vintage Motorcycles Apart?
Defining a Classic Motorcycle & Vintage Bike
The terms "classic bike" and "vintage motorcycle" are often used interchangeably, but they do carry distinct meanings in the world of bike maintenance and collecting. Generally, a classic motorcycle refers to bikes that are 20-40 years old, recognized for their enduring design and reliable engineering. A vintage bike is typically even older, often produced before the 1970s, showcasing hand-built craftsmanship and iconic features like steel frames and minimalist electrics. Both classic and vintage bikes require meticulous attention to their unique bottom bracket setups and moving parts, setting them apart from modern bikes in both aesthetics and function.
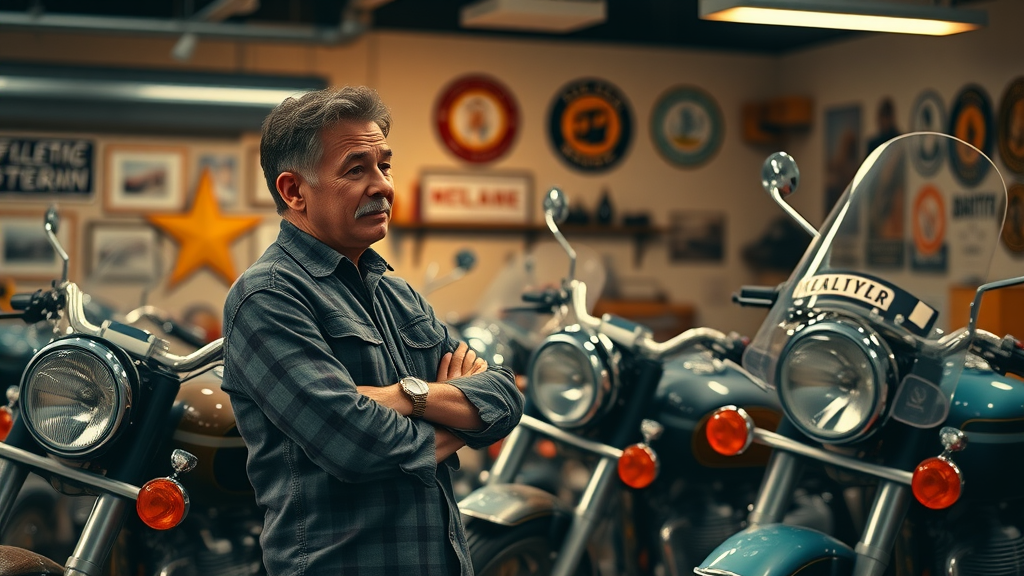
Owning an authentic classic or vintage bike is like having a piece of rolling history. These machines reflect eras where bar tapes were crafted by hand and even the smallest detail, from brake levers to chrome accents, was thoughtfully designed. Paying homage to such machines involves maintaining them with the same care they were built with, ensuring they remain more than just a display—keeping them in good running condition for countless more adventures on the open road.
Notable Differences: Classic vs. Modern Road Bikes
The difference between classic bikes and their modern counterparts isn’t just about age—it's about construction, ride feel, and maintenance requirements. Classic motorcycles predominantly feature steel frames, classic drive trains, and mechanical brakes, whereas modern bikes often employ lightweight materials, disc brakes, and computer-assisted systems. This influences everything from bottom bracket compatibility to the type of lubricants and fluids required for bike maintenance.
When comparing a classic motorcycle to a new road bike, you’ll notice that older motorcycles demand hands-on mechanical skill and regular inspections, especially of tires, tubes, and bar tape. Modern bikes, meanwhile, benefit from advanced engineering but often require specialized tools not needed for vintage bikes. For classic bike owners, the big difference lies in the attention to detail and commitment to the legacy of their machines—a reward that is as much about pride as it is about riding performance.
Comparison of Classic Motorcycle, Vintage Motorcycle, and Modern Bike Features |
|||
Feature |
Classic Motorcycle |
Vintage Motorcycle |
Modern Bike |
|---|---|---|---|
Frame Material |
Steel Frame |
Steel Frame |
Aluminum/Carbon Fiber |
Brake System |
Mechanical, Drum/Pad |
Mechanical, Drum/Pad |
Hydraulic, Disc Brakes |
Drive Train |
Chain/Shaft |
Chain/Shaft |
Chain, Belt, Electronic |
Electronics |
Minimal |
Very Minimal |
Advanced; Digital |
Maintenance Frequency |
High; Attention to Detail |
Very High; Regular TLC |
Moderate; Self-diagnostics |
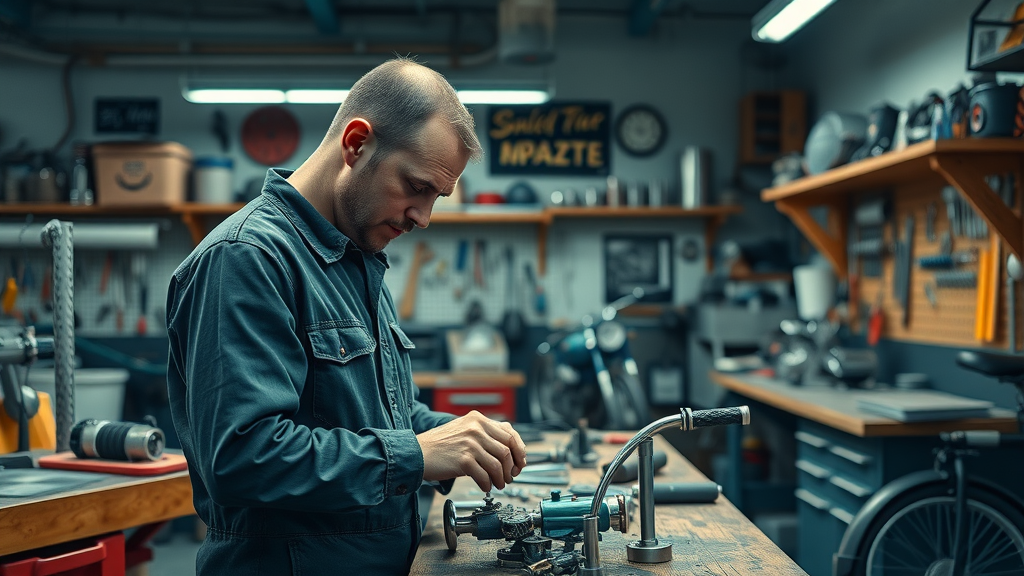
Preparing for Classic Bike Maintenance: Tools and Workspace
Essential Tools for Classic Motorcycle and Vintage Bike Maintenance
Wrenches, lubricants, bike stands, bottom bracket tools
Equipping yourself with the right tools is non-negotiable for effective classic bike maintenance. For vintage motorcycle enthusiasts, basic spanners, socket wrenches, and quality lubricants form the core of your toolkit. A tough, reliable bike stand lifts your vehicle for better access to the bottom bracket, drive train, front and rear wheels, and brake system—all areas that see regular wear on older motorcycles. Essential lubricants not only keep moving parts running smoothly, but also provide vital protection against rust, especially on exposed bare metal.
Don’t overlook specialty items: a bottom bracket tool for periodic checks, chain wear measurement devices, and precision screwdrivers for sensitive bar tape and carburetor work. Investing in classic motorcycle-specific cleaning products preserves the shine of chrome and paintwork, while a torque wrench ensures bolts are tightened to proper specs, preventing future headaches. Many bike mechanics recommend keeping a separate box for rare vintage bike parts, so you’re always ready for routine maintenance or a quick fix in your garage or local bike shop.
Setting Up an Efficient Maintenance Space
"An organized garage is a vintage motorcycle’s best friend." – Classic Bike Mechanic Tom R.
A well-structured workspace is key to consistent and safe classic bike maintenance. Start with a clean, well-lit garage—orderly storage of wrenches, lubricants, and bottom bracket tools is a good idea for efficiency. Pegboards with labeled hooks for tools, organized bins for spare chains and brake pads, and a dedicated workbench for small parts and bar tape changes set the foundation of an effective maintenance routine. Flooring mats or trays beneath the work area catch fluids, making cleanup simpler and safeguarding your workspace’s integrity.
Beyond organization, safety is paramount. Always keep personal protective equipment handy and clearly mark hazardous materials. Having detailed maintenance checklists within sight encourages thorough, repeatable routines and ensures nothing gets skipped in the process. For classic motorcycles, a designated area for record-keeping is valuable; document each oil change, bottom bracket check, and chain lubrication. Ultimately, an efficient space turns bike maintenance into a streamlined hobby, enhancing both productivity and enjoyment of your vintage motorcycle journey.
Routine Classic Bike Maintenance: Daily, Weekly, and Monthly Tasks
Daily Checks Every Classic Bike Owner Should Perform
Fluid levels, tire inspection, visible leaks, quick test ride
Daily attention is foundational in classic bike maintenance. Each day before you start your ride, check all fluid levels—oil, brake, and coolant—ensuring your vintage motorcycle has what it needs for smooth operation. Give the tires a quick inspection for proper pressure and tread depth, and don’t forget to visually scan for any leaks beneath the engine or bare metal components. A short test ride around the block can reveal subtle issues with the bottom bracket, chain, or bar tape that aren’t visible on the stand.
Many mechanical failures are preventable with these daily routines, saving you from more costly repairs at your local bike shop. Trust your senses during inspections: unusual smells, strange noises, or new vibrations often signal deeper issues. Attending to these signs promptly keeps your classic motorcycle in good condition and ready for more road-tripping adventures.
Weekly Vintage Motorcycle Maintenance Procedures
Brake testing, chain lubrication, lights/electrical systems
Set aside time each week for more in-depth checks on your classic bike. Brake testing is non-negotiable—inspect brake pads for wear, make sure the brake lever feels smooth, and verify disc brakes (if fitted) or traditional systems are functioning properly. Clean and lubricate the drive train, including checking for chain wear, sprocket alignment, and tension. Lights and electrical systems need extra vigilance on vintage motorcycles due to the sensitivity of older wiring—replace any dim bulbs or frayed wires immediately.
Weekly maintenance reinforces the longevity of your steel frame and moving parts. It’s a smart time to address minor issues before they snowball, ensuring every component, from bar tape to bottom bracket, is performing as it should. Remember, consistent care is the ultimate investment in the lifespan and reliability of your cherished classic motorcycle.
Monthly Classic Motorcycle Inspection Checklist
Full lubrication, bolt tightening, bottom bracket assessment, engine snags
Monthly classics maintenance goes beyond routine. Start by lubricating all moving parts thoroughly—paying special attention to the bottom bracket, chain, and control cables. Tighten every accessible bolt to manufacturer-recommended torque, ensuring nothing rattles loose on your next road bike outing. The monthly inspection is prime time for a comprehensive bottom bracket assessment as classic bikes can develop play in these vital joints, affecting handling and safety.
Address engine ‘snags’ or hesitations by examining carburetor settings, air filters, and ignition timing. This is also an opportunity to deep-clean your vintage bike’s bar tape, polish bare metal parts, and check for subtle signs of chain wear not caught during weekly routines. Document all monthly findings for future reference or when visiting your trusted bike mechanic or bike shop for more advanced repairs.
Critical Systems: Engine Care in Classic Motorcycles
Best Oils and Fluids for Classic Motorcycles
Selecting the best oil is pivotal for classic motorcycle longevity. For most vintage bikes, high-zinc, mineral-based 20W-50 oil offers the wear protection these older engines need, thanks to its robust anti-wear and anti-corrosion properties. Dedicated “classic motorcycle oil” blends are often a good idea, as they’re formulated for the metallurgy and tolerances of classic engines and their moving parts. Avoid using synthetic oils unless specified by the manufacturer, as older seals may not be compatible, potentially causing leaks on bare metal engine cases.
Alongside oil, ensure coolant and brake fluids meet or exceed period specifications. Proper fluids reduce internal friction in the drive train, protect the bottom bracket and shaft, and help keep your road bike or vintage motorcycle ready for anything. Documenting every fluid change is also crucial for maintaining value and preventing untimely mechanical issues that can be simply a matter of routine neglect.
Cleaning and Tuning Vintage Motorcycle Carburetors
The carburetor is the heart of any vintage motorcycle’s engine, and meticulous cleaning is crucial for reliable performance. Begin by removing the carburetors and soaking them in a dedicated cleaner to break down fuel varnish and debris. Use soft brushes and compressed air on jets and passages, avoiding harsh tools that might scar bare metal surfaces. After cleaning, reassemble carefully and use fresh gaskets to prevent air leaks and preserve engine integrity.
Tuning involves synchronizing multiple carburetors (if applicable), adjusting float heights, and setting fuel-air mixtures for optimal combustion. A well-tuned carburetor brings back lost power, improves throttle response, and extends engine lifespan. Many experienced bike mechanics agree: regular carburetor service can be the difference between a troublesome vintage bike and one that runs like it just rolled off the showroom floor.
Identifying and Preventing Engine Wear
Classic bikes, especially older motorcycles, can fall victim to preventable engine wear if neglected. Signs include increased engine noise, sluggish throttle response, oil leaks around gaskets, and declining fuel efficiency. Address these early by routinely inspecting the drive train, changing oil as per schedule, and using genuine or period-correct parts. Regularly monitor compression, spark plug condition, and timing settings to identify developing problems before they escalate.
Preventative steps—like consistent lubrication, bolt torque checks, and paying attention to detail—are invaluable. For rare issues, partner with a trusted bike mechanic or classic motorcycle specialist for advanced diagnostics. A stitch in time saves nine: proper maintenance today means fewer engine rebuilds and more open-road memories tomorrow.
Electrical Systems in Classic Bike Maintenance
Typical Electrical Faults in Vintage Bikes
Electrical gremlins are infamous among classic motorcycle enthusiasts, largely due to aging wiring, corroded connectors, and brittle insulation on vintage bikes. Common faults include intermittent lighting, malfunctioning horn, weak starting, and erratic gauges. Moisture, vibration, and time can degrade contacts, especially on older motorcycles with minimal electronic protection compared to modern bikes. Identify trouble early by checking fuses, ground connections, and the battery for corrosion or loose mounts.
Simple cleaning and contact-tightening often resolve minor issues, but it’s crucial to use quality period-correct wire and replace brittle or spliced segments whenever possible. Document recurring problems to assist your local bike mechanic or provide context at your next visit to the bike shop for major repairs.
Maintaining Classic Motorcycle Battery Life
Batteries in classic bikes require more attention than those in modern machines. Check electrolyte levels monthly on older lead-acid units, ensuring fluid fully covers plates to avoid premature failure. Charge batteries regularly during periods of inactivity and keep terminals clean and corrosion-free using a baking soda paste or commercial terminal cleaner.
If your vintage motorcycle is stored for long stretches, remove the battery and keep it on a trickle charger in a cool, dry place. This not only extends battery life but also preserves your electrical system’s integrity, ensuring your classic bike is ready to fire up when the open road beckons again.
Upgrading vs Restoring: Wiring on Vintage Motorcycles
Deciding whether to restore original wiring or upgrade to modern equivalents is a quintessential classic bike maintenance debate. For purists, period-correct wires, connectors, and tape preserve authenticity and value, provided they’re kept in good condition. However, for regular riders prioritizing reliability, discreet upgrades using modern wires and insulated connectors deliver peace of mind without compromising visual appeal.
Regardless of approach, ensure that wiring follows the correct color-coding and route as per original diagrams. Upgrades should be reversible where possible, with detailed records maintained for future owners or bike mechanics restoring the vintage motorcycle to factory specification. As always, a methodical electrical check should be part of your routine classic bike maintenance regimen.
Tire and Wheel Maintenance on Vintage Bikes and Motorcycles
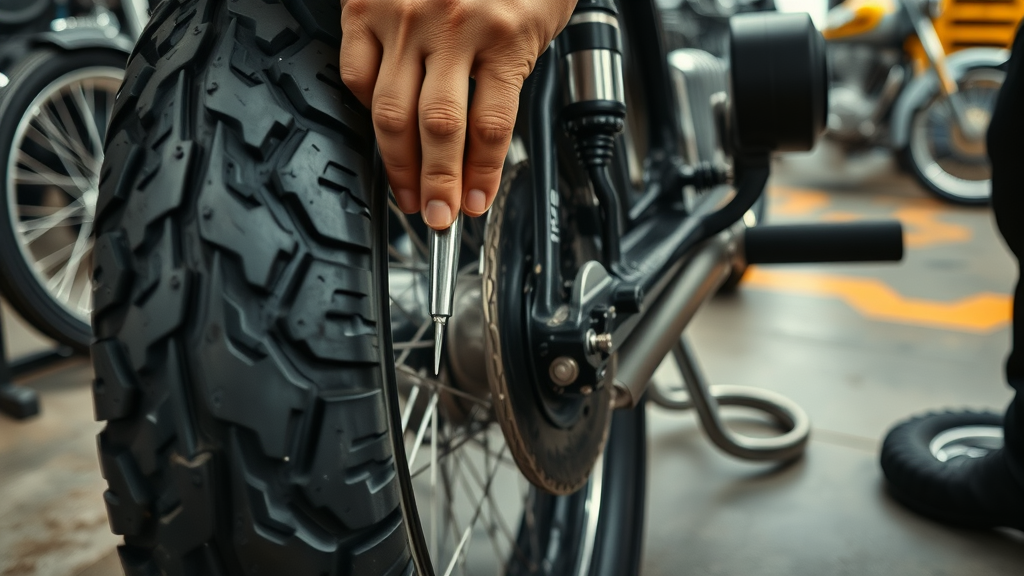
Tire Selection and Care for Classic Bike Longevity
Tires are your only touchpoint with the road, so choosing the correct type is critical for classic bike safety and performance. Vintage motorcycles demand period-appropriate tires, often with specific tread patterns and sidewall constructions to match original handling characteristics. When selecting new tires, consult with your local bike shop or trusted mechanic for compatible brands and models. Routine inspection for cracks, flat-spots, or hardening rubber ensures both authenticity and riding confidence.
Always maintain recommended tire pressures and replace tubes if they show signs of age or patching. For rare or discontinued sizes, specialty restoration shops or vintage bike enthusiasts’ clubs are invaluable resources. Document your tire changes, and visually inspect the tread before every ride to avert avoidable mishaps on your classic motorcycle journey.
Proper Wheel Alignment for Vintage Road Bikes
Wheel alignment is critical to classic bike maintenance—not just for safety, but for maintaining the handling characteristics vintage bikes are prized for. Check both front and rear wheels for trueness by lifting the bike and spinning each wheel, watching for lateral movement or wobble. Inspect spoke tension and hub bearings for free play or friction, as these can dramatically impact stability on the road and contribute to premature wear in the bottom bracket and drive train.
If you detect misalignment, professional adjustment at a reputable bike shop or with an experienced bike mechanic is recommended. Correcting alignment preserves your classic motorcycle’s integrity and lets you enjoy the road bike feel it was designed for, all while extending the lifespan of your tires and rims.
Bottom Bracket Assessment for Classic and Vintage Bikes
The bottom bracket is the unseen powerhouse of your classic or vintage bike, supporting the crank and connecting moving parts that turn your energy into forward motion. Routine assessment involves checking for play, smoothness of rotation, and absence of grinding or clicking sounds. Loose or worn bottom brackets sap your bike’s efficiency, affect gear alignment, and can even damage the steel frame if left unchecked. Cleaning, greasing, and torquing the bracket according to manufacturer specs should be part of every classic bike maintenance checklist.
When restoring an old bike, consider replacing the entire bottom bracket assembly if it shows excessive deterioration—a task best performed with the right specialized tools or by your local bike mechanic. Keep careful records: documented maintenance significantly enhances resale value and provides peace of mind for future repairs.
Brake System Overhaul: Staying Safe on Classic and Vintage Bikes
Inspecting and Replacing Classic Motorcycle Brake Pads
Brake pads on a classic motorcycle must be in excellent condition to ensure stopping power and safety. Check pads every few weeks for wear, glazing, or contamination by oil or dirt. If your classic bike features rim or drum brake systems—as is common with many vintage bikes—replace pads at the first sign of uneven or excessive wear for optimal grip. Advanced riders may upgrade to period-correct disc brakes where possible for better performance, but keep original components for authenticity and resale value.
Replacement is straightforward: use a quality replacement compatible with your make and model. Properly bed in new pads, and always torque brake system bolts to specification. Don’t forget to test both brake lever responsiveness and front and rear balance during every maintenance cycle.
Brake Fluid and Line Maintenance for Vintage Motorcycles
Brake fluids degrade over time, absorbing moisture and losing effectiveness—a significant risk for classic bikes. Change brake fluid annually, using the type recommended by your bike mechanic or the manufacturer. Inspect lines for brittle rubber, cracks, or leaks, and replace any suspect segments immediately. High-quality braided lines, while not always original, provide extra safety and reliability for regular riders without detracting from a vintage motorcycle’s looks.
Bleed the system thoroughly to remove air and test for consistent lever feel. Keep a maintenance log detailing all brake servicing; this not only supports resale value but also protects your investment on every ride down memory lane.
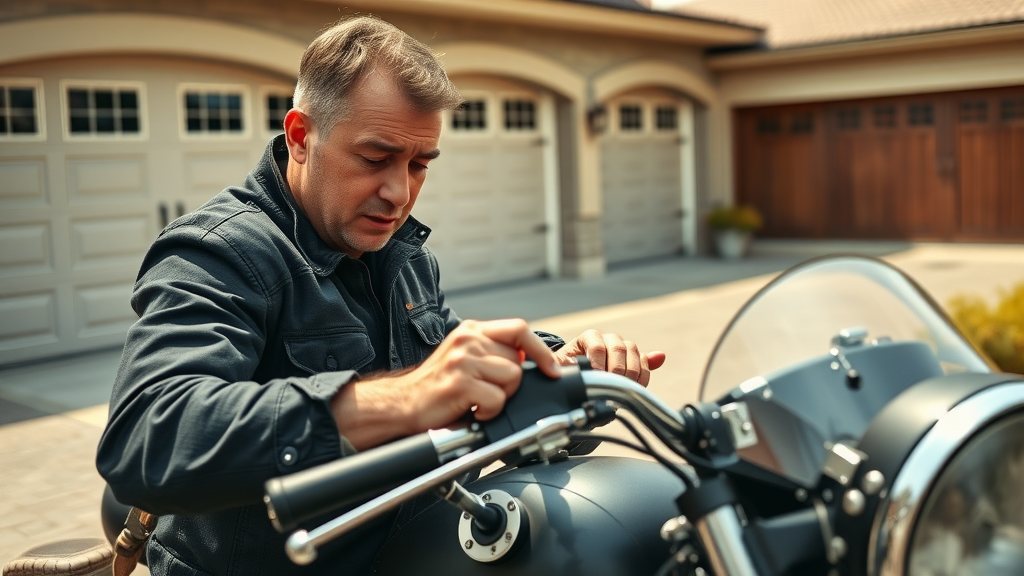
Chain, Gear, and Drivetrain Maintenance for Classic Bikes
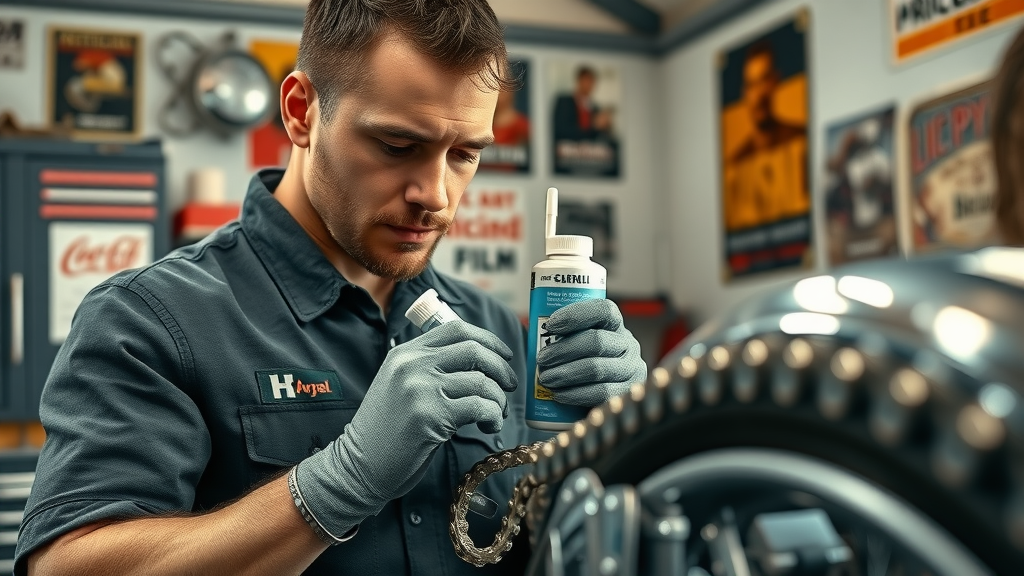
Chain Guard Cleaning and Lubrication
The chain and drive train are some of the hardest worked—and most neglected—components on older motorcycles and classic bikes. Remove the guard and clean the chain using a dedicated solvent and a soft brush, making sure to dislodge any grit that could cause premature chain wear. After cleaning, dry it thoroughly before applying a liberal coat of motorcycle-specific chain lubricant to all moving parts, ensuring every link is protected. A clean chain guard not only protects your chain but helps retain the original look of your bike.
Reinstall the chain guard and rotate the wheel to ensure even lubrication distribution. Check tension and alignment after every clean, adjusting as necessary per your classic bike’s owner manual. Regular attention here translates to smoother gear changes, reduced noise, and fewer costly drive train replacements in the long run.
Gear Alignment and Adjustment in Vintage Road Bikes
Gears are the gateway to smooth, enjoyable rides on classic and vintage bikes. Misaligned gears cause skipping, excessive wear, or even drive train failure—all avoidable with routine checks. Inspect the derailleur function, cable tension, and sprocket wear, adjusting as needed to maintain crisp shifting. For bikes with early indexed shifting systems or friction shifters, regular lubrication of moving parts is vital.
Whenever you restore or customize a classic bike, genuine or period-correct parts help preserve authenticity, but modern replacements may offer better durability for regular use. After each adjustment session, test ride in all gear combinations and fine-tune until shifting is seamless. Consistency in gear alignment enhances both your riding pleasure and mechanical reliability, ensuring every journey is as trouble-free as the last.
Protecting the Frame: Preserving Classic Motorcycle Looks and Value
Rust Prevention and Regular Cleaning on Vintage Bikes
Steel frames and exposed chrome are prone to rust, one of the biggest threats to vintage bike longevity. Wash your motorcycle regularly using gentle automotive soap, thoroughly rinse, and dry all bare metal areas to eliminate water spots. A soft microfiber cloth and non-abrasive polish protect paint and bar tape, while chrome cleaner shields metallic finishes from moisture and pitting. Apply a thin coat of wax to painted and chromed surfaces every month as part of your classic bike maintenance ritual.
Keep your motorcycle stored in a dry, well-ventilated garage to further deter rust. If rust does appear, gently remove it with steel wool and apply a touch-up paint to prevent spread. Document all frame care, especially before selling or insuring your vintage motorcycle—the attention to detail will stand out to buyers and appraisers alike.
Classic Paintwork and Chrome Protection
Preserve the original luster of classic paintwork and chrome with regular, detail-oriented cleaning. Avoid harsh chemicals, opting for specialized automotive polishes and protectants. Use a fresh microfiber cloth for each session and buff gently to maintain the finish without introducing scratches. For bikes with custom bar tape or rare decals, use pH-neutral products to avoid fading, and steer clear of abrasive pads or rough towels that might harm unique visual features.

For serious collectors or those restoring an old bike, document every paint touch-up and chrome treatment. Both authenticity and attention to fine detail are key when presenting your vintage motorcycle for appraisal or sale, safeguarding not just the look, but the investment value of your ride for years to come.
DIY Troubleshooting: Fixing Common Vintage Bike Problems
How to Handle Oil Leaks in Classic Motorcycles
Oil leaks are a familiar foe for classic bike owners. Start with a thorough inspection: pay close attention to the bottom bracket area, valve covers, and main engine gaskets for signs of fresh seepage. Clean the suspect area and track the leak's origin after a short ride. Often, leaks on vintage motorcycles result from worn seals, aged gaskets, or periodic use of modern oils not suited for older metallurgy.
Replace gaskets and seals with period-correct equivalents where available. Use a torque wrench to avoid over-tightening bolts on bare metal surfaces. If the leak persists despite your best efforts, consult with a specialist bike mechanic for a more in-depth engine or drive train inspection. Proper documentation helps pinpoint recurring issues and prevents costly mistakes during future repairs.
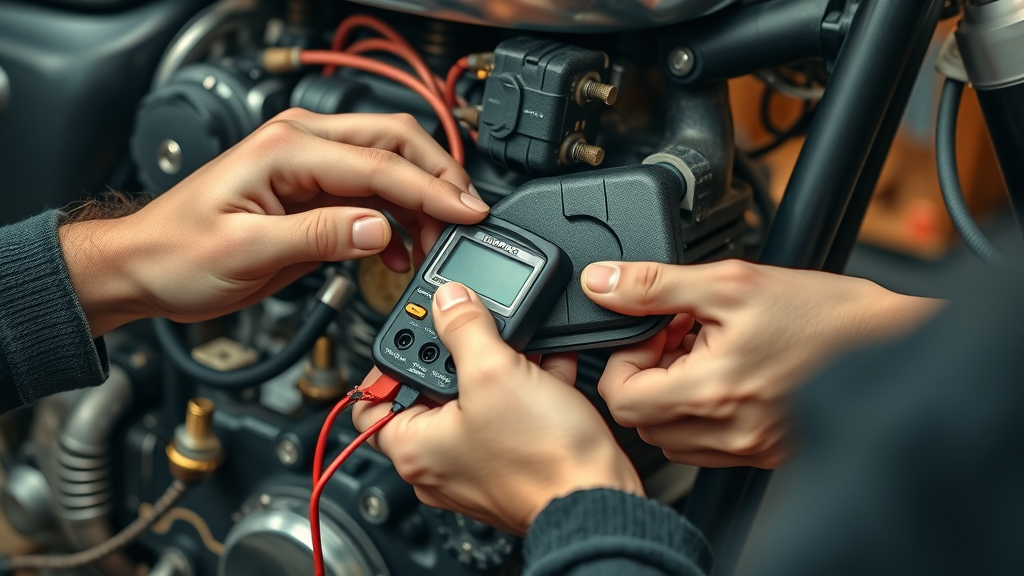
Fixing Electrical Issues on Vintage Bikes
Electrical niggles, like intermittent spark or flickering gauges, are often solved by methodical troubleshooting. Begin by cleaning all ground points and checking for worn, frayed, or corroded wires. Test each circuit systematically with a multimeter, comparing readings against specifications for your specific vintage motorcycle model. Replace dubious connectors and isolate problematic circuits one-at-a-time, recording tests and repairs in your maintenance log.
Keep replacement wires period-appropriate if preservation is the goal, or invest in discreet modern equivalents for regular use. Sometimes, a simple switch replacement or fuse swap will resolve chronic issues. If resolving the fault eludes your expertise or specialized equipment is required, make a note and seek professional help—a classic motorcycle specialist will have the tools and knowledge to solve vintage wiring headaches efficiently.
Noise, Vibration, and Other Troubles in Classic Bike Maintenance
Noises or vibrations are more than mere annoyances—they can signal significant mechanical faults. Isolate sounds by location: clicks from the bottom bracket, rattles from the chain guard, or buzzing from loose bar tape. Investigate and secure any suspect fasteners, rubber bushings, or mounts. Persistent vibration may indicate issues with engine balance, transmission alignment, or wheel trueness.
Systematically address each symptom: lubricate, tighten, and test after each adjustment. If the noise persists or is accompanied by new performance issues, escalate your investigation or consult a trusted bike mechanic. Keeping a detailed troubleshooting log streamlines diagnostics, saving both time and money in the quest to keep your classic bike road-ready.
When to Call a Pro: Recognizing Classic Motorcycle Repair Limits
Specialist Services for Rare and Antique Bikes
Some classic bike maintenance and restoration tasks are best left to specialists. If you own a particularly rare or antique model, sourcing period-correct parts, restoring intricate bodywork, or rebuilding unique drive train components may exceed DIY capabilities. Professional bike mechanics and restoration experts typically have access to original manufacturer documentation, specialized jigs, and advanced diagnostic equipment, ensuring the best results for your vintage motorcycle.
Don't risk irreversible mistakes with rare bikes: investment in a professional repair or restoration often pays for itself in value preservation and peace of mind. Reputable bike shops or restoration houses can even provide before-and-after documentation, supporting insurance valuations and future resale opportunities.
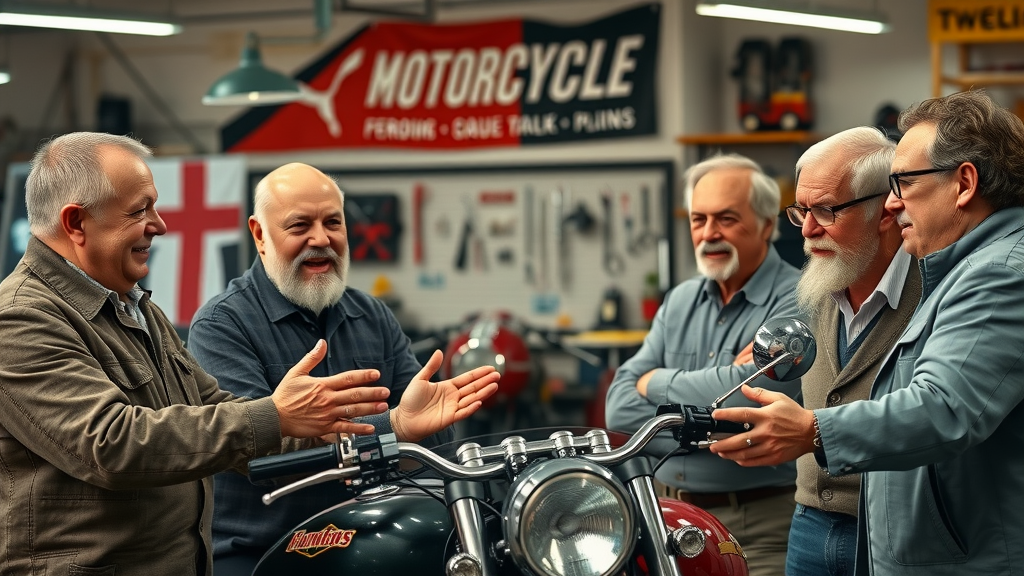
How to Choose a Classic Bike Mechanic
Selecting a qualified bike mechanic for your classic motorcycle is crucial. Look for professionals with demonstrable experience with your make and model—ask for references, inspect their workshop for organization and period-correct tools, and review sample restoration projects if possible. Local bike shops often have dedicated classic motorcycle specialists or can recommend reliable contacts within the vintage bike community.
Choose a mechanic who values documentation and offers clear, itemized estimates for all work. Open communication ensures expectations are met and that your classic bike receives the attention, authenticity, and detail it deserves during every maintenance cycle or major overhaul.
Preserving Value: Documentation and Record-Keeping for Vintage Motorcycles
Why Maintenance Logs Matter for Classic Bike Resale
Keeping detailed maintenance logs is key to protecting your investment in a classic or vintage bike. Well-documented service history helps validate mileage, demonstrates responsible ownership, and reassures potential buyers during resale. Include dates, mileage, specific work performed, and the source of any replacement parts—especially for rare pieces like bottom brackets or authentic steel frame stampings.
Buyers and appraisers alike value transparency. A comprehensive record shows off your commitment to classic bike maintenance and often results in a higher resale value and quicker sales, and can be a valuable resource for future repairs or insurance claims.
Vintage Motorcycle Registration and Insurance Tips
Registration and insurance for vintage motorcycles require special attention. Photograph and catalog identifying frame numbers, keep copies of all classic bike maintenance receipts, and store original manuals. Seek out insurance policies that offer “agreed value” or restoration coverage, protecting both the labor and passion invested in your vintage bike.
Consult your local vehicle registration authority or classic motorcycle groups for guidelines on historic or collector plates. Keeping up-to-date with regional rules can simplify compliance and protect your right to enjoy your treasured classic bike on public roads.
People Also Ask: Classic Bike Maintenance Questions Answered
How to maintain a vintage motorcycle?
Maintaining a vintage motorcycle involves a consistent, thorough approach: perform regular cleaning, lubricate chains and moving parts, and conduct detailed engine checks and safety inspections. Use the correct tools and quality parts—many experienced riders recommend keeping a separate kit for classic motorcycles. Focus on periodic oil changes, brake checks, bottom bracket assessments, and immediate attention to small faults. Consistency and detail will keep your vintage bike in peak condition for years to come.
What is the N-1 rule for bikes?
The N-1 rule is a playful take on bike collecting, suggesting that the ideal number of bikes you should own is "one fewer than would cause conflict with your significant other." For vintage bike enthusiasts, this means balancing your passion for collecting with the maintenance resources you can reasonably provide. It’s a reminder that every classic or vintage bike in your stable warrants dedicated attention to detail and regular upkeep for safe, enjoyable riding.
What regular maintenance should be done on a bike?
Routine bike maintenance includes cleaning the frame, lubricating the chain, checking brake pads, inspecting tires and tubes, and monitoring fluid levels. For classic and vintage bikes, add carburetor cleaning, oil changes, attention to the bottom bracket, and regular inspection of bar tape, steel frame joints, and electrical systems. This holistic approach prevents wear and costly repairs, supporting both safety and riding enjoyment.
What is the best oil for classic bikes?
The best oil for classic motorcycles is typically a high-zinc, mineral-based 20W-50 blend or a specialized classic motorcycle oil. These oils provide the necessary protection for vintage bike metallurgy and engine tolerances, ensuring optimal performance and minimizing wear. Always check your owner’s manual or consult a classic bike mechanic for the recommended type and change frequency for your specific model.
Top Classic Bike Maintenance Tips from the Experts
Seasonal storage advice: Always store your classic bike in a dry, secure garage, on stands if possible.
Engine warm-up routines: Let your vintage motorcycle idle briefly before riding for even oil distribution.
Fuel system care: Drain old fuel if riding infrequently and use preservation stabilizers for longer storage.
Regular ride scheduling: Take your bike out for occasional rides to keep all moving parts fresh and lubricated.
Authenticity preservation: Use period-correct parts and fluids to maintain your classic bike’s value and history.
"A well-maintained classic bike is not just a machine—it's a legacy." – Vintage Motorcycle Restorer Ann M.
Key Takeaways: Classic Bike Maintenance Essentials
Consistency is crucial in classic bike maintenance
Use period-correct fluids and parts for vintage bikes
Seek specialist help when limits are reached
Maintain thorough repair and maintenance documentation
Classic Bike Maintenance Video Guide
Video Guide: Top 5 Classic Bike Maintenance Steps
Instructional video demonstrating step-by-step classic bike maintenance, featuring tools, workspace, oil changes, brake checks, and troubleshooting with close-ups and expert narration.
Watch detailed demonstrations on diagnosing and repairing common electrical faults in classic motorcycles.
Frequently Asked Questions on Classic Bike Maintenance
How often should I service my vintage motorcycle?
Service your vintage motorcycle every 2,000-3,000 miles or at least twice a year, even if you ride infrequently. For stored bikes, conduct a thorough check before the riding season starts, focusing on fluids, brakes, and moving parts to ensure reliability and safety.
Are original parts always best for classic bike maintenance?
Original parts are ideal for authenticity and value, but quality reproductions or modern alternatives may offer improved reliability and safety for regular riders. Always document replacements, and consult with classic bike specialists for best-fit options.
How can I prevent rust on my classic motorcycle?
Store your bike in a dry space, clean and wax all painted and chrome surfaces regularly, and inspect for early signs of corrosion. Promptly address any rust spots with appropriate cleaners and touch-up paint to prevent spread and preserve structural integrity.
Where can I find a reliable classic bike mechanic?
Ask for recommendations at local vintage bike clubs, visit reputable bike shops specializing in classic motorcycles, or consult online forums. Look for mechanics with proven experience, transparent pricing, and a passion for proper vintage bike care.
Conclusion: Safeguarding the Ride—Making Classic Bike Maintenance a Ritual
Summing Up the Vintage Motorcycle Care Journey
"Preserving vintage bikes isn’t just about performance; it’s about passion, history, and legacy."
Start Your Classic Bike Maintenance Journey Today – Call Nasty Performance Motorcycle Shop: 847-458-4858
Your vintage motorcycle deserves passion, expertise, and ritual care. Call Nasty Performance Motorcycle Shop Today: 847-458-4858 for trusted classic bike maintenance support.


Write A Comment