Nasty Performance ~ 847-458-4858 

  • Blog Home
  • Categories
    • Motorcycle Maintenance
    • Riding Tips & Preps
    • Safety & Inspection
    • Customizations & Upgrades
    • DIY Motorcycle Repairs
    • Motocycle Audio Systems
    • Motocycle Seasonal Care & Storage
    • Engine, Electrical Performance
  • Bike Night
  • Nasty Performance Motorcycle Shop
October 22.2026
1 Minute Read

What to Pack for Riding in Hot Weather: Stay Cool and Safe

Have you ever set out on an exhilarating summer ride, only to discover you’re drenched, fatigued, or sunburned halfway through your journey? Whether you’re gearing up for horseback riding or firing up your motorcycle, packing the right gear for hot weather is more than a matter of comfort—it's essential for your safety, health, and performance. In this comprehensive guide, we’ll challenge what you thought you knew about riding gear, highlight expert tips, and ensure your next ride leaves you cool, protected, and ready for adventure.

What to Pack for Riding in Hot Weather: Essential Guide

Opening Question: Are You Ready for Your Next Hot Weather Ride?

Before you zip, buckle, or cinch up, think—are you truly prepared to tackle the heat? The summer sun isn't just an inconvenience; it can quickly turn an enjoyable journey into a risk if you haven’t packed the right hot weather essentials. What to pack for riding in hot weather goes far beyond grabbing a water bottle or wearing a light-colored t-shirt. It’s about using modern fabric technology, practical accessories, and expert packing strategies that make all the difference on the road or trail. Prioritizing your comfort and safety on hot days means understanding how each piece of gear— from wicking show shirts and riding boots to sun sleeves and hydration packs— plays a role in keeping you cool and out of harm’s way. Addressing both horseback riding and motorcycle enthusiasts, this guide delivers actionable, step-by-step advice, so you’ll never second-guess what you bring along, no matter how high the temperature climbs.

Packing for hot weather riding doesn’t need to be overwhelming. When you know the right materials, smart outfit combinations, and dependable summer riding accessories, you can stay cool and protected, no matter the sun’s intensity. Read on to arm yourself with expert knowledge, packing checklists, and insider tips for conquering the summer heat on any ride.
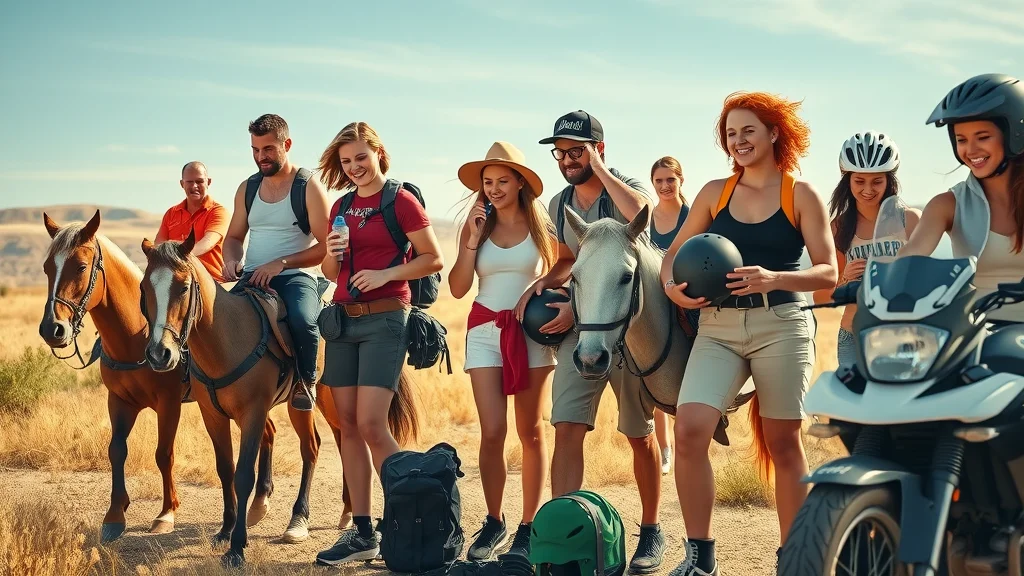
Vibrant group of diverse riders (horseback and motorcyclists) preparing gear for hot weather ride — cheerful, energetic expressions; actions include checking backpacks, sipping water, and adjusting helmets; sunlit trailhead, dry grasses, open sky; photorealistic, sharp detail, sandy beige, whites, vivid sky blue, golden daylight, softly blurred background, 35mm wide-angle lens.

What You'll Learn About What to Pack for Riding in Hot Weather

  • Key considerations for horseback riding and motorcycle riding in hot weather
  • Choosing the right riding clothes and riding boots
  • The science behind wicking fabric, light colors, and sun protection
  • Practical packing checklists for summer riding

Understanding the Risks of Riding in Hot Weather

Stay Cool: Why Temperature Matters on the Trail and the Road

Hot weather demands vigilance and preparation—not just to stay comfortable, but to protect your health. When temperatures climb, the body’s ability to cool itself through sweat is tested, *especially when riding gear is involved*. For both horseback riding and motorcycle adventures, heat-related risks include dehydration, heat stroke, and dangerous sun exposure. Riders often underestimate the impact of the sun’s intensity, believing that wind from movement will keep them cool. In reality, without proper gear and hydration, you might experience fatigue, dizziness, or even sunburns on bare skin that drastically reduce your safety and enjoyment.

Choosing lightweight, wicking fabric, and keeping sun protection top of mind are key strategies for every rider. Airflow provided by technical riding shirts, proper ventilation in helmets, and thoughtfully layered clothing make all the difference in reducing body temperature. This isn’t just about staying comfortable; heat-related illnesses can set in quickly and silently. Practicing smart packing, using items like cooling towels and hydration packs, and understanding why light colors and functional materials reflect sunlight and provide airflow help riders stay safe when the thermometer spikes.

While preparing for hot weather rides, it's also important to consider how your gear and bike maintenance routines adapt to seasonal changes. For a deeper dive into keeping your motorcycle in peak condition throughout the year, check out these seasonal bike care secrets every rider should know—they offer practical tips that complement your summer riding preparations.

"Hot weather demands both smart preparation and adaptable gear—hydration, protection, and comfort are the pillars of safe riding."
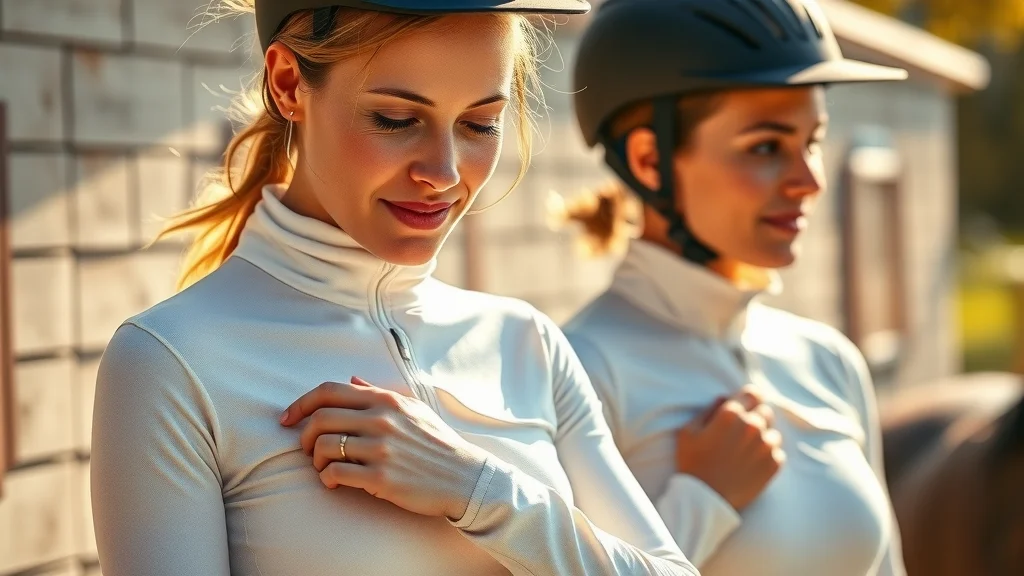
Moisture-wicking, light-colored riding outfits and gear; focused models adjusting sleeves and collars to highlight breathability; photorealistic, sun-soaked backdrop, ultra-fine fabric textures and skin tones; whites, pastels, tan, color pops under bright daylight; soft bokeh background, 50mm lens.

Riding Clothes: Choosing the Best Materials and Styles for Hot Weather

Breathable Riding Outfits: Wicking Fabric and Light Colors

The foundation of any summer riding outfit is the fabric. High-performance wicking fabric pulls sweat away from your body, drying quickly and reducing chafing—especially important for anyone who plans on spending hours in the saddle or on the bike seat. Technical riding shirts and tights often feature flat seams, which further reduce the chance of irritation on hot days. Light colors such as white, pale blue, and beige reflect sunlight, unlike darker shades which absorb heat and raise your body temperature. Well-designed riding clothes will often feature subtle perforated fabric panels, mesh underarms, or zippered vents to provide airflow where you need it most. Avoid the temptation to wear sleeveless shirts or expose bare skin, as this can lead to dangerous sunburn and doesn't provide the protection needed during a mishap or fall.

For horseback riding, opt for long pants or breeches made from lightweight technical materials. For motorcyclists, specifically choose ventilated jackets rated for hot weather, which combine reinforced protection with breathable mesh. Always think of your entire riding outfit as a system working together: moisture-wicking shirts, ventilated pants, and sun sleeves are a winning combination to keep you cool and comfortable on any ride.

Top Picks: Show Shirt, Knee Patch, and Full Seat Recommendations

A top-quality show shirt designed for summer riding delivers style, performance, and practicality. Look for shirts with mesh paneling, hidden vents, and a high SPF rating for added sun protection. Popular brands now produce shirts that look crisp and classic while actively cooling and moving with you. When it comes to breeches, knee patch and full seat styles offer both functionality and comfort. Knee patches provide targeted grip ideal for long hours in the saddle, while full seat options made from silicone or modern synthetic blends are designed to be lightweight and breathable without sacrificing stickiness for stability during horseback riding.

For both men and women, modern summer breeches and riding tights prioritize stretch, cooling, and quick-drying action. Be sure to select riding clothes that fit snugly but don’t restrict movement—proper fit enhances the performance benefits of wicking fabric and keeps you feeling fresh. Riders investing in show shirts, knee patch, and full seat gear will notice the difference immediately: less sweat, more confidence, and improved performance no matter how intense the rays.

Hot Weather Riding Boots and Accessories
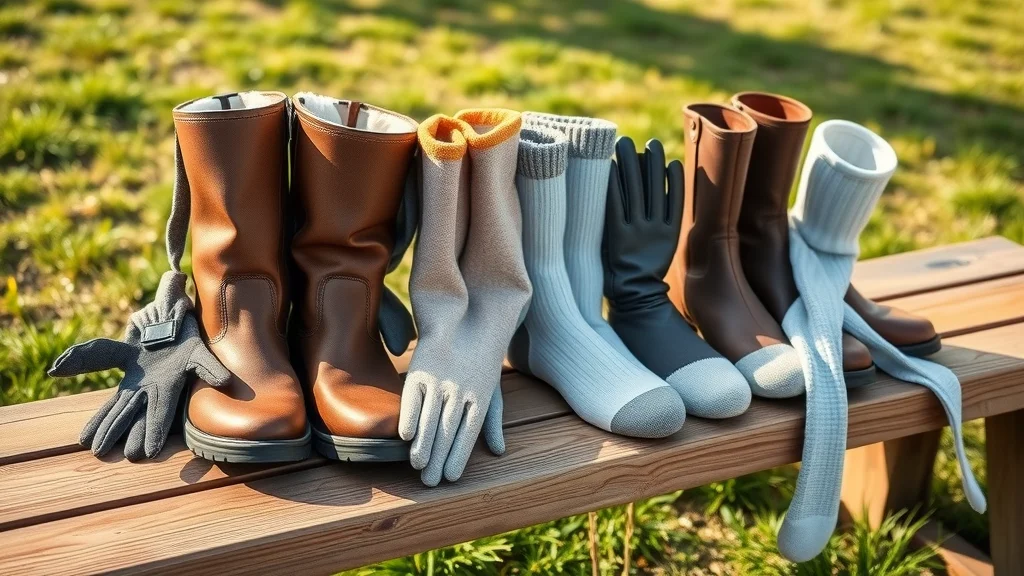
Stylish array of lightweight riding boots, gloves, breathable socks, sun sleeves arranged on wood bench outdoors, grass and sunlight in background; photorealistic, dynamic breeze, crisp textures, earthy browns, grays, white, sky blue, soft afternoon lighting, shallow depth, 28mm lens.

Lightweight Riding Boots for Comfort and Protection

Many riders assume boots are one-size-fits all, but choosing the proper riding boots for hot weather can make all the difference. For summer riding, focus on lightweight materials such as perforated leather, mesh inserts, or modern synthetics. These features allow sweat to evaporate and air to circulate, keeping feet cooler and reducing the risk of blisters. Short paddock boots with ventilated panels are growing in popularity, offering maximum breathability while ensuring safety and ankle support. For motorcycle enthusiasts, seek boots that prioritize air flow without compromising on protective reinforcement. The right riding boots support comfort, keep your grip steady, and help you stay cool mile after mile on hot asphalt or sun-baked trails.

Remember, your feet endure the bulk of the ride—don’t overlook comfort and breathability when packing. Lightweight summer riding boots, worn with moisture-wicking socks, offer crucial benefits for any rider prone to overheating or riding for extended periods in the sun.

Essential Accessories: Gloves, Socks, and Sun Sleeves

Accessories play a pivotal role in completing your hot weather riding outfit. First, choose gloves crafted from light, breathable materials with mesh or ventilated panels, keeping your grip firm, reducing sweaty slips, and protecting hands from sunburn or blisters. Next, select breathable socks—look for moisture-wicking fabrics and seamless toes to prevent rubbing and keep feet cool inside riding boots. Sun sleeves are a must for both horseback riders and motorcyclists, protecting exposed arms from direct UV rays without adding unnecessary warmth. Some innovative sun sleeves even have cooling properties activated by sweat, making them ideal for all-day rides.

Think of these essential accessories as the finishing touches that not only boost your personal comfort, but also enhance overall safety. When every layer, from boots to gloves, is chosen with intentionality, you’ll notice how staying comfortable becomes second nature, even on record-breaking hot weather days.

Sun Protection: Keeping Skin Safe While Riding

Effective Sun Protection Strategies for Horseback Riding and Summer Riding

Protecting your skin from sun damage is as essential as wearing a helmet. The first line of defense is quality, high-SPF sunscreen—pick a broad-spectrum, water- and sweat-resistant formula that you can reapply during breaks. Cover as much skin as possible using long sleeve shirts made from lightweight, UPF-rated fabrics, and always wear a wide-brimmed sun hat or helmet with a visor to shield your face and neck. Riders tempted to wear short sleeve shirts or bare their arms should keep in mind—sunburn can sap energy, increase dehydration, and cause long-term damage. Protective sun sleeves, riding tights, and show shirts designed for hot weather deliver both performance and peace of mind.

Don’t forget your lips, ears, and nose when applying sunscreen, and invest in quality, UV-filtering sunglasses to protect your eyes. Whether you’re heading out for a short spin or a multi-hour trek, prioritizing sun protection lets you enjoy the freedom of summer riding without the consequences.
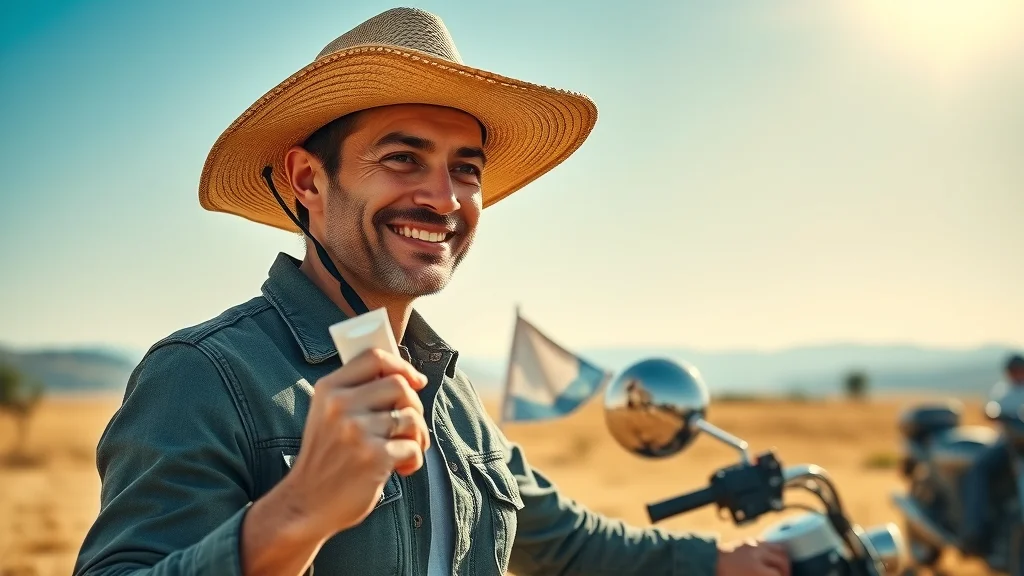
Confident rider applying high-SPF sunscreen and donning a wide-brim sun hat before a ride; photorealistic, sun-drenched countryside, active sunbeam effects, lifelike skin shading, vibrant scenery, natural greens, beige, white, bold blue sky, sharp sunlight, blurred background, 85mm portrait lens.

Hydration: Smart Ways to Stay Hydrated During Hot Weather Rides

Hydration Packs and Water Bottles: What to Pack for Riding in Hot Weather

Hydration can make or break your summer riding experience. Even a mild level of dehydration can diminish your reflexes, impair mental clarity, and increase the risk of heat stroke. For both horseback riders and motorcyclists, hydration packs worn on your back make water easily accessible without the need to stop. They’re perfect for long rides because you can sip frequently and consistently. Alternatively, high-capacity insulated water bottles stay cool for hours even in hot weather, making them perfect for roadside or trail-side breaks. Riders should carry enough water for the entire ride, factoring in the heat, sweat rates, and ride length.

Some hydration packs include additional cooling towels or storage for energy snacks, helping you maintain energy and lower your core temperature. Regardless of your chosen method, always make hydration a conscious part of packing, and set reminders to drink, even if you don’t feel thirsty. For every hour of riding, especially when temperatures soar, plan for regular sips. Smart hydration habits and the right packing strategies ensure you stay healthy, alert, and ready for the road ahead.

Comparing Key Features of Riding Clothes, Riding Boots, and Accessories for Hot Weather

Category Best Materials/Features Main Benefits in Hot Weather
Riding Clothes Wicking fabric, mesh panels, light colors, flat seams, UPF-rated Reduces sweat, provides airflow, protects from sun, stays cool and comfortable
Riding Boots Perforated leather, mesh inserts, lightweight synthetics, ankle support Foot breathability, prevents blisters, maintains protection, enhances grip
Accessories Ventilated gloves, moisture-wicking socks, cooling sun sleeves, wide-brim hats Extra grip, prevents sunburn, keeps skin dry, improves comfort and safety

Practical Packing Checklist for Hot Weather Riding

  • Lightweight wicking riding outfits and show shirts
  • Sun protection gear: hats, sleeves, sunscreen
  • Hydration tools: bottles, packs
  • Breathable riding boots and comfortable socks
  • Personal first-aid kit and cooling towels
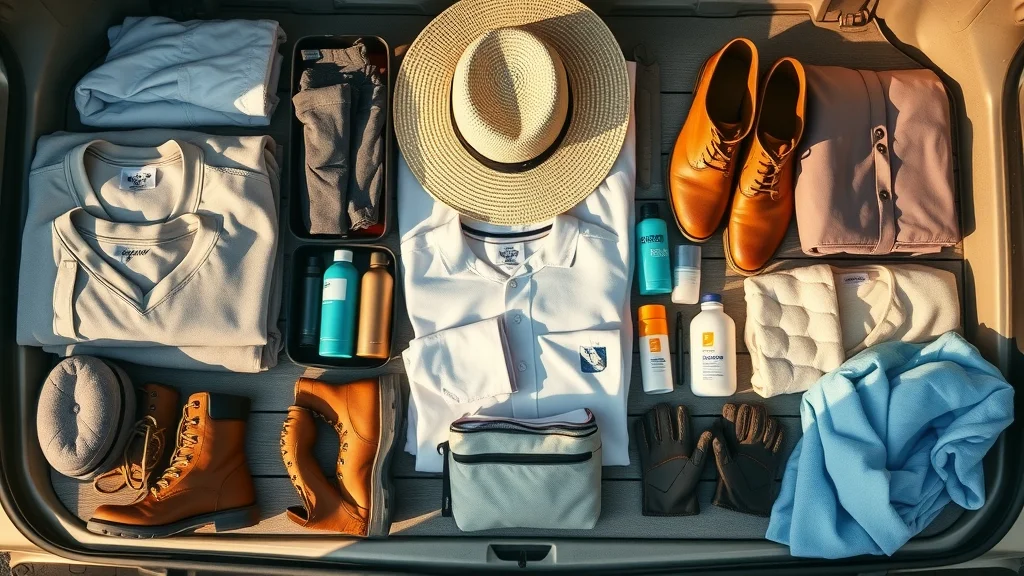
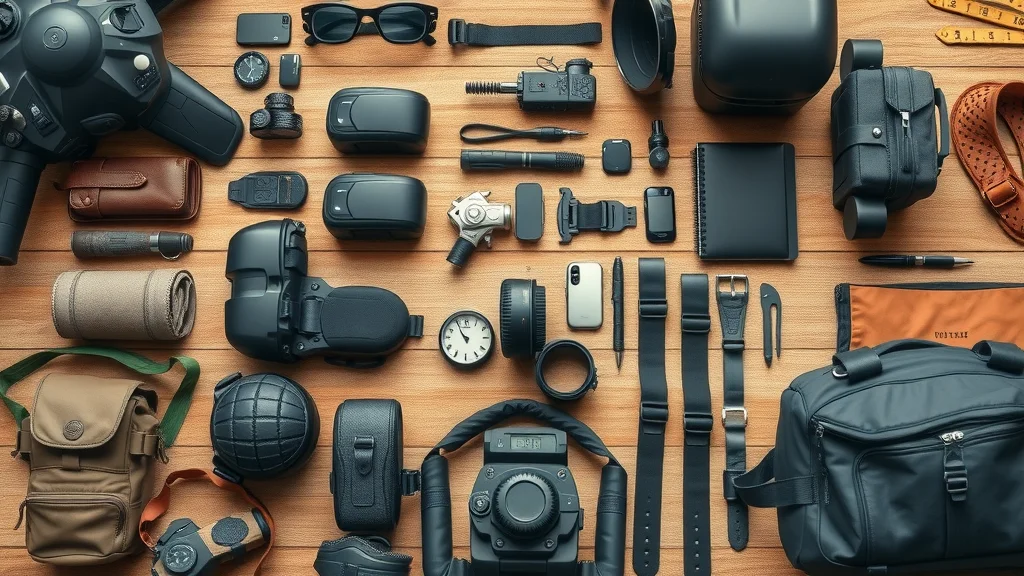
Packing layout for a hot weather ride — organized essentials: wicking shirts, boots, sun hat, sunscreen, water bottles, cooling towels, gloves on vintage wooden floor or vehicle tailgate; photorealistic, natural textures, soft sunlight, high clarity, summery colors, 35mm lens.

People Also Ask: What to Wear When Horse Riding in Hot Weather?

Answer: What to Wear When Horseback Riding in Hot Weather

The best horseback riding outfit for summer focuses on both comfort and sun protection. Opt for a long sleeve riding shirt made of wicking fabric in light colors that reflects sunlight. Combine this with riding tights or breeches (either knee patch or full seat) using moisture-wicking, quick-dry materials. Wearing riding boots designed for summer ensures your feet stay cool and protected. Complete your outfit with a vented helmet (or a wide-brim visor), UV-filtering sunglasses, and sun sleeves. While you might be tempted to wear short sleeves, exposing bare skin increases risk of sunburn and chafing. Carefully chosen, technical riding clothes help you stay cool and safe, even on the hottest summer riding days.
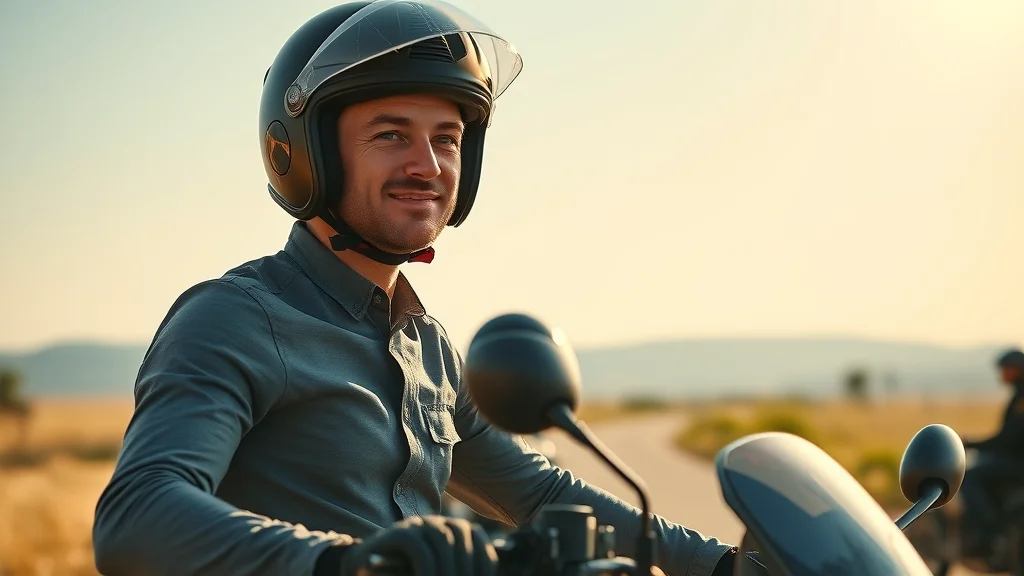
Cool, modern rider demonstrating a full hot weather riding outfit—ventilated shirt, light pants, riding boots, sun sleeve, helmet with visor; photorealistic, relaxed posture, sunlit landscape, wind movement in clothing, sharp natural textures, morning light, 50mm lens.

People Also Ask: Is 100 Degrees Too Hot to Ride a Motorcycle?

Answer: Is 100 Degrees Too Hot to Ride a Motorcycle?

Riding a motorcycle at 100 degrees Fahrenheit is possible, but it substantially raises the risk of heat exhaustion, dehydration, and sunburn. In such hot weather, proper preparation is critical. Always wear full protective gear made from mesh and ventilated materials, use a hydration pack, and take frequent breaks in the shade. Listen to your body, and never compromise safety—even if your gear feels warm initially, it provides crucial protection from the sun, wind, and potential road rash. Some riders choose to avoid midday rides or postpone trips if the heat index is extremely high. Ultimately, if you feel dizzy, nauseous, or excessively hot, it’s time to stop—no ride is worth risking your health in dangerous conditions.

People Also Ask: What Do Harley Riders Wear in Summer?

Answer: What Do Harley Riders Wear in Summer?

Harley riders know that summer riding means balancing the need for rugged protection with coolness and comfort. Most Harley riders choose lightweight mesh riding jackets, ventilated motorcycle pants or jeans, and moisture-wicking shirts, often in light colors. Protective riding boots, ventilated gloves, sunglasses, and a certified helmet are essential, even when the sun blazes. Many also add a neck gaiter for sun protection and carry hydration packs for long runs. Properly chosen riding clothes in summer allow Harley enthusiasts to maintain signature style while staying safe, dry, and cool out on the open road.

People Also Ask: How Do Bikers Stay Cool in Summer?

Answer: How Do Bikers Stay Cool in Summer?

Bikers apply layers of preventive strategies to beat summer heat. The core approach is to wear moisture-wicking shirts, ventilated jackets and pants, and sun protection like sleeves or bandanas. Packing a hydration pack or insulated water bottle helps riders drink water throughout the journey. Many also use cooling towels around the neck or wrists and select gloves that provide airflow to keep hands dry. Planning rides during early morning or late evening, when temperatures are lower, is another smart tactic. Every biker learns that staying cool isn’t about sacrificing protection; it means choosing advanced materials and smart layering to stay cool and safe on every summer ride.

FAQs About What to Pack for Riding in Hot Weather

  • Can I wear shorts for horseback riding in hot weather?
    It’s best to avoid shorts for horseback riding, even in hot weather. Shorts expose bare skin to saddle friction, sunburn, and potential scrapes during falls. Choose long pants or technical riding tights for both protection and comfort.
  • Are mesh jackets safe for motorcycle riding?
    Yes, mesh motorcycle jackets can be safe, provided they have CE-rated armor in high-impact areas. Mesh panels enhance airflow while retaining protective qualities—just ensure the jacket fits well and is designed for summer riding.
  • How often should I reapply sunscreen during a ride?
    Reapply sunscreen every two hours, and immediately after heavy sweating or wiping your face. Always apply a generous layer before heading out and keep a travel-sized bottle packed for easy reapplication.
  • What materials should riding clothes be made of for hot weather?
    Choose wicking fabric such as technical synthetics (polyester blends), specialized mesh, and UPF-rated cottons. These materials wick sweat, dry quickly, and provide airflow and sun protection—perfect for hot weather riding.

Key Takeaways: What to Pack for Riding in Hot Weather

  • Opt for lightweight, moisture-wicking riding outfits and show shirts
  • Choose breathable riding boots and light colors
  • Emphasize sun protection and hydration at every step
  • Pack smart—prioritize comfort, safety, and adaptability

For Expert Gear and Advice, Call Nasty Performance Motorcycle Shop Today: 847-458-4858

Prepare, pack, and ride with confidence—let every journey be safe, cool, and unforgettable.

If you’re ready to take your riding experience to the next level, don’t stop at just packing for the heat—think about how your approach to bike care can enhance every ride, no matter the season. Exploring comprehensive strategies for year-round maintenance can help you avoid unexpected issues and keep your motorcycle performing at its best. Discover more expert advice and actionable tips in our guide to seasonal bike care secrets every rider must know. By combining smart packing with proactive maintenance, you’ll ensure every adventure is smooth, safe, and truly memorable.
Riding Tips & Preps

0 Comments

Write A Comment

*
*
Please complete the captcha to submit your comment.
Related Posts All Posts

How to Prepare for Group Riding Safety: Avoid Costly Mistakes

Did you know the majority of group ride accidents don’t happen because of high speeds, but rather due to a lack of preparation and miscommunication? When you’re sharing the open road with fellow motorcycle enthusiasts, knowing how to prepare for group riding safety can mean the difference between an unforgettable group motorcycle ride and a costly mistake. This in-depth guide will arm you with the knowledge and practical steps needed to keep every group ride safe, organized, and enjoyable—so your entire group can truly ride safe and enjoy the journey. A Surprising Truth About Group Riding Safety "Most motorcycle accidents in group rides stem from poor communication and unpreparedness, not reckless speed." While it’s easy to imagine that group riding injuries are the result of thrill-seeking or excessive speed, the reality is far more mundane—and preventable. Research and rider experience alike reveal that the most frequent causes of group ride mishaps are a lack of coordination, overlooked safety checks, and the absence of standardized protocols. In most cases, it’s not the open road that poses the biggest threat, but what happens before and during the ride when communication breaks down and established roles or signals are ignored. That’s why understanding how to prepare for group riding safety is vital whether you’re a novice or an experienced rider. Adopting best practices for motorcycle group riding isn’t just a good idea—it’s essential. By clarifying group ride roles, agreeing on hand signals, and following proven strategies, you can turn potential hazards into manageable routines. So, whether you’re gearing up for your next big group motorcycle adventure or organizing your regular monthly group rides, investing in preparation today will keep everyone safer tomorrow. What You’ll Learn About How to Prepare for Group Riding Safety Key principles for safe group motorcycle riding Essential hand signals every group rider must know The critical roles of lead and sweep riders How to communicate and position riders for safety Common costly mistakes—and how to avoid them By the end of this comprehensive article, you’ll have practical insights and step-by-step instructions to confidently approach group riding—whether you’re joining a local motorcycle group or leading a group ride on a new scenic route. We’ll cover everything from effective ride prep to the most important hand signals, and even break down why group structure makes all the difference on the open road. Understanding Group Riding: The Foundation of How to Prepare for Group Riding Safety Why Group Ride Preparation Matters Before any group motorcycle ride hits the road, preparation sets the tone for the entire experience. Skipping crucial steps—such as assigning a lead rider or discussing emergency hand signals—can put the entire group at unnecessary risk. In group riding, every rider depends on the readiness of the rest of the group, making pre-ride planning just as important as the ride itself. Imagine riding in a group where no one knows the route, the fuel stop locations, or what hand signals mean. It leads to confusion, improper spacing, and even potential road hazards that experienced riders might miss. Knowing how to prepare for group riding safety is about more than just looking out for yourself—it's about ensuring the collective safety and enjoyment of everyone, whether they’re at the front, in the middle, or at the back of the group. While group riding safety relies on communication and structure, it’s equally important to ensure your motorcycle is in top condition before every ride. For a deeper dive into keeping your bike ready for any season, check out these seasonal bike care secrets every rider must know—a resource that complements your group ride preparation with essential maintenance tips. Defining a Group Motorcycle Ride and Essential Safety Principles A group ride is any motorcycle ride where multiple riders travel together, following agreed-upon protocols. The foundational principle of group motorcycling is clear communication—before, during, and after the ride. This includes establishing a procedure in place for route changes, traffic conditions, and responding to road hazards. Essential safety principles for motorcycle group riding also include maintaining proper formations, respecting traffic lights, and adapting to road surfaces as a unit. Every group ride should be built around mutual trust, visible signals, and respect for the skill levels of every rider in your group. Mastering group riding safety isn’t a one-time event; it’s an ongoing commitment that protects the entire group from avoidable risks. Step-By-Step Guide: How to Prepare for Group Riding Safety Determine your group size and experience levels: Before scheduling your motorcycle group ride, assess how many riders will join and the skill range within your group. Larger groups often require more structure and can benefit from dividing into smaller sub-groups based on riding experience. Experienced riders can act as mentors, offering advice during ride prep and helping less experienced participants learn protocols. Assign lead and sweep riders for your group ride: Appointing a lead rider (to set the pace) and a sweep rider (to monitor the back of the group) is essential for managing traffic conditions, ensuring clear communication, and responding quickly to unexpected situations. These roles anchor the group, provide structure, and serve as the primary contacts throughout the motorcycle ride. Plan your motorcycle group riding route and stops: Map out your entire route, including stops for fuel, rest, and food. Communicate these planned fuel stops and breaks in advance so nobody is surprised and everyone stays together. Good ride prep means selecting safe meeting points and alternate paths in case of a road hazard or detour, ensuring a smooth and stress-free journey. Perform pre-ride bike and gear checks: Safety starts with equipment. Every rider should check their motorcycle, brakes, tires, and lights—plus inspect their personal gear and helmet. It’s a good idea to review any recent repairs, and experienced riders should be available to assist newcomers during this process. These checks reduce the risk of breakdowns or preventable emergencies during the group ride. Discuss and agree on group riding protocols: Before leaving, hold a brief meeting to outline hand signals, lead and sweep duties, expected formations, and how to respond to emergencies. Agreeing on group protocol keeps every group motorcycle ride running smoothly even as traffic conditions or road surfaces change. Hand Signals and Communication: How to Prepare for Group Riding Safety Essential Hand Signals for Group Motorcycle Rides: Description, Visual, and Meaning Description Visual Meaning Left Turn Left arm extended straight out Indicates the group will turn left; all riders prepare to follow. Right Turn Left arm bent upward at 90°, hand up Signals a right turn is coming up for the group. Stop Left arm down, palm open Warns the group to stop—usually for a light, stop sign, or hazard. Single File Left hand up, index finger pointing up Switch to a single-file formation, often for narrow roads or hazards. Staggered Formation Left hand up, two fingers extended upward Move back into a safe staggered formation after single file. Hazard in Road Point directly at the road hazard (using left or right foot/hand) Alerts group to avoid a pothole, debris, or slick patch ahead. Why Clear Hand Signal Use Prevents Group Riding Incidents Group riding relies heavily on non-verbal communication, especially when wind noise and helmets make speaking impossible. The timely use of hand signals is the backbone of safe group rides, ensuring that information about traffic lights, hazards, or route changes reaches every rider quickly. Without clear signals, the group risks sudden stops or misinterpretation—leading to collisions or separation. Practicing hand signal communication during ride prep helps reinforce memory and group awareness. Whether you’re the lead rider announcing a fuel stop or the sweep rider reporting a road hazard, synchronized signals are a fundamental tool for a safe and enjoyable group motorcycle ride. Remember, consistency matters: everyone in the group should recognize and agree on what each hand signal means before the engines start. Top Hand Signals Every Group Motorcycle Rider Must Use To make all the difference during your next group ride, ensure every rider is fluent in a core set of hand signals: left turn, right turn, stop, hazard, single file, staggered formation, and signal for slowing down. These cover the essential situations encountered in a typical group motorcycle outing. Regularly review signals before each ride—it’s a simple step that eliminates confusion and keeps the entire group moving as a unit. A good idea is to designate the lead and sweep riders as signal initiators. They’ll pass signals forward and backward along the line, so even riders in the back of the group receive timely warnings. When everyone is attentive and responsive, hand signals become the glue that holds a safe group ride together. Demonstrating Hand Signals and Proper Communication in Group Motorcycle Riding Proper Riding Formations: The Backbone of Group Riding Safety Staggered vs. Single File: Choosing the Right Formation for Group Ride Safety Group riding safety hinges on riding in the correct formation for the road and traffic conditions. The standard staggered formation allows for maximum visibility and safety among group riders—each motorcycle is offset from the one ahead, creating safe spacing while maintaining close communication. On wider, multi-lane roads with consistent traffic flow, staggered formation is the best option for most groups. In contrast, single file is required on narrow roads, twisty sections, or whenever road hazards reduce available space. By swiftly switching from staggered to single file (using the designated hand signal), the group adapts to changing conditions and protects riders from sudden obstacles or sharp curves. Understanding when and why to use each formation is a core part of how to prepare for group riding safety and ensures every rider in your group enjoys a safe group ride. Maintaining Safe Distances During Group Motorcycle Rides Proper distance between motorcycles ensures that riders have enough reaction time in case of sudden stops or road surface changes. In staggered formation, maintain at least one second of following distance from the bike directly ahead and two seconds from the motorcycle directly in line. This prevents pileups and gives everyone room to maneuver while still keeping the group together. In single-file situations, space out even further—especially when navigating road hazards or unpredictable traffic conditions. Remind every rider in your group of these spacing rules at each pre-ride meeting. Spacing isn’t just about safety; it also reduces stress, keeps everyone visible in mirrors, and lets the lead rider and sweep manage the group more efficiently. Lead and Sweep Roles: How Leadership Anchors Group Riding Safety Responsibilities of Lead Riders The lead rider sets the tone for every group ride. Their responsibilities go far beyond simply being first; they monitor traffic, adjust speed, communicate with hand signals, and signal stops or changes in formation to the rest of the group. The lead is also in charge of navigating the route, anticipating road hazards, and supporting less experienced riders by riding predictably and patiently. A good lead rider stays aware of the group’s position, road surface changes, and keeps in regular contact with the sweep rider via signals or radio. Before departure, the lead should review the ride plan with the entire group—a procedure in place is what makes all the difference. The lead rider’s clear vision and calm judgment anchor safe and effective group rides. Duties of Sweep Riders in Group Riding The sweep rider—sometimes called the tail—rides at the back of the group to keep everyone in check. Their main duty is to ensure no rider is left behind during the motorcycle ride. If a breakdown or emergency occurs, the sweep helps coordinate assistance and communicates with the lead and rest of the group. An experienced sweep rider is invaluable, especially in mixed-experience groups. They’re responsible for watching for stragglers, reminding the group about proper hand signals, and keeping an eye out for changes in the back of the group that might not be visible to the lead. Whether handling a flat tire at the back of the group or ensuring every rider exits at a fuel stop, a diligent sweep keeps the entire group accountable and safe. Common Mistakes and How to Avoid Group Ride Safety Issues Skipping the pre-ride meeting Inconsistent communication using hand signals Failing to consider different skill levels in the group Improper spacing between motorcycles Ignoring the lead and sweep structure These common mistakes all have one thing in common: they disrupt unity and create openings for confusion, accidents, or costly errors. The most effective way to avoid group ride safety issues is to establish a group structure and stick to it. Hold a mandatory pre-ride meeting to go over the route, hand signals, the roles of lead and sweep, and the importance of formation and spacing. Be attentive to the skill level of every rider in your group. Place less experienced riders directly behind the lead rider (where conditions are easiest), and communicate all turns, stops, and hazards clearly. Keep a flexible attitude—changing formations or adjusting pace to keep the group together is a smart, safe group ride strategy. FAQs on How to Prepare for Group Riding Safety What does 2 fingers down mean to bikers? Answer: Explanation of the two-finger gesture as a greeting and sign of rider acknowledgement, benefiting group riding awareness. The iconic two fingers down gesture is a universal biker greeting, signaling “ride safe” and mutual respect between riders. While not a formal group riding signal, it builds camaraderie and raises awareness among group motorcycle riders and independent travelers alike. On a group ride, extending this gesture unites the entire group with other riders on the open road and serves as a reminder of the shared commitment to safety and community. What is the 1% rule in motorcycles? Answer: Brief history and the significance of the '1% rule' in motorcycle culture, unrelated to typical group riding safety but often misunderstood. The “1% rule” is a reference from motorcycle culture, originating after a statement by the American Motorcyclist Association that 99% of riders are law-abiding citizens, suggesting the “1%” are outlaws. It is not related to how to prepare for group riding safety or the best practices covered in this guide. For group motorcycle rides, focus on structure, preparation, and communication—not outlaw mythos. How to ride safely in a group? Answer: Step-by-step strategies for group motorcycle ride safety—planning, assigning roles, mastering hand signals, and respecting formations. Riding safely in a group starts with ride prep: know the route, assign trusted riders as lead and sweep, and review hand signals as a team. During the motorcycle ride, maintain staggered or single-file formations, adapt to traffic conditions, and always communicate changes with clear hand signals. A disciplined, mutual understanding within the group is the surest way to travel the open road together without issues. Why do bikers tap their helmet when they see a cop? Answer: The helmet tap as a widely used hand signal to warn other riders of police presence, enhancing overall group ride communication. The helmet tap is a non-verbal hand signal indicating police or speed enforcement ahead. Though informal, it’s widely understood among motorcycle group riders as an act of courtesy and awareness, helping the entire group avoid surprises and reinforcing the culture of communication that’s essential for group riding safety. Key Takeaways: How to Prepare for Group Riding Safety Always communicate plans and signals before the ride Understand and use correct formations for group safety Assign clear lead and sweep roles in every group ride Hand signals are essential for non-verbal communication Consistent group riding practices prevent costly mistakes Take the Next Step for Group Riding Safety "Safe rides are built on preparation. Don’t leave your group’s well-being to chance—ride smart, ride united." Make every ride a safe group ride—start with thorough preparation, effective hand signals, and clear communication. The open road is best enjoyed together when everyone is ready and protected. Group riding safety is just one piece of the puzzle for a truly rewarding motorcycle experience. If you’re looking to elevate your skills and keep your bike performing at its best year-round, explore our expert guide on seasonal bike care secrets every rider must know. You’ll discover practical maintenance strategies that go hand-in-hand with safe riding, ensuring your motorcycle is always ready for the next adventure. Take your preparation to the next level and enjoy peace of mind on every journey—because a well-cared-for bike is the foundation of every safe and memorable group ride. For Expert Group Motorcycle Ride Prep, Call Nasty Performance Motorcycle Shop Today: 847-458-4858 Whether you need help with pre-ride inspections, want a refresher on hand signals, or are looking to organize your next motorcycle group ride with confidence, Nasty Performance Motorcycle Shop is your go-to resource. Their knowledgeable staff can assist you in all aspects of group ride safety—so don’t wait until mistakes happen, call 847-458-4858 and make your next group motorcycle adventure the safest yet!

Beginner’s Guide to Packing for Motorcycle Trips Made Simple

Did you know that improper packing is one of the top reasons trips go off track? Packing might just seem like stuffing bags, but when you're heading out on a motorcycle trip, how you organize your gear directly influences comfort, safety, and enjoyment. Whether you’re gearing up for your first weekend escape or a cross-country touring motorcycle adventure, mastering the basics of smart packing transforms stressful rides into memorable journeys. Dive into this beginner’s guide to packing for motorcycle trips and start your next trip prepared, organized, and ready for whatever the road brings. Unlocking the Secrets of Smart Motorcycle Trip Packing "Did you know that improper packing is one of the top reasons trips go off track? Learn how a beginner’s guide to packing for motorcycle trips can transform your journey." The secret to a successful motorcycle trip packing experience starts with knowledge and planning. It’s easy to underestimate the challenges of trip packing until you’re on the open road facing an unexpected downpour or, worse, rooting through your bags to find lost essentials. Whether you’re a novice or planning your first long distance trip, understanding the core principles behind a well-organized trip pack can make every mile smoother. Smart motorcycle packing means strategically placing each item for balance, easy access, and weather preparedness. One of the top mistakes new riders make is failing to adapt their packing list to the journey's duration and destination. Rather than guessing what you’ll need, this beginner’s guide to packing for motorcycle trips unpacks everything from gear essentials to ingenious organization tricks that save space and ensure nothing gets left behind—or flies off on the highway. After all, smart motorcycle trip packing is not just about what you take, but also how you carry it. What You'll Learn in This Beginner’s Guide to Packing for Motorcycle Trips How to create an effective motorcycle trip packing list Essential gear and motorcycle trip pack essentials for every weather and distance Expert tips for motorcycle packing that maximize space and comfort Proven strategies for long distance and touring motorcycle adventures Understanding Motorcycle Trip Packing Essentials The Foundation: Why a Structured Packing List Matters A well-planned packing list is the foundation for every smooth motorcycle trip packing experience. When you’re dealing with limited space and a moving vehicle, discipline and order matter more than ever. A structured trip packing list prioritizes what’s essential—balancing must-have protective gear, emergency items, and simple comforts. The process begins by categorizing items (like clothing, tools, and paperwork) to prevent forgetting vital things and overpacking unnecessary bulk. Using a motorcycle trip packing list takes the guesswork out of what to pack and minimizes stress, allowing you to focus wholly on the ride. More experienced riders swear by checking off a written (or digital) list before every departure, which is a proven way to save time and avoid last-minute dashes to the nearest store for a forgotten piece of riding gear. With practice, your packing list becomes personalized, reflecting your riding habits, weather, and trip duration. As you refine your packing strategy, it's also important to consider how seasonal changes can impact your gear choices and trip preparation. For a deeper dive into maintaining your motorcycle and adapting your approach throughout the year, check out these seasonal bike care secrets every rider should know—they’ll help you stay ready for any weather or road condition. Motorcycle Trip Pack Categories: Clothing, Tools, Documents, and More Organizing your motorcycle trip pack into smart, manageable categories is a cornerstone of efficient packing. Start by separating your gear into essential groups: riding gear (helmets, jackets, boots), everyday clothing, repair tools, first aid, and critical documents. This structured approach not only helps ensure nothing important is left behind but also enables you to retrieve items quickly in the middle of a long moto adventure or unpredictable weather. Tech tools, such as a well-charged phone, chargers, and possibly a GPS device, belong in their category, while a small kit with basic trip repair tools (think tire patch, wrenches, and duct tape) is crucial for roadside fixes. Clever storage solutions, like compression sacks and ziplock bags, keep smaller items dry and compact, making it easier to utilize limited storage space on your bike. By dividing your packing into categories, you create a safety net against accidental omission and set yourself up for a hassle-free long distance trip. Crafting the Ultimate Motorcycle Trip Packing List Riding gear: helmets, jackets, gloves, and boots Weather-appropriate clothing for long motorcycle journeys Tool kits for road repairs Medical and emergency supplies Documents: license, registration, insurance Electronics and chargers Item Short Trip Need Long Trip Need Pro Packing Tips Riding Gear (helmet, jacket, gloves, boots) Yes Yes (may need spares) Pack protective gear first, ensure comfort & fit. Consider waterproof gear for longer rides. Weather-Appropriate Clothing Minimal layers Multiple layers; options for changes in weather Use compression sacks to save space, focus on moisture-wicking fabrics for long moto trips. Tool Kit Basic tools Full tool roll, tire kit Keep tools organized in a roll; include bungee cords and cargo net for securing loads. Medical/Emergency Supplies Basic kit Expanded kit, safety pins, emergency blanket Pack these where easily accessible in any emergency. Documents (license, reg, insurance) Yes Yes (+ copies) Seal originals in a ziplock bag; keep digital backups if possible. Electronics & Chargers Minimal—phone & charger Phone, GPS, portable battery, chargers for all devices Keep a dedicated pouch for all electronics; avoid tangling cords by using cable ties. Choosing the Right Bags and Compression Sacks for Motorcycle Packing Top Touring Motorcycle Luggage Systems for Beginners Picking the right luggage is crucial in motorcycle trip packing. As a beginner, you’ll likely choose between saddlebags, tail bags, or tank bags. Hard cases offer unmatched protection and security, ideal for all-weather touring motorcycle trips. However, soft bags or hybrid systems can save space and are generally lighter—perfect for beginners mindful of their bike’s weight and limited space. Ensure your chosen system securely attaches to your motorcycle with minimal risk of movement during your ride. Saddlebags distribute weight low and evenly on the bike, which is perfect for stability during long distance trips. Tail bags and tank bags are advantageous for storing frequently accessed items like snacks, rain gear, or maps. Regardless of type, always consider weather resistance and easy access. Investing in quality fastening systems—like bungee cords or a rock-solid cargo net—keeps your load steady, protecting both your items and your safety on winding roads. How Compression Sacks Maximize Space for Motorcycle Trip Packing Using a compression sack is every seasoned rider’s secret weapon for efficient motorcycle trip packing. These sturdy sacks allow you to reduce the volume of bulky clothing and sleeping gear so you can free up limited storage space on your bike. Simply stow your soft items—jackets, mid-layers, socks—within each sack, then cinch it down until excess air is squeezed out. This not only saves room but also keeps your items organized and protected from moisture. Compression sacks are invaluable for long moto journeys, allowing easy separation of clean and dirty clothes or quick swaps for changing weather. Modern versions are lightweight, water-resistant, and add almost no extra bulk. For longer distance trips, consider investing in a few color-coded sacks to quickly locate what you need. This upgraded packing strategy can mean the difference between a stressful, overstuffed bag and a streamlined, enjoyable motorcycle adventure. Expert Tips: Packing for Long Distance Motorcycle Adventures Layering and minimizing bulk Balancing weight for safety Securing the load to avoid shifts on rough terrain For long distance motorcycle trip packing, efficiency is everything. Begin by layering clothing to minimize bulk—opt for a moisture-wicking base, comfortable mid-layer, and lightweight but waterproof outerwear. This classic trip packing hack ensures adaptability while using minimal space. Remember, packing light is key; resist the urge to bring "just in case" items that only add to your load. Next, balance your cargo by placing heavier items low and near the bike’s centerline. An unbalanced load impacts handling and safety. Secure everything tightly using bungee cords or cargo nets, double-checking for movement before you hit the road. Clever placement of essential items—like first aid kits and rain gear—where they are quick to reach can make your journey safer and less stressful. Finally, always test-pack before your actual departure: it’s the only way to spot awkward fits and storage space issues before they happen out on the open highway. Watch this step-by-step video demonstration to see the packing process in action—including safe weight distribution, how to use compression sacks for clothing and gear, and tips on placing essential trip pack items for quick access. See exactly how seasoned riders turn chaos into order before every motorcycle trip. Packing for Different Types of Motorcycle Trips Weekend Escapes vs. Extended Touring Motorcycle Adventures Packing for a day trip or a short weekend escape is dramatically different than prepping for a long moto or extended touring motorcycle adventure. For short journeys, keep your trip pack basic—only the essentials like light weatherproof clothing, minimal tools, and a few snacks. Stick to a single bag or tank bag to avoid unnecessary weight. In contrast, extended motorcycle adventures demand thoughtful motorcycle trip packing: more changes of clothes, expanded tool kit, layered riding gear, and potentially camping supplies. Here, multiple luggage options come into play, and maintaining a tight, organized packing list is vital for balancing convenience and managing the weight. Always customize your approach based on ride length, expected terrain, and access to resources along your route. Whether quick getaway or epic ride, a smart trip packing list saves time and enhances every mile. Seasonal Motorcycle Trip Packing List Adjustments Every season brings unique challenges for motorcycle trip packing. In summer, pack light, focusing on high-ventilated gear and extra hydration. Spring and fall rides require a blend of rain gear, mid-weight layers, and flexible gloves. Winter adventures demand the bulkiest pack: insulated, waterproof layers, heated gear if possible, plus emergency supplies for cold weather risks. Always adjust your trip packing list to account for rapidly changing conditions—adding safety pins, ziplock bags for electronics, and wind/waterproof covers for bags. Even on warm weekends, rapid weather changes can catch you unprepared, especially in the mountains or remote areas. With the right attitude and a flexible approach to your motorcycle trip pack, every season becomes rideable and memorable. Quotes from Experienced Riders: Their Trip Packing Secrets "Packing light but right is the golden rule—your comfort and safety depend on it." — Veteran Touring Rider Talking with seasoned riding communities always reveals surprising packing tricks. From using compression sacks for efficient storage space, to never forgetting a compact tool kit with safety pins, and utilizing bungee cords for secure loads, riders agree that less is often more. Many mention creating a trip pack customized for each long distance trip, and refining their motorcycle packing with every ride. Their biggest advice? Stick to your packing list, review it before every departure, and always prioritize protective gear and comfort. Common Motorcycle Trip Packing Mistakes Beginners Make Overpacking and underpacking: what to avoid Packing non-essential items Improperly securing bags Beginners often falter by overpacking—filling every inch of storage space with “just in case” items—or underpacking, forgetting essentials like rain gear or crucial tools. Another common misstep is neglecting to properly secure bags: all it takes is one sudden stop or bumpy patch to send gear flying with only a loose cargo net or failing strap. Avoid packing non-essentials to keep weight manageable and focus on a packing list that serves both daily and emergency needs. Carelessness with securing your cargo can lead to scattered belongings or worse, a dangerous handling situation. Always double-check every buckle, bungee, and zipper before you hit the open road. Seasoned riders frequently use safety pins, ziplock bags for organization, and test their trip pack load with a short ride before every long adventure. With a bit of care and the right gear, such mistakes become learning opportunities—not trip-ending disasters. Discover how to build and use a comprehensive packing list to streamline every part of your motorcycle trip. This friendly explainer highlights category-based organizing, pre-trip checks, and quick tips for customizing your list for every journey type and season. People Also Ask: Beginner's Guide to Packing for Motorcycle Trips What is the 2 4 12 second rule on a motorcycle? The “2 4 12 second rule” is a fundamental safety guideline for motorcycle riders. It means you should maintain a minimum following distance of two seconds behind the vehicle in front, allow four seconds if conditions are less than ideal (like rain or heavy traffic), and actively scan the road 12 seconds ahead to anticipate turns, hazards, or changing traffic. This rule helps ensure enough time for safe stopping and reaction, especially during long motorcycle adventures or when your packs add weight to your ride. Understanding Following Distance: The 2, 4, and 12 Second Rule Explained for Motorcycle Trips On motorcycle trips—whether a quick day trip or a cross-country journey—keeping the proper following distance can prevent accidents. Two seconds is the minimum in ideal conditions, but increasing to four seconds gives a safer buffer in rain, traffic, or when carrying heavy loads. Scanning 12 seconds ahead lets you spot obstacles or route changes early, which is even more important when your trip packing adds weight or shifts your balance. What does 2 fingers down mean on a motorcycle? The “2 fingers down” gesture is a friendly signal in motorcycle culture. When a rider lowers two fingers on their left hand as they pass another biker, it’s a way of showing mutual respect, solidarity, and a wish for a safe journey. It’s a tradition that unites riders everywhere, whether you’re on a solo day trip or a long moto tour. Motorcycle Trip Culture: The Meaning Behind the 2 Fingers Down Gesture Showing two fingers down stands for peace and safety on the road. It’s a nonverbal way to connect with fellow riders and celebrate the unique brotherhood or sisterhood of motorcycle travel. Even as you focus on your trip packing and gear, don’t forget the simple gestures that make motorcycle adventures so memorable. What to pack for a 7 day motorcycle trip? For a week-long motorcycle trip, essentials include: full riding gear (helmet, jacket, gloves, and boots), seven sets of moisture-wicking clothing (with at least two sets for flexibility), rain gear, a compact tool kit, small first-aid/emergency kit, documents (license, insurance, registration), chargers for electronics, and toiletries. Use compression sacks and dedicated bags to organize. Don’t forget small but often-overlooked items like safety pins, a ziplock bag for valuables, and bungee cords for securing loose items. Detailed Packing List for a Week-Long Motorcycle Trip Here’s a quick reference: 1 helmet, 1-2 jackets (all-weather), 2-3 pairs of gloves, 1 pair of riding boots, 1 rain suit, 7 sets of underwear/socks, 3-4 shirts, 2-3 pants/jeans, sleepwear, tool kit, medical kit, all documents, phone and GPS with chargers, camera (optional), toiletries, sunscreen, lip balm, and compact towel. Pack versatile items that suit both riding and time off the bike for evening meals or sightseeing. Is $20,000 a lot for a motorcycle? The value of a motorcycle depends on brand, model type, condition, and features. $20,000 can buy a high-end touring motorcycle packed with accessories or a brand-new mid-range adventure/touring bike. While it may seem steep for beginners, investing in comfort, safety, and quality is worthwhile for those planning frequent or long distance motorcycle trips. Always compare models, research reviews, and assess your intended use before buying. Motorcycle Trip Budgeting: Understanding Motorcycle Costs and Value Budgeting for a motorcycle adventure means weighing initial purchase price, maintenance, fuel, gear, and travel costs. Whether you aim for a budget-friendly bike or splurge on a premium ride, prioritize models that fit your touring motorcycle goals and can handle your planned trip packing strategy. Remember, quality riding gear and reliable storage solutions are equally important investments! FAQs: Beginner's Guide to Packing for Motorcycle Trips How do I choose the right riding gear for a motorcycle trip? Look for gear specifically designed for your riding conditions: select a helmet that fits well, a durable, weather-appropriate jacket, gloves for your climate, and boots that offer good support. Prioritize comfort, protection, and weatherproofing. Try your gear out with your bike before your trip to ensure flexibility and comfort. What are the essentials for a motorcycle trip packing list? Essentials include full riding gear, a basic tool kit, first aid supplies, weather-appropriate clothing, critical documents (license, registration, insurance), electronics (phone, GPS, chargers), toiletries, and any medications you need. How can I prevent my bags from shifting during a trip? Use sturdy fastening systems such as bungee cords, cargo nets, or purpose-built bag straps. Test the load by moving your bike and taking a short ride before leaving for your trip. Make adjustments as needed to ensure nothing moves or rattles. What storage options are best for long distance motorcycle packing? For long trips, invest in a reliable combination of hard cases and soft bags. Compression sacks are vital for reducing clothing bulk, and waterproof covers are critical for unpredictable weather. Make sure all storage is securely attached and easy to access. Key Takeaways for First-Time Motorcycle Trip Packers Start with a clear, categorized packing list Prioritize safety, comfort, and balanced weight Adapt packing approach to trip duration and weather Utilize modern packing gear like compression sacks Connect with the Experts for Motorcycle Trip Packing Advice "Call Nasty Performance Motorcycle Shop Today: 847-458-4858 for personalized tips on your next motorcycle trip pack." Ready to take your packing to the next level or have questions about your first big ride? Call Nasty Performance Motorcycle Shop Today: 847-458-4858 for personalized, expert packing advice. Ride smarter—happy travels! Conclusion: With a practical strategy, organized packing list, and the right mindset, even first-time motorcycle trip packers can conquer the open road safely and comfortably! Now that you’re equipped with the fundamentals of motorcycle trip packing, why not take your preparation a step further? Understanding how to care for your bike throughout the changing seasons can make every journey smoother and extend the life of your ride. Explore the essential seasonal bike care tips trusted by experienced riders—these insights will help you anticipate challenges, protect your investment, and ensure your motorcycle is always ready for adventure, no matter the weather. Your next trip starts with smart packing and continues with year-round bike care.

Stop Exhaustion: Your Guide to Motorcycle Riding Fatigue

Ever wondered why you feel drained after a motorcycle ride—even if you’re loving every second? Could fatigue on your next ride put your safety at risk? Dive in and discover how to overcome fatigue on motorcycle rides for good. What You'll Learn in This Guide to Motorcycle Riding Fatigue Understand the leading causes of fatigue on motorcycle rides Learn how to overcome fatigue on motorcycle trips with effective strategies Discover safety techniques to manage fatigue for both short and long journeys Are You Suffering From Motorcycle Riding Fatigue? Recognizing the Signs If you frequently finish your journeys feeling more worn out than refreshed, you might be suffering from motorcycle riding fatigue—a challenge every enthusiastic rider eventually faces. Fatigue on motorcycle rides can creep in quietly, yet its effects can compromise your focus, slow your reaction time, and ultimately risk your safety. Common signs include drooping eyelids, difficulty concentrating, muscle soreness, and a general sense of lethargy. These symptoms don’t just appear on marathon tours; even a fun afternoon spin can leave your energy levels sapped. Recognizing these warning signs is a crucial step in effective fatigue management. If you notice yourself yawning, stretching your legs and restlessly shifting your body position, or catching yourself daydreaming instead of focusing on the road, it’s time to act. Restlessness, irritability, and delayed response to hazards are other red flags. The truth is, both your body and mind are tested during a long ride, especially when battling wind noise, weather changes, or uncomfortable gear. Monitoring your physical and mental state can prevent minor fatigue from turning into a major risk on the open road. The Science of Fatigue on Motorcycle Rides: Causes and Effects Fatigue on motorcycle rides isn’t just about feeling tired—it’s a complex blend of physical and mental exhaustion. Unlike driving a car, riding a motorcycle is physically demanding, requiring constant engagement of your body and mind. Factors such as dehydration, improper nutrition, poor sleep the night before (skipping on a good night’s rest), wind noise, and even the type of helmet you wear (like a face helmet or open face) all play a role. Environmental conditions—such as hot sun or cold rain—can drain your energy levels faster than anticipated during a full day on the road. Long-term fatigue can build gradually, manifesting as aching muscles, mental fog, and a noticeable dip in alertness. In contrast, short-term symptoms may include feeling drowsy or unfocused after just a few hours. Both forms of fatigue make it harder to make quick decisions—potentially turning small mistakes into critical errors. For riders tackling motorcycle tours or dual sport adventures, knowing the science behind fatigue can help you anticipate the toll it takes—enabling smarter choices that prioritize motorcycle safety for every journey. Physical and Mental Fatigue on Motorcycle Rides: What Every Rider Must Know Common contributors to fatigue on motorcycle journeys: dehydration, lack of rest, nutritional deficits, excessive wind noise, awkward body position, and improper gear. Short-term vs. long-term symptoms and risks: short rides may bring on yawning and mental lapses, while extended or repeated rides result in sore joints, persistent tiredness, and increased risk of falling asleep at the handlebars. Physical fatigue happens as your muscles, particularly in your arms, legs and rest of your core, work to stabilize your motorcycle and absorb road vibrations. Over time, even experienced riders find their energy levels plummeting if they ignore signs like cramping or tingling limbs—both of which point to decreased blood flow and exhaustion. Equally important, mental fatigue builds from constant vigilance, sensory overload, and monotony—often made worse by open highway stretches without much change in scenery. Understanding these different fatigue sources is essential for crafting a strategy that goes beyond simple rest stops. Whether you ride a dual sport for fun or rely on your bike for daily commutes, smart fatigue management starts with self-awareness, a well-chosen face helmet, and a commitment to balancing physical effort with mindful mental breaks. While managing fatigue is crucial for every ride, it's equally important to consider how seasonal changes can impact your motorcycle's performance and your comfort on the road. For practical advice on keeping your bike in top shape throughout the year, explore these seasonal bike care secrets every rider should know to ensure both you and your machine are ready for any journey. Core Strategies to Overcome Fatigue on Motorcycle Rides Hydration and nutrition tips to manage fatigue Best pre-ride planning habits to prevent exhaustion Essential gear for minimizing fatigue on motorcycle trips Overcoming fatigue on motorcycle rides requires an intentional approach. Hydration and nutrition are foundational—the body and mind need regular water and consistent food intake to maintain energy levels. Pack healthy snacks (like trail mix, fruit, or lean protein bars) and water, consuming them at every break. Steer clear of relying solely on caffeine, which can spike and then crash your energy, leaving you more tired halfway through your ride. Equally important is pre-ride planning. Start with a good night’s rest, review your route to anticipate challenging sections, and schedule regular stops at least every 60–90 minutes. Adjust your body position and stretch often to prevent cramps and maintain blood flow—critical for avoiding soreness on longer motorcycle tours. The right gear, from a comfortable helmet (face helmet or otherwise) to padded gloves and well-fitted riding boots, can also make a significant difference by reducing strain and buffering wind noise that contributes to mental fatigue. Building these habits will boost your resilience and help you finish even the most intense long ride feeling strong. Mental Fatigue on Motorcycle Journeys: Staying Sharp and Alert Cognitive techniques to stay awake and alert Managing distraction and focus over long rides "Mental fatigue is just as dangerous as physical exhaustion—plan breaks and stay mindful." Mental fatigue often sneaks up on riders, particularly during uneventful highway stretches or after hours of sensory bombardment. To stay awake and prevent mental burnout, incorporate deliberate cognitive strategies. Play mental games—such as periodically scanning mirrors or identifying road signs that start with that letter—or break up your route with varied scenery whenever possible. Practicing mindfulness, such as focusing on your breath or noting specific sounds, keeps your brain engaged and wards off the dangers of autopilot riding. Distractions like mobile devices, prolonged thoughts about work, or even the persistent discomfort from an ill-fitting open face helmet can undermine your attention. To stay sharp, establish a routine of mental check-ins during rest stops, ensuring you’re present, alert, and ready for changing road conditions. Set reminders to reassess both your physical energy level and mental focus—especially crucial on full day motorcycle tours or group rides. Actively managing your state of mind is a non-negotiable part of safe, enjoyable riding for the long haul. Managing Fatigue on Motorcycle Adventures: Proactive Solutions Creating an effective rest schedule Signs it’s time to pull over to prevent suffering from motorcycle fatigue Overcoming fatigue with stretching and movement tips Planning your breaks before hitting the road is a proactive tactic essential for reducing fatigue on motorcycle rides. Schedule a stop every hour or at least every 70–90 minutes—regardless of how you feel in the moment. During each break, hydrate, eat a small snack, check your route, and most importantly, move: stretch your arms, legs, and neck to combat stiffness and improve blood flow. This habit minimizes the risk of soreness and keeps your body and mind aligned for the journey ahead. Learn to recognize the specific signs that it’s time to pull over: persistent yawning, blurred vision, nodding off for split seconds, or delayed reaction to traffic. Don’t push through fatigue—doing so greatly increases your risk of mistakes. Instead, use rest stops as opportunities to regroup mentally. Even a short walk or change of scenery can refresh your focus. Incorporating a variety of movement into your ride—such as standing on the pegs or wiggling toes in your boots—helps maintain alertness and comfort, ensuring you finish strong rather than suffering from motorcycle fatigue. Pro Rider Tactics: How to Overcome Fatigue on Motorcycle Rides Expert insights on the most effective ways to manage fatigue Personal routines from seasoned riders "Before a long ride, I review the route and schedule stops every hour to reduce fatigue." – Experienced Tour Rider Top riders consistently deploy proven routines to overcome fatigue on motorcycle rides. One fundamental habit is adjusting your schedule based on personal stamina and the demands of your journey. Seasoned motorcyclists routinely stretch both before setting out and at every break. The best riders also keep lightweight, moisture-wicking gear on hand for temperature regulation, and they use earplugs to minimize wind noise, a major contributor to mental fatigue during high-speed stretches. Many pros favor a pre-ride ritual—reviewing the route, checking bike ergonomics, and setting reminders to monitor energy levels. Some riders keep checklists to fine-tune their body position during the ride, while others swap out open face or dual sport helmets for the one that offers the best balance of comfort and noise protection. Ultimately, building a personalized fatigue management plan, inspired by the routines of experts, allows you to tailor your approach for every motorcycle tour, whether you’re out for a weekend or a full day trek. Table: Quick Reference—Guide to Motorcycle Riding Fatigue & Best Practices Symptom Prevention Tip When to Take Action Drowsiness Increase hydration, plan breaks The moment drowsiness hits Mental fog Take a mindfulness or focus break Every 90 minutes Sore muscles Adjust position/stretch every hour At first sign of discomfort Lack of concentration Try cognitive exercises, rest Before risky situations Lists of Must-Do Habits to Manage and Overcome Fatigue on Motorcycle Rides Do: Schedule frequent breaks to stay awake and refreshed Do: Check your bike ergonomics for comfort and posture Don't: Ignore early signs of fatigue—act immediately Don't: Rely solely on caffeine to overcome fatigue People Also Ask: Key Questions About Managing Fatigue on Motorcycle Rides What is the 1% rule in motorcycles? The 1% rule is often quoted in motorcycle culture, referring to riders who operate outside mainstream safety norms. For fatigue management and motorcycle safety, don’t gamble with the odds—choose to be among the 99% who prioritize rest and alertness, which dramatically reduces risk of suffering from motorcycle riding fatigue and related incidents. How should you manage fatigue when riding a motorcycle? Start with a good night’s sleep and proper hydration. During the ride, stop for breaks every hour, stretch, drink water, have a healthy snack, and reassess your energy levels. Avoid pushing through exhaustion; if you experience symptoms—like nodding off, sore muscles, or mental fog—pull over immediately. This proactive approach, used by veteran riders on long rides and motorcycle tours, is your best defense against both mental and physical fatigue on motorcycle rides. What is the 2 4 12 second rule on a motorcycle? This safety rule helps you maintain optimal focus and avoid mental fatigue by ensuring you always scan 2, 4, and 12 seconds ahead on the road for obstacles, changes in traffic, and hazards. Regularly applying the 2 4 12 second rule not only sharpens awareness during a full day ride but also significantly decreases the chances of surprise lapses due to mind wandering. What does 2 fingers down mean to bikers? When riders flash “2 fingers down,” it’s a universal sign of respect and camaraderie, especially on group rides. More than a friendly gesture, it also serves as a subtle check-in—encouraging others to acknowledge their alertness and readiness. In the context of fatigue, this signal is a reminder to look out for each other and stay aware of everyone’s energy and focus during shared motorcycle rides. Frequently Asked Questions (FAQs) About Guide to Motorcycle Riding Fatigue How often should I take breaks to overcome fatigue on motorcycle trips? It’s best to stop every 60–90 minutes, regardless of how you feel. This prevents both mental and physical fatigue from building up. Frequent stops keep your body alert, restore blood flow, and clear your mind—especially important for long rides. What are early warning signs of suffering from motorcycle fatigue? Common signs include yawning, loss of concentration, sore or tingling muscles, and frequent shifting in your seat. If you notice any of these, it’s crucial to take action before fatigue on motorcycle rides becomes a real hazard. Are there specific foods and drinks to help manage fatigue on motorcycle journeys? Yes—focus on water, electrolyte-rich drinks, protein bars, nuts, and fruit. Avoid processed foods high in sugar and simple carbs, which cause spikes and crashes in energy levels. Hydration and balanced nutrition are your allies for overcoming fatigue on motorcycle adventures. Key Takeaways From This Guide to Motorcycle Riding Fatigue Proactive fatigue management is essential for safety on all motorcycle rides Both mental and physical fatigue require attention—don’t neglect either Use expert strategies to overcome fatigue and make every ride enjoyable If you’re committed to staying energized and safe on every ride, remember that fatigue management is just one piece of the puzzle. Proactive care for your motorcycle—especially as seasons change—can further enhance your comfort, performance, and peace of mind on the road. For a deeper dive into year-round maintenance strategies that complement your fatigue-fighting habits, check out the comprehensive guide to seasonal bike care secrets every rider must know. By combining smart self-care with expert bike maintenance, you’ll be ready to tackle any adventure with confidence and control. Stay Energized—Contact the Experts Call Nasty Performance Motorcycle Shop Today: 847-458-4858

© 2026 Nasty Performance All Rights Reserved. 2035 S. Eastwood Dr., Woodstock, IL 60098 . Contact Us . Terms of Service . Privacy Policy

eyJjb21wYW55IjoiTmFzdHkgUGVyZm9ybWFuY2UiLCJhZGRyZXNzIjoiMjAzNSBTLiBFYXN0d29vZCBEci4iLCJjaXR5IjoiV29vZHN0b2NrIiwic3RhdGUiOiJJTCIsInppcCI6IjYwMDk4IiwiZW1haWwiOiJuYXRlQG5hc3R5cGVyZm9ybWFuY2UuY29tIiwidG9zIjoiUEhBK1BITjBjbTl1Wno0OFpXMCtWMmhsYmlCNWIzVWdjMmxuYmkxcGJpQjNhWFJvSUhWekxDQjViM1VnWVhKbElHZHBkbWx1WnladVluTndPeUI1YjNWeUlIQmxjbTFwYzNOcGIyNGdZVzVrSUdOdmJuTmxiblFnZEc4Z2MyVnVaQ0I1YjNVZ1pXMWhhV3dnWVc1a0wyOXlJRk5OVXlCMFpYaDBJRzFsYzNOaFoyVnpMaUJDZVNCamFHVmphMmx1WnlCMGFHVWdWR1Z5YlhNZ1lXNWtJRU52Ym1ScGRHbHZibk1nWW05NElHRnVaQ0JpZVNCemFXZHVhVzVuSUdsdUlIbHZkU0JoZFhSdmJXRjBhV05oYkd4NUlHTnZibVpwY20wZ2RHaGhkQ0I1YjNVZ1lXTmpaWEIwSUdGc2JDQjBaWEp0Y3lCcGJpQjBhR2x6SUdGbmNtVmxiV1Z1ZEM0OEwyVnRQand2YzNSeWIyNW5Qand2Y0Q0S0NqeHdQanhoSUdoeVpXWTlJbWgwZEhBNkx5OTNkM2N1WjI5dloyeGxMbU52YlNJK2FIUjBjRG92TDNkM2R5NW5iMjluYkdVdVkyOXRQQzloUGp3dmNENEtDanh3UGladVluTndPend2Y0Q0S0NqeHdQanh6ZEhKdmJtYytVMFZTVmtsRFJUd3ZjM1J5YjI1blBqd3ZjRDRLQ2p4d1BsZGxJSEJ5YjNacFpHVWdZU0J6WlhKMmFXTmxJSFJvWVhRZ1kzVnljbVZ1ZEd4NUlHRnNiRzkzY3lCNWIzVWdkRzhnY21WalpXbDJaU0J5WlhGMVpYTjBjeUJtYjNJZ1ptVmxaR0poWTJzc0lHTnZiWEJoYm5rZ2FXNW1iM0p0WVhScGIyNHNJSEJ5YjIxdmRHbHZibUZzSUdsdVptOXliV0YwYVc5dUxDQmpiMjF3WVc1NUlHRnNaWEowY3l3Z1kyOTFjRzl1Y3l3Z1pHbHpZMjkxYm5SeklHRnVaQ0J2ZEdobGNpQnViM1JwWm1sallYUnBiMjV6SUhSdklIbHZkWElnWlcxaGFXd2dZV1JrY21WemN5QmhibVF2YjNJZ1kyVnNiSFZzWVhJZ2NHaHZibVVnYjNJZ1pHVjJhV05sTGlCWmIzVWdkVzVrWlhKemRHRnVaQ0JoYm1RZ1lXZHlaV1VnZEdoaGRDQjBhR1VnVTJWeWRtbGpaU0JwY3lCd2NtOTJhV1JsWkNBbWNYVnZkRHRCVXkxSlV5WnhkVzkwT3lCaGJtUWdkR2hoZENCM1pTQmhjM04xYldVZ2JtOGdjbVZ6Y0c5dWMybGlhV3hwZEhrZ1ptOXlJSFJvWlNCMGFXMWxiR2x1WlhOekxDQmtaV3hsZEdsdmJpd2diV2x6TFdSbGJHbDJaWEo1SUc5eUlHWmhhV3gxY21VZ2RHOGdjM1J2Y21VZ1lXNTVJSFZ6WlhJZ1kyOXRiWFZ1YVdOaGRHbHZibk1nYjNJZ2NHVnljMjl1WVd4cGVtRjBhVzl1SUhObGRIUnBibWR6TGp3dmNENEtDanh3UGxsdmRTQmhjbVVnY21WemNHOXVjMmxpYkdVZ1ptOXlJRzlpZEdGcGJtbHVaeUJoWTJObGMzTWdkRzhnZEdobElGTmxjblpwWTJVZ1lXNWtJSFJvWVhRZ1lXTmpaWE56SUcxaGVTQnBiblp2YkhabElIUm9hWEprSUhCaGNuUjVJR1psWlhNZ0tITjFZMmdnWVhNZ1UwMVRJSFJsZUhRZ2JXVnpjMkZuWlhNc0lFbHVkR1Z5Ym1WMElITmxjblpwWTJVZ2NISnZkbWxrWlhJZ2IzSWdZMlZzYkhWc1lYSWdZV2x5ZEdsdFpTQmphR0Z5WjJWektTNGdXVzkxSUdGeVpTQnlaWE53YjI1emFXSnNaU0JtYjNJZ2RHaHZjMlVnWm1WbGN5d2dhVzVqYkhWa2FXNW5JSFJvYjNObElHWmxaWE1nWVhOemIyTnBZWFJsWkNCM2FYUm9JSFJvWlNCa2FYTndiR0Y1SUc5eUlHUmxiR2wyWlhKNUlHOW1JR1ZoWTJnZ1UwMVRJSFJsZUhRZ2JXVnpjMkZuWlNCelpXNTBJSFJ2SUhsdmRTQmllU0IxY3k0Z1NXNGdZV1JrYVhScGIyNHNJSGx2ZFNCdGRYTjBJSEJ5YjNacFpHVWdZVzVrSUdGeVpTQnlaWE53YjI1emFXSnNaU0JtYjNJZ1lXeHNJR1Z4ZFdsd2JXVnVkQ0J1WldObGMzTmhjbmtnZEc4Z1lXTmpaWE56SUhSb1pTQlRaWEoyYVdObElHRnVaQ0J5WldObGFYWmxJSFJvWlNCVFRWTWdkR1Y0ZENCdFpYTnpZV2RsY3k0Z1YyVWdaRzhnYm05MElHTm9ZWEpuWlNCaGJua2dabVZsY3lCbWIzSWdaR1ZzYVhabGNua2diMllnWlcxaGFXd2diM0lnVTAxVExpQlVhR2x6SUdseklHRWdabkpsWlNCelpYSjJhV05sSUhCeWIzWnBaR1ZrSUdKNUlIVnpMaUJJYjNkbGRtVnlMQ0J3YkdWaGMyVWdZMmhsWTJzZ2QybDBhQ0I1YjNWeUlHbHVkR1Z5Ym1WMElITmxjblpwWTJVZ2NISnZkbWxrWlhJZ1lXNWtJR05sYkd4MWJHRnlJR05oY25KcFpYSWdabTl5SUdGdWVTQmphR0Z5WjJWeklIUm9ZWFFnYldGNUlHbHVZM1Z5SUdGeklHRWdjbVZ6ZFd4MElHWnliMjBnY21WalpXbDJhVzVuSUdWdFlXbHNJR0Z1WkNCVFRWTWdkR1Y0ZENCdFpYTnpZV2RsY3lCMGFHRjBJSGRsSUdSbGJHbDJaWElnZFhCdmJpQjViM1Z5SUc5d2RDMXBiaUJoYm1RZ2NtVm5hWE4wY21GMGFXOXVJSGRwZEdnZ2IzVnlJR1Z0WVdsc0lHRnVaQ0JUVFZNZ2MyVnlkbWxqWlhNdUlGbHZkU0JqWVc0Z1kyRnVZMlZzSUdGMElHRnVlU0IwYVcxbExpQktkWE4wSUhSbGVIUWdKbkYxYjNRN1UxUlBVQ1p4ZFc5ME95QjBieVp1WW5Od096eG9hV2RvYkdsbmFIUWdZMnhoYzNNOUltTnZiWEJoYm5sVFRWTlFhRzl1WlZWd1pHRjBaU0krYm5Wc2JEd3ZhR2xuYUd4cFoyaDBQaTRnUVdaMFpYSWdlVzkxSUhObGJtUWdkR2hsSUZOTlV5QnRaWE56WVdkbElDWnhkVzkwTzFOVVQxQW1jWFZ2ZERzZ2RHOGdkWE1zSUhkbElIZHBiR3dnYzJWdVpDQjViM1VnWVc0Z1UwMVRJRzFsYzNOaFoyVWdkRzhnWTI5dVptbHliU0IwYUdGMElIbHZkU0JvWVhabElHSmxaVzRnZFc1emRXSnpZM0pwWW1Wa0xpQkJablJsY2lCMGFHbHpMQ0I1YjNVZ2QybHNiQ0J1YnlCc2IyNW5aWElnY21WalpXbDJaU0JUVFZNZ2JXVnpjMkZuWlhNZ1puSnZiU0IxY3k0OEwzQStDZ284Y0Q0OGMzUnliMjVuUGxsUFZWSWdVa1ZIU1ZOVVVrRlVTVTlPSUU5Q1RFbEhRVlJKVDA1VFBDOXpkSEp2Ym1jK1BDOXdQZ29LUEhBK1NXNGdZMjl1YzJsa1pYSmhkR2x2YmlCdlppQjViM1Z5SUhWelpTQnZaaUIwYUdVZ1UyVnlkbWxqWlN3Z2VXOTFJR0ZuY21WbElIUnZPand2Y0Q0S0NqeHZiRDRLQ1R4c2FUNXdjbTkyYVdSbElIUnlkV1VzSUdGalkzVnlZWFJsTENCamRYSnlaVzUwSUdGdVpDQmpiMjF3YkdWMFpTQnBibVp2Y20xaGRHbHZiaUJoWW05MWRDQjViM1Z5YzJWc1ppQmhjeUJ3Y205dGNIUmxaQ0JpZVNCMGFHVWdVMlZ5ZG1salpTWWpNems3Y3lCeVpXZHBjM1J5WVhScGIyNGdabTl5YlNBb2MzVmphQ0JwYm1admNtMWhkR2x2YmlCaVpXbHVaeUIwYUdVZ0puRjFiM1E3VW1WbmFYTjBjbUYwYVc5dUlFUmhkR0VtY1hWdmREc3BJR0Z1WkR3dmJHaytDZ2s4YkdrK2JXRnBiblJoYVc0Z1lXNWtJSEJ5YjIxd2RHeDVJSFZ3WkdGMFpTQjBhR1VnVW1WbmFYTjBjbUYwYVc5dUlFUmhkR0VnZEc4Z2EyVmxjQ0JwZENCMGNuVmxMQ0JoWTJOMWNtRjBaU3dnWTNWeWNtVnVkQ0JoYm1RZ1kyOXRjR3hsZEdVdUlFbG1JSGx2ZFNCd2NtOTJhV1JsSUdGdWVTQnBibVp2Y20xaGRHbHZiaUIwYUdGMElHbHpJSFZ1ZEhKMVpTd2dhVzVoWTJOMWNtRjBaU3dnYm05MElHTjFjbkpsYm5RZ2IzSWdhVzVqYjIxd2JHVjBaU3dnYjNJZ2QyVWdhR0YyWlNCeVpXRnpiMjVoWW14bElHZHliM1Z1WkhNZ2RHOGdjM1Z6Y0dWamRDQjBhR0YwSUhOMVkyZ2dhVzVtYjNKdFlYUnBiMjRnYVhNZ2RXNTBjblZsTENCcGJtRmpZM1Z5WVhSbExDQnViM1FnWTNWeWNtVnVkQ0J2Y2lCcGJtTnZiWEJzWlhSbExDQjNaU0JvWVhabElIUm9aU0J5YVdkb2RDQjBieUJ6ZFhOd1pXNWtJRzl5SUR4emRISnZibWMrUEhOd1lXNGdjM1I1YkdVOUltTnZiRzl5T2lOR1JqQXdNREE3SWo1MFpYSnRhVzVoZEdVZ2VXOTFjaUJoWTJOdmRXNTBMM0J5YjJacGJHVWdZVzVrSUhKbFpuVnpaU0JoYm5rZ1lXNWtJR0ZzYkNCamRYSnlaVzUwSUc5eUlHWjFkSFZ5WlNCMWMyVWdiMllnZEdobElGTmxjblpwWTJVZ0tHOXlJR0Z1ZVNCd2IzSjBhVzl1SUhSb1pYSmxiMllwTGp3dmMzQmhiajQ4TDNOMGNtOXVaejQ4TDJ4cFBnbzhMMjlzUGdvS1BIQStKbTVpYzNBN1BDOXdQZ284YUdsbmFHeHBaMmgwSUdOc1lYTnpQU0pqYjIxd1lXNTVUbUZ0WlZWd1pHRjBaU0krVG1GemRIa2dVR1Z5Wm05eWJXRnVZMlU4TDJocFoyaHNhV2RvZEQ0OFluSWdMejRLUEdocFoyaHNhV2RvZENCamJHRnpjejBpWTI5dGNHRnVlVUZrWkhKbGMzTlZjR1JoZEdVaVBqSXdNelVnVXk0Z1JXRnpkSGR2YjJRZ1JISXVMQ0JYYjI5a2MzUnZZMnNzSUVsTUlEWXdNRGs0UEM5b2FXZG9iR2xuYUhRK1BHSnlJQzgrQ2p4b2FXZG9iR2xuYUhRZ1kyeGhjM005SW1OdmJYQmhibmxRYUc5dVpWVndaR0YwWlNJK0tEZzBOeWtnTkRVNExUUTROVGc4TDJocFoyaHNhV2RvZEQ0OFluSWdMejRLUEdocFoyaHNhV2RvZENCamJHRnpjejBpWTI5dGNHRnVlVVZ0WVdsc1ZYQmtZWFJsSWo1dVlYUmxRRzVoYzNSNWNHVnlabTl5YldGdVkyVXVZMjl0UEM5b2FXZG9iR2xuYUhRKyIsInByaXZhY3kiOiJQSEErUEhOMGNtOXVaejVRVWtsV1FVTlpQQzl6ZEhKdmJtYytQQzl3UGdvS1BIQStQSE4wY205dVp6NVVhR1VnYVc1bWIzSnRZWFJwYjI0Z2NISnZkbWxrWldRZ1pIVnlhVzVuSUhSb2FYTWdjbVZuYVhOMGNtRjBhVzl1SUdseklHdGxjSFFnY0hKcGRtRjBaU0JoYm1RZ1kyOXVabWxrWlc1MGFXRnNMQ0JoYm1RZ2QybHNiQ0J1WlhabGNpQmlaU0JrYVhOMGNtbGlkWFJsWkN3Z1kyOXdhV1ZrTENCemIyeGtMQ0IwY21Ga1pXUWdiM0lnY0c5emRHVmtJR2x1SUdGdWVTQjNZWGtzSUhOb1lYQmxJRzl5SUdadmNtMHVJRlJvYVhNZ2FYTWdiM1Z5SUdkMVlYSmhiblJsWlM0OEwzTjBjbTl1Wno0OEwzQStDZ284Y0Q0OGMzUnliMjVuUGtsT1JFVk5Ua2xVV1R3dmMzUnliMjVuUGp3dmNENEtDanh3UGp4bGJUNVpiM1VnWVdkeVpXVWdkRzhnYVc1a1pXMXVhV1o1SUdGdVpDQm9iMnhrSUhWekxDQmhibVFnYVhSeklITjFZbk5wWkdsaGNtbGxjeXdnWVdabWFXeHBZWFJsY3l3Z2IyWm1hV05sY25Nc0lHRm5aVzUwY3l3Z1kyOHRZbkpoYm1SbGNuTWdiM0lnYjNSb1pYSWdjR0Z5ZEc1bGNuTXNJR0Z1WkNCbGJYQnNiM2xsWlhNc0lHaGhjbTFzWlhOeklHWnliMjBnWVc1NUlHTnNZV2x0SUc5eUlHUmxiV0Z1WkN3Z2FXNWpiSFZrYVc1bklISmxZWE52Ym1GaWJHVWdZWFIwYjNKdVpYbHpKaU16T1RzZ1ptVmxjeXdnYldGa1pTQmllU0JoYm5rZ2RHaHBjbVFnY0dGeWRIa2daSFZsSUhSdklHOXlJR0Z5YVhOcGJtY2diM1YwSUc5bUlFTnZiblJsYm5RZ2VXOTFJSEpsWTJWcGRtVXNJSE4xWW0xcGRDd2djbVZ3Ykhrc0lIQnZjM1FzSUhSeVlXNXpiV2wwSUc5eUlHMWhhMlVnWVhaaGFXeGhZbXhsSUhSb2NtOTFaMmdnZEdobElGTmxjblpwWTJVc0lIbHZkWElnZFhObElHOW1JSFJvWlNCVFpYSjJhV05sTENCNWIzVnlJR052Ym01bFkzUnBiMjRnZEc4Z2RHaGxJRk5sY25acFkyVXNJSGx2ZFhJZ2RtbHZiR0YwYVc5dUlHOW1JSFJvWlNCVVQxTXNJRzl5SUhsdmRYSWdkbWx2YkdGMGFXOXVJRzltSUdGdWVTQnlhV2RvZEhNZ2IyWWdZVzV2ZEdobGNpNDhMMlZ0UGp3dmNENEtDanh3UGp4emRISnZibWMrUkVsVFEweEJTVTFGVWlCUFJpQlhRVkpTUVU1VVNVVlRQQzl6ZEhKdmJtYytQQzl3UGdvS1BIQStQSE4wY205dVp6NVpUMVVnUlZoUVVrVlRVMHhaSUZWT1JFVlNVMVJCVGtRZ1FVNUVJRUZIVWtWRklGUklRVlE2UEM5emRISnZibWMrUEM5d1Bnb0tQRzlzUGdvSlBHeHBQbGxQVlZJZ1ZWTkZJRTlHSUZSSVJTQlRSVkpXU1VORklFbFRJRUZVSUZsUFZWSWdVMDlNUlNCU1NWTkxMaUJVU0VVZ1UwVlNWa2xEUlNCSlV5QlFVazlXU1VSRlJDQlBUaUJCVGlBbWNYVnZkRHRCVXlCSlV5WnhkVzkwT3lCQlRrUWdKbkYxYjNRN1FWTWdRVlpCU1V4QlFreEZKbkYxYjNRN0lFSkJVMGxUTGlBc0xpQkJUa1FnVlZNc0lFbFVKaU16T1R0VElFTlZVMVJQVFVWU1V5d2dSVmhRVWtWVFUweFpJRVJKVTBOTVFVbE5VeUJCVEV3Z1YwRlNVa0ZPVkVsRlV5QlBSaUJCVGxrZ1MwbE9SQ3dnVjBoRlZFaEZVaUJGV0ZCU1JWTlRJRTlTSUVsTlVFeEpSVVFzSUVsT1EweFZSRWxPUnl3Z1FsVlVJRTVQVkNCTVNVMUpWRVZFSUZSUElGUklSU0JKVFZCTVNVVkVJRmRCVWxKQlRsUkpSVk1nVDBZZ1RVVlNRMGhCVGxSQlFrbE1TVlJaTENCR1NWUk9SVk5USUVaUFVpQkJJRkJCVWxSSlExVk1RVklnVUZWU1VFOVRSU0JCVGtRZ1RrOU9MVWxPUmxKSlRrZEZUVVZPVkM0OEwyeHBQZ29KUEd4cFBrMUJTMFZUSUU1UElGZEJVbEpCVGxSWklGUklRVlFnS0drcElGUklSU0JUUlZKV1NVTkZJRmRKVEV3Z1RVVkZWQ0JaVDFWU0lGSkZVVlZKVWtWTlJVNVVVeXdnS0dscEtTQlVTRVVnVTBWU1ZrbERSU0JYU1V4TUlFSkZJRlZPU1U1VVJWSlNWVkJVUlVRc0lGUkpUVVZNV1N3Z1UwVkRWVkpGTENCUFVpQkZVbEpQVWkxR1VrVkZMQ0FvYVdscEtTQlVTRVVnVWtWVFZVeFVVeUJVU0VGVUlFMUJXU0JDUlNCUFFsUkJTVTVGUkNCR1VrOU5JRlJJUlNCVlUwVWdUMFlnVkVoRklGTkZVbFpKUTBVZ1YwbE1UQ0JDUlNCQlEwTlZVa0ZVUlNCUFVpQlNSVXhKUVVKTVJTd2dRVTVFSUNocGRpa2dRVTVaSUVWU1VrOVNVeUJKVGlCVVNFVWdVMDlHVkZkQlVrVWdWMGxNVENCQ1JTQkRUMUpTUlVOVVJVUXVQQzlzYVQ0S0NUeHNhVDVCVGxrZ1RVRlVSVkpKUVV3Z1JFOVhUa3hQUVVSRlJDQlBVaUJQVkVoRlVsZEpVMFVnVDBKVVFVbE9SVVFnVkVoU1QxVkhTQ0JVU0VVZ1ZWTkZJRTlHSUZSSVJTQlRSVkpXU1VORklFbFRJRVJQVGtVZ1FWUWdXVTlWVWlCUFYwNGdSRWxUUTFKRlZFbFBUaUJCVGtRZ1VrbFRTeUJCVGtRZ1ZFaEJWQ0JaVDFVZ1YwbE1UQ0JDUlNCVFQweEZURmtnVWtWVFVFOU9VMGxDVEVVZ1JrOVNJRUZPV1NCRVFVMUJSMFVnVkU4Z1dVOVZVaUJEVDAxUVZWUkZVaUJUV1ZOVVJVMGdUMUlnVEU5VFV5QlBSaUJFUVZSQklGUklRVlFnVWtWVFZVeFVVeUJHVWs5TklGUklSU0JFVDFkT1RFOUJSQ0JQUmlCQlRsa2dVMVZEU0NCTlFWUkZVa2xCVEM0OEwyeHBQZ29KUEd4cFBrNVBJRUZFVmtsRFJTQlBVaUJKVGtaUFVrMUJWRWxQVGl3Z1YwaEZWRWhGVWlCUFVrRk1JRTlTSUZkU1NWUlVSVTRzSUU5Q1ZFRkpUa1ZFSUVKWklGbFBWU0JHVWs5TklFOVNJRlJJVWs5VlIwZ2dUMUlnUmxKUFRTQlVTRVVnVTBWU1ZrbERSU0JUU0VGTVRDQkRVa1ZCVkVVZ1FVNVpJRmRCVWxKQlRsUlpJRTVQVkNCRldGQlNSVk5UVEZrZ1UxUkJWRVZFSUVsT0lGUklSU0JVVDFNdVBDOXNhVDRLUEM5dmJENEtDanh3UGp4emRISnZibWMrVEVsTlNWUkJWRWxQVGlCUFJpQk1TVUZDU1V4SlZGazhMM04wY205dVp6NDhMM0ErQ2dvOGNENVpUMVVnUlZoUVVrVlRVMHhaSUZWT1JFVlNVMVJCVGtRZ1FVNUVJRUZIVWtWRklGUklRVlFnUVU1RUlGTklRVXhNSUU1UFZDQkNSU0JNU1VGQ1RFVWdSazlTSUVGT1dTQkVTVkpGUTFRc0lFbE9SRWxTUlVOVUxDQkpUa05KUkVWT1ZFRk1MQ0JUVUVWRFNVRk1MQ0JEVDA1VFJWRlZSVTVVU1VGTUlFOVNJRVZZUlUxUVRFRlNXU0JFUVUxQlIwVlRMQ0JKVGtOTVZVUkpUa2NnUWxWVUlFNVBWQ0JNU1UxSlZFVkVJRlJQTENCRVFVMUJSMFZUSUVaUFVpQk1UMU5USUU5R0lGQlNUMFpKVkZNc0lFZFBUMFJYU1V4TUxDQlZVMFVzSUVSQlZFRWdUMUlnVDFSSVJWSWdTVTVVUVU1SFNVSk1SU0JNVDFOVFJWTWdLRVZXUlU0Z1NVWWdTRUZUSUVKRlJVNGdRVVJXU1ZORlJDQlBSaUJVU0VVZ1VFOVRVMGxDU1V4SlZGa2dUMFlnVTFWRFNDQkVRVTFCUjBWVEtTd2dVa1ZUVlV4VVNVNUhJRVpTVDAwNlBDOXdQZ29LUEc5c1Bnb0pQR3hwUGxSSVJTQlZVMFVnVDFJZ1ZFaEZJRWxPUVVKSlRFbFVXU0JVVHlCVlUwVWdWRWhGSUZORlVsWkpRMFU3UEM5c2FUNEtDVHhzYVQ1VVNFVWdRMDlUVkNCUFJpQlFVazlEVlZKRlRVVk9WQ0JQUmlCVFZVSlRWRWxVVlZSRklFZFBUMFJUSUVGT1JDQlRSVkpXU1VORlV5QlNSVk5WVEZSSlRrY2dSbEpQVFNCQlRsa2dSMDlQUkZNc0lFUkJWRUVzSUVsT1JrOVNUVUZVU1U5T0lFOVNJRk5GVWxaSlEwVlRJRkJWVWtOSVFWTkZSQ0JQVWlCUFFsUkJTVTVGUkNCUFVpQk5SVk5UUVVkRlV5QlNSVU5GU1ZaRlJDQlBVaUJVVWtGT1UwRkRWRWxQVGxNZ1JVNVVSVkpGUkNCSlRsUlBJRlJJVWs5VlIwZ2dUMUlnUmxKUFRTQlVTRVVnVTBWU1ZrbERSVHM4TDJ4cFBnb0pQR3hwUGxWT1FWVlVTRTlTU1ZwRlJDQkJRME5GVTFNZ1ZFOGdUMUlnUVV4VVJWSkJWRWxQVGlCUFJpQlpUMVZTSUZSU1FVNVRUVWxUVTBsUFRsTWdUMUlnUkVGVVFUczhMMnhwUGdvSlBHeHBQbE5VUVZSRlRVVk9WRk1nVDFJZ1EwOU9SRlZEVkNCUFJpQkJUbGtnVkVoSlVrUWdVRUZTVkZrZ1QwNGdWRWhGSUZORlVsWkpRMFU3SUU5U1BDOXNhVDRLQ1R4c2FUNUJUbGtnVDFSSVJWSWdUVUZVVkVWU0lGSkZURUZVU1U1SElGUlBJRlJJUlNCVFJWSldTVU5GTGp3dmJHaytDand2YjJ3K0NnbzhjRDQ4ZFQ1Q2VTQnlaV2RwYzNSbGNtbHVaeUJoYm1RZ2MzVmljMk55YVdKcGJtY2dkRzhnYjNWeUlHVnRZV2xzSUdGdVpDQlRUVk1nYzJWeWRtbGpaU3dnWW5rZ2IzQjBMV2x1TENCdmJteHBibVVnY21WbmFYTjBjbUYwYVc5dUlHOXlJR0o1SUdacGJHeHBibWNnYjNWMElHRWdZMkZ5WkN3Z0puRjFiM1E3ZVc5MUlHRm5jbVZsSUhSdklIUm9aWE5sSUZSRlVrMVRJRTlHSUZORlVsWkpRMFVtY1hWdmREc2dZVzVrSUhsdmRTQmhZMnR1YjNkc1pXUm5aU0JoYm1RZ2RXNWtaWEp6ZEdGdVpDQjBhR1VnWVdKdmRtVWdkR1Z5YlhNZ2IyWWdjMlZ5ZG1salpTQnZkWFJzYVc1bFpDQmhibVFnWkdWMFlXbHNaV1FnWm05eUlIbHZkU0IwYjJSaGVTNDhMM1UrUEM5d1Bnb0tQSEErSm01aWMzQTdQQzl3UGdvOGFHbG5hR3hwWjJoMElHTnNZWE56UFNKamIyMXdZVzU1VG1GdFpWVndaR0YwWlNJK1RtRnpkSGtnVUdWeVptOXliV0Z1WTJVOEwyaHBaMmhzYVdkb2RENDhZbklnTHo0S1BHaHBaMmhzYVdkb2RDQmpiR0Z6Y3owaVkyOXRjR0Z1ZVVGa1pISmxjM05WY0dSaGRHVWlQakl3TXpVZ1V5NGdSV0Z6ZEhkdmIyUWdSSEl1TENCWGIyOWtjM1J2WTJzc0lFbE1JRFl3TURrNFBDOW9hV2RvYkdsbmFIUStQR0p5SUM4K0NqeG9hV2RvYkdsbmFIUWdZMnhoYzNNOUltTnZiWEJoYm5sUWFHOXVaVlZ3WkdGMFpTSStLRGcwTnlrZ05EVTRMVFE0TlRnOEwyaHBaMmhzYVdkb2RENDhZbklnTHo0S1BHaHBaMmhzYVdkb2RDQmpiR0Z6Y3owaVkyOXRjR0Z1ZVVWdFlXbHNWWEJrWVhSbElqNXVZWFJsUUc1aGMzUjVjR1Z5Wm05eWJXRnVZMlV1WTI5dFBDOW9hV2RvYkdsbmFIUSsifQ==

Terms of Service

Privacy Policy

Core Modal Title

Sorry, no results found

You Might Find These Articles Interesting

T
Please Check Your Email
We Will Be Following Up Shortly
*
*
*