Nasty Performance ~ 847-458-4858 

  • Blog Home
  • Categories
    • Motorcycle Maintenance
    • Riding Tips & Preps
    • Safety & Inspection
    • Customizations & Upgrades
    • DIY Motorcycle Repairs
    • Motocycle Audio Systems
    • Motocycle Seasonal Care & Storage
    • Engine, Electrical Performance
  • Bike Night
  • Nasty Performance Motorcycle Shop
September 14.2026
1 Minute Read

What Is the Best Schedule for Motorcycle Service Intervals

Did you know? Missing a single scheduled service interval can reduce your motorcycle’s lifespan and reliability—yet most riders are unaware of manufacturer recommendations. If you want to keep your ride safe, smooth, and ready for adventure, understanding the best schedule for motorcycle service intervals is crucial. In this comprehensive guide, you’ll learn how to tailor your maintenance schedule for peak performance, maximize your investment, and avoid costly repairs down the road.

Unlocking the Best Schedule for Motorcycle Service Intervals: An Unconventional Look

Did you know? Missing a single scheduled service interval can reduce your motorcycle’s lifespan and reliability—yet most riders are unaware of manufacturer recommendations.

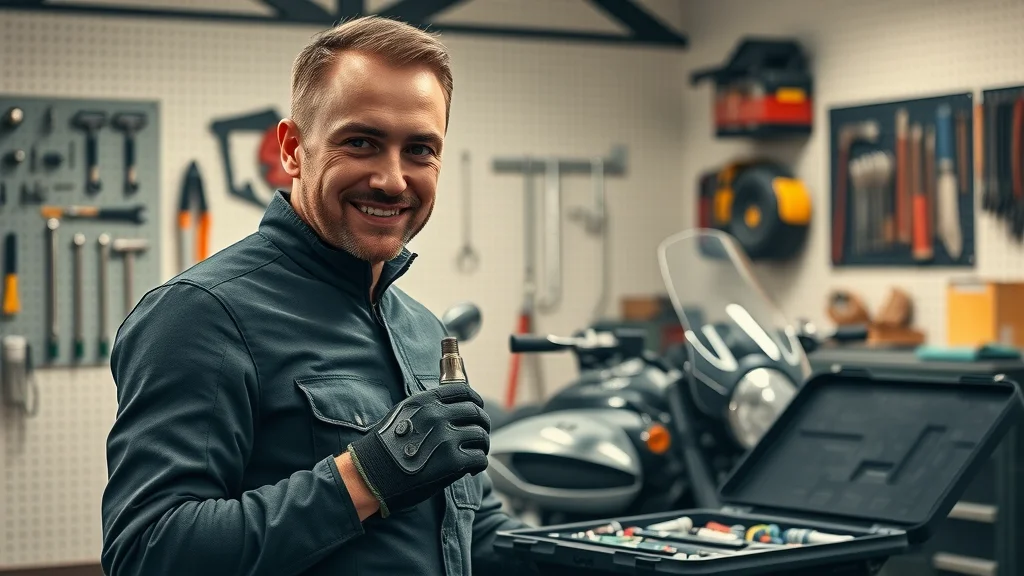
Enthusiastic mechanic checking a motorcycle

What You'll Learn About the Best Schedule for Motorcycle Service Intervals

  • How to identify the best schedule for motorcycle service intervals based on manufacturer guidelines
  • Importance of routine maintenance and oil changes
  • Service interval tips from professional service departments
  • Bonus: Top questions riders ask about motorcycle service intervals

Understanding Service Intervals: Foundations for the Best Schedule

What Are Service Intervals and Why Do They Matter for the Best Schedule?

Service intervals are the specific mileage or time frames recommended by your motorcycle’s manufacturer for conducting routine maintenance. These regular check-ins are not just about extending your bike’s life—they’re fundamental for keeping you safe on every ride. By following a carefully structured schedule, you can easily spot potential issues such as worn brake pads, aging engine oil, or changes in tire wear before they become costly or dangerous problems. Each interval is mapped out to make it easy for you to track key milestones in your bike’s care.

When you proactively address routine maintenance and inspections, your motorcycle performs more smoothly and with greater reliability. Actions like changing the oil, inspecting the air filter, checking tread depth and performing a visual inspection of the surface of the tire are foundational to the best schedule for motorcycle service intervals. This structured approach also gives you priceless peace of mind, knowing every twist of the throttle is backed by diligent care. Timely adjustments of your chain or belt, monitoring primary fluid, and other maintenance tasks mean a safer, more enjoyable ride every time you hit the road.

While establishing a routine for service intervals is essential, it's equally important to adapt your maintenance habits as the seasons change. For practical tips on how to keep your motorcycle in top shape year-round, explore these seasonal bike care secrets every rider should know to complement your regular service schedule.

Manufacturer Recommendations on the Best Schedule for Motorcycle Service Intervals

"Following the best schedule for motorcycle service intervals isn’t just about longevity—it’s about ensuring your safety on every ride."

Motorcycle manufacturers offer specific service schedules tailored to each model’s engineering and intended use. Typically, these start with a major first check at the 600-mile mark, followed by every 4,000 to 8,000 miles or every 6 to 12 months, whichever comes first. These intervals are carefully calculated based on the wear patterns of parts like the clutch and throttle cables, air filter, engine oil and oil filter, and even factors like climate or riding style—which can cause these intervals to vary based on your unique conditions.

Ignoring these recommendations can lead to subtle but serious consequences: increased engine wear, diminished brake performance, and even sudden electrical or battery issues. Regularly visiting a service department or trusted technician ensures your maintenance log is up-to-date, your brake inspection is thorough, and your bike’s intricate systems—from the wheel bearing to the rear wheel and throttle cables—are in peak condition. Always consult your owner’s manual for the best schedule for motorcycle service intervals suited to your machine.
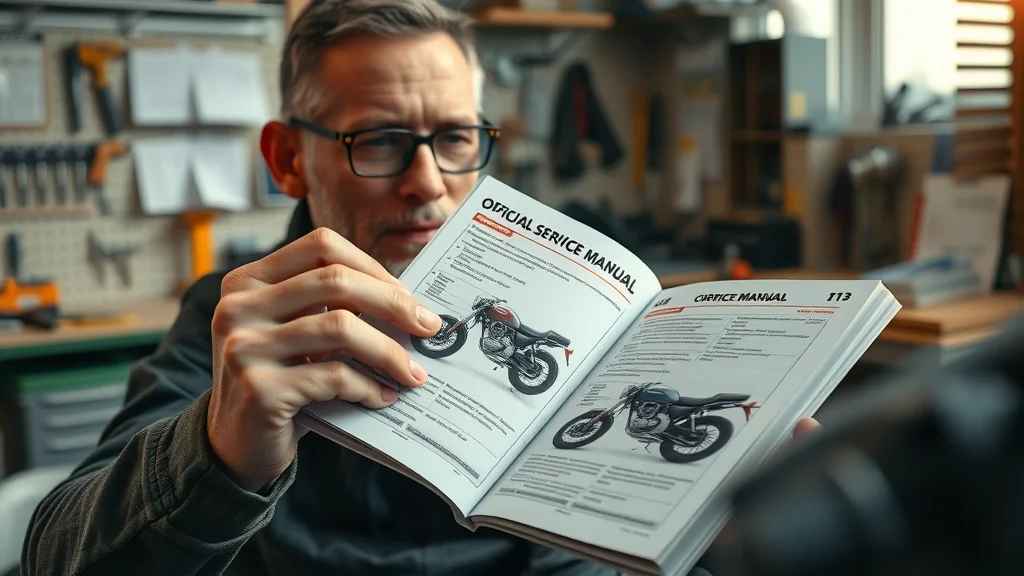
Close-up of motorcycle owner reviewing service manual as part of best schedule for motorcycle service intervals

Routine Maintenance: Key Elements of the Best Schedule for Motorcycle Service Intervals

Essential Oil Change Guidance as Part of the Service Interval

  • How often to conduct an oil change for optimal engine health
  • Recognizing oil change warning signs between scheduled service intervals

One of the cornerstone tasks of the best schedule for motorcycle service intervals is the oil change. Frequent, well-timed oil and filter changes keep fresh oil circulating through critical engine components, drastically improving lubrication and cooling. Most manufacturers recommend changing the oil every 3,000 to 5,000 miles, but for some high-performance models or aggressive riding styles, this interval might be shorter.

Between scheduled service intervals, keep an eye out for engine oil that looks dark and dirty, or for oil change alert indicators on your dashboard. Ignoring these signals can shorten your engine’s life and invite expensive repairs. Using the right grade and amount of fresh oil alongside a new oil filter supports optimal engine performance, prevents premature wear, and preserves your investment. Always include oil change frequency as a top priority in your maintenance checklist.
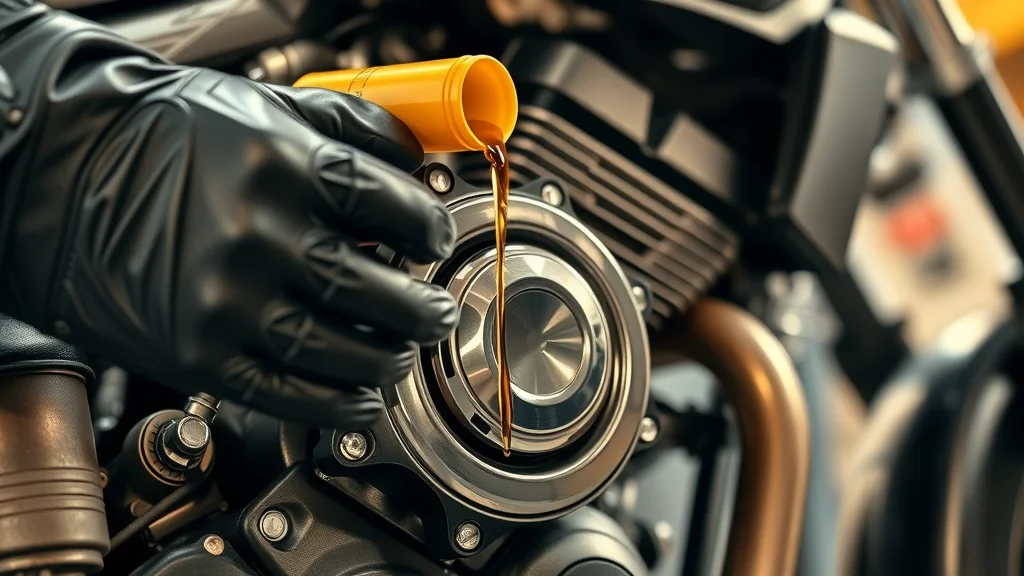
Hands changing oil in a motorcycle engine as part of best schedule for motorcycle service intervals

Routine Maintenance Checklist for Motorcycle Service Intervals

  • Tire pressure and tread inspection
  • Brake system checks
  • Chain lubrication and adjustment
  • Coolant and fluid levels
  • Battery inspection
  • Lighting and electrical function checks

An effective routine maintenance checklist is essential for making your motorcycle service intervals seamless and thorough. Start with a visual inspection of your tire pressure and tread depth—signs of uneven wear or low air can indicate deeper issues with the rear wheel or wheel bearing. Next, check your brakes for wear indicators, inspect brake fluid, and ensure your pads respond crisply during both front and rear brake pulls.

Lubricating and adjusting your chain or belt is critical for smooth power delivery and to avoid premature drivetrain wear. Don’t forget other vital areas like battery test procedures, verifying coolant and all fluid levels, and carefully examining the lighting, turn signals, and electrical functions for proper operation. By closely following these steps, you’ll notice minor issues before they escalate and improve both performance and safety.
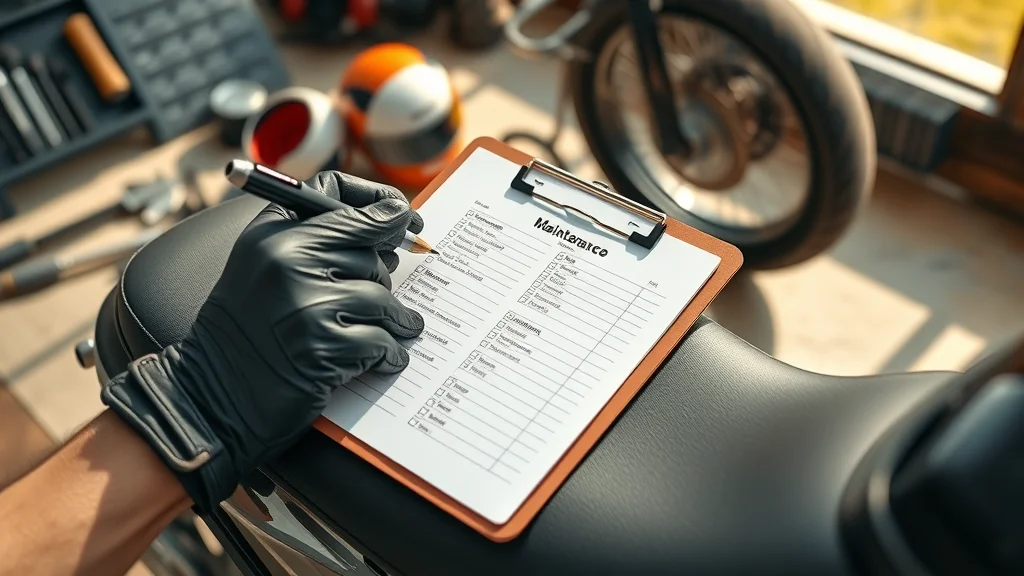
Maintenance checklist on motorcycle seat with gloved hands marking items, demonstrating best schedule for motorcycle service intervals

Guidelines by Mileage and Time: Crafting the Best Schedule for Motorcycle Service Intervals

Mileage/Time Routine Maintenance Major Service Interval
600 miles/1 month Initial inspection, oil change —
4,000 miles/6 months Oil change, brake check, general inspection —
8,000 miles/12 months Full inspection, coolant, brake fluid change Valves check
16,000 miles/24 months Major overhaul, replace spark plugs Valve clearance adjustment

The table above provides a reference for the best schedule for motorcycle service intervals, blending both mileage and time for thorough coverage. Your bike’s specific schedule might slightly differ, especially if you use your motorcycle in a wide range of riding conditions or climates. At the 600-mile mark, an initial inspection is vital, as it catches any manufacturing defects or early-wear issues. By 4,000 miles, another oil change, general inspection, and brake check keep your systems running smoothly.

The 8,000- and 16,000-mile intervals introduce more comprehensive checks, such as replacing spark plugs, checking valves, and addressing major overhaul tasks. Always remember: even if you don’t reach these mileage benchmarks, sticking to the time-based component (e. g. , 6, 12, or 24 months) ensures your fluids, filters, and gaskets stay fresh, preventing degradation due to age and environmental exposure.

Service Department Insights: Pro Advice for the Best Schedule for Motorcycle Service Intervals

"Staying consistent with your motorcycle’s service interval—especially if you ride in extreme conditions—will save you from costly repairs down the road." — Nasty Performance Motorcycle Shop Technician

Service departments staffed by experienced technicians are an incredible resource for personalized advice on the best schedule for motorcycle service intervals. Experts stress that regular professional inspections—especially after hard riding or adverse weather—are just as crucial as your at-home routine. Riding often in extreme heat, humidity, or rain can accelerate tire wear, gunk up your air filter, or speed up deterioration in your bike’s brake fluid.

Professional mechanics bring years of hands-on knowledge, making nuanced recommendations you might not find in your owner’s manual. A good service department can help you monitor wear indicators on your brakes, assess surface of the tire, perform a battery test, and verify whether your chain or belt needs replacement, not just adjustment. When you maintain a strong partnership with your service department, you’ll benefit from accountability, performance gains, and that ever-coveted peace of mind knowing your ride is ready for any adventure.

Motorcycle service department technician advising rider on best schedule for motorcycle service intervals

People Also Ask About the Best Schedule for Motorcycle Service Intervals

What is the 2 4 12 second rule on a motorcycle?

The 2-4-12 second rule is a safe riding guideline, not a maintenance standard. It refers to giving yourself enough time and space to respond to hazards while riding. “2 seconds” provides a safe following distance, “4 seconds” is for following at higher speeds or in poor conditions, and “12 seconds” means scanning the road ahead for obstacles. Following these rules keeps you alert, safe, and gives you peace of mind—but following the best schedule for motorcycle service intervals protects your bike so it’s performing at its best whenever you need to react quickly.

How often should a motorcycle be serviced?

Most motorcycles should be serviced every 4,000 to 6,000 miles or at least every six months, but these intervals can vary based on your make, model, and how aggressively you ride. Your owner’s manual sets the gold standard—always check it! Tasks like oil changes, air filter inspections, brake checks, and battery tests must be included in each interval. Regular service strengthens your motorcycle’s reliability and safety. When in doubt, ask an experienced technician at your local service department for model-specific guidance.

Which bike is most liked by girls?

The “most liked” motorcycle often depends on individual style, comfort, size, and brand preference. Many riders, regardless of gender, appreciate bikes that are lightweight, easy to handle, and have low seat heights—making models like the Honda Rebel, Yamaha MT series, or Kawasaki Ninja 300 popular among newer or petite riders. Ultimately, the best bike is the one that matches the rider’s comfort, confidence, and style, and is maintained routinely according to the best schedule for motorcycle service intervals for safety and reliability.

What does 2 fingers up mean on a motorcycle?

“Two fingers up,” also known as the motorcycle wave, is a friendly gesture riders share when passing each other. It signifies camaraderie, respect, and safe travels. Just as this simple signal promotes community, following a consistent schedule for service intervals also shows respect—for yourself, your bike, and other riders—by ensuring your motorcycle stays safe and reliable on the road.

Watch this quick explainer to see how timely maintenance tasks like oil changes, inspections, and valve checks fit together in your motorcycle’s service cycle. Protecting your ride means sticking to a schedule—so your engine, brakes, and battery deliver peak performance every time you head out.

Common Questions and FAQs About the Best Schedule for Motorcycle Service Intervals

  • What are signs I should bring my motorcycle in for service outside scheduled intervals? If you notice unusual noises, sluggish performance, fluid leaks, warning lights, or difficulty starting, schedule a service appointment—even if you haven’t reached your next mileage milestone yet.
  • Can I perform routine maintenance myself, or should I always visit a service department? Many routine checks like oil changes, chain lubrication, and tire inspections can be DIY, but professional inspections at key intervals ensure you don’t overlook critical issues like wheel bearing or brake system problems.
  • How do service intervals differ between new and used motorcycles? New motorcycles often have a more frequent initial service interval (e.g., 600 miles), while used bikes may require additional checks due to unknown maintenance history. Track service records and err on the side of caution for used bikes.
  • What impact does climate have on the best schedule for motorcycle service intervals? Riding in hot, cold, or wet climates can accelerate wear on fluids, air filters, brakes, and electronics. Adjust your interval to be more conservative—shorten time between services and be extra vigilant on routine checks.

Key Takeaways for the Best Schedule for Motorcycle Service Intervals

  • Consistently following your manufacturer’s schedule is crucial
  • Routine maintenance is essential for performance and safety
  • Consult a professional service department when in doubt

Ready to Protect Your Investment?

Call Nasty Performance Motorcycle Shop Today: 847-458-4858

Mastering your motorcycle’s service intervals is just the beginning of a truly reliable riding experience. To take your maintenance routine to the next level, consider how seasonal changes can impact your bike’s performance and longevity. Discover expert strategies for adapting your care regimen throughout the year by reading seasonal bike care secrets every rider must know. These insights will help you anticipate challenges before they arise, ensuring your motorcycle stays in peak condition no matter the weather or riding season. Elevate your approach and enjoy every mile with confidence.
Motorcycle Maintenance

0 Comments

Write A Comment

*
*
Please complete the captcha to submit your comment.
Related Posts All Posts

Cost And Benefits of Routine Motorcycle Service

Introduction: The Value of Routine Motorcycle Service Did you know? Regular motorcycle maintenance can extend your ride's lifespan by years while keeping you safe on the road. This surprising fact speaks volumes about the importance of routine motorcycle service. Riders often underestimate how minor checks and basic tasks protect not just the machine, but also the person behind the handlebars. Every mile you ride adds to both the memories and the mechanical wear—making upkeep not an optional chore, but a wise investment. Let’s pull back the curtain on why a proactive approach with a thorough maintenance checklist keeps your bike running dependably and your adventures worry-free. Whether you’re new to motorcycle maintenance or a seasoned rider, understanding what goes into a routine motorcycle service can make all the difference between carefree cruising and costly roadside mishaps. This guide will break down the maintenance essentials, demystify the key service points, showcase the cost benefits, and compare do-it-yourself methods with professional service. By the end, you’ll see that taking charge of your motorcycle’s health not only ensures peak performance but also guards your safety and wallet. What You'll Learn About Routine Motorcycle Service Core maintenance tasks involved in routine motorcycle service How scheduled service can prevent costly repairs Benefits of maintaining critical components like tire pressure, brake pads, and oil/filter A comparative overview of DIY service versus professional service Common FAQs about motorcycle maintenance and safety Understanding Routine Motorcycle Service Essentials Routine motorcycle service is more than just a quick oil change or a casual look over your brakes—it's a systematic approach to keeping your bike in top condition. Essential service involves following a maintenance checklist that covers core tasks like monitoring tire pressure, inspecting and changing your oil and filter, checking brake pads and brake fluid, and replacing the fuel filter as needed. These tasks help ensure your motorcycle is always ready for the road while decreasing the risk of surprise repairs. It’s important to note that a routine service schedule—ideally performed as recommended in your owner’s manual—offers peace of mind by reducing the potential for unexpected breakdowns. Proactive checks on your air filter, drive chain, and all fluid levels not only optimize performance but also maximize the longevity and reliability of your two-wheeled machine. Modern motorcycles come with sophisticated systems, so routine attention to details like clutch and throttle adjustments, proper belt tension, and head and wheel bearings, can make it easy to keep your motorcycle maintenance up to factory standards. Motorcycle Maintenance Checklist: Comprehensive Service Points Checking and adjusting tire pressure Monitoring and changing brake fluid Inspecting and replacing brake pads Changing the oil and replacing the oil and filter Cleaning and replacing the fuel filter General safety and functionality checks Building a regular habit of going through a maintenance checklist ensures nothing is overlooked. Skilled riders know that tire inspections safeguard grip and stability, while brake pad changes keep stopping distances short and safe. Attending to each item—like oil changes with fresh oil, updating air filters, and cleaning the drive chain—lays the groundwork for a safe, smooth, and enjoyable ride every time. Incorporating comprehensive checks including the steering head bearings, wheel bearing, and the rear wheel, as well as monitoring the health of the motor through annual inspection cycles, supports long-term reliability. Following a motorcycle maintenance checklist is the single best way to ensure your bike running condition and retain its value. Table: Routine Motorcycle Service Versus Occasional Repairs Service Frequency Routine Motorcycle Service Occasional Repairs Proactive or Reactive Proactive Reactive Typical Costs Lower long-term Higher per incident Impact on Performance Consistently optimal Variable Downtime Planned/minimal Unplanned/extended The table above highlights that making routine motorcycle service a priority is a proactive way to keep long-term costs manageable and performance consistently high. Waiting for problems to arise may save a little time up front, but unplanned downtime and high repair bills often follow, especially if major components fail unexpectedly. Sticking to a scheduled cycle of service not only makes it easier for certified technicians to spot wear and tear, but it also helps riders plan for minimal interruptions. By managing small fixes now, you prevent larger, unpredictable repair needs and extend the life of your motorcycle's genuine parts. The Economic Impact: Cost Benefits of Routine Motorcycle Service Riders who invest in routine motorcycle service quickly discover the cost benefits outweigh the perceived inconvenience of maintenance appointments. By keeping up with regular oil changes, inspecting brake pads, and replacing air and fuel filters according to the maintenance schedule, you are building long-term value into your ride. Small routine expenses help avoid the high fees of emergency repairs—especially when wear on vital components goes unnoticed until a breakdown. Think of routine maintenance as insurance for your bike and your budget. Addressing issues proactively keeps all parts running smoothly. For example, a simple check of your tire pressure or topping off brake fluid regularly can prevent excessive tire wear and brake fade. Not only will this extend the lifespan of expensive parts, but a properly maintained motorcycle also commands a higher resale price, should you ever decide to upgrade. Ultimately, routine motorcycle service provides financial peace of mind as well as on-road safety. While routine service covers the essentials, many riders also want to know how to adapt their maintenance habits throughout the year. For a deeper dive into seasonal adjustments and tips for keeping your motorcycle in peak condition no matter the weather, explore the seasonal bike care secrets every rider should know. Motorcycle Maintenance: Protecting Key Components Maintaining Tire Pressure for Optimal Safety Maintaining the correct tire pressure is one of the simplest but most crucial elements of routine motorcycle service. Tire pressure affects everything from handling, braking, and fuel efficiency, to the longevity of your tires. A motorcycle tire that’s even slightly underinflated can compromise grip during cornering and cause uneven wear, shortening the life of your tires and increasing risk to rider safety. Routinely use a reliable digital gauge to check tire pressure at least once a month and before any long trip, adjusting it to the specifications outlined in your manual for optimal performance. Motorcycle maintenance checklists typically include a tire inspection for sidewall or tread damage as well as pressure. Underinflation leads to sluggish bike running, while overinflation may result in reduced shock absorption over rough surfaces. Keeping your tire pressure within the recommended range is not just a matter of performance—it’s critical for peace of mind on every ride. Pair this routine with tire rotation and a visual assessment of the rear wheel and wheel bearings to catch problems before they become hazards. Inspecting and Replacing the Fuel Filter The fuel filter protects your engine from contaminants that can enter via gasoline. Over time, even top-quality fuel may contain small amounts of debris or moisture, which the fuel filter traps before they reach delicate engine components. A clogged filter can cause poor engine performance, rough idling, or even stalling. That’s why inspecting and, if necessary, replacing the fuel filter is a regular task on any motorcycle maintenance checklist—it keeps the bike running smoothly and protects your investment in genuine parts. Most owner’s manuals recommend checking fuel filters every major service interval, but riding in dirty or dusty conditions may require more frequent attention. Replacing a tired fuel filter is a relatively quick task, especially if you’re familiar with basic DIY repairs, and it can prevent more serious carburetor or injector damage. This small maintenance habit is vital for riders who want consistent power delivery and the peace of mind that comes from reliable starts in every season. Monitoring and Topping Off Brake Fluid Brake fluid is the unsung hero of safe riding, translating lever pressure into reliable stopping power. Over time, moisture can seep into your motorcycle’s braking system, lowering the fluid’s boiling point and potentially leading to a loss of effectiveness during hard braking. That’s why it’s crucial to check brake fluid reservoirs as part of your routine motorcycle service—look for the correct fluid level and any discoloration that could indicate contamination or aging. Changing or topping off brake fluid according to the service manual preserves not only the feel of your brakes but their cutting-edge responsiveness, especially in emergencies. When doing a full service or annual inspection, many certified technicians recommend flushing the old brake fluid entirely for optimal performance. This attention to detail complements your checks of brake pad condition, ensuring total braking system reliability for every ride. When and How to Check Brake Pads Brake pads are an essential safety component that directly affects your ability to stop quickly and securely. Routinely inspecting your brake pad thickness, as part of your maintenance checklist, is key to avoiding metal-to-metal contact and damage to rotors—especially if you do a lot of city riding or commute daily. Look for signs of wear, such as thinning pad material, grinding sounds, or decreased responsiveness each time you perform a visual check or before embarking on a long ride. General best practice is to check your brake pads every 2,000-3,000 miles, or during each full service, and replace them well before they’re worn down to the manufacturer’s minimum thickness. This small, proactive step keeps your braking system in top condition, preventing costly surprises and helping you ride with confidence, especially on winding roads or during emergency stops. Change the Oil and Replace Oil and Filter The heart of every healthy motorcycle is clean, fresh oil—regular oil change intervals are a core aspect of any maintenance checklist. Old or contaminated oil can cause internal engine wear, reduce performance, and even lead to breakdowns. Your maintenance schedule should include changing the oil and filter at manufacturer-recommended intervals to ensure smooth operation and engine longevity. Many riders find satisfaction in doing their own oil and filter changes, but whether handled at home or by certified technicians, this routine task directly supports a longer-lasting, efficient motorcycle. Using the right grade of oil and a genuine parts oil filter makes it easy to follow factory recommendations and keep your bike running at its best for every road trip or urban commute. Motorcycle Maintenance Checklist: Monthly and Mileage-Based Tasks Monthly: Tire pressure, chain lubrication, fluid levels, lights, and controls check Every service interval (as per manual): Oil and oil filter, air filter, fuel filter, brake pads/disks, brake fluid, coolant inspection By breaking down the maintenance checklist into monthly and mileage-based tasks, you make it easy to keep up with what matters most for your motorcycle’s health. A quick monthly check of tire inflation, the drive chain’s condition, and basic lights ensures safe operation, while service interval items like oil changes, brake checks, and air filter replacements protect against long-term wear and tear. This balanced approach is why a routine motorcycle service schedule is the blueprint for hassle-free, peak performance riding. Regular maintenance also includes checking the spark plug and inspecting areas like the steering head and wheel bearings for smooth rotation and stability. Following the maintenance schedule in your manual not only preserves your bike’s value but also makes it ready for every adventure—rain or shine. Long-Term Benefits of Sticking to a Maintenance Checklist "A stitch in time saves nine – and on a motorcycle, routine attention saves lives and wallets." – Nasty Performance Mechanic Committing to a motorcycle maintenance checklist offers long-term rewards that go well beyond the garage. Consistent service maintains engine health, enhances fuel efficiency, and keeps performance at its peak. By fixing small problems early, you reduce costly repairs down the road and preserve the genuine joy of riding. Not to mention, a well-documented service history increases resale value and boosts confidence—both for you and future buyers. The savings and safety gained from regular checks are invaluable. Many bikes with years of service and high mileage continue to run strong because attentive riders keep up with their maintenance schedules. You’re not only protecting your two-wheeled investment, you’re also maximizing every dollar and ride for years to come. DIY Versus Professional Routine Motorcycle Service DIY: Potential cost savings, hands-on satisfaction, risk of missed details Professional: Expertise, access to tools, documented service history, higher upfront cost Choosing between DIY and professional routine motorcycle service depends on your comfort, experience, and what you value most—cost savings or expert peace of mind. Doing your own maintenance, such as chain lubrication, tire inspection, and oil change, offers a sense of accomplishment and can be lighter on your wallet. However, it’s important to recognize the potential for overlooked steps, especially on complex modern bikes with advanced electronics, belt tension, or intricate brake fluid lines. Opting for professional service gives you access to certified technicians with specialized tools, factory knowledge, and the assurance that every maintenance checklist item is covered. Shops typically document each service, which not only strengthens your resale value but also gives you a reliable record of care. The investment in higher initial costs pays off in the form of trouble-free riding, thorough checks of spark plugs, wheel bearings, and head bearings, and an annual inspection at a trusted facility. People Also Ask: Your Routine Motorcycle Service Questions What is routine maintenance on a motorcycle? Routine maintenance on a motorcycle involves regularly inspecting, cleaning, and replacing essential components according to a maintenance checklist. Tasks include checking tire pressure, adjusting fluid levels like oil and brake fluid, inspecting brake pads, cleaning or replacing the air and fuel filters, lubricating the drive chain, and keeping lights and controls operational. Sticking to your motorcycle’s recommended maintenance schedule prevents breakdowns, promotes safety, and ensures reliability on every ride. Which bike is most liked by girls? The most liked bike can vary greatly by region, style, and individual preference. Many women favor motorcycles that offer a manageable seat height, lighter weight, and easy handling—such as sport bikes, cruisers, and certain classic models. Comfort, design, and brand reputation often play big roles, but ultimately, the best bike is the one that matches the rider’s personality and riding needs. What does 2 fingers up mean on a motorcycle? The "2 fingers up" gesture, usually made as riders pass each other, is a universal symbol of camaraderie among motorcyclists. It’s a friendly way of saying “stay safe” or “enjoy the ride,” building community on the road. Riders use this simple sign to acknowledge fellow enthusiasts, regardless of bike model or location. What is the 4 second rule on a motorcycle? The "4 second rule" is a safety guideline that encourages motorcyclists to keep at least four seconds behind the vehicle in front. This buffer zone gives you enough time to react to sudden stops, obstacles, or changing road conditions, enhancing both your safety and the effectiveness of your bike’s braking system. FAQs About Routine Motorcycle Service How often should routine motorcycle service be performed? Most manufacturers recommend following a maintenance schedule outlined in your manual—typically every 3,000 to 5,000 miles, with monthly checks of core systems like tire pressure and fluids. Are all motorcycles subject to the same maintenance schedule? No. Different makes, models, and riding conditions can affect how often components like oil and filter, brake pads, air filters, or drive chains need attention. Always consult your owner’s manual for the most accurate intervals. What critical components wear fastest on modern bikes? Brake pads, tires, chains, fuel filters, and air filters usually require the most frequent inspections and replacements, especially with intensive city riding or challenging weather conditions. Is professional motorcycle service recommended for beginners? Yes, professional service is highly recommended for beginners. Certified technicians ensure everything from fluid levels to spark plug gaps and chain tension meets safety standards, providing crucial peace of mind for new riders. How does climate affect routine service needs? Extreme climates—hot, cold, or very wet—can accelerate wear on parts like tires, brake fluid, and chains. Riders in these conditions may need to perform some checks, like tire pressure and chain lubrication, more frequently. Key Takeaways: Prioritizing Motorcycle Maintenance Routine motorcycle service is an investment in safety, reliability, and cost control. Following a maintenance checklist prevents breakdowns and extends life. Some tasks are DIY-friendly, while others are best left to professionals. Well-maintained motorcycles retain higher resale value and perform better. Final Thoughts on the Cost and Benefits of Routine Motorcycle Service Prioritizing routine motorcycle service empowers you to ride further, safer, and with confidence—while protecting both your machine and your wallet. Make your bike’s health a routine, not an afterthought—Call Nasty Performance Motorcycle Shop Today: 847-458-4858. As you continue to refine your motorcycle maintenance routine, remember that each season brings its own set of challenges and opportunities for care. If you’re ready to take your bike’s longevity and performance to the next level, consider exploring advanced strategies for year-round upkeep. Discover how to adapt your maintenance checklist for changing weather, storage, and riding conditions by visiting our comprehensive guide on seasonal bike care secrets every rider must know. This resource is packed with actionable insights to help you protect your investment and enjoy smooth, safe rides no matter the time of year. Elevate your maintenance game and ensure your motorcycle is always ready for the road ahead.

How To Perform Motorcycle Spark Plug Replacement

Startling Fact: Overlooked spark plugs are among the top reasons for sudden engine breakdowns in motorcycles. Understanding how to perform motorcycle spark plug replacement doesn’t just prevent costly repairs—it can significantly boost your bike’s reliability, ensure responsive performance, and even improve your fuel efficiency. Every rider, from weekend cruisers to daily commuters, can benefit from mastering this essential maintenance skill. An Eye-Opening Fact: Why Properly Performing Motorcycle Spark Plug Replacement Matters Recent studies show that overlooked motorcycle spark plugs are among the top reasons for sudden engine breakdowns. Understanding how to perform motorcycle spark plug replacement can dramatically increase the reliability and longevity of your ride while improving fuel efficiency. If you’ve ever been stranded roadside due to a sputtering engine, there’s a good chance a neglected spark plug played a role. Replacing your motorcycle spark plug at proper intervals keeps your combustion chamber firing smoothly, minimizes the risk of hard starts and misfires, and allows your engine’s air-fuel mixture to ignite with peak precision. Whether your ride features a modern efi bike or a vintage classic, taking care of the spark plug is a foundation of stress-free riding. With a few tools, the right technique, and expert insights, you can make this crucial maintenance task routine—leading to smoother throttle response, better gas mileage, and longer engine life. Performing this task correctly can mean the difference between an unforgettable road trip and a frustrating interruption. What You'll Learn in This Motorcycle Spark Plug Replacement Guide Signs it's time to perform motorcycle spark plug replacement A step-by-step walkthrough of the spark plug replacement process Common complications and safety guidelines for handling spark plugs Expert tips to maximize engine performance post-replacement Understanding Motorcycle Spark Plugs and Their Crucial Role What Is a Spark Plug? The spark plug is a small but essential component housed in your motorcycle's cylinder head, responsible for delivering the vital electric spark that ignites the compressed air-fuel mixture within the combustion chamber. Every time your engine turns over, it relies on the spark plug’s precision timing and sturdy build to fire efficiently and reliably. If your spark plugs are worn or dirty, you may experience engine misfires, sluggish starts, or even acceleration issues. Modern efi bikes, classic carbureted models, and everything in between depend on well-maintained spark plugs for smooth engine cycles. Paying attention to your plug’s ground strap, center electrode, and ensuring proper spark plug gap are important details that not only affect performance but also prevent excess fuel usage and costly repairs. Types of Motorcycle Spark Plugs Motorcycle spark plugs come in several varieties, each tailored for different needs and maintenance schedules. The most common types are copper, platinum, and iridium. Copper spark plugs are the traditional choice, requiring more frequent replacement but offering budget-friendly performance. Platinum plugs, on the other hand, offer better durability and improved conductivity, making them a go-to for riders who want less frequent maintenance without high costs. Iridium spark plugs represent the top end: they last the longest—sometimes up to 50,000 miles—and provide the strongest, most consistent spark, making them ideal for high-performance or modern efi bikes. When choosing between types, consider your motorcycle’s requirements, your average riding conditions, and always consult your owner’s or service manual for specific recommendations. The right spark plug can directly impact how often you need to perform motorcycle spark plug replacement and deliver optimum results. Identifying When to Perform Motorcycle Spark Plug Replacement Key Symptoms of Worn-Out Motorcycle Spark Plugs Hard starts or engine misfires Decreased fuel economy Unusual engine noises or vibrations Visible carbon buildup on spark plugs Recognizing these warning signs helps prevent unexpected breakdowns and keeps your motorcycle running reliably. Hard starts and misfires usually indicate the plug’s center electrode or ground strap aren’t producing a robust spark. If you notice more frequent fill-ups or struggle to get your engine to turn over—especially on cold mornings—it may be time to check your spark plug. Carbon buildup or oil fouling on the plug tip means your combustion isn’t optimal, affecting everything from throttle response to overall power. Addressing these issues promptly, before they escalate, is a key reason why every rider should schedule regular motorcycle spark plug inspections alongside other routine maintenance tasks, like cleaning the air filter or checking plug wires for damage. While inspecting your spark plugs is crucial, integrating this check with other seasonal maintenance tasks can further enhance your motorcycle’s reliability. For a deeper dive into comprehensive upkeep, consider exploring essential seasonal bike care strategies every rider should know to keep your machine performing at its best year-round. Recommended Replacement Frequency for Motorcycle Spark Plugs "Routine inspection and timely replacement of your motorcycle spark plug can prevent costly repairs and preserve optimal performance," advises motorcycle mechanic specialist. Most motorcycles require spark plug replacement every 8,000 to 15,000 miles, though this interval can vary based on spark plug type, engine design, and your riding habits. Refer to your official service manual for the maintenance schedule that best suits your bike. While copper plugs have a shorter lifespan, platinum and iridium types can go longer—but all spark plugs need to be checked regularly, especially on modern efi bikes where consistent ignition is vital. It’s a good idea to monitor for performance drops, unusual sounds, or engine warning lights—these often precede visual evidence of spark plug wear. Proactive replacement is always safer than waiting for failure, reducing your chances of being left stranded. Tools and Materials Needed to Perform Motorcycle Spark Plug Replacement New motorcycle spark plugs Socket wrench and spark plug socket Torque wrench Spark plug gap gauge Dielectric grease Protective gloves These basic tools are essential for a safe, efficient plug change. Having a gap gauge allows you to check and correct the plug gap quickly, while a torque wrench ensures you won’t over-tighten or damage the threads in your cylinder head. Always wear gloves to protect your hands and keep oils off the new plugs. Dielectric grease applied to your spark plug boot ensures a secure, moisture-resistant connection, and the spark plug socket’s rubber insert helps safely grip the plug during removal and installation. For a truly thorough job, using compressed air to clear debris from around the plug before removal can prevent dirt from falling into the combustion chamber. Step-by-Step Guide to Properly Perform Motorcycle Spark Plug Replacement Step 1: Preparing Your Motorcycle for Spark Plug Replacement Start by ensuring your motorcycle is turned off, fully cooled down, and parked securely on a flat surface. Remove seat panels or side covers to access the spark plug; on some efi bike models, the gas tank may need to be carefully lifted or removed for better access to the plug wires and plug boot. Always keep your workspace organized—a clear surface helps avoid losing small components and makes it much easier to follow each step. Having your tools, a gap gauge, and the replacement spark plug close by will streamline the process and help you avoid interruptions. If you’re unsure about any step, reference your owner’s or service manual for details specific to your motorcycle make and model. Step 2: Removing the Old Spark Plug Begin by carefully pulling the spark plug boot or wire off the plug; grip the plug boot itself and not the wire to avoid unnecessary damage. If it’s stubborn, a gentle twisting motion can help. With a spark plug socket attached to your socket wrench, turn the plug counterclockwise to remove it from the cylinder head. Take a moment to inspect the old plug for signs of oil fouling, carbon buildup, or eroded ground strap—these hints can reveal potential engine health issues. If a lot of dirt is present around the plug, use some compressed or canned air to clear it away before removal. This step prevents debris from falling into your engine, safeguarding longevity and performance. Finally, compare the old and new spark plugs for type and length to guarantee correct fitment. Step 3: Checking and Adjusting Spark Plug Gap To check the gap on your new motorcycle spark plug, use a dedicated gap gauge or feeler gauge to measure the space between the center electrode and the ground strap. Your service manual will specify the correct dimension, often in millimeters or thousandths of an inch. An incorrect gap can lead to weak sparks, misfires, or engine knock; if you need to adjust, gently bend the ground strap using the gap gauge. Never apply force to the center electrode. This small but vital detail ensures your replacement spark plug fires consistently under all riding conditions, whether you’re cruising city streets or pushing your engine on the open highway. Checking the gap before installation is a pro tip that can dramatically improve combustion efficiency and throttle response. Step 4: Installing the New Motorcycle Spark Plug Carefully thread the new spark plug into the cylinder head by hand—this prevents cross-threading which could damage your engine. Once finger-tight, use the torque wrench to secure the plug to your motorcycle’s specified torque setting (always found in your service manual). Over-tightening risks stripping threads, while under-tightening can cause leaks or arcing. After the plug is seated, apply a thin coat of dielectric grease to the spark plug boot for optimal electrical contact and moisture resistance, then re-attach the boot or plug wire securely. With this step, you’ve set the foundation for reliable engine firing on every ride. Double-check your work before moving to the next phase to ensure long-lasting results. Step 5: Final Checks and Testing Before calling your replacement job complete, re-install any removed panels and review your tool checklist. Turn the key and start your motorcycle, observing for a smooth and steady idle. Listen for any abnormal noises or hesitation—these could indicate a loose plug boot, incorrect gap, or other issues needing attention. Let the engine run for a few minutes and take a short test ride to confirm restored performance. These final checks help confirm your new spark plug is firing correctly and that all connections are secure, so you can hit the road with confidence in your maintenance handiwork. Troubleshooting After You Perform Motorcycle Spark Plug Replacement Engine still misfiring: Inspect wiring and ignition coils Difficulty starting: Recheck spark plug gap and tighten Check engine light: Use diagnostic tool for additional codes If your engine continues to misfire after installing a new spark plug, check the plug wire and ignition coil for secure, clean connections—especially on modern efi bikes. If the engine is hard to start, double-check the torque setting and ensure you’ve achieved the correct spark plug gap. Reinstalling the plug or giving attention to the plug boot connection often resolves these issues. If a check engine light appears, a diagnostic scan can point to sensors or other components impacting spark delivery. Follow these troubleshooting steps for a smooth-running motorcycle and peace of mind after replacement. Best Practices and Expert Advice for Motorcycle Spark Plug Maintenance "Consistent inspection of your motorcycle spark plugs every season ensures you catch early signs of wear before they escalate into major performance issues." – Certified technician For reliable performance, inspect your spark plugs at least once per riding season or every 5,000 to 7,500 miles—whichever comes first. Check for carbon buildup, worn ground straps, and maintain the correct spark plug gap using a reliable gap gauge. Integrate spark plug checks with other routine tasks like cleaning the air filter, checking plug wires for cracks, or replacing fuel filters on your modern efi bike. These proactive habits save time and money and extend the life of your ride. Remember, even the best spark plugs wear out eventually, and immediate attention to symptoms ensures enjoyable, uninterrupted journeys. If you experience persistent performance dips despite fresh plugs, consult a professional technician or your bike’s official website for troubleshooting support. Comparison Table: Types of Motorcycle Spark Plugs by Longevity and Performance Type Expected Lifespan Performance Benefits Copper Short (8,000–10,000 miles) Budget-friendly, basic performance Platinum Moderate (up to 30,000 miles) Improved durability and efficiency Iridium Long (up to 50,000 miles) Highest longevity and spark consistency Video Tutorial: How to Perform Motorcycle Spark Plug Replacement Watch a step-by-step demonstration of how to perform motorcycle spark plug replacement for clear, visual guidance. Video overview: Hands-on motorcycle spark plug replacement tutorial — Clear, instructional, video footage of a professional mechanic demonstrating spark plug replacement on a standard street motorcycle, with cutaways showing close-ups, tool handling, and before-after engine startup, set in a tidy, modern workshop, friendly voiceover with helpful on-screen steps. FAQs About Motorcycle Spark Plug Replacement and Maintenance When should I perform motorcycle spark plug replacement? Spark plug replacement is generally required every 8,000 to 15,000 miles, depending on your motorcycle’s spark plug type and manufacturer guidelines. Check your owner’s manual and follow a regular inspection routine to maintain optimal performance. Can I clean and reuse old spark plugs? While it’s sometimes possible to clean a spark plug with carbon buildup using a wire brush or canned air, it’s often more reliable to replace worn plugs. Reusing excessively worn or fouled plugs may result in continued engine misfires or poor performance. What torque setting should I use for my motorcycle spark plug? Torque specs vary by motorcycle, so consult your service manual for the recommended setting. Over- or under-tightening can cause thread damage or misfires. Using a torque wrench ensures secure installation and proper engine sealing. People Also Ask (Motorcycle Spark Plug Replacement) How often should spark plugs be replaced on a motorcycle? Motorcycle spark plugs should typically be replaced every 8,000 to 15,000 miles, or as specified in your motorcycle’s ownership manual. Routine inspection is recommended for optimal performance. What is the most sold motorcycle of all time? The Honda Super Cub holds the title as the world’s best-selling motorcycle, renowned for its reliability and simple maintenance—a testament to the impact of basic upkeep like spark plug replacement. What is the 4 second rule on a motorcycle? The 4 second rule involves maintaining a safe distance behind another vehicle to allow enough time to react and stop safely, which is essential for all riders regardless of motorcycle spark plug condition. What kills spark plugs quickly? Factors such as poor fuel quality, excessive engine heat, incorrect spark plug gap, and infrequent maintenance can all lead to faster spark plug deterioration. Key Takeaways for Anyone Set to Perform Motorcycle Spark Plug Replacement Regularly perform motorcycle spark plug replacement to prevent start-up and performance issues Choose spark plugs recommended by your manufacturer for longevity and engine health Use the proper tools and follow precise steps for a reliable replacement process Contact the Experts for Professional Motorcycle Spark Plug Replacement If you’re unsure how to perform motorcycle spark plug replacement or want the assurance of professional expertise, call Nasty Performance Motorcycle Shop today at 847-458-4858. Mastering spark plug replacement is just one part of a well-rounded motorcycle maintenance routine. To truly safeguard your bike’s performance through every season, it’s wise to adopt a holistic approach that includes regular inspections, cleaning, and timely upgrades. Discover more expert-backed tips and advanced care techniques by reading seasonal bike care secrets every rider must know. By expanding your maintenance knowledge, you’ll not only extend your motorcycle’s lifespan but also enjoy smoother, safer rides no matter the weather or road conditions.

Tips on When to Conduct Your Motorcycle Lubrication Maintenance

Did you know that a staggering amount of motorcycle breakdowns are easily preventable? Regular, well-timed motorcycle lubrication maintenance doesn’t just keep your ride smooth—it’s your best defense against costly repairs and sudden mechanical failures. Neglecting something as simple as chain cleaning or brake lever lubrication can shorten the life of your motorcycle by thousands of miles. In this comprehensive guide, you'll uncover expert tips, techniques, and schedules that will have your bike running cleaner, quieter, and longer, whether you’re a daily commuter, a weekend adventurer, or a first-time bike owner. Startling Facts: Why Motorcycle Lubrication Maintenance is More Important Than You Think “Over 60% of motorcycle breakdowns are preventable with regular lubrication maintenance.” — Motorcycle Maintenance Institute Motorcycle lubrication maintenance is a crucial, yet often overlooked, aspect of keeping your bike in top-notch condition. Many riders underestimate the impact of proper lubrication, but failing to clean and lubricate essential components—like your motorcycle chain, brake levers, and pivot points—can dramatically increase the chances of breakdowns, accelerated wear, and compromised safety. The act of lubricating your motorcycle isn’t just about avoiding squeaks; it’s about ensuring every journey is safe and enjoyable. Problems like increased friction, damage to rubber seals, and difficulty in operating the brake lever or clutch cable can arise when these moving parts are left dry or contaminated. A properly maintained lubrication routine extends the life of your motorcycle, saves money on repairs, and enhances riding performance. Ignoring these maintenance tasks leads to noisy, stiff parts and mounting internal damage. With modern machines featuring sealed chains and high-viscosity index motorcycle oils, not following regular cleaning and lubrication intervals could cost you more in the long run. Knowing when—and how—to maintain your bike’s moving parts can make the difference between a reliable ride and an untimely breakdown. What You’ll Learn About Motorcycle Lubrication Maintenance How to identify optimal lubrication intervals The key motorcycle parts requiring lubrication Proper techniques for motorcycle chain cleaning Common mistakes to avoid when performing motorcycle lubrication maintenance Understanding the Basics: What Is Motorcycle Lubrication Maintenance? Defining Motorcycle Lubrication Maintenance Motorcycle lubrication maintenance involves regularly cleaning, inspecting, and lubricating all the moving parts of your motorcycle that are prone to friction, wear, or corrosion. This includes the drive chain, pivot points, brake levers, and any other fittings or components that move or rotate. Keeping these parts lubricated reduces metal-to-metal contact, prevents grime from damaging rubber seals, and helps your motorcycle operate efficiently. Lubrication maintenance is not a one-time task; it requires a proactive, routine approach tailored to your riding conditions. For many riders, the focus is on the motorcycle chain—a key transfer point for engine power. However, maintenance goes beyond chain lube and chain cleaning. Components like the clutch cable, brake lever, and various pivot points also demand attention. Lubricating your motorcycle helps to ward off rust, preserve rubber seals, and maintain optimal performance. This comprehensive approach means moving parts won’t seize, and your motorcycle remains responsive and safe, mile after mile. While understanding the basics is essential, mastering the correct cleaning and lubrication process for your motorcycle chain can make a significant difference in performance and longevity. For a detailed, step-by-step approach to effective chain cleaning and lubrication, explore our guide on seasonal bike care secrets every rider must know, which covers practical maintenance routines tailored to changing weather and riding conditions. Importance of Lubrication for Motorcycle Chains and Moving Parts The motorcycle chain is responsible for transferring power from the engine to the rear wheel, making it a central element in your bike’s motion. If left unlubricated or dirty, the chain and sprocket can experience accelerated wear, decreased efficiency, and even catastrophic failure. Proper chain lube forms a protective barrier against dirt and water, keeping the drive chain operating smoothly. In addition, pivot points and brake levers require attention to ensure that every movement is effortless and that the rubber seals within these areas do not degrade prematurely. Effective lubrication reduces the risks associated with friction, heat accumulation, and corrosion. It therefore extends the life of your motorcycle’s drive chain and critical moving parts. Riding in varied weather conditions—rain, dust, or extreme heat—puts even more stress on these components, making a regular lubrication schedule essential for lasting performance and safe operation. Common Lubricants Used in Motorcycle Maintenance The best lubricant for motorcycle lubrication maintenance depends on the specific application. For motorcycle chains, use a chain-specific lube formulated to withstand high loads and resist fling-off. For sealed chains, opt for a lube that protects O-rings or X-rings without degrading the rubber seals. Multipurpose grease is excellent for pivot points like levers, kickstands, and foot controls as it stays in place and provides enduring protection. Light oils are well-suited for brake levers, clutch cables, and small linkages where a quick, thin, penetrating lubrication is needed. Avoid heavy motor oils or incompatible lubricants that may cause accumulation of debris or premature wear. Signs It’s Time for Motorcycle Lubrication Maintenance Recognizing Dry or Noisy Motorcycle Chains One of the most obvious indicators that your motorcycle needs lubrication maintenance is a dry or noisy motorcycle chain. If you hear squeaks, rattles, or harsh grinding sounds while riding, the lack of lubrication or debris buildup is likely the culprit. A clean and lubed chain should operate almost silently and smoothly. Inspect visually for dullness, rust, or signs of stretching on the drive chain. When the chain’s color changes from a fresh, metallic sheen to a brown or rusty hue, or when visible grime builds up, it’s time to clean and lubricate it. Regularly inspect for leaks or residue near rubber seals, which may also indicate the need for immediate action. Don’t ignore sudden changes in the noise or feel of your chain. Neglecting these warning signs can lead to excessive wear not only on the chain but on the sprockets and transmission as well. For sealed chains, extra caution is needed, as old lubricant and dirt trapped under the seals can cause unseen damage if left untreated. Stiff Pivot Points and Brake Lever Issues Pivot points and brake levers are essential for safe, responsive control. If you notice increased stiffness or a “sticky” sensation when operating the brake lever or clutch cable, or if the return action feels sluggish, lubrication is necessary. A dry or corroded pivot point can restrict proper movement, making these controls unreliable. Watch for a gritty, rough feeling when you squeeze the brake or clutch lever, as this means moving parts are no longer lubricated and friction is increasing. Consistent, effortless movement ensures that safety mechanisms work when you need them—especially in high-stress situations. Stiffness in these controls can also point to a buildup of old grease, dust, or incompatible lubricant. Make sure to refresh with the proper motorcycle oil or multipurpose grease, and regularly check these parts during every maintenance session. Addressing these symptoms early will extend the life of your pivot points and keep overall motorcycle handling sharp. Performance Changes and Increased Friction Another warning: reduced performance and increased friction throughout the bike, whether it’s in acceleration, braking, or responsiveness. If you notice that the motorcycle feels sluggish, doesn’t accelerate smoothly, or if you feel vibrations and dragging from the drive chain or moving parts, your lubrication maintenance may be overdue. The amount of wear can accumulate quickly—especially if you ride in wet, dusty, or urban environments where grime and debris abound. Changes in how the motorcycle chain rests on the sprockets—a loose or uneven fit, skipping, or binding—is a sign of neglect. Regular lubrication isn’t just about prevention; it’s about restoring the joy of riding and the safety margin you expect from your machine. Key Areas for Motorcycle Lubrication Maintenance Motorcycle Chain: Why Regular Chain Cleaning and Lubrication Are Essential No component is more crucial than your motorcycle chain, which must be cleaned and lubricated at regular intervals. If left dirty, sand and grime act as abrasives on rollers and sprocket teeth, quickly eroding metal parts and damaging the rubber seals in sealed chains. An unserviced chain loses flexibility and can snap or derail, posing significant danger. Chain cleaning should always precede lubrication so that debris doesn’t become trapped beneath fresh chain lube. Whether your motorcycle uses a sealed or unsealed chain, always use a specified chain cleaner, a quality chain brush, and finish with a high-viscosity chain lube. Chains on off-road bikes and motorcycles ridden in wet or gritty environments may require even more frequent cleaning and lubrication. If your bike has a center stand, use it to fully rotate the drive chain for easier cleaning and inspection. Staying consistent with chain cleaning and lube can dramatically extend the life of your motorcycle, improve throttle response, and prevent premature wear on the drivetrain components. Pivot Point Maintenance: Ensuring Smooth Movement Pivot points are the moving hinges that enable handlebars, levers, pedals, and other components to function effortlessly. Each pivot—whether it's for the clutch lever, brake pedal, gear shifter, or kickstand—should be cleaned and greased regularly using multipurpose grease or copper grease, as indicated in your manual. Lubrication prevents these high-wear areas from seizing, rusting, or developing a loose, rattling feel. For best results, fully rotate the levers and pedals as you apply lubricant, ensuring the grease reaches all contact points. Neglecting these areas leads to increased effort to operate controls and risks unexpected part failures. If a pivot point develops play or a squeaking noise, it’s a clear call for immediate maintenance. Always clean old or contaminated grease before adding new, as layering can attract excess dirt. Brake Lever Lubrication: Preventing Sticks and Slips Your brake lever is a vital safety mechanism and must always perform smoothly. Lubricating the brake lever’s pivot pin and engagement surfaces with a drop of light oil or appropriate lubricant helps keep the mechanism responsive and reduces stickiness, particularly in demanding conditions. Be careful: applying too much oil or getting lubricant near the brake pads can compromise braking ability. Before applying lubricant, clean the area thoroughly to remove any old oil, grime, or dust. If your brake lever feels gritty or resists movement, inspect for wear and lubricate as per manufacturer recommendations. Consistent brake lever maintenance ensures reliability and keeps your ride safe and precise during every stop. Additional Fittings and Components to Clean and Lube Beyond the chain and pivot points, there are several other components worth your attention: the clutch cable, throttle linkage, kickstand, foot pegs, and even helmet locks can all benefit from periodic lubrication. Focus on areas where movement creates friction or where water is likely to cause rust. Use light oil for cables and throttle linkages for rapid penetration, while heavier greases are suitable for metal-on-metal pivots or joints that absorb significant stress. Particular care should be given to rubber seals on fitting components and sealed chains to prevent drying and cracking. Each maintenance task—no matter how small—contributes to the overall health and reliability of your motorcycle, helping you avoid unpleasant surprises on your next ride. How Often Should You Perform Motorcycle Lubrication Maintenance? “Follow the maintenance schedule in your owner’s manual, but inspect your chain and moving parts more frequently under harsh riding conditions.” — Certified Motorcycle Technician Your ideal motorcycle lubrication maintenance schedule depends on how, where, and how often you ride. As a general rule, clean and lubricate your motorcycle chain every 500 miles or after riding in rain, mud, or dusty conditions. Harsh climates, city commuting, or off-road adventures demand more frequent inspections and maintenance sessions, as contaminants build up quickly. For pivot points and brake levers, inspect and lubricate every month, or more frequently if you notice stiffness or sticking. Creating a regular schedule and sticking to it is the best way to maximize the life of your motorcycle and ensure safe, enjoyable performance. Always refer to your owner’s manual for manufacturer-specific lubrication intervals, as some motorcycles with sealed chains or high-quality parts may require less frequent servicing than others. Still, regular hands-on inspections give you early warning signs—like noise, resistance, or dirt buildup—allowing you to address maintenance tasks as soon as necessary. Consistency is your ally in preventing both minor nuisances and major mechanical failures. Step-by-Step Guide: Clean and Lubricate Your Motorcycle Chain Gather the right tools and products Chain clean: Steps for effective motorcycle chain cleaning Techniques to clean and lube the chain for optimal performance Safety practices when handling cleaning agents 1. Gather the right tools and products. You’ll need a chain cleaner or degreaser, a chain brush or soft bristle brush, clean rags, and an appropriate chain lube that matches your chain and riding conditions. 2. Chain clean: Steps for effective motorcycle chain cleaning. Put your motorcycle on its center stand or rear paddock stand to fully rotate the drive chain. Spray the chain cleaner along the entire length, let it soak for a few minutes, then scrub the chain thoroughly with the brush to remove dirt, mud, and old lube. Wipe off all debris with a clean rag. 3. Techniques to clean and lube the chain for optimal performance. Once the chain is dry, rotate the rear wheel and apply fresh chain lube evenly along the inside of the chain, ensuring the lubricant penetrates all rollers and links. Avoid over-lubricating, as excess lube attracts dust and dirt. 4. Safety practices when handling cleaning agents. Always wear gloves, work in a well-ventilated area, and ensure that cleaning agents or chain lube do not contact rubber seals, tires, or braking surfaces. Dispose of used rags and chemicals responsibly. Pivot Point and Brake Lever Lubrication Techniques Identifying Critical Pivot Points Locating the critical pivot points on your motorcycle will ensure you don’t miss essential areas requiring lubrication maintenance. These usually include the clutch and brake levers, gear shifter, kickstand, rear suspension linkages, and foot controls. When inspecting, look for metal-on-metal movement—these are the areas that experience the most friction. Any visible play, squeak, or rough action is a sign to clean and add fresh lubrication. Reference your owner’s manual to confirm which pivot points require multipurpose grease and which may benefit from a lighter oil. Regular attention to these spots helps ensure smooth operation, improves the response of your drive chain, and prevents unnecessary wear or mechanical noise. Proper Process for Lubricating Brake Levers To lubricate your brake lever for optimal performance, first remove any accumulated dust or dirt with a clean cloth. Use a fine-tipped oiler or dropper bottle to place a drop or two of light oil directly onto the lever’s pivot pin and return spring. Exercise the lever several times to distribute the oil, then wipe away any excess to avoid attracting dust. Take care not to get oil on the brake pads, as this will reduce stopping power. For motorcycles with cable-actuated brakes or clutches, apply a small amount of lube directly inside the cable’s housing too. This keeps the cable moving freely and extends its lifespan. Check for smooth, consistent movement after each application—if stiffness persists, inspect for kinks or frays and address any deeper issues before resuming use. Recommended Products for Motorcycle Lubrication Maintenance When choosing lubricants for motorcycle lubrication maintenance, it’s crucial to use products formulated specifically for motorcycles. Opt for chain lubes labeled for O-ring or X-ring sealed chains if your bike uses them. For pivot points, multipurpose or copper grease provides strong metal protection without running or dripping. Light silicone sprays or light machine oils are perfect for cables, brake levers, and small linkages. Consult your owner’s manual or a certified technician if in doubt about compatibility—using the wrong product can damage rubber seals or cause excessive buildup of dirt and contaminants. Always avoid using general-purpose greases or thick motor oils for parts that demand specialized lubrication. Common Mistakes in Motorcycle Lubrication Maintenance (And How to Avoid Them) Over-lubricating the motorcycle chain: Excessive lube attracts dirt, creating abrasive paste that wears chain and sprocket faster. Using incorrect lubricants: Incompatible oils or greases can destroy rubber seals and reduce chain life. Neglecting chain cleaning before lubrication: Applying fresh lube to dirty chain traps grime inside, causing corrosion and extra wear. Ignoring pivot points and brake levers: These hidden areas are just as vital as the chain for safe handling and control. Failing to clean and lube all necessary components: Overlooking cables, side stands, and linkages can lead to seized or unresponsive parts. Motorcycle Lubrication Maintenance Tips for All Seasons Adjusting Lubrication Maintenance Schedules for Weather Riding conditions affect how often and how thoroughly you perform motorcycle lubrication maintenance. In wet or muddy weather, chains and pivot points need attention more frequently, since water and debris quickly wash away lubricants and accelerate wear. In hot, dry climates, dust and sand can act as abrasives, so regular cleaning and relubrication are necessary to protect rubber seals and sealed chains. Always inspect moving parts after riding in extreme weather, and adjust your routine to account for seasonal changes. Maintaining consistent lubrication during winter layups or humid summer months is key for extending the life of your motorcycle’s components and ensuring a reliable ride year-round. Protecting the Motorcycle Chain in Wet or Dusty Environments In wet, muddy, or dusty conditions, your motorcycle chain is more susceptible to dirt ingress and the loss of chain lube. After rides in such environments, perform a thorough chain clean to remove contaminants, then reapply the proper lubricant as soon as the chain dries. Sealed chains (O- or X-ring) require extra scrutiny since abrasive particles can find their way past compromised rubber seals. Certain products, such as chain lubes with water-repellent properties, offer added protection in adverse environments. Consider covering your chain with a guard if your motorcycle design permits and avoiding rides in deep water or thick dust whenever practical. Storing Your Motorcycle: Pre- and Post-Storage Lubrication Maintenance If you’re storing your motorcycle for any extended period, always perform a complete lubrication maintenance routine beforehand. Clean your chain, lubricate pivot points, cables, and the brake lever, and ensure all moving parts are well-protected from moisture and oxidation. When taking your bike out of storage, repeat this process—check for dried or contaminated lubricant, rust, or grime that may have accumulated while resting. A few minutes’ care before and after storage prevents costly damage and sets you up for a season of trouble-free riding. Table: Maintenance Checklist for Motorcycle Lubrication Component Recommended Interval Key Lubricant Type Special Notes Motorcycle Chain Every 500 miles or after rain Chain-specific lube Inspect for wear Pivot Points Monthly Multipurpose grease Clean before lubing Brake Levers Monthly Light oil Avoid excess oil on pads People Also Ask: Motorcycle Lubrication Maintenance Questions How often should I lube my motorcycle? Answer to How often should I lube my motorcycle? You should lube your chain every 500 miles, or more often if you’ve been riding in wet or dirty conditions. Always inspect more frequently if you notice noise, stiffness, or visible dirt buildup. In addition to the chain, all pivot points and brake levers should be lubricated monthly, with adjustments made for harsh environments or intensive use. Is it okay to put WD-40 on a motorcycle chain? Answer to Is it okay to put WD-40 on a motorcycle chain? WD-40 can be used for initial cleaning of the chain, but it's not a suitable chain lube for most motorcycles—especially those with sealed chains. It tends to wash away too quickly and can degrade the rubber seals. Always use a dedicated motorcycle chain lubricant compatible with your bike’s chain type. How long can a motorcycle sit without being driven? Answer to How long can a motorcycle sit without being driven? A motorcycle can sit unused for several weeks provided it’s been properly cleaned and lubricated beforehand. However, if left for longer periods, parts may start to corrode or become dry, so perform a full lubrication maintenance routine before and after any lengthy storage. Always check for signs of rust, dryness, or stiffness before your first ride after storage. What to lubricate on a motorcycle? Answer to What to lubricate on a motorcycle? Key areas to lubricate include the motorcycle chain, pivot points (like the gear shifter, brake pedal, and levers), brake levers, clutch cable, throttle linkage, kickstand, and foot controls. Refer to your owner’s manual for additional recommended lubrication points and be consistent with your regimen to guarantee safe, efficient operation on every ride. Frequently Asked Questions (FAQs) on Motorcycle Lubrication Maintenance What happens if I skip motorcycle lubrication maintenance? Does the type of chain affect lubricant choice? Can over-lubricating motorcycle chains cause problems? Do new motorcycles require immediate lubrication maintenance? Watch this practical how-to video demonstrating the entire process of cleaning and lubricating your motorcycle chain, pivot points, and brake levers. You'll see every step up close, learn safety best practices, and discover which tools and products are recommended—all shot in a modern garage for easy-to-follow instructions. This video highlights the most frequent chain cleaning mistakes, demonstrates how to spot them, and provides quick fixes to ensure your chain and drive components remain in optimal condition. Key Takeaways: Motorcycle Lubrication Maintenance Best Practices Regular motorcycle lubrication maintenance prevents wear and breakdowns Clean and lubrication are essential for chain, pivot points, and brake levers Always use recommended lubricants for motorcycle chains and moving parts Develop a consistent lubrication maintenance routine for safety and longevity Ready for Expert Motorcycle Lubrication Maintenance? Don’t leave your motorcycle’s health to chance. Call Nasty Performance Motorcycle Shop Today: 847-458-4858 Take action today—stick to a regular motorcycle lubrication maintenance routine and your ride will thank you with years of smooth, reliable service and safer journeys! If you’re ready to elevate your motorcycle care beyond the basics, consider how seasonal changes can impact every aspect of your maintenance routine. From protecting your bike during winter storage to optimizing performance in the summer heat, understanding the nuances of seasonal bike care will help you anticipate challenges and keep your motorcycle in peak condition year-round. Dive into our expert insights for advanced strategies and discover how a proactive approach can make every ride smoother, safer, and more enjoyable—no matter the season.

© 2026 Nasty Performance All Rights Reserved. 2035 S. Eastwood Dr., Woodstock, IL 60098 . Contact Us . Terms of Service . Privacy Policy

eyJjb21wYW55IjoiTmFzdHkgUGVyZm9ybWFuY2UiLCJhZGRyZXNzIjoiMjAzNSBTLiBFYXN0d29vZCBEci4iLCJjaXR5IjoiV29vZHN0b2NrIiwic3RhdGUiOiJJTCIsInppcCI6IjYwMDk4IiwiZW1haWwiOiJuYXRlQG5hc3R5cGVyZm9ybWFuY2UuY29tIiwidG9zIjoiUEhBK1BITjBjbTl1Wno0OFpXMCtWMmhsYmlCNWIzVWdjMmxuYmkxcGJpQjNhWFJvSUhWekxDQjViM1VnWVhKbElHZHBkbWx1WnladVluTndPeUI1YjNWeUlIQmxjbTFwYzNOcGIyNGdZVzVrSUdOdmJuTmxiblFnZEc4Z2MyVnVaQ0I1YjNVZ1pXMWhhV3dnWVc1a0wyOXlJRk5OVXlCMFpYaDBJRzFsYzNOaFoyVnpMaUJDZVNCamFHVmphMmx1WnlCMGFHVWdWR1Z5YlhNZ1lXNWtJRU52Ym1ScGRHbHZibk1nWW05NElHRnVaQ0JpZVNCemFXZHVhVzVuSUdsdUlIbHZkU0JoZFhSdmJXRjBhV05oYkd4NUlHTnZibVpwY20wZ2RHaGhkQ0I1YjNVZ1lXTmpaWEIwSUdGc2JDQjBaWEp0Y3lCcGJpQjBhR2x6SUdGbmNtVmxiV1Z1ZEM0OEwyVnRQand2YzNSeWIyNW5Qand2Y0Q0S0NqeHdQanhoSUdoeVpXWTlJbWgwZEhBNkx5OTNkM2N1WjI5dloyeGxMbU52YlNJK2FIUjBjRG92TDNkM2R5NW5iMjluYkdVdVkyOXRQQzloUGp3dmNENEtDanh3UGladVluTndPend2Y0Q0S0NqeHdQanh6ZEhKdmJtYytVMFZTVmtsRFJUd3ZjM1J5YjI1blBqd3ZjRDRLQ2p4d1BsZGxJSEJ5YjNacFpHVWdZU0J6WlhKMmFXTmxJSFJvWVhRZ1kzVnljbVZ1ZEd4NUlHRnNiRzkzY3lCNWIzVWdkRzhnY21WalpXbDJaU0J5WlhGMVpYTjBjeUJtYjNJZ1ptVmxaR0poWTJzc0lHTnZiWEJoYm5rZ2FXNW1iM0p0WVhScGIyNHNJSEJ5YjIxdmRHbHZibUZzSUdsdVptOXliV0YwYVc5dUxDQmpiMjF3WVc1NUlHRnNaWEowY3l3Z1kyOTFjRzl1Y3l3Z1pHbHpZMjkxYm5SeklHRnVaQ0J2ZEdobGNpQnViM1JwWm1sallYUnBiMjV6SUhSdklIbHZkWElnWlcxaGFXd2dZV1JrY21WemN5QmhibVF2YjNJZ1kyVnNiSFZzWVhJZ2NHaHZibVVnYjNJZ1pHVjJhV05sTGlCWmIzVWdkVzVrWlhKemRHRnVaQ0JoYm1RZ1lXZHlaV1VnZEdoaGRDQjBhR1VnVTJWeWRtbGpaU0JwY3lCd2NtOTJhV1JsWkNBbWNYVnZkRHRCVXkxSlV5WnhkVzkwT3lCaGJtUWdkR2hoZENCM1pTQmhjM04xYldVZ2JtOGdjbVZ6Y0c5dWMybGlhV3hwZEhrZ1ptOXlJSFJvWlNCMGFXMWxiR2x1WlhOekxDQmtaV3hsZEdsdmJpd2diV2x6TFdSbGJHbDJaWEo1SUc5eUlHWmhhV3gxY21VZ2RHOGdjM1J2Y21VZ1lXNTVJSFZ6WlhJZ1kyOXRiWFZ1YVdOaGRHbHZibk1nYjNJZ2NHVnljMjl1WVd4cGVtRjBhVzl1SUhObGRIUnBibWR6TGp3dmNENEtDanh3UGxsdmRTQmhjbVVnY21WemNHOXVjMmxpYkdVZ1ptOXlJRzlpZEdGcGJtbHVaeUJoWTJObGMzTWdkRzhnZEdobElGTmxjblpwWTJVZ1lXNWtJSFJvWVhRZ1lXTmpaWE56SUcxaGVTQnBiblp2YkhabElIUm9hWEprSUhCaGNuUjVJR1psWlhNZ0tITjFZMmdnWVhNZ1UwMVRJSFJsZUhRZ2JXVnpjMkZuWlhNc0lFbHVkR1Z5Ym1WMElITmxjblpwWTJVZ2NISnZkbWxrWlhJZ2IzSWdZMlZzYkhWc1lYSWdZV2x5ZEdsdFpTQmphR0Z5WjJWektTNGdXVzkxSUdGeVpTQnlaWE53YjI1emFXSnNaU0JtYjNJZ2RHaHZjMlVnWm1WbGN5d2dhVzVqYkhWa2FXNW5JSFJvYjNObElHWmxaWE1nWVhOemIyTnBZWFJsWkNCM2FYUm9JSFJvWlNCa2FYTndiR0Y1SUc5eUlHUmxiR2wyWlhKNUlHOW1JR1ZoWTJnZ1UwMVRJSFJsZUhRZ2JXVnpjMkZuWlNCelpXNTBJSFJ2SUhsdmRTQmllU0IxY3k0Z1NXNGdZV1JrYVhScGIyNHNJSGx2ZFNCdGRYTjBJSEJ5YjNacFpHVWdZVzVrSUdGeVpTQnlaWE53YjI1emFXSnNaU0JtYjNJZ1lXeHNJR1Z4ZFdsd2JXVnVkQ0J1WldObGMzTmhjbmtnZEc4Z1lXTmpaWE56SUhSb1pTQlRaWEoyYVdObElHRnVaQ0J5WldObGFYWmxJSFJvWlNCVFRWTWdkR1Y0ZENCdFpYTnpZV2RsY3k0Z1YyVWdaRzhnYm05MElHTm9ZWEpuWlNCaGJua2dabVZsY3lCbWIzSWdaR1ZzYVhabGNua2diMllnWlcxaGFXd2diM0lnVTAxVExpQlVhR2x6SUdseklHRWdabkpsWlNCelpYSjJhV05sSUhCeWIzWnBaR1ZrSUdKNUlIVnpMaUJJYjNkbGRtVnlMQ0J3YkdWaGMyVWdZMmhsWTJzZ2QybDBhQ0I1YjNWeUlHbHVkR1Z5Ym1WMElITmxjblpwWTJVZ2NISnZkbWxrWlhJZ1lXNWtJR05sYkd4MWJHRnlJR05oY25KcFpYSWdabTl5SUdGdWVTQmphR0Z5WjJWeklIUm9ZWFFnYldGNUlHbHVZM1Z5SUdGeklHRWdjbVZ6ZFd4MElHWnliMjBnY21WalpXbDJhVzVuSUdWdFlXbHNJR0Z1WkNCVFRWTWdkR1Y0ZENCdFpYTnpZV2RsY3lCMGFHRjBJSGRsSUdSbGJHbDJaWElnZFhCdmJpQjViM1Z5SUc5d2RDMXBiaUJoYm1RZ2NtVm5hWE4wY21GMGFXOXVJSGRwZEdnZ2IzVnlJR1Z0WVdsc0lHRnVaQ0JUVFZNZ2MyVnlkbWxqWlhNdUlGbHZkU0JqWVc0Z1kyRnVZMlZzSUdGMElHRnVlU0IwYVcxbExpQktkWE4wSUhSbGVIUWdKbkYxYjNRN1UxUlBVQ1p4ZFc5ME95QjBieVp1WW5Od096eG9hV2RvYkdsbmFIUWdZMnhoYzNNOUltTnZiWEJoYm5sVFRWTlFhRzl1WlZWd1pHRjBaU0krYm5Wc2JEd3ZhR2xuYUd4cFoyaDBQaTRnUVdaMFpYSWdlVzkxSUhObGJtUWdkR2hsSUZOTlV5QnRaWE56WVdkbElDWnhkVzkwTzFOVVQxQW1jWFZ2ZERzZ2RHOGdkWE1zSUhkbElIZHBiR3dnYzJWdVpDQjViM1VnWVc0Z1UwMVRJRzFsYzNOaFoyVWdkRzhnWTI5dVptbHliU0IwYUdGMElIbHZkU0JvWVhabElHSmxaVzRnZFc1emRXSnpZM0pwWW1Wa0xpQkJablJsY2lCMGFHbHpMQ0I1YjNVZ2QybHNiQ0J1YnlCc2IyNW5aWElnY21WalpXbDJaU0JUVFZNZ2JXVnpjMkZuWlhNZ1puSnZiU0IxY3k0OEwzQStDZ284Y0Q0OGMzUnliMjVuUGxsUFZWSWdVa1ZIU1ZOVVVrRlVTVTlPSUU5Q1RFbEhRVlJKVDA1VFBDOXpkSEp2Ym1jK1BDOXdQZ29LUEhBK1NXNGdZMjl1YzJsa1pYSmhkR2x2YmlCdlppQjViM1Z5SUhWelpTQnZaaUIwYUdVZ1UyVnlkbWxqWlN3Z2VXOTFJR0ZuY21WbElIUnZPand2Y0Q0S0NqeHZiRDRLQ1R4c2FUNXdjbTkyYVdSbElIUnlkV1VzSUdGalkzVnlZWFJsTENCamRYSnlaVzUwSUdGdVpDQmpiMjF3YkdWMFpTQnBibVp2Y20xaGRHbHZiaUJoWW05MWRDQjViM1Z5YzJWc1ppQmhjeUJ3Y205dGNIUmxaQ0JpZVNCMGFHVWdVMlZ5ZG1salpTWWpNems3Y3lCeVpXZHBjM1J5WVhScGIyNGdabTl5YlNBb2MzVmphQ0JwYm1admNtMWhkR2x2YmlCaVpXbHVaeUIwYUdVZ0puRjFiM1E3VW1WbmFYTjBjbUYwYVc5dUlFUmhkR0VtY1hWdmREc3BJR0Z1WkR3dmJHaytDZ2s4YkdrK2JXRnBiblJoYVc0Z1lXNWtJSEJ5YjIxd2RHeDVJSFZ3WkdGMFpTQjBhR1VnVW1WbmFYTjBjbUYwYVc5dUlFUmhkR0VnZEc4Z2EyVmxjQ0JwZENCMGNuVmxMQ0JoWTJOMWNtRjBaU3dnWTNWeWNtVnVkQ0JoYm1RZ1kyOXRjR3hsZEdVdUlFbG1JSGx2ZFNCd2NtOTJhV1JsSUdGdWVTQnBibVp2Y20xaGRHbHZiaUIwYUdGMElHbHpJSFZ1ZEhKMVpTd2dhVzVoWTJOMWNtRjBaU3dnYm05MElHTjFjbkpsYm5RZ2IzSWdhVzVqYjIxd2JHVjBaU3dnYjNJZ2QyVWdhR0YyWlNCeVpXRnpiMjVoWW14bElHZHliM1Z1WkhNZ2RHOGdjM1Z6Y0dWamRDQjBhR0YwSUhOMVkyZ2dhVzVtYjNKdFlYUnBiMjRnYVhNZ2RXNTBjblZsTENCcGJtRmpZM1Z5WVhSbExDQnViM1FnWTNWeWNtVnVkQ0J2Y2lCcGJtTnZiWEJzWlhSbExDQjNaU0JvWVhabElIUm9aU0J5YVdkb2RDQjBieUJ6ZFhOd1pXNWtJRzl5SUR4emRISnZibWMrUEhOd1lXNGdjM1I1YkdVOUltTnZiRzl5T2lOR1JqQXdNREE3SWo1MFpYSnRhVzVoZEdVZ2VXOTFjaUJoWTJOdmRXNTBMM0J5YjJacGJHVWdZVzVrSUhKbFpuVnpaU0JoYm5rZ1lXNWtJR0ZzYkNCamRYSnlaVzUwSUc5eUlHWjFkSFZ5WlNCMWMyVWdiMllnZEdobElGTmxjblpwWTJVZ0tHOXlJR0Z1ZVNCd2IzSjBhVzl1SUhSb1pYSmxiMllwTGp3dmMzQmhiajQ4TDNOMGNtOXVaejQ4TDJ4cFBnbzhMMjlzUGdvS1BIQStKbTVpYzNBN1BDOXdQZ284YUdsbmFHeHBaMmgwSUdOc1lYTnpQU0pqYjIxd1lXNTVUbUZ0WlZWd1pHRjBaU0krVG1GemRIa2dVR1Z5Wm05eWJXRnVZMlU4TDJocFoyaHNhV2RvZEQ0OFluSWdMejRLUEdocFoyaHNhV2RvZENCamJHRnpjejBpWTI5dGNHRnVlVUZrWkhKbGMzTlZjR1JoZEdVaVBqSXdNelVnVXk0Z1JXRnpkSGR2YjJRZ1JISXVMQ0JYYjI5a2MzUnZZMnNzSUVsTUlEWXdNRGs0UEM5b2FXZG9iR2xuYUhRK1BHSnlJQzgrQ2p4b2FXZG9iR2xuYUhRZ1kyeGhjM005SW1OdmJYQmhibmxRYUc5dVpWVndaR0YwWlNJK0tEZzBOeWtnTkRVNExUUTROVGc4TDJocFoyaHNhV2RvZEQ0OFluSWdMejRLUEdocFoyaHNhV2RvZENCamJHRnpjejBpWTI5dGNHRnVlVVZ0WVdsc1ZYQmtZWFJsSWo1dVlYUmxRRzVoYzNSNWNHVnlabTl5YldGdVkyVXVZMjl0UEM5b2FXZG9iR2xuYUhRKyIsInByaXZhY3kiOiJQSEErUEhOMGNtOXVaejVRVWtsV1FVTlpQQzl6ZEhKdmJtYytQQzl3UGdvS1BIQStQSE4wY205dVp6NVVhR1VnYVc1bWIzSnRZWFJwYjI0Z2NISnZkbWxrWldRZ1pIVnlhVzVuSUhSb2FYTWdjbVZuYVhOMGNtRjBhVzl1SUdseklHdGxjSFFnY0hKcGRtRjBaU0JoYm1RZ1kyOXVabWxrWlc1MGFXRnNMQ0JoYm1RZ2QybHNiQ0J1WlhabGNpQmlaU0JrYVhOMGNtbGlkWFJsWkN3Z1kyOXdhV1ZrTENCemIyeGtMQ0IwY21Ga1pXUWdiM0lnY0c5emRHVmtJR2x1SUdGdWVTQjNZWGtzSUhOb1lYQmxJRzl5SUdadmNtMHVJRlJvYVhNZ2FYTWdiM1Z5SUdkMVlYSmhiblJsWlM0OEwzTjBjbTl1Wno0OEwzQStDZ284Y0Q0OGMzUnliMjVuUGtsT1JFVk5Ua2xVV1R3dmMzUnliMjVuUGp3dmNENEtDanh3UGp4bGJUNVpiM1VnWVdkeVpXVWdkRzhnYVc1a1pXMXVhV1o1SUdGdVpDQm9iMnhrSUhWekxDQmhibVFnYVhSeklITjFZbk5wWkdsaGNtbGxjeXdnWVdabWFXeHBZWFJsY3l3Z2IyWm1hV05sY25Nc0lHRm5aVzUwY3l3Z1kyOHRZbkpoYm1SbGNuTWdiM0lnYjNSb1pYSWdjR0Z5ZEc1bGNuTXNJR0Z1WkNCbGJYQnNiM2xsWlhNc0lHaGhjbTFzWlhOeklHWnliMjBnWVc1NUlHTnNZV2x0SUc5eUlHUmxiV0Z1WkN3Z2FXNWpiSFZrYVc1bklISmxZWE52Ym1GaWJHVWdZWFIwYjNKdVpYbHpKaU16T1RzZ1ptVmxjeXdnYldGa1pTQmllU0JoYm5rZ2RHaHBjbVFnY0dGeWRIa2daSFZsSUhSdklHOXlJR0Z5YVhOcGJtY2diM1YwSUc5bUlFTnZiblJsYm5RZ2VXOTFJSEpsWTJWcGRtVXNJSE4xWW0xcGRDd2djbVZ3Ykhrc0lIQnZjM1FzSUhSeVlXNXpiV2wwSUc5eUlHMWhhMlVnWVhaaGFXeGhZbXhsSUhSb2NtOTFaMmdnZEdobElGTmxjblpwWTJVc0lIbHZkWElnZFhObElHOW1JSFJvWlNCVFpYSjJhV05sTENCNWIzVnlJR052Ym01bFkzUnBiMjRnZEc4Z2RHaGxJRk5sY25acFkyVXNJSGx2ZFhJZ2RtbHZiR0YwYVc5dUlHOW1JSFJvWlNCVVQxTXNJRzl5SUhsdmRYSWdkbWx2YkdGMGFXOXVJRzltSUdGdWVTQnlhV2RvZEhNZ2IyWWdZVzV2ZEdobGNpNDhMMlZ0UGp3dmNENEtDanh3UGp4emRISnZibWMrUkVsVFEweEJTVTFGVWlCUFJpQlhRVkpTUVU1VVNVVlRQQzl6ZEhKdmJtYytQQzl3UGdvS1BIQStQSE4wY205dVp6NVpUMVVnUlZoUVVrVlRVMHhaSUZWT1JFVlNVMVJCVGtRZ1FVNUVJRUZIVWtWRklGUklRVlE2UEM5emRISnZibWMrUEM5d1Bnb0tQRzlzUGdvSlBHeHBQbGxQVlZJZ1ZWTkZJRTlHSUZSSVJTQlRSVkpXU1VORklFbFRJRUZVSUZsUFZWSWdVMDlNUlNCU1NWTkxMaUJVU0VVZ1UwVlNWa2xEUlNCSlV5QlFVazlXU1VSRlJDQlBUaUJCVGlBbWNYVnZkRHRCVXlCSlV5WnhkVzkwT3lCQlRrUWdKbkYxYjNRN1FWTWdRVlpCU1V4QlFreEZKbkYxYjNRN0lFSkJVMGxUTGlBc0xpQkJUa1FnVlZNc0lFbFVKaU16T1R0VElFTlZVMVJQVFVWU1V5d2dSVmhRVWtWVFUweFpJRVJKVTBOTVFVbE5VeUJCVEV3Z1YwRlNVa0ZPVkVsRlV5QlBSaUJCVGxrZ1MwbE9SQ3dnVjBoRlZFaEZVaUJGV0ZCU1JWTlRJRTlTSUVsTlVFeEpSVVFzSUVsT1EweFZSRWxPUnl3Z1FsVlVJRTVQVkNCTVNVMUpWRVZFSUZSUElGUklSU0JKVFZCTVNVVkVJRmRCVWxKQlRsUkpSVk1nVDBZZ1RVVlNRMGhCVGxSQlFrbE1TVlJaTENCR1NWUk9SVk5USUVaUFVpQkJJRkJCVWxSSlExVk1RVklnVUZWU1VFOVRSU0JCVGtRZ1RrOU9MVWxPUmxKSlRrZEZUVVZPVkM0OEwyeHBQZ29KUEd4cFBrMUJTMFZUSUU1UElGZEJVbEpCVGxSWklGUklRVlFnS0drcElGUklSU0JUUlZKV1NVTkZJRmRKVEV3Z1RVVkZWQ0JaVDFWU0lGSkZVVlZKVWtWTlJVNVVVeXdnS0dscEtTQlVTRVVnVTBWU1ZrbERSU0JYU1V4TUlFSkZJRlZPU1U1VVJWSlNWVkJVUlVRc0lGUkpUVVZNV1N3Z1UwVkRWVkpGTENCUFVpQkZVbEpQVWkxR1VrVkZMQ0FvYVdscEtTQlVTRVVnVWtWVFZVeFVVeUJVU0VGVUlFMUJXU0JDUlNCUFFsUkJTVTVGUkNCR1VrOU5JRlJJUlNCVlUwVWdUMFlnVkVoRklGTkZVbFpKUTBVZ1YwbE1UQ0JDUlNCQlEwTlZVa0ZVUlNCUFVpQlNSVXhKUVVKTVJTd2dRVTVFSUNocGRpa2dRVTVaSUVWU1VrOVNVeUJKVGlCVVNFVWdVMDlHVkZkQlVrVWdWMGxNVENCQ1JTQkRUMUpTUlVOVVJVUXVQQzlzYVQ0S0NUeHNhVDVCVGxrZ1RVRlVSVkpKUVV3Z1JFOVhUa3hQUVVSRlJDQlBVaUJQVkVoRlVsZEpVMFVnVDBKVVFVbE9SVVFnVkVoU1QxVkhTQ0JVU0VVZ1ZWTkZJRTlHSUZSSVJTQlRSVkpXU1VORklFbFRJRVJQVGtVZ1FWUWdXVTlWVWlCUFYwNGdSRWxUUTFKRlZFbFBUaUJCVGtRZ1VrbFRTeUJCVGtRZ1ZFaEJWQ0JaVDFVZ1YwbE1UQ0JDUlNCVFQweEZURmtnVWtWVFVFOU9VMGxDVEVVZ1JrOVNJRUZPV1NCRVFVMUJSMFVnVkU4Z1dVOVZVaUJEVDAxUVZWUkZVaUJUV1ZOVVJVMGdUMUlnVEU5VFV5QlBSaUJFUVZSQklGUklRVlFnVWtWVFZVeFVVeUJHVWs5TklGUklSU0JFVDFkT1RFOUJSQ0JQUmlCQlRsa2dVMVZEU0NCTlFWUkZVa2xCVEM0OEwyeHBQZ29KUEd4cFBrNVBJRUZFVmtsRFJTQlBVaUJKVGtaUFVrMUJWRWxQVGl3Z1YwaEZWRWhGVWlCUFVrRk1JRTlTSUZkU1NWUlVSVTRzSUU5Q1ZFRkpUa1ZFSUVKWklGbFBWU0JHVWs5TklFOVNJRlJJVWs5VlIwZ2dUMUlnUmxKUFRTQlVTRVVnVTBWU1ZrbERSU0JUU0VGTVRDQkRVa1ZCVkVVZ1FVNVpJRmRCVWxKQlRsUlpJRTVQVkNCRldGQlNSVk5UVEZrZ1UxUkJWRVZFSUVsT0lGUklSU0JVVDFNdVBDOXNhVDRLUEM5dmJENEtDanh3UGp4emRISnZibWMrVEVsTlNWUkJWRWxQVGlCUFJpQk1TVUZDU1V4SlZGazhMM04wY205dVp6NDhMM0ErQ2dvOGNENVpUMVVnUlZoUVVrVlRVMHhaSUZWT1JFVlNVMVJCVGtRZ1FVNUVJRUZIVWtWRklGUklRVlFnUVU1RUlGTklRVXhNSUU1UFZDQkNSU0JNU1VGQ1RFVWdSazlTSUVGT1dTQkVTVkpGUTFRc0lFbE9SRWxTUlVOVUxDQkpUa05KUkVWT1ZFRk1MQ0JUVUVWRFNVRk1MQ0JEVDA1VFJWRlZSVTVVU1VGTUlFOVNJRVZZUlUxUVRFRlNXU0JFUVUxQlIwVlRMQ0JKVGtOTVZVUkpUa2NnUWxWVUlFNVBWQ0JNU1UxSlZFVkVJRlJQTENCRVFVMUJSMFZUSUVaUFVpQk1UMU5USUU5R0lGQlNUMFpKVkZNc0lFZFBUMFJYU1V4TUxDQlZVMFVzSUVSQlZFRWdUMUlnVDFSSVJWSWdTVTVVUVU1SFNVSk1SU0JNVDFOVFJWTWdLRVZXUlU0Z1NVWWdTRUZUSUVKRlJVNGdRVVJXU1ZORlJDQlBSaUJVU0VVZ1VFOVRVMGxDU1V4SlZGa2dUMFlnVTFWRFNDQkVRVTFCUjBWVEtTd2dVa1ZUVlV4VVNVNUhJRVpTVDAwNlBDOXdQZ29LUEc5c1Bnb0pQR3hwUGxSSVJTQlZVMFVnVDFJZ1ZFaEZJRWxPUVVKSlRFbFVXU0JVVHlCVlUwVWdWRWhGSUZORlVsWkpRMFU3UEM5c2FUNEtDVHhzYVQ1VVNFVWdRMDlUVkNCUFJpQlFVazlEVlZKRlRVVk9WQ0JQUmlCVFZVSlRWRWxVVlZSRklFZFBUMFJUSUVGT1JDQlRSVkpXU1VORlV5QlNSVk5WVEZSSlRrY2dSbEpQVFNCQlRsa2dSMDlQUkZNc0lFUkJWRUVzSUVsT1JrOVNUVUZVU1U5T0lFOVNJRk5GVWxaSlEwVlRJRkJWVWtOSVFWTkZSQ0JQVWlCUFFsUkJTVTVGUkNCUFVpQk5SVk5UUVVkRlV5QlNSVU5GU1ZaRlJDQlBVaUJVVWtGT1UwRkRWRWxQVGxNZ1JVNVVSVkpGUkNCSlRsUlBJRlJJVWs5VlIwZ2dUMUlnUmxKUFRTQlVTRVVnVTBWU1ZrbERSVHM4TDJ4cFBnb0pQR3hwUGxWT1FWVlVTRTlTU1ZwRlJDQkJRME5GVTFNZ1ZFOGdUMUlnUVV4VVJWSkJWRWxQVGlCUFJpQlpUMVZTSUZSU1FVNVRUVWxUVTBsUFRsTWdUMUlnUkVGVVFUczhMMnhwUGdvSlBHeHBQbE5VUVZSRlRVVk9WRk1nVDFJZ1EwOU9SRlZEVkNCUFJpQkJUbGtnVkVoSlVrUWdVRUZTVkZrZ1QwNGdWRWhGSUZORlVsWkpRMFU3SUU5U1BDOXNhVDRLQ1R4c2FUNUJUbGtnVDFSSVJWSWdUVUZVVkVWU0lGSkZURUZVU1U1SElGUlBJRlJJUlNCVFJWSldTVU5GTGp3dmJHaytDand2YjJ3K0NnbzhjRDQ4ZFQ1Q2VTQnlaV2RwYzNSbGNtbHVaeUJoYm1RZ2MzVmljMk55YVdKcGJtY2dkRzhnYjNWeUlHVnRZV2xzSUdGdVpDQlRUVk1nYzJWeWRtbGpaU3dnWW5rZ2IzQjBMV2x1TENCdmJteHBibVVnY21WbmFYTjBjbUYwYVc5dUlHOXlJR0o1SUdacGJHeHBibWNnYjNWMElHRWdZMkZ5WkN3Z0puRjFiM1E3ZVc5MUlHRm5jbVZsSUhSdklIUm9aWE5sSUZSRlVrMVRJRTlHSUZORlVsWkpRMFVtY1hWdmREc2dZVzVrSUhsdmRTQmhZMnR1YjNkc1pXUm5aU0JoYm1RZ2RXNWtaWEp6ZEdGdVpDQjBhR1VnWVdKdmRtVWdkR1Z5YlhNZ2IyWWdjMlZ5ZG1salpTQnZkWFJzYVc1bFpDQmhibVFnWkdWMFlXbHNaV1FnWm05eUlIbHZkU0IwYjJSaGVTNDhMM1UrUEM5d1Bnb0tQSEErSm01aWMzQTdQQzl3UGdvOGFHbG5hR3hwWjJoMElHTnNZWE56UFNKamIyMXdZVzU1VG1GdFpWVndaR0YwWlNJK1RtRnpkSGtnVUdWeVptOXliV0Z1WTJVOEwyaHBaMmhzYVdkb2RENDhZbklnTHo0S1BHaHBaMmhzYVdkb2RDQmpiR0Z6Y3owaVkyOXRjR0Z1ZVVGa1pISmxjM05WY0dSaGRHVWlQakl3TXpVZ1V5NGdSV0Z6ZEhkdmIyUWdSSEl1TENCWGIyOWtjM1J2WTJzc0lFbE1JRFl3TURrNFBDOW9hV2RvYkdsbmFIUStQR0p5SUM4K0NqeG9hV2RvYkdsbmFIUWdZMnhoYzNNOUltTnZiWEJoYm5sUWFHOXVaVlZ3WkdGMFpTSStLRGcwTnlrZ05EVTRMVFE0TlRnOEwyaHBaMmhzYVdkb2RENDhZbklnTHo0S1BHaHBaMmhzYVdkb2RDQmpiR0Z6Y3owaVkyOXRjR0Z1ZVVWdFlXbHNWWEJrWVhSbElqNXVZWFJsUUc1aGMzUjVjR1Z5Wm05eWJXRnVZMlV1WTI5dFBDOW9hV2RvYkdsbmFIUSsifQ==

Terms of Service

Privacy Policy

Core Modal Title

Sorry, no results found

You Might Find These Articles Interesting

T
Please Check Your Email
We Will Be Following Up Shortly
*
*
*