
Nasty Performance ~ 847-458-4858 

  • Blog Home
  • Categories
    • Motorcycle Maintenance
    • Riding Tips & Preps
    • Safety & Inspection
    • Customizations & Upgrades
    • DIY Motorcycle Repairs
    • Motocycle Audio Systems
    • Motocycle Seasonal Care & Storage
    • Engine, Electrical Performance
  • Bike Night
  • Nasty Performance Motorcycle Shop
November 07.2026
1 Minute Read

Things to Avoid in Covering Your Motorcycle for Storage

Did you know that choosing the wrong motorcycle cover or skipping basic prep can trigger corrosion, fade your paint, or even wreck your bike’s electronics—even if your motorcycle is parked for just a few weeks? Proper motorcycle storage is more than tossing on any cover; each decision can affect your bike’s value, safety, and how quickly you can get back on the road. This guide uncovers the things to avoid in covering your motorcycle for storage, helping you dodge silent mistakes that prompt costly repairs and loss of performance.

Why Knowing Things to Avoid in Covering Your Motorcycle for Storage Is Essential

"Did you know improper motorcycle cover choices can lead to corrosion, paint damage, and ruined electronics—even during short-term motorcycle storage?"
  • Key misconceptions about motorcycle cover and storage risks
  • Summary of heavy duty vs. standard motorcycle cover mistakes
  • Main dangers of poor duty motorcycle cover selection
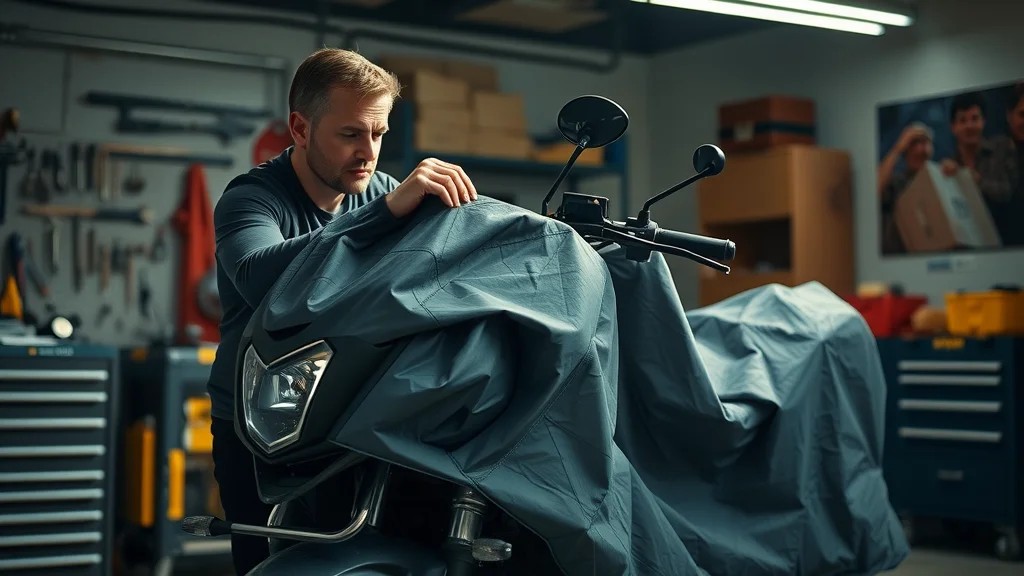
Concerned motorcycle owner inspecting covered bike in garage, checking for proper motorcycle cover usage and storage conditions for motorcycle storage

What You'll Learn About Things to Avoid in Covering Your Motorcycle for Storage

  • Essential do’s and don’ts for motorcycle storage
  • Selecting the right duty motorcycle cover for long-term protection
  • Critical motorcycle cover oversights leading to costly damage

Table: Things to Avoid in Covering Your Motorcycle for Storage Vs. Proper Storage Techniques

Things to Avoid Best Practices
Using a non-breathable, plastic cover Choose a breathable, water-resistant quality motorcycle cover designed for your bike
Covering your motorcycle while it’s wet or dirty Always wash and dry your motorcycle before storage
Leaving exhaust pipe open and uncovered Protect ignition and exhaust pipe from dust, pests, and moisture
Storing your motorcycle in direct sunlight with a cover on Store in a cool, shaded or indoor area whenever possible
Using ill-fitting or old, torn duty motorcycle cover Ensure proper fitment and condition of your heavy duty motorcycle cover
Neglecting regular inspection during storage Check under your motorcycle cover and inspect for condensation, pests, or damage monthly

Common Mistakes When Using a Motorcycle Cover for Storage

Using Non-Breathable Covers: The Hidden Moisture Trap
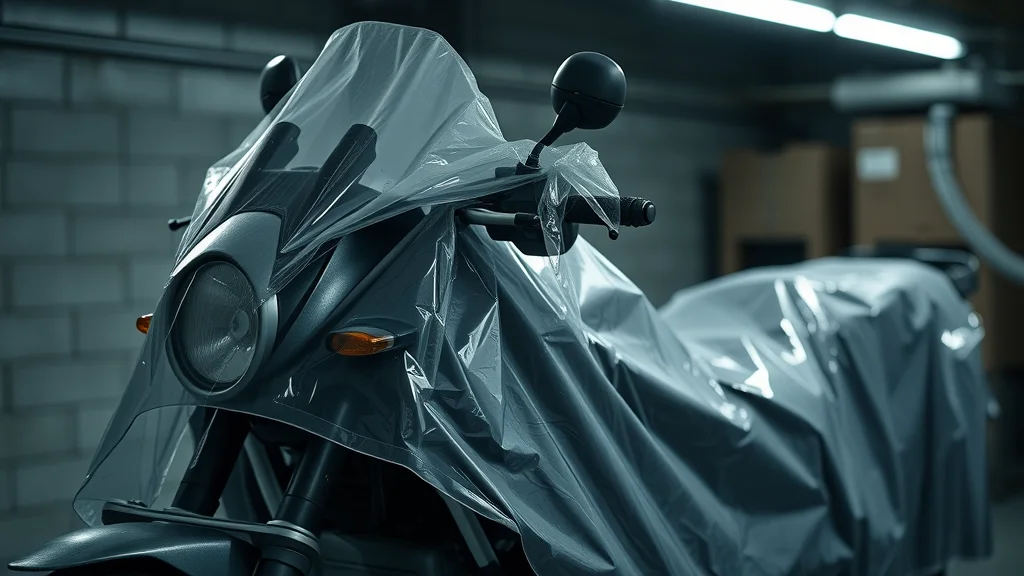
Plastic motorcycle cover causing moisture buildup and condensation, leading to possible rust on metal parts during motorcycle storage

Choosing the wrong duty motorcycle cover is a common error, often underestimated in motorcycle storage. Many riders are tempted by generic plastic covers or tarps, thinking they're offering sufficient protection. Unfortunately, non-breathable covers seal in humidity, especially in climates with fluctuating temperatures. Condensation accumulates under plastic, becoming a breeding ground for rust on your bike’s chain, frame, and moving parts. Worse, trapped moisture can promote mold, mildew growth, and encourage corrosion on wiring and sensitive electronics—issues that stay hidden until it’s time to ride. Even a short stint with a non-breathable bike cover can lead to damage, such as fading paint and brittle plastic trim. To avoid these pitfalls, always invest in a breathable, high-quality motorcycle cover built for storage, designed to wick moisture away while blocking dust and debris naturally.

Remember: Heavy duty doesn’t always mean better if the material can’t breathe. The best covers balance strength with passive airflow, protecting your motorcycle without locking in damaging humidity. Properly choosing your motorcycle cover prevents a cycle of costly repairs stemming from preventable long-term exposure to moisture traps—and keeps your ride in good condition for the next adventure.

For riders looking to further refine their storage approach, understanding the nuances between different types of covers and their seasonal performance can make a significant difference. You might find it helpful to explore additional tips on seasonal motorcycle care strategies to ensure your bike remains protected year-round.

Neglecting to Clean Before Applying a Heavy Duty Motorcycle Cover

Many owners rush to shield their ride with a heavy duty motorcycle cover after a ride or light drizzle, believing it’s sufficient to keep the elements off. However, covering a dirty, moist motorcycle is an invitation for trouble. Dirt, dust, and even minor road grime trapped between your paint and the cover act like fine sandpaper, slowly marring your finish over time. Residual water, especially inside hard-to-reach spots such as around the exhaust pipe, engine casing, or under seats, creates microenvironments perfect for rust and mold. Failing to thoroughly wash your motorcycle and allow it to dry before covering can lead to damage across every surface—from dulled paint to pitted chrome and corroded fasteners.

Proper preparation is as important as picking the right duty motorcycle cover: always wash your motorcycle, dry it completely, and inspect for contaminants or leaks. This step prevents trapped moisture and debris from undermining your investment, ensuring that the motorcycle cover you choose will actually protect your bike throughout its storage period.

Over-Tightening or Under-Tightening Your Duty Motorcycle Cover

Fitment matters—a motorcycle cover that’s too tight can stretch, tear, or even crack surfaces if friction occurs at wind-exposed edges, while a cover that’s too loose can whip in the wind or let in dust, insects, and debris. Over-tightening the cover, especially with bungee cords or aggressive straps, creates unnecessary stress on soft plastics and paintwork. Over months, these tension points can leave marks or encourage the buildup of condensation in corners, promoting rust. Conversely, a loose cover causes its own brand of chaos: wind-driven movement results in micro-abrasions, and the lack of a seal allows contaminants to sneak in and settle directly on your ride.

The key is choosing a duty motorcycle cover designed for your bike’s make and model, using adjustable, soft elastic hems and tie-downs. Check that the cover sits snugly without stretching, hugging contours without squashing antennae or mirror stems. Proper fitment reduces shifting, maintains breathability, and keeps your motorcycle safe from both weather and unnecessary wear.

Ignoring the Importance of Proper Ventilation in Motorcycle Storage

Proper motorcycle storage with a well-ventilated, high-quality motorcycle cover and airflow in clean indoor garage

Ventilation is frequently overlooked, especially when storing your motorcycle indoors. Without fresh airflow, humidity can rise even in a dry garage, especially after recent washing or significant temperature shifts. A quality motorcycle cover offers built-in vents or mesh panels, allowing moisture to escape and preventing stagnant air pockets that encourage condensation and corrosion. Properly ventilated motorcycle storage extends the lifespan of your duty motorcycle cover and your bike, keeping mechanical and electrical parts in good condition.

If your current cover lacks exhaust vents, invest in one designed specifically for indoor storage—with smart vent placement for consistent airflow. Open the cover occasionally to air things out and check for any lingering dampness or foul scents, both signs of trapped moisture. This simplicity can save you from extensive, costly repairs down the line—no more hidden rust or mysterious electrical gremlins on spring startup.

Storing Your Motorcycle in Direct Sunlight with a Cover On

It’s a widespread misconception that simply using a motorcycle cover is enough to protect your bike from sunlight. However, most materials—even heavy duty—have UV limits, and exposure to direct sun while covered can cause heat buildup, warping plastics and prematurely aging paint. Plastic and vinyl covers can bake onto the surface, especially after a ride when the engine, exhaust pipe, and metal components are warm. The interior temperature under the cover may skyrocket beyond safe levels, melting seals or gaskets and degrading wiring insulation.

For best results, store your motorcycle in a cool, shaded, or well-ventilated indoor area. If outdoor storage is your only option, choose a light-colored, UV-resistant heavy duty motorcycle cover, and check that your location minimizes direct sunlight during the hottest parts of the day. Regularly shifting your bike or adjusting its position can also prevent UV “hot spots” and material fatigue, and periodic inspection will help ensure your cover is still protecting rather than harming your investment.

  • Using a tarp instead of a motorcycle cover
  • Leaving ignition or exhaust unprotected
  • Covering immediately after a ride or wash

Selecting the Best Duty Motorcycle Cover for Effective Motorcycle Storage
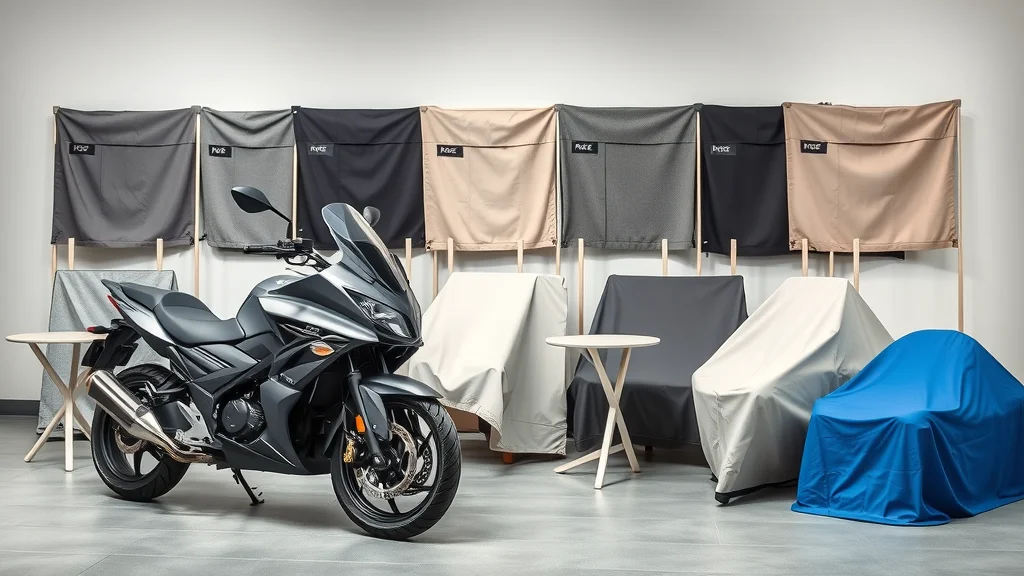
Modern motorcycle displayed with high-quality duty motorcycle cover options and material samples for proper motorcycle storage

Heavy Duty Motorcycle Cover Features You Need

Not all covers are created equal when it comes to storing your motorcycle, especially for extended periods. Heavy duty motorcycle covers should be made from thick, durable, UV-resistant, and water-repellent materials. Look for reinforced seams, adjustable tie-downs, and integrated vents to allow airflow and prevent condensation. If your bike will be outside at all, features like weatherproof coatings, heat-resistant panels (especially around the exhaust pipe), and lock holes for anti-theft chains up the protection. A quality motorcycle cover, specifically built for your environment and usage, should feel robust and slightly pliable—never brittle or plasticky, as those materials can crack or bond to your paint after sun exposure.

Don’t forget: The difference between an average bike cover and a purpose-built duty motorcycle cover can be the difference between a pristine ride and one needing costly repairs. Look for covers tested for both indoor and outdoor storage, matching your storage situation and climate.

Fitment and Material Considerations for Storing Your Motorcycle

Fit is just as critical as material. A cover that’s too large leaves room for dust, pests, and moisture, while one that’s undersized can strain zippers, seams, and cover fabric. Always consult your motorcycle’s dimensions and manufacturer’s recommendations. For best results when you store your bike, select a cover measured to your ride’s specific profile (including windshield, mirrors, bags, etc. ). Material-wise, opt for a multi-layered, breathable synthetic blend that allows trapped moisture to escape but still offers a shield against airborne contaminants and physical impacts.

Never use plastic-only covers, as they lack the flexibility and breathability needed for long-term motorcycle storage. Heavier materials—like treated canvas or advanced synthetics—offer both strength and airflow. Finally, inspect fabric regularly for small tears or thinning; early replacement can prevent sudden failure during the harshest months.

How to Store Your Bike Indoors with the Correct Motorcycle Cover

  • Checking cover breathability
  • Avoiding plastic-only covers
  • Choosing appropriate sizing for your duty motorcycle
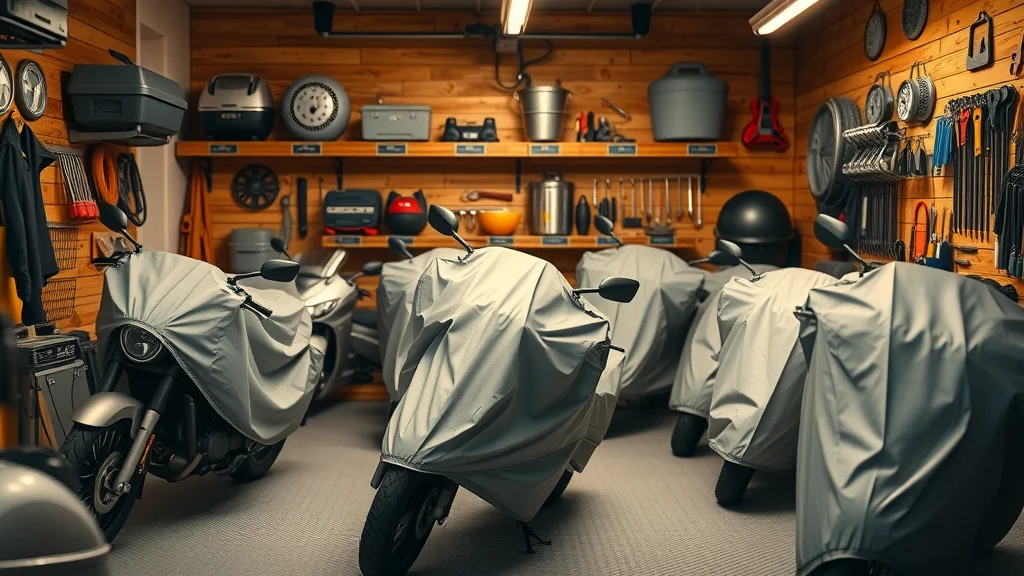
Cozy garage with multiple motorcycles covered with well-fitted, high-quality breathable covers for indoor motorcycle storage

If your garage, basement, or dedicated motorcycle storage room is your main storage space, maximize the environment by selecting a breathable, multi-layered cover. Clean and organize the area to avoid accidental bumps or tipped tools that can puncture the cover. Tuck in ignition wiring and cables, double-check that vents on your cover are open and unobstructed, and gently place the cover starting from the top so it slides evenly over mirrors and bars. Proper indoor motorcycle storage also means periodically removing the cover for brief inspections, checking tire pressure, battery state, and signs of pests or condensation. These habits, paired with the right motorcycle cover, ensure your bike emerges from storage in excellent condition.

In this expert video, a certified mechanic demonstrates real-world storage do’s and don’ts using various duty motorcycle covers. You'll learn how to spot breathable vs. non-breathable materials, properly fit a heavy duty motorcycle cover, and inspect storage conditions to avoid silent problems brewing beneath the cover. Close-ups reveal clear differences in fabric and ventilation, equipping you to avoid the most common storage mistakes.

How to Prepare Your Motorcycle for Storage

  • Washing and drying before using your duty motorcycle cover
  • Inspecting for leaks or damages ahead of long-term storage
  • Proper battery and fluid maintenance during motorcycle storage

Quotes from Expert Mechanics on Motorcycle Cover Preparation

"A heavy duty motorcycle cover is only as effective as your prep work underneath it — never skip a thorough clean and dry." — Certified Motorcycle Technician

Before you even reach for your duty motorcycle cover, proper preparation sets you up for storage success. Begin by washing your motorcycle thoroughly, ensuring no stubborn dirt or road salts remain—these can corrode paint or metal quickly. Dry every part, paying special attention to crevices, under the seat, and around the exhaust pipe where pockets of moisture hide. Next, perform a quick inspection for fluid leaks or signs of mechanical wear, addressing them before storage. For an extended period of motorcycle storage, consider changing your oil before storing, filling the tank fully (to prevent condensation inside), and adding stabilizers as needed.

Disconnect and maintain your battery if not in regular use, and check that all moving parts like the motorcycle chain are properly lubricated. These steps, paired with a breathable heavy duty motorcycle cover, ensure your motorcycle remains in good condition and is ready to hit the road as soon as storage ends.

This step-by-step guide shows exactly how to prep your bike, from meticulous cleaning to battery disconnection, complete with pro tips on storing your motorcycle safely for any season.

People Also Ask: Common Questions About Things to Avoid in Covering Your Motorcycle for Storage

What is the 4 second rule on a motorcycle?

Answer:

The 4 second rule for motorcyclists means maintaining at least four seconds’ worth of stopping distance between your bike and the vehicle ahead. This extra time helps riders react appropriately to road hazards or sudden braking, especially important when weather or road conditions might compromise control. Following this rule ensures safer travels, whether your motorcycle is in everyday use or headed for storage.

How to prepare your motorcycle for storage?

Answer:

To properly store your motorcycle, wash and dry it completely, inspect for leaks or damage, top off or stabilize the fuel, disconnect the battery, and lubricate the motorcycle chain and other moving parts. Always use a breathable, fitted motorcycle cover and position your bike in a dry, well-ventilated area. These steps prevent corrosion and keep your motorcycle in good condition throughout its time in storage.

What does 2 fingers down mean to bikers?

Answer:

When riders extend two fingers downward as they pass, they’re sharing a gesture of respect and camaraderie within the motorcycling community. The “2 fingers down” salute represents both peace and a nod to safety—reminding everyone on the road to ride safe, whether commuting regularly or storing your motorcycle for long periods.

What is the 1% rule in motorcycles?

Answer:

The “1% rule” refers to the small percentage of riders—1%—who operate outside mainstream, law-abiding motorcycle culture. Most bikers are responsible enthusiasts who value safety and proper motorcycle storage, while the 1% label often applies to outlaw groups. For all riders, maintaining your motorcycle with the proper cover and storage methods helps keep you within the 99% enjoying biking responsibly.

Essential FAQs on Things to Avoid in Covering Your Motorcycle for Storage

  • Can a motorcycle cover damage my paint if used incorrectly?
    Yes—using a cover on a dirty or wet bike, or using a non-breathable heavy duty cover, can cause scratches, fade paint, or trap moisture against surfaces, leading to costly repairs.
  • How often should I air out my motorcycle during storage?
    It’s best to check and air out your motorcycle every 2–4 weeks while in storage, especially in fluctuating climates or after heavy rainfall, to prevent moisture buildup.
  • Are heavy duty motorcycle covers better for long-term storage?
    Heavy duty motorcycle covers, made from breathable and weather-resistant materials, provide the best protection—just ensure correct sizing, fitment, and ventilation to avoid potential storage mistakes.

Recap: Key Takeaways on Things to Avoid in Covering Your Motorcycle for Storage

  • Breathability is crucial for every motorcycle cover during storage
  • Prep and positioning matter as much as duty motorcycle cover quality
  • Regular inspection can prevent storage-related motorcycle damage

Ready to Secure Your Motorcycle’s Future? Connect with Nasty Performance Motorcycle Shop

"Safeguard your motorcycle investment. Call Nasty Performance Motorcycle Shop Today: 847-458-4858 for expert storage solutions!"

Don’t leave your motorcycle’s well-being to chance. Take the next step and speak with the pros who know how to properly store your motorcycle for any season.

If you’re interested in taking your motorcycle maintenance to the next level, consider diving into broader seasonal care routines. Our comprehensive guide on seasonal bike care secrets every rider must know offers advanced insights and actionable tips to keep your ride performing at its best, no matter the time of year. Explore these strategies to ensure your motorcycle is always ready for the road ahead.

Motocycle Seasonal Care & Storage

0 Comments

Write A Comment

*
*
Please complete the captcha to submit your comment.
Related Posts All Posts

Common Mistakes in Motorcycle Tire Pressure in Winter to Pay Attention to

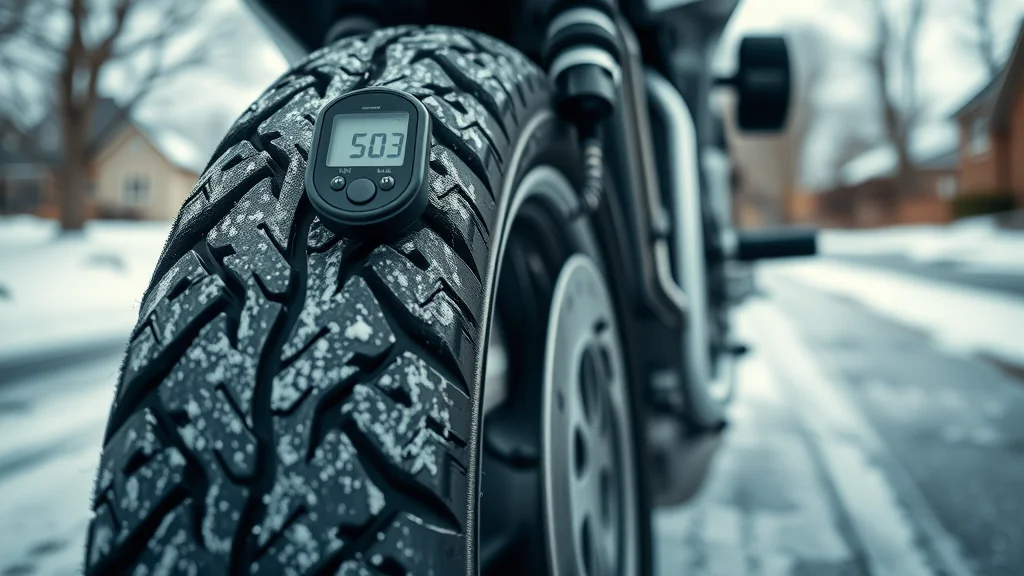
Are you sure your motorcycle is truly winter-ready, or is a hidden tire pressure mistake waiting to catch you off guard with every cold snap? As winter's chill settles in, many riders focus on covering their bikes, checking the battery tender, or even draining the fuel system, overlooking something far more fundamental: the common mistakes in motorcycle tire pressure in winter. This article dives deep into the often-ignored yet critical role tire pressure plays during colder months, revealing why ignoring it can jeopardize your safety, performance, and peace of mind. Get ready to challenge conventional wisdom and gain the know-how for a truly safe ride this winter. Are You Making These Common Mistakes in Motorcycle Tire Pressure in Winter? Every winter, even seasoned riders risk their safety by underestimating how much cold temperatures alter motorcycle tire pressure. As the thermometer drops, tire pressure decreases due to gas molecules contracting, meaning yesterday’s “normal” could be dangerously low by morning. Many motorcyclists make the mistake of assuming their summer PSI is automatically safe for winter riding—when, in reality, your motorcycle tires require closer inspection and often a slight pressure boost to maintain optimal grip and stability on slick roads. Another widespread error is failing to check tire pressure as often during winter storage or between rides. When left unattended for extended periods, under-inflated motorcycle tires can develop flat spots, especially when resting in unheated garages. These flat spots not only reduce tire lifespan but also hamper handling, increasing the risk on icy roads. By understanding that winter tire inflation pressure is based on cold conditions and recognizing that even small temperature fluctuations can impact your motorcycle tire pressure, you’re already one step closer to a safe ride. Let’s dig deeper into what you need to know, how to avoid these pitfalls, and why being meticulous with tire maintenance is vital for every winter rider. It's also worth noting that tire pressure is just one aspect of comprehensive winter motorcycle care. For a more tactical look at how to protect your entire bike during the colder months, including tips on storage and maintenance routines, explore these seasonal bike care secrets every rider must know to keep your motorcycle in peak condition all winter long. What You'll Learn About Motorcycle Tire Pressure and Winter Storage Key motorcycle tire pressure mistakes during cold weather How winter storage impacts tire safety and performance Tire inflation best practices for winter riding Author’s expert perspective and recommendations Understanding Motorcycle Tire Pressure: Why It Matters in Winter Motorcycle tire pressure isn’t just a maintenance checkbox—it’s the linchpin of your bike’s performance, especially when cold temperatures strike. As thermometers plunge, the air inside your tires contracts and the PSI (pounds per square inch) drops. Tires that felt perfectly inflated on a warm day are suddenly underinflated, leading to decreased traction, poor handling, and a much higher risk of deadly slips on icy patches or wet roads. The science is simple: the volume and pressure of gas molecules inside your tire shrink with the heat loss, drastically affecting your tire’s ability to grip the pavement. FactorImpact on Tire PressureWinter Considerations Temperature Drops Pressure Decreases Requires frequent checks Improper Tire Inflation Handling Problems Greater risk on icy roads Winter Storage Flat spots, lost pressure Needs pre-spring adjustment Beyond just your safe ride, poorly maintained tire pressure during winter storage can wreak havoc on your tires. A bike parked in a cold garage for extended periods will lose air gradually, and if left resting on the same spot, the tires may develop flat spots. When the spring thaw arrives, these flat spots compromise both comfort and safety until the tires wear round again—or worse, force early replacements. In short, routinely checking tire inflation and correcting any pressure loss is a must for any rider serious about keeping their motorcycle tires in top shape, no matter the season. Top Common Mistakes in Motorcycle Tire Pressure in Winter Forgetting to adjust tire pressure for lower temperatures Assuming summer PSI is safe for winter riding Ignoring winter storage maintenance for motorcycle tires Not checking for air leaks after cold snaps Using the 4 PSI rule incorrectly Ignoring these common mistakes in motorcycle tire pressure in winter can lead to serious safety problems and expensive damage. For instance, if you rely on your usual summer tire pressure, you’re probably running underinflated in cold weather—making it much easier to lose control during an emergency maneuver or when hitting a patch of black ice. Some riders also mistakenly believe that once their bike is in winter storage, tire checks aren’t necessary. However, a tire losing pressure in the garage can develop flat spots that leave your motorcycle unsafe when the season changes. Many riders focus on fuel system care for winter storage, but neglecting tire pressure adjustments can lead to hidden dangers on the road. After a major cold snap, it’s also common to forget to check for slow leaks. Tires slightly damaged or with aged valves can lose air overnight when temperatures swing, turning a minor oversight into a big risk. Even the famous 4 PSI rule—meant to gauge whether your tires are operating at the right pressure—can be misapplied if not considered with winter-specific recommendations. Avoid these missteps by making tire checks and pressure adjustments as routine as charging your battery tender or using a breathable motorcycle cover in the off-season. Tire Inflation Techniques: Avoiding Risks with Proper Motorcycle Tire Pressure Use manufacturer-recommended PSI for winter Verify pressure when tires are cold for accuracy Check tire inflation at least every two weeks in winter months The key to a safe winter ride is understanding that your motorcycle tire pressure should always be set according to the manufacturer’s specification for cold weather—not just the sticker you see for “normal” conditions. That’s because cold temperatures will reduce the measured PSI, so if you’re not compensating for this, you’re riding on underinflated tires by default. Always use a quality digital gauge and fill your motorcycle tires when they’re cold—ideally before you’ve ridden more than a few hundred feet. Warm-up friction rapidly increases pressure, giving you a less accurate reading. Make it a habit to check your tire pressure every two weeks during winter and after any dramatic drop in temperature. For motorcycles in storage, slightly over-inflate to help ward off flat spots, then reset to recommended PSI before your first ride. And never check the tire immediately after a ride—the heat from motion distorts your readings, leading to accidental overinflation. Regular, accurate checks and mindful tire inflation = peace of mind and maximum safety. Video Guide: Visual Guide: Checking and Adjusting Tire Pressure for Winter Motorcycle Storage Expert Insights: Preparing Your Motorcycle for Winter Tire Safety When it comes to preparing your motorcycle for winter, all the attention often goes to the fuel system, the battery tender, or preventing a dead battery—but as experts will tell you, proper tire maintenance is just as crucial for a truly safe ride. As freezing air moves in and bikes spend more time parked on concrete or asphalt, the risk of pressure loss and flat spots increases. Using a breathable motorcycle cover, parking on a soft mat or carpet, and spinning the wheels occasionally all help prevent rust and unnecessary tire fatigue. Before your first ride each spring, check your motorcycle tire pressure thoroughly. Factor in any storage-induced loss and adjust to the recommended PSI for the current temperatures. Pro tip: if you’re not sure about the correct inflation, consult your owner’s manual or a trusted professional. Remember, tires are designed to perform within a certain pressure band to ensure optimum grip, handling, and braking—especially when the road is slick or unpredictable. Preparing your motorcycle for winter isn’t just about tackling the fuel system or covering your bike—tire pressure is your first line of defense against hazardous winter conditions. People Also Ask: Vital Questions on Common Mistakes in Motorcycle Tire Pressure in Winter What is the 7'7 rule for winter tires? Understanding the 7'7 Rule and Its Importance for Motorcycle Tire Pressure in Winter The 7'7 rule is a handy guideline often cited for winter tire safety. It means that when temperatures consistently stay below 7°C (44. 6°F) for 7 days, it’s officially time to switch to winter tires or, at the very least, adjust your tire pressure for cold weather riding. For motorcycles, this translates into a proactive approach—ensuring that you’re running the recommended winter PSI (as specified by the manufacturer) and checking for adequate tread depth and tire flexibility. Being vigilant once this rule applies helps you avoid the drop in inflation pressure caused by cold temperatures, greatly boosting performance and safety. Is it better to lower your PSI in a motorcycle when it's winter time? Why Appropriate Tire Pressure in Winter is Critical for Motorcycle Safety Contrary to some outdated advice, lowering your motorcycle tire pressure during winter is not recommended. In fact, you should ensure your inflation pressure meets the manufacturer’s cold-weather recommended PSI. Lowering PSI can decrease the tire’s structural integrity, reduce its ability to cut through water or slush, and increase the risk of underinflation—leading to unstable handling and prematurely worn tires. Always check tire pressure in ambient conditions and bring it up to spec for the safest and most controlled ride on slippery, icy, or wet winter roads. What is the 4 PSI rule? Applying the 4 PSI Rule to Motorcycle Tire Pressure in Winter Conditions The 4 PSI rule suggests that after a standard ride, your tire pressure should increase by approximately 4 PSI from the initially measured cold reading. This increase indicates that the tire is performing efficiently under optimal load and friction. If the post-ride pressure is much higher, your starting pressure was too low; if it changes very little, the tire may have started overinflated. However, remember that in winter, the rule is mainly a double-check—never a replacement for regularly setting and confirming pressure when tires are fully cold. Is 25 PSI too low in winter? Risks of Underinflated Motorcycle Tires: Understanding Safe Winter PSI Levels Running your motorcycle tires at 25 PSI in winter is almost always too low—unless specifically recommended by the manufacturer for your particular bike, which is quite rare. Underinflated tires not only reduce grip but also drastically affect handling, braking, and can even lead to the formation of flat spots during winter storage. Always reference your owner’s manual or a professional for the correct tire pressure; for most modern motorcycles, safe winter PSI typically ranges much higher than 25. When in doubt, consult a pro before hitting the icy roads. FAQs on Motorcycle Tire Pressure in Winter How often should you check tire pressure during winter? Ideally, check your motorcycle tire pressure at least every two weeks during the winter. Cold temperatures, storage, and daily swings can lead to gradual pressure loss—and since tires are designed to perform at a specific inflation pressure, regular checks are crucial for safety and longevity. What are the signs of improperly inflated tires? Signs include uneven wear, difficulty handling or steering, noticeably flat spots, or feeling vibrations at certain speeds. If your safe ride feels off, it’s time to check the tire pressure or consult a professional. Do heated storage areas affect recommended PSI? Yes, storing your motorcycle in a heated garage may reduce the winter-related pressure drops, but you should still follow the recommended tire pressure guidelines and verify PSI before each ride, as the bike may be exposed to cold temperatures during use. Can you use the same tires for summer and winter riding? Most all-season motorcycle tires are designed for year-round use, but winter storage and regular pressure checks are essential. If in doubt about your tires’ suitability, ask a professional if you should switch or adjust for safer winter performance. Key Takeaways for Avoiding Common Mistakes in Motorcycle Tire Pressure in Winter Always check tire pressure before and during winter Adjust PSI to manufacturer’s winter recommendations Do not neglect tire maintenance during winter storage Consult professionals if unsure about correct tire pressure Ready to Ride Safe This Winter? Contact the Experts For peak motorcycle tire safety this winter, professional guidance goes a long way. Call Nasty Performance Motorcycle Shop Today: 847-458-4858 If you’re committed to mastering every aspect of motorcycle safety and performance throughout the year, don’t stop at tire pressure. There’s a wealth of knowledge to help you protect your bike from seasonal hazards, optimize storage, and extend its lifespan. Discover more expert strategies and essential maintenance routines by diving into seasonal bike care secrets every rider must know. By expanding your understanding of holistic bike care, you’ll be better equipped to handle whatever the weather throws your way and ensure your motorcycle is always ready for the next adventure.

Expert Advice on Motorcycle Fuel Tank Preparation You Can’t Miss

Did you know? Just one night of neglect can allow moisture and contaminants inside a gas tank, causing rust that leads to expensive repairs, fuel inefficiency, or a total system breakdown. Understanding expert advice on motorcycle fuel tank preparation could save you hundreds—and keep every ride smooth, powerful, and worry-free. This comprehensive guide sets out the crucial steps, techniques, and professional secrets for preparing and protecting your motorcycle gas tank. Whether you ride daily or seasonally, mastering proper tank prep is the surest way to guarantee long-term performance and reliability. An Eye-Opening Fact: How Proper Gas Tank Prep Maximizes Motorcycle Performance When it comes to peak motorcycle performance, experts agree that overlooked fuel tank care is a leading cause of avoidable setbacks. Your motorcycle gas tank acts as the heart of your fuel system—feeding clean, uncontaminated gasoline to your engine and ensuring steady, unimpeded combustion. Missing crucial prep steps can introduce debris, old varnished fuel, and even microscopic rust particles that quickly undermine engine health. From experienced mechanics to dedicated enthusiasts, the message is clear: tank prep is not just about aesthetics. It’s essential maintenance that directly impacts acceleration, engine longevity, fuel efficiency, and even the overall safety of your ride. Following expert advice on motorcycle fuel tank preparation, such as using quality degreasers, protecting bare metal surfaces, and keeping internal parts free of debris, means you avoid the pitfall of costly repairs and can instead focus on pure riding pleasure—mile after mile. A pristine gas tank also shields your fuel pump and connected systems from contaminants that cause clogs or corrosion over time. By routinely following a professional prep regimen, you create a reliable first defense against water ingress, flaking rust, and chemical breakdowns that could otherwise lead you stranded. So, before hitting the road or putting your bike away for the season, invest some care into your gas tank. You’ll be rewarded with smoother performance and extended service life for every major component in your motorcycle’s fuel system. What You'll Learn From Our Expert Advice on Motorcycle Fuel Tank Preparation The importance of comprehensive tank prep for longevity Step-by-step process to prepare your motorcycle gas tank Expert tips on preventing common fuel tank issues How to avoid fuel contamination and rust Understanding Motorcycle Gas Tank Preparation: Fuel System Basics Before diving into the hands-on steps of motorcycle gas tank prep, it’s essential to understand its vital role within your overall fuel system. Your tank does more than store fuel—its interior condition directly influences your fuel pump, fuel lines, carburetor, and engine performance. Old gasoline, moisture, and tiny bits of debris tend to accumulate over time. These contaminants can lead to clogged fuel pumps, rusted internals, and inefficient combustion. Without proper tank prep, even new motorcycles can suffer from accelerated wear. That’s why following best practices, from draining and cleaning to applying tank liners, is considered a must by professionals. It's not just about avoiding visible rust; it’s about protecting every fuel-dependent part of your bike. Comprehensive tank preparation begins with the removal of old fuel and ends with advanced rust prevention steps. Regular maintenance—such as using a biodegradable degreaser, ensuring parts are allowed to sit overnight before painting, and inspecting for corrosion—is essential to prevent minor issues from escalating. Motorcycles, unlike cars, are often exposed to varying climates and humidity, making their gas tanks susceptible to faster degradation if neglected. By understanding the basics and prioritizing tank prep, you ensure your bike’s engine receives only clean, contaminant-free fuel, allowing you to ride with confidence and avoid frequent trips to the shop. For riders interested in a more holistic approach to motorcycle maintenance, incorporating seasonal care routines alongside your fuel tank preparation can further extend your bike’s lifespan. Discover practical strategies for year-round upkeep in this guide to essential seasonal bike care. Why In-Depth Tank Prep Is Crucial for Maintaining Your Motorcycle Gas Tank In-depth tank prep goes beyond a simple rinse—it’s about safeguarding your fuel system from the inside out. Every time you refuel, microscopic residues can build up inside the gas tank. Left unchecked, these deposits start to corrode the surface, leading to internal flaking rust and narrow fuel passages that impede flow. Rust isn’t just an aesthetic nuisance; it can break loose and block your fuel pump or injectors, leading to sputtering performance and costly repairs. Mechanics often point out that a single session of professional tank prep—removing the tank, thoroughly inspecting and treating bare metal, and using products like brake parts cleaner—can add years to your tank’s lifespan. Properly prepping your tank also means addressing old fuel, which can gum up internals and leave a sticky residue that makes future cleaning harder. Owners frequently overlook internal surfaces, prioritizing shiny exteriors but forgetting that it’s the hidden rust and water pockets that often spell trouble. Seasoned riders cite the practice of using compressed air to clear out debris, immediately drying internals with a rag after rinsing, and ensuring nothing is left behind before reinstalling the tank. These steps enforce a barrier against oxidation and moisture infiltration, two main culprits of premature tank failure. With expert advice on motorcycle fuel tank preparation, even tanks that require extensive sanding or have suffered from years of neglect can be restored to reliable service. Ultimately, it’s this commitment to detail that lets your motorcycle gas tank deliver reliable performance and trouble-free riding for years to come. Expert Steps: Prepping Your Gas Tank Like a Pro Professional mechanics follow a systematic approach to tank prep, ensuring no step is skipped and all potential issues are addressed from the outset. The first crucial step is thoroughly draining the old fuel and removing any debris from the inside and bottom of the gas tank. Once drained, the tank is removed safely from the motorcycle frame, making sure to disconnect any fuel pump or sender units to avoid accidental damage. With the tank removed, experts recommend using a biodegradable degreaser and letting it sit overnight to break down stubborn grime and varnish. After degreasing, a complete inspection of the tank’s interior surfaces for rust, pitting, or signs of old fuel varnish is performed—this stage often reveals hidden problems that, left untreated, would compromise the finished result. The next phases involve direct action: applying rust prevention treatments, using brake parts cleaner for deep cleaning, and coating any exposed bare metal surfaces with a tank liner or epoxy primer to prevent future rusting. Allowing proper drying time for each layer is critical—most professionals stress that each stage should sit overnight before painting or installing new components. This technical patience ensures that all cleaning agents and sealers fully cure, giving you the strongest possible protection. Adhering to these steps guarantees that your motorcycle gas tank is not only clean, but also fortified against the most common threats that riders face. This methodical approach, as endorsed by experienced technicians, is the key to maintaining both performance and reliability. Draining the old fuel and debris Removing the motorcycle gas tank safely Thoroughly cleaning and inspecting the interior Applying rust prevention methods and tank liner Allowing proper drying time for each tank prep layer “A meticulously prepped gas tank is often the difference between a smooth ride and relentless mechanical headaches.” — Experienced Motorcycle Technician Tank Prep Essentials: Products and Techniques Experts Recommend Having the right set of tools and products distinguishes average tank prep from expert-level care. While anyone can attempt basic cleaning, it's the careful selection of products and adherence to proven techniques that separates professional results from amateur efforts. Key items like fuel stabilizer, a quality biodegradable degreaser, comprehensive tank sealer kits, and proper protective gloves and eyewear shield both the tank and the person doing the prep. Motorcycle experts also rely on specific cleaning agents—such as brake parts cleaner or dedicated parts cleaner—to address every particle of residue and rust. These products are designed to prevent rusting, promote fuel stability, and keep internals dry enough to reject contaminants even in humid storage. Hands-on expert techniques include allowing each layer or application to sit overnight before painting, flushing the tank with clean water between steps, and using compressed air to clear out nooks and recesses. After every cleaning or treatment, professionals thoroughly inspect internals with a light to verify that the bare metal is perfectly clean and rust-free. As motorcycle mechanics point out, quality tank prep starts with reliable products and ends with a readiness to repeat detailed cleaning procedures as needed, for a flawless, lasting result. Top Tools and Materials for Motorcycle Gas Tank Preparation Fuel stabilizer Biodegradable degreaser Tank sealer kits Protective gloves and eyewear Product Primary Use Why Experts Recommend Biodegradable Degreaser Removes old fuel, varnish, and residue from tank interior Safe for metal, non-toxic, breaks down stubborn deposits Fuel Stabilizer Prevents fuel degradation during storage Keeps gasoline fresh, prevents starting issues after long storage periods Tank Sealer Kit Seals and lines interior surfaces to prevent future rusting Creates a protective barrier, extends tank lifespan, resists chemical breakdown Brake Parts Cleaner Final rinse and cleaning of rust and debris Evaporates quickly, leaves surfaces residue-free, ideal for finishing touches Protective Gloves & Eyewear Personal safety during handling of chemicals Protects skin and eyes from splashes of cleaner, sealer, and fuel Advanced Tank Prep Tips to Prevent Future Issues Seasoned mechanics and restoration experts have developed a series of advanced tips to push tank prep results to the next level. They emphasize the importance of using a dedicated parts cleaner between every prep stage, especially after sanding or rust removal, to ensure no debris remains before applying treatments. If your tank has signs of substantial pitting or internal corrosion, consider light sanding on bare metal, followed by a thorough rinse and the application of a high-quality epoxy primer before sealer. Additionally, some professionals advocate for a light mist of compressed air after each rinse to guarantee no moisture is left behind, reducing the chance of future rust formation. These steps may require time and patience but are essential for any tank that requires extensive restoration work. Other preventive measures include installing a modern fuel filter inline after tank prep, thus preventing residual particles from reaching the fuel pump or carbs. Mechanics also recommend routinely checking the tank, especially after exposure to rain or humidity, and using a fuel stabilizer if the bike will sit for extended periods. Letting your tank sit overnight before painting and installing fuel components ensures every product cures fully for longevity. By following these advanced tank prep tips, you protect your motorcycle gas tank from recurring problems, ensuring each start is reliable and every journey remains interruption-free. Watch as a top technician demonstrates the full expert process: draining old fuel, thorough tank cleaning with approved products, rust inspection, and final tank liner application—all shot in a state-of-the-art workshop for crystal-clear visuals and step-by-step guidance. People Also Ask: Expert Answers on Motorcycle Gas Tank Preparation Is it better to drain gas or use stabilizer? Both draining gas and using a fuel stabilizer have unique advantages, but the best approach depends on your storage scenario. Draining the gas tank entirely is beneficial if you’re storing your motorcycle for several months or conducting a deep tank prep, as it eliminates the risk of old fuel varnishing and stops water contamination before it starts. On the other hand, if you need to leave gasoline in the tank, adding a quality fuel stabilizer prevents the gas from breaking down and forming deposits. Experts recommend stabilizer for short-term or seasonal storage and full draining for extended inactivity or before major maintenance. Either way, combining these strategies with expert advice on motorcycle fuel tank preparation ensures your bike starts easily and avoids gunky buildup or costly rust repairs down the road. How many coats of primer on a motorcycle gas tank? Applying the right number of primer coats is critical for both rust prevention and paint adhesion. Professionals generally recommend two to three thin coats of epoxy primer on a cleaned, bare metal motorcycle gas tank. Each layer should be allowed to dry thoroughly, ideally letting it sit overnight to ensure full curing and adherence before sanding or applying color coats. This careful method creates a solid protective base, shielding the tank from moisture and reducing the risk of premature rusting or paint bubbling. Remember, the key is even application and patience—rushing any paint stage can compromise the prep work you’ve just accomplished. What does putting salt in a gas tank do? Introducing any foreign material—including salt—into your gas tank is highly damaging and should never be done. Salt accelerates corrosion at a rapid rate, leading to severe internal rust, clogging of fuel lines, and potentially catastrophic engine failure. Tiny salt crystals dissolve in moisture, attack bare metal surfaces, and create unmanageable deposits that no standard fuel system cleaner can remove. This is a common sabotage tactic and, besides damaging the gas tank, it can ruin injectors, pumps, and many downstream components. Always keep your gas tank sealed and protected, and address any evidence of contamination immediately using the expert tank prep methods outlined above. How long until gas goes bad in a motorcycle tank? Typically, gasoline in a motorcycle gas tank can start to degrade within one to three months. Without stabilizer, fresh gas reacts with air and humidity, forming sticky varnish and gums that clog fuel passages. Factors like high temperatures and tank venting can accelerate this breakdown. Most experts recommend draining the tank or adding a stabilizer if the bike will sit unused for more than four weeks. Regular attention—along with proper tank prep—ensures clean fuel and a smooth start every season, avoiding problems associated with stale or contaminated gasoline. Key Takeaways: Expert Advice on Motorcycle Fuel Tank Preparation Always prioritize thorough tank prep for optimal performance Quality products and correct techniques make a lasting difference Address issues like rust and old fuel preemptively Consult professional advice for advanced tank prep approaches "Preventative maintenance on your gas tank is an investment in your motorcycle's future." Your Next Step Toward Flawless Motorcycle Gas Tank Preparation Whether you’re restoring a classic or maintaining your daily ride, following expert advice on motorcycle fuel tank preparation is a game-changer. Adopt the methods and tools above, prevent future hassles, and make every ride count. Ready for professional results? Call Nasty Performance Motorcycle Shop Today: 847-458-4858 If you’re eager to take your motorcycle maintenance to the next level, don’t stop at just the fuel tank. Comprehensive care throughout the year is the secret to a bike that performs flawlessly in every season. Explore the full spectrum of seasonal maintenance strategies and discover how proactive habits can protect your investment and enhance your riding experience by visiting Seasonal Bike Care Secrets Every Rider Must Know. With these expert insights, you’ll be equipped to handle not only tank prep but every aspect of motorcycle upkeep—ensuring your machine is always ready for the road ahead.

Avoid These Things When Storing Your Motorcycle During the Rainy Season

Did you know? According to motorcycle restoration experts, more bikes are damaged by improper storage during the rainy season than by riding in the rain itself. While you might park your motorcycle to protect it from wet roads, hidden dangers like rust, flat spots, and electrical failures can still strike—sometimes faster than you think. Guard your investment with these vital tips so your ride is ready to roar when the skies clear. A Surprising Reality: How Neglecting Motorcycle Storage Risks Your Ride’s Longevity Many riders believe storing a motorcycle is as simple as parking it in the garage and throwing on a cover. Yet, overlooking actual things to avoid in storing motorcycle during rainy season could quietly erode your bike’s health. From tire pressure dipping due to humidity changes to unchecked fuel system problems spurring corrosion, seemingly minor oversights stack up over time. The rainy season brings not just slippery streets but challenges like moist air, inconsistent temperatures, and increased condensation, all of which threaten your motorcycle’s delicate balance of metal, rubber, and electronics. The reality is that motorcycle storage during wet weather requires more than a routine cleaning. Without the right precautions, you risk rust on metal parts, flat spots on tires, and short circuits in your bike's wiring. Motorcycle maintenance professionals routinely see bikes that were structurally sound at the start of rainy weather but suffered severe declines simply due to careless storage. Ignoring proper storage protocols could mean facing major repairs or replacement costs—definitely not the way you want to start the next riding season. What You’ll Learn About Things to Avoid in Storing Motorcycle During Rainy Season Critical mistakes to avoid when you store your motorcycle during wet weather Actionable motorcycle storage tips specific to the rainy season How tire pressure, fuel, and protection measures affect your bike’s health Expert recommendations for the best ways to store your motorcycle Understanding the Importance of Proper Motorcycle Storage During Rainy Season Why Failing to Store Your Motorcycle Properly Can Cause Severe Damage Proper storage isn’t an optional luxury—it’s the best protection between your motorcycle and costly weather-related decay. When a motorcycle sits in a damp or improperly ventilated environment, moisture infiltrates key areas, from the exhaust pipe to the nooks around the frame and fuel system. This moisture, if left unchecked, can cause rust and corrosion on metal parts, degrade your brake fluid, and harm the crankcase and transmission even if you change the oil before storage. Tires, too, succumb to flat spots or pressure loss due to sitting idle in cold, damp conditions. If electrical components aren’t covered, condensation leads to short circuits that will leave your bike needing expensive repairs just as the riding season returns. Many riders also overlook the impact of fuel system problems—they can build up quickly as humidity interacts with untreated gasoline. Water in the fuel tank, carburetor, or injectors often prompts costly clogs and corrosion. Far from a minor oversight, these issues accumulate into a serious threat to your bike’s performance and reduce the time before you can safely put your bike on the road again. The bottom line: Motorcycle maintenance during storage is non-negotiable if you value your investment. For a deeper dive into comprehensive seasonal maintenance, including step-by-step storage routines and expert-approved checklists, you may find it helpful to explore these essential seasonal bike care secrets every rider should know. This resource expands on practical strategies to keep your motorcycle in peak condition year-round. Long-Term Benefits of Avoiding Common Storage Mistakes Taking the right steps to properly store your motorcycle during the rainy season isn’t just about short-term protection; it’s a long-term investment in your bike’s future. When you follow recommended storage practices, you reduce the risk of rust, electrical failure, and rubber degradation. Additionally, by preparing your bike correctly, from the fuel system to tire pressure checks, you ensure it stays ready to ride with minimal post-storage fuss. This means you can hit the road with confidence, avoid pesky start-of-season repairs, and enjoy peak performance from the first dry day onward. Long-term neglect is often the silent killer of even the most robust bikes. By proactively monitoring moisture, protecting wire harnesses, and keeping moving parts lubricated, you extend the bike’s lifespan, preserve the vibrancy of painted surfaces, and minimize the risk of flat spots or battery drain. These efforts aren’t just for appearance’s sake—they keep critical systems functional so you can focus on riding, not repairing, when good weather returns. Common Things to Avoid in Storing Motorcycle During Rainy Season Leaving your motorcycle exposed to rain Ignoring tire pressure before storage Overlooking fuel system preparation Failing to cover electrical components Improper lubrication of moving parts Each mistake above might seem “small,” but combined, they spell disaster for even the best machines. Leaving your bike exposed allows water to pool on surfaces, encouraging rust and corrosion on metal parts and inviting water to seep into the fuel system. Ignoring tire pressure risks flat spots or potential sidewall damage, making your next ride unsafe and uncomfortable. Neglecting to protect your electrical components risks short circuits, while failing to lubricate moving parts can cause seizing, binding, or premature wear—none are issues you want to confront when the riding season resumes. Expert Advice: Do’s and Don’ts to Store Your Motorcycle in the Wet Season Motorcycle Storage Preparation Checklist Check and adjust tire pressure Clean and dry thoroughly Use premium covers to store your motorcycle Remove or treat fuel with stabilizer Regularly inspect during storage Follow this checklist every time you store your motorcycle for the rainy season. Start by inflating your tires to the correct pressure to prevent flat spots and sidewall cracking over an extended period. Wash and dry your bike meticulously to avoid trapping moisture under dirt or mud, especially in hard-to-reach areas such as under the seat or behind the exhaust pipe. A clean motorcycle is less prone to corrosion, and it allows you to spot minor issues before they turn into major headaches. Invest in a high-quality bike cover—not just any tarp—to guard against rain, humidity, and dust. If possible, store your bike indoors or under a shelter where environmental conditions are stable. The fuel system is especially vulnerable—either treat the remaining gasoline with a fuel stabilizer or drain it entirely if storing for an extended period. Don’t forget to check up on your motorcycle every few weeks. Give the tires a spin, inspect for moisture intrusion, and ensure your battery stays charged (consider using a battery tender for extra protection). Deep Dive: Key Areas to Monitor When You Store Your Motorcycle Why Tire Pressure Matters in Rainy Season Motorcycle Storage Ignoring tire pressure before storing your bike is a classic pitfall. Rubber degrades more quickly in changing temperatures and high humidity. Low pressure leaves your tires vulnerable to flat spots—compressed areas of rubber that don’t flex back after weeks or months of sitting. This damage means you’ll feel rough, thumping rides or, in severe cases, have to replace your tires before the first start of the new riding season. Always inflate the tires to the manufacturer’s recommended (or slightly higher) pressure before storage, and rotate the tires periodically to distribute weight evenly. Remember, it only takes a few weeks for a flat spot to form, especially on thinner or older tires. By ensuring correct pressure and moving your bike every little while, you preserve the roundness and strength of your tires, saving money and avoiding dangerous road vibrations later. The Impact of Moisture on Your Bike’s Electrical System A motorcycle’s electrical system is among the most sensitive components when it comes to rainy season storage. Unprotected wiring, connectors, and the battery itself are highly susceptible to moisture buildup, which can cause corrosion, short circuits, or total electrical failure. Storing your bike near sources of dampness or with high humidity in the garage means moisture can silently creep into switches, under the dashboard, or beneath the seat wiring harnesses. The risk is simple: ignore these components, and you could be met with a dead bike—no ignition, no lights, no security. Use dielectric grease on connectors for extra protection, keep your battery tender connected, and always cover exposed electrical areas. If possible, consider removing the battery entirely for indoor storage, especially for extended periods. Protecting Paint and Metal from Corrosion Exposure to moisture erodes more than just hidden mechanisms; it threatens your motorcycle’s paint and metal parts as well. Rain and humidity are the enemies of any exposed metal, leading to visible rust, pitting, and a gradual dulling of your beautiful finish. Before the rainy season begins, wash, dry, and apply wax to all painted surfaces—this creates a shield that beads off water and prevents corrosive elements from sticking. Don’t forget smaller metal parts such as the kickstand, exhaust pipe, and chain. Use lubricant and rust-prevention sprays designed for motorcycles on these moving or bare parts. Storing your bike under a breathable bike cover offers extra protection against condensation, so you’re rewarded with a shining bike when sunnier days return. Fuel System: Steps to Prevent Rain-Induced Issues The fuel system often suffers most from improper storage. Moisture can condense inside your gas tank, diluting the fuel, and resulting in difficult starts or internal rust. If your bike features a carbureted engine, always drain the carburetor before storage. For modern bikes, add a fuel stabilizer to a nearly full tank, run the engine to circulate the treated gasoline, and seal the cap tightly to limit airflow. Don’t ignore your oil and filter before storing, either—a fresh change helps prevent internal corrosion and acids from old oil eating away at internal parts. At the same time, make sure your exhaust pipe is clear and dry; stick a cover or block in its opening if rodents or excessive moisture are an issue in your storage area. These extra steps keep your motorcycle ready to ride and reduce nasty surprises when you fire up the engine after a long rainy stretch. Table: Things to Avoid in Storing Motorcycle During Rainy Season Vs. Best Practices Mistake Why to Avoid Correct Method Leaving the bike exposed to rain Water causes rust on metal parts, ruins paint, and can reach electronics Use a premium, waterproof cover and store your bike indoors when possible Ignoring tire pressure Results in flat spots, compromised sidewalls, and poor handling next season Inflate tires to correct pressure and rotate tires periodically Overlooking fuel system preparation Leads to oxidation, clogs, and corrosion inside the tank and fuel lines Add fuel stabilizer or drain tank, run engine to circulate, change the oil and filter before storing Not covering electrical parts Increases risk of moisture-induced short circuits and corrosion Seal connectors with dielectric grease and use a weatherproof cover Failing to lubricate moving parts Parts seize up, bind, or corrode, increasing wear and tear Apply lubricant to all chains, levers, cables, and visible metal QUOTE: Seasoned Rider's Perspective on Motorcycle Storage ‘Most motorcycles lost to rust aren’t from riding in the rain—it’s from storing them wrong when the skies open up. Preparation is everything.’ — Local mechanic, Nasty Performance Motorcycle Shop Watch the full expert step-by-step storage demonstration on safe rainy season preparation. FAQs on Things to Avoid in Storing Motorcycle During Rainy Season What happens if you leave your motorcycle outside during heavy rain? Leaving your motorcycle outside exposes it to direct rain, which can lead to rapid rust on exposed metal parts, water ingress in the fuel system and exhaust pipe, and electrical issues. Over time, these can cause significant, sometimes irreversible, damage that affects both the appearance and performance of your motorcycle. Is it necessary to start the motorcycle occasionally during the rainy season? Yes, starting your motorcycle occasionally helps keep moving parts lubricated, prevents seals from drying out, and allows you to check for issues like moisture buildup or battery drain. Aim for a short run every few weeks, combined with a quick inspection for leaks or corrosion. Can using a tarp damage your motorcycle’s paint job? Standard plastic tarps can indeed trap moisture, rub against the paint job during wind, and lead to scratches or dull spots. Always use a purpose-made, breathable bike cover to protect both paint and metal without causing long-term harm. How often should you check tire pressure while storing your motorcycle? You should check your tire pressure at least once a month during storage to prevent flat spots and keep the tires in good condition. If you can, rotate the tires or roll the bike forward a bit to change the contact point and further reduce risk. Addressing Common Concerns: People Also Ask What is the 1% rule in motorcycles? Answer: The "1% rule" refers to a long-standing saying within the motorcycle community, suggesting that only 1% of bikers are outlaws or operate outside the law. The vast majority—99%—abide by rules and ride for recreation and community. It’s important to note this concept is more cultural lore and not related to motorcycle storage practices. What does 2 fingers down mean to bikers? Answer: When a biker extends two fingers down towards the road, it’s a sign of mutual respect and camaraderie. It symbolizes the bond among riders, wishing "safe travels" or "keep two wheels on the ground"—a reminder to ride safely, especially as you get your bike ready to ride after storage. What is the 4 second rule on a motorcycle? Answer: The “4 second rule” is a safety guideline for riders, advising you to keep at least a four-second gap between you and the vehicle ahead. This gives you plenty of time to react, especially valuable when returning to the road after a long storage period and your reflexes may need readjusting. Can motorcycles be left in the rain? Answer: While motorcycles are built to handle some weather, leaving them unprotected in the rain for prolonged periods will almost always lead to issues like rust, corrosion, faded paint, and electrical malfunctions. If you must store your bike outside, always use a quality, waterproof bike cover and inspect the bike regularly for emerging problems. Key Takeaways on Things to Avoid in Storing Motorcycle During Rainy Season Never leave your bike exposed to rain for prolonged periods. Always check tire pressure before and during storage. Thorough cleaning and drying prevent long-term damage. Using high-quality covers is essential for protection. Routine checks can save you from costly repairs. Final Thoughts: Safeguard Your Ride With Smart Storage Store Your Motorcycle the Right Way — Protect It This Rainy Season ‘Prevention is the best protection for your motorcycle—never underestimate the rainy season’s impact on storage decisions.’ Ready for Expert Help? Call Nasty Performance Motorcycle Shop Today: 847-458-4858 If you’re looking to elevate your motorcycle care beyond rainy season storage, consider broadening your knowledge with advanced maintenance strategies that adapt to every season. Discover how proactive habits and expert insights can help you avoid costly surprises and keep your bike performing at its best, no matter the weather. For a comprehensive guide to year-round protection and performance, explore seasonal bike care secrets every rider must know—your next step toward mastering motorcycle longevity and reliability.

© 2026 Nasty Performance All Rights Reserved. 2035 S. Eastwood Dr., Woodstock, IL 60098 . Contact Us . Terms of Service . Privacy Policy

eyJjb21wYW55IjoiTmFzdHkgUGVyZm9ybWFuY2UiLCJhZGRyZXNzIjoiMjAzNSBTLiBFYXN0d29vZCBEci4iLCJjaXR5IjoiV29vZHN0b2NrIiwic3RhdGUiOiJJTCIsInppcCI6IjYwMDk4IiwiZW1haWwiOiJuYXRlQG5hc3R5cGVyZm9ybWFuY2UuY29tIiwidG9zIjoiUEhBK1BITjBjbTl1Wno0OFpXMCtWMmhsYmlCNWIzVWdjMmxuYmkxcGJpQjNhWFJvSUhWekxDQjViM1VnWVhKbElHZHBkbWx1WnladVluTndPeUI1YjNWeUlIQmxjbTFwYzNOcGIyNGdZVzVrSUdOdmJuTmxiblFnZEc4Z2MyVnVaQ0I1YjNVZ1pXMWhhV3dnWVc1a0wyOXlJRk5OVXlCMFpYaDBJRzFsYzNOaFoyVnpMaUJDZVNCamFHVmphMmx1WnlCMGFHVWdWR1Z5YlhNZ1lXNWtJRU52Ym1ScGRHbHZibk1nWW05NElHRnVaQ0JpZVNCemFXZHVhVzVuSUdsdUlIbHZkU0JoZFhSdmJXRjBhV05oYkd4NUlHTnZibVpwY20wZ2RHaGhkQ0I1YjNVZ1lXTmpaWEIwSUdGc2JDQjBaWEp0Y3lCcGJpQjBhR2x6SUdGbmNtVmxiV1Z1ZEM0OEwyVnRQand2YzNSeWIyNW5Qand2Y0Q0S0NqeHdQanhoSUdoeVpXWTlJbWgwZEhBNkx5OTNkM2N1WjI5dloyeGxMbU52YlNJK2FIUjBjRG92TDNkM2R5NW5iMjluYkdVdVkyOXRQQzloUGp3dmNENEtDanh3UGladVluTndPend2Y0Q0S0NqeHdQanh6ZEhKdmJtYytVMFZTVmtsRFJUd3ZjM1J5YjI1blBqd3ZjRDRLQ2p4d1BsZGxJSEJ5YjNacFpHVWdZU0J6WlhKMmFXTmxJSFJvWVhRZ1kzVnljbVZ1ZEd4NUlHRnNiRzkzY3lCNWIzVWdkRzhnY21WalpXbDJaU0J5WlhGMVpYTjBjeUJtYjNJZ1ptVmxaR0poWTJzc0lHTnZiWEJoYm5rZ2FXNW1iM0p0WVhScGIyNHNJSEJ5YjIxdmRHbHZibUZzSUdsdVptOXliV0YwYVc5dUxDQmpiMjF3WVc1NUlHRnNaWEowY3l3Z1kyOTFjRzl1Y3l3Z1pHbHpZMjkxYm5SeklHRnVaQ0J2ZEdobGNpQnViM1JwWm1sallYUnBiMjV6SUhSdklIbHZkWElnWlcxaGFXd2dZV1JrY21WemN5QmhibVF2YjNJZ1kyVnNiSFZzWVhJZ2NHaHZibVVnYjNJZ1pHVjJhV05sTGlCWmIzVWdkVzVrWlhKemRHRnVaQ0JoYm1RZ1lXZHlaV1VnZEdoaGRDQjBhR1VnVTJWeWRtbGpaU0JwY3lCd2NtOTJhV1JsWkNBbWNYVnZkRHRCVXkxSlV5WnhkVzkwT3lCaGJtUWdkR2hoZENCM1pTQmhjM04xYldVZ2JtOGdjbVZ6Y0c5dWMybGlhV3hwZEhrZ1ptOXlJSFJvWlNCMGFXMWxiR2x1WlhOekxDQmtaV3hsZEdsdmJpd2diV2x6TFdSbGJHbDJaWEo1SUc5eUlHWmhhV3gxY21VZ2RHOGdjM1J2Y21VZ1lXNTVJSFZ6WlhJZ1kyOXRiWFZ1YVdOaGRHbHZibk1nYjNJZ2NHVnljMjl1WVd4cGVtRjBhVzl1SUhObGRIUnBibWR6TGp3dmNENEtDanh3UGxsdmRTQmhjbVVnY21WemNHOXVjMmxpYkdVZ1ptOXlJRzlpZEdGcGJtbHVaeUJoWTJObGMzTWdkRzhnZEdobElGTmxjblpwWTJVZ1lXNWtJSFJvWVhRZ1lXTmpaWE56SUcxaGVTQnBiblp2YkhabElIUm9hWEprSUhCaGNuUjVJR1psWlhNZ0tITjFZMmdnWVhNZ1UwMVRJSFJsZUhRZ2JXVnpjMkZuWlhNc0lFbHVkR1Z5Ym1WMElITmxjblpwWTJVZ2NISnZkbWxrWlhJZ2IzSWdZMlZzYkhWc1lYSWdZV2x5ZEdsdFpTQmphR0Z5WjJWektTNGdXVzkxSUdGeVpTQnlaWE53YjI1emFXSnNaU0JtYjNJZ2RHaHZjMlVnWm1WbGN5d2dhVzVqYkhWa2FXNW5JSFJvYjNObElHWmxaWE1nWVhOemIyTnBZWFJsWkNCM2FYUm9JSFJvWlNCa2FYTndiR0Y1SUc5eUlHUmxiR2wyWlhKNUlHOW1JR1ZoWTJnZ1UwMVRJSFJsZUhRZ2JXVnpjMkZuWlNCelpXNTBJSFJ2SUhsdmRTQmllU0IxY3k0Z1NXNGdZV1JrYVhScGIyNHNJSGx2ZFNCdGRYTjBJSEJ5YjNacFpHVWdZVzVrSUdGeVpTQnlaWE53YjI1emFXSnNaU0JtYjNJZ1lXeHNJR1Z4ZFdsd2JXVnVkQ0J1WldObGMzTmhjbmtnZEc4Z1lXTmpaWE56SUhSb1pTQlRaWEoyYVdObElHRnVaQ0J5WldObGFYWmxJSFJvWlNCVFRWTWdkR1Y0ZENCdFpYTnpZV2RsY3k0Z1YyVWdaRzhnYm05MElHTm9ZWEpuWlNCaGJua2dabVZsY3lCbWIzSWdaR1ZzYVhabGNua2diMllnWlcxaGFXd2diM0lnVTAxVExpQlVhR2x6SUdseklHRWdabkpsWlNCelpYSjJhV05sSUhCeWIzWnBaR1ZrSUdKNUlIVnpMaUJJYjNkbGRtVnlMQ0J3YkdWaGMyVWdZMmhsWTJzZ2QybDBhQ0I1YjNWeUlHbHVkR1Z5Ym1WMElITmxjblpwWTJVZ2NISnZkbWxrWlhJZ1lXNWtJR05sYkd4MWJHRnlJR05oY25KcFpYSWdabTl5SUdGdWVTQmphR0Z5WjJWeklIUm9ZWFFnYldGNUlHbHVZM1Z5SUdGeklHRWdjbVZ6ZFd4MElHWnliMjBnY21WalpXbDJhVzVuSUdWdFlXbHNJR0Z1WkNCVFRWTWdkR1Y0ZENCdFpYTnpZV2RsY3lCMGFHRjBJSGRsSUdSbGJHbDJaWElnZFhCdmJpQjViM1Z5SUc5d2RDMXBiaUJoYm1RZ2NtVm5hWE4wY21GMGFXOXVJSGRwZEdnZ2IzVnlJR1Z0WVdsc0lHRnVaQ0JUVFZNZ2MyVnlkbWxqWlhNdUlGbHZkU0JqWVc0Z1kyRnVZMlZzSUdGMElHRnVlU0IwYVcxbExpQktkWE4wSUhSbGVIUWdKbkYxYjNRN1UxUlBVQ1p4ZFc5ME95QjBieVp1WW5Od096eG9hV2RvYkdsbmFIUWdZMnhoYzNNOUltTnZiWEJoYm5sVFRWTlFhRzl1WlZWd1pHRjBaU0krYm5Wc2JEd3ZhR2xuYUd4cFoyaDBQaTRnUVdaMFpYSWdlVzkxSUhObGJtUWdkR2hsSUZOTlV5QnRaWE56WVdkbElDWnhkVzkwTzFOVVQxQW1jWFZ2ZERzZ2RHOGdkWE1zSUhkbElIZHBiR3dnYzJWdVpDQjViM1VnWVc0Z1UwMVRJRzFsYzNOaFoyVWdkRzhnWTI5dVptbHliU0IwYUdGMElIbHZkU0JvWVhabElHSmxaVzRnZFc1emRXSnpZM0pwWW1Wa0xpQkJablJsY2lCMGFHbHpMQ0I1YjNVZ2QybHNiQ0J1YnlCc2IyNW5aWElnY21WalpXbDJaU0JUVFZNZ2JXVnpjMkZuWlhNZ1puSnZiU0IxY3k0OEwzQStDZ284Y0Q0OGMzUnliMjVuUGxsUFZWSWdVa1ZIU1ZOVVVrRlVTVTlPSUU5Q1RFbEhRVlJKVDA1VFBDOXpkSEp2Ym1jK1BDOXdQZ29LUEhBK1NXNGdZMjl1YzJsa1pYSmhkR2x2YmlCdlppQjViM1Z5SUhWelpTQnZaaUIwYUdVZ1UyVnlkbWxqWlN3Z2VXOTFJR0ZuY21WbElIUnZPand2Y0Q0S0NqeHZiRDRLQ1R4c2FUNXdjbTkyYVdSbElIUnlkV1VzSUdGalkzVnlZWFJsTENCamRYSnlaVzUwSUdGdVpDQmpiMjF3YkdWMFpTQnBibVp2Y20xaGRHbHZiaUJoWW05MWRDQjViM1Z5YzJWc1ppQmhjeUJ3Y205dGNIUmxaQ0JpZVNCMGFHVWdVMlZ5ZG1salpTWWpNems3Y3lCeVpXZHBjM1J5WVhScGIyNGdabTl5YlNBb2MzVmphQ0JwYm1admNtMWhkR2x2YmlCaVpXbHVaeUIwYUdVZ0puRjFiM1E3VW1WbmFYTjBjbUYwYVc5dUlFUmhkR0VtY1hWdmREc3BJR0Z1WkR3dmJHaytDZ2s4YkdrK2JXRnBiblJoYVc0Z1lXNWtJSEJ5YjIxd2RHeDVJSFZ3WkdGMFpTQjBhR1VnVW1WbmFYTjBjbUYwYVc5dUlFUmhkR0VnZEc4Z2EyVmxjQ0JwZENCMGNuVmxMQ0JoWTJOMWNtRjBaU3dnWTNWeWNtVnVkQ0JoYm1RZ1kyOXRjR3hsZEdVdUlFbG1JSGx2ZFNCd2NtOTJhV1JsSUdGdWVTQnBibVp2Y20xaGRHbHZiaUIwYUdGMElHbHpJSFZ1ZEhKMVpTd2dhVzVoWTJOMWNtRjBaU3dnYm05MElHTjFjbkpsYm5RZ2IzSWdhVzVqYjIxd2JHVjBaU3dnYjNJZ2QyVWdhR0YyWlNCeVpXRnpiMjVoWW14bElHZHliM1Z1WkhNZ2RHOGdjM1Z6Y0dWamRDQjBhR0YwSUhOMVkyZ2dhVzVtYjNKdFlYUnBiMjRnYVhNZ2RXNTBjblZsTENCcGJtRmpZM1Z5WVhSbExDQnViM1FnWTNWeWNtVnVkQ0J2Y2lCcGJtTnZiWEJzWlhSbExDQjNaU0JvWVhabElIUm9aU0J5YVdkb2RDQjBieUJ6ZFhOd1pXNWtJRzl5SUR4emRISnZibWMrUEhOd1lXNGdjM1I1YkdVOUltTnZiRzl5T2lOR1JqQXdNREE3SWo1MFpYSnRhVzVoZEdVZ2VXOTFjaUJoWTJOdmRXNTBMM0J5YjJacGJHVWdZVzVrSUhKbFpuVnpaU0JoYm5rZ1lXNWtJR0ZzYkNCamRYSnlaVzUwSUc5eUlHWjFkSFZ5WlNCMWMyVWdiMllnZEdobElGTmxjblpwWTJVZ0tHOXlJR0Z1ZVNCd2IzSjBhVzl1SUhSb1pYSmxiMllwTGp3dmMzQmhiajQ4TDNOMGNtOXVaejQ4TDJ4cFBnbzhMMjlzUGdvS1BIQStKbTVpYzNBN1BDOXdQZ284YUdsbmFHeHBaMmgwSUdOc1lYTnpQU0pqYjIxd1lXNTVUbUZ0WlZWd1pHRjBaU0krVG1GemRIa2dVR1Z5Wm05eWJXRnVZMlU4TDJocFoyaHNhV2RvZEQ0OFluSWdMejRLUEdocFoyaHNhV2RvZENCamJHRnpjejBpWTI5dGNHRnVlVUZrWkhKbGMzTlZjR1JoZEdVaVBqSXdNelVnVXk0Z1JXRnpkSGR2YjJRZ1JISXVMQ0JYYjI5a2MzUnZZMnNzSUVsTUlEWXdNRGs0UEM5b2FXZG9iR2xuYUhRK1BHSnlJQzgrQ2p4b2FXZG9iR2xuYUhRZ1kyeGhjM005SW1OdmJYQmhibmxRYUc5dVpWVndaR0YwWlNJK0tEZzBOeWtnTkRVNExUUTROVGc4TDJocFoyaHNhV2RvZEQ0OFluSWdMejRLUEdocFoyaHNhV2RvZENCamJHRnpjejBpWTI5dGNHRnVlVVZ0WVdsc1ZYQmtZWFJsSWo1dVlYUmxRRzVoYzNSNWNHVnlabTl5YldGdVkyVXVZMjl0UEM5b2FXZG9iR2xuYUhRKyIsInByaXZhY3kiOiJQSEErUEhOMGNtOXVaejVRVWtsV1FVTlpQQzl6ZEhKdmJtYytQQzl3UGdvS1BIQStQSE4wY205dVp6NVVhR1VnYVc1bWIzSnRZWFJwYjI0Z2NISnZkbWxrWldRZ1pIVnlhVzVuSUhSb2FYTWdjbVZuYVhOMGNtRjBhVzl1SUdseklHdGxjSFFnY0hKcGRtRjBaU0JoYm1RZ1kyOXVabWxrWlc1MGFXRnNMQ0JoYm1RZ2QybHNiQ0J1WlhabGNpQmlaU0JrYVhOMGNtbGlkWFJsWkN3Z1kyOXdhV1ZrTENCemIyeGtMQ0IwY21Ga1pXUWdiM0lnY0c5emRHVmtJR2x1SUdGdWVTQjNZWGtzSUhOb1lYQmxJRzl5SUdadmNtMHVJRlJvYVhNZ2FYTWdiM1Z5SUdkMVlYSmhiblJsWlM0OEwzTjBjbTl1Wno0OEwzQStDZ284Y0Q0OGMzUnliMjVuUGtsT1JFVk5Ua2xVV1R3dmMzUnliMjVuUGp3dmNENEtDanh3UGp4bGJUNVpiM1VnWVdkeVpXVWdkRzhnYVc1a1pXMXVhV1o1SUdGdVpDQm9iMnhrSUhWekxDQmhibVFnYVhSeklITjFZbk5wWkdsaGNtbGxjeXdnWVdabWFXeHBZWFJsY3l3Z2IyWm1hV05sY25Nc0lHRm5aVzUwY3l3Z1kyOHRZbkpoYm1SbGNuTWdiM0lnYjNSb1pYSWdjR0Z5ZEc1bGNuTXNJR0Z1WkNCbGJYQnNiM2xsWlhNc0lHaGhjbTFzWlhOeklHWnliMjBnWVc1NUlHTnNZV2x0SUc5eUlHUmxiV0Z1WkN3Z2FXNWpiSFZrYVc1bklISmxZWE52Ym1GaWJHVWdZWFIwYjNKdVpYbHpKaU16T1RzZ1ptVmxjeXdnYldGa1pTQmllU0JoYm5rZ2RHaHBjbVFnY0dGeWRIa2daSFZsSUhSdklHOXlJR0Z5YVhOcGJtY2diM1YwSUc5bUlFTnZiblJsYm5RZ2VXOTFJSEpsWTJWcGRtVXNJSE4xWW0xcGRDd2djbVZ3Ykhrc0lIQnZjM1FzSUhSeVlXNXpiV2wwSUc5eUlHMWhhMlVnWVhaaGFXeGhZbXhsSUhSb2NtOTFaMmdnZEdobElGTmxjblpwWTJVc0lIbHZkWElnZFhObElHOW1JSFJvWlNCVFpYSjJhV05sTENCNWIzVnlJR052Ym01bFkzUnBiMjRnZEc4Z2RHaGxJRk5sY25acFkyVXNJSGx2ZFhJZ2RtbHZiR0YwYVc5dUlHOW1JSFJvWlNCVVQxTXNJRzl5SUhsdmRYSWdkbWx2YkdGMGFXOXVJRzltSUdGdWVTQnlhV2RvZEhNZ2IyWWdZVzV2ZEdobGNpNDhMMlZ0UGp3dmNENEtDanh3UGp4emRISnZibWMrUkVsVFEweEJTVTFGVWlCUFJpQlhRVkpTUVU1VVNVVlRQQzl6ZEhKdmJtYytQQzl3UGdvS1BIQStQSE4wY205dVp6NVpUMVVnUlZoUVVrVlRVMHhaSUZWT1JFVlNVMVJCVGtRZ1FVNUVJRUZIVWtWRklGUklRVlE2UEM5emRISnZibWMrUEM5d1Bnb0tQRzlzUGdvSlBHeHBQbGxQVlZJZ1ZWTkZJRTlHSUZSSVJTQlRSVkpXU1VORklFbFRJRUZVSUZsUFZWSWdVMDlNUlNCU1NWTkxMaUJVU0VVZ1UwVlNWa2xEUlNCSlV5QlFVazlXU1VSRlJDQlBUaUJCVGlBbWNYVnZkRHRCVXlCSlV5WnhkVzkwT3lCQlRrUWdKbkYxYjNRN1FWTWdRVlpCU1V4QlFreEZKbkYxYjNRN0lFSkJVMGxUTGlBc0xpQkJUa1FnVlZNc0lFbFVKaU16T1R0VElFTlZVMVJQVFVWU1V5d2dSVmhRVWtWVFUweFpJRVJKVTBOTVFVbE5VeUJCVEV3Z1YwRlNVa0ZPVkVsRlV5QlBSaUJCVGxrZ1MwbE9SQ3dnVjBoRlZFaEZVaUJGV0ZCU1JWTlRJRTlTSUVsTlVFeEpSVVFzSUVsT1EweFZSRWxPUnl3Z1FsVlVJRTVQVkNCTVNVMUpWRVZFSUZSUElGUklSU0JKVFZCTVNVVkVJRmRCVWxKQlRsUkpSVk1nVDBZZ1RVVlNRMGhCVGxSQlFrbE1TVlJaTENCR1NWUk9SVk5USUVaUFVpQkJJRkJCVWxSSlExVk1RVklnVUZWU1VFOVRSU0JCVGtRZ1RrOU9MVWxPUmxKSlRrZEZUVVZPVkM0OEwyeHBQZ29KUEd4cFBrMUJTMFZUSUU1UElGZEJVbEpCVGxSWklGUklRVlFnS0drcElGUklSU0JUUlZKV1NVTkZJRmRKVEV3Z1RVVkZWQ0JaVDFWU0lGSkZVVlZKVWtWTlJVNVVVeXdnS0dscEtTQlVTRVVnVTBWU1ZrbERSU0JYU1V4TUlFSkZJRlZPU1U1VVJWSlNWVkJVUlVRc0lGUkpUVVZNV1N3Z1UwVkRWVkpGTENCUFVpQkZVbEpQVWkxR1VrVkZMQ0FvYVdscEtTQlVTRVVnVWtWVFZVeFVVeUJVU0VGVUlFMUJXU0JDUlNCUFFsUkJTVTVGUkNCR1VrOU5JRlJJUlNCVlUwVWdUMFlnVkVoRklGTkZVbFpKUTBVZ1YwbE1UQ0JDUlNCQlEwTlZVa0ZVUlNCUFVpQlNSVXhKUVVKTVJTd2dRVTVFSUNocGRpa2dRVTVaSUVWU1VrOVNVeUJKVGlCVVNFVWdVMDlHVkZkQlVrVWdWMGxNVENCQ1JTQkRUMUpTUlVOVVJVUXVQQzlzYVQ0S0NUeHNhVDVCVGxrZ1RVRlVSVkpKUVV3Z1JFOVhUa3hQUVVSRlJDQlBVaUJQVkVoRlVsZEpVMFVnVDBKVVFVbE9SVVFnVkVoU1QxVkhTQ0JVU0VVZ1ZWTkZJRTlHSUZSSVJTQlRSVkpXU1VORklFbFRJRVJQVGtVZ1FWUWdXVTlWVWlCUFYwNGdSRWxUUTFKRlZFbFBUaUJCVGtRZ1VrbFRTeUJCVGtRZ1ZFaEJWQ0JaVDFVZ1YwbE1UQ0JDUlNCVFQweEZURmtnVWtWVFVFOU9VMGxDVEVVZ1JrOVNJRUZPV1NCRVFVMUJSMFVnVkU4Z1dVOVZVaUJEVDAxUVZWUkZVaUJUV1ZOVVJVMGdUMUlnVEU5VFV5QlBSaUJFUVZSQklGUklRVlFnVWtWVFZVeFVVeUJHVWs5TklGUklSU0JFVDFkT1RFOUJSQ0JQUmlCQlRsa2dVMVZEU0NCTlFWUkZVa2xCVEM0OEwyeHBQZ29KUEd4cFBrNVBJRUZFVmtsRFJTQlBVaUJKVGtaUFVrMUJWRWxQVGl3Z1YwaEZWRWhGVWlCUFVrRk1JRTlTSUZkU1NWUlVSVTRzSUU5Q1ZFRkpUa1ZFSUVKWklGbFBWU0JHVWs5TklFOVNJRlJJVWs5VlIwZ2dUMUlnUmxKUFRTQlVTRVVnVTBWU1ZrbERSU0JUU0VGTVRDQkRVa1ZCVkVVZ1FVNVpJRmRCVWxKQlRsUlpJRTVQVkNCRldGQlNSVk5UVEZrZ1UxUkJWRVZFSUVsT0lGUklSU0JVVDFNdVBDOXNhVDRLUEM5dmJENEtDanh3UGp4emRISnZibWMrVEVsTlNWUkJWRWxQVGlCUFJpQk1TVUZDU1V4SlZGazhMM04wY205dVp6NDhMM0ErQ2dvOGNENVpUMVVnUlZoUVVrVlRVMHhaSUZWT1JFVlNVMVJCVGtRZ1FVNUVJRUZIVWtWRklGUklRVlFnUVU1RUlGTklRVXhNSUU1UFZDQkNSU0JNU1VGQ1RFVWdSazlTSUVGT1dTQkVTVkpGUTFRc0lFbE9SRWxTUlVOVUxDQkpUa05KUkVWT1ZFRk1MQ0JUVUVWRFNVRk1MQ0JEVDA1VFJWRlZSVTVVU1VGTUlFOVNJRVZZUlUxUVRFRlNXU0JFUVUxQlIwVlRMQ0JKVGtOTVZVUkpUa2NnUWxWVUlFNVBWQ0JNU1UxSlZFVkVJRlJQTENCRVFVMUJSMFZUSUVaUFVpQk1UMU5USUU5R0lGQlNUMFpKVkZNc0lFZFBUMFJYU1V4TUxDQlZVMFVzSUVSQlZFRWdUMUlnVDFSSVJWSWdTVTVVUVU1SFNVSk1SU0JNVDFOVFJWTWdLRVZXUlU0Z1NVWWdTRUZUSUVKRlJVNGdRVVJXU1ZORlJDQlBSaUJVU0VVZ1VFOVRVMGxDU1V4SlZGa2dUMFlnVTFWRFNDQkVRVTFCUjBWVEtTd2dVa1ZUVlV4VVNVNUhJRVpTVDAwNlBDOXdQZ29LUEc5c1Bnb0pQR3hwUGxSSVJTQlZVMFVnVDFJZ1ZFaEZJRWxPUVVKSlRFbFVXU0JVVHlCVlUwVWdWRWhGSUZORlVsWkpRMFU3UEM5c2FUNEtDVHhzYVQ1VVNFVWdRMDlUVkNCUFJpQlFVazlEVlZKRlRVVk9WQ0JQUmlCVFZVSlRWRWxVVlZSRklFZFBUMFJUSUVGT1JDQlRSVkpXU1VORlV5QlNSVk5WVEZSSlRrY2dSbEpQVFNCQlRsa2dSMDlQUkZNc0lFUkJWRUVzSUVsT1JrOVNUVUZVU1U5T0lFOVNJRk5GVWxaSlEwVlRJRkJWVWtOSVFWTkZSQ0JQVWlCUFFsUkJTVTVGUkNCUFVpQk5SVk5UUVVkRlV5QlNSVU5GU1ZaRlJDQlBVaUJVVWtGT1UwRkRWRWxQVGxNZ1JVNVVSVkpGUkNCSlRsUlBJRlJJVWs5VlIwZ2dUMUlnUmxKUFRTQlVTRVVnVTBWU1ZrbERSVHM4TDJ4cFBnb0pQR3hwUGxWT1FWVlVTRTlTU1ZwRlJDQkJRME5GVTFNZ1ZFOGdUMUlnUVV4VVJWSkJWRWxQVGlCUFJpQlpUMVZTSUZSU1FVNVRUVWxUVTBsUFRsTWdUMUlnUkVGVVFUczhMMnhwUGdvSlBHeHBQbE5VUVZSRlRVVk9WRk1nVDFJZ1EwOU9SRlZEVkNCUFJpQkJUbGtnVkVoSlVrUWdVRUZTVkZrZ1QwNGdWRWhGSUZORlVsWkpRMFU3SUU5U1BDOXNhVDRLQ1R4c2FUNUJUbGtnVDFSSVJWSWdUVUZVVkVWU0lGSkZURUZVU1U1SElGUlBJRlJJUlNCVFJWSldTVU5GTGp3dmJHaytDand2YjJ3K0NnbzhjRDQ4ZFQ1Q2VTQnlaV2RwYzNSbGNtbHVaeUJoYm1RZ2MzVmljMk55YVdKcGJtY2dkRzhnYjNWeUlHVnRZV2xzSUdGdVpDQlRUVk1nYzJWeWRtbGpaU3dnWW5rZ2IzQjBMV2x1TENCdmJteHBibVVnY21WbmFYTjBjbUYwYVc5dUlHOXlJR0o1SUdacGJHeHBibWNnYjNWMElHRWdZMkZ5WkN3Z0puRjFiM1E3ZVc5MUlHRm5jbVZsSUhSdklIUm9aWE5sSUZSRlVrMVRJRTlHSUZORlVsWkpRMFVtY1hWdmREc2dZVzVrSUhsdmRTQmhZMnR1YjNkc1pXUm5aU0JoYm1RZ2RXNWtaWEp6ZEdGdVpDQjBhR1VnWVdKdmRtVWdkR1Z5YlhNZ2IyWWdjMlZ5ZG1salpTQnZkWFJzYVc1bFpDQmhibVFnWkdWMFlXbHNaV1FnWm05eUlIbHZkU0IwYjJSaGVTNDhMM1UrUEM5d1Bnb0tQSEErSm01aWMzQTdQQzl3UGdvOGFHbG5hR3hwWjJoMElHTnNZWE56UFNKamIyMXdZVzU1VG1GdFpWVndaR0YwWlNJK1RtRnpkSGtnVUdWeVptOXliV0Z1WTJVOEwyaHBaMmhzYVdkb2RENDhZbklnTHo0S1BHaHBaMmhzYVdkb2RDQmpiR0Z6Y3owaVkyOXRjR0Z1ZVVGa1pISmxjM05WY0dSaGRHVWlQakl3TXpVZ1V5NGdSV0Z6ZEhkdmIyUWdSSEl1TENCWGIyOWtjM1J2WTJzc0lFbE1JRFl3TURrNFBDOW9hV2RvYkdsbmFIUStQR0p5SUM4K0NqeG9hV2RvYkdsbmFIUWdZMnhoYzNNOUltTnZiWEJoYm5sUWFHOXVaVlZ3WkdGMFpTSStLRGcwTnlrZ05EVTRMVFE0TlRnOEwyaHBaMmhzYVdkb2RENDhZbklnTHo0S1BHaHBaMmhzYVdkb2RDQmpiR0Z6Y3owaVkyOXRjR0Z1ZVVWdFlXbHNWWEJrWVhSbElqNXVZWFJsUUc1aGMzUjVjR1Z5Wm05eWJXRnVZMlV1WTI5dFBDOW9hV2RvYkdsbmFIUSsifQ==

Terms of Service

Privacy Policy

Core Modal Title

Sorry, no results found

You Might Find These Articles Interesting

T
Please Check Your Email
We Will Be Following Up Shortly
*
*
*