Nasty Performance ~ 847-458-4858 

  • Blog Home
  • Categories
    • Motorcycle Maintenance
    • Riding Tips & Preps
    • Safety & Inspection
    • Customizations & Upgrades
    • DIY Motorcycle Repairs
    • Motocycle Audio Systems
    • Motocycle Seasonal Care & Storage
    • Engine, Electrical Performance
  • Bike Night
  • Nasty Performance Motorcycle Shop
February 27.2026
1 Minute Read

Spring Motorcycle Startup Checklist: Ride Smoothly This Season

Did you know that nearly 60% of riders encounter motorcycle issues after winter storage? That number isn’t just a statistic—it’s a wake-up call. As the daylight lingers longer and the open road beckons, ensuring your bike is ready should be your top priority. This comprehensive spring motorcycle startup checklist will arm you with expert insights, simple step-by-step instructions, and critical maintenance check tips to make your riding season safe and stress-free. Don’t let hidden mechanical gremlins stall your adventures—start strong, ride confidently, and keep your motorcycle in peak working order all season long.

classic motorcycle in a clean garage, rider inspecting the bike for spring motorcycle startup checklist, bright morning light, organized workshop

Unlocking the Essentials: Why Following a Spring Motorcycle Startup Checklist Matters

Every seasoned rider understands the anticipation that builds after a long winter. Yet, jumping onto your motorcycle without a thorough spring motorcycle startup checklist can lead to hiccups that ruin the joy of the first ride. Motorcycle maintenance after storage is more than ticking boxes—it’s about safety, performance, and maximizing the life span of your bike. Skipped maintenance checks can result in issues like dry rot in tires, excessive wear in brake pads, or mysterious electrical problems. Ignoring a step now could mean an unwanted breakdown or costly repairs later in the riding season.

Think of the spring checklist as your best insurance against the side effects of a long winter . It covers everything from fluids to brakes, air filters to spark plugs , making it a vital annual ritual. By methodically following a motorcycle maintenance checklist , you not only prevent issues but also get more acquainted with your machine’s quirks and needs—empowering you for every journey ahead. By making your spring startup part of your riding tradition, you’ll ensure a smoother, safer, and more enjoyable riding season.

Spring Motorcycle Startup Checklist Fact: 60% of Riders Experience Bike Issues After Winter Storage

After months of sitting idle, motorcycles often face issues like dead batteries, flat spots on tires, degraded fluid quality, or seized cables. Statistically, the majority of riders encounter such challenges, emphasizing the importance of a structured spring startup procedure. A well-done maintenance check dramatically reduces unscheduled trips to the mechanic and keeps you safe on the road.

Following a detailed motorcycle maintenance checklist reliably uncovers hidden problems—crucial issues that could otherwise escalate during the rapidly approaching riding season . Taking these preventive measures now not only keeps your ride worry-free but also helps you spot wear and tear that may have started at the end of last season, allowing for timely repairs and part replacements.

What Riders Will Learn from This Spring Motorcycle Startup Checklist

  • Understand the critical motorcycle maintenance tasks required for spring

  • Learn step-by-step maintenance check strategies for the new riding season

  • Discover pro tips from service manuals and industry experts

  • Identify common pitfalls in spring motorcycle startup process

  • Utilize a printable maintenance checklist for hassle-free riding
motorcycle mechanic

Timing and Preparation: Getting Ready for the Riding Season with Your Spring Motorcycle Startup Checklist

When it comes to motorcycle maintenance, timing is everything . Many riders want to roll out at the first hint of warmth, but prepping your motorcycle before the crowds hit the road gives you a distinct advantage. Starting your spring motorcycle startup checklist early helps you address unforeseen issues, order parts if needed, and avoids the rush at service shops.

Dedicating time before the riding season officially begins allows for a relaxed, thorough approach to each maintenance check . You’ll be better able to spot signs of damage from storage, like dry rot or fuel filter degradation. Preparing early ensures that your first ride is about freedom and fun, not fighting unexpected mechanical glitches.

Why March and April Are Ideal for Your Motorcycle Maintenance

Experienced riders and service manuals agree—March and April are the sweet spot for pre-season motorcycle maintenance . These months provide ample time to complete a full inspection before the high-traffic periods. Weather conditions tend to be milder, making it more comfortable to work in your garage or driveway.

Tackling your spring motorcycle startup checklist early also means you’ll beat the rush if you require professional assistance. Replacement parts (like a spark plug or air filter ) are often in high demand when the season picks up. Starting now puts you at the front of the line, ensuring you ride with confidence from day one of the season.

Items Needed Before Starting Your Spring Motorcycle Maintenance Checklist

Gathering your supplies before beginning the spring motorcycle startup checklist streamlines the process and prevents interruptions. At a minimum, you’ll need basic hand tools, a service manual specific to your motorcycle model, a tire pressure gauge, fresh fluids (engine oil, brake fluid, coolant), and new air filters or spark plugs if replacements are due.

Personal safety is crucial during motorcycle maintenance. Equip yourself with gloves, eye protection, and a clean workspace that’s well-lit. Having a notepad or mobile app for logging your checks and findings can serve as an invaluable reference, particularly when ordering replacement parts or scheduling future maintenance. Being prepared sets the tone for a thorough, effective startup.
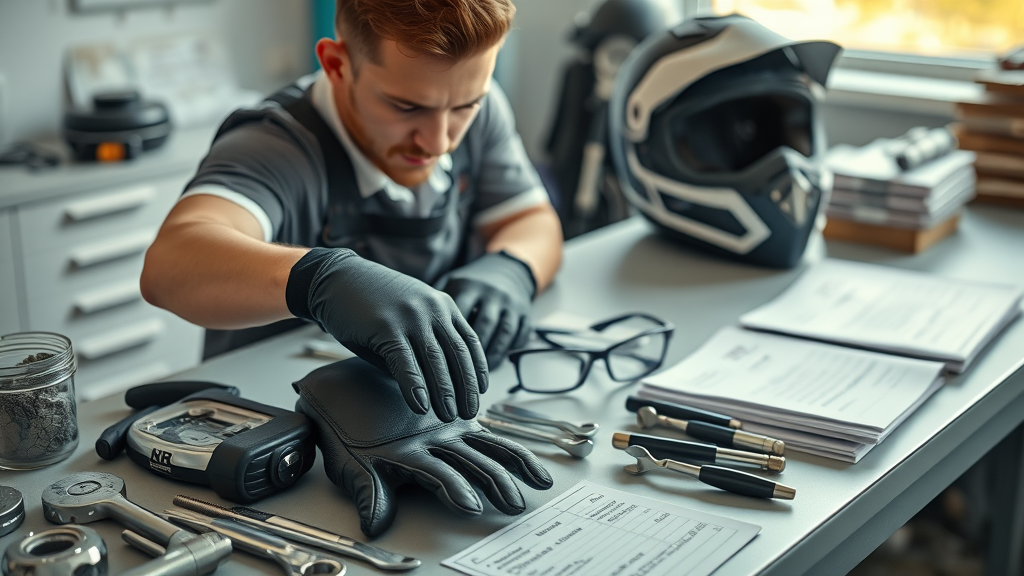
motorcycle maintenance tools kit for spring startup, checklist, safety glasses, and helmet on workbench

Motorcycle Maintenance: Step-by-Step Spring Motorcycle Startup Checklist for a Trouble-Free Season

Comprehensive motorcycle maintenance is more than a quick glance at your machine. A successful spring motorcycle startup checklist begins with organized steps, from visual inspections to checking fluids, tires, and critical components like the drive chain or spark plug . Tackling each item methodically not only increases safety but also boosts your confidence every time you hit the open road.

Below, we break down the essential motorcycle maintenance checklist into manageable tasks, supported by pro insights from service manuals and industry experts. Keep your riding season on track by following each step and logging your work along the way.

Visual Inspection as the First Maintenance Check

  • Check frame and fairings for cracks or damage

  • Inspect undercarriage and visible wiring

Start your maintenance check with a thorough visual review. Closely inspect the frame and fairings for signs of damage sustained during storage. Look out for cracks, bends, or discolored spots. Examine the undercarriage for rust, oil leaks, or loose bolts that might threaten your ride’s integrity.

Don't overlook your bike’s visible wiring. Rodent damage can occur over the long winter , leading to electrical problems that affect your lighting, ignition, and controls. Confirming that wires are intact and well-secured prevents unwelcome surprises when you power up for the first time this riding season .

Fluids and Lubrication: Key Motorcycle Maintenance Checklist Step

  • Engine oil level and condition

  • Brake fluid and clutch fluid check

  • Coolant level inspection

  • Lubricate cables, levers, and pivot points

Fluids are the lifeblood of any motorcycle. Begin by checking your engine oil—both its level and condition. An oil change may be due if the fluid appears dark or sludgy. Inspect your brake fluid and clutch fluid reservoirs next, ensuring they are at proper levels and free of contamination. Neglected fluids can lead to dangerous brake fade or clutch slip during your first rides.

Inspect coolant levels if your bike is liquid-cooled, topping up as needed per your service manual guidelines. Finally, apply fresh lubricant to throttle cables, levers, and pivot points. Neglecting lubrication increases friction, which wears out moving parts and diminishes your control—two things you don’t want compromising your spring rides.

Tire and Wheel Examination for the Riding Season

  • Assess tire pressure and tread depth

  • Inspect wheels for warping or corrosion

Tires form your sole connection to the road, making their health a non-negotiable aspect of the spring motorcycle startup checklist . Check for proper inflation with a reliable tire gauge, always confirming levels against specifications in your service manual. Underinflated or hardened tires from winter storage can develop flat spots or even dry rot .

Inspect tread depth to ensure safe handling and water dispersal, replacing any tire showing significant wear or cracks. Examine wheels for warping, corrosion, or loose spokes, and check for excessive grease or leaks around hub areas. Trust your senses—unusual appears, feels, or sounds often mean it’s time for further inspection or professional help.
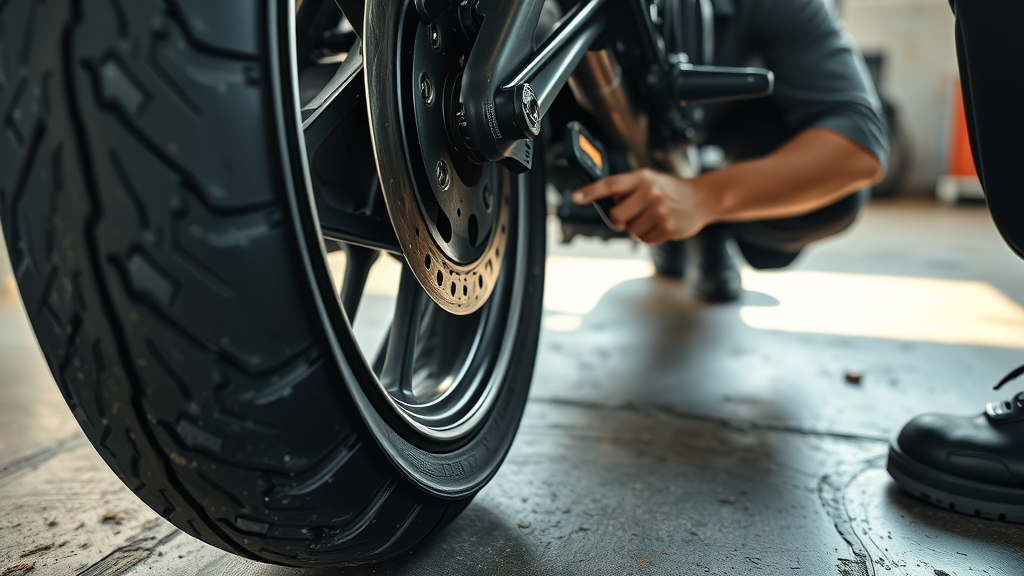
motorcycle tire tread check by technician, digital gauge, spring motorcycle startup checklist, detailed chrome wheel

Battery Check in Your Spring Motorcycle Startup Checklist

  • Test voltage or charge

  • Clean terminals and check secure mounting

Few things are as disheartening as turning your key and hearing only silence. Batteries can lose charge or corrode over a long winter , so a voltage test is critical. Use a multimeter to ensure your battery holds a healthy charge; consider using a trickle charge if needed.

Clean any corrosion from battery terminals and confirm that connections are tight and mounts are secure. Loose or corroded terminals can cause intermittent power loss, creating the illusion of faulty electrical systems. Attending to your battery’s health is a must for a smooth start to your riding season .

Air Filter and Spark Plug Inspection: Crucial Motorcycle Maintenance Checks

  • Replace or clean air filter as needed, per service manual

  • Remove, inspect and gap spark plugs

Your air filter is your engine’s first defense against dust and debris. A clogged air filter strains your engine, limits performance, and increases fuel consumption. Remove it for inspection; clean or replace as outlined in your service manual .

Similarly, remove and check your spark plug for wear, proper gap, and carbon buildup. Replace plugs that show excessive fouling or are past their scheduled interval. Spark plugs are vital for reliable ignition and efficient fuel burning—don’t underestimate their impact on your upcoming rides.

Brakes, Suspension, and Drive System: Vital Points on Your Maintenance Checklist

Safety systems deserve special attention in your spring motorcycle startup checklist. Brakes, suspension, and drive systems take the brunt of wear over every riding season. Their condition can make or break your confidence—literally. Here's how to approach each check to ensure responsive performance for every mile.

Brake Check: Pads, Rotors, and Hydraulic Systems

Inspect your front and rear brake pad thickness, looking for uneven or excessive wear . Pads should not be less than the manufacturer’s minimum; replace any that are close. Evaluate the rotors for grooves, scoring, or warping—problems here compromise stopping ability.

Next, gently squeeze the brake lever and rear brake pedal, watching for sponginess or delayed response. Cloudy or darkened brake fluid means it’s time for a flush and refill. Pay special attention to brake lines ; cracks, leaks, or swelling require immediate action for safe riding.

Suspension: Ensuring Riding Comfort for the New Season

Suspension is central to both handling and comfort. Check for leaks around fork seals and rear shocks; oil weeping is a sure sign of worn seals. Push down on the bike and notice how it responds—bouncy or unresponsive suspension may indicate worn springs or damping components.

Verify that adjustment points (preload, damping) are set appropriately as described in your service manual. Address any clunking or squeaking noises, which may signal dry bushings or loose fasteners. A healthy suspension not only smooths bumps but also maintains the correct geometry for sharp, responsive handling—invaluable at higher speeds.

Drive System: Chain, Belt, or Shaft Maintenance Checklist Steps

Whether your bike uses a chain, drive belt , or shaft, the drive system ensures all engine power reaches the ground. For chains, inspect for kinks, rust, or excessive slack, then adjust and lubricate per your service manual . Proper chain alignment and tension are critical to prevent skipping or early wear.

Check belt drives for fraying, cracks, or uneven wear; replace any component showing signs of damage . If your motorcycle features a shaft drive, inspect fluid levels and seals to ensure no leaks or contamination. Regular attention to the drive system keeps you rolling smoothly—and your ride whisper-quiet.
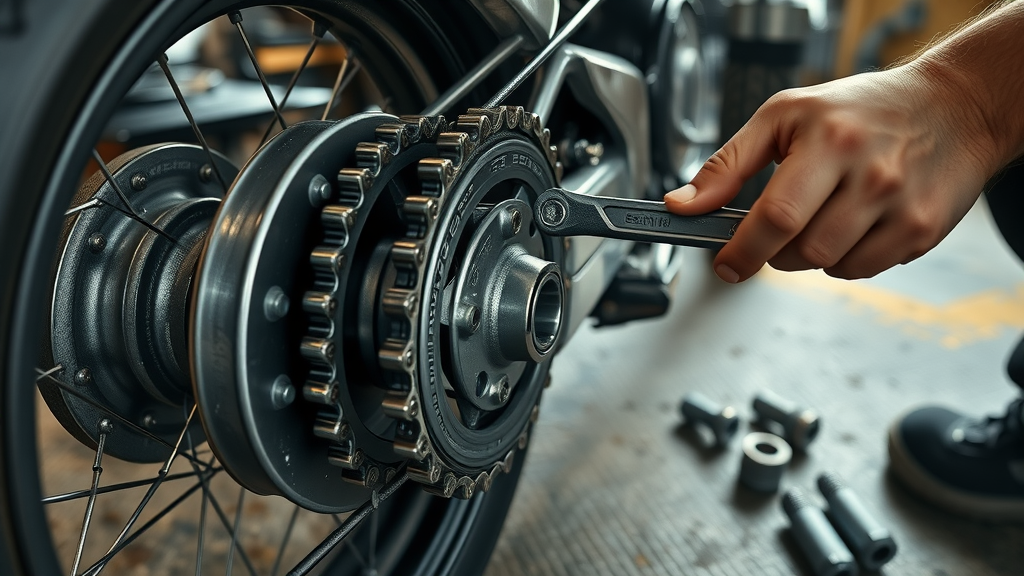
closeup motorcycle chain and rear sprocket maintenance check, technician inspecting tension, detailed for spring startup checklist

Lighting, Controls, and Safety Features: Finalizing Your Spring Motorcycle Maintenance

Completing your spring motorcycle startup checklist means covering all lighting, controls, and safety features. Even minor issues here can lead to significant risks on the road. Every control and electrical component must be in working order to ensure a fully safe and lawful ride.

Testing All Lights and Electricals in the Spring Motorcycle Startup Checklist

  • Verify operation of headlights, brake lights, indicators, and horn

A quick check of your lighting and electrical systems ensures you’ll see and be seen during any ride this riding season . Test your headlights on high and low beams, examine the brightness of brake lights, make sure indicators flash at a regular interval, and confirm your horn rings clearly.

Do not overlook brake light operation—a faulty rear signal is not only unsafe but can also draw the attention of law enforcement. Replace burnt bulbs and address any fuses or relay concerns as soon as possible.

Check Controls and Adjust Levers for Comfortable Riding

Comfort and control go hand in hand for a successful riding season . Adjust brake and clutch levers, throttle cables, and mirrors to your preferred settings. Feel for smooth travel on all levers and check for any stiffness or excessive slack, which could indicate the need for cable lubrication or replacement.

Confirm all switches and buttons engage smoothly without sticking, paying careful attention to emergency stops and kill switches. These quick final checks complete your spring motorcycle startup checklist —now your bike is as eager for the road as you are.
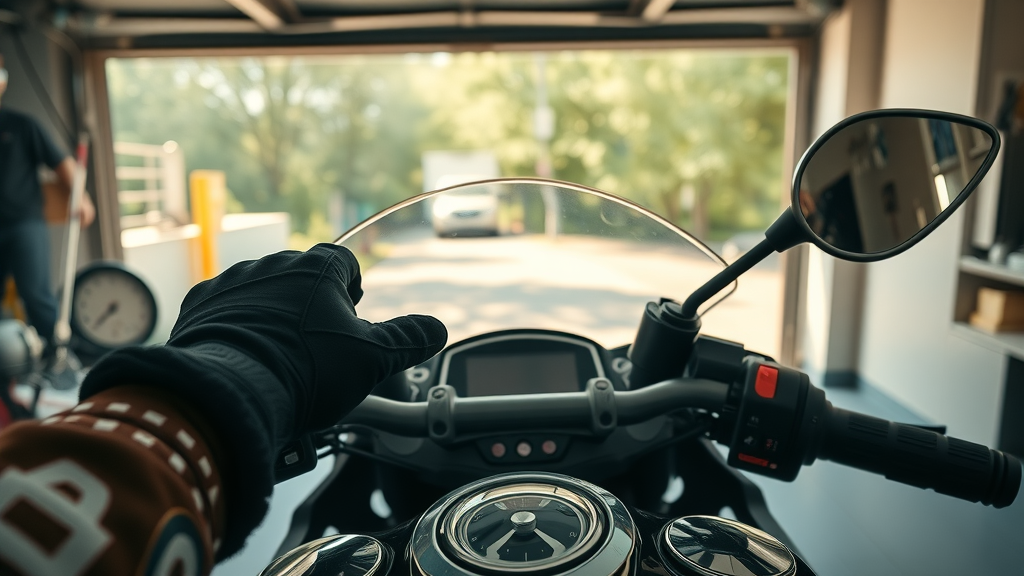
motorcycle cockpit with rider adjusting brake lever as part of spring motorcycle startup checklist, dashboard lights illuminated

Printable Spring Motorcycle Maintenance Checklist Table

Component

Task

Frequency

Service Manual Reference

Tires

Inspect/Inflate

Every Ride

Page 15

Brakes

Check/Replace Pads

Every Month

Page 18

Oil

Change/Top Off

Every 3 Months

Page 20

Coolant

Check/Fill

Every Season

Page 24

Air Filter

Inspect/Replace

Every Season

Page 28

Spark Plug

Inspect/Replace

Every Season

Page 32

Expert Guidance: Quotes on Spring Motorcycle Maintenance and Safety

"A thorough spring motorcycle maintenance checklist is the best insurance for a safe season on two wheels." – Motorcycle Safety Foundation

Top 10 Pro Tips for an Effective Spring Motorcycle Startup Checklist

  1. Start your maintenance in natural light

  2. Use a service manual for step guidance

  3. Document all checks digitally or on paper

  4. Always replace questionable parts

  5. Never overlook your safety gear

  6. Consult DIY motorcycle forums for advice

  7. Double-check everything before the first ride

  8. Take a short first ride near home

  9. Schedule maintenance reminders

  10. Save receipts from parts and services

Instructional video demonstrating the full spring motorcycle startup checklist, including visuals: tire pressure check, oil inspection, battery maintenance, light and electrical test, and first ride safety tips. Clear narration with close-up shots of each process in a well-lit garage environment.

People Also Ask: Preparing Your Motorcycle for Spring

How to prepare your motorcycle for spring?

To prepare your motorcycle for spring, perform a comprehensive spring motorcycle startup checklist : inspect tires, fluid levels, battery, spark plugs, and brakes, and ensure all lights and controls function correctly. Finish by cleaning your bike and checking safety gear.

Is spring motorcycle season?

Yes, spring is widely considered the start of the motorcycle riding season , making it essential to follow a spring motorcycle startup checklist to ensure your ride is safe and reliable after winter storage.

What is the checklist for motorcycle service?

A typical motorcycle service checklist for spring includes: oil change, fluid top-ups, air filter and spark plug checks, inspecting tires and brakes, battery maintenance, inspecting lights/electricals, and a general visual inspection guided by your motorcycle’s service manual .

How to prepare a motorcycle for summer?

To prepare a motorcycle for summer, begin with the spring motorcycle startup checklist . Then, check coolant systems, lubricate moving parts, ensure protection from UV exposure, and consider quality summer riding gear for comfort and safety.

Common Spring Motorcycle Maintenance Mistakes to Avoid

  • Neglecting to check tire pressures

  • Forgoing battery inspection

  • Skipping the service manual

  • Overlooking expired fluids

  • Failing to assess brake pads

Watch our demo as a technician walks through each step of the spring motorcycle startup checklist—perfect for visual learners before their first ride of the season.

FAQs: Spring Motorcycle Startup Checklist

How often should I follow a spring motorcycle startup checklist?

Ideally, perform a spring motorcycle startup checklist annually, before your first ride of the new riding season.

Can I do my spring motorcycle maintenance at home?

Yes, many motorcycle owners manage their own spring maintenance using a checklist as long as they have basic tools and access to the service manual .

Key Points to Remember from the Spring Motorcycle Startup Checklist

  • A full motorcycle maintenance checklist keeps you safe throughout the riding season

  • Always consult your motorcycle service manual when in doubt

  • Consistent maintenance checks extend your motorcycle’s lifespan

Get Ready for the Road: Download Your Spring Motorcycle Startup Checklist and Ride Confidently

Ready to make this your safest and most enjoyable season yet? Download your Spring Motorcycle Startup Checklist now, and cruise into every ride with total confidence!

To ensure your motorcycle is ready for the riding season, it’s essential to follow a comprehensive spring startup checklist. The article “Motorcycle Maintenance: Spring Checklist” by State Farm® provides a detailed guide covering crucial tasks such as pre-ride inspections, fluid changes, brake checks, and battery maintenance. ( statefarm.com ) Additionally, “Motorcycle Maintenance Checklist for Spring” by Foremost Insurance offers insights into battery charging, tire examination, and air filter inspection, emphasizing the importance of thorough preparation after winter storage. ( foremost.com ) By consulting these resources, you can ensure your motorcycle is in optimal condition for a safe and enjoyable riding season.

Motocycle Seasonal Care & Storage

0 Comments

Write A Comment

*
*
Please complete the captcha to submit your comment.
Related Posts All Posts

Best Practices for Motorcycle Fuel Tank Preparation You Must Know

Did you know? According to industry experts, improper motorcycle fuel tank preparation is the leading cause of early paint failure and corrosion—costing riders hundreds in preventable repairs every year. If you want your motorcycle gas tank to look stunning and last for years, mastering these best practices for motorcycle fuel tank preparation is vital. In this guide, you’ll gain expert-backed, clear steps for prepping, painting, and maintaining your fuel tank—ensuring both resilience and that head-turning showroom shine. What You'll Learn About Best Practices for Motorcycle Fuel Tank Preparation Essential steps for preparing your motorcycle gas tank Why tank liner and etch primer are critical Common mistakes to avoid during fuel tank preparation Tips for when and how to paint a motorcycle gas tank Answers to your top questions on motorcycle fuel tank maintenance Why Best Practices for Motorcycle Fuel Tank Preparation Matter When it comes to a successful paint job and long-lasting performance, few components are as crucial as your motorcycle fuel tank. The gas tank is the centerpiece of your bike’s style and a key protector for your fuel system. Neglecting best practices—like skipping a tank liner or using the wrong etch primer—can result in rust, leaks, and peeling paint. Applying proper techniques means you prevent rust, stop fuel contamination, and give paint a perfect base to adhere. Whether you're restoring a vintage ride or freshening up your current bike, precise fuel tank preparation ensures your investment pays off both in reliability and appearance. "A well-prepared motorcycle gas tank is the foundation of a long-lasting, beautiful paint job and reliable performance." Step-by-Step Guide: Best Practices for Motorcycle Fuel Tank Preparation 1. Draining and Cleaning the Motorcycle Gas Tank How to properly drain gas from the tank Using stabilizer or draining completely Cleaning the interior for tank liner application The first step in every fuel tank prep project is to safely remove all fuel from the motorcycle gas tank. Begin by removing the gas cap and opening the petcock or drain plug, tilting the tank over a fuel-safe container. If storing for a long period, decide whether to use a fuel stabilizer or fully drain and dry the tank. A stabilizer can protect fuel from degrading during short-term storage, while a full drain eliminates moisture and prevents rust for longer projects. Once empty, clean the inside with a gentle, non-corrosive detergent or a specialized prep product. This removes old fuel residues, which can interfere with tank liner application or painting down the line. Always allow the tank to become completely dry before proceeding to the next step. For tough deposits, a microfiber pad or appropriate tank cleaning tools ensure a pristine base and can help you get the tank ready for further treatment with liner or primer. Proper cleaning and preparation of your motorcycle gas tank not only ensures a flawless finish but also sets the stage for effective seasonal maintenance. For a deeper dive into how to protect your bike throughout the year, including fuel system care during storage, check out these seasonal bike care secrets every rider should know. 2. Addressing Rust and Corrosion in the Gas Tank Inspecting for rust in the fuel tank Methods for rust removal Preparing for etch primer Inspecting for rust is a vital step after cleaning your motorcycle gas tank. Peek inside the tank with a flashlight, paying close attention to weld seams and low points where moisture tends to collect. Surface rust can often be addressed with white vinegar or a commercial rust remover. Pour the rust remover into the tank and agitate it—sometimes using a handful of small nuts and bolts inside to help loosen rusty areas. For heavy buildup, repeated treatments may be necessary. After successful rust removal, rinse thoroughly with water and dry the tank with compressed air or by letting it sit in a warm, dry area. Finally, prep the metal with an appropriate metal prep product to neutralize remaining residues, laying the groundwork for the next step—whether that’s applying a tank liner or moving on to an etch primer. 3. Applying Spot Putty and Tank Liner for a Flawless Motorcycle Gas Tank Using spot putty to repair minor flaws Importance of a quality tank liner Sealing seams and internal surfaces Before you paint a motorcycle gas tank, check for dents or pitting that could impact the final result. Using a small amount of automotive spot putty, fill minor imperfections on the tank’s surface. Allow it to cure fully, then use fine sandpaper to sand the gas tank for a smooth finish—being careful not to expose bare metal where unnecessary. Next, apply a high-quality tank liner (typically an epoxy liner) on the inside. This step is especially critical for older or restored tanks. The tank liner coats the internal metal surface, stopping fuel leaks and rust from forming. Rotate the tank slowly to ensure all seams and surfaces are thoroughly covered. Once applied, let the liner cure at room temperature for however long the manufacturer recommends—a step that’s often overlooked but essential for a dry surface and long-term protection. Wipe away any excess product from the outside before moving on. 4. Priming and Painting a Motorcycle Gas Tank: Pro Tips How many coats of primer for a fuel tank Applying etch primer for longevity Best practices for painting a motorcycle and clear coat application With your gas tank’s exterior flawlessly smoothed and its interior protected by a tank liner, it’s time for priming and painting. Start with a dedicated etch primer; it chemically bonds to the metal, giving paint a solid foundation and offering superior rust prevention. Two to three light coats of primer are standard, letting each dry completely according to product guidelines. For best results, sand the gas tank lightly with fine sandpaper between coats to ensure maximum adhesion. After the primer, apply your chosen automotive paint using smooth, even strokes. Multiple thin coats create the deepest, most resilient color—avoid heavy sprays that can cause drips or orange peel. Finish by applying a clear coat for protection and shine. Allow all layers, especially the final coat of clear, to cure fully on a clean, dust-free dry surface before reassembling and filling the tank. This staged approach keeps the motorcycle gas tank looking new and prevents future paint and corrosion issues. Preparation Step Best Practice Key Products Used Draining/Cleaning Use stabilizer or full drain before extended storage Fuel stabilizer, mild detergent Rust Removal Use non-abrasive methods first Vinegar, rust remover Spot Putty Apply sparingly to small imperfections Automotive spot putty Tank Liner Coat interior fully and cure as directed Epoxy tank liner Priming/Painting Follow primer and paint cure times strictly Etch primer, automotive paint People Also Ask About Best Practices for Motorcycle Fuel Tank Preparation Is it better to drain gas or use stabilizer? Exploring the pros and cons of draining the fuel tank vs. using a stabilizer When each method is recommended Whether you should drain your motorcycle gas tank or use a fuel stabilizer depends on your maintenance plans and climate. Draining the fuel tank entirely is best when your motorcycle will sit unused for months (like in winter storage), as it removes moisture and prevents rust from forming inside. Using a stabilizer, on the other hand, is ideal if you'll ride again within a few weeks. A stabilizer keeps fuel fresh but won’t remove the risk of rust if condensation develops. If you plan to paint a motorcycle gas tank or apply a liner, always ensure the tank is fully emptied and air dried before starting. Regular inspection will help avoid issues linked with fuel breakdown or interior tank corrosion. How long until gas goes bad in a motorcycle tank? Factors affecting fuel degradation in the motorcycle gas tank Consequences for fuel tank preparation Typically, gasoline in a motorcycle tank starts to degrade after about 3–4 weeks, with ethanol blends attracting moisture even faster. Exposure to air from a loose gas cap or a poorly sealed tank allows oxygen and humidity to start forming internal rust and varnish buildups. These conditions undermine future tank liner application and can cause fuel delivery problems. To prevent rust and maintain a clean tank to ensure optimal fuel flow, always fill the tank for short-term storage or drain it entirely for long-term or winter layups. This keeps the metal surface from deteriorating and ensures you’re starting with a clean slate before you paint a motorcycle or perform repairs. How many coats of primer on a motorcycle gas tank? The ideal number of primer coats for optimal adhesion and finish Expert insights on etch primer and clear coat usage For most projects, applying two to three coats of etch primer on bare metal is recommended. This provides enough thickness for adhesion without clogging details or making it harder to sand the gas tank. Each primer layer should be thin and even; let it dry fully to a touchable dry surface before adding the next. After priming, sand with ultra-fine sandpaper to smooth out any texture, then spray your color coat of paint in three to four thin layers. Finish by applying the clear coat generously but evenly—typically two coats—to deliver both protection and shine. Patience through each drying cycle ensures the best possible finish when you paint a motorcycle gas tank. What does putting salt in a gas tank do? Dangers of foreign substances in the fuel tank How contamination undermines motorcycle gas tank longevity Introducing salt or other foreign material into your motorcycle gas tank is disastrous. Salt attracts and retains water, accelerating corrosion and pitting on the tank’s metal surface. Any contaminant can block fuel passages, damage the reserve tank, or destroy engine components. Regularly inspect your fuel tank cap and fill area for debris, and never let anything but clean fuel enter the tank. If you suspect contamination, drain and clean the tank immediately, then follow up with rust removal, liner application, and inspection of the internal metal prep product to restore the tank’s integrity. This way, you protect your bike’s longevity and avoid avoidable damage caused by contamination. Expert Tips and Common Pitfalls in Motorcycle Fuel Tank Preparation Why skipping tank liner can lead to premature failure Spot putty mistakes to avoid for a flawless finish Paint a motorcycle gas tank: Application timing and technique Experts warn that skipping tank liner—especially on older fuel tanks—can invite leaks, pinhole rust, and paint blistering from fuel vapor. Always apply an epoxy liner unless using a new tank with factory coating. For spot putty, don’t overbuild; thin layers dry faster and sand smoother, while thick applications might crack as the tank expands or contracts. When it’s time to paint a motorcycle gas tank, time your project around low humidity and moderate temperatures. Use masking tape to protect threads and petcock openings. Remember to sand the gas tank between coats—persistence here means you’ll avoid runs or an uneven clear coat. Avoiding these common pitfalls promises a gorgeous, enduring finish and a motorcycle you’ll be proud to show off. FAQs on Best Practices for Motorcycle Fuel Tank Preparation How often should I inspect my motorcycle gas tank for rust? Inspect your motorcycle gas tank for rust at least every six months, and always before painting or applying a liner. Moisture and bad gas can cause rapid corrosion if unchecked. Can I apply a tank liner without removing the fuel tank? While some products allow in-place lining, it’s always best to remove the tank. This ensures a clean, dry surface, full rotation during application, and avoids spilling excess product on your frame or engine. Is etch primer necessary before painting a motorcycle gas tank? Yes, etch primer chemically bonds to the bare metal of your motorcycle gas tank, giving better adhesion for paint and helping to prevent rust. Skipping it often leads to paint chipping or bubbling over time. Key Takeaways for Motorcycle Fuel Tank Preparation Comprehensive preparation ensures a durable and attractive finish Using proper tank liner and primer products is crucial Regular maintenance prevents issues with your fuel tank Need Help? Call Nasty Performance Motorcycle Shop Today: 847-458-4858 Ready for a pro-grade motorcycle gas tank finish? Meticulous fuel tank preparation is the secret to riding with confidence and style. Follow these steps—and never skip tank liner or primer—to keep your tank looking flawless for the long haul! If you’re looking to take your motorcycle maintenance to the next level, consider how seasonal changes can impact every aspect of your ride—from fuel system health to overall performance. Discover expert strategies for year-round protection and longevity by exploring seasonal bike care secrets every rider must know. This resource will help you anticipate challenges before they arise and keep your motorcycle in peak condition, no matter the season. Elevate your maintenance routine and enjoy worry-free riding all year long.

Cold Weather Motorcycle Safety Tips You Can’t Ignore

Did you know that the risk of a motorcycle accident increases by up to 45% in cold weather? If you’re one of the dedicated few who refuses to tuck the bike away during winter riding season, you already know that riding a motorcycle in the cold brings unique challenges—and unique thrills. But here’s the bottom line: understanding cold weather motorcycle safety is essential to ride safe, stay warm, and avoid serious hazards. This in-depth guide delivers practical, research-backed tips for winter motorcycle riding that will help you layer up, winterize your bike, master safe riding techniques, and prepare for whatever the season throws at you. Whether you’re a daily commuter or a weekend adventurer, these strategies will help you enjoy cold weather riding with confidence. Understanding Cold Weather Motorcycle Safety: Why It Matters All Season Cold weather motorcycle safety isn’t just about putting on a thicker jacket or bracing yourself for the chill. The cold season dramatically impacts both the operation of your machine and your body’s performance. When temperatures drop, everything from tire pressure to reaction time can be compromised, making it more important than ever to adjust your preparation and riding style. Riders often underestimate just how quickly a fun winter ride can become hazardous due to freezing temperatures, black ice, and reduced road grip. Motorcycle riding in winter weather introduces more than discomfort—it can be dangerous. Even a good motorcycle can struggle in the cold if you neglect essential maintenance or ride in gear not suited for the season. A cold-weather motorcycle accident is rarely a single-mistake event; it’s often the result of multiple winter riding risks stacking up, from wind chill sapping your strength to icy patches reducing control. That’s why cold weather motorcycle safety is a year-round concern, deserving of time, attention, and careful planning. Ensuring you stay prepared and proactive can make the difference between safe adventure and a call to a personal injury attorney. A Surprising Statistic: Motorcycle Accidents Increase 45% in Cold Weather According to recent transportation studies, motorcycle accidents are 45% more likely to occur in cold weather conditions. This spike stems from three primary factors: reduced tire grip on cold or icy roads, longer stopping distances due to compromised reaction time, and decreased visibility during shorter, darker winter days. While these facts may seem daunting, knowing the risks is the first step in avoiding them. This statistic isn’t meant to scare riders off the road but to underline the need for meticulous winter motorcycle preparation, strategic gear choices, and continually vigilant weather assessment. With intentional habits, having fun and staying safe during cold weather motorcycle riding is absolutely possible for riders of all skill levels. How Winter Motorcycle Riding Conditions Affect Your Safety Winter riding isn’t just cold—it transforms every aspect of motorcycle riding . The combination of frigid air, icy surfaces, wind chill, and unpredictable weather conditions introduces hazards that aren’t present during warmer months. For starters, low temperatures cause a reduction in tire pressure , reducing your tire's contact patch and overall grip on the road. This impacts how your bike handles, making it easier to lose traction—especially when navigating curves or performing sudden maneuvers. Beyond mechanical challenges, winter weather riding can test a rider’s limits. Prolonged exposure to cold can slow reaction time , dull your senses, and increase your risk of developing hypothermia. This means it’s not just the motorcycle that needs protection—your personal safety depends on staying warm, alert, and responsive. Furthermore, snowbanks, black ice, and salted roads present unpredictable risks requiring both defensive riding strategies and a proactive approach. Impact of cold weather on motorcycle operation Unique risks of winter roads How freezing temperatures alter riding a motorcycle Maintaining vigilance and respecting the season’s limitations are central tenets of winter motorcycle safety. That’s why investing in proper gear, understanding roadway hazards, and winterizing your ride are the foundations for safe, enjoyable cold weather motorcycle journeys. Layering Up: The Best Cold Weather Motorcycle Riding Gear The right riding gear isn’t just about comfort; it’s about cold weather motorcycle safety . As temperatures plummet, your best defense against the elements is a careful strategy of layering and the use of specialized heated gear. Modern gear innovations ensure even the harshest winter riding days can be manageable and, dare we say—enjoyable! Successful winter motorcycle riding starts with a thermal base layer , which wicks away sweat and prevents chills. Add insulated jackets and pants to trap body heat while allowing for movement. Top it off with a waterproof outer shell to block wind and moisture. For extra protection, invest in heated gear , like a heated jacket or heated gloves , which keep your core and extremities warm even on the longest rides. Failing to layer properly or skimping on gear can quickly lead to cold-related fatigue, slower reaction times, and, ultimately, an unsafe ride. Why Layers and Heated Gear Matter for Weather Motorcycle Riding The science behind layering is simple: multiple, thinner layers trap more warm air and allow for better thermal regulation than a single heavy coat. Start with a base layer —ideally moisture-wicking to keep sweat off your skin. Over this, an insulating layer retains heat, while the final shell layer blocks wind and wet. For those who brave particularly cold conditions, heated gear (jackets, gloves, and even pants) is a winter riding game-changer. Heated gear is unique in maintaining safe body temperatures through variable settings, targeting key areas most vulnerable to cold stress. Neglecting proper gear isn’t just uncomfortable—it’s dangerous. Numb hands, fogged visors, or stiff limbs can all compromise your ability to ride safely . Investing in quality layers and heated gear makes it possible to ride a motorcycle through winter’s worst without sacrificing comfort, skill, or safety. Thermal base layers Insulated jackets and pants Waterproof outer shells Heated gear essentials Best Cold Weather Motorcycle Riding Gear Features Gear Type Recommended Features Why It Matters for Cold Weather Motorcycle Safety Thermal Base Layer Moisture-wicking, thin Keeps sweat away to prevent chills Heated Jacket Adjustable temperature Maintains core warmth on longer rides Insulated Gloves Waterproof, windproof Ensures hand dexterity for controls Wool Socks Breathable, thick Prevents numbness in toes Top Picks: Heated Jacket and Gloves for Winter Motorcycle Comfort Wearing the right gear can make the difference between an enjoyable ride and dangerous hypothermia, says the National Safety Council. The standout essentials for winter riding are a heated jacket and heated gloves . A heated jacket keeps your core temperature steady, helping combat wind chill on long highway stretches. Look for jackets with adjustable temperature controls, distributed heating zones, and waterproof exteriors. Likewise, heated gloves prevent numb fingers—ensuring you retain complete control and dexterity, even in sub-freezing conditions. While there are many brands and designs, the best heated gear uses battery packs or plugs into your motorcycle’s power source. They typically offer settings to tailor warmth to the weather, preventing both overheating and cold exposure. Don’t forget: pairing heated gear with a thermal base layer is far more effective than relying on a single heavy layer alone for winter motorcycle safety. Motorcycle Preparation: Winterizing for Cold Weather Motorcycle Riding Protecting your bike for winter weather motorcycle riding goes far beyond a routine inspection. Cold weather motorcycle safety requires a comprehensive winterization process to safeguard your machine from freezing, corrosion, and reduced performance. Start by checking your battery and charging system, as cold temperatures dramatically reduce battery efficiency. Use winter-grade oil formulated for lower viscosity and easier cold starts. Proper winterization minimizes the odds of mechanical failure and preserves your motorcycle for peak performance no matter the season. Test all lights, brakes, and if available, heated grips and seats. Inspect your tire tread—worn tires are even less effective on slick surfaces—and always monitor tire pressure , which can drop quickly as the temperature falls. Lubricate cables and apply anti-freeze to relevant systems. By addressing these winter-specific maintenance steps, you greatly reduce the risk of a sudden breakdown or accident during winter weather. Essential Winter Motorcycle Maintenance Steps Check battery and charging systems Use winter-grade oil Test brakes, lights, and heated grips Inspect tire tread and pressure—cold decreases PSI Apply anti-freeze and lubricants to avoid freeze-up Remember: even the best riding gear can't make up for a motorcycle in poor condition during cold weather riding. Proper winterizing keeps you safe and prevents costly repairs in the spring. Mastering Techniques for Safe Cold Weather Motorcycle Riding Once your gear and bike are winter-ready, the focus should shift to your riding technique. The road demands more from those intent on riding a motorcycle safely in winter. Cold weather means longer stopping distances, reduced traction—even for high-quality winter motorcycle tires—and the constant threat of black ice or unexpected precipitation. Adjusting how you ride is essential for cold weather motorcycle safety . First, slow down and increase your following distance to give yourself more room to respond to slip-ups—yours or those of other drivers. Use gentle, progressive movements when accelerating, braking, or turning. Sudden or jerky controls can result in losing grip, especially on cold tires or slick pavement. Scan ahead for shaded spots, overpasses, and bridges—prime locations for invisible black ice. When in doubt, err on the side of caution and always have an “exit strategy” when navigating high-risk sections. Reducing Risk: Adjusting Your Riding Technique in Winter Slow down and increase your following distance Use gentle inputs for acceleration, braking, and cornering Anticipate black ice and shaded spots Avoid sudden maneuvers “Anticipate danger and always ride with an exit strategy in mind,” advises Liz Jansen, renowned motorcycle safety coach. Practicing these fundamentals regularly during winter riding ensures your skills stay sharp and your reflexes remain quick for all types of weather riding conditions. Dealing with Common Dangers: Weather Motorcycle Hazards in Winter Winter unleashes a whole new set of dangers for motorcyclists, and even experienced riders can be caught off-guard. Black ice forms fastest on bridges, overpasses, and shaded curves, making them especially treacherous. Lower temperatures mean less flexible tires, and overall cold weather riding provides reduced grip, even for the most advanced all-season rubber. Unexpected snow bursts or freezing rain can abruptly make a safe trip risky. Finally, the unpredictability of other drivers—many of whom aren’t expecting to see motorcycles in winter weather—adds yet another layer of difficulty. A distracted or unprepared driver is one of the leading causes of personal injury in weather motorcycle accidents. Understanding these threats and practicing defensive riding greatly increases your odds of staying safe during winter motorcycle riding. Black ice on bridges and overpasses Reduced tire grip in cold weather Unexpected snow or freezing rain Distracted or unprepared drivers Emergency Preparedness: What to Do If Things Go Wrong No amount of preparation can eliminate all risk when riding in cold. That’s why a solid emergency plan is a critical piece of cold weather motorcycle safety . Pack a winter-specific road emergency kit with tools, flashlight, emergency flares, a first aid kit, portable phone charger, and extra thermal layers. Always be prepared for personal injury scenarios: know basic first aid, and carry your insurance and emergency contact information easily accessible. Most importantly, learn to recognize your own limits and don’t hesitate to call for help when winter riding conditions become unmanageable. If you’re stranded or involved in an accident, staying calm and keeping warm could very well save your life. Communicate your travel plans with someone you trust, and never hesitate to end a ride early when conditions deteriorate. Packing a road emergency kit Preparing for personal injury scenarios Knowing when to call for help Cold Weather Motorcycle Safety and Visibility Staying visible is just as important as staying warm during winter motorcycle riding. Short days, gray skies, and heavy precipitation mean you’re harder for motorists to spot. Invest in high-visibility riding gear —bright colors, reflective strips, and LED accessories increase your chances of being seen. Make sure your helmet visor stays clean and fog-free, as condensation builds up quickly in cold weather. Adding reflective tape to your motorcycle and jacket further ensures visibility for other vehicles, especially at night or in heavy traffic. High-visibility riding gear is a must in winter’s low light Ensure clean, fog-free helmet visors Use reflective tape on your motorcycle and jacket Never underestimate the value of visibility—it’s a simple, effective way to drastically reduce your risk of an accident in all weather motorcycle riding conditions. Smart Weather Motorcycle Route Planning in the Cold Efficient route planning can mean the difference between a routine winter ride and a treacherous misadventure. Use real-time weather apps to monitor changing conditions and avoid severe weather or unexpected snowstorms. Plan your route with plenty of gas stations and rest stops, giving yourself time to warm up and the flexibility to adjust your plan. Whenever possible, avoid poorly maintained rural roads, which are more likely to have snow accumulation, black ice, or sudden obstacles. Use weather apps to check real-time road conditions Plan routes with more gas stations and rest stops Avoid rural or poorly maintained roads Share your route and expected arrival times with someone you trust, and prepare for detours due to road closures or emergent weather conditions. Smart planning is the foundation of cold weather motorcycle safety. People Also Ask: Cold Weather Motorcycle Safety Explained How cold is too cold for a motorcycle? There is no absolute temperature cutoff for all motorcycles, but riding becomes increasingly dangerous when temperatures drop below 32°F (0°C), especially when factoring in wind chill . At this point, cold temperatures impact tire flexibility, battery performance, and a rider’s response time—making it critical to equip heated gear, check road conditions, and reconsider travel if there’s risk of ice or snow accumulation. How cold is 40 degrees on a motorcycle? At an ambient temperature of 40°F (4°C), wind chill caused by riding a motorcycle at moderate speeds can lower the “feels like” temperature into the 30s or even 20s. This rapidly increases the risk of hypothermia and numbness, especially for exposed skin. Proper layering, a good helmet visor, and heated gear are essential to maintain safety and comfort at these temperatures. Is it bad to leave a motorcycle in the cold? Leaving a motorcycle unprotected in cold weather can damage the battery, cause fluids to thicken, and accelerate rust or corrosion—especially if exposed to moisture or salt. Whenever possible, store your motorcycle in a garage or under a weatherproof cover. Be sure to maintain the battery using a tender and check fluids regularly during winter months. Are cold starts bad for your motorcycle? Frequent cold starts can increase engine wear, as oil circulates more slowly at low temperatures. Using winter-grade oil and allowing the engine to warm up before riding in the winter helps minimize wear. Regular maintenance becomes even more critical for cold weather motorcycle safety, reducing the risks of breakdowns or mechanical failures. Frequently Asked Questions on Cold Weather Motorcycle Safety Can you ride a motorcycle in freezing rain? Technically yes, but it’s strongly discouraged. Freezing rain creates instant black ice and can cover both the road and your visor, making visibility and control nearly impossible. If caught in freezing rain, find a safe place to wait until conditions improve. What are the best tires for cold weather motorcycle riding? Look for tires designed for winter riding, with softer compounds and deep tread patterns that maintain grip at low temperatures. Properly inflated tires with excellent tread are non-negotiable for winter motorcycle safety. How do I protect my face and eyes from cold wind? Wear a full face helmet with a fog-resistant visor, paired with a balaclava or neck gaiter for added protection. Keeping your face covered reduces wind chill and the risk of frostbite. Is heated gear worth the investment? Absolutely. Heated jackets and heated gloves are among the best investments you can make for winter motorcycle riding. They provide consistent warmth, improve comfort, and help maintain alertness on long, cold rides. Key Action Steps for Cold Weather Motorcycle Safety Inspect gear, motorcycle, and weather conditions before every ride Layer for warmth and visibility Ride cautiously and adjust for slippery surfaces Plan your route and communicate your ride plan Integrating these steps with the right riding gear , solid winterization habits, and safe riding techniques ensures each cold weather ride arrives without incident. Ride Smart, Stay Safe: Final Thoughts on Winter Motorcycle Riding Cold weather motorcycle safety is all about preparation, smart habits, and unwavering respect for the season. Invest in your gear, your motorcycle, and your riding strategies to ride safely, confidently, and comfortably in even the coldest weather. Ready for Winter? Get Expert Cold Weather Motorcycle Safety Support Don’t leave your winter motorcycle safety to chance. Call Nasty Performance Motorcycle Shop Today: 847-458-4858 and get professional guidance, gear recommendations, and expert maintenance before your next ride in the cold. For comprehensive insights into cold weather motorcycle safety, consider exploring the following resources: “Winter Motorcycle Riding Guide - Tips to Stay Safe” : This guide offers detailed advice on winter riding gear, maintenance, and techniques to navigate cold weather challenges effectively. ( dairylandinsurance.com ) “13 Cold Weather Riding Tips” : This article provides practical tips on layering, minimizing wind chill, and recognizing early signs of hypothermia to ensure a safe and comfortable ride during winter months. ( adventuremotorcycle.com ) If you’re serious about enhancing your cold weather riding experience, these resources will equip you with the knowledge and strategies needed to ride safely and comfortably in winter conditions. Call Nasty Performance Motorcycle Shop Today: 847-458-4858

Motorcycle Chain Lubrication Fall Hacks for Smooth Riding

Are you ready to keep your motorcycle gliding smoothly through the autumn chill? As temperatures dip and leaves begin to blanket the roads, one overlooked hero determines whether your ride is flawless or frustrating—your motorcycle chain. Countless riders neglect proper motorcycle chain lubrication fall routines, leading to costly repairs and unexpected interruptions. This guide unpacks the essential hacks, expert tips, and step-by-step strategies for foolproof chain maintenance this season, helping you master your autumn rides and protect your bike’s most vital component. Are You Protecting Your Motorcycle Chain This Fall? Discover Essential Motorcycle Chain Lubrication Fall Tips When autumn sets in, fluctuating temperatures, rainfall, and debris put new stresses on your motorcycle chain , making motorcycle chain lubrication fall care vital. Without consistent attention, your bike chain faces accelerated wear and the threat of seizing links. Imagine heading out for a scenic leaf-peeping adventure on your dirt bike only to be sidelined by a gritty, rusted-out chain. That’s why mastering the right chain lube techniques can save you from expensive chain and sprocket replacements and keep your ride reliable. Not only does a dry or poorly lubed motorcycle chain strain the drive chain system and sap your bike’s efficiency, but it also becomes more vulnerable to autumn’s moisture-rich and unpredictable conditions. By adopting the proper clean and lube regimen, you ensure every journey is smooth, safe, and enjoyable, regardless of the weather. Below, explore this season’s top strategies and why prioritizing chain lubrication right now will pay off every mile you ride. Prevent costly repairs with effective chain lube methods Boost your bike chain longevity as the temperatures drop Learn expert dirt bike and motorcycle chain maintenance hacks for the fall season Why Motorcycle Chain Lubrication Fall Maintenance Matters for Smooth Riding As autumn approaches, your motorcycle chain faces unique challenges not present in the hotter months. Dampness from morning dew, unexpected rain showers, and falling leaf debris all threaten to compromise your chain and sprockets . Neglecting motorcycle chain lubrication fall maintenance increases friction, reduces chain life, and amplifies the risk of breaking down far from home. A chain that is left uncleaned or poorly lubricated will start to squeak, squeal, and eventually seize—signs that it’s time to review your chain lube routine. Your bike’s chain lubricant acts as both a shield and a solution, repelling moisture, minimizing contaminants, and smoothing link movement. Whether you ride a classic street model or an agile dirt bike , prioritizing autumn chain care ensures your chain and sprocket can endure seasonal extremes. Expert mechanics unanimously confirm that sticking to a fall-optimized chain maintenance plan can add thousands of trouble-free miles to your journey. With just a few minutes of attention each week, you’ll avoid the stress of unexpected mechanical issues and costly parts replacements. Impacts of Weather on Motorcycle Chain and Chain Lube Autumn’s unpredictable weather can test even the toughest motorcycle chains . Mist, sudden rainfall, and shifting temperatures seep into links and side plates, breaking down standard chain lube . Moisture, especially in cooler evenings, quickly attracts dust, silt, and leafy debris, forming a gritty paste that acts like sandpaper between your chain’s moving parts. If left unchecked, this compromise on lubrication leads to rapid corrosion, stiff joints, and uneven wear of your drive chain , particularly on ring chains and sealed chains . Don’t underestimate the damage a single overlooked weekend can cause. Even a few days of riding without proper maintenance can let water and grime work their way into the heart of the chain, resulting in rusted rollers or even chain failure. By adopting autumn-ready chain lubricant strategies, including regular inspections and weather-appropriate products, you significantly reduce these risks, ensuring your motorcycle chain remains flexible and protected no matter how harsh the fall season becomes. “Your motorcycle chain is the unsung hero of your ride—don’t let fall conditions leave it neglected.” Avoiding Ride Interruptions: The Importance of Consistent Chain Lube for Dirt Bikes and Road Bikes Riding season doesn't end with the arrival of fall—unless poor chain care interrupts your plans. Both road bikes and dirt bikes rely heavily on a consistently lubricated bike chain to function properly. Missed or irregular lube applications increase the risk of snapped links, seized side plates, and unpredictable failures. For the adventure rider, nothing shatters the thrill of an autumn trail like a failed chain in the middle of muddy woods. To keep your rides free from interruptions, make chain lube part of your weekly checklist. Whether prepping your ring chain for mud-splattered trails or conditioning a sealed chain for wet asphalt, maintaining the correct level of lubrication stabilizes chain performance. This practice not only prolongs your chain and sprocket system’s life but also saves you money in the long run, preventing costly breakdowns and giving you uninterrupted, enjoyable autumn rides. Step-by-Step Guide to Motorcycle Chain Lubrication Fall Prep Fall preparation goes beyond a quick spritz of chain lube ; it’s a multi-step process that ensures all bases are covered before unpredictably wet or cold conditions take their toll. Starting with a thorough chain clean , you’ll eliminate damaging residues that trap new contaminants. The next task is selecting gear oil or chain lubricant formulas specifically tailored for cooler temperatures, enhancing adhesion and providing robust protection against moisture ingress. Having the right supplies ready—a reliable chain cleaner , soft brushes, microfiber cloths, select gear oil , or wax-based lubes—ensures the entire process goes smoothly. Don’t forget to check your chain tension and align your rear wheel for optimal performance after maintenance. Following the best-practice steps outlined below will arm you against the worst that autumn can throw at your motorcycle chain, whether you’re prepping a road warrior or an off-road beast. Clean the Chain Thoroughly Before Applying Chain Lube The secret to effective motorcycle chain lubrication fall starts with a meticulous chain clean . Dirt, old grease, and autumn debris accumulate rapidly, especially on bike chains and dirt bike drivetrains. To clean a chain correctly, elevate the bike so the rear wheel spins freely, then apply a quality chain cleaner generously. Use a stiff-bristled brush to scrub every link, particularly around the side plates and between ring chains where grime lodges the most. Rinse with water or wipe with a damp cloth, ensuring no cleaner residue remains. Dry the drive chain thoroughly, as applying chain lube to a damp surface traps moisture against steel, inviting rust. Taking time for this critical prep will help your new lubricant adhere more effectively, boost the lifespan of your chain and sprocket , and preserve the function of your motorcycle chain through the months ahead. Choosing the Right Chain Lubricant and Gear Oil for Fall Temperatures Comparison of Chain Lubricant Types and Gear Oils for Fall Lubricant Type Ideal Temperature Range Benefits Suitable For Synthetic Spray 35–70°F Anti-fling, all-weather protection Street bikes Gear Oil 20–60°F Deep lubrication Dirt bikes Wax-based 40–80°F Water resistance All bikes Colder nights and wet morning dew require lubricants that can perform under pressure. Gear oil delivers superior penetration for dirt bike chains being subjected to mud and water, while synthetic sprays provide consistent protection for street rides through rain-slicked city streets. For all-around performance, wax-based lubricants offer high water resistance and are ideal for riders mixing urban and trail environments, or when prepping multiple bike chains for seasonal storage. Always check your type of chain —sealed, ring, or standard—since some formulas can degrade O-rings or X-rings . Match your chain lubricant to not only your riding style but also the unique challenges of fall weather. Whether it’s chain and sprocket wear, mud splatter, or heavy rain, the right lube and gear oil combo keeps your motorcycle chain primed for action no matter what autumn brings. How to Properly Apply Chain Lube to Motorcycle Chain in Autumn Warm up the motorcycle chain. Clean the chain and sprocket area. Spray chain lube evenly. Check every link and ring chain component. Wipe off excess with a microfiber cloth. Effective motorcycle chain lubrication fall isn’t just about the type of lube—it’s about the application. For best results, run your bike briefly to warm the drive chain (never when it’s dangerously hot), which helps the lubricant flow into every crevice. With the engine off, ensure the bike chain is spotless and fully dry before application. Spray or brush the chosen chain lube onto the inside of the chain while slowly rotating the rear wheel by hand. Target each link and pay close attention to ring chain and sealed chain components, where friction and contamination hit hardest. Let the lubricant settle for at least 20 minutes to create a protective, lasting film. Wipe away any overspray from side plates and the surrounding area using a microfiber towel. This final step is critical: excess lube collects dirt, defeating its primary purpose. Properly lubed, your chain will flex easily and resist even the wettest fall conditions, granting you peace of mind on every twisting backroad. Common Motorcycle Chain Lubrication Fall Mistakes and How to Avoid Them Autumn is notorious for revealing maintenance missteps that went unnoticed during summer rides. Two common mistakes stand out: over-lubricating (leaving the chain greasy and prone to debris buildup) and under-lubricating (leading to squeaks and eventual rust). Instead of guessing, learn to read your chain’s cues—whether it’s a dirt-caked ring chain or a stiff link that barely flexes, these clues signal trouble. Routine inspection and balanced application of chain lube prevent either extreme, optimizing the bike chain’s performance through rain, mud, and fallen leaves. Failure to fully clean a chain before lubing can trap abrasive particles beneath the lubricant layer, accelerating grit-induced wear. Meanwhile, skipping post-clean lubrication altogether or using improper products exposes your chain and sprocket system to rapid oxidation and stretch. Fall is no time to cut corners with your motorcycle chain ; attention to detail now saves hours of repairs—and hundreds of dollars—in the spring. Overusing or Underusing Chain Lube on Your Bike Chain Applying too much chain lube is just as harmful as too little. A thick, dripping layer acts like adhesive, attracting dust and micro-grit that form a grinding paste around your drive chain . Within days, this accelerates wear on your side plates and pin joints, especially for sealed chains and ring chains where debris is difficult to remove. Conversely, skimping on lube after a fall rainstorm instantly exposes metal surfaces to water and airborne chemicals, fast-tracking the rusting process. The right balance is key: always wipe away excess after every application, and check the chain’s flexibility to confirm even coverage without over-saturation. By finding this middle ground, you support both chain performance and cleanliness, even on muddy dirt trails or salted city roads. Neglecting Chain Clean and Winter Prep for Ring Chains and other modern sealed chains present a unique challenge in autumn. Their internal seals protect against grease loss, but only if chain cleaner is consistently applied to dislodge mud and micro-particles before autumn storage. Many riders overlook this last step, assuming a quick lube job is enough to see them through the off-season. In reality, neglecting a deep chain clean before winter lets moisture and leftover grime corrode or freeze vital moving parts, damaging seals and risking costly replacements down the line. For optimal health, always clean and lubricate your ring chain thoroughly in late fall, then inspect for stiffness or discoloration. Store your bike indoors or under a waterproof cover, and consider a final wipe of weatherproof gear oil if extended storage is planned. This extra diligence guarantees your chain and sprockets emerge from hibernation ready for the first spring ride—no nasty surprises or wallet-draining repairs. Best Practices for Chain Maintenance: Experts Weigh In “Proper motorcycle chain lubrication fall routines can extend chain and sprocket lifespan by thousands of miles.” Pro Tips for Dirt Bike and Off-road Motorcycle Chain Care in the Fall Off-road bikes face extra punishment in the fall, with mud, grit, and sudden water crossings turning every ride into a challenge for your chain. Frequent chain cleaner applications are essential to flush out abrasive particles. Use a combination of soft and stiff brushes to reach between rollers and side plates—especially important for sealed chains found on performance bikes. For maximum longevity, alternate between gear oil and wax-based lubricants, depending on exposure to deep water or sticky clay. Never skip an inspection after a demanding ride. Look for kinks, uneven wear on the chain and sprocket , and signs of oil or lube depletion. Preventive action now—tightening links or topping off chain lubricant —prevents headaches on future back roads and saves on frequent chain replacements. Remember, tough environments require tougher maintenance—what works for street bikes rarely suffices on the trail. How Often Should You Perform Chain Cleaner and Chain Maintenance in Autumn? Both motorcycle chain manufacturers and expert mechanics recommend checking your chain at least every 300–400 miles in autumn, with a full chain cleaner cycle after every wet or dirty ride. Wet weather and leaf debris demand vigilance, as contaminants accumulate far faster in the fall than during dry summer months. Dirt bikes exposed to heavy mud should see even more frequent clean and lube sessions, sometimes after each outing. For road bikes that stick mostly to pavement, inspect and lube the chain at the first sign of squeaking, visible dirt, or sluggish movement. The goal is consistency—don’t wait for obvious corrosion before taking action. By keeping to this routine, you ensure that your chain and sprocket remain in peak shape, supporting a safer, smoother ride. Inspect chain tension Clean the chain Apply optimal chain lubricant Examine chain and sprockets for wear Monitor chain lube levels after rainy rides People Also Ask About Motorcycle Chain Lubrication Fall What is the biggest mistake on chain lube? Answer: The most common mistake is over-lubricating the motorcycle chain, which attracts excess dirt and debris. Instead, apply a light layer of chain lube only after a thorough chain clean. What is the best way to lubricate a motorcycle chain? Answer: The best way is to clean the chain first with a dedicated chain cleaner, let it dry, then apply the recommended chain lubricant evenly across the entire length, especially focusing on ring chain areas. How long should you wait to ride a motorcycle after you lube the chain? Answer: Wait at least 15–30 minutes after applying chain lube for it to settle and adhere properly, ensuring optimal protection during your ride. Should you lube motorcycle chain inside or outside? Answer: Always apply chain lube to the inside of the motorcycle chain, as this helps the lubricant reach vital links and protects against spin-off when riding. Chain Lube Video Tutorial: Fall Lubrication for Motorcycle Chains Instructional walkthrough demonstrating motorcycle chain lubrication process during fall with step-by-step visuals and expert commentary. Motorcycle Chain Lubrication Fall Hacks: Visual Walkthrough for Dirt Bikes and Ring Chains Understanding how chain lubricant protects within each link is vital, especially on modern ring chains found on dirt bikes and high-end motorcycles. A properly lubed chain distributes lubrication throughout each roller and internal space, maintaining flexibility and reducing abrasive contact points. Use visual inspections and even animated guides to understand lubricant penetration and adapt your technique for different type of chains . A cutaway view helps clarify where grime is likely to hide and which chain components—the rings, side plates, and rollers—need the most attention. If you can see clear, consistent movement and no sticky buildup, you’re well on your way to mastering seasonal chain care, reducing the risk of costly ring failure and chain replacement next spring. Expert FAQ on Motorcycle Chain Lubrication Fall What chain lube to use for fall and wet conditions? For fall and wet riding, choose a wax-based chain lube or a gear oil specifically labeled for water resistance and cool temperatures. Synthetic sprays can also work but be sure they’re intended for all-weather performance. How can I tell if my motorcycle chain needs lubrication in the cold season? Check for dryness, squeaking, or visible dirt buildup. A chain that looks or sounds dry—or resists easy movement—needs immediate lubrication after a proper clean. Rust spots and stiff links are clear indicators as well. Do different types of dirt bike chains require different lubricants during fall? Yes, standard, ring, and sealed chains can react differently to the same lubricant. Always check manufacturer recommendations, and when in doubt, wax-based lubes offer broad protection for all chain types used on dirt bikes in autumn. Final Thoughts and Ready for a Smooth Fall Ride? “Every well-maintained motorcycle chain is a guarantee for unforgettable autumn journeys.” To ensure a season of flawless riding, clean, lubricate, and inspect your motorcycle chain regularly. Follow the techniques, gear tips, and hacks above—and embrace every twist and turn this autumn. For Fall Motorcycle Chain Lubrication or Repairs, Call Nasty Performance Motorcycle Shop Today: 847-458-4858 To enhance your understanding of motorcycle chain maintenance during the fall season, consider exploring the following resources: “How to Clean and Maintain Your Motorcycle Chain” : This guide provides a comprehensive overview of cleaning techniques, lubrication methods, and maintenance schedules to keep your chain in optimal condition. ( gulfoilltd.com ) “How Often Should You Lube Your Motorcycle Chain?” : This article discusses the importance of regular chain lubrication, detailing the recommended frequency and best practices to ensure longevity and performance. ( us.haynes.com ) By consulting these resources, you’ll gain valuable insights into effective chain maintenance strategies tailored for autumn riding conditions. Call Nasty Performance Motorcycle Shop Today: 847-458-4858

© 2026 Nasty Performance All Rights Reserved. 2035 S. Eastwood Dr., Woodstock, IL 60098 . Contact Us . Terms of Service . Privacy Policy

eyJjb21wYW55IjoiTmFzdHkgUGVyZm9ybWFuY2UiLCJhZGRyZXNzIjoiMjAzNSBTLiBFYXN0d29vZCBEci4iLCJjaXR5IjoiV29vZHN0b2NrIiwic3RhdGUiOiJJTCIsInppcCI6IjYwMDk4IiwiZW1haWwiOiJuYXRlQG5hc3R5cGVyZm9ybWFuY2UuY29tIiwidG9zIjoiUEhBK1BITjBjbTl1Wno0OFpXMCtWMmhsYmlCNWIzVWdjMmxuYmkxcGJpQjNhWFJvSUhWekxDQjViM1VnWVhKbElHZHBkbWx1WnladVluTndPeUI1YjNWeUlIQmxjbTFwYzNOcGIyNGdZVzVrSUdOdmJuTmxiblFnZEc4Z2MyVnVaQ0I1YjNVZ1pXMWhhV3dnWVc1a0wyOXlJRk5OVXlCMFpYaDBJRzFsYzNOaFoyVnpMaUJDZVNCamFHVmphMmx1WnlCMGFHVWdWR1Z5YlhNZ1lXNWtJRU52Ym1ScGRHbHZibk1nWW05NElHRnVaQ0JpZVNCemFXZHVhVzVuSUdsdUlIbHZkU0JoZFhSdmJXRjBhV05oYkd4NUlHTnZibVpwY20wZ2RHaGhkQ0I1YjNVZ1lXTmpaWEIwSUdGc2JDQjBaWEp0Y3lCcGJpQjBhR2x6SUdGbmNtVmxiV1Z1ZEM0OEwyVnRQand2YzNSeWIyNW5Qand2Y0Q0S0NqeHdQanhoSUdoeVpXWTlJbWgwZEhBNkx5OTNkM2N1WjI5dloyeGxMbU52YlNJK2FIUjBjRG92TDNkM2R5NW5iMjluYkdVdVkyOXRQQzloUGp3dmNENEtDanh3UGladVluTndPend2Y0Q0S0NqeHdQanh6ZEhKdmJtYytVMFZTVmtsRFJUd3ZjM1J5YjI1blBqd3ZjRDRLQ2p4d1BsZGxJSEJ5YjNacFpHVWdZU0J6WlhKMmFXTmxJSFJvWVhRZ1kzVnljbVZ1ZEd4NUlHRnNiRzkzY3lCNWIzVWdkRzhnY21WalpXbDJaU0J5WlhGMVpYTjBjeUJtYjNJZ1ptVmxaR0poWTJzc0lHTnZiWEJoYm5rZ2FXNW1iM0p0WVhScGIyNHNJSEJ5YjIxdmRHbHZibUZzSUdsdVptOXliV0YwYVc5dUxDQmpiMjF3WVc1NUlHRnNaWEowY3l3Z1kyOTFjRzl1Y3l3Z1pHbHpZMjkxYm5SeklHRnVaQ0J2ZEdobGNpQnViM1JwWm1sallYUnBiMjV6SUhSdklIbHZkWElnWlcxaGFXd2dZV1JrY21WemN5QmhibVF2YjNJZ1kyVnNiSFZzWVhJZ2NHaHZibVVnYjNJZ1pHVjJhV05sTGlCWmIzVWdkVzVrWlhKemRHRnVaQ0JoYm1RZ1lXZHlaV1VnZEdoaGRDQjBhR1VnVTJWeWRtbGpaU0JwY3lCd2NtOTJhV1JsWkNBbWNYVnZkRHRCVXkxSlV5WnhkVzkwT3lCaGJtUWdkR2hoZENCM1pTQmhjM04xYldVZ2JtOGdjbVZ6Y0c5dWMybGlhV3hwZEhrZ1ptOXlJSFJvWlNCMGFXMWxiR2x1WlhOekxDQmtaV3hsZEdsdmJpd2diV2x6TFdSbGJHbDJaWEo1SUc5eUlHWmhhV3gxY21VZ2RHOGdjM1J2Y21VZ1lXNTVJSFZ6WlhJZ1kyOXRiWFZ1YVdOaGRHbHZibk1nYjNJZ2NHVnljMjl1WVd4cGVtRjBhVzl1SUhObGRIUnBibWR6TGp3dmNENEtDanh3UGxsdmRTQmhjbVVnY21WemNHOXVjMmxpYkdVZ1ptOXlJRzlpZEdGcGJtbHVaeUJoWTJObGMzTWdkRzhnZEdobElGTmxjblpwWTJVZ1lXNWtJSFJvWVhRZ1lXTmpaWE56SUcxaGVTQnBiblp2YkhabElIUm9hWEprSUhCaGNuUjVJR1psWlhNZ0tITjFZMmdnWVhNZ1UwMVRJSFJsZUhRZ2JXVnpjMkZuWlhNc0lFbHVkR1Z5Ym1WMElITmxjblpwWTJVZ2NISnZkbWxrWlhJZ2IzSWdZMlZzYkhWc1lYSWdZV2x5ZEdsdFpTQmphR0Z5WjJWektTNGdXVzkxSUdGeVpTQnlaWE53YjI1emFXSnNaU0JtYjNJZ2RHaHZjMlVnWm1WbGN5d2dhVzVqYkhWa2FXNW5JSFJvYjNObElHWmxaWE1nWVhOemIyTnBZWFJsWkNCM2FYUm9JSFJvWlNCa2FYTndiR0Y1SUc5eUlHUmxiR2wyWlhKNUlHOW1JR1ZoWTJnZ1UwMVRJSFJsZUhRZ2JXVnpjMkZuWlNCelpXNTBJSFJ2SUhsdmRTQmllU0IxY3k0Z1NXNGdZV1JrYVhScGIyNHNJSGx2ZFNCdGRYTjBJSEJ5YjNacFpHVWdZVzVrSUdGeVpTQnlaWE53YjI1emFXSnNaU0JtYjNJZ1lXeHNJR1Z4ZFdsd2JXVnVkQ0J1WldObGMzTmhjbmtnZEc4Z1lXTmpaWE56SUhSb1pTQlRaWEoyYVdObElHRnVaQ0J5WldObGFYWmxJSFJvWlNCVFRWTWdkR1Y0ZENCdFpYTnpZV2RsY3k0Z1YyVWdaRzhnYm05MElHTm9ZWEpuWlNCaGJua2dabVZsY3lCbWIzSWdaR1ZzYVhabGNua2diMllnWlcxaGFXd2diM0lnVTAxVExpQlVhR2x6SUdseklHRWdabkpsWlNCelpYSjJhV05sSUhCeWIzWnBaR1ZrSUdKNUlIVnpMaUJJYjNkbGRtVnlMQ0J3YkdWaGMyVWdZMmhsWTJzZ2QybDBhQ0I1YjNWeUlHbHVkR1Z5Ym1WMElITmxjblpwWTJVZ2NISnZkbWxrWlhJZ1lXNWtJR05sYkd4MWJHRnlJR05oY25KcFpYSWdabTl5SUdGdWVTQmphR0Z5WjJWeklIUm9ZWFFnYldGNUlHbHVZM1Z5SUdGeklHRWdjbVZ6ZFd4MElHWnliMjBnY21WalpXbDJhVzVuSUdWdFlXbHNJR0Z1WkNCVFRWTWdkR1Y0ZENCdFpYTnpZV2RsY3lCMGFHRjBJSGRsSUdSbGJHbDJaWElnZFhCdmJpQjViM1Z5SUc5d2RDMXBiaUJoYm1RZ2NtVm5hWE4wY21GMGFXOXVJSGRwZEdnZ2IzVnlJR1Z0WVdsc0lHRnVaQ0JUVFZNZ2MyVnlkbWxqWlhNdUlGbHZkU0JqWVc0Z1kyRnVZMlZzSUdGMElHRnVlU0IwYVcxbExpQktkWE4wSUhSbGVIUWdKbkYxYjNRN1UxUlBVQ1p4ZFc5ME95QjBieVp1WW5Od096eG9hV2RvYkdsbmFIUWdZMnhoYzNNOUltTnZiWEJoYm5sVFRWTlFhRzl1WlZWd1pHRjBaU0krYm5Wc2JEd3ZhR2xuYUd4cFoyaDBQaTRnUVdaMFpYSWdlVzkxSUhObGJtUWdkR2hsSUZOTlV5QnRaWE56WVdkbElDWnhkVzkwTzFOVVQxQW1jWFZ2ZERzZ2RHOGdkWE1zSUhkbElIZHBiR3dnYzJWdVpDQjViM1VnWVc0Z1UwMVRJRzFsYzNOaFoyVWdkRzhnWTI5dVptbHliU0IwYUdGMElIbHZkU0JvWVhabElHSmxaVzRnZFc1emRXSnpZM0pwWW1Wa0xpQkJablJsY2lCMGFHbHpMQ0I1YjNVZ2QybHNiQ0J1YnlCc2IyNW5aWElnY21WalpXbDJaU0JUVFZNZ2JXVnpjMkZuWlhNZ1puSnZiU0IxY3k0OEwzQStDZ284Y0Q0OGMzUnliMjVuUGxsUFZWSWdVa1ZIU1ZOVVVrRlVTVTlPSUU5Q1RFbEhRVlJKVDA1VFBDOXpkSEp2Ym1jK1BDOXdQZ29LUEhBK1NXNGdZMjl1YzJsa1pYSmhkR2x2YmlCdlppQjViM1Z5SUhWelpTQnZaaUIwYUdVZ1UyVnlkbWxqWlN3Z2VXOTFJR0ZuY21WbElIUnZPand2Y0Q0S0NqeHZiRDRLQ1R4c2FUNXdjbTkyYVdSbElIUnlkV1VzSUdGalkzVnlZWFJsTENCamRYSnlaVzUwSUdGdVpDQmpiMjF3YkdWMFpTQnBibVp2Y20xaGRHbHZiaUJoWW05MWRDQjViM1Z5YzJWc1ppQmhjeUJ3Y205dGNIUmxaQ0JpZVNCMGFHVWdVMlZ5ZG1salpTWWpNems3Y3lCeVpXZHBjM1J5WVhScGIyNGdabTl5YlNBb2MzVmphQ0JwYm1admNtMWhkR2x2YmlCaVpXbHVaeUIwYUdVZ0puRjFiM1E3VW1WbmFYTjBjbUYwYVc5dUlFUmhkR0VtY1hWdmREc3BJR0Z1WkR3dmJHaytDZ2s4YkdrK2JXRnBiblJoYVc0Z1lXNWtJSEJ5YjIxd2RHeDVJSFZ3WkdGMFpTQjBhR1VnVW1WbmFYTjBjbUYwYVc5dUlFUmhkR0VnZEc4Z2EyVmxjQ0JwZENCMGNuVmxMQ0JoWTJOMWNtRjBaU3dnWTNWeWNtVnVkQ0JoYm1RZ1kyOXRjR3hsZEdVdUlFbG1JSGx2ZFNCd2NtOTJhV1JsSUdGdWVTQnBibVp2Y20xaGRHbHZiaUIwYUdGMElHbHpJSFZ1ZEhKMVpTd2dhVzVoWTJOMWNtRjBaU3dnYm05MElHTjFjbkpsYm5RZ2IzSWdhVzVqYjIxd2JHVjBaU3dnYjNJZ2QyVWdhR0YyWlNCeVpXRnpiMjVoWW14bElHZHliM1Z1WkhNZ2RHOGdjM1Z6Y0dWamRDQjBhR0YwSUhOMVkyZ2dhVzVtYjNKdFlYUnBiMjRnYVhNZ2RXNTBjblZsTENCcGJtRmpZM1Z5WVhSbExDQnViM1FnWTNWeWNtVnVkQ0J2Y2lCcGJtTnZiWEJzWlhSbExDQjNaU0JvWVhabElIUm9aU0J5YVdkb2RDQjBieUJ6ZFhOd1pXNWtJRzl5SUR4emRISnZibWMrUEhOd1lXNGdjM1I1YkdVOUltTnZiRzl5T2lOR1JqQXdNREE3SWo1MFpYSnRhVzVoZEdVZ2VXOTFjaUJoWTJOdmRXNTBMM0J5YjJacGJHVWdZVzVrSUhKbFpuVnpaU0JoYm5rZ1lXNWtJR0ZzYkNCamRYSnlaVzUwSUc5eUlHWjFkSFZ5WlNCMWMyVWdiMllnZEdobElGTmxjblpwWTJVZ0tHOXlJR0Z1ZVNCd2IzSjBhVzl1SUhSb1pYSmxiMllwTGp3dmMzQmhiajQ4TDNOMGNtOXVaejQ4TDJ4cFBnbzhMMjlzUGdvS1BIQStKbTVpYzNBN1BDOXdQZ284YUdsbmFHeHBaMmgwSUdOc1lYTnpQU0pqYjIxd1lXNTVUbUZ0WlZWd1pHRjBaU0krVG1GemRIa2dVR1Z5Wm05eWJXRnVZMlU4TDJocFoyaHNhV2RvZEQ0OFluSWdMejRLUEdocFoyaHNhV2RvZENCamJHRnpjejBpWTI5dGNHRnVlVUZrWkhKbGMzTlZjR1JoZEdVaVBqSXdNelVnVXk0Z1JXRnpkSGR2YjJRZ1JISXVMQ0JYYjI5a2MzUnZZMnNzSUVsTUlEWXdNRGs0UEM5b2FXZG9iR2xuYUhRK1BHSnlJQzgrQ2p4b2FXZG9iR2xuYUhRZ1kyeGhjM005SW1OdmJYQmhibmxRYUc5dVpWVndaR0YwWlNJK0tEZzBOeWtnTkRVNExUUTROVGc4TDJocFoyaHNhV2RvZEQ0OFluSWdMejRLUEdocFoyaHNhV2RvZENCamJHRnpjejBpWTI5dGNHRnVlVVZ0WVdsc1ZYQmtZWFJsSWo1dVlYUmxRRzVoYzNSNWNHVnlabTl5YldGdVkyVXVZMjl0UEM5b2FXZG9iR2xuYUhRKyIsInByaXZhY3kiOiJQSEErUEhOMGNtOXVaejVRVWtsV1FVTlpQQzl6ZEhKdmJtYytQQzl3UGdvS1BIQStQSE4wY205dVp6NVVhR1VnYVc1bWIzSnRZWFJwYjI0Z2NISnZkbWxrWldRZ1pIVnlhVzVuSUhSb2FYTWdjbVZuYVhOMGNtRjBhVzl1SUdseklHdGxjSFFnY0hKcGRtRjBaU0JoYm1RZ1kyOXVabWxrWlc1MGFXRnNMQ0JoYm1RZ2QybHNiQ0J1WlhabGNpQmlaU0JrYVhOMGNtbGlkWFJsWkN3Z1kyOXdhV1ZrTENCemIyeGtMQ0IwY21Ga1pXUWdiM0lnY0c5emRHVmtJR2x1SUdGdWVTQjNZWGtzSUhOb1lYQmxJRzl5SUdadmNtMHVJRlJvYVhNZ2FYTWdiM1Z5SUdkMVlYSmhiblJsWlM0OEwzTjBjbTl1Wno0OEwzQStDZ284Y0Q0OGMzUnliMjVuUGtsT1JFVk5Ua2xVV1R3dmMzUnliMjVuUGp3dmNENEtDanh3UGp4bGJUNVpiM1VnWVdkeVpXVWdkRzhnYVc1a1pXMXVhV1o1SUdGdVpDQm9iMnhrSUhWekxDQmhibVFnYVhSeklITjFZbk5wWkdsaGNtbGxjeXdnWVdabWFXeHBZWFJsY3l3Z2IyWm1hV05sY25Nc0lHRm5aVzUwY3l3Z1kyOHRZbkpoYm1SbGNuTWdiM0lnYjNSb1pYSWdjR0Z5ZEc1bGNuTXNJR0Z1WkNCbGJYQnNiM2xsWlhNc0lHaGhjbTFzWlhOeklHWnliMjBnWVc1NUlHTnNZV2x0SUc5eUlHUmxiV0Z1WkN3Z2FXNWpiSFZrYVc1bklISmxZWE52Ym1GaWJHVWdZWFIwYjNKdVpYbHpKaU16T1RzZ1ptVmxjeXdnYldGa1pTQmllU0JoYm5rZ2RHaHBjbVFnY0dGeWRIa2daSFZsSUhSdklHOXlJR0Z5YVhOcGJtY2diM1YwSUc5bUlFTnZiblJsYm5RZ2VXOTFJSEpsWTJWcGRtVXNJSE4xWW0xcGRDd2djbVZ3Ykhrc0lIQnZjM1FzSUhSeVlXNXpiV2wwSUc5eUlHMWhhMlVnWVhaaGFXeGhZbXhsSUhSb2NtOTFaMmdnZEdobElGTmxjblpwWTJVc0lIbHZkWElnZFhObElHOW1JSFJvWlNCVFpYSjJhV05sTENCNWIzVnlJR052Ym01bFkzUnBiMjRnZEc4Z2RHaGxJRk5sY25acFkyVXNJSGx2ZFhJZ2RtbHZiR0YwYVc5dUlHOW1JSFJvWlNCVVQxTXNJRzl5SUhsdmRYSWdkbWx2YkdGMGFXOXVJRzltSUdGdWVTQnlhV2RvZEhNZ2IyWWdZVzV2ZEdobGNpNDhMMlZ0UGp3dmNENEtDanh3UGp4emRISnZibWMrUkVsVFEweEJTVTFGVWlCUFJpQlhRVkpTUVU1VVNVVlRQQzl6ZEhKdmJtYytQQzl3UGdvS1BIQStQSE4wY205dVp6NVpUMVVnUlZoUVVrVlRVMHhaSUZWT1JFVlNVMVJCVGtRZ1FVNUVJRUZIVWtWRklGUklRVlE2UEM5emRISnZibWMrUEM5d1Bnb0tQRzlzUGdvSlBHeHBQbGxQVlZJZ1ZWTkZJRTlHSUZSSVJTQlRSVkpXU1VORklFbFRJRUZVSUZsUFZWSWdVMDlNUlNCU1NWTkxMaUJVU0VVZ1UwVlNWa2xEUlNCSlV5QlFVazlXU1VSRlJDQlBUaUJCVGlBbWNYVnZkRHRCVXlCSlV5WnhkVzkwT3lCQlRrUWdKbkYxYjNRN1FWTWdRVlpCU1V4QlFreEZKbkYxYjNRN0lFSkJVMGxUTGlBc0xpQkJUa1FnVlZNc0lFbFVKaU16T1R0VElFTlZVMVJQVFVWU1V5d2dSVmhRVWtWVFUweFpJRVJKVTBOTVFVbE5VeUJCVEV3Z1YwRlNVa0ZPVkVsRlV5QlBSaUJCVGxrZ1MwbE9SQ3dnVjBoRlZFaEZVaUJGV0ZCU1JWTlRJRTlTSUVsTlVFeEpSVVFzSUVsT1EweFZSRWxPUnl3Z1FsVlVJRTVQVkNCTVNVMUpWRVZFSUZSUElGUklSU0JKVFZCTVNVVkVJRmRCVWxKQlRsUkpSVk1nVDBZZ1RVVlNRMGhCVGxSQlFrbE1TVlJaTENCR1NWUk9SVk5USUVaUFVpQkJJRkJCVWxSSlExVk1RVklnVUZWU1VFOVRSU0JCVGtRZ1RrOU9MVWxPUmxKSlRrZEZUVVZPVkM0OEwyeHBQZ29KUEd4cFBrMUJTMFZUSUU1UElGZEJVbEpCVGxSWklGUklRVlFnS0drcElGUklSU0JUUlZKV1NVTkZJRmRKVEV3Z1RVVkZWQ0JaVDFWU0lGSkZVVlZKVWtWTlJVNVVVeXdnS0dscEtTQlVTRVVnVTBWU1ZrbERSU0JYU1V4TUlFSkZJRlZPU1U1VVJWSlNWVkJVUlVRc0lGUkpUVVZNV1N3Z1UwVkRWVkpGTENCUFVpQkZVbEpQVWkxR1VrVkZMQ0FvYVdscEtTQlVTRVVnVWtWVFZVeFVVeUJVU0VGVUlFMUJXU0JDUlNCUFFsUkJTVTVGUkNCR1VrOU5JRlJJUlNCVlUwVWdUMFlnVkVoRklGTkZVbFpKUTBVZ1YwbE1UQ0JDUlNCQlEwTlZVa0ZVUlNCUFVpQlNSVXhKUVVKTVJTd2dRVTVFSUNocGRpa2dRVTVaSUVWU1VrOVNVeUJKVGlCVVNFVWdVMDlHVkZkQlVrVWdWMGxNVENCQ1JTQkRUMUpTUlVOVVJVUXVQQzlzYVQ0S0NUeHNhVDVCVGxrZ1RVRlVSVkpKUVV3Z1JFOVhUa3hQUVVSRlJDQlBVaUJQVkVoRlVsZEpVMFVnVDBKVVFVbE9SVVFnVkVoU1QxVkhTQ0JVU0VVZ1ZWTkZJRTlHSUZSSVJTQlRSVkpXU1VORklFbFRJRVJQVGtVZ1FWUWdXVTlWVWlCUFYwNGdSRWxUUTFKRlZFbFBUaUJCVGtRZ1VrbFRTeUJCVGtRZ1ZFaEJWQ0JaVDFVZ1YwbE1UQ0JDUlNCVFQweEZURmtnVWtWVFVFOU9VMGxDVEVVZ1JrOVNJRUZPV1NCRVFVMUJSMFVnVkU4Z1dVOVZVaUJEVDAxUVZWUkZVaUJUV1ZOVVJVMGdUMUlnVEU5VFV5QlBSaUJFUVZSQklGUklRVlFnVWtWVFZVeFVVeUJHVWs5TklGUklSU0JFVDFkT1RFOUJSQ0JQUmlCQlRsa2dVMVZEU0NCTlFWUkZVa2xCVEM0OEwyeHBQZ29KUEd4cFBrNVBJRUZFVmtsRFJTQlBVaUJKVGtaUFVrMUJWRWxQVGl3Z1YwaEZWRWhGVWlCUFVrRk1JRTlTSUZkU1NWUlVSVTRzSUU5Q1ZFRkpUa1ZFSUVKWklGbFBWU0JHVWs5TklFOVNJRlJJVWs5VlIwZ2dUMUlnUmxKUFRTQlVTRVVnVTBWU1ZrbERSU0JUU0VGTVRDQkRVa1ZCVkVVZ1FVNVpJRmRCVWxKQlRsUlpJRTVQVkNCRldGQlNSVk5UVEZrZ1UxUkJWRVZFSUVsT0lGUklSU0JVVDFNdVBDOXNhVDRLUEM5dmJENEtDanh3UGp4emRISnZibWMrVEVsTlNWUkJWRWxQVGlCUFJpQk1TVUZDU1V4SlZGazhMM04wY205dVp6NDhMM0ErQ2dvOGNENVpUMVVnUlZoUVVrVlRVMHhaSUZWT1JFVlNVMVJCVGtRZ1FVNUVJRUZIVWtWRklGUklRVlFnUVU1RUlGTklRVXhNSUU1UFZDQkNSU0JNU1VGQ1RFVWdSazlTSUVGT1dTQkVTVkpGUTFRc0lFbE9SRWxTUlVOVUxDQkpUa05KUkVWT1ZFRk1MQ0JUVUVWRFNVRk1MQ0JEVDA1VFJWRlZSVTVVU1VGTUlFOVNJRVZZUlUxUVRFRlNXU0JFUVUxQlIwVlRMQ0JKVGtOTVZVUkpUa2NnUWxWVUlFNVBWQ0JNU1UxSlZFVkVJRlJQTENCRVFVMUJSMFZUSUVaUFVpQk1UMU5USUU5R0lGQlNUMFpKVkZNc0lFZFBUMFJYU1V4TUxDQlZVMFVzSUVSQlZFRWdUMUlnVDFSSVJWSWdTVTVVUVU1SFNVSk1SU0JNVDFOVFJWTWdLRVZXUlU0Z1NVWWdTRUZUSUVKRlJVNGdRVVJXU1ZORlJDQlBSaUJVU0VVZ1VFOVRVMGxDU1V4SlZGa2dUMFlnVTFWRFNDQkVRVTFCUjBWVEtTd2dVa1ZUVlV4VVNVNUhJRVpTVDAwNlBDOXdQZ29LUEc5c1Bnb0pQR3hwUGxSSVJTQlZVMFVnVDFJZ1ZFaEZJRWxPUVVKSlRFbFVXU0JVVHlCVlUwVWdWRWhGSUZORlVsWkpRMFU3UEM5c2FUNEtDVHhzYVQ1VVNFVWdRMDlUVkNCUFJpQlFVazlEVlZKRlRVVk9WQ0JQUmlCVFZVSlRWRWxVVlZSRklFZFBUMFJUSUVGT1JDQlRSVkpXU1VORlV5QlNSVk5WVEZSSlRrY2dSbEpQVFNCQlRsa2dSMDlQUkZNc0lFUkJWRUVzSUVsT1JrOVNUVUZVU1U5T0lFOVNJRk5GVWxaSlEwVlRJRkJWVWtOSVFWTkZSQ0JQVWlCUFFsUkJTVTVGUkNCUFVpQk5SVk5UUVVkRlV5QlNSVU5GU1ZaRlJDQlBVaUJVVWtGT1UwRkRWRWxQVGxNZ1JVNVVSVkpGUkNCSlRsUlBJRlJJVWs5VlIwZ2dUMUlnUmxKUFRTQlVTRVVnVTBWU1ZrbERSVHM4TDJ4cFBnb0pQR3hwUGxWT1FWVlVTRTlTU1ZwRlJDQkJRME5GVTFNZ1ZFOGdUMUlnUVV4VVJWSkJWRWxQVGlCUFJpQlpUMVZTSUZSU1FVNVRUVWxUVTBsUFRsTWdUMUlnUkVGVVFUczhMMnhwUGdvSlBHeHBQbE5VUVZSRlRVVk9WRk1nVDFJZ1EwOU9SRlZEVkNCUFJpQkJUbGtnVkVoSlVrUWdVRUZTVkZrZ1QwNGdWRWhGSUZORlVsWkpRMFU3SUU5U1BDOXNhVDRLQ1R4c2FUNUJUbGtnVDFSSVJWSWdUVUZVVkVWU0lGSkZURUZVU1U1SElGUlBJRlJJUlNCVFJWSldTVU5GTGp3dmJHaytDand2YjJ3K0NnbzhjRDQ4ZFQ1Q2VTQnlaV2RwYzNSbGNtbHVaeUJoYm1RZ2MzVmljMk55YVdKcGJtY2dkRzhnYjNWeUlHVnRZV2xzSUdGdVpDQlRUVk1nYzJWeWRtbGpaU3dnWW5rZ2IzQjBMV2x1TENCdmJteHBibVVnY21WbmFYTjBjbUYwYVc5dUlHOXlJR0o1SUdacGJHeHBibWNnYjNWMElHRWdZMkZ5WkN3Z0puRjFiM1E3ZVc5MUlHRm5jbVZsSUhSdklIUm9aWE5sSUZSRlVrMVRJRTlHSUZORlVsWkpRMFVtY1hWdmREc2dZVzVrSUhsdmRTQmhZMnR1YjNkc1pXUm5aU0JoYm1RZ2RXNWtaWEp6ZEdGdVpDQjBhR1VnWVdKdmRtVWdkR1Z5YlhNZ2IyWWdjMlZ5ZG1salpTQnZkWFJzYVc1bFpDQmhibVFnWkdWMFlXbHNaV1FnWm05eUlIbHZkU0IwYjJSaGVTNDhMM1UrUEM5d1Bnb0tQSEErSm01aWMzQTdQQzl3UGdvOGFHbG5hR3hwWjJoMElHTnNZWE56UFNKamIyMXdZVzU1VG1GdFpWVndaR0YwWlNJK1RtRnpkSGtnVUdWeVptOXliV0Z1WTJVOEwyaHBaMmhzYVdkb2RENDhZbklnTHo0S1BHaHBaMmhzYVdkb2RDQmpiR0Z6Y3owaVkyOXRjR0Z1ZVVGa1pISmxjM05WY0dSaGRHVWlQakl3TXpVZ1V5NGdSV0Z6ZEhkdmIyUWdSSEl1TENCWGIyOWtjM1J2WTJzc0lFbE1JRFl3TURrNFBDOW9hV2RvYkdsbmFIUStQR0p5SUM4K0NqeG9hV2RvYkdsbmFIUWdZMnhoYzNNOUltTnZiWEJoYm5sUWFHOXVaVlZ3WkdGMFpTSStLRGcwTnlrZ05EVTRMVFE0TlRnOEwyaHBaMmhzYVdkb2RENDhZbklnTHo0S1BHaHBaMmhzYVdkb2RDQmpiR0Z6Y3owaVkyOXRjR0Z1ZVVWdFlXbHNWWEJrWVhSbElqNXVZWFJsUUc1aGMzUjVjR1Z5Wm05eWJXRnVZMlV1WTI5dFBDOW9hV2RvYkdsbmFIUSsifQ==

Terms of Service

Privacy Policy

Core Modal Title

Sorry, no results found

You Might Find These Articles Interesting

T
Please Check Your Email
We Will Be Following Up Shortly
*
*
*