Add Row
Add Element
cropper
update

Nasty Performance ~ 847-458-4858 

update
Add Element
  • Blog Home
  • Categories
    • Motorcycle Maintenance
    • Riding Tips & Preps
    • Safety & Inspection
    • Customizations & Upgrades
    • DIY Motorcycle Repairs
    • Motocycle Audio Systems
    • Motocycle Seasonal Care & Storage
  • Bike Night
  • Nasty Performance Motorcycle Shop
July 19.2025
1 Minute Read

Motorcycle Safety Checks That Could Save Your Life

Did you know that nearly one-third of fatal motorcycle accidents result from mechanical failures or improper maintenance ? This eye-opening fact highlights just how critical regular motorcycle safety checks are for every rider. Whether you’re a seasoned enthusiast or gearing up for your first trip, neglecting pre-ride inspections can turn a simple oversight into a life-or-death scenario. In this comprehensive guide, you’ll discover the lifesaving steps and expert advice you need to ride with confidence and avoid becoming another statistic.

Why Motorcycle Safety Checks Are Critical: A Look at the Numbers

The importance of motorcycle safety checks is impossible to overstate when you examine the numbers. According to recent studies by the National Highway Traffic Safety Administration, a significant portion of motorcycle accidents stem not from rider error but from mechanical failures. Many of these tragic incidents could have been easily prevented with routine safety checks, proper maintenance, and a critical eye for detail before every ride. In fact, skipping even a simple safety check can leave you vulnerable to hazards hiding in plain sight.

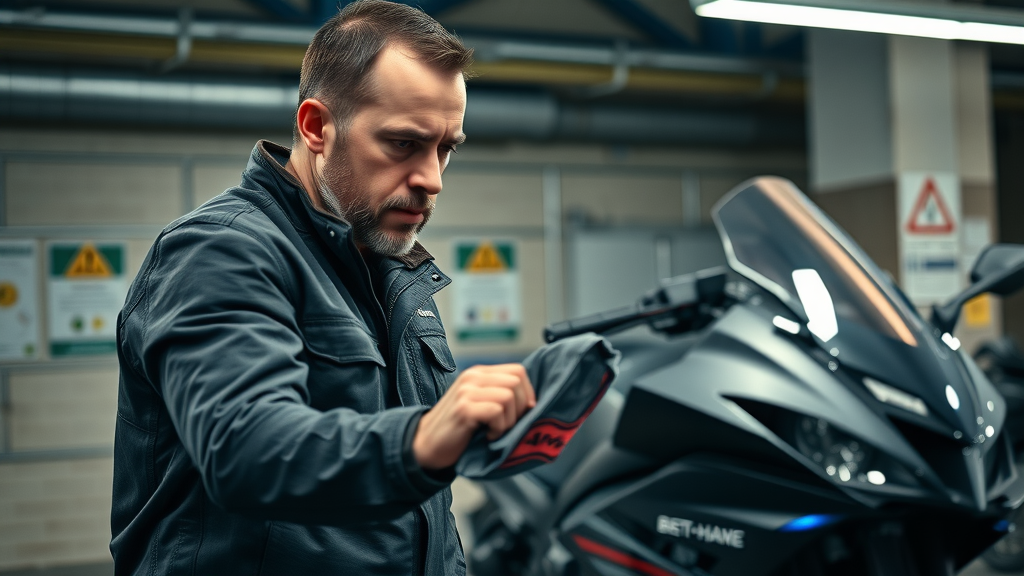
A pre-ride safety inspection acts as your first line of defense against unexpected malfunctions—from brake lamp failures to tire blowouts. Performing these checks consistently not only ensures personal safety but also keeps you compliant with inspection regulations implemented to protect all road users. Many motorcycle riders underestimate the power of a quick ride inspection and how it can directly prevent tragedies. The following section covers what you must inspect and why every point on the safety checklist matters for your well-being—and potentially for your life.

"According to the National Highway Traffic Safety Administration, nearly one-third of fatal motorcycle accidents are caused by mechanical failures or improper maintenance—regular motorcycle safety checks can be the difference between life and death."

Somber, experienced motorcycle rider performing a safety check on a sportbike in a well-lit garage with safety posters. The focus is on careful inspection, relating to motorcycle safety checks.

Understanding Motorcycle Safety Checks: Essential Pre-Ride Inspection Steps

Every effective motorcycle safety check starts before you even roll out of the garage. Regular, methodical inspections are crucial for identifying risks and avoiding motorcycle accident situations resulting from overlooked issues. This section covers the safety checklist items recommended by safety foundations and outlined in your owner’s handbook, ensuring nothing critical slips through the cracks.

The core pre-ride safety inspection covers several vital areas. For starters, always assess tire pressure and tread depth to prevent loss of grip and unexpected blowouts. Next, ensure your brakes are in top shape by testing both front and rear for stiffness, odd noises, or a “spongy” feel. Light and signal inspections follow, since functioning headlights, brake lamps, and turn signals are mandatory for night and day riding. With fluid levels, don’t forget to check engine oil, coolant, and brake fluid, as low or contaminated fluids can lead to catastrophic engine or brake failures. Lastly, inspect your chain or belt for slack and wear—neglecting this simple step leads to loss of power or control mid-ride.

  • Tire pressure and tread assessment
  • Brakes functionality check
  • Light and signal inspection
  • Fluid levels review
  • Chain and belt condition
  • Suspension system inspection
  • Mirrors and handlebars adjustment
Motorcycle Safety Check Item Why It Matters Frequency
Tires Ensures optimal grip and stability Before Every Ride
Brakes Critical for safe stopping Before Every Ride
Lights/Signals Visibility to others Before Every Ride
Fluid Levels Maintains engine/operational integrity Weekly
Drive Chain/Belt Prevents loss of power or control Weekly
Mirrors/Handlebars Clear view and secure handling Before Every Ride
Suspension Smooth and stable ride Monthly

Gloved hands inspecting motorcycle tire tread and brake disc for depth and wear, emphasizing detailed motorcycle safety checks.

Comprehensive Motorcycle Safety Inspection: Avoid Common Motorcycle Accident Risks

A comprehensive motorcycle safety inspection does more than help you avoid traffic tickets or failed official inspections—it dramatically reduces your risk of being an accident victim . Each year, motorcycle accidents occur due to issues that would have been caught through careful attention to small details. From worn tires to faulty brake systems, even seemingly minor oversights can lead to catastrophic loss of control or extended stopping distances that spell disaster. The following subsections dive into the most critical parts of a thorough inspection, helping you develop the habits that protect both you and your motorcycle from preventable danger.

Safety checks target the hidden dangers that are easy to forget, such as hairline cracks in sidewalls or subtle wobbling in wheels. Additionally, many serious motorcycle riders say these detailed inspections are more effective than relying solely on scheduled services. By understanding the components most commonly linked to mechanical failure, you’ll know exactly what to look for every time you inspect your motorcycle—keeping your rides far safer and much more enjoyable.

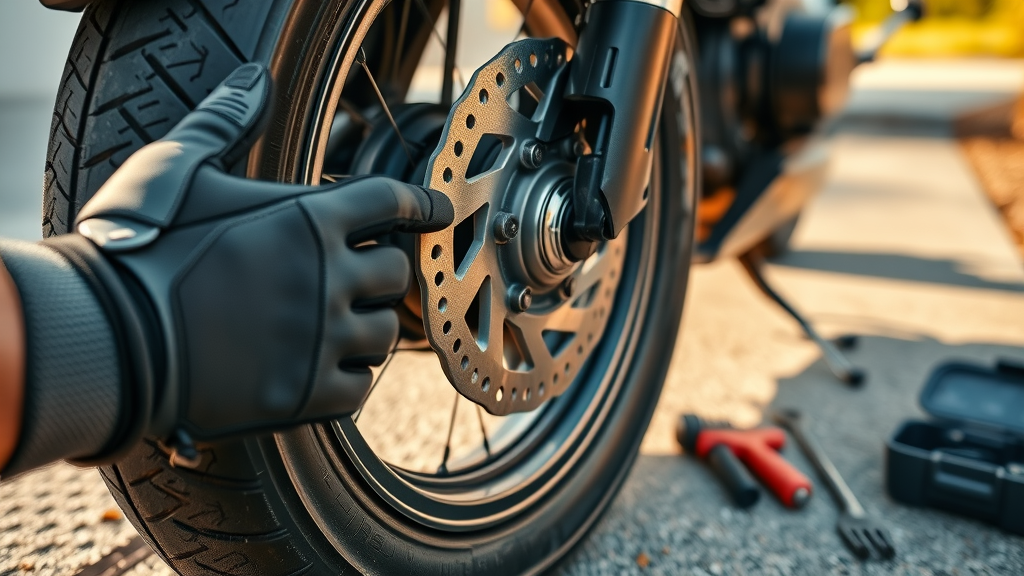
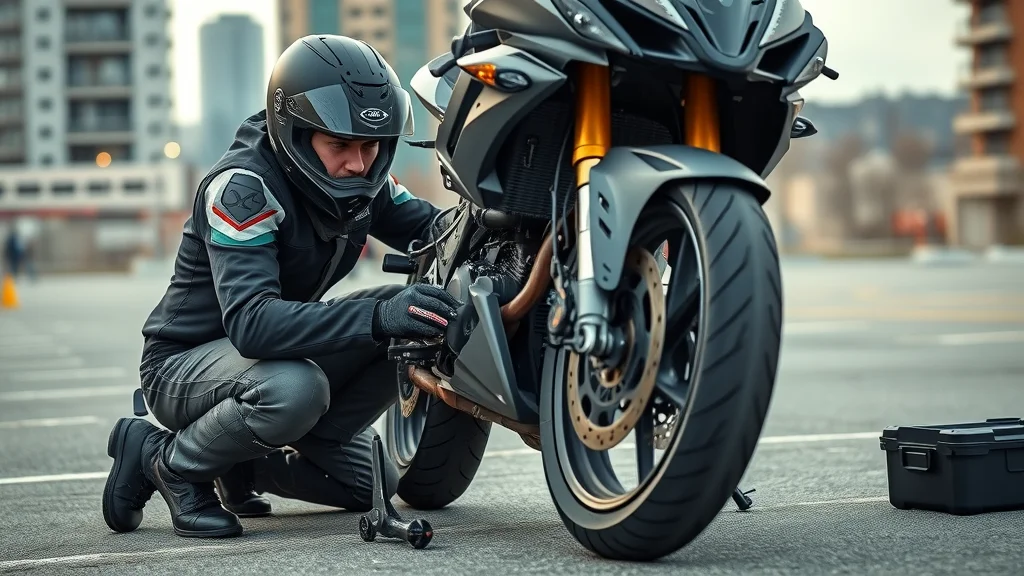
Tires and Wheels: Preventing Blowouts and Loss of Control

Your tires and wheels are the only link between you and the road, making their condition essential for safe riding. Regularly check to make sure tire pressure is within the recommended range found in your owners handbook, as under- or over-inflation reduces stability and can produce rapid tread wear. Look for embedded objects or any signs of wear and damage on the tread and sidewalls. Small punctures, uneven wear, or low tread depth are classic precursors to blowouts and should be addressed immediately before you hit the road. A quick safety inspection of the wheel should reveal no dents, cracks, or looseness when rocked side-to-side.

Don’t forget to inspect wheel alignment; improper tracking increases the risk of rapid tire wear and compromised handling, which can precipitate a serious motorcycle accident . Some riders overlook wheel bearings and valve stems, but these tiny components play a huge role in maintaining vertical centerline integrity and secure tire-to-road contact. Properly disposed about the vertical centerline tires and wheels are a prerequisite for safe travels, helping ensure your motorcycle handles predictably under braking, cornering, and adverse weather.

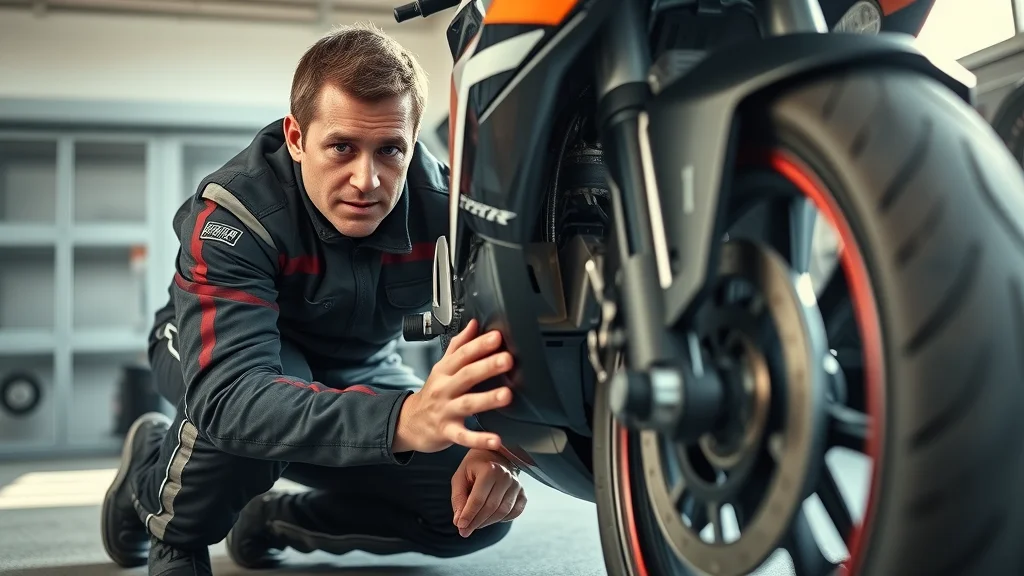
Brake System: Your First Line of Defense

The brake system remains your most critical safeguard against collisions and emergencies. Begin by checking both the front and rear brakes for proper functionality and sufficient pad thickness—refer to your owners handbook for minimum requirements. Brake fluid levels should be in the appropriate range and free from air bubbles, with clear or slightly amber fluid. If you detect a “spongy” lever feel or hear grinding sounds, halt your ride inspection and resolve the issue immediately—these are red flags for imminent brake failure.

Examine the brake lines for leaks, cracks, and signs of deterioration, especially near connection points. Your brake lamp must light up when the levers are engaged—a non-functioning lamp not only attracts the attention of law enforcement but puts you at extreme risk during sudden stops. Just as with tires, making brake safety a non-negotiable part of your safety check wards off the personal injuries and trauma that come from preventable mechanical accidents.

Motorcycle technician testing the front brake lever and wheel during a safety check in a professional workshop, focusing on motorcycle safety inspection.

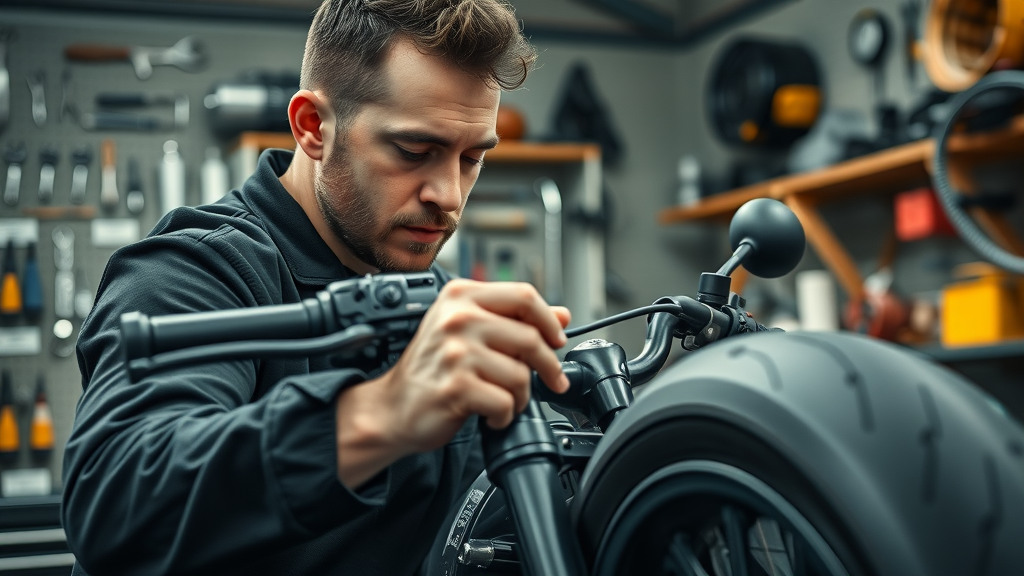
Performing a Safety Inspection: Step-by-Step Guide

Performing a thorough motorcycle safety inspection doesn’t have to be complicated. In fact, following a simple step-by-step approach makes these vital checks second nature, allowing you to spot problems before they turn catastrophic. This section covers how to consistently and efficiently inspect your motorcycle to maximize both safety and peace of mind.

Begin each inspection by checking all lights and indicators for proper functionality. Don’t overlook the brake lamp and turn signals—functional lighting dramatically improves your visibility and helps prevent accidents. Next, test the horn, mirrors, and handlebar controls. Adjusting mirrors ensures a clear rear view and helps maintain proper separation distance between you and other vehicles. Inspect the chain or belt for slack, wear, or distress, as these often go easy to forget but are vital for power delivery. Examine cables for fraying or sticking and assess suspension for leaks or stiffness, both of which impact handling and ride comfort.

  • Check all lights and indicators for functionality
  • Test horn, mirrors, and handlebar controls
  • Inspect chain/belt for slack or signs of distress
  • Examine cables for fraying or sticking
  • Assess suspension for leaks or stiffness
"Never assume everything is fine—performing a thorough safety inspection each ride can expose issues before they turn catastrophic."

Young rider referencing a motorcycle safety checklist before riding, with step-by-step inspection instructions visible, illustrating motorcycle safety checks in action.

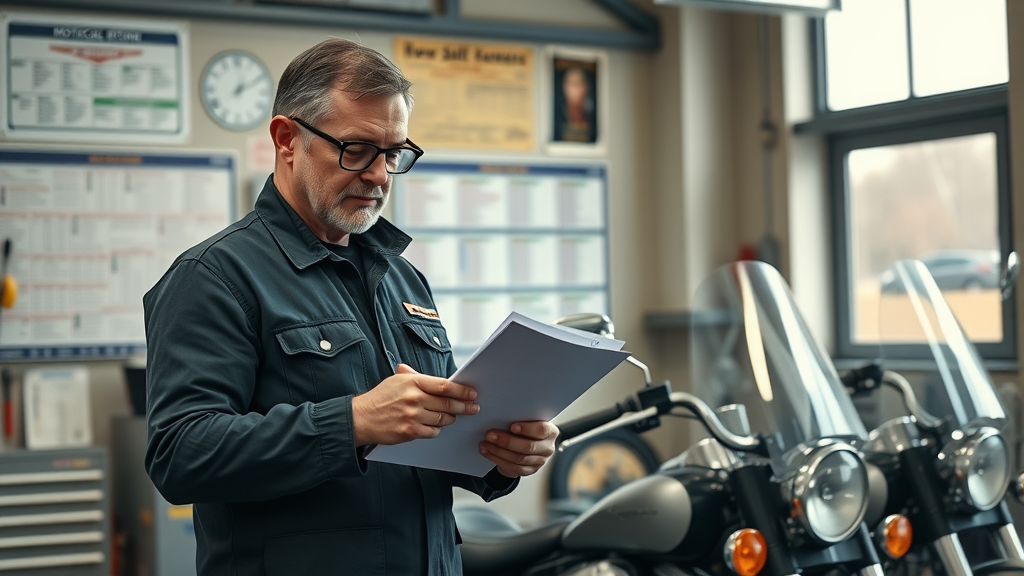
Understanding Motorcycle Safety Inspection Regulations

Every rider should familiarize themselves with local inspection regulations that affect their ability to ride legally and safely. Inspection laws differ state by state but generally exist to enforce minimum safety standards—protecting riders, passengers, and others on the road. Whether you ride daily or seasonally, adhering to these regulations lowers your risk of a personal injury accident and ensures you’re not cited for non-compliance at city hall or during a random roadside check.

Failing an official safety inspection due to something as trivial as a missing license plate light or non-functioning turn signal can lead to fines or having your bike sidelined. That’s why experience shows that integrating state inspection requirements into your own safety checklist produces the best results—not only protecting you from mechanical issues but also from unnecessary encounters with law enforcement or city hall. Consult your owner’s handbook for all required systems and intervals.

Why Adherence to Local Inspection Regulations Protects You

Strict compliance with inspection regulations doesn’t just help you avoid legal trouble—it also ensures higher standards for motorcycle safety . Each checklist item represents a layer of defense against unexpected incidents. By routinely reviewing guidelines and requiring the same diligence from fellow motorcycle riders, you contribute to a safer riding community that’s less likely to produce accident victims. Regulatory rules are in place for your benefit, strengthening habits that carry real-world consequences for every journey you take.

Additionally, knowing that your bike has passed all state or regional checks through a formal safety inspection offers peace of mind, reinforcing confidence in both your machine and your skill as a rider. Whether you perform moped or full motorcycle inspections, awareness and compliance make for hassle-free rides and fewer unpleasant surprises at checkpoints or following a motorcycle accident.

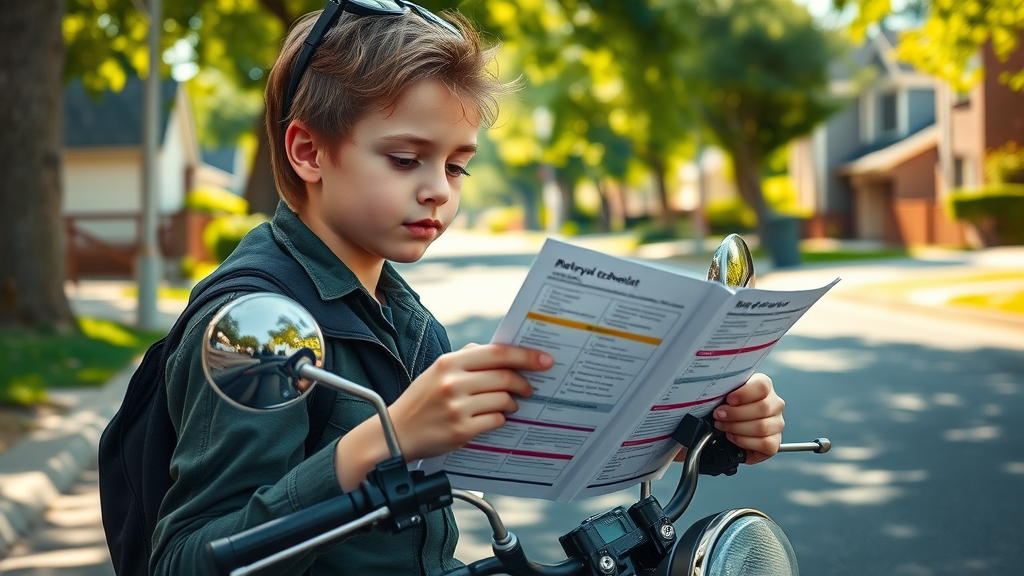
Creating a Motorcycle Safety Checklist for Every Ride

Every responsible rider should maintain and follow a customized safety checklist before every journey. This systematic approach ensures you don’t overlook any essential details—especially those that can lead to disaster when forgotten. A solid checklist not only makes each step easy to remember but is also adaptable, so riders of all experience levels stay protected. Think of it as a fail-safe for your ride inspection that eliminates guesswork and brings consistency to your routine.

Below is a proven sequence every motorcycle rider should follow before rolling out:

  1. Start with a visual walk-around
  2. Check tire pressure and condition
  3. Test brakes and clutch levers for proper resistance
  4. Examine lights, turn signals, and horn
  5. Ensure mirrors are properly aligned
  6. Review fluid levels under the seat and beneath the bike
  7. Check for loose fasteners, nuts, and bolts

Diverse group of motorcycle riders reviewing safety checklists before a ride, demonstrating collaborative motorcycle safety inspection habits.

Real Stories: Motorcycle Safety Checks That Prevented Accidents

Real-life experiences highlight how adherence to motorcycle safety checks can make all the difference. Many riders report finding severely worn brake pads minutes before heading out—a discovery that likely prevented a serious motorcycle accident. Others share stories of noticing dangerously low tire pressure or frayed cables during routine inspections, enabling them to avoid becoming an accident victim or facing a breakdown miles from help.

These testimonials are reminders that performing a quick but thorough safety inspection can expose hidden issues that, if left unchecked, can escalate fast. The best advice comes from those who’ve witnessed the alternative. As a result, the number of potential personal injury incidents among vigilant riders is considerably lower, reinforcing the practical value of making a safety check a ritual every time you hit the road.

"I once found my brake pads worn to the metal right before a group ride—if I hadn’t done my safety inspection, I could have ended up in the hospital." — Local Rider

For those who prefer a visual learning style, a step-by-step video demonstrating a complete pre-ride motorcycle safety inspection can quickly boost your confidence in handling your own checks. These informative videos typically cover each item in the safety checklist and offer practical demonstrations—from inspecting tires to evaluating the brake lamp and ensuring turn signals operate correctly. Refer to trusted online workshops or safety foundation channels for official guidance.

Watching a professional walk through each ride inspection solidifies best practices and can reveal best-kept secrets for spotting potential hazards early. Make it a point to supplement your reading with video learning for a well-rounded understanding.

People Also Ask: What does a motorcycle safety inspection consist of?

A typical motorcycle safety inspection includes checking tire pressure and tread depth, examining brake systems and brake lamp operation, confirming all lights and turn signals function, reviewing fluid levels, ensuring proper chain or belt tension, inspecting mirrors, handlebars, and frame for integrity, and verifying that all critical fasteners are secure. Depending on your region, regulations might also require emissions or noise checks. Always consult your owners handbook for the most up-to-date and region-specific instructions.

Don’t overlook functional items such as the horn, and be mindful of visual checks for obvious damage or leaks. These easy-to-follow steps not only ensure compliance with inspection regulations but also make sure you catch problems before they become severe.

People Also Ask: Do motorcycles have to be inspected in Pennsylvania?

Yes, in Pennsylvania, all motorcycles must pass an annual safety inspection conducted by certified garages approved by the state. This safety inspection covers a range of criteria such as brakes, lights, turn signals, license plate lights, tires, and frame integrity, as well as any structural modifications. A current inspection sticker is mandatory for legal street use, and riding without one can result in fines and possibly having your registration revoked.

Inspections must be performed at recognized state facilities—riders cannot perform the safety check themselves for legal compliance. Always verify the latest requirements through the Pennsylvania Department of Transportation for up-to-date details.

Certified motorcycle safety inspector records results during state inspection at an official garage as part of mandatory motorcycle safety inspection regulations.

People Also Ask: What do you need to check before riding a motorcycle?

Before riding, perform a comprehensive ride inspection by checking tire pressure, tread depth, braking systems, lights (including turn signals and brake lamp), horn, mirrors, handlebars, cables, and all critical fluids (engine oil, brake fluid, coolant). You should also ensure all license plate mounting hardware is secured and inspect your motorcycle for visible leaks or damage.

Owners handbooks will provide a detailed safety checklist tailored to your specific model. Consistently performing these steps can help you avoid becoming a motorcycle accident victim due to preventable mechanical issues.

People Also Ask: Do you have to have a motorcycle inspected in NC?

In North Carolina, motorcycles registered for street use are required to undergo a safety inspection annually at authorized inspection stations. The safety check evaluates system functionality including brakes, lights and lamps, signals, mirrors, tires, and sometimes emissions depending on the motorcycle’s age and engine type. Riding without a current inspection sticker is illegal and could result in tickets or a hold on renewing your registration.

Always check with the North Carolina Department of Motor Vehicles or city hall for the most up-to-date inspection regulations and standards for your region.

Frequently Asked Questions on Motorcycle Safety Checks

  • How often should I perform motorcycle safety checks?
    It’s recommended to perform a full safety inspection before every ride and a more detailed mechanical review monthly.
  • Can I do a safety inspection myself, or do I need a mechanic?
    Most pre-ride safety checks can be performed yourself, but annual inspections for legal compliance must be done at certified locations as dictated by local laws.
  • What are the most commonly overlooked items during a ride inspection?
    Riders often miss worn brake pads, improperly inflated tires, deteriorated cables, and non-functional turn signals or license plate lights.
  • Does an official safety inspection cover the same items as a DIY checklist?
    Many items overlap, but state inspections might include emissions, noise compliance, and additional system checks beyond the regular checklist.
  • Are there mobile apps for motorcycle safety checklist reminders?
    Yes, several apps can guide you through each step of a ride inspection, log maintenance records, and send routine reminders.

Expert Recommendations: Motorcycle Safety Checklists for Every Rider

"A pre-ride motorcycle safety check is the first and most critical step every rider should take, no matter the distance—your life may literally depend on it." — Motorcycle Safety Foundation

Experts from organizations like the Motorcycle Safety Foundation and Law Tigers agree that building a consistent safety routine is the easiest way to minimize risk. Always refer to your owner’s handbook for specifics, but anchor your habits around the safety checklist and adapt it for long trips or varying road conditions.

Don’t hesitate to seek a free consultation or professional check if you have doubts about any component. Remember, a small investment of time in your ride inspection saves incalculable costs in repairs—or personal safety—down the road. Make use of available resources, like online community forums or official safety foundation tips, to stay updated on best practices.

Key Insights on Motorcycle Safety Inspections and Lifesaving Checks

  • Regular motorcycle safety checks avert mechanical failures and accidents.
  • State inspection regulations must be followed for legal and safety compliance.
  • Checklists ensure no critical inspection steps are skipped.
  • Visual inspection, functional tests, and fluid reviews are all key.
  • Motorcycle safety is a daily responsibility for every rider.

Watching “The Importance of Motorcycle Safety Checks Before Every Ride” video content is a great supplement to this article. These videos provide real-world demonstrations of how a rigorous safety check prevents accidents and solidifies best practices through repetition and visual reinforcement. Take advantage of expert approved tutorials to reinforce your learning.

Get Professional Motorcycle Safety Inspections to Ride With Confidence

Want added peace of mind before your next adventure? Schedule a professional motorcycle safety inspection today and ensure your bike meets every regulation and best practice for safe riding. Never underestimate the impact of a qualified eye on your ride inspection—sometimes the subtle issues only show up to trained professionals. Call Us Today: 847-458-4858.

What You'll Learn

  • Why regular motorcycle safety checks are essential for preventing accidents
  • How to conduct detailed pre-ride inspections and what to look for
  • State requirements for safety inspections and how to stay compliant
  • Real-life stories highlighting the importance of catching issues early
  • Expert-backed checklists and resources for every type of rider

Conclusion

Take responsibility each time you ride: combine daily motorcycle safety checks with periodic professional inspections to ensure your machine is always road-ready and safe. Consistent diligence is your motorcycle’s—and your own—best protection.

Regular motorcycle safety checks are essential to ensure your ride remains safe and reliable. The California DMV’s “Preparing to Ride” guide emphasizes the importance of pre-ride inspections, detailing checks for tires, brakes, lights, and fluids to prevent mechanical failures. ( dmv.ca.gov ) Similarly, the Motorcycle Safety Foundation recommends the T-CLOCS system—Tires, Controls, Lights, Oil, Chassis, and Stands—as a comprehensive pre-ride inspection method to identify potential issues before hitting the road. ( mcleishorlando.com ) By incorporating these systematic checks into your routine, you can significantly reduce the risk of accidents and ensure a safer riding experience.

Safety & Inspection

Write A Comment

*
*
Related Posts All Posts

Defensive Riding Strategies That Could Save Your Life

Did you know? According to the National Highway Traffic Safety Administration, motorcyclists are 28 times more likely than car drivers to die in a crash per vehicle mile traveled. This unsettling truth highlights just how vital defensive riding strategies are for every motorcycle rider. If you want to stay safe on the road, understanding and mastering defensive riding techniques is not just an option—it's a necessity. Today, we break down practical, proven approaches you can begin using right now to protect yourself whenever you ride. Startling Motorcycle Accident Facts: Why Defensive Riding Strategies Are Essential "Studies show that motorcyclists are 28 times more likely than passenger vehicle occupants to die in a crash per vehicle mile traveled." — National Highway Traffic Safety Administration Understanding the High Stakes of Motorcycle Safety In the world of motorcycling , every ride is a negotiation with risk. Unlike drivers in cars, motorcycle riders face greater exposure and fewer physical protections. Traffic can change in an instant, road conditions may shift unexpectedly, and other road users often overlook riders, placing them in unnecessary danger. This is why motorcycle safety isn’t only about following laws—it's about riding skills , preparation, and anticipating what other drivers might do. The consequences of a motorcycle accident can be severe, including lifelong injuries, major financial challenges, or worse. Effective defensive riding strategies empower you to take control of your safety on the road. By understanding key facts—like the elevated risk of fatality and the prevalence of visibility-related accidents—you can begin shaping your habits for survival. Defensive riding doesn't just mean reacting; it means planning, positioning, and preparing every moment you ride. This proactive approach is the single best way to reduce the risks unique to motorcycling, helping you stay safe no matter the environment or weather conditions. By incorporating these principles into every journey, you directly address the dangers outlined in accident statistics and move from being a passive participant on the road to an active, safety-focused rider. Let's explore how you can do exactly that. Mastering Defensive Riding Strategies: Core Principles for Every Rider Defensive riding fundamentals: Anticipation and preparation Risk mitigation through situational awareness Staying visible and understanding blind spots Defensive riding strategies begin with a mindset of continuous anticipation and preparation . The most skilled motorcycle riders don't just operate the controls; they scan the road , read the traffic patterns, and anticipate every possible move nearby vehicles might make. This mental approach—sometimes called riding is a mindset —requires you to expect the unexpected. When you prepare mentally and remain alert physically, you’re better equipped to avoid or minimize the impact of potential hazards . Another cornerstone of defensive riding is risk mitigation through situational awareness . This isn’t just about seeing what’s in front of you. It means knowing what’s happening all around, including checking your mirrors frequently and predicting how traffic behavior could change. Situational awareness is your early warning system that helps you react in time to unexpected situations and allows you to make split-second decisions that could save your life. Lastly, staying visible and understanding blind spots for both yourself and for other drivers is key. Wearing bright or reflective gear, using your headlights—even during the day—and maintaining a position on the road where you are most visible can dramatically reduce your risk of being missed by a turning car or a sudden lane change. Use your turn signals and brake light to communicate your intentions, and remember that clear communication on the road is a vital component of defensive riding. Key Defensive Riding Skills for Daily Rides When it comes to daily commuting or leisure riding , several defensive riding skills stand out as essential. First, maintain a safe following distance . Always leave room between your motorcycle and the vehicle in front —the standard recommendation is at least a 2-4 second buffer to allow enough time to react to sudden stops or swerves. This simple habit gives you precious moments to avoid collisions and adjust your path smoothly. Second, never stop scanning for potential hazards . Continuously watch for things like cars pulling out, debris on the road, erratic drivers, and even unpredictable pedestrians. Remember, the more you scan, the more likely you’ll identify and mitigate risks before they become real threats. Riding techniques like visually "sweeping" the road ahead and keeping your head moving amplify your situational awareness. Finally, always anticipate other drivers' unpredictable actions . Assume that another driver may not see you, may suddenly change lanes, or could even run a stop sign. The best motorcycle riders mentally prepare for these possibilities and keep fingers over brake controls and adjust their riding line accordingly. By developing these defensive riding skills , you significantly enhance your safety on the road and reduce the chance of a motorcycle accident . Most Effective Defensive Riding Techniques to Prevent Motorcycle Accidents Maintaining safe following distances Scanning for potential hazards Anticipating other drivers' unpredictable actions Defensive riding techniques are your best defense against everyday roadway risks. Maintaining a safe following distance —generally a 2-4 second gap—gives you the critical advantage of visibility and reaction time. This buffer zone can make the difference between a near-miss and an avoidable collision. Always scan for potential hazards : potholes, merging vehicles, aggressive drivers, and changing traffic signals. By continuously observing your surroundings and future path, you can spot dangers while they are still manageable, helping you adjust your speed and position long before trouble arises. Combine this with defensive use of the horn, lights, and turn signals to alert others to your presence and intentions— clear communication is key to ensuring your safety . To manage unpredictable drivers, anticipate risky scenarios: expect a car to move without signaling, or a distracted driver to drift into your lane. By mentally rehearsing what you would do if something goes wrong, you not only react faster but often avoid dangerous situations entirely. Integrate these defensive riding strategies into your regular riding routine to build strong habits and improve your overall motorcycle safety . Technique Purpose Practical Example Maintain buffer zone Reduces collision risk Keep 2-4 second gap Use of lights/horn Increases visibility Signal when overtaking Mirror checks Prevents surprises Every 5-8 seconds Blind Spots: How to Manage and Minimize Hidden Dangers Blind spots are a significant cause of motorcycle accidents . Many road users simply cannot see motorcyclists in their side or rearview mirrors, especially when motorcycles travel alongside larger vehicles like trucks or SUVs. To mitigate this risk, always ride where you are most visible—ideally, so you can see the driver’s face in their mirror. If you cannot, assume you’re invisible to that driver. Wear bright or reflective clothing, use your headlight even during the day, and avoid lingering in a vehicle’s blind spot. Proper lane positioning enhances your visibility and reduces the chance of surprises. Proactively manage your own blind spots as well. Frequently check your mirrors and make quick shoulder glances—sometimes called "head checks"—before changing lanes or turning. This simple habit prevents collisions with vehicles or cyclists you might miss otherwise. Use your turn signal early and keep your intentions clear, giving others time and space to react appropriately. Adopting these visibility-focused riding techniques strengthens your defensive riding foundation and supports your goal of staying as safe as possible on the road. Remember, every precaution you take is another step toward helping you stay injury-free and confident on every ride. The Role of Situational Awareness in Advanced Defensive Riding Strategies Understanding situational awareness on the road Identifying and predicting hazards Responding to rapidly changing scenarios Situational awareness is the backbone of all defensive riding strategies . It means being completely tuned in to your environment—traffic flow, road surface, weather, and even the emotional state of other drivers. A vigilant rider regularly evaluates intersections, monitors sidewalk activity, and keeps an eye out for delivery vans, cyclists, and sudden obstacles. This approach helps you scan the road ahead continuously, increasing your safety on the road . To identify and predict hazards , use active observation. For example, if you see a car's brake light flicker, anticipate that vehicle may slow or stop abruptly. If a parked car's wheels are turned out, expect a possible entry into your lane. By weaving proactive hazard management into your rides, you’re always a step ahead and can take evasive action smoothly. Responding to rapidly changing scenarios often separates seasoned riders from beginners. Traffic jams, bad weather, and distracted drivers introduce unpredictable variables into any journey. Always have an exit plan, think defensively about where you could steer in an emergency, and rehearse these escape routes while you ride. By keeping your awareness dynamic, you champion defensive riding in real time. Enhancing Safe Riding with Predictive Observation Predictive observation elevates safe riding by teaching you to read the road like a chess match—several moves ahead. This skill is about noticing small cues: a driver checking mirrors before merging, a child approaching a crosswalk, or a truck’s load shifting in the breeze. Each signal provides an opportunity to make adjustments and maintain control. Practicing predictive observation involves more than just keeping your eyes moving; it’s about constantly updating your mental “map” of the road. Are cars bunching up at an intersection? Is a bicycle about to enter your lane? When you spot these indicators, you can reduce speed or change your position preemptively, ensuring you always have enough time to react to unexpected situations . By mastering this advanced aspect of situational awareness , you create a safety buffer that protects you from the unexpected. Remember, defensive riding is about being proactive—not simply reacting when danger appears but preventing it from materializing in the first place. Critical Riding Skills That Strengthen Defensive Riding Strategies Braking techniques for emergencies Controlled steering and cornering Proper use of motorcycle controls during evasive maneuvers No set of defensive riding strategies is complete without practical riding skills —especially braking, steering, and emergency control. When an obstacle appears or a vehicle in front suddenly stops, your ability to apply the brakes smoothly and progressively can prevent a crash. Practice using both front and rear brakes together, and always be prepared for quick stops without skidding or losing control. Controlled steering and cornering are vital techniques. Enter every turn at a speed that allows you to adjust mid-curve if something unexpected appears—like gravel or an oncoming car crossing the center line. Look where you want to go, not at the obstacle, and use your core and arms to guide the bike firmly but gently. Building these skills helps you stay safe whether you're enjoying a winding rural road or navigating city streets. Effective use of motorcycle controls during evasive maneuvers means balancing throttle, brakes, and clutch quickly and seamlessly. Drill emergency swerving and braking in safe, controlled areas so when the time comes, your actions are automatic and precise. The more you practice, the better your instincts and muscle memory will become—ensuring your defensive riding is as effective as possible in real-world emergencies. Defensive Riding Skills for Adverse Weather and Night Riding Adverse weather and night riding add a whole new layer of complexity for motorcycle riders. Rain, fog, snow, or poor lighting conditions can reduce visibility and make road surfaces unpredictable. This is when defensive riding skills are most vital. Adapt by reducing speed, increasing your following distance, and using extra caution when applying brakes or making turns. Wet or slick roads require gentle throttle and smooth, progressive braking to prevent loss of traction. Always check your tires and ensure they offer the necessary grip for changing conditions. Wear specialized rain gear and equipment outfitted with reflective materials or bright colors to improve your visibility to other road users. Ride with your headlight on and avoid riding in another vehicle's spray zone, where visibility and traction are worst. At night, slow down further—your ability to scan the road and respond to obstacles is naturally reduced in the dark. Maintaining defensive riding practices in harsh environments involves combining every skill you’ve learned: situational awareness, visibility, predictive observation, and advanced control of your motorcycle. The more unpredictable the conditions, the more crucial it becomes to anticipate problems and give yourself every possible advantage to stay safe . This compilation of real and staged motorcycle dashcam footage demonstrates defensive riding strategies in dynamic situations. With expert narration, you'll witness everything from proper following distances and lane positioning to hazard avoidance and proactive communication. Urban, suburban, and highway scenarios are included, giving practical breakdowns of the best techniques for staying safe in every riding environment. Pay particular attention to how riders use mirror checks , anticipate lane changes by other vehicles, and position themselves for maximum visibility. The skills exhibited in these clips are tested and proven, reminding us that good habits truly do save lives. Reviewing real-world examples enhances your defensive riding mindset, giving you new ideas for practicing and improving your own riding skills . Make these techniques part of your muscle memory by visualizing and rehearsing them before your next journey. Proper defensive riding techniques differ in city streets versus open country roads. In urban environments, anticipate frequent stops, aggressive drivers, and unpredictable pedestrian movement. In rural or suburban settings, scan for wildlife, debris, and tight curves. This instructional video demonstrates the best ways to rehearse emergency stops, evasive maneuvers, and space management in both settings. Learning to adapt your approach for each environment ensures you're ready, no matter where you ride. When practicing, start in low-traffic or closed environments such as parking lots or riding schools. Build confidence with controlled braking, cornering, and swerving drills . As you become more adept, progress to real-world scenarios, always prioritizing situational awareness , visibility, and proactive risk management. By intentionally cycling through defensive drills tailored to your regular riding conditions, you embed these safety-enhancing behaviors into your daily routine, supporting a lifetime of safe riding regardless of location or circumstance. People Also Ask: How to Be a Defensive Rider? Being a defensive rider means consistently using strategies that increase your safety on the road. Start by anticipating risks , maintaining safe following distances , and always keeping your awareness high. Practice scanning mirrors, managing blind spots , and wearing bright or reflective gear to maximize your visibility. Above all, approach every ride with a mindset that other road users may not see you and always be prepared to react quickly to the unexpected situations . Routine training and continuous skill development are essential. Take advanced safety courses and review real-world footage to identify ways you could improve your defensive riding skills . Stay adaptable, never become complacent, and always strive to elevate your ability to assess and respond to hazards proactively. Sharing the road responsibly, signaling your intentions clearly, and always leaving enough time and space to maneuver safely are foundational habits for any defensive rider. Practice these every time you ride to greatly reduce your risk of being involved in a motorcycle accident . People Also Ask: What is Defensive Riding Theory? Defensive riding theory is the practice of riding with the belief that every other vehicle on the road is a potential hazard. It's a proactive approach that encompasses anticipation, visibility, awareness, and control . The theory encourages motorcycle riders to maintain a “what if” mindset—constantly asking, "What if that car suddenly stops?" or, “What if a pedestrian steps into my lane?" It blends technical riding techniques —like smooth braking and proper body position during turns—with mental habits like continuous observation and prediction. The goal is to minimize the likelihood and severity of collisions, improve response to emergencies, and create a consistent margin of safety regardless of environment. By embracing this theory, riders train themselves to take proactive steps before hazards even fully materialize, making every journey safer and more controlled. People Also Ask: What's the Hardest Trick to Do on a Motorcycle? While many motorcycle stunts and tricks require extensive practice and skill, the hardest “trick” in real-world riding is mastering advanced emergency maneuvers under stress . This includes perfecting sudden, progressive braking and high-speed swerves to avoid obstacles. These skills demand both physical coordination and split-second judgment, especially when performed on unpredictable roads or in heavy traffic. Other riders may point to technical stunts such as wheelies or stoppies, but these are rarely useful in defensive riding. Instead, the most valuable and challenging skills for safety are often invisible: precise control, anticipation, and the ability to remain focused and calm during surprise situations. Make mastering these “tricks” your priority—they’re the ones that actually save lives . Consider enrolling in an advanced riding course to push your skills to their limits and gain confidence performing emergency maneuvers on cue. People Also Ask: What is the Most Important Factor in Defensive Driving? The most important factor in defensive driving or riding is situational awareness . This means consistently monitoring your surroundings, being alert to changes in traffic, environment, and road surface, and staying mentally engaged with what’s happening ahead, beside, and behind your motorcycle. Without strong situational awareness, you may not spot hazards or have enough time to react to unexpected situations . It underpins all other defensive riding skills, from correct lane positioning to emergency braking and hazard avoidance. The better your awareness, the more likely you are to stay safe in all riding conditions. Practice developing your situational awareness by setting riding goals each trip, such as noticing every car that enters your 360-degree “bubble” or scanning side roads for possible merging vehicles. Expert Insights: Quotes on Defensive Riding and Motorcycle Accident Prevention "Good defensive riding skills start with the mindset that every vehicle on the road could cause an accident—and preparing accordingly." — Certified Motorcycle Safety Instructor Comprehensive FAQs on Defensive Riding Strategies What are the top three defensive riding strategies new riders should focus on? How can experienced riders continue improving their defensive riding skills? What gear improves visibility and safety in urban environments? Which riding techniques help avoid the majority of intersection accidents? What are the top three defensive riding strategies new riders should focus on? New riders should prioritize: (1) maintaining adequate following distances; (2) consistent mirror and blind spot checks; and (3) practicing anticipation through scanning for hazards. These habits form the bedrock of effective defensive riding skills and create valuable reaction time in emergencies. How can experienced riders continue improving their defensive riding skills? Experienced riders should seek out advanced courses, review dashcam footage to reinforce positive habits, and continually self-assess for complacency or risky shortcuts. Practicing in varied conditions—urban, rural, night, and wet weather—ensures your skills remain sharp and responsive. What gear improves visibility and safety in urban environments? Wearing bright or reflective clothing , high-visibility helmets, and equipping your motorcycle with daytime running lights or extra reflectors dramatically increases your presence on the road. Always use your turn signals and regularly check that your brake light is working correctly for maximum motorcycle safety . Which riding techniques help avoid the majority of intersection accidents? Intersections are hot spots for motorcycle accidents . Approaching them with reduced speed, covering the brakes, and watching for cars that may turn or run a light are critical. Always make eye contact with drivers when possible, use your horn if unsure they see you, and ride in a lane position that maximizes your visibility. Key Takeaways: Implementing Defensive Riding Strategies to Stay Safe Defensive riding strategies dramatically reduce risks and improve motorcycle safety. Advanced situational awareness and proactive hazard management are vital riding skills for all riders. Routine practice of defensive riding techniques saves lives on every journey. Ready to Apply Defensive Riding Strategies? Start Your Safer Ride Today Every day on your motorcycle is another chance to sharpen your defensive riding strategies and protect yourself from unnecessary risk. Take what you’ve learned in this guide and turn it into action—whether it’s rehearsing emergency braking, upgrading your safety gear, or simply adopting a more attentive rider mindset. The streets are unpredictable, but your preparation doesn’t have to be. Stay safe, be proactive, and enjoy the journey with confidence. To enhance your understanding of defensive riding strategies, consider exploring the following resources: Defensive Riding: Maximize Your Spring Motorcycle Rides with Proactive Strategies offers practical tips on maintaining safe following distances, effective lane positioning, and the importance of continuous learning to improve your riding skills. Most Effective Defensive Riding Techniques for Motorcyclists provides insights into anticipating driver behavior, adapting to various road conditions, and mastering emergency braking techniques to enhance your safety on the road. By delving into these articles, you’ll gain valuable knowledge to implement defensive riding strategies effectively, ensuring a safer and more enjoyable motorcycling experience.

Motorcycle Brake Inspection: Spot Problems Before They Happen

Did you know that, according to the NHTSA, over 20% of motorcycle accidents are linked to brake failure or compromised braking performance ? Your motorcycle brake system is the critical connection between you and a safe stop. This article will guide you through everything you must know about motorcycle brake inspection—how to spot problems before they escalate , avoid expensive repairs, maximize safety , and enjoy complete confidence every time you apply the brake. Why Motorcycle Brake Inspection is a Critical Safety Measure "According to the NHTSA, over 20% of motorcycle accidents are linked to brake failure or compromised braking performance." Understand the role of regular motorcycle brake inspection in accident prevention Identify consequences of skipping brake inspections Real-life examples of avoidable incidents due to neglected brake pads and brake fluid Regular motorcycle brake inspection is not just a suggested maintenance task—it’s a vital step in keeping you and your passengers safe on every ride. When you skip a brake inspection, you risk allowing subtle issues like pad wear , contaminated brake fluid , or failing brake lines to go undetected. These minor concerns can quickly escalate, drastically reducing the effectiveness of your brake system and possibly leading to disastrous results, including collision or injury. Case studies show that many accidents could have been prevented with something as simple as regular checks for thinning brake pads or fluid level issues . Consider a scenario where a routine inspection reveals a small crack in your brake line . Addressing it early can be an easy, low-cost fix. Ignored, that crack could create a leak, letting your brake fluid escape and causing a frightening loss of stopping power when you need it most. Don’t wait for a near-miss or brake warning lights—integrating consistent inspections into your schedule is one of the most effective ways to protect yourself, avoid expensive repairs, and ensure uncompromised brake performance . What Motorcycle Brake Inspection Involves: A Step-by-Step Overview Check for wear and thickness of brake pads Inspect brake fluid levels and quality Evaluate both disc brakes and drum brakes Examine the entire brake line and brake system components A professional motorcycle brake inspection covers far more than a quick glance at your wheels. Step by step, it ensures each piece of your braking system functions as it should. This begins with visually checking brake pad thickness and wear, as well as scanning for visible cracks or crumbling—signs your brake pads may need urgent replacement. Next, an assessment of brake fluid level and clarity is crucial; if fluid appears cloudy or discolored, it’s a clear indication it’s time for a fluid change to maintain reliable brake performance. Both disc brakes and drum brakes require close evaluation. Disc rotors are checked for grooves or warping, while drum brakes are tested for brake shoe wear and soft pedal feel. An inspector then reviews your entire brake line for leaks, bulges, or corrosion, ensuring there are no hidden dangers lurking beneath. The process also reviews all hardware, connectors, and the master cylinder , providing a comprehensive picture of your overall brake operation and identifying any need to replace the brake parts before trouble strikes. Inspection Step Why it Matters Recommended Frequency Visual check of brake pads Ensures pads haven’t worn out, maintaining stopping power Every 1,000 miles or 3 months Brake fluid assessment Prevents spongy brakes and corrosion Every 6 months Disc and drum brake examination Prevents warping or jamming Every 3,000 miles Brake line inspection Prevents leaks and loss of pressure Annually Key Components to Assess During Motorcycle Brake Inspection Motorcycle Brake Pads: How to Check for Wear Look for uneven or thin brake pads Assess for glazing or contamination Brake pad wear is the most common cause of diminished brake performance for motorcycle riders. Start by closely inspecting your motorcycle brake pads —if they appear thin, uneven, or show signs of cracking and chipping, they likely need replacement. A quick visual check can reveal whether the wear indicator is exposed, signaling the pad’s thickness has reached its safe limit. Moreover, look out for glazing, which occurs when pads become shiny due to overheating, or contamination from oil, grease, or dirt, all of which compromise braking effectiveness. "Worn motorcycle brake pads can double your stopping distance." pad wear brake rotor brake pads Inspecting Disc Brakes and Drum Brakes on Motorcycles Signs of worn disc brakes: grooves, scoring, discoloration Drum brake symptoms: soft pedal, longer stopping Modern motorcycles typically use a combination of disc brake and drum brake systems. A thorough brake inspection requires assessing both for unique signs of wear. Start with the disc brake rotors , looking for obvious grooves, heat discoloration (often blue or gold), or excessive scoring. These signs indicate excessive friction or overheating and may point to underlying problems with the brake pad or caliper alignment. For drum brakes , pay attention to a soft or unusually long pedal travel, which could mean the brake shoes are worn or out of adjustment. Both types of brakes should stop the motorcycle firmly and predictably without pulsing or noise—issues signal that professional service is needed. Regular assessments prevent catastrophic failures like seized hydraulic drum components or warped rotors, both leading contributors to lost stopping power and increased risk on the road. Brake Fluid: Why It’s Essential in Motorcycle Brake Inspection Cloudy or discolored brake fluid indicates contamination Low brake fluid can point to leaks in the brake system Your motorcycle’s brake fluid is the lifeblood of its braking system. Fresh, clean fluid ensures consistent pressure when you pull the brake lever or step on the brake pedal. Over time, however, brake fluid can absorb moisture and contaminants, turning cloudy or dark. This not only degrades your braking response but accelerates corrosion in key brake system components like the master cylinder and brake caliper . Always address low or dirty brake fluid promptly—a low fluid level usually points to leaks in your lines or hardware, while dark, sludgy liquid means it’s time for a flush. For best results, replace fluid every 12-24 months even if your brakes seem to be working fine. Preventative action will vastly reduce the risk of sudden brake failure or expensive brake service down the road. Reviewing the Brake Line and Brake System Integrity Look for cracks, leaks, or bulges in the brake line Check all connections for tightness Brake line failure is a silent and dangerous problem many riders overlook. During a proper motorcycle brake inspection , carefully scrutinize every brake line for cracks, pinhole leaks, bulges, or soft spots—any of which can lead to pressure loss or total brake failure. Flexible rubber lines wear with age and exposure; stainless steel braided lines, while longer lasting, can still show signs of fatigue or chafing at connection points. Furthermore, meticulously check for tightness at all line junctions, including where hoses meet the master cylinder , brake caliper , or ABS components. Even a minor drip or sticky fitting can allow fluid to seep out under pressure, leaving you with a spongy lever and compromised brake performance . Address any suspect areas right away—your ability to safely apply the brake in a crisis could depend on it. When Should You Replace the Brake Components? Symptoms indicating urgent replacement: squealing, pedal pulsation, or reduced responsiveness How to time regular replacements based on mileage or wear indicators Knowing exactly when to replace the brake components can mean the difference between a smooth stop and a dangerous skid. Warning signs such as persistent squealing, shuddering or pulsing when you apply the brake, reduced lever or pedal responsiveness, or metallic grinding sounds should trigger an immediate brake service appointment. Ignore these at your peril, as they often mean metal-on-metal contact or total pad failure is imminent. For routine maintenance, follow the manufacturer’s guidelines—typically, brake pads every 10,000-15,000 miles, brake fluid flush every 12-24 months, and a complete inspection every 3,000-6,000 miles. Many modern bikes have wear indicators on pads to help you gauge their remaining life. If you regularly ride in harsh conditions (rain, dirt, heavy commuting), consider more frequent checks and maintenance. Consistency is key to safe riding and maximizing the lifespan of all consumable parts in your brake system. What Sets a Professional Brake Service Apart? "Expert technicians can spot subtle problems in your motorcycle brake system that a DIY inspection might miss." Tools and techniques used in a comprehensive brake inspection Importance of OEM or high-quality replacement parts for brake pads Not all brake inspections are created equal. Professional brake service goes beyond what most riders can achieve at home, utilizing advanced diagnostic tools to measure pad thickness, rotor runout, brake fluid moisture content, and even microscopic cracks in seals and hoses. Certified technicians know where to look for early warning signs in every brake system component, including the master cylinder and calipers, that aren’t always obvious during a visual home inspection. Another crucial aspect is the use of OEM (original equipment manufacturer) or high-quality aftermarket parts, which guarantee fitment, reliability, and braking performance. Professionals also apply correct torque specs, leading to a longer lifespan for pads, rotors, and shoes. These details can be the difference between years of trouble-free riding or a surprise breakdown at the worst time. If you’re new to motorcycle maintenance, investing in professional service at regular intervals is an investment in safety and confidence. People Also Ask: Essential Motorcycle Brake Inspection Questions How to inspect motorcycle brakes? Visually inspect brake pads for thickness and wear Check brake fluid levels and clarity Examine rotor or drum surfaces Test for proper brake lever and pedal feel To inspect motorcycle brakes , start with a visual check of your brake pads —look for any signs they’re thin, cracked, or unevenly worn. Next, open the brake fluid reservoir and confirm the fluid level is within the marked range and the fluid is clear, not cloudy or dark. Move on to your rotors and drums, checking for grooves, scoring, or discoloration. Finally, apply the brake and take note of how the brake lever and brake pedal feel—a spongy response or excessive travel means air or fluid loss may be present in your brake system . Is a brake inspection worth it? Absolutely. A routine brake inspection is one of the most effective and affordable ways to ensure your motorcycle remains safe to operate. A small investment in preventive maintenance can save you hundreds of dollars in repairs and, more importantly, help you avoid dangerous breakdowns or accidents caused by brake failure. Regular inspections help identify issues like worn pads, contaminated fluid, or compromised brake lines before they turn into costly or life-threatening problems. What is the 70 30 rule on a motorcycle? The 70/30 rule refers to optimal braking technique for motorcycles, especially during emergency stops. Riders are advised to apply approximately 70% of their stopping force through the front brake and 30% through the rear. This approach utilizes the natural weight transfer to the front wheel when applying the brake, maximizing stopping power and minimizing the risk of rear tire lift or skid. Practice this ratio during safe stops to build your braking proficiency. What is included in a brake inspection? A comprehensive motorcycle brake inspection covers several key points. It typically includes checking brake pad and brake shoe wear, inspecting disc brake and rotor condition, measuring the fluid level and quality, evaluating the brake line for integrity, testing the function of the brake lever and pedal, and assessing the condition of the master cylinder and calipers. Many professional services will also inspect hardware and fasteners for tightness and any signs of corrosion, giving you a full picture of your brake system’s health. Motorcycle Brake Inspection FAQs How often should I schedule a motorcycle brake inspection? What are the signs of failing motorcycle brakes? Can I inspect my motorcycle brakes at home? Does brake fluid type matter for different motorcycles? How often should I schedule a motorcycle brake inspection? For most riders, a motorcycle brake inspection every 3,000-6,000 miles or twice per year is ideal. However, if you ride more aggressively or in demanding conditions, inspect more frequently. What are the signs of failing motorcycle brakes? Signs include spongy or sinking brake lever , low or contaminated fluid level , vibrations, odd noises like grinding or squealing, and visible fluid leaks under your bike. Can I inspect my motorcycle brakes at home? Yes, with basic tools you can check pad thickness, fluid level, and visually assess most brake components. However, periodic professional evaluations are strongly recommended. Does brake fluid type matter for different motorcycles? Absolutely—always use the brake fluid recommended by your motorcycle’s manufacturer. Mixing types can damage seals and affect brake performance . Five Signs Your Motorcycle Brakes Need Immediate Attention Spongy or unresponsive brake lever Visible thinning of brake pads Unusual grinding or squealing noises Vibrations while braking Brake fluid leaks under your motorcycle These red flags should never be ignored. A spongy brake lever often means air has entered the system or fluid is low. Thinning brake pads will soon expose metal, causing expensive rotor damage. Grinding, squealing, or vibrations signal misalignment, pad wear, or defects. Finally, if you ever notice a puddle of fluid under your bike by a wheel, brake system integrity has already been breached and urgent repair is required. Best Practices to Maintain Your Motorcycle Brake System Schedule routine motorcycle brake inspection every 3,000-6,000 miles Use manufacturer-recommended brake pads and brake fluid Flush brake fluid every 12-24 months Keep records of all brake service visits A proactive approach is the best defense against brake-related problems. Book a full motorcycle brake inspection on a regular schedule, especially after riding through rain or debris. Adhere strictly to your manufacturer’s specification for pads and fluid—budget substitutes can reduce braking performance and shorten the life of both brake pads and rotors. Keep a log of every brake service or part replacement; this record will help you anticipate maintenance needs, spot recurring patterns, and preserve resale value. Braking Techniques Every Rider Should Master for Safer Motorcycle Brake Inspection Results Progressive braking: how to apply and release the lever smoothly The right way to use both front and rear motorcycle brakes Understanding weight transfer for maximum grip Braking skill is as vital as maintenance for your motorcycle safety. The secret to consistent stopping power is mastering progressive braking : gently squeeze the front brake lever to preload the suspension, then increase pressure for a smooth, controlled stop. Always use both the front and rear brakes together for balanced stopping and longer brake pad life. Proper use helps maximize the effectiveness of your recently serviced motorcycle brakes and extends the life of the entire brake system. Another essential is learning the forces at play—when you apply the brake , your weight shifts forward, giving the front wheel more grip. Respect this weight transfer, and avoid abrupt moves on sandy or wet roads. Practicing these techniques in a safe environment boosts your riding confidence and amplifies the benefits of every brake inspection and adjustment. Empower Your Ride: Schedule Your Expert Motorcycle Brake Inspection Today "A safe ride begins with reliable motorcycle brakes. Don’t wait for trouble—spot and solve problems before they happen." Ride with confidence—call us today at 847-458-4858 to book your next expert motorcycle brake inspection . Prioritize your safety before the next adventure begins! What You'll Learn: Understand the essentials of motorcycle brake inspection , gain confidence for DIY checks, learn when to seek professional brake service , and master safe braking techniques for every ride. Regular motorcycle brake inspections are essential for rider safety and optimal performance. The article “How to Inspect your Motorcycle Brake System” provides a comprehensive guide on checking brake discs, calipers, and fluid levels, emphasizing the importance of early detection of issues like disc warping and fluid contamination. ( bendixmoto.com.au ) Similarly, “Motorcycle brake system maintenance: Guide on how to check everything for your safety” outlines steps for brake fluid control, hose verification, and component adjustments, highlighting the need for routine checks to prevent brake failure. ( motorcyclesports.net ) By incorporating these practices, riders can ensure their braking systems remain reliable, reducing the risk of accidents and costly repairs.

Terms of Service

Privacy Policy

Core Modal Title

Sorry, no results found

You Might Find These Articles Interesting

T
Please Check Your Email
We Will Be Following Up Shortly
*
*
*