cropper
update

Nasty Performance ~ 847-458-4858 

update
  • Blog Home
  • Categories
    • Motorcycle Maintenance
    • Riding Tips & Preps
    • Safety & Inspection
    • Customizations & Upgrades
    • DIY Motorcycle Repairs
    • Motocycle Audio Systems
    • Motocycle Seasonal Care & Storage
    • Engine, Electrical Performance
  • Bike Night
  • Nasty Performance Motorcycle Shop
December 06.2025
1 Minute Read

Don't Ignore Motorcycle Safety—Protect Yourself Today

Did you know that motorcycle crashes are 28 times more likely to result in a fatal crash than car accidents? This is a stark reality that every motorcycle rider and road user needs to face. Whether you're zipping through city traffic or cruising on open highways, motorcycle safety isn't just about you—it's about everyone sharing the road. Modern roads are filled with distractions and fast-moving vehicles, making motorcycle safety more important than ever. In this comprehensive guide, you'll discover exactly why prioritizing your safety can make the difference between a close call and a life-changing accident.

Motorcycle Safety: Startling Statistics You Can’t Ignore

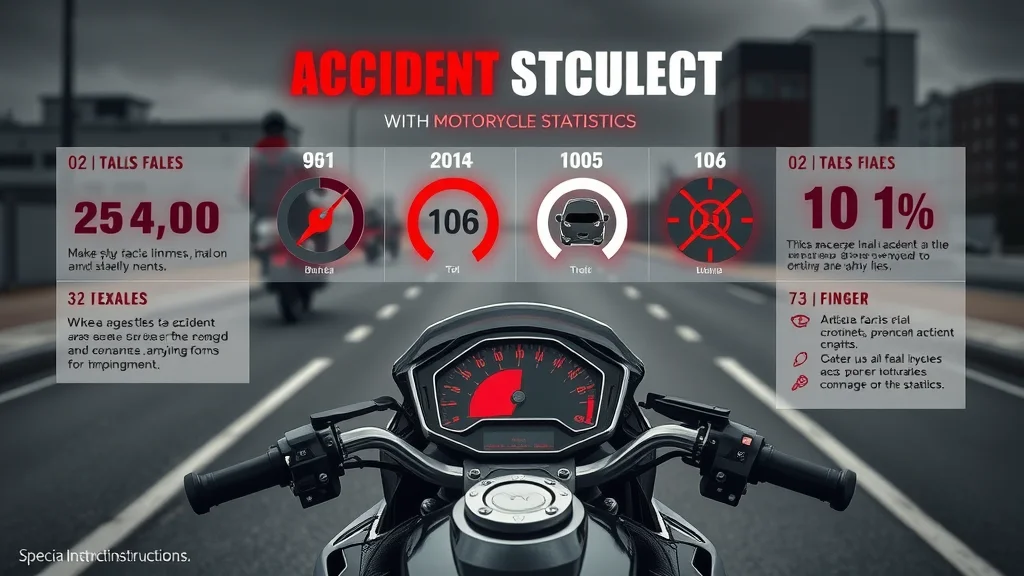
Motorcycle safety continues to be a top concern on roads across the United States, making it a topic no rider or driver can afford to overlook. According to the latest data from the National Highway Traffic Safety Administration (NHTSA), motorcyclists are significantly overrepresented in traffic fatalities, accounting for 14% of all traffic deaths despite comprising only 3% of registered motor vehicles. In fact, every year thousands of motorcycle-related fatalities and serious injuries occur, a stark reminder of the vulnerability riders face in comparison to passenger car occupants.

Many motorcycle crashes happen because both motorcyclists and other road users either misjudge their positions or simply fail to notice each other in busy traffic. Studies consistently show that intersections are particularly dangerous, with approximately 70% of motorcycle accidents occurring there. Rider education and awareness campaigns stress that each road user must take personal responsibility for safety on the road. With the rise of distracted driving and the popularity of motorcycles among young and experienced riders alike, the stakes for enforcing effective safety measures, proper gear, and training programs are higher than ever. Don't become another statistic—understand the risks and take action to protect yourself today.

Dramatic motorcycle accident scene at urban street intersection at dusk, emergency responders attending aftermath, motion blur of emergency vehicles, motorcycle safety, United States

Why Motorcycle Safety Matters Now More Than Ever

Today’s roads are busier and more unpredictable than ever before. Distractions from mobile devices, crowded intersections, and fluctuating speed limits increase the odds of a motorcycle crash with every mile. For riders, understanding the importance of motorcycle safety means recognizing that while bikes are fun and liberating, one mistake—yours or another road user’s—could be fatal. Traffic safety experts warn that motorcycle riders continue to be overrepresented in fatalities, with injuries and fatalities both exceeding those of other motor vehicles on a per-mile basis.

"Motorcycle crashes are 28 times more likely to be fatal than car crashes—National Highway Traffic Safety Administration"

Fortunately, research shows that consistent use of motorcycle helmets and safety gear, defensive riding habits, and skills training through a reputable safety program dramatically reduce the risks. When riders commit to ongoing learning—whether through dedicated training sessions, keeping up with safety tips on social media, or engaging with local safety foundations—they stack the odds in their favor. Recognizing these realities is the first step toward safer journeys for every motorcycle rider and all road users.

To further strengthen your defensive riding skills and reduce your risk on the road, it’s helpful to explore proven techniques that experienced riders rely on. For a deeper dive into practical strategies that can make a real difference, check out these defensive riding strategies that could save your life—they offer actionable tips for anticipating hazards and staying safe in unpredictable traffic.

What You'll Learn About Motorcycle Safety

  • The importance of motorcycle safety
  • Essential gear and habits for safe riding
  • Road sharing tips for motorcyclists and drivers
  • Understanding motorcycle laws and safety programs

Essential Motorcycle Safety Gear Every Rider Needs

The foundation of motorcycle safety is the gear you wear. Modern protective equipment can mean the difference between a close call and a life-altering injury in the event of a motorcycle crash. Every motorcycle rider—from new enthusiasts to experienced riders—should never compromise on their safety gear, as proven by countless studies and supported by traffic safety experts. Key gear includes a properly-fitted, DOT-approved motorcycle helmet to safeguard against head injuries, plus armored jackets and pants to protect your body from scrapes and impacts. Don’t forget high-grip gloves for control and durable boots to lessen ankle injuries.

Confident motorcyclist in full safety gear, standing next to a parked motorcycle on open road, essential motorcycle safety gear, United States
  • Helmets: Proven to reduce risk
  • Protective jackets and pants
  • Gloves and boots
  • Signal indicators and visibility enhancements

Visibility accessories also play a vital role, from reflective vests to advanced signal indicators and auxiliary lighting—these help ensure other drivers spot you before it’s too late. Investing in recommended gear isn’t just about legality; it’s about maximizing your survival in a surprise encounter or even a low-speed skid. As safety advocates and the Motorcycle Safety Foundation continually stress, no ride is too short for proper protection.

Safety Gear Protection Level Legal Requirement
Full-Face Helmet High Mandatory in some states
Armored Jacket & Pants Medium to High Recommended
Gloves & Boots Medium Recommended

Share the Road: Motorcycle Safety Tips for All Drivers

Motorcycle safety isn’t just a rider’s responsibility—it’s a shared commitment among all road users. Accidents often occur because other drivers fail to see motorcyclists, overlook blind spots, or misjudge speed and distance. To protect everyone, drivers must recognize motorcycles’ unique needs. Even single lapses, such as not making a full stop at an intersection or ignoring lane discipline, can result in a fatal crash.

By adhering to simple but crucial habits—checking mirrors and blind spots, yielding as you would for any vehicle, and respecting lane splitting laws (where legal)—drivers help create a safer environment. Maintaining at least a 4-second following distance allows both driver and rider time to react to sudden obstacles or changes in traffic. This not only protects motorcycle riders but also enhances overall traffic safety for every road user, reinforcing the fundamental message: We all must share the road.

How Drivers Can Help Prevent Motorcycle Accidents

  • Always check blind spots
  • Respect lane splitting laws
  • Yield to motorcycles as you would any other vehicle
  • Keep a safe following distance—at least a 4 second rule
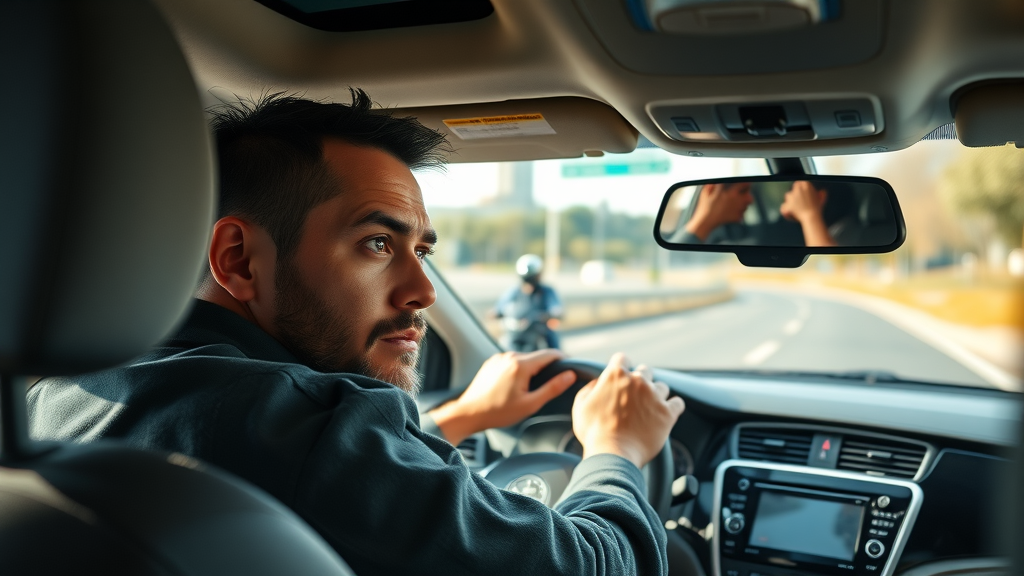
Alert car driver checking mirror, motorcycle visible, share the road with motorcycle riders, United States

A significant portion of motorcycle crashes happen due to inattentiveness on the part of other road users. By actively scanning for motorcycles when merging or changing lanes, respecting their right of way, and keeping distractions to a minimum, drivers can prevent life-altering or fatal crashes. In the spirit of the share the road campaigns and the safety found on government websites and safety foundations, every driver’s vigilance forms the backbone of a safer commuting experience for all.

Mastering Safe Riding Techniques

For every motorcycle rider, improving your motorcycle skill is a lifelong journey. Successful, safe riding centers on being proactive, not reactive. Defensive maneuvers and acute road awareness are your best defenses against unpredictable hazards. This is more than a best practice—it's a survival strategy supported by every reputable safety program and echoed in the curriculum of top motorcycle safety foundation training.

Mastering safe riding means consistent use of signal indicators, scanning for signs of trouble well ahead, and anticipating the moves of other road users. Defensive habits like keeping your hands ready to brake (the two fingers up sign), maintaining proper lane positioning, and being especially cautious at intersections set experienced riders apart from the rest. Remember: Over 70% of motorcycle accidents happen at intersections, so enhancing road awareness is not optional—it's crucial.

Riding a Motorcycle: Defensive Maneuvers and Road Awareness

  • Use signal indicators consistently
  • Adopt defensive riding habits
  • Keep hands ready to brake (the two fingers up sign)
  • Anticipate common accident spots—70% occur at intersections

Skilled motorcyclist using defensive maneuver with hand signal, city intersection, signal indicators, motorcycle safety, United States

The combination of defensive maneuvering and heightened situational awareness helps riders avoid hidden hazards—like sudden lane changes, erratic road users, debris, or unpredictable weather. Systematic rider education and frequent practice of learned techniques prepare you for these realities. These aren't just abstract concepts; they're lifesaving habits advocated by the Motorcycle Safety Foundation, reinforced in classroom settings, and circulated widely via social media safety campaigns. Your vigilance makes all the difference each time you set out on two wheels.

Motorcycle Safety Laws, Licenses, and Rider Training Programs

State laws regarding motorcycle safety and licensing are in place to protect road users and reduce the rates of injuries and fatalities. Obtaining a motorcycle license isn’t just a formality—it ensures that each motorcycle rider demonstrates a basic standard of knowledge and capability before heading onto public roads. The process often includes knowledge tests, on-road skills assessments, and mandatory participation in safety programs, all designed to lower the risk of fatal crashes and enhance the culture of safe riding in the United States.

Many states now require new and even experienced riders to complete a recognized safety program, such as those managed by the Motorcycle Safety Foundation or similar organizations. These courses provide not only the fundamentals of control and safe maneuvering, but also valuable practice in emergency scenarios. Whether you’re preparing for your first license or refreshing your skills as an experienced rider, formal rider education—supported by current resources on gov websites and social media—remains essential for surviving critical moments on the road.

Obtaining Your Motorcycle License and Enrolling in Safety Programs

  • Step-by-step license process
  • Benefits of safety program participation
  • Ongoing education through social media and community initiatives

The journey to safe riding starts with obtaining your motorcycle license. After passing a written test covering road rules and the unique risks faced by motorcycle riders, you’ll complete a hands-on skills training assessment. Safety program participation teaches hazard recognition, emergency maneuvers, and defensive riding—core components that dramatically lower risks of a motorcycle crash. Community-driven initiatives and interactive learning opportunities are increasingly available through social media, making it easier than ever to access real-time advice, join local riding groups, and keep your skills sharp year-round. Committing to rider education isn’t just smart—it’s essential for anyone serious about motorcycle safety.

People Also Ask About Motorcycle Safety

What is the 4 second rule for motorcycles?

Answer: The 4 second rule refers to the safe following distance when riding behind another vehicle. Ensure there are at least four seconds between your motorcycle and the vehicle in front to allow enough time to react and stop safely.

What kills motorcyclists the most?

Answer: The leading causes of motorcyclist fatalities are lack of helmet use, impaired riding, and collisions at intersections—especially with vehicles turning left in front of motorcycles.

What does 2 fingers up mean on a motorcycle?

Answer: The '2 fingers up' gesture is a way for motorcyclists to greet one another on the road and signifies mutual respect or safe travels.

Friendly motorcyclist giving two fingers up sign as a greeting, open countryside road, motorcycle safety, United States

Where do 70% of motorcycle accidents occur?

Answer: Approximately 70% of motorcycle accidents occur at intersections, highlighting the need for extra vigilance in these areas.

Key Takeaways for Motorcycle Safety

  • Always wear proper safety gear
  • Be alert and practice defensive riding
  • Understand your legal responsibilities and keep your license and training up to date
  • Share the road responsibly—both motorcyclists and drivers play a role in overall safety

FAQs: Top Questions on Motorcycle Safety

  • What is the best motorcycle safety program?
  • How does weather impact motorcycle safety?
  • Are there new technologies making motorcycles safer?
  • Should I invest in advanced rider training?

Conclusion: Take Your Motorcycle Safety Seriously

"Safety is not an accident—it is a choice for every rider on every trip."

Determined motorcycle group riding safely in formation, following safe distance rules, motorcycle safety, United States

Motorcycle safety is a journey that evolves with every mile and every lesson learned. If you’re ready to take your commitment to the next level, consider exploring broader accident prevention strategies that address the most common—and costly—mistakes riders make. Our comprehensive guide on motorcycle accident prevention offers advanced insights and practical steps to help you avoid pitfalls before they happen. By deepening your understanding and staying proactive, you’ll not only protect yourself but also contribute to a safer riding community. Let your next ride be your safest yet—empower yourself with knowledge and stay ahead of the curve.

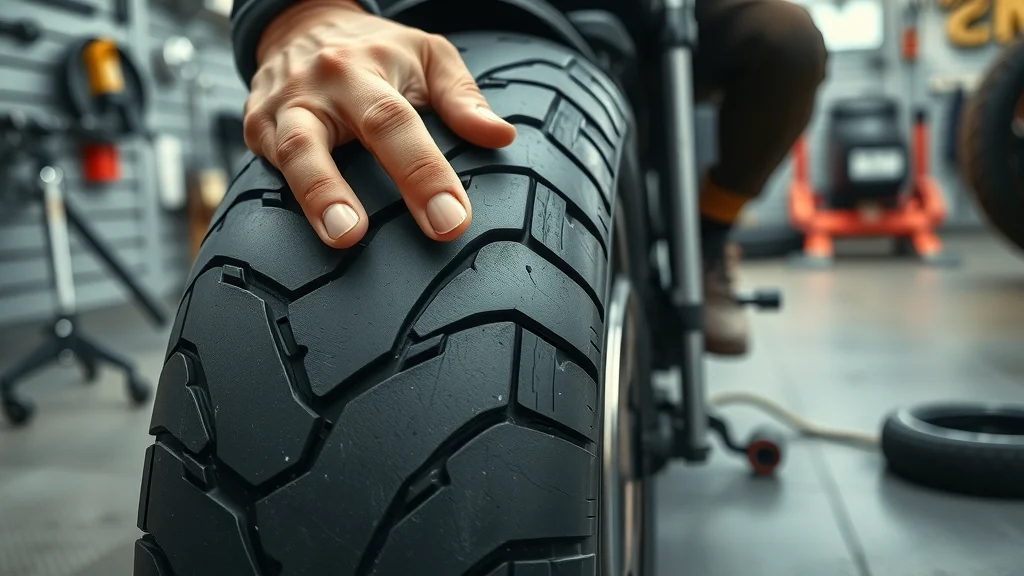
Ready to Ride Safer? Call Nasty Performance Motorcycle Shop Today: 847-458-4858

Safety & Inspection

0 Comments

Write A Comment

*
*
Please complete the captcha to submit your comment.
Related Posts All Posts

Ultimate Guide to Motorcycle Tire Safety Checks Revealed

Did you know that tire problems are one of the leading causes of motorcycle accidents worldwide? Even the best riders can find themselves in dangerous situations if they neglect simple tire safety checks. Your motorcycle tires are all that connect you to the road, so making sure they’re in peak condition could literally save your life. In this comprehensive guide to motorcycle tire safety checks, you’ll find everything you need to keep your ride smooth, safe, and exhilarating every time. Motorcycle Tire Safety: Why Regular Checks Matter "An overlooked motorcycle tire can turn a smooth ride into a disaster—routine safety checks are your first line of defense." – Tire Safety Expert What You'll Learn in This Guide to Motorcycle Tire Safety Checks Understanding the importance of thorough motorcycle tire safety checks Step-by-step procedures for inspecting tread depth, tire pressure, valve stems, and tire wear Common safety hazards with motorcycle tires and how to avoid them Practical tips for increasing the longevity of your front and rear tire Regular tire safety checks are not just a recommendation—they are essential for every rider who values motorcycle safety. From tread depth to proper tire inflation, inspecting your rear tire and front and rear tire for wear, and checking valve stems can significantly reduce the risk of tire failure on the road. By understanding tire wear indicators and knowing exactly what to look for, you’ll ensure optimal performance and peace of mind, no matter where your adventures take you. The Essentials: Starting Your Guide to Motorcycle Tire Safety Checks Gather Tools and Prepare for Motorcycle Tire Checks Tire pressure gauge Tread depth gauge Flashlight Inspection checklist Before you begin your motorcycle tire safety check, make sure you have all the proper tools. A tire pressure gauge ensures accurate inflation, while a tread depth gauge is crucial for measuring tread depth and identifying uneven wear. A flashlight illuminates hard-to-see areas, revealing embedded objects or subtle sidewall damage. Lastly, an inspection checklist keeps you organized, ensuring you never miss an essential step in your tire inspection routine. Set yourself up on a flat, well-lit surface, such as a garage or driveway. Before conducting your front and rear tire checks, allow your motorcycle tires to cool for reliable pressure readings. Regularly inspect both the front and rear tire, as each experiences different forces on the road and may show unique patterns of tire wear. By gathering your tools and approaching the inspection methodically, you lay the groundwork for safer, more enjoyable rides and reduce the risk of premature tire wear or unexpected tire failure. While mastering tire safety checks is crucial, it's also important to recognize how seasonal changes can impact your motorcycle's overall performance and tire condition. For practical advice on adapting your maintenance routine throughout the year, explore these seasonal bike care secrets every rider should know to keep your motorcycle in top shape no matter the weather. Inspecting Tread Depth and Motorcycle Tire Wear for Enhanced Safety How to Measure Tread Depth and Identify Uneven Wear Measuring the tread depth of your motorcycle tire is one of the most effective ways to ensure traction and road grip, especially during sudden stops or wet weather. Insert a tread depth gauge into the tread grooves—perform this on at least three separate spots across the tire. Your owner's manual or tire manufacturer will list minimum tread depth requirements, but as a rule of thumb, 2/32" is often considered the lowest safe limit. Always check both the front and rear tire, as the tread depth requirements might differ between them. Uneven tire wear can signal alignment or suspension issues. If you notice tread wear concentrated on one side (also called “wear on one side”), center, or edges of your tires, this may indicate improper tire inflation or a mechanical problem, which can affect optimal performance. Monitoring and addressing tire wear not only ensures safe handling but also extends the life of your motorcycle tires. Remember, proper tire maintenance is a small effort with big rewards—better grip, safer cornering, and more consistent braking. Comparison of Recommended Tread Depths for Various Motorcycle Tires (Front and Rear) Type of Tire Front Tire Minimum Tread Depth Rear Tire Minimum Tread Depth Sport/Street 2/32 inch (1.6mm) 2/32 inch (1.6mm) Touring/Cruiser 3/32 inch (2.4mm) 3/32 inch (2.4mm) Off-Road/Knobby 4/32 inch (3.2mm) 4/32 inch (3.2mm) Spotting and Addressing Uneven Tire Wear Signs of uneven wear Causes of uneven tire wear Safety implications Carefully inspect your tires for signs of uneven wear, such as bald patches, exposed cords, or tread depth variation. Causes can range from improper tire inflation and overloading to misaligned suspension and aggressive riding. Even subtle differences between the front and rear tire may point to issues requiring immediate attention. If you spot excessive tread wear down the middle, the culprit is often over-inflation. Edge wear could mean repeated cornering or under-inflation. Pay attention to the tread wear indicator—a small bar set across the tread groove—which offers a visual cue for when it’s time to replace your motorcycle tire. The safety implications of ignoring uneven wear are severe. It can compromise traction, increase braking distances, and cause unpredictable handling, especially on wet or winding roads. By routinely examining for premature tire wear and consulting your motorcycle manufacturer’s guidelines, you maintain greater control over your bike and reduce the risk of tire failure. Checking Tire Pressure, Inflation, and Valve Stems on Motorcycle Tires Step-by-Step Guide to Checking Tire Pressure for Front and Rear Tires Correct tire inflation methods Ensuring accurate tire pressure readings Maintaining the right tire pressure is crucial for your motorcycle’s stability and handling. Begin by consulting your motorcycle or tire manufacturer’s recommendations (usually listed in the manual or on the swingarm). Use a reliable digital or analog pressure gauge, ensuring readings are taken when tires are cold for accuracy. Remove the valve stem cap, firmly attach the pressure gauge, and compare your measurement to the recommended PSI for both the front and rear tire. If the pressure is too low or too high, adjust accordingly with a quality pump or inflator—never guess or rely on visual checks alone. Consistently keeping your motorcycle tire inflation within the specified range not only prevents uneven wear but also optimizes fuel efficiency, braking, and contact with the road. Remember, improper tire inflation increases the risk of tire failure and jeopardizes rider safety. For a truly thorough guide to motorcycle tire safety checks, always include tire pressure readings as part of your regular routine, and don’t forget to recheck after extended rides or drastic temperature changes. Inspecting Valve Stems for Safety and Reliability Valve stems are the unsung heroes of tire safety, quietly maintaining your tire pressure and keeping your ride controlled. During your inspection, look for cracks, visible wear, or leaks around the base of the valve stems. Press the valve core briefly with a small tool; if air escapes freely or the valve feels loose, it may need replacement. Ensure the valve stem cap is always secured, as this helps block debris and moisture from entering the stem and compromising pressure. Neglecting valve stems can result in slow leaks, pressure loss, and—worst case—a rapid deflation that can make even a minor road hazard deadly. Stay ahead by adding valve stem inspections to your checklist every time you check your tire or perform other motorcycle safety tasks. This proactive approach saves you from unexpected tire failure and costly repairs down the line. Identifying Embedded Objects and Other Hazards During Motorcycle Tire Safety Checks How to spot and safely remove embedded objects Inspecting for sidewall damage Precautions after finding punctures Embedded objects—like nails, glass shards, or sharp stones—are some of the most obvious but overlooked causes of tire damage and eventual tire failure. Run your hand slowly along the tire’s surface, feeling for anything sticking out or pressed into the rubber. If you spot a nail or similar object, resist the urge to remove it immediately, as this can lead to a sudden loss of pressure and make the tire unsafe to ride home. Instead, note the location, mark it if necessary, and consult a tire or motorcycle specialist to assess the damage safely. During your check, also inspect for sidewall damage—bulges, cuts, or exposed cords—which are clear signs of damage and an increased risk of tire failure. After locating a puncture or serious wear, refrain from riding at high speeds and avoid carrying passengers or heavy loads. Remember, riding with compromised motorcycle tires can undermine all other safety measures. By integrating a thorough hazard check into every guide to motorcycle tire safety checks, you greatly increase your odds of safe, trouble-free rides. People Also Ask: Common Questions on Your Guide to Motorcycle Tire Safety Checks How often should you perform motorcycle tire safety checks? Ideally, you should perform a full motorcycle tire safety check before every ride, especially if you’re planning a long trip or haven’t used your bike in a while. At a minimum, check tire pressure, tread depth, and look for embedded objects or visible signs of tire damage weekly. More frequent inspections are advised if you ride daily, traverse rough roads, or carry heavy loads. What is the minimum tread depth for motorcycle tires for safe riding? Check your motorcycle or tire manufacturer’s recommendations, but most experts agree that 2/32 inch (1. 6mm) is the minimum safe tread depth for street and sport motorcycle tires. Off-road tires may require a bit more. If tread grooves are nearly flush with the wear bars or the surface feels slick, replacing tires becomes essential for safe handling and braking. Can uneven tire wear impact motorcycle handling and safety? Absolutely. Uneven wear undermines stability, causes vibration, and affects the way your motorcycle turns and stops. Continual riding on unevenly worn tires raises the risk of tire failure and extends braking distances, especially on wet roads. For optimal performance and consistent motorcycle safety, regularly inspect both your front and rear tire for tread wear patterns. Why is it important to check the valve stems during tire inspections? Valve stems are critical to holding air in your tires. Over time, exposure to weather, heat, or road debris can degrade them. A damaged or leaking valve stem can cause a slow loss of pressure, reducing your control and increasing the risk of tire failure. Ensuring your valve stems are intact and properly capped is a simple, yet crucial step in any guide to motorcycle tire safety checks. Expert Answers: Motorcycle Tire Safety Checks and Best Practices Q: How do you know when to replace your motorcycle tires? A: Look for visible cracks, low tread depth, persistent loss of pressure, or uneven wear—all are key indicators for replacement. Q: Are there differences in tire safety checks for front and rear tires? A: Yes, inspect both tires separately since wear patterns and pressure requirements may differ. Q: What should you do if you find an embedded object? A: Do not remove it immediately; consult a tire specialist to assess safety and potential repair. Key Takeaways from Your Guide to Motorcycle Tire Safety Checks Routine motorcycle tire safety checks are crucial for rider safety Carefully review tread depth, tire pressure, and valve stems with each inspection Address tire wear and embedded objects immediately Consistent maintenance prolongs the life of your motorcycle tires and ensures safer rides Ready for Your Next Ride? Professional Motorcycle Tire Safety Check Assistance "Don't wait for a problem to happen—proactive tire safety can save lives and money in the long run." For expert advice and thorough inspections, trust professionals. Call Nasty Performance Motorcycle Shop Today: 847-458-4858 Conclusion Mastering this guide to motorcycle tire safety checks means every ride starts—and ends—safely. Prioritize regular inspections, act on tire wear, and don’t hesitate to seek professional help when needed. If you’re ready to take your motorcycle maintenance to the next level, consider how a holistic approach can further enhance your safety and riding experience. Beyond tire checks, understanding the nuances of seasonal care can help you anticipate issues before they arise and keep your bike performing at its best year-round. Discover more expert strategies and maintenance tips in our comprehensive guide to seasonal bike care secrets every rider must know. By expanding your knowledge, you’ll be better equipped to protect your investment and enjoy every mile with confidence.

How Often to Inspect Motorcycle Safety for Night Riding Tips

Did you know night rides are three times more dangerous than daytime riding for a motorcycle rider? Riding a motorcycle at night presents unique challenges—reduced visibility, increased risk from hidden hazards, and greater demands on your alertness. Whether you’re an experienced motorcycle rider or just starting out, understanding how often to inspect motorcycle safety for night riding could mean the difference between a safe return or a sudden setback on the open road. In this comprehensive guide, we break down vital inspection schedules, essential pre-ride checks, and expert-backed tactics to ensure your nighttime ride is as safe as possible for all motorcycle riders. Startling Facts About Night Rides and Motorcycle Safety Motorcycle at night conditions present unique challenges that put motorcycle riders at a higher risk compared to daytime riding. According to recent studies, the vast majority of motorcycle accidents during night rides are linked to poor visibility, malfunctioning brake lights, or neglected auxiliary lights. When riding a motorcycle at night, the road ahead can conceal potential hazards like debris, wildlife, or even other vehicles without proper illumination. Even seasoned motorcycle riders are susceptible to these pitfalls without a strict and regular inspection regime. As a knowledgeable motorcycle rider, you must recognize that the open road after sunset demands more vigilance and preparedness. The combination of reduced visibility and increased driver fatigue can lead to slower reaction times for motorcycle riders. Every journey—no matter how short—should begin with a careful check of core safety features, including brake lights and auxiliary lighting. To safeguard yourself and your fellow riders, learning how often to inspect motorcycle safety for night riding is not just helpful: It’s essential for every motorcycle at night adventure. “Motorcycle at night can present hidden hazards unseen in daylight. Frequent safety inspections are not just recommended—they’re essential.” What You'll Learn About How Often to Inspect Motorcycle Safety for Night Riding Understand the frequency of motorcycle safety inspections for night rides Identify key components to check before riding a motorcycle at night Recognize the importance of brake lights, auxiliary lights, and defensive riding techniques Apply maintenance checklists specifically tailored for motorcycle riders who prefer night rides Learn from expert insights and best practices The Critical Checklist: How Often to Inspect Motorcycle Safety for Night Riding Understanding how often to inspect motorcycle safety for night riding is the cornerstone of safe and enjoyable night rides for every motorcycle rider. Regular inspections dramatically reduce the potential hazards associated with riding a motorcycle at night. For every motorcycle at night outing, a pre-ride inspection is necessary—this covers core elements like brake lights, auxiliary lights, tires, and helmet visor clarity. Motorcycle riders who ride frequently should conduct a weekly deep-dive into critical systems, ensuring the brake light, auxiliary lights, and cables are in prime condition to enhance your visibility as you illuminate the road ahead. Monthly, it’s essential to inspect all electrical systems—including the integration of any aftermarket auxiliary lights—and perform a seasonal review as you transition into longer nighttime ride sessions or before embarking on extended trips after sunset. Keeping a consistent, proactive maintenance schedule offers bright returns and peace of mind, ensuring you’re always ready for whatever the night brings on the open road. Effective inspection not only catches potential hazards early but also extends the life and reliability of your motorcycle at night. In addition to these regular checks, it's helpful to align your inspection habits with broader maintenance routines that address seasonal changes. For a deeper dive into how shifting weather and temperature can impact your bike’s performance and safety, consider reviewing essential seasonal bike care strategies every rider should know. This approach ensures your motorcycle is prepared for both night riding and the unique demands of each season. Pre-ride inspection every night ride Weekly deep-dive safety check for frequent motorcycle riders Monthly inspection of auxiliary lights and electrical systems Seasonal review for all critical components especially before extended night rides Sample Inspection Schedule for Motorcycle at Night Component Before Every Ride Weekly Monthly Brake lights ✓ ✓ ✓ Tires & Tread ✓ ✓ ✓ Auxiliary lights ✓ ✓ ✓ Chain & Sprockets ✓ ✓ Helmet/Visor ✓ Controls/Cables ✓ ✓ Essential Safety Checks Before Riding a Motorcycle at Night Each time you prepare for a night ride, commit to a meticulous pre-ride check. This practice is indispensable for motorcycle riders, not only to enhance your visibility but also to mitigate the increased risk of nighttime riding. Start by ensuring your brake lights and auxiliary lights are clean and functioning at their brightest, as these features greatly improve your visibility to other drivers on the road ahead. Riding a motorcycle at night demands more attention to details that may be overlooked during daytime riding. Potential hazards—including obscured road markings, reflective strips fallen from gear, or faded helmet visors—require regular monitoring to minimize danger on every ride. Night riding also demands preparedness beyond mechanical checks. Defensive riding practices—such as maintaining a safe distance from vehicles ahead and anticipating potential hazards—should be top of mind, as reaction time is significantly affected by reduced visibility at night. Utilize reflective clothing and gloves with reflective elements, and routinely clean all reflective surfaces, to ensure you stand out against the shadows and headlights during motorcycle at night journeys. For every motorcycle rider, mastering these pre-ride routines makes all the difference in arriving safely at your destination. Examining Brake Light and Auxiliary Lights for Motorcycle Riders Inspecting your brake light and auxiliary lights is critical every time before riding a motorcycle at night. A reliable brake light signals your intentions to drivers behind you, ensuring visibility to other drivers and preventing rear-end collisions. Make it a routine to check that all brake lights offer bright, unbroken illumination, especially vital for a nighttime ride when visibility is already reduced. Equally important are your auxiliary lights—spotlights, fog lights, or additional LEDs installed to illuminate the road ahead—these help to both increase your own visibility and better reveal potential hazards on the road. To maximize the safety benefits of auxiliary lighting, clean all light lenses before your ride and confirm that all bulbs and connections are in prime working condition. Many motorcycle riders forget to routinely clean or test these lights, leading to dimmer outputs and greater exposure to risks unique to riding a motorcycle at night. Adopt a proactive inspection habit: test your brake lights and all auxiliary lighting before and after each journey. Bright, clear lights are the simplest and most effective means to enhance your visibility and offer brighter illumination for the road ahead, significantly reducing your chance of a mishap. Inspect brake lights for brightness and function before every trip Check all auxiliary lights for proper operation ahead of night rides Wipe down and clean lights to maximize visibility Defensive Riding Preparations: Visibility and Preparedness for Night Rides Strong defensive riding practices are essential when motorcycle at night. Visibility is key—reflective clothing and reflective strips strategically placed on your gear, boots, and helmet can dramatically increase visibility to other drivers. Regular checks of your helmet visor for scratches or fogging are crucial; any imperfection can scatter light and obscure your view of the road ahead, especially during nighttime rides or in rainy conditions. Defensive riding means constantly anticipating potential hazards, from unpredictable drivers to sudden debris illuminated only at the last second. Beyond equipment, your attitude and riding technique shape your safety. Maintain a safe distance at all times, using the road ahead to anticipate potential hazards. Brake and signal earlier than during daylight hours, allowing more time for those around you to react. Routinely practice adopting a mindset focused on early hazard detection and defensive riding, particularly during night rides—a time when fatigue and reduced visibility both work against even the most experienced motorcycle rider. Remember: visibility, awareness, and proactive gear checks will set you apart, ensuring a safer ride for all motorcycle riders on the open road. Wear reflective gear and ensure all reflectors are clean Adopt defensive riding strategies: keep distance, expect the unexpected Regularly review helmet visor for clarity and scratches Video: Step-by-step guide to inspecting motorcycle safety for night riding Expert-Backed Strategies for Night Riding Motorcycle Safety Expert motorcycle riders emphasize that successful night rides are the result of proactive safety strategies. High-visibility auxiliary lights are an investment not only in seeing the road ahead but also in making yourself unmistakably visible to other drivers. Choose certified reflective stickers and apparel for your gear, boots, and motorcycle—these small enhancements provide brighter, more consistent illumination, helping to anticipate potential hazards sooner. Nighttime ride preparation also calls for extra caution when braking or signaling: always signal earlier and allow more time for other drivers who might struggle to see you or your brake light in challenging conditions. Seasoned motorcycle riders also stress the importance of regular communication and camaraderie. Riding in groups amplifies collective visibility and provides an added safety net during night rides. Leverage technology such as helmet-mounted LEDs, reflective gloves with reflective elements, and sturdy auxiliary lights for the best possible coverage on every ride. By consistently applying these expert tips, you not only protect yourself but also set a strong example for fellow motorcycle riders traveling the open road after sunset. “Night rides require extra vigilance—an overlooked brake light or auxiliary light can spell disaster for even experienced motorcycle riders. ” Install high-visibility auxiliary lights and maintain them regularly Use only certified reflective stickers and apparel Leverage braking and signaling early, especially in low-light conditions People Also Ask: Night Riding Safety for Motorcycle Riders What is the 4 second rule on a motorcycle? The 4 second rule helps motorcycle riders determine a safe following distance, crucial when riding a motorcycle at night due to reduced visibility and increased stopping distances. What does 2 fingers down mean to bikers? The two fingers down gesture is a universal sign among motorcycle riders, symbolizing respect and a safe ride, especially important for night rides where camaraderie is key. Why do bikers tap their helmet when they see a cop? Tapping the helmet is a signal among motorcycle riders to alert others of police presence on the road, emphasizing awareness for safety, particularly during night rides. What is the 1% rule in motorcycles? The 1% rule refers to outlaw motorcycle clubs and does not impact routine safety inspections, but highlights the diverse culture among motorcycle riders. FAQs About How Often to Inspect Motorcycle Safety for Night Riding Is it safe to ride a motorcycle at night if you inspect it regularly? Yes, regular inspections of your motorcycle’s brake lights, auxiliary lights, and safety gear significantly increase safety during night rides, although caution and defensive riding are always advised. What should motorcycle riders focus on for night rides? Focus on inspecting all lighting, cleaning your helmet visor, wearing reflective gear, and adopting defensive riding techniques to minimize risk when riding a motorcycle at night. How do you improve visibility when riding a motorcycle after sunset? Use high-output auxiliary lights, keep all reflectors and lights clean, and wear reflective clothing or gloves with reflective elements to enhance your visibility to other drivers. What are the most overlooked safety aspects for motorcycle at night? Routine maintenance of auxiliary lights, cleaning reflective surfaces, and checking the clarity of your helmet visor are often overlooked but are crucial for safe night rides. Key Takeaways for Motorcycle Riders: Night Riding Inspection Frequency Inspect core safety features before every night ride Plan regular in-depth checks for long-term motorcycle at night performance Emphasize defensive riding and clear visibility for all motorcycle riders Stay Safe: Consult Motorcycle Professionals for Night Riding Preparation Call Nasty Performance Motorcycle Shop Today: 847-458-4858 Conclusion: Prioritize regular inspections and visibility to make every motorcycle at night journey safe and enjoyable—never overlook safety before hitting the road. Night riding is just one aspect of comprehensive motorcycle care. If you’re looking to elevate your safety and performance year-round, exploring the nuances of seasonal maintenance can make a significant difference in how your bike handles changing conditions. Discover how proactive adjustments and expert tips can keep your motorcycle running smoothly, no matter the weather, by reading about seasonal bike care secrets every rider must know. Taking these extra steps ensures you’re not only prepared for night rides but also for every twist and turn the riding season brings. Stay ahead of the curve and ride with confidence, whatever the time of day or year.

Learn How to Perform Motorcycle Emergency Braking Safely

Did you know that improper emergency braking is one of the leading causes of motorcycle crashes? Mastering how to perform motorcycle emergency braking safely could make the difference between a minor scare and a life-altering incident. Every second counts when the unexpected happens on the road. Whether it’s a car turning without warning or an animal darting into your path, knowing the right braking technique isn’t just for expert riders—it’s essential for everyone on two wheels. Startling Facts: The Importance of Knowing How to Perform Motorcycle Emergency Braking "A split second can mean the difference between a safe stop and a serious crash—mastering motorcycle emergency braking is crucial for every rider." Motorcycle riders face significantly shorter reaction times than drivers in cars. An unexpected hazard can appear at any moment, requiring a swift and precise emergency stop. The ability to execute emergency braking correctly improves your stopping power and can greatly reduce stopping distance, which is critical for your safety. Motorcycles use both front and rear brakes, each playing a distinct role in the emergency braking process. Understanding and practicing standardized braking technique ensures that you remain in control of your bike and significantly minimizes the risk of a rear wheel skid or a dangerous wheel lock. What You'll Learn About Motorcycle Emergency Braking Techniques Understanding the dynamics of emergency braking and emergency stop Step-by-step process of how to perform motorcycle emergency braking safely Differences between rear brake and front brake application How to handle gear change and brake lever usage during an emergency stop Safety tips for preventing rear wheel lock-up and optimizing braking response How to use linked brakes appropriately Introduction to How to Perform Motorcycle Emergency Braking Every motorcyclist will eventually face a situation where an emergency stop is unavoidable. Learning how to perform motorcycle emergency braking is not something to leave to chance—not only does it protect you, but it also equips you to react swiftly and confidently in critical situations. Practicing emergency braking builds muscle memory, refines your reaction time, and allows you to manage the front brake, rear brake, and gear change effectively when every split second counts. Far too often, riders either brake too abruptly or not hard enough, leading to front or rear wheel lock, skidding, and loss of control. While mastering emergency braking is essential for immediate safety, it's equally important to keep your motorcycle in peak condition to ensure your brakes and other systems respond as expected. For a comprehensive approach to motorcycle care, consider exploring seasonal bike care strategies that every rider should know—these tips can help you maintain optimal performance year-round. This guide will break down the science behind emergency stops, uncover common braking misconceptions, and teach you how to use both the front brake and rear brake efficiently. You’ll also get scenario-specific advice and expert tips on making emergency stops safer—whether you’re navigating wet roads, slippery gravel, or making a quick stop at highway speeds. Why Learning Emergency Braking is Essential for Every Rider Accidents rarely announce themselves. When faced with an emergency, being able to brake hard without losing traction or control is a lifesaving skill. Many riders mistakenly believe that just grabbing the brake lever or stomping on the brake pedal will stop them in time, but abrupt braking is the fastest way to lose grip, pitch forward, or send the rear wheel sliding. By mastering how to perform motorcycle emergency braking, you dramatically increase your odds of surviving and avoiding serious collisions. With regular practice in controlled environments, riders internalize safe braking procedures, making them second nature in high-pressure scenarios. Common Misconceptions About Motorcycle Emergency Braking There are several widespread myths about emergency braking among both new and experienced riders. One misconception is that using the front brake is dangerous and should be avoided. In reality, the front brake supplies approximately 70-80% of the bike’s stopping power due to weight transfer during hard stops. Another mistaken belief is that the rear brake should be the primary way to stop in a crisis; unfortunately, relying solely on the rear brake extends stopping distances and increases the risk of rear wheel lock-up. Equally problematic is the idea that sudden and maximum brake pressure is always safer—this often leads to wheels locking and skids, especially if the road surface is slippery or uneven. Core Concepts: Emergency Braking and Emergency Stop Explained Defining Emergency Braking and Emergency Stop Emergency braking refers to the rapid, controlled deceleration required to avoid a hazard. An emergency stop is the process whereby you bring the bike to a halt as quickly and safely as possible, maintaining control throughout. During an emergency stop, your goal is to keep your bike upright and in a straight line while maximizing stopping power through balanced use of the front brake and rear brake. The efficiency of your braking technique, the condition of your tires, and your grasp of the brake lever and brake pedal directly affect the likelihood of a safe outcome. These foundational concepts are essential before exploring advanced braking systems or scenario-based adjustments. The Science of Motorcycle Braking Forces When you initiate an emergency stop, forces acting on your motorcycle dramatically change. The instant you apply the brakes, weight is transferred forward, compressing the front tire and increasing its traction and stopping capacity, while the rear wheel carries less load. This weight transfer highlights why the front brake is responsible for the majority of your braking power and why careful modulation is needed to avoid pitching forward or causing the front wheel to lose traction. Proper brake pressure application, done progressively and smoothly, helps maintain grip between tires and road while minimizing wheel lock. Understanding braking forces equips you to harness maximum stopping power without exceeding traction limits and risking a fall. The Role of Front Brake and Rear Brake in Emergency Braking Front Brake Dynamics in Emergency Stop Situations The front brake is the workhorse during motorcycle emergency braking, providing up to 80% of the total stopping power, especially as weight shifts forward onto the front tire. Pulling the front brake lever with a progressive squeeze (rather than an abrupt grab) helps maximize stopping power while preventing the front wheel from locking up. Controlled front brake application maintains the bike upright and stable, reducing stopping distances dramatically. However, using too much force on the front brake lever too quickly, especially on slippery or uneven surfaces, increases the risk of losing the front tire grip and results in a fall. Practicing progressive front brake lever use is critical for every rider who wants to stop their motorcycle effectively and safely during an emergency stop. Rear Brake Usage: Pitfalls and Best Practices The rear brake supports the front brake by stabilizing the bike during sudden stops. Gently applying the rear brake pedal adds extra control, preventing the rear wheel from lifting and improving overall balance. However, excessive force or abrupt pressure on the rear brake can lead to locking the rear wheel. When the rear wheel locks, the motorcycle skids and can become unpredictable, especially during high-speed stops or on low-traction surfaces. The best practice is to use the rear brake in tandem with the front brake—never as your sole source of stopping power—and to modulate rear brake pressure to maintain stability. This approach ensures that the rear wheel remains in line, reducing the risk of a high-side crash or rear-end skid during emergency braking. Preventing Rear Wheel Lock-up During Emergency Braking Rear wheel lock-up remains a common issue during panicked stops. To prevent rear wheel lock-up: apply rear brake pressure smoothly rather than abruptly, especially as the rear becomes lighter due to weight transfer to the front. If you sense the rear wheel beginning to skid or lose grip, immediately release and reapply the brake pedal smoothly to regain traction and keep control. Coordination between the front and rear brake levers is essential; maintaining the bike upright and braking in a straight line further minimizes the risk of either wheel locking. Practice is key—riders who regularly simulate emergency stops in controlled settings become adept at recognizing and correcting rear wheel lock-ups before they escalate. "Smooth brake lever input, more on the front brake and controlled rear brake pressure, can save you from skidding off course." Step-by-Step Guide: How to Perform Motorcycle Emergency Braking Safely Assess the hazard and remain calm: Instantly identify the need for an emergency stop—keep a cool head to avoid panicked actions. Close the throttle and apply both brakes simultaneously: Roll off the throttle completely while engaging both front brake (lever) and rear brake (pedal) at once. Apply progressive front brake pressure: Squeeze the front brake lever smoothly and firmly, increasing pressure as the suspension loads up to maximize stopping power. Maintain balance with gentle rear brake application: Press the rear brake pedal lightly, adding stability without risking rear wheel lock-up. Monitor and control gear change if feasible: If you have time, downshift smoothly while keeping the clutch engaged to avoid destabilizing the bike. Keep eyes up and look ahead: Focus beyond the immediate hazard to stay balanced and avoid fixating on obstacles. Release brakes gradually once stopped: After coming to a complete stop, let go of the brakes smoothly to prevent sudden jerks or loss of balance. Detailed Instructions for Using the Brake Lever During Emergency Stop The key to effective emergency braking is the way you use your brake levers. For the front brake lever, use two to four fingers, squeezing progressively rather than grabbing abruptly. This action gradually transfers weight to the front tire, enhancing grip and reducing the likelihood of the front wheel locking up. Pull the lever in a smooth, controlled motion—avoid sudden, jerky movements that could make the front tire lose traction. Your rear brake pedal should be pressed just enough to add rear wheel stability, but never so hard as to lock up the rear wheel, especially as the suspension compresses and the rear of the bike becomes lighter. By coordinating both levers, you’ll maintain optimal braking force and control, which is the foundation of safe emergency stops. Optimal Gear Change Strategies While Braking Gear change during emergency braking should be approached with caution. If possible, downshift as your speed drops, but do so only while pulling in the clutch to prevent engine braking from destabilizing the bike. Many inexperienced riders get caught up trying to find the right gear rather than focusing on stopping safely. It’s more important to bring the motorcycle to a complete stop using the brakes first than to worry about gear position. Once stopped safely, you can shift into neutral or first gear to prepare for moving off again if needed. Practicing smooth gear changes alongside emergency stops in a safe environment can significantly boost your confidence and technique under pressure. Braking Systems: Understanding Linked Brakes and ABS in Emergency Situations How Linked Brakes Affect Emergency Braking Linked brakes are systems where activating one brake (usually the front brake lever) also applies a proportion of the rear brake, or vice versa. This technology helps riders who may struggle to coordinate both front and rear brake inputs during an emergency stop. With linked brakes, stopping power is distributed automatically, reducing the chances of rear wheel lock or applying uneven brake pressure. Riders should still practice the fundamentals, as linked systems are designed to supplement, not replace, correct technique. Familiarize yourself with your specific linked brake setup by consulting your motorcycle’s manual and testing the feel in a controlled area before relying on it in real-world emergencies. The Role of ABS in Preventing Rear Wheel and Front Wheel Lock-Up Anti-lock Braking Systems (ABS) are a lifesaver during emergency braking, preventing both the front and rear wheels from locking up when overwhelming brake force is applied. ABS works by rapidly modulating brake pressure when it senses a wheel about to skid, allowing you to brake hard while maintaining steering control. ABS is especially useful in low-traction conditions like wet pavement, gravel, or painted road lines. However, ABS is not a substitute for proper technique; you still need to apply both the front and rear brake progressively and keep your bike upright in a straight line for maximum effectiveness. Understanding how your ABS system responds in different braking scenarios can give you even more confidence during crisis stops. Scenario-Based Emergency Braking: Real-World Application Wet Roads: Emergency Stop Adjustments Rain-soaked streets drastically reduce tire grip, increasing stopping distances and the risk of wheel locks. During emergency stops in wet conditions, be extra vigilant and apply the brakes even more progressively and gently than usual. Focus on using both brakes, but avoid sudden or maximum pressure on either the front brake lever or rear brake pedal. Keep your motorcycle as upright as possible and your inputs smooth to maximize the contact patch and prevent tire slip. Allow for a longer stopping distance and always keep your eyes forward to scan for the slickest spots, such as painted road lines or manhole covers, which are especially hazardous during emergency braking on wet roads. Gravel, Sand, and Slippery Surfaces Loose surfaces such as gravel or sand pose one of the greatest challenges for emergency braking. Here, the focus shifts to minimizing both braking power and steering input. Use gentle pressure on both front and rear brakes, prioritizing the rear brake slightly more than on asphalt, and try to keep the bike moving in a straight line. Sudden or harsh use of the front brake lever can cause the front tire to dig in and lose grip completely. If you feel a wheel starting to slide or if the wheel locks, quickly release and reapply the brakes to regain traction. Anticipate longer stopping distances and keep your inputs as fluid as possible to stay in control during emergency stops on slippery surfaces. Highway Emergency Braking: Maintaining Control at Speed At highway speeds, braking distances extend and the need for precision becomes even greater. When an emergency stop is required, apply both the front brake lever and rear brake pedal simultaneously, increasing pressure as the motorcycle’s weight transfers to the front wheel. Keep your bodyweight slightly back to help maintain bike balance and avoid pitching forward. Remain in a straight line; avoid swerving aggressively, as sudden direction changes can easily overwhelm tire grip and cause a loss of control. Downshift smoothly if time permits, but only after prioritizing braking. Remember that ABS and linked brakes offer valuable support at highway speeds, helping prevent wheels from locking when you brake hard. Advanced Tips: Mastering How to Perform Motorcycle Emergency Braking Practice emergency stops regularly in controlled environments: Set up training sessions in empty parking lots with cones or markers to simulate hazards and sharpen your braking reflexes. Understand your brake balance and motorcycle setup: Each bike behaves differently—get to know how your specific model’s front and rear brakes interact during hard stops. Maintain your brake system for reliability: Regularly inspect brake pads, rotors, brake fluid, and tire condition to ensure your braking system delivers maximum stopping power when you need it most. Tables: Comparing Front Brake vs. Rear Brake Impact Brake Type Stopping Power Risk of Skid Typical Application Front Brake 70–80% High if abrupt Primary for emergency braking Rear Brake 20–30% Low, but risk of lock-up Stabilizing aid People Also Ask: Motorcycle Emergency Braking How do you perform an emergency stop on a motorcycle? To perform an emergency stop, remain calm and instantly close the throttle. Apply both the front brake lever and rear brake pedal simultaneously. Use progressive pressure on the front brake to maximize stopping power without causing the front tire to lock, while gently pressing the rear brake for added stability. Keep your motorcycle in a straight line and your body upright, gripping the tank with your knees. As you come to a complete stop, smoothly release both brakes. Practice these steps regularly in controlled conditions for best results. Is it better to use front or rear brake during emergency braking? During emergency braking, the front brake provides most of your stopping power due to weight transfer to the front wheel. Always prioritize progressive front brake use, supplemented by gentle rear brake input for balance. Relying solely on the rear brake significantly extends your stopping distance and increases skidding risk. Both brakes used together, with proper technique, ensure the shortest and safest stop. What should you avoid during motorcycle emergency braking? Avoid grabbing or slamming either brake abruptly. Sudden application can trigger wheels locking or skidding, resulting in loss of control. Don’t focus just on the hazard—instead, keep your eyes up and the bike upright. Ensure you don’t downshift abruptly, as it can unsettle the motorcycle. Always strive for smooth, coordinated input on both the front brake lever and rear brake pedal for the most effective emergency stop. How does road condition affect emergency braking? Road conditions significantly impact emergency braking effectiveness. Wet surfaces, gravel, and loose debris all reduce traction and increase stopping distance. In these situations, apply brakes more gently and progressively, use both brakes, keep your inputs smooth, and maintain the motorcycle upright in a straight line to prevent losing grip on either wheel. Can ABS help in motorcycle emergency stops? Absolutely. ABS (Anti-lock Braking System) helps prevent both front and rear wheels from locking up under heavy braking. It modulates brake pressure automatically, allowing you to focus on steering and maintaining balance even under panic stops on slippery surfaces. However, proper braking technique is still essential to get the best results from ABS. What are linked brakes and how do they help with emergency braking? Linked brakes distribute stopping force between the front and rear wheels even if you use just one brake lever or pedal. This aids in maintaining stability and optimizing stopping distances, especially in emergencies. Still, familiarizing yourself with how your linked braking system works is important for maximum safety during real-world emergency braking scenarios. FAQs About How to Perform Motorcycle Emergency Braking How does body position impact emergency braking? Proper body position is crucial. Sit upright, grip the tank with your knees, and keep your arms relaxed but ready. This posture keeps the bike upright and stable during aggressive braking, helping maximize grip and control. Should you practice emergency stops regularly? Yes! Regular, controlled practice improves your reaction time, hones your technique, and builds muscle memory for real-world emergencies, making emergency braking more instinctive. What's the difference between controlled stop and emergency stop? A controlled stop is planned and gradual, while an emergency stop is unplanned and requires maximum braking power in the shortest distance, with a focus on keeping control throughout. Key Takeaways: Achieving Safe Motorcycle Emergency Braking Progressive brake application is the safest method Understand your motorcycle's braking system (front brake, rear brake, linked brakes) Practice in safe, controlled spaces is essential to mastering emergency stop Maintain and inspect your braking system regularly Ready to Enhance Your Safety? Call Nasty Performance Motorcycle Shop Today: 847-458-4858 Take action now and make motorcycle safety your top priority—regular training and expert advice are just a phone call away! If you're committed to mastering emergency braking, consider taking your motorcycle safety and performance to the next level by focusing on year-round bike maintenance. Proactive care not only extends the life of your ride but also ensures your braking system and other critical components are always ready when you need them most. Discover expert advice and essential routines in Seasonal Bike Care Secrets Every Rider Must Know. By integrating these seasonal strategies with your emergency braking skills, you'll be better equipped for safe, confident riding in any condition.

Terms of Service

Privacy Policy

Core Modal Title

Sorry, no results found

You Might Find These Articles Interesting

T
Please Check Your Email
We Will Be Following Up Shortly
*
*
*