Add Row
Add Element
cropper
update

Nasty Performance ~ 847-458-4858 

update
Add Element
  • Blog Home
  • Categories
    • Motorcycle Maintenance
    • Riding Tips & Preps
    • Safety & Inspection
    • Customizations & Upgrades
    • DIY Motorcycle Repairs
    • Motocycle Audio Systems
    • Motocycle Seasonal Care & Storage
    • Engine, Electrical Performance
  • Bike Night
  • Nasty Performance Motorcycle Shop
November 20.2025
1 Minute Read

Motorcycle Antifreeze Service: Is Yours Ready for Cold?

Are you sure your motorcycle is prepared to handle winter’s icy grip, or could hidden coolant issues leave your engine out in the cold? As the first frost settles in, riders everywhere wonder if their bike’s coolant system can weather the season. In this comprehensive guide, discover why regular motorcycle antifreeze service isn’t just a winter chore—it’s essential maintenance that can make or break your ride’s longevity and performance. Whether you’re a seasoned street warrior or prepping your very first bike for winter, this article demystifies coolant changes, flushes, and coolant types, arming you with the knowledge to ride with confidence, no matter the temperature outside.

Is Your Motorcycle Antifreeze Service Up to the Challenge of Winter?

As temperatures drop, your motorcycle’s cooling system faces its toughest test. Motorcycle engines are particularly vulnerable in cold weather; neglecting your motorcycle antifreeze service can lead to reduced engine performance, freezing of cooling channels, and even catastrophic engine damage. Yet, many riders overlook the signs that it’s time for a coolant change or coolant flush. To avoid engine breakdowns or costly repairs, it’s crucial to ensure your coolant level is correct and that the fluid itself is capable of withstanding freezing and high operating temperatures. This article will walk you through everything from spotting issues early to understanding how coolant types affect your ride and safety. Let’s make sure your bike stays all systems go, even as the mercury dips.

motorcycle antifreeze service inspection in professional garage with cold weather

Why Regular Motorcycle Antifreeze Service Matters

Routine motorcycle antifreeze service is about more than just preventing your engine from freezing during winter. Coolant plays a vital role year-round by regulating operating temperature, preventing overheating on hot days, and protecting metal engine parts from corrosion and buildup. When antifreeze breaks down—either from age, contamination, or improper coolant type—it loses its ability to raise the boiling point and lower the freezing point of your engine’s coolant system. Old or dirty coolant can also cause blockages in coolant passages and the water pump, leading to overheating or underperformance. Regular wellness checks and scheduled service will help ensure your bike’s cooling system is always ready for the long road ahead.

For riders interested in a more hands-on approach, understanding the nuances of a proper coolant flush can make a significant difference in your bike’s performance. If you want a detailed walkthrough of the process, including tips for avoiding common pitfalls, check out our step-by-step guide to motorcycle coolant flushes for practical advice and expert recommendations.

What You'll Learn About Motorcycle Antifreeze Service

  • Signs your motorcycle needs antifreeze service
  • Step-by-step guide on coolant change and coolant flush
  • Comparison of coolant types for motorcycles
  • The risks of neglecting motorcycle antifreeze service

Understanding Motorcycle Coolant Change: When and Why

Knowing when to schedule a coolant change is key to protecting both your engine and your wallet. As coolant ages, its anti-corrosive properties fade, and deposits can build up, reducing efficiency. Most manufacturers recommend servicing your cooling system every two years, though this can vary between coolant types and riding conditions. If you notice rusty, cloudy, or sludgy fluid in your coolant reservoir tank, or if you smell something sweet around the radiator cap, it’s time to act. Frequent high-rpm riding, stop-and-go traffic, or extreme climates can also shorten coolant life. Paying close attention to scheduled service intervals and your manufacturer’s guidelines is vital for maximizing performance and engine life.

modern motorcycle engine with clean coolant channels for coolant change

Coolant Change vs. Coolant Flush: What's the Difference?

A coolant change typically involves draining the old fluid from the cooling system and refilling it with fresh antifreeze, while a coolant flush goes several steps further. During a flush, the entire system is cleaned using a flush solution or distilled water to remove lingering debris and contaminants that can’t be eliminated by draining alone. Over time, these impurities can settle in hard-to-reach parts such as the water pump, radiator, and filler neck, causing blockages or wear. Flushing is especially critical if your coolant appears brown, has particulate buildup, or you’ve neglected service for a long time. By performing a flush, you restore your system’s peak efficiency, protect against corrosion, and ensure consistent cooling.

How Often to Schedule Motorcycle Antifreeze Service

Most bike manufacturers recommend a motorcycle antifreeze service every two years or every 24,000 miles—whichever comes first. However, your service interval may change if you regularly run the bike in extreme conditions, use the wrong coolant mix, or notice frequent changes in your coolant level. Riders should check the coolant at least every oil change, and before and after a long ride, to ensure there are no leaks or air bubbles in the system. If you notice a drop in the reservoir tank, or if the engine temperature fluctuates unexpectedly, it’s time for a checkup. Following your owner’s manual for interval recommendations and adjusting for your usage style is the surest path to engine longevity.

Coolant Flush: The Process and Its Importance in Motorcycle Antifreeze Service

“Regular coolant flushes can extend the life of your motorcycle’s engine and prevent costly repairs.”

A coolant flush doesn’t just refresh your coolant—it revitalizes your whole cooling system. The process begins by draining the old coolant and then cycling distilled water or a flush-specific solution through the system to clear out residue, corrosion, and possible clogs. This is crucial because buildup from old coolant can decrease heat transfer efficiency and cause overheating during both high and low operating temperatures. After a thorough flush, you’ll refill the system with the appropriate new coolant, ensuring all air bubbles are properly bled. This results in better protection against freezing, boiling, and rust, and supports optimal performance in all weather, especially through winter’s coldest months.

coolant flush mechanic pouring fresh antifreeze into motorcycle

Symptoms That Indicate Your Motorcycle Needs a Coolant Flush

Watch for telltale signs that your system is overdue for a coolant flush. If you notice your engine temperature gauge creeping up, persistent overheating, or see colored stains near the radiator or coolant drain bolt, it’s time to take action. Pooled coolant beneath your bike or frequent top-ups are also red flags. A strong, sweet odor or visible rust particles in the coolant reservoir tank means contamination that could quickly deteriorate your engine’s health. Additionally, if your coolant appears milky, oily, or has visible sediment, or if the radiator fan kicks in too often, don’t delay a thorough flush. Addressing these symptoms now will help prevent extensive engine damage or the need for a costly overhaul down the road.

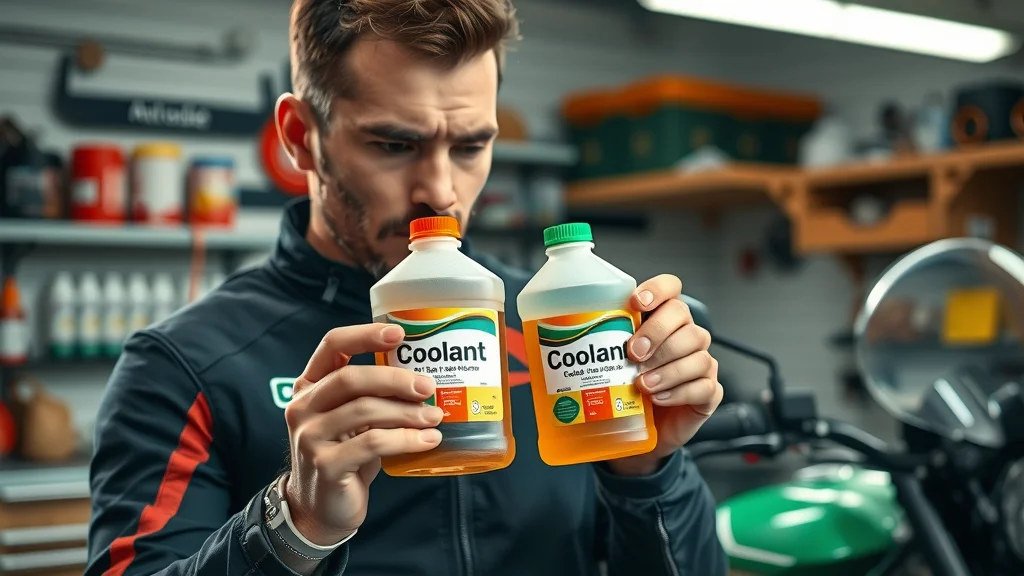
Motorcycle Coolant Types: Which Is Right for Your Ride?

Not all coolant types are created equal. The right choice for your bike can depend on its make, model, and how you ride. Ethylene glycol based coolants are most commonly used—affordable, widely available, and effective at regulating operating temperatures. However, they can be toxic and are best handled with caution. Propylene glycol based coolants offer a less toxic, more eco-friendly alternative, but at a higher price point. If you prefer simplicity, opt for pre-mixed motorcycle coolants, which save time and reduce the risk of improper mixing (never use just tap water—always use distilled water when mixing your own). Choosing the best coolant type means matching your bike's needs and your own maintenance habits for optimal performance and safety.

Coolant Type Pros Cons Best For
Ethylene Glycol Based Widely available, affordable Toxicity Most motorcycles
Propylene Glycol Based Less toxic, eco-friendly Pricier, rarer Eco-conscious riders
Pre-mixed Motorcycle Coolant Ready to use, balanced Cost per liter Quick maintenance

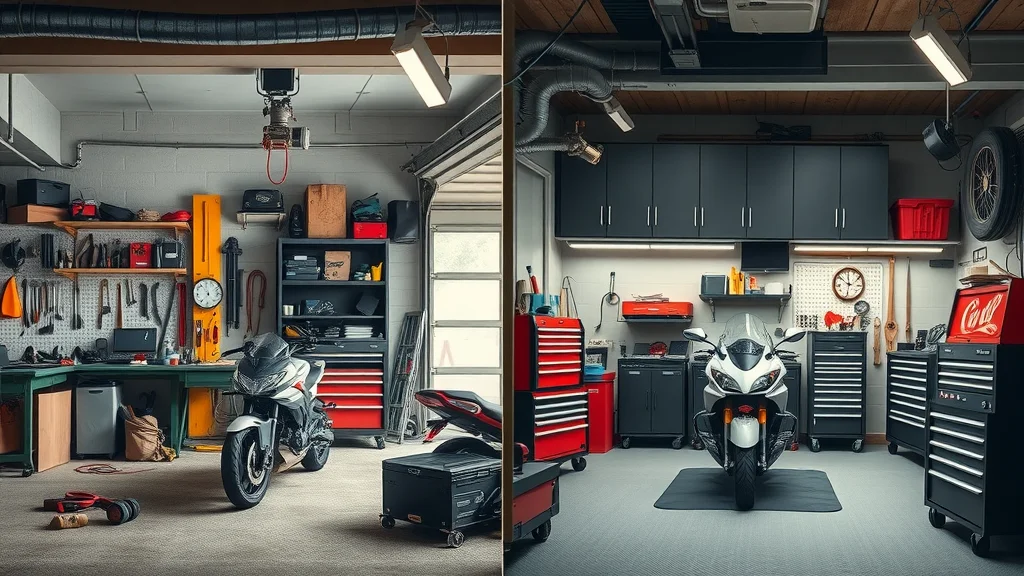
DIY vs. Professional Motorcycle Antifreeze Service: Which to Choose?

Deciding between do-it-yourself and professional motorcycle antifreeze service depends on your comfort with routine maintenance, available time, and access to the right tools. Tackling a coolant change at home can save money and provide satisfaction—if you’re detail-oriented and follow safety precautions. However, professional service offers expert inspection of related systems like the water pump, radiator cap, and hoses, which might not be checked during a typical DIY job. Mechanics have specialized tools and the experience to spot underlying problems, flush the system thoroughly, and bleed out stubborn air bubbles. For peace of mind and comprehensive care, especially if you’re prepping for a long trip or haven’t serviced your bike in a long time, turning to experts is a smart move.

DIY vs professional motorcycle antifreeze service garage comparison

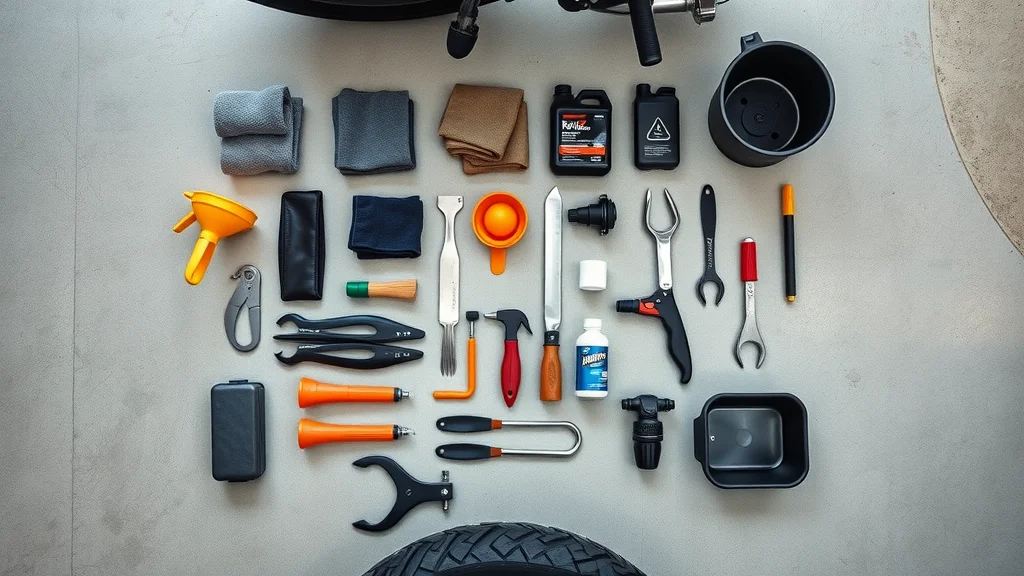
What Tools and Supplies Are Needed for a Motorcycle Coolant Change?

  • Drain pan
  • Coolant funnel
  • Replacement antifreeze
  • Protective gloves
  • Rags/towels

Having the right tools on hand makes all the difference when performing a coolant change. A drain pan helps you collect old coolant without spillage (never re-use coolant), while a dedicated funnel and set of gloves help prevent contact with toxic substances. Rags or towels ensure any drips are caught before they hit your garage floor. Make sure you’re using the proper replacement antifreeze for your motorcycle and always dispose of old coolant in accordance with local regulations to protect the environment.

Step-by-Step Guide: Performing a Motorcycle Antifreeze Service

motorcycle coolant change drain pan funnel gloves tools step
  1. Let engine cool and locate coolant reservoir: Begin with a fully cooled engine to avoid burns; find the reservoir tank, radiator cap, and coolant drain bolt/plug.
  2. Drain old coolant completely: Place the drain pan under the drain bolt or plug, unscrew it, and let the old coolant drain out fully. Remember to remove the radiator cap to allow smooth drainage.
  3. Flush cooling system as needed: Reinstall the drain plug, fill the system with distilled water, and run the bike until it reaches operating temperature. Drain this water to cleanse the system. Repeat if necessary until water runs clear.
  4. Refill with fresh, correct antifreeze: Use the correct mix of coolant—never just tap water. Pour it through the filler neck until the radiator is full, then top off the reservoir tank to proper coolant level.
  5. Bleed air from system and run engine: With the cap off, run the engine briefly to purge remaining air bubbles; top off as needed, then secure cap and check for leaks.

Top Motorcycle Antifreeze Service Mistakes and How to Avoid Them

rider comparing coolant types avoiding coolant flush mistakes

Rushing through your coolant change or coolant flush can lead to costly errors. Common mistakes include using the wrong coolant type for your motorcycle, forgetting to tightly secure the drain plug or drain bolt, using contaminated tools, or mixing tap water instead of recommended distilled water. Even experienced riders sometimes neglect to bleed out air bubbles from the system, which can cause overheating or erratic temperature readings. Always double-check your work, consult your owner’s manual, and ensure the cooling system is properly sealed and bled before hitting the road.

Risks of Using the Wrong Coolant Types

Selecting the improper coolant—or mixing different coolant types—can be disastrous for your motorcycle. Incompatible formulations can react, forming sludge that blocks critical cooling channels, damages the water pump, or compromises seals. Using tap water introduces minerals that corrode metal parts, scale up the system, and lower both boiling and freezing points. In worst cases, your bike could suffer from engine damage requiring expensive repairs. To avoid these risks, choose the coolant type designed specifically for your engine, and never mix brands or types unless approved by the manufacturer.

Check out our visual step-by-step guide to performing a thorough motorcycle antifreeze service, including proper draining, flushing, and refilling methods.

People Also Ask: Motorcycle Antifreeze Service Questions Answered

How often should motorcycle coolant be changed?

Most experts and manufacturers recommend changing your motorcycle coolant every two years or every 24,000 miles, whichever comes first. However, if you ride in harsh conditions, use your bike for a long time between services, or notice changes in coolant appearance, check your owner’s manual and consider more frequent changes. Regularly monitor the coolant level and color during oil changes for early warning signs of trouble.

Is a coolant flush worth the money?

Yes, a coolant flush is a valuable investment in your bike’s health. It removes contaminants that build up over time, clears rust, scale, and residue, and ensures your cooling system works at optimal efficiency. Skipping this maintenance can result in costly engine damage or performance issues, making a professional flush well worth the cost for peace of mind and long-term reliability.

Do I need to flush the coolant on my motorcycle?

If your coolant looks cloudy, rusty, or if you can’t remember your last service, it’s time for a flush. Most bikes benefit from a flush every few years, or any time the system has been contaminated, repaired, or run with the incorrect coolant. Flushing out old fluid and buildup helps the cooling system maintain consistent operating temperature and prevents overheating and freezing in extreme weather.

How often should antifreeze be serviced?

Antifreeze should be serviced at least every two years, with more frequent checks for high-mileage or high-performance motorcycles. Always check your manufacturer’s interval and inspect the coolant during oil changes or after long rides to catch any problems early. Prompt servicing ensures your engine is protected year-round.

See real-world examples of coolant service mistakes and learn the right techniques to avoid them on your next motorcycle antifreeze service.

Key Takeaways: Motorcycle Antifreeze Service Essentials

motorcycle antifreeze service completed, bike ready for winter
  • Timely motorcycle antifreeze service prevents major engine issues.
  • Know the right coolant type for your bike.
  • Regular coolant flushes are an investment in your bike’s longevity.

Frequently Asked Questions About Motorcycle Antifreeze Service

  • What happens if I skip motorcycle antifreeze service?
    Skipping service can lead to engine overheating, corrosion, and costly repairs due to improper cooling or freezing of coolant channels.
  • Can I mix different coolant types in my motorcycle?
    Mixing non-compatible coolant types can cause sludge formation, reduce performance, and risk engine damage. Always stick to your manufacturer’s recommended coolant.
  • How do I safely dispose of old motorcycle coolant?
    Do not pour old antifreeze down the drain or onto the ground. Use a sealed container and take it to a local automotive recycling center or hazardous waste disposal facility. Handle with care—antifreeze is toxic to people and animals.

Conclusion: Prepare Your Ride—Don’t Delay Motorcycle Antifreeze Service

Your best defense against cold weather engine issues is proactive care—make motorcycle antifreeze service part of your regular maintenance to ride worry-free, all winter long.

If you’re committed to keeping your motorcycle in peak condition, antifreeze service is just one piece of the puzzle. For a broader perspective on comprehensive motorcycle maintenance and how to prepare your bike for every season, explore our expert resources on year-round motorcycle care. You’ll discover advanced strategies, seasonal checklists, and insider tips that go beyond coolant changes—empowering you to ride with confidence, no matter what the road or weather brings. Take the next step in your maintenance journey and ensure your bike is always ready for adventure.

Ready for the Cold? Call Nasty Performance Motorcycle Shop Today: 847-458-4858

Motocycle Seasonal Care & Storage

Write A Comment

*
*
Related Posts All Posts

How to Prep Motorcycle for Spring: Essential Tips Inside

Did you know? Most motorcycle breakdowns in the spring are caused by issues that start with neglected winter storage. Before you head out for your first ride of the spring riding season, it’s crucial to understand how proper motorcycle maintenance after winter can make or break your upcoming adventures. This guide gives you the essential steps on how to prep motorcycle for spring, so you can enjoy every mile ahead with total confidence and safety. Startling Fact: Most Motorcycle Breakdowns in Spring Result from Neglected Winter Storage Spring is when the open road calls to every rider, but it’s also the season when shops see a spike in repairs due to overlooked winter storage issues. Failing to address common post-winter problems not only risks your ride’s performance but could compromise your safety. More than 60% of shops report that the majority of their spring service jobs stem from simple issues like dead motorcycle batteries, stale gas in the gas tank, flat spots on tires from poor positioning, or overlooked brake pad wear. Proper spring motorcycle maintenance is not just about extending your bike’s life—it is about ensuring your personal safety and avoiding avoidable headaches. Starting the season with a thorough maintenance check—from fluids to brake pads and beyond—gives you peace of mind and maximizes the thrill of every spring ride. Why Proper Motorcycle Maintenance After Winter Storage is Crucial for a Safe Riding Season After months in storage, even the best-kept motorcycles require a careful maintenance checklist before returning to the road. Fluids settle or degrade, the brake pads can harden or rust, and your gas tank may have accumulated moisture or old fuel. All these factors increase the risk of mechanical failure, braking inefficiency, or engine trouble during spring riding. In fact, skipping essential steps—like checking the battery, inspecting brake lines, or reviewing your service manual—can leave you stranded or, worse, put you in harm’s way. When each maintenance check is navigated with care, you’re not just prepping your machine—you’re safeguarding your entire riding season. Routine post-storage maintenance leads to improved responsiveness, better fuel economy, and lower repair costs throughout the year. Make a commitment to thorough motorcycle maintenance and enjoy your spring riding with confidence. What You'll Learn: Your Complete Guide to How to Prep Motorcycle for Spring Understand the must-do motorcycle maintenance checklist for spring Gain expert tips for effective maintenance checks from service manuals Learn about brake pads, gas tank care, and post-storage inspection Find out how to ensure your motorcycle is road-ready for spring riding Discover key FAQs and answer PAA questions on prepping motorcycles Spring Motorcycle Maintenance Checklist: Your Roadmap to a Safe Riding Season For a truly safe start to your spring riding, follow a thorough maintenance checklist designed for post-winter motorcycle maintenance. Each of these points—including brake pads, the gas tank, and referencing the service manual—ensures your bike is ready to hit the road with nothing left to chance. Comprehensive Spring Motorcycle Maintenance Checklist Maintenance Check Brake Pads Gas Tank Service Manual Reference Action Needed Battery Charge/Test Check brake pad for movement during test Inspect for fuel stability Locate battery care section Charge or replace battery as needed Fluid Levels (Oil, Coolant, Brake Fluid) Examine for wear/replace if below spec Check for rust or deposits Fluid types and intervals Change or top-up fluids, schedule oil change Tire Pressure & Tread Inspect for uneven pad wear Ensure fuel lines clear Tire inspection guidelines Inflate, repair, or replace tires as needed Chain/Sprocket Check rear brake engagement N/A Lubrication points listed Clean and lubricate chain, adjust slack Inspecting Your Motorcycle: Key Maintenance Checks Before Spring Riding Before the first test ride, investing time in a thorough inspection can prevent minor issues from ballooning into breakdowns. Start by reviewing your motorcycle battery—check the charge and, if necessary, recharge or replace it. Move on to examine all essential fluids. Check your oil, coolant, and brake fluid levels based on your specific service manual instructions, and replace any that appear dirty or have reached their mileage interval. Next, inspect your tires for tire pressure and look for cracks, flat spots, or excessive wear on the tread. This time of year, neglected tires can mean unsafe handling as soon as the temperatures and speeds increase. Don’t forget to check moving parts—including the drive chain, clutch and throttle cables, and brake lines. Lubricate or adjust as needed according to your manufacturer’s service manual. Following this maintenance checklist, you’re laying the groundwork for safer, trouble-free rides right from the start of the spring riding season. For riders looking to go even deeper with their seasonal maintenance, exploring additional strategies can make a big difference. You might find it helpful to review the seasonal bike care secrets every rider must know for more tactical tips on keeping your motorcycle in peak condition throughout the year. How to Check and Replace Brake Pads for Optimal Motorcycle Maintenance Properly functioning brake pads are a non-negotiable for motorcycle safety. After being idle through winter storage, your brake pad material can become compromised. Start your inspection by examining both the front and rear brake pads for excessive wear, thinning, or glazing. Many service manuals provide visual thickness indicators—if the pad thickness is at or below the minimum, it's time to replace them. While at it, inspect the brake line or brake lines for any signs of cracking or leaking. Pay close attention to the brake lever response and the engagement of both front and rear brakes during every test ride. If your brake pads need replacing, follow the step-by-step guide in your service manual. Typically, this involves removing the relevant caliper, extracting the old pad, and carefully inserting a new one—matching both size and type. Reassemble and pump the brake lever to restore hydraulic pressure before your spring test ride. Remember to check brake fluid levels after replacing pads, as worn pads can affect overall system performance. Doing this thoroughly now can significantly reduce the risk of accidents and give you confidence for the whole riding season. "Ignoring your brake pads after winter can increase your stopping distance by up to 30%, putting you at risk for spring accidents." — Certified Motorcycle Mechanic Inspecting the Gas Tank: Preventing Common Post-Winter Problems Your gas tank, after winter storage, can become a breeding ground for condensation, rust, or stale fuel. Open the fuel tank cap and visually inspect for any signs of moisture, rust spots, or residue. The presence of old fuel—especially if you didn’t use a stabilizer before storage—can clog your fuel filter and result in poor running or engine hesitation. If the fuel smells sour, drain and refill with fresh gasoline. This step, along with inspecting the tank’s interior, will help prevent unwanted engine problems across the spring. Don’t forget to check the fuel lines for any cracks or leaks, as rubber and plastic can degrade over time in fluctuating temperatures. A quick verification of your service manual will highlight your specific model’s procedure for proper gas tank inspection, care, and cleaning. Addressing gas tank issues now ensures smoother throttle response, efficient fuel use, and a longer engine life during the coming riding season. Referencing Your Service Manual: Step-by-Step Maintenance Checklist for Spring Your motorcycle’s service manual is the single most authoritative guide for model-specific maintenance. Referencing the correct sections during your spring prep ensures each maintenance check is performed to factory specs. The manual will list exact fluid capacities, recommended types and brands of consumables (like oil and air filter), step-by-step instructions for adjusting clutch and throttle cables, and even the torque specs for critical fasteners. Skipping this resource often leads to costly errors or missed problems that only reveal themselves at speed. By following the service manual closely, you’re setting yourself up for a safe and reliable spring riding experience, and you’ll be better prepared to address maintenance concerns swiftly in the future, too. Create a habit each season of cross-referencing your inspection and maintenance checklist with your manual. If you can’t find your physical copy, most manufacturers provide PDF versions for download—keeping one on your phone ensures you’ll always have expert guidance at hand, even while working in the garage. Addressing Issues After Winter Storage: Prepare for Spring Riding Some motorcycles develop issues during winter storage that aren’t obvious until a thorough maintenance check or the first test ride. Common concerns include dried-out fluid seals, weakened brake pads, corroded drive chain, or sticky controls. Addressing these problems—rather than ignoring them—will prevent small annoyances from developing into major failures during active spring riding. Following up with corrective maintenance, such as changing the oil, replacing the air filter or fuel filter, and tightening bolts, is time well spent. Even if you’re pressed for time, prioritize inspecting the front and rear brake systems, checking tire condition, and changing any fluids that look even slightly compromised. Your peace of mind and safety are worth the extra effort before you hit the road for your first ride. Fluids, Filters, and Tires: Start Your Maintenance Check Strong Begin your spring refresh with the essentials: fluids, filters, and tires. Drain and refill engine oil if it wasn’t changed before winter, and inspect coolant and brake fluid for clarity or contaminants. Check your air filter for signs of dirt or rodent nests—a clogged air or fuel filter will zap your performance before your first test ride. Tire condition is another priority: ensure pressures are at manufacturer spec and look for signs of dry rot, uneven tread wear, or sidewall cracks. Replace tires at the first hint of unsafe tread, as spring riding often means damp or debris-covered roads, and compromised tires directly affect your stopping distance and handling. If you recently changed fluids based on mileage or before storage, visually inspect their condition anyway; sometimes older fluids degrade simply from sitting in the cold, especially brake fluid and coolant, which can absorb moisture over time. A few proactive changes now save major hassle and expense later this riding season. Safety Systems: From Brake Pads to Lights — Don’t Miss a Step Safety checks go hand-in-hand with springtime motorcycle maintenance. Beyond the critical inspection of brake pads and lines, test the brake lever for smooth operation, and see that all bulbs (headlights, taillights, indicators) light up bright and clear. Sometimes, bulbs or fuses can fail over a long winter, and a non-functioning light is an easy ticket—or worse, a risk you don’t want to take. If your service manual lists a checklist, follow each point dutifully, and do not ignore the clutch and throttle responsiveness—hesitation or stiffness here can signal cables needing lubrication or replacement. Take a lap around your bike, reviewing every visible nut, fastener, and cover, ensuring nothing’s come loose with time. Confirm mirrors are tight and properly adjusted. Only then can you feel confident your safety systems are 100% reliable for when you hit the road after winter. Test Ride: Confirming Your Motorcycle Is Ready for Spring Riding The culminating step of your how to prep motorcycle for spring routine is the test ride. This is where you observe the results of your hard work in real road conditions and catch anything your garage inspection might have missed. Choose an open, familiar route—preferably with a variety of speeds and gentle stops. Pay close attention to throttle response, braking sharpness, steering feel, vibration, and any unusual noises. Evaluate performance, making extra mental notes about the clutch, throttle smoothness, and how the front and rear brakes respond when coming to a full stop. Don’t rush this first test. Give each system a few tries. If you notice hesitation, odd sounds, vibrations, or the feel of the controls isn’t quite right, take the bike back to the garage and repeat your inspection of the affected systems. This rigorous approach can uncover hidden issues with brake pads, tire pressure, or lingering debris in the gas tank or fuel system. Only after passing this real-world test can you confidently launch into a full riding season of spring riding. Checklist for Your First Spring Test Ride & Performance Evaluation Begin with a gentle warm-up ride at low speed Check engine response and idle for smoothness Test throttle and brake lever feel separately Apply front and rear brakes at several speeds Listen for knocks or rattles from suspension and engine Verify indicator and brake light visibility in sunlight Inspect tires again after ride for newly visible wear Diagnosing Unusual Noises or Handling Issues After Maintenance Not all issues become obvious in static inspection—some only reveal themselves during or after your test ride. Listen carefully for new or persistent noises: metallic scraping may point to poorly fitted brake pads or debris in the pads themselves; clunks or wobbles could indicate loose fasteners or play in the suspension. If you notice a mushy or unresponsive brake lever, immediately stop to check fluid levels and search for possible air leaks along the brake line. Handling tweaks are equally important—if the bike feels heavy in corners or slow to respond, tire issues, incorrect pressures, or feathered tread could be the culprit. Vibration at speed may mean the drive chain needs tensioning, or the wheels should be balanced. Return to your service manual for troubleshooting guides, and always err on the side of caution: address any anomaly you discover before committing to daily spring rides. This approach ensures your safety and optimal performance throughout the season. People Also Ask: Key Questions on How to Prep Motorcycle for Spring What is the 2 4 12 second rule on a motorcycle? The 2-4-12 second rule is a vital principle in motorcycle safety. It means you should scan 2 seconds ahead for immediate risks, 4 seconds for possible threats in your path, and 12 seconds to assess the broader road environment. This mental checklist helps you anticipate dangers, improve your response time, and keep you safer during spring riding, especially when roads may have changed after the winter months. How to prep your bike for spring? To properly prep your bike for spring, follow a comprehensive motorcycle maintenance checklist: charge or replace your battery, check your oil and coolant, inspect and replace brake pads as needed, review your gas tank for old or tainted fuel, ensure correct tire pressure and tread depth, lubricate chain and cables, and review your service manual for any model-specific steps. After thorough checks, perform a gentle test ride to confirm all systems operate safely and smoothly. What is rule 5 motorcycle? “Rule 5” in the motorcycle community commonly refers to the tongue-in-cheek advice: “Harden the [rider] up!” However, for practical spring prep, always prioritize your maintenance check—don’t cut corners on safety or inspection protocols. Trust your service manual for guidelines, and take spring maintenance seriously for the best and safest riding season possible. How cold does 40 degrees feel on a motorcycle? At 40°F while riding a motorcycle, wind chill makes it feel significantly colder—often like the low 30s or even upper 20s (Fahrenheit). Without proper gear and preparation, hypothermia and numbness can set in quickly, especially at highway speeds. For spring riding, layer appropriately, wear windproof gloves, and make sure your motorcycle maintenance is done to avoid any breakdowns or roadside stops in chilly weather. FAQs on How to Prep Motorcycle for Spring Do I need to change my motorcycle oil every spring? Yes. Even if you didn’t ride during winter, condensation can collect in your engine, making a fresh oil change essential for engine protection and longevity. Is tire replacement necessary or just inflation? Check tire condition first—if there’s cracking, flat spots, or excessive wear, replace immediately instead of just inflating. Safe tire pressure is crucial, but the tire’s physical integrity matters most. Should I consult my service manual for every maintenance check? Absolutely. Your service manual ensures each task is done correctly and identifies specs unique to your make and model—never skip it. Can I skip the battery check if it was new last year? No. Even a new battery can drain or sulfate in winter storage. Always check charge levels and connections before spring riding. What’s the quickest maintenance checklist for experienced riders? Battery charge, fresh oil and coolant, brake pad and tire inspection, lights check, chain lubrication, and a short test ride before hitting the open road. Key Takeaways: How to Prep Motorcycle for Spring and Enjoy a Safe Riding Season A thorough spring maintenance check reduces breakdown risk and maximizes safety Following a detailed maintenance checklist—inclusive of brake pads, gas tank, and reference to service manual—ensures peak performance for the riding season Don’t overlook battery, fluids, and tire health after winter storage Always test ride carefully before regular spring riding Ready to Hit the Road? Ensure Professional Motorcycle Maintenance By Calling Nasty Performance Motorcycle Shop Today: 847-458-4858 If you want peace of mind and expert service for the ultimate spring riding experience, call Nasty Performance Motorcycle Shop at 847-458-4858. Trust the pros to prepare your bike for every adventure! Conclusion: Secure a Head Start for Spring Riding Season with Thorough Motorcycle Maintenance By following these how to prep motorcycle for spring steps, you set yourself up for a safe, exhilarating, and worry-free riding season. Make maintenance your first ride—every spring. As you continue to refine your maintenance routine and seek out new ways to protect your investment, consider broadening your knowledge with expert advice on year-round care. For a deeper dive into strategies that keep your motorcycle performing at its best in every season, explore the comprehensive insights in Seasonal Bike Care Secrets Every Rider Must Know. This resource is packed with advanced tips and proven techniques to help you ride with confidence, no matter what the calendar says.

How to Winterize a Motorcycle: Step-by-Step Guide

Did you know improper winter storage can reduce your motorcycle’s lifespan by up to 30%? These chilly winter days bring more than icy roads—they threaten the very engine, gas tank, exhaust pipe, and electrical systems you depend on for riding season. Winterizing your bike isn’t just an expert tip; it’s a crucial step to ensure your motorcycle remains in good condition for that long-anticipated first spring ride. This comprehensive guide will show you how to winterize your motorcycle, protect your investment, and guarantee smooth rides when spring arrives. How to Winterize a Motorcycle: Why Winter Storage Matters "Did you know improper winter storage can reduce your motorcycle’s lifespan by up to 30%?" — Industry Expert Properly learning how to winterize a motorcycle is vital for any rider who wants to maximize their bike’s lifespan and reliability. If you neglect proper winter storage, corrosion can silently compromise metal parts, internal condensation can damage the exhaust pipe and engine, and untreated fuel left in the gas tank can gum up crucial components. Furthermore, batteries can lose charge, and tires can develop flat spots, making for a rough start when the warmer months return. It’s not just about convenience—it’s about keeping your bike running safely and effectively for years to come. Prevent corrosion—from frame to exhaust pipes Safeguard the engine and preserve fuel system integrity Ensure safe, smooth starts when spring arrives Whether you store your motorcycle in a storage unit, a heated garage, or opt for indoor storage, following a proven winterization method ensures your spring ride is as thrilling as ever and that your bike remains in good condition throughout the harshest winter days. What You'll Learn About How to Winterize a Motorcycle Step-by-step process for how to winterize a motorcycle Tools and materials required Tips for ensuring good condition after winter Common mistakes to avoid By the end of this article, you’ll know how to properly winterize your motorcycle, select the right tools and storage options, and avoid costly mistakes. We’ll cover essential protection solutions for your engine, gas tank, exhaust pipe, tires, and more—ensuring you can ride your bike with confidence and peace of mind when spring returns. As you work through these winterization steps, remember that keeping your motorcycle in peak condition is an ongoing process. For more hands-on advice and updates on advanced maintenance techniques, be sure to check our latest motorcycle care resources as they become available. Essential Tools and Materials for How to Winterize a Motorcycle Tool / Material Purpose Fuel Stabilizer Prevents fuel system gumming and corrosion in the gas tank Motorcycle Cover Shields from dust, moisture, and temperature swings Storage Unit or Indoor Storage Protects against harsh winter days and precipitation Battery Tender / Trickle Charger Maintains battery charge and health during winter storage Tire Gauge Ensures tires are inflated to correct PSI and prevents flat spots Cleaning Supplies Removes dirt, preventing corrosion and rust These tools will help you keep your motorcycle in good condition, avoid grime buildup, and extend the life of components—ensuring that putting your bike back on the road is as simple and enjoyable as possible. Step 1: Deep Cleaning—Preparing to Winterize Your Motorcycle An often-overlooked but crucial step when you winterize your motorcycle is thoroughly cleaning the entire bike. Begin by giving the motorcycle a deep wash, using mild soap and soft brushes to remove hardened dirt, salt, and bugs from every surface—including the hard-to-reach areas near the exhaust pipes and chain. Take your time to inspect the frame, wheels, gas tank, and swingarm for any signs of damage, rust, or potential issues. Any existing damage can worsen during winter storage, so addressing them before putting your bike away is just a good idea. Wash and dry the motorcycle thoroughly—especially near the chain and underbody Inspect for scratches, nicks, and leaks; address them immediately Apply chain lubricant and grease on all moving parts to stave off rust and ensure that your bike remains in good condition during winter days Deep cleaning keeps your motorcycle free from residues that accelerate corrosion. After cleaning, let it dry fully before moving to the next step. This foundational work ensures that all other winterization efforts are maximally effective. Step 2: Fuel System and Gas Tank—Using Fuel Stabilizer for Motorcycle Winterization The gas in your motorcycle’s tank can deteriorate and clog the fuel system over several cold winter days. That’s why using a fuel stabilizer is an important part of winterizing your bike. Fuel stabilizer prevents fuel breakdown, stops gumming inside the carburetor or fuel injectors, and helps keep your gas tank rust-free by filling up any air spaces where moisture condensation could form. How to Add Fuel Stabilizer to Your Motorcycle Fill the gas tank completely to reduce air space inside Add manufacturer’s recommended amount of fuel stabilizer (also called fuel treatment) Run the engine for several minutes to circulate the treated fuel throughout the system By treating your fuel before putting your bike into winter storage, you protect the engine for an easy start when spring arrives. Treated fuel is much less likely to cause clogging or require extensive maintenance later on. This simple act pays off in engine health and hassle-free rides come the next warm day. Step 3: Battery Care—Keep Your Motorcycle in Good Condition The cold can sap power from your motorcycle battery, leaving it dead when you want to ride your bike. Leaving your battery connected and idle during winter days is a recipe for disappointment. Instead, follow these steps to ensure that your battery stays in good condition: Carefully remove the battery from the motorcycle Store it in a cool, dry location (never directly on concrete) Connect to a battery tender or trickle charger to maintain an optimal charge over the winter Batteries naturally discharge, and extreme temperatures make this worse. Battery tenders keep your battery ready for action. If you don’t use a tender, charge the battery every few weeks. This way, when spring arrives, you won’t waste any time in the garage—you’ll be ready to ride your bike safely and confidently. Step 4: Engine and Exhaust Pipe Protection During Winter Storage Even when you’re not riding, your engine and exhaust pipes are vulnerable to moisture, rust, or even critter invasion if not properly secured. Protecting these components is an essential step when you winterize your motorcycle. Start by ensuring your engine is at operating temp after running stabilized fuel through the system, and avoid leaving the spark plugs exposed or the exhaust pipe open to the elements. How to Protect Exhaust Pipes Plug exhaust pipes with clean, dry cloths or use commercially available covers designed for motorcycles This prevents internal condensation and stops rodents or insects from crawling inside over winter days "Moisture in the exhaust pipe is one of the leading causes of winter motorcycle engine trouble." This step can save you from costly repairs or frustrating troubleshooting when you start your bike after winter storage. Making this a routine part of your winterization process adds reliable protection for vital engine parts. Step 5: Lubrication, Fluids, and Tires—How to Winterize Your Bike Completely Don’t let neglect during winter storage cause expensive surprises in the spring. Before you put your motorcycle away, make sure all fluids are topped up and lubricants are fresh. Changing engine oil and replacing the filter ensures no contaminants sit inside the engine for months, which could lead to corrosion or sludge when you want to ride your bike next season. Change engine oil and filter—even if recently replaced—to prevent contaminants from settling Top up coolant and brake fluid levels to avoid condensation-related problems Inflate tires to their recommended PSI and use stands if possible—flat spots are a common issue in winter storage Additionally, lubricate clutch levers, cables, and pivot points to keep everything moving freely. Properly winterized fluids and tires mean your motorcycle will be in good condition and ready to roll the second spring arrives. Step 6: Choosing the Right Storage Solution: Storage Unit vs Indoor Storage Where and how you store your bike over the winter days will hugely impact its condition. The debate between renting a storage unit or using indoor storage at home depends on your climate, budget, and garage space. A heated garage or finished basement offers excellent protection against temperature swings, but not every rider has this luxury, especially in colder climates or urban settings. Storage unit: Secure, weatherproof, and accessible but can cost extra and sometimes lacks climate control Indoor storage: A garage or basement provides stable temperature and security, ideal for harsh winter days but may require further space and preparation Regardless of location, always cover your motorcycle with a quality motorcycle cover for another layer of protection from dust, pests, and stray moisture Finding the right winter storage solution helps you properly winterize and safeguard your investment. The effort keeps your motorcycle in good condition and speeds up preparation when spring finally arrives. Step 7: Cover and Check—Final Preparations to Winterize Your Motorcycle With all mechanical tasks complete, the last step is to securely cover your motorcycle and double-check your work. Moving the bike to its storage location, be sure it sits upright or on a center stand if possible, to prevent strain on the tires or suspension. Place a high-quality motorcycle cover over the bike, ensuring full coverage—including wheels, seat, and controls. Cover your motorcycle securely, even in a garage or storage unit Do a final walk-around, checking all steps: fuel stabilizer used, battery tended, fluids topped, exhaust pipes plugged, and tires inflated This vital step keeps your winterized motorcycle dust-free, rust-resistant, and ensures nothing is overlooked before the long winter days start. When you properly winterize your bike, it’s ready for adventure the moment you are. Insurance and Motorcycle Coverage Considerations During Winter Storage Many riders think about maintenance but forget about the importance of reviewing their motorcycle insurance policy during winter storage. Whether you store your motorcycle in a storage unit or your home garage, updating your motorcycle insurance and understanding your motorcycle coverage options can save you from unnecessary costs in case of theft, fire, or accidental damage. Reviewing Your Motorcycle Insurance Policy It’s always a good idea to review your insurance policy each season, ensuring you’re covered for winter risks Motorcycle insurance providers may offer reduced rates for stored bikes or extra coverage for storage units and indoor storage situations Staying updated on your policy gives you peace of mind and financial protection while your motorcycle is not in use Comprehensive motorcycle coverage—whether maintained year-round or adjusted for storage periods—protects your investment and guarantees you can ride your bike with confidence once spring returns. People Also Ask: What Needs to Be Done to Winterize a Motorcycle? Clean and dry the bike—including hidden areas Add fuel stabilizer to the gas tank and run the engine to circulate Remove and maintain the battery with a tender Check all fluids, lubricate moving parts, and plug exhaust pipes Cover and store your bike in a protected, secure spot By thoroughly following these steps, you ensure that your bike will be in good condition and avoid the most common winter storage pitfalls. Taking a little time now means you’ll spend less time in the garage—and more on the open road when spring riding season arrives. People Also Ask: Is it Okay to Leave Gas in a Motorcycle Over Winter? Leaving untreated gas in your gas tank can degrade the fuel system. Always use a fuel stabilizer or drain the tank completely before storing your motorcycle for winter. Using fuel treatment is essential to stop varnish buildup and keep your motorcycle safe. Treating your gas tank before storage helps prevent more expensive repairs and ensures smooth starts after winter days. People Also Ask: What is the 2 4 12 Second Rule on a Motorcycle? The 2-4-12 second rule refers to recommended safe following distances and reaction times when riding a motorcycle. Review your motorcycle insurance and practice safe riding after winterization. This safety rule helps you maintain proper space and reaction time when you ride your bike, especially after it comes out of winter storage. Combined with a properly winterized motorcycle, adherence to safety rules means a longer, accident-free riding season. People Also Ask: What Does 2 Fingers Up Mean on a Motorcycle? The ‘two fingers up’ gesture is a common friendly greeting among motorcycle riders, symbolizing respect and camaraderie—especially after a safe ride out of winter storage. After you winterize your motorcycle and hit the road again, don’t forget to share in this tradition—reminding you and others to always value safety, friendship, and the community spirit among riders. FAQs on How to Winterize a Motorcycle How early should I begin to winterize my motorcycle? It’s a good idea to start the winterization process a couple of weeks before the first hard frost. This gives you enough time to source needed materials, perform maintenance, and address any last-minute repairs without feeling rushed. Can I use any motorcycle cover? While there are lots of ways to cover your bike, always opt for a breathable, fitted motorcycle cover. Generic covers may trap moisture or leave gaps. Specific motorcycle covers are designed for breathability and complete protection, whether you use a storage unit or indoor storage. What maintenance should I perform before the first spring ride? Before you ride your bike after winter storage, inspect your tires, check all fluids, reconnect and charge your battery, and test brakes and lights. Check the gas tank for any old fuel, replace the spark plugs if necessary, and clean/lubricate the chain. A quick once-over ensures your motorcycle is in good condition for the new riding season. Key Takeaways: How to Winterize a Motorcycle Thorough preparation ensures good condition for your bike throughout winter storage Use fuel stabilizer and store your bike in a secure location with a quality motorcycle cover Motorcycle insurance coverage is important all year—review your policy for peace of mind Step-by-step demonstration: Watch a rider methodically preparing a motorcycle for winter storage in a garage—including washing, adding fuel stabilizer, unplugging battery, covering, and checking insurance—all in a clear, instructional, well-lit home setting. Experts share practical winter storage and insurance tips—learn from seasoned pros to ensure your motorcycle remains protected all season long. Conclusion: Protect Your Investment—Winterize Your Motorcycle Effectively "Proper winterization saves time, money, and ensures memorable riding seasons ahead." Safeguard your ride for the long haul. Take the steps now, and your bike will repay you with reliability come spring. If you’re eager to keep your motorcycle in top shape year-round, there’s always more to discover beyond winterization. As our site grows, you’ll find in-depth guides, expert tips, and the latest updates on motorcycle performance and care at Nasty Performance’s main resource hub. Whether you’re looking to master seasonal maintenance or explore advanced upgrades, staying informed is the key to a safer, more enjoyable ride. Bookmark our site and check back soon for new articles and insights tailored to passionate riders like you. Ready to Winterize Your Motorcycle? Call Nasty Performance Motorcycle Shop Today: 847-458-4858 Don’t wait for the cold to take its toll—schedule your winterization service and ride stress-free all year!

Engine Oil Change Fall: Why Timing Could Save Your Bike

Did you know motorcycles using fresh engine oil before fall storage show 35% less engine wear come spring? This eye-opening fact redefines seasonal motorbike maintenance. If you care about your bike’s performance and engine health, timing your engine oil change fall could be the most cost-effective, high-impact decision you make this year. In this article, you’ll discover the surprising data behind fall oil changes, learn why late-year service matters more than most riders realize, and get actionable advice from motorcycle maintenance experts. If you're hoping for hassle-free spring starts and long-term engine protection, read on—your motorcycle will thank you next season. Why Engine Oil Change in Fall Is Backed by Surprising Data The tradition of performing an engine oil change fall is gaining serious momentum—and the numbers support the trend. Recent service logs and maintenance studies indicate that bikes receiving a fresh oil change before fall experience less corrosion and internal engine wear after sitting idle through winter. This translates directly to smoother starts, better engine performance , and fewer costly repairs in spring. Practical experience backs up the studies: mechanics report fewer sludge, residue, or acidity issues in motorcycles that underwent an oil change service before fall storage. By proactively addressing engine oil , you reduce the risk posed by moisture and contaminants settling in your sump for months. For any rider who values motor oil health and reliability, the timing couldn’t be more critical—instead of putting off changing your oil until the riding season, consider doing it as you prepare for the colder months ahead. Startling Fact: Studies show that motorcycles using fresh engine oil before fall storage show 35% less engine wear in spring—protecting vital components through winter’s harshness. A Closer Look at Fall Oil Change Trends and Their Impact A deep dive into industry reports reveals a growing number of riders and certified technicians now prioritize oil change service in autumn. The consensus among professionals is that oil left in the engine after a full season of riding becomes acidic and laden with contaminants, which accelerate wear and rust during extended storage. This is particularly important for owners of older bikes or those who store bikes in areas with fluctuating temperatures and high humidity. Moreover, insurance claims and repair shop data indicate that bikes maintained with a fall engine oil change boast longer lifespans, higher resale values, and enhanced fuel economy come spring—a direct byproduct of better-lubricated moving parts and less risk of sticky valves or hardened gaskets. When viewed through the lens of these trends, it’s clear that the engine oil change fall isn’t just a suggested best practice—it’s a proven method for maximizing value and peace of mind. Understanding the Importance of Engine Oil Change Fall for Motorcycles The engine oil change fall recommendation is no passing fad—it's grounded in how motor oil works and interacts with your motorcycle’s engine during cold and dormant periods. When temperatures drop, any residual contaminants, moisture, or acidity in old oil can wreak havoc. Only a fresh oil change can truly shield metallic surfaces and vital components from this risk. Motorcycles, especially those left idle over winter, are prone to condensation inside the engine, creating a breeding ground for rust and internal oxidation. This is the time when changing your oil isn't about regular intervals but about strategic seasonal protection. Committing to a fall oil change service means you’re committed to both performance and longevity. The Role of Engine Oil in Seasonal Protection Engine oil acts as the lifeblood of your bike’s engine, reducing friction between moving parts, trapping debris, and cooling essential components. During winter layups, stagnant motor oil degrades, allowing acids and moisture to compromise metal surfaces, gaskets, and seals. This is where a properly timed oil change makes a significant impact. By replacing dirty oil with fresh engine oil before winter, you ensure a clean barrier against corrosive elements. This proactive measure preserves your engine’s integrity and prevents the common issues faced by those who delay an oil change service until spring. The result is a smoother, trouble-free start after months of storage, adding years to your bike's operational life. Oil Change Myths vs. Realities: Spring and Fall Debate One misconception about oil change service is that waiting until spring is equally effective. In reality, by the time riding season returns, old oil may have already caused minor, sometimes irreversible damage. Another myth is that only high-mileage or hard-ridden bikes need a fall oil change; in truth, even rarely used motorcycles face moisture, acidity, and residue risks. The debate between “ spring and fall ” scheduling reveals a clear winner: motorcycles with an end-of-season oil change emerge with stronger engine performance and higher consistency in oil levels post-storage. Proactive fall maintenance isn’t just about following a maintenance schedule —it’s about understanding your engine’s chemistry and acting before unseen threats set in. “An engine oil change in fall is one of the simplest ways to ensure your bike’s longevity into the next season.” – Respected Moto Technician Critical Benefits of a Fall Oil Change Service: Protecting Engine Health and Longevity The advantages of an engine oil change fall go beyond short-term performance—this maintenance choice directly influences your motorcycle’s health over time. First, changing your oil flushes out accumulated debris and acids, preventing corrosion of lifters, camshafts, and bearings. Second, a fresh filter and oil provide immediate lubrication and protection throughout winter, even as oil naturally settles in the sump. Third, fall oil change service reduces start-up wear in spring. With less residue and better oil flow, you minimize harsh dry starts and extend the life of critical components. For riders serious about preserving investment and optimizing engine performance , this timing is a non-negotiable. Why Oil Change Service Before Storage Matters: Moisture, Acidity, and Residue Risks Storing your motorcycle for months exposes it to significant moisture and condensation risks—especially if you skip a change service . Old engine oil contains water vapor from combustion, acids from fuel breakdown, and metal shavings from engine wear. If these byproducts sit in your engine all winter, they speed up corrosion and cause subtle but persistent health issues for your bike. Regular removal of these contaminants via a timely oil change not only prevents costly repairs down the road, but also preserves vital seals, bearings, and cylinder walls. When you change your oil in the fall, you’re giving your bike a fresh, clean slate that will maintain optimal oil level stability and performance come spring. Engine Oil Change Fall vs. Spring and Fall Scheduling: What’s Better for Maintenance? While opinions vary, evidence suggests that a pre-storage engine oil change fall outperforms other schedules for long-term asset protection. Spring oil changes mainly refresh what’s already been compromised, while fall services offer preventive maintenance that directly addresses seasonal threats. The best maintenance schedule combines the strengths of both: a thorough engine oil change fall , followed by a quick check of oil levels and condition when prepping for spring rides. This hybrid approach ensures a protective oil layer year-round and helps maintain a more consistent engine performance profile. Comparison Table: Fall vs. Spring Engine Oil Change—Benefits, Drawbacks, and Recommendations Timing Key Benefits Drawbacks Expert Recommendation Fall Removes contaminants before storage Protects against winter moisture & acid Better spring start-ups Requires advance planning Best for engine longevity and reliability Spring Fresh oil for new season Easy to combine with other checks Contaminants linger over winter Possible increased engine wear Acceptable if fall service missed, but less optimal How to Change Your Oil and Check Oil Level Properly Before Fall Storage Performing a DIY oil change service for autumn is a practical, cost-saving routine for any rider who wants to safeguard their motorcycle. Begin with the right tools: fresh engine oil suitable for your bike’s make and model, a compatible oil filter, a drain pan, gloves, and appropriate wrenches. Ensure the engine is slightly warm for easier draining but not hot enough to cause burns. The process starts by removing the drain plug and old oil, followed by filter replacement, refilling with the proper type of motor oil (synthetic oil, synthetic blend, or conventional motor oil), and checking your oil level post-change. Taking your time with inspection and making sure the oil pan is completely drained can make all the difference. Don’t forget to update your maintenance log for optimal record-keeping. Start the engine and let it run for a few minutes to warm up the oil (not hot). Turn off the engine and place an oil pan beneath the drain plug. Remove the drain plug and allow old oil to drain completely. Replace the oil filter with a new, compatible filter. Reinstall drain plug securely, ensuring no leaks. Refill with recommended engine oil (synthetic, blend, or conventional). Start the engine and let it idle for a minute, then shut off and check your oil level. Top off if necessary. Dispose of used oil and filter at a certified recycling center. Check Your Oil: Signs You Need an Engine Oil Change Fall Recognizing when your motorcycle demands an engine oil change fall is crucial. Visible symptoms like dark, thick oil, persistent warning lights, or a sharp drop in oil levels are clear indicators. Sluggish engine response and increased mechanical noise indicate it's past time for a change service . Sometimes, the signs are subtle: difficulty starting in cooler weather, a musty or burnt oil smell, or inconsistent oil on the dipstick. If you notice any of these warning signs, act promptly—delaying could mean compounding internal wear, while a timely change keeps your lubricants and bike running smoothly all year. Darker-than-usual or gritty oil on dipstick Difficulty shifting or increased mechanical noise Low oil level despite recent refills Engine warning lights related to oil pressure Unpleasant smells near the oil cap or exhaust Pro Tip: Always check your oil level after an oil change and before winterization. Choosing Between Synthetic Oil and Synthetic Blend for Your Engine Oil Change Fall Selecting the right motor oil is a critical step in maximizing seasonal protection and longevity. Riders can choose between full synthetic oil , synthetic blend, or conventional motor oil—each offering unique benefits for your motorcycle depending on age, usage, and local climate. Full synthetic oil leads in performance, especially under temperature extremes, while synthetic blends provide a balance of protection and affordability. Conventional motor oil remains an acceptable choice for older bikes or low-mileage riders, though it may offer less robust winter protection. Consider your manufacturer’s recommendations and your own riding patterns before making a choice. Comparing Synthetic Oil, Synthetic Blend, and Conventional Motor Oil Synthetic oil is engineered at the molecular level to provide superior control over viscosity, temperature stability, and protection for moving parts. It's the best bet for high-performance motorcycles, extreme climates, and riders seeking extended intervals between changes. Synthetic blends mix synthetic base stocks with conventional oil, offering improved protection and better resistance to breakdown for moderate conditions. Conventional motor oil is refined directly from crude oil and, while it meets minimum lubrication standards, may not provide the longevity or cold-start protection of synthetics. If you have an older bike or follow a strict maintenance schedule with regular oil changes, this type may suffice. However, most experts recommend a blend or full synthetic for modern motorcycles heading into winter storage. Motor Oil Types for Fall Oil Change: Performance, Protection, and Price Oil Type Performance in Cold Protection Level Recommended For Typical Price Full Synthetic Excellent Highest Modern, high-performance bikes High Synthetic Blend Good Above Average General riding, mixed conditions Moderate Conventional Average Basic Older or low-mileage bikes Low Common Oil Change Service Mistakes to Avoid Before Fall Even seasoned riders can make small yet costly mistakes with their oil change service before winter. One of the most common errors is forgetting to check your oil level after the change, which can lead to under- or over-filled sumps that stress engine seals and gaskets. Another pitfall is using an old filter or low-quality parts, which compromise the effectiveness of fresh lubricants and diminish long-term protection. Other avoidable missteps include skipping the warm-up before draining oil (resulting in incomplete removal of old oil), reusing gaskets, or ignoring potential leaks after reassembly. These mistakes can offset the benefits of seasonal oil changes, so following a careful, step-by-step process is essential to keep your bike running smoothly through and beyond the winter. Forgetting to check your oil level after service Ignoring low oil levels pre-storage Using an old filter or poor-quality replacements People Also Ask about Engine Oil Change Fall Is it normal for engine oil level to drop? Yes, minor reduction in oil level over time is normal due to evaporation, internal consumption, or small leaks. However, a sudden or consistent drop could indicate wear or a leak. Always check your oil level regularly, especially before and after performing a seasonal oil change or storage. Is it better to change oil in fall or spring? Changing your oil in the fall, right before bike storage, is generally better for preventing winter moisture and acid buildup in the engine. Spring oil changes don't undo any corrosion that may have developed from leftover contaminants. For best engine performance and maintenance, prioritize an engine oil change fall . How long overdue can I go for an oil change? It's not recommended to delay an oil change beyond your manufacturer’s recommended interval or the maintenance schedule specified for your bike. Going months overdue can lead to internal damage from contaminated oil and reduce the lifespan of vital moving parts . Always aim for timely service to keep your engine running smoothly. How much engine oil loss is normal? Most motorcycles may lose a small amount of engine oil over thousands of miles, typically no more than a few ounces. If you notice rapid loss or oil levels dropping between checks, investigate for leaks or mechanical issues and consult a certified technician if necessary. Professional vs. DIY: When to Book an Oil Change Service for Fall While many riders enjoy tackling seasonal maintenance as a DIY project, there are distinct situations when a professional oil change service is the smarter choice. If you notice persistent low oil levels despite frequent top-ups, uncertain or inconsistent oil appearance, or a dramatic drop in engine performance , it’s time to involve an expert. A certified technician can diagnose underlying issues, recommend the right type of oil for your specific needs, and ensure a comprehensive inspection is performed. Choosing professional service before fall is particularly vital for owners of high-mileage or older bikes, for whom preventive maintenance is essential for reliability. Additionally, if you’re unsure about proper disposal techniques, filter replacement, or following your manufacturer’s recommended schedule, booking with a reputable shop guarantees peace of mind. Persistent low oil levels despite refills Inconsistent or milky appearance of motor oil Engine knocking, excessive heat, or performance drops Difficulty completing the maintenance checklist or filter replacement Desire for professional inspection and certified results Frequently Asked Questions about Engine Oil Change Fall and Motorcycle Maintenance Do I need to replace my oil filter with every fall oil change? Yes, always use a fresh filter when changing your oil, as contaminants can linger in used filters and compromise new lubricants during storage. Can I use synthetic oil in older bikes for fall? In most cases, yes—synthetic oils offer superior cold-weather and anti-corrosion protection, even for older bikes, but confirm compatibility with your manufacturer’s guidelines. How often should I change my oil if the bike is rarely used during winter? At least once before or after long-term storage, or every 12 months, whichever comes first—even infrequent use allows moisture and acids to build up in the oil. Expert Opinions: Why Engine Oil Change Fall Is Essential for Every Motorcycle “Proper fall engine oil change service locks in performance and peace of mind—don’t gamble on next season’s ride.” – Renowned Motorcycle Mechanic Seasoned service pros agree: nothing beats a fall oil change for long-term protection. By removing old, acid-laden oil, you prevent unseen winter damage and guarantee a ready-to-ride bike at the first hint of spring. This is "cheap insurance" for your engine's future. Doesn’t matter if you have a cutting-edge sport bike or a classic cruiser—taking oil maintenance seriously now simplifies everything next season. If you haven't scheduled your engine oil change fall , now's the time. Key Takeaways for Scheduling Engine Oil Change Fall Change your oil before storing for winter Always check oil level before and after oil change service Consider synthetic oil for superior cold-weather protection Address any leaks or oil loss immediately Book your fall oil change service early to avoid the seasonal rush Protect Your Ride: Take Action on Your Engine Oil Change Fall Today Call Nasty Performance Motorcycle Shop Today: 847-458-4858 Why Engine Oil Change Fall Matters: Last Thoughts on Optimizing Maintenance Timing “Think of a fall engine oil change as cheap insurance for a smooth spring start.” Prioritize your bike’s wellbeing—schedule your engine oil change fall before winter hits, and enjoy reliable, peak performance year after year. Changing your motorcycle’s engine oil before fall storage is a proactive step to ensure optimal performance and longevity. As temperatures drop, old oil can thicken, making it harder for your engine to start and run smoothly. An oil change with the right oil for cooler temperatures will keep your engine running efficiently, even on the coldest mornings. ( firestoneofdurango.com ) Additionally, using a high-quality oil filter designed to withstand high pressure is crucial, as cooler weather can cause oil to thicken, generating substantial pressure that may damage key engine components. ( repaironeauto.com ) By performing an oil and filter change before the cooler months, you protect your engine from potential cold-weather issues, ensuring a smoother start and ride come spring. Call Nasty Performance Motorcycle Repair Shop at: 847-458-4858

Terms of Service

Privacy Policy

Core Modal Title

Sorry, no results found

You Might Find These Articles Interesting

T
Please Check Your Email
We Will Be Following Up Shortly
*
*
*