Add Row
Add Element
cropper
update

Nasty Performance ~ 847-458-4858 

update
Add Element
  • Blog Home
  • Categories
    • Motorcycle Maintenance
    • Riding Tips & Preps
    • Safety & Inspection
    • Customizations & Upgrades
    • DIY Motorcycle Repairs
    • Motocycle Audio Systems
    • Motocycle Seasonal Care & Storage
    • Engine, Electrical Performance
  • Bike Night
  • Nasty Performance Motorcycle Shop
December 05.2025
1 Minute Read

Is a Motorcycle Performance Upgrade Right for You? Find Out

Have you ever wondered if a motorcycle performance upgrade could transform your riding experience, making every twist of the throttle deliver more excitement and control? Whether you crave blistering acceleration, crave more agile handling, or simply want your two-wheel companion to match your personal riding goals, the world of motorcycle performance upgrades may be calling your name. In this comprehensive guide, we’ll demystify the process—from assessing your needs and exploring upgrade essentials to understanding the real-world impact and legal considerations. Get ready to discover how you can safely and smartly unlock your bike’s true potential!

dynamic motorcycle in motion, rider accelerating on a scenic winding highway, motorcycle performance upgrade, golden hour lighting, motion blur

Are You Ready for a Motorcycle Performance Upgrade? Assessing Your Riding Goals and Expectations

Beginning your journey toward a motorcycle performance upgrade starts with honest self-assessment. Riders often envision more horsepower, sharper throttle response, or heightened reliability, but the key lies in matching these aspirations to both your skill level and future ambitions. Ask yourself:

  • What are your primary objectives with a motorcycle performance upgrade?

  • Do you seek more horsepower, better throttle response, or improved reliability?

  • Are there particular motorcycle performance issues you want to address?

Understanding Motorcycle Performance Upgrade Essentials

Motorcycle performance upgrades encompass modifications and enhancements designed to increase horsepower, improve throttle response, and boost reliability . These upgrades aren’t limited to racing pros; everyday riders can also benefit tremendously by targeting their individual performance goals. The main categories of upgrades include exhaust systems, air intake and air filters, fuel system enhancements, big bore kits, and performance camshafts.

  • Defining motorcycle performance upgrades

  • Key performance upgrade categories

  • Common misconceptions about motorcycle performance enhancements

One common misconception is that a single modification can drastically improve every aspect of your motorcycle performance. In truth, achieving substantial results often involves a balanced combination of upgrades and properly optimized fuel and ignition systems. Furthermore, some believe that exhaust systems or air filters alone can instantly add tons of horsepower, but without adequate tuning or supporting upgrades, gains remain modest. By understanding these basics, you’ll be prepared to make smart, results-driven decisions as you embark on your performance upgrade journey.

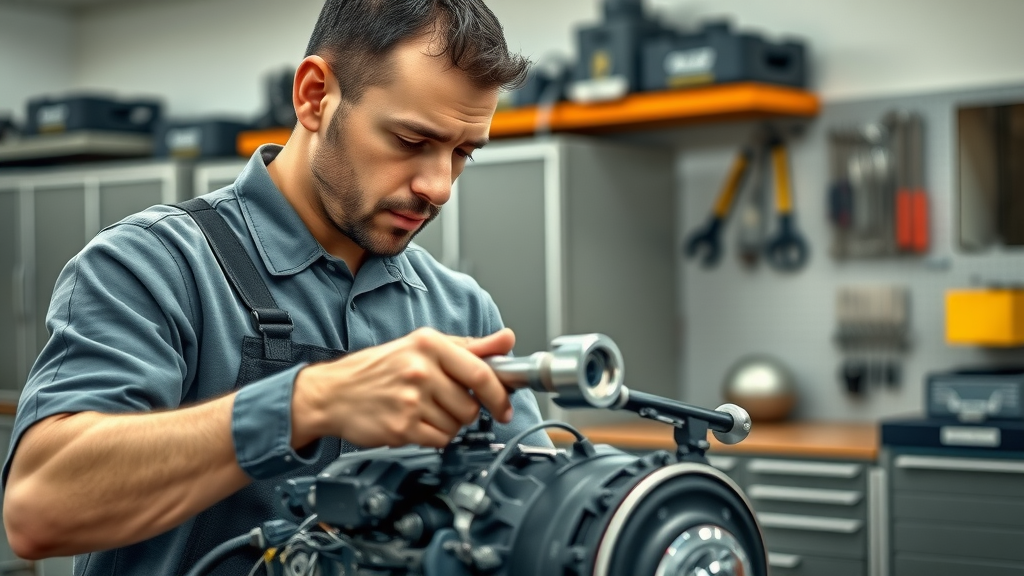
Motorcycle Performance: Core Components that Influence Power and Handling

The backbone of any successful motorcycle performance upgrade lies in understanding which components directly impact power, handling, and reliability. From intake and exhaust systems to the fuel delivery mechanisms and beyond, each plays a specialized role. Meticulous adjustments and the right mix of upgrades can significantly improve overall motorcycle performance, delivering tangible gains whether you’re a weekend warrior or everyday commuter. Let’s dive into the essentials of each core system so you can maximize efficiency and output from your two-wheeled machine.

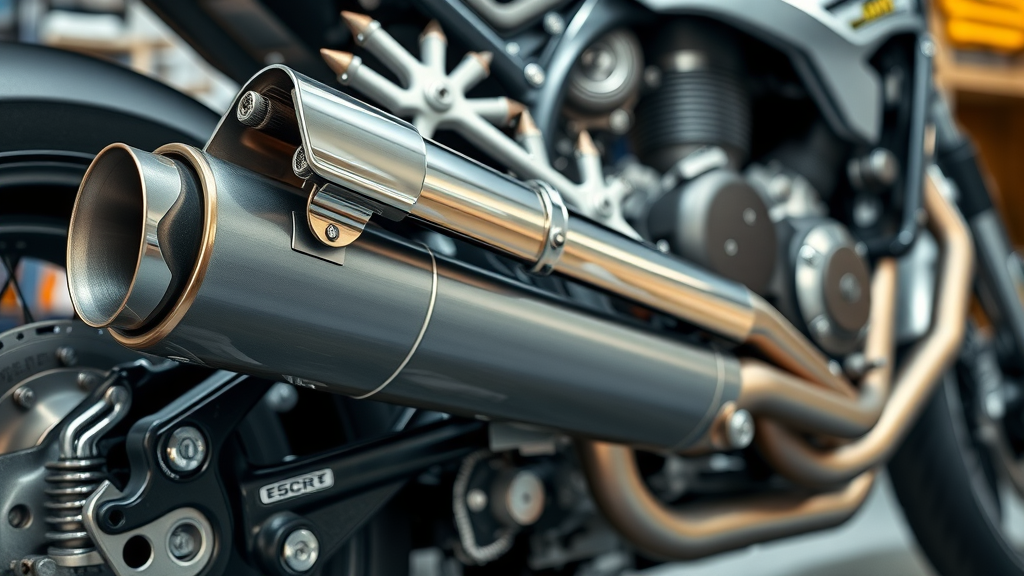
How the Exhaust System Impacts Motorcycle Performance

The exhaust system sits at the heart of performance enhancements, serving as the critical conduit for expelling combustion gases efficiently. Upgrading to a high-quality aftermarket exhaust system can dramatically improve exhaust flow, translating into measurable horsepower and torque gains. Riders often notice not just a boost in power output , but also a sharper, more aggressive exhaust note that adds a visceral dimension to their rides.

  • Benefits of upgrading your exhaust system

  • Exhaust systems and horsepower gains

  • Choosing the right exhaust setup

Choosing the correct exhaust setup is essential for balancing performance, fuel efficiency, and sound . Factors such as material (stainless steel vs. titanium vs. carbon fiber), type (slip-on or full system), and compliance with emissions regulations should all be considered. Keep in mind: To fully realize the benefits of an exhaust upgrade, it’s vital to pair it with appropriate fuel system adjustments and professional dyno tuning —otherwise, gains may fall short of expectations.

sleek custom motorcycle exhaust system, polished, showcasing optimal exhaust flow and integration, motorcycle performance upgrade, workshop background

Air Intake and Air Filter: Maximizing Efficiency in Motorcycle Performance Upgrades

Air intake systems and air filters are the lungs of your motorcycle’s engine, dictating how much oxygen is available for combustion. Stock air intake and air box systems are designed for broad reliability, not peak performance gains . Swapping to a high-flow aftermarket air intake and performance air filter increases airflow, contributing to enhanced throttle response and more robust power delivery across the rev range.

  • Differences between stock and aftermarket air intake systems

  • Role of air filter in performance upgrades

  • High-flow air intake vs. standard air box

It’s crucial to match your air cleaner or air filter selection to your riding style and the specific demands of your performance modifications. While high-flow air intakes deliver maximum efficiency for sport bikes and heavily-modified cruisers, everyday riders may benefit from a balanced solution that filters well without sacrificing reliability. Remember, pairing enhanced intake and exhaust systems is essential for achieving the synergistic power gains most riders are after.

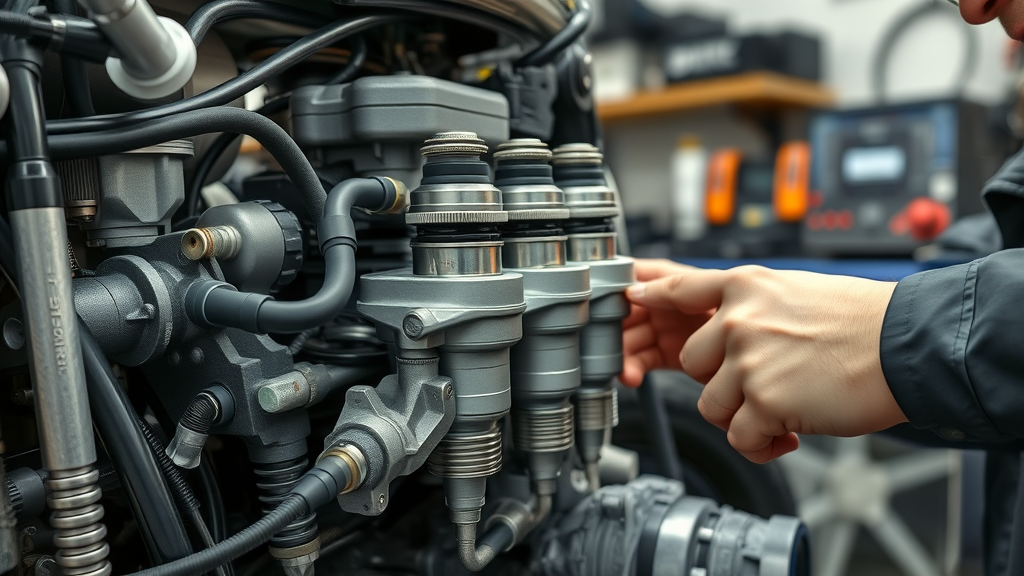
Optimizing Fuel System & Delivery for Superior Performance Upgrades

The fuel system is a foundational element in any motorcycle performance upgrade. Whether your bike is fuel-injected or carbureted, optimizing fuel delivery ensures your upgraded engine receives the precise air-fuel mixture needed to unleash all available power. Components like aftermarket fuel controllers or remapped ECUs are increasingly popular, allowing for tailored adjustments that accommodate all recent modifications.

  • Fuel system components and their impact

  • Fuel delivery tuning after performance upgrades

  • Synchronizing fuel injection or carburetors

Post-upgrade, dyno tuning is critical to achieving maximum power, throttle response, and fuel efficiency. Skilled technicians adjust ignition timing and fueling maps until the engine delivers peak performance and efficiency . Synchronization between fuel injection or carburetors further helps unlock smooth power delivery and prevent lean or rich running conditions that compromise reliability. Proper tuning after each performance upgrade is not just a recommendation—it’s an absolute necessity.

performance motorcycle fuel injection system, technician calibrating for optimal fuel delivery, motorcycle performance upgrade, detailed, garage setting

Exploring the Big Bore Kit and Bore Upgrades

If power gains are your ultimate pursuit, a big bore kit or bore upgrade warrants serious consideration. A big bore kit increases the engine's displacement by expanding the cylinder bore, enabling more fuel and air to enter each combustion cycle. This results in substantial power and torque increases that can transform even the most sedate rides into electric experiences.

  • What is a big bore kit?

  • Benefits and risks of bore kit upgrades

  • Real-world gains from big bore modifications

However, it’s not just about raw numbers. Bigger isn’t always better—risks such as heat management, reduced long-term reliability, and increased stresses on other fuel system and drivetrain components must be addressed. For performance enthusiasts, combining a big bore kit with supporting mods like exhaust, intake, and advanced fueling delivers breathtaking gains—especially when paired with expert dyno tuning to dial everything in for peak results.

Upgrading the Performance Camshaft to Unlock Maximum Motorcycle Performance

Adding a performance camshaft tweaks the heart of the engine, precisely adjusting valve timing and lift. Upgraded camshafts change the power curve, yielding improvements in both torque and high-rev horsepower. Selecting the appropriate camshaft profile depends on your goals: aggressive timing profiles suit racers and track enthusiasts, while moderate profiles serve street riders seeking a more spirited daily ride.

  • How performance camshafts affect power and torque curves

  • Selecting the right camshaft for your riding style

The right camshaft can move the torque curve where you want it—improving midrange punch for city riding, or extending peak power for track use. Remember: Upgrading the camshaft often requires synchronized changes in the fuel system , ignition timing, and even supporting valve train upgrades for maximum reliability and impact.

Comparison of Popular Motorcycle Performance Upgrade Components

Component

Estimated Horsepower Gain

Cost Range

Recommended For

Exhaust System

3-10%

$200-$1,200

All riders

Air Intake/Filter

2-7%

$50-$500

Sport/cruiser riders

Fuel Controller

5-15%

$250-$700

Tuners/track riders

Big Bore Kit

15-30%

$400-$2,000

Performance enthusiasts

Performance Camshaft

8-18%

$250-$800

Aggressive/track setups

Performance Upgrades: Balancing Horsepower, Reliability, and Cost

Choosing a motorcycle performance upgrade plan is about finding that crucial balance between horsepower gains, reliability, and budget . Each incremental step—be it exhaust, intake, or a big bore—offers diminishing returns if not matched thoughtfully to your overall vision. It’s easy to get caught chasing the biggest numbers, but smart riders understand that durability and real-world usability are just as vital as dyno figures.

  • Identifying diminishing returns of incremental upgrades

  • Budgeting for your motorcycle performance project

  • Impact of performance upgrades on long-term reliability

Budgeting for performance upgrades means factoring in not just parts and labor, but also the recurring need for maintenance, tuning, and possible supporting changes down the road. Upgrading selectively—prioritizing the upgrades that deliver the most direct improvement for your particular riding style—will help keep your project rewarding, sustainable, and street-legal. The wise mantra: “A smart motorcycle performance upgrade plan is about intelligent investment—not just chasing the highest numbers.” – Nasty Performance Technician

"A smart motorcycle performance upgrade plan is about intelligent investment—not just chasing the highest numbers." – Nasty Performance Technician

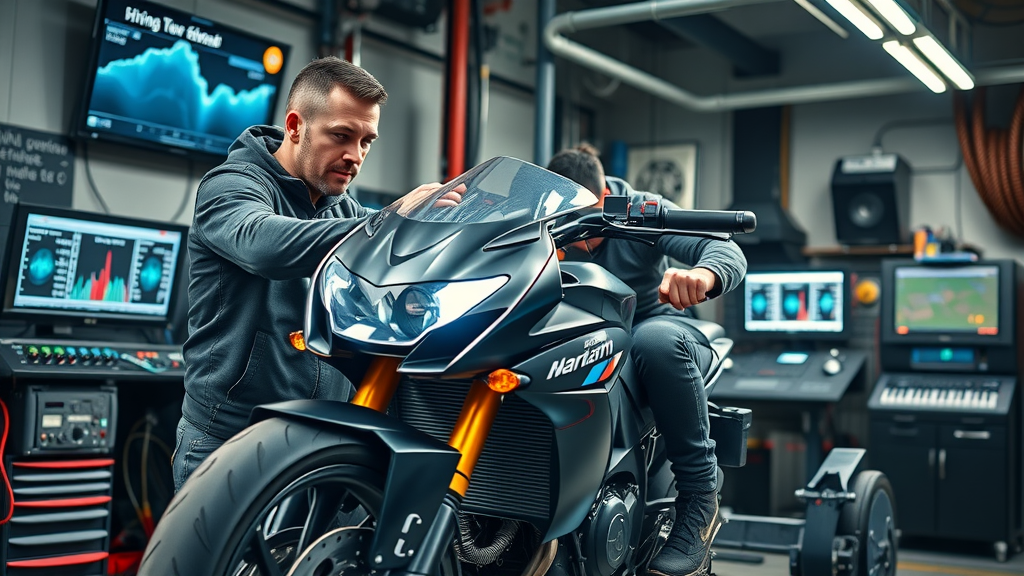
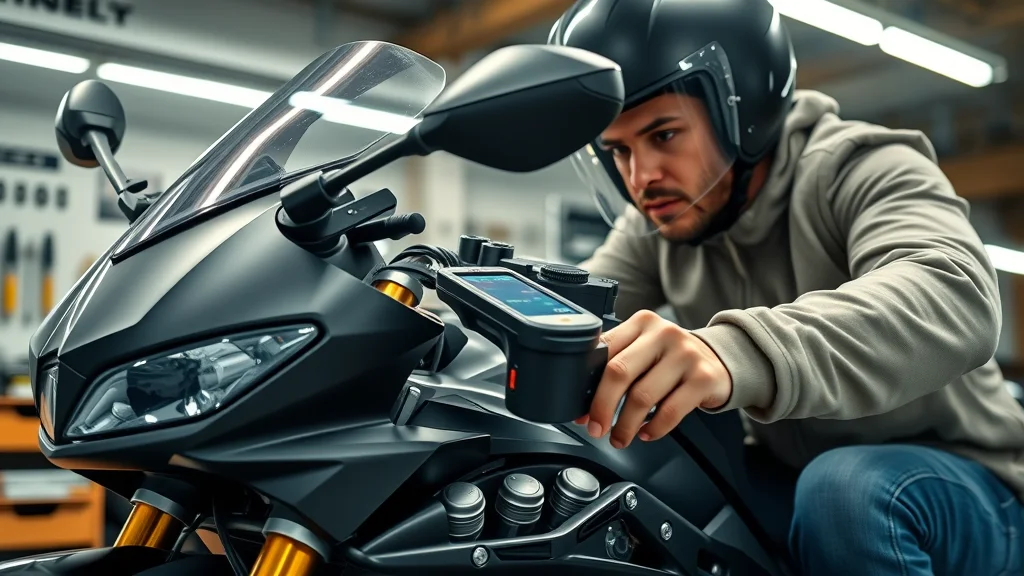
Tuning Matters: Dyno Tuning and Optimization Following Your Motorcycle Performance Upgrade

No performance upgrade is truly complete without precise dyno tuning . This process utilizes advanced machinery to diagnose and optimize your motorcycle’s air-fuel ratios, power bands, and ignition timing under real-world load. Dyno tuning maximizes every upgrade—whether you’ve installed a new air intake, exhaust system, or completed a big bore conversion—by custom-tailoring your settings for optimal results.

  • What is dyno tuning and why is it essential?

  • How dyno tuning maximizes your performance upgrades

  • Stages of dyno tuning for comprehensive results

Stages of dyno tuning start with a baseline run to record existing power output and identify inefficiencies. Next, technicians incrementally adjust fueling, ignition, and other parameters, each time running the bike again for data. The result is a finely-tuned machine that delivers smoother throttle, better fuel efficiency, and maximum safe horsepower—all backed by data, not just guesswork.

motorcycle on dyno testing machine, performance upgrade optimization, technician monitoring live tuning results

Step-by-Step: The Motorcycle Performance Upgrade Process Demystified

  1. Assessing the current motorcycle performance baseline: Start with a thorough inspection and diagnostics to identify strengths and bottlenecks of your current setup. This baseline provides crucial context for future improvements.

  2. Choosing suitable exhaust system, air intake, and fuel upgrades: Select and install performance parts based on your riding style and upgrade goals. Focus on improvements that work together—such as matching your intake and exhaust for balanced power delivery .

  3. Upgrading the big bore kit or performance camshaft (if desired): For enthusiasts chasing significant power gains , now’s the time to install a big bore kit or performance camshaft , ensuring all necessary supporting modifications are in place.

  4. DYNO tuning for optimal results: A post-upgrade dyno session will optimize fueling, ignition timing, and performance maps for your specific modifications.

  5. Post-upgrade maintenance and checks: Regularly inspect and service your upgraded components. This ensures ongoing reliability and preserves the investment in your build.

mechanic upgrading motorcycle engine parts, performance upgrade process, professional workshop, maintenance in progress

Popular Motorcycle Performance Upgrades: Choosing What’s Right for Your Riding Style

There is no one-size-fits-all approach to performance upgrades . For sport bikes , modifications typically focus on peak power and razor-sharp handling—upgraded exhausts, high-flow air intakes, and precision fuel controllers are favorites. Cruisers and touring motorcycles may benefit more from torque-boosting upgrades, comfort enhancements, and reliability-driven modifications.

  • Sport bike performance upgrades

  • Cruiser and touring motorcycle performance enhancements

  • Everyday riding vs. track-focused upgrades

Everyday commuting calls for balanced, reliable upgrades that subtly increase motorcycle performance without sacrificing comfort or fuel efficiency. In contrast, track-focused builds lean on aggressive fueling, high-compression pistons, and extensive dyno tuning to shave seconds and stand out. Select your upgrades based on your predominant riding style to enjoy the biggest improvement with the least compromise and risk.

See the difference for yourself! Watch an engaging, expert-led walkthrough comparing motorcycle performance and acceleration before and after ECU, exhaust, and big bore modifications. Visuals include dyno graphs, on-road footage, and authentic rider testimonials.

What Are the Legal and Warranty Considerations with Motorcycle Performance Upgrades?

While the lure of motorcycle performance upgrades is strong, it's essential to consider emissions regulations, potential impacts on dealer warranties, and local laws regarding modified motorcycles. Often, changes to the exhaust system or drastic fuel system mods push bikes outside the boundaries of emissions compliance required by many regions. These adjustments can lead to warranty challenges or even tickets on public roads.

  • Understanding emissions regulations for exhaust systems

  • Dealer warranty implications of performance upgrades

  • Local law compliance for modified motorcycles

Engaging with knowledgeable professionals who are familiar with both local regulations and how to document compliant upgrades helps you avoid costly missteps. Always check local statutes and consult your dealer before embarking on major modifications—especially if your motorcycle is under factory warranty.

Expert Advice: Signs You Need a Motorcycle Performance Upgrade

If your motorcycle feels sluggish, struggles with throttle response, or fails to keep up with your performance goals, it could be a sign that your bike is ready for an upgrade. Common symptoms include:

  • Common symptoms indicating your bike may benefit

  • When stock components hit their performance ceiling

  • Signs of performance potential for upgrades

Additional signals may include the feeling that your stock components have reached their limits, sluggishness during acceleration, or simply a curiosity about what your motorcycle could truly achieve with professional upgrades. If any of these resonate with your experience, it may be time to explore options with a trusted performance shop.

Quotes from Motorcycle Performance Upgrade Enthusiasts and Technicians

"The right performance upgrade breathes new life into any bike—just make sure it's done professionally." – Nasty Performance Customer

People Also Ask: Answers to Frequent Motorcycle Performance Upgrade Questions

How to increase the horsepower of a motorcycle?

  • You can increase motorcycle horsepower with upgrades such as air intake, exhaust system, dyno tuning, performance camshaft, and a big bore kit. A combination tailored to your engine delivers best results.

What is the 12 second rule on a motorcycle?

  • The 12 second rule advises scanning ahead to the point your motorcycle will reach in 12 seconds, improving reaction time and safety—crucial for performance-enhanced bikes.

What is a stage 4 motorcycle upgrade?

  • A stage 4 motorcycle performance upgrade often includes big bore kits, high compression pistons, performance camshaft, upgraded exhaust, fuel system mods, and dyno tuning, representing the most dramatic power increase.

What is a stage 3 motorcycle upgrade?

  • A stage 3 performance upgrade typically includes big bore kits, performance cams, air intakes, fuel delivery enhancements, and advanced dyno tuning—designed for serious performance seekers.

Essential FAQs on Motorcycle Performance Upgrades

  • Will a motorcycle performance upgrade void my warranty?

  • How much does a typical motorcycle performance upgrade cost?

  • Can I combine multiple performance upgrades safely?

  • Are there performance upgrades for beginner riders?

  • How long does a motorcycle performance upgrade take?

Watch our deep dive into dyno tuning and discover how this essential service supercharges every motorcycle performance upgrade, ensuring your gains are real, safe, and lasting.

Explore expert comparisons of leading exhaust systems—see live horsepower graphs, hear real exhaust notes, and learn how to choose the right setup for your riding needs and budget.

Next Steps: Deciding If a Motorcycle Performance Upgrade Is Right for Your Ride

  • Steps to consult specialist performance shops

  • Questions to ask before scheduling your performance upgrade

  • Final checklist for your motorcycle performance project

Ready to move forward? Begin by consulting a reputable specialist shop, ask about dyno tuning, warranty, and compliance issues, and prepare a checklist to align your upgrades with your performance goals and budget before making any major investments.

Recap: Key Motorcycle Performance Upgrade Takeaways

  • Proper planning maximizes returns on performance upgrades

  • Legal and safety checks are critical

  • Dyno tuning is essential for best results

  • Rely on professionals for complicated upgrades

Upgrade Your Motorcycle Performance Now: Expert Help Just a Call Away

  • Call Nasty Performance Motorcycle Shop Today: 847-458-4858

Conclusion

Choose your motorcycle performance upgrade journey wisely, rely on experienced professionals, and always align your upgrades with your riding style and goals for the safest, most rewarding experience.

Upgrading your motorcycle’s performance can significantly enhance your riding experience by improving power, handling, and efficiency. For instance, installing a high-flow air filter allows your engine to “breathe” better, leading to smoother acceleration and increased horsepower. ( bikepromech.in ) Similarly, upgrading to a high-performance exhaust system can improve engine efficiency by reducing back pressure, resulting in increased horsepower and torque. ( twowheeltribe.com ) If you’re serious about maximizing your motorcycle’s potential, these resources will provide valuable insights into effective performance upgrades.

Engine, Electrical Performance

0 Comments

Write A Comment

*
*
Related Posts All Posts

Battery Maintenance Motorcycle Tips to Prevent Winter Failures

"Did you know that over 40% of winter motorcycle breakdowns are caused by battery failure? Don’t let your ride fall victim to the cold—master battery maintenance motorcycle essentials today."Cold weather is the number one enemy of your motorcycle battery. Without proper battery maintenance motorcycle strategies, winter can leave you stranded and disappointed just when you’re ready to ride. Many riders overlook simple battery care, only to discover come spring that their motorcycle won’t start. Don’t be part of the 40% who experience winter battery failures. In this comprehensive guide, we’ll uncover proven battery maintenance motorcycle practices, show you how to maximize battery life, and share expert-backed steps to protect your ride through every chilly month. Whether you use traditional acid batteries or modern maintenance-free types, following these proactive tips will keep your adventure going strong—no matter what winter brings.Why Battery Maintenance Motorcycle Care Matters for Winter ReliabilityUnderstanding Winter’s Impact on Your Motorcycle BatteryAs temperatures drop, motorcycle batteries are strained like never before. Cold weather significantly reduces a motorcycle battery’s ability to supply dc volts efficiently, resulting in sluggish starts or complete power loss. Acid batteries, in particular, are vulnerable—while AGM batteries and lithium batteries fare better, they’re still not immune. The chemistry inside all motorcycle batteries slows down in the cold, decreasing the available cranking amps needed for winter starts. Leaving your bike parked in an unheated garage or, worse, outdoors can significantly reduce battery life and reliability.For bikes left unused during the winter, the risk of battery failure increases further. The battery will slowly discharge on its own and, unless you charge fully before storage or use a battery tender, it may lose enough charge to prevent starting altogether. Acid batteries typically require more frequent attention compared to glass mat (AGM) or other maintenance-free batteries. With a simple checklist and a few best practices, riders can extend battery life and enjoy reliable performance even in the harshest winter months.Cold temperatures reduce a motorcycle battery’s power deliveryIncreased risk of failures when left unusedHigher risk for acid batteries compared to modern AGM modelsKey Principles of Battery Maintenance Motorcycle Best PracticesEnsure Your Motorcycle Battery Is Fully ChargedOne of the most critical rules of battery maintenance motorcycle care is ensuring your battery is fully charged before and during winter storage. A low battery exposed to cold can freeze, damaging the internal plates and rendering it useless. Always charge fully with a smart battery charger designed for motorcycles, checking that it matches your battery’s amperage and voltage requirements. If your battery charger isn’t compatible—especially important for lithium or glass mat types—you risk undercharging or overcharging, both of which significantly reduce life and safety.Ensure your battery charger displays a full charge indicator before disconnecting. Signs that your battery is not fully charged include sluggish starts, dim lights, and low voltage readings (under 12.4V DC volts for most batteries). Remember, proper care means storing your battery in a dry place and checking its voltage from time to time using a multimeter. Charging fully and correctly before storage prevents deep discharge, a leading cause of premature failures during cold weather.Always fully charge the battery before storing for winterUse a high-quality battery charger designed for motorcyclesSigns your battery is not fully chargedRegular Motorcycle Battery Inspections and CleaningPeriodic inspection and cleaning are pillars of effective battery maintenance motorcycle protocol. Corrosion at the battery terminal is a silent killer; it increases electrical resistance, leading to poor charging and unreliable starting. Always check for powdery white or green build-up on the terminals and clean contacts carefully with a proper solution. Clean, tight connections guarantee efficient power delivery and make charging the battery safer and faster.Don’t forget to check for physical damage like swollen, cracked cases or leaking fluid levels—sure signs it’s time for a replacement. For acid batteries, always wear protective gloves and goggles, since battery acid can cause burns. Remove the battery from the motorcycle if you need to clean thoroughly or store long-term, and always secure the battery cap tightly after topping up with distilled water. Regular checks, even during periods of non-use, will catch problems before they leave you stranded in the cold.Examine terminals for corrosionInspect case for swelling or cracksClean contacts with proper solutionSafety precautions for handling acid batteriesChoosing the Right Type: Acid Batteries vs. Maintenance-Free BatteriesNot all motorcycle batteries are created equal, especially when winter is coming. Traditional acid batteries require topping off fluid levels, periodic recharging, and close monitoring during storage. If neglected, acid batteries are more prone to losing their charge or suffering cold-related failures. In contrast, maintenance-free batteries such as AGM or lithium variants need less frequent attention. AGM batteries, which use glass mat separators, are highly resistant to vibration and cold, making them a reliable winter option.The best approach to battery maintenance motorcycle owners can take is to understand their specific battery type. Acid batteries call for top-ups with distilled water and vented storage, while sealed maintenance-free types should be regularly voltage checked and stored in a dry place. Evaluate your riding style, region, and storage space to select the ideal motorcycle battery—and always follow manufacturer recommendations for charging the battery safely.Key differences between acid batteries and maintenance-free typesPros and cons for cold storageEssential steps for maintaining each typeOptimizing Battery Life Throughout the Off-SeasonPreventing Parasitic Drain in Motorcycle Battery SystemsParasitic drain is a hidden danger that can sap your motorcycle battery’s power even when your bike is parked. This occurs when electrical components like alarms, clocks, accessories, or faulty wiring draw small amounts of power at all times. Over weeks, parasitic drain can reduce battery voltage below safe levels, shortening battery life or killing an already weak cell. Diagnosing the sources, such as aftermarket electronics or improper wiring, is crucial for long-term battery maintenance motorcycle routines.For most motorcycles, you can minimize parasitic drain by disconnecting the negative cable for long-term storage or by installing a kill switch that cuts all power. For those who value convenience, battery tenders can help—these maintenance chargers prevent overcharging while supplying just enough current to keep the battery fully charged throughout winter. Proactive steps now mean fewer surprises later and a ready-to-ride battery come spring.What is parasitic drain and why it mattersIdentifying common sources: alarms, accessories, faulty wiringDisconnecting vs. using switchesWhy Use Battery Tenders—Best Practices for Battery Maintenance Motorcycle OwnersBattery tenders are a game-changer for winter storage. Unlike basic battery chargers, tenders (or maintenance chargers) detect when your battery is fully charged, automatically switching to “float” mode to supply a very small current. This keeps the voltage optimal and prevents overcharging—one of the leading causes of reduced battery life. Battery tenders are especially important for premium batteries like AGM or lithium batteries, providing gentle, sustained maintenance throughout periods of inactivity.Setting up a battery tender is easy: connect the positive and negative leads to their respective battery terminals, plug in the charger, and let it do its work. For best results, periodically check connections and ensure there’s no moisture where the battery is stored. Popular brands recommended by motorcycle enthusiasts and professional shops include Battery Tender, NOCO Genius, and VDC Electronics. Investing in a smart tender today saves stress—and money—when spring arrives.Benefits of using battery tenders in winterStep-by-step setupMaintaining optimal voltage without overchargingTop battery tender and charger recommendationsComparison Table: Popular Motorcycle Battery Charger OptionsBrand/ModelTypeAmperagePrice RangeBest Use CaseBattery Tender JuniorFloat/Maintenance Charger0.75A$25–$35Long-term winter storage, most motorcycle batteriesNOCO Genius 2Smart Charger2A$40–$55Fast charging, AGM & lithium batteriesVDC Electronics BatteryMINDerDesulfator/Maintenance Charger1A$45–$60Repair & maintain older acid batteriesCharging the Battery Safely and EfficientlyCharging the battery properly is a key aspect of battery maintenance motorcycle routines. Always use a charger that matches your battery’s chemistry—be it acid, AGM, or lithium. Attach the positive (red) clamp to the positive terminal and the negative (black) clamp to the negative terminal. Never attempt to charge a frozen battery; thaw it naturally first to avoid catastrophic failure. Monitor charging progress, and if your charger offers a readout, keep an eye on amperage and voltage to track the battery’s health.Typical charging times vary: basic acid batteries may take 8–12 hours at 1–2A, while AGM and lithium batteries can charge more rapidly. Avoid overcharging, which leads to swelling, venting, and reduced battery life. For best battery maintenance motorcycle outcomes, always double-check connections, use safety goggles and gloves, and store the battery and charger in a well-ventilated, dry place.How to use a battery charger for motorcyclesTypical charging times and safe practicesMonitoring your charger and battery healthMaximizing Battery Life and Longevity with Proactive Battery Maintenance Motorcycle StepsTips to Extend Battery Life and Avoid Unexpected FailuresProlonging the life of your motorcycle battery doesn’t require much—just consistent battery maintenance motorcycle standards. Foremost, store your bike indoors and away from freezing temperatures. Ambient cold significantly reduces battery fully charged states, especially in garages with drafts or outdoor sheds. Disconnect the battery from the motorcycle if you won’t be riding for more than a month, and place it on a wooden shelf or bench, not on cold concrete, which can accelerate discharge in some batteries.From time to time, measure your battery voltage with a multimeter; a healthy reading hovers just above 12.7V DC volts. Even maintenance-free batteries benefit from monthly checks and a quick charge if they fall below 12.4V. If you notice sluggish cranking or dimming lights, act immediately—charging fully and cleaning contacts will often restore performance. Preventive care today ensures reliability and significantly reduces worries about battery life through winter and beyond.Store your bike indoors, away from extreme coldDisconnect battery if storage will be long-termRoutine voltage checks with a multimeterTop Signs Your Motorcycle Battery Needs ReplacementEven with perfect battery maintenance motorcycle routines, batteries don’t last forever. Expect most acid batteries to last 2–3 years, while AGM and lithium batteries may offer service for 4–6 years. Key warning signs that your battery is on its way out include delayed engine start (the motor spins slowly, if at all); dimmed headlights and instrument clusters, especially when idling; cracked or swollen battery casings; and visible acid leaks.If your battery is nearing its typical lifespan—past the three-year mark for acid versions, or five years for AGM or lithium—it’s wise to preemptively plan for a replacement. Monitoring battery cap integrity, ensuring no vents are blocked, and keeping fluid levels correct on acid batteries will extend service but, as with all components, replacement is eventually required. Don’t risk an unexpected breakdown on the first warm days of spring—act before complete failure strikes.Delayed engine startDimmed headlights or instrumentationAge benchmarks for typical battery life"A little battery maintenance goes a long way. Preventive care ensures your motorcycle is ready when you are—no matter how long winter lasts." – Shop Manager, Nasty Performance MotorcyclePeople Also Ask: Battery Maintenance Motorcycle EssentialsWhat is the best way to maintain a motorcycle battery?The best way to maintain your motorcycle battery is to keep it fully charged with a quality battery tender, routinely clean the terminals, store the battery in a dry place away from temperature extremes, and check voltage monthly. Regular care extends battery life and prepares your bike for reliable starts all season.Keep it fully charged, use battery tenders, regularly clean contacts, store in mild temperatures, and check voltage monthly.How often does a motorcycle battery need to be charged?If you’re not using a battery tender during the off-season, charge your motorcycle battery at least every 30 days to maintain optimal life and performance. A smart charger ensures you don’t overcharge, and regular charging fully through winter prevents deep discharges that can damage all battery types.At least every 30 days if not using a tender, or keep on a smart charger during off-season storage.Are motorcycle batteries maintenance free?Some modern motorcycle batteries are maintenance-free—they’re sealed and designed to reduce time spent on care. However, most traditional acid batteries require periodic checking of fluid levels under the battery cap and should be recharged as needed for best reliability.Some modern batteries are sealed and require minimal care, but most traditional acid batteries need periodic checks and fluid maintenance.How long can a motorcycle battery sit unused?A new, fully charged motorcycle battery can sit unused for 2–3 months without significant loss of function, but it’s best to check with a voltmeter from time to time. Older or acid batteries shouldn’t be left idle for more than a month before charging fully for longevity.Up to 2-3 months for new, fully charged batteries, but older or acid batteries should not be left unused for more than a month without recharging.Frequently Asked Questions About Battery Maintenance Motorcycle ConcernsIs it safe to leave a battery charger connected all winter? Yes, maintenance chargers (battery tenders) are designed specifically for this purpose—they maintain optimal voltage without overcharging, making them ideal for winter storage.How can I tell if my charger is compatible with my motorcycle battery? Check both your charger’s specifications and your battery’s type (acid, AGM, lithium). Using a non-compatible charger can reduce performance or cause safety issues.What is the typical lifespan of a properly maintained motorcycle battery? Acid batteries last 2–3 years, AGM batteries up to 5, and lithium batteries can sometimes last 6 years or more with regular battery maintenance motorcycle procedures.Proven Battery Maintenance Motorcycle Checklist to Prevent Winter FailuresTest voltage and charging at start and end of storageClean and protect battery terminalsConfirm charger/tender connectionStore battery off concrete floorsInspect for leaks, swelling, corrosionReview owner’s manual for model-specific guidanceStay Winter-Ready: Expert Battery Maintenance Motorcycle Recommendations"Don’t wait until spring to discover a dead battery. Commit to regular battery maintenance motorcycle routines for performance and peace of mind."Prioritize proactive checks before winter.Invest in quality charging tools.Follow manufacturer guidelines for your motorcycle battery type.Contact Nasty Performance Motorcycle Shop for Professional Battery Maintenance Motorcycle ServiceExpert diagnostics and battery replacementPersonalized winter care recommendations for all motorcycle modelsCall Nasty Performance Motorcycle Shop Today: 847-458-4858Take action now—proactive battery maintenance motorcycle steps will ensure you never miss a ride come spring.For expert support, diagnostics, or battery replacement,Call Nasty Performance Motorcycle Shop today at 847-458-4858 !To enhance your understanding of motorcycle battery maintenance, consider exploring the following resources:“How to Maintain and Protect Your Motorcycle Battery” : This guide offers comprehensive insights into preventing premature battery failure and keeping your motorcycle ready to ride at a moment’s notice. ( blog.batterymart.com )“How to Choose and Maintain a Motorcycle Battery” : This article provides essential practices for selecting and maintaining your motorcycle battery, including regular inspections, proper charging techniques, and storage procedures during the off-season. ( teammcc.com )By delving into these resources, you’ll gain valuable knowledge to keep your motorcycle battery in optimal condition, ensuring reliable performance throughout the year.

Master Motorcycle ECU Tuning to Maximize Every Ride

Did you know that over 60% of modern motorcycles can have their performance significantly upgraded through ECU tuning—yet most riders never tap into this hidden power? ECU tuning isn’t just for professional racers; it’s the secret advantage for every bike enthusiast seeking to maximize precision, power, and the pure thrill of riding. Whether you’re chasing a sharper throttle response or wanting a smoother commute, mastering motorcycle ECU tuning can elevate every ride. This guide pulls back the curtain, demystifying ECU flash, ecu tuning, and ecu flashing so you can unlock your bike’s full potential with confidence. Motorcycle ECU Tuning: The Key to Unleashing Your Bike’s True Potential Over 60% of modern motorcycles can have performance improved by ECU tuning—yet most riders never unlock this advantage. ECU tuning isn’t just for the racetrack—street riders experience enhanced throttle response and smoother riding with the right configuration. Motorcycle ECU tuning stands at the cutting edge of performance upgrades, giving riders direct access to a world of hidden horsepower, optimized fuel consumption, and superior ride dynamics. Modern bikes are engineered with layers of electronic control, and the engine control unit ( ECU ) acts as the brain—balancing fuel delivery, ignition timing, throttle mapping, and much more. Yet, from the factory, ECUs are programmed for a broad range of conditions, often leaving much of your bike’s capability locked away. Tuning the ECU unlocks this potential. The process—sometimes called ECU flash , ecu tuning, or ecu flashing —customizes how the engine behaves across the entire rpm range. Through custom mapping and intelligent software adjustments, you can transform a stock ECU into a high-performance maestro tailored specifically for your needs. Think stronger acceleration, more responsive throttle, and improved fuel efficiency for everything from spirited street rides to long touring adventures. Understanding Motorcycle ECU Tuning: What It Is and How It Works Definition of motorcycle ECU tuning Purpose and process of ECU flash and ecu flashing Differences between factory and custom ECU tuning Compatibility across brands and models ECU tuning refers to the process of altering the stock settings within your bike’s engine control unit . By adjusting fuel and ignition mapping, throttle mapping, and other critical parameters, your motorcycle can respond more accurately to changes in barometric pressure, input sensors, exhaust system, and your unique riding style. This is accomplished through either an ECU flash —where the factory system is reprogrammed—or more advanced ecu tuning using specialized software and equipment. The main reason manufacturers opt for one-size-fits-all stock ECU settings is to comply with global emission standards and ensure reliability across a wide variety of environments. But riders can benefit immensely by tailoring ECU calibration for their specific motorcycle models and use cases. Custom mapping lets you set performance goals: more aggressive acceleration, better fuel mapping for economy, or smoother closed loop and open loop operation. Thanks to advancements over the past decade , ECU flashing is now accessible for most fuel-injected motorcycles and many aftermarket performance systems are released for all popular brands. Whether you ride a sport bike, cruiser, or touring machine, custom fuel and ignition mapping allows you to truly command your entire engine operation, elevating your experience with precision tuning . Benefits of Motorcycle ECU Tuning: Performance, Efficiency, and Safety Increased horsepower and torque Improved throttle response Enhanced fuel economy and engine efficiency Aftermarket vs. factory settings: Unlocking hidden potential The benefits of motorcycle ECU tuning reach well beyond simple horsepower numbers. A well-executed ecu flash or ecu tuning can deliver a dramatic increase in both torque and peak horsepower, often between 5-20% depending on the motorcycle model and supporting upgrades. Many riders note that their bike feels more alive throughout the entire rpm range, with custom mapping ensuring optimal response in both open loop and closed loop operation. Increased performance isn’t the only gain— fuel economy and engine efficiency often improve, thanks to precisely mapped fuel and ignition curves. Throttle response sharpens, giving riders a feeling of direct control, while tuning can also address issues like abrupt power delivery and excessive fuel consumption. By optimizing both fuel and ignition mapping, the bike operates cooler and safer, especially under aggressive riding or track conditions. Ultimately, the main reason for upgrading from stock ECU settings isn’t just about raw speed, but about unlocking smoother riding, enhanced reliability, and complete confidence in your machine. For city riding, weekend touring, or competitive track use, a custom throttle mapping ensures your motorcycle matches your goals. "Motorcycle ECU tuning can transform your entire riding experience, whether you're chasing top speed or looking for smoother city rides." — Industry Specialist, Nasty Performance Comparing ECU Flash, ECU Tuning, and ECU Flashing for Motorcycles Process Typical Gains Application Notes ECU Flash 5-15% HP increase All riding styles Safely customizes air/fuel/timing maps ECU Tuning 10-20% HP & torque Performance-focused Includes remapping and advanced features ECU Flashing 5-12% HP & response Both street & racing Can be reversed to factory specifications Understanding the difference between ecu flash , ecu tuning, and ecu flashing is essential for choosing the right solution. An ECU flash is typically a one-time rewrite of your stock ECU , replacing factory fuel, ignition, and throttle mapping with custom programming. This process is safe and effective for most riding styles, providing a substantial boost in power, torque, and throttle response. ECU tuning goes further, allowing for real-time customization and adjustments to match performance modifications such as a new exhaust system or intake. It often uses advanced software to fine-tune feedback from input sensors, ensuring precise control through the entire rpm range. Meanwhile, ecu flashing offers reversible changes—ideal for riders who want to switch back to stock for warranty or inspection purposes, yet still crave extra performance in their daily rides. Whichever method you choose, the goal is to balance performance, efficiency, and safety, allowing all modern motorcycle models to experience finely tuned closed loop operation and class-leading results. How to Choose the Right Motorcycle ECU Tuning Solution Factors to consider: bike model, riding style, warranty implications Evaluating ecu flash and ecu tuning options Identifying reputable tuners and service providers Selecting the ideal motorcycle ECU tuning solution starts with a clear understanding of your bike’s specific requirements. Factors such as your motorcycle’s make and model, intended riding style, and any existing modifications can influence the type of tuning needed. For example, high-performance bikes or those with aftermarket exhaust systems might benefit most from custom mapping, while commuter motorcycles often gain efficiency using a basic ecu flash. Warranty and service provider reputation should not be overlooked. Some manufacturers may void warranties for modified stock ECU settings, so discuss potential implications with your dealer before proceeding. Next, compare ecu flash and ecu tuning products, examining their compatibility with your motorcycle models and evaluating the included features, such as the ability to fine-tune throttle mapping and fuel and ignition. Finally, always research and select a reputable tuning shop or service provider. Look for proven experience in tuning a wide range of motorcycles, transparent feedback and testing processes, and the use of high-quality tuning software. This diligence ensures not only performance gains but also safety and reliability across the entire rpm range. Popular Motorcycle ECU Tuning Products and Services Reviewed Comparison of top-rated motorcycle ECU tuning kits Pricing overview Pros and cons based on user reviews In-shop vs. DIY ecu flashing Today’s market offers a variety of high-quality motorcycle ECU tuning kits and services, including popular brands like Woolich Racing, Dynojet Power Commander, and Bazzaz. These kits offer a spectrum of capabilities—from plug-and-play systems that improve fuel mapping for street riders, to pro-grade units that provide full custom throttle and ignition mapping. Pricing can range from $350 for basic plug-in modules to well over $1200 for advanced ecu tuning services that include dyno testing, custom mapping for both open loop and closed loop operation, and ongoing tech support. In-shop ecu flash and ecu tuning ensures professional expertise and access to precision tools, but growing numbers of riders are successfully using DIY kits via laptops and step-by-step guides, sometimes with remote support from tuners. User reviews highlight key pros—such as noticeable horsepower gains, sharply improved throttle response, and smoother power delivery—as well as potential cons, including the need for technical knowledge with DIY solutions and the possibility of warranty complications. No matter your approach, investing in a quality solution can transform engine operation and fuel consumption for years to come. "Investing in quality ECU tuning not only boosts performance but can extend the life of your motorcycle by optimizing key parameters." Motorcycle ECU Tuning: Frequently Asked Questions Can you tune a motorcycle ECU? Yes, virtually all modern fuel-injected motorcycles support ECU tuning. Specialized equipment and software allow technicians to adjust the bike’s stock ECU, customizing fuel and ignition maps, throttle response, and other key parameters. ECU tuning provides personalized results for different motorcycle models and riding goals, whether you pursue maximum performance or smooth daily riding. How much does an ECU tune cost for a motorcycle? The cost of motorcycle ECU tuning varies depending on the service level, motorcycle model, and shop. A basic ecu flash or plug-and-play system may cost between $350–$500, while custom ecu tuning with dyno testing and personalized mapping can range from $600–$1500 or more. Prices can also depend on whether the tuning is performed in-shop or as a DIY process with remote tuner support. Is ECU remapping safe for motorcycles? When performed by knowledgeable professionals or with reputable DIY kits, ECU remapping is safe and can even improve engine longevity by optimizing performance parameters. The main reason for concern is incorrect installation or poorly calibrated fuel and ignition mapping, which may negatively impact engine operation. Choose experienced tuners and proven solutions to ensure the safety and reliability of your motorcycle. How much HP does ECU tuning add? Motorcycle ECU tuning typically adds 5–20% more horsepower and torque, depending on the motorcycle model, supporting modifications, and the accuracy of custom mapping. Gains are often more pronounced with performance upgrades like aftermarket exhaust systems or air filters, as the tuning process adjusts for changes across the entire rpm range. Even for stock motorcycles, a professional ecu flash and custom fuel mapping can provide significant improvements in throttle response and ride quality. Checklist: What to Know Before Tuning Your Motorcycle ECU Confirm compatibility with your bike’s make and model Choose between plug-and-play, ecu flashing, or custom ecu tuning Research warranty policies and service provider reputation Schedule a professional dyno test for precision results Before diving into motorcycle ECU tuning , make sure your chosen upgrade is compatible with your motorcycle. Assess your technical comfort level and decide if a plug-and-play, ecu flash, or professional custom tuning best fits your needs. Warranty considerations are important—some manufacturers may restrict coverage if the stock ECU is modified. If you’re seeking maximum performance and engine safety, always arrange for a post-tuning dyno test and choose experienced tuners with strong industry feedback and testing credentials. Take Advantage of Expert Motorcycle ECU Tuning—Transform Your Riding Today Unlock every ounce of your motorcycle’s performance—choose a professional ecu flash, ecu tuning, or ecu flashing solution tailored to your ride. For expert results and personalized guidance, Call Nasty Performance Motorcycle Shop today: 847-458-4858. To further enhance your understanding of motorcycle ECU tuning, consider exploring the following resource: “Motorcycle ECU Tuning: A Mechanic’s Guide to Performance and Efficiency” ( aapefi.com ) This guide provides a comprehensive overview of ECU tuning, detailing the process of reprogramming electronic control units to boost power and improve fuel efficiency. If you’re serious about unlocking your motorcycle’s full potential, these resources will provide valuable insights and practical guidance.

Restore Performance with Motorcycle Carburetor Cleaning Service

Did you know that up to 80% of motorcycle performance issues are directly related to a clogged or dirty carburetor? Whether your bike struggles to start, idles rough, or lacks the responsive punch it once had, the culprit is often lurking within your carburetor. If you want a solution that transforms your ride—from frustrating engine stutters to silky-smooth acceleration—a professional motorcycle carburetor cleaning service is your first and best step. This detailed guide will show precisely why cleaning your motorcycle carb is the ultimate way to restore top-tier engine performance.Unlock Optimal Power: Why Motorcycle Carburetor Cleaning Service MattersStartling Statistic: Did you know that up to 80% of motorcycle performance issues are directly related to a clogged or dirty carburetor?For most riders, peak engine performance is non-negotiable. But if your bike’s throttle feels sluggish or you’re constantly dealing with hard starts, the hidden problem often lies in a neglected carburetor. Motorcycle carburetor cleaning service goes far beyond surface cleaning—it's the intricate process that ensures your motorcycle carb delivers the exact air-fuel mixture your engine craves. Dirt, varnish, and buildup in pilot jets, needle valves, and fuel lines can choke performance, cause fuel economy dips, and even damage sensitive rubber parts. Routine professional cleaning eliminates internal blockages, optimizing gas flow and restoring that crisp, powerful response you expect from your ride.In fact, poor responsiveness, excess emissions, and rough idling are all clear warning signs that your carburetor needs expert attention. A proper motorcycle carburetor cleaning isn’t just about getting your engine started—it’s about ensuring safe, reliable rides and extending your engine’s lifespan. As fuel system deposits build up over time, only specialized ultrasonic equipment and skilled hands can tackle the stubborn gunk and finely tuned passages of the modern carb. Don’t leave your performance to chance; trust in proven cleaning methods to keep your bike’s heartbeat strong.What You'll Learn About Motorcycle Carburetor Cleaning ServiceWhat is included in professional motorcycle carburetor cleaning serviceHow motorcycle carburetor cleaning service restores performanceWhen and why your motorcycle carb needs cleaningCost, benefits, and frequently asked questionsComparing DIY vs. professional motorcycle carburetor cleaningEvery rider deserves to understand what goes into a motorcycle carburetor cleaning service, why it’s essential, and how it can help avoid costly repairs down the road. In this article, you’ll uncover everything from the critical features of a pro-grade service, the technology used (like ultrasonic and sonic cleaners), to the advantages over generic carb cleaner sprays. We’ll break down expert insights so you know exactly when your motorcycle carb needs attention, how often to clean the carburetor, and what you should expect to pay at a reasonable price—including the difference between single and multi-carb setups.We’ll also provide an honest look at DIY vs. professional servicing, plus real testimonials direct from our customers at Nasty Performance. Whether you own an older small engine carb or a high-performance sportbike, these tips will help every rider make smarter decisions for their interests and personal maintenance style.For those interested in keeping their motorcycle in top shape throughout the year, understanding seasonal maintenance routines can be just as crucial as carburetor care. Discover practical strategies for protecting your bike in every season by exploring essential seasonal bike care secrets every rider should know.Understanding Motorcycle Carburetor Cleaning Service: Features and ProcessWhat Happens During a Motorcycle Carburetor Cleaning ServiceVisual inspection of motorcycle carbDisassembly and ultrasonic cleaningJet and passage clearingReassembly and synchronizationWhen you book a motorcycle carburetor cleaning service, professional attention starts with a visual inspection, checking for leaks, worn rubber parts, and evidence of dirty carburetors or clogged jets. An experienced technician then carefully removes and disassembles the motorcycle carb, noting each jet, needle valve, and pilot jet. Using high-powered ultrasonic or sonic cleaners, the service eliminates internal residues burned into metal surfaces, especially in the intricate passages and around the needle valve seat.After cleaning and bench inspection, every passage is cleared with compressed air or specific carb cleaner solutions. Reassembly is performed with meticulous attention to detail, ensuring the correct placement of needle valves, gas tank connections, and fuel lines. The finished cleaning includes synchronization (for multi-carb systems) so each cylinder receives an even mixture. This process returns your engine carb to its original glory—ensuring consistent starts, smoother idle, reduced emissions, and a marked improvement in overall engine performance, all in support of your interests and personal riding enjoyment.Key Features of Our Motorcycle Carburetor Cleaning ServiceExpert techniciansGenuine partsFast turnaroundOur motorcycle carburetor cleaning service at Nasty Performance is powered by expert technicians who know small engine carb systems down to the last spring and seating ring. Every job is completed using industry-approved, genuine parts, ensuring the highest standards of safety and durability. We take pride in minimizing turnaround time—your motorcycle won’t sit idle for days. Instead, with a typical service taking just 1–2 hours, you’ll be back on the road quickly, with peace of mind that the job was done right.A clean motorcycle carburetor is the heartbeat of a high-performing bike. – Lead Technician, Nasty Performance Motorcycle ShopWe acknowledge that your motorcycle is a valuable investment. Our service isn’t just about the cleaning—it’s about professional diagnostics, replacing worn gaskets or needle valve seat components, and ensuring your bike is truly ride-ready. Professional attention, fast service, and genuine parts make all the difference when it comes to reliable engine performance.Top Benefits of Motorcycle Carburetor Cleaning ServiceRestored throttle responseImproved fuel efficiencyLonger engine lifeSmoother idle and startsReduced emissionsRoutine motorcycle carburetor cleaning service provides a stack of immediate and long-term advantages. Firstly, it restores lively throttle response, letting you enjoy crisp, powerful acceleration on demand. You’ll also experience substantial improvements in fuel efficiency—the right air-fuel mixture reduces wasted gas and helps your engine performance stay consistent, mile after mile. Clean jets, passages, and a properly adjusted needle valve ensure your engine’s internal parts don’t have to fight gummed-up deposits, leading to a longer lifespan for every vital component.What about cold starts and idling hiccups? A clean carb guarantees easy starts and stable idle, dramatically reducing annoying engine stalls and the frustration of multiple attempts just to get going. Most importantly, professional service supports better emission control. By preventing fuel leaks, misfires, and improper combustion, your bike runs cleaner—helping both your health and the environment. These benefits far outweigh the minor cost of regular cleaning and set you up for thousands of miles of worry-free riding, fully in support of the purposes explained by experienced riders and technicians alike.When Is Motorcycle Carburetor Cleaning Service Needed? Common Signs and RecommendationsPoor accelerationHard startsEngine stallingBackfiring or sputteringUnusual fuel consumptionWondering when to clean the carburetor? If your motorcycle carb starts showing signs of lagging power, hard starts, or odd sounds—like popping or backfiring—it’s likely overdue for service. These symptoms typically indicate blocked pilot jets, compromised needle valves, or deposits interfering with fuel line flow and the valve seat. Even subtle changes, such as an unexpected increase in fuel consumption, can signal partial blockages and dirt inside your motorcycle carburetor.Stalling, stumbling acceleration, or the need to constantly adjust your throttle to keep the engine running all point toward dirty internal carb parts. If your gas tank has sat unused for extended periods, varnish and plug formation are inevitable, stressing the need for a deep chemical and sonic cleaner bath. For bikes stored each winter, a professional cleaning service is the best way to eliminate gum and debris from the fuel system and restore performance without risking damage to sensitive components or rubber seals.How Often Should Motorcycle Carburetor Be Cleaned?Regular motorcycle carburetor cleaning is recommended every 6,000–10,000 miles, depending on riding conditions and fuel quality.The recommended interval for a motorcycle carburetor cleaning service usually falls between every 6,000 and 10,000 miles. However, the actual timeline may depend on factors like fuel quality, frequency of use, and storage methods. If your riding interests and personal habits include long periods with the bike in storage, or if you use lower-quality gas, it’s smart to err on the side of caution and schedule a cleaning sooner.Remember, waiting for issues to appear might seem cost-savvy, but dirty carburetors can cause expensive engine damage, lead to excessive wear on your needle valve seat and pilot jets, and even require full rebuilds if neglected. Regular carb cleaning ensures your engine carb stays healthy, your throttle is always responsive, and your fuel consumption remains efficient. This proactive approach saves time, frustration, and money in the long run while supporting your bike’s performance and reliability.Cost of Motorcycle Carburetor Cleaning Service: Value for Your InvestmentService optionsEstimated Price RangeSingle carb cleaning$70 – $120Multi-carb cleaning$120 – $250Add-on tuning$40 – $80Ultrasonic deep clean$50 – $100 extraPricing for a professional motorcycle carburetor cleaning service can be based on the number of carbs, level of cleaning needed, and whether extras like add-on tuning are required. For most modern and classic motorcycles, a single carburetor cleaning falls in the reasonable price range of $70–$120. Multi-carb setups—common in high-performance or vintage bikes—cost more, reflecting the added labor to clean and synchronize each unit. Deep ultrasonic cleaning, vital for tackling severe deposits or after extended storage, carries an additional charge, as does in-depth adjustment and tuning.This investment pays dividends in smoother rides, better fuel economy, and avoiding high repair costs that come from neglect. Always ask for a detailed breakdown so there are no surprises, and make sure your chosen shop uses genuine parts, especially when replacing needle valves, valve seats, and rubber gaskets. Trustworthy service shops will have set turnaround times and transparent forms you submit for tracking work and warranty coverage, as explained in this notice.Professional vs. DIY Motorcycle Carburetor Cleaning Service: Pros and ConsAspectProfessional ServiceDIYSkill levelExpertIntermediateTools neededSpecializedBasicTime required1–2 hours3–5 hours+WarrantyYesNoWhen deciding between a professional motorcycle carburetor cleaning service and DIY, carefully weigh your interests and personal experience. Professionals bring years of technical training, the right chemicals (sonic cleaner, ultrasonic baths), and tools such as carb synchronizers that ensure your fuel line, pilot jets, and needle valves are precisely cleaned and set. Fast turnaround and warranty coverage mean peace of mind—and no stress if something goes awry.DIY is an option for handy riders with the right instructions and patience, but common pitfalls include damaging rubber parts, improper cleaning of the valve seat, or missing residual gunk that only professional sonic cleaner technology can remove. Unless your activity on this service is born from lots of prior experience, entrusting your engine carb and performance to the pros is often the smartest and safest way forward, as your information about your activity will show a marked improvement post-service.How the Motorcycle Carburetor Cleaning Service Works at Nasty PerformanceStep 1: InspectionStep 2: Carburetor removalStep 3: Disassembly and cleaningStep 4: Reassembly and adjustmentStep 5: Testing and final diagnosticsAt Nasty Performance, every motorcycle carburetor cleaning service follows a proven workflow: We begin with a full inspection of the motorcycle carb and fuel system, identifying all symptoms and potential issues. Next, the carburetor is gently removed and disassembled by a skilled mechanic, with each jet, needle valve, and rubber seal catalogued for cleaned restoration. We use both ultrasonic and brake cleaner methods to ensure every internal surface and fuel passage is immaculate before careful reassembly.Our specialists replace worn needle valve seat components as needed and set all jets and adjustments to manufacturer specs. Finally, post-cleaning, your engine carb undergoes comprehensive testing—measuring idle quality, throttle response, and emissions—so when you pick up your bike, it’s running at peak efficiency. Our commitment: trustworthy results, timely turnaround, and clear, informative forms you submit for post-service support.Watch our pro mechanic at Nasty Performance perform each step of the motorcycle carburetor cleaning service—inspection, removal, ultrasonic cleaning, reassembly, and engine testing—in a modern, organized workshop. See up-close why riders trust our expertise!Customer Testimonials and Reviews for Motorcycle Carburetor Cleaning Service"I noticed immediate throttle improvement after a motorcycle carburetor cleaning service at Nasty Performance!" – Satisfied CustomerOur customers often share glowing feedback after seeing the difference a comprehensive cleaning makes. Riders consistently mention smoother idle, easier starts, and restored fuel economy as immediate post-service benefits. These results demonstrate our support of the purposes explained throughout this guide—that regular carb maintenance is vital for every engine carb and for those who care about the longevity of their machines.People Also Ask: Motorcycle Carburetor Cleaning ServiceHow much does it cost to have motorcycle carbs cleaned?The cost for motorcycle carburetor cleaning service typically ranges from $70 to $250 depending on the number of carbs and level of cleaning required. Additional tuning or parts may incur extra costs.How hard is it to clean a carburetor on a motorcycle?Cleaning a motorcycle carburetor can be a challenging task, especially for multi-carb setups. It requires time, patience, and precision. Professional motorcycle carburetor cleaning services ensure thoroughness and avoid common DIY pitfalls.How often does a motorcycle carburetor need to be cleaned?On average, a motorcycle carburetor should be cleaned every 6,000–10,000 miles or whenever symptoms such as hard starting or poor performance arise.Can you clean motorcycle carbs without removing them?While some products claim to clean motorcycle carburetors without removal, the most effective motorcycle carburetor cleaning service involves disassembly and deep cleaning to access all buildup.Comprehensive Motorcycle Carburetor Cleaning FAQCan dirty carbs damage your engine?How long does a motorcycle carburetor cleaning service take?Does cleaning the motorcycle carb improve fuel economy?Is ultrasonic cleaning necessary?QuestionShort AnswerCan dirty carbs damage your engine?Yes, it can lead to lean running and overheating.How long does service take?Typically 1–3 hours depending on the model.Does cleaning the carburetor improve fuel economy?Yes, it restores proper fuel flow.Is ultrasonic cleaning necessary?For severe buildup, it’s highly recommended.Still have more questions? Call our experts at Nasty Performance—you’ll get trustworthy answers tailored to your bike and riding habits!Key Takeaways: Motorcycle Carburetor Cleaning Service EssentialsMotorcycle carburetor cleaning service is vital for engine performanceScheduled maintenance prevents costly repairsProfessional service provides the most reliable resultsReady to Book? Call Nasty Performance Motorcycle Shop Today: 847-458-4858Your engine deserves the best—schedule your motorcycle carburetor cleaning service and feel the instant difference. Call Nasty Performance Motorcycle Shop now at 847-458-4858 to restore your ride’s power and reliability!Conclusion: Restore your motorcycle’s performance and ensure peak engine health with professional carburetor cleaning. Choose timely service, real expertise, and proven results—your next smooth ride starts here.If you’re committed to keeping your motorcycle running at its best, don’t stop with carburetor maintenance alone. Proactive care throughout the year can make a world of difference in your bike’s longevity and reliability. For a deeper dive into expert tips on preparing your motorcycle for every season, check out these seasonal bike care secrets every rider must know. You’ll discover advanced strategies for storage, cleaning, and preventative maintenance that go hand-in-hand with a clean carburetor—ensuring your ride is always ready for the road ahead.

Terms of Service

Privacy Policy

Core Modal Title

Sorry, no results found

You Might Find These Articles Interesting

T
Please Check Your Email
We Will Be Following Up Shortly
*
*
*