Add Row
Add Element
cropper
update

Nasty Performance ~ 847-458-4858 

update
Add Element
  • Blog Home
  • Categories
    • Motorcycle Maintenance
    • Riding Tips & Preps
    • Safety & Inspection
    • Customizations & Upgrades
    • DIY Motorcycle Repairs
    • Motocycle Audio Systems
    • Motocycle Seasonal Care & Storage
    • Engine, Electrical Performance
  • Bike Night
  • Nasty Performance Motorcycle Shop
January 19.2026
1 Minute Read

How Engine Remapping for Motorcycles Boosts Power Instantly

Have you ever wondered if your motorcycle could deliver more power, sharper throttle response, and better fuel efficiency—almost instantly? Engine remapping for motorcycles could be the answer you've been searching for, unlocking performance and exhilarating gains that take your riding to the next level. Let's unravel how a simple tweak to your bike’s brain can transform every ride!

dynamic sport motorcycle speeding down an open highway with engine remapping for motorcycles, rider leaning into a turn, photorealistic lifelike

Curious How Engine Remapping for Motorcycles Unleashes Surprising Gains Instantly?

Riders across the globe are chasing that next-level rush—a turn of the throttle that delivers immediate, thrilling power. Engine remapping for motorcycles offers this surge, adjusting the engine's electronic brain to unlock hidden performance. By refining fuel injections, ignition timing, and throttle response, ECU remapping maximizes your bike’s output right from the first ride.

Enthusiasts notice instant improvements: crisper acceleration, more robust power output, and an enhanced riding experience. Whether you’re a sportbike fanatic, a touring enthusiast, or cruising on a naked, engine remapping taps into the full potential of your motorcycle’s hardware. This process doesn’t just unleash extra horsepower—it creates a smoother, more responsive ride, pulling you ahead of the pack as soon as you twist the throttle.

Understanding Engine Remapping for Motorcycles: The Science Behind Instant Power

  • How ECU remap and ecu tuning work in motorcycles

  • Key benefits like improved throttle response , power delivery , and fuel efficiency

  • Differences between ecu remapping and tuning with a stock ECU

  • Practical considerations including costs, safety, and longevity

The heart of modern motorcycle performance lies within the engine control unit (ECU)—a sophisticated onboard computer that manages critical functions like fuel delivery , ignition timing , and air-fuel ratios. Manufacturers typically program these control units with conservative settings to accommodate worldwide regulations, varying fuel quality, and reliability concerns. As a result, your motorcycle’s full potential is rarely accessible out of the box. That’s where engine remapping for motorcycles comes in.

Remapping and tuning the ECU recalibrates these settings, customizing them to your specific bike, aftermarket exhausts, or air filter upgrades. The science is straightforward: optimized fueling and spark advance deliver improved combustion, translating into boisterous power delivery , exceptional fuel efficiency , and fewer flat spots in acceleration. By working intelligently with the factory hardware, remapping ensures you get modern performance and economy—without compromising safety or engine life.

What Is Engine Remapping for Motorcycles and How Does It Differ from ECU Remapping & ECU Tuning?

Engine remapping for motorcycles involves altering the parameters within your bike’s ECU (Engine Control Unit), making its decision-making smarter and more performance-oriented. While often used interchangeably, ECU remapping , ECU tuning , and engine remapping can carry subtle differences. Remapping generally focuses on uploading new, pre-tested map data to enhance performance, while tuning may involve manual, iterative adjustments, usually fine-tuned for unique setups such as turbo-kits or track bikes.

modern motorcycle ECU computer module for ecu remap, technician analyzing diagnostic tool data, engine remapping for motorcycles in a garage workshop

The stock ECU is set with universally-safe mappings to prevent engine knock and to meet emission standards, even on lower quality fuels and various climates. By contrast, remapped ECUs tailor these parameters to prioritize your bike’s power delivery , especially when combined with performance exhausts or high-flow air filters. This targeted adjustment means a remapped ECU can unlock horsepower and torque far above what’s available through factory settings.

Breaking Down the Stock ECU vs. Remapped ECU

Feature

Stock ECU

Remapped ECU

Power Delivery

Linear, often conservative

Optimized for increased horsepower and torque, smoother rise

Throttle Response

Can be sluggish or delayed

Sharpened, immediate, more responsive at all rev ranges

Fuel Economy

Moderate to good (with safe margins)

Often improved through efficient fueling (when tuned correctly)

Flat Spots & Hesitation

Present due to emissions/fuel cut strategies

Minimized for smoother acceleration throughout

Customization Potential

Minimal–factory tune only

High–supports aftermarket components & custom setup

In summary, a remapped ECU unlocks the hidden capabilities of your motorcycle, allowing custom tailoring for both power output and fuel efficiency . The result is a bike that feels more alive and responsive, with each adjustment calibrated specifically for your needs.

How ECU Remap and ECU Tuning Transform Motorcycle Performance

ECU remapping and tuning can be nothing short of transformative for motorcycle enthusiasts. By reprogramming your ECU, essential elements such as power delivery , throttle response , and fuel efficiency can be optimized to suit both your riding style and your machine’s hardware. Performance mods like upgraded exhaust or air filter installations further benefit from a remap, ensuring that every ounce of added potential is captured.

When a motorcycle undergoes an ECU remap, it’s not just about squeezing out raw horsepower. Tuning the engine control unit affects all aspects of performance—from eliminating annoying flat spots along the RPM curve, to delivering reliable gains in power and torque . This means a smoother, more exhilarating ride at all speeds, better control in critical moments, and even improved fuel consumption when adjustments are done with care.

The Impact of Engine Remapping for Motorcycles on Power and Torque

The most immediate and celebrated impact of engine remapping for motorcycles is a dramatic surge in power and torque . By refining how the engine combusts fuel, remapping ensures that each piston stroke puts more energy to the ground without the risk of engine knock. The adjustments made to the ignition timing and fuel maps release horsepower that the factory left hidden, and the flexibility of custom map options means your bike can be set up exactly as you like.

For modern machines equipped with electronic throttle and high-tech fueling controls, these improvements are especially pronounced. Riders commonly report more punch at low and mid-range RPMs—where acceleration feels instantaneous and overtaking is effortless. This isn’t just about top-end figures: the added torque and responsive throttle transform every corner exit and straightaway.

Combine a remap with simple bolt-ons—like a freer-flowing air filter or aftermarket exhaust—and the leap in performance can be even greater. This synergy is what makes ECU remapping a foundational performance upgrade, moving beyond cosmetic gains to real, measurable improvements in how your motorcycle feels and performs.

How Throttle Response Improves After ECU Remapping

After engine remapping for motorcycles , throttle response is sharper, more accurate, and far more predictable. This improvement is achieved by recalibrating how the ECU interprets and executes throttle commands. Whether you ride with cable-driven or ride-by-wire systems, the fuel and ignition timing curves can be optimized for instantaneous action—eliminating the delay that often plagues factory-tuned machines.

close-up of motorcycle rider improving throttle response after engine remapping for motorcycles, lifelike photorealistic highly detailed

With these tweaks, the engine’s response to throttle input is immediate across the entire rev range, especially at lower RPMs where sluggishness is most apparent. When you crack open the throttle, the engine delivers a predictable and progressive surge—free from the stutters, hesitations, or flat spots caused by factory fuel cutoffs or conservative emission strategies.

This level of responsiveness not only adds to the excitement of fast riding but also improves safety and control—perfect for navigating tricky corners or making split-second decisions in traffic. If you value connectivity and confidence between your wrist and the rear wheel, a quality ECU remap is truly a game-changer.

Eliminating Flat Spots: Achieving Smooth Power Delivery through Engine Remapping

One of the most frustrating issues with stock mappings is the presence of flat spots —noticeable gaps where power delivery feels dead or delayed as you accelerate. These occur when the ECU cuts fuel or retards ignition timing to meet emissions, often making the bike feel lackluster just when you need it most. Engine remapping for motorcycles specifically targets these troublesome points, ironing out the power curve for seamless acceleration at all throttle positions.

"After remapping, my bike felt alive—even at low revs, the throttle response was immediate and the ride more exhilarating."

By creating a custom map for your setup—a performance exhaust, high-flow air filter, or other upgrades—you ensure the engine control unit delivers the right mix of fuel and spark at every moment. The result? Consistent, linear power delivery with no flat spots or hiccups, making both spirited and everyday riding more enjoyable and predictable.

The elimination of dead zones in your bike’s rev range also reduces fatigue, letting you ride with confidence whether you’re commuting, canyon carving, or out for a track day. When every horsepower is accounted for, you get the fullest, most exciting response from your machine.

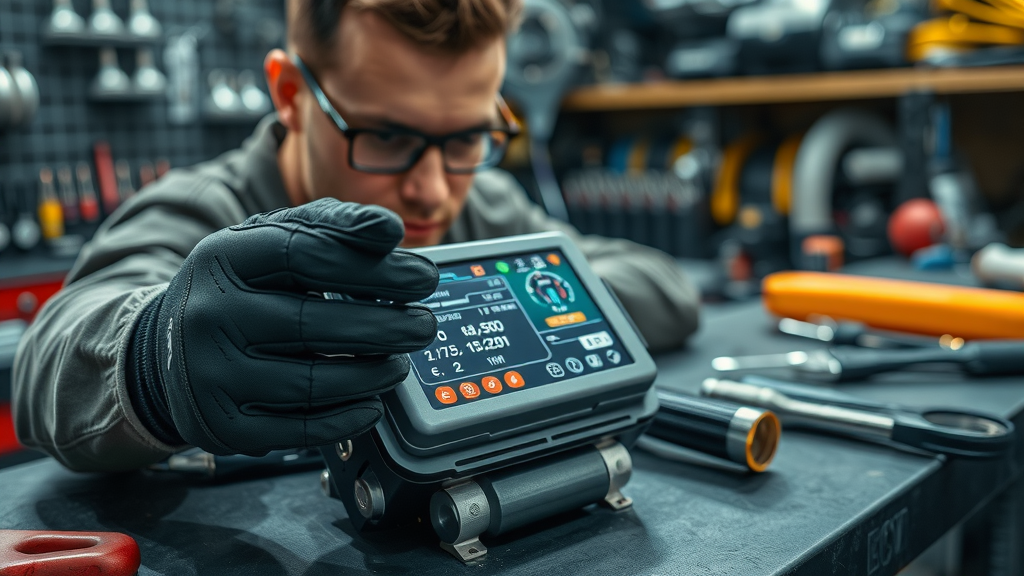
The ECU Remapping Procedure: Step-By-Step Guide to Engine Remapping for Motorcycles

  1. Diagnostic assessment and reading the stock ECU: The technician connects diagnostic tools to your motorcycle, extracting the current map and establishing a performance baseline.

  2. Adjusting fueling, ignition timing, and throttle settings: Customized changes are made based on your bike’s mods and your riding preferences, optimizing fuel injection and spark.

  3. Implementing and testing the new remap: The updated mapping is uploaded to your ECU. The technician tests the changes on the road or a dyno to verify improvements and checks for error codes.

  4. Fine-tuning for optimal fuel efficiency and performance: After initial testing, the map is further adjusted to balance power output and fuel consumption , ensuring reliable, efficient performance.

motorcycle technician performing ecu remap and tuning with laptop during engine remapping for motorcycles, highly detailed workshop

The remapping process doesn’t end at upload—a reputable shop will always verify results with before-and-after dyno runs and on-the-road feedback. This ensures that your ride performs at its best while maintaining fuel efficiency and engine safety.

Why Ignition Timing Matters When Remapping Motorcycles

Ignition timing is the precise moment when the spark plug ignites the compressed air-fuel mixture inside the engine. Get it wrong and you risk engine knock , stalled performance, or even damage. When done right through engine remapping for motorcycles , ignition timing lets you harness maximum power safely, especially when running high-octane fuel or performance mods.

Remapping the ignition curve can maximize midrange punch, make throttle control more linear, and offer safer, more consistent power delivery in any weather or load condition. Combining these adjustments with the right fueling and intake modifications is how tuners achieve the perfect balance between performance and reliability.

Whether you’re chasing max horsepower or dialing in for endurance and prolonged engine life , getting ignition timing right is a critical step during any remap or ECU tuning session.

Immediate vs. Long-term Benefits of Engine Remapping for Motorcycles

  • Instant improvements:

    • Faster throttle and smoother acceleration

    • Greater power and torque at all RPMs

    • No more flat spots

  • Long-term advantages:

    • Enhanced fuel efficiency

    • Prolonged engine life with proper tuning

As soon as your motorcycle’s ECU remap is applied, the improvements are obvious. Throttle response is crisper, acceleration is stronger, and even subtle riding maneuvers feel more rewarding. The long-term gains are equally significant—the balance between performance and economy means fewer fill-ups, less engine strain, and a bike that continues delivering exciting rides for years to come.

It’s this blend of short-term thrill and long-term reliability that’s won over so many riders to the benefits of engine remapping for motorcycles. When performed by experts and paired with quality components, remapping stands as one of the most effective and intelligent upgrades available today.

Engine Remapping for Motorcycles and Fuel Economy: Myths and Facts

There’s a persistent myth among riders that tuning an engine for more power must always reduce fuel economy . In reality, a carefully developed remap can deliver both increased performance and fuel efficiency . This is because the engine control unit can be tuned to run leaner (with less fuel) in cruising conditions, only enriching the mixture when full throttle is needed.

"Contrary to popular belief, a well-done engine remap for motorcycles can lead to better fuel economy and sustainability."

fuel delivery ignition timing

In summary: with the right setup and some careful tuning, engine remapping supports both stronger performance and better miles-per-gallon. It’s a win-win for performance-minded riders who also value efficiency.

How Fuel Efficiency and Fuel Economy Change Post-Remap

Post-remap, most riders report not only a livelier throttle but also an uptick in real-world fuel efficiency . Efficient fuel atomization, smarter ignition timing , and cleaner intake airflow mean more energy is extracted from every drop of fuel. For city commuters or long-distance tourers, these savings add up quickly, stretching your fuel budget and making the most of every tank.

While aggressive performance tuning can increase consumption with frequent hard acceleration, a balanced map typically delivers better fuel economy under normal riding conditions. The engine control unit adapts to both performance and efficiency, keeping your motorcycle economical even as it delivers more spirited rides.

The changes may be subtle or significant depending on your riding style and how far your custom map pushes the hardware. However, for most casual to semi-aggressive riders, a well-mapped ECU brings out the best of both worlds: fun and frugality.

Engine Remapping for Motorcycles: Cost, Safety, and Warranty Implications

Motorcycle Type

Avg. Cost of ECU Remap

Expected Fuel Savings

Warranty Impact

Sportbike (600-1000cc)

$350 - $700

+5 to 15% improvement possible

Potentially voids engine/drivetrain warranty

Adventure Touring

$400 - $750

+8 to 18% on highway

Check with dealer—varies by brand

Cruiser

$300 - $600

+4 to 10% typical

Warranty impact less common if flashed at dealer

clean motorcycle workshop with digital displays, organized tools, warranty paper discussion, engine remapping for motorcycles

The financial side of engine remapping for motorcycles varies with the bike, hardware, and shop expertise. While the process is an investment, the returns in performance, fuel savings, and ride quality can quickly justify the cost for serious enthusiasts. However, caution is needed—remapping may affect your factory warranty . Some dealerships consider any non-factory map as grounds for limited coverage, especially for drivetrain and electrical issues.

Always check your manufacturer’s stance, and when in doubt, seek out workshops that specialize in OEM-compliant flashes. Safety during and after the process matters—working with professionals ensures your bike remains reliable and protected against improper settings or damaging ecu flash attempts.

In many cases, the cost is offset by reduced service intervals (due to a cleaner-running engine), improved fuel economy , and the sheer enjoyment of a bike that truly comes alive.

Is Engine Remapping for Motorcycles Worth It? Weighing the Pros and Cons

  • Benefits:

    • Enhanced performance and power

    • Optimized throttle response

    • Improved fuel efficiency

  • Drawbacks:

    • Potential warranty void

    • Initial cost of ECU remapping

For most riders, the benefits of engine remapping for motorcycles significantly outweigh the drawbacks—provided it’s done by professionals and in consideration of warranty and long-term goals. You gain a motorcycle better suited to your individual style, improved safety and ride control, and access to all the performance your hardware can deliver.

Riders should always weigh the pros against the cons: the initial outlay and potential warranty implications must be considered. But as one of the most effective performance mods, a remap stands tall in its ability to transform the riding experience for the better.

People Also Ask About Engine Remapping for Motorcycles

Is it worth remapping a motorcycle?

Yes, many riders believe it is well worth remapping a motorcycle, especially when paired with other performance mods like exhaust upgrades or air filters. Not only does it unlock fuller performance and sharper throttle response, but the process can tailor your engine’s behavior to your preferences, maximizing both fun and efficiency. The key is working with a skilled professional and considering warranty factors.

Is remapping ECU safe in motorcycles?

Remapping the ECU is safe when done by experienced technicians using reputable tools and tested maps. Provided the remap respects the engine’s limits and includes checks for proper air/fuel ratios, EGTs, and knock, the process is both effective and reliable. Amateur or “off the shelf” tuning can carry risks—choose a specialized shop to ensure your motorcycle’s safety.

Can you remap a motorcycle?

Absolutely—modern motorcycles with electronic engine management are prime candidates for remapping. With the right equipment, any ECU can be accessed, adjusted, and reprogrammed to suit your goals. While some older carbureted bikes can’t be directly remapped, many contemporary models across brands can benefit from advanced engine remapping for motorcycles.

How much does it cost to remap a motorcycle?

The cost to remap a motorcycle’s ECU typically ranges from $300 to $750, depending on the bike, location, and complexity of changes. Prices may increase if additional dyno tuning, extensive diagnostics, or full custom map creation are involved. While the upfront price can be significant, the performance and efficiency gains often pay dividends in the long run.

Frequently Asked Questions About Engine Remapping for Motorcycles

  • Will ECU remapping void my warranty?
    It might, depending on your manufacturer’s policy and whether the process is done by an authorized service center. Always confirm before remapping.

  • Is ECU remapping reversible?
    Yes, a reputable tuner can often revert your ECU to the factory map if needed, restoring original settings and safeguards.

  • How often should I remap my motorcycle after upgrades?
    It’s recommended to remap after major modifications like exhaust or intake changes, or if you notice changes in power delivery, throttle response, or fuel efficiency.

  • Can remapping fix throttle lag and flat spots?
    Yes, addressing throttle lag and smoothing out flat spots is one of the main goals of ECU tuning, providing quicker response and seamless acceleration.

Expert Recommendations to Maximize Results With Engine Remapping for Motorcycles

  • Use only reputable shops for ECU remap and ECU tuning

  • Combine engine remapping with periodic dyno checks

  • Prioritize reliability and safety over maximum power

expert motorcycle tuner checking dyno results after ecu tuning, engine remapping for motorcycles, in a high-tech shop

Following these expert tips ensures your engine remapping yields all the intended benefits—high performance, smooth riding, long-term reliability, and peace of mind regarding safety. Remember: the full experience hinges on correct setup, regular checks, and mindful maintenance.

Ready to Experience the Power of Engine Remapping for Motorcycles?

Call Nasty Performance Motorcycle Shop Today: 847-458-4858


This article provided a comprehensive look at how engine remapping for motorcycles delivers instant gains and long-term performance and efficiency. Take your ride to the next level and consult the experts for the best results!

To further enhance your understanding of engine remapping for motorcycles, consider exploring the following resources:

  • “Advantages of ECU Remapping for Motorcycle Performance” : This article delves into how ECU remapping can significantly boost your motorcycle’s performance by optimizing fuel injection and ignition timing, leading to improved throttle response and increased horsepower. ( qualitycycleparts.com )

  • “Top 5 Benefits of Remapping Your Bike After Exhaust Upgrade” : This piece outlines the advantages of remapping your bike’s ECU following an exhaust upgrade, including unleashing full power and torque, improved throttle response, and enhanced fuel efficiency. ( motodeal.racing )

If you’re serious about maximizing your motorcycle’s performance and efficiency, these resources will provide valuable insights into the benefits and considerations of engine remapping.

Engine, Electrical Performance

0 Comments

Write A Comment

*
*
Please complete the captcha to submit your comment.
Related Posts All Posts

Rev Up with Motorcycle Dyno Tuning: What You Need to Know

Ready to unlock up to 15% more horsepower from your motorcycle? Professional motorcycle dyno tuning isn’t reserved for the racetrack; it’s a critical service that transforms both smooth street rides and white-knuckle sport bikes. With expert calibration and real-time adjustments, dyno tuning uses science—not guesswork—to give you more bang for your buck every time you hit the throttle. Dive into this comprehensive guide and discover why smart riders everywhere demand more performance, reliability, and customized power from dyno tuning. Unlocking Motorcycle Performance: The Power of Motorcycle Dyno Tuning Did you know that professional motorcycle dyno tuning can boost your bike’s horsepower by up to 15%? Discover how dyno tuning transforms both street and race machines through science, precision, and expert calibration. Motorcycle dyno tuning optimizes your engine’s potential, improves throttle response, and safeguards engine health, making it a critical service for enthusiasts seeking maximum value and performance. Motorcycle dyno tuning is more than a buzzword—it’s the science-backed method for extracting every ounce of performance and reliability from your two-wheeled machine. Whether you ride a fuel injected or carbureted motorcycle, this real-time process measures your bike’s true horsepower and torque output—no more guessing or estimation. By using sophisticated equipment like a dynojet dyno , certified technicians customize your air/fuel ratios, ignition timing, and ECU parameters for your riding style, modifications, and goals. This expertise ensures not just maximum power , but also optimal throttle response and protection against potential engine damage—a perfect blend for riders demanding more excitement and peace of mind. What Motorcycle Dyno Tuning Delivers: Core Benefits and Value Maximized horsepower and torque Consistent fuel mapping for fuel injected bikes Cleaner throttle response and smoother acceleration Detection of engine or tuning issues before damage can occur Tailored setup for unique riding styles and modifications “Dyno tuning is not just about chasing numbers—it’s about unlocking the ideal balance of power, responsiveness, and reliability for every rider.” – Nasty Performance Technician When you invest in motorcycle dyno tuning , you’re investing in a total transformation of your bike’s dynamics. Maximized horsepower and torque mean not only better top-end speed, but also impressive mid-range punch and low-end grunt. For today’s fuel injected bikes, precise, consistent fuel mapping ensures each cylinder is firing at its best, regardless of modifications like a full exhaust or upgraded intake. The result? Smoother throttle response, cleaner acceleration, and tangible improvements every time you twist the grip. More importantly, a dyno tune allows expert technicians to detect hidden issues before they turn into costly repairs—catching fuel ratio imbalances, misfiring, or warning signs in spark plugs . These adjustments can save your engine from premature wear or catastrophic failure, delivering not just performance but long-term value and peace of mind. How Motorcycle Dyno Tuning Works: The Process Step by Step What is Dyno Tuning and Why is it Crucial? Overview of dyno tuning and the science behind measuring horsepower and torque Real-time analysis of air/fuel ratios, RPMs, and speed At its core, dyno tuning is about establishing a scientific baseline by measuring your bike’s output in a controlled environment. A specialized dynamometer—like the industry-standard dynojet dyno —engages the rear wheel and creates resistance while your bike goes through ramp runs and steady state tests. The dyno captures vital information: horsepower, torque, RPMs, air/fuel ratio , and even exhaust gas signatures. This objective data replaces outdated tuning-by-ear methods, making it the foundation for every precision adjustment that follows. Technicians use this detailed feedback to evaluate how your bike performs at wide open throttle as well as in everyday riding situations. Whether your ride is a high-strung sport bike or a daily commuter, dyno tuning highlights not just peak numbers, but also weaknesses in your current setup—missing horsepower, lean or rich fuel ratios , or uneven power delivery. This is the foundation for tailoring a tune that matches your personal interests and riding goals down to the finest detail. The Motorcycle Dyno Tuning Process Broken Down Initial assessment and safety check Baseline dyno run Air/fuel ratio and ECU adjustments Custom mapping and power optimization Final dyno reading and results report Typical Steps in Motorcycle Dyno Tuning Description Duration (Approx.) Initial Assessment Review bike condition, modifications, and goals. 15-30 min Baseline Dyno Run Capture stock performance data using ramp run and steady state tests. 15-20 min ECU & Air/Fuel Adjustment Live analysis and adjustment of fuel ratios and ignition timing. 30-60 min Custom Mapping Develop map tailored to modifications and rider preferences. 30-60 min Final Run & Review Confirm results, print power/torque graphs, check diagnostics. 15-30 min Comparison of baseline vs. tuned performance graphs The full cycle of motorcycle dyno tuning starts with assessing your bike and goals, whether it’s about maximizing your bang for your buck or adapting to a new full exhaust system . After confirming your bike is in good condition , technicians perform a baseline test and then make those all-important ECU flash and fuel ratio updates. Finally, you receive a side-by-side comparison: Click to see graph of your ride’s journey from stock to tuned! ECU Flash and Fuel Injected Motorcycle Dyno Services The Link Between Dyno Tuning, ECU Flash, and Fuel Injected Systems Importance of customized ECU flash for modern motorcycles How dyno tuning integrates with fuel injected engine mapping Achieving specific modulation in throttle responsiveness and power curves “A custom ECU flash through dyno tuning is the smartest upgrade you can make to your fuel injected motorcycle.” – Industry Expert Modern bikes—especially fuel injected and electronically controlled models—benefit most from marrying ECU flash services with precision dyno tuning . Unlike out-of-the-box settings that try to serve every rider, a custom flash lets you tweak parameters like traction control, RPM limiters, and throttle-by-wire systems . This dynamic synergy means you don’t just modify a component; you optimize the way every part of your bike works together under real-world data and riding conditions. For those with performance upgrades (think: full exhaust , air filters, cams), a custom ECU flash is critical. It lets you recalibrate your ride for those changes, correcting fuel and ignition maps so you avoid lean fuel ratios and ensure smooth wider open throttle transitions. The result? A bike that adapts perfectly to your personal interests —whether that’s daily city commutes or track-day domination. Unlocks specialized features: Traction control, RPM limiters, and throttle-by-wire adjustments Provides a dynamic solution for aftermarket installations (exhaust, air filters, cams) Choosing an ECU flash as part of your motorcycle dyno tuning package means your bike's engine management is truly tailor-made . It's not just about turning up the numbers—it’s about ensuring every service can be based on your specific hardware, riding style, and goals. This approach ensures maximum performance and more bang for your buck , while also safeguarding engine reliability . Comparing Motorcycle Dyno Tuning vs. Traditional Tuning Methods Real-time measurement vs estimation Benefits of precision tuning for both standard and performance motorcycles Method Precision Customization Typical Results Cost Comparison Dyno Tuning High (live data capture, steady state & ramp run) Extensive (custom maps, ecu flash, performance mods) 10-15% power gain, smoother throttle, engine diagnostics $$–$$$ Traditional (Carburetor/Manual) Low to Medium (rely on feel, trial & error) Limited (standard jetting, less suited for fuel injected) Minor gains, risk of imbalances, slower adjustments $–$$ A major advantage of modern motorcycle dyno tuning is the ability to perform real-time measurements versus the old-school method of tuning by “feel” or estimation. Computerized dynos, especially when paired with technicians trained in ecu flash modifications, capture precise snapshots of your engine’s performance across wide open and variable throttle settings. This delivers the kind of accuracy necessary to tune a motorcycle for both everyday reliability and race-ready power—the kind of results that older methods simply can’t provide. Whether your machine is a basic stock bike or a heavily modified sport bike , the precision and customization of dyno tuning means you’re not leaving performance—or engine health—to chance. It's the essential step for unlocking both value and performance in every ride. Motorcycle Dyno Tuning: When, Why & How Often Should You Get It? How aftermarket upgrades or modifications call for fresh dyno tuning Suggested intervals, even for stock engines, to maintain peak performance Signs your motorcycle needs dyno tuning: symptoms and red flags The timing of motorcycle dyno tuning is critical for ongoing engine health and performance. Every time you make significant changes—like adding a full exhaust , swapping air filters, adjusting cams, or even after a major overhaul—a dyno session realigns your engine’s parameters for the new setup. But even if you ride a stock bike , periodic dyno services (every 6,000–10,000 miles) help maintain your bike in good condition , prevent premature wear, and catch issues before they become costly. Red flags that it might be time for a tune include rough idle , unexpected loss of power , unusual fuel consumption , or uneven spark plug readings . Don’t ignore them—making adjustments sooner with a professional dyno tune helps your motorcycle run smoother and keeps you riding safely. What to Expect at a Professional Motorcycle Dyno Tuning Session Assessment of bike and owner goals Consultation about modifications, fuel system, and riding style Overview of time, cost, and what results to anticipate Service Component Description Estimated Price (USD) Initial Consultation Discuss mods, owner goals, and diagnosis $50–$100 Full Dyno Tune (Fuel Injected) Full mapping, ecu flash , power optimization $300–$600 Dyno Run Only Performance report, no tuning $80–$150 Aftermarket Part Setup Setup for exhaust, air filters, or cams included in map Included or +$50–$150 Expect your first session to start with a thorough check of your motorcycle’s current condition, spark plug readings, exhaust system , and any forms you submit prior. A trained expert will then cycle your bike through a ramp run or steady state ramping, making real-time ECU and fuel ratio adjustments as needed. Finally, you’ll leave with a performance report, custom map, and expert advice for keeping your bike at its best. Key Motorcycle Dyno Tuning Features: What Sets Premium Services Apart Factory-trained technicians and dyno-certified experts Usage of high-end dynamometer equipment Customized maps and comprehensive aftercare support What separates a standard dyno tune from a premium experience? It starts with factory-trained technicians —people who not only understand the science of power your motorcycle but also bring years of hands-on experience with brands like robin winzell and the finest tuning tools in the industry. Top shops invest in state-of-the-art dynojet dyno setups, laptop-linked monitors, and digital interface platforms. Premium services go further by offering ongoing aftercare: comprehensive diagnostics, custom power maps for routine checkups, and support of the purposes for different riding modes. That means peace of mind—knowing your motorcycle is optimized for months, not just the next ride. List of Essential Questions Before Booking Motorcycle Dyno Tuning Is the dyno shop experienced with your make and model? What types of dyno readings (horsepower, torque) are provided? Do they offer ecu flash and fuel injected tuning as standard? Is a custom map included in the cost? Before you contact our service or give us a call , make sure the shop is equipped to handle not just basic ramp run tests but also advanced services like ecu flash and fuel injected mapping. Ask if they provide detailed horsepower and torque graphs (so you can click to see graph ), and whether a custom tune is tailored—not just “off the shelf.” Don’t hesitate to ask about their experience with your exact model, especially if you’ve invested in unique modifications or ride a less common brand. The right answers will help you get the best bang for your buck . Reviewing Motorcycle Dyno Tuning Results: What Does the Dyno Say? Interpreting post-tuning power graphs Understanding how horsepower gains reflect on the street or track Double-checking smoothness, torque curve improvements, and diagnostics The most exciting moment after a dyno tune is seeing your results. Post-session, you’ll receive detailed performance graphs that document horsepower, torque, and fuel ratio numbers—both before and after tuning. These figures are more than stats—they reveal engine health, improvements in torque delivery, response at wide open throttle, and smoothness throughout the RPM range. Savvy riders and experts alike will click to see graph not just for bragging rights, but to catch nuances in the powerband and clutch system. Whether you’re prepping for another ramp run or tracking hundreds of miles as a gold member , the proof lies in the ride: Your tuned results show up as faster launches, effortless cruising, and maximum performance with reliable safety built in. Expert Tips: Maximizing the Effectiveness of Motorcycle Dyno Tuning Ideal preparation steps before your session Best practices for break-in after tuning How to maintain top performance month after month To get the most out of your motorcycle dyno tuning session, start with prep: Ensure spark plugs are fresh, oil and filters (air and fuel) are clean, and your bike is in good condition . Bring notes about your interests and personal riding style, so the technician can tailor the tune (especially important if you use a power commander or similar device). After tuning, follow the expert’s recommended break-in period. Warm up thoroughly for the first few rides and avoid sustained wide open throttle until all systems settle. Regular post-tuning checkups—especially after long trips, modifications, or extended storage—will keep your bike in peak condition, mile after mile. FAQ Section: Motorcycle Dyno Tuning Questions Answered Is dyno tuning worth it for a motorcycle? Dyno tuning offers validated gains, extended engine life, and tailored riding experience for every budget and rider type. Absolutely. A professional dyno tune unlocks not only measurable power and throttle response but also customizes your bike to your exact use case—be it road, track, or all-day touring. With real-world, steady state data and expert ecu flash adjustments, it’s an investment that pays off in reliability, peace of mind, and true performance. How often should you dyno tune a motorcycle? Every 6,000-10,000 miles or after significant modifications, depending on usage and engine setup. Plan for dyno tuning every 6,000–10,000 miles, or whenever you install major upgrades like a full exhaust system , remap your ECU, or overhaul the fueling system. Regular checks help your bike stay optimized for changing conditions and mileage. How much HP does dyno tuning add? A typical dyno tune can add 5-15% more horsepower, with more noticeable gains on performance bikes or after major upgrades. While results vary, most riders see a 5–15% bump in horsepower with a quality dyno tune , especially when paired with upgrades like performance intakes, fuel injected systems, or ecu flash programming. Gains are even more pronounced on modified or sport bike setups. What does a dyno do for a motorcycle? A dyno provides precise, real-world measurement and tuning of engine output, air/fuel ratios, and performance for customized optimization. A dynamometer tests your bike’s output just like on the road—measuring horsepower, torque, RPM, and fuel ratio at different loads, capturing real-time performance data. This allows expert techs to tune a motorcycle for optimal safety, response, and efficiency, whether it’s fuel injected or carbureted . Motorcycle Dyno Tuning Success Stories & Case Studies Before-and-after examples: Stock vs. tuned comparisons Customer testimonials on throttle response and rideability The proof is in the ride! Customers love the immediate difference after dyno tuning : Naeem, a touring rider, reported his stock bike felt “like a new machine,” with far better acceleration and smoothness. Another client, Lucas, had his sport bike tuned with full exhaust and ecu flash—he gained 12% in peak horsepower and said throttle control was “lighter and faster everywhere.” From stock exhaust setups to high-performance upgrades, real-world riders consistently describe better throttle feel, more stable cruising, and long-term engine health. The right dyno tune delivers more than a number—it creates a better relationship between rider and machine. Walkthrough of live dyno session, with expert explanations and real-time data analysis (Insert video here) Conclusion Ready for more performance and reliability from your motorcycle? Call Nasty Performance Motorcycle Shop Today: 847-458-4858 and book your dyno tuning session to experience custom results first-hand! To further enhance your understanding of motorcycle dyno tuning, consider exploring the following resources: “Motorcycle Dyno Tuning: Unleash Maximum Performance!” ( motorcycleguidelines.com ) This article provides a comprehensive overview of the dyno tuning process, detailing each step from pre-dyno inspection to performance fine-tuning. It also addresses frequently asked questions, such as the cost of a dyno tune and its benefits for motorcycle performance. “Dyno Tuning Motorcycles - How does it work and why is it important?” ( woolichracing.com ) This resource explains the mechanics of dynamometers and their role in measuring torque and power. It emphasizes the importance of dyno testing, especially after installing aftermarket components, to ensure optimal air-fuel ratios and prevent potential engine damage. If you’re serious about optimizing your motorcycle’s performance, these resources will provide valuable insights into the benefits and processes of dyno tuning.

Motorcycle Battery Charging Tips

Did you know that up to 40% of motorcycles suffer early battery failure due to poor charging habits? If you’re one of the many riders who’ve experienced a dead battery miles from home, it’s time to upgrade your know-how. In this comprehensive guide, you’ll unlock the essential motorcycle battery charging tips that not only save money but keep your ride charged and ready, ride after ride. Surprising Facts About Motorcycle Battery Charging Tips "Up to 40% of motorcycles suffer early battery failure due to poor charging habits—mastering motorcycle battery charging tips can save you time and costs." Motorcycle batteries are vital to your ride’s reliability, yet charging mistakes remain common. Many riders unknowingly reduce their battery life—sometimes by years—simply by using an improper battery charger or neglecting periodic battery charge checks. The truth is, adopting safe and correct motorcycle battery charging tips isn’t just about immediate function; it’s an investment in your motorcycle’s electrical system and long-term performance. By using a compatible battery charger and following proper safety precautions—like connecting the positive terminal and negative terminal correctly—you dramatically reduce your risk of a dead battery and electrical faults. Let's dive into the facts and learn how to protect your investment. What You'll Learn: Essential Motorcycle Battery Charging Tips The safest and most effective motorcycle battery charging tips How to use a battery charger and maintain battery charge Differences among various motorcycle battery types, including AGM motorcycle batteries Proper handling of positive terminal and negative terminal connections Step-by-step guidance on charging your motorcycle battery Troubleshooting common issues with motorcycle batteries Understanding Your Motorcycle Battery Every motorcycle relies on a reliable battery to start the engine, power essential electronics, and keep you safe on the road. Yet, not all batteries are created equal. Understanding your motorcycle battery is the first step toward effective battery charge management, maximum battery life, and hassle-free rides. Knowing your battery type—whether it's a conventional lead acid, AGM motorcycle battery, or advanced lithium model—affects how you charge, maintain, and select the right battery charger. With varying needs for electrolyte solution management, cycling, and charge rate, picking suitable battery chargers and understanding your battery’s electrical energy requirements keeps you from suffering premature failure or costly mistakes down the road. Most modern motorcycles use either flooded lead acid batteries, AGM batteries (Absorbed Glass Mat), or lithium-ion options. Conventional lead acid batteries are cost-effective but require more frequent maintenance and precise charging techniques, while AGM motorcycle options last longer and offer greater resistance to vibration, though they need a special charger and proper safety precautions. Knowing what battery you have is essential: using the wrong charging method or exceeding the correct voltages can shorten battery life, risk damage to your bike’s electrical system, or leave you stranded. Let’s look closer at how each major battery type differs and what that means for charging your motorcycle battery. Common Motorcycle Battery Types: Lead Acid, AGM Motorcycle, and More Motorcycle batteries come in various battery types, each with unique advantages and maintenance requirements. The most common are flooded lead acid (conventional battery), AGM motorcycle batteries, and increasingly, lithium-ion. Lead acid batteries rely on an electrolyte solution and require periodic top-ups with distilled water, as well as close attention to charge rate and cycle. AGM motorcycle batteries, on the other hand, utilize a fiberglass mat that absorbs the electrolyte, making them more resistant to leaks and vibration but needing a charger designed specifically for AGM batteries to avoid overcharging or undercharging. Lithium-ion motorcycle batteries offer lightweight convenience and rapid charging but may not be compatible with all charging systems unless a special charger is used. Each battery type dictates a specific approach for battery charge and affects your choice of battery charger. For example, charging a lead acid battery with too high a current can cause excessive gassing and even explosions if open flames are involved, while AGM batteries need a slower, controlled charge for best results. Battery terminals—specifically the positive terminal and negative terminal—must always be connected in the correct sequence to avoid sparking and ensure your bike’s electrical energy is used safely. Use the following table for an easy reference to pros and cons, charging tips, and ideal charger types. Comparison Table: Battery Types, Pros, Cons, and Ideal Charging Tips Battery Type Pros Cons Ideal Charging Tips Lead Acid (Flooded) Low cost, widely available, easy to service Needs regular maintenance, risk of leaks & spills Charge slowly, check electrolyte solution; avoid overcharging AGM Motorcycle Battery Maintenance-free, vibration-resistant, longer lifespan More expensive, sensitive to overcharging Use a charger designed for AGM; never exceed 14.4V, ensure automatic shutoff feature Lithium-Ion Very lightweight, fast charging, retains charge well Higher initial cost, requires special charger, sensitive to temperature Charge only with compatible smart charger; avoid deep discharges How Battery Charge Impacts Motorcycle Performance Maintaining the correct battery charge plays a crucial role in your motorcycle’s overall performance. A well-charged battery delivers consistent electrical energy to your bike’s starter, lights, fuel injection, and onboard electronics. If the battery charge dips too low, starting can become unreliable, lights may dim, and sensitive electronics in your motorcycle’s electrical system could be at risk. In the worst cases, a low or dead battery leaves your motorcycle stranded, often at the most inconvenient times. Beyond just starting power, a healthy motorcycle battery supports stable voltage to the electrical system and reduces strain on alternators and regulators. Regularly monitoring battery charge—even during off-season storage—helps you avoid surprises and ensures your bike is ready to go when the weather improves. Following motorcycle battery charging tips—like partial charging (the 80-20 rule), using a smart charger, and not exceeding the recommended voltage—translates directly to better battery life, fewer breakdowns, and smoother rides all year long. For riders looking to keep their bikes in peak condition throughout the year, integrating smart battery care with broader seasonal maintenance routines can make a significant difference. Discover more practical strategies for protecting your motorcycle during every season in this essential guide to seasonal bike care. Fundamentals of Motorcycle Battery Charging Tips Why following proven motorcycle battery charging tips prevents premature battery failure Effect of proper battery charge on motorcycle longevity How to identify when to use a battery charger The basics of effective battery charging come down to a few key principles: always match your battery charger to your battery type, regularly monitor the health and charge of your motorcycle battery, and don’t overlook safety precautions. These battery charging tips help extend battery life while preventing accidental damage to your motorcycle’s electrical system or even personal injury. One surprisingly common cause of battery failure is leaving a battery partially discharged over time, which allows sulfation to build up inside lead acid batteries—dramatically shortening its useful life. Proper battery charge is also vital for maximizing your motorcycle’s longevity. The battery doesn’t just start the engine; it buffers electrical energy for all critical circuits, from engine management to navigation and communication. By understanding and applying essential motorcycle battery charging tips, such as never charging an AGM battery with a conventional battery charger, and testing battery voltage with a multimeter routinely, you can catch issues early and avoid the need for emergency service. If your motorcycle sits unused for weeks, it's wise to connect a smart charger with an automatic shutoff feature to maintain the correct voltage and prevent a dead battery. Choosing the Right Battery Charger for Motorcycle Battery Charging Tips Not all battery chargers are created equal, and using the wrong kind on your motorcycle battery can cause irreversible damage. Today’s market includes a wide range of battery chargers—from basic manual units to advanced smart chargers designed for each battery type. The most effective motorcycle battery charging tips always stress using a charger that matches your specific battery type, whether that’s a conventional lead acid, AGM motorcycle, or lithium-ion battery. Manual chargers can work well for conventional battery types if the user is attentive but lack features like an automatic shutoff, which can lead to overcharging. In contrast, a smart charger is a modern solution, automatically adjusting voltage and current and shutting off or switching to maintenance mode when the battery is fully charged. When selecting a battery charger, always check for compatibility flags—many models identify if they're suitable for use with AGM motorcycle batteries, and some come with dedicated settings for deep-cycle or lithium options. Look for features such as polarity protection to avoid damage from reversed positive terminal and negative terminal connections, short circuit protection, and overcharge safeguards. Today's best chargers are easy to use, quick to connect, and help ensure each battery charge is precise and safe. Selecting Safe and Suitable Battery Chargers The foundation of reliable motorcycle battery charging is a good charger. Never use a car battery charger or a generic charging device on your motorcycle battery unless it’s specifically marked as compatible. Car chargers may supply too much current for small motorcycle batteries, risking overheating, damage to battery terminals, or even explosions—especially in the presence of open flames or poor ventilation. Choose a charger designed for motorcycles with an appropriate charging rate (typically 1–3 amps for most standard batteries) and suited to the battery type in your bike, whether it’s lead acid, AGM, or lithium variety. Before making a purchase, confirm that your battery charger includes features like an automatic shutoff feature, trickle mode for maintenance charging, and compatibility labels for AGM motorcycle batteries or specialty lithium units. A dedicated smart charger is usually worth the investment, providing peace of mind by preventing overcharging and constantly adjusting output for maximum battery life. Avoid using makeshift solutions; sticking to proven products ensures your battery charge remains within optimal parameters for safety and performance. Automatic vs Manual Battery Chargers: Which Is Better? When deciding between automatic and manual battery chargers, consider both convenience and safety. Manual chargers require user intervention to monitor battery charge and stop the process when complete. While they offer simplicity for experienced users, the risk of overcharging is high if you forget to disconnect, leading to shortened battery life or even critical battery failure—particularly true with sensitive AGM motorcycle batteries. On the other hand, automatic battery chargers (or smart chargers) use sensors to detect battery charge level, automatically switch to trickle mode, and even shut off when the battery is fully charged. This hands-off approach not only protects against overcharging, but also means less time spent worrying about your battery’s health. For most riders—especially those storing motorcycles for the winter or only riding occasionally—a smart charger is highly recommended. The automatic shutoff feature, safety safeguards, and compatibility with various battery types make it the easiest way to keep a motorcycle battery charged safely and efficiently. Whether you choose a smart or manual model, always double-check manufacturer guidance to avoid damaging your battery or risking faults in the electrical system. How to Charge Your Motorcycle Battery: Step-by-Step Guide Charging your motorcycle battery correctly not only extends its life but ensures consistent performance every time you ride. This step-by-step guide covers essential safety precautions, the right way to connect the positive terminal and negative terminal, and how to monitor the battery charge throughout the process. By following these proven motorcycle battery charging tips, you’ll avoid common mistakes that lead to battery failure or electrical system faults. Whether you are working with a conventional lead acid unit, an AGM motorcycle battery, or even a modern lithium-ion option, always read your manufacturer’s manual before starting. Ensuring compatibility between your battery type and chosen battery charger is the foundation for a safe, successful charge. If in doubt about what type of battery you have or the proper procedure to follow, consult a motorcycle technician or contact a professional shop for guidance before proceeding. Safety Precautions for Charging Your Motorcycle Battery Before you begin charging your motorcycle battery, ensure you are working in a well-ventilated area, away from open flames or sparks, as hydrogen gas released during charging can be flammable. Always wear protective gloves and eye protection to safeguard against accidental acid splashes, especially if you are working with acid batteries or lead acid models. Never lean directly over the battery during charging in case pressure builds up inside the casing. Additionally, inspect your battery terminals for corrosion and secure all connections before initiating battery charge—this reduces electrical resistance and prevents accidental sparking. Take note of your surroundings and eliminate clutter. Keep flammable materials away from the battery charging area, and do not smoke or use any electrical appliance that could generate a spark nearby. Safety precautions also include ensuring the battery charger is unplugged before connecting to the battery terminals and using the charger only as instructed by the manufacturer. Following these steps keeps you and your motorcycle’s electrical system safe and maximizes the success of your battery charge. Proper Connection of Positive Terminal and Negative Terminal One fundamental tip for charging your motorcycle battery is the correct order of connecting the charger leads. Always connect the positive terminal (usually marked with a “+” or red cover) first before attaching the negative terminal (marked with a “-” or black cover). By doing this, you reduce the risk of accidental sparking and possible short circuits that can damage sensitive electronics in your motorcycle’s electrical system. The connection should be secure but not overtightened, to avoid stripping the battery terminal threads or risking a loose connection that could generate excess heat. When disconnecting after battery charge is complete, reverse the order: remove the negative terminal first, then the positive terminal. If your charger is equipped with an automatic shutoff feature, verify charging has ended before detaching cables. For the best results with AGM motorcycle batteries and other sensitive units, always use a smart charger with polarity protection, which prevents damage if the leads are connected in the wrong order. This practice is especially important for riders using advanced electronic systems or custom wiring modifications, where a voltage spike could trigger costly repairs. Monitoring Battery Charge and Battery Charge Completion A key battery charging tip is to continuously monitor your battery’s charging progress. Most smart chargers come with LED indicators or digital displays showing charge status and battery voltage. Check periodically to ensure the charger hasn’t encountered an error and that the battery temperature remains stable. For conventional lead acid and AGM batteries, a slow and steady battery charge is best; rapid charging or using a high-amperage battery charger not intended for motorcycles can cause overheating, swelling, or irreversible capacity loss. Once your battery charger signals that the battery is fully charged, disconnect the charger leads in the correct order and inspect the battery for any signs of leaks, swelling, or odd smells before reinstalling it in your motorcycle. It’s a smart practice to check the voltage with a multimeter: for most lead acid and AGM motorcycle batteries, a full charge should register between 12.6V and 12.8V. Properly monitoring battery charge during and after the process assures you can ride with confidence, knowing your electrical system is receiving stable, reliable power. AGM Motorcycle Batteries: Special Charging Tips Unique traits of AGM motorcycle batteries Optimal charging voltages for AGM motorcycle batteries Common mistakes when charging AGM motorcycle batteries AGM motorcycle batteries have rapidly become the preferred battery type for many modern bikes, thanks to their maintenance-free operation, ability to withstand vibrations, and resistance to leakage. However, AGM batteries also require special charging precautions that go beyond standard motorcycle battery charging tips. These units are highly sensitive to overcharging and can suffer permanent capacity loss or swelling if charged with a conventional battery charger. Always use a dedicated smart charger designed for AGM batteries, which carefully regulates voltage and current to prevent damage. When charging, never exceed 14.4 volts, and always follow the manufacturer’s recommendations. Many riders make the mistake of using generic or car chargers without an automatic shutoff feature, risking catastrophic battery failure. For best results, connect the positive terminal and negative terminal using insulated clips, double-check the voltage setting of your charger, and never attempt to "jump-start" an AGM battery with high amperage—a mistake that can immediately ruin battery life and void warranties. Regular voltage checks and adhering to the 80-20 rule (keeping the charge between 20% and 80% of capacity) helps maximize performance and lifespan. Common Motorcycle Battery Charging Tips and Maintenance Checklist Regularly inspect battery terminals for corrosion Ensure your battery charger matches your battery type Follow safety precautions during every charge Schedule routine testing of battery charge Keeping your motorcycle battery in top condition is about more than just occasional charging—regular inspection and maintenance are essential. Begin each season by inspecting battery terminals for corrosion, which appears as white or greenish residue around the positive terminal and negative terminal. Corrosion builds up quickly in humid environments or when batteries are left partially discharged, and it disrupts the flow of electrical energy, causing weak starts or unreliable performance. Clean terminals with a mixture of baking soda and water using a stiff brush, and reapply terminal protectant to slow future buildup. Make it a habit to check that your battery charger is compatible with your battery type each time you connect for a battery charge, especially if you own more than one charger or use borrowed equipment. Following established safety precautions ensures every charging cycle is safe, both for you and your motorcycle’s electrical system. Lastly, routine voltage tests with a multimeter—both before rides and after parking for extended periods—alert you to declining battery health, allowing proactive action before a dead battery can ruin your plans. People Also Ask—Expert Answers to Your Motorcycle Battery Charging Questions What's the best way to charge a motorcycle battery? A: The best way to charge a motorcycle battery is by using a compatible battery charger with automatic shut-off features. Always connect the positive terminal before the negative terminal, and never exceed recommended voltages, especially for AGM motorcycle batteries. What is the 80 20 rule for charging batteries? A: The 80-20 rule for battery charge recommends charging only up to 80% and discharging no lower than 20% to optimize battery life and prevent stress, especially relevant for AGM motorcycle batteries. Is it okay to charge a motorcycle battery while still connected? A: Charging your motorcycle battery while still connected can be safe if you use a smart battery charger and follow proper safety precautions, protecting sensitive electronics and maintaining battery integrity. How long should a motorcycle battery hold its charge? A: A fully charged motorcycle battery should retain its charge for several weeks to a couple of months, depending on battery type, age, and temperature. Frequently Asked Questions about Motorcycle Battery Charging Tips How often should I charge my motorcycle battery? For motorcycles ridden regularly, charge monthly or whenever voltage falls below 12.4V. For seasonal storage, maintain with a smart charger or check monthly. Can I use a car charger on my motorcycle battery? No, unless specifically designed for motorcycles. Car chargers risk overcharging and damaging smaller motorcycle batteries. Why do AGM motorcycle batteries need special charging? AGM batteries are sensitive to overcharging and require precisely regulated voltage, which smart chargers provide. How do I test the battery charge level accurately? Use a digital multimeter to check voltage: 12.6–12.8V is healthy for most lead acid and AGM batteries. Key Takeaways: Motorcycle Battery Charging Tips for Long-Term Performance Always use manufacturer-recommended battery chargers Monitor both positive and negative terminal connections during charging Frequent battery charge and maintenance lengthens lifespan AGM motorcycle batteries require specialized care Next Steps: Keep Your Motorcycle Battery in Top Shape "Call Nasty Performance Motorcycle Shop Today: 847-458-4858 for expert advice on motorcycle battery charging tips and premium service." Stay charged, ride smart—apply these expert motorcycle battery charging tips and enjoy hassle-free performance on every journey. As you put these battery charging strategies into practice, remember that true motorcycle reliability comes from a holistic approach to care. From battery health to seasonal storage, every detail matters in keeping your ride ready for adventure. If you’re eager to elevate your maintenance routine and uncover more ways to protect your investment year-round, explore the top seasonal bike care secrets every rider should know. This resource is packed with actionable insights that go beyond the battery, helping you master every aspect of motorcycle upkeep for lasting performance and peace of mind.

Motorcycle Carburetor Cleaning Service: Fix Rough Idles Fast

Did you know that over 80% of motorcycle performance problems—especially on sports bikes—are caused by neglected carburetor maintenance? That rough idle stealing away your fun could be a clogged carb just waiting for some expert attention. A professional motorcycle carburetor cleaning service goes far beyond what spray-in-a-can carb clean products can do, restoring crisp throttle, smoother idling, and the thrill of a responsive ride. If your ride hesitates, stalls, or struggles to start, don’t miss these crucial insights that could have you back on the road—fast! What You'll Learn About Motorcycle Carburetor Cleaning Service The importance of a professional motorcycle carburetor cleaning service for peak performance and reliability Common symptoms that reveal dirty carbs on your high-revving sports bike An overview of the carb clean and rebuild service process—what you actually get for your investment Price breakdowns and what to expect from reputable professional services Why Motorcycle Carburetor Cleaning Service Matters: A Surprising Fact Did you know that over 80% of motorcycle performance issues—especially on sports bikes—are linked to neglected carburetor maintenance? A professional motorcycle carburetor cleaning service can drastically improve power, acceleration, and fuel efficiency. If your motorcycle stumbles at idle, struggles at high RPMs, or simply won’t fire up till warm, the culprit is often a dirty or unbalanced carburetor. Today's sports bikes and even dedicated track machines like the Ducati Panigale rely on intricate fuel delivery, and even a small amount of buildup can sabotage performance. Avoid unnecessary part replacements, repeated "tank slappers" from unpredictable power delivery, and enjoy safer, more reliable rides with timely expert carb service. For riders interested in a deeper dive into the step-by-step process and best practices for keeping your motorcycle’s carburetor in top shape, our detailed guide on motorcycle carburetor cleaning techniques covers everything from disassembly to reassembly, ensuring you understand what goes into a thorough service. Carb Clean and Rebuild Service: Key Features & Benefits Deep ultrasonic carburetor cleaning for motorcycles, breaking down even the most stubborn deposits in critical passages Precision carb synchronization and tuning for sports bike models—matched to factory base settings for maximum efficiency and power Carburetor rebuild service with OEM-grade or superior replacement components for dependable operation Immediate benefits: sharper throttle response, reduced fuel line vapor lock, improved economy, and glass-smooth idling even on cold starts "A proper motorcycle carburetor cleaning service is crucial for reliable road performance—especially for high-revving sports bikes." — Lead Mechanic at Nasty Performance Motorcycle Shop How Hard Is It to Clean a Carburetor on a Motorcycle? Cleaning a motorcycle carburetor isn’t just a matter of spraying some cleaner and calling it done. Even experienced DIYers can miss the hidden internal passages or jets, especially in multi-carb racks found on sports and sport bike models like the Ducati Panigale. Many home attempts, using basic tools from places like Harbor Freight, fall short when it comes to precision cleaning and reassembly. Proper service involves total disassembly, professional ultrasonic cleaning, part inspection, and precise reassembly to set to factory base settings. For complex setups, especially multi-carb sports bikes, a professional motorcycle carburetor cleaning service is key to lasting reliability and performance. A clean package from trusted bike service providers is always a better bet than “bolt on and fire” shortcuts. How Often Does a Motorcycle Carburetor Need to Be Cleaned? Most manufacturers, particularly for high-performance sports bikes, recommend a thorough motorcycle carburetor cleaning service every 12,000 to 15,000 miles. However, bikes that sit for long periods, run with old fuel, or experience rough idles, hesitation, or backfiring should have their carbs inspected sooner. Regular service with clean package services helps prevent the “steals away our fun” scenarios caused by sluggish throttle or persistent stalling. Professional bike service programs often send friendly dept sms txt reminders for scheduled maintenance or offer package services like those popular in Fullerton, CA sport bike shops. Carburetor Cleaning Intervals by Motorcycle Type Motorcycle Type Recommended Cleaning Interval Symptoms of Dirty Carb Sports Bike Every 12,000 miles Rough idle, hesitation, reduced throttle response Cruiser Every 15,000 miles Poor acceleration, stalling Tourer Every 13,000 miles Backfiring, hard starting Can You Clean a Motorcycle Carburetor Without Removing It? While there are many surface cleaning sprays and quick-fix additives on the market, they usually can’t reach the crucial internal passages, jets, and emulsifier tubes—areas most likely to be blocked on sports bikes. True carb clean package services require removing the carburetor from the engine, complete disassembly, and cleaning every component in a specialized ultrasonic tank. This process ensures all obstructed fuel line paths and airways are restored. A quick spray might clear some debris temporarily, but only a full rebuild service ensures long-term smooth operation and eliminates recurring poor idle or throttle issues. What’s Included in a Full Carb Clean and Rebuild Service? Complete disassembly of all carburetor(s) from your bike Ultrasonic cleaning of jets, venturi, float bowls, and all passages Inspection and replacement of worn or compromised parts using OEM or upgraded components Precise adjustment and synchronization of multi-carb assemblies for smooth, consistent throttle response—especially vital for high-performance sports bike models How Much Does It Cost to Get Carbs Balanced? On average, carburetor balancing will cost between $100 and $300, depending on the type of motorcycle and the complexity of its carburetor setup. For multi-carb sports bikes or rare models like the Ducati Panigale, the price may trend towards the higher end, especially if additional diagnostic services or replacement parts are required. Many reputable bike service shops offer our complete rebuild and carb clean package services, which include balancing, ultrasonic cleaning, carb reassembly, and synchronization. Always ask about turnaround time and whether your chosen service shop includes carb balancing as part of their clean package; it’s the difference between “just clean” and truly performance-ready carbs back on your bike at a reasonable price. What Are the Most Common Signs You Need a Carb Clean or Rebuild Service? Rough idle and frequent stalling, even after bike is till warm Significantly decreased throttle response, especially under load Loss of power at high RPMs—noticeable when accelerating hard on sports bikes Hard starting after the bike has been sitting or between short rides Excessive fuel odor or visible smoke from the exhaust, suggesting fuel line issues or stuck float Frequently Asked Questions About Motorcycle Carburetor Cleaning Service Can I use additives instead of a carburetor cleaning service? While fuel additives may help break down minor varnish in the fuel line or tank, they are rarely effective for blocked jets or internal passages. Professional carburetor cleaning is necessary for a true fresh start. How long does the service take for a sports bike? A complete carb clean and rebuild service usually takes one to two business days, depending on bike complexity and parts availability. Shop sms txt or dept sms will often notify you when ready for pickup. Does a carburetor cleaning service improve fuel efficiency? Absolutely! Clean, synchronized carbs ensure precise fuel and air delivery, resulting in better economy and less risk of running rich or lean. Will cleaning the carb fix all rough idle issues? Carburetor cleaning solves most rough idle symptoms, especially those tied to fueling. However, issues with wheel bearings, ignition, or external fuel line clogs may also require attention. A trustworthy bike service shop will diagnose root causes during the clean package inspection. Key Takeaways: Why Choose a Professional Motorcycle Carburetor Cleaning Service Professional carburetor cleaning services extend your engine’s lifespan by preventing unnecessary wear and costly repairs down the road Specialized sports bike service ensures factory-level tuning and optimal performance, exactly as intended for models like the Ducati Panigale A full carb clean and rebuild service addresses the root causes of poor running—not just the symptoms—ensuring you get the most from every ride Ready to Fix Rough Idles? Call Nasty Performance Motorcycle Shop Today: 847-458-4858 Your ride deserves to run at its best! For ultra-fast turnaround time, proven results, and expert service online or in shop, call Nasty Performance Motorcycle Shop now at 847-458-4858 and ask for our carb clean package services. Don’t let carb problems steal away your fun—stop struggling till warm and get your carbs back on track with certified pros. If you’re committed to keeping your motorcycle in peak condition year-round, don’t stop at carburetor care. Discover essential strategies for every season in our comprehensive resource, Seasonal Bike Care Secrets Every Rider Must Know. From prepping for winter storage to maximizing summer performance, these expert tips will help you avoid common pitfalls and extend the life of your ride. Take your maintenance routine to the next level and ensure your bike is always ready for the road, no matter the weather.

Terms of Service

Privacy Policy

Core Modal Title

Sorry, no results found

You Might Find These Articles Interesting

T
Please Check Your Email
We Will Be Following Up Shortly
*
*
*