cropper
update

Nasty Performance ~ 847-458-4858 

update
  • Blog Home
  • Categories
    • Motorcycle Maintenance
    • Riding Tips & Preps
    • Safety & Inspection
    • Customizations & Upgrades
    • DIY Motorcycle Repairs
    • Motocycle Audio Systems
    • Motocycle Seasonal Care & Storage
    • Engine, Electrical Performance
  • Bike Night
  • Nasty Performance Motorcycle Shop
September 02.2025
1 Minute Read

Don't Miss Out: Waterproof Motorcycle Stereo for All Weathers!

  • Did you know that over 60% of riders experience audio failure due to weather exposure? Discover how a waterproof motorcycle stereo ensures continuous sound—rain or shine.

  • Learn top waterproof motorcycle stereo benefits

  • Compare leading audio system features

  • Dive into compatibility with Android Auto and Apple CarPlay

  • Access the latest user reviews and buying tips
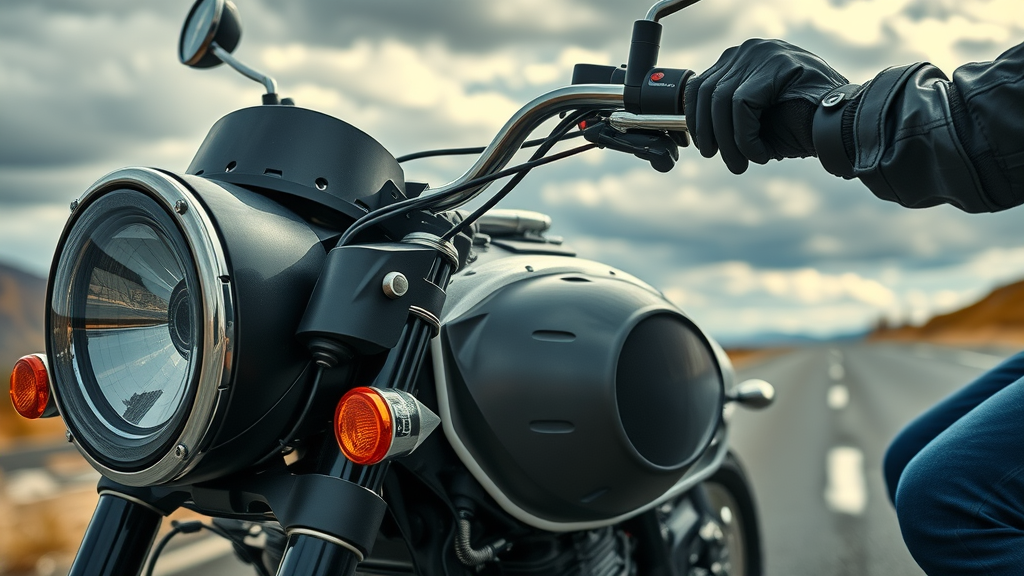
rugged motorcycle parked roadside with modern waterproof stereo system, speakers gleaming, rider adjusting settings, mountain highway background, rain droplets, natural daylight, black and chrome

Imagine setting out on a cross-country adventure or a rainy morning commute with your favorite playlist streaming flawlessly—no matter how fierce the storm. For motorcycle enthusiasts, a waterproof motorcycle stereo isn’t just a luxury, it’s an essential gear upgrade ensuring consistent entertainment, safe hands-free communication, and seamless navigation in any weather. With over 60% of riders encountering audio system issues from water, dust, or extreme temperatures, choosing a purpose-built audio solution means the difference between endless silence and an electrifying soundtrack to your journeys.

Why Invest in a Waterproof Motorcycle Stereo for Every Ride?

  • Practical benefits for touring, commuting, and adventure riding—all-weather durability.

  • Real-world examples: Harley Davidson and other motorcycle models with robust motorcycle audio systems.

A waterproof motorcycle stereo is a game changer for any rider who refuses to let the weather dictate their journey. Whether you tour vast highways, commute through unpredictable city downpours, or carve mountain passes on an adventure bike, these audio systems are engineered to withstand the elements and maintain reliable performance. Features like dust-proof enclosures, corrosion-resistant hardware, and high-impact designs mean your audio experience remains uninterrupted—even when nature lashes out.

Real-world motorcycle models like Harley Davidson outfitted with robust motorcycle audio systems exemplify how a purpose-built solution elevates the ride. From group rides to solo expeditions, the best waterproof stereo units deliver clear and vibrant sound quality that cuts through city noise or serenades you on open roads, providing not just entertainment but also a safer, more immersive riding experience. Modern systems boast tight seals and advanced drainage, all paired with technologies like Bluetooth, FM/AM, and mobile app integration for the ultimate user experience.

enthusiastic group of riders including Harley Davidson, gathered before a storm, showing off waterproof motorcycle audio systems, cityscape to countryside backdrop, clouds signaling rain, vibrant gear

Top Features to Look for in a Waterproof Motorcycle Stereo and Audio Systems

Key Components: Understanding Motorcycle Audio, Audio System, and Motorcycle Radios

  • Speaker power and wattage

  • Bluetooth, FM/AM, and source unit compatibility

  • Security and waterproof ratings (IP standards)

When evaluating any motorcycle audio system , start by inspecting the core components: speakers, head unit (source unit), and controls. Speaker wattage is crucial for cutting through wind and road noise—look for systems delivering at least 40-100W RMS per channel for a solid audio experience. High-efficiency speakers maintain clarity even at highway speeds, while IP-rated enclosures (like IP67 or IP68) assure resistance to water, dust, and even full submersion.

You’ll want a stereo featuring Bluetooth connectivity for a wireless connection with your Android Phone or Apple device, FM/AM radio options for local stations, and a robust source unit that manages various audio sources—USB port, SD card, and auxiliary inputs included. Security features such as anti-theft mounting and lockable components add peace of mind during stops. Together, these technical specs form the backbone of top-performing motorcycle radios designed for reliability and exceptional sound quality wherever you ride.
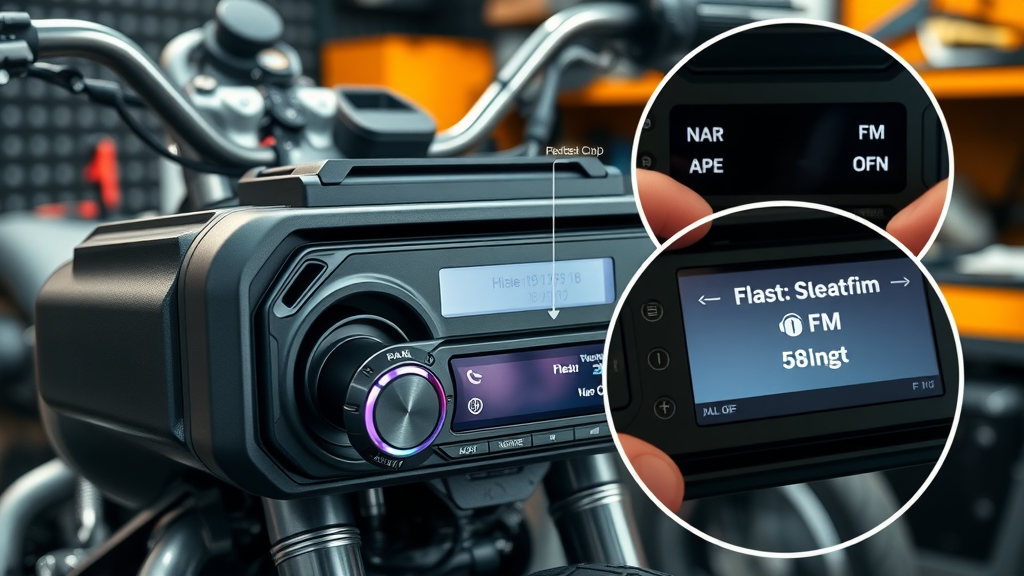
sleek waterproof motorcycle stereo system, labeled component diagram, zoom-in of speaker grilles, audio unit interface showing Bluetooth/FM options, technical workspace, matte metallics

Connectivity Excellence: Android Auto, Apple CarPlay, and Compatibility with Android Phones

  • Hands-free control and easy navigation system integration

  • Music and call management on-the-go

In today’s connected world, seamless compatibility with Android Auto and Apple CarPlay sets the best motorcycle audio systems apart. Integration with your phone’s navigation system enables hands-free GPS, voice commands, and simple track selection without ever taking your hands off the bars. Imagine listening to music, taking calls, or receiving navigation prompts through a waterproof stereo interface so you never lose focus on the road or miss urgent communication.

The hallmark of premium systems is simple, reliable pairing and smooth operation with both Android phones and Apple devices, along with fast response Bluetooth and auxiliary connections for music and call management . These units, specifically designed to withstand the elements , often come with glove-friendly controls or handlebar remote options, maintaining usability even in challenging riding conditions. Ultimately, this level of connectivity brings infotainment and safety to a whole new standard for modern motorcycles.

Comparing the Best Waterproof Motorcycle Stereos: From Rockford Fosgate to Harley Davidson

Rockford Fosgate’s Leading-Edge Motorcycle Audio and Sound System Features

"Rockford Fosgate’s audio system brings concert-quality sound to the open road"—Industry Expert

  • Breakdown of audio systems designed for extreme weather and vibration

  • Exclusive advantages for Harley Davidson and other popular motorcycle models

Rockford Fosgate stands at the forefront of motorcycle audio, renowned for purpose-built systems that deliver unparalleled performance across all weather scenarios. Their waterproof motorcycle stereo kits feature high-powered amplifiers, full-range speakers with marine-grade protection, and finely tuned digital source units optimized for sound quality at speed. These audio solutions are stringently tested against vibration, UV, salt, and temperature—ensuring riders hear every note in rain, snow, or searing summer sun.

For Harley Davidson motorcycles and other top brands, Rockford Fosgate offers exclusive package upgrades fitting factory cutouts, seamless wiring harnesses, and vehicle-matching aesthetics. The result is a clear and vibrant audio experience, with distortion-free bass and crisp highs—whether you’re city cruising or surging down the interstate. Expertly engineered to boost both music volume and durability, these audio systems truly bring “concert-quality sound” to your favorite motorcycle model.
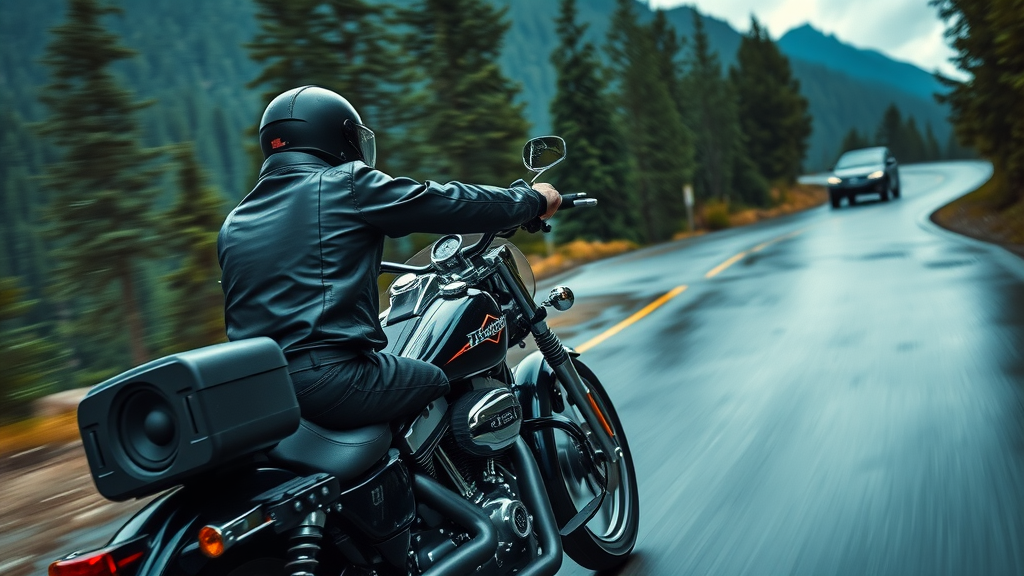
motorcyclist riding Harley Davidson with Rockford Fosgate audio system, speakers blasting music, rain in motion, wet scenic forested road, chrome and black highlights, soundwave effects

Top 5 Waterproof Motorcycle Radios and Audio Systems: A Quick List

  1. Best all-around: Rockford Fosgate waterproof motorcycle stereo

  2. Most compatible: Leading model with Apple CarPlay and Android Auto support

  3. Best budget option: Reliable standard motorcycle audio system

  4. Premium pick: High-fidelity audiophile motorcycle system

  5. Top connectivity: Audio system with advanced streaming and Bluetooth features
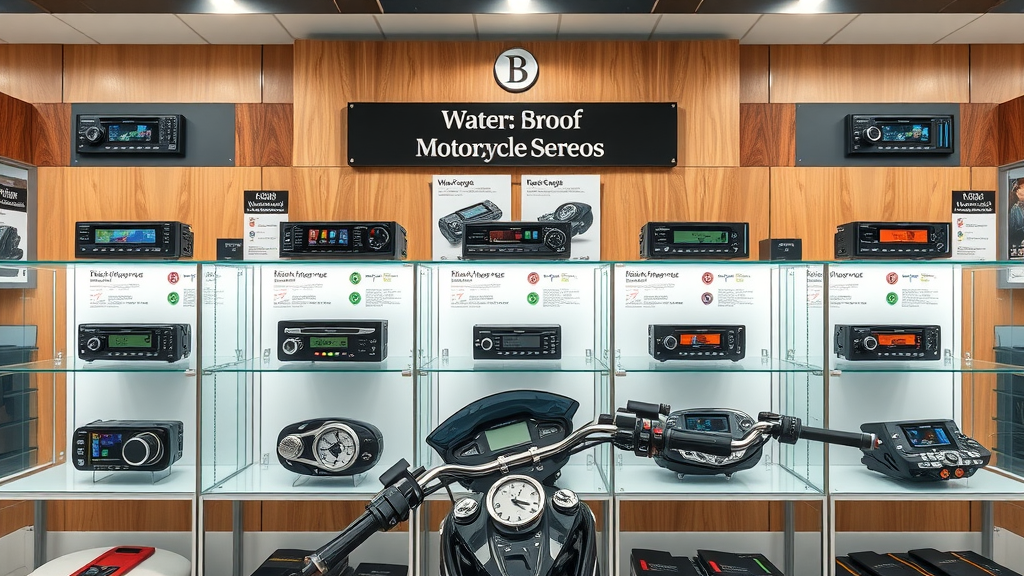
retail display, lineup of waterproof motorcycle stereos from various brands, glass cabinets, comparison charts, clean electronics store, colorful units

How to Install a Waterproof Motorcycle Stereo on Your Motorcycle Model

  • Step-by-step guidance: Compatibility with various sound systems and navigation system units

  • Essential tools, wiring tips, and waterproofing tricks

Installing a waterproof motorcycle stereo doesn’t have to be daunting, especially when following a clear, step-by-step guide. Begin by verifying that your chosen audio system is designed for your motorcycle model and that all necessary mounting brackets and adapters are included. Gather essential tools such as wire strippers, screwdrivers, crimpers, and waterproof connectors. Remove your old unit (or factory blank), mount the new head unit securely, and run wiring harnesses along existing channels—making sure cables are shielded and away from moving parts or sharp edges.

Securely attach speakers and ensure all components are tightly sealed to prevent water ingress. Use dielectric grease around connection points, zip-tie excess cable away from high-heat areas, and finish by testing all audio sources—Bluetooth, FM/AM, and USB port—before reassembling panels. For advanced installations, such as integrating Android Auto, Apple CarPlay, or a dedicated navigation system, ensure compatibility and consult your audio kit’s manual. The result is a robust, weatherproof audio system ready to soundtrack each and every mile.
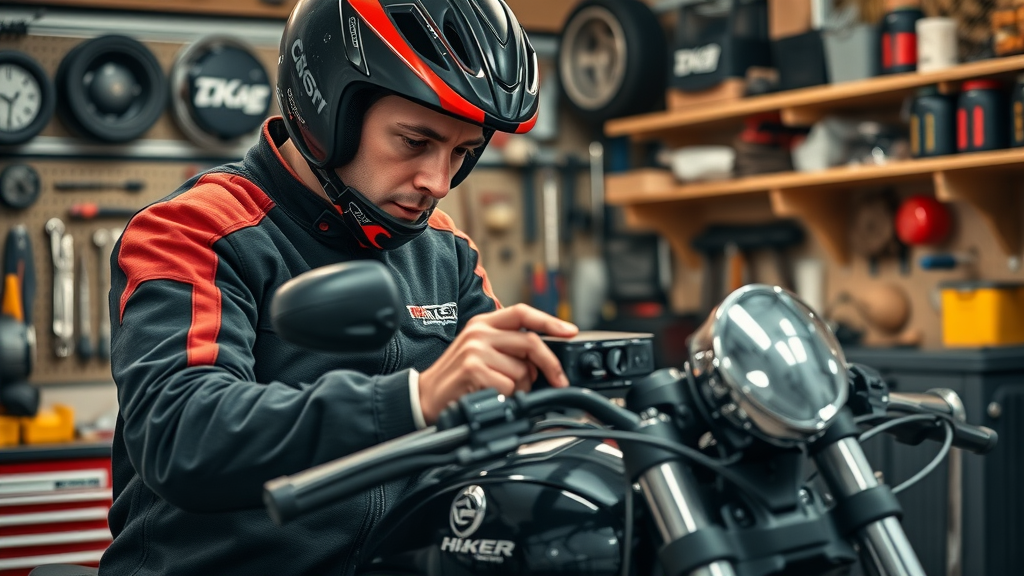
mechanic in riding gear installing waterproof stereo unit on cruiser bike in organized home garage, step-by-step, black and red tones

Real User Reviews: Motorcycle Audio Performance in All Weather Conditions

"My waterproof motorcycle stereo handled the Rocky Mountain rain with zero audio loss." —Avid Long-Distance Rider

  • User stories—tourers, commuters, and adventurers

  • Maintenance insights for maximizing audio system reliability

Riders across the world praise waterproof motorcycle stereos for withstanding unpredictable climates—from foggy coasts to humid city traffic and even snow-choked mountain roads. Long-distance tourers report uninterrupted audio performance during days of heavy rain, while urban commuters appreciate hands-free call and navigation system features on drizzly morning rides. Adventurous souls, facing deep mud or river crossings, rank reliable sound quality above all, with many asserting their audio system “never missed a beat” through the worst conditions.

Keeping your system at peak performance is straightforward: periodically inspect seals, ensure connectors remain clean and tight, and avoid leaving your bike exposed to sun for extended periods. A quick check of speaker grilles and drainage holes after each wash or storm helps maintain clarity and volume. With these simple habits, your motorcycle audio investment will delight you for years of worry-free riding.

contented rider in adventure gear by rain-soaked mountain pass, clear music from motorcycle stereo, misty landscape, water beads on speakers, rich green and gray tones

Price Comparison Table: Best Waterproof Motorcycle Stereo and Audio Systems

Model

IP Rating

Wattage

Key Features

Price

Compatible Motorcycle Models

Rockford Fosgate PMX-HD9813

IP67

100W RMS per channel

Bluetooth, FM/AM, Apple CarPlay & Android Auto integration, Marine-grade build

$699

Harley Davidson (1998-2013)

Harley Davidson Boom! Audio Stage II

IP66

75W RMS per channel

Plug-n-play, HD Navigation, voice control, premium speakers

$949

Harley Davidson Touring Models

Kuryakyn MTX Road Thunder

IP65

50W RMS per channel

Compact, easy fitment, Bluetooth streaming, USB port charging

$449

Universal (most models)

Jensen HD1BT

IP66

40W RMS per channel

Bluetooth, FM/AM, easy install, backlit LCD

$399

Universal (cruisers, touring motorcycles)

BOSS Audio MCBK420B

IP65

30W RMS per channel

Low-cost, Bluetooth/USB, weatherproof amp

$159

Standard & budget motorcycles

glossy price comparison infographic, waterproof motorcycle audio models arranged in tables, digital dashboard, brand icons, futuristic showroom, bold colors

People Also Ask About Waterproof Motorcycle Stereo

Are waterproof motorcycle stereos worth the investment?

  • Waterproof motorcycle stereos offer superior durability, protecting your audio investment against rain, dust, and extreme conditions—making them ideal for year-round riders.

Absolutely. Waterproof motorcycle stereos provide unmatched peace of mind, designed to withstand everything from sudden downpours to dusty backroads without missing a beat. By using advanced seals, weatherproof enclosures, and robust electronics, you protect your audio system and guarantee the best sound system performance, regardless of Mother Nature’s mood.

Especially for those who ride year-round, these systems eliminate worries about damage caused by water ingress or corrosion. Investing in a reputable, specifically designed waterproof audio system means you’ll enjoy long-lasting entertainment, reliable navigation prompts, and hands-free calls, mile after mile.

Can I install a waterproof motorcycle radio on any bike?

  • Most waterproof motorcycle radios and audio systems come with universal kits. However, compatibility with your motorcycle model should be confirmed for hassle-free installation.

Many motorcycle radios are engineered with universal fitment in mind, accompanied by adjustable brackets, compact source units, and adaptable wiring harnesses. However, it’s vital to confirm the stereo’s compatibility with your specific motorcycle model, as some bikes require exclusive fitment kits or extra connectors.

This is particularly important for models with integrated navigation systems, handlebar controls, or advanced electrical systems—always check the product manual and consult with the manufacturer or a professional audio dealer to ensure an ideal match and a smooth installation.

What is the typical lifespan of a waterproof motorcycle stereo audio system?

  • A quality audio system can last 5+ years with proper care—IP67 or higher waterproof ratings are a good benchmark.

The longevity of a waterproof motorcycle stereo depends largely on build quality and maintenance. Top brands like Rockford Fosgate and Harley Davidson design their audio systems to last more than a half-decade, even with regular exposure to rain and sun. Models with IP67 or higher waterproof ratings resist both water and dust ingress, helping to avoid premature failures.

To ensure maximum lifespan, follow routine maintenance such as cleaning connectors, inspecting gaskets, and protecting the system when parked outdoors. With these habits, your audio solution can provide entertaining rides season after season.

Expert Buying Tips: Selecting the Right Waterproof Motorcycle Stereo and Audio System

  • Assess sound system and navigation system needs before purchase

  • Evaluate brand support, warranty, and user reviews

  • Check motorcycle model compatibility with preferred features like Bluetooth, Android Auto, and Apple CarPlay

Before you buy, clarify what you value most in a waterproof motorcycle stereo : is it music quality, call clarity, robust navigation integration, or streamlined wireless connection? Make a checklist of must-haves, then focus on audio systems with proven weatherproofing and top-tier user reviews.

Always consider brand reputation and support—well-known brands like Rockford Fosgate and Harley Davidson stand behind their products with strong warranties and dedicated service. Scan user forums for real-world experiences and reliability feedback. Lastly, double-check that the stereo is compatible with your motorcycle model—especially if you want advanced functionality such as Android Auto, Apple CarPlay, or unique handlebar controllers.

shopper reviewing waterproof motorcycle stereo comparison chart, highlighting warranty and features, minimalist tech showroom, analytic expressions

FAQs: Everything You Should Know About Waterproof Motorcycle Stereos

  • What is the best waterproof motorcycle stereo for sport bikes vs cruisers?
    The ideal stereo depends on your bike type—cruisers benefit from large speaker pods and robust amplifier kits, while sport bikes need compact, aerodynamic systems. Always opt for IP67+ rating and Bluetooth/Apple CarPlay compatibility for top performance.

  • Do motorcycle audio systems affect battery life?
    Modern audio solutions are designed for efficiency, but high-wattage speakers and amplifiers can impact battery drain if used at high volumes for prolonged periods. Upgrading to a battery with higher capacity or using an additional power management module is a smart precaution.

  • How does adding a source unit impact my factory motorcycle audio system?
    Adding a high-quality source unit can amplify sound quality, bring new features (like Android Auto), and expand media compatibility. However, ensure proper installation to avoid interfering with factory wiring and maintain safety standards.

  • Is Bluetooth or wired better for motorcycle radios?
    Bluetooth provides wireless convenience and hands-free control, but wired connections can minimize interference and maximize audio fidelity. The best waterproof motorcycle radios offer both options, allowing you to switch based on preference or riding needs.

Watch: Waterproof Motorcycle Stereo Installations and Real-World Sound Tests

  • Video demonstration of waterproof motorcycle stereo installation and durability testing

For a closer look, watch expert installs and real-world durability tests online, where top waterproof audio systems tackle pounding rain, mud, and bumpy roads—delivering proof of consistent high-fidelity performance. These tests highlight ease of installation, toughness under extreme conditions, and the thrilling sound quality you can expect from a premium motorcycle radio.

Ready for Unmatched Sound? Choose Your Waterproof Motorcycle Stereo Today

  • Don’t settle for silence—upgrade to a premium waterproof motorcycle stereo for an unbeatable audio experience in all conditions. Explore our recommended audio systems now!

Act now and elevate your riding experience—select a waterproof motorcycle stereo that matches your sense of adventure and ensures every journey is unforgettable, come rain or shine.

Take action: Review your riding needs, compare the best models above, and select a waterproof motorcycle stereo that fits your bike and lifestyle for years of sonic satisfaction—rain or shine.

To enhance your understanding of waterproof motorcycle stereos, consider exploring the following resources:

  • GoHawk RD8-X All-in-One Soundbar Waterproof Bluetooth Motorcycle Stereo Speakers (Black)

This product offers a built-in amplifier, Bluetooth connectivity, AUX input, USB support, and FM radio, all housed in an IP56 water-resistant aluminum body. It’s designed for easy installation on handlebars ranging from 7/8” to 1.25” in diameter. ( gohawk.com )

  • Carpuride W603 Wireless Portable Waterproof IP67 Motorcycle Stereo

Featuring a 6.3-inch HD IPS capacitive touchscreen, this stereo supports wireless Apple CarPlay and Android Auto, providing seamless access to calls, music, navigation, and voice control. Its IP67 waterproof rating ensures durability in various weather conditions. ( carpuride.com )

These resources offer detailed insights into the features and benefits of waterproof motorcycle stereos, helping you make an informed decision for your riding needs.

Motocycle Audio Systems

0 Comments

Write A Comment

*
*
Please complete the captcha to submit your comment.
Related Posts All Posts

Top Accessories for Custom Motorcycle Sound System Setup to Help You Ride Louder and Smarter

When considering upgrades like premium speakers or amplifiers, it's also important to think about how these components interact with your bike's electrical system and overall setup. For a deeper dive into optimizing your amplifier choice and installation, check out this guide on seasonal bike care and audio system maintenance, which covers practical tips for keeping your sound system performing at its best year-round. Elevating your motorcycle audio experience is just one aspect of creating a ride that’s both thrilling and reliable. If you’re looking to take your bike’s performance and longevity to the next level, explore our comprehensive resource on seasonal bike care secrets every rider must know. This article reveals expert strategies for protecting your investment through every season, ensuring your custom sound system and the rest of your motorcycle stay in peak condition. Discover how proactive care and smart upgrades work hand-in-hand to deliver a safer, more enjoyable ride—no matter the weather or road ahead.

Guide to Motorcycle Amp and Speaker Install Tips That Will Change Your Ride

Did you know that motorcycle stereo system upgrades have surged by nearly 40% worldwide in the last five years? As more riders crave not just the thrill of the open road but also the perfect soundtrack, motorcycle audio innovation has exploded. Upgrading your motorcycle amp and speakers isn't just a passing trend—it's a game-changer for the whole riding experience, delivering crisp, clear sound that confidently cuts through wind noise, engine rumble, and highway traffic. In this guide to motorcycle amp and speaker install tips, you'll uncover why investing in your sound system means every journey is unforgettable—no matter where the road leads. Startling Facts: How a Motorcycle Amp and Speaker Upgrade Transforms Your Sound System Today’s motorcycle stereo systems can rival even high-end car audio setups—not just in volume, but in delivering audio clarity and immersive sound quality at every speed. The latest innovations in motorcycle audio have paved the way for systems that cut through wind and engine noise, transforming the way riders experience music, podcasts, and navigation instructions. Riders are increasingly prioritizing audio system upgrades, using sophisticated motorcycle amplifiers and top-notch motorcycle speakers to produce clear sound under the most challenging riding conditions. The motivation behind these upgrades stems from a desire for freedom paired with comfort and convenience. Whether it’s the urge to enjoy your favorite playlist at 70 mph or the need for sharp, distortion-free directions in city traffic, a modern motorcycle audio system can make all the difference. By investing in the right amplifier and speaker setup, you’re investing in an upgraded riding experience where every mile is set to the perfect soundtrack. This is more than just a trend—it's a revolution that's here to stay. What You'll Learn in This Guide to Motorcycle Amp and Speaker Install Tips Key benefits of upgrading a motorcycle stereo system Essential tips for amplifier and speaker selection Step-by-step installation process for motorcycle audio systems Common issues and pro troubleshooting guides for superior sound quality Understanding Motorcycle Stereo System Basics for Your Next Audio Upgrade A motorcycle audio system consists of several main parts: a head unit (stereo), a motorcycle amplifier, and one or more motorcycle speakers. Unlike car audio, motorcycle audio is specially engineered to handle open-air environments, variable weather, and significant vibrations, which means every component must be durable and weatherproof. The head unit is often mounted on the fairing or handlebars and acts as the control center, sending the audio signal to the amplifier. The amplifier boosts the signal, ensuring your motorcycle speakers can compete with wind noise and engine sounds, delivering that sought-after clear sound at highway speed. The motorcycle speakers, which can be placed in fairings, saddlebags, or handlebar pods, are designed to output great sound regardless of how harsh the ride gets. In contrast to car audio where sound remains trapped inside a cabin, motorcycle stereo systems push audio into the open road, demanding smart audio setup, orientation, and rugged design for optimal sound quality. "A well-installed motorcycle stereo system isn’t just about volume, it’s about clarity on every ride." Components Required for an Effective Motorcycle Sound System Install Motorcycle amplifier options Variety of motorcycle speakers and careful speaker placement Audio system wiring essentials Saddlebag speakers and specialty additions Component Pros Cons Motorcycle Amplifiers High power output, improves sound quality, compact size Can be challenging to install, needs weather protection Motorcycle Speakers Designed for outdoor use, precise sound direction Size limitations affect bass, require secure mounting Stereo Systems (Head Units) Bluetooth/USB options, easy-to-access controls Must fit specific motorcycle models, potential theft risk Wiring Kits All necessary cables, shielded to minimize interference Installation complexity, space required along frame Controls & Accessories Wireless or bar-mounted controls, user-friendly Extra wiring, may require modification of bars/panels Planning Your Motorcycle Audio System: Choosing the Right Amplifier and Speakers Selecting the ideal motorcycle amplifiers and motorcycle speakers is central to any effective sound system upgrade. First, consider your music tastes and volume needs—rock, hip-hop, and genres with deep bass require robust amplifiers and speakers with a wide frequency range. For riders who mostly enjoy podcasts or the subtlety of classical music, clarity and even midrange performance become more important. Make sure the amplifier’s output rating matches the speaker’s power handling, as mismatched components lead to distortion or even damage. Fitment is equally important in a motorcycle audio system. Double-check your motorcycle’s space limitations—fairings and saddlebags only fit certain speaker sizes, and the available mounting spots may dictate your choices. Look for waterproof, vibration-resistant components designed for motorcycles, not car audio. Integration also matters: decide if you want to keep your stock head unit, connect additional accessories, or run Bluetooth and hands-free controls. Planning for integration now saves headaches later, guaranteeing the best possible sound quality and reliability on every journey. Expert insight: "The correct motorcycle amplifier delivers crisp power without draining your bike’s battery." Match amp ratings to motorcycle speakers for optimal performance Ensure every audio component is waterproof and vibration-resistant Plan integration with existing audio or accessories for seamless functionality When planning your audio upgrade, it's also wise to consider how seasonal changes can impact your motorcycle's performance and the longevity of your new sound system. For practical advice on keeping your bike in top shape throughout the year, check out these seasonal bike care secrets every rider must know—a resource that pairs perfectly with your audio upgrade plans. Pre-Install Checks: Preparing Your Motorcycle for an Audio System Upgrade Before diving into your motorcycle amp and speaker install, preparation is key to a safe and smooth installation process. Begin with a checklist: confirm all wiring in your current audio setup is compatible with your new components. Verify that you have strong, corrosion-free mounting points for speakers and amplifiers—these anchor points prevent rattling and maintain sound quality. Evaluate the available space on your bike, ensuring your new amplifier and speakers won’t interfere with controls, steering, or critical electronics. Also, check the battery and charging system to prevent power issues after upgrading your audio system. Make sure all planned upgrades—especially more powerful amplifiers—are within your electrical system’s capabilities. Double-check the weatherproofing of your new gear: outdoor-rated speakers, sealed connectors, and covered amplifiers are vital for reliability. Careful preparation reduces installation headaches and sets the stage for a perfect motorcycle sound system tailored to your needs. Step-by-Step Guide to Motorcycle Amp and Speaker Install Tips Disconnecting the battery—Start with safety; always remove the negative terminal to prevent shorts or shocks during your install. Removing existing stereo components—Carefully take out factory speakers, head units, and wiring, noting where connectors and fasteners belong. Mounting the amplifier and running new wires—Choose a dry, vibration-resistant spot for the amp. Run shielded wiring through safe, unobstructed frame paths. Installing motorcycle speakers and verifying placement—Mount new speakers in the designated fairing, bar, or saddlebag positions. Tighten hardware and angle speakers toward your riding position for optimal sound. Connecting and testing your new audio system—Securely attach wires, double-check all connections, and reconnect the battery for a thorough test ride and audio check. For visual learners, here’s a step-by-step how-to video guiding you through the installation process for a motorcycle stereo system, amplifier, and speakers—complete with expert tips for safe wiring and exceptional sound results. Motorcycle Speaker Placement: Maximizing Your Stereo System’s Sound Quality The placement of motorcycle speakers is crucial for maximizing your motorcycle stereo system’s sound quality. Front fairing locations typically offer the best directional projection, sending sound directly toward the rider’s ears and cutting through wind and highway noise. For cruisers and touring bikes, adding speakers to saddlebags or rear positions can create a surround-sound effect, enveloping the rider for a richer audio experience. Speaker direction also matters—angle your motorcycle speakers for a direct line with your helmet position to reduce audio loss and minimize distortion. When possible, avoid placing speakers near engine or exhaust outlets, as heat and vibration can impact longevity and clarity. Secure mounting reduces rattle and distortion, ensuring your music or navigation instructions remain clear, crisp, and powerful, whether you’re navigating city traffic or powering down the interstate. Key Tips for Improving Your Motorcycle Audio System and Sound Quality Use shielded cables for better audio fidelity and noise resistance Secure and orient speakers properly for optimal projection Adjust amplifier gain settings to boost clarity and reduce distortion "Fine-tuning gain and EQ settings creates vastly improved sound quality on a motorcycle audio system." Troubleshooting Motorcycle Audio System Issues Diagnosing power and wiring problems—Use a digital multimeter to check for loose or corroded connections, shorts, or underpowered components. Resolving static or poor sound quality—Ensure all ground wires are tightly attached to clean, unpainted chassis points and upgrade to shielded cables if needed. Troubleshooting amplifier and speaker connections—Systematic inspection will reveal crossed polarities, loose terminal screws, or bad fuses. Advanced Upgrades: Adding Saddlebag Speakers and Custom Audio System Features When to consider saddlebag speaker upgrades—If you crave even more immersive sound, saddlebag speakers expand the audio stage and improve surround quality. Integrating custom LED lighting—RGB or accent lighting can sync with your audio system, turning your motorcycle into a rolling light show for night rides. Using Bluetooth and wireless controllers—Upgrade to wireless controls for safer, more convenient adjustments of your motorcycle audio system without letting go of the handlebars. Watch this short video to see how saddlebag speakers are installed as part of a full motorcycle stereo system upgrade, including tips on secure mounting, wiring, and synchronization with existing audio. Comparing Motorcycle Amplifiers: Class D vs. Other Options Amplifier Type Efficiency Size Heat Output Power Output Pros Cons Class D Very High Compact Low Strong Energy-efficient, fits most motorcycles, low heat May have slight distortion at max output Class A/B Moderate Medium Medium Excellent Balanced sound, low distortion Larger size, runs hotter Factory (OEM) Low Small Low Basic Plug-and-play, bike-specific Lower power, limited upgrade options Maintenance Best Practices for Your Motorcycle Stereo System Inspect wiring and connectors periodically for corrosion, tightness, or signs of wear Keep motorcycle speakers clean and dry—Gently remove road dirt and moisture from grilles and cones to preserve great sound Perform amplifier checks regularly—ensure adequate airflow and test operation for peak sound quality People Also Ask: Your Biggest Motorcycle Audio System Questions Answered What is the ideal wattage for a motorcycle amplifier? Most riders find that an amplifier rated between 50-100 watts RMS per channel is optimal for motorcycle audio systems, striking a balance between volume and clarity while respecting a motorcycle's limited electrical capacity. Can you add more speakers to an existing motorcycle sound system? Yes, you can safely add extra speakers or a subwoofer by pairing them with a capable amplifier and upgraded wiring. This can significantly enhance your motorcycle stereo system for a more immersive on-road audio experience. Is waterproofing necessary for motorcycle audio components? Absolutely. Because motorcycles face rain, washing, and high humidity, always use waterproof motorcycle speakers, amplifiers, and wiring to ensure long life and clear sound from your motorcycle stereo. Frequently Asked Questions About Motorcycle Amp and Speaker Installation How long does a typical motorcycle sound system install take? Are aftermarket motorcycle stereo systems compatible with all bikes? What are telltale signs of audio system installation errors? Key Takeaways for Your Next Guide to Motorcycle Amp and Speaker Install Tips Plan your motorcycle stereo system upgrade around your riding style and sound preferences Use quality motorcycle amplifiers and speakers for a clear, powerful audio experience Follow this guide to motorcycle amp and speaker install tips for reliable installation and lasting performance Ready for the Ultimate Motorcycle Audio Experience? Call Nasty Performance Motorcycle Shop Today: 847-458-4858 Upgrading your motorcycle’s audio system is just one piece of the puzzle when it comes to enjoying every ride to the fullest. To truly protect your investment and keep your bike performing at its best, it’s essential to master year-round maintenance strategies. Discover expert tips for prepping your motorcycle for every season by exploring seasonal bike care secrets every rider must know. This guide will help you extend the life of your audio upgrades and ensure your motorcycle is always ready for the road, no matter the weather. Take your riding experience to the next level by combining superior sound with smart, proactive care.

Step-by-Step Process for Motorcycle Fairing Audio Upgrades: Everything You Need to Know

Did you know that over 70% of riders who upgrade their motorcycle fairing speakers report a significant boost in both sound clarity and overall audio experience—even at highway speeds? For many motorcycle enthusiasts, the roar of the engine has always been the soundtrack to every ride. But there’s a growing wave of riders seeking more: crisp, immersive sound from cutting-edge motorcycle audio systems. Whether you’re cruising on a touring motorcycle or ripping through city streets, a thoughtful, step-by-step process for motorcycle fairing audio upgrades can dramatically change both your comfort and your connection to the road. This comprehensive guide reveals every essential detail from system selection to troubleshooting and professional installation—so you can explore the full possibilities of your ride’s sound. An Eye-Opening Fact About Motorcycle Fairing Audio Upgrades Motorcycle fairing audio upgrades are not just a luxury for audiophiles—they’ve become a vital consideration for everyday riders seeking a safer and more enjoyable journey. Studies have shown that high-quality fairing speakers can help bikers maintain focus and reduce fatigue, especially on touring motorcycles at highway speed. With weatherproof, purpose-built motorcycle fairing speakers, you can experience sound quality that rivals many home audio kits, even as wind, engine, and road noise threaten to drown out ordinary setups. The evolution of motorcycle audio means riders now expect a well-matched audio system—one that combines digital signal finesse, speaker size optimization, and installation precision for every riding condition. Why the Step-by-Step Process for Motorcycle Fairing Audio Upgrades Matters to Riders Embarking on a step-by-step process for motorcycle fairing audio upgrades ensures that every part of your audio system works in harmony—from the fairing speaker size to amplifier choice and wiring integrity. For riders seeking reliability and peak audio experience, skipping steps can mean the difference between clear sound at highway speeds and frustrating distortion or complete system failure. Following a structured installation guide means you’ll avoid common pitfalls, especially in tricky stages like wire routing or integrating advanced features such as Bluetooth connectivity. Upgrading fairing speakers isn’t just about adding volume—it’s about engineering a balanced system tailored for your bike’s unique fairing, boosting both sound clarity and system reliability for all your adventures. What You’ll Learn: Mastering the Step-by-Step Process for Motorcycle Fairing Audio Upgrades Understand key components of motorcycle fairing speaker systems How to select the right fairing speakers for your setup Essential steps in the motorcycle audio upgrade process Tips on wiring, amplifier choice, and professional installation options FAQs and expert insights for motorcycle fairing audio upgrades Understanding Motorcycle Fairing Audio: The Essentials What Is a Motorcycle Fairing and How Does It Affect Audio? At its core, a motorcycle fairing is the panel or shell placed at the front or sides of a bike—primarily designed to reduce drag and protect the rider from wind and debris. However, as technology advanced, the motorcycle fairing became the prime real estate for integrating audio systems and speakers. The unique construction of motorcycle fairings—smooth curves, airflow management, and often limited internal space—presents unique opportunities and challenges for sound quality. When upgrading your fairing speaker system, the choice of speaker size and how the fairing directs acoustics can make or break sound clarity at varying highway speeds. Custom motorcycle audio setups rely on matching the right fairing speakers with proper enclosure and placement, transforming your fairing from a simple windbreaker into a concert hall on wheels. Key Elements of Motorcycle Audio and Fairing Speakers A truly immersive motorcycle audio system begins with understanding its core elements: the fairing speakers, amplifier, wiring, and digital signal processor. Motorcycle fairing speakers are typically engineered to withstand the elements—rain, dust, and vibration—making weatherproofing a critical factor. The speaker size, measured in inches (commonly 4”, 5. 25”, 6. 5”, or 6”x9”), will affect both volume and frequency range, directly influencing sound clarity. Amplifiers boost power to your motorcycle speakers, allowing them to cut through wind noise at highway speed. Meanwhile, digital signal processors help refine audio by filtering out unwanted frequencies, emphasizing vocals, or balancing bass and treble for a superior listening experience. Each component in the upgrade process must be carefully chosen to suit your specific motorcycle fairing and riding conditions. Comparing Types of Motorcycle Fairing Speaker Systems Not all motorcycle fairing speaker setups are created equal. The most common types include coaxial speakers, which integrate tweeters and woofers for compact installations, and two-way or three-way component systems that split frequency ranges for enhanced sound quality. Touring motorcycle owners may opt for multiple fairing speakers or rear speakers for a fuller soundstage, while sportbike riders prioritize compactness without sacrificing clarity. Speaker sizes also matter; larger speakers typically handle more power and deeper bass, but careful attention to mounting brackets and space availability within your motorcycle fairings is crucial. Additionally, some systems bundle amplifiers or digital signal processors for comprehensive audio performance. Choosing among these options comes down to balancing installation complexity, speaker size compatibility, and audio upgrade goals. As you compare different fairing speaker systems and plan your installation, it's also important to consider how seasonal changes can impact your bike's performance and audio reliability. For practical tips on keeping your motorcycle in top shape year-round, check out these essential seasonal bike care secrets every rider should know. Table Comparing Common Motorcycle Fairing Speaker Sizes and Power Ratings Speaker Size Typical Power Handling (RMS) Suitable For Notes 4" 25-40W Compact Fairings, Entry-Level Upgrades Space-saving, moderate sound clarity, ideal for city riding conditions. 5.25" 40-60W Standard Fairings, Balanced Setups Good midrange, fits most motorcycles without extensive modifications. 6.5" 60-100W Touring Motorcycles, High-Performance Audio Kits Enhanced bass response, excellent for highway speed audio experience. 6”x9” Oval 90-150W Full Touring Setups Maximum volume and range, requires larger fairings or custom mounting brackets. Choosing the Right Fairing Speakers for Your Motorcycle Audio System Factors to Consider: Speaker Size, Power, and Placement When diving into the step-by-step process for motorcycle fairing audio upgrades, the first major decision is the selection of speaker size and power rating. Larger speaker sizes (such as 6. 5” or 6”x9”) are preferred for touring motorcycles due to their ability to handle higher volumes without distortion—crucial for maintaining sound clarity at highway speeds. Compact fairings may only allow for 4” or 5. 25” fairing speakers, but with the right amplifier and DSP, impressive results are still possible. Placement matters as much as size: positioning your motorcycle speakers so they face the rider, unobstructed by handlebars or windscreens, increases both sound quality and system reliability. Always verify your motorcycle fairing’s available mounting space before purchasing speakers or audio kits; the right fit ensures the installation process is safe, secure, and aesthetically pleasing. Matching Motorcycle Speakers with Touring Motorcycle Fairings Touring motorcycles are favorites for riders seeking the ultimate long-distance comfort and audio quality. Their expansive motorcycle fairings often accommodate larger, higher-wattage fairing speakers, setting the stage for superior sound quality. The challenge becomes matching the speaker size not only to the available space but also integrating amplifiers and rear speakers for full surround sound. Too large, and you risk interference with controls or aesthetics; too small, and you lose valuable sound clarity at highway speeds. Many aftermarket vendors offer tailored fairing speaker kits for popular touring motorcycle models, streamlining the installation process. Riders benefit from consulting installation guides or seek professional install shops to ensure the audio upgrade complements both the fairing’s aerodynamics and structural integrity. Expert Quote: “Choosing the correct fairing speaker dramatically impacts sound quality and safety during your ride.” Brands and Options for Motorcycle Fairing Speakers When searching for fairing speakers, the market presents a range of trusted brands—from established names known for automotive audio such as Rockford Fosgate and JBL, to niche manufacturers specializing in motorcycle audio like Hogtunes and Kicker. Each comes with unique pros and cons: some prioritize raw power and bass, others focus on sound clarity and easy integration with existing motorcycle audio systems. Riders should always consider whether speakers are explicitly weatherproofed, if mounting brackets are included, and compatibility with digital signal processors for fine-tuning audio performance. Reading product reviews, visiting motorcycle audio shops, or exploring the full range of offerings at professional install locations will help guide the optimum choice for your personal riding style and upgrade goals. Top Fairing Speakers for Motorcycle Audio: Pros and Cons Rockford Fosgate: Power and reliability, but may require custom fitting. Hogtunes: Designed for Harley and touring motorcycles, often plug-and-play. Kicker: Known for bass and durability, ideal for riders seeking premium sound quality. JBL: Excellent digital signal processing, premium clarity; price point is higher. Boss Audio: Budget-friendly, wide compatibility, but not as much punch at highway speed. Preparing for a Step-by-Step Motorcycle Fairing Audio Upgrade Tool Checklist for Installing Fairing Speakers Every successful fairing speaker installation starts with the right tools. A complete kit should include a set of screwdrivers for removing the fairing and mounting speakers, wire strippers and crimpers for electrical connections, and a multimeter for verifying voltage and detecting wiring faults. A socket and wrench set is vital for unbolting stubborn fairing hardware, and some installations may also require specialty tools for prying panels or adjusting mounting brackets. Organized preparation not only speeds up the step-by-step process for motorcycle fairing audio upgrades but also ensures your motorcycle audio system is built safely and to last. Keeping all your tools accessible on a clean workbench, and following installation guides precisely, are key practices in any DIY or professional install scenario. Screwdrivers Wire strippers and crimpers Multimeter Socket and wrench set Safety Precautions Before Starting the Motorcycle Fairing Audio Upgrade Prioritizing safety is a non-negotiable step in any audio system upgrade. Before tackling your motorcycle fairing, disconnect the battery to prevent accidental shorts or shocks. Always work on a stable, flat surface with adequate lighting—preferably in a garage or workshop where you can keep track of small components. Use protective gloves when handling metal fairings or wiring, and eye protection to guard against flying debris or accidental tool slips. It’s smart to photograph each stage of disassembly, especially if you’re unfamiliar with your motorcycle fairing’s internal structure; this makes reassembly and troubleshooting far easier if you run into unexpected challenges. Never force parts apart—if a fastener resists, double-check for hidden screws or durable adhesive. Step-by-Step Process for Motorcycle Fairing Audio Upgrades: Removal Stage How to Remove the Motorcycle Fairing Safely The first physical step in the upgrade process is carefully removing the motorcycle fairing. Start by consulting your bike’s manual or installation guides, noting the location of all screws, bolts, and clips. Remove fasteners methodically using the correct screwdriver or wrench to prevent stripping or chipping paint. Set hardware aside in labeled containers to make reassembly seamless. As you detach the fairing, support it with both hands to avoid sudden drops that could crack the housing or damage integrated controls. Avoid using force—most modern motorcycle fairings are designed to come apart smoothly when the right fasteners are removed. Take photos or notes at each step, especially if there are intricate wiring harnesses or connectors attached to stock fairing speakers. Removing Old Fairing Speakers and Inspecting Components With the fairing removed, the next task is to extract any existing fairing speakers. Gently unfasten speaker mounts or brackets, taking care not to damage adjacent wiring. Before pulling the speakers out, disconnect power and signal lines, making note of how each connector fits. Now inspect the exposed cavities and wiring for wear, corrosion, or loose connections—these are common culprits for sound quality issues, even after an upgrade. Also verify that mounting brackets are secure, and no water or dust ingress has affected system reliability or previous installation involves. Taking the time to thoroughly check every component saves time and headaches in later stages of the audio upgrade. Checklist: What to Inspect During Speaker Removal Speaker wiring for fraying or corrosion Mounting brackets for security and alignment Fairing cavities for moisture or dust Connector pins for signs of burning or bending Existing holes or slots for fitting new speaker sizes Cleaning and Preparing the Fairing for New Motorcycle Speakers Before installing any new fairing speaker components, thoroughly clean the fairing’s internal surfaces using a soft, damp cloth and mild soap. Remove all dust, grease, and residues that could interfere with mounting or affect sound quality. This is also the time to address minor cracks or surface damage—repairing or stabilizing imperfections boosts the system reliability of your upgraded motorcycle audio system. If your new speakers require custom mounting brackets or additional holes, mark and pre-drill with careful measurements so the final installation aligns perfectly with the fairing’s intended structure. Clean work not only influences the finished look but also ensures a tight, vibration-free fit that will last over countless miles and varied riding conditions. Step-by-Step Process for Motorcycle Fairing Audio Upgrades: Installation Stage Wire Routing and Connections for Motorcycle Fairing Speakers Efficient, well-organized wiring is critical to both the performance and safety of any motorcycle audio upgrade. Start by planning your wire routing, using existing channels or flexible conduit within the motorcycle fairing whenever possible. Secure wires with clips or zip ties to prevent movement, chafing, or pinching that could lead to shorts or audio interference. Always use marine- or automotive-grade cabling rated for outdoor use, and choose connectors that resist moisture and corrosion. For digital signal or amplified systems, carefully match polarity and signal routing to avoid phasing issues and to maintain the full frequency range your new fairing speakers can deliver. Once everything is positioned, double-check each connection with a multimeter before powering up the motorcycle audio system for the first time. Installing New Fairing Speaker Components Securely With the wiring in place, it’s time to securely mount the new motorcycle fairing speakers. Start by aligning each speaker so it sits flush against the fairing surface—uneven mounting can result in unwanted vibrations and diminished sound clarity. Use any supplied gaskets or mounting hardware to create a tight seal, paying attention to torque specs if provided in the installation guides. For larger speaker sizes or multi-component systems (like tweeters and midrange drivers), confirm the arrangement doesn’t block instrumentation or controls. Finally, double-check all screws, ensure speaker grills are firmly attached, and confirm that no loose hardware could rattle free while riding at highway speeds. Attention to these details ensures your audio upgrade looks factory-finished and delivers impressively clear sound, no matter your riding conditions. Mounting the Amplifier for Motorcycle Audio (if applicable) Upgrading to a high-performance motorcycle audio system may require installing an external amplifier, especially for larger fairing speakers. Select a mounting location inside the fairing or under the seat that provides adequate ventilation and protection from water. Secure the amplifier with vibration-resistant brackets, and route power and signal wires using grommets to prevent chafing. Be sure to follow manufacturer recommendations for ground wire placement and fuse ratings to maximize safety and protect your new audio investment. With the amplifier in place, connect inputs and outputs, referencing your specific fairing audio system’s wiring diagram to guarantee the correct signal flow. Before final assembly, power up and confirm that all channels and speaker sizes are functioning as intended. Table Summarizing Popular Amplifier Choices for Motorcycle Fairing Audio Amplifier Brand Channels Power Output (RMS) Key Features Fairing Compatibility Rockford Fosgate 2/4 75W - 150W Compact, Class D, Weatherproof Fits most touring and bagger fairings Kicker 2/4 50W - 100W Adjustable DSP, Heat Protection Popular for Harley and metric cruisers Hogtunes 2 70W - 100W Plug and Play Kits Designed for Harley-Davidson fairings Testing the Motorcycle Fairing Speakers: Essential Checks Once installation is complete, systematic testing is vital for sound quality and system reliability. Begin with all connections exposed, activating the audio system at low volume to check for consistent sound from each fairing speaker and channel. Listen for unwanted hums, distortion, or silence that could indicate a wiring or polarity issue. Gradually increase volume, simulating highway speeds to detect rattles or clarity loss. Use the onboard or smartphone-based digital signal processor (DSP) to fine-tune the frequency range and balance for your preferred listening profile. Finally, check that all mounting brackets remain secure and that protective grills and covers sit flush. If any issues are discovered, troubleshoot immediately before you reattach the fairing and get back on the road. Optimizing Your Motorcycle Audio: Tuning and Custom Adjustments How to Tune Your Motorcycle Fairing Speakers for Clear Sound Fine-tuning is the final step in the step-by-step process for motorcycle fairing audio upgrades—and it can make the difference between acceptable and outstanding audio quality. Start by adjusting your EQ settings to boost midrange (for voice and instruments) while trimming excess bass, which can get muddy at highway speed. Utilize the digital signal processor to target problematic frequency ranges and eliminate peaks or dips in volume. If your motorcycle speakers allow for physical angle adjustments, try positioning them directly toward the rider’s ears for maximum clarity. For touring motorcycles or group rides, consider a moderate volume setting that lets background music complement engine noise without overwhelming your senses. Tuning isn’t a one-and-done task: revisit your settings in different riding conditions and experiment until your sound clarity is precisely what you envision. Troubleshooting Common Issues with Motorcycle Audio Upgrades Even the best motorcycle audio systems may encounter hiccups, especially in demanding riding conditions. Common problems include static or distortion from poor connections, sudden volume drops due to weak wiring, and unwanted rattles from loosely mounted fairing speakers. To troubleshoot, begin by isolating each component: test alternate cables, verify secure power and grounding, and examine every connector for corrosion or looseness. Sometimes, the culprit is user error in DSP or amplifier settings—reset to factory defaults, then re-tune. For persistent issues that impact system reliability or sound quality at highway speeds, don’t hesitate to consult professional install shops or reference detailed installation guides provided by fairing speaker manufacturers. Common Motorcycle Fairing Audio Problems & Solutions: Static sounds: Clean and re-seat wiring connections. Low volume: Check amplifier gain and DSP settings. Rattling: Tighten all mounting brackets and hardware. Distortion at high volume: Reassess speaker size and amplifier compatibility. Complete silence: Inspect fuses and battery connections. When to Consider a Professional Installation for Motorcycle Fairing Audio Benefits of Professional Install for Motorcycle Audio While many riders enjoy the DIY route, professional installation offers peace of mind and long-term performance benefits. Certified technicians can handle the nuances of each motorcycle fairing, making sure that fairing speakers are installed securely and that amplifier integration is seamless. For those looking to explore the full potential of their motorcycle audio system—including advanced digital signal setups or custom fairing modifications—a professional install can guarantee top-tier sound quality, reduced risk of electrical faults, and compliance with warranty requirements. If your upgrade involves cutting or major fairing changes, professional shops often have specialized tools and experience to complete the job cleanly—a major plus for complex touring motorcycle audio kits. What to Expect from Professional Installation Shops At a professional installation shop, expect a detailed consultation on your riding habits, preferred sound quality, and motorcycle fairing type. Technicians will recommend optimal speaker sizes, amplifier models, and even rear speakers tailored to your touring motorcycle. Installation involves careful disassembly and reassembly, with thorough testing at each stage. Established shops use high-quality wiring, grommets for vibration isolation, and waterproofing to safeguard against riding conditions. Most reputable shops offer a warranty on their work, giving riders peace of mind that their motorcycle audio system will stand up to years of use—even in varying weather and highway speed scenarios. Maintaining and Upgrading Motorcycle Fairing Audio Over Time Long-Term Care for Motorcycle Fairing Speakers Ongoing care extends the lifespan and performance of your motorcycle fairing speakers. Regularly check wiring and connectors for corrosion, especially if riding in wet or dusty conditions. Gently clean speaker grills to prevent debris buildup from muffling sound clarity, and inspect all mounting points for tightness. When storing your motorcycle, use covers to shield the audio system from direct sun and rain. Following a simple maintenance routine helps you catch early signs of wear— protecting your investment and ensuring the best audio experience for every ride. Upgrading Motorcycle Audio Technology: What’s Next? The world of motorcycle audio never stands still. Bluetooth connectivity, app-based DSP control, and lightweight amplifiers are rapidly becoming standard. Riders seeking further enhancements may look to wireless speaker systems or integrated navigation-audio combos tailored for long-haul touring motorcycles. As motorcycle fairings evolve with new shapes and materials, expect future audio upgrade kits to become simpler to install, more robust against the elements, and even more immersive in their sound quality— helping every rider explore the full spectrum of their music, podcasts, or navigation assistance on two wheels. Expert Answers: People Also Ask What class amp is best for a motorcycle? Answer: Explaining amp classes and how to match with motorcycle fairing speaker systems. For most motorcycle fairing speaker systems, Class D amplifiers are the preferred choice. These amps are compact, energy-efficient, and produce very little heat—making them ideal for confined spaces inside motorcycle fairings. They match well with modern fairing speakers by delivering clean, consistent power that boosts sound clarity without draining your motorcycle battery excessively. When choosing, ensure the amplifier’s output matches your speakers’ power ratings for balanced, distortion-free audio at all speeds. What gives Harley its sound? Answer: Delving into engine design and exhaust tuning that create the distinct Harley sound. Harley-Davidson’s signature sound comes from its unique V-twin engine design and specifically staggered ignition timing, resulting in an uneven firing pattern. This arrangement, in combination with custom exhaust tuning, produces the iconic “potato-potato” rumble loved by motorcycle enthusiasts worldwide. The deep resonance and uneven rhythm can also impact how motorcycle audio systems sound at idle—so riders often customize both for a truly personal experience. How to make a motorcycle sound like a Harley? Answer: Exploring modifications, including exhaust changes, for emulating the Harley sound. To emulate the Harley sound, most bikes require both engine tuning and custom exhaust modifications. High-flow pipes and slip-on mufflers alter backpressure and resonance, helping standard bikes reproduce that deep, throaty note. While fairing speaker upgrades improve music clarity, achieving Harley’s unique mechanical tone is all about mechanical parts and the sonic “signature” built into their V-twin engines and exhaust systems. How do I make my motorcycle speakers louder? Answer: Practical steps for increasing volume and clarity of motorcycle fairing speakers. To boost the volume of your motorcycle fairing speakers, start by upgrading to a higher-output amplifier and speakers with a greater power-handling capacity. Ensure all wiring is of high quality to avoid voltage drops, and tighten connections for minimal signal loss. Fine-tune the DSP or equalizer to focus on frequencies most audible at highway speeds. For best results, ensure your speakers are securely mounted within the fairing—loose installations can sap both loudness and sound clarity. Frequently Asked Questions About the Step-by-Step Process for Motorcycle Fairing Audio Upgrades What is the average installation time for motorcycle fairing audio upgrades? Most upgrades take 2-4 hours for experienced DIYers, or less with professional install services, depending on speaker size, complexity, and fairing type. Can I install fairing speakers on any type of motorcycle fairing? Most modern motorcycle fairings can accommodate speakers, but always verify available space, wiring access, and mounting bracket compatibility before purchase. How important is weatherproofing for motorcycle fairing audio? Extremely important; all fairing speakers and wiring exposed to outdoor conditions should be certified weatherproof to ensure durability and fire safety. Do upgraded motorcycle audio systems drain the battery faster? Powerful systems may consume more energy, especially if using large amplifiers or Bluetooth connectivity. Ensuring the proper amp class and careful wiring helps prevent excessive drain. Is it worth investing in premium motorcycle fairing speakers? Investing in quality fairing speakers pays off in better sound clarity, system reliability, and resistance to harsh riding conditions. Key Takeaways From the Step-by-Step Process for Motorcycle Fairing Audio Upgrades Preparation and choosing the right equipment is critical for success Professional installs offer peace of mind, but many home mechanics can achieve great results Routine maintenance of your motorcycle audio setup extends its life If you’re ready to take your motorcycle experience to the next level, remember that a great audio system is just one part of a well-maintained ride. Staying on top of seasonal maintenance not only protects your investment in upgraded fairing speakers but also ensures your bike performs flawlessly in any weather. For a deeper dive into expert strategies that keep your motorcycle running strong all year, explore our comprehensive guide to seasonal bike care. Discover how proactive care and smart upgrades work hand-in-hand to deliver the ultimate riding experience—mile after mile, season after season. Ready to Upgrade? Call Nasty Performance Motorcycle Shop Today: 847-458-4858 Enjoy every mile with a custom motorcycle audio experience—contact Nasty Performance for expert guidance and professional installation of your motorcycle fairing speaker system!

Terms of Service

Privacy Policy

Core Modal Title

Sorry, no results found

You Might Find These Articles Interesting

T
Please Check Your Email
We Will Be Following Up Shortly
*
*
*