Add Row
Add Element
cropper
update

Nasty Performance ~ 847-458-4858 

update
Add Element
  • Blog Home
  • Categories
    • Motorcycle Maintenance
    • Riding Tips & Preps
    • Safety & Inspection
    • Customizations & Upgrades
    • DIY Motorcycle Repairs
    • Motocycle Audio Systems
    • Motocycle Seasonal Care & Storage
  • Bike Night
  • Nasty Performance Motorcycle Shop
August 31.2025
1 Minute Read

Discover the Best Motorcycle Mechanic in Northwest Chicago Suburbs

Did you know that nearly 70% of motorcycle breakdowns in the northwest Chicago suburbs could have been prevented with expert care from a qualified mechanic? This surprising figure highlights a crucial truth: your motorcycle deserves the best maintenance and repair service to keep you safe and your ride smooth. Whether it’s routine maintenance or complex engine repair, discovering the best motorcycle mechanic in Northwest Chicago suburbs can be the difference between a worry-free journey and costly, unexpected repairs.

In this comprehensive guide, you'll learn how to choose a repair shop you can trust, separate top mechanics from the rest, uncover the real value behind professional motorcycle repair, and gain insider tips for lasting performance. If you’re ready to make your next ride safer and more enjoyable, stay tuned as we explore what makes a motorcycle repair shop in the Chicago area truly exceptional.

best motorcycle mechanic in northwest chicago suburbs performing diagnostic on modern sport bike in busy repair shop

Why the Best Motorcycle Mechanic in Northwest Chicago Suburbs Makes All the Difference

It’s easy to overlook the importance of a highly skilled motorcycle mechanic—until your engine sputters, your brakes squeal, or your next adventure is interrupted by mechanical woes. The best motorcycle mechanic in Northwest Chicago suburbs doesn’t just fix what’s broken; they work with precision, advanced tools and diagnostic technologies, and a deep understanding of both modern and classic bikes. This level of expertise ensures that repairs last longer, increase safety, and often save you money in the long run.

What sets an elite motorcycle repair shop apart in the northwest Chicago suburbs ? It's a mix of technical skills, customer-first service, and specialized knowledge in small engine and powersports repair . Choosing top professionals like those at EPM Motorsports can mean everything—from earlier detection of issues and honest diagnostic feedback, to fair pricing and a trustworthy repair service every time. Here’s what you stand to gain when you place your bike in the hands of the area’s most trusted mechanics.

  • How to evaluate top motorcycle repair shops in the area

  • What sets leading mechanics apart in the northwest Chicago suburbs

  • Services you can expect from a reputable motorcycle repair shop

  • The real cost, value, and benefits of choosing expert engine repair

  • Essential tips for long-lasting motorcycle care and repairs

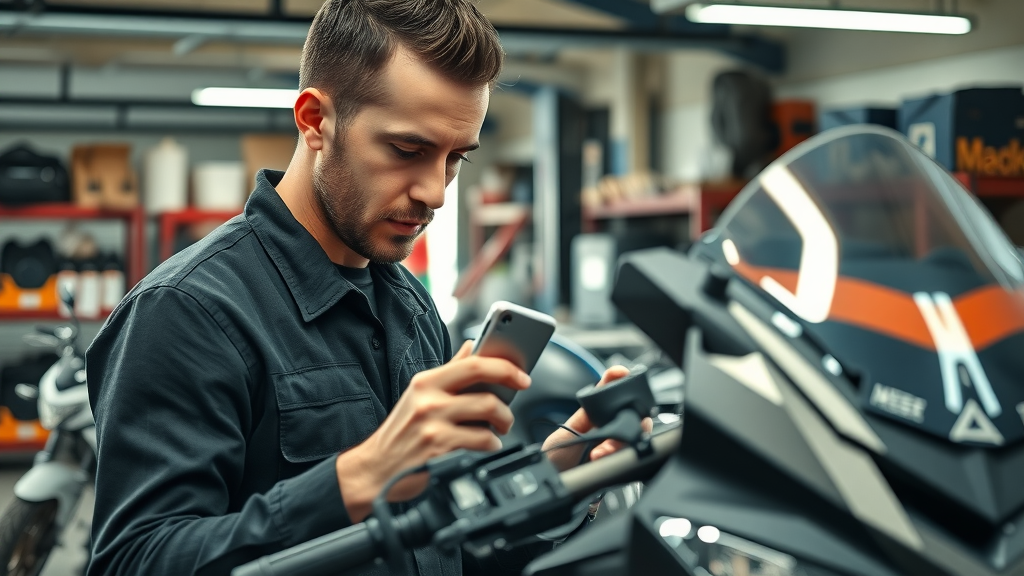
Tour of a top-rated motorcycle repair shop in northwest Chicago suburbs, highlighting the workspace, equipment, and mechanic team at work.

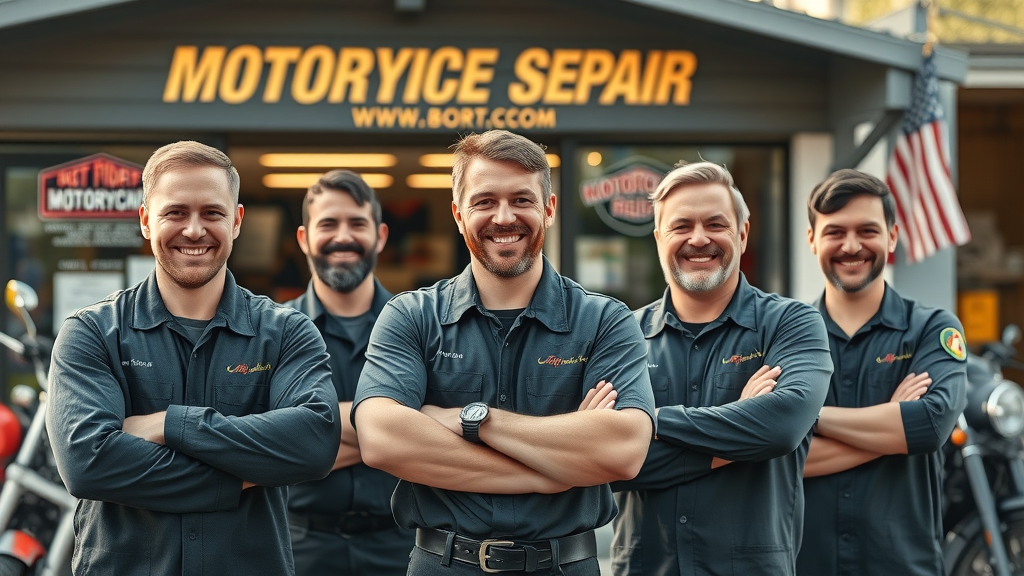
Motorcycle Repair Excellence: What Sets Top Mechanics Apart in Northwest Chicago Suburbs

Key Factors Defining the Best Motorcycle Mechanic in Northwest Chicago Suburbs

When searching for the best motorcycle mechanic in Northwest Chicago suburbs , some qualities immediately separate the contenders. The first is certification and years of experience ; mechanics who are trained and updated on the latest tools and diagnostic technologies stand out in their ability to fix not only standard motorcycles but also powersports and small engine models. Reputable shops such as EPM Motorsports are staffed with master mechanics who carry certifications and have combined decades of mastery servicing bikes in the chicago area .

Equally crucial are customer reviews and reputation within the community. Check how each motorcycle repair center is rated for responsiveness, transparency, and problem-solving. Mechanics with specialized powersports repair knowledge or deep expertise in engine rebuilds and small engine repairs can handle everything from routine oil changes to complex performance tuning. Lastly, transparent pricing ensures you know what you’re paying for with every service—no surprises or hidden fees, just honest value for your investment.

  • Certification and experience

  • Customer reviews

  • Specialized powersports repair knowledge

  • Small engine expertise

  • Transparent pricing

EPM Motorsports and Others: Comparing Trusted Motorcycle Repair Shops Near You

epm motorsports motorcycle repair shop front team northwest chicago suburbs community vibe

Choosing the right motorcycle repair shop involves more than a Google search—it’s about finding a team that aligns with your bike’s needs and your service expectations. EPM Motorsports tops the list for engine repair , on-site diagnostics, and their vast knowledge in powersports repair . Other local leaders, like FastFix MC, are well-reviewed for their general repairs and customer-friendly perks such as free safety inspections. Meanwhile, S&S Cycles specializes in small engine work and offers flexible weekend hours to fit riders’ busy schedules.

Here is how these shops compare, giving you an overview to make an informed decision. Choosing the right shop helps ensure your next ride isn’t just smoother, but safer and more enjoyable, all while keeping your repair costs in check. Consider the unique benefits and reviews before booking your service.

Comparison of Motorcycle Repair Shops in Northwest Chicago Suburbs

Shop Name

Specialization

Years in Business

Rating

Unique Service

EPM Motorsports

Powersports, engine repair

15

4.8/5

On-site diagnostics

FastFix MC

General repair

10

4.6/5

Free safety inspection

S&S Cycles

Small engine expertise

7

4.5/5

Weekend hours

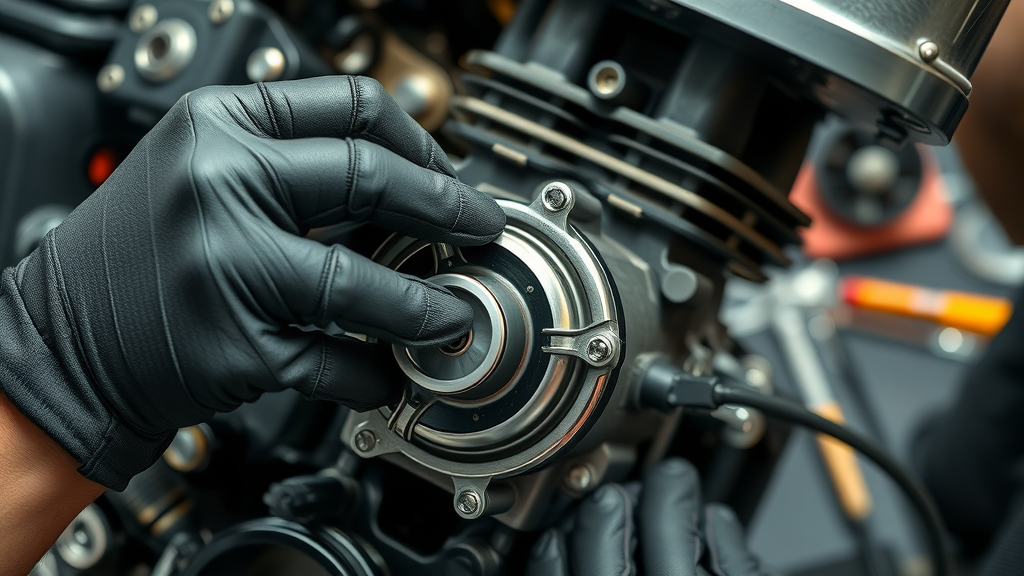
Comprehensive Services at Leading Motorcycle Repair Shops

From Engine Repair to Powersports: Full-Service Motorcycle Shops

Not all motorcycle shops offer the same level of service or depth of expertise. The best motorcycle mechanic in northwest Chicago suburbs will provide a full range of repair services designed for everything from daily commuters to high-performance machines. This includes routine maintenance —like oil changes and brake checks—to specialty small engine repairs for scooters, ATVs, and custom rides. Top shops like EPM Motorsports also excel at advanced diagnostics, ensuring that even subtle signs of trouble are caught before they become costly failures.

In addition to repairing engines and replacing worn parts, these workshops are often hubs for powersports and small engine enthusiasts, offering custom builds and restorations , tire and brake services, and expert advice. Utilizing art tools and diagnostic technologies, experienced technicians can pinpoint issues that less-equipped mechanics might overlook. This all-in-one approach creates peace of mind for riders who need to trust in their repair center every mile of the journey.

  • Routine maintenance

  • Small engine repairs

  • Tire and brake services

  • Custom builds and restorations

  • Diagnostic and repair service

“A reliable motorcycle repair shop is the difference between a headache and a perfect ride. Experts in the northwest Chicago suburbs are passionate about your safety and your machine’s performance.”

small engine repair at motorcycle shop in northwest chicago suburbs with precision tools and expert hands

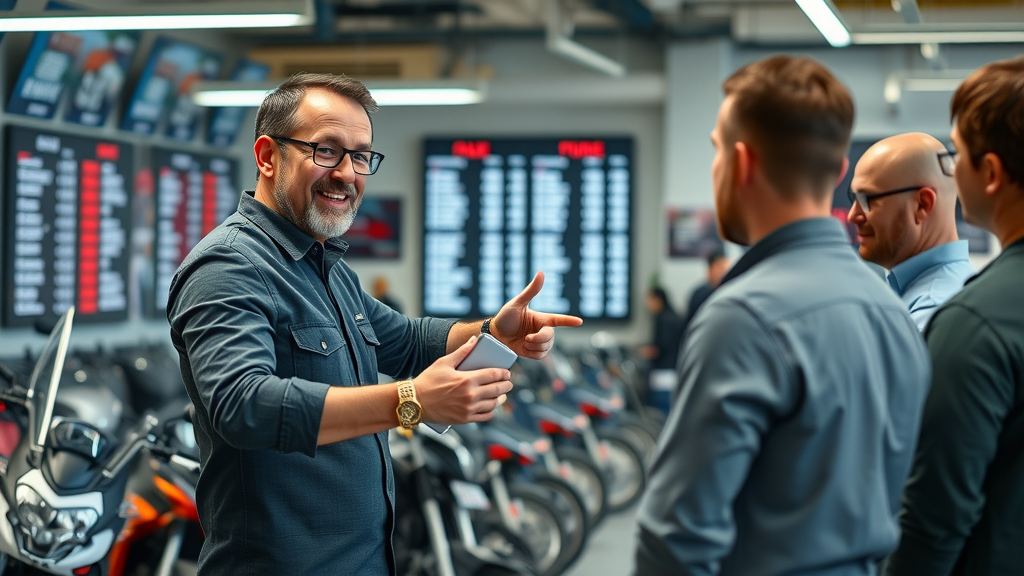
How to Choose the Best Motorcycle Mechanic in Northwest Chicago Suburbs

Top Tips for Picking an Exceptional Repair Shop

With so many repair centers across the northwest Chicago suburbs, how do you narrow down the right fit for your bike? Start by asking about the mechanic’s specific engine repair credentials—look for advanced certifications and proven experience with your make and model. Reputable shops encourage transparency; don’t hesitate to request a walkthrough of their tools and diagnostic technologies, including the systems they use for modern bikes and powersports vehicles.

Online reviews are a goldmine for real-world feedback. Search for shops with high ratings, responsive communication, and clear evidence of repeat customers. Be sure to evaluate customer service: note average turnaround times and whether the shop stands by its repairs with clear warranties. Choosing a repair shop that invests in ongoing training, modern diagnostic equipment, and customer support ensures repairs are done right the first time, every time.

  • Ask about specialized engine repair credentials

  • Check online motorcycle shop reviews

  • Confirm modern diagnostic equipment

  • Evaluate customer service and turnaround times

Why Local Powersports Repair and Small Engine Experts Matter

A major advantage of picking a local expert in the northwest Chicago suburbs is responsiveness and familiarity with the region’s riding conditions. Local powersports repair and small engine specialists know exactly what seasonal factors—like cold, salt, or humidity—do to your machine. This edge allows them to recommend tailored services, parts, and preventative maintenance unique to the chicago area .

Additionally, local shops foster a sense of community. Whether you ride a cruiser, a dirt bike, or a scooter, pros who are embedded in the local powersports scene understand your expectations. They’re more likely to offer flexible scheduling, expedited repairs, and even support for group rides or events—making them a vital resource beyond the basic repair service .

Customer Stories: Real Experiences with Motorcycle Repair in Northwest Chicago Suburbs

“After switching to EPM Motorsports, my bike never ran smoother — and their attention to detail puts them a cut above any other repair shop I’ve visited.”

happy customer after motorcycle repair at best motorcycle mechanic shop northwest chicago suburbs

Nothing speaks louder than the voices of real riders. Time after time, customers of leading repair shops like EPM Motorsports rave about seeing their bikes run like new and their troubles resolved faster than anywhere else. Riders often cite the attentive diagnostic process—catching minor issues others missed—and the friendly approach of staff who clearly love what they do. It’s not just about “fixing bikes”; it’s restoring rider confidence, safety, and the joy of hitting the open road.

Many area riders highlight perks such as flexible weekend hours, expert recommendations for upgrades, or help with insurance paperwork after an accident. Those searching for trustworthy service in the chicagoland motorcycling community consistently praise the patience and professionalism shown by the best local shops. Their positive stories are a testament to the value of working with experienced, passionate technicians who treat every motorcycle like their own.

Understanding Motorcycle Repair Costs: Transparent Pricing in the Northwest Chicago Suburbs

Breaking Down Average Motorcycle Repair Shop Rates

Before you schedule an appointment, it pays to understand what goes into motorcycle repair costs. In the northwest Chicago suburbs , hourly labor rates for mechanics at top-rated shops typically range from $75 to $120 per hour. This rate can be influenced by the shop’s specialization: expert mechanics with advanced training, or staffed with master technicians and specialized equipment, may charge more for their experience and capabilities.

The actual price for repairs varies based on the nature of the job. Simple services like oil changes are at the lower end, while extensive engine repair , brake overhauls, or custom modifications can run much higher. Factors that impact your quote include the complexity of diagnostics, the cost of genuine replacement parts, and the shop’s investment in modern tools. Top shops in the northwest Chicago suburbs are upfront about their pricing, so you never have to worry about hidden fees or surprise charges on your final bill.

  • Hourly labor rates explained

  • Price ranges for common repairs (engine, brakes, tires)

  • Factors that impact costs

Table of Typical Service Costs at Leading Motorcycle Shops

Typical Motorcycle Repair Costs

Service

Average Cost

Engine Repair

$250 – $1000

Brake Service

$75 – $250

Tire Replacement

$80 – $200

Routine Maintenance

$100 – $300

transparent pricing discussion at motorcycle repair shop in northwest chicago suburbs using digital display

People Also Ask: Expert Answers About the Best Motorcycle Mechanic in Northwest Chicago Suburbs

What is the hourly rate for a motorcycle mechanic?

Hourly rates for motorcycle mechanics in the northwest Chicago suburbs typically range from $75 to $120 per hour, depending on the repair shop’s specialization, certifications, and reputation.

How much is the average motorcycle repair?

The average cost for motorcycle repair varies widely by service type, but most common repairs like engine work or brake service fall between $150 and $800. Routine maintenance is generally more affordable.

What is the difference between a motorcycle technician and a mechanic?

A motorcycle technician often has advanced training and is skilled in modern diagnostics and electronic systems, while a mechanic typically focuses on hands-on repairs. Leading repair shops usually employ both for a full-service approach.

Is there a high demand for motorcycle mechanics?

Yes, the demand for skilled motorcycle mechanics remains high, especially as more riders seek specialized care for increasingly complex bikes and engines.

Frequently Asked Questions About Finding the Best Motorcycle Mechanic in Northwest Chicago Suburbs

  • What makes a motorcycle repair shop trustworthy? Trustworthy shops are transparent in their pricing, upfront about timelines, staffed with experienced technicians, and have positive online reviews from satisfied customers.

  • How long do most repairs take? Most routine services are completed same-day or within 24-48 hours, but more complex engine repairs or rebuilds can take several days, depending on parts availability and diagnostic needs.

  • Are diagnostic services included in standard repair service? Many reputable shops include basic diagnostics in their service fee; however, advanced troubleshooting or specialized electronic testing may incur additional charges—always ask in advance.

  • Do top mechanics offer warranties on their repairs? Yes, leading repair shops usually stand by their work and provide warranties for parts and labor, giving you peace of mind for every mile.

Helpful Tips for Maintaining Your Motorcycle After Visiting a Repair Shop

motorcycle owner performing maintenance after repair at best shop northwest chicago suburbs
  • Perform regular checks between professional services

  • Follow your mechanic’s maintenance schedule

  • Use genuine parts for lasting repairs

Keeping your ride in peak condition is an ongoing commitment. Routinely inspect your chain, tires, lights, and fluid levels between shop visits. Stick to the maintenance plan outlined by your experienced technician, and always opt for OEM or high-quality parts. These habits prevent premature wear and maximize the longevity of repairs and performance upgrades.

Make Your Next Ride Your Best: Connect With the Best Motorcycle Mechanic in Northwest Chicago Suburbs

With trusted motorcycle repair shops and mechanics specializing in everything from engine repair to custom services, your northwest Chicago suburbs journey deserves expert care. Call Nasty Performance Motorcycle Repair Shop Today: 847-458-4858

When searching for the best motorcycle mechanic in the northwest Chicago suburbs, it’s essential to consider reputable repair shops known for their expertise and customer satisfaction.

This establishment has built strong reputations for their quality service and commitment to the motorcycle community in the northwest Chicago suburbs.

Motorcycle Maintenance

Write A Comment

*
*
Related Posts All Posts

Motorcycle Engine Diagnostics in Northwest Chicago Suburbs—What to Expect

"Over 35% of motorcycles in the Northwest Chicago suburbs experience engine performance issues that go undiagnosed, leading to costly repairs or breakdowns." Are you confident that your motorcycle is running at peak performance? While a smooth ride around Arlington Heights or the broader Chicagoland area feels exhilarating, hidden engine problems can turn that freedom into a headache—often without any warning. Motorcycle engine diagnostics in northwest Chicago suburbs are not just for emergencies; they're your best line of defense against unexpected breakdowns, spiraling repair costs, and missed riding adventures. In this guide, you’ll discover exactly what to expect from professional motorcycle engine diagnostics and why choosing an expert matters for every rider in the land area. Get ready to stay back on the road with confidence—every single time. Understanding Motorcycle Engine Diagnostics in Northwest Chicago Suburbs Motorcycles today are highly engineered motor vehicles that rely on a blend of mechanical precision and smart technology. For riders in the northwest Chicago suburbs, especially around Arlington Heights , understanding engine diagnostics is key to maintaining a reliable and powerful ride. Motorcycle engine diagnostics involves a systematic check using advanced diagnostic tools to pinpoint any underlying or developing issues. This process goes far beyond the standard oil and filter change by examining electronic systems, sensors, and mechanical components to ensure your motorcycle is running smoothly. Regular engine diagnostics are critical in identifying problems that might not yet have visible symptoms. Issues like electrical faults, fuel delivery irregularities, or even worn-out valves and piston rings can seriously impact performance if not caught early. Quality repair shops in the northwest suburbs use sophisticated technologies and certified technicians to ensure your motorcycle repair is handled with the highest standard. By investing in precise diagnostics, you protect your engine’s longevity, avoid complex repairs, and ensure maximum road safety every season. Why Motorcycle Engine Diagnostics in Northwest Chicago Suburbs Are Essential for Peak Performance Preventative care reduces long-term engine repair costs Accurate diagnostics safeguard motorcycle reliability Motorcycle repair services catch minor problems before escalation The real value of consistent engine diagnostic checks lies in prevention. Routine diagnostics catch engine problems—like faulty sensors, oil leaks, or fuel injection errors—before they spiral into major breakdowns needing a full engine rebuild . Early detection means repairs are simpler and more affordable, extending your bike’s lifespan and keeping your rides safe. Moreover, motorcycle repair shops using advanced diagnostic tools can evaluate not only the engine’s electronics, but the health of mechanical parts such as pistons and valves. This level of detailed attention ensures that your motorcycle stays in top shape , ready to handle the diverse weather and road conditions found throughout the chicagoland area . How Engine Diagnostic Processes Work: Step-by-Step Overview Professional engine diagnostic processes start with an initial consultation. Certified technicians listen to your concerns—like abnormal noises, reduced power, or an unexpected check engine light. Next, they hook up advanced diagnostic tools that communicate with your motorcycle’s onboard computer. This step reveals any fault codes present, providing a data-driven starting point for further investigation. Once digital diagnostics are complete, technicians proceed with mechanical inspections: they look for worn components, check fluid levels, and often perform compression or leak-down tests. All findings are documented, equipping you with transparent information about your bike’s condition. In areas like arlington heights , shops adhere to industry standards and provide clear outlines of recommended repair services before any work begins. Cutting-Edge Diagnostic Tools Used in Motorcycle Engine Diagnostics in Northwest Chicago Suburbs OBD-II scanners for real-time engine data Compression testers for engine health Digital voltmeters for electrical diagnostics The accuracy of engine diagnostics depends heavily on the quality of tools and diagnostic technologies in use. Top repair shops in the northwest suburbs deploy a suite of advanced equipment. OBD-II scanners interface with your bike’s engine control unit to extract real-time data on performance, error codes, and emission levels. Compression testers measure cylinder pressure, indicating potential issues with piston rings, valves, or head gaskets. And for intricate electrical systems, digital voltmeters help pinpoint faults in wiring, battery, or ignition circuits. These diagnostic tools give technicians an edge in both routine maintenance and complex repairs, ensuring quick and precise identification of issues. When it comes to motorcycle engine diagnostics in northwest Chicago suburbs, this blend of expertise and equipment is what sets the best repair shops apart from the rest. Comprehensive Motorcycle Repair and Engine Rebuild Services Near Arlington Heights After accurate diagnostics, riders near Arlington Heights enjoy access to comprehensive repair services —from simple fixes to full engine rebuilds . Trusted mechanics and repair shops offer a wide range of solutions catering to all makes and models. These services address the unique needs that come with varying Chicago suburban riding conditions, such as pothole-studded roads or fluctuating temperatures. A full engine repair or complex engine rebuild employs years of experience from certified technicians, ensuring each component is restored or replaced using only quality parts . From worn-out pistons to advanced valve adjustments, every detail contributes to powerful, long-lasting performance. Whether your need is for a quick oil change or a major overhaul, professional engine services in the northwest Chicago suburbs guarantee that your ride is ready for every season. Specialized Engine Repair Services: What’s Included Cylinder and piston inspection Valve adjustments Crankshaft and camshaft balancing Among the specialized offerings in motorcycle repair, detailed inspections of cylinders and pistons reveal the root causes of power loss or knocking sounds. Valve adjustments restore optimal airflow and combustion efficiency, making your engine run more smoothly. Crankshaft and camshaft balancing ensures each moving part is synchronized, preventing excessive vibration and uneven wear—critical for high-mileage motor vehicles commonly found in the Arlington Heights area. These services not only prolong engine life but enhance ride quality and fuel efficiency. When combined with routine maintenance such as oil and filter changes, you can rest assured that your engine stays in top form—no matter how far you ride across the northwest suburbs. EPM Motorsports: Trusted Experts for Motorcycle Engine Diagnostics and Repair in Northwest Chicago Suburbs When it comes to premium motorcycle engine diagnostics in northwest Chicago suburbs , EPM Motorsports stands out for their commitment to transparency, expertise, and customer service. With years of experience, their master mechanics are certified technicians who receive ongoing training in the latest diagnostic technologies and complex repair procedures. Riders trust EPM Motorsports not only for accurate engine diagnostic services, but also for full engine repairs and rebuilds. EPM Motorsports prioritizes using only quality parts , whether your bike needs routine maintenance work , an oil change, or a full engine rebuild. This attention to detail translates to better reliability and performance for every ride in Arlington Heights and the larger northern suburbs of Chicago. Plus, their shop is equipped with state-of-the-art tools for diagnostics and repair—ensuring that no issue goes undetected or unresolved. Why Choose EPM Motorsports for Engine Diagnostics and Quality Parts Certified repair technicians with specialized training State-of-the-art diagnostic tools for effective engine analysis Access to quality parts for durable repairs Choosing the right repair shop is about more than convenience. With EPM Motorsports, you receive transparent communication, thorough reporting, and guaranteed workmanship on every repair service . Their focus on customer service and reliability ensures you leave every appointment confident to get back on the road, knowing your engine is in top shape . Comparative Chart: Motorcycle Engine Diagnostics vs. Engine Repair vs. Engine Rebuild Services in Arlington Heights Service Type Description When Needed Benefits Engine Diagnostics Electronic and mechanical testing of all engine components using diagnostic tools. When warning lights appear; routine maintenance; performance issues. Pinpoints problems; prevents escalation; fast turnaround. Engine Repair Targeted repair of identified faulty components (e.g., valves, pistons, gaskets). After diagnostics detect issues; when symptoms are present. Restores performance; prolongs engine life; cost-effective than rebuilds. Engine Rebuild Complete overhaul replacing or reconditioning major engine internals. Severe engine failure; high-mileage bikes with excessive wear. Resets engine to near-new condition; eliminates repeated failures. What to Expect with Motorcycle Engine Diagnostics and Repair Services At reputable shops like EPM Motorsports, you can expect a defined, transparent process for every engine diagnostic or repair appointment. Upon arrival, a service advisor will discuss your concerns, explain the diagnostic approach, and provide a rough timeline. Diagnostic testing typically begins with the latest digital tools, followed by mechanical inspections of critical engine components. Once diagnostics are completed, you’ll receive a detailed report outlining discovered issues, repair recommendations, and all available options. This fosters complete transparency at every step—from initial check-in, through service, to providing warranties on parts and labor. You’ll also receive accurate estimates that factor in both labor and quality parts, helping you make informed decisions about your motorcycle’s care. Transparency, Timelines, and Cost Overview for Motorcycle Engine Diagnostics in Northwest Chicago Suburbs Overview of service process and expected duration Cost considerations for diagnostics, repair, and rebuild Parts and labor guarantees with every service Diagnostic appointments typically last 1–2 hours, while repairs or engine rebuilds may require additional time depending on complexity. Costs are clearly detailed upfront, covering every aspect—diagnostic fees, labor, and the use of premium quality parts. EPM Motorsports further backs each job with a warranty, assuring you durable repairs and complete peace of mind. This commitment to clear timelines and honest pricing makes them a top choice for engine diagnostics and repair services in Arlington Heights and surrounding suburbs. In addition, EPM Motorsports’ focus on process transparency and customer service means no surprises or hidden charges—just straightforward, expert care that gets you back on the road quickly and confidently. Frequently Asked Questions on Motorcycle Engine Diagnostics in Northwest Chicago Suburbs How often should I get a motorcycle engine diagnostic? It’s recommended to schedule engine diagnostics at least once a year or whenever you notice a change in performance, unusual sounds, or warning lights. Early and regular diagnostics help catch problems before they turn into complex repairs, supporting both safety and motorcycle longevity. Can diagnostics reveal hidden engine repair problems? Yes, advanced diagnostic tools and techniques can uncover problems that are not immediately noticeable during a visual check. These can include internal wear, electrical faults, or fuel delivery issues, allowing for targeted repairs and reducing the risk of serious engine damage. What sets EPM Motorsports apart for engine rebuild services? EPM Motorsports stands out for its team of certified technicians, use of cutting-edge diagnostic technologies, commitment to using only quality parts, and transparent customer service. This ensures comprehensive repairs and engine rebuilds that offer unmatched reliability for every rider in the northwest Chicago suburbs. People Also Ask What is included in a motorcycle engine diagnostic? A thorough inspection using electronic diagnostic tools, compression testing, and visual engine checks. Repair services at reputable shops also include assessing fuel, electrical, and mechanical systems. How long does a motorcycle engine diagnostic take in the Northwest Chicago suburbs? A standard motorcycle engine diagnostic typically takes 1-2 hours, with duration varying based on the complexity of the engine and repair service required. What signs indicate I need engine diagnostics or engine repair? Performance drop, unusual noises, starting issues, excessive exhaust smoke, or warning lights—prompting a motorcycle repair or engine rebuild assessment. See a Real Motorcycle Engine Diagnostic in Action at EPM Motorsports. (Visit our website or stop by our Arlington Heights location for a full demonstration video.) Choosing the Right Motorcycle Engine Diagnostics Service in Arlington Heights and Beyond Evaluate expertise in engine diagnostic technology Confirm use of quality parts and modern repair services Look for detailed repair documentation and transparent pricing Selecting a reliable shop for your motorcycle engine diagnostics in northwest Chicago suburbs involves more than convenience. Make sure your mechanic offers up-to-date diagnostic tools, uses proven quality parts , and stands by their repairs with comprehensive documentation. Transparent quotes and honest timelines are vital—look for repair shops with proven reputations and customer testimonials within Arlington Heights and adjacent neighborhoods. Your bike deserves only the best, especially when it comes to long-term performance and future resale value. Don’t hesitate to ask about years of experience, certified training, and whether the shop’s services include full engine repairs or rebuilds for all makes and models. A confident, transparent conversation with your service advisor is the hallmark of a trustworthy provider like EPM Motorsports. Recap: Key Factors for Effective Motorcycle Engine Diagnostics in Northwest Chicago Suburbs Timely engine diagnostic prevents major repairs Expert motorcycle repair keeps you riding with confidence Rebuild services available for severe engine issues "Choosing a local expert for motorcycle engine diagnostics in Northwest Chicago suburbs ensures reliable performance and peace of mind." For ongoing motorcycle reliability across the Chicago suburbs, timely engine diagnostics, access to master mechanics, and transparent, quality-focused repair services are essential. Your peace of mind and safe riding experience start with choosing the right diagnostic and repair partner. Ready for Reliable Motorcycle Engine Diagnostics? Contact Nasty Performance Motorcycle Shop Today Call Us Today: 847-458-4858 for a detailed diagnostic and repair service quote Don't wait for a warning sign to enjoy worry-free rides. Call Nasty Performance Motorcycle Shop now for expert motorcycle engine diagnostics in the northwest Chicago suburbs and get your bike running smoothly—season after season! For riders seeking expert motorcycle engine diagnostics in the northwest Chicago suburbs, Nasty Performance is a reputable service center. Choosing a service center with expert technicians and advanced diagnostic tools is essential for maintaining your motorcycle’s performance and longevity.

Step-by-Step Bike Servicing to Keep Your Motorcycle Ride Smooth

Did you know that 60% of motorcycle failures happen because crucial maintenance steps are overlooked? That’s right—more than half of those dreaded breakdowns or sudden malfunctions occur because basic bike and bike maintenance routines get skipped or rushed! If you’re looking to save money in the long run, avoid inconvenient breakdowns, and enjoy a consistently smooth ride, adopting a step-by-step bike servicing approach can transform your experience—whether you’re working on your bike at home or between trips to your local bike shop. In this comprehensive guide, you’ll uncover easy-to-follow techniques for cleaning your bike, checking disc brakes and brake pads, fixing a flat, and much more—all tailored for every rider from casual cruiser to weekend road warrior. Unlocking Smoother Rides: Why Step-by-Step Bike Servicing Is Essential (Did You Know 60% of Motorcycle Failures Are Due to Overlooked Maintenance?) When it comes to motorcycling, step-by-step bike servicing is not just about keeping your ride shiny; it’s about guaranteeing reliability and safety every time you hit the road. The majority of avoidable mechanical failures—like worn brake pads, neglected chain and cassette, or under-inflated tires—stem from missed maintenance. A basic bike that receives regular, thorough attention stands a far better chance of performing well and lasting longer, whether it’s a daily commuter or a prized touring motorcycle. Think of each servicing step as a shield against costly repairs, untimely breakdowns, and hazardous situations. By following a thorough checklist—cleaning your bike, inspecting key bike parts, and performing routine safety checks at home—you’re essentially putting money in the long term back into your pocket and adding years to your motorcycle’s lifespan. Regular servicing also allows you to spot hidden wear and tear that could otherwise interrupt a dream ride or daily commute. Embracing these routines means you’re prepared for the unexpected, ready with the right tools, and confident when small adjustments or emergency repairs are needed. For any rider determined to keep their motorcycle in good working order and ensure a blissfully smooth ride, this methodical approach is the true game-changer. What You’ll Learn in This Guide : Comprehensive step-by-step bike servicing checklist Key bike maintenance and repair processes for smooth rides Best methods for bike cleaning at home Important safety check protocols for motorcycles How to fix a flat and repair disc brakes effectively Understanding Step-by-Step Bike Servicing for Every Motorcycle Owner What Makes Step-by-Step Bike Servicing Different from Routine Bike Maintenance? The main distinction between step-by-step bike servicing and standard bike maintenance lies in the level of attention to detail. While routine maintenance often involves a cursory check of obvious components—like a quick look at the tire or a fast chain lubrication—true step-by-step servicing means methodically inspecting and addressing every part of your motorcycle. This includes everything from detailed cleaning your bike at home to checking the torque rating on critical bolts and ensuring the bottom bracket is tight and free from excess dirt and grime. Taking a systematic approach ensures you won’t miss hidden issues, such as slight wear in your rear derailleur, hairline cracks in a brake pad, or sticky movement in the brake and gear cables. By spending a little extra time on a thorough check, you can catch problems before they develop into something that could lead you straight to the bike shop for costly bike repair. This attention to every step also empowers home mechanics to build knowledge, extending well beyond basic bike adjustments into advanced diagnostic and repair skills. Moreover, a step-by-step routine provides structure to your bike at home care routine, making it easier to schedule tasks, stock up on essential bike maintenance supplies, and check off each process for consistent, reliable results every time. The Benefits of Consistent Bike Clean and Maintenance Routines Regular, structured bike clean and maintenance routines offer major benefits for every motorcycle enthusiast. Firstly, consistent servicing keeps your moving parts—chains, brake pads, cables—in peak working condition, preventing small issues from escalating. Well-maintained motorcycles have longer intervals between serious repairs, offer smoother gear changes, and guarantee effective braking response from both rim and disc brakes. On top of performance, consistent bike cleaning keeps corrosive dirt and grime at bay, preserving the finish and structural integrity of your bike frame and parts. By protecting delicate systems like the disc brake and ensuring key bolts and connectors remain rust-free, you’re helping your motorcycle retain value while extending its functional life. Home bike mechanics also enjoy safety peace of mind; each session’s safety check minimizes risk of sudden component failure during rides. Finally, these habits foster a deeper relationship between rider and machine. Understanding how each component works makes small adjustments and on-the-fly repairs more intuitive—saving your hard-earned money in the long run and boosting your confidence, wherever your journey takes you. Essential Bike Maintenance Tools and Products for Effective Servicing at Home Checklist: Must-Have Bike Repair and Servicing Tools Wrenches and Screwdrivers Chain Lubricant and Cleaners Brake Pads and Disc Brake Tools Pumps, Tire Levers & Puncture Kits Safety Equipment and Gloves Having the right tools is crucial for step-by-step bike servicing —especially for riders who prefer bike repair at home. At the bare minimum, you’ll need a well-organized toolkit featuring wrenches, screwdrivers (flat and Phillips), and Allen keys to address most bolt fixtures, as well as a bike stand to safely secure your motorcycle during checks and repairs. Quality chain lubricant and biodegradable cleaners keep moving parts free from dirt and grime, while specific disc brake tools ensure that servicing modern braking systems is both safe and effective. For tire-related maintenance, ensure you have tire levers , a reliable air pump, and a puncture repair kit. These tools are invaluable when handling a fix a flat scenario. Good gloves and basic safety equipment also protect you from accidental injuries when working on sharper or moving components. Investing in these essentials makes your bike at home maintenance sessions efficient, safe, and comprehensive—putting you in control of your motorcycle’s condition. Step-by-Step Bike Servicing: Preparing Your Bike at Home Setting Up Your Home Workstation for Bike Servicing Creating a dedicated workstation is the foundation for efficient bike maintenance and repair at home. Choose a well-lit, ventilated area—ideally a garage or shed—with easy access to all your tools. Arrange wrenches, screwdrivers, bike cleaners, and safety gear within arm’s reach, ideally using magnetic racks, bins, or a pegboard for neat organization. Position your bike stand securely so your motorcycle is upright and stable, making it easier to access every angle of the bike frame while minimizing the risk of accidental falls or scratches. Ensure there’s sufficient space for laying out small parts during disassembly and cleaning. Keep towels and cleaning products close at hand; disposable gloves protect your hands and prevent oil and residue transfer. With everything organized, servicing tasks—from checking your bottom bracket to inspecting brake pads or disc brakes—will move quickly and smoothly, giving you more confidence to tackle even unfamiliar maintenance processes. An Initial Safety Check: Key Steps for Reliable Motorcycle Maintenance Before beginning a full bike servicing session, an initial safety check is essential. Start by looking over the bike frame for cracks, rust, or any visible damage, paying close attention to the weld points and mounting brackets. Check the tires for cuts, uneven wear, or embedded debris, and make sure the tire pressure is within recommended limits using a reliable gauge. Spin both wheels to check for wobble or rim damage and ensure the wheel nuts or axles are tight and secure. Test all lights and the horn, and manually operate the front and rear brakes, feeling for any stiffness, squeal, or spongy response—often an early sign of air in the brake fluid or worn brake pads . Confirm that the handlebars move smoothly and that the steering is neither too tight nor too loose. By addressing these points, you’re already eliminating several of the most common causes of sudden breakdowns before deeper maintenance even begins. Cleaning Your Bike: The First Step in Step-by-Step Bike Servicing Quick List: Best Practices for Bike Clean and Maintenance Use Biodegradable Cleaning Agents Clean Hard-to-Reach Components Protect the Chain and Disc Brakes During Washing Dry and Lubricate After Cleaning Every step-by-step bike servicing session should begin with a thorough bike clean. Start by rinsing the frame, wheels, and undercarriage using a low-pressure garden hose to remove surface dust and loose dirt and grime. For stubborn buildup, use a sponge or soft brush with biodegradable bike cleaner—never harsh dish soap—as it can strip protective finishes and dry out plastic or rubber parts. Pay special attention to crevices around the chain and cassette, gear sprockets, and disc brakes, where debris tends to accumulate. Remember to shield delicate parts like the chain and disc brake rotors from excessive water or spray. You can do this by covering them with a clean cloth during washing or by using minimal water in those areas. Once cleaned, dry your bike thoroughly, especially around the moving parts, to prevent rust and corrosion. Apply chain oil and re-lubricate the necessary components immediately after drying. This not only keeps everything running smoothly but also acts as a protective barrier against residual moisture. Regularly cleaning your bike ensures that you’re always working with a dirt-free machine, allowing more accurate inspections and prolonging the lifespan of every part. Detailed Inspection During Step-by-Step Bike Servicing: What to Look For Safety Check: Ensuring Brakes, Tires, and Suspension Are Roadworthy During your step-by-step bike servicing , a focused inspection of safety-critical systems is vital. Start with the brakes—both disc and rim brakes. Look for uneven wear or thinning of the brake pads , and check the brake fluid reservoir for correct levels (for hydraulic systems). Squeeze the levers and listen for grinding or squealing; these sounds can warn of worn-out surfaces. Move on to the tires, checking for embedded stones, cracks, and overall tread depth. Press down on the suspension to ensure smooth bounce and no oil leaks or abnormal creaks. Even with regular bike maintenance at home, don't overlook the connection points between wheels and the bike frame. Confirm nuts, quick-releases, or axles are tight and the wheels rotate without side-to-side wobble. Finally, test the steering by turning the handlebars—any resistance, wobble, or clicking could indicate issues with the fork, headset, or front wheel assembly. A thorough safety check before and after rides can mean the difference between an enjoyable journey and a stressful roadside problem. Inspecting Cables, Chains, and Gear Functionality The longevity of your motorcycle heavily depends on the condition of its cables, chain, and gear components. Begin by running your hand along each cable, feeling for fraying or rust near the ends, particularly where they enter the casing. Next, inspect the chain for clean links, even stretching, and a lightly-oiled sheen. Spin the rear wheel and check the chain’s movement across the sprockets; any skipping, tight spots, or excessive play suggests it’s time for a replacement or adjustment. Shift through all gears, monitoring the smoothness and accuracy of the front and rear derailleur travel. A sticky barrel adjuster or misaligned derailleur can lead to poor shifting and added wear on the cassette and chainring. By catching minor cable and gear issues early, you save yourself larger, costlier bike repair jobs down the road and maintain that signature smooth ride every enthusiast seeks. How to Fix a Flat Tire: Bike Repair for Home Mechanics Repairing a flat tire is a vital skill in any step-by-step bike servicing toolkit. Begin by removing your wheel—usually with the aid of a wrench or quick-release lever—then use tire levers to slip the tire bead over the rim. Inflate the tube slightly and look for punctures or holes by feeling for escaping air or submerging the tube in water (bubbles indicate the leak). Dry and patch the hole with a puncture kit, following the manufacturer’s instructions for bonding and setting time. Inspect the inside of the tire and the rim strip for sharp debris, glass, or thorns; even the smallest item left behind can quickly trigger another flat. Once the patch is secure and the area is dry, reassemble and inflate the tire to the proper PSI (noted on your tire’s sidewall). Spin the wheel to ensure it seats evenly without bulges or hop. With practice, this simple but critical step can be done at home in minutes, sparing you both downtime and an emergency trip to the bike shop. Disc Brake and Brake Pad Maintenance in Step-by-Step Bike Servicing Troubleshooting and Servicing Disc Brakes and Pads Disc brakes offer superior stopping power, but only if properly serviced. Begin by carefully removing the wheel and using a flashlight to examine the pads’ thickness and contact surface. Worn out or uneven brake pads need to be replaced immediately; they should not be less than 1mm thick. Check for scraping, squealing, or a pulsing sensation in the lever, all of which can suggest a warped rotor, air in the brake line, or contamination on the pad surface. When replacing pads, clean the caliper and rotor with isopropyl alcohol to remove grease and dirt. For hydraulic systems, monitor brake fluid levels and bleed the line if you feel any sponginess at the lever. Examine all mounting bolts for correct torque rating to avoid loose or overtightened parts. With routine disc brake servicing, you’ll enjoy confident stops and peace of mind in traffic or on twisty roads. Lubricating and Adjusting Key Components in Bike Maintenance Chain Lubrication and Gear Adjustment Techniques Proper chain lubrication is fundamental for smooth, efficient riding and the long-term health of your drivetrain. After cleaning and drying, apply a dedicated chain oil, rotating the pedals to ensure every link gets coated. Wipe away excess oil with a clean rag—too much attracts dirt and increases wear and tear. For gear adjustments, begin with the barrel adjuster on the derailleur to fine-tune cable tension. Small adjustments here can eliminate most issues with missed shifts or gear skipping. Inspect the rear derailleur for alignment and the condition of jockey wheels. Periodically check the chain and cassette for excessive stretch or tooth wear, replacing worn components to maintain sharp, reliable shifting action and maximum efficiency from your bike maintenance routine. Headset, Bottom Bracket, and Suspension Maintenance Steps Beyond the obvious moving parts, don’t overlook the bearings and structural support systems of your motorcycle. Begin by checking the headset bearing for smooth, play-free rotation; if you feel any notchiness or hear grinding, disassemble, clean, and lubricate, or replace the bearings as needed. Next, ensure the bottom bracket (the axle area at the crank) rotates without resistance or wobble—a gritty feeling here signals dirt intrusion or worn bearings. Suspension maintenance involves checking for oil leaks, corrosion, or bent stanchions. Clean stanchions with a microfiber towel and inspect for seal leaks after each bike clean. Regular attention prevents catastrophic failure, especially on rough or variable terrain, and keeps your ride handling like new. Step-by-Step Bike Servicing for Electrical and Lighting Systems Testing and Replacing Bulbs and Battery Check Reliable lighting and electrical systems are key to safety and visibility. Start each servicing session by turning on headlights, brake lights, and indicators to confirm all bulbs function, noting any flicker or dullness. Replace any failing bulbs with new ones meeting the manufacturer’s specifications. Check the horn for prompt, loud response—weak or nonfunctioning horns often point to battery or wiring issues. For battery checks, use a voltage meter to measure resting and load voltages. Corroded terminals should be cleaned with baking soda solution and a small wire brush. Replace the battery if it fails to hold charge or delivers less than the required voltage under load. Secure all harnesses and inspect for exposed or pinched wiring—a proactive step that can prevent unexpected electrical shorts and delivery failure while on the road. Final Safety Check After Completing Step-by-Step Bike Servicing Checklist for Pre-Ride Bike Safety Check Lights and Horn Test Brake Response Analysis Tire Pressure and Wheel Check Cable and Chain Integrity After completing your step-by-step bike servicing routine, conduct a comprehensive pre-ride check. Turn on all lights and check the horn for strong, consistent sound—a failing electrical system can jeopardize your safety in low-visibility scenarios. Next, gently squeeze both brake levers, checking for a sharp, confident response without fade. Inspect tire pressure and wheel trueness, spinning each wheel to confirm roundness and immediate stop when the brake is applied. Finally, run your hand over all exposed cables and the chain, ensuring there are no snags, fraying, or tight spots. This swift but structured inspection confirms that your bike is ready for another safe, smooth, and enjoyable ride. Basic Bike Troubleshooting: When to Call a Professional After Step-by-Step Bike Servicing "A well-maintained bike not only extends its lifespan but keeps you and others safe on the road." - Motorcycle Servicing Expert No matter how methodical your bike maintenance routine, some problems require professional intervention. If persistent issues arise—such as chronic electrical failures, ongoing disc brake fade, deep-seated bottom bracket rattles, or unexplained loss of performance—contact a certified bike mechanic or visit your trusted bike shop. Serious frame cracks, advanced suspension leaks, or major wiring faults generally need specialized tools, replacement parts, and experience beyond most bike at home setups. Knowing your limits ensures safety and helps avoid further (and costlier) damage to your motorcycle. People Also Ask About Step-by-Step Bike Servicing How often should I perform step-by-step bike servicing? It’s recommended to perform a full step-by-step bike servicing at least once per month for regular riders. However, partial cleaning your bike and checking critical components like tire pressure, brake pads, and the chain should be done every 2-3 rides—especially before long journeys or riding in harsh conditions. Seasonal changes and increased mileage may require more frequent checks. What are the essential components of bike maintenance at home? Home bike maintenance should include cleaning your bike, lubricating the chain, checking brakes (including disc brake and rim brakes), inspecting cables and gear systems, adjusting tire pressure, and ensuring all bolts are torqued to specification. These tasks help keep your bike in good working order and prevent major issues from developing. Can I use household products for bike cleaning during servicing? While some household products like mild dish soap can be used sparingly, it’s best to opt for cleaners specifically formulated for bike parts. Harsh detergents may strip away protective finishes or corrode sensitive components. Biodegradable cleaners are recommended for cleaning your bike, as they are environmentally friendly and won’t damage materials. How do I know if my disc brakes need repair or replacement? If your disc brakes squeal, feel spongy, or the lever travels too far before engaging, it’s time to inspect the brake pads and rotors. Look for thinning pads (1mm or less), visible grooves or cracks on the rotor, and any signs of fluid leaks. Persistent issues after pad replacement often signal it’s time for professional service. Expert Answers: Frequently Asked Questions on Step-by-Step Bike Servicing FAQs : Does step-by-step bike servicing improve fuel efficiency? Absolutely. Well-lubricated chains and properly inflated tires mean less resistance and smoother movement—directly improving fuel efficiency over time. What safety checks are most often overlooked in home bike maintenance? Cable fraying, loose axle bolts, and under-lubricated chains are among the most missed checks. systematic inspection ensures even these hidden risks are addressed, keeping your ride safe and reliable. Is professional tuning necessary after basic bike repair at home? It’s not always necessary, but complex repairs—like advanced brake or suspension work—do benefit from a professional’s eye, ensuring the highest safety standards are met before hitting the road. Table: Step-by-Step Bike Servicing Checklist Task Frequency Tools Needed Bike clean and wash Every 2 weeks Biodegradable cleaner, cloth Chain lubrication Weekly Chain oil, brush Brake check (disc brakes) Monthly Allen key, brake fluid Tire pressure & fix a flat Pre-ride/As needed Pump, patch kit Full safety check Monthly General toolkit Keep Your Motorcycle Ride Smooth with Routine Step-by-Step Bike Servicing — Call Us Today: 847-458-4858 Ready for smoother, safer journeys? Make step-by-step bike servicing a habit and experience the confidence of a perfectly tuned machine with every ride. Call us today: 847-458-4858 for expert support or to schedule a professional tune-up! Regular, step-by-step bike servicing is crucial for maintaining your motorcycle’s performance and safety. To assist you in this process, here are two comprehensive guides that offer detailed instructions: DIY Bike Service: How to Service a Bike at Home This guide provides a thorough checklist for home bike servicing, covering essential tasks such as cleaning, wheel and tire inspections, brake maintenance, and bolt checks. It emphasizes the importance of regular cleaning to prevent damage and offers step-by-step instructions for each maintenance task. DIY Bike Maintenance: A Step-by-Step Guide This resource outlines fundamental maintenance steps, including cleaning, lubricating the chain, checking tire pressure, adjusting brakes, and inspecting bolts and nuts. It provides clear, easy-to-follow instructions suitable for beginners and highlights the importance of regular upkeep to ensure a safe and enjoyable riding experience. By following these guides, you can develop a consistent maintenance routine that enhances your motorcycle’s longevity and performance. Regular attention to these tasks will help you identify potential issues early, ensuring smoother and safer rides.

Classic Vintage Motorcycle Maintenance Tips Every Rider Should Know

Did you know that over 65% of vintage motorcycles end up with preventable mechanical failures due to irregular maintenance? Vintage bike ownership isn’t just about style; it’s about responsibility. This comprehensive guide pulls back the curtain on classic bike maintenance, showing you how proper care not only extends your ride’s life, but also preserves its value and reliability. Whether you’re a seasoned collector or a weekend enthusiast, learning smart classic motorcycle upkeep is the secret to enjoying every journey – and many more to come.Opening Insights: Why Classic Bike Maintenance Matters"Did you know that over 65% of vintage motorcycles end up with preventable mechanical failures due to irregular maintenance?" – Industry Survey 2022Unveiling the Importance of Classic Bike MaintenanceClassic bike maintenance is more than a routine—it's the heartbeat of vintage motorcycle ownership. These machines, crafted with steel frames and timeless engineering, demand regular attention to their moving parts to keep them running in good condition. Without a proactive approach to bike maintenance, even the best vintage bikes are vulnerable to chain wear, brake failure, and electrical issues. Road bikes and classic motorcycles are distinct in their construction, requiring extra diligence in lubrication, fastener checks, and system diagnostics. With the right care, every ride not only evokes nostalgia but also guarantees a safe and smooth performance, minimizing the risk of roadside breakdowns that could jeopardize both safety and investment.When you treat classic motorcycle maintenance as a ritual rather than a chore, you’ll discover that these bikes reward you with a unique sense of accomplishment and reliability. It’s not simply a matter of keeping the engine running; it’s about ensuring the authenticity, value, and history of your vintage bike remain intact. Paying attention to detail—whether it's the integrity of your bottom bracket or the tension in your chain—pays dividends in time saved and memories made. Embrace the preventive mindset, and your classic or vintage motorcycle will thank you with every turn of the wheel.Classic Motorcycle Longevity and ReliabilityPreserving the reliability of a classic motorcycle depends on a structured classic bike maintenance schedule. Older motorcycles were engineered for longevity, but only thrive if given regular inspections and authentic parts. Ensuring that everything from the drive train to the bar tape is in top condition prevents the common pitfalls seen in neglected vintage motorcycles, such as oil leaks, electrical gremlins, and corrosion on bare metal parts. A disciplined approach not only extends the lifespan of your beloved vintage bike but also keeps it performing at its peak, mile after memorable mile.No matter the age or make, vintage bikes rely on their owners for attentive bike maintenance. Negligence accelerates chain wear, devalues classic steel frames, and leads to costly restoration efforts. By following proactive maintenance routines and using period-correct components, you reinforce your motorcycle’s unique character and keep its legendary spirit alive for future generations.What You'll Learn in This Classic Bike Maintenance GuideComprehensive breakdown of vintage motorcycle upkeepExpert recommendations for classic motorcycle preservationStep-by-step classic bike maintenance checklistsIdentification and troubleshooting common issues in vintage bikesUnderstanding the Classic Bike: What Sets Vintage Motorcycles Apart?Defining a Classic Motorcycle & Vintage BikeThe terms "classic bike" and "vintage motorcycle" are often used interchangeably, but they do carry distinct meanings in the world of bike maintenance and collecting. Generally, a classic motorcycle refers to bikes that are 20-40 years old, recognized for their enduring design and reliable engineering. A vintage bike is typically even older, often produced before the 1970s, showcasing hand-built craftsmanship and iconic features like steel frames and minimalist electrics. Both classic and vintage bikes require meticulous attention to their unique bottom bracket setups and moving parts, setting them apart from modern bikes in both aesthetics and function.Owning an authentic classic or vintage bike is like having a piece of rolling history. These machines reflect eras where bar tapes were crafted by hand and even the smallest detail, from brake levers to chrome accents, was thoughtfully designed. Paying homage to such machines involves maintaining them with the same care they were built with, ensuring they remain more than just a display—keeping them in good running condition for countless more adventures on the open road.Notable Differences: Classic vs. Modern Road BikesThe difference between classic bikes and their modern counterparts isn’t just about age—it's about construction, ride feel, and maintenance requirements. Classic motorcycles predominantly feature steel frames, classic drive trains, and mechanical brakes, whereas modern bikes often employ lightweight materials, disc brakes, and computer-assisted systems. This influences everything from bottom bracket compatibility to the type of lubricants and fluids required for bike maintenance.When comparing a classic motorcycle to a new road bike, you’ll notice that older motorcycles demand hands-on mechanical skill and regular inspections, especially of tires, tubes, and bar tape. Modern bikes, meanwhile, benefit from advanced engineering but often require specialized tools not needed for vintage bikes. For classic bike owners, the big difference lies in the attention to detail and commitment to the legacy of their machines—a reward that is as much about pride as it is about riding performance.Comparison of Classic Motorcycle, Vintage Motorcycle, and Modern Bike FeaturesFeatureClassic MotorcycleVintage MotorcycleModern BikeFrame MaterialSteel FrameSteel FrameAluminum/Carbon FiberBrake SystemMechanical, Drum/PadMechanical, Drum/PadHydraulic, Disc BrakesDrive TrainChain/ShaftChain/ShaftChain, Belt, ElectronicElectronicsMinimalVery MinimalAdvanced; DigitalMaintenance FrequencyHigh; Attention to DetailVery High; Regular TLCModerate; Self-diagnosticsPreparing for Classic Bike Maintenance: Tools and WorkspaceEssential Tools for Classic Motorcycle and Vintage Bike MaintenanceWrenches, lubricants, bike stands, bottom bracket toolsEquipping yourself with the right tools is non-negotiable for effective classic bike maintenance. For vintage motorcycle enthusiasts, basic spanners, socket wrenches, and quality lubricants form the core of your toolkit. A tough, reliable bike stand lifts your vehicle for better access to the bottom bracket, drive train, front and rear wheels, and brake system—all areas that see regular wear on older motorcycles. Essential lubricants not only keep moving parts running smoothly, but also provide vital protection against rust, especially on exposed bare metal.Don’t overlook specialty items: a bottom bracket tool for periodic checks, chain wear measurement devices, and precision screwdrivers for sensitive bar tape and carburetor work. Investing in classic motorcycle-specific cleaning products preserves the shine of chrome and paintwork, while a torque wrench ensures bolts are tightened to proper specs, preventing future headaches. Many bike mechanics recommend keeping a separate box for rare vintage bike parts, so you’re always ready for routine maintenance or a quick fix in your garage or local bike shop.Setting Up an Efficient Maintenance Space"An organized garage is a vintage motorcycle’s best friend." – Classic Bike Mechanic Tom R.A well-structured workspace is key to consistent and safe classic bike maintenance. Start with a clean, well-lit garage—orderly storage of wrenches, lubricants, and bottom bracket tools is a good idea for efficiency. Pegboards with labeled hooks for tools, organized bins for spare chains and brake pads, and a dedicated workbench for small parts and bar tape changes set the foundation of an effective maintenance routine. Flooring mats or trays beneath the work area catch fluids, making cleanup simpler and safeguarding your workspace’s integrity.Beyond organization, safety is paramount. Always keep personal protective equipment handy and clearly mark hazardous materials. Having detailed maintenance checklists within sight encourages thorough, repeatable routines and ensures nothing gets skipped in the process. For classic motorcycles, a designated area for record-keeping is valuable; document each oil change, bottom bracket check, and chain lubrication. Ultimately, an efficient space turns bike maintenance into a streamlined hobby, enhancing both productivity and enjoyment of your vintage motorcycle journey.Routine Classic Bike Maintenance: Daily, Weekly, and Monthly TasksDaily Checks Every Classic Bike Owner Should PerformFluid levels, tire inspection, visible leaks, quick test rideDaily attention is foundational in classic bike maintenance. Each day before you start your ride, check all fluid levels—oil, brake, and coolant—ensuring your vintage motorcycle has what it needs for smooth operation. Give the tires a quick inspection for proper pressure and tread depth, and don’t forget to visually scan for any leaks beneath the engine or bare metal components. A short test ride around the block can reveal subtle issues with the bottom bracket, chain, or bar tape that aren’t visible on the stand.Many mechanical failures are preventable with these daily routines, saving you from more costly repairs at your local bike shop. Trust your senses during inspections: unusual smells, strange noises, or new vibrations often signal deeper issues. Attending to these signs promptly keeps your classic motorcycle in good condition and ready for more road-tripping adventures.Weekly Vintage Motorcycle Maintenance ProceduresBrake testing, chain lubrication, lights/electrical systemsSet aside time each week for more in-depth checks on your classic bike. Brake testing is non-negotiable—inspect brake pads for wear, make sure the brake lever feels smooth, and verify disc brakes (if fitted) or traditional systems are functioning properly. Clean and lubricate the drive train, including checking for chain wear, sprocket alignment, and tension. Lights and electrical systems need extra vigilance on vintage motorcycles due to the sensitivity of older wiring—replace any dim bulbs or frayed wires immediately.Weekly maintenance reinforces the longevity of your steel frame and moving parts. It’s a smart time to address minor issues before they snowball, ensuring every component, from bar tape to bottom bracket, is performing as it should. Remember, consistent care is the ultimate investment in the lifespan and reliability of your cherished classic motorcycle.Monthly Classic Motorcycle Inspection ChecklistFull lubrication, bolt tightening, bottom bracket assessment, engine snagsMonthly classics maintenance goes beyond routine. Start by lubricating all moving parts thoroughly—paying special attention to the bottom bracket, chain, and control cables. Tighten every accessible bolt to manufacturer-recommended torque, ensuring nothing rattles loose on your next road bike outing. The monthly inspection is prime time for a comprehensive bottom bracket assessment as classic bikes can develop play in these vital joints, affecting handling and safety.Address engine ‘snags’ or hesitations by examining carburetor settings, air filters, and ignition timing. This is also an opportunity to deep-clean your vintage bike’s bar tape, polish bare metal parts, and check for subtle signs of chain wear not caught during weekly routines. Document all monthly findings for future reference or when visiting your trusted bike mechanic or bike shop for more advanced repairs.Critical Systems: Engine Care in Classic MotorcyclesBest Oils and Fluids for Classic MotorcyclesSelecting the best oil is pivotal for classic motorcycle longevity. For most vintage bikes, high-zinc, mineral-based 20W-50 oil offers the wear protection these older engines need, thanks to its robust anti-wear and anti-corrosion properties. Dedicated “classic motorcycle oil” blends are often a good idea, as they’re formulated for the metallurgy and tolerances of classic engines and their moving parts. Avoid using synthetic oils unless specified by the manufacturer, as older seals may not be compatible, potentially causing leaks on bare metal engine cases.Alongside oil, ensure coolant and brake fluids meet or exceed period specifications. Proper fluids reduce internal friction in the drive train, protect the bottom bracket and shaft, and help keep your road bike or vintage motorcycle ready for anything. Documenting every fluid change is also crucial for maintaining value and preventing untimely mechanical issues that can be simply a matter of routine neglect.Cleaning and Tuning Vintage Motorcycle CarburetorsThe carburetor is the heart of any vintage motorcycle’s engine, and meticulous cleaning is crucial for reliable performance. Begin by removing the carburetors and soaking them in a dedicated cleaner to break down fuel varnish and debris. Use soft brushes and compressed air on jets and passages, avoiding harsh tools that might scar bare metal surfaces. After cleaning, reassemble carefully and use fresh gaskets to prevent air leaks and preserve engine integrity.Tuning involves synchronizing multiple carburetors (if applicable), adjusting float heights, and setting fuel-air mixtures for optimal combustion. A well-tuned carburetor brings back lost power, improves throttle response, and extends engine lifespan. Many experienced bike mechanics agree: regular carburetor service can be the difference between a troublesome vintage bike and one that runs like it just rolled off the showroom floor.Identifying and Preventing Engine WearClassic bikes, especially older motorcycles, can fall victim to preventable engine wear if neglected. Signs include increased engine noise, sluggish throttle response, oil leaks around gaskets, and declining fuel efficiency. Address these early by routinely inspecting the drive train, changing oil as per schedule, and using genuine or period-correct parts. Regularly monitor compression, spark plug condition, and timing settings to identify developing problems before they escalate.Preventative steps—like consistent lubrication, bolt torque checks, and paying attention to detail—are invaluable. For rare issues, partner with a trusted bike mechanic or classic motorcycle specialist for advanced diagnostics. A stitch in time saves nine: proper maintenance today means fewer engine rebuilds and more open-road memories tomorrow.Electrical Systems in Classic Bike MaintenanceTypical Electrical Faults in Vintage BikesElectrical gremlins are infamous among classic motorcycle enthusiasts, largely due to aging wiring, corroded connectors, and brittle insulation on vintage bikes. Common faults include intermittent lighting, malfunctioning horn, weak starting, and erratic gauges. Moisture, vibration, and time can degrade contacts, especially on older motorcycles with minimal electronic protection compared to modern bikes. Identify trouble early by checking fuses, ground connections, and the battery for corrosion or loose mounts.Simple cleaning and contact-tightening often resolve minor issues, but it’s crucial to use quality period-correct wire and replace brittle or spliced segments whenever possible. Document recurring problems to assist your local bike mechanic or provide context at your next visit to the bike shop for major repairs.Maintaining Classic Motorcycle Battery LifeBatteries in classic bikes require more attention than those in modern machines. Check electrolyte levels monthly on older lead-acid units, ensuring fluid fully covers plates to avoid premature failure. Charge batteries regularly during periods of inactivity and keep terminals clean and corrosion-free using a baking soda paste or commercial terminal cleaner.If your vintage motorcycle is stored for long stretches, remove the battery and keep it on a trickle charger in a cool, dry place. This not only extends battery life but also preserves your electrical system’s integrity, ensuring your classic bike is ready to fire up when the open road beckons again.Upgrading vs Restoring: Wiring on Vintage MotorcyclesDeciding whether to restore original wiring or upgrade to modern equivalents is a quintessential classic bike maintenance debate. For purists, period-correct wires, connectors, and tape preserve authenticity and value, provided they’re kept in good condition. However, for regular riders prioritizing reliability, discreet upgrades using modern wires and insulated connectors deliver peace of mind without compromising visual appeal.Regardless of approach, ensure that wiring follows the correct color-coding and route as per original diagrams. Upgrades should be reversible where possible, with detailed records maintained for future owners or bike mechanics restoring the vintage motorcycle to factory specification. As always, a methodical electrical check should be part of your routine classic bike maintenance regimen.Tire and Wheel Maintenance on Vintage Bikes and MotorcyclesTire Selection and Care for Classic Bike LongevityTires are your only touchpoint with the road, so choosing the correct type is critical for classic bike safety and performance. Vintage motorcycles demand period-appropriate tires, often with specific tread patterns and sidewall constructions to match original handling characteristics. When selecting new tires, consult with your local bike shop or trusted mechanic for compatible brands and models. Routine inspection for cracks, flat-spots, or hardening rubber ensures both authenticity and riding confidence.Always maintain recommended tire pressures and replace tubes if they show signs of age or patching. For rare or discontinued sizes, specialty restoration shops or vintage bike enthusiasts’ clubs are invaluable resources. Document your tire changes, and visually inspect the tread before every ride to avert avoidable mishaps on your classic motorcycle journey.Proper Wheel Alignment for Vintage Road BikesWheel alignment is critical to classic bike maintenance—not just for safety, but for maintaining the handling characteristics vintage bikes are prized for. Check both front and rear wheels for trueness by lifting the bike and spinning each wheel, watching for lateral movement or wobble. Inspect spoke tension and hub bearings for free play or friction, as these can dramatically impact stability on the road and contribute to premature wear in the bottom bracket and drive train.If you detect misalignment, professional adjustment at a reputable bike shop or with an experienced bike mechanic is recommended. Correcting alignment preserves your classic motorcycle’s integrity and lets you enjoy the road bike feel it was designed for, all while extending the lifespan of your tires and rims.Bottom Bracket Assessment for Classic and Vintage BikesThe bottom bracket is the unseen powerhouse of your classic or vintage bike, supporting the crank and connecting moving parts that turn your energy into forward motion. Routine assessment involves checking for play, smoothness of rotation, and absence of grinding or clicking sounds. Loose or worn bottom brackets sap your bike’s efficiency, affect gear alignment, and can even damage the steel frame if left unchecked. Cleaning, greasing, and torquing the bracket according to manufacturer specs should be part of every classic bike maintenance checklist.When restoring an old bike, consider replacing the entire bottom bracket assembly if it shows excessive deterioration—a task best performed with the right specialized tools or by your local bike mechanic. Keep careful records: documented maintenance significantly enhances resale value and provides peace of mind for future repairs.Brake System Overhaul: Staying Safe on Classic and Vintage BikesInspecting and Replacing Classic Motorcycle Brake PadsBrake pads on a classic motorcycle must be in excellent condition to ensure stopping power and safety. Check pads every few weeks for wear, glazing, or contamination by oil or dirt. If your classic bike features rim or drum brake systems—as is common with many vintage bikes—replace pads at the first sign of uneven or excessive wear for optimal grip. Advanced riders may upgrade to period-correct disc brakes where possible for better performance, but keep original components for authenticity and resale value.Replacement is straightforward: use a quality replacement compatible with your make and model. Properly bed in new pads, and always torque brake system bolts to specification. Don’t forget to test both brake lever responsiveness and front and rear balance during every maintenance cycle.Brake Fluid and Line Maintenance for Vintage MotorcyclesBrake fluids degrade over time, absorbing moisture and losing effectiveness—a significant risk for classic bikes. Change brake fluid annually, using the type recommended by your bike mechanic or the manufacturer. Inspect lines for brittle rubber, cracks, or leaks, and replace any suspect segments immediately. High-quality braided lines, while not always original, provide extra safety and reliability for regular riders without detracting from a vintage motorcycle’s looks.Bleed the system thoroughly to remove air and test for consistent lever feel. Keep a maintenance log detailing all brake servicing; this not only supports resale value but also protects your investment on every ride down memory lane.Chain, Gear, and Drivetrain Maintenance for Classic BikesChain Guard Cleaning and LubricationThe chain and drive train are some of the hardest worked—and most neglected—components on older motorcycles and classic bikes. Remove the guard and clean the chain using a dedicated solvent and a soft brush, making sure to dislodge any grit that could cause premature chain wear. After cleaning, dry it thoroughly before applying a liberal coat of motorcycle-specific chain lubricant to all moving parts, ensuring every link is protected. A clean chain guard not only protects your chain but helps retain the original look of your bike.Reinstall the chain guard and rotate the wheel to ensure even lubrication distribution. Check tension and alignment after every clean, adjusting as necessary per your classic bike’s owner manual. Regular attention here translates to smoother gear changes, reduced noise, and fewer costly drive train replacements in the long run.Gear Alignment and Adjustment in Vintage Road BikesGears are the gateway to smooth, enjoyable rides on classic and vintage bikes. Misaligned gears cause skipping, excessive wear, or even drive train failure—all avoidable with routine checks. Inspect the derailleur function, cable tension, and sprocket wear, adjusting as needed to maintain crisp shifting. For bikes with early indexed shifting systems or friction shifters, regular lubrication of moving parts is vital.Whenever you restore or customize a classic bike, genuine or period-correct parts help preserve authenticity, but modern replacements may offer better durability for regular use. After each adjustment session, test ride in all gear combinations and fine-tune until shifting is seamless. Consistency in gear alignment enhances both your riding pleasure and mechanical reliability, ensuring every journey is as trouble-free as the last.Protecting the Frame: Preserving Classic Motorcycle Looks and ValueRust Prevention and Regular Cleaning on Vintage BikesSteel frames and exposed chrome are prone to rust, one of the biggest threats to vintage bike longevity. Wash your motorcycle regularly using gentle automotive soap, thoroughly rinse, and dry all bare metal areas to eliminate water spots. A soft microfiber cloth and non-abrasive polish protect paint and bar tape, while chrome cleaner shields metallic finishes from moisture and pitting. Apply a thin coat of wax to painted and chromed surfaces every month as part of your classic bike maintenance ritual.Keep your motorcycle stored in a dry, well-ventilated garage to further deter rust. If rust does appear, gently remove it with steel wool and apply a touch-up paint to prevent spread. Document all frame care, especially before selling or insuring your vintage motorcycle—the attention to detail will stand out to buyers and appraisers alike.Classic Paintwork and Chrome ProtectionPreserve the original luster of classic paintwork and chrome with regular, detail-oriented cleaning. Avoid harsh chemicals, opting for specialized automotive polishes and protectants. Use a fresh microfiber cloth for each session and buff gently to maintain the finish without introducing scratches. For bikes with custom bar tape or rare decals, use pH-neutral products to avoid fading, and steer clear of abrasive pads or rough towels that might harm unique visual features.For serious collectors or those restoring an old bike, document every paint touch-up and chrome treatment. Both authenticity and attention to fine detail are key when presenting your vintage motorcycle for appraisal or sale, safeguarding not just the look, but the investment value of your ride for years to come.DIY Troubleshooting: Fixing Common Vintage Bike ProblemsHow to Handle Oil Leaks in Classic MotorcyclesOil leaks are a familiar foe for classic bike owners. Start with a thorough inspection: pay close attention to the bottom bracket area, valve covers, and main engine gaskets for signs of fresh seepage. Clean the suspect area and track the leak's origin after a short ride. Often, leaks on vintage motorcycles result from worn seals, aged gaskets, or periodic use of modern oils not suited for older metallurgy.Replace gaskets and seals with period-correct equivalents where available. Use a torque wrench to avoid over-tightening bolts on bare metal surfaces. If the leak persists despite your best efforts, consult with a specialist bike mechanic for a more in-depth engine or drive train inspection. Proper documentation helps pinpoint recurring issues and prevents costly mistakes during future repairs.Fixing Electrical Issues on Vintage BikesElectrical niggles, like intermittent spark or flickering gauges, are often solved by methodical troubleshooting. Begin by cleaning all ground points and checking for worn, frayed, or corroded wires. Test each circuit systematically with a multimeter, comparing readings against specifications for your specific vintage motorcycle model. Replace dubious connectors and isolate problematic circuits one-at-a-time, recording tests and repairs in your maintenance log.Keep replacement wires period-appropriate if preservation is the goal, or invest in discreet modern equivalents for regular use. Sometimes, a simple switch replacement or fuse swap will resolve chronic issues. If resolving the fault eludes your expertise or specialized equipment is required, make a note and seek professional help—a classic motorcycle specialist will have the tools and knowledge to solve vintage wiring headaches efficiently.Noise, Vibration, and Other Troubles in Classic Bike MaintenanceNoises or vibrations are more than mere annoyances—they can signal significant mechanical faults. Isolate sounds by location: clicks from the bottom bracket, rattles from the chain guard, or buzzing from loose bar tape. Investigate and secure any suspect fasteners, rubber bushings, or mounts. Persistent vibration may indicate issues with engine balance, transmission alignment, or wheel trueness.Systematically address each symptom: lubricate, tighten, and test after each adjustment. If the noise persists or is accompanied by new performance issues, escalate your investigation or consult a trusted bike mechanic. Keeping a detailed troubleshooting log streamlines diagnostics, saving both time and money in the quest to keep your classic bike road-ready.When to Call a Pro: Recognizing Classic Motorcycle Repair LimitsSpecialist Services for Rare and Antique BikesSome classic bike maintenance and restoration tasks are best left to specialists. If you own a particularly rare or antique model, sourcing period-correct parts, restoring intricate bodywork, or rebuilding unique drive train components may exceed DIY capabilities. Professional bike mechanics and restoration experts typically have access to original manufacturer documentation, specialized jigs, and advanced diagnostic equipment, ensuring the best results for your vintage motorcycle.Don't risk irreversible mistakes with rare bikes: investment in a professional repair or restoration often pays for itself in value preservation and peace of mind. Reputable bike shops or restoration houses can even provide before-and-after documentation, supporting insurance valuations and future resale opportunities.How to Choose a Classic Bike MechanicSelecting a qualified bike mechanic for your classic motorcycle is crucial. Look for professionals with demonstrable experience with your make and model—ask for references, inspect their workshop for organization and period-correct tools, and review sample restoration projects if possible. Local bike shops often have dedicated classic motorcycle specialists or can recommend reliable contacts within the vintage bike community.Choose a mechanic who values documentation and offers clear, itemized estimates for all work. Open communication ensures expectations are met and that your classic bike receives the attention, authenticity, and detail it deserves during every maintenance cycle or major overhaul.Preserving Value: Documentation and Record-Keeping for Vintage MotorcyclesWhy Maintenance Logs Matter for Classic Bike ResaleKeeping detailed maintenance logs is key to protecting your investment in a classic or vintage bike. Well-documented service history helps validate mileage, demonstrates responsible ownership, and reassures potential buyers during resale. Include dates, mileage, specific work performed, and the source of any replacement parts—especially for rare pieces like bottom brackets or authentic steel frame stampings.Buyers and appraisers alike value transparency. A comprehensive record shows off your commitment to classic bike maintenance and often results in a higher resale value and quicker sales, and can be a valuable resource for future repairs or insurance claims.Vintage Motorcycle Registration and Insurance TipsRegistration and insurance for vintage motorcycles require special attention. Photograph and catalog identifying frame numbers, keep copies of all classic bike maintenance receipts, and store original manuals. Seek out insurance policies that offer “agreed value” or restoration coverage, protecting both the labor and passion invested in your vintage bike.Consult your local vehicle registration authority or classic motorcycle groups for guidelines on historic or collector plates. Keeping up-to-date with regional rules can simplify compliance and protect your right to enjoy your treasured classic bike on public roads.People Also Ask: Classic Bike Maintenance Questions AnsweredHow to maintain a vintage motorcycle?Maintaining a vintage motorcycle involves a consistent, thorough approach: perform regular cleaning, lubricate chains and moving parts, and conduct detailed engine checks and safety inspections. Use the correct tools and quality parts—many experienced riders recommend keeping a separate kit for classic motorcycles. Focus on periodic oil changes, brake checks, bottom bracket assessments, and immediate attention to small faults. Consistency and detail will keep your vintage bike in peak condition for years to come.What is the N-1 rule for bikes?The N-1 rule is a playful take on bike collecting, suggesting that the ideal number of bikes you should own is "one fewer than would cause conflict with your significant other." For vintage bike enthusiasts, this means balancing your passion for collecting with the maintenance resources you can reasonably provide. It’s a reminder that every classic or vintage bike in your stable warrants dedicated attention to detail and regular upkeep for safe, enjoyable riding.What regular maintenance should be done on a bike?Routine bike maintenance includes cleaning the frame, lubricating the chain, checking brake pads, inspecting tires and tubes, and monitoring fluid levels. For classic and vintage bikes, add carburetor cleaning, oil changes, attention to the bottom bracket, and regular inspection of bar tape, steel frame joints, and electrical systems. This holistic approach prevents wear and costly repairs, supporting both safety and riding enjoyment.What is the best oil for classic bikes?The best oil for classic motorcycles is typically a high-zinc, mineral-based 20W-50 blend or a specialized classic motorcycle oil. These oils provide the necessary protection for vintage bike metallurgy and engine tolerances, ensuring optimal performance and minimizing wear. Always check your owner’s manual or consult a classic bike mechanic for the recommended type and change frequency for your specific model.Top Classic Bike Maintenance Tips from the ExpertsSeasonal storage advice: Always store your classic bike in a dry, secure garage, on stands if possible.Engine warm-up routines: Let your vintage motorcycle idle briefly before riding for even oil distribution.Fuel system care: Drain old fuel if riding infrequently and use preservation stabilizers for longer storage.Regular ride scheduling: Take your bike out for occasional rides to keep all moving parts fresh and lubricated.Authenticity preservation: Use period-correct parts and fluids to maintain your classic bike’s value and history."A well-maintained classic bike is not just a machine—it's a legacy." – Vintage Motorcycle Restorer Ann M.Key Takeaways: Classic Bike Maintenance EssentialsConsistency is crucial in classic bike maintenanceUse period-correct fluids and parts for vintage bikesSeek specialist help when limits are reachedMaintain thorough repair and maintenance documentationClassic Bike Maintenance Video GuideVideo Guide: Top 5 Classic Bike Maintenance StepsInstructional video demonstrating step-by-step classic bike maintenance, featuring tools, workspace, oil changes, brake checks, and troubleshooting with close-ups and expert narration.Watch detailed demonstrations on diagnosing and repairing common electrical faults in classic motorcycles.Frequently Asked Questions on Classic Bike MaintenanceHow often should I service my vintage motorcycle?Service your vintage motorcycle every 2,000-3,000 miles or at least twice a year, even if you ride infrequently. For stored bikes, conduct a thorough check before the riding season starts, focusing on fluids, brakes, and moving parts to ensure reliability and safety.Are original parts always best for classic bike maintenance?Original parts are ideal for authenticity and value, but quality reproductions or modern alternatives may offer improved reliability and safety for regular riders. Always document replacements, and consult with classic bike specialists for best-fit options.How can I prevent rust on my classic motorcycle?Store your bike in a dry space, clean and wax all painted and chrome surfaces regularly, and inspect for early signs of corrosion. Promptly address any rust spots with appropriate cleaners and touch-up paint to prevent spread and preserve structural integrity.Where can I find a reliable classic bike mechanic?Ask for recommendations at local vintage bike clubs, visit reputable bike shops specializing in classic motorcycles, or consult online forums. Look for mechanics with proven experience, transparent pricing, and a passion for proper vintage bike care.Conclusion: Safeguarding the Ride—Making Classic Bike Maintenance a RitualSumming Up the Vintage Motorcycle Care Journey"Preserving vintage bikes isn’t just about performance; it’s about passion, history, and legacy."Start Your Classic Bike Maintenance Journey Today – Call Nasty Performance Motorcycle Shop: 847-458-4858Your vintage motorcycle deserves passion, expertise, and ritual care. Call Nasty Performance Motorcycle Shop Today: 847-458-4858 for trusted classic bike maintenance support.

Terms of Service

Privacy Policy

Core Modal Title

Sorry, no results found

You Might Find These Articles Interesting

T
Please Check Your Email
We Will Be Following Up Shortly
*
*
*