
Nasty Performance ~ 847-458-4858 

  • Blog Home
  • Categories
    • Motorcycle Maintenance
    • Riding Tips & Preps
    • Safety & Inspection
    • Customizations & Upgrades
    • DIY Motorcycle Repairs
    • Motocycle Audio Systems
    • Motocycle Seasonal Care & Storage
    • Engine, Electrical Performance
  • Bike Night
  • Nasty Performance Motorcycle Shop
August 11.2026
1 Minute Read

Benefits of Motorcycle Suspension Upgrades That Improve Your Ride

Ever wondered why some riders seem to glide effortlessly over potholes and twisty roads while others struggle with every bump? The secret could be in their suspension. Discover how the benefits of motorcycle suspension upgrades go far beyond just absorbing bumps—they can transform your riding experience, comfort, and confidence on every journey. If you’re aiming for smoother rides, greater control, and a custom fit for your unique riding style, you’re in the right place.

Unlocking the Benefits of Motorcycle Suspension Upgrades

Motorcycle enthusiasts know that suspension upgrades can mean the difference between an average ride and an unforgettable, confidence-inspiring adventure. Stock suspension, while designed to suit the general rider, rarely matches the demands of diverse riding styles, various road conditions, or specialty needs like performance riding. By upgrading your motorcycle suspension system, you open a world of possibilities—whether you’re craving smoother handling on city streets, more stability on track days, or added comfort on long rides.

The benefits of motorcycle suspension upgrades include improved handling and stability, enhanced safety, and a noticeable boost in rider comfort. A quality suspension system that’s properly set up for your weight, riding style, and typical road conditions delivers a better bike feel and increases your contact with the road for unmatched confidence. Don’t underestimate the impact of technologies like adjustable rebound damping, spring rates, and custom rear shocks—these upgrades can dramatically redefine what your bike can do, keeping you safer and more comfortable mile after mile.
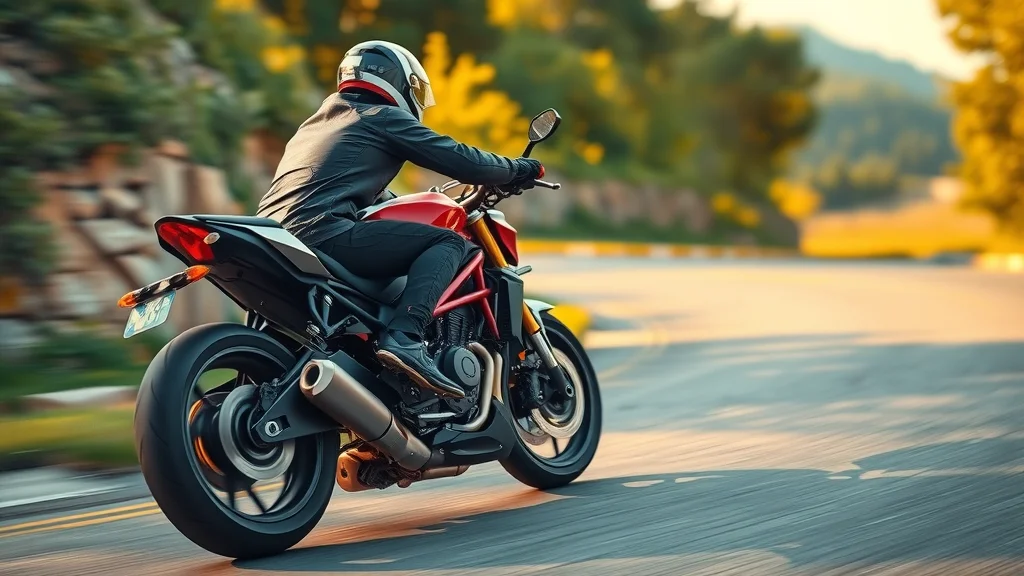
Dynamic motorcycle on a winding road showcasing the benefits of motorcycle suspension upgrades

Curious How Suspension Upgrades Transform Your Ride?

If you’ve ever questioned the performance of your bike’s stock shock or felt discomfort during long rides, you’re not alone. Upgraded suspension systems absorb bumps more efficiently and allow for precise adjustments tailored to your riding demands. This isn’t just about comfort—advanced rear shocks and forks dramatically improve the bike’s responsiveness, increase stability during aggressive maneuvers, and help you achieve a properly set ride height and sag setting for your individual needs. In short, suspension upgrades turn a good bike into a great one.

Why Riders Should Reconsider Their Stock Suspension

Many riders stick with their stock suspension simply because it comes standard with their motorcycle. However, stock setups are built for average rider weight and generic road conditions, often resulting in a compromise between cost and universal appeal. But every motorcyclist and every ride is unique. By reconsidering and upgrading your suspension system—especially the rear shock and rear suspension—you’ll experience custom-tuned handling and comfort. Don’t settle for one-size-fits-all when you can have a motorcycle suspension system perfectly matched to your riding style and expectations.

What You'll Learn About the Benefits of Motorcycle Suspension Upgrades

  • The fundamentals of motorcycle suspension systems
  • Why stock suspension often falls short
  • Impact of rear shock and rear suspension upgrades
  • Custom suspension options for every riding style
  • The real-world advantages of suspension upgrades for safety, comfort, and performance

Understanding Motorcycle Suspension Systems

To fully appreciate the benefits of motorcycle suspension upgrades, it’s crucial to understand how your bike’s suspension system works. At its core, the suspension system manages how your wheels respond to bumps, bends, and changes in speed. Properly functioning motorcycle suspension ensures your tires maintain contact with the road, balancing rider weight, and absorbing shocks to deliver that all-important smoother ride. Whether you commute daily or chase long rides, understanding these components is the first step toward a more comfortable and controlled ride.

How a Motorcycle Suspension System Works

The motorcycle suspension system is made up of several key components: the front forks, rear shock, springs, and dampers. The front forks absorb impacts from the front wheel, while the rear shock manages the back end. Springs are responsible for supporting the rider’s weight and maintaining proper ride height. Dampers control the speed at which the suspension compresses and rebounds, keeping the bike composed over bumps, in corners, or when braking. An aftermarket or upgraded suspension system typically offers adjustable features such as spring rate, damping adjustment, and preload. These features allow you to tailor the ride to your specific needs, resulting in a properly set, highly responsive, and confidence-inspiring motorcycle.
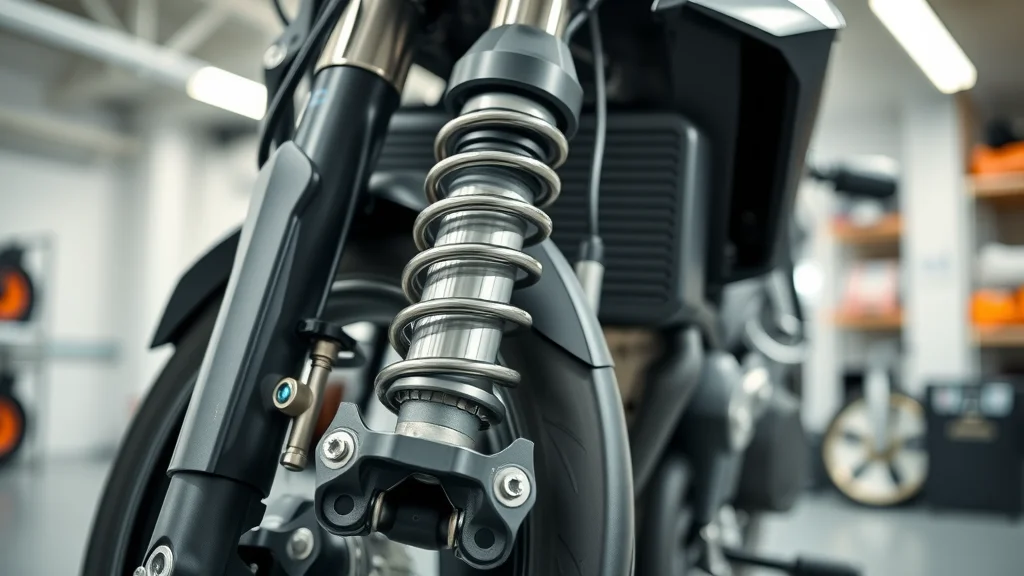
Modern motorcycle suspension components front fork and rear shock in a garage, illustrating suspension system details

The Role of Rear Shock, Front Forks, and Rear Suspension

Rear shock and rear suspension are critical for delivering stability, especially when carrying additional weight or riding on uneven surfaces. The front forks absorb bumps at the front; the rear shock supports the rear, and together they work as a complete suspension system. Upgraded rear suspension components often offer higher-quality materials, progressive spring rates, and sophisticated damping control. This means that whether you’re traversing city streets or attacking a racetrack, your bike feels properly set, your tire contact with the road is maximized, and your riding experience is elevated. The right combination of suspension upgrades changes everything—from reducing harshness on rough roads to offering more precise bike feel in corners.

Common Motorcycle Suspension Terms Explained

Understanding suspension terminology will help you make the most of your upgrades: Sag Setting: Adjusts how much the suspension compresses under your weight. Spring Rate: Refers to how stiff the suspension spring is; it must match your rider weight and riding style. Rebound Damping: Controls the speed at which the suspension returns to its normal position after compression. Compression: Refers to how fast the suspension compresses when hitting a bump. Damping Adjustment: Fine-tunes how the suspension absorbs and controls movement for a custom ride experience. These concepts are foundational for anyone looking to achieve the benefits of motorcycle suspension upgrades.

Comparison of Stock Suspension vs. Upgraded Suspension
Feature Stock Suspension Upgraded Suspension
Damping Control Basic Tunable
Comfort Limited Enhanced
Performance Standard Improved

Why Upgrade? Benefits of Motorcycle Suspension Upgrades

So, why should you consider a suspension upgrade? It’s simple: enhanced safety, improved ride quality, and a finely tuned bike that responds to your every input. Unlike the limitations of a stock suspension, an upgraded suspension system offers adjustability to match your preferred riding style and local road conditions. You’ll stop worrying about bumpy streets, potholes, or sudden swerves because your bike will feel planted and predictable. Whether you want better handling for daily commuting or specialized performance for track days, the benefits of motorcycle suspension upgrades are undeniable.

Improved Handling and Stability With Advanced Suspension Systems

When you install an upgraded suspension, the immediate difference you’ll notice is in cornering and overall ride stability. The advanced control offered by adjustable rear shocks and front forks keeps your tires firmly in contact with the road, even during aggressive maneuvers. No more squatting or nose-diving—just a smoother ride and increased confidence through every curve. Whether it’s a custom suspension setup or a high-quality aftermarket shock, the correct spring rate and properly set sag settings will maximize grip, enhance feedback, and allow you to push your bike further with safety and control.
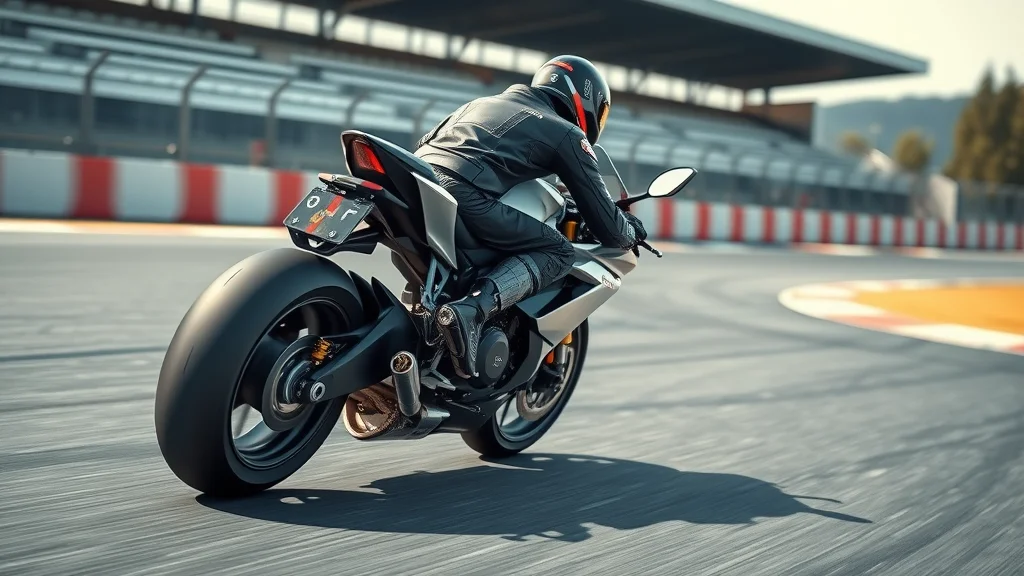
Sport motorcycle on racetrack with visible upgraded suspension system for improved handling

Enhanced Safety: How Suspension Upgrades Reduce Braking Distance

Safety is paramount, and a proper suspension system significantly reduces your stopping distance. With upgraded suspension, your tires maintain better contact with the surface—even under heavy-braking situations—because the damping and rebound characteristics are optimized for your weight and riding style. You’ll experience less front-end dive, more predictable responses, and greater control when maneuvering in emergencies. Improved suspension upgrades can make a meaningful difference, especially on unpredictable roads, enhancing your safety and bike feel every time you ride.

Better Comfort on Every Ride: Suspension Upgrade Advantages

Comfort is often overlooked but critical—especially on longer rides. An aftermarket shock or upgraded suspension system absorbs bumps and vibrations, drastically reducing rider fatigue. Quality suspension upgrades use superior materials and sophisticated damping systems that smooth out the roughest surfaces, making every journey—long or short—much more enjoyable. The impact is immediate: less soreness, more stamina, and greater enjoyment, mile after mile.

"When you invest in the benefits of motorcycle suspension upgrades, every mile becomes more enjoyable and secure."

Personalizing Performance: Matching Suspension Upgrades to Your Riding Style

Not all riders are alike, and neither are their needs from a motorcycle suspension system. Personalizing your custom suspension setup ensures maximum performance, whether you’re touring across states, commuting daily, or chasing adrenaline on a track. The correct suspension upgrades, properly adjusted for your riding style, rider weight, and typical road conditions, unlock your bike’s potential and elevate every ride.
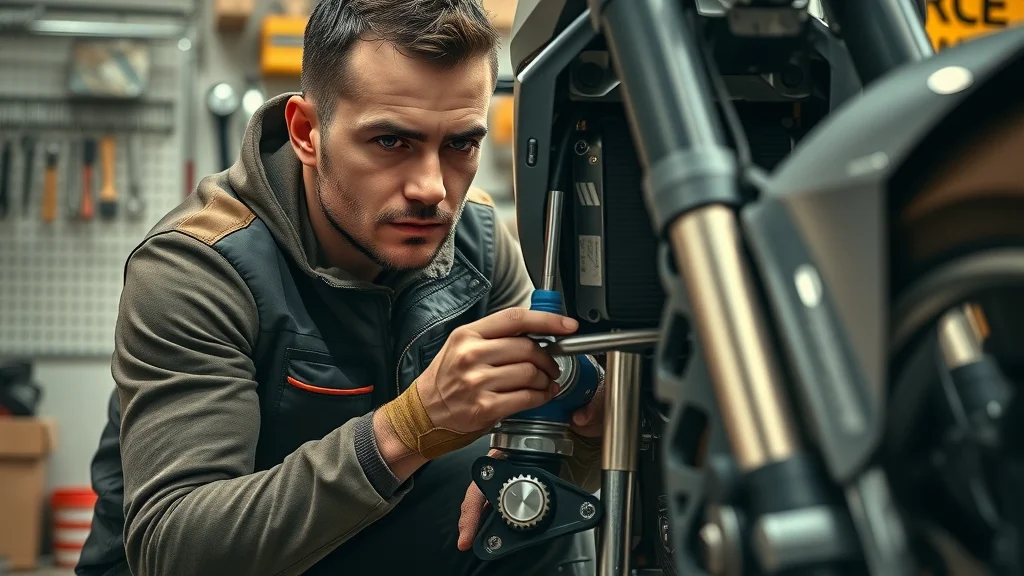
Motorcyclist adjusting rear shock for riding style in custom garage environment

How Riding Style Influences Suspension Choices

Every riding style requires a different approach to motorcycle suspension upgrades. For example, long-distance touring demands plush damping and comfort-oriented settings, while aggressive track riding benefits from firmer spring rates and stiffer damping for stability. Adventure riders need flexibility to handle rough, variable terrain, while commuters may prioritize both maneuverability and a smoother ride over city streets. No matter your preference, a custom or upgraded suspension system can be tailored to fit your individual expectations.

  • Touring
  • Commuting
  • Track days
  • Adventure riding

Custom Suspension Solutions for Every Type of Rider

Custom suspension options include adjustable shocks, variable spring rates, and advanced damping controls, all designed to create a suspension system matched to your habits and needs. Whether you’re lighter or heavier than average, carry a passenger, or carry gear, custom suspension upgrades ensure your bike is properly set for ideal sag, ride height, and response. The flexibility to fine-tune your setup, from rebound damping to compression adjustments, results in a smoother ride, less fatigue, and more enjoyment. For many, investing in aftermarket suspension or tailored rear shock solutions is one of the best ways to improve riding experience and confidence.

Diverse group of motorcyclists with bikes featuring visible custom and upgraded suspension systems

The Impact of Compression and Rebound Damping on Riding Experience

Two of the most crucial adjustments for motorcycle suspension systems are compression and rebound damping. Compression damping controls how quickly the suspension compresses under a bump—essential for absorbing shocks and maintaining control. Rebound damping determines how rapidly the suspension returns to its original position after being compressed. Fine-tuning these settings, especially on an upgraded rear shock or rear suspension, leads to significant improvements in stability, comfort, and the bike’s responsiveness. Mastering these adjustments ensures your bike feels correct for your weight, pace, and riding style, leading to a safer and more predictable riding experience.

seasonal bike care strategies

Rear Shock and Rear Suspension: Key Upgrades for Maximum Impact

When it comes to maximum impact, focusing on the rear shock and rear suspension yields big results. The rear end of your motorcycle takes much of the load, especially under acceleration, when carrying passengers, or with extra cargo. Upgrading the rear suspension—from progressive-rate springs to adjustable aftermarket shocks—improves traction, stability, and comfort on any road surface. Riders who experience instability, excessive bouncing, or unpredictable bike feel often find that rear suspension upgrades completely transform their motorcycle’s behavior and their confidence as a result.

Stock vs. Upgraded Rear Suspension: What Changes?

The main difference between stock and upgraded rear suspension is the quality and adjustability of the components. Stock shocks are built for average loads and cost-efficiency, offering limited adjustment for sag, spring rates, and damping. Upgraded rear suspension uses higher-quality materials and more precise valving, allowing you to fine-tune settings for your weight, gear, and riding style. The result? Better traction, less bottoming out, superior response over rough surfaces, and customizable ride height and sag. Investing in an aftermarket shock or custom rear suspension ensures your bike feels dialed in, safer, and more enjoyable no matter the scenario.
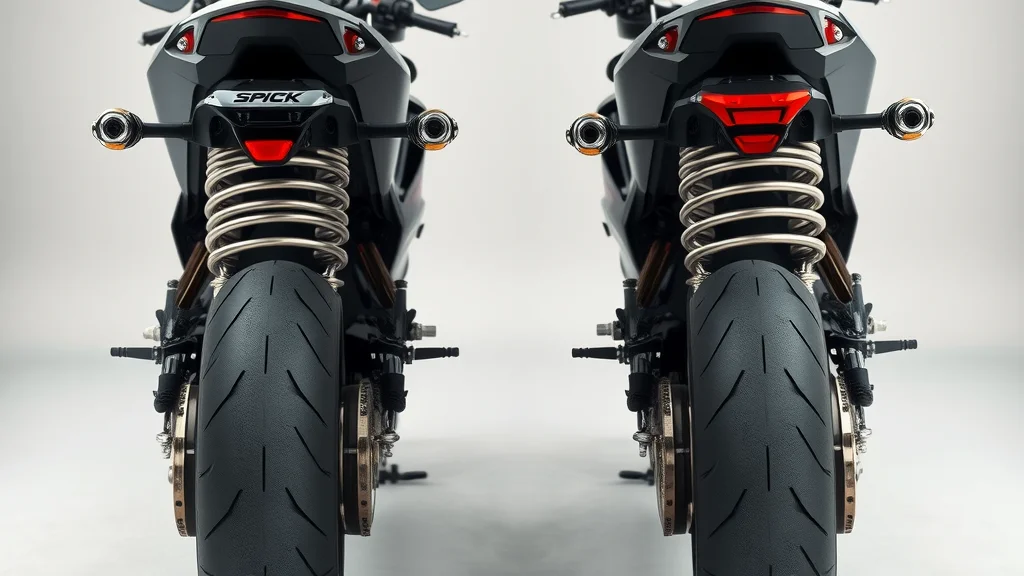
Comparison of stock and upgraded rear suspension on two motorcycles, highlighting suspension upgrades

Understanding Rebound Damping in Rear Shock Adjustments

Rebound damping is vital to the rear shock’s performance. Too little damping and your suspension rebounds too quickly, causing the bike to feel bouncy and unsettled; too much, and your rear suspension could pack down, making it harsh and unresponsive. A properly adjusted aftermarket or custom shock with well-set rebound damping delivers a smoother ride, greater traction, and a more predictable bike feel. By understanding and tuning rebound damping, you take control of your riding experience, whether on uneven city streets or twisty mountain passes.

The Installation Process for Suspension Upgrades

Considering a suspension upgrade and wondering if you can tackle it yourself? While some upgrades, like adjusting preload or sag settings, are DIY-friendly, installing advanced rear shocks or front forks often requires special tools and mechanical expertise. Proper installation ensures that your new suspension system performs as intended and keeps you safe on the road. Following the manufacturer’s specifications for spring rates, damping adjustment, and torque settings is crucial for a successful upgrade.

Can You Upgrade Motorcycle Suspension Yourself?

With a bit of mechanical know-how, basic upgrades—such as swapping springs or making minor damping adjustments—can be done at home with common tools. However, for full suspension replacements or advanced upgrades (like new rear shocks, upgraded forks, or custom suspension systems), professional installation is recommended. This guarantees that every component is properly set, torque specifications are met, and your new suspension system is correctly calibrated for your weight and riding style—giving you peace of mind for every ride.
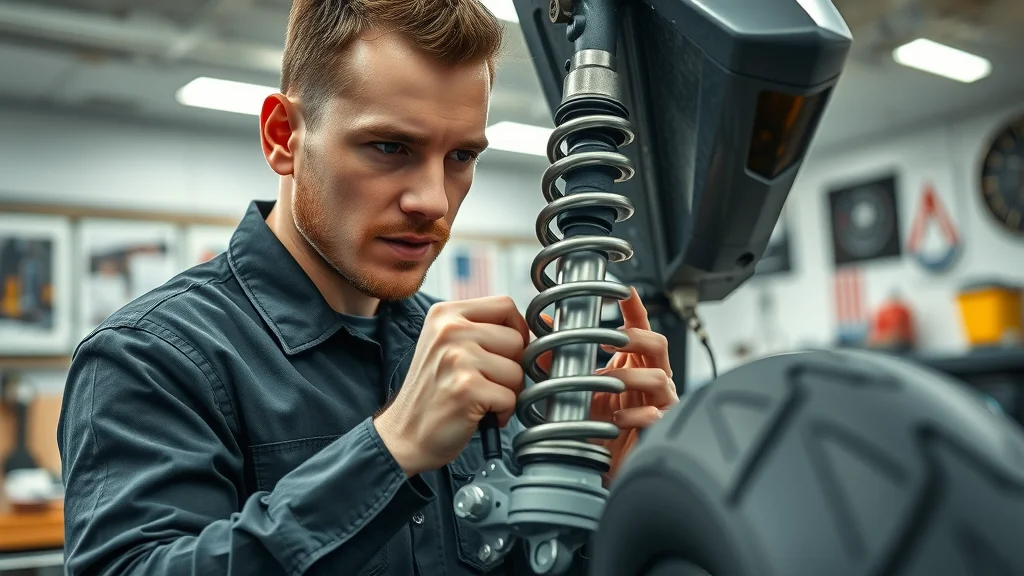
Professional mechanic installing a high-performance rear suspension upgrade on a motorcycle

Professional Suspension System Setup: What to Expect

Bringing your motorcycle to a professional shop for suspension upgrades comes with several benefits. Experts will assess your rider weight, ask about your typical riding style, and set your new shocks and forks to achieve the correct sag settings, spring rates, and damping adjustments. They’ll also check for any issues, such as worn bushings or leaking seals, to ensure your new system runs smoothly. Expect a detailed walk-through of your new setup and advice on how to fine-tune as your needs evolve, ensuring you enjoy all the benefits of motorcycle suspension upgrades from day one.

How Suspension Upgrades Improve Long-Term Riding Experience

The long-term benefits of motorcycle suspension upgrades extend beyond day-to-day riding. With the right upgrades, you’ll experience reduced fatigue, less wear and tear on your bike, and a prolonged lifespan for your entire suspension system. Investing in quality suspension components and professional setup pays dividends in both the quality and reliability of your motorcycle adventures.

Happy motorcycle rider enjoying the benefits of upgraded motorcycle suspension system while cruising on a scenic highway

Reduced Rider Fatigue on Extended Journeys

Few things are as exhausting as fighting an uncomfortable, bouncy bike over long distances. Suspension upgrades take the sting out of rough roads and long rides, absorbing impacts and reducing vibrations that fatigue muscles and joints. Riders who tackle cross-country adventures, challenging commutes, or group rides quickly notice how a well-tuned motorcycle suspension system supports their posture, keeps them fresher, and allows them to focus on the road ahead. A smoother ride means more time enjoying the journey and less time nursing aches afterward.

Increasing the Lifespan of Your Motorcycle Suspension System

Upgraded suspension doesn’t just improve ride comfort; it also increases the durability of your bike’s critical components. High-quality springs, dampers, and bushings resist wear, retain their performance longer, and reduce stress on the frame, wheels, and tires. With regular maintenance and professional setup, your suspension system will deliver consistent performance and protect your investment for years, making it one of the smartest ways to enhance your long-term riding experience.

Visual Guide:

Frequently Asked Questions About Motorcycle Suspension Upgrades

What is the 4 second rule on a motorcycle?

The 4 second rule is a safety guideline to maintain a safe following distance behind another vehicle. You pick a fixed point, like a signpost, and ensure it takes at least 4 seconds to reach it after the vehicle ahead passes it. A properly set suspension system helps you react more quickly and efficiently, contributing to safer braking and smoother handling for your motorcycle, especially during sudden stops.

Is upgrading your suspension worth it?

Absolutely! Upgrading your suspension brings immediate benefits such as enhanced comfort, better handling, and increased safety. Whether it's a smoother ride, more precise steering, or reduced rider fatigue, investing in a quality suspension system pays off for every rider. Custom or aftermarket shocks tailored to your riding style and weight transform not just your motorcycle, but your entire riding experience.

Which bike is most liked by girls?

There isn’t a single answer, as motorcycle preferences vary widely. Many female riders appreciate bikes that are lightweight, have adjustable seat heights, and offer a comfortable ride—qualities enhanced by a good suspension system. Suspension upgrades can make a bike more accessible and comfortable, increasing confidence for any rider, regardless of gender.

Is it better to have higher or lower preload?

The ideal preload depends on your weight, gear, and riding style. Higher preload is used to compensate for added weight (like passengers or luggage) while lower preload is comfortable for solo riding. It’s essential to properly set your preload—too much can make the ride harsh, and too little can cause the bike to sag excessively and handle poorly. Upgraded suspension systems provide the adjustments needed to perfectly match your needs.

Essentials to Remember: Key Takeaways on the Benefits of Motorcycle Suspension Upgrades

  1. Suspension upgrades deliver real improvements in handling, comfort, and safety.
  2. Tailoring your motorcycle suspension system to your riding style maximizes performance benefits.
  3. Rear shock and rear suspension upgrades make a significant difference for demanding riders.

Ready to Transform Your Motorcycle Ride?

Call Nasty Performance Motorcycle Shop Today: 847-458-4858

Invest in your ride. From improved safety to unmatched comfort, the benefits of motorcycle suspension upgrades await. Contact our team and take the first step toward a better ride today!

seasonal bike care secrets every rider must know

Customizations & Upgrades

0 Comments

Write A Comment

*
*
Please complete the captcha to submit your comment.
Related Posts All Posts

Cost of LED Lighting Upgrades: Is It Worth the Investment?

Did you know that upgrading to LED lighting can reduce your lighting energy costs by up to 75% over time? Yet, despite the clear promise of energy savings, many homeowners and small business owners pause at the cost of LED lighting upgrades. Is the "sticker shock" justified, or does the math make sense in the long run? In this comprehensive guide, we'll peel back the layers of lighting upgrades, examining the true costs—and the real returns—of making the switch to LEDs. Shedding Light on the Cost of LED Lighting Upgrades When it comes to lighting upgrade decisions, understanding the cost of LED lighting upgrades is essential. While the upfront price tag for LED bulbs and fixtures can initially seem high compared to traditional bulbs like incandescent or metal halide, the calculus shifts when you take a closer look at long-term savings. Not only do LED lights dramatically reduce ongoing energy costs, but their durability and efficiency can also mean far fewer bulb replacements and lower maintenance costs. For small business owners and homeowners alike, the decision often centers on whether the initial investment is justified by sustained energy savings and improved lighting quality. This article unpacks the many practical sides of upgrading to LED lighting, from understanding the breakdown of costs to evaluating your potential return on investment with a lighting retrofit versus sticking with older lighting solutions. Why the Cost of LED Lighting Upgrades Matters Today The focus on sustainable buildings, rising energy prices, and the need to reduce energy cost for both environmental and financial reasons makes understanding the cost of LED lighting upgrades more relevant than ever. LEDs not only consume less power but also contribute to fewer maintenance headaches and longer operational lifespans. However, many decision-makers are still put off by the perceived initial expense, weighing it against competing priorities. “Switching to LED lighting can result in significant long-term savings, but the initial investment is often what stalls decision-making for both homeowners and small businesses.” What You’ll Learn About the Cost of LED Lighting Upgrades Understand every factor affecting the cost of LED lighting upgrades Compare LED lighting retrofit versus traditional lighting retrofit Identify potential return on investment for LED upgrades Review key considerations for LED installation and maintenance cost Gain clarity on the practical and financial benefits for your home or small business Understanding the Cost of LED Lighting Upgrades When evaluating the cost of LED lighting upgrades, it's imperative to look past just bulb prices. The total expenditure involves factors such as installation, fixtures, and the complexity of the space. Most notably, an LED retrofit can sometimes require new wiring or upgrades to existing lighting systems, especially if the previous setup used fixtures incompatible with modern LED lights. However, the initial cost should always be compared with the reduced energy costs, fewer replacements, and less frequent maintenance that LED bulbs provide. Their average life is several times longer than traditional options, and improved design in LED fixtures means richer, more controllable lighting—ideal for both homes and small businesses. If you're considering how to maximize the value of your upgrades, it's also worth exploring how seasonal changes can impact your maintenance routines and overall efficiency. For practical tips on keeping your equipment in top shape throughout the year, check out these essential seasonal care strategies for riders. Key Elements That Influence the Cost of LED Lighting Upgrades Understanding what affects the cost of LED lighting upgrades allows for smarter planning and budgeting. Each project is unique, but common elements can dramatically impact your investment and eventual savings. Type of LED lights and fixtures: Different brands, wattages, and fixture types vary widely in price and efficiency. Number of light bulbs required per space: Larger areas or businesses with more rooms naturally require more bulbs and fixtures. Complexity of the LED installation: Retrofitting old wiring, upgrading panels, or automating controls can add to labor costs. Existing infrastructure and requirement for a lighting retrofit: The age and compatibility of current fixtures dictate the scale and type of upgrade needed. Expected energy saving and energy savings potential: The greater your current usage, the more you’ll save with energy-efficient LED lighting. By breaking the costs down and factoring in likely future savings, you can weigh your options and tailor your lighting upgrade to your unique home or small business needs. LED Lighting Retrofit vs. Traditional Lighting Retrofit Deciding between an LED lighting retrofit and a traditional solution may seem daunting, but the differences are substantial. A traditional lighting retrofit often uses less efficient bulbs (like incandescent bulbs or metal halide lamps) that last fewer hours and use significantly more electricity. In contrast, an LED lighting retrofit captures modern advances, delivering superior efficacy, reliability, and, crucially, reduced operational costs. Let's put these differences into perspective by examining their real-world impact on costs, maintenance, and performance over time. Comparing the Cost and Benefits of LED Lighting Retrofit A direct comparison shows the short- and long-term trade-offs between these two retrofit strategies. LEDs win in almost every category except up-front cost. Still, the investment typically pays for itself within a few years through lower energy bills and fewer replacements. Comparison Table: LED Lighting Retrofit vs. Traditional Lighting Retrofit Feature LED Lighting Retrofit Traditional Lighting Retrofit Initial Cost Higher Lower Maintenance Cost Low (rare bulb replacement, less labor) High (frequent bulb changes, more labor) Lifespan Up to 25,000–50,000 hours (times longer than traditional) 1,000–5,000 hours Energy Saving 50–75% savings possible Minimal savings compared to LEDs Return on Investment High (payback in 1–3 years) Low Lighting Quality Consistent, instant-on, multiple color temperatures Often flickers, limited color quality Life Cycle of LED Lights: Long-Term Maintenance Costs The value of LED lighting comes alive when you look at the full life cycle. LED bulbs typically last tens of thousands of hours—far outpacing the lifespan of incandescent bulbs, metal halide, or even compact fluorescents. This extended life means replacement and maintenance costs drop lower and lower over the years. In a well-planned LED lighting retrofit, your maintenance team will spend less time on ladders and more time on other priorities. For building managers, these savings are especially pronounced in facilities where lighting access is difficult or downtime is expensive. The fewer the burned-out bulbs, the lower the labor bills and the less disruption to your home or business. How the Cost of LED Lighting Upgrades Impacts Your Bottom Line The ultimate measure of any lighting upgrade is its impact on your bottom line. After the initial outlay for LED installation, you’ll immediately see a drop in monthly energy costs and a sharp reduction in costly maintenance cycles. Businesses report hundreds, even thousands, in annual savings on energy and replacements when older bulbs are swapped for longer-lasting LED lights. Evaluating Maintenance Cost and Maintenance Costs Over Time When evaluating the cost of LED lighting upgrades, consider not just the price of a new LED bulb, but also the long-term maintenance costs associated with replacements and repairs. Since LED fixtures don’t need to be replaced as frequently as metal halide or incandescent, you’ll see a marked improvement in your maintenance budget. "While LED bulbs can be more expensive upfront, their lower maintenance costs and extended lifespan contribute to considerable savings in the long run." Return on Investment (ROI) from LED Lighting Upgrades For most people considering a lighting retrofit, the pivotal question remains: What’s my return on investment? It’s important to look beyond the initial spend and track how quickly the energy savings recoup that investment and begin feeding back into your bottom line. Calculating the Return on Investment for LED Lighting Payback period—how long it takes for the energy cost savings to match your initial cost of LED lighting upgrades—is typically only 1–3 years for most homes and businesses. Simple calculations compare pre-upgrade electricity bills with post-upgrade costs, while factoring in reduced maintenance costs and any rebates. Ultimately, beyond the payback period, every month translates to pure savings. Case Study: Small Business Savings with LED Lights Consider a small business transitioning from energy-hungry metal halide lamps to modern LED fixtures. After an LED lighting retrofit, not only did they notice better lighting quality and improved employee comfort, but their annual lighting energy costs plummeted. Their maintenance staff also spent less time replacing bulbs—freeing resources for other operations. Over a few years, the investment paid for itself, and their energy bills were consistently lower every month. LED Lighting for Small Business: Why Upgrade? For any small business, lighting is both a cost center and a strategic asset. Upgrading to LED lighting doesn’t just bring down utility costs—it elevates workplace safety, ambiance, and employee productivity. Dimmable and color-tuned LED fixtures can be tailored to the specific needs of your business, whether it’s a bright retail space or a calm office environment. Practical Benefits and Energy Saving for Small Businesses Small businesses that invest in LED lighting upgrades enjoy clear, measurable benefits. Not only do these upgrades improve the workspace, but they also result in a competitive advantage through lowered operational costs. Improved energy efficiency with LED fixtures Decreased energy saving consumption Reduced maintenance costs and downtime Enhanced lighting quality and workplace comfort Top Considerations Before Investing in LED Lighting Upgrade Before you leap into a lighting upgrade, weigh a few essential factors. Careful planning ensures your LED lighting retrofit fits your needs, brings tangible energy savings, and avoids costly missteps. Choosing LED Light Bulbs and Fixtures Evaluate the lumens, color temperature, and compatibility of LED bulbs and LED fixtures. The right selection impacts both the quality of light and energy efficiency in your space. Not all LED lights are equal—look for products from reputable brands, suitable CRI (color rendering index) for your environment, and certifications for efficiency. LED Installation Planning and Budgeting Map out the requirements for LED installation. This includes evaluating your current infrastructure, calculating the number of fixtures, and getting estimates from a reliable electrical contractor. Don’t forget to budget for any upgrades required to existing wiring, controls, or lighting panels. Potential Pitfalls in Lighting Retrofit Projects Common mistakes with lighting retrofits include mismatching LED bulbs, overlooking fixture compatibility, or failing to account for future expansion needs. Work closely with lighting specialists to ensure your investment performs as expected and stands the test of time. Addressing Common LED Lighting Upgrade Concerns Impact of LED lighting on migraines Potential influence on circadian rhythm Professional fees for LED installation Longevity and replacement schedules for LED lights People Also Ask: Cost of LED Lighting Upgrades Do LED lights trigger migraines? Understanding the Health Effects of LED Lights Most modern LED lights are engineered to minimize flicker and provide consistent illumination, reducing the risk of triggering migraines compared to older or lower-quality lighting solutions. That said, highly sensitive individuals may find rapid flickering or harsh blue-white tones unpleasant. Always choose high-quality, flicker-free LED lighting and look for warm color temperatures to enhance comfort at home or in the office. Is it worth the cost replacing all my bulbs to LED? Weighing the Cost of LED Lighting Upgrades for Your Home or Business Upgrading every light bulb in your home or business to LED bulbs offers significant savings on energy costs and maintenance. Though the upfront cost of purchasing bulbs and installation is higher, these expenses are quickly offset by lower utility bills and fewer replacements. The investment is particularly compelling in spaces where lights are frequently used—think kitchens, offices, or commercial floors—making this upgrade one of the most impactful ways to save money and improve lighting quality. Do LED lights affect circadian rhythm? Scientific Insights on LED Lighting and Sleep Patterns LED lights, like all artificial lighting, can influence your circadian rhythm if used improperly—especially at night. Exposure to high-intensity blue-rich LED lighting before bedtime may disrupt sleep for some people. To limit these effects, opt for LED fixtures with warm white color temperatures in bedrooms, and consider dimmable or adjustable lighting to mimic natural dawn and dusk cycles. How much will an electrician charge to change a light fixture? LED Installation Costs: What to Expect The price charged by an electrical contractor to swap your old fixture for an LED light or panel can vary depending on the complexity of the job and location. While it often represents a small portion of the total cost of LED lighting upgrades, labor and safety are critical—professional installation guarantees longevity, correct wiring, and code compliance for your lighting upgrade. Frequently Asked Questions about the Cost of LED Lighting Upgrades What is a lighting retrofit and how does it impact costs? A lighting retrofit involves updating old fixtures and bulbs to modern, efficient options like LED lighting. While initial investment may be higher, you benefit from lower energy costs, better lighting quality, and less maintenance over time. How do LED light bulbs compare to metal halide or other traditional bulbs? LED bulbs offer longer lifespans, greater efficiency, and lower operation costs than metal halide or incandescent bulbs, which require frequent replacement and use more energy for the same illumination. What are the benefits of a complete LED lighting upgrade? A complete upgrade provides enhanced lighting quality, increased safety, decreased downtime, reduced environmental impact, and significant long-term savings for both homes and small businesses. Key Takeaways: Making an Informed Decision About the Cost of LED Lighting Upgrades LED lighting upgrades require upfront investment but offer significant energy savings and maintenance cost reductions. A successful lighting retrofit delivers better illumination and a strong return on investment. Careful planning ensures the cost of LED lighting upgrades pays off in the long run. Ready to Upgrade? Explore Your LED Lighting Options Call Nasty Performance Motorcycle Shop Today: 847-458-4858 Upgrade to smarter lighting and start saving today — your wallet and your workspace will thank you! As you weigh the benefits of LED lighting upgrades, remember that optimizing your environment goes beyond just energy savings—it’s about creating a space that supports your lifestyle or business goals year-round. If you’re interested in taking a holistic approach to maintenance and performance, our guide on seasonal bike care secrets every rider must know offers valuable insights that can help you keep all your equipment running smoothly, no matter the season. Exploring these strategies can empower you to make smarter investments, not just in lighting, but in every aspect of your property or business. Take the next step toward efficiency and reliability—your future self will thank you for it.
Common Mistakes in Custom Fender Designs and How to Avoid Them

Hook: Have you ever wondered if the perfect custom fender is quietly sabotaged by a small, easily overlooked flaw? Even the sharpest builders can miss details that lead to costly, frustrating fender damage. Are You Making These Common Mistakes in Custom Fender Designs? If you’re investing time, money, and creativity into a custom build, you want your fenders to look stunning and perform reliably. Yet, common mistakes in custom fender designs continue to plague even the most experienced garage pros and professional shops. From misunderstood material choices like mishandled carbon fiber to improper fitment and rusty mounting areas, the list of pitfalls is long—and the consequences can be both a cosmetic issue and a real threat to your project’s longevity or safety. It’s tempting to focus solely on the visual wow factor, but skipping over essential details like precise alignment, hardware specifications, or corrosion protection leads to ongoing headaches and recurring fender damage. Before your next performance build hits the road, ask yourself: Have I double-checked every mounting point, or am I risking wheel clearance problems and paint damage? Avoiding these traps can mean the difference between a flawless custom build and a series of costly repairs or replacements. What You'll Learn Discover the frequent pitfalls in custom fender designs Explore the most common types of fender damage See expert opinions on prevention and best practices Candid custom motorcycle workshop scene: Builders carefully examining fender alignment. "Custom fender work is an art, but even the most seasoned builders can fall into traps that lead to unnecessary fender damage." Common Types of Fender Damage in Custom Builds When it comes to common types of fender damage, every builder has a story—from a pristine custom job marred by parking lot dings to side fenders succumbing to road debris. The reality is that no matter how much care is taken, design oversights often show up first as poor fit or paint damage. If the fender is cracked, exhibits shallow dents, or there is rust near mounting points, it’s likely a result of avoidable errors like ignoring mounting specifications or misjudging tire clearance. Some types of fender damage are direct results of improper choice or mishandling of materials, especially with advanced materials like carbon fiber. Others relate to hardware issues: ignoring fastener ratings, mounting in ill-prepared locations, or neglecting corrosion protection. These fender damage affects both the aesthetics and the structural integrity of the build, creating headaches that might require a replacement fender or even threaten the safety of surrounding panels. Knowing these typical mistakes allows you to avoid moderate to severe consequences that can come from something as simple as poor wheel clearance or neglected corrosion protection. While addressing these common pitfalls is crucial, it's equally important to consider how seasonal changes can impact your bike's components. For a deeper dive into maintaining your ride throughout the year and preventing weather-related issues, check out these seasonal bike care secrets every rider must know. Type of Fender Typical Mistake Related Fender Damage Possible Solutions Steel Fender Poor fitment and skipping corrosion protection Paint damage, rust near mounting points, shallow dents Careful alignment; rust-preventive coatings Carbon Fiber Fender Mishandling during installation; incorrect fasteners Cracks, stress marks, mounting area failures Use recommended mounting techniques; specialized fasteners Plastic (ABS) Fender Improper bolt torque; exposure to road debris Fracture points near mounting, cosmetic fading Check bolt specs, use UV-resistant coatings Aluminum Fender Overtightening fasteners; neglecting vibration damping Cracking near mounting, moderate to severe structural failure Use proper torque specs, install vibration dampers Types of Fender Damage Affecting Custom Designs Different types of fender damage impact your custom build in unique ways. Some fender damage affects only the cosmetics—a scratched paint job or minor dings from a parking lot scrape may not seem serious, but they can set in motion a chain of rust and fatigue. Poor fitment can cause persistent rubbing against the tire, leading to gradual wear or even a catastrophic failure if the tire clearance is too tight. For those who specialize in carbon fiber builds, even a small crack or improper mounting technique can render a premium fender useless, requiring a full replacement. Larger issues, such as cracks near mounting points or stress marks around hardware, might indicate deeper flaws that can compromise the stability of the entire setup. Road debris can also quickly convert a pristine fender into a replacement candidate, especially when overlooked during the material choice or mounting phase. Recognizing these common types of fender damage, from cosmetic issues to mounting area failures, is crucial for preventing problems that escalate into major repair bills or jeopardize the safety and looks of your ride. Macro detail of a damaged custom fender showing cracks and scratches. Misalignment issues Inadequate material choice (e.g., carbon fiber mishandling) Ignoring mounting hardware specifications Overlooking corrosion protection How Damage Affect Custom Fender Performance The way damage affects custom fender performance is often underestimated, yet it can seriously undermine even the most impressive build. When a fender is poorly aligned—perhaps due to a rush during fitting or misjudged wheel clearance—it doesn’t only look wrong, but can cause tire rubbing, abnormal suspension responses in turns, and even accelerated wear on both the fender and the tires. More severe structural issues, such as corrosion spreading from mounting points or fatigue cracks from improper fasteners, might force you into repeatedly replacing the fender or facing complications with surrounding panels. Cosmetic damage, like chipped paint, may seem like a minor concern. However, once protective coatings are breached, moisture and road debris can creep in, spreading rust near mounting areas and weakening the fender itself. In performance builds especially, a poorly installed or cracked fender can compromise airflow and stability at speed. Ignoring mounting hardware specifications may leave your fender vulnerable to vibration, resulting in a moderate to severe performance drop—or worse, complete detachment. Thus, addressing how damage affects your setup is not just about aesthetics; it’s an essential part of longevity and safety for all types of fender in custom work. Visual comparison of perfect vs. damaged custom fender installations. How to Prevent the Most Common Mistakes in Custom Fender Designs Avoiding the common mistakes in custom fender designs is well within reach if you follow expert-approved best practices. The process begins with meticulous alignment—never trust eyeballing alone. Use alignment marks, proper jigs, and always double-check wheel clearance. When it’s time to choose materials, opt for what fits your use case (steel, aluminum, plastic, or carbon fiber), but treat each with the respect for their unique strengths and weaknesses—especially carbon fiber, which is lightweight but requires careful handling and specialized fastening techniques. Material mishandling accounts for more types of fender damage than most customizers realize. Don’t cut corners with mounting hardware. Fasteners must match the application, and torque specs should be followed precisely to avoid fatigue and stress cracking near mounting areas. Finally, never overlook corrosion protection. Even the most resilient finishes struggle against time, moisture, and road debris if not properly shielded. A combination of rust-resistant coatings and regular inspection around mounting points and hidden seams can extend the service life of your custom fender exponentially—and prevent emergencies that require a replacement fender at the worst possible moment. Double-check fender alignment before final mounting Choose the right materials, like carbon fiber, and handle with care Use proper fasteners and mounting techniques Apply corrosion-resistant coatings for durability Step-by-step demonstration of best practices for custom fender assembly. Learning from the Most Common Types of Fender Mistakes Whether you’re upgrading classic builds or pushing the edge with modern designs, learning from the most common types of fender mistakes is essential to progress and avoid costly backtracks. Many of these mistakes are universal—misjudged alignment, incorrect material handling, ignoring essential mounting details, or simply underestimating corrosion risk. For those who admire legendary brands or “holy grail” guitars, it’s vital to remember that quality stems from attention to minute details and the willingness to understand how damage affects the entire instrument or vehicle over time. By taking a critical look at both classic and contemporary craftsmanship—from the precision of vintage Fender guitars to the high-tech approach in modern custom shops—builders can draw inspiration and technical lessons alike. The mantra is clear: examine every potential source of error, keep learning, and document solutions for future builds. Not only does this protect your work from types of fender damage, but it also sets new benchmarks in aesthetic beauty and mechanical reliability. Collage comparing classic and modern Fender craftsmanship. This walkthrough demonstrates key indicators for spotting and addressing damage common in custom fender projects—essential viewing for any builder. Frequently Asked Questions What is the holy grail of Fender guitars? Answer: The term "holy grail" often refers to highly sought-after early Vintage Fender Stratocasters and Telecasters, prized for their tone, craftsmanship, and rarity, influencing custom fender design choices. Why did John Mayer stop using Fender? Answer: John Mayer's departure from Fender was due to creative differences and the pursuit of customized guitars to suit his evolving needs—a testament to the importance of avoiding design mistakes in high-profile custom projects. How to spot a fake Fender? Answer: Spotting a fake involves checking serial numbers, logo authenticity, hardware quality, and the types of fender materials and finishing techniques used—common mistakes in fakes include poor material choices and shoddy assembly. What is the difference between Fender Custom Shop and Standard Fender? Answer: Fender Custom Shop guitars are handcrafted to bespoke specifications, typically avoiding the common mistakes in custom fender designs found in mass-produced Standard models. Conclusion Mastering custom fender design means recognizing and sidestepping common mistakes. By learning from the common types of fender damage and applying expert-approved steps, you ensure lasting quality and performance in every custom build. If you’re committed to elevating your custom builds, don’t stop at fender design—comprehensive care is the key to long-term performance and reliability. Explore how proactive maintenance and seasonal adjustments can protect every aspect of your ride, from paintwork to mechanical integrity. Our guide on seasonal bike care secrets offers actionable strategies to keep your motorcycle in peak condition year-round. By integrating these advanced care techniques with your custom design expertise, you’ll set a new standard for durability and style. Take the next step and discover how holistic bike care can transform your riding experience. Ready to Perfect Your Custom Fender? Call Nasty Performance Motorcycle Shop Today: 847-458-4858 Whether you’re correcting old mistakes or planning your next flawless project, let our experts make your vision a reality—reach out now!

Avoid These Common Mistakes in Custom Handlebars for Motorcycles

Are you certain your custom handlebars are set up for maximum comfort, control, and safety? For many riders, swapping out their motorcycle handlebars is the ultimate expression of style and individuality. But if you rush into customization, you could end up with a cool look—and a whole lot of problems. This guide dives deep into the common mistakes in custom handlebars for motorcycles and gives you the knowledge to avoid pain, legal issues, and unsafe rides. Don’t risk your riding experience—let’s make your next upgrade smooth, secure, and uniquely yours. Are You Setting Up Your Custom Handlebars the Right Way? Making the switch to custom handlebars should enhance your comfort and riding style, not become the source of ongoing frustration. Yet, many riders discover too late that their chosen custom motorcycle handlebars create more challenges than they solve. One overlooked measurement, and you may find yourself dealing with strain on your wrists, riding position discomfort, or even back pain over long distances. The biggest issue is assuming that all handlebars are built for all motorcycle types or riding styles. Ape hangers might look impressive, but they’re a nightmare for riders needing a relaxed wrist and nimble control of turn signals, especially during extended riding time. To avoid these pitfalls, always consider your preferred riding position and riding style suitability before making modifications. Taking your time, measuring twice, and understanding how changes affect both ergonomics and compliance are essential steps. Addressing the installation of brake lines and ensuring compatibility with your existing grips, throttle, and triple clamp should take precedence over just picking what looks good. A perfect fit not only transforms your ride—it also prevents costly mistakes and keeps you safe on the road. When considering upgrades, it's also important to remember that handlebar changes are just one aspect of overall motorcycle care. For a comprehensive approach, integrating seasonal maintenance routines can help ensure your bike remains in peak condition year-round, complementing any customizations you make. You can find practical advice on this topic in these essential seasonal bike care secrets every rider should know. The Most Overlooked Mistakes in Custom Handlebars for Motorcycles When customizing your motorcycle, certain mistakes occur so often they almost seem inevitable. Riders often forget to check the compatibility of new handlebars with their bike’s controls, such as throttle cables, brake lines, and wiring for turn signals. Others neglect the importance of ergonomic fit, resulting in discomfort, numbness, or even long-term injuries. Common mistakes in custom handlebars for motorcycles include selecting a handlebar style based solely on appearance—like opting for ape hangers or drag bars—without considering how they affect posture and steering. Another all-too-common error is ignoring the weight distribution and balance that different handlebar shapes create. For instance, beach bars offer a laid-back look, but their position might cause excessive forward lean or strain on your back and shoulders if not properly fitted. Many riders choose aftermarket motorcycle handlebars for the aesthetics, only to realize these handlebars are built with different riding positions in mind, leading to fatigue or loss of control. So before you install that new set, remember: a small mistake can have major safety consequences. What You'll Learn About Common Mistakes in Custom Handlebars for Motorcycles Recognize the main problems riders face with motorcycle handlebar installations Avoid design and fitment errors when selecting custom motorcycle handlebars Adapt your riding style for better comfort and control Step-by-step guidance for safer custom motorcycle upgrades Understanding Motorcycle Handlebar Anatomy Before you can avoid the common mistakes in custom handlebars for motorcycles, it pays to know what you’re working with. Handlebars are much more than the place you rest your hands—they dictate your riding posture, affect leverage, and determine how comfortable, safe, and in-control you’ll feel mile after mile. Features like bar rise, width, pullback, and the placement of controls and accessories combine to create a unique handling experience. Get just one measurement wrong, and the whole ride suffers. Riders looking to emulate the look of a custom motorcycle—whether it’s a café racer, chopper, or bobber—often underestimate the trickiness of re-routing brake lines or ensuring accessories fit snugly and function smoothly. That’s why understanding each component’s role is crucial for a successful installation and proper function. A poorly matched handlebar can compress cables, cause throttle stickiness, or even restrict your visibility. Always start by mapping out the essential measurements and confirming compatibility with your current bike setup. This isn’t just a technical upgrade, it’s the foundation of a safer, longer, and more exhilarating riding journey. Key Components of Motorcycle Handlebars Types of motorcycle handlebars Essential measurements (width, pullback, rise) Compatible controls and accessories Comparison of Motorcycle Handlebar Types and Their Impact on Riding Style Handlebar Type Typical Riding Style Ergonomic Notes Common Models Ape Hangers Relaxed cruiser, show bikes Prone to back pain if too high; can strain wrists Harley-Davidson, Custom Choppers Drag Bars Sporty, aggressive posture Forward lean forces more weight onto wrists Custom café racer, streetfighter Beach Bars Laid-back cruising Wide grip boosts leverage; can cause shoulder discomfort if fitted too far apart Classic cruisers Clubman Café racer, vintage look Aggressive, low position encourages racing stance Café racers, retro bikes Flat Bars Urban, commutes Neutral, upright, best for city riding and maneuverability Standard/naked bikes Custom Motorcycle Handlebar Design: Where Most Go Wrong The biggest pitfall in custom motorcycle handlebar design is underestimating how much riding comfort truly matters. Too often, riders focus on the visual appeal—choosing ape hangers, beach bars, or drag bars for the “wow” factor—while ignoring the physical consequences. If the new bars force excessive forward lean or fail to support a relaxed wrist position, the result is predictable: nagging aches and back pain that only worsen over time. Each style, from café racers to choppers, has its quirks. For example, bars that are too wide or too high can increase wind resistance and strain on your shoulders, while those set too narrow can limit your control. The process becomes even trickier when customer support number or expert consultation is overlooked. Installing bars that clash with your motorcycle handlebar geometry can also cause issues with cable length, brake lines, and throttle action. That’s why smart customizing your motorcycle means balancing form and function. Overlooking Ergonomics and Comfort – Leading to Back Pain Comfort is about more than just avoiding pain—it’s crucial for maintaining focus, safety, and enjoyment on every ride. Disregarding ergonomic principles in pursuit of the flashiest custom handlebars is the fastest way to develop back pain, wrist strain, or even numbness during longer trips. Many bike riders fall into the “looks first, feel later” trap, placing form over function until those long rides become exercises in endurance rather than pleasure. If your handlebar setup causes you to slouch, overreach, or awkwardly change your hand position, it can lead directly to back pain and a permanent dislike for what should be your dream build. Using a professional fitment service or consulting with customer support can help you avoid designs that compromise spine alignment. Even the slightest miscalculation when aligning handlebars with your riding position can mean you’re fighting muscle fatigue from the very first mile. Riding style suitability is everything: choose bars that support your back and let your shoulders relax, so you can enjoy longer rides with less fatigue. Neglecting Rider’s Riding Style During Customizations A handlebar that’s perfect for one type of motorcycle or rider can be a nightmare for another. Ignoring your unique riding style when selecting handlebars can lead to an uncomfortable ride and less control over your custom motorcycle. Consider the difference between riders who favor upright, leisurely touring versus those who enjoy the aggressive lean of café racers. Fitting ape hangers or drag bars to a bike designed for city commuting often results in wrist soreness and awkward steering. Each riding position, from sporty forward lean to laid-back cruising, demands a different handlebar shape to provide extra stability, comfort, and optimal leverage. Overlooking this factor can increase your risk of back injury, reduce your reaction time, and lead to dissatisfaction with your investment. Testing different bar positions before making a final choice and getting feedback from customer support or experienced bike riders are essential steps for comfort and safety. Impact on long rides Riding style adaptations Risk of back pain with improper setups “Every custom motorcycle build should prioritize both function and rider comfort, not just looks.” Choosing the Right Custom Handlebars for Your Motorcycle Finding the perfect set of custom handlebars for your ride means balancing fit, function, and style. Start by clearly defining your primary riding style: Will you be logging highway miles on weekend trips, cruising locally, or darting through city traffic? Matching the handlebars to your bike’s intended use and your preferred riding position ensures riding style suitability, prevents muscle fatigue, and makes for a more enjoyable experience. Consulting specialists or calling a dedicated customer support number can save you from common rookie errors, including mismatched cable lengths, improper control placements, or legal oversights. Measuring handlebar width, rise, and pullback correctly guarantees you’re not forced into awkward positions or compromised maneuverability. A thoughtful selection today means fewer headaches—and less back pain—tomorrow. Key Factors for Selecting Custom Handlebar and Motorcycle Handlebar Types Matching handlebars to your bike’s purpose Sizing tips to prevent fatigue and discomfort Importance of professional fitment to avoid common mistakes in custom handlebars for motorcycles Installation Pitfalls with Custom Handlebars Upgrading to custom motorcycle handlebars is tempting for any enthusiast, but do-it-yourself installation can lead to expensive setbacks if you’re not prepared. The wiring process presents one of the trickiest challenges—incorrect routing can lead to pinched wires or malfunctioning controls, affecting your turn signals, throttle response, and even safety equipment. It’s also common to encounter issues with brake lines being too short or too long, which can drastically alter brake feel and performance. Addressing all compatibility points before starting the job is non-negotiable if you want your custom handlebar install to succeed. DIY jobs also frequently overlook proper alignment. If your bars aren’t precisely centered with the triple clamp, your steering and stability could be compromised at high speeds. Always take the time to check for evenness after tightening the controls—and don’t cut corners on torque and thread locker, especially for bikes that see regular, rough road use. Seeking guidance from professional technicians or reputable custom shops—through their customer support number or in person—can help avoid the most common mistakes in custom handlebars for motorcycles. DIY Errors: Common Mistakes When Fitting Custom Motorcycle Handlebars Wiring challenges Throttle and control incompatibility Stability and alignment risks “Even experienced riders face challenges when swapping out motorcycle handlebars. Don’t overlook the safety and legal angles.” The Impact of Common Mistakes in Custom Handlebars for Motorcycles on Performance and Safety Mistakes made during the selection or installation process can have far-reaching consequences. Incorrect motorcycle handlebar choices may lead to poor steering response, excessive strain on your wrists, and uncomfortable riding positions. Over time, these add up to a reduction in riding enjoyment and a higher risk of long-term injury from bad posture. Even worse, failing to account for the mechanical limitations of your bike—like overly stretched brake lines or throttle cables—can result in complete loss of control or safety equipment failure when you need it most. Choosing the wrong handlebar setup also affects your motorcycle’s longevity. Poor alignment and fit from common mistakes in custom handlebars for motorcycles can stress the frame or suspension, cause premature tire wear, and even void your bike’s warranty. That’s why it’s so crucial to take each stage of the process seriously and recognize when to consult professional help. How Incorrect Handlebar Selection Can Affect Your Motorcycle Steering and handling Strain and riding comfort Long-term impact on motorcycle lifespan Expert Tips for Avoiding Common Mistakes in Custom Handlebars for Motorcycles Done right, customizing your motorcycle handlebars adds safety, comfort, and unique style. Before you buy or install, take a careful inventory of your riding habits, needs, and personal anatomy. Measure twice, ask for advice from bike pros or customer support, and don’t skimp on quality or fitment. Staying mindful of safety, legal requirements, and ergonomic principles lets you avoid nearly all the common mistakes in custom handlebars for motorcycles. Professional technicians stress the value of a step-by-step approach: always start with your riding style, move to bar selection for your specific motorcycle, and finish with test fits and thorough safety checks. These few extra moments spent planning and consulting pros can save you hours (and dollars) of frustration down the line. Step-by-Step Guide to Choosing and Installing Motorcycle Handlebars Assess your riding style and preferred handlebar feel Choose handlebars matching your motorcycle and posture Test fit for reach and height Double check all connections and controls People Also Ask About Common Mistakes in Custom Handlebars for Motorcycles What is the 4 second rule on a motorcycle? The 4 second rule helps riders maintain a safe distance from the vehicle in front. It’s crucial when testing out new motorcycle handlebars for the first time, as different custom handlebars can change your reaction time. What is the 40cm handlebar rule? The 40cm handlebar rule refers to maximum legal widths in some jurisdictions. Always check local laws before fitting custom motorcycle handlebars to avoid compliance issues. Which bike is most liked by girls? Style preferences vary widely, but comfortable riding style and aesthetics in motorcycle handlebar design are often considerations for all riders, regardless of gender. How do I know what handlebars should I get for my motorcycle? Assess your riding needs, comfort, and motorcycle type. Consult a knowledgeable shop about custom handlebars for best results and to avoid common mistakes. Common Mistakes in Custom Handlebars for Motorcycles: Pro Tips Recap Always match handlebars to your riding style Prioritize back pain prevention through ergonomic design Double check all installations for safety FAQs on Custom Handlebar and Motorcycle Handlebar Issues What should I consider before modifying my motorcycle handlebars? Always check for riding style suitability, legal limits, and the compatibility of controls, brake lines, and cables. Consult with a professional for the perfect fit. How can custom handlebars improve my riding experience? Properly selected and fitted custom handlebars provide extra comfort, better control, and allow you to adapt your riding position to prevent discomfort and back pain. Are there legal restrictions on motorcycle handlebars? Yes. Many states and countries have rules—such as the 40cm handlebar rule or maximum height requirements. Always confirm before making changes. Ready to Avoid Common Mistakes in Custom Handlebars for Motorcycles? Call Nasty Performance Motorcycle Shop Today: 847-458-4858 Get proactive: Measure, consult, and install the right custom handlebars for comfort, safety, and performance—your next ride depends on it. If you’re committed to keeping your motorcycle in top shape beyond just the handlebars, there’s even more you can do to protect your investment and enhance your riding experience. Exploring expert strategies for seasonal bike care will help you maintain peak performance, extend the life of your customizations, and ensure every ride is as smooth as possible. Take your maintenance knowledge to the next level by discovering the most effective seasonal bike care secrets every rider must know—because true customization is about both style and long-term reliability.

© 2025 Nasty Performance All Rights Reserved. 2035 S. Eastwood Dr., Woodstock, IL 60098 . Contact Us . Terms of Service . Privacy Policy

eyJjb21wYW55IjoiTmFzdHkgUGVyZm9ybWFuY2UiLCJhZGRyZXNzIjoiMjAzNSBTLiBFYXN0d29vZCBEci4iLCJjaXR5IjoiV29vZHN0b2NrIiwic3RhdGUiOiJJTCIsInppcCI6IjYwMDk4IiwiZW1haWwiOiJuYXRlQG5hc3R5cGVyZm9ybWFuY2UuY29tIiwidG9zIjoiUEhBK1BITjBjbTl1Wno0OFpXMCtWMmhsYmlCNWIzVWdjMmxuYmkxcGJpQjNhWFJvSUhWekxDQjViM1VnWVhKbElHZHBkbWx1WnladVluTndPeUI1YjNWeUlIQmxjbTFwYzNOcGIyNGdZVzVrSUdOdmJuTmxiblFnZEc4Z2MyVnVaQ0I1YjNVZ1pXMWhhV3dnWVc1a0wyOXlJRk5OVXlCMFpYaDBJRzFsYzNOaFoyVnpMaUJDZVNCamFHVmphMmx1WnlCMGFHVWdWR1Z5YlhNZ1lXNWtJRU52Ym1ScGRHbHZibk1nWW05NElHRnVaQ0JpZVNCemFXZHVhVzVuSUdsdUlIbHZkU0JoZFhSdmJXRjBhV05oYkd4NUlHTnZibVpwY20wZ2RHaGhkQ0I1YjNVZ1lXTmpaWEIwSUdGc2JDQjBaWEp0Y3lCcGJpQjBhR2x6SUdGbmNtVmxiV1Z1ZEM0OEwyVnRQand2YzNSeWIyNW5Qand2Y0Q0S0NqeHdQanhoSUdoeVpXWTlJbWgwZEhBNkx5OTNkM2N1WjI5dloyeGxMbU52YlNJK2FIUjBjRG92TDNkM2R5NW5iMjluYkdVdVkyOXRQQzloUGp3dmNENEtDanh3UGladVluTndPend2Y0Q0S0NqeHdQanh6ZEhKdmJtYytVMFZTVmtsRFJUd3ZjM1J5YjI1blBqd3ZjRDRLQ2p4d1BsZGxJSEJ5YjNacFpHVWdZU0J6WlhKMmFXTmxJSFJvWVhRZ1kzVnljbVZ1ZEd4NUlHRnNiRzkzY3lCNWIzVWdkRzhnY21WalpXbDJaU0J5WlhGMVpYTjBjeUJtYjNJZ1ptVmxaR0poWTJzc0lHTnZiWEJoYm5rZ2FXNW1iM0p0WVhScGIyNHNJSEJ5YjIxdmRHbHZibUZzSUdsdVptOXliV0YwYVc5dUxDQmpiMjF3WVc1NUlHRnNaWEowY3l3Z1kyOTFjRzl1Y3l3Z1pHbHpZMjkxYm5SeklHRnVaQ0J2ZEdobGNpQnViM1JwWm1sallYUnBiMjV6SUhSdklIbHZkWElnWlcxaGFXd2dZV1JrY21WemN5QmhibVF2YjNJZ1kyVnNiSFZzWVhJZ2NHaHZibVVnYjNJZ1pHVjJhV05sTGlCWmIzVWdkVzVrWlhKemRHRnVaQ0JoYm1RZ1lXZHlaV1VnZEdoaGRDQjBhR1VnVTJWeWRtbGpaU0JwY3lCd2NtOTJhV1JsWkNBbWNYVnZkRHRCVXkxSlV5WnhkVzkwT3lCaGJtUWdkR2hoZENCM1pTQmhjM04xYldVZ2JtOGdjbVZ6Y0c5dWMybGlhV3hwZEhrZ1ptOXlJSFJvWlNCMGFXMWxiR2x1WlhOekxDQmtaV3hsZEdsdmJpd2diV2x6TFdSbGJHbDJaWEo1SUc5eUlHWmhhV3gxY21VZ2RHOGdjM1J2Y21VZ1lXNTVJSFZ6WlhJZ1kyOXRiWFZ1YVdOaGRHbHZibk1nYjNJZ2NHVnljMjl1WVd4cGVtRjBhVzl1SUhObGRIUnBibWR6TGp3dmNENEtDanh3UGxsdmRTQmhjbVVnY21WemNHOXVjMmxpYkdVZ1ptOXlJRzlpZEdGcGJtbHVaeUJoWTJObGMzTWdkRzhnZEdobElGTmxjblpwWTJVZ1lXNWtJSFJvWVhRZ1lXTmpaWE56SUcxaGVTQnBiblp2YkhabElIUm9hWEprSUhCaGNuUjVJR1psWlhNZ0tITjFZMmdnWVhNZ1UwMVRJSFJsZUhRZ2JXVnpjMkZuWlhNc0lFbHVkR1Z5Ym1WMElITmxjblpwWTJVZ2NISnZkbWxrWlhJZ2IzSWdZMlZzYkhWc1lYSWdZV2x5ZEdsdFpTQmphR0Z5WjJWektTNGdXVzkxSUdGeVpTQnlaWE53YjI1emFXSnNaU0JtYjNJZ2RHaHZjMlVnWm1WbGN5d2dhVzVqYkhWa2FXNW5JSFJvYjNObElHWmxaWE1nWVhOemIyTnBZWFJsWkNCM2FYUm9JSFJvWlNCa2FYTndiR0Y1SUc5eUlHUmxiR2wyWlhKNUlHOW1JR1ZoWTJnZ1UwMVRJSFJsZUhRZ2JXVnpjMkZuWlNCelpXNTBJSFJ2SUhsdmRTQmllU0IxY3k0Z1NXNGdZV1JrYVhScGIyNHNJSGx2ZFNCdGRYTjBJSEJ5YjNacFpHVWdZVzVrSUdGeVpTQnlaWE53YjI1emFXSnNaU0JtYjNJZ1lXeHNJR1Z4ZFdsd2JXVnVkQ0J1WldObGMzTmhjbmtnZEc4Z1lXTmpaWE56SUhSb1pTQlRaWEoyYVdObElHRnVaQ0J5WldObGFYWmxJSFJvWlNCVFRWTWdkR1Y0ZENCdFpYTnpZV2RsY3k0Z1YyVWdaRzhnYm05MElHTm9ZWEpuWlNCaGJua2dabVZsY3lCbWIzSWdaR1ZzYVhabGNua2diMllnWlcxaGFXd2diM0lnVTAxVExpQlVhR2x6SUdseklHRWdabkpsWlNCelpYSjJhV05sSUhCeWIzWnBaR1ZrSUdKNUlIVnpMaUJJYjNkbGRtVnlMQ0J3YkdWaGMyVWdZMmhsWTJzZ2QybDBhQ0I1YjNWeUlHbHVkR1Z5Ym1WMElITmxjblpwWTJVZ2NISnZkbWxrWlhJZ1lXNWtJR05sYkd4MWJHRnlJR05oY25KcFpYSWdabTl5SUdGdWVTQmphR0Z5WjJWeklIUm9ZWFFnYldGNUlHbHVZM1Z5SUdGeklHRWdjbVZ6ZFd4MElHWnliMjBnY21WalpXbDJhVzVuSUdWdFlXbHNJR0Z1WkNCVFRWTWdkR1Y0ZENCdFpYTnpZV2RsY3lCMGFHRjBJSGRsSUdSbGJHbDJaWElnZFhCdmJpQjViM1Z5SUc5d2RDMXBiaUJoYm1RZ2NtVm5hWE4wY21GMGFXOXVJSGRwZEdnZ2IzVnlJR1Z0WVdsc0lHRnVaQ0JUVFZNZ2MyVnlkbWxqWlhNdUlGbHZkU0JqWVc0Z1kyRnVZMlZzSUdGMElHRnVlU0IwYVcxbExpQktkWE4wSUhSbGVIUWdKbkYxYjNRN1UxUlBVQ1p4ZFc5ME95QjBieVp1WW5Od096eG9hV2RvYkdsbmFIUWdZMnhoYzNNOUltTnZiWEJoYm5sVFRWTlFhRzl1WlZWd1pHRjBaU0krYm5Wc2JEd3ZhR2xuYUd4cFoyaDBQaTRnUVdaMFpYSWdlVzkxSUhObGJtUWdkR2hsSUZOTlV5QnRaWE56WVdkbElDWnhkVzkwTzFOVVQxQW1jWFZ2ZERzZ2RHOGdkWE1zSUhkbElIZHBiR3dnYzJWdVpDQjViM1VnWVc0Z1UwMVRJRzFsYzNOaFoyVWdkRzhnWTI5dVptbHliU0IwYUdGMElIbHZkU0JvWVhabElHSmxaVzRnZFc1emRXSnpZM0pwWW1Wa0xpQkJablJsY2lCMGFHbHpMQ0I1YjNVZ2QybHNiQ0J1YnlCc2IyNW5aWElnY21WalpXbDJaU0JUVFZNZ2JXVnpjMkZuWlhNZ1puSnZiU0IxY3k0OEwzQStDZ284Y0Q0OGMzUnliMjVuUGxsUFZWSWdVa1ZIU1ZOVVVrRlVTVTlPSUU5Q1RFbEhRVlJKVDA1VFBDOXpkSEp2Ym1jK1BDOXdQZ29LUEhBK1NXNGdZMjl1YzJsa1pYSmhkR2x2YmlCdlppQjViM1Z5SUhWelpTQnZaaUIwYUdVZ1UyVnlkbWxqWlN3Z2VXOTFJR0ZuY21WbElIUnZPand2Y0Q0S0NqeHZiRDRLQ1R4c2FUNXdjbTkyYVdSbElIUnlkV1VzSUdGalkzVnlZWFJsTENCamRYSnlaVzUwSUdGdVpDQmpiMjF3YkdWMFpTQnBibVp2Y20xaGRHbHZiaUJoWW05MWRDQjViM1Z5YzJWc1ppQmhjeUJ3Y205dGNIUmxaQ0JpZVNCMGFHVWdVMlZ5ZG1salpTWWpNems3Y3lCeVpXZHBjM1J5WVhScGIyNGdabTl5YlNBb2MzVmphQ0JwYm1admNtMWhkR2x2YmlCaVpXbHVaeUIwYUdVZ0puRjFiM1E3VW1WbmFYTjBjbUYwYVc5dUlFUmhkR0VtY1hWdmREc3BJR0Z1WkR3dmJHaytDZ2s4YkdrK2JXRnBiblJoYVc0Z1lXNWtJSEJ5YjIxd2RHeDVJSFZ3WkdGMFpTQjBhR1VnVW1WbmFYTjBjbUYwYVc5dUlFUmhkR0VnZEc4Z2EyVmxjQ0JwZENCMGNuVmxMQ0JoWTJOMWNtRjBaU3dnWTNWeWNtVnVkQ0JoYm1RZ1kyOXRjR3hsZEdVdUlFbG1JSGx2ZFNCd2NtOTJhV1JsSUdGdWVTQnBibVp2Y20xaGRHbHZiaUIwYUdGMElHbHpJSFZ1ZEhKMVpTd2dhVzVoWTJOMWNtRjBaU3dnYm05MElHTjFjbkpsYm5RZ2IzSWdhVzVqYjIxd2JHVjBaU3dnYjNJZ2QyVWdhR0YyWlNCeVpXRnpiMjVoWW14bElHZHliM1Z1WkhNZ2RHOGdjM1Z6Y0dWamRDQjBhR0YwSUhOMVkyZ2dhVzVtYjNKdFlYUnBiMjRnYVhNZ2RXNTBjblZsTENCcGJtRmpZM1Z5WVhSbExDQnViM1FnWTNWeWNtVnVkQ0J2Y2lCcGJtTnZiWEJzWlhSbExDQjNaU0JvWVhabElIUm9aU0J5YVdkb2RDQjBieUJ6ZFhOd1pXNWtJRzl5SUR4emRISnZibWMrUEhOd1lXNGdjM1I1YkdVOUltTnZiRzl5T2lOR1JqQXdNREE3SWo1MFpYSnRhVzVoZEdVZ2VXOTFjaUJoWTJOdmRXNTBMM0J5YjJacGJHVWdZVzVrSUhKbFpuVnpaU0JoYm5rZ1lXNWtJR0ZzYkNCamRYSnlaVzUwSUc5eUlHWjFkSFZ5WlNCMWMyVWdiMllnZEdobElGTmxjblpwWTJVZ0tHOXlJR0Z1ZVNCd2IzSjBhVzl1SUhSb1pYSmxiMllwTGp3dmMzQmhiajQ4TDNOMGNtOXVaejQ4TDJ4cFBnbzhMMjlzUGdvS1BIQStKbTVpYzNBN1BDOXdQZ284YUdsbmFHeHBaMmgwSUdOc1lYTnpQU0pqYjIxd1lXNTVUbUZ0WlZWd1pHRjBaU0krVG1GemRIa2dVR1Z5Wm05eWJXRnVZMlU4TDJocFoyaHNhV2RvZEQ0OFluSWdMejRLUEdocFoyaHNhV2RvZENCamJHRnpjejBpWTI5dGNHRnVlVUZrWkhKbGMzTlZjR1JoZEdVaVBqSXdNelVnVXk0Z1JXRnpkSGR2YjJRZ1JISXVMQ0JYYjI5a2MzUnZZMnNzSUVsTUlEWXdNRGs0UEM5b2FXZG9iR2xuYUhRK1BHSnlJQzgrQ2p4b2FXZG9iR2xuYUhRZ1kyeGhjM005SW1OdmJYQmhibmxRYUc5dVpWVndaR0YwWlNJK0tEZzBOeWtnTkRVNExUUTROVGc4TDJocFoyaHNhV2RvZEQ0OFluSWdMejRLUEdocFoyaHNhV2RvZENCamJHRnpjejBpWTI5dGNHRnVlVVZ0WVdsc1ZYQmtZWFJsSWo1dVlYUmxRRzVoYzNSNWNHVnlabTl5YldGdVkyVXVZMjl0UEM5b2FXZG9iR2xuYUhRKyIsInByaXZhY3kiOiJQSEErUEhOMGNtOXVaejVRVWtsV1FVTlpQQzl6ZEhKdmJtYytQQzl3UGdvS1BIQStQSE4wY205dVp6NVVhR1VnYVc1bWIzSnRZWFJwYjI0Z2NISnZkbWxrWldRZ1pIVnlhVzVuSUhSb2FYTWdjbVZuYVhOMGNtRjBhVzl1SUdseklHdGxjSFFnY0hKcGRtRjBaU0JoYm1RZ1kyOXVabWxrWlc1MGFXRnNMQ0JoYm1RZ2QybHNiQ0J1WlhabGNpQmlaU0JrYVhOMGNtbGlkWFJsWkN3Z1kyOXdhV1ZrTENCemIyeGtMQ0IwY21Ga1pXUWdiM0lnY0c5emRHVmtJR2x1SUdGdWVTQjNZWGtzSUhOb1lYQmxJRzl5SUdadmNtMHVJRlJvYVhNZ2FYTWdiM1Z5SUdkMVlYSmhiblJsWlM0OEwzTjBjbTl1Wno0OEwzQStDZ284Y0Q0OGMzUnliMjVuUGtsT1JFVk5Ua2xVV1R3dmMzUnliMjVuUGp3dmNENEtDanh3UGp4bGJUNVpiM1VnWVdkeVpXVWdkRzhnYVc1a1pXMXVhV1o1SUdGdVpDQm9iMnhrSUhWekxDQmhibVFnYVhSeklITjFZbk5wWkdsaGNtbGxjeXdnWVdabWFXeHBZWFJsY3l3Z2IyWm1hV05sY25Nc0lHRm5aVzUwY3l3Z1kyOHRZbkpoYm1SbGNuTWdiM0lnYjNSb1pYSWdjR0Z5ZEc1bGNuTXNJR0Z1WkNCbGJYQnNiM2xsWlhNc0lHaGhjbTFzWlhOeklHWnliMjBnWVc1NUlHTnNZV2x0SUc5eUlHUmxiV0Z1WkN3Z2FXNWpiSFZrYVc1bklISmxZWE52Ym1GaWJHVWdZWFIwYjNKdVpYbHpKaU16T1RzZ1ptVmxjeXdnYldGa1pTQmllU0JoYm5rZ2RHaHBjbVFnY0dGeWRIa2daSFZsSUhSdklHOXlJR0Z5YVhOcGJtY2diM1YwSUc5bUlFTnZiblJsYm5RZ2VXOTFJSEpsWTJWcGRtVXNJSE4xWW0xcGRDd2djbVZ3Ykhrc0lIQnZjM1FzSUhSeVlXNXpiV2wwSUc5eUlHMWhhMlVnWVhaaGFXeGhZbXhsSUhSb2NtOTFaMmdnZEdobElGTmxjblpwWTJVc0lIbHZkWElnZFhObElHOW1JSFJvWlNCVFpYSjJhV05sTENCNWIzVnlJR052Ym01bFkzUnBiMjRnZEc4Z2RHaGxJRk5sY25acFkyVXNJSGx2ZFhJZ2RtbHZiR0YwYVc5dUlHOW1JSFJvWlNCVVQxTXNJRzl5SUhsdmRYSWdkbWx2YkdGMGFXOXVJRzltSUdGdWVTQnlhV2RvZEhNZ2IyWWdZVzV2ZEdobGNpNDhMMlZ0UGp3dmNENEtDanh3UGp4emRISnZibWMrUkVsVFEweEJTVTFGVWlCUFJpQlhRVkpTUVU1VVNVVlRQQzl6ZEhKdmJtYytQQzl3UGdvS1BIQStQSE4wY205dVp6NVpUMVVnUlZoUVVrVlRVMHhaSUZWT1JFVlNVMVJCVGtRZ1FVNUVJRUZIVWtWRklGUklRVlE2UEM5emRISnZibWMrUEM5d1Bnb0tQRzlzUGdvSlBHeHBQbGxQVlZJZ1ZWTkZJRTlHSUZSSVJTQlRSVkpXU1VORklFbFRJRUZVSUZsUFZWSWdVMDlNUlNCU1NWTkxMaUJVU0VVZ1UwVlNWa2xEUlNCSlV5QlFVazlXU1VSRlJDQlBUaUJCVGlBbWNYVnZkRHRCVXlCSlV5WnhkVzkwT3lCQlRrUWdKbkYxYjNRN1FWTWdRVlpCU1V4QlFreEZKbkYxYjNRN0lFSkJVMGxUTGlBc0xpQkJUa1FnVlZNc0lFbFVKaU16T1R0VElFTlZVMVJQVFVWU1V5d2dSVmhRVWtWVFUweFpJRVJKVTBOTVFVbE5VeUJCVEV3Z1YwRlNVa0ZPVkVsRlV5QlBSaUJCVGxrZ1MwbE9SQ3dnVjBoRlZFaEZVaUJGV0ZCU1JWTlRJRTlTSUVsTlVFeEpSVVFzSUVsT1EweFZSRWxPUnl3Z1FsVlVJRTVQVkNCTVNVMUpWRVZFSUZSUElGUklSU0JKVFZCTVNVVkVJRmRCVWxKQlRsUkpSVk1nVDBZZ1RVVlNRMGhCVGxSQlFrbE1TVlJaTENCR1NWUk9SVk5USUVaUFVpQkJJRkJCVWxSSlExVk1RVklnVUZWU1VFOVRSU0JCVGtRZ1RrOU9MVWxPUmxKSlRrZEZUVVZPVkM0OEwyeHBQZ29KUEd4cFBrMUJTMFZUSUU1UElGZEJVbEpCVGxSWklGUklRVlFnS0drcElGUklSU0JUUlZKV1NVTkZJRmRKVEV3Z1RVVkZWQ0JaVDFWU0lGSkZVVlZKVWtWTlJVNVVVeXdnS0dscEtTQlVTRVVnVTBWU1ZrbERSU0JYU1V4TUlFSkZJRlZPU1U1VVJWSlNWVkJVUlVRc0lGUkpUVVZNV1N3Z1UwVkRWVkpGTENCUFVpQkZVbEpQVWkxR1VrVkZMQ0FvYVdscEtTQlVTRVVnVWtWVFZVeFVVeUJVU0VGVUlFMUJXU0JDUlNCUFFsUkJTVTVGUkNCR1VrOU5JRlJJUlNCVlUwVWdUMFlnVkVoRklGTkZVbFpKUTBVZ1YwbE1UQ0JDUlNCQlEwTlZVa0ZVUlNCUFVpQlNSVXhKUVVKTVJTd2dRVTVFSUNocGRpa2dRVTVaSUVWU1VrOVNVeUJKVGlCVVNFVWdVMDlHVkZkQlVrVWdWMGxNVENCQ1JTQkRUMUpTUlVOVVJVUXVQQzlzYVQ0S0NUeHNhVDVCVGxrZ1RVRlVSVkpKUVV3Z1JFOVhUa3hQUVVSRlJDQlBVaUJQVkVoRlVsZEpVMFVnVDBKVVFVbE9SVVFnVkVoU1QxVkhTQ0JVU0VVZ1ZWTkZJRTlHSUZSSVJTQlRSVkpXU1VORklFbFRJRVJQVGtVZ1FWUWdXVTlWVWlCUFYwNGdSRWxUUTFKRlZFbFBUaUJCVGtRZ1VrbFRTeUJCVGtRZ1ZFaEJWQ0JaVDFVZ1YwbE1UQ0JDUlNCVFQweEZURmtnVWtWVFVFOU9VMGxDVEVVZ1JrOVNJRUZPV1NCRVFVMUJSMFVnVkU4Z1dVOVZVaUJEVDAxUVZWUkZVaUJUV1ZOVVJVMGdUMUlnVEU5VFV5QlBSaUJFUVZSQklGUklRVlFnVWtWVFZVeFVVeUJHVWs5TklGUklSU0JFVDFkT1RFOUJSQ0JQUmlCQlRsa2dVMVZEU0NCTlFWUkZVa2xCVEM0OEwyeHBQZ29KUEd4cFBrNVBJRUZFVmtsRFJTQlBVaUJKVGtaUFVrMUJWRWxQVGl3Z1YwaEZWRWhGVWlCUFVrRk1JRTlTSUZkU1NWUlVSVTRzSUU5Q1ZFRkpUa1ZFSUVKWklGbFBWU0JHVWs5TklFOVNJRlJJVWs5VlIwZ2dUMUlnUmxKUFRTQlVTRVVnVTBWU1ZrbERSU0JUU0VGTVRDQkRVa1ZCVkVVZ1FVNVpJRmRCVWxKQlRsUlpJRTVQVkNCRldGQlNSVk5UVEZrZ1UxUkJWRVZFSUVsT0lGUklSU0JVVDFNdVBDOXNhVDRLUEM5dmJENEtDanh3UGp4emRISnZibWMrVEVsTlNWUkJWRWxQVGlCUFJpQk1TVUZDU1V4SlZGazhMM04wY205dVp6NDhMM0ErQ2dvOGNENVpUMVVnUlZoUVVrVlRVMHhaSUZWT1JFVlNVMVJCVGtRZ1FVNUVJRUZIVWtWRklGUklRVlFnUVU1RUlGTklRVXhNSUU1UFZDQkNSU0JNU1VGQ1RFVWdSazlTSUVGT1dTQkVTVkpGUTFRc0lFbE9SRWxTUlVOVUxDQkpUa05KUkVWT1ZFRk1MQ0JUVUVWRFNVRk1MQ0JEVDA1VFJWRlZSVTVVU1VGTUlFOVNJRVZZUlUxUVRFRlNXU0JFUVUxQlIwVlRMQ0JKVGtOTVZVUkpUa2NnUWxWVUlFNVBWQ0JNU1UxSlZFVkVJRlJQTENCRVFVMUJSMFZUSUVaUFVpQk1UMU5USUU5R0lGQlNUMFpKVkZNc0lFZFBUMFJYU1V4TUxDQlZVMFVzSUVSQlZFRWdUMUlnVDFSSVJWSWdTVTVVUVU1SFNVSk1SU0JNVDFOVFJWTWdLRVZXUlU0Z1NVWWdTRUZUSUVKRlJVNGdRVVJXU1ZORlJDQlBSaUJVU0VVZ1VFOVRVMGxDU1V4SlZGa2dUMFlnVTFWRFNDQkVRVTFCUjBWVEtTd2dVa1ZUVlV4VVNVNUhJRVpTVDAwNlBDOXdQZ29LUEc5c1Bnb0pQR3hwUGxSSVJTQlZVMFVnVDFJZ1ZFaEZJRWxPUVVKSlRFbFVXU0JVVHlCVlUwVWdWRWhGSUZORlVsWkpRMFU3UEM5c2FUNEtDVHhzYVQ1VVNFVWdRMDlUVkNCUFJpQlFVazlEVlZKRlRVVk9WQ0JQUmlCVFZVSlRWRWxVVlZSRklFZFBUMFJUSUVGT1JDQlRSVkpXU1VORlV5QlNSVk5WVEZSSlRrY2dSbEpQVFNCQlRsa2dSMDlQUkZNc0lFUkJWRUVzSUVsT1JrOVNUVUZVU1U5T0lFOVNJRk5GVWxaSlEwVlRJRkJWVWtOSVFWTkZSQ0JQVWlCUFFsUkJTVTVGUkNCUFVpQk5SVk5UUVVkRlV5QlNSVU5GU1ZaRlJDQlBVaUJVVWtGT1UwRkRWRWxQVGxNZ1JVNVVSVkpGUkNCSlRsUlBJRlJJVWs5VlIwZ2dUMUlnUmxKUFRTQlVTRVVnVTBWU1ZrbERSVHM4TDJ4cFBnb0pQR3hwUGxWT1FWVlVTRTlTU1ZwRlJDQkJRME5GVTFNZ1ZFOGdUMUlnUVV4VVJWSkJWRWxQVGlCUFJpQlpUMVZTSUZSU1FVNVRUVWxUVTBsUFRsTWdUMUlnUkVGVVFUczhMMnhwUGdvSlBHeHBQbE5VUVZSRlRVVk9WRk1nVDFJZ1EwOU9SRlZEVkNCUFJpQkJUbGtnVkVoSlVrUWdVRUZTVkZrZ1QwNGdWRWhGSUZORlVsWkpRMFU3SUU5U1BDOXNhVDRLQ1R4c2FUNUJUbGtnVDFSSVJWSWdUVUZVVkVWU0lGSkZURUZVU1U1SElGUlBJRlJJUlNCVFJWSldTVU5GTGp3dmJHaytDand2YjJ3K0NnbzhjRDQ4ZFQ1Q2VTQnlaV2RwYzNSbGNtbHVaeUJoYm1RZ2MzVmljMk55YVdKcGJtY2dkRzhnYjNWeUlHVnRZV2xzSUdGdVpDQlRUVk1nYzJWeWRtbGpaU3dnWW5rZ2IzQjBMV2x1TENCdmJteHBibVVnY21WbmFYTjBjbUYwYVc5dUlHOXlJR0o1SUdacGJHeHBibWNnYjNWMElHRWdZMkZ5WkN3Z0puRjFiM1E3ZVc5MUlHRm5jbVZsSUhSdklIUm9aWE5sSUZSRlVrMVRJRTlHSUZORlVsWkpRMFVtY1hWdmREc2dZVzVrSUhsdmRTQmhZMnR1YjNkc1pXUm5aU0JoYm1RZ2RXNWtaWEp6ZEdGdVpDQjBhR1VnWVdKdmRtVWdkR1Z5YlhNZ2IyWWdjMlZ5ZG1salpTQnZkWFJzYVc1bFpDQmhibVFnWkdWMFlXbHNaV1FnWm05eUlIbHZkU0IwYjJSaGVTNDhMM1UrUEM5d1Bnb0tQSEErSm01aWMzQTdQQzl3UGdvOGFHbG5hR3hwWjJoMElHTnNZWE56UFNKamIyMXdZVzU1VG1GdFpWVndaR0YwWlNJK1RtRnpkSGtnVUdWeVptOXliV0Z1WTJVOEwyaHBaMmhzYVdkb2RENDhZbklnTHo0S1BHaHBaMmhzYVdkb2RDQmpiR0Z6Y3owaVkyOXRjR0Z1ZVVGa1pISmxjM05WY0dSaGRHVWlQakl3TXpVZ1V5NGdSV0Z6ZEhkdmIyUWdSSEl1TENCWGIyOWtjM1J2WTJzc0lFbE1JRFl3TURrNFBDOW9hV2RvYkdsbmFIUStQR0p5SUM4K0NqeG9hV2RvYkdsbmFIUWdZMnhoYzNNOUltTnZiWEJoYm5sUWFHOXVaVlZ3WkdGMFpTSStLRGcwTnlrZ05EVTRMVFE0TlRnOEwyaHBaMmhzYVdkb2RENDhZbklnTHo0S1BHaHBaMmhzYVdkb2RDQmpiR0Z6Y3owaVkyOXRjR0Z1ZVVWdFlXbHNWWEJrWVhSbElqNXVZWFJsUUc1aGMzUjVjR1Z5Wm05eWJXRnVZMlV1WTI5dFBDOW9hV2RvYkdsbmFIUSsifQ==

Terms of Service

Privacy Policy

Core Modal Title

Sorry, no results found

You Might Find These Articles Interesting

T
Please Check Your Email
We Will Be Following Up Shortly
*
*
*