
Did you know? Installing the right saddlebags can instantly triple your motorcycle’s storage capacity, transforming road trips and daily rides alike. For riders looking to maximize both function and style, understanding how to install custom saddlebag options isn’t just a skill—it’s the key to safer, more enjoyable journeys. Whether you crave the classic look of tanned leather or the security of a hard mount, mastering these install choices makes all the difference. This guide will take you step-by-step through everything you need to know, from prepping your gear to final alignment checks, ensuring your saddlebags are as ready for adventure as you are.
Unlocking Maximum Storage: Why Learning How to Install Custom Saddlebag Options Matters
When it comes to maximizing your motorcycle’s utility, few upgrades offer as much versatility as custom saddlebag options. Riders are often surprised at how much additional storage thoughtful installation can provide—making room not just for daily essentials but also for extended travel gear. Properly learning how to install custom saddlebag options allows you to tailor your ride's storage precisely to your needs, be it a secure hard mount setup for adventure touring or a premium tanned leather model for weekend cruises.
If your mounting system isn’t up to par, you may deal with shifting saddlebags, obstructed turn signals, or even safety hazards when the road gets rough. This guide simplifies the process from start to finish, focusing on practical choices such as mounting system compatibility, hard mount adjustability, and essential features like signal relocation. With the right approach, you won’t just add storage—you’ll do it safely and with lasting style.
What You'll Learn
- Essential steps for how to install custom saddlebag options
- Key considerations for choosing a mounting system and hard mount setup
- Insights into turn signal relocation processes
- Maintenance advice for tanned leather saddlebags
Getting Started: Essential Tools and Pre-Installation Tips for How to Install Custom Saddlebag Options
Before diving into the installation, assembling the right tools and preparing your motorcycle properly is vital. The correct tools will make the process smoother and reduce the risk of damaging your saddlebag options or your motorcycle. Begin by reviewing compatible mounting system types for your specific model. Some motorcycles require unique hard mount hardware, while others are compatible with a variety of rail tube mounted bags or basic leather straps.
Gather basic tools such as metric wrenches, hex keys, and a torque wrench, along with any specialty hardware included in your saddlebag kit—this can be particularly important for hard saddlebags or custom fit leather bags. Equally crucial is having installation instructions on hand, as products are designed differently by each manufacturer. In addition, ensure your motorcycle is parked on a stable surface and that you’ve cleaned the rear fender and mounting points thoroughly. Careful prep makes it easier to securely install the saddlebags, position your lowest option if needed, and avoid pitfalls like misalignment or blocked turn signals later on.
As you prepare your tools and review your mounting system, it’s also helpful to understand the nuances of maintaining your motorcycle’s storage solutions over time. For a deeper dive into keeping your saddlebags and bike in top condition throughout the year, check out these seasonal bike care secrets every rider must know for practical maintenance tips and expert advice.

- Reviewing compatible mounting system types
- Basic and specialty tools required for installation
- Checklist for prepping your motorcycle for new saddlebag options
Comparing Saddlebag Types: Hard Mounts, Tanned Leather, and Custom Options
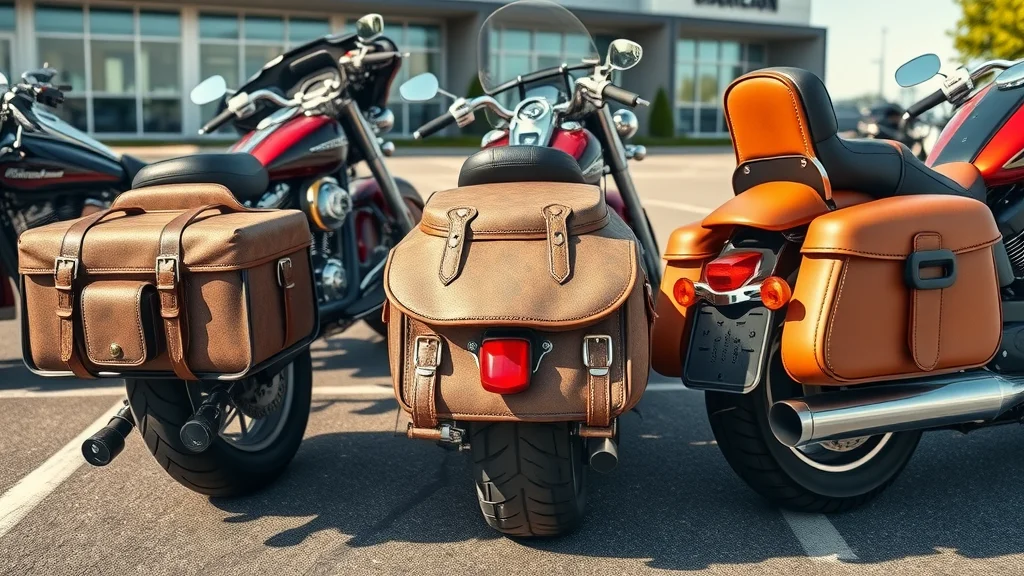
Selecting the ideal saddlebag type hinges on lifestyle, visual preferences, and your typical use case. Hard mount saddlebags, constructed from durable plastics or metals, are preferred for their ruggedness and security—perfect for those seeking a more permanent setup for daily commutes or long-haul journeys. Conversely, tanned leather and vegetable tanned leather options remain popular for riders wanting a classic, lightweight look that’s both flexible and easy to detach. Custom options offer the ultimate in personalized fit and design, though they may involve more complex mounting and frequent adjustments.
To help visualize your decision, consider matching your saddlebag size to the luggage frame or lowest position possible for stability, sequencing with parallel or leather straps as the mounting system requires. Each option has its trade-offs—hard saddlebags might need periodic hardware checks, while tanned leather options demand routine care, especially if exposed to the elements on scenic rides or cafe racer journeys. Use the table below to compare at a glance which option serves your needs best.
| Saddlebag Type | Material | Pros | Cons |
|---|---|---|---|
| Hard Mount | Plastic/Metal | Durable, secure | Heavier, less flexible |
| Tanned Leather | Leather | Classic look, lightweight | Requires care |
| Custom Options | Various | Personalized fit, style | May need additional installation steps |
Step-by-Step Guide: How to Install Custom Saddlebag Options
Step 1: Reviewing the Mounting System
It’s crucial to understand your motorcycle’s mounting system before performing any modifications. Most motorcycles come with mounting points above the rear fender or along the rail tube, specifically designed for a set of slots or brackets. Begin by consulting your vehicle manual or any installation instructions provided by your saddlebag manufacturer. Hard mount systems often utilize dedicated bolts, while tanned leather or custom bags might work with a combination of parallel straps or leather straps threaded through the luggage frame.
Evaluate each mounting option thoroughly for compatibility with your motorcycle model. Double-check the position for future adjustments, ensuring no interference with the rear wheel, exhaust, or turn signal. This assessment forms the foundation for a safe, reliable installation—one that will stay secure whether you’re tackling city commutes or heading out for a cross-country ride.
Step 2: Positioning Hard Mount Saddlebag Hardware
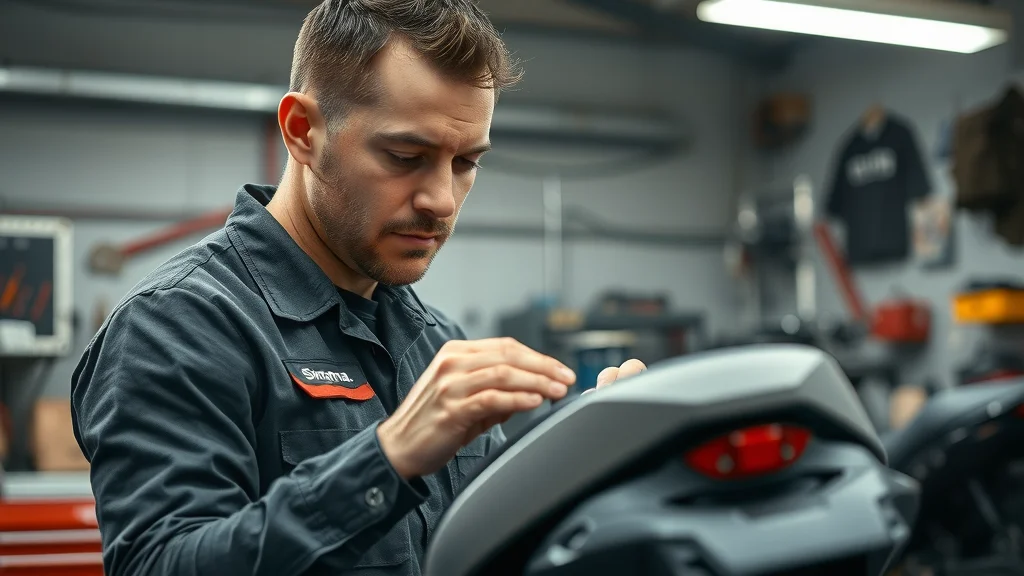
With the correct mounting points identified, the next task is aligning your hard mount hardware. Position the mount so the bags rest at your desired height—typically, the lowest position that doesn’t obstruct the rear fender or touch the rear wheel. Using a torque wrench, fasten the mounting hardware securely, ensuring even pressure and alignment across both sides. Many kits include a set of slots or adjustable brackets to help fit a wide range of motorcycle models and bag sizes.
Test the hard mount’s stability by gently applying downward pressure; a well-installed mount will not budge or rattle. Aligning hard mount options may also require temporarily removing or adjusting the rear turn signal. Following these steps minimizes installation errors and maximizes storage without compromising on safety or balance, making your pair of saddlebags ready for any load.
Step 3: Installing and Adjusting Tanned Leather Saddlebags
For those installing tanned leather saddlebags, begin by carefully threading the leather straps or nylon cords through the luggage frame, rail tube, or dedicated set of slots. Leather bags need a snug fit—not too tight to prevent stretching or deformation, but close enough to avoid flopping during travel. Adjust the bag’s position, ensuring a symmetrical and stylish appearance that aligns with the bike’s profile.
Once both sides are secured, double-check for any contact between the vegetable tanned leather and hot components like the exhaust. If the leather saddlebag is too close to heat sources, it may warp, fade, or degrade more quickly. Consider using additional hardware or adjusters if included in the saddlebag kit to fine-tune placement. For added security, periodically check the tightness of the straps, especially after long rides or weather exposure.
Step 4: Ensuring Secure Fit and Alignment
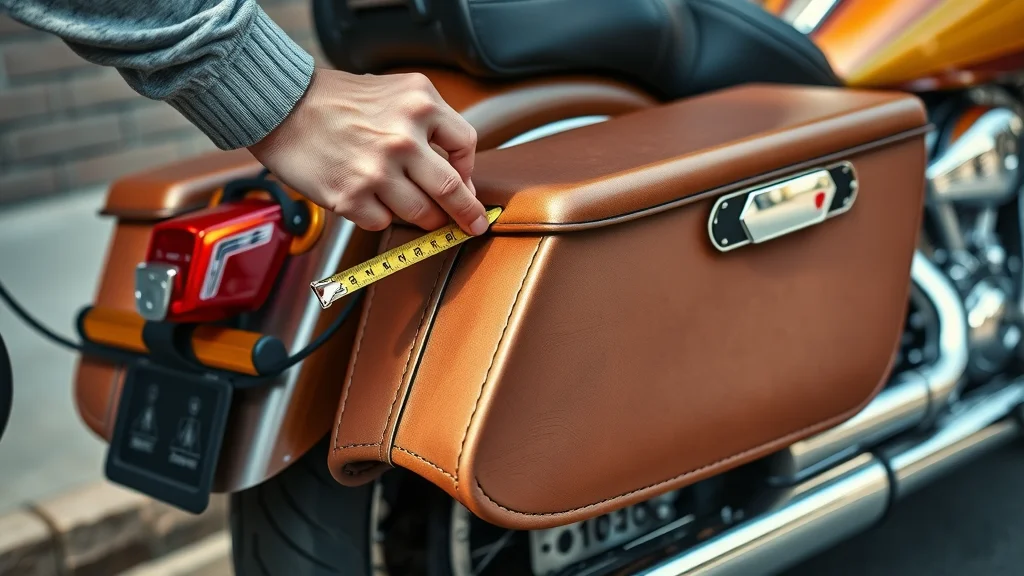
After initial placement, take time to ensure your custom saddlebag options are mounted perfectly. Use a measuring tape to verify equal spacing between each saddlebag and the motorcycle’s centerline, and between the bag and rear wheel. Small misalignments can lead to operational problems, such as worn tires or difficult handling, especially with larger or hard saddlebags.
Double-check that all fasteners, leather straps, and mounting hardware remain tight as you move or adjust the bags. Make minor corrections for an exact fit, testing that the saddlebags clear critical moving parts like the suspension and do not obstruct the turn signal. By following these detailed checks, you enhance both the security and style of your motorcycle, ensuring your bags stay in place—regardless of the terrain or cargo load.
Turn Signal and Signal Relocation: Everything You Need to Know
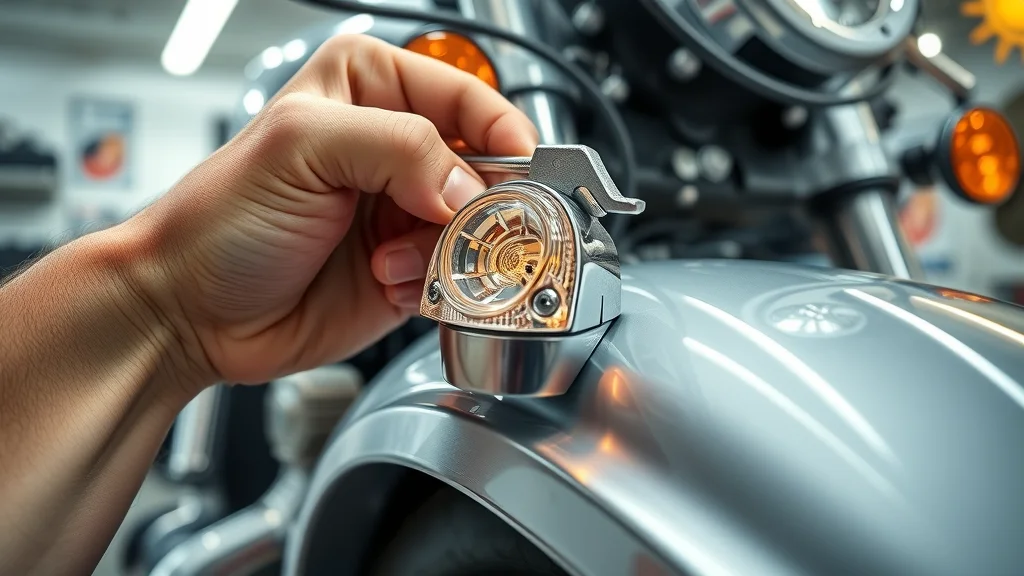
A frequently overlooked detail of how to install custom saddlebag options is the impact on your motorcycle’s turn signals. Many mount options or hard saddlebags, particularly those installed in the lowest position, may obstruct OEM turn signals or require relocation to maintain safety and legal compliance. It’s vital to understand your motorcycle model’s wiring and intended signal location before proceeding with any changes.
Use the specific tools outlined in your installation instructions—typically screwdrivers, pliers, and occasionally soldering equipment—to carefully detach the turn signal from the stock position. Avoid forcing wires; use nylon cords or zip ties to route cables cleanly. Reposition and fasten the turn signal in its new slot or bracket, ensuring the angle and illumination remain visible from behind. Pay attention to common mistakes, like pinched wires or loose bolts, as these issues can result in signal failure or malfunction during rides.
- Understanding turn signal and signal relocation requirements
- Tools for successful turn signal relocation
- Common mistakes to avoid
Expert Insights: Quotes from Seasoned Motorcycle Installers
"Properly installing your custom saddlebag options ensures long-term security and stylish functionality on the road." - Alex Turner, Motorcycle Customization Specialist
Maintenance Tips for Tanned Leather and Hard Mount Saddlebags
Keeping your saddlebags in top condition involves periodic maintenance tailored to the bag’s material and mount style. For tanned leather or vegetable tanned leather saddlebags, regular cleaning and conditioning are essential. Use a pH-balanced leather cleaner and occasionally apply a weatherproofing balm, focusing on seams and high-wear areas. This routine ensures your leather bags retain their classic look and resist the elements, especially on frequently ridden cafe racer or touring motorcycles.
With hard mount saddlebag options, perform periodic checks for stability. Examine nuts, bolts, and the luggage frame’s structural integrity after long rides—the vibration from the road or repeated installations can loosen hardware over time. Address any concerns promptly to prevent the saddlebags from shifting into the rear wheel or coming loose unexpectedly. Troubleshooting early helps protect both your gear and your motorcycle’s finish, keeping your storage solutions ready for whatever comes next.
- Leather care best practices
- Periodic checks for hard mount stability
- Troubleshooting: what to watch out for post-installation
Top Mistakes to Avoid When Learning How to Install Custom Saddlebag Options
While the installation process may appear straightforward, some common pitfalls can undermine your hard work and compromise storage safety. Foremost among these is neglecting turn signal relocation; obstructed signals not only diminish safety but may get you in trouble during vehicle inspections. Another frequent error is poorly matching your mounting system to your motorcycle model, leading to an insecure fit or even damage to the rear fender or luggage frame.
Improper sealing or maintenance of tanned leather saddlebags is another avoidable mistake. Failing to care for leather can result in premature wear, water damage, or a sagging appearance that detracts from your ride’s style. Careful planning, the right hardware, and regular checks are your safeguards against these issues—helping your saddlebag installation stand the test of time.
- Neglecting turn signal relocation
- Poor selection of mounting system
- Improper sealing of tanned leather saddlebags
Video Tutorial: How to Install Custom Saddlebag Options for Maximum Storage
Watch this step-by-step visual guide for installing custom motorcycle saddlebags, including mounting system selection, hardware fitting, leather bag care, and final bag alignment. Presented in full 1080p clarity with close-ups and hands-on demonstrations for every step.
People Also Ask: How to Install Custom Saddlebag Options
[Insert PAA question 1 here]
Comprehensive Answer
When you’re learning how to install custom saddlebag options, the first thing to check is whether your motorcycle requires a specific mounting system or is compatible with universal hardware. Each motorcycle model offers different attachment points—look for rail tubes, a set of slots, or dedicated brackets near the rear fender. Begin by following any installation instructions supplied with your saddlebag, making sure all hardware fits cleanly and the saddlebag is centered on both sides. Double-check turn signal positioning, especially if hard mounts block visibility, and test for secure fit by gently rocking each saddlebag after installation.
[Insert PAA question 2 here]
Comprehensive Answer
You’ll often find that tanned leather and hard saddlebags have unique requirements for installation and care. Hard mount bags generally need alignment with the luggage frame and tight hardware, while vegetable tanned leather bags benefit from careful strap placement and periodic adjustments. For both, always ensure there’s adequate clearance between the bag and rear wheel, and conduct frequent inspections for wear, especially after long rides or rough terrain. Address loose bolts or worn leather straps immediately to maintain the safest and longest-lasting setup.
FAQs About How to Install Custom Saddlebag Options and Mounting Systems
-
What is the most secure mounting system for custom saddlebags?
Hard mount systems fastened directly to the luggage frame or rail tube are usually the most secure, providing a durable hold for daily use and heavy loads. -
Do I need to always perform turn signal relocation?
Turn signal relocation is often required when custom saddlebag options block the original signals. Always check your local laws and the placement on your specific motorcycle model. -
How do I maintain my tanned leather saddlebags?
Clean with a leather-specific solution, treat with conditioner, and store away from direct sun when possible. Regularly inspect for cracks or sagging and recondition the leather as needed.
Key Takeaways: Mastering How to Install Custom Saddlebag Options
Choosing the right saddlebag and mounting system, performing proper installation, and regular maintenance will maximize your motorcycle’s storage and keep your ride safe and stylish.
Now that you’ve mastered the essentials of installing custom saddlebag options, consider how ongoing care can extend the life and performance of your upgrades. Proactive maintenance not only preserves your saddlebags’ appearance but also ensures your motorcycle is always ready for the next adventure. For riders who want to go beyond installation and truly protect their investment, exploring expert strategies for year-round bike care can make all the difference. Discover more ways to keep your ride in peak condition by exploring seasonal bike care secrets every rider must know—your next level of motorcycle mastery starts with the right knowledge.


Write A Comment