Add Row
Add Element
cropper
update

Nasty Performance ~ 847-458-4858 

update
Add Element
  • Blog Home
  • Categories
    • Motorcycle Maintenance
    • Riding Tips & Preps
    • Safety & Inspection
    • Customizations & Upgrades
    • DIY Motorcycle Repairs
    • Motocycle Audio Systems
    • Motocycle Seasonal Care & Storage
    • Engine, Electrical Performance
  • Bike Night
  • Nasty Performance Motorcycle Shop
December 04.2025
1 Minute Read

Winter Motorcycle Gear Guide: Stay Warm and Protected

Did you know that over 30% of winter motorcycle accidents are linked to riders lacking the right winter gear? Riding through cold weather isn’t just a small discomfort—it can change the outcome of your journey. Whether you’re new to winter riding or looking to upgrade your kit, our winter motorcycle gear guide reveals everything you need to stay warm, protected, and confident when temperatures drop. Discover expert tips and best practices to transform your cold weather riding into a safe and enjoyable adventure.

Unveiling the Risks: Why a Winter Motorcycle Gear Guide Matters

"Riding in cold weather without proper motorcycle gear increases the risk of hypothermia and impaired reaction times." – National Safety Council
  • Recent studies reveal that over 30% of winter motorcycle accidents are linked to inadequate winter gear.
  • Cold weather riding increases fatigue and reduces concentration.

When embarking on a winter ride, many underestimate how quickly cold weather can impact both comfort and safety. Prolonged exposure to cold air not only causes discomfort but also slows reflexes and tires you out faster—critical factors when navigating unpredictable roads. A dedicated winter motorcycle gear guide is your roadmap to avoiding these hidden dangers, letting you focus on the road ahead. As the chill sets in, wearing the correct motorcycle gear keeps you insulated, dry, and alert, significantly lowering the risks highlighted in safety studies. That’s why understanding and investing in the right winter gear isn’t just smart—it’s essential to stay warm, protected, and safe.

Modern motorcycle rider wearing full winter motorcycle gear, confident and focused on a snowy forested highway, light snowfall, shot with sharp detail — winter motorcycle gear guide

What You'll Learn in This Winter Motorcycle Gear Guide

  • Essential winter motorcycle gear for every rider
  • How to layer for maximum warmth and comfort
  • Top-rated riding jackets, gloves, and base layers
  • Best practices for cold weather riding safety

This guide arms you with practical advice and the latest recommendations for winter motorcycle gear. From understanding the basics of layering to reviewing specific product suggestions, you’ll discover everything you need to ride through winter safely and comfortably. Whether you’re facing icy highways or just chilly morning commutes, you’ll learn actionable tips that help you select, wear, and maintain the best riding gear for cold weather. Keep reading for a deep dive into tested strategies and detailed checklists—all designed to keep you warm and protected throughout the cold season.

As you build your winter riding kit, it’s also important to consider how seasonal changes affect your motorcycle’s performance and longevity. For a comprehensive look at essential maintenance routines that complement your cold weather gear, check out these seasonal bike care secrets every rider should know—they’ll help ensure your bike is as ready for winter as you are.

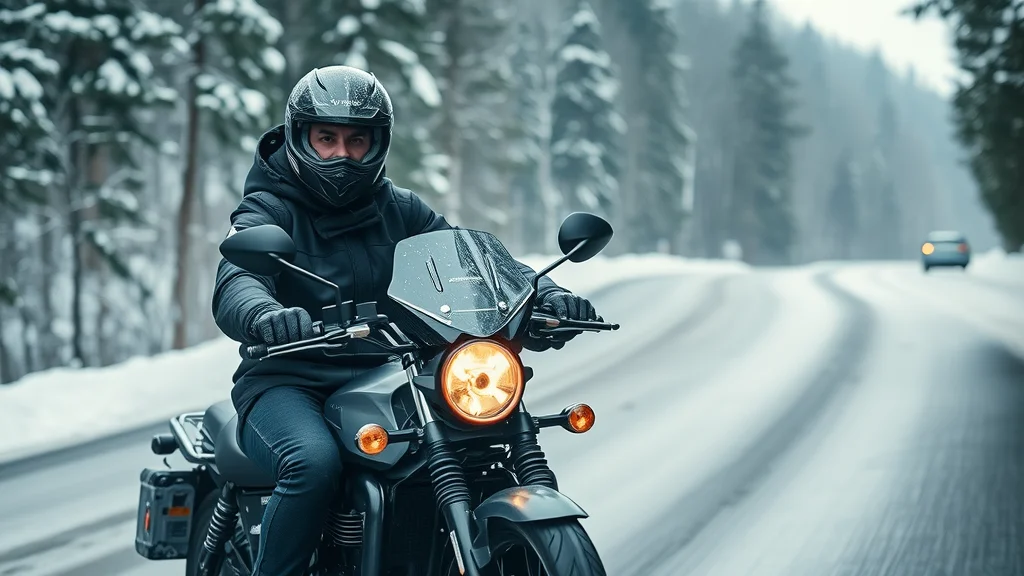
Understanding the Hazards of Cold Weather Riding

How Cold Weather Impacts Motorcycle Riding

Cold weather riding presents unique hazards that every motorcyclist must take seriously. Exposure to low temperatures can sap your concentration and drain your stamina, making quick responses more difficult when faced with black ice or unpredictable traffic. Even elite riding gear can only do its job if you use it properly and understand how cold air affects your body and your bike. Hypothermia is a very real risk, especially when traveling at highway speeds—wind chill can drive perceived temperatures down dramatically. In addition to physical effects, fatigue sets in faster, leading to lapses in focus just when you need to stay sharp the most.

Besides lowering body temperature, cold weather increases the risk of stiff joints, slower muscle response, and even numbness, all of which make maneuvering and brake control harder. Fogged visors, frozen brake levers, and loss of tactile feedback in your fingers can lead to dangerous mistakes. Seasoned riders respect the hazards of cold weather riding and prioritize gear that addresses these specific challenges. From the right base layers to heated gear, every layer counts toward keeping you dry, alert, and safe on wintry roads.

Cautious motorcycle rider navigating icy conditions in a suburban winter street, icy patches visible — cold weather riding hazards

Key Winter Gear and Techniques to Stay Warm

Wearing the right winter motorcycle gear is the foundation of safe and enjoyable cold weather riding. Start with moisture-wicking base layers made of materials like merino wool, which draw sweat away and keep you dry and comfortable. Over this, add an insulating layer such as a fleece or down-filled liner, which traps heat close to your body. Your outer layer—a robust and waterproof riding jacket and pants—will act as the primary shield from wind, water, and cold air.

Equally important are accessories: heated gloves or grips, thick socks, and a neck tube can make the difference between comfort and misery on the bike. Practice layering and learn how to regulate warmth by adjusting vents on your gear, adding or removing layers as needed. Techniques like planning frequent breaks for circulation, using hand and foot warmers, and choosing routes with less exposure to icy wind help you stay warm throughout your winter ride. Mastering these gear choices and techniques builds your resilience, so you can confidently tackle whatever winter throws your way.

Essential Layers: Building a Winter Motorcycle Gear System

Base Layer: Your First Line of Defense

  • Best base layers for moisture wicking
  • Base layers versus base layer: what matters most

The right base layer forms the foundation of your winter motorcycle gear system. Its primary duty is to wick moisture away from your skin, maintaining warmth without allowing sweat to chill you. High-quality base layers are often made of technical fabrics like merino wool or synthetic microfibers, both of which offer excellent moisture management. Merino wool, in particular, stands out for its natural odor-resistance, softness, and superior temperature regulation.

When deciding between multiple base layers or just a single high-performance base layer, prioritize fit and breathability. Layers that sit snugly (but not tightly) work best at moving moisture away from your skin and keeping you dry and comfortable. Always avoid cotton, as it retains moisture, leaving you colder in the long run. Combining the right base layer with additional insulating and weatherproofing garments ensures that each layer can work together, keeping you warm during long winter rides.

Close-up of hands laying out winter motorcycle base layers; soft wool and technical fibers — base layer for cold weather riding

Insulating Layers: Trap the Heat During Cold Weather Riding

The insulating layer sits between your base layer and outer shell, and it’s in charge of trapping heat to keep your core temperature stable. Look for fleece, down, or advanced synthetic insulators that pack warmth without adding excessive bulk. Adjustable mid-layers allow for flexibility—add an extra sweater or thermal liner when temperatures plummet or scale back if you’re working up a sweat. Many motorcycle-specific insulating layers are designed to provide freedom of movement while maximizing heat retention, a critical factor for winter riding gear.

Layering is as much about flexibility as warmth. If your insulating layer is too thick, it may restrict your movement or prevent your outer shell from sealing properly. Instead, opt for slim, purpose-built insulated liners that work harmoniously with your winter motorcycle jacket or pants. This system ensures warmth, comfort, and unimpeded handling of your controls—a must for cold weather riding.

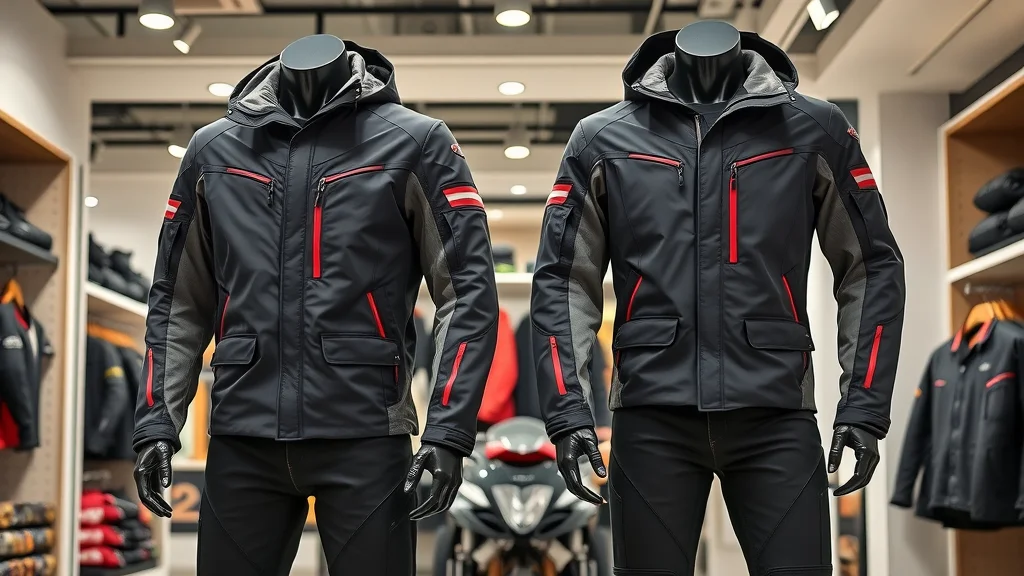
Outer Shells: Winter Riding Jackets and Pants for Maximum Protection

  • Comparing waterproof motorcycle jackets and pants
  • Motorcycle jacket vs riding jackets: Which is better for winter?

The outer shell is your first defensive barrier against the elements. Waterproof motorcycle jackets and pants are designed to shield you from wind, rain, and snow. Look for products with a high-quality waterproof membrane, sealed seams, and ample ventilation zippers for moisture control. Compare different types of riding jackets: true winter jackets typically incorporate more robust insulation, storm flaps, and adjustable cuffs to keep cold air from sneaking in.

When deciding between a dedicated motorcycle jacket versus multi-purpose riding jackets, consider winter-specific features: extended collars, integrated hood systems, and reinforced impact zones. Matching waterproof motorcycle pants offer equal protection for your legs while maintaining flexibility and safety. Stay alert for products with reflective panels—these boost your visibility on gloomy winter rides, helping you stay safe on every journey.

Pair of premium winter motorcycle jackets and pants in a gear store — waterproof, insulated, detailed textures — winter riding jackets vs motorcycle jackets

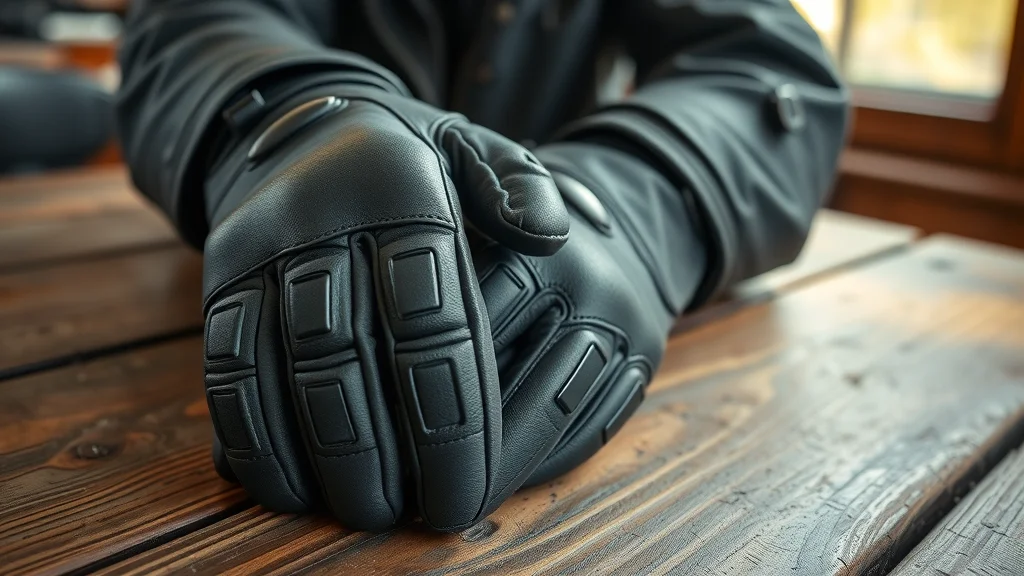
Winter Motorcycle Gloves & Hands Protection

Features to Look for in Winter Motorcycle Gloves

Choosing the right winter motorcycle gloves is much more than a comfort consideration—it’s about maintaining full control and dexterity on the road. Key features include waterproofing, insulation, and armored protection. Gloves should fit snugly enough to allow free movement without gaps that let in cold air. Popular models utilize advanced membranes that repel water while being breathable, ensuring your hands stay dry even in heavy snow or rain.

For the best experience, opt for motorcycle glove designs with layered thermal linings, adjustable wrist straps, and pre-curved fingers. Modern winter gloves may also offer touchscreen capability and reinforced palms to extend durability. If you ride long distances in frigid temperatures, consider heated glove options that run off your bike’s battery or a rechargeable pack. Ultimately, your winter motorcycle gloves should balance warmth, protection, and responsiveness, ensuring comfort and safety for every winter ride.

Close up of winter motorcycle gloves; waterproof, thermal lining, armored knuckles — features for cold weather riding

Tips for Keeping Hands and Feet Warm When Weather Riding

Your hands and feet are the first to feel the effects of cold weather on the motorcycle. Invest in quality motorcycle gloves with adequate insulation and wind-blocking features, and always keep an extra pair for emergencies. Layering thin liner gloves beneath your main gloves can increase warmth and wick away moisture. For your feet, select moisture-wicking, thermal socks—“Darn Tough” brand socks are highly rated among riders—and choose sturdy, insulated boots with non-slip soles.

To maximize warmth, use heated insoles or boot heaters on especially cold days, and take regular breaks to keep circulation flowing. Never underestimate the value of dry gear: always carry spare socks and gloves in case you get wet. Routine movement, such as stretching fingers and wiggling toes at stops, also helps maintain sensation and prevents stiffness. Thoughtful planning and high-quality gear enable you to keep your hands and feet warm and responsive during every winter adventure.

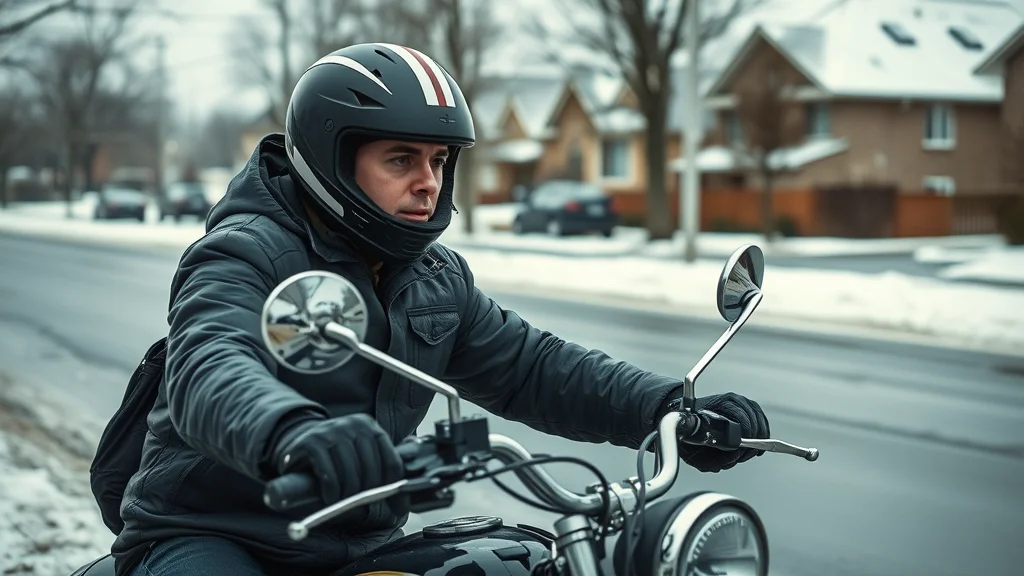
Head, Face, and Neck: Critical Winter Motorcycle Gear

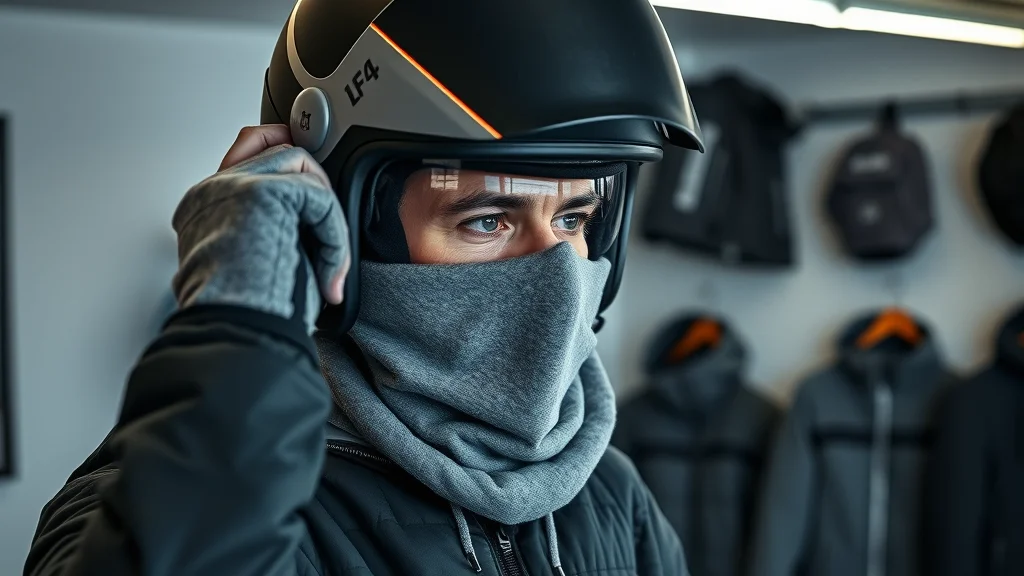
Winter Helmets and Balaclavas for Cold Weather

The head, face, and neck are highly exposed points on a winter ride, requiring specialized motorcycle gear. A well-fitting winter helmet with a sealed visor helps retain heat and block wind. Look for helmets with anti-fog and pin-lock systems to prevent condensation buildup that can obscure your vision. Balaclavas made from fleece or performance synthetics offer added protection by shielding your neck and face from biting winds, slipping comfortably under your helmet without bunching or restricting movement.

Never ride with gaps around your collar or under your chin—wind can rush through the smallest of spaces, rapidly bringing down your body temperature. Many winter helmets now feature improved ventilation control and wind skirts at the chin to keep you extra comfortable. Combining a quality helmet with a good balaclava is one of the most effective ways to ensure your upper body stays warm and protected, no matter how cold the winter weather.

Rider preparing with a winter helmet and balaclava in a garage — anti-fog visor and fleece balaclava for cold weather riding

Neck Tubes and Face Shields: Defending Against the Chill

Neck tubes, sometimes called gaiters or buffs, offer flexible, lightweight defense against chilly air creeping down your collar. Made from soft fleece, wool, or technical synthetics, they are easy to pull over your head or adjust throughout the day. Face shields that attach to your helmet further block the wind and prevent frostbite on exposed cheeks or lips. If you experience frequent fogging, consider face shields with integrated breath guards, which direct your exhaled air away from the visor.

Don’t overlook the cumulative effect of small gaps: wind entering at your neck or under your helmet adds up over miles, draining your energy and dulling your focus. Well-chosen neck tubes and face shields play a surprisingly large role in staying warm, comfortable, and fully alert on cold weather rides. These small investments make winter rides much more enjoyable and less risky.

Protecting Lower Extremities: Winter Motorcycle Gear for Legs and Feet

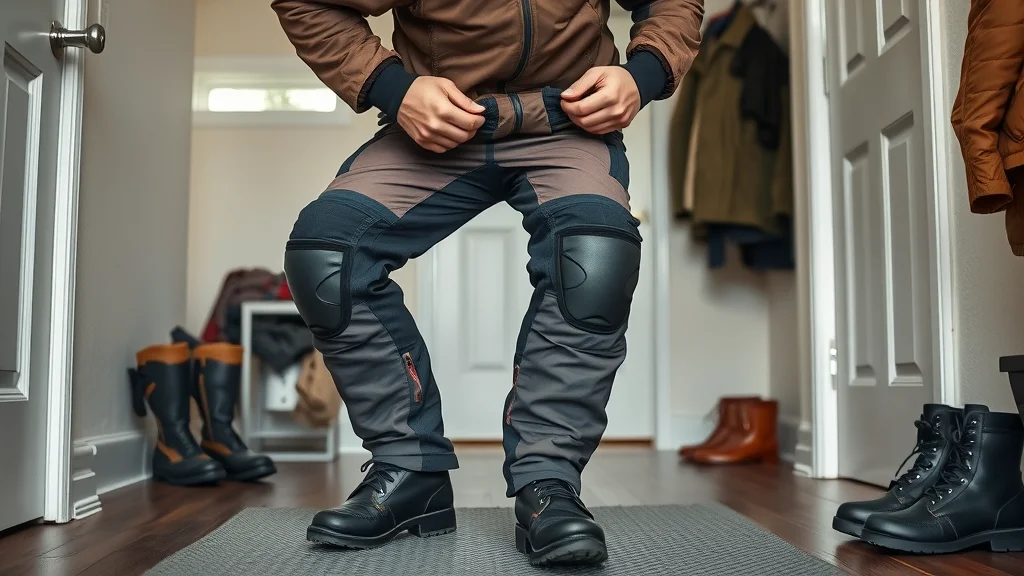
Selecting Durable Pants and Riding Gear for Cold Weather

Protecting your legs on a winter ride is just as important as shielding your core. Insulated winter motorcycle pants, often equipped with waterproof liners and knee armor, provide essential protection against the cold and enable full mobility. Look for pants that allow you to wear a thermal base layer underneath and feature adjustable ventilation for optimal comfort. Key features include reinforced impact zones, articulated knees, and zippered cuffs that fit smoothly over boots, preventing drafts around your ankles.

The best pants for winter riding are those designed with multi-layer systems—a wicking liner, insulating middle, and a tough, waterproof outer shell. This configuration ensures you don’t sacrifice comfort or safety, even during long commutes or adventurous rides deep into winter landscapes. Remember, staying dry is half the battle: quality riding gear for legs and feet means you can stay safe and warm, no matter what the forecast brings.

Motorcyclist pulling on insulated winter riding pants over base layers in a mudroom — features water-resistant material for cold weather riding

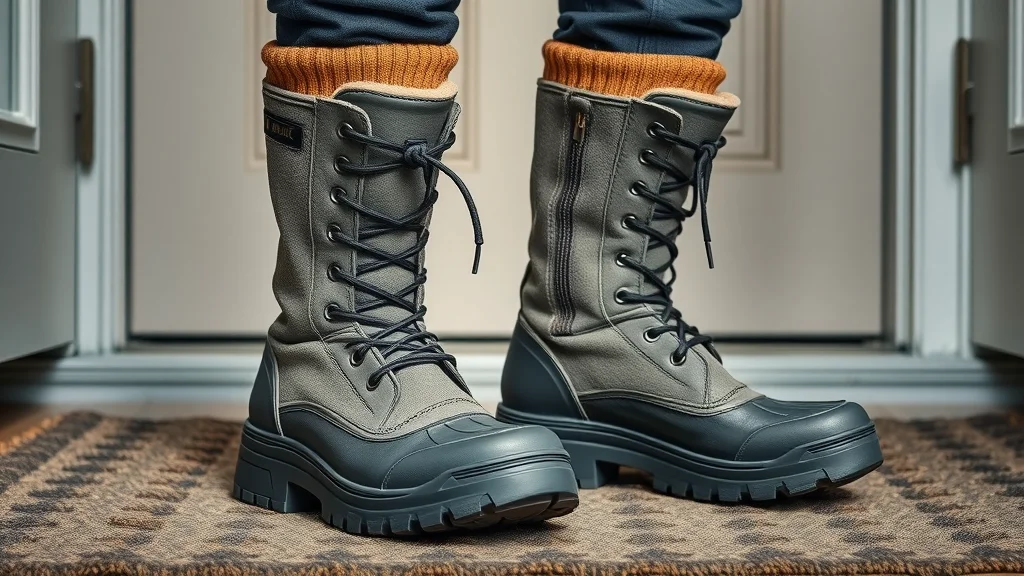
Heated Socks & Boots: Addressing Cold Weather Riding Challenges

"Darn Tough socks are a game-changer for long winter motorcycle trips." – Seasoned Rider

Your choice of socks and boots directly affects your comfort and reaction time while riding in winter. Thermal socks made with wool blends, like Darn Tough, provide unmatched warmth and moisture control. For longer winter rides or especially harsh climates, heated socks are a worthwhile investment, circulating gentle warmth to thwart numbness and stiffness.

Complement high-quality socks with insulated, waterproof motorcycle boots that rise above your ankles and seal tightly without pinching. Some modern motorcycle boots feature integrated electric heating elements, which can be powered by your bike’s battery or a portable pack. Always make sure your boots are roomy enough to allow slight toe movement—this promotes circulation and helps keep your feet warm throughout your journey. Proactive investment in proper gear guarantees a safer, more comfortable ride during the winter months.

Pair of rugged winter motorcycle boots with heated socks placed by the door — essential for winter motorcycle gear

Heated Gear Explained: Benefits and Buying Guide

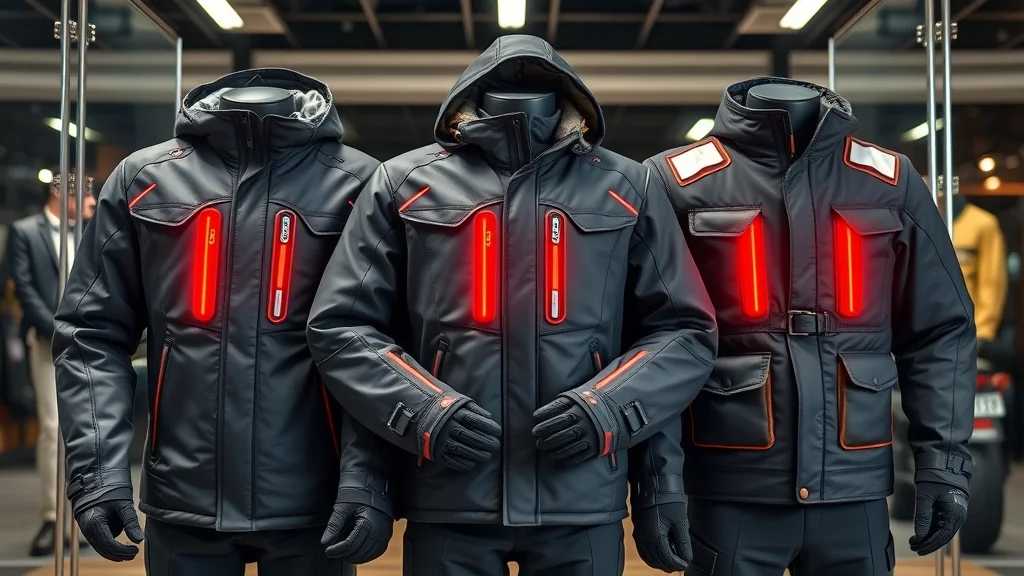
Heated Jackets, Jacket Liners, and Vests

For those committed to winter riding, heated gear is a game-changer. Heated jackets, jacket liners, and vests use thin, flexible heating wires to deliver maintained warmth directly to the core. Most systems are adjustable, allowing you to set your preferred temperature for any condition. Heated jacket liners can be worn under any outer shell, providing versatility and ensuring you’re ready for both mild and freezing days.

The main advantage of heated jackets and liners is their ability to supplement your natural protection against cold, especially during long rides when body heat alone isn’t enough. Models vary by their power sources: some connect directly to your motorcycle, while others utilize rechargeable batteries for complete flexibility. Evaluate control settings, coverage of heating zones, and ease of layer integration when selecting your system. Investing in reliable heated gear extends your riding season and boosts your overall comfort.

Heated Gloves and Grips: What to Know

Beyond jackets, heated gloves and grips make a world of difference. Integrated heated gloves feature strategically placed elements that warm your fingers and palms, maintaining full dexterity and preventing the dangerous numbness that leads to slow reaction times. Heated grips, installed on your handlebars, offer a constant, gentle heat for your hands—even when you’re wearing thick gloves overtop.

Consider battery life, adjustability, and weatherproofing when selecting heated glove systems. Quality models boast quick heat-up times, multiple warmth settings, and waterproof construction. For extended rides in extreme cold, some riders combine both heated gloves and grips—providing redundancy and ensuring ultimate comfort. Whether you choose battery-powered or bike-connected options, heated gear is a must-have for those who refuse to let winter slow them down.

How to Choose Reliable Heated Riding Gear

When shopping for heated riding gear, prioritize proven reliability and safety. Look for gear with user-replaceable batteries, robust heating elements, and attention to craftsmanship in construction, such as reinforced wiring and weather-sealed connectors. Many premium products are designed with advanced thermal regulation that prevents overheating, making them safer for long-haul travel.

Brand reputation and warranty support are key factors—respected manufacturers like Gerbing, Tourmaster, and Firstgear provide excellent support and high-quality control. Take time to read user reviews and make sure the items you choose are compatible with the rest of your cold weather system. Above all, don’t underestimate the impact of a well-balanced kit; reliable heated gear gives you the confidence to enjoy winter riding to the fullest.

Collection of winter motorcycle heated gear including jacket, gloves, and vest — heated gear for cold weather riding

Comprehensive Gear List: Winter Motorcycle Gear Checklist

  • Base layers
  • Insulation layers
  • Outer shells (riding jacket and pants)
  • Winter motorcycle gloves
  • Boots and socks
  • Heated gear (vests, liners, gloves)
  • Helmet, balaclava, and face shield
Winter Motorcycle Gear Comparison: Features, Comfort, Pricing
Item Key Features Comfort Rating Waterproof Approx. Price ($)
Base Layer (Merino) Moisture-wicking, odor-resistant 9/10 No 60–100
Insulating Fleece Breathable, thermal retention 8/10 No 50–120
Winter Riding Jacket Windproof, armored, waterproof membrane 10/10 Yes 200–500
Winter Motorcycle Gloves Thermal lining, armored knuckles, touchscreen 9/10 Yes 70–200
Insulated Boots Waterproof, slip-resistant sole 8/10 Yes 120–300
Heated Gear (Jacket/Gloves) Battery/bike-powered, multi-zone heating 10/10 Yes 150–450
Helmet & Balaclava Anti-fog, thermal lining 9/10 Yes 100–400

Best Practices for Winter Motorcycle Maintenance

Pre-Ride Checks & Essential Tips for Cold Weather Riding

  • Battery maintenance in cold weather
  • Tire pressure monitoring
  • Proper storage of winter motorcycle gear

Routine winter maintenance is crucial for both safety and performance. Cold weather can drain your battery quickly, so check charge levels before every ride and keep a trickle charger handy. Tire pressure often drops with falling temperatures, affecting traction on icy or wet roads—inspect and adjust pressure as needed. Don’t neglect your riding gear: store all winter gear in a dry, well-ventilated area and air it out after each ride to prevent mildew and material breakdown.

Additionally, inspect your motorcycle’s brake fluid, coolant, and lighting, as cold conditions can reveal hidden weaknesses in these systems. Taking the time for these pre-ride checks ensures your bike and your gear are ready for whatever winter throws at you. Preparedness is the first—and most effective—step in ensuring you stay safe and warm, trip after trip.

Motorcycle and rider performing pre-ride checks in winter — battery, tires, and gear preparation for cold weather riding

Expert Tips for Weather Riding: Staying Safe and Warm

"Riding gear selection is just as important as route planning in winter motorcycle conditions."

Mastering winter motorcycle gear and maintenance will pay dividends each time you head out into the cold. Keep your ride short and plan frequent breaks, especially on long journeys. Hydrate regularly—cold air can be deceptively dehydrating—and always have spare base layers and gloves in your luggage. Refine your route to avoid heavily shaded roads where ice lingers and opt for main thoroughfares that are cleared more frequently.

Above all, listen to your body. If you feel cold or sluggish, stop and warm up! Check the weather before departure and adjust your riding gear selection accordingly. As you gain experience, you’ll develop your own preferences and tweaks for staying warm—but always heed expert recommendations for safety and comfort, combining them with your personal insights for the ultimate winter ride.

People Also Ask

What is the best winter motorcycle gear?

The best winter motorcycle gear includes insulated, waterproof jackets and pants, heated gloves, thermal base layers, and weather-resistant boots. Leading brands offer specialized gear designed specifically for cold weather riding, ensuring maximum protection and comfort.

What is the 2 4 12 second rule on a motorcycle?

The 2-4-12 second rule is a motorcycle safety guideline: maintain a 2-second following distance in city riding, extend to 4 seconds on the highway, and look at least 12 seconds ahead of your position to anticipate hazards.

What does 2 fingers up mean on a motorcycle?

Riders often signal each other with a '2 fingers up' gesture, symbolizing respect and camaraderie within the motorcycle community. It’s a friendly greeting prioritizing safety and mutual awareness.

Should I leave gas in my motorcycle over the winter?

It's recommended to use a fuel stabilizer and fill the tank before winter storage to prevent rust and fuel degradation during cold weather.

FAQs: Winter Motorcycle Gear Guide

  • How do I clean and maintain winter motorcycle gear? Clean gear as recommended by the manufacturer. Remove liners and air dry after each ride. Store items in a climate-controlled area to maximize lifespan and performance.
  • Can I use summer motorcycle gear for winter riding? It’s not recommended. Summer gear lacks insulation and may not be waterproof, leaving you exposed to the cold and wet.
  • Are heated grips safe for prolonged rides? Yes—modern heated grips are specifically designed for ongoing use, but always follow the manufacturer’s instructions to prevent overheating or battery drain.
  • What is the lifespan of thermal base layers? With proper care, high-quality base layers last several years. Wash gently, dry flat, and avoid high heat.
  • How can I maximize warmth without sacrificing safety? Layer wisely, avoid cotton, and invest in well-fitted outer shells with armor. Never bulk up so much that movement is impeded or visibility is reduced.

Key Takeaways from This Winter Motorcycle Gear Guide

  • Proper winter motorcycle gear is critical for safety and comfort.
  • Layering provides the most effective defense against cold weather.
  • Investing in quality gear pays off in durability and protection.
  • Routine motorcycle maintenance is essential before every ride.
  • Utilize expert advice to stay warm and protected throughout the season.

Final Thoughts: Elevate Your Cold Weather Riding Experience

Gear Up Confidently With This Winter Motorcycle Gear Guide

Don’t let winter slow you down—embrace cold weather riding with confidence by investing in the right gear and preparation. Call Nasty Performance Motorcycle Shop Today: 847-458-4858 for expert guidance, gear selection, or to book your service. Stay warm, ride safe, and enjoy the best of winter motorcycling!

If you’re ready to take your winter riding to the next level, consider expanding your knowledge beyond gear and into holistic seasonal bike care. Understanding how to protect your motorcycle throughout the year can dramatically improve performance, safety, and longevity—especially when temperatures fluctuate. Explore our in-depth guide on seasonal bike care secrets every rider must know for expert strategies that go hand-in-hand with your winter gear. By combining smart maintenance with the right apparel, you’ll be fully equipped to enjoy every season on two wheels with confidence and peace of mind.

Motorcycle Maintenance

0 Comments

Write A Comment

*
*
Please complete the captcha to submit your comment.
Related Posts All Posts

Get Your Motorcycle Inspection for Spring

Did you know that a thorough motorcycle inspection for spring can prevent up to 40% of early season breakdowns? While many riders can’t wait to hit the open road as the weather warms, skipping your spring maintenance can mean trouble just when the season begins. This detailed guide not only reveals crucial steps you need for a safe riding season, but also highlights lesser-known checks that can make the difference between a smooth ride and a roadside mishap. Read on to discover how to keep your bike running in peak condition—all season long. Spring Motorcycle Inspection: Surprising Facts Every Rider Should Know Riders often underestimate the impact a seasonal maintenance check can have on their bike’s reliability and their own safety. The transition from winter storage to an active riding season brings hidden risks: fluids degrade, batteries lose charge, tires may develop flat spots or dry rot, and electrical connections can corrode. According to recent studies, up to 40% of early spring breakdowns could have been avoided with a proper motorcycle inspection for spring. This isn’t just routine motorcycle maintenance—it’s your passport to a trouble-free, exhilarating riding season on the open road. The main keyword to focus on: motorcycle inspection for spring. Including this in your annual prep ensures your maintenance checklist covers all areas. By adhering to a comprehensive approach—spanning fluids, brakes, battery care, tires, and controls—you drastically reduce the risk of losing control or facing a critical component failure. So, don’t just dust off your machine and go: take the time to run through a motorcycle maintenance checklist and experience the freedom of the road with peace of mind. Did You Know? Motorcycle Inspection for Spring Prevents 40% of Early Season Breakdowns What You’ll Learn in This Motorcycle Inspection for Spring Guide The complete motorcycle maintenance checklist for spring Step-by-step maintenance check processes Expert motorcycle maintenance advice for riding season When to perform a test ride after inspection Critical maintenance check items for a safe open road experience Why a Motorcycle Inspection for Spring is Crucial for Riding Season A comprehensive motorcycle inspection for spring is not just about checking boxes on a maintenance checklist—it’s about ensuring your safety and maximizing the joy of the riding season. After a period of winter storage, components like brake pads, air filter, spark plugs, and engine oil can deteriorate, leading to a higher risk of failures once you’re back on the open road. Proper motorcycle maintenance keeps you in control and guards against costly repairs or dangerous situations. Regular spring inspections also help riders catch early signs of damage or excessive wear, like abnormal tire pressure, leaking fluids, or electrical issues. Addressing these before hitting the road means you're far less likely to face sudden breakdowns or be caught unprepared. And let’s not forget: an annual maintenance check may also be a requirement for your insurance cover—ensuring that claims won’t be denied due to poor upkeep. "Regular spring inspections are your best defense against costly, dangerous failures later in the year." — Motorcycle Maintenance Expert As you work through your spring motorcycle inspection, it’s helpful to have a detailed maintenance checklist on hand to ensure you don’t overlook any critical steps. For a practical, step-by-step breakdown of essential tasks, check out these seasonal bike care secrets every rider must know—they offer actionable tips that complement your spring prep routine. Comprehensive Motorcycle Maintenance Checklist for Spring Visual inspection: frame, controls, stands Fluid levels: oil, brake fluid, coolant Check battery, tires, and brakes Inspect chain, belt, or shaft Test lights, horn, and electrical systems Inspection Item Recommended Action Engine Oil Replace if old/low Air Filter Clean or change Battery Charge or replace Spark Plugs Inspect and replace if needed Tires Check pressure/tread Maintenance Check: Step-by-Step Motorcycle Inspection for Spring Pre-Inspection After Winter Storage The first step of any effective motorcycle inspection for spring is to assess the effects of winter storage. Motorcycles left stationary for months are prone to developing issues that may not be immediately obvious. Carefully check for fluid leaks underneath the bike—these could signal degraded seals or worn gaskets. It’s equally important to examine all visible components for rust formation or corrosion, especially on brake lines and electrical connections, which are susceptible to moisture and temperature swings. Another critical maintenance check involves assessing the tires for signs of dry rot or flat spots—look for cracks along the sidewalls and uneven wear. These risks can jeopardize your grip and traction on the open road. By methodically performing these visual inspections, you’ll catch problems while they’re manageable and before they threaten both your ride and your safety. Use this step as the baseline for the full maintenance checklist to follow. Check for fluid leaks Assess for rust, corrosion, and tire dry rot Motorcycle Air Filter and Spark Plug Maintenance When considering your spring maintenance checklist, paying special attention to the air filter and spark plugs is essential. The air filter ensures your engine breathes cleanly and efficiently; if clogged with dust or moisture from winter storage, it can cause your bike to run unevenly or lose power. Remove the air filter according to your motorcycle’s manual, inspect it for visible dirt, and either clean or replace it based on its condition. This simple motorcycle maintenance step boosts performance and engine longevity. Spark plugs are the core of your engine's ignition system. Faulty plugs can lead to hard starts, backfiring, or even misfires out on the open road. Carefully inspect the spark plugs for wear—look for soot, oily residue, or worn electrodes. Replace spark plugs that show any signs of excessive wear, ensuring reliable ignition every time you start up for the new riding season. Remove and inspect air filter Clean or replace per motorcycle maintenance checklist Check spark plugs for wear Motorcycle Battery and Electrical System Spring Maintenance Check Charging, Connections, and Lights No motorcycle inspection for spring is complete without a thorough check of the battery and electrical system. A discharged or corroded battery is a top cause of breakdowns early in the riding season. Be sure to fully charge your battery before that first ride, and consider using a trickle charger during the off-season to prolong its life. Once charged, meticulously tighten all cable connections and scrutinize for corrosion or frayed wires—weak connections can cause your motorcycle’s powerful electronics to malfunction at the least convenient moment. Test all lights, indicators, and the horn to be certain your motorcycle is in proper working order. These are key not just for your safety, but for legal compliance as well. From brake lights to high beams, make sure everything is working properly before you set out. Minor electrical problems are usually easy fixes during routine maintenance and can make a major difference in preventing accidents and ensuring visibility on the open road. Fully charge battery before use Tighten all cable connections Test lights, indicators, and horn Tires and Brakes: Motorcycle Inspection for Spring and Riding Season Checking Tire Tread, Pressure, and Age Ensuring your tires are in good condition is non-negotiable for a safe and exhilarating riding season. Tire tread depth directly affects your bike’s grip and handling. Use a tread gauge to inspect for sufficient depth—shallow tread risks hydroplaning or slipping, especially on wet spring roads. Don’t forget to check for sidewall cracks or bubbles, as these are classic signs of excessive wear or dry rot, particularly after winter storage. Also, motorcycle tires have a lifespan—regardless of visible wear, replace any tire more than five years old to guarantee peak performance and safety. Maintaining correct air pressure is equally vital; under-inflated or over-inflated tires compromise handling, increase stopping distances, and could lead to losing control. Routinely check both front and rear tire pressures against your manufacturer’s specifications, and don’t overlook the valve stems or caps. This simple maintenance check can help you ride with confidence and extend your tire life—all a critical part of your motorcycle inspection for spring. Brake Pad and Brake Fluid Maintenance Checklist Brake systems are your primary defense against accidents, making their inspection a top priority during your spring maintenance check. Begin by inspecting both the brake pads and discs for signs of excessive wear or scoring. Thin brake pads or severely grooved discs mean reduced stopping power; replace them promptly to ensure your brake response remains razor-sharp. Assess the feel of both the front and rear brake levers—any sponginess or inconsistent response signals air in the brake lines or low brake fluid levels, demanding immediate attention. Next, check the condition and level of your brake fluid. Old or contaminated brake fluid can degrade performance and lead to dangerous situations. For peace of mind on the open road, replace brake fluid as recommended by your owner’s manual, and use only the correct type. Keeping your braking system in working order is central to safe riding, especially as spring traffic and unpredictable weather return. Inspect for sidewall cracks and tread depth Test brake lever/pedal feel Change brake fluid as needed Checking Fluids and Lubrication During Your Motorcycle Inspection for Spring Fluid checks are a crucial step in the motorcycle inspection for spring, ensuring your engine, transmission, and cooling system—all vital for reliable performance—are ready for action. Start with the engine oil: inspect the level and quality, and change it if it’s dark, gritty, or more than six months old. Fresh oil protects internal components from friction, overheating, and premature wear. Don’t forget transmission or gear oil for models that require it, and for liquid-cooled bikes, check coolant levels and condition. Low or dirty coolant can lead to overheating, putting your engine at high risk. A quick inspection of all visible hoses helps you spot leaks or cracks before they become major issues. Taking these proactive steps as part of your spring maintenance checklist helps keep your motorcycle in peak condition for a trouble-free riding season. Engine oil check and change Transmission/gear oil level Coolant check for liquid-cooled bikes Chain, Belt, and Shaft: Maintenance Checklist for Safe Riding Your motorcycle’s final drive system—chain, belt, or shaft—transfers engine power to the rear wheel. Neglecting this during a motorcycle inspection for spring could result in major breakdowns or even accidents on the open road. For chain-driven bikes, inspect for correct tension, adequate lubrication, and signs of rust or kinking. Clean and lube your chain according to your motorcycle maintenance checklist, using quality motorcycle chain lube, and adjust it for proper slack. Belt drives require you to check for cracks, fraying, or excessive stretching and adjust tension if needed. For shaft drives, make sure the final drive housing isn’t leaking and the fluid is clean and at the proper level. Rattles, whines, or clunks here are warning signs of excessive wear and should be addressed before the riding season kicks off. Regular maintenance checks in this area ensure reliable power transfer and a smoother, safer ride. Chain/belt tension & lubrication Look for abnormal wear or noise Inspect final drive housing (shaft bikes) Test Ride: Confirming Your Motorcycle Maintenance for Spring Success "Never skip the test ride — it’s your last chance to catch something you might have missed." — Certified Motorcycle Mechanic The final step in your motorcycle inspection for spring is the test ride—a crucial, often overlooked part of the process. Take your bike on a controlled, low-traffic route to ensure the engine, brakes, transmission, and controls respond as they should. Pay special attention to any unusual noises, vibrations, or handling issues—these can indicate overlooked problems even after the most diligent maintenance checklist. This practice run also allows you to feel the brakes’ bite, test throttle response, and confirm that all electrical accessories—lights, horn, indicators—are fully operational. Only after a successful test ride should you consider your motorcycle ready for the open road and the adventure of a new riding season. Remember, riding safety begins before you even leave the driveway. Safety Accessories & Gear: Preparing for the Open Road After Motorcycle Inspection Helmet, gloves, jacket inspection Reflectors and legal compliance As the final piece of the puzzle, inspect your riding gear. Your helmet should have no cracks or major scratches, the visor should be free from fogging or scratches that impair visibility, and all straps must be secure. Gloves and jackets require a check for tears or excessive wear, as this gear acts as your last defense in a slide or accident. Confirm all reflectors, tags, and lighting devices are attached and functional for legal compliance—your life may depend on being seen. Never compromise on motorcycle safety or skip this step, as even the best-maintained bike requires the right protective gear to ensure you’re riding in good condition. Seasonal Tips for a Confident Start to the Riding Season Start your season with a short ride, gradually increasing distance as confidence in your motorcycle’s working order grows. Keep the maintenance checklist handy throughout spring, and repeat quick checks before each ride. Store your insurance cover documents with your gear, be mindful of ever-changing spring road conditions, and ride alert—it’s the best way to guarantee more miles and safer journeys long into the season. People Also Ask About Motorcycle Inspection for Spring How to prepare a motorcycle for spring? A: Start with a motorcycle maintenance checklist that includes inspecting fluids, battery, tires, and brakes. Clean or replace the air filter, check spark plugs, and ensure all lights work. Run a test ride to confirm everything is functioning well before hitting the open road. What to check on a motorcycle after winter? A: Focus on the maintenance check after winter storage: look for leaks, corrosion, low battery, tire dryness, and ensure oil and brake fluid are at optimal levels. How often do motorcycles need to be inspected? A: A thorough motorcycle inspection is recommended at the start of every riding season, especially in spring. Regular monthly checks and before each long ride keep your bike in safe condition. What is the 4 second rule for motorcycles? A: The 4 second rule helps riders maintain a safe following distance. When the vehicle in front passes a landmark, count four seconds before you pass the same spot, giving ample reaction time in emergencies. Video Guide: Motorcycle Inspection for Spring Maintenance Checklist A well-produced video walkthrough showing a professional mechanic performing a complete spring motorcycle inspection in a bright, clean workshop. Features step-by-step demonstrations including tire checks, fluid top-ups, battery connection assessments, and a final test ride on a picturesque spring road. No text overlays. Cinematic, inviting, and brand-friendly style. Video Demonstration: Performing a Spring Motorcycle Maintenance Check Motorcycle Inspection for Spring: Key Takeaways for a Safe Riding Season Use a comprehensive maintenance checklist Perform scheduled maintenance checks after any winter storage Address all fluid, battery, tire, and safety gear concerns Never skip the spring test ride Frequently Asked Questions about Motorcycle Inspection for Spring Can I do my own motorcycle inspection for spring or should I visit a professional? Most riders with basic tools and a manufacturer’s manual can perform a thorough motorcycle inspection for spring themselves. However, if you’re a new rider or encounter issues like persistent leaks, odd noises, or electrical faults, a professional service is recommended for peace of mind and warranty safety. Are there special tips for new riders doing their first maintenance check? Yes. Take your time, consult your motorcycle maintenance checklist, and don’t hesitate to ask experienced riders or local mechanics for guidance. Start with visual checks, document what looks unusual, and double-check tire tread, air filter, and brake fluid levels before your first ride. How do I choose the right fluids for my bike? Always refer to your owner’s manual or consult a qualified mechanic. Use only manufacturer-recommended oils, brake fluids, and coolants—using the wrong type can cause damage or void your insurance cover or warranty. Ready for the Open Road? Schedule Your Motorcycle Inspection for Spring Now! "A little time spent on a motorcycle inspection for spring could be the best investment you make all year." Call Nasty Performance Motorcycle Shop Today: 847-458-4858 Conclusion: Take charge of your riding season by making motorcycle inspection for spring an annual tradition. With a proper maintenance checklist and a little time, you’ll hit the open road with confidence, comfort, and peace of mind. For riders who want to go beyond the basics and truly master year-round motorcycle care, there’s even more to discover. Expanding your knowledge of seasonal maintenance strategies can help you anticipate issues before they arise and keep your bike performing at its best in every climate. If you’re ready to elevate your maintenance routine and unlock expert-level tips for every season, explore seasonal bike care secrets every rider must know—it’s your next step toward a safer, smoother, and more enjoyable ride all year long.

Your Spring Motorcycle Maintenance Checklist

Did you know? The majority of motorcycle breakdowns in the spring are caused by issues that could have been prevented with just 30 minutes of routine inspection. As the world thaws and the urge for the open road grows irresistible, taking the time for a spring motorcycle maintenance checklist is not just a good idea—it’s essential for a safe and thrilling riding season. This guide delivers everything you need to ride confidently from your first start, combining pro tips, key maintenance tasks, and the latest safety guidelines to get your bike in peak condition—before you twist the throttle for that first spring ride. Start Your Spring Motorcycle Maintenance Checklist with This Surprising Fact It might surprise you, but over 60% of motorcycle accidents related to mechanical failure stem from skipped maintenance checks after winter storage. Even riders who are vigilant about in-season upkeep can overlook hidden issues that develop while a bike sits idle—like corroded battery terminals, under-inflated tires, or brittle brake lines. That’s why a thorough spring motorcycle maintenance checklist isn’t just about keeping your engine purring; it’s about safeguarding your ride and, ultimately, your life. Whether you fiend for the thrill of the open road or value the serene peace of mind when everything works as it should, starting the season with a comprehensive maintenance check is non-negotiable. This guide will empower you to identify potential trouble spots and ensure your machine is in perfect working order, ready for miles of safe adventure ahead. What You'll Learn: A Complete Spring Motorcycle Maintenance Checklist How to perform a thorough motorcycle maintenance check before riding season Key components every comprehensive maintenance checklist must cover Tips directly from industry service manual guidelines for best results Safety-critical steps for visual inspection and troubleshooting Common mistakes riders make when preparing for the open road Why a Spring Motorcycle Maintenance Checklist Matters "Routine maintenance isn’t just about performance—it’s about rider safety and peace of mind before hitting the open road." – Certified Motorcycle Technician Completing a spring motorcycle maintenance checklist is about more than boosting your motorcycle’s performance or extending its lifespan. The real priority is rider safety. Neglecting essential maintenance tasks can leave you vulnerable to avoidable accidents caused by factors like worn brake pads, low brake fluid, or cracked fuel lines. Regular, seasonal maintenance checks ensure every component—from your engine oil and battery terminals to your tires and brake lines—is ready to perform under pressure. This preparation grants you not only a smooth operation and optimal riding experience but also that indispensable peace of mind while you start the season. As you plan your first trip onto the open road, remember: your safety begins with your toolbox and a checklist. As you work through your spring motorcycle maintenance checklist, it’s helpful to understand how seasonal changes can impact your bike’s performance and longevity. For a deeper dive into year-round care strategies and how to adapt your maintenance routine as the weather shifts, check out these essential seasonal bike care secrets every rider should know. Essential Tools and Service Manual for Your Motorcycle Maintenance Checklist Before you can tackle your spring motorcycle maintenance checklist, assemble the right tools and have your service manual at hand. The service manual contains detailed instructions specific to your motorcycle’s make and model, ensuring that every maintenance task—from an oil change to inspecting your clutch and throttle cables—is done correctly. A typical maintenance check requires basic yet crucial tools that empower you to perform the majority of inspections and minor repairs yourself—even if you’re not a professional mechanic. Basic hand tools: sockets, wrenches, and screwdrivers, useful for removing panels, tightening bolts, and tackling most common fasteners Tire pressure gauge and a multimeter, which help you verify precision in essential metrics like tire inflation and electrical system health The official service manual for your specific motorcycle model, providing accurate maintenance schedules, torque specifications, and troubleshooting advice tailored to your bike Equipping yourself with the right gear and authoritative information is the first step in effective motorcycle maintenance. With these essentials at your side, you’re set to handle everything your bike needs to thrive for the riding season. Step-by-Step Spring Motorcycle Maintenance Checklist 1. Begin with a Complete Visual Inspection A thorough visual inspection is the foundation of every effective spring motorcycle maintenance checklist. This foundational step allows you to catch signs of wear, leaks, or damage before they morph into costly repairs or safety hazards. Start by carefully examining all visible components for cracked, brittle, or frayed rubber hoses, worn gaskets, or seepage points around the engine. Check under the bike for puddles or spots left from winter storage that might indicate an oil leak or other issue. Give special attention to the front and rear wheels, the drive belt or chain, and the condition of the brake lines. By methodically scanning every angle, you can identify trouble spots like loose fasteners, aging wiring, and even subtle paint bubbles that often signal underlying rust. Spot-check your fuel lines and fuel filter for cracks or stiffness, as fuel system degradation is especially common after long periods of inactivity. The visual inspection prepares you to prioritize other critical tasks on your list—so take your time, use a flashlight for those hard-to-reach areas, and never underestimate the clarity of a fresh, unbiased look at your motorcycle’s current state. Remember to check your mirrors, controls, and footpegs as well while you’re at it! This extra diligence during the visual inspection translates directly to safety and confidence once you finally hit the open road. 2. Batteries and Electrical System: Key Maintenance Check Check battery terminals for signs of corrosion and test for proper voltage Inspect all visible wires for fraying, loose connections, or insulation damage, replacing components as needed Test functionality of lights (headlamp, turn signals, brake light), horn, and any electronic accessories Your battery and electrical system are often overlooked components that can leave you stranded if not addressed. After winter storage, try starting your engine—if it’s slow to turn over, use a multimeter to test battery voltage and charge as specified in your service manual. Corroded battery terminals are a common culprit behind starting problems; clean them thoroughly using a wire brush and a baking soda solution. Don’t forget to examine your fuse box and ensure all fuses are appropriately rated and intact. While checking the rest of the system, trace wires leading to your horn, signal lights, and brake light. Make sure you correct any brittle sheathing or exposed wires right away to prevent shorts or electrical fires. Function-test every bulb and electronic system. If you encounter dim or flickering lights, consider replacing bulbs or examining the wiring for deeper faults. Addressing electrical concerns now helps avoid headaches and ensures all safety systems are fully operational for the riding season. 3. Tires and Wheels: Foundation of Riding Season Safety Worn or under-inflated tires compromise every aspect of riding—handling, traction, and most importantly, safety. Start your tire maintenance check with a careful visual inspection for cracks, bald spots, or embedded debris that might have worsened during winter storage. Using a tread depth gauge, measure the remaining tread; replace the tire if it’s below the minimum safe limit (usually 2/32 inch for most models). Don’t forget to check both the front and rear wheels—imbalances or damage can threaten your smooth operation on turns or under sudden braking. Tire pressure is another critical metric on your spring motorcycle maintenance checklist. Under-inflated tires cause excessive heat buildup and poor fuel efficiency, while over-inflated ones reduce grip and comfort. Use a quality tire pressure gauge and consult your service manual for model-specific inflation requirements. Inspect the wheels for bent rims or out-of-round conditions and pay close attention to the valve stems, which can crack or dry out while stored. A proactive approach here not only helps prevent blowouts but guarantees that your first ride of the season feels as responsive and exhilarating as the last. 4. Fluids and Filters: Motorcycle Maintenance Essentials Change engine oil and oil filter for maximum engine health Check brake fluid and coolant levels, topping up or flushing as specified by your manual Inspect clutch and transmission fluids, ensuring lubricants are at the recommended levels Replace or clean the air filter if dirty, worn, or clogged Fluids and filters are the lifeblood of any motorcycle, and after a period of winter storage, every fluid deserves attention. An oil change is a staple for good motorcycle maintenance—old engine oil can develop acidic compounds and lose its lubricating qualities over time, risking engine wear and overheating. Don’t just drain and refill; replace the oil filter as well to ensure contaminants from previous seasons are fully eliminated. Check your brake fluid for clarity and contamination; murky fluid or low levels can impact brake performance and safety. Flush the brake lines if needed, especially if the bike showed any signs of reduced brake feel last season. Coolant and transmission fluids often get forgotten, but their condition is vital for maintaining optimal engine temperature and smooth shifting. A quick inspection and top-up according to your maintenance schedule will keep these systems working order. The air filter should be checked as a clogged or dirty filter restricts airflow, reducing horsepower and efficiency—replace or clean as dictated by your service manual for maximum benefit. 5. Brakes, Chains, and Cables: Safety-First on Your Maintenance Checklist Inspect brake pads, rotors, and lines for thickness and wear, replacing brake pads if necessary; check the brake fluid in the reservoir and look for leaks along the brake lines Lubricate and tension your chain (or inspect your drive belt for cracks and tension), making sure it moves freely with no tight spots or excessive slack Check and adjust cable tension for clutch and throttle to ensure crisp response with no sticky or sluggish movement The integrity of your braking and drive systems is the difference between smooth operation and danger. Even slightly worn brake pads or rotted brake lines can drastically extend stopping distances, especially in an emergency. Chains should be free of grit and lubricated per the maintenance schedule, while drive belts must be checked for nicks or gaps. Tighten or adjust as outlined in your service manual, and address any resistance or odd sounds that hint at deeper mechanical faults. Maintaining proper cable slack in the clutch and throttle—without excess play—ensures predictable control and quick response when split-second action is required out on the open road. Routine maintenance of these systems prevents the most common breakdowns and unsafe riding conditions. Taking your time with this part of the spring motorcycle maintenance checklist helps ensure that every mile is not only enjoyable but also as secure as possible. 6. Suspension and Forks: Assess Before the Open Road Suspension components like front forks and rear shocks take the brunt of every road imperfection; neglecting them can turn a pleasant ride into a bumpy, unpredictable ordeal. Start by inspecting for oil seepage or grime around the fork seals—a sign that a rebuild or replacement is in order. Compress the suspension and listen for squeaks, knocks, or sluggish rebound, which may indicate internal wear or inadequate lubrication. Check the condition of the rear shocks for rust or bending and make sure damping and rebound settings match your weight and riding style for optimal stability. This is an area where your service manual can provide invaluable guidance. Detailed torque specifications and troubleshooting advice ensure you don’t overlook hidden faults. A smooth, well-tuned suspension doesn’t just improve comfort—it’s a crucial factor in maintaining safe control at high speeds and when cornering fast. If you discover anything out of the ordinary, or if you’re unsure about inspection results, consider bringing your bike to a professional mechanic before embarking on your first extended trip of the season. 7. Air Filter and Final Visual Check Don't overlook your air filter—the gateway between the outside environment and your engine. A dirty or clogged air filter reduces power and increases fuel consumption, while leaving your engine vulnerable to harmful debris. Remove the air filter, hold it up to the light, and replace or clean if it looks dark, clogged, or deteriorated—refer to your service manual for the correct method. Once you’ve completed all major maintenance tasks, walk around your bike one last time to perform a comprehensive visual inspection. Look for anything you might have missed, like loose fasteners, disconnected hoses, or unsafe modifications from seasons past. This final look serves as the last line of defense to ensure your motorcycle is fully prepped before your engine rumbles to life for the spring riding season. By finishing strong and double-checking every element, you can hit the open road with full confidence in both your machine and your maintenance skills. Spring Motorcycle Maintenance Checklist: Quick Reference Table Maintenance Item Task Recommended Frequency Visual Inspection Check for leaks, cracks, and damage Before each season Tires & Wheels Inspect, check pressure and tread Monthly Batteries Charge, clean terminals Seasonally Fluids & Filters Replace as needed Seasonally or per manual Brakes Check pads and fluids Every ride Chain & Cables Lubricate, inspect 500 miles Suspension & Forks Inspect for leaks and wear Annually Air Filter Clean or replace 5,000 miles or as needed Watch this step-by-step guide, featuring experienced mechanics and real-world demonstration on various motorcycle models. Each inspection task and service manual tip is shown in action—perfect for both novice and seasoned riders who want to see the full motorcycle maintenance checklist in motion. Tips for a Safe Start to the Riding Season Double-check your maintenance checklist before your first ride to confirm you haven’t missed any safety-critical areas Take a test ride in a controlled area, such as an empty parking lot, to detect any hidden issues like unusual noises, vibration, or brake fade Review your insurance and riding gear—make sure your motorcycle insurance is current and that your helmet and protective wear are in good condition Common Mistakes Riders Make When Following a Spring Motorcycle Maintenance Checklist Ignoring worn brake pads or tires due to assumed “just one more ride” mentality Neglecting to replace or clean the air filter, reducing both engine performance and life Skipping the service manual’s specific recommendations and relying on guesswork Forgetting a final visual inspection—often the last step that catches missed details By avoiding these common pitfalls and adhering closely to your checklist—with an emphasis on following your service manual and looking out for signs of wear—you’ll keep your ride safe, reliable, and ready for the open road. Understand how to read, interpret, and apply key details from your motorcycle’s service manual. This video highlights critical sections, such as torque specifications, recommended maintenance intervals, and part diagrams, empowering you to handle your motorcycle maintenance with precision and confidence. People Also Ask: Spring Motorcycle Maintenance Checklist Questions How to prep a motorcycle for spring? To prep your motorcycle for spring, begin with a detailed spring motorcycle maintenance checklist: perform a complete visual inspection for leaks or damage, change the engine oil and oil filter, check and top up all fluids (including brake fluid and coolant), inspect battery terminals, verify tire pressure and tread depth, lubricate the chain or drive belt, and ensure all lights and signals are functional. Don’t overlook cleaning the air filter and consulting your service manual for any model-specific requirements. Finish with a gentle test ride to verify everything is in working order before hitting the open road. What is the 12 second rule for motorcycles? The “12 second rule” refers to scanning ahead of your motorcycle approximately 12 seconds down the road to anticipate hazards, traffic changes, or obstacles. By maintaining this long-range visual awareness—especially during the early riding season when road debris and unpredictable situations are common—you give yourself ample time to brake, steer, or make adjustments. Practicing this rule enhances rider safety and reduces the likelihood of sudden, risky maneuvers. What maintenance needs to be done on a motorcycle? Key motorcycle maintenance tasks include changing engine oil and filters, checking and topping up fluids (brake, coolant, and transmission), inspecting and replacing air filters, adjusting and lubricating the chain or drive belt, checking brakes and brake pads for wear, maintaining proper tire pressure and tread, ensuring all lights and signals are working, and tightening fasteners. Always follow your motorcycle’s specific maintenance schedule as outlined in the service manual to ensure every critical item is covered. How do I know if my motorcycle fork springs are bad? Bad fork springs often cause excessive front-end dive under braking, poor rebound, or a rough ride over bumps. Look for oil leaks around fork seals, uneven tire wear, or an unusually harsh or soft feel in the suspension. Consult your service manual for recommended inspections and tests; if you notice any instability or hear odd noises during a bounce test, the fork springs or associated components may need to be serviced or replaced for safety and smooth operation. Expert Quotes on Motorcycle Maintenance and Riding Safety "Your motorcycle deserves a little extra attention before the riding season. Following the right maintenance checklist keeps your ride smooth and worry-free." – Local Bike Mechanic Key Takeaways: Mastering the Spring Motorcycle Maintenance Checklist Following a complete spring motorcycle maintenance checklist boosts safety and reliability A thorough maintenance check and adherence to your service manual prevent costly surprises Routine care helps you make the most of every riding season FAQs About Spring Motorcycle Maintenance Checklists How often should I do a spring motorcycle maintenance checklist? Perform a thorough maintenance checklist at the start of every riding season and follow regular maintenance intervals as outlined in your service manual throughout the year. Can I do all maintenance myself or do I need a professional? Many maintenance tasks, such as oil changes, air filter cleaning, and visual inspections, can be done at home with basic tools and access to your service manual. For more complex repairs or if you’re unsure, trust a certified mechanic. What is the most commonly missed item in spring checks? The air filter is often forgotten—riders overlook its impact on engine performance and only change it when problems arise. Regularly cleaning or replacing the air filter is crucial for reliability. Does skipping a year of maintenance really matter? Absolutely—neglecting regular maintenance can lead to accelerated wear, safety risks, and costly breakdowns. Sticking to your maintenance schedule is essential for performance and peace of mind. Ready for Riding Season? Call Nasty Performance Motorcycle Shop Today: 847-458-4858 Don’t leave your safety and riding adventure to chance. Complete your spring motorcycle maintenance checklist—or let our pros handle it for you. For professional inspections and expert service, call Nasty Performance Motorcycle Shop at 847-458-4858 and start your season right! If you’re eager to take your motorcycle care to the next level and ensure your ride stays in peak condition all year long, there’s even more to discover. Explore the broader strategies and expert insights in Seasonal Bike Care Secrets Every Rider Must Know. This resource goes beyond spring prep, offering guidance on adapting your maintenance habits for every season, protecting your investment, and maximizing your bike’s performance no matter the weather. Dive in to unlock advanced tips and keep your motorcycle adventure-ready, mile after mile.

Motorcycle Spring Tune-Up: Get Ready for the Ride of Your Life

Imagine starting your riding season confident your motorcycle won’t let you down. According to the Motorcycle Industry Council, over 80% of riders who perform a comprehensive motorcycle spring tune-up experience fewer roadside breakdowns during the riding season. Don’t leave your open road adventures to chance—proper spring motorcycle maintenance can mean the difference between a memorable ride and an unforeseen pit stop. This guide walks you through every step of the motorcycle spring tune-up process, so you’re ready to hit the open road safely and with peace of mind. Kickstart Your Riding Season: The Shocking Truth About Motorcycle Spring Tune-Up "According to the Motorcycle Industry Council, over 80% of riders who perform a comprehensive motorcycle spring tune-up experience fewer roadside breakdowns during the riding season." As the weather warms up and the roads beckon, getting your motorcycle ready with a spring tune-up isn’t just advisable—it’s essential. Your bike’s performance, reliability, and your own safety depend on starting the season with a thorough maintenance check. Riders who consistently perform a motorcycle spring tune-up report smoother rides, fewer interruptions, and avoid the common frustrations that plague those who neglect their bikes after winter storage. By focusing on a maintenance checklist—covering everything from tire pressure to spark plugs—riders can eliminate surprises and maximize every journey. It's not just about the thrill of the open road; it's about ensuring every mile is worry-free. This section will present the realities, the facts, and the best practices so you can make this riding season exceptional. While a spring tune-up is crucial, many riders overlook the importance of adapting their maintenance routine to the unique challenges of each season. For a deeper dive into how to keep your bike in peak condition year-round, check out these seasonal bike care secrets every rider should know—they offer practical tips that complement your spring preparations and help extend your motorcycle’s longevity. What You'll Learn in This Motorcycle Spring Tune-Up Guide Essential steps in a motorcycle spring tune-up for riding season preparation Comprehensive motorcycle maintenance checklist and common maintenance tasks Expert tips on air filter, spark plugs, and suspension adjustments How to conduct an effective maintenance check and safeguard your spring motorcycle Best practices to maximize performance and safety on the open road Understanding the Importance of Motorcycle Spring Tune-Up for Riding Season Why Motorcycle Maintenance Matters: Safety, Longevity, and Performance Motorcycle maintenance isn’t just a box to check; it’s a proactive approach to protect your investment and, more critically, your wellbeing. When you perform diligent motorcycle maintenance at the start of the riding season, you ensure that all components—from brakes to drive chains—are in optimal working order. This means your bike responds quickly, handles predictably, and you reduce the risk of breakdowns or, worse, accidents. Even a simple maintenance checklist can reveal hidden issues like worn brake pads, low brake fluid, or cracks in fuel lines that could become hazardous once you hit the open road. By staying vigilant, you extend the life of your motorcycle, improve fuel efficiency, and enjoy each mile with confidence during the spring motorcycle season. Routine motorcycle maintenance also impacts your wallet in the long run. Small issues such as dirty air filters, slightly loose drive chains, or unbalanced wheels can cause undue wear on your engine, suspension, and tires, leading to unexpected (and expensive) repairs down the road. Remember to check your bike’s major systems: a quick maintenance check on spark plugs, suspension, and battery health can prevent interruptions to your riding season. Riding gear also benefits from inspection—ensuring your helmet, gloves, and protective clothing are intact. In short, a little preventative care through a motorcycle spring tune-up goes a long way toward an enjoyable, hassle-free season. Common Issues Prevented by Thorough Maintenance Check A thorough maintenance check during your motorcycle spring tune-up helps you catch potential surprises before they become dangerous problems. For instance, tire flat spots from winter storage, weakened brake pads, or stale fuel in the gas tank can cause major headaches—or worse, safety hazards—if left unaddressed. Checking the air filter is critical, as debris or blockages reduce engine performance. Similarly, corroded battery connections or frayed control cables can lead to electrical failures, leaving you stranded. Unattended suspension issues or traction problems—often due to overlooked tire pressure or tread depth—can dramatically impact handling on the open road. By performing a complete motorcycle maintenance checklist at the season’s start, you also prevent minor nuisances like weak brake lights, leaky brake lines, or insufficient oil levels from turning into larger, costlier repairs. This diligent approach makes each ride this riding season not only safer but also more pleasurable, knowing your bike is in prime condition. Motorcycle Maintenance Checklist: Must-Do Tasks for Spring Motorcycle Preparation Visual inspection (tires, frame, chain, and bodywork) Fluid levels (oil, coolant, brake, and clutch) Electrical system: battery and lighting Control cables and levers Brakes and suspension Spring Motorcycle Maintenance Checklist with Estimated Time and Tools Needed Task Estimated Time Tools Needed Check Tire Pressure & Tread 10 minutes Tire gauge, flashlight Inspect & Lubricate Chain 15 minutes Chain brush, lubricant, rags Change Oil & Replace Oil Filter 30 minutes Socket set, oil pan, new filter Check Brake Pads & Fluid 15 minutes Wrenches, fluid tester, gloves Test Battery and Lights 10 minutes Multimeter Inspect Air Filter 15 minutes Screwdrivers, new filter (if needed) Suspension Adjustment 20 minutes Wrenches, measuring tape Step-by-Step Motorcycle Spring Tune-Up: Detailed Maintenance Check Inspecting and Replacing the Air Filter During Your Motorcycle Spring Tune-Up The air filter is a critical yet often overlooked component during spring motorcycle maintenance. After months in winter storage, dust and debris can clog the air filter, restricting airflow and reducing engine performance and fuel economy. Start by locating the air filter housing—typically under the seat or a side panel. Gently remove it for inspection. If you notice heavy dirt accumulation, tears, or oil contamination, it’s time to replace the filter with a new one that matches your model’s specifications. For reusable filters, cleaning per the manufacturer’s instructions is sufficient—just make sure it’s thoroughly dry before reinstalling. A clean air filter ensures optimal engine combustion, allowing your bike to breathe freely and deliver peak performance during the riding season. Ignoring air filter maintenance could lead to sluggish acceleration, poor mileage, and even long-term engine damage, making this step indispensable in your motorcycle spring tune-up. Spark Plug and Spark Plugs Check: Ensuring Reliable Ignition Reliable ignition is paramount, and nothing affects it more than healthy spark plugs. Over time, spark plugs collect carbon deposits, erode at the electrodes, and may even crack—especially after winter storage. During your comprehensive motorcycle maintenance check, remove each spark plug and inspect its tip. Look for ash, oil, or excessive blackening, which indicates it’s time for a replacement. Using a feeler gauge, check and adjust the gap on new spark plugs to ensure precise ignition. Replacing old or fouled spark plugs guarantees smooth startups and consistent power delivery, so you aren’t left with a stalling bike on the open road. For peace of mind, consider swapping all spark plugs at the beginning of the riding season. Experts also recommend an anti-seize compound on the threads to facilitate future removals. Integrating spark plug inspection into your motorcycle maintenance checklist will safeguard against rough idling and misfires throughout your spring motorcycle adventures. Oil Change and Fluid Replacement in Spring Motorcycle Maintenance Fluids are the lifeblood of your bike, and changing your oil is one of the most crucial spring motorcycle maintenance tasks. Oil degrades over time—especially when your bike sits idle during winter storage—collecting moisture, acids, and particulates. Begin by warming up your engine to thin the oil, then drain it completely from the sump. Replace the oil filter to ensure no contaminants linger before filling with fresh, high-quality oil suitable for your bike’s specifications. Don’t overlook other fluid systems: inspect and top up coolant levels to avoid overheating, check brake fluid for clarity and level (replace if murky or old), and test clutch fluid if applicable. Neglecting fluids invites corrosion, impairs lubrication, and risks catastrophic failures just as the riding season begins. Proper fluid replacement is a hallmark of responsible motorcycle maintenance, directly impacting not just performance but rider safety for all your spring adventures. Checking Tire Pressure, Tread, and Wheel Suspension Tires connect you to the road, making them a central focus of every motorcycle maintenance checklist. Start with air pressure: refer to the owner’s manual for recommended PSI and use a quality tire gauge to check both front and rear tires. Low air pressure can affect handling and speed premature tire wear, while overinflation may reduce traction, especially in changing spring weather conditions. Next, examine tread depth using a tread gauge or the “penny test”—insufficient tread compromises grip, especially on wet or silt-covered roads common in early spring. Don’t skip a careful look for cracks, bald patches, or flat spots (a common byproduct of winter storage). Lastly, test wheel suspension by pressing down on the handlebars and rear of the motorcycle; watch for smooth rebound and listen for unusual noises. Any resistance, oil leaks, or uneven damping in the suspension system warrant immediate attention to ensure a safe, stable ride as you embrace the open road. Adjusting and Lubricating the Chain The drive chain is responsible for transferring engine power to the rear wheel, and its condition directly affects your bike’s performance during the riding season. Begin with a visual inspection: look for signs of kinks, excessive slack, rust, or dry spots. Rotate the rear wheel and measure deflection at the chain’s midpoint; adjust the tension using your manufacturer-specified guidelines—too tight, and you risk premature bearing wear; too loose, and the chain may skip or derail. After adjustment, thoroughly clean the chain using a chain brush and apply a suitable lubricant. This preventive maintenance helps avoid costly repairs and keeps acceleration smooth. Include the chain check in every spring motorcycle maintenance session, ensuring both safety and optimal power delivery. Regular adjustment and lubrication also complement other motorcycle maintenance tasks by reducing component stress and extending chain life. Getting Your Motorcycle Suspension Ready for the Riding Season How to Perform a Suspension Maintenance Check The suspension system dictates how your motorcycle handles bumps, corners, and uneven pavement—a critical factor in rider safety and comfort during the open road season. Start with a visual inspection for oil leaks near shocks or forks, and check bushings and seals for signs of damage or wear. Next, compress and rebound the suspension by applying weight to the bike—smooth, resistance-free movement is a good sign; harsh compression or noisy rebounds often signal issues that need addressing. Ensure both front and rear shocks are adjusted according to your riding weight and style. Refer to your owner’s manual for preload, damping, and rebound settings, and use measuring tools to verify correct sag. Suspension maintenance is a nuanced motorcycle maintenance task, but when performed correctly, it dramatically improves tire contact, braking, and general bike control—making every ride smoother and safer throughout the spring motorcycle season. Upgrading Springs and Adjusting Suspension Settings Advanced riders or those carrying extra weight (such as passengers or luggage) may benefit from upgrading to progressive or performance springs. Modern shocks offer a range of adjustability—and springtime is the perfect opportunity to dial in your settings. Use a spanner wrench or the provided tools to adjust preload, damping, and compression (if your model supports it). Write down baseline settings and make incremental adjustments based on road feel and handling feedback. Suspension improvements can reduce fatigue on long rides and help prevent loss of control over rough terrain. If you notice uneven tire wear, persistent bottoming, or excessive bounce, consider professional service. Regardless of your skill level, include suspension tuning in all spring motorcycle maintenance routines for maximum safety and comfort as you launch into the new riding season. Preparing for the Open Road: Spring Motorcycle Riding Tips Pre-ride checks before every trip Adapting to changing spring weather Practicing the 4 second rule and other safe riding techniques Your first ride after a winter hiatus deserves both excitement and careful attention. Conduct a quick pre-ride check every time—inspect tire pressure, brakes, lights, and signals, and ensure your riding gear (especially helmet and gloves) fits correctly and is damage-free. Spring weather can be unpredictable: be prepared for cool mornings, warm afternoons, or sudden spring showers, and adjust your speed and following distance to suit road conditions. Most importantly, put safety first by employing the “4 second rule”: allow at least four seconds’ distance between your bike and the vehicle in front to give yourself ample time to react. Reacclimate gradually—don’t start with the longest or most challenging rides. By following these spring motorcycle tips, you’ll not only keep yourself safe but also ensure the riding season begins on a high note, filled with memorable journeys along the open road. People Also Ask: Essential Motorcycle Spring Tune-Up Questions Answered What does a motorcycle tune-up consist of? A motorcycle tune-up typically includes a comprehensive maintenance check and covers essential systems: oil and fluid changes, air filter inspection or replacement, spark plugs assessment, adjustment and lubrication of the drive chain, full brake inspection (pads, lines, and fluid), and checking tire pressure and tread. It should also involve battery testing, lighting and electrical system check, and visual scan for any obvious signs of damage or wear. A tune-up ensures that your bike is in working order, maximizing performance, safety, and longevity for a smooth riding season. How to prep a motorcycle for spring? To prep a motorcycle for spring, begin by inspecting and charging the battery with a trickle charger if necessary, draining any stale fuel and checking the gas tank for residue, and replacing engine oil and filter. Move onto visual and tactile checks for flat spots, tire air pressure, and tread depth. Inspect fluid systems (coolant, brake fluid, clutch), examine brake pads and lines, and ensure lights and signals work properly. Clean or replace the air filter, check the drive chain for proper tension and lubrication, and test all controls (levers, cables). Finish by reviewing riding gear and confirming your motorcycle insurance is up to date—then you’re ready and safe to hit the open road. What is the 4 second rule for motorcycles? The “4 second rule” is a safe following distance guideline for motorcyclists. It means you should keep at least four seconds of space between your motorcycle and the vehicle ahead. To measure, choose a stationary point and start counting when the vehicle in front passes it—your front tire should pass four seconds later. This gap gives you enough time to react to sudden stops, road hazards, or changing conditions, especially at higher speeds or during the unpredictable spring motorcycle riding season. It’s a simple yet effective component of safe riding technique. Do I need to tune my motorcycle suspension? Yes—tuning your suspension is recommended, especially at the start of the riding season or after winter storage. Suspension settings directly affect how your motorcycle handles, brakes, and absorbs road irregularities. Whether it's adjusting preload, damping, or changing springs, a suspension check ensures comfort, stability, and safety. Riders who carry extra weight or seek improved performance should fine-tune their settings or consider upgrades as part of their motorcycle maintenance checklist. Properly tuned suspension delivers the smooth, predictable ride that makes spring motorcycle adventures enjoyable and secure. Motorcycle Spring Tune-Up FAQs How often should you conduct a motorcycle spring tune-up? At minimum, a full tune-up should be performed at the beginning of every riding season. If you ride year-round or cover high mileage, additional checks every few thousand miles are ideal. What tools are needed for a comprehensive motorcycle maintenance checklist? Basic toolkit includes socket set, wrenches, screwdrivers, tire pressure gauge, chain brush and lube, oil pan, multimeter, and service manual. Advanced tasks may require a torque wrench, feeler gauge, or specialized suspension tools. Are there signs your spring motorcycle needs immediate repairs? Yes—look for slow starts, flickering lights, odd engine noises, spongy brakes, fluid leaks, uneven tire wear, or any dashboard warning indicators. Prompt repairs keep your season smooth and safe. Can beginners handle spring motorcycle maintenance, or should they consult professionals? Many basic tasks are beginner-friendly with a good manual and patience; however, complex repairs or high-performance bikes often require professional service to guarantee safety and optimal results. Key Takeaways: Maximize Your Riding Season with a Motorcycle Spring Tune-Up Consistent motorcycle maintenance boosts performance and safety Follow a thorough maintenance checklist for reliable riding season readiness Spring motorcycle care prevents costly breakdowns during open road adventures Professional tune-ups can add value for complex or high-performance bikes Ready for the Ride? Call Nasty Performance Motorcycle Shop Today: 847-458-4858 Don’t let hidden issues curb your adventure. Book your professional motorcycle spring tune-up at Nasty Performance Motorcycle Shop—your safest ticket to a worry-free riding season! As you gear up for an unforgettable riding season, remember that spring maintenance is just the beginning of a year-round commitment to your bike’s health and your own safety. If you’re eager to take your motorcycle care to the next level, explore our expert guide on seasonal bike care strategies for every rider. You’ll discover advanced tips for adapting your maintenance routine to changing weather, storage, and riding demands—ensuring your machine stays in top shape no matter the season. Dive deeper and empower yourself with knowledge that keeps you ahead of the curve, mile after mile.

Terms of Service

Privacy Policy

Core Modal Title

Sorry, no results found

You Might Find These Articles Interesting

T
Please Check Your Email
We Will Be Following Up Shortly
*
*
*