Add Row
Add Element
cropper
update

Nasty Performance ~ 847-458-4858 

update
Add Element
  • Blog Home
  • Categories
    • Motorcycle Maintenance
    • Riding Tips & Preps
    • Safety & Inspection
    • Customizations & Upgrades
    • DIY Motorcycle Repairs
    • Motocycle Audio Systems
    • Motocycle Seasonal Care & Storage
    • Engine, Electrical Performance
  • Bike Night
  • Nasty Performance Motorcycle Shop
December 10.2025
1 Minute Read

Unveil the Secret of Motorcycle Engines for Power Boost

Did you know the difference between a basic cycle engine and a high performance motorcycle engine can mean a 50% boost in speed and acceleration? Motorcycle engines are not just mechanical hearts—they’re the secret to unleashing a bike’s true power. Unlocking optimal performance doesn’t always require advanced mechanical expertise. Sometimes, it’s all about understanding a few core secrets.

Dynamic close-up of a high-performance motorcycle engine, powerfully idling in a professional garage, motorcycle engines in focus, metallic greys and chrome

A Startling Secret: How Motorcycle Engines Drive Performance

When it comes to pure adrenaline, motorcycle engines are the ultimate source. Every twist of the throttle transforms a rider’s intentions into raw motion, and the hidden mechanics inside the engine determine just how far that power will take you. Whether you ride a classic dirt bike, a cutting-edge sport bike, or a touring machine, the type of engine under the tank shapes your speed, acceleration, and even your riding experience. This article peels back the layers of the engine type mysteries, delving into how subtle details can mean big differences on the road and track.

From the underappreciated efficiency of parallel twin and inline engine layouts to the raging high performance upgrades used by racing professionals, the secrets to maximum power are surprisingly accessible. By understanding the core principles of cycle engine design and what sets high performance engines apart, you’ll gain practical insights to transform your own bike for peak output and lasting reliability.

Did You Know? Surprising Facts About Cycle Engines and Power

Many riders are shocked to learn that some motorcycle engines can rev up to 16,000 RPM, compared to a car’s average 6,000. Modern engine types have evolved from simple single-cylinder IC engine blueprints into complex multi-cylinder machines capable of high speed and lower maintenance. Each cycle engine, from dirt bikes to touring motorcycles, reflects a balance between power, efficiency, and unique riding dynamics. Even subtle differences—like a switch from air cool to liquid cooling system, or upgrading to a twin engine configuration—can profoundly change your riding experience, giving a smoother ride, more torque, or greater efficiency.

"The heart of every motorcycle is its engine—understand it, and you unlock unparalleled power."

What You'll Learn About Motorcycle Engines

  • The fundamental cycle engine types and their differences
  • How motorcycle engine type affects speed, power, and efficiency
  • Secret methods to extract more power from motorcycle engines
  • Choosing high-performance motorcycle engines for different needs
  • Expert tips for maintaining and upgrading your motorcycle engine

Vivid illustration of various motorcycle engine types, engines cut open to reveal internal components, cycle engines, metallic and black

Understanding Motorcycle Engines: The Core of Performance

Motorcycle Engine Basics: How Cycle Engines Work

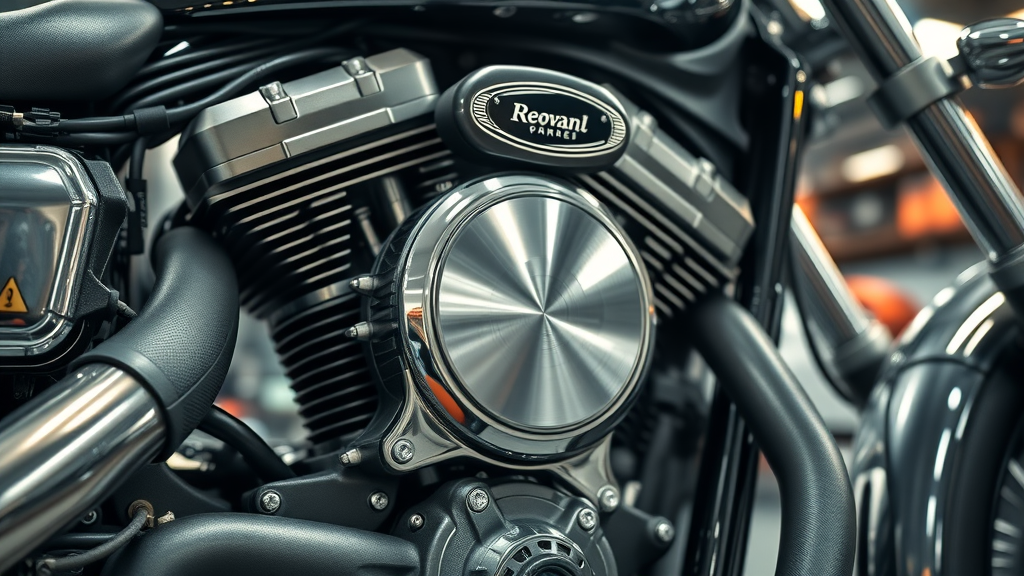
At their core, motorcycle engines operate using internal combustion: air and fuel mix in a small chamber, then ignite, creating a controlled explosion that pushes a piston. The piston turns the crankshaft, converting that force into rotational energy that powers the bike’s wheels. The number of pistons—referred to as cylinder engines—affects characteristics like horsepower, smoothness, and efficiency. In their simplest form, single-cylinder engines are lightweight and easy to maintain, making them common in dirt bikes and beginner cycles. However, they may lack the refined power delivery of twin engines or multi-cylinder setups. Modern ic engine designs embrace variable cam timing, fuel injection, and counterbalancers to maximize performance, minimize vibration, and extend longevity.

A bike’s engine type closely relates to how it delivers power. Smaller engines, such as those found in a dirt bike, are often optimized for low-end torque and quick acceleration on rough terrain, while larger, multi-cylinder engines in touring or sport bikes are tuned for high speed and smoother highway cruising. The interplay between engine types, fuel delivery, and exhaust systems is the first layer of the secret to maximizing your motorcycle’s power output.

Engine Types: From Single to Twin Engine and Beyond

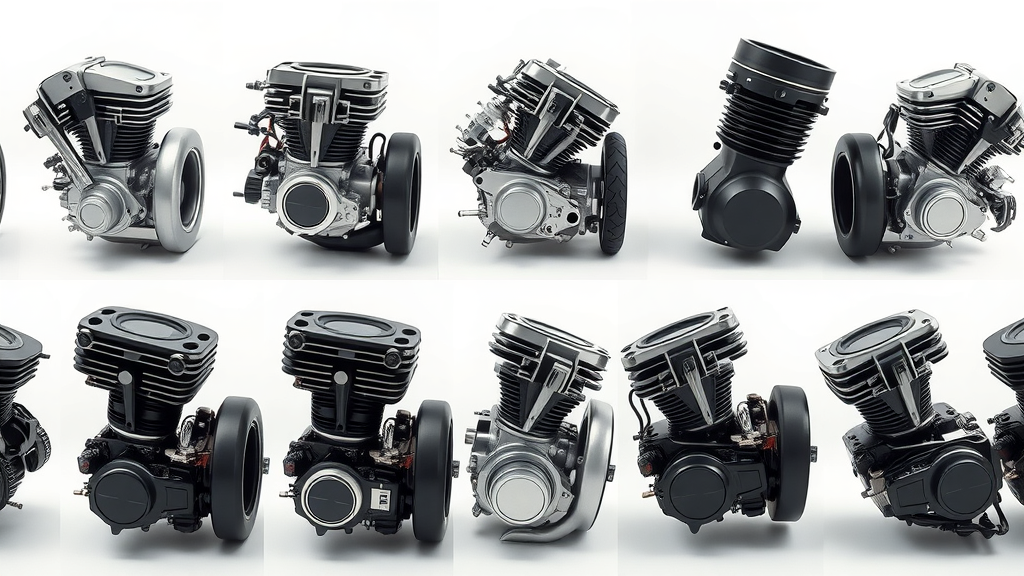
There are several common engine types in the motorcycle world, each offering their own advantages. Single-cylinder engines are lightweight, affordable, and easy to repair, making them ideal for trail bikes and dirt bikes. Twin engine setups, such as the parallel twin and V-twin, balance power and smoothness, delivering a well-rounded riding experience for street motorcycles and cruisers. Inline engine configurations, most notably inline-four, promise top-end horsepower and silky delivery, central to modern sport bikes. The rotary engine, though rare, produces smooth, uninterrupted torque due to its unconventional internal design, while boxer engines—famous for their horizontally opposed cylinders—offer unique balance and a low center of gravity.

Each engine configuration is engineered for particular strengths, from the high-revving nature of inline engines to the gritty, instant torque of V-twin engines. Assessing the pros and cons of engine types helps riders choose their perfect motorcycle. For example, twin engines offer fewer moving parts compared to more complex multi-cylinder configurations, which can mean lower maintenance and easy to maintain for daily use, while the inline engine excels at high speed and highway performance.

Comparison of Motorcycle Engine Types
Engine Type Main Features Common Bikes Pros Cons
Single Cylinder Lightweight, few moving parts, quick torque Dirt bikes, entry motorcycles Simple, easy to maintain, low cost Vibrations, lower top speed
Parallel Twin Two cylinders, compact, balanced Sport, commuter, touring bikes Good balance of power and handling Less peak power vs. multi-cylinder
V-Twin Cylinders at V-angle, low-end torque Cruisers, custom bikes Tons of torque, iconic sound Heavier, can vibrate
Inline Four Four cylinders, high revs, smooth Sport bikes, superbikes High speed, smooth ride Heavier, more complex
Rotary Engine Rotating disc, no pistons Rare, collector bikes Smooth power, fewer moving parts Unique maintenance, less common
Boxer Engine Horizontally opposed cylinders Touring, adventure bikes Low center of gravity, smooth Wide engine block

Cylinder Engines: Power and Efficiency Explained

The number and arrangement of cylinders in motorcycle engines has a huge effect on both performance and feel. A single-cylinder engine favors lightweight efficiency and instant torque, which is why dirt bikes largely depend on this simple design. Twin engines, like the parallel twin and V-twin, introduce smoother power delivery and often higher horsepower, catering to a smooth ride and long-distance touring comfort. Multi-cylinder engines, such as inline-fours, can achieve extremely high speeds and quick acceleration, thanks to rapid firing cycles and well-tuned engine layout.

Cylinder engines that use a well-designed engine layout not only maximize power, but they also shape the bike’s handling and balance. For example, the low, wide construction of a boxer engine ensures high-speed stability, while the narrow width of a parallel twin allows for nimble handling in urban settings. These choices reflect trade-offs in engine block size, moving parts, and in real-world efficiency, making your engine type a critical decision for any enthusiast who craves control over performance.

Two-Stroke vs Four-Stroke Engine: The Classic Debate

The age-old debate between two-stroke and four-stroke engines still sparks passion among motorcycle fans. Two-stroke engines are simple, lightweight, and pack remarkable punch for their size. With only two movements (up and down) to complete a power cycle, they deliver quick acceleration and are preferred in motorsports and dirt bike competitions. However, their design leads to less efficiency, more pollution, and they typically require more frequent maintenance.

In contrast, four-stroke engines—the standard in most modern motorcycles—offer a balance of power and economy. By splitting the combustion cycle into four steps, these engines produce cleaner emissions, lower fuel consumption, and are easier to control at lower speeds. Their complex construction, though, means more moving parts, a heavier engine, and sometimes a higher upfront cost. Choosing between these engine types comes down to the intended use, with two-strokes appealing to those seeking high performance bursts and four-strokes to riders who value reliability and everyday usability.

Exploring High Performance Motorcycle Engines

Aggressive modern sport motorcycle with high performance engine racing along a track, vivid colors and motion blur, motorcycle engines

What Makes a High Performance Motorcycle Engine?

A high performance motorcycle engine isn’t just about raw size or cylinder count. It’s the result of precision engineering, high-quality materials, and innovative design that together raise efficiency, power, and responsiveness far above standard models. Advanced cooling systems, lightweight internals, and finely tuned ignition systems grant these engines unmatched output. Sport bikes often rely on inline four engines that can rev extremely high, while custom builds might use turbocharging or supercharging to extract more horsepower from a familiar engine block. A twin engine or parallel twin setup, when upgraded for racing, can also deliver high speed and rapid acceleration. Ultimately, engines produce power relative to their design, and features such as variable valve timing, forged pistons, and race-spec exhausts all contribute to the high performance allure.

Manufacturers of high performance motorcycle engines focus on reducing friction and weight, boosting airflow, and maximizing combustion efficiency. This constant pursuit of speed and smoothness distinguishes racing ic engine designs from everyday commuter cycle engines, ensuring that those bikes riding at the upper limit experience unmatched energy and thrill. The critical secret? Every detail, from the camshaft angle to the cylinder head polish, translates directly to the engine’s real-world capability.

High Performance Engine Upgrades: Must-Know Tips

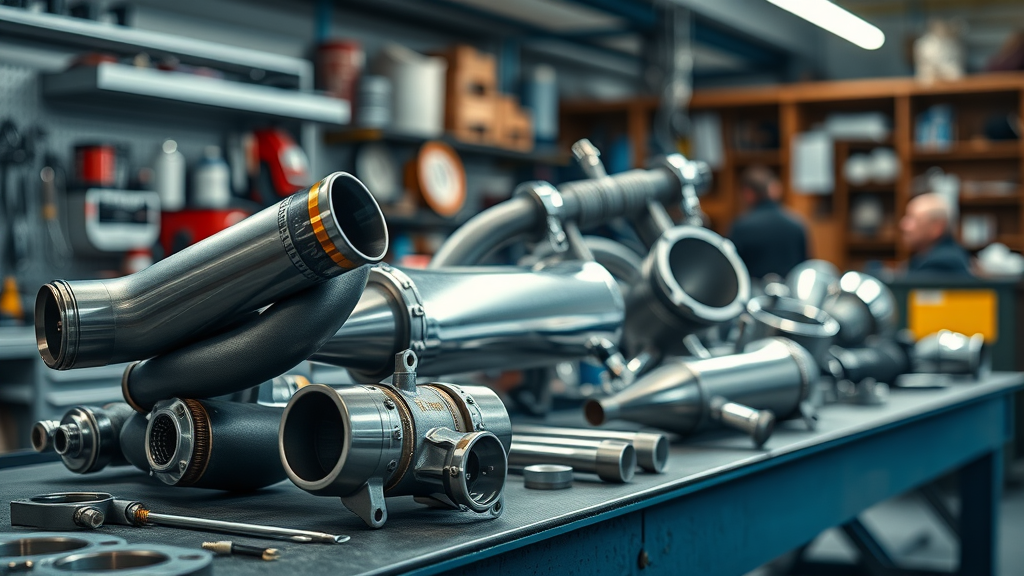
Pushing your motorcycle engine into the high performance category doesn’t always require an expensive overhaul—strategic upgrades often make the biggest difference. For instance, a premium exhaust and intake system can significantly improve airflow, boosting both horsepower and fuel efficiency. ECU remapping allows for personalized engine management, raising redlines, and adjusting fuel timing for optimized combustion. More ambitious riders can install high-compression pistons or even invest in turbocharging/supercharging kits to radically increase the engine’s output.

Upgrades such as performance air filters are cost-effective ways to ensure cleaner, more abundant airflow into the combustion chamber, which increases the efficiency of every power stroke. Combining these hardware modifications with careful tuning brings you close to professional racing standards, even on a standard street bike. Engine types that are easy to modify, such as inline engines and twin engines, are especially popular among enthusiasts seeking more from their machines.

  • Exhaust and intake upgrades
  • ECU remapping
  • High-compression pistons
  • Turbocharging and supercharging
  • Performance air filters

Close view of aftermarket exhausts, high-performance motorcycle engine upgrade parts on a workbench

Special Engines: Rotary, Inline, and Parallel Twin Engines

Rotary Engines: Unique Features and Applications

The rotary engine is a rare sight in today’s motorcycle world, but its unique internal design offers benefits rivaling traditional cycle engines. Unlike typical piston-driven engines, a rotary engine uses a triangular rotor spinning within a housing, producing ultra-smooth and uninterrupted power. With fewer moving parts, rotary engines offer lower maintenance, high-revving performance, and a distinct vibration-free ride. However, they’ve mostly been limited to collector motorcycles or concept models due to special maintenance requirements and less mainstream adoption.

Despite their niche status, rotary engines showcase how outside-the-box engine types can deliver both innovation and excitement. Their compact size, smooth operation, and distinctive sound continue to captivate enthusiasts, serving as a bold reminder that the evolution of motorcycle engines is far from over.

Futuristic motorcycle with visible rotary engine, innovative cycle engine design in motorcycle engines, nightlife cityscape

Inline Engines vs Parallel Twin Engines: Pros and Cons

Choosing between inline engines and parallel twin engines often depends on what you seek in your riding experience. Inline engines (such as the popular inline-four) are built for high speed and maximum horsepower. Their balanced firing order and high-revving capacity create a smooth, almost electric feel, preferred by sport bikers and performance enthusiasts. These engines shine at high speeds and have rapid throttle response, but tend to be heavier and more complex compared to twin engine variants.

Parallel twin engines, on the other hand, are revered for their versatility and reliability. They feature two cylinders positioned side-by-side in the cylinder block, allowing for compact engine layout and balanced power delivery. These engines offer a harmonious mix of low-end torque and reasonable top-end speed, making them perfect for everyday commuting, touring, and even city riding. Their simplicity yields easier maintenance and fewer moving parts, but they may not reach the high RPMs or raw power output of a multi-cylinder inline engine.

Motorcycle Engine Cooling Systems and Layouts

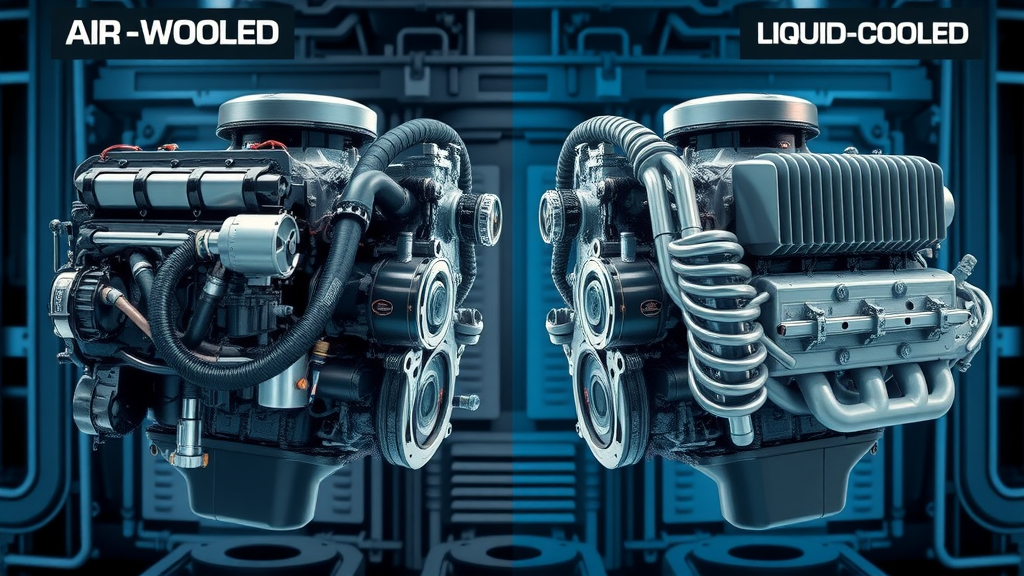
Air Cool vs Liquid Cooling System: Which Is Best?

Every motorcycle engine needs to manage heat to work reliably and safely, which is where the cooling system comes in. Air cool systems rely on fins around the cylinder block to dissipate heat into the open air as the motorcycle moves. This method is lightweight, low maintenance, and traditional—perfect for classic bikes and some dirt bikes. However, high-performance engines or those running sustained high speed can quickly overheat with air cooling alone.

Liquid cooling systems, common in modern sport bikes and high performance motorcycles, circulate coolant through the engine and a radiator, efficiently absorbing, transferring, and dissipating excess heat. This method keeps temperatures stable even under extreme loads, allowing higher output and engine longevity. The trade-offs? Liquid-cooled engines add complexity, potential leaks, and a bit of extra weight. Ultimately, the best cooling system choice depends on your engine type, riding style, and how much high speed performance you expect.

Split-scene: air cooled vs liquid cooling motorcycle engines, showing cooling system functional differences, cycle engines

Engine Layout: Maximizing Performance and Handling

The physical arrangement—or engine layout—of a motorcycle engine has a direct impact on the entire riding experience. A low, flat engine, such as a boxer, lowers the bike’s center of gravity, aiding stability during high speed cornering. A narrow inline or parallel twin engine improves agility, making city navigation and quick turns easier. The engine’s placement in the frame also affects weight distribution, crucial for traction and confidence on any riding surface.

For example, a rotary engine’s compact and centralized mass allows for unique frame shapes and handling characteristics. Cruiser bikes use the long, low V-twin engine to create both a visual and physical sense of balance, while sport bikes opt for inline layouts to minimize width and optimize aerodynamics. In every case, understanding how engine layout influences performance lets you pick or modify a machine perfectly suited to your skill and ambitions.

Dirt Bike Engines vs Street Cycle Engines: Key Distinctions

Dirt bike engine vs street motorcycle engine, exposed cycle engines in action, dirt bike and street bike comparison

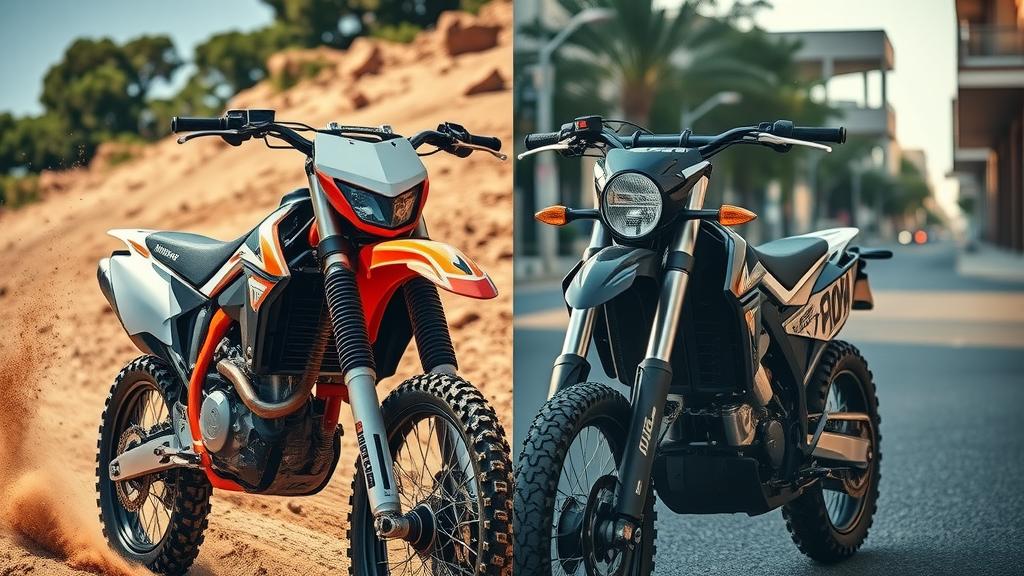
Dirt Bike Engine Type and Performance Considerations

Dirt bikes and off-road cycles prioritize compact and lightweight engine types that excel in quick acceleration, low-end torque, and absolute mechanical simplicity. The single-cylinder, air cool ic engine is a favorite here—featuring fewer moving parts and lower maintenance. Such engines allow riders to tackle rugged trails, abrupt hills, and muddy obstacles with agility, even if top speed falls short of their street counterparts.

High performance off-road cycle engines are often tuned for responsive throttle, giving riders the explosive power needed to pop over jumps or navigate rocky terrain. Reliability and easy-to-maintain design are essential, so durability is prioritized over sheer output. For dirt bikes, the best engine layout combines ground clearance with power out of tight, technical turns.

Street Motorcycle Engine Upgrades For Maximum Power

Street bikes and sport motorcycles present more diverse engine types, from parallel twin to high-output inline and V-twin engines. The goal here is often a balance of speed, efficiency, and handling for both city riding and highway touring. When upgrading a street motorcycle for more power, focus on areas such as improved fuel delivery, bolt-on turbo or supercharger kits, and lighter, high-flow exhaust and intake systems. ECU tuning is popular, allowing fine-grained adjustment to engine performance across the RPM range.

Modern street bikes with multi-cylinder engines can also benefit from suspension upgrades and improved braking systems, as increased power demands higher safety margins. Regular engine maintenance—oil changes, valve adjustments, and timing inspection—ensures lasting performance and lower maintenance in the long run. Ultimately, well-executed upgrades transform even a standard street bike into a high speed, adrenaline-fueled machine.

People Also Ask: Answers to Top Motorcycle Engine Questions

What kind of engines do motorcycles have?

Motorcycles utilize a broad range of engine types, including single-cylinder, parallel twin, V-twin, inline engine (like inline-four), rotary engine, and boxer engine. Most motorcycles use internal combustion (ic engine) powerplants, running on either two-stroke or four-stroke cycles. The specific engine type impacts the bike’s performance, weight, maintenance needs, and riding characteristics. Sport bikes favor high-revving inline engines, cruisers love V-twins, and dirt bikes typically use light, strong single-cylinders with air-cool designs.

How fast would a 1000 hp motorcycle go?

Aerodynamic futuristic motorcycle motorcycle engines on salt flats, high speed 1000hp run, blurred motion

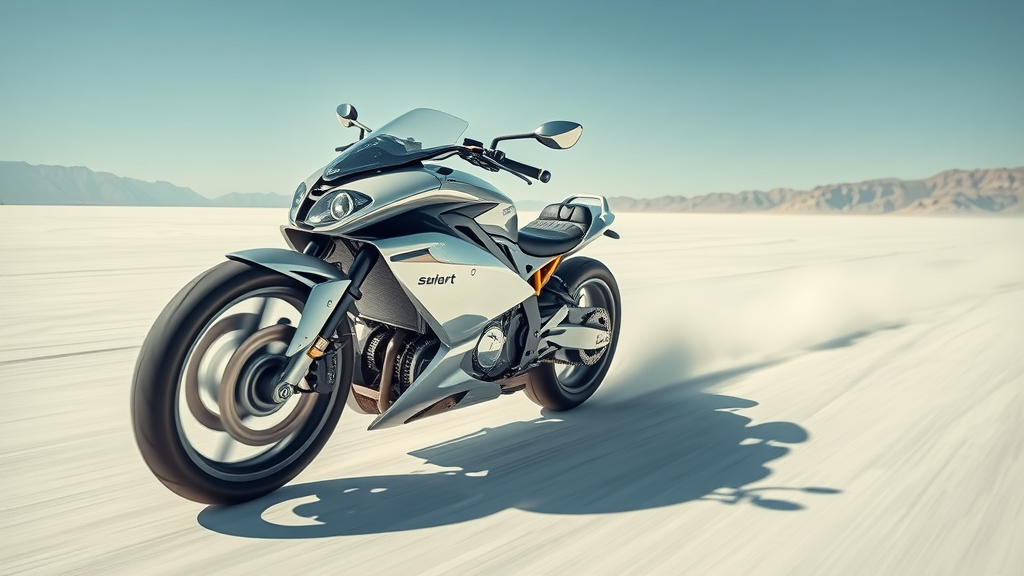
A 1000 hp motorcycle is a marvel of engineering, capable of speeds that easily exceed 250 mph, with theoretical top speeds approaching or passing 300 mph under perfect conditions. Real-world records on custom bikes and experimental runs (often on salt flats) push the limits even further, proving engines produce extreme output when tuned or forced to these extremes. However, real-world speed is affected by aerodynamics, gearing, tire limitations, and safety factors, so these figures represent the outer edge of possibility rather than something seen on the average sport bike.

What is the best engine for a motorbike?

The “best” engine depends on your goals. For day-to-day reliability and economy, a parallel twin or single-cylinder engine offers easy to maintain, efficient performance. Riders chasing high speed and ultimate power often prefer an inline-four or V-twin engine type, common in sport bikes and cruisers. Adventure and touring riders might choose a boxer engine for its stable engine layout and low center of gravity. Ultimately, the best engine is one aligned to your riding environment, performance expectations, and maintenance tolerance.

What motorcycle can go 400 mph?

No production motorcycle has broken the 400 mph barrier, but specialty projects like the Ack Attack streamliner, powered by highly modified multi-engine layouts, have officially exceeded 376 mph at Bonneville Salt Flats. These bikes feature custom cycle engines specifically designed for land speed records, and rely on advanced aerodynamics, forced induction, and reinforced frames to attempt such feats. For everyday riders, high speed records are more about engineering curiosity than something experienced on public roads.

Essential FAQs on Motorcycle Engines

  • What are the best motorcycle engines for beginners?
    Single-cylinder or parallel twin engines are excellent for new riders. They're lightweight, manageable, and easy to maintain, giving a forgiving introduction to cycle engine performance.
  • How often should I service my motorcycle engine?
    It's best to refer to your owner's manual, but generally, oil changes every 3,000-5,000 miles, annual valve checks, and regular air filter changes keep motorcycle engines in peak form.
  • Are rotary engines reliable for motorcycles?
    Rotary engines have fewer moving parts and deliver smooth power, but specialized maintenance and limited parts availability mean they're less practical for everyday use compared to more common engine types.
  • What are the signs of a high performance motorcycle engine?
    Expect rapid throttle response, high-rev capability, advanced cooling system, race-tuned exhaust, and precision internals. These engines produce more power and sound distinctively aggressive at speed.

Key Takeaways: Motorcycle Engines and Power Boosts

  • Understanding motorcycle engines is the first step to maximizing power and efficiency.
  • Engine type, cooling systems, and layout determine engine performance.
  • Upgrading to high performance components can substantially boost bike power.
  • Maintenance and appropriate modifications ensure longevity and peak output.

Conclusion: Unlock Your Motorcycle's True Engine Potential

Supercharge Your Ride With Advanced Engine Knowledge

"Mastery of your motorcycle's engine is mastery of the machine itself."

Ready to Boost Your Motorcycle Engines?

Call Nasty Performance Motorcycle Shop Today: 847-458-4858

Engine, Electrical Performance

0 Comments

Write A Comment

*
*
Please complete the captcha to submit your comment.
Related Posts All Posts

Rev Up with Motorcycle Dyno Tuning: What You Need to Know

Ready to unlock up to 15% more horsepower from your motorcycle? Professional motorcycle dyno tuning isn’t reserved for the racetrack; it’s a critical service that transforms both smooth street rides and white-knuckle sport bikes. With expert calibration and real-time adjustments, dyno tuning uses science—not guesswork—to give you more bang for your buck every time you hit the throttle. Dive into this comprehensive guide and discover why smart riders everywhere demand more performance, reliability, and customized power from dyno tuning. Unlocking Motorcycle Performance: The Power of Motorcycle Dyno Tuning Did you know that professional motorcycle dyno tuning can boost your bike’s horsepower by up to 15%? Discover how dyno tuning transforms both street and race machines through science, precision, and expert calibration. Motorcycle dyno tuning optimizes your engine’s potential, improves throttle response, and safeguards engine health, making it a critical service for enthusiasts seeking maximum value and performance. Motorcycle dyno tuning is more than a buzzword—it’s the science-backed method for extracting every ounce of performance and reliability from your two-wheeled machine. Whether you ride a fuel injected or carbureted motorcycle, this real-time process measures your bike’s true horsepower and torque output—no more guessing or estimation. By using sophisticated equipment like a dynojet dyno , certified technicians customize your air/fuel ratios, ignition timing, and ECU parameters for your riding style, modifications, and goals. This expertise ensures not just maximum power , but also optimal throttle response and protection against potential engine damage—a perfect blend for riders demanding more excitement and peace of mind. What Motorcycle Dyno Tuning Delivers: Core Benefits and Value Maximized horsepower and torque Consistent fuel mapping for fuel injected bikes Cleaner throttle response and smoother acceleration Detection of engine or tuning issues before damage can occur Tailored setup for unique riding styles and modifications “Dyno tuning is not just about chasing numbers—it’s about unlocking the ideal balance of power, responsiveness, and reliability for every rider.” – Nasty Performance Technician When you invest in motorcycle dyno tuning , you’re investing in a total transformation of your bike’s dynamics. Maximized horsepower and torque mean not only better top-end speed, but also impressive mid-range punch and low-end grunt. For today’s fuel injected bikes, precise, consistent fuel mapping ensures each cylinder is firing at its best, regardless of modifications like a full exhaust or upgraded intake. The result? Smoother throttle response, cleaner acceleration, and tangible improvements every time you twist the grip. More importantly, a dyno tune allows expert technicians to detect hidden issues before they turn into costly repairs—catching fuel ratio imbalances, misfiring, or warning signs in spark plugs . These adjustments can save your engine from premature wear or catastrophic failure, delivering not just performance but long-term value and peace of mind. How Motorcycle Dyno Tuning Works: The Process Step by Step What is Dyno Tuning and Why is it Crucial? Overview of dyno tuning and the science behind measuring horsepower and torque Real-time analysis of air/fuel ratios, RPMs, and speed At its core, dyno tuning is about establishing a scientific baseline by measuring your bike’s output in a controlled environment. A specialized dynamometer—like the industry-standard dynojet dyno —engages the rear wheel and creates resistance while your bike goes through ramp runs and steady state tests. The dyno captures vital information: horsepower, torque, RPMs, air/fuel ratio , and even exhaust gas signatures. This objective data replaces outdated tuning-by-ear methods, making it the foundation for every precision adjustment that follows. Technicians use this detailed feedback to evaluate how your bike performs at wide open throttle as well as in everyday riding situations. Whether your ride is a high-strung sport bike or a daily commuter, dyno tuning highlights not just peak numbers, but also weaknesses in your current setup—missing horsepower, lean or rich fuel ratios , or uneven power delivery. This is the foundation for tailoring a tune that matches your personal interests and riding goals down to the finest detail. The Motorcycle Dyno Tuning Process Broken Down Initial assessment and safety check Baseline dyno run Air/fuel ratio and ECU adjustments Custom mapping and power optimization Final dyno reading and results report Typical Steps in Motorcycle Dyno Tuning Description Duration (Approx.) Initial Assessment Review bike condition, modifications, and goals. 15-30 min Baseline Dyno Run Capture stock performance data using ramp run and steady state tests. 15-20 min ECU & Air/Fuel Adjustment Live analysis and adjustment of fuel ratios and ignition timing. 30-60 min Custom Mapping Develop map tailored to modifications and rider preferences. 30-60 min Final Run & Review Confirm results, print power/torque graphs, check diagnostics. 15-30 min Comparison of baseline vs. tuned performance graphs The full cycle of motorcycle dyno tuning starts with assessing your bike and goals, whether it’s about maximizing your bang for your buck or adapting to a new full exhaust system . After confirming your bike is in good condition , technicians perform a baseline test and then make those all-important ECU flash and fuel ratio updates. Finally, you receive a side-by-side comparison: Click to see graph of your ride’s journey from stock to tuned! ECU Flash and Fuel Injected Motorcycle Dyno Services The Link Between Dyno Tuning, ECU Flash, and Fuel Injected Systems Importance of customized ECU flash for modern motorcycles How dyno tuning integrates with fuel injected engine mapping Achieving specific modulation in throttle responsiveness and power curves “A custom ECU flash through dyno tuning is the smartest upgrade you can make to your fuel injected motorcycle.” – Industry Expert Modern bikes—especially fuel injected and electronically controlled models—benefit most from marrying ECU flash services with precision dyno tuning . Unlike out-of-the-box settings that try to serve every rider, a custom flash lets you tweak parameters like traction control, RPM limiters, and throttle-by-wire systems . This dynamic synergy means you don’t just modify a component; you optimize the way every part of your bike works together under real-world data and riding conditions. For those with performance upgrades (think: full exhaust , air filters, cams), a custom ECU flash is critical. It lets you recalibrate your ride for those changes, correcting fuel and ignition maps so you avoid lean fuel ratios and ensure smooth wider open throttle transitions. The result? A bike that adapts perfectly to your personal interests —whether that’s daily city commutes or track-day domination. Unlocks specialized features: Traction control, RPM limiters, and throttle-by-wire adjustments Provides a dynamic solution for aftermarket installations (exhaust, air filters, cams) Choosing an ECU flash as part of your motorcycle dyno tuning package means your bike's engine management is truly tailor-made . It's not just about turning up the numbers—it’s about ensuring every service can be based on your specific hardware, riding style, and goals. This approach ensures maximum performance and more bang for your buck , while also safeguarding engine reliability . Comparing Motorcycle Dyno Tuning vs. Traditional Tuning Methods Real-time measurement vs estimation Benefits of precision tuning for both standard and performance motorcycles Method Precision Customization Typical Results Cost Comparison Dyno Tuning High (live data capture, steady state & ramp run) Extensive (custom maps, ecu flash, performance mods) 10-15% power gain, smoother throttle, engine diagnostics $$–$$$ Traditional (Carburetor/Manual) Low to Medium (rely on feel, trial & error) Limited (standard jetting, less suited for fuel injected) Minor gains, risk of imbalances, slower adjustments $–$$ A major advantage of modern motorcycle dyno tuning is the ability to perform real-time measurements versus the old-school method of tuning by “feel” or estimation. Computerized dynos, especially when paired with technicians trained in ecu flash modifications, capture precise snapshots of your engine’s performance across wide open and variable throttle settings. This delivers the kind of accuracy necessary to tune a motorcycle for both everyday reliability and race-ready power—the kind of results that older methods simply can’t provide. Whether your machine is a basic stock bike or a heavily modified sport bike , the precision and customization of dyno tuning means you’re not leaving performance—or engine health—to chance. It's the essential step for unlocking both value and performance in every ride. Motorcycle Dyno Tuning: When, Why & How Often Should You Get It? How aftermarket upgrades or modifications call for fresh dyno tuning Suggested intervals, even for stock engines, to maintain peak performance Signs your motorcycle needs dyno tuning: symptoms and red flags The timing of motorcycle dyno tuning is critical for ongoing engine health and performance. Every time you make significant changes—like adding a full exhaust , swapping air filters, adjusting cams, or even after a major overhaul—a dyno session realigns your engine’s parameters for the new setup. But even if you ride a stock bike , periodic dyno services (every 6,000–10,000 miles) help maintain your bike in good condition , prevent premature wear, and catch issues before they become costly. Red flags that it might be time for a tune include rough idle , unexpected loss of power , unusual fuel consumption , or uneven spark plug readings . Don’t ignore them—making adjustments sooner with a professional dyno tune helps your motorcycle run smoother and keeps you riding safely. What to Expect at a Professional Motorcycle Dyno Tuning Session Assessment of bike and owner goals Consultation about modifications, fuel system, and riding style Overview of time, cost, and what results to anticipate Service Component Description Estimated Price (USD) Initial Consultation Discuss mods, owner goals, and diagnosis $50–$100 Full Dyno Tune (Fuel Injected) Full mapping, ecu flash , power optimization $300–$600 Dyno Run Only Performance report, no tuning $80–$150 Aftermarket Part Setup Setup for exhaust, air filters, or cams included in map Included or +$50–$150 Expect your first session to start with a thorough check of your motorcycle’s current condition, spark plug readings, exhaust system , and any forms you submit prior. A trained expert will then cycle your bike through a ramp run or steady state ramping, making real-time ECU and fuel ratio adjustments as needed. Finally, you’ll leave with a performance report, custom map, and expert advice for keeping your bike at its best. Key Motorcycle Dyno Tuning Features: What Sets Premium Services Apart Factory-trained technicians and dyno-certified experts Usage of high-end dynamometer equipment Customized maps and comprehensive aftercare support What separates a standard dyno tune from a premium experience? It starts with factory-trained technicians —people who not only understand the science of power your motorcycle but also bring years of hands-on experience with brands like robin winzell and the finest tuning tools in the industry. Top shops invest in state-of-the-art dynojet dyno setups, laptop-linked monitors, and digital interface platforms. Premium services go further by offering ongoing aftercare: comprehensive diagnostics, custom power maps for routine checkups, and support of the purposes for different riding modes. That means peace of mind—knowing your motorcycle is optimized for months, not just the next ride. List of Essential Questions Before Booking Motorcycle Dyno Tuning Is the dyno shop experienced with your make and model? What types of dyno readings (horsepower, torque) are provided? Do they offer ecu flash and fuel injected tuning as standard? Is a custom map included in the cost? Before you contact our service or give us a call , make sure the shop is equipped to handle not just basic ramp run tests but also advanced services like ecu flash and fuel injected mapping. Ask if they provide detailed horsepower and torque graphs (so you can click to see graph ), and whether a custom tune is tailored—not just “off the shelf.” Don’t hesitate to ask about their experience with your exact model, especially if you’ve invested in unique modifications or ride a less common brand. The right answers will help you get the best bang for your buck . Reviewing Motorcycle Dyno Tuning Results: What Does the Dyno Say? Interpreting post-tuning power graphs Understanding how horsepower gains reflect on the street or track Double-checking smoothness, torque curve improvements, and diagnostics The most exciting moment after a dyno tune is seeing your results. Post-session, you’ll receive detailed performance graphs that document horsepower, torque, and fuel ratio numbers—both before and after tuning. These figures are more than stats—they reveal engine health, improvements in torque delivery, response at wide open throttle, and smoothness throughout the RPM range. Savvy riders and experts alike will click to see graph not just for bragging rights, but to catch nuances in the powerband and clutch system. Whether you’re prepping for another ramp run or tracking hundreds of miles as a gold member , the proof lies in the ride: Your tuned results show up as faster launches, effortless cruising, and maximum performance with reliable safety built in. Expert Tips: Maximizing the Effectiveness of Motorcycle Dyno Tuning Ideal preparation steps before your session Best practices for break-in after tuning How to maintain top performance month after month To get the most out of your motorcycle dyno tuning session, start with prep: Ensure spark plugs are fresh, oil and filters (air and fuel) are clean, and your bike is in good condition . Bring notes about your interests and personal riding style, so the technician can tailor the tune (especially important if you use a power commander or similar device). After tuning, follow the expert’s recommended break-in period. Warm up thoroughly for the first few rides and avoid sustained wide open throttle until all systems settle. Regular post-tuning checkups—especially after long trips, modifications, or extended storage—will keep your bike in peak condition, mile after mile. FAQ Section: Motorcycle Dyno Tuning Questions Answered Is dyno tuning worth it for a motorcycle? Dyno tuning offers validated gains, extended engine life, and tailored riding experience for every budget and rider type. Absolutely. A professional dyno tune unlocks not only measurable power and throttle response but also customizes your bike to your exact use case—be it road, track, or all-day touring. With real-world, steady state data and expert ecu flash adjustments, it’s an investment that pays off in reliability, peace of mind, and true performance. How often should you dyno tune a motorcycle? Every 6,000-10,000 miles or after significant modifications, depending on usage and engine setup. Plan for dyno tuning every 6,000–10,000 miles, or whenever you install major upgrades like a full exhaust system , remap your ECU, or overhaul the fueling system. Regular checks help your bike stay optimized for changing conditions and mileage. How much HP does dyno tuning add? A typical dyno tune can add 5-15% more horsepower, with more noticeable gains on performance bikes or after major upgrades. While results vary, most riders see a 5–15% bump in horsepower with a quality dyno tune , especially when paired with upgrades like performance intakes, fuel injected systems, or ecu flash programming. Gains are even more pronounced on modified or sport bike setups. What does a dyno do for a motorcycle? A dyno provides precise, real-world measurement and tuning of engine output, air/fuel ratios, and performance for customized optimization. A dynamometer tests your bike’s output just like on the road—measuring horsepower, torque, RPM, and fuel ratio at different loads, capturing real-time performance data. This allows expert techs to tune a motorcycle for optimal safety, response, and efficiency, whether it’s fuel injected or carbureted . Motorcycle Dyno Tuning Success Stories & Case Studies Before-and-after examples: Stock vs. tuned comparisons Customer testimonials on throttle response and rideability The proof is in the ride! Customers love the immediate difference after dyno tuning : Naeem, a touring rider, reported his stock bike felt “like a new machine,” with far better acceleration and smoothness. Another client, Lucas, had his sport bike tuned with full exhaust and ecu flash—he gained 12% in peak horsepower and said throttle control was “lighter and faster everywhere.” From stock exhaust setups to high-performance upgrades, real-world riders consistently describe better throttle feel, more stable cruising, and long-term engine health. The right dyno tune delivers more than a number—it creates a better relationship between rider and machine. Walkthrough of live dyno session, with expert explanations and real-time data analysis (Insert video here) Conclusion Ready for more performance and reliability from your motorcycle? Call Nasty Performance Motorcycle Shop Today: 847-458-4858 and book your dyno tuning session to experience custom results first-hand! To further enhance your understanding of motorcycle dyno tuning, consider exploring the following resources: “Motorcycle Dyno Tuning: Unleash Maximum Performance!” ( motorcycleguidelines.com ) This article provides a comprehensive overview of the dyno tuning process, detailing each step from pre-dyno inspection to performance fine-tuning. It also addresses frequently asked questions, such as the cost of a dyno tune and its benefits for motorcycle performance. “Dyno Tuning Motorcycles - How does it work and why is it important?” ( woolichracing.com ) This resource explains the mechanics of dynamometers and their role in measuring torque and power. It emphasizes the importance of dyno testing, especially after installing aftermarket components, to ensure optimal air-fuel ratios and prevent potential engine damage. If you’re serious about optimizing your motorcycle’s performance, these resources will provide valuable insights into the benefits and processes of dyno tuning.

Motorcycle Battery Charging Tips

Did you know that up to 40% of motorcycles suffer early battery failure due to poor charging habits? If you’re one of the many riders who’ve experienced a dead battery miles from home, it’s time to upgrade your know-how. In this comprehensive guide, you’ll unlock the essential motorcycle battery charging tips that not only save money but keep your ride charged and ready, ride after ride. Surprising Facts About Motorcycle Battery Charging Tips "Up to 40% of motorcycles suffer early battery failure due to poor charging habits—mastering motorcycle battery charging tips can save you time and costs." Motorcycle batteries are vital to your ride’s reliability, yet charging mistakes remain common. Many riders unknowingly reduce their battery life—sometimes by years—simply by using an improper battery charger or neglecting periodic battery charge checks. The truth is, adopting safe and correct motorcycle battery charging tips isn’t just about immediate function; it’s an investment in your motorcycle’s electrical system and long-term performance. By using a compatible battery charger and following proper safety precautions—like connecting the positive terminal and negative terminal correctly—you dramatically reduce your risk of a dead battery and electrical faults. Let's dive into the facts and learn how to protect your investment. What You'll Learn: Essential Motorcycle Battery Charging Tips The safest and most effective motorcycle battery charging tips How to use a battery charger and maintain battery charge Differences among various motorcycle battery types, including AGM motorcycle batteries Proper handling of positive terminal and negative terminal connections Step-by-step guidance on charging your motorcycle battery Troubleshooting common issues with motorcycle batteries Understanding Your Motorcycle Battery Every motorcycle relies on a reliable battery to start the engine, power essential electronics, and keep you safe on the road. Yet, not all batteries are created equal. Understanding your motorcycle battery is the first step toward effective battery charge management, maximum battery life, and hassle-free rides. Knowing your battery type—whether it's a conventional lead acid, AGM motorcycle battery, or advanced lithium model—affects how you charge, maintain, and select the right battery charger. With varying needs for electrolyte solution management, cycling, and charge rate, picking suitable battery chargers and understanding your battery’s electrical energy requirements keeps you from suffering premature failure or costly mistakes down the road. Most modern motorcycles use either flooded lead acid batteries, AGM batteries (Absorbed Glass Mat), or lithium-ion options. Conventional lead acid batteries are cost-effective but require more frequent maintenance and precise charging techniques, while AGM motorcycle options last longer and offer greater resistance to vibration, though they need a special charger and proper safety precautions. Knowing what battery you have is essential: using the wrong charging method or exceeding the correct voltages can shorten battery life, risk damage to your bike’s electrical system, or leave you stranded. Let’s look closer at how each major battery type differs and what that means for charging your motorcycle battery. Common Motorcycle Battery Types: Lead Acid, AGM Motorcycle, and More Motorcycle batteries come in various battery types, each with unique advantages and maintenance requirements. The most common are flooded lead acid (conventional battery), AGM motorcycle batteries, and increasingly, lithium-ion. Lead acid batteries rely on an electrolyte solution and require periodic top-ups with distilled water, as well as close attention to charge rate and cycle. AGM motorcycle batteries, on the other hand, utilize a fiberglass mat that absorbs the electrolyte, making them more resistant to leaks and vibration but needing a charger designed specifically for AGM batteries to avoid overcharging or undercharging. Lithium-ion motorcycle batteries offer lightweight convenience and rapid charging but may not be compatible with all charging systems unless a special charger is used. Each battery type dictates a specific approach for battery charge and affects your choice of battery charger. For example, charging a lead acid battery with too high a current can cause excessive gassing and even explosions if open flames are involved, while AGM batteries need a slower, controlled charge for best results. Battery terminals—specifically the positive terminal and negative terminal—must always be connected in the correct sequence to avoid sparking and ensure your bike’s electrical energy is used safely. Use the following table for an easy reference to pros and cons, charging tips, and ideal charger types. Comparison Table: Battery Types, Pros, Cons, and Ideal Charging Tips Battery Type Pros Cons Ideal Charging Tips Lead Acid (Flooded) Low cost, widely available, easy to service Needs regular maintenance, risk of leaks & spills Charge slowly, check electrolyte solution; avoid overcharging AGM Motorcycle Battery Maintenance-free, vibration-resistant, longer lifespan More expensive, sensitive to overcharging Use a charger designed for AGM; never exceed 14.4V, ensure automatic shutoff feature Lithium-Ion Very lightweight, fast charging, retains charge well Higher initial cost, requires special charger, sensitive to temperature Charge only with compatible smart charger; avoid deep discharges How Battery Charge Impacts Motorcycle Performance Maintaining the correct battery charge plays a crucial role in your motorcycle’s overall performance. A well-charged battery delivers consistent electrical energy to your bike’s starter, lights, fuel injection, and onboard electronics. If the battery charge dips too low, starting can become unreliable, lights may dim, and sensitive electronics in your motorcycle’s electrical system could be at risk. In the worst cases, a low or dead battery leaves your motorcycle stranded, often at the most inconvenient times. Beyond just starting power, a healthy motorcycle battery supports stable voltage to the electrical system and reduces strain on alternators and regulators. Regularly monitoring battery charge—even during off-season storage—helps you avoid surprises and ensures your bike is ready to go when the weather improves. Following motorcycle battery charging tips—like partial charging (the 80-20 rule), using a smart charger, and not exceeding the recommended voltage—translates directly to better battery life, fewer breakdowns, and smoother rides all year long. For riders looking to keep their bikes in peak condition throughout the year, integrating smart battery care with broader seasonal maintenance routines can make a significant difference. Discover more practical strategies for protecting your motorcycle during every season in this essential guide to seasonal bike care. Fundamentals of Motorcycle Battery Charging Tips Why following proven motorcycle battery charging tips prevents premature battery failure Effect of proper battery charge on motorcycle longevity How to identify when to use a battery charger The basics of effective battery charging come down to a few key principles: always match your battery charger to your battery type, regularly monitor the health and charge of your motorcycle battery, and don’t overlook safety precautions. These battery charging tips help extend battery life while preventing accidental damage to your motorcycle’s electrical system or even personal injury. One surprisingly common cause of battery failure is leaving a battery partially discharged over time, which allows sulfation to build up inside lead acid batteries—dramatically shortening its useful life. Proper battery charge is also vital for maximizing your motorcycle’s longevity. The battery doesn’t just start the engine; it buffers electrical energy for all critical circuits, from engine management to navigation and communication. By understanding and applying essential motorcycle battery charging tips, such as never charging an AGM battery with a conventional battery charger, and testing battery voltage with a multimeter routinely, you can catch issues early and avoid the need for emergency service. If your motorcycle sits unused for weeks, it's wise to connect a smart charger with an automatic shutoff feature to maintain the correct voltage and prevent a dead battery. Choosing the Right Battery Charger for Motorcycle Battery Charging Tips Not all battery chargers are created equal, and using the wrong kind on your motorcycle battery can cause irreversible damage. Today’s market includes a wide range of battery chargers—from basic manual units to advanced smart chargers designed for each battery type. The most effective motorcycle battery charging tips always stress using a charger that matches your specific battery type, whether that’s a conventional lead acid, AGM motorcycle, or lithium-ion battery. Manual chargers can work well for conventional battery types if the user is attentive but lack features like an automatic shutoff, which can lead to overcharging. In contrast, a smart charger is a modern solution, automatically adjusting voltage and current and shutting off or switching to maintenance mode when the battery is fully charged. When selecting a battery charger, always check for compatibility flags—many models identify if they're suitable for use with AGM motorcycle batteries, and some come with dedicated settings for deep-cycle or lithium options. Look for features such as polarity protection to avoid damage from reversed positive terminal and negative terminal connections, short circuit protection, and overcharge safeguards. Today's best chargers are easy to use, quick to connect, and help ensure each battery charge is precise and safe. Selecting Safe and Suitable Battery Chargers The foundation of reliable motorcycle battery charging is a good charger. Never use a car battery charger or a generic charging device on your motorcycle battery unless it’s specifically marked as compatible. Car chargers may supply too much current for small motorcycle batteries, risking overheating, damage to battery terminals, or even explosions—especially in the presence of open flames or poor ventilation. Choose a charger designed for motorcycles with an appropriate charging rate (typically 1–3 amps for most standard batteries) and suited to the battery type in your bike, whether it’s lead acid, AGM, or lithium variety. Before making a purchase, confirm that your battery charger includes features like an automatic shutoff feature, trickle mode for maintenance charging, and compatibility labels for AGM motorcycle batteries or specialty lithium units. A dedicated smart charger is usually worth the investment, providing peace of mind by preventing overcharging and constantly adjusting output for maximum battery life. Avoid using makeshift solutions; sticking to proven products ensures your battery charge remains within optimal parameters for safety and performance. Automatic vs Manual Battery Chargers: Which Is Better? When deciding between automatic and manual battery chargers, consider both convenience and safety. Manual chargers require user intervention to monitor battery charge and stop the process when complete. While they offer simplicity for experienced users, the risk of overcharging is high if you forget to disconnect, leading to shortened battery life or even critical battery failure—particularly true with sensitive AGM motorcycle batteries. On the other hand, automatic battery chargers (or smart chargers) use sensors to detect battery charge level, automatically switch to trickle mode, and even shut off when the battery is fully charged. This hands-off approach not only protects against overcharging, but also means less time spent worrying about your battery’s health. For most riders—especially those storing motorcycles for the winter or only riding occasionally—a smart charger is highly recommended. The automatic shutoff feature, safety safeguards, and compatibility with various battery types make it the easiest way to keep a motorcycle battery charged safely and efficiently. Whether you choose a smart or manual model, always double-check manufacturer guidance to avoid damaging your battery or risking faults in the electrical system. How to Charge Your Motorcycle Battery: Step-by-Step Guide Charging your motorcycle battery correctly not only extends its life but ensures consistent performance every time you ride. This step-by-step guide covers essential safety precautions, the right way to connect the positive terminal and negative terminal, and how to monitor the battery charge throughout the process. By following these proven motorcycle battery charging tips, you’ll avoid common mistakes that lead to battery failure or electrical system faults. Whether you are working with a conventional lead acid unit, an AGM motorcycle battery, or even a modern lithium-ion option, always read your manufacturer’s manual before starting. Ensuring compatibility between your battery type and chosen battery charger is the foundation for a safe, successful charge. If in doubt about what type of battery you have or the proper procedure to follow, consult a motorcycle technician or contact a professional shop for guidance before proceeding. Safety Precautions for Charging Your Motorcycle Battery Before you begin charging your motorcycle battery, ensure you are working in a well-ventilated area, away from open flames or sparks, as hydrogen gas released during charging can be flammable. Always wear protective gloves and eye protection to safeguard against accidental acid splashes, especially if you are working with acid batteries or lead acid models. Never lean directly over the battery during charging in case pressure builds up inside the casing. Additionally, inspect your battery terminals for corrosion and secure all connections before initiating battery charge—this reduces electrical resistance and prevents accidental sparking. Take note of your surroundings and eliminate clutter. Keep flammable materials away from the battery charging area, and do not smoke or use any electrical appliance that could generate a spark nearby. Safety precautions also include ensuring the battery charger is unplugged before connecting to the battery terminals and using the charger only as instructed by the manufacturer. Following these steps keeps you and your motorcycle’s electrical system safe and maximizes the success of your battery charge. Proper Connection of Positive Terminal and Negative Terminal One fundamental tip for charging your motorcycle battery is the correct order of connecting the charger leads. Always connect the positive terminal (usually marked with a “+” or red cover) first before attaching the negative terminal (marked with a “-” or black cover). By doing this, you reduce the risk of accidental sparking and possible short circuits that can damage sensitive electronics in your motorcycle’s electrical system. The connection should be secure but not overtightened, to avoid stripping the battery terminal threads or risking a loose connection that could generate excess heat. When disconnecting after battery charge is complete, reverse the order: remove the negative terminal first, then the positive terminal. If your charger is equipped with an automatic shutoff feature, verify charging has ended before detaching cables. For the best results with AGM motorcycle batteries and other sensitive units, always use a smart charger with polarity protection, which prevents damage if the leads are connected in the wrong order. This practice is especially important for riders using advanced electronic systems or custom wiring modifications, where a voltage spike could trigger costly repairs. Monitoring Battery Charge and Battery Charge Completion A key battery charging tip is to continuously monitor your battery’s charging progress. Most smart chargers come with LED indicators or digital displays showing charge status and battery voltage. Check periodically to ensure the charger hasn’t encountered an error and that the battery temperature remains stable. For conventional lead acid and AGM batteries, a slow and steady battery charge is best; rapid charging or using a high-amperage battery charger not intended for motorcycles can cause overheating, swelling, or irreversible capacity loss. Once your battery charger signals that the battery is fully charged, disconnect the charger leads in the correct order and inspect the battery for any signs of leaks, swelling, or odd smells before reinstalling it in your motorcycle. It’s a smart practice to check the voltage with a multimeter: for most lead acid and AGM motorcycle batteries, a full charge should register between 12.6V and 12.8V. Properly monitoring battery charge during and after the process assures you can ride with confidence, knowing your electrical system is receiving stable, reliable power. AGM Motorcycle Batteries: Special Charging Tips Unique traits of AGM motorcycle batteries Optimal charging voltages for AGM motorcycle batteries Common mistakes when charging AGM motorcycle batteries AGM motorcycle batteries have rapidly become the preferred battery type for many modern bikes, thanks to their maintenance-free operation, ability to withstand vibrations, and resistance to leakage. However, AGM batteries also require special charging precautions that go beyond standard motorcycle battery charging tips. These units are highly sensitive to overcharging and can suffer permanent capacity loss or swelling if charged with a conventional battery charger. Always use a dedicated smart charger designed for AGM batteries, which carefully regulates voltage and current to prevent damage. When charging, never exceed 14.4 volts, and always follow the manufacturer’s recommendations. Many riders make the mistake of using generic or car chargers without an automatic shutoff feature, risking catastrophic battery failure. For best results, connect the positive terminal and negative terminal using insulated clips, double-check the voltage setting of your charger, and never attempt to "jump-start" an AGM battery with high amperage—a mistake that can immediately ruin battery life and void warranties. Regular voltage checks and adhering to the 80-20 rule (keeping the charge between 20% and 80% of capacity) helps maximize performance and lifespan. Common Motorcycle Battery Charging Tips and Maintenance Checklist Regularly inspect battery terminals for corrosion Ensure your battery charger matches your battery type Follow safety precautions during every charge Schedule routine testing of battery charge Keeping your motorcycle battery in top condition is about more than just occasional charging—regular inspection and maintenance are essential. Begin each season by inspecting battery terminals for corrosion, which appears as white or greenish residue around the positive terminal and negative terminal. Corrosion builds up quickly in humid environments or when batteries are left partially discharged, and it disrupts the flow of electrical energy, causing weak starts or unreliable performance. Clean terminals with a mixture of baking soda and water using a stiff brush, and reapply terminal protectant to slow future buildup. Make it a habit to check that your battery charger is compatible with your battery type each time you connect for a battery charge, especially if you own more than one charger or use borrowed equipment. Following established safety precautions ensures every charging cycle is safe, both for you and your motorcycle’s electrical system. Lastly, routine voltage tests with a multimeter—both before rides and after parking for extended periods—alert you to declining battery health, allowing proactive action before a dead battery can ruin your plans. People Also Ask—Expert Answers to Your Motorcycle Battery Charging Questions What's the best way to charge a motorcycle battery? A: The best way to charge a motorcycle battery is by using a compatible battery charger with automatic shut-off features. Always connect the positive terminal before the negative terminal, and never exceed recommended voltages, especially for AGM motorcycle batteries. What is the 80 20 rule for charging batteries? A: The 80-20 rule for battery charge recommends charging only up to 80% and discharging no lower than 20% to optimize battery life and prevent stress, especially relevant for AGM motorcycle batteries. Is it okay to charge a motorcycle battery while still connected? A: Charging your motorcycle battery while still connected can be safe if you use a smart battery charger and follow proper safety precautions, protecting sensitive electronics and maintaining battery integrity. How long should a motorcycle battery hold its charge? A: A fully charged motorcycle battery should retain its charge for several weeks to a couple of months, depending on battery type, age, and temperature. Frequently Asked Questions about Motorcycle Battery Charging Tips How often should I charge my motorcycle battery? For motorcycles ridden regularly, charge monthly or whenever voltage falls below 12.4V. For seasonal storage, maintain with a smart charger or check monthly. Can I use a car charger on my motorcycle battery? No, unless specifically designed for motorcycles. Car chargers risk overcharging and damaging smaller motorcycle batteries. Why do AGM motorcycle batteries need special charging? AGM batteries are sensitive to overcharging and require precisely regulated voltage, which smart chargers provide. How do I test the battery charge level accurately? Use a digital multimeter to check voltage: 12.6–12.8V is healthy for most lead acid and AGM batteries. Key Takeaways: Motorcycle Battery Charging Tips for Long-Term Performance Always use manufacturer-recommended battery chargers Monitor both positive and negative terminal connections during charging Frequent battery charge and maintenance lengthens lifespan AGM motorcycle batteries require specialized care Next Steps: Keep Your Motorcycle Battery in Top Shape "Call Nasty Performance Motorcycle Shop Today: 847-458-4858 for expert advice on motorcycle battery charging tips and premium service." Stay charged, ride smart—apply these expert motorcycle battery charging tips and enjoy hassle-free performance on every journey. As you put these battery charging strategies into practice, remember that true motorcycle reliability comes from a holistic approach to care. From battery health to seasonal storage, every detail matters in keeping your ride ready for adventure. If you’re eager to elevate your maintenance routine and uncover more ways to protect your investment year-round, explore the top seasonal bike care secrets every rider should know. This resource is packed with actionable insights that go beyond the battery, helping you master every aspect of motorcycle upkeep for lasting performance and peace of mind.

Motorcycle Carburetor Cleaning Service: Fix Rough Idles Fast

Did you know that over 80% of motorcycle performance problems—especially on sports bikes—are caused by neglected carburetor maintenance? That rough idle stealing away your fun could be a clogged carb just waiting for some expert attention. A professional motorcycle carburetor cleaning service goes far beyond what spray-in-a-can carb clean products can do, restoring crisp throttle, smoother idling, and the thrill of a responsive ride. If your ride hesitates, stalls, or struggles to start, don’t miss these crucial insights that could have you back on the road—fast! What You'll Learn About Motorcycle Carburetor Cleaning Service The importance of a professional motorcycle carburetor cleaning service for peak performance and reliability Common symptoms that reveal dirty carbs on your high-revving sports bike An overview of the carb clean and rebuild service process—what you actually get for your investment Price breakdowns and what to expect from reputable professional services Why Motorcycle Carburetor Cleaning Service Matters: A Surprising Fact Did you know that over 80% of motorcycle performance issues—especially on sports bikes—are linked to neglected carburetor maintenance? A professional motorcycle carburetor cleaning service can drastically improve power, acceleration, and fuel efficiency. If your motorcycle stumbles at idle, struggles at high RPMs, or simply won’t fire up till warm, the culprit is often a dirty or unbalanced carburetor. Today's sports bikes and even dedicated track machines like the Ducati Panigale rely on intricate fuel delivery, and even a small amount of buildup can sabotage performance. Avoid unnecessary part replacements, repeated "tank slappers" from unpredictable power delivery, and enjoy safer, more reliable rides with timely expert carb service. For riders interested in a deeper dive into the step-by-step process and best practices for keeping your motorcycle’s carburetor in top shape, our detailed guide on motorcycle carburetor cleaning techniques covers everything from disassembly to reassembly, ensuring you understand what goes into a thorough service. Carb Clean and Rebuild Service: Key Features & Benefits Deep ultrasonic carburetor cleaning for motorcycles, breaking down even the most stubborn deposits in critical passages Precision carb synchronization and tuning for sports bike models—matched to factory base settings for maximum efficiency and power Carburetor rebuild service with OEM-grade or superior replacement components for dependable operation Immediate benefits: sharper throttle response, reduced fuel line vapor lock, improved economy, and glass-smooth idling even on cold starts "A proper motorcycle carburetor cleaning service is crucial for reliable road performance—especially for high-revving sports bikes." — Lead Mechanic at Nasty Performance Motorcycle Shop How Hard Is It to Clean a Carburetor on a Motorcycle? Cleaning a motorcycle carburetor isn’t just a matter of spraying some cleaner and calling it done. Even experienced DIYers can miss the hidden internal passages or jets, especially in multi-carb racks found on sports and sport bike models like the Ducati Panigale. Many home attempts, using basic tools from places like Harbor Freight, fall short when it comes to precision cleaning and reassembly. Proper service involves total disassembly, professional ultrasonic cleaning, part inspection, and precise reassembly to set to factory base settings. For complex setups, especially multi-carb sports bikes, a professional motorcycle carburetor cleaning service is key to lasting reliability and performance. A clean package from trusted bike service providers is always a better bet than “bolt on and fire” shortcuts. How Often Does a Motorcycle Carburetor Need to Be Cleaned? Most manufacturers, particularly for high-performance sports bikes, recommend a thorough motorcycle carburetor cleaning service every 12,000 to 15,000 miles. However, bikes that sit for long periods, run with old fuel, or experience rough idles, hesitation, or backfiring should have their carbs inspected sooner. Regular service with clean package services helps prevent the “steals away our fun” scenarios caused by sluggish throttle or persistent stalling. Professional bike service programs often send friendly dept sms txt reminders for scheduled maintenance or offer package services like those popular in Fullerton, CA sport bike shops. Carburetor Cleaning Intervals by Motorcycle Type Motorcycle Type Recommended Cleaning Interval Symptoms of Dirty Carb Sports Bike Every 12,000 miles Rough idle, hesitation, reduced throttle response Cruiser Every 15,000 miles Poor acceleration, stalling Tourer Every 13,000 miles Backfiring, hard starting Can You Clean a Motorcycle Carburetor Without Removing It? While there are many surface cleaning sprays and quick-fix additives on the market, they usually can’t reach the crucial internal passages, jets, and emulsifier tubes—areas most likely to be blocked on sports bikes. True carb clean package services require removing the carburetor from the engine, complete disassembly, and cleaning every component in a specialized ultrasonic tank. This process ensures all obstructed fuel line paths and airways are restored. A quick spray might clear some debris temporarily, but only a full rebuild service ensures long-term smooth operation and eliminates recurring poor idle or throttle issues. What’s Included in a Full Carb Clean and Rebuild Service? Complete disassembly of all carburetor(s) from your bike Ultrasonic cleaning of jets, venturi, float bowls, and all passages Inspection and replacement of worn or compromised parts using OEM or upgraded components Precise adjustment and synchronization of multi-carb assemblies for smooth, consistent throttle response—especially vital for high-performance sports bike models How Much Does It Cost to Get Carbs Balanced? On average, carburetor balancing will cost between $100 and $300, depending on the type of motorcycle and the complexity of its carburetor setup. For multi-carb sports bikes or rare models like the Ducati Panigale, the price may trend towards the higher end, especially if additional diagnostic services or replacement parts are required. Many reputable bike service shops offer our complete rebuild and carb clean package services, which include balancing, ultrasonic cleaning, carb reassembly, and synchronization. Always ask about turnaround time and whether your chosen service shop includes carb balancing as part of their clean package; it’s the difference between “just clean” and truly performance-ready carbs back on your bike at a reasonable price. What Are the Most Common Signs You Need a Carb Clean or Rebuild Service? Rough idle and frequent stalling, even after bike is till warm Significantly decreased throttle response, especially under load Loss of power at high RPMs—noticeable when accelerating hard on sports bikes Hard starting after the bike has been sitting or between short rides Excessive fuel odor or visible smoke from the exhaust, suggesting fuel line issues or stuck float Frequently Asked Questions About Motorcycle Carburetor Cleaning Service Can I use additives instead of a carburetor cleaning service? While fuel additives may help break down minor varnish in the fuel line or tank, they are rarely effective for blocked jets or internal passages. Professional carburetor cleaning is necessary for a true fresh start. How long does the service take for a sports bike? A complete carb clean and rebuild service usually takes one to two business days, depending on bike complexity and parts availability. Shop sms txt or dept sms will often notify you when ready for pickup. Does a carburetor cleaning service improve fuel efficiency? Absolutely! Clean, synchronized carbs ensure precise fuel and air delivery, resulting in better economy and less risk of running rich or lean. Will cleaning the carb fix all rough idle issues? Carburetor cleaning solves most rough idle symptoms, especially those tied to fueling. However, issues with wheel bearings, ignition, or external fuel line clogs may also require attention. A trustworthy bike service shop will diagnose root causes during the clean package inspection. Key Takeaways: Why Choose a Professional Motorcycle Carburetor Cleaning Service Professional carburetor cleaning services extend your engine’s lifespan by preventing unnecessary wear and costly repairs down the road Specialized sports bike service ensures factory-level tuning and optimal performance, exactly as intended for models like the Ducati Panigale A full carb clean and rebuild service addresses the root causes of poor running—not just the symptoms—ensuring you get the most from every ride Ready to Fix Rough Idles? Call Nasty Performance Motorcycle Shop Today: 847-458-4858 Your ride deserves to run at its best! For ultra-fast turnaround time, proven results, and expert service online or in shop, call Nasty Performance Motorcycle Shop now at 847-458-4858 and ask for our carb clean package services. Don’t let carb problems steal away your fun—stop struggling till warm and get your carbs back on track with certified pros. If you’re committed to keeping your motorcycle in peak condition year-round, don’t stop at carburetor care. Discover essential strategies for every season in our comprehensive resource, Seasonal Bike Care Secrets Every Rider Must Know. From prepping for winter storage to maximizing summer performance, these expert tips will help you avoid common pitfalls and extend the life of your ride. Take your maintenance routine to the next level and ensure your bike is always ready for the road, no matter the weather.

Terms of Service

Privacy Policy

Core Modal Title

Sorry, no results found

You Might Find These Articles Interesting

T
Please Check Your Email
We Will Be Following Up Shortly
*
*
*