Nasty Performance ~ 847-458-4858 

  • Blog Home
  • Categories
    • Motorcycle Maintenance
    • Riding Tips & Preps
    • Safety & Inspection
    • Customizations & Upgrades
    • DIY Motorcycle Repairs
    • Motocycle Audio Systems
    • Motocycle Seasonal Care & Storage
    • Engine, Electrical Performance
  • Bike Night
  • Nasty Performance Motorcycle Shop
July 21.2025
1 Minute Read

Riding Techniques for Motorcycles That Improve Control

  • Did you know that over 80% of motorcycle accidents could be avoided with better riding techniques for motorcycles? Explore expert methods and unlock a safer, more confident riding experience.

What You'll Learn from This Guide

  • How to build foundational motorcycle riding skills for better control and safety.
  • The importance of mastering the friction zone , executing sharp right turns , and practicing low speed maneuvers .
  • Why protective gear is essential for every ride, and tips for continual improvement in your riding skills .

Essential Riding Techniques for Motorcycles: Achieving Optimal Control on the Road

  • Understand the core principles of riding techniques for motorcycles and why they are critical for every rider seeking improved handling and safety.

Riding techniques for motorcycles are the cornerstone of safe and enjoyable motorcycle riding. Whether you’re new to riding or looking to sharpen your existing skills, practicing the right techniques is vital for maintaining control and confidence on every journey. From mastering the clutch’s friction zone to negotiating sharp right turns and slow speed maneuvers, the fundamentals shape how you interact with your bike and the road.

Many riders underestimate the pivotal role of foundational riding skills—such as balanced posture, throttle and brake control, and focused vision—but these are the building blocks that differentiate amateurs from experienced riders. Applying these principles doesn’t just make you a better motorcyclist; it greatly reduces risk, enhances your responsiveness, and transforms your overall riding experience. With the right approach, every ride can become a chance to hone your skills, avoid common pitfalls, and enjoy the journey with heightened awareness and safety.

Key Takeaways: Mastering Riding Techniques for Motorcycles

  • Gain comprehensive insight into riding techniques for motorcycles that refine control and boost rider confidence.
  • Learn how friction zone mastery, sharp right turn execution, and controlled speed riding contribute to safer journeys.
  • Discover the importance of protective gear and injury prevention in real-world scenarios.

Building Foundational Motorcycle Riding Skills for All Riders

Understanding Motorcycle Control: Balancing, Braking, and Throttle

Achieving true mastery of riding techniques for motorcycles starts with understanding the relationship between balance, throttle, and braking—core elements that are interdependent at all speeds. First, balancing on two wheels requires you to sense and adjust your body position in response to the bike’s movement. Small changes in speed or terrain can shift your center of gravity, so it’s imperative to stay loose and responsive. Using gentle inputs on the handlebars instead of rigid movements helps maintain harmony between rider and machine.

Next, braking skills are essential—learning the delicate dance between the front brake and rear brake ensures controlled stops and smooth slow speed riding. The front brake is your primary stopping force, but at low speeds, a soft touch on the rear brake offers added stability. Never forget the importance of a well-maintained brake pad and tire pressure; these directly affect your stopping power and grip. Throttle control, meanwhile, lays the foundation for both acceleration and steady speed. Practicing in a parking lot lets you experience how feathering the throttle and brake lever helps you maintain a controlled environment for learning.
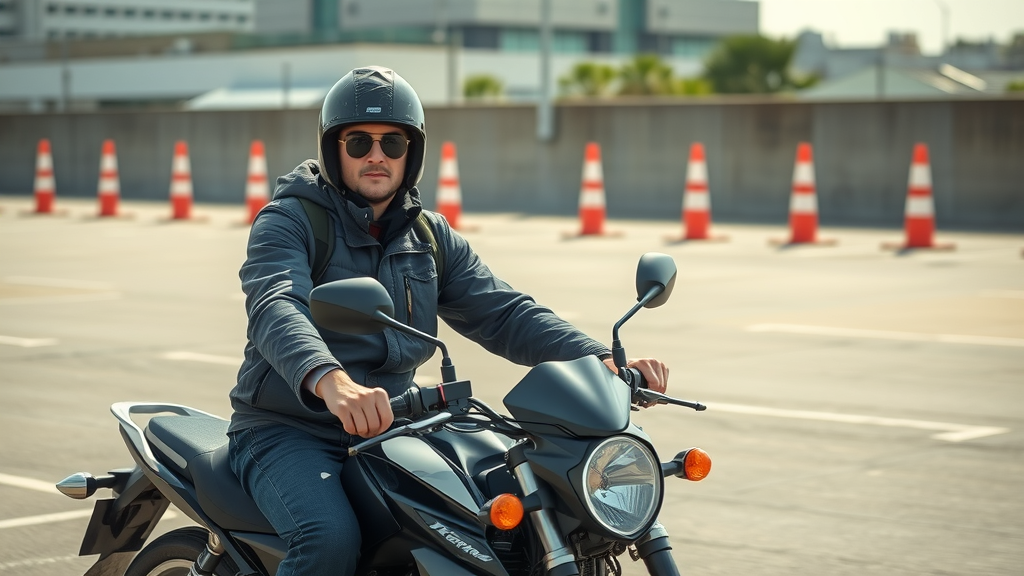
Focused beginner practicing motorcycle riding skills, balancing and braking in a parking lot with orange cones

Essential Motorcycle Riding Skills: Posture & Vision

  • Maintain a relaxed grip, proper foot placement, and upright body posture.
  • Keep eyes scanning ahead and always 'look where you want to go.'

An often-overlooked aspect of effective motorcycle riding is the way you position your body on the bike. For optimal control, keep your upper body relaxed, elbows slightly bent, and arms loose—not stiff. Your feet should stay firmly on the foot pegs with the balls of your feet providing balance and immediate access to the brake lever and gear shifter. The correct posture lets you counteract the laws of physics that want to destabilize your ride, especially when maneuvering at low or higher speeds.

Just as critical is your vision—great riders develop the habit of keeping their eyes scanning ahead, actively looking where they want the motorcycle to go. This technique prevents target fixation, reduces the chance of missing objects in your blind spot , and enables smoother, smarter maneuvers. Always plan your actions several seconds ahead, especially when sharing the road with unpredictable car drivers or during a busy riding season.

Protective Gear: The Foundation of Safe Riding Techniques for Motorcycles

Selecting Essential Protective Gear for Every Ride

  • Helmets, armored jackets, gloves, pants, and boots: Key safety considerations
  • Understanding modern materials and certification standards

The best riding techniques for motorcycles are only as effective as the protective gear you wear. Essential gear includes a DOT, ECE, or Snell-certified helmet for head protection, armored jackets and pants with impact-absorbing padding, sturdy gloves, and abrasion-resistant boots. These items aren’t just for style—they are fundamental for motorcycle safety, especially if you find yourself in a slide or sudden stop.

Today’s gear is crafted with high-tech materials like Kevlar lining and advanced polymers, delivering maximum protection with minimal weight. Always check for current certification standards, as they indicate the gear’s ability to withstand impact and abrasion. Remember, on-road hazards—from inattentive car drivers to unexpected road debris—are unpredictable, so dressing for the slide, not the ride, should be your mantra.

"The best riding techniques for motorcycles mean nothing without proper protective gear—always dress for the slide, not the ride."
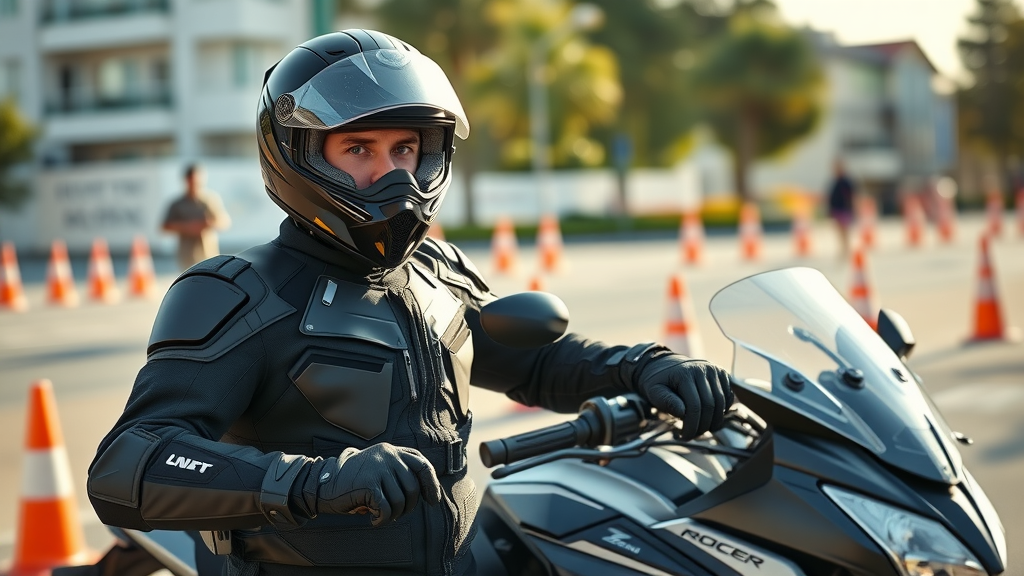
Motorcycle rider in full protective gear, helmet, armored jacket, gloves, boots, beside bike in sunlit urban backdrop

Mastering the Friction Zone: Precision in Riding Techniques for Motorcycles

What is the Friction Zone and Why Does It Matter?

  • Defined: The area between fully released and fully engaged clutch
  • Applications in slow speed and low speed maneuvering

One of the most critical riding techniques for motorcycles is understanding and mastering the friction zone . This is the “sweet spot” where your clutch is partially engaged—neither fully engaged nor fully disengaged—which allows your engine’s power to be transmitted smoothly to the rear wheel without stalling. Mastery of the friction zone is the foundation for low speed riding maneuvers, parking lot drills, and maintaining balance during complex turns and U-turns.

Keeping your motorcycle in the friction zone gives you precise control, letting you feather the throttle and maintain stability as you negotiate tight spaces or slow speed challenges. Practicing friction zone techniques also improves your confidence, directly impacting your ability to perform sharp right turns, navigate crowded environments, and execute emergency stops. Think of this as a fundamental skill that every motorcycle rider should aim to perfect early in their journey.

Step-by-Step: Friction Zone Practice Drills

  1. Slowly release the clutch until the engine begins to pull
  2. Gently apply throttle to find the balance
  3. Practice in a controlled environment (parking lot, cones)

To master the friction zone, practice these steps in a controlled environment . Start by idling in first gear, then slowly let out the clutch until you feel the bike begin to move forward without stalling—the bike is now in the friction zone. Gradually roll on the throttle to keep the engine running steady, making micro-adjustments to stay balanced. Repeat this process through exercises like “walking the bike” or riding slowly around cones so you can manage the rear brake and throttle together. This drill is especially useful for mastering parking lot maneuvers and keeping the bike under control at low speeds.

Remember, practice is key. As you refine your friction zone control, you’ll notice smoother transitions, quicker starts from a complete stop, and increased confidence tackling real-world riding scenarios. The friction zone sets the stage for advanced riding skills, acting as a gateway to more complex maneuvers and safe, responsive riding practices.

Watch: Demonstration: How to Master the Friction Zone for Smooth Motorcycle Operation

Close-up of hands skillfully managing clutch and throttle controls, demonstrating the friction zone technique on a motorcycle in a parking lot with cones

Executing Sharp Right Turns: Advanced Riding Techniques for Motorcycles

Dynamics of Sharp Right Turn and Sharp Right Turns

Sharp right turns are among the most challenging maneuvers in motorcycle riding, testing a rider’s balance, throttle control, and ability to smoothly coordinate clutch and brakes. Unlike left turns, sharp right turns often have tighter radii, limited visibility, and can be complicated by a change in road camber or surface quality. Success in this maneuver requires not only technical skill but also the ability to predict and adapt to dynamic factors like oncoming traffic or an unexpected obstacle in your riding line.

Many riders struggle with sharp right turns due to fear of leaning the bike, concern about front tire slip, or improper body positioning. Mastery here is all about controlled smoothness—using small counter-steering inputs, steady throttle, and keeping your eyes focused where you want the bike to end up. Practicing in a parking lot or on a closed track under supervision is the safest way to refine these skills before applying them in real-world traffic.

Technique Common Pitfalls Expert Tips
Head turns: Look through the corner Target fixation on the curb or obstacles Always look where you want to go, not where you fear going
Counter-steering: Gentle push on the right handlebar Over-correcting or tensing arms Stay relaxed; tiny inputs make a big difference in sharp right turns
Smooth clutch and throttle management Snapping clutch or erratic throttle creates instability Maintain steady speed, use friction zone if needed
Use of rear brake for balance at low speeds Forgetting rear brake or relying only on front brake Feather the rear brake gently for added stability

Practicing Sharp Right Turns: Step-by-Step Guidance

  1. Reduce speed and look through the turn
  2. Counter-steer slightly and maintain throttle control
  3. Use body lean and focus on smooth clutch engagement

Begin by entering the turn at a manageable steady speed. Shift your gaze to the exit—not the hazard—since your motorcycle goes where your eyes go. Apply a slight counter-steer by gently pushing the right handlebar to initiate the lean, keeping arms loose. As the bike starts to turn, smoothly maintain throttle and work within the friction zone to control speed. A relaxed posture and slight pressure on the rear brake will help stabilize the bike.

Always practice sharp right turns in a safe, controlled environment until muscle memory kicks in. Set up cones in a parking lot, mark a turning path, and progressively reduce the radius as your skills improve. These drills will boost your confidence and ensure you’re prepared for tight right-handers during real rides.

Video Analysis: Real-World Mistakes in Sharp Right Turns

Watch: Footage breakdown: What happens when riders execute or misjudge sharp right turns. Key errors include looking down or at obstacles, over-braking the front tire, and rushing the turn—all leading to a loss of balance or traction. By learning to spot these mistakes, you can proactively avoid them on your own rides.
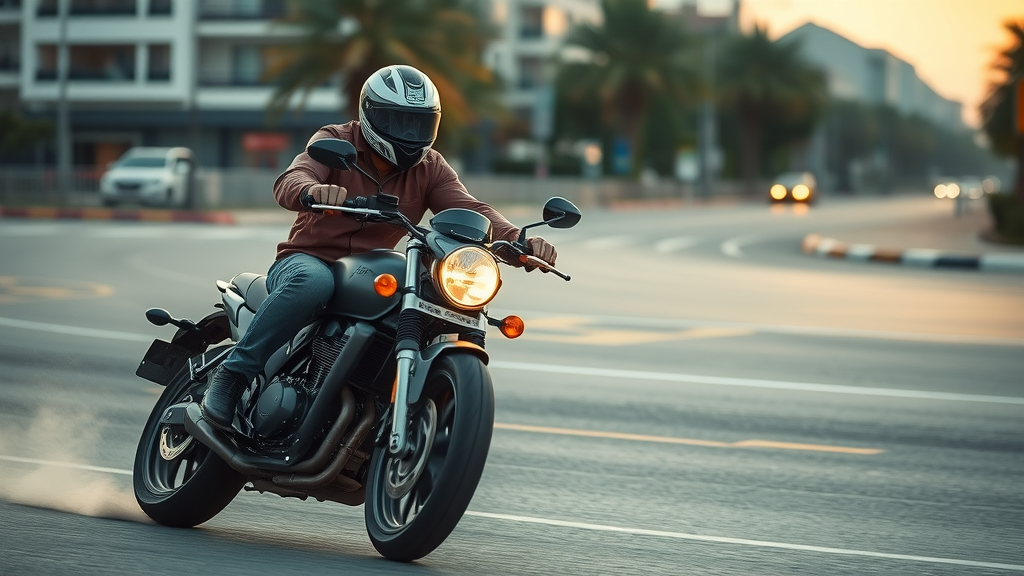
Confident motorcyclist performing a sharp right turn in the city, body leaning, focus on advanced riding technique

Low Speed and Slow Speed Control Riding Techniques for Motorcycles

Techniques to Master Low Speed Maneuvers

  • Clutch, throttle, and rear brake coordination
  • Practicing figure eights and U-turns in confined areas

Mastery of slow speed riding techniques distinguishes truly advanced motorcycle riders. At low speeds , the dynamic balance required changes—input from the clutch, throttle, and especially the rear brake becomes even more important. To maintain control, keep your bike in the friction zone while feathering the throttle and applying light pressure to the rear brake—not the front brake, which can destabilize the bike at walking pace.

Routine practice is essential. Set up cones in a quiet parking lot and challenge yourself with drills like figure eights and U-turns, keeping your body upright while the bike leans gently beneath you. These exercises not only reinforce your friction zone skills but actively sharpen your situational awareness and handling in real-world situations, such as navigating traffic jams or group ride formations.
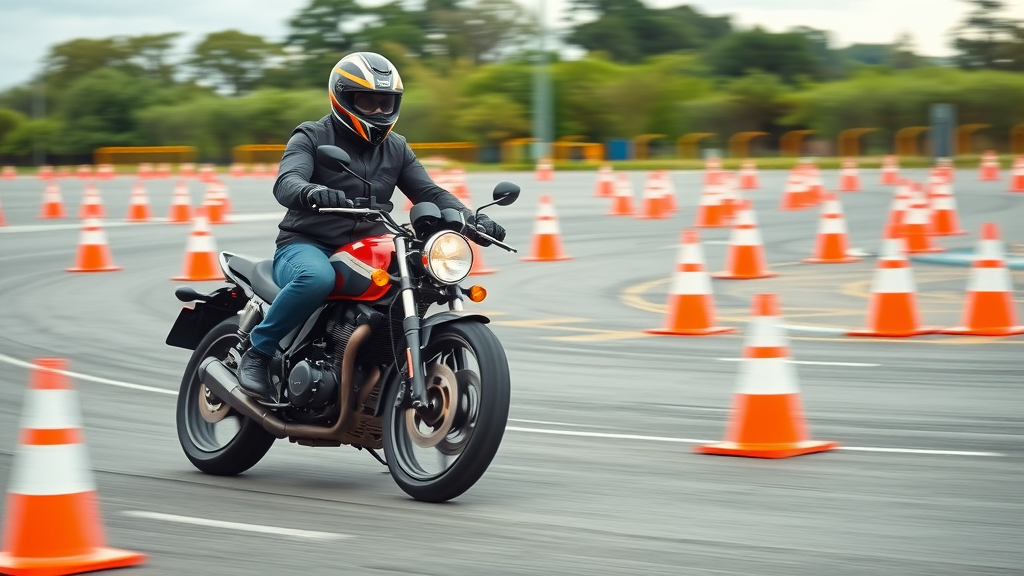
Motorcycle rider practicing figure eights at slow speed, upright and focused, among orange cones in a paved training yard

Maintaining Confidence and Balance at Slow Speed

  • Head and eyes scanning for path
  • Knees gripping the tank for additional stability

Confidence at low speeds comes from consistent practice and attention to detail. Keep your head up and eyes scanning ahead—this helps stabilize your balance and directs your path of travel. By keeping your knees snug against the fuel tank, you add extra stability, making it easier to maintain balance and respond to small wobbles before they turn into a loss of control.

Remember, slow speed riding isn’t about rushing; it’s about precision and patience. The more you practice, the more second-nature these techniques will become, reducing the risk of a tip-over or collision when maneuvering through crowded or tight spaces.

Speed Riding: Essential Skills for Motorcyclists

When and How to Practice Speed Riding Safely

  • Best practice environments for speed riding skill development
  • Mental preparedness and reaction time improvement

Developing speed riding skills is best accomplished in a closed, controlled environment such as a racetrack or motorcycle training center. Speed riding requires not only advanced technical skills but also keen mental awareness and sharp reaction times. Track days provide a safe arena to test your limits, improve throttle and brake control at higher speeds, and get used to the demands of trail braking and high-speed maneuvers.

Always approach this practice with a readiness to learn—your focus must be on incremental improvement, not showing off. Reaction time can be improved through repeated exposure and mental drills, reinforcing correct responses to sudden obstacles or changes in the riding environment. Speed riding is not about reckless acceleration; it’s about precision, responsibility, and knowing when to push and when to hold back for safety.
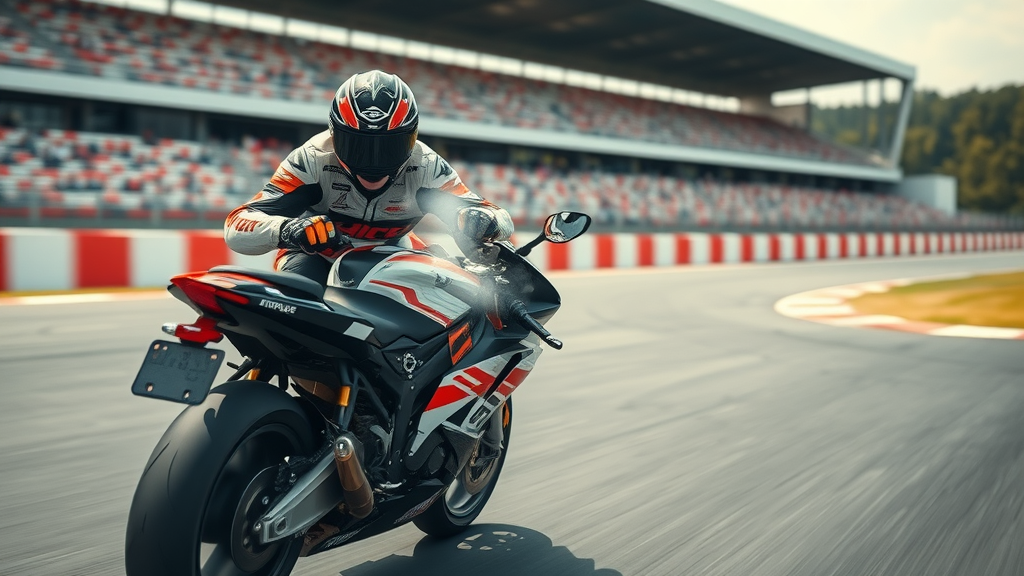
Sport motorcycle rider accelerating on a controlled track, emphasizing speed riding and safety, wearing full protective gear

Speed Riding vs. Safe Riding: Finding the Right Balance

"Responsible speed riding begins and ends with knowing your limits and respecting the road."

Advanced riding skills are exciting and can greatly expand your riding experience, but they must always be matched with a commitment to riding safe and staying within your abilities. The best riders develop a feel for the road’s surface, their bike’s brakes and tire grip, and their personal reaction limits. Practicing in a controlled environment teaches humility and respect for the inherent risks.

Understanding the line between enthusiastic speed riding and reckless behavior is the key to long-term enjoyment and survival as a motorcyclist. Ride smart, stay safe , and always be prepared to dial back your speed if conditions aren’t ideal or if you’re not feeling 100% focused.
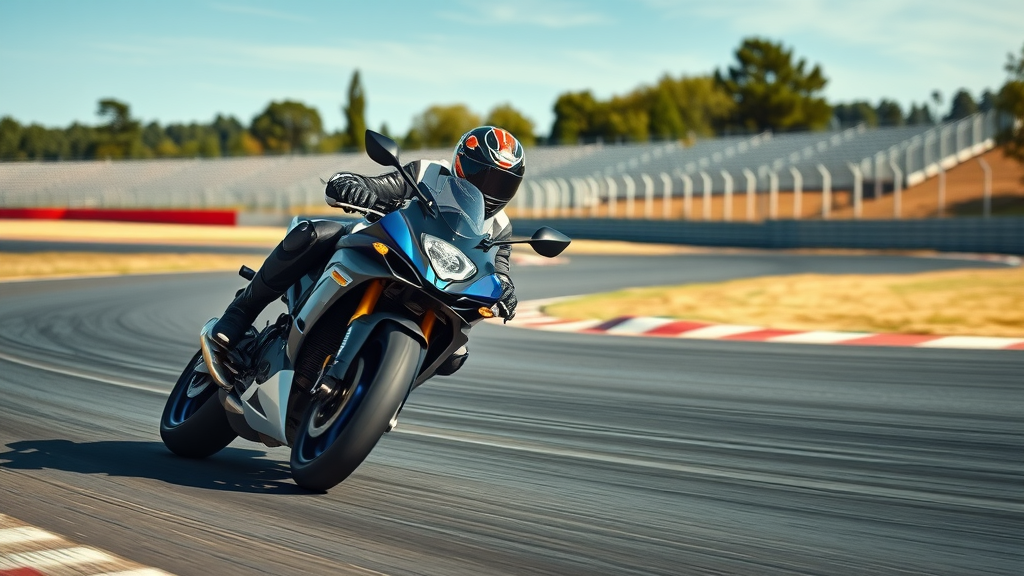
Motorcyclist leaning into a moderate speed turn on a controlled track, symbolizing balanced safe speed riding

Developing Advanced Motorcycle Riding Skills for Long-Term Mastery

  • Counter-steering at speed
  • Trail braking techniques
  • Emergency evasive maneuvers

Moving beyond the basics opens the door to advanced motorcycle riding techniques, each requiring discipline, practice, and a respect for the laws of physics . At speeds above 15 mph, counter-steering is the primary method for changing direction quickly—push left to go left, push right to go right. Trail braking, which means continuing to brake lightly while entering a turn and gradually releasing the front brake as you lean, boosts both control and stability during corner entry.

Advanced evasive maneuvers—like sudden swerves or emergency stops—are essential for dodging hazards and avoiding accidents. Practicing these moves in a safe, open area with ample runoff is crucial. Riders should also regularly inspect equipment such as brake pads and maintain correct tire pressure to ensure maximum performance when these techniques are needed most.

Watch: Demonstration: Emergency Maneuvers and Advanced Riding Skills for Motorcycles
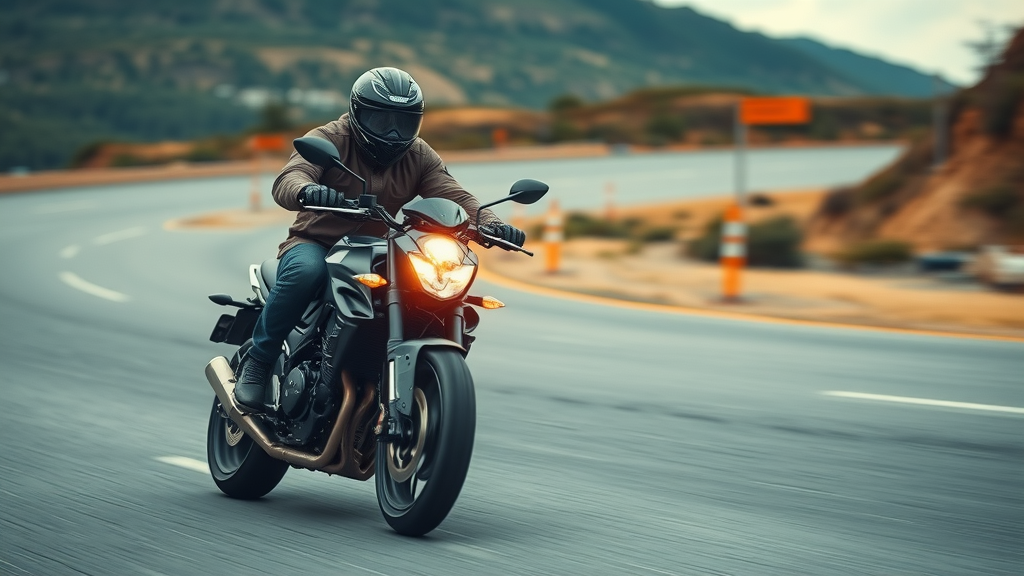
Expert motorcycle rider performing an emergency evasive maneuver on a mountain curve, skillful advanced riding

People Also Ask

What is the 12 second rule on a motorcycle?

  • The 12 second rule recommends scanning the road 12 seconds ahead to anticipate hazards, maintain lane control, and plan smooth maneuvers—key to applying riding techniques for motorcycles that proactively prevent accidents.

What's the hardest trick to do on a motorcycle?

  • Advanced stunts such as wheelies, stoppies, and drifting require exceptional motorcycle riding skills, precise throttle control, and deep mastery of riding techniques for motorcycles.

What's the hardest thing about riding a motorcycle?

  • Many riders find maintaining balance during slow speed maneuvers and executing sharp right turns among the hardest aspects due to the need for meticulous control, timing, and constant practice of riding techniques for motorcycles.

Why do motorcycle riders put two fingers out?

  • Extending two fingers (a peace sign or 'V') is a traditional motorcycle rider's wave, symbolizing camaraderie and mutual respect among those sharing the road—a gesture rooted in rider culture and etiquette.

Additional FAQs on Riding Techniques for Motorcycles

  • How do I master the friction zone more quickly?
    Frequent short sessions in a quiet parking lot, focusing on slow clutch-throttle coordination and using cones as markers, will rapidly improve your friction zone proficiency. Stay relaxed and consistent with practice.
  • What role does counter-steering play in riding techniques for motorcycles?
    Counter-steering is crucial at speeds above 15 mph, allowing for effective, safe, and fast directional changes. Mastering this technique greatly enhances control and confidence in all riding situations.
  • Are sharp right turns more dangerous than left turns?
    Sharp right turns can be riskier due to tighter angles, obstacles, and limited visibility, making skilled execution and practice essential for safety during real-world riding.
  • Best low speed practice routines for new riders?
    Figure eights, U-turns, and slow weaving through cones are best for developing slow-speed balance, control, and confidence for beginners.
  • Signs your protective gear may need replacing?
    Replace gear if you notice frayed seams, compromised armor, worn pads, or faded reflective elements. Outdated helmet standards or after any crash also warrant replacement for optimal safety.

Expert Tips and Quotes: Elevating Your Motorcycle Riding

"Your best riding technique for motorcycles lies in constant vigilance—practice deliberately and always learn from every ride."
  • Join local riding courses and practice groups
  • Use checklists before every ride to ensure gear and bike readiness
  • Reflect on each ride to identify improvement areas

Summary and Next Steps for Enhancing Riding Techniques for Motorcycles

  • Prioritize skill-building and daily practice of core riding techniques for motorcycles.
  • Always wear protective gear and invest in ongoing skill advancement.
  • Stay updated with the latest techniques, attend workshops, and foster rider community engagement for ongoing mastery.

Ready to Transform Your Riding? Unlock Elite Riding Techniques for Motorcycles and Take Every Journey with Confidence

  • Level up your motorcycle riding skills today—enroll in an advanced course, practice these essential riding techniques for motorcycles, and ride prepared, skilled, and safe every time you hit the road.

Take action: Commit to practicing these riding techniques for motorcycles regularly—your safety, control, and confidence will improve with every ride.

To enhance your understanding of motorcycle control, consider exploring the following resources:

  • 10 Motorcycle Riding Tips for ALL Riders offers practical advice on clutch and throttle control, braking techniques, and defensive riding strategies to improve your riding proficiency.

  • Motorcycle Riding Strategies from the Minnesota Department of Public Safety provides insights into visual directional control, countersteering, and effective braking methods to enhance safety and control.

If you’re serious about mastering motorcycle control, these resources will provide valuable techniques and strategies to elevate your riding skills.
Riding Tips & Preps

0 Comments

Write A Comment

*
*
Please complete the captcha to submit your comment.
Related Posts All Posts

Beginner’s Guide to Packing for Motorcycle Trips Made Simple

Did you know that improper packing is one of the top reasons trips go off track? Packing might just seem like stuffing bags, but when you're heading out on a motorcycle trip, how you organize your gear directly influences comfort, safety, and enjoyment. Whether you’re gearing up for your first weekend escape or a cross-country touring motorcycle adventure, mastering the basics of smart packing transforms stressful rides into memorable journeys. Dive into this beginner’s guide to packing for motorcycle trips and start your next trip prepared, organized, and ready for whatever the road brings. Unlocking the Secrets of Smart Motorcycle Trip Packing "Did you know that improper packing is one of the top reasons trips go off track? Learn how a beginner’s guide to packing for motorcycle trips can transform your journey." The secret to a successful motorcycle trip packing experience starts with knowledge and planning. It’s easy to underestimate the challenges of trip packing until you’re on the open road facing an unexpected downpour or, worse, rooting through your bags to find lost essentials. Whether you’re a novice or planning your first long distance trip, understanding the core principles behind a well-organized trip pack can make every mile smoother. Smart motorcycle packing means strategically placing each item for balance, easy access, and weather preparedness. One of the top mistakes new riders make is failing to adapt their packing list to the journey's duration and destination. Rather than guessing what you’ll need, this beginner’s guide to packing for motorcycle trips unpacks everything from gear essentials to ingenious organization tricks that save space and ensure nothing gets left behind—or flies off on the highway. After all, smart motorcycle trip packing is not just about what you take, but also how you carry it. What You'll Learn in This Beginner’s Guide to Packing for Motorcycle Trips How to create an effective motorcycle trip packing list Essential gear and motorcycle trip pack essentials for every weather and distance Expert tips for motorcycle packing that maximize space and comfort Proven strategies for long distance and touring motorcycle adventures Understanding Motorcycle Trip Packing Essentials The Foundation: Why a Structured Packing List Matters A well-planned packing list is the foundation for every smooth motorcycle trip packing experience. When you’re dealing with limited space and a moving vehicle, discipline and order matter more than ever. A structured trip packing list prioritizes what’s essential—balancing must-have protective gear, emergency items, and simple comforts. The process begins by categorizing items (like clothing, tools, and paperwork) to prevent forgetting vital things and overpacking unnecessary bulk. Using a motorcycle trip packing list takes the guesswork out of what to pack and minimizes stress, allowing you to focus wholly on the ride. More experienced riders swear by checking off a written (or digital) list before every departure, which is a proven way to save time and avoid last-minute dashes to the nearest store for a forgotten piece of riding gear. With practice, your packing list becomes personalized, reflecting your riding habits, weather, and trip duration. As you refine your packing strategy, it's also important to consider how seasonal changes can impact your gear choices and trip preparation. For a deeper dive into maintaining your motorcycle and adapting your approach throughout the year, check out these seasonal bike care secrets every rider should know—they’ll help you stay ready for any weather or road condition. Motorcycle Trip Pack Categories: Clothing, Tools, Documents, and More Organizing your motorcycle trip pack into smart, manageable categories is a cornerstone of efficient packing. Start by separating your gear into essential groups: riding gear (helmets, jackets, boots), everyday clothing, repair tools, first aid, and critical documents. This structured approach not only helps ensure nothing important is left behind but also enables you to retrieve items quickly in the middle of a long moto adventure or unpredictable weather. Tech tools, such as a well-charged phone, chargers, and possibly a GPS device, belong in their category, while a small kit with basic trip repair tools (think tire patch, wrenches, and duct tape) is crucial for roadside fixes. Clever storage solutions, like compression sacks and ziplock bags, keep smaller items dry and compact, making it easier to utilize limited storage space on your bike. By dividing your packing into categories, you create a safety net against accidental omission and set yourself up for a hassle-free long distance trip. Crafting the Ultimate Motorcycle Trip Packing List Riding gear: helmets, jackets, gloves, and boots Weather-appropriate clothing for long motorcycle journeys Tool kits for road repairs Medical and emergency supplies Documents: license, registration, insurance Electronics and chargers Item Short Trip Need Long Trip Need Pro Packing Tips Riding Gear (helmet, jacket, gloves, boots) Yes Yes (may need spares) Pack protective gear first, ensure comfort & fit. Consider waterproof gear for longer rides. Weather-Appropriate Clothing Minimal layers Multiple layers; options for changes in weather Use compression sacks to save space, focus on moisture-wicking fabrics for long moto trips. Tool Kit Basic tools Full tool roll, tire kit Keep tools organized in a roll; include bungee cords and cargo net for securing loads. Medical/Emergency Supplies Basic kit Expanded kit, safety pins, emergency blanket Pack these where easily accessible in any emergency. Documents (license, reg, insurance) Yes Yes (+ copies) Seal originals in a ziplock bag; keep digital backups if possible. Electronics & Chargers Minimal—phone & charger Phone, GPS, portable battery, chargers for all devices Keep a dedicated pouch for all electronics; avoid tangling cords by using cable ties. Choosing the Right Bags and Compression Sacks for Motorcycle Packing Top Touring Motorcycle Luggage Systems for Beginners Picking the right luggage is crucial in motorcycle trip packing. As a beginner, you’ll likely choose between saddlebags, tail bags, or tank bags. Hard cases offer unmatched protection and security, ideal for all-weather touring motorcycle trips. However, soft bags or hybrid systems can save space and are generally lighter—perfect for beginners mindful of their bike’s weight and limited space. Ensure your chosen system securely attaches to your motorcycle with minimal risk of movement during your ride. Saddlebags distribute weight low and evenly on the bike, which is perfect for stability during long distance trips. Tail bags and tank bags are advantageous for storing frequently accessed items like snacks, rain gear, or maps. Regardless of type, always consider weather resistance and easy access. Investing in quality fastening systems—like bungee cords or a rock-solid cargo net—keeps your load steady, protecting both your items and your safety on winding roads. How Compression Sacks Maximize Space for Motorcycle Trip Packing Using a compression sack is every seasoned rider’s secret weapon for efficient motorcycle trip packing. These sturdy sacks allow you to reduce the volume of bulky clothing and sleeping gear so you can free up limited storage space on your bike. Simply stow your soft items—jackets, mid-layers, socks—within each sack, then cinch it down until excess air is squeezed out. This not only saves room but also keeps your items organized and protected from moisture. Compression sacks are invaluable for long moto journeys, allowing easy separation of clean and dirty clothes or quick swaps for changing weather. Modern versions are lightweight, water-resistant, and add almost no extra bulk. For longer distance trips, consider investing in a few color-coded sacks to quickly locate what you need. This upgraded packing strategy can mean the difference between a stressful, overstuffed bag and a streamlined, enjoyable motorcycle adventure. Expert Tips: Packing for Long Distance Motorcycle Adventures Layering and minimizing bulk Balancing weight for safety Securing the load to avoid shifts on rough terrain For long distance motorcycle trip packing, efficiency is everything. Begin by layering clothing to minimize bulk—opt for a moisture-wicking base, comfortable mid-layer, and lightweight but waterproof outerwear. This classic trip packing hack ensures adaptability while using minimal space. Remember, packing light is key; resist the urge to bring "just in case" items that only add to your load. Next, balance your cargo by placing heavier items low and near the bike’s centerline. An unbalanced load impacts handling and safety. Secure everything tightly using bungee cords or cargo nets, double-checking for movement before you hit the road. Clever placement of essential items—like first aid kits and rain gear—where they are quick to reach can make your journey safer and less stressful. Finally, always test-pack before your actual departure: it’s the only way to spot awkward fits and storage space issues before they happen out on the open highway. Watch this step-by-step video demonstration to see the packing process in action—including safe weight distribution, how to use compression sacks for clothing and gear, and tips on placing essential trip pack items for quick access. See exactly how seasoned riders turn chaos into order before every motorcycle trip. Packing for Different Types of Motorcycle Trips Weekend Escapes vs. Extended Touring Motorcycle Adventures Packing for a day trip or a short weekend escape is dramatically different than prepping for a long moto or extended touring motorcycle adventure. For short journeys, keep your trip pack basic—only the essentials like light weatherproof clothing, minimal tools, and a few snacks. Stick to a single bag or tank bag to avoid unnecessary weight. In contrast, extended motorcycle adventures demand thoughtful motorcycle trip packing: more changes of clothes, expanded tool kit, layered riding gear, and potentially camping supplies. Here, multiple luggage options come into play, and maintaining a tight, organized packing list is vital for balancing convenience and managing the weight. Always customize your approach based on ride length, expected terrain, and access to resources along your route. Whether quick getaway or epic ride, a smart trip packing list saves time and enhances every mile. Seasonal Motorcycle Trip Packing List Adjustments Every season brings unique challenges for motorcycle trip packing. In summer, pack light, focusing on high-ventilated gear and extra hydration. Spring and fall rides require a blend of rain gear, mid-weight layers, and flexible gloves. Winter adventures demand the bulkiest pack: insulated, waterproof layers, heated gear if possible, plus emergency supplies for cold weather risks. Always adjust your trip packing list to account for rapidly changing conditions—adding safety pins, ziplock bags for electronics, and wind/waterproof covers for bags. Even on warm weekends, rapid weather changes can catch you unprepared, especially in the mountains or remote areas. With the right attitude and a flexible approach to your motorcycle trip pack, every season becomes rideable and memorable. Quotes from Experienced Riders: Their Trip Packing Secrets "Packing light but right is the golden rule—your comfort and safety depend on it." — Veteran Touring Rider Talking with seasoned riding communities always reveals surprising packing tricks. From using compression sacks for efficient storage space, to never forgetting a compact tool kit with safety pins, and utilizing bungee cords for secure loads, riders agree that less is often more. Many mention creating a trip pack customized for each long distance trip, and refining their motorcycle packing with every ride. Their biggest advice? Stick to your packing list, review it before every departure, and always prioritize protective gear and comfort. Common Motorcycle Trip Packing Mistakes Beginners Make Overpacking and underpacking: what to avoid Packing non-essential items Improperly securing bags Beginners often falter by overpacking—filling every inch of storage space with “just in case” items—or underpacking, forgetting essentials like rain gear or crucial tools. Another common misstep is neglecting to properly secure bags: all it takes is one sudden stop or bumpy patch to send gear flying with only a loose cargo net or failing strap. Avoid packing non-essentials to keep weight manageable and focus on a packing list that serves both daily and emergency needs. Carelessness with securing your cargo can lead to scattered belongings or worse, a dangerous handling situation. Always double-check every buckle, bungee, and zipper before you hit the open road. Seasoned riders frequently use safety pins, ziplock bags for organization, and test their trip pack load with a short ride before every long adventure. With a bit of care and the right gear, such mistakes become learning opportunities—not trip-ending disasters. Discover how to build and use a comprehensive packing list to streamline every part of your motorcycle trip. This friendly explainer highlights category-based organizing, pre-trip checks, and quick tips for customizing your list for every journey type and season. People Also Ask: Beginner's Guide to Packing for Motorcycle Trips What is the 2 4 12 second rule on a motorcycle? The “2 4 12 second rule” is a fundamental safety guideline for motorcycle riders. It means you should maintain a minimum following distance of two seconds behind the vehicle in front, allow four seconds if conditions are less than ideal (like rain or heavy traffic), and actively scan the road 12 seconds ahead to anticipate turns, hazards, or changing traffic. This rule helps ensure enough time for safe stopping and reaction, especially during long motorcycle adventures or when your packs add weight to your ride. Understanding Following Distance: The 2, 4, and 12 Second Rule Explained for Motorcycle Trips On motorcycle trips—whether a quick day trip or a cross-country journey—keeping the proper following distance can prevent accidents. Two seconds is the minimum in ideal conditions, but increasing to four seconds gives a safer buffer in rain, traffic, or when carrying heavy loads. Scanning 12 seconds ahead lets you spot obstacles or route changes early, which is even more important when your trip packing adds weight or shifts your balance. What does 2 fingers down mean on a motorcycle? The “2 fingers down” gesture is a friendly signal in motorcycle culture. When a rider lowers two fingers on their left hand as they pass another biker, it’s a way of showing mutual respect, solidarity, and a wish for a safe journey. It’s a tradition that unites riders everywhere, whether you’re on a solo day trip or a long moto tour. Motorcycle Trip Culture: The Meaning Behind the 2 Fingers Down Gesture Showing two fingers down stands for peace and safety on the road. It’s a nonverbal way to connect with fellow riders and celebrate the unique brotherhood or sisterhood of motorcycle travel. Even as you focus on your trip packing and gear, don’t forget the simple gestures that make motorcycle adventures so memorable. What to pack for a 7 day motorcycle trip? For a week-long motorcycle trip, essentials include: full riding gear (helmet, jacket, gloves, and boots), seven sets of moisture-wicking clothing (with at least two sets for flexibility), rain gear, a compact tool kit, small first-aid/emergency kit, documents (license, insurance, registration), chargers for electronics, and toiletries. Use compression sacks and dedicated bags to organize. Don’t forget small but often-overlooked items like safety pins, a ziplock bag for valuables, and bungee cords for securing loose items. Detailed Packing List for a Week-Long Motorcycle Trip Here’s a quick reference: 1 helmet, 1-2 jackets (all-weather), 2-3 pairs of gloves, 1 pair of riding boots, 1 rain suit, 7 sets of underwear/socks, 3-4 shirts, 2-3 pants/jeans, sleepwear, tool kit, medical kit, all documents, phone and GPS with chargers, camera (optional), toiletries, sunscreen, lip balm, and compact towel. Pack versatile items that suit both riding and time off the bike for evening meals or sightseeing. Is $20,000 a lot for a motorcycle? The value of a motorcycle depends on brand, model type, condition, and features. $20,000 can buy a high-end touring motorcycle packed with accessories or a brand-new mid-range adventure/touring bike. While it may seem steep for beginners, investing in comfort, safety, and quality is worthwhile for those planning frequent or long distance motorcycle trips. Always compare models, research reviews, and assess your intended use before buying. Motorcycle Trip Budgeting: Understanding Motorcycle Costs and Value Budgeting for a motorcycle adventure means weighing initial purchase price, maintenance, fuel, gear, and travel costs. Whether you aim for a budget-friendly bike or splurge on a premium ride, prioritize models that fit your touring motorcycle goals and can handle your planned trip packing strategy. Remember, quality riding gear and reliable storage solutions are equally important investments! FAQs: Beginner's Guide to Packing for Motorcycle Trips How do I choose the right riding gear for a motorcycle trip? Look for gear specifically designed for your riding conditions: select a helmet that fits well, a durable, weather-appropriate jacket, gloves for your climate, and boots that offer good support. Prioritize comfort, protection, and weatherproofing. Try your gear out with your bike before your trip to ensure flexibility and comfort. What are the essentials for a motorcycle trip packing list? Essentials include full riding gear, a basic tool kit, first aid supplies, weather-appropriate clothing, critical documents (license, registration, insurance), electronics (phone, GPS, chargers), toiletries, and any medications you need. How can I prevent my bags from shifting during a trip? Use sturdy fastening systems such as bungee cords, cargo nets, or purpose-built bag straps. Test the load by moving your bike and taking a short ride before leaving for your trip. Make adjustments as needed to ensure nothing moves or rattles. What storage options are best for long distance motorcycle packing? For long trips, invest in a reliable combination of hard cases and soft bags. Compression sacks are vital for reducing clothing bulk, and waterproof covers are critical for unpredictable weather. Make sure all storage is securely attached and easy to access. Key Takeaways for First-Time Motorcycle Trip Packers Start with a clear, categorized packing list Prioritize safety, comfort, and balanced weight Adapt packing approach to trip duration and weather Utilize modern packing gear like compression sacks Connect with the Experts for Motorcycle Trip Packing Advice "Call Nasty Performance Motorcycle Shop Today: 847-458-4858 for personalized tips on your next motorcycle trip pack." Ready to take your packing to the next level or have questions about your first big ride? Call Nasty Performance Motorcycle Shop Today: 847-458-4858 for personalized, expert packing advice. Ride smarter—happy travels! Conclusion: With a practical strategy, organized packing list, and the right mindset, even first-time motorcycle trip packers can conquer the open road safely and comfortably! Now that you’re equipped with the fundamentals of motorcycle trip packing, why not take your preparation a step further? Understanding how to care for your bike throughout the changing seasons can make every journey smoother and extend the life of your ride. Explore the essential seasonal bike care tips trusted by experienced riders—these insights will help you anticipate challenges, protect your investment, and ensure your motorcycle is always ready for adventure, no matter the weather. Your next trip starts with smart packing and continues with year-round bike care.

Stop Exhaustion: Your Guide to Motorcycle Riding Fatigue

Ever wondered why you feel drained after a motorcycle ride—even if you’re loving every second? Could fatigue on your next ride put your safety at risk? Dive in and discover how to overcome fatigue on motorcycle rides for good. What You'll Learn in This Guide to Motorcycle Riding Fatigue Understand the leading causes of fatigue on motorcycle rides Learn how to overcome fatigue on motorcycle trips with effective strategies Discover safety techniques to manage fatigue for both short and long journeys Are You Suffering From Motorcycle Riding Fatigue? Recognizing the Signs If you frequently finish your journeys feeling more worn out than refreshed, you might be suffering from motorcycle riding fatigue—a challenge every enthusiastic rider eventually faces. Fatigue on motorcycle rides can creep in quietly, yet its effects can compromise your focus, slow your reaction time, and ultimately risk your safety. Common signs include drooping eyelids, difficulty concentrating, muscle soreness, and a general sense of lethargy. These symptoms don’t just appear on marathon tours; even a fun afternoon spin can leave your energy levels sapped. Recognizing these warning signs is a crucial step in effective fatigue management. If you notice yourself yawning, stretching your legs and restlessly shifting your body position, or catching yourself daydreaming instead of focusing on the road, it’s time to act. Restlessness, irritability, and delayed response to hazards are other red flags. The truth is, both your body and mind are tested during a long ride, especially when battling wind noise, weather changes, or uncomfortable gear. Monitoring your physical and mental state can prevent minor fatigue from turning into a major risk on the open road. The Science of Fatigue on Motorcycle Rides: Causes and Effects Fatigue on motorcycle rides isn’t just about feeling tired—it’s a complex blend of physical and mental exhaustion. Unlike driving a car, riding a motorcycle is physically demanding, requiring constant engagement of your body and mind. Factors such as dehydration, improper nutrition, poor sleep the night before (skipping on a good night’s rest), wind noise, and even the type of helmet you wear (like a face helmet or open face) all play a role. Environmental conditions—such as hot sun or cold rain—can drain your energy levels faster than anticipated during a full day on the road. Long-term fatigue can build gradually, manifesting as aching muscles, mental fog, and a noticeable dip in alertness. In contrast, short-term symptoms may include feeling drowsy or unfocused after just a few hours. Both forms of fatigue make it harder to make quick decisions—potentially turning small mistakes into critical errors. For riders tackling motorcycle tours or dual sport adventures, knowing the science behind fatigue can help you anticipate the toll it takes—enabling smarter choices that prioritize motorcycle safety for every journey. Physical and Mental Fatigue on Motorcycle Rides: What Every Rider Must Know Common contributors to fatigue on motorcycle journeys: dehydration, lack of rest, nutritional deficits, excessive wind noise, awkward body position, and improper gear. Short-term vs. long-term symptoms and risks: short rides may bring on yawning and mental lapses, while extended or repeated rides result in sore joints, persistent tiredness, and increased risk of falling asleep at the handlebars. Physical fatigue happens as your muscles, particularly in your arms, legs and rest of your core, work to stabilize your motorcycle and absorb road vibrations. Over time, even experienced riders find their energy levels plummeting if they ignore signs like cramping or tingling limbs—both of which point to decreased blood flow and exhaustion. Equally important, mental fatigue builds from constant vigilance, sensory overload, and monotony—often made worse by open highway stretches without much change in scenery. Understanding these different fatigue sources is essential for crafting a strategy that goes beyond simple rest stops. Whether you ride a dual sport for fun or rely on your bike for daily commutes, smart fatigue management starts with self-awareness, a well-chosen face helmet, and a commitment to balancing physical effort with mindful mental breaks. While managing fatigue is crucial for every ride, it's equally important to consider how seasonal changes can impact your motorcycle's performance and your comfort on the road. For practical advice on keeping your bike in top shape throughout the year, explore these seasonal bike care secrets every rider should know to ensure both you and your machine are ready for any journey. Core Strategies to Overcome Fatigue on Motorcycle Rides Hydration and nutrition tips to manage fatigue Best pre-ride planning habits to prevent exhaustion Essential gear for minimizing fatigue on motorcycle trips Overcoming fatigue on motorcycle rides requires an intentional approach. Hydration and nutrition are foundational—the body and mind need regular water and consistent food intake to maintain energy levels. Pack healthy snacks (like trail mix, fruit, or lean protein bars) and water, consuming them at every break. Steer clear of relying solely on caffeine, which can spike and then crash your energy, leaving you more tired halfway through your ride. Equally important is pre-ride planning. Start with a good night’s rest, review your route to anticipate challenging sections, and schedule regular stops at least every 60–90 minutes. Adjust your body position and stretch often to prevent cramps and maintain blood flow—critical for avoiding soreness on longer motorcycle tours. The right gear, from a comfortable helmet (face helmet or otherwise) to padded gloves and well-fitted riding boots, can also make a significant difference by reducing strain and buffering wind noise that contributes to mental fatigue. Building these habits will boost your resilience and help you finish even the most intense long ride feeling strong. Mental Fatigue on Motorcycle Journeys: Staying Sharp and Alert Cognitive techniques to stay awake and alert Managing distraction and focus over long rides "Mental fatigue is just as dangerous as physical exhaustion—plan breaks and stay mindful." Mental fatigue often sneaks up on riders, particularly during uneventful highway stretches or after hours of sensory bombardment. To stay awake and prevent mental burnout, incorporate deliberate cognitive strategies. Play mental games—such as periodically scanning mirrors or identifying road signs that start with that letter—or break up your route with varied scenery whenever possible. Practicing mindfulness, such as focusing on your breath or noting specific sounds, keeps your brain engaged and wards off the dangers of autopilot riding. Distractions like mobile devices, prolonged thoughts about work, or even the persistent discomfort from an ill-fitting open face helmet can undermine your attention. To stay sharp, establish a routine of mental check-ins during rest stops, ensuring you’re present, alert, and ready for changing road conditions. Set reminders to reassess both your physical energy level and mental focus—especially crucial on full day motorcycle tours or group rides. Actively managing your state of mind is a non-negotiable part of safe, enjoyable riding for the long haul. Managing Fatigue on Motorcycle Adventures: Proactive Solutions Creating an effective rest schedule Signs it’s time to pull over to prevent suffering from motorcycle fatigue Overcoming fatigue with stretching and movement tips Planning your breaks before hitting the road is a proactive tactic essential for reducing fatigue on motorcycle rides. Schedule a stop every hour or at least every 70–90 minutes—regardless of how you feel in the moment. During each break, hydrate, eat a small snack, check your route, and most importantly, move: stretch your arms, legs, and neck to combat stiffness and improve blood flow. This habit minimizes the risk of soreness and keeps your body and mind aligned for the journey ahead. Learn to recognize the specific signs that it’s time to pull over: persistent yawning, blurred vision, nodding off for split seconds, or delayed reaction to traffic. Don’t push through fatigue—doing so greatly increases your risk of mistakes. Instead, use rest stops as opportunities to regroup mentally. Even a short walk or change of scenery can refresh your focus. Incorporating a variety of movement into your ride—such as standing on the pegs or wiggling toes in your boots—helps maintain alertness and comfort, ensuring you finish strong rather than suffering from motorcycle fatigue. Pro Rider Tactics: How to Overcome Fatigue on Motorcycle Rides Expert insights on the most effective ways to manage fatigue Personal routines from seasoned riders "Before a long ride, I review the route and schedule stops every hour to reduce fatigue." – Experienced Tour Rider Top riders consistently deploy proven routines to overcome fatigue on motorcycle rides. One fundamental habit is adjusting your schedule based on personal stamina and the demands of your journey. Seasoned motorcyclists routinely stretch both before setting out and at every break. The best riders also keep lightweight, moisture-wicking gear on hand for temperature regulation, and they use earplugs to minimize wind noise, a major contributor to mental fatigue during high-speed stretches. Many pros favor a pre-ride ritual—reviewing the route, checking bike ergonomics, and setting reminders to monitor energy levels. Some riders keep checklists to fine-tune their body position during the ride, while others swap out open face or dual sport helmets for the one that offers the best balance of comfort and noise protection. Ultimately, building a personalized fatigue management plan, inspired by the routines of experts, allows you to tailor your approach for every motorcycle tour, whether you’re out for a weekend or a full day trek. Table: Quick Reference—Guide to Motorcycle Riding Fatigue & Best Practices Symptom Prevention Tip When to Take Action Drowsiness Increase hydration, plan breaks The moment drowsiness hits Mental fog Take a mindfulness or focus break Every 90 minutes Sore muscles Adjust position/stretch every hour At first sign of discomfort Lack of concentration Try cognitive exercises, rest Before risky situations Lists of Must-Do Habits to Manage and Overcome Fatigue on Motorcycle Rides Do: Schedule frequent breaks to stay awake and refreshed Do: Check your bike ergonomics for comfort and posture Don't: Ignore early signs of fatigue—act immediately Don't: Rely solely on caffeine to overcome fatigue People Also Ask: Key Questions About Managing Fatigue on Motorcycle Rides What is the 1% rule in motorcycles? The 1% rule is often quoted in motorcycle culture, referring to riders who operate outside mainstream safety norms. For fatigue management and motorcycle safety, don’t gamble with the odds—choose to be among the 99% who prioritize rest and alertness, which dramatically reduces risk of suffering from motorcycle riding fatigue and related incidents. How should you manage fatigue when riding a motorcycle? Start with a good night’s sleep and proper hydration. During the ride, stop for breaks every hour, stretch, drink water, have a healthy snack, and reassess your energy levels. Avoid pushing through exhaustion; if you experience symptoms—like nodding off, sore muscles, or mental fog—pull over immediately. This proactive approach, used by veteran riders on long rides and motorcycle tours, is your best defense against both mental and physical fatigue on motorcycle rides. What is the 2 4 12 second rule on a motorcycle? This safety rule helps you maintain optimal focus and avoid mental fatigue by ensuring you always scan 2, 4, and 12 seconds ahead on the road for obstacles, changes in traffic, and hazards. Regularly applying the 2 4 12 second rule not only sharpens awareness during a full day ride but also significantly decreases the chances of surprise lapses due to mind wandering. What does 2 fingers down mean to bikers? When riders flash “2 fingers down,” it’s a universal sign of respect and camaraderie, especially on group rides. More than a friendly gesture, it also serves as a subtle check-in—encouraging others to acknowledge their alertness and readiness. In the context of fatigue, this signal is a reminder to look out for each other and stay aware of everyone’s energy and focus during shared motorcycle rides. Frequently Asked Questions (FAQs) About Guide to Motorcycle Riding Fatigue How often should I take breaks to overcome fatigue on motorcycle trips? It’s best to stop every 60–90 minutes, regardless of how you feel. This prevents both mental and physical fatigue from building up. Frequent stops keep your body alert, restore blood flow, and clear your mind—especially important for long rides. What are early warning signs of suffering from motorcycle fatigue? Common signs include yawning, loss of concentration, sore or tingling muscles, and frequent shifting in your seat. If you notice any of these, it’s crucial to take action before fatigue on motorcycle rides becomes a real hazard. Are there specific foods and drinks to help manage fatigue on motorcycle journeys? Yes—focus on water, electrolyte-rich drinks, protein bars, nuts, and fruit. Avoid processed foods high in sugar and simple carbs, which cause spikes and crashes in energy levels. Hydration and balanced nutrition are your allies for overcoming fatigue on motorcycle adventures. Key Takeaways From This Guide to Motorcycle Riding Fatigue Proactive fatigue management is essential for safety on all motorcycle rides Both mental and physical fatigue require attention—don’t neglect either Use expert strategies to overcome fatigue and make every ride enjoyable If you’re committed to staying energized and safe on every ride, remember that fatigue management is just one piece of the puzzle. Proactive care for your motorcycle—especially as seasons change—can further enhance your comfort, performance, and peace of mind on the road. For a deeper dive into year-round maintenance strategies that complement your fatigue-fighting habits, check out the comprehensive guide to seasonal bike care secrets every rider must know. By combining smart self-care with expert bike maintenance, you’ll be ready to tackle any adventure with confidence and control. Stay Energized—Contact the Experts Call Nasty Performance Motorcycle Shop Today: 847-458-4858

Beginner’s Guide to Riding in Hot Weather Without Heat Stress

Did you know that the human body can lose as much as 1. 5 liters of water per hour while cycling in the heat, potentially turning a hot day out into a dangerous health emergency? Extreme heat doesn’t just make you sweat—it can stealthily sap your focus, dull reaction time, and leave you open to heat stress or even heat stroke. This comprehensive beginner’s guide to riding in hot weather uncovers how to stay cool, ride safely, and outsmart the hottest conditions to ensure every mile remains enjoyable and safe. Riding in Hot Weather: Why It’s Different and How to Prepare Riding in hot weather is more than just a challenge—it’s a test of preparation, knowledge, and respect for your limits. Unlike cooler conditions, hot weather riding places extra stress on both your body and your gear. The fierce sun, sweltering air, and rising pavement temperatures can quickly turn an enjoyable ride into a risky one if you're unprepared. High humidity slows your body's ability to cool down through sweat, raising your core temperature, increasing heart rate, and paving the way for heat exhaustion and heat stroke. This means you’ll need to approach each ride with new strategies, not just your usual routine. Let this guide arm you with tools, tips, and real-life tactics to beat heat stress and keep every adventure safe and rewarding. Whether you’re commuting, tackling a century, or planning a motorcycle ride on a hot day, knowing how to anticipate risks, monitor your body, and adjust your approach makes all the difference. Practical insights here show you how simple changes—like planning frequent breaks, wearing ventilated gear, and choosing the right hydration strategy—add up to a safer, more enjoyable experience. Embrace these lessons, and riding in hot weather becomes an opportunity, not a setback. What You’ll Learn How hot weather impacts riding comfort and safety Recognizing signs of heat exhaustion and heat stroke Gear and hydration tips for cycling in the heat Real-life strategies to stay cool and reduce heat stress on the road While preparing for hot weather rides, it's also wise to consider how seasonal changes affect your bike’s performance and longevity. For a deeper dive into essential maintenance tips that keep your ride in top shape year-round, check out these seasonal bike care secrets every rider should know. Understanding Heat Stress for Riders: The Real Risks Heat stress is a silent adversary on any hot weather ride, often developing before you even realize it’s happening. The line between discomfort and danger can blur quickly—especially as your core temperature rises and dehydration sets in. Heat exhaustion is usually the first stage, triggered by fluid and salt loss. Symptoms like dizziness, nausea, heavy sweating, and confusion should never be ignored, as they’re warning signs that your body is struggling. If conditions worsen or no action is taken, heat stroke can develop—a true medical emergency with symptoms such as flushed skin, lack of sweating, rapid pulse, and altered mental state. Recognizing these cues early and acting fast is a fundamental skill every rider needs. This beginner’s guide to riding in hot weather details clear differences between heat exhaustion and heat stroke and explains what to do at every stage. Whether you’re cycling in the heat, riding in hot weather, or simply trying to stay cool on a summer road trip, your health always comes first. Being aware of risk factors like high humidity, intense sun, full riding gear, and lack of shaded breaks gives you the tools to ride safely and avoid riding into danger. Condition Symptoms What to Do Outcomes Heat Exhaustion Heavy sweating, weakness, dizziness, headache, nausea, cool/clammy skin, rapid pulse Stop riding; move to shade; drink water or electrolyte drink; use ice cubes or wet cloths; monitor symptoms Often resolves with quick response; can develop into heat stroke if untreated Heat Stroke Hot, dry/flushed skin; confusion; no sweating; rapid, strong pulse; high body temperature Call emergency services (911); immediate cooling (shade, cold packs); do not give fluids if unconscious Life-threatening; needs urgent medical attention “Temperature extremes are not just uncomfortable—they can quietly sabotage your physical performance and become dangerous if you’re unprepared.” Cycling in the Heat: The Science Behind Heat Stress What Happens to Your Body During Weather Riding When you head out cycling in the heat, your body launches into protective mode to keep cool. As the temperature rises, so does your heart rate, pumping blood to the skin where sweat evaporates to dissipate heat. But in hot weather, humidity or intense sun can overwhelm this natural cooling system. Sweat production increases, but if you don’t replenish fluids and electrolytes, dehydration sets in—leading to higher core temperatures and sluggish performance. The result? Your reaction time slows, decision-making suffers, and risk of heat exhaustion and heat stroke skyrockets. Even a short ride can turn dangerous if you don’t respect what your body is telling you. It’s a common challenge for beginners and experienced riders alike: the first warning sign may just be mild fatigue or a dry mouth, but the true threat is often invisible until it’s severe. That’s why understanding how your body copes—and sometimes fails—in hot weather is key to every safe and enjoyable ride. Common Triggers for Heat Exhaustion and Heat Stroke There are several classic triggers for heat stress during weather riding. Direct exposure to the sun for prolonged periods, riding in the hottest hours, neglecting hydration, or donning full, non-breathable gear can tip you over the edge. Riders often underestimate the added risk from reflective roads, which boost the temperature around your body even further. The back of your neck and other exposed areas are especially vulnerable, and once your body’s cooling mechanisms are overwhelmed, core temperature rises dangerously. Additional factors—like a high intensity pace, inadequate shade stops, and heavy clothing—can make even a moderate day feel like extreme heat. Understanding these common triggers helps you not only plan better, but also recognize early warning signs and act before things get dangerous. Essential Pre-Ride Planning from the Beginner’s Guide to Riding in Hot Weather Reviewing Weather Riding Alerts and Heat Index Before every ride in hot weather, it’s critical to check local weather riding alerts and the heat index—a measure that combines temperature and humidity to gauge what the air actually ‘feels like. ’ Even on a breezy morning, a soaring heat index can turn a ride into a health risk. Seasoned cyclists know to adapt plans to shifting conditions, sometimes rescheduling to the early evening or dawn when temperatures are safer. Failing to monitor these alerts can mean riding right into extreme heat and stacking the odds against your safety and comfort. Checklist – What to Prepare Before High-Temperature Rides Monitor forecast, heat index, and weather alerts Plan a shaded route with frequent breaks Charge your phone and map rest stops Pack an electrolyte-rich hydration pack Choose lightweight, ventilated gear Apply sunscreen and bring backup sunglasses Let someone know your route and estimated return time Understanding „How Hot Is Too Hot for Riding?“ There’s no single number for “too hot,” but a heat index above 90°F (32°C) should have every rider on high alert. If the forecast calls for excessive heat warnings or UV levels are extreme, it’s best to avoid riding or switch plans to a cooler part of the day. Pushing through hot weather not only feels uncomfortable—it can lead to irreversible health risks. Heat sensitivity is personal: factors like age, fitness, and medical history can change your risk. When in doubt, err on the side of caution and prioritize your health, not your mileage goals. “Respect the forecast—riding your motorcycle in extreme heat isn’t only about comfort but about long-term health and safety.” Smart Gear Choices for Riding in Hot Weather Protective vs. Breathable: What to Wear When Cycling in the Heat Choosing what to wear is a balancing act between safety and staying comfortable. Breathable, ventilated gear is your best friend in hot weather. Mesh fabrics and moisture-wicking layers keep airflow moving and sweat evaporating, reducing your risk of overheating. However, don’t sacrifice protection: even on a hot day, proper padding makes the difference between a close call and a serious road rash. For motorcycle rides, look for lightweight jackets with ventilation panels and built-in armor, and always opt for eye protection to guard against sun glare and debris when cycling in the heat. The right gear lets you stay cool and ride safely, no matter how high the mercury climbs. Consider switching to lighter gloves, ventilated shoes, and bandanas for the back of your neck, all engineered to beat the heat while keeping you protected from wind and road hazards. Selecting Hot Weather Helmets, Jackets, and Gloves The right helmet can mean the difference between a miserable and a refreshing ride. Seek out models with multiple vents and moisture-wicking internal liners. For gloves, lightweight designs with perforations or mesh backs allow your hands to breathe. When it comes to jackets, look for those designed specifically for weather riding, offering protective armor while maximizing airflow. Don’t forget reflective details—they help keep you visible in the scorching midday sun or early evening light. For motorcycle riders, mesh jackets with armor, short-cuff gloves, and summer-rated boots keep safety high and heat at bay. Always try before you buy; fit and comfort are essential, as pinching or tight clothing increases sweat and discomfort. Investing in dedicated hot weather gear prepares you not just for today’s ride, but for every warm day ahead. Innovative Accessories to Stay Cool Simple accessories can make dramatic differences in comfort and performance during hot weather riding. Cooling towels, evaporative bandanas, and vented balaclavas offer targeted relief for exposed areas like the back of your neck. Keep a small pack of ice cubes or a cold gel insert handy for rest stops. Hydration packs with insulated tubes help ensure a chilly drink is always at hand, and handlebar-mounted fans provide added airflow for those tackling extreme heat conditions. Technology also plays a role: smart watches now feature core temperature and heart rate tracking to alert you to early warning signs of heat stress before symptoms worsen. Even simple tweaks—like choosing lighter helmet colors, or swapping in more airy gear—can help you stay cool and focused. Prioritize gear that keeps sweat moving off your skin and supports your body’s natural cooling efforts. Hydration and Nutrition: Top Fueling Tactics for Cycling in the Heat How to Stay Hydrated: Water, Electrolytes, and Timing Hydration is your top defense against heat stress. Always start a ride well-hydrated and continue to stay hydrated by sipping water every 15-20 minutes, not just when thirsty. For rides over an hour in the heat, consider drinks formulated with electrolytes to replace the salts lost in sweat. This maintains a balanced heart rate and helps prevent muscle cramps and heat exhaustion. Timing matters: pre-hydrate before the ride, keep a bottle accessible while on the move, and replenish fluids as soon as you finish. Many athletes swear by using a hydration pack—these make it easier to sip frequently, allowing your focus to stay on the road, not your thirst. Avoid sugary drinks and caffeine, as they can accelerate dehydration. Mastering smart hydration is essential for every successful ride, whether you’re cycling in the heat or riding in hot weather on your motorcycle. Quick List: Best Drinks and Snacks for Weather Riding Electrolyte sports drinks (low sugar) Cold water (consider adding ice cubes for refreshment) Coconut water (natural electrolytes) Bananas, pretzels, or trail mix for sustained energy Energy gels or chews with added sodium and potassium Product Type Best Features Hydration Pack Hands-free water carrier Easy access, large capacity, keeps water cold Electrolyte Tablets Additive for water bottles Customizable, lightweight, easy to pack Coconut Water Natural drink Supplies potassium, low sugar, refreshing Sports Drink Bottle or powder Optimized salt/sugar blend, many flavors Warning Signs: Early Symptoms of Heat Exhaustion Recognizing early warning signs of heat exhaustion can stop a crisis before it begins. Watch for heavy sweating, muscle cramps, paleness, dizziness, headache, nausea, or a rapid but weak pulse. Feeling lightheaded, having trouble focusing, or noticing a drop in physical or mental energy means it’s time to take a break and cool down. Ignoring these symptoms invites further risk—once heat stress progresses, the threshold for recovery decreases dramatically, especially during prolonged rides in the heat. If you notice these signs, don’t hesitate: seek shade, begin hydration, and apply cool compresses to exposed areas. Your body is telling you it’s time to stop and recover—listen and avoid riding back into danger. On-the-Road Tactics: Staying Cool, Alert, and Safe Scheduling Frequent Breaks and Shade Stops One of the golden rules from every beginner’s guide to riding in hot weather: schedule frequent breaks. Never push through without pausing and assessing how you feel. At every opportunity, stop in shaded areas, remove your helmet, and soak a cloth in cool water for your face and the back of your neck. These shade stops lower core temperature, help keep heart rate steady, and allow you to hydrate effectively. Smart riders incorporate pre-identified rest stops into their route, turning breaks from a chore into a strategic advantage. On particularly hot days, even five extra minutes every hour can tip the scales toward safety, helping you stay cool and ride safely through the summer months. Bring a small snack for these pauses to maintain energy and support ongoing hydration. Adjusting Your Pace for Extreme Heat Even experienced cyclists need to slow down in extreme heat. A reduced pace lowers your risk of overheating, giving your body time to adapt and sweat more efficiently. Save hard efforts for cooler conditions—conserve energy for emergencies. The best riders know that skill is not just speed, but smart adaptation to conditions. If you find your heart rate is unusually high, or sense you’re overheating, ease off, shift to lower gears, and focus on smooth, steady pedaling. Adaptability separates riders who finish strong from those who face heat stress mid-ride. Remain aware of early warning signs and err on the side of caution: there’s no such thing as “too slow” when your health is on the line. Top 5 Techniques to Beat Heat Stress While Riding Start early or late—avoid midday sun Use ventilated gear and light colors Hydrate before, during, and after the ride Schedule frequent breaks in the shade Apply sunscreen and use cooling accessories Recognizing and Responding to Heat Stroke and Heat Exhaustion First Aid Steps for Riders Suffering from Heat Stress If you or a fellow rider shows signs of heat exhaustion or heat stroke during a ride, it’s critical to respond immediately. Move to a shaded area and remove excess gear to help cool the body quickly. Provide cool water or an electrolyte drink only if the person is conscious and able to drink. Apply wet towels or ice cubes to the neck, armpits, and wrists—these exposed areas help lower core temperature. Monitor closely; if symptoms progress to confusion, seizures, or unconsciousness, call for emergency help right away. Never leave a rider with severe symptoms alone, and avoid riding further until they have recovered. The first five minutes can mean the difference between a safe recovery and a life-threatening emergency when dealing with heat stress on the road. “Knowing what to do in the first five minutes can save a life—yours or a fellow rider’s.” Special Considerations for Motorcycle Riders: Adapting Your Beginner’s Guide to Riding in Hot Weather Unique Gear and Habits for Riding Your Motorcycle in Hot Weather Motorcycle riding in hot weather comes with its own set of hazards and solutions. Protective gear is non-negotiable—yet the wrong choice can trap heat and increase your risk of heat stress. Opt for mesh jackets with integrated armor, lightweight gloves, moisture-wicking base layers, and ventilated boots. Always wear full eye protection for glare and debris. Fill a hydration pack before every ride; it allows you to stay hydrated without removing your helmet or stopping. Don’t forget to check tire pressure, as extreme heat can impact performance on the road and increase the likelihood of road rash if you go down. The best motorcycle riders know to plan stops every 45-60 minutes, swapping sweaty gear for fresh items if possible. Wear a cooling neck wrap or invest in an airflow helmet to enhance comfort during even the hottest rides. The 4-Second Rule on a Motorcycle: Explained On a motorcycle ride—especially in hot weather—maintaining a safe distance from vehicles ahead is essential. The 4-second rule helps ensure enough stopping distance, giving you time to react if something unexpected occurs. Simply pick a roadside marker and count four seconds from when the vehicle ahead passes it; if you reach the marker before finishing the count, slow down and increase your gap. This is particularly important in extreme heat when fatigue, evaporation, and slowed reaction time increase the risk of collisions or losing control. Adopting the 4-second rule is a cornerstone of safe weather riding for beginners and seasoned bikers alike. People Also Ask: Weather Riding FAQs What Does 2 Fingers Down Mean to Bikers? When you see bikers flashing two fingers down, they’re giving a respectful nod to fellow riders: it means “ride safely” or “keep the rubber side down. ” It’s a friendly gesture promoting unity and reminding riders everywhere to look out for one another, especially during risky conditions like riding in hot weather or challenging environments. What is the 1% Rule in Motorcycles? The 1% rule refers to the idea that 99% of motorcyclists are law-abiding citizens, while the remaining 1% belong to outlaw clubs. For new or casual riders, it’s mostly historical context—it’s not a code to live by, but rather a term that sometimes surfaces in motorcycle culture. As a beginner, focus on positive community, safety, and responsible riding. How Hot is Too Hot for Riding? Most experts agree that a heat index above 90°F (32°C) is when you should reconsider or significantly modify your riding plans. If you’re feeling the effects—dizzy, overheated, or fatigued—it’s already too hot for your body. Listen to your internal cues, monitor local advisories, and remember that safety trumps any personal record or destination. What is the 4 Second Rule on a Motorcycle? The 4-second rule is all about safe following distance: count to four as the vehicle in front of you passes a fixed point. This helps compensate for increased reaction time due to fatigue, distractions, or adverse conditions—like hot weather. Stick to this habit for a safer motorcycle ride year-round. Beginner’s Guide to Riding in Hot Weather: Quick Key Takeaways Plan ahead: check weather, gear up appropriately Stay hydrated and listen to your body Know the signs of heat stress Adapt your riding habits for extreme heat Never underestimate the risk—err on the side of caution Frequently Asked Questions for the Beginner’s Guide to Riding in Hot Weather How do you cool down quickly during a ride? Take off excess gear, find shade, apply a cool wet cloth or ice cubes to the back of your neck and wrists, and sip cool water. Let your body’s core temperature stabilize before resuming. Is mesh gear safe in a crash? Mesh gear can offer effective ventilation, but ensure it also has abrasion resistance and integrated armor for protection comparable to traditional gear. Always buy quality from reputable brands. What foods should you avoid before riding in the heat? Steer clear of heavy, high-fat foods and excessive sugar before a ride. Focus on easy-to-digest snacks like fruit or trail mix that provide quick energy without slowing you down. Can dehydration affect concentration while riding? Yes. Even mild dehydration can dull your focus, slow reaction time, and increase the risk of mistakes or road rash. Make hydration a top priority during any warm-weather or hot day ride. Summing Up the Beginner’s Guide to Riding in Hot Weather Without Heat Stress “Every accomplished rider started as a beginner—mastering hot weather riding ensures your journeys are safe, comfortable, and memorable.” Ready to stay cool and ride safely? Call Nasty Performance Motorcycle Shop Today: 847-458-4858 If you’re committed to making every ride safe and enjoyable, don’t stop with just hot weather strategies. Expanding your knowledge to include year-round bike care can help you avoid unexpected breakdowns and keep your machine running smoothly through every season. Discover expert advice and practical tips in Seasonal Bike Care Secrets Every Rider Must Know—your next step toward mastering both the road and your ride, no matter what the weather brings.

© 2026 Nasty Performance All Rights Reserved. 2035 S. Eastwood Dr., Woodstock, IL 60098 . Contact Us . Terms of Service . Privacy Policy

eyJjb21wYW55IjoiTmFzdHkgUGVyZm9ybWFuY2UiLCJhZGRyZXNzIjoiMjAzNSBTLiBFYXN0d29vZCBEci4iLCJjaXR5IjoiV29vZHN0b2NrIiwic3RhdGUiOiJJTCIsInppcCI6IjYwMDk4IiwiZW1haWwiOiJuYXRlQG5hc3R5cGVyZm9ybWFuY2UuY29tIiwidG9zIjoiUEhBK1BITjBjbTl1Wno0OFpXMCtWMmhsYmlCNWIzVWdjMmxuYmkxcGJpQjNhWFJvSUhWekxDQjViM1VnWVhKbElHZHBkbWx1WnladVluTndPeUI1YjNWeUlIQmxjbTFwYzNOcGIyNGdZVzVrSUdOdmJuTmxiblFnZEc4Z2MyVnVaQ0I1YjNVZ1pXMWhhV3dnWVc1a0wyOXlJRk5OVXlCMFpYaDBJRzFsYzNOaFoyVnpMaUJDZVNCamFHVmphMmx1WnlCMGFHVWdWR1Z5YlhNZ1lXNWtJRU52Ym1ScGRHbHZibk1nWW05NElHRnVaQ0JpZVNCemFXZHVhVzVuSUdsdUlIbHZkU0JoZFhSdmJXRjBhV05oYkd4NUlHTnZibVpwY20wZ2RHaGhkQ0I1YjNVZ1lXTmpaWEIwSUdGc2JDQjBaWEp0Y3lCcGJpQjBhR2x6SUdGbmNtVmxiV1Z1ZEM0OEwyVnRQand2YzNSeWIyNW5Qand2Y0Q0S0NqeHdQanhoSUdoeVpXWTlJbWgwZEhBNkx5OTNkM2N1WjI5dloyeGxMbU52YlNJK2FIUjBjRG92TDNkM2R5NW5iMjluYkdVdVkyOXRQQzloUGp3dmNENEtDanh3UGladVluTndPend2Y0Q0S0NqeHdQanh6ZEhKdmJtYytVMFZTVmtsRFJUd3ZjM1J5YjI1blBqd3ZjRDRLQ2p4d1BsZGxJSEJ5YjNacFpHVWdZU0J6WlhKMmFXTmxJSFJvWVhRZ1kzVnljbVZ1ZEd4NUlHRnNiRzkzY3lCNWIzVWdkRzhnY21WalpXbDJaU0J5WlhGMVpYTjBjeUJtYjNJZ1ptVmxaR0poWTJzc0lHTnZiWEJoYm5rZ2FXNW1iM0p0WVhScGIyNHNJSEJ5YjIxdmRHbHZibUZzSUdsdVptOXliV0YwYVc5dUxDQmpiMjF3WVc1NUlHRnNaWEowY3l3Z1kyOTFjRzl1Y3l3Z1pHbHpZMjkxYm5SeklHRnVaQ0J2ZEdobGNpQnViM1JwWm1sallYUnBiMjV6SUhSdklIbHZkWElnWlcxaGFXd2dZV1JrY21WemN5QmhibVF2YjNJZ1kyVnNiSFZzWVhJZ2NHaHZibVVnYjNJZ1pHVjJhV05sTGlCWmIzVWdkVzVrWlhKemRHRnVaQ0JoYm1RZ1lXZHlaV1VnZEdoaGRDQjBhR1VnVTJWeWRtbGpaU0JwY3lCd2NtOTJhV1JsWkNBbWNYVnZkRHRCVXkxSlV5WnhkVzkwT3lCaGJtUWdkR2hoZENCM1pTQmhjM04xYldVZ2JtOGdjbVZ6Y0c5dWMybGlhV3hwZEhrZ1ptOXlJSFJvWlNCMGFXMWxiR2x1WlhOekxDQmtaV3hsZEdsdmJpd2diV2x6TFdSbGJHbDJaWEo1SUc5eUlHWmhhV3gxY21VZ2RHOGdjM1J2Y21VZ1lXNTVJSFZ6WlhJZ1kyOXRiWFZ1YVdOaGRHbHZibk1nYjNJZ2NHVnljMjl1WVd4cGVtRjBhVzl1SUhObGRIUnBibWR6TGp3dmNENEtDanh3UGxsdmRTQmhjbVVnY21WemNHOXVjMmxpYkdVZ1ptOXlJRzlpZEdGcGJtbHVaeUJoWTJObGMzTWdkRzhnZEdobElGTmxjblpwWTJVZ1lXNWtJSFJvWVhRZ1lXTmpaWE56SUcxaGVTQnBiblp2YkhabElIUm9hWEprSUhCaGNuUjVJR1psWlhNZ0tITjFZMmdnWVhNZ1UwMVRJSFJsZUhRZ2JXVnpjMkZuWlhNc0lFbHVkR1Z5Ym1WMElITmxjblpwWTJVZ2NISnZkbWxrWlhJZ2IzSWdZMlZzYkhWc1lYSWdZV2x5ZEdsdFpTQmphR0Z5WjJWektTNGdXVzkxSUdGeVpTQnlaWE53YjI1emFXSnNaU0JtYjNJZ2RHaHZjMlVnWm1WbGN5d2dhVzVqYkhWa2FXNW5JSFJvYjNObElHWmxaWE1nWVhOemIyTnBZWFJsWkNCM2FYUm9JSFJvWlNCa2FYTndiR0Y1SUc5eUlHUmxiR2wyWlhKNUlHOW1JR1ZoWTJnZ1UwMVRJSFJsZUhRZ2JXVnpjMkZuWlNCelpXNTBJSFJ2SUhsdmRTQmllU0IxY3k0Z1NXNGdZV1JrYVhScGIyNHNJSGx2ZFNCdGRYTjBJSEJ5YjNacFpHVWdZVzVrSUdGeVpTQnlaWE53YjI1emFXSnNaU0JtYjNJZ1lXeHNJR1Z4ZFdsd2JXVnVkQ0J1WldObGMzTmhjbmtnZEc4Z1lXTmpaWE56SUhSb1pTQlRaWEoyYVdObElHRnVaQ0J5WldObGFYWmxJSFJvWlNCVFRWTWdkR1Y0ZENCdFpYTnpZV2RsY3k0Z1YyVWdaRzhnYm05MElHTm9ZWEpuWlNCaGJua2dabVZsY3lCbWIzSWdaR1ZzYVhabGNua2diMllnWlcxaGFXd2diM0lnVTAxVExpQlVhR2x6SUdseklHRWdabkpsWlNCelpYSjJhV05sSUhCeWIzWnBaR1ZrSUdKNUlIVnpMaUJJYjNkbGRtVnlMQ0J3YkdWaGMyVWdZMmhsWTJzZ2QybDBhQ0I1YjNWeUlHbHVkR1Z5Ym1WMElITmxjblpwWTJVZ2NISnZkbWxrWlhJZ1lXNWtJR05sYkd4MWJHRnlJR05oY25KcFpYSWdabTl5SUdGdWVTQmphR0Z5WjJWeklIUm9ZWFFnYldGNUlHbHVZM1Z5SUdGeklHRWdjbVZ6ZFd4MElHWnliMjBnY21WalpXbDJhVzVuSUdWdFlXbHNJR0Z1WkNCVFRWTWdkR1Y0ZENCdFpYTnpZV2RsY3lCMGFHRjBJSGRsSUdSbGJHbDJaWElnZFhCdmJpQjViM1Z5SUc5d2RDMXBiaUJoYm1RZ2NtVm5hWE4wY21GMGFXOXVJSGRwZEdnZ2IzVnlJR1Z0WVdsc0lHRnVaQ0JUVFZNZ2MyVnlkbWxqWlhNdUlGbHZkU0JqWVc0Z1kyRnVZMlZzSUdGMElHRnVlU0IwYVcxbExpQktkWE4wSUhSbGVIUWdKbkYxYjNRN1UxUlBVQ1p4ZFc5ME95QjBieVp1WW5Od096eG9hV2RvYkdsbmFIUWdZMnhoYzNNOUltTnZiWEJoYm5sVFRWTlFhRzl1WlZWd1pHRjBaU0krYm5Wc2JEd3ZhR2xuYUd4cFoyaDBQaTRnUVdaMFpYSWdlVzkxSUhObGJtUWdkR2hsSUZOTlV5QnRaWE56WVdkbElDWnhkVzkwTzFOVVQxQW1jWFZ2ZERzZ2RHOGdkWE1zSUhkbElIZHBiR3dnYzJWdVpDQjViM1VnWVc0Z1UwMVRJRzFsYzNOaFoyVWdkRzhnWTI5dVptbHliU0IwYUdGMElIbHZkU0JvWVhabElHSmxaVzRnZFc1emRXSnpZM0pwWW1Wa0xpQkJablJsY2lCMGFHbHpMQ0I1YjNVZ2QybHNiQ0J1YnlCc2IyNW5aWElnY21WalpXbDJaU0JUVFZNZ2JXVnpjMkZuWlhNZ1puSnZiU0IxY3k0OEwzQStDZ284Y0Q0OGMzUnliMjVuUGxsUFZWSWdVa1ZIU1ZOVVVrRlVTVTlPSUU5Q1RFbEhRVlJKVDA1VFBDOXpkSEp2Ym1jK1BDOXdQZ29LUEhBK1NXNGdZMjl1YzJsa1pYSmhkR2x2YmlCdlppQjViM1Z5SUhWelpTQnZaaUIwYUdVZ1UyVnlkbWxqWlN3Z2VXOTFJR0ZuY21WbElIUnZPand2Y0Q0S0NqeHZiRDRLQ1R4c2FUNXdjbTkyYVdSbElIUnlkV1VzSUdGalkzVnlZWFJsTENCamRYSnlaVzUwSUdGdVpDQmpiMjF3YkdWMFpTQnBibVp2Y20xaGRHbHZiaUJoWW05MWRDQjViM1Z5YzJWc1ppQmhjeUJ3Y205dGNIUmxaQ0JpZVNCMGFHVWdVMlZ5ZG1salpTWWpNems3Y3lCeVpXZHBjM1J5WVhScGIyNGdabTl5YlNBb2MzVmphQ0JwYm1admNtMWhkR2x2YmlCaVpXbHVaeUIwYUdVZ0puRjFiM1E3VW1WbmFYTjBjbUYwYVc5dUlFUmhkR0VtY1hWdmREc3BJR0Z1WkR3dmJHaytDZ2s4YkdrK2JXRnBiblJoYVc0Z1lXNWtJSEJ5YjIxd2RHeDVJSFZ3WkdGMFpTQjBhR1VnVW1WbmFYTjBjbUYwYVc5dUlFUmhkR0VnZEc4Z2EyVmxjQ0JwZENCMGNuVmxMQ0JoWTJOMWNtRjBaU3dnWTNWeWNtVnVkQ0JoYm1RZ1kyOXRjR3hsZEdVdUlFbG1JSGx2ZFNCd2NtOTJhV1JsSUdGdWVTQnBibVp2Y20xaGRHbHZiaUIwYUdGMElHbHpJSFZ1ZEhKMVpTd2dhVzVoWTJOMWNtRjBaU3dnYm05MElHTjFjbkpsYm5RZ2IzSWdhVzVqYjIxd2JHVjBaU3dnYjNJZ2QyVWdhR0YyWlNCeVpXRnpiMjVoWW14bElHZHliM1Z1WkhNZ2RHOGdjM1Z6Y0dWamRDQjBhR0YwSUhOMVkyZ2dhVzVtYjNKdFlYUnBiMjRnYVhNZ2RXNTBjblZsTENCcGJtRmpZM1Z5WVhSbExDQnViM1FnWTNWeWNtVnVkQ0J2Y2lCcGJtTnZiWEJzWlhSbExDQjNaU0JvWVhabElIUm9aU0J5YVdkb2RDQjBieUJ6ZFhOd1pXNWtJRzl5SUR4emRISnZibWMrUEhOd1lXNGdjM1I1YkdVOUltTnZiRzl5T2lOR1JqQXdNREE3SWo1MFpYSnRhVzVoZEdVZ2VXOTFjaUJoWTJOdmRXNTBMM0J5YjJacGJHVWdZVzVrSUhKbFpuVnpaU0JoYm5rZ1lXNWtJR0ZzYkNCamRYSnlaVzUwSUc5eUlHWjFkSFZ5WlNCMWMyVWdiMllnZEdobElGTmxjblpwWTJVZ0tHOXlJR0Z1ZVNCd2IzSjBhVzl1SUhSb1pYSmxiMllwTGp3dmMzQmhiajQ4TDNOMGNtOXVaejQ4TDJ4cFBnbzhMMjlzUGdvS1BIQStKbTVpYzNBN1BDOXdQZ284YUdsbmFHeHBaMmgwSUdOc1lYTnpQU0pqYjIxd1lXNTVUbUZ0WlZWd1pHRjBaU0krVG1GemRIa2dVR1Z5Wm05eWJXRnVZMlU4TDJocFoyaHNhV2RvZEQ0OFluSWdMejRLUEdocFoyaHNhV2RvZENCamJHRnpjejBpWTI5dGNHRnVlVUZrWkhKbGMzTlZjR1JoZEdVaVBqSXdNelVnVXk0Z1JXRnpkSGR2YjJRZ1JISXVMQ0JYYjI5a2MzUnZZMnNzSUVsTUlEWXdNRGs0UEM5b2FXZG9iR2xuYUhRK1BHSnlJQzgrQ2p4b2FXZG9iR2xuYUhRZ1kyeGhjM005SW1OdmJYQmhibmxRYUc5dVpWVndaR0YwWlNJK0tEZzBOeWtnTkRVNExUUTROVGc4TDJocFoyaHNhV2RvZEQ0OFluSWdMejRLUEdocFoyaHNhV2RvZENCamJHRnpjejBpWTI5dGNHRnVlVVZ0WVdsc1ZYQmtZWFJsSWo1dVlYUmxRRzVoYzNSNWNHVnlabTl5YldGdVkyVXVZMjl0UEM5b2FXZG9iR2xuYUhRKyIsInByaXZhY3kiOiJQSEErUEhOMGNtOXVaejVRVWtsV1FVTlpQQzl6ZEhKdmJtYytQQzl3UGdvS1BIQStQSE4wY205dVp6NVVhR1VnYVc1bWIzSnRZWFJwYjI0Z2NISnZkbWxrWldRZ1pIVnlhVzVuSUhSb2FYTWdjbVZuYVhOMGNtRjBhVzl1SUdseklHdGxjSFFnY0hKcGRtRjBaU0JoYm1RZ1kyOXVabWxrWlc1MGFXRnNMQ0JoYm1RZ2QybHNiQ0J1WlhabGNpQmlaU0JrYVhOMGNtbGlkWFJsWkN3Z1kyOXdhV1ZrTENCemIyeGtMQ0IwY21Ga1pXUWdiM0lnY0c5emRHVmtJR2x1SUdGdWVTQjNZWGtzSUhOb1lYQmxJRzl5SUdadmNtMHVJRlJvYVhNZ2FYTWdiM1Z5SUdkMVlYSmhiblJsWlM0OEwzTjBjbTl1Wno0OEwzQStDZ284Y0Q0OGMzUnliMjVuUGtsT1JFVk5Ua2xVV1R3dmMzUnliMjVuUGp3dmNENEtDanh3UGp4bGJUNVpiM1VnWVdkeVpXVWdkRzhnYVc1a1pXMXVhV1o1SUdGdVpDQm9iMnhrSUhWekxDQmhibVFnYVhSeklITjFZbk5wWkdsaGNtbGxjeXdnWVdabWFXeHBZWFJsY3l3Z2IyWm1hV05sY25Nc0lHRm5aVzUwY3l3Z1kyOHRZbkpoYm1SbGNuTWdiM0lnYjNSb1pYSWdjR0Z5ZEc1bGNuTXNJR0Z1WkNCbGJYQnNiM2xsWlhNc0lHaGhjbTFzWlhOeklHWnliMjBnWVc1NUlHTnNZV2x0SUc5eUlHUmxiV0Z1WkN3Z2FXNWpiSFZrYVc1bklISmxZWE52Ym1GaWJHVWdZWFIwYjNKdVpYbHpKaU16T1RzZ1ptVmxjeXdnYldGa1pTQmllU0JoYm5rZ2RHaHBjbVFnY0dGeWRIa2daSFZsSUhSdklHOXlJR0Z5YVhOcGJtY2diM1YwSUc5bUlFTnZiblJsYm5RZ2VXOTFJSEpsWTJWcGRtVXNJSE4xWW0xcGRDd2djbVZ3Ykhrc0lIQnZjM1FzSUhSeVlXNXpiV2wwSUc5eUlHMWhhMlVnWVhaaGFXeGhZbXhsSUhSb2NtOTFaMmdnZEdobElGTmxjblpwWTJVc0lIbHZkWElnZFhObElHOW1JSFJvWlNCVFpYSjJhV05sTENCNWIzVnlJR052Ym01bFkzUnBiMjRnZEc4Z2RHaGxJRk5sY25acFkyVXNJSGx2ZFhJZ2RtbHZiR0YwYVc5dUlHOW1JSFJvWlNCVVQxTXNJRzl5SUhsdmRYSWdkbWx2YkdGMGFXOXVJRzltSUdGdWVTQnlhV2RvZEhNZ2IyWWdZVzV2ZEdobGNpNDhMMlZ0UGp3dmNENEtDanh3UGp4emRISnZibWMrUkVsVFEweEJTVTFGVWlCUFJpQlhRVkpTUVU1VVNVVlRQQzl6ZEhKdmJtYytQQzl3UGdvS1BIQStQSE4wY205dVp6NVpUMVVnUlZoUVVrVlRVMHhaSUZWT1JFVlNVMVJCVGtRZ1FVNUVJRUZIVWtWRklGUklRVlE2UEM5emRISnZibWMrUEM5d1Bnb0tQRzlzUGdvSlBHeHBQbGxQVlZJZ1ZWTkZJRTlHSUZSSVJTQlRSVkpXU1VORklFbFRJRUZVSUZsUFZWSWdVMDlNUlNCU1NWTkxMaUJVU0VVZ1UwVlNWa2xEUlNCSlV5QlFVazlXU1VSRlJDQlBUaUJCVGlBbWNYVnZkRHRCVXlCSlV5WnhkVzkwT3lCQlRrUWdKbkYxYjNRN1FWTWdRVlpCU1V4QlFreEZKbkYxYjNRN0lFSkJVMGxUTGlBc0xpQkJUa1FnVlZNc0lFbFVKaU16T1R0VElFTlZVMVJQVFVWU1V5d2dSVmhRVWtWVFUweFpJRVJKVTBOTVFVbE5VeUJCVEV3Z1YwRlNVa0ZPVkVsRlV5QlBSaUJCVGxrZ1MwbE9SQ3dnVjBoRlZFaEZVaUJGV0ZCU1JWTlRJRTlTSUVsTlVFeEpSVVFzSUVsT1EweFZSRWxPUnl3Z1FsVlVJRTVQVkNCTVNVMUpWRVZFSUZSUElGUklSU0JKVFZCTVNVVkVJRmRCVWxKQlRsUkpSVk1nVDBZZ1RVVlNRMGhCVGxSQlFrbE1TVlJaTENCR1NWUk9SVk5USUVaUFVpQkJJRkJCVWxSSlExVk1RVklnVUZWU1VFOVRSU0JCVGtRZ1RrOU9MVWxPUmxKSlRrZEZUVVZPVkM0OEwyeHBQZ29KUEd4cFBrMUJTMFZUSUU1UElGZEJVbEpCVGxSWklGUklRVlFnS0drcElGUklSU0JUUlZKV1NVTkZJRmRKVEV3Z1RVVkZWQ0JaVDFWU0lGSkZVVlZKVWtWTlJVNVVVeXdnS0dscEtTQlVTRVVnVTBWU1ZrbERSU0JYU1V4TUlFSkZJRlZPU1U1VVJWSlNWVkJVUlVRc0lGUkpUVVZNV1N3Z1UwVkRWVkpGTENCUFVpQkZVbEpQVWkxR1VrVkZMQ0FvYVdscEtTQlVTRVVnVWtWVFZVeFVVeUJVU0VGVUlFMUJXU0JDUlNCUFFsUkJTVTVGUkNCR1VrOU5JRlJJUlNCVlUwVWdUMFlnVkVoRklGTkZVbFpKUTBVZ1YwbE1UQ0JDUlNCQlEwTlZVa0ZVUlNCUFVpQlNSVXhKUVVKTVJTd2dRVTVFSUNocGRpa2dRVTVaSUVWU1VrOVNVeUJKVGlCVVNFVWdVMDlHVkZkQlVrVWdWMGxNVENCQ1JTQkRUMUpTUlVOVVJVUXVQQzlzYVQ0S0NUeHNhVDVCVGxrZ1RVRlVSVkpKUVV3Z1JFOVhUa3hQUVVSRlJDQlBVaUJQVkVoRlVsZEpVMFVnVDBKVVFVbE9SVVFnVkVoU1QxVkhTQ0JVU0VVZ1ZWTkZJRTlHSUZSSVJTQlRSVkpXU1VORklFbFRJRVJQVGtVZ1FWUWdXVTlWVWlCUFYwNGdSRWxUUTFKRlZFbFBUaUJCVGtRZ1VrbFRTeUJCVGtRZ1ZFaEJWQ0JaVDFVZ1YwbE1UQ0JDUlNCVFQweEZURmtnVWtWVFVFOU9VMGxDVEVVZ1JrOVNJRUZPV1NCRVFVMUJSMFVnVkU4Z1dVOVZVaUJEVDAxUVZWUkZVaUJUV1ZOVVJVMGdUMUlnVEU5VFV5QlBSaUJFUVZSQklGUklRVlFnVWtWVFZVeFVVeUJHVWs5TklGUklSU0JFVDFkT1RFOUJSQ0JQUmlCQlRsa2dVMVZEU0NCTlFWUkZVa2xCVEM0OEwyeHBQZ29KUEd4cFBrNVBJRUZFVmtsRFJTQlBVaUJKVGtaUFVrMUJWRWxQVGl3Z1YwaEZWRWhGVWlCUFVrRk1JRTlTSUZkU1NWUlVSVTRzSUU5Q1ZFRkpUa1ZFSUVKWklGbFBWU0JHVWs5TklFOVNJRlJJVWs5VlIwZ2dUMUlnUmxKUFRTQlVTRVVnVTBWU1ZrbERSU0JUU0VGTVRDQkRVa1ZCVkVVZ1FVNVpJRmRCVWxKQlRsUlpJRTVQVkNCRldGQlNSVk5UVEZrZ1UxUkJWRVZFSUVsT0lGUklSU0JVVDFNdVBDOXNhVDRLUEM5dmJENEtDanh3UGp4emRISnZibWMrVEVsTlNWUkJWRWxQVGlCUFJpQk1TVUZDU1V4SlZGazhMM04wY205dVp6NDhMM0ErQ2dvOGNENVpUMVVnUlZoUVVrVlRVMHhaSUZWT1JFVlNVMVJCVGtRZ1FVNUVJRUZIVWtWRklGUklRVlFnUVU1RUlGTklRVXhNSUU1UFZDQkNSU0JNU1VGQ1RFVWdSazlTSUVGT1dTQkVTVkpGUTFRc0lFbE9SRWxTUlVOVUxDQkpUa05KUkVWT1ZFRk1MQ0JUVUVWRFNVRk1MQ0JEVDA1VFJWRlZSVTVVU1VGTUlFOVNJRVZZUlUxUVRFRlNXU0JFUVUxQlIwVlRMQ0JKVGtOTVZVUkpUa2NnUWxWVUlFNVBWQ0JNU1UxSlZFVkVJRlJQTENCRVFVMUJSMFZUSUVaUFVpQk1UMU5USUU5R0lGQlNUMFpKVkZNc0lFZFBUMFJYU1V4TUxDQlZVMFVzSUVSQlZFRWdUMUlnVDFSSVJWSWdTVTVVUVU1SFNVSk1SU0JNVDFOVFJWTWdLRVZXUlU0Z1NVWWdTRUZUSUVKRlJVNGdRVVJXU1ZORlJDQlBSaUJVU0VVZ1VFOVRVMGxDU1V4SlZGa2dUMFlnVTFWRFNDQkVRVTFCUjBWVEtTd2dVa1ZUVlV4VVNVNUhJRVpTVDAwNlBDOXdQZ29LUEc5c1Bnb0pQR3hwUGxSSVJTQlZVMFVnVDFJZ1ZFaEZJRWxPUVVKSlRFbFVXU0JVVHlCVlUwVWdWRWhGSUZORlVsWkpRMFU3UEM5c2FUNEtDVHhzYVQ1VVNFVWdRMDlUVkNCUFJpQlFVazlEVlZKRlRVVk9WQ0JQUmlCVFZVSlRWRWxVVlZSRklFZFBUMFJUSUVGT1JDQlRSVkpXU1VORlV5QlNSVk5WVEZSSlRrY2dSbEpQVFNCQlRsa2dSMDlQUkZNc0lFUkJWRUVzSUVsT1JrOVNUVUZVU1U5T0lFOVNJRk5GVWxaSlEwVlRJRkJWVWtOSVFWTkZSQ0JQVWlCUFFsUkJTVTVGUkNCUFVpQk5SVk5UUVVkRlV5QlNSVU5GU1ZaRlJDQlBVaUJVVWtGT1UwRkRWRWxQVGxNZ1JVNVVSVkpGUkNCSlRsUlBJRlJJVWs5VlIwZ2dUMUlnUmxKUFRTQlVTRVVnVTBWU1ZrbERSVHM4TDJ4cFBnb0pQR3hwUGxWT1FWVlVTRTlTU1ZwRlJDQkJRME5GVTFNZ1ZFOGdUMUlnUVV4VVJWSkJWRWxQVGlCUFJpQlpUMVZTSUZSU1FVNVRUVWxUVTBsUFRsTWdUMUlnUkVGVVFUczhMMnhwUGdvSlBHeHBQbE5VUVZSRlRVVk9WRk1nVDFJZ1EwOU9SRlZEVkNCUFJpQkJUbGtnVkVoSlVrUWdVRUZTVkZrZ1QwNGdWRWhGSUZORlVsWkpRMFU3SUU5U1BDOXNhVDRLQ1R4c2FUNUJUbGtnVDFSSVJWSWdUVUZVVkVWU0lGSkZURUZVU1U1SElGUlBJRlJJUlNCVFJWSldTVU5GTGp3dmJHaytDand2YjJ3K0NnbzhjRDQ4ZFQ1Q2VTQnlaV2RwYzNSbGNtbHVaeUJoYm1RZ2MzVmljMk55YVdKcGJtY2dkRzhnYjNWeUlHVnRZV2xzSUdGdVpDQlRUVk1nYzJWeWRtbGpaU3dnWW5rZ2IzQjBMV2x1TENCdmJteHBibVVnY21WbmFYTjBjbUYwYVc5dUlHOXlJR0o1SUdacGJHeHBibWNnYjNWMElHRWdZMkZ5WkN3Z0puRjFiM1E3ZVc5MUlHRm5jbVZsSUhSdklIUm9aWE5sSUZSRlVrMVRJRTlHSUZORlVsWkpRMFVtY1hWdmREc2dZVzVrSUhsdmRTQmhZMnR1YjNkc1pXUm5aU0JoYm1RZ2RXNWtaWEp6ZEdGdVpDQjBhR1VnWVdKdmRtVWdkR1Z5YlhNZ2IyWWdjMlZ5ZG1salpTQnZkWFJzYVc1bFpDQmhibVFnWkdWMFlXbHNaV1FnWm05eUlIbHZkU0IwYjJSaGVTNDhMM1UrUEM5d1Bnb0tQSEErSm01aWMzQTdQQzl3UGdvOGFHbG5hR3hwWjJoMElHTnNZWE56UFNKamIyMXdZVzU1VG1GdFpWVndaR0YwWlNJK1RtRnpkSGtnVUdWeVptOXliV0Z1WTJVOEwyaHBaMmhzYVdkb2RENDhZbklnTHo0S1BHaHBaMmhzYVdkb2RDQmpiR0Z6Y3owaVkyOXRjR0Z1ZVVGa1pISmxjM05WY0dSaGRHVWlQakl3TXpVZ1V5NGdSV0Z6ZEhkdmIyUWdSSEl1TENCWGIyOWtjM1J2WTJzc0lFbE1JRFl3TURrNFBDOW9hV2RvYkdsbmFIUStQR0p5SUM4K0NqeG9hV2RvYkdsbmFIUWdZMnhoYzNNOUltTnZiWEJoYm5sUWFHOXVaVlZ3WkdGMFpTSStLRGcwTnlrZ05EVTRMVFE0TlRnOEwyaHBaMmhzYVdkb2RENDhZbklnTHo0S1BHaHBaMmhzYVdkb2RDQmpiR0Z6Y3owaVkyOXRjR0Z1ZVVWdFlXbHNWWEJrWVhSbElqNXVZWFJsUUc1aGMzUjVjR1Z5Wm05eWJXRnVZMlV1WTI5dFBDOW9hV2RvYkdsbmFIUSsifQ==

Terms of Service

Privacy Policy

Core Modal Title

Sorry, no results found

You Might Find These Articles Interesting

T
Please Check Your Email
We Will Be Following Up Shortly
*
*
*