Add Row
Add Element
cropper
update

Nasty Performance ~ 847-458-4858 

update
Add Element
  • Blog Home
  • Categories
    • Motorcycle Maintenance
    • Riding Tips & Preps
    • Safety & Inspection
    • Customizations & Upgrades
    • DIY Motorcycle Repairs
    • Motocycle Audio Systems
    • Motocycle Seasonal Care & Storage
    • Engine, Electrical Performance
  • Bike Night
  • Nasty Performance Motorcycle Shop
January 11.2026
1 Minute Read

Motorcycle Winter Storage: Avoid Damage This Season

Did you know that improper motorcycle winter storage can reduce your bike’s lifespan by up to 30%? If you’re not preparing your motorcycle for winter correctly, rust, battery failure, and costly repairs could be waiting for you when spring arrives. This comprehensive guide reveals the best strategies and expert tips to ensure your motorcycle stays in top shape throughout winter and is ready to ride when warmer days return.

Startling Facts About Motorcycle Winter Storage

"Studies show that improper motorcycle winter storage can reduce your bike’s lifespan by up to 30%."

Understanding the Real Risks of Motorcycle Winter Storage

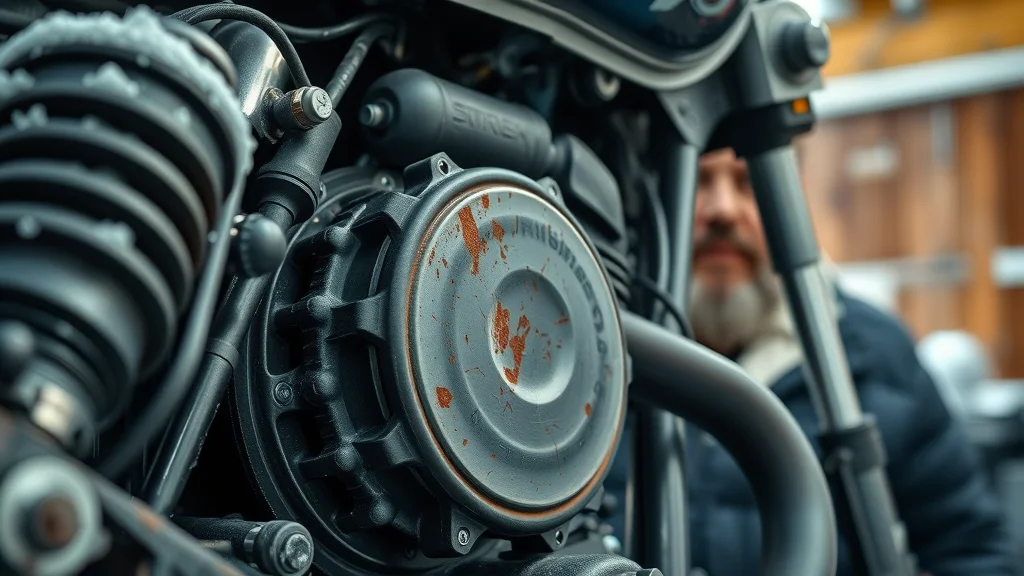
Motorcycle winter storage is not just about keeping your bike out of sight during the colder months— it’s about actively preventing rust, corrosion, and component failure. Exposing your motorcycle to cold temperatures, moisture, and road salt without following winterization best practices can lead to significant mechanical issues. Damage to the gas tank, chain drive, battery, and exhaust pipe can add up quickly, leaving you with maintenance headaches and unexpected costs.

Neglecting proper winter storage can affect your full operating temperature systems, fuel efficiency, and even critical safety features. A winterized motorcycle is not only protected from the elements but is less likely to suffer from corroded connections, flat batteries, and seized brakes. Using a robust motorcycle cover, fuel stabilizer, and following a proven winter storage checklist can extend its life and reduce seasonal maintenance expenses. Let’s dive into the vital steps to successful motorcycle winterization.

Crisp close-up of a motorcycle’s exposed engine with rust spots and concerned owner inspecting, demonstrating motorcycle winter storage risks in a cold garage.

What You'll Learn About Motorcycle Winter Storage

  • How to properly prepare your bike using proven motorcycle winterization techniques

  • Step-by-step checklists for storing a motorcycle inside or outside in winter

  • Important maintenance actions you shouldn’t overlook

  • Expert tips to avoid costly motorcycle storage mistakes

Why Motorcycle Winter Storage Is Critical

The decision to prepare your motorcycle for winter storage is vital for every responsible rider. When you proactively winterize your motorcycle, you’re not just defending against cosmetic damages or minor annoyances. You’re safeguarding the engine, battery, tire pressure, and moving parts against the harsh effects of cold, condensation, and inactivity. Modern bikes—with complex electronics and performance engines—are especially vulnerable to severe winter weather.

Proper motorcycle winterization prevents costly breakdowns, premature parts replacement, and can even optimize your motorcycle’s performance lifespan. Without appropriate care, storing your motorcycle for the winter could mean springtime issues like a dead battery, fuel system clogs, or corrosion inside the exhaust pipe and chain drive. In short, thoughtful winter storage keeps your ride safe and ready for action.

The Dangers of Improper Motorcycle Winter Storage

"Leaving your motorcycle exposed can lead to rust, battery damage, and engine issues by spring," says technician Mike Rogers.

Many owners overlook important details when storing a motorcycle, such as using a battery tender or adding a fuel stabilizer to a full gas tank. If you skip winter storage steps, even minor oversights can result in significant headaches. For instance, condensation in the fuel tank or exhaust pipe encourages rust, while unlubricated chain drives and neglecting battery care can result in costly replacements. Furthermore, exposed wiring and connectors are susceptible to corrosion and animal damage when winterized incompletely.

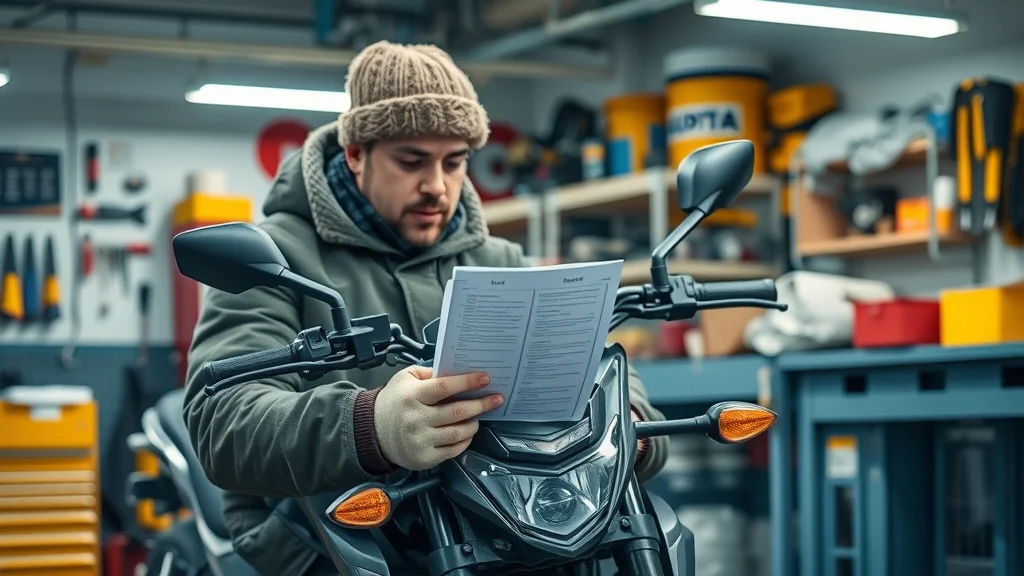
It’s a good idea to follow a proven motorcycle winterization checklist and understand why each step matters. The following sections guide you through the most comprehensive strategies for protecting your motorcycle during an extended period of winter inactivity, ensuring you can avoid the most common and expensive pitfalls.

For riders seeking even more detailed advice on winterizing their motorcycles, our in-depth resources at Nasty Performance offer additional checklists and expert recommendations to help you avoid the most common storage mistakes.

Comprehensive Checklist for Motorcycle Winter Storage

  • Wash and dry your bike

  • Inspect and lubricate the chain

  • Fill your gas tank and add fuel stabilizer

  • Change the oil and filter

  • Remove and maintain the battery

  • Check tire pressure and prevent flat spots

  • Cover the exhaust pipe openings

  • Store on a stand if possible

  • Use a high-quality motorcycle cover

Bright garage with motorcycle being cleaned and drying, owner cheerfully wiping down the bike before winter storage, depicting proper motorcycle winterization steps.

Prepping Your Bike: Motorcycle Winterization Tips

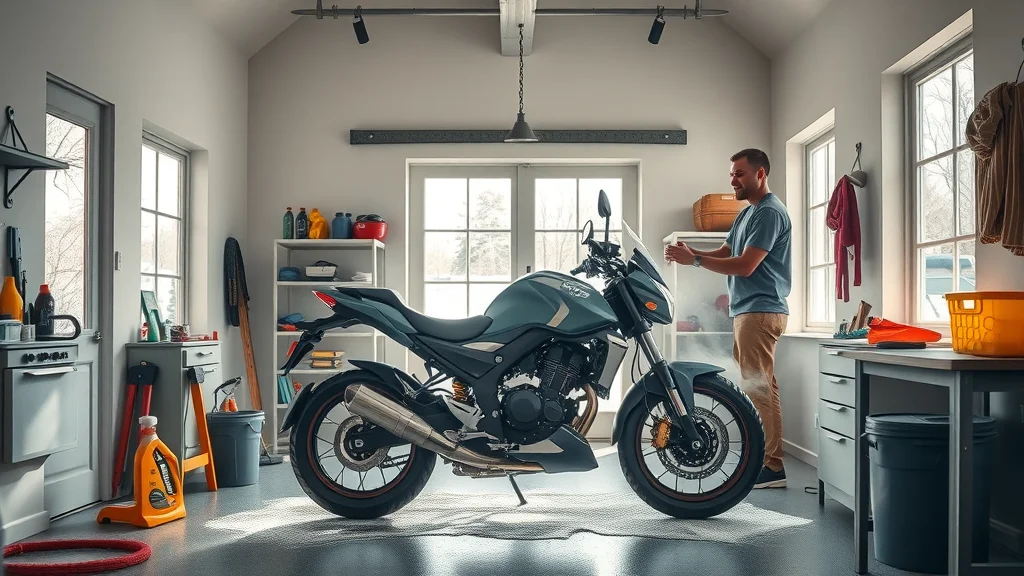
Effective motorcycle winterization is not just for enthusiasts—every rider should know the key steps to prepare a motorcycle for winter. A little proactive care now avoids disappointment when you’re eager to be ready to ride in spring. This section provides you with all the vital steps for full operating temperature protection, from battery care to lubricating your chain drive and using the proper motorcycle cover.

Start with a thorough wash, removing salt, bugs, and road grime from every surface. Once dry, focus on maintenance: change the oil and filter to prevent corrosive deposits, and fill your gas tank with fuel stabilizer to stop ethanol breakdown. Lubricate the chain or shaft drive, check fluid levels, and maintain optimal tire pressure. Depending on your bike, covering the exhaust pipe and airbox prevents critters from taking residence. With these motorcycle winterization techniques, you extend its life and ensure you don’t face expensive repairs next season.

Step-by-Step Guide to Winterize Your Motorcycle

1. Clean Your Bike: Remove dirt, debris, and old grease to prevent rust and corrosion.
2. Lubricate Moving Parts: Pay close attention to the chain drive, cables, and control levers.
3. Gas Tank & Fuel Stabilizer: Fill your gas tank to the top and add the recommended fuel stabilizer; run the engine long enough to cycle stabilized fuel through the system.
4. Engine Oil & Filter: Changing the oil and filter prevents acidic buildup.
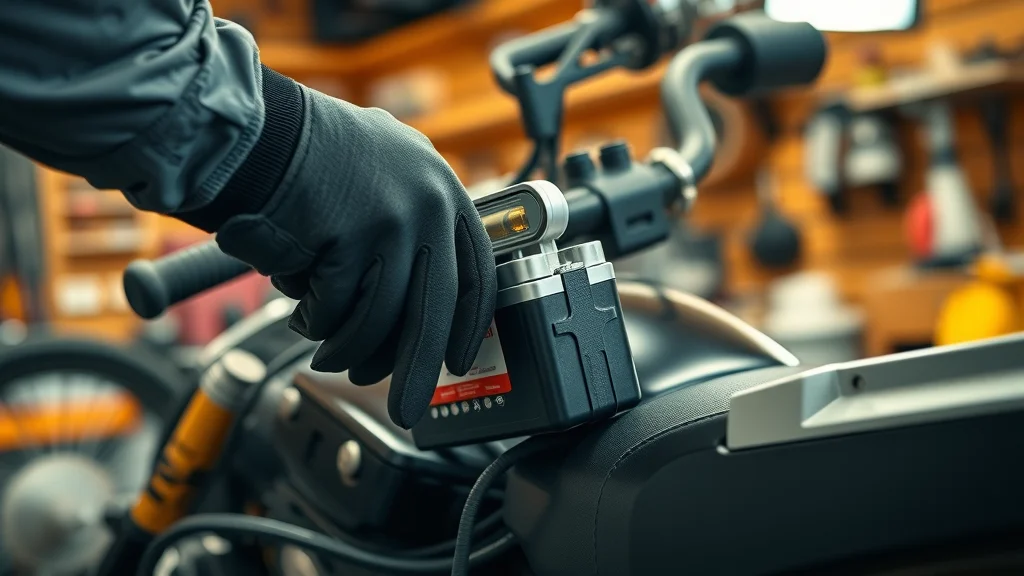
5. Battery Maintenance: Remove the motorcycle battery, store it indoors, and attach a smart battery tender to maintain health when not in use.
6. Tire Care: Inflate tires to the correct tire pressure and use stands to prevent flat spots.
7. Exhaust Pipe & Intake Protection: Use covers or steel wool to block the exhaust pipe and airbox—from rodents and moisture.
8. Storage Cover: Use a weather-resistant motorcycle cover to keep dust, moisture, and UV rays at bay.

Modern motorcycle with winterization supplies, owner in warm gear checking list, illustrating key steps to winterize your motorcycle in a clean workshop.

Essential Supplies for Best Motorcycle Winter Storage

To execute the best winter motorcycle storage strategy, you’ll want to stock up on the following:

  • High-quality motorcycle cover

  • Fuel stabilizer suitable for your bike’s gas tank

  • Smart battery tender, for ongoing battery maintenance

  • Appropriate chain lubricant and cleaning supplies

  • Oil and filter changer kit

  • Tire gauge and inflator

  • Exhaust pipe covers or steel wool plugs

Investing in these essential supplies means you’re set for a stress-free spring startup. These items support not only a preserved motorcycle battery and gas tank but protect against critter nests and environmental damage in indoor and outdoor environments alike.

Where to Store a Motorcycle During Winter

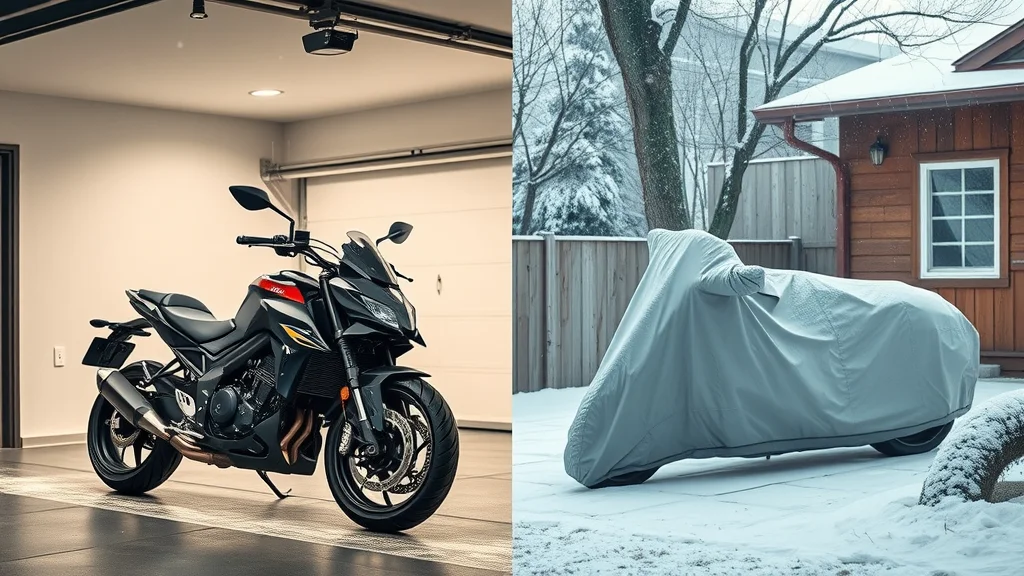
The location you choose for motorcycle winter storage makes a significant difference. Storing your motorcycle indoors offers maximum protection from freezing temperatures, wind, snow, and humidity. If you lack a garage, covered parking, storage units, or even a weatherproof shed can suffice with extra precautions. Storing your motorcycle outside in winter is possible, but you must invest in a premium motorcycle cover and perform checks throughout the season.

Think ahead: Indoor storage may also impact your insurance rates and reduce theft risk. Always secure your bike and document its pre-winter condition before long-term storage.

How to Store a Motorcycle Over the Winter

Answer: Inside is best, but alternatives exist if you lack a garage—see outdoor storage section below.

Storing a motorcycle indoors for the winter is the gold standard. If possible, keep your bike in a dry, climate-controlled garage, basement, or dedicated storage unit. This protects vital systems from condensation, fluctuating temperatures, and corrosion. For homes without garage access, consider renting a small storage unit—monthly storage fees can pale in comparison to potential repair bills.

Outdoor winter storage calls for added vigilance. Use a weatherproof motorcycle cover, park on concrete or wood to avoid ground moisture, and shield the exhaust pipe and airbox. Check your motorcycle periodically for ice formation and animal intrusion. Always weigh the pros and cons of each storage option based on your budget, location, and risk tolerance.

Ideal Locations for Motorcycle Storage

Best options for motorcycle winter storage:

  • Garage or basement: Consistent temperature, security, and protection from precipitation

  • Rented unit: Many facilities offer monthly agreements, keeping storage fees reasonable

  • Enclosed shed: Keeps away wind and moisture, works well with a quality motorcycle cover

  • Under porch/awning: When paired with a proper motorcycle cover, these can substitute in milder climates

Always lock your motorcycle and consider additional antitheft or alarm options during storage.

Split scene of indoor vs outdoor motorcycle storage: one bike safe in a bright garage, one under a premium cover in the snow, comparing motorcycle winter storage options.

Storing a Motorcycle Without a Garage During Winter

Answer: Use weatherproof motorcycle covers, seek covered porches, or consider rental storage units.

No garage? You can still successfully store a motorcycle outside in winter. Use a thick, waterproof motorcycle cover designed for freezing conditions. Waterproof isn’t enough—look for covers that also allow ventilation to prevent trapped moisture which can damage the paint and battery.

If available, relocate your motorcycle to a carport, under-deck, or outdoor structure that offers some respite from precipitation and wind. For affordable, longer-term storage, look into self-storage units—storage fees may be a good idea to avoid thousands in possible damage. Routinely inspect for condensation, rodent nests, and check the chain drive condition. Always disconnect and maintain the battery as part of your motorcycle winterization routine.

Can You Store a Motorcycle Outside in Winter?

The pros, cons, and best practices if indoor storage is not an option.

It’s absolutely possible to store your motorcycle outside in winter when indoor solutions are unavailable, but you must face increased risks. Outdoor storage exposes your bike to condensation, corrosion, ice, and theft. The right weatherproof motorcycle cover and a location shielded from snow drifts and puddles help mitigate damage. If riding is off the table for months, elevate your motorcycle on a stand for improved airflow and tire longevity.

Best practices include: routinely clearing snow from covers, using rodent deterrents near the exhaust pipe and seat, and storing your battery indoors connected to a battery tender. While not as ideal as indoor storage, consistent attention helps reduce seasonal wear and tear. Remember, thorough motorcycle winterization and frequent checkups are the keys to readying your bike for spring.

Advanced Motorcycle Winter Storage: Maintenance Tricks

Maintaining your motorcycle’s key systems during winter maximizes lifespan and reliability. Don’t just park and forget—give special attention to your battery, exhaust pipe, and tires with the following expert winter storage tricks.

These maintenance tips ensure that the battery holds its charge, the exhaust pipe remains rust-free, and tires maintain their integrity during an extended period off the road. A small investment in supplies (like a smart battery tender and exhaust covers) pays major dividends when you’re ready to ride.

How to Protect Your Battery and Electrical System

Most motorcycle batteries lose charge in cold temperatures. Remove the motorcycle battery for the winter, clean the terminals, and store it in a warmer, indoor space. Attaching a smart battery tender (“trickle charger”) keeps the charge at optimal levels, preventing sulfation and loss of battery capacity over time. For modern bikes, disconnecting the battery also helps protect the electronic modules from small electrical leaks or shorts during storage.

If your electrical system includes alarms or trackers, check if they draw power even when the motorcycle is off. For longer winter storage, recheck the battery’s voltage monthly, ensuring it’s in full operating condition by spring. Replace old or weak batteries before winter for total peace of mind.

Treating the Exhaust Pipe and Airbox

Rust and critter infestations commonly start in the exhaust pipe and airbox during long storage periods. Block each exhaust pipe opening with a rag or steel wool (removing it before you ride, of course). This simple act prevents condensation and rodents from causing costly damage inside the exhaust system. Similarly, tape over or stuff the airbox intake if accessible. Combined with a thorough cleaning, this measure preserves the delicate internals from corrosion and contamination throughout winter.

After winter storage, double-check these areas for blockages before running the bike again. Keeping your fuel system and exhaust pipe clean ensures quick startup and prevents unpleasant surprises when you’re eager to get back on the road.

Why Tire Care Matters During Motorcycle Winter Storage

Motorcycle tires can develop flat spots and dry rot if left underinflated or under load for an extended period. To prevent this, inflate your tires to the manufacturer’s recommended tire pressure before storing. If possible, raise your motorcycle on a center or paddock stand to relieve pressure and keep the rubber from developing memory spots. If floor stands aren’t available, roll your motorcycle slightly every few weeks, and check for signs of cracking or low pressure.

Cold weather reduces air pressure in tires, so periodic checks with a gauge during winter storage are a good idea. Taking these extra tire precautions means your ride will feel smooth and safe on your first outing in spring.

Close-up of hand attaching a battery tender to motorcycle battery in a warm, organized garage, demonstrating vital motorcycle battery care for winter storage.

Motorcycle Covers and Additional Protection for Winter Storage

A robust motorcycle cover is your first line of defense against the elements during winter storage—indoors or out. Not all covers are created equal; look for multi-layer construction, breathability, and secure ties to keep out moisture while preventing mold and mildew. Covers with reinforced panels protect from minor dings, while UV protection keeps paint vibrant and plastics from cracking.

Additional protection may include chock blocks for tire safety, desiccant packs to control humidity, and rodent deterrent sachets placed around your storage area. These added steps help ensure your motorcycle emerges from winter in full operating condition.

Choosing the Right Motorcycle Cover

When selecting a motorcycle cover for winter storage, choose quality over price. Covers should be waterproof yet breathable, with elastic hems that seal tightly at the bottom. Models with heat-resistant panels prevent damage if you cover a slightly warm engine.

Investing in a reputable motorcycle cover designed specifically for your bike’s size and shape can greatly reduce weather-related and environmental damage. If you store your motorcycle outside in winter, opt for extra tie-downs and lockable grommets for both security and practical weather protection. Remember: a well-chosen cover protects your effort and your finances.

Extra Steps for Storing a Motorcycle Long-Term

If your motorcycle will remain unused for several months, step up your winterization with sector-leading strategies. Fully empty any carburetor bowls by running the bike and then draining the float, especially for older models—this prevents gumming of the fuel system. Spray fogging oil into the spark plug holes and turn the engine a few times for extended storage protection.

Document your storage process and keep a printed motorcycle winterization checklist for easy reference. Label and bag up fasteners or accessories you remove for safekeeping. When spring returns, this diligence will make your motorcycle ready to ride with minimal fuss and maximum reliability.

Popular Questions: Motorcycle Winter Storage (People Also Ask)

How to store a motorcycle over the winter?

Answer: Clean your motorcycle, fill the tank, add stabilizer, change the oil, disconnect and maintain the battery, inflate the tires, cover exhaust and air intakes, and store in a cool, dry location with a motorcycle cover.

How to store a motorcycle without a garage during winter?

Answer: Use a weatherproof motorcycle cover, park in a sheltered spot or consider renting a self-storage unit, lubricate all moving parts, and routinely check for moisture or critter activity.

What is the 12 second rule on a motorcycle?

Answer: The 12 second rule refers to looking 12 seconds ahead while riding to spot hazards early, a vital safety tip in all seasons, especially important before returning to riding post-winter.

Should I fill my gas tank for winter storage?

Answer: Yes, a full tank—treated with fuel stabilizer—prevents moisture build-up and fuel system corrosion during motorcycle winter storage.

Comparison Table: Indoor vs. Outdoor Motorcycle Winter Storage

Feature

Indoor Storage

Outdoor Storage

Protection from Elements

High

Low-Moderate

Theft Risk

Lower

Higher

Moisture/Rust Prevention

Excellent

Moderate

Battery Longevity

Better

Variable

Maintenance Access

Easy

Difficult

Infographic of indoor and outdoor motorcycle storage comparison, with icons for garage, lock, battery, and tools highlighting motorcycle winter storage best practices.

Essential FAQs on Motorcycle Winter Storage

  • How do I prevent rodents during motorcycle winter storage?

    • Seal exhaust pipe openings and airboxes, use rodent deterrent sachets around your storage area, and occasionally check for nests or chewing damage.

  • Can I start my motorcycle occasionally during winter?

    • It’s better not to unless you can run it to full operating temperature each time; otherwise, condensation may increase the risk of rust and electrical issues.

  • Is it bad to store a motorcycle on its tires all season?

    • Long-term storage directly on tires can cause flat spots and premature wear. Use center or paddock stands if possible; otherwise, keep tires fully inflated and rotate the bike occasionally.

  • How soon after winter storage can I ride my motorcycle?

    • Once you’ve checked tire pressure, removed intake/exhaust covers, reconnected the battery, and performed basic safety checks, your motorcycle should be ready to ride.

Key Takeaways: Protect Your Motorcycle with Proper Winter Storage

  • Proper motorcycle winter storage prevents costly repairs and extends your bike’s lifespan

  • Indoor storage and regular maintenance are crucial

  • Don’t forget to maintain battery health and cover exhaust pipes

  • A quality motorcycle cover is essential whether inside or out

Expert Video Guide: Motorcycle Winter Storage Tutorial

Watch: Step-By-Step Process to Winterize Your Motorcycle

Professional video tutorial featuring a certified motorcycle technician demonstrating a detailed motorcycle winterization process in a well-lit workshop. Close-up and wide shots of cleaning, maintenance, and cover application, with voiceover explanations and easy-to-follow steps, designed for beginner and experienced riders alike.

Conclusion: Maximize the Benefits of Proper Motorcycle Winter Storage

"Winter is tough on motorcycles, but smart storage makes spring rides trouble-free."

Take a proactive approach to motorcycle winter storage and your bike will reward you with peak performance and minimal springtime headaches.

As you master the essentials of motorcycle winter storage, remember that ongoing learning and expert support can make all the difference in your riding experience. For those interested in advanced maintenance strategies, seasonal upgrades, or personalized advice, the team at Nasty Performance is continually developing new resources to help you get the most from your machine year-round. Stay tuned for future updates and in-depth guides that will empower you to protect, maintain, and enhance your motorcycle—no matter the season. Your next level of motorcycle care is just a step away.

Ready to Protect Your Bike?

Call Nasty Performance Motorcycle Shop Today: 847-458-4858

Motocycle Seasonal Care & Storage

0 Comments

Write A Comment

*
*
Please complete the captcha to submit your comment.
Related Posts All Posts

Here's How to Start Your Motorcycle After Winter Storage

Did you cover all the crucial steps before restarting your motorcycle, or could one overlooked detail leave you stranded this spring? Did Winter Storage Leave Your Motorcycle Out in the Cold? Opening Hook: Should You Follow Standard Advice to Start Your Motorcycle After Winter? As motorcycle enthusiasts eager for the first ride of spring, we’ve all faced the frustration of twisting the ignition and hearing its fruitless click after a long winter break. Should you just follow the same old advice, or are there vital steps you’re missing? Restarting your bike after a period of time in cold storage isn’t just about hitting the starter; neglecting details like a drained battery, stale fuel, or contaminated spark plug can create unnecessary headaches—or worse, lasting damage. Before you pull your prized machine back onto the open road, this guide will walk you through proven, mechanic-backed strategies to start your motorcycle after winter efficiently and safely. By addressing everything from fluid levels to tire pressure, you’ll avoid common pitfalls, minimize risk of engine knock or rough starting, and maximize your ride’s performance for the entire season. Let’s break down what you need to know before your first throttle twist, so your journey starts with confidence — not complications. What You'll Learn When You Start Your Motorcycle After Winter Storage Understand why winter affects your motorcycle performance Step-by-step process to start your motorcycle after winter Expert tips on spark plugs, fluid level, and tire pressure Proactive maintenance for a smooth riding season The Impacts of Winter Storage on Your Motorcycle How Extended Inactivity Affects Your Motorcycle During winter months, your motorcycle faces a barrage of challenges that can quietly erode its performance. The most pressing factor is battery drain. If you didn’t use a smart charger over the winter, your bike’s battery may be too weak to turn the engine. This is especially true for newer models with onboard electronics that draw power even at rest. Inactivity also accelerates fuel system deterioration; old gasoline can degrade, clog fuel lines, gunk up the fuel pump, or even cause varnish buildup that affects starts and idling. Spark plugs can collect moisture or become fouled, making ignition unreliable. Flat spots may develop on tires, critical fluid levels—from engine oil to brake fluid—may drop, and rubber components such as belts and seals can show signs of dry rot. Recognizing these potential pitfalls is the first step in ensuring your motorcycle doesn’t just start but runs like a bad boy when you need it most. By preparing for these specific challenges, you minimize the risk of damage and avoid costly, frustrating setbacks. If you want to take your post-winter maintenance a step further, consider exploring additional seasonal care tips that can help you prevent common issues before they arise. For a deeper dive into practical strategies, check out these essential seasonal bike care secrets every rider should know. Essential Preparations Before Trying to Start Your Motorcycle After Winter Inspecting and Charging the Battery How to safely access your motorcycle battery Best practices for battery charging Before you try to start your motorcycle after winter, assessing the battery is non-negotiable. Begin by locating the battery—often under the seat or a side cover—and visually check for corrosion or loose cables. Remove the battery with gloves to avoid acid contact, and use a smart charger, not a jump start, since sudden surges can damage sensitive electronics found in modern bikes. A voltage reading below 12.5V indicates a weak battery; charge it for several hours (or preferably overnight) until fully topped off. If your battery won’t hold a charge, it’s best to replace it to prevent early season headaches. While reinstalling, clean terminals with a wire brush and apply dielectric grease to ward off corrosion. Always reconnect the positive terminal first. If your motorcycle has sat for an extended period of time, a healthy battery is your insurance against electrical gremlins. Skipping this step risks more than a no-start—it could leave you stranded and damage your workhorse’s starting circuit. Check the Oil and Fluid Levels Before You Start Your Motorcycle After Winter Checking your oil level is crucial after months of hibernation. Contaminants, moisture, and degraded oil can jeopardize piston rings, bearings, and the engine’s longevity. Use a clean dipstick or sight glass to check the level and look for discoloration or milkiness—signs of water intrusion or old oil. Top off with fresh oil if needed, but an outright oil change (including a new oil filter) is best for most riders at season’s start. Don’t forget other fluids. Inspect brake fluid reservoirs for clarity and adequate level, remembering that dark fluid may indicate a needed flush. Double-check coolant level in liquid-cooled bikes, as freezing or evaporation may lower the mark. Transmission and clutch fluid, if separate, should remain clear with no burnt odor. Neglecting these areas can compromise safety and function, making fluid checks one of the most fundamental yet overlooked tasks when you start your motorcycle after winter. Examining the Spark Plug and Spark Plugs for Reliable Starting How to inspect and clean spark plugs When to replace a spark plug before starting your motorcycle Your spark plug (and on multi-cylinder bikes, the spark plugs) sit at the heart of reliable ignition. Begin by pulling the plugs with a dedicated tool, examining them for carbon deposits, oil fouling, or signs of corrosion. Clean light deposits with a wire brush; severe fouling or worn electrode tips suggest it’s time to replace them. When reinstalling, apply anti-seize to the threads and ensure each plug hole is dry and free from debris to avoid misfires. Upgrading to a fresh spark plug can make a night-and-day difference, reducing starting effort and smoothing idle. If your model requires a gapped plug, measure and adjust to spec; improper gap can sabotage new plugs’ performance. Investing time in these checks prevents elusive starting problems and reduces strain on your battery and starter. Fuel System Checks: Cleaning, Refilling, and Preventing Issues Signs of old fuel in the system How to safely drain and refill the fuel tank Additives and treatments for fuel system health The fuel system is a notorious trouble spot following winter storage. Stale fuel loses combustibility and can gum up the fuel pump, carburetor jets, or injectors. Signs of old gas include sour odor, dark color, and visible residue in the tank or line. If you spot these, carefully drain the tank (off-bike preferred), safely dispose of the bad gas, and refill with fresh gas. Use a funnel to avoid spillage and inspect fuel lines for brittleness or leaks. To fend off future buildup, consider a fuel stabilizer or cleaning additive. These help clear varnishes and prevent water absorption. Run the fuel through by starting the bike; periodic use keeps the fuel system in optimal health, especially important for carbureted or older models. A proactive approach here can save you expensive repairs down the road. Ensuring Correct Tire Pressure After Winter Storage Recommended tire pressure for safe operation Spotting signs of tire damage post-winter Checking your tire pressure is not just routine—it’s life-saving. Tires often lose air pressure during cold months, and underinflation invites flat spots, compromised handling, and increased wear. Use a reliable pressure gauge to check both front and rear tires, inflating to the specification listed on your swingarm decal or owner’s manual. Carefully inspect the sidewalls and tread for signs of dry rot, cracking, or embedded debris. Look for signs of damage like bubbles, odd bulges, or excessive signs of wear. If you spot problems, it’s time to consider replacement before that first spring trip. Ensuring correct tire pressure and sound tire condition boosts safety, maintains grip, and smooths out your initial rides after winter slumber. Step-by-step walkthrough: How to start your motorcycle after winter (battery, spark plugs, fuel system) Step-by-Step Guide: How to Start Your Motorcycle After Winter Confirm your workspace is safe and ventilated Charge and install the battery Check the oil and top off fluid levels Inspect the spark plug and replace if needed Address fuel system by draining or treating old fuel Check tire pressure and inflate as necessary Turn the ignition and monitor engine response Let the engine idle and listen for unusual noises Meticulously following this checklist ensures your motorcycle transitions safely from storage to street. Each step addresses the most common culprits of no-starts and rough initial rides. When you start your motorcycle after winter this way, you not only safeguard its systems but also establish a solid foundation for a fun, worry-free season on the road. Expert Insights: Common Issues When You Start Your Motorcycle After Winter "Many riders overlook the importance of fresh fuel and clean spark plugs after winter, leading to starting troubles and rough idling." – Certified Motorcycle Mechanic, John Randall "A little proactive battery maintenance goes a long way to avoid early season headaches." – Nasty Performance Motorcycle Shop Tech Team Ignoring preventative steps can leave even the baddest bike in the shop instead of on the street. Mechanics consistently report that sludge in the fuel system, old spark plugs, and neglected fluid levels are top culprits for early season service calls. By carefully addressing these issues up front, you greatly reduce the chances of unexpected problems or expensive repairs as you get back in the saddle. Maintenance Tips for Smooth Riding All Season Routine motorcycle maintenance schedule post-winter Keeping an eye on fluid levels, spark plugs, and battery charge Best practices for off-season motorcycle storage A proactive maintenance schedule prevents small issues from escalating into major headaches. Check your bike monthly for fluid levels (oil, coolant, brake fluid), clean and inspect spark plugs, and keep the battery charge topped up. If you have belt drive or chain drive, inspect and lubricate them along with regular tire inspection for pressure and signs of damage. While storing your motorcycle off-season, stabilize the fuel system, disconnect and trickle-charge the battery, and keep tires off cold concrete with paddock stands or boards to avoid flat spots. Cover the bike to protect from dust and rodents, and periodically rotate the wheels. Good off-season habits lead to easy starts and fewer surprises year after year. Task What to Check/Do Recommended Frequency Battery Charge, inspect, clean terminals Before first start, monthly if stored Spark Plug(s) Inspect, clean, replace if worn Before first start, every 5,000-8,000 miles Fluid Levels Check oil, brake fluid, coolant Before first start, every month Tire Pressure Inflate to spec, inspect for dry rot/signs of damage Before first ride, every month Fuel System Drain/refill tank, add stabilizer, check lines Before first start, stabilizer every storage period People Also Ask About Starting Your Motorcycle After Winter How to start a motorcycle after winter? To start your motorcycle after winter, begin by removing the bike from storage and inspecting it for any obvious damage. Fully charge and install the battery, check all fluid levels (oil, coolant, brake fluid), and replace or clean the spark plug. Drain any old fuel from the fuel system and refill with fresh gas, adding a fuel system cleaner if necessary. Check tire pressure and look for signs of dry rot or flat spots. Start the engine, let it idle, and listen for any odd noises before riding. How long can a motorcycle sit without starting? A motorcycle can typically sit for about one to three months without major consequences, as long as the battery is maintained and fluid levels (especially oil and brake fluid) are correct. Longer storage without proper preparation—such as draining the fuel system and stabilizing gas—can result in battery drain, fuel varnish, and tire flat spots. If a bike sits more than a period of time (like a full winter), always check these critical areas before attempting to restart. What is the 12 second rule on a motorcycle? The 12 second rule is a safety guideline for riders: you should scan the road ahead so that you always see at least 12 seconds in the future. This gives ample time to react to unexpected hazards, especially when resuming your riding routine after a long season off. It helps you maintain the correct following distance, anticipate traffic flow, and ride defensively—crucial points after your motorcycle emerges from storage when both you and your bike may need a warmup period. Is it okay to leave gas in a motorcycle over winter? Leaving untreated gas in your motorcycle’s tank over winter can lead to problems like fuel breakdown, gummed-up carburetors or injectors, and corrosion in the fuel system. The best practice is to add a fuel stabilizer to fresh gas and run the engine for several minutes before storage. This ensures stabilized fuel circulates throughout the system, preventing separation and preserving internal components for easy spring starts. Expert tips: Troubleshooting common problems when you start your motorcycle after winter Frequently Asked Questions about How to Start Your Motorcycle After Winter What signs indicate my spark plug or spark plugs need replacing after storage? If the electrode is worn, covered in sooty carbon, or the ceramic insulator is cracked, replace your spark plug. Any sign of persistent engine misfire or hard starts can also indicate plug trouble. How do I check my fuel system for clogs or build-up after winter? Inspect the fuel lines for stiffness or leaks, open the fuel tank for residue or bad odor, and, if possible, drain a small amount from the carburetor or injector for clarity. Running the bike on fresh gas with additive for a short while may help clean out minor build-up, but persistent trouble could mean a deeper clean is needed. Which fluid levels are critical for post-winter starting? Engine oil, brake fluid, and coolant (for water-cooled bikes) must all be at correct levels and in good condition. Contaminants or low levels can result in poor performance or even engine damage. Tips for preserving tire pressure during winter? Inflate tires slightly above recommended pressure before storage and check regularly. Move your motorcycle occasionally or use stands to avoid flat spots, and keep tires off cold concrete to minimize air loss and dry rot. Key Takeaways for Starting Your Motorcycle After Winter Prioritize battery, fuel system, spark plug, and fluid level inspections Address any mechanical issues before riding Follow a proactive maintenance routine for longevity Ready for the Road? Start Your Motorcycle After Winter with Confidence By carefully checking your battery, fluids, spark plugs, and fuel system, you’ve set the stage for a safer, smoother return to the open road this season. If you’re looking to elevate your motorcycle care beyond just the basics of post-winter starting, there’s a wealth of knowledge waiting for you. Discover how to protect your ride year-round, extend its lifespan, and enjoy peak performance in every season by exploring seasonal bike care secrets every rider must know. These expert insights go beyond routine checklists, offering advanced tips and strategies to keep your motorcycle in top shape no matter the weather. Take the next step in your maintenance journey and ensure your bike is always ready for the adventures ahead. Action: Call Nasty Performance Motorcycle Shop Today: 847-458-4858

Seasonal Motorcycle Tune-Up Services to Boost Your Bike’s Life

Did you know that only 40% of riders follow a regular motorcycle maintenance checklist? Skipping seasonal motorcycle tune-up services can drastically reduce your bike’s lifespan and performance. If you want your motorcycle to keep up with the open road and every new riding season, a little proactive care goes a long way. In this guide, we'll reveal how timely maintenance checkups can help your motorcycle run smoothly, deliver optimal performance, and ensure your adventures stay safe and worry-free all year round. Unlocking Longevity: Why Seasonal Motorcycle Tune-Up Services Matter The longevity and reliability of your motorcycle depend heavily on routine maintenance and, specifically, targeted seasonal motorcycle tune-up services. Every riding season brings environmental changes that can impact your bike—think of grit and salt from winter months, or the heat and humidity of summer. These factors stress components like your air filter, brake fluid, fuel lines, and battery, making regular assessments critical. A proper maintenance check before and after the riding season is the key to a bike running smoothly, boosting motorcycle safety, and keeping your adventures rolling. As industry experts caution, neglecting regularly scheduled tune-up services can reduce your engine’s life by half. A full motorcycle maintenance checklist—spanning oil changes, brake pad inspection, chain lubrication, and more—ensures your motorcycle is ready for every weather shift and terrain change. Staying proactive not only safeguards your investment, but it also gives you peace of mind knowing your motorcycle is ready for every journey—no matter the season. Did You Know? Only 40% of Riders Follow a Regular Motorcycle Maintenance Checklist A recent survey uncovered that fewer than half of all motorcycle owners stick to a prescribed maintenance checklist throughout the year. This oversight often leads to preventable problems, from worn brake pads and contaminated brake fluid to neglected air filters and poorly maintained drive chains. Whether you're gearing up for the open road or storing your bike for the winter months, following a seasonal motorcycle maintenance checklist is vital—not just for the bike’s health but for your safety as well. The numbers don’t lie: riders who embrace a scheduled maintenance check experience fewer breakdowns and higher overall satisfaction. "Skipping scheduled seasonal motorcycle tune-up services can halve your bike’s engine life." – Industry Expert What You'll Learn About Seasonal Motorcycle Tune-Up Services The benefits of routine motorcycle maintenance Step-by-step seasonal motorcycle maintenance check How to use a motorcycle maintenance checklist Pro tips for maximizing motorcycle safety with a tune-up Understanding Seasonal Motorcycle Tune-Up Services: A Comprehensive Guide A seasonal motorcycle tune-up service is a targeted maintenance checklist performed at the start and end of each riding season. Much more than a routine oil change, it systematically addresses every part of your motorcycle that can be affected by fluctuating weather and road conditions. From testing the battery during the cold winter months, ensuring your tires are ready for the spring, to checking brake fluid and fuel lines during the summer heat—a comprehensive seasonal tune-up is like giving your bike a reset button. Performing these checks—either yourself or through skilled technicians at a professional motorcycle shop—boosts the bike’s reliability, keeps your ride running smoothly, and ensures optimal performance. Best of all, adhering to a seasonal maintenance checklist also protects your motorcycle insurance cover by demonstrating responsible ownership, which can sometimes even lower premium costs. Let's explore the most important elements you should cover during each seasonal motorcycle maintenance check. For riders looking to deepen their understanding of seasonal care, exploring additional seasonal bike care secrets can provide practical tips and lesser-known strategies to keep your motorcycle in top shape throughout the year. These insights complement your tune-up routine and help address unique challenges each season brings. Key Components of Seasonal Motorcycle Maintenance The core of any effective seasonal motorcycle tune-up services involves paying close attention to the following components. Start with a thorough engine inspection and an oil change to keep the engine running smoothly. Don’t skimp on replacing the air filter, which protects against contaminants year-round. Equally important is the brake fluid check; old fluid or unaddressed brake pad wear can seriously compromise motorcycle safety. Engine inspection and oil change: Fresh oil and a well-maintained engine help ensure your bike delivers optimal performance, especially after tough riding seasons or winter storage. Air filter and brake fluid replacement: Contaminated air filter and brake fluid can hinder engine efficiency and braking response—be proactive and swap them at every maintenance check. Drive chain lubrication: Lubricate the drive chain to lessen friction and extend its working order. Routine chain checks also spot wear before it becomes a costly repair. Electrical system and battery maintenance: Particularly vital after the winter months, battery checks and trickle charger use ensure your bike is ready to start for the new riding season. Inspect the battery for charge and terminal corrosion. Motorcycle Maintenance Checklist for Every Season Staying organized with a seasonal motorcycle maintenance checklist makes it easy to protect your bike’s health and maximize its life. The checklist below compares priority tune-up tasks for winter, spring, summer, and fall—making it easy to see what needs attention as seasons shift. Season Oil Change Brake Fluid Air Filter Battery Tires Chain Lubrication Winter ✔️ Check/Replace Check Maintain (trickle charge) Inspect & Store Properly Lubricate Spring ✔️ Flush/Replace Replace Test/Recharge Inspect Tire Pressure & Tread Lubricate & Adjust Summer Check/Top-Up Check/Top-Up Clean Monitor Monitor for Heat Wear Inspect Often Fall ✔️ Check Check/Clean Prepare for Storage Inspect & Adjust Lubricate Fully Adhering to this maintenance checklist lets you prevent seasonal wear and breakdowns. It’s the ideal tool for both DIY motorcycle enthusiasts and those scheduling professional tune-up services. Step-By-Step Seasonal Motorcycle Maintenance Check Following a detailed maintenance check at the start and end of each season is the best way to ensure your bike is running smoothly and safely on the open road. This step-by-step process includes vital checks across your entire motorcycle, from fluids and filters to tires and electrical. Even if you’re not a skilled technician, these pro tips will make your routine maintenance effective and straightforward. Conduct a visual maintenance check of the entire bike Replace or top-up brake fluid as needed Inspect and clean/replacement of air filter Lubricate the chain and check for wear Test electrical components and recharge battery Review tire pressure and tread depth Tackling these steps helps prevent major issues before they start—think of it as insurance for the open road. Plus, consistent checks on critical systems like brake lines and fuel lines allow you to catch subtle issues early. If you’re not comfortable with every task, enlist your local shop’s skilled technicians or use professional pickup and delivery motorcycle tune-up services for the highest level of motorcycle safety. Routine Motorcycle Maintenance vs. Seasonal Motorcycle Tune-Up Services While routine motorcycle maintenance and seasonal motorcycle tune-up services may sound similar, there are significant differences. Routine maintenance often involves quick checks such as topping fluids, adjusting the gas tank, or visual tire scans. In contrast, seasonal tune-ups are more comprehensive, combining a full maintenance checklist with deeper inspections and part replacements—ideal for prepping your motorcycle for the challenges of winter months or the heavy use of a new riding season. By following scheduled seasonal maintenance, you not only adhere to the manufacturer’s recommendations but also avoid expensive repairs and ensure your motorcycle insurance cover remains active. For those who ride year-round as well as those who store their bike for the winter, timely seasonal tune-ups are essential for keeping your bike in working order and extending its life, offering greater peace of mind every time you hit the open road. Why Scheduled Maintenance Matters for Motorcycle Safety Motorcycle safety starts with regular, scheduled maintenance—there’s no shortcut around it. Every skipped oil change, neglected air filter, or overlooked brake pad check increases the risk of issues that can put you or your bike in danger. By keeping every part on a strict maintenance check schedule, you reduce breakdowns, improve performance, and protect yourself and other road users. An up-to-date motorcycle maintenance checklist acts as your personal safety guarantee—especially when it includes thorough examinations of spark plugs, fuel lines, rear brake systems, and recommended tire pressure. Preventive care minimizes hazards and maximizes both the enjoyment and the safety of every ride, whether you’re commuting in the city or chasing sunsets on the open road. "A thorough maintenance checklist is your best defense against roadside breakdowns." – Veteran Mechanic Expert Advice: Motorcycle Maintenance Tips for the Open Road To get the most from every mile and maintain optimal performance, smart riders adhere to these key seasonal motorcycle maintenance tips. Each builds on the fundamentals of a strong maintenance check, making your time on the open road safer, smoother, and more enjoyable. Remember—some small habits can make a huge difference in the life of your bike. Prioritize brake inspections at every seasonal tune-up service Regular oil and air filter changes extend engine life Use manufacturer-recommended fluids and parts Don’t overlook minor electrical issues Whether you handle basic checks at home or rely on skilled technicians for a complete maintenance checklist, the focus should always be on early intervention and preventive care. Addressing minor issues—like a fluctuating trickle charge or worn brake pad—before they escalate is the most reliable way to ensure your tires remain safe, your chain lubricated, and your motorcycle is ready for any riding season adventure. Convenient Seasonal Motorcycle Tune-Up Services: Pickup and Delivery Options Life gets busy, but that shouldn’t stop you from keeping your bike in peak condition. Increasingly, shops now offer pickup and delivery options for seasonal motorcycle tune-up services. This convenient option is a lifesaver for riders who want a detailed maintenance check without the hassle of transporting their motorcycle themselves. With pickup and delivery, skilled technicians arrive at your location, carefully transport your motorcycle, complete the full maintenance checklist, and return it ready for the next ride. This streamlines your seasonal tune-ups—and in many cases, may help satisfy motorcycle insurance cover requirements for regular maintenance. How Pickup and Delivery Streamline Your Maintenance Check Choosing a pickup and delivery service removes two major obstacles: time and transportation. No need to worry about borrowing a trailer or rearranging your schedule—your motorcycle is safely transported, serviced, and returned by professionals. This is especially beneficial during the winter months when getting your bike to a shop can be a challenge, or if your maintenance check uncovers issues that require extended repairs. By opting for these services, you guarantee your bike receives expert-level motorcycle maintenance, regardless of your own technical experience or availability. It’s a stress-free way to keep your machine in working order and ready to hit the open road at a moment’s notice. People Also Ask: Common Questions About Seasonal Motorcycle Tune-Up Services How much is a motorcycle tuneup? Answer: Motorcycle tune-up services typically range from $100-$350 based on scope, location, and model. What is the 12 second rule on a motorcycle? Answer: The 12 second rule encourages riders to scan the roadway ahead at least 12 seconds in advance for safety and reaction time. What does a motorcycle tune up consist of? Answer: A motorcycle tune-up consists of a maintenance check involving oil, air filter, brake fluid, tire inspection, battery check, and chain lubrication. How often do you tune up a motorcycle? Answer: It’s recommended to schedule tune-up services seasonally or every 3,000–6,000 miles, depending on usage and manufacturer guidelines. Frequently Asked Questions About Seasonal Motorcycle Tune-Up Services Can I perform a seasonal motorcycle maintenance checklist at home? Yes, many riders perform their own seasonal checks with basic tools and a step-by-step maintenance checklist. However, complex jobs are best left to skilled technicians. Which brands require the most frequent tune-up services? High-performance brands and those used for daily commuting may require more frequent checks. Always follow your manufacturer’s recommendations for tune-up intervals. Are pickup and delivery motorcycle tune-up services available everywhere? Availability varies by location, but most reputable motorcycle repair shops now offer convenient pickup and delivery options for scheduled maintenance checks. What signs indicate I need a seasonal maintenance check ASAP? Difficulty starting, unusual noises, low tire pressure, visible wear on brake pads, or inconsistent throttle response—all are signs your motorcycle is due for a full maintenance check immediately. Key Takeaways: Maximizing the Life of Your Motorcycle via Seasonal Tune-Up Services Seasonal motorcycle tune-up services are crucial for long-term performance Following a detailed motorcycle maintenance checklist boosts reliability and safety Routine maintenance checks can prevent costly repairs and breakdowns If you’re ready to take your motorcycle care to the next level, there’s always more to discover about keeping your ride in peak condition. For a deeper dive into expert strategies and year-round maintenance wisdom, check out the comprehensive guide on seasonal bike care secrets every rider must know. You’ll find advanced tips, seasonal storage advice, and actionable insights that can help you extend your bike’s life and performance even further. Embrace the full spectrum of seasonal care and make every ride smoother, safer, and more enjoyable—your motorcycle will thank you for it. Ready for Your Next Ride? Contact Nasty Performance Motorcycle Shop Today Call Nasty Performance Motorcycle Shop Today: 847-458-4858 Don’t let maintenance delays cut your next adventure short. Schedule your seasonal motorcycle tune-up services now and keep your bike running smoothly all year!

Winter Motorcycle Maintenance Checklist: Protect Your Bike Today

Did you know that improper winter storage causes over 30% of preventable motorcycle repairs each spring? Many riders underestimate how harsh winter weather can be on their bikes, leading to costly setbacks just as the riding season begins. Whether you’re planning on winter riding or stashing your motorcycle for winter, the right maintenance steps can help you avoid nasty surprises, preserve moving parts, and keep your bike in good condition all year round. Follow this winter motorcycle maintenance checklist to shield your beloved ride against winter’s toughest challenges, ensuring a smooth start — and thrilling rides — in spring. Startling Facts: Why the Winter Motorcycle Maintenance Checklist Matters According to industry studies, improper winter storage causes over 30% of preventable motorcycle repairs each spring. The statistics don’t lie—winter storage missteps account for a significant portion of annual motorcycle repairs. Neglecting your winter motorcycle maintenance checklist can result in corroded moving parts, dead motorcycle batteries, gum-up in the fuel system, and costly tire replacements due to flat spots. Frigid temperatures and road salt are relentless, and unless you take proactive steps, small maintenance gaps can quickly become expensive problems. Addressing crucial needs—like preserving brake fluid, maintaining your motorcycle cover, and using a trickle charger—greatly lowers the risk of off-season issues. What You’ll Learn with This Winter Motorcycle Maintenance Checklist Why following a winter motorcycle maintenance checklist reduces costly repairs Step-by-step guide to winter storage and motorcycle winterization Expert advice on preserving moving parts, brake fluid, and battery health How to prepare your motorcycle for winter and ensure a smooth resurgence in spring Understanding Motorcycle Winter Storage Essentials When temperatures drop, your motorcycle needs more than just a garage slot – it demands careful attention and smart winter storage decisions. The combination of cold weather, condensation, and inactivity exposes your bike to a range of risks, from battery drain to internal corrosion. Following a thorough winter motorcycle maintenance checklist ensures you’re covering every essential, from storing your motorcycle in the right location to choosing a motorcycle cover that actually works against winter’s threats. Smart motorcycle winter storage balances convenience, safety, and long-term bike performance. The beauty of diligent preparation is that the good habits you develop now will not only shield your motorcycle for winter but also make the spring start-up a total breeze. Whether you opt for indoor storage with climate control or your only option is a home garage, knowing the risks and the right protections for your gas tank, brake fluid, moving parts, and especially your motorcycle’s battery is critical. Let’s break down how to nail winter motorcycle maintenance for your specific bike, environment, and winter riding plans. As you work through your winter motorcycle maintenance checklist, it's also helpful to understand how these seasonal routines fit into your overall bike care strategy. For a deeper dive into year-round maintenance tactics and how to adapt your approach as the weather changes, check out these essential seasonal bike care secrets every rider should know. Why Proper Winter Storage is Crucial for Motorcycle Winter Performance If you want your machine to stay in top shape through the coldest months, you have to give serious thought to how, where, and with what you store your motorcycle. Proper winter storage is about more than avoiding cosmetic damage—a neglected bike can develop internal issues like moisture in your exhaust pipe, crystalized gas that damages the fuel system, or stuck brakes due to old brake fluid. Each of these issues is preventable if you stick to a proven winter motorcycle maintenance checklist. Think of winter storage as an insurance policy. Bikes that are prepped and protected can stand up to cold temperatures, resist corrosion, and avoid the dreaded springtime repair bill. Whether you’re winterizing a sports bike or touring machine, moving parts like your chain drive, clutch cable, and pivot points require special attention. The stark difference between a well-maintained and a neglected winter ride comes down to storage habits. Choosing the Right Motorcycle Storage Location Not all storage spaces are created equal. The best place for motorcycle winter storage is somewhere dry, protected from freezing temperatures and moisture, and away from constant humidity swings. An indoor storage spot—a heated garage or dedicated storage facility—is greatly preferred, keeping your motorcycle for winter out of the elements. Even home garages can suffer from condensation, so position your bike away from garage doors or drafty vents. If you must store a motorcycle outdoors, invest in a high-quality weather-resistant motorcycle cover and elevate the tires with a motorcycle stand to avoid flat spots. When deciding where to store your motorcycle, look for places that minimize rapid temperature changes. These fluctuations cause condensation, leading to rust and moisture inside your engine, gas tank, and exhaust pipe. For extra insurance, check that your storage area is free from pests, rodents, and strong chemical fumes. Proper location is the first step in protecting your investment and setting a solid foundation for your winter motorcycle maintenance checklist. The Importance of a Quality Motorcycle Cover for Winter Storage Most riders overlook the humble motorcycle cover—but it’s a vital line of defense in any winter motorcycle maintenance checklist. A breathable, weather-resistant cover prevents moisture buildup, which is crucial for fighting off rust and corrosion. Look for materials that are both water-repellent and allow condensation to escape, especially during extended periods of winter storage. A poorly chosen cover can do more harm than good by trapping water against your motorcycle’s surface, encouraging rot and mildew. To get the best results, opt for a cover that fits snugly over your bike’s shape without compressing moving parts or the gas tank. Premium options are reinforced to guard against UV rays on warmer winter days and are tough enough to outlast snow, ice, and wind. Pairing the right location with a solid cover is your formula for successful motorcycle winter storage, extending the bike’s lifespan and preserving cosmetics as well as performance. Step-by-Step Winter Motorcycle Maintenance Checklist 1. Clean and Inspect Your Motorcycle for Winter Storage Wash off dirt, debris, and road salt Check for corrosion on moving parts Clean exhaust pipe and ensure no blockages Begin your winter motorcycle maintenance checklist with a deep clean, making sure every bit of dirt, dust, or road salt is removed. This banishes corrosive grime that would otherwise wreak havoc during winter storage. Pay extra attention to the chain drive, wheels, and undercarriage—these are common hotspots for buildup, especially if you’ve been riding after the first salting of the roads. After washing, dry your motorcycle thoroughly to keep moisture from seeping into nooks or behind panels. Now, conduct a detailed inspection for any signs of corrosion, rust, or wear, particularly around moving parts. This is the perfect moment to catch minor issues before they escalate during winter motorcycle storage. Finally, inspect your exhaust pipe for blockages, debris, or moisture. Cleaning and inspecting lay a solid groundwork so the rest of your winter motorcycle maintenance steps have maximum impact. 2. Lubricate All Moving Parts Before Winterizing Chain, controls, pivot points Why lubricating moving parts preserves longevity Don’t let friction wreak havoc while your motorcycle sits. Lubricate all moving parts, including the chain, clutch lever, cables, and pivot points, as a proactive measure in your winter motorcycle maintenance checklist. The reasoning is simple: when temperatures plunge, metal shrinks and can seize; without adequate lubrication, dormant moving parts become breeding grounds for rust. Use a premium, cold-weather-specific motorcycle lubricant that forms a protective film, ensuring smooth movement come spring. Also, pay attention to the chain drive — clean it thoroughly before applying lubricant. Focus on areas susceptible to moisture and corrosion and don’t forget hidden linkage, suspension attachment points, and kickstands. Lubrication not only secures mechanical longevity but also makes your spring maintenance a far less daunting task. You’ll thank yourself later for having included this simple but crucial step in your winter motorcycle maintenance checklist. 3. Fluid Care: Brake Fluid and Engine Oil for Winter Motorcycle Storage Change engine oil before winter storage Top off brake fluid and coolant to prevent moisture accumulation Old, dirty oil holds contaminants that can etch metal surfaces or create acids during long winter storage. That’s why changing the oil before motorcycle winterization is always a good idea—fresh oil is less likely to cause internal corrosion. Likewise, don’t forget your brake fluid and coolant levels; these vital fluids attract moisture over time, becoming susceptible to dilution or freezing. Top them off with fresh, manufacturer-recommended choices to guarantee winter-long protection of sensitive moving parts and the gas tank. Always check your owner’s manual for the right procedures and products and remember: topping up or replacing fluids not only extends component life but also supports a seamless, trouble-free riding experience once winter storage ends. These steps are small commitments that yield major returns in performance and peace of mind when it's finally time to take your motorcycle for winter rides again. 4. Battery Maintenance: Use a Trickle Charger for Motorcycle Winterization Remove and store the battery or connect a trickle charge Benefits of a trickle charger versus standard charging The motorcycle battery is easily one of the most overlooked—and most easily drained—components during winter storage. Removing the battery for indoor storage is optimal, but if that’s not possible, attaching a smart trickle charger or battery tender is your best bet. Unlike conventional chargers, a trickle charger keeps a steady, low charge flowing, preventing both overcharging and full depletion over an extended period. This preserves battery health, allowing for an instant start when winter gives way to riding weather. Trickle charging also extends battery lifespan, saves you from investing in replacements, and reduces the risk of short-cycling—the gradual weakening of batteries due to repeated discharge and recharge cycles. Modern trickle chargers are designed for easy connect/disconnect right on your workbench, and many include safety features to handle cold temperatures commonly experienced during motorcycle winter storage. Incorporate battery care into your winter motorcycle maintenance checklist, and you’ll avoid frustration and enjoy riding sooner. 5. Fuel System Prep: Should You Leave Gas in a Motorcycle Over Winter? Stabilizing the fuel Draining vs. topping up your gas tank Risks of old fuel in winter storage The question of what to do with your gas tank—drain it or fill it—is one every responsible bike owner faces. For most, the best strategy is to top off your tank and add a quality fuel stabilizer. A full tank reduces condensation and protects against rust, while the stabilizer keeps gas from turning into varnish and clogging up the fuel system, especially if your motorcycle is stored for an extended period. After adding stabilizer, run your engine for five minutes to cycle the mixture through the lines and injectors. Draining the tank may be suitable for carbureted engines, but it’s not recommended for modern fuel-injected models—a dry tank is more prone to rust. Always avoid leaving stale gas to sit; it can degrade rubber gaskets, clog fuel injectors, and leave you with a motorcycle that refuses to start in spring. Incorporate this fuel step in your comprehensive winter motorcycle maintenance checklist for optimal performance. 6. Tire Care and Pressure for Safe Motorcycle Winter Storage Elevate tires or periodically rotate to avoid flat spots Check pressure and condition During winter storage, tire neglect can lead to unsightly—and sometimes dangerous—flat spots. If possible, place your motorcycle on a stand to take weight off both tires. For those without a motorcycle stand, periodically rotate the wheels every few weeks to distribute pressure evenly. It’s also essential to check tire pressure before placing your bike into storage and throughout the winter. Cold air causes pressure to drop, potentially deforming the tire and increasing the risk of dry rot. Regularly inspect the tread and sidewalls for signs of cracking or dry rot, which can be exacerbated by winter weather and long periods of inactivity. Well-maintained tires not only extend tire life but also safeguard you from a bumpy ride or loss of traction during the first ride of the season. Make tire health and pressure checks a key item on your winter motorcycle maintenance checklist. 7. Exhaust Pipe & Intake Precautions Cover exhaust pipe openings to prevent pests and moisture Inspect pipe for moisture or leaks Mice and insects love making winter homes in your exhaust pipe and intake system. Keep these pests, along with moisture, at bay by plugging exhaust openings with clean rags or purpose-made covers designed for winter motorcycle storage. This simple step keeps rodents and water out, preventing internal corrosion and expensive spring repairs. Remove all covers before you start your engine in spring—forgetting to do so can damage the exhaust system. Periodically inspect the exhaust for signs of moisture, condensation, or even leaks that could develop over the course of storage. Prevention here is worth its weight in gold, as the cost of exhaust repairs or pest removal quickly adds up. This task, though small, is pivotal to a complete winter motorcycle maintenance checklist. How to Winterize Your Motorcycle: Expert Recommendations "Consistent winter motorcycle maintenance dramatically extends your bike’s lifespan and eliminates spring surprises." – Tony Greco, Certified Motorcycle Mechanic Expert mechanics universally agree: investing time in proactive motorcycle winterization means a healthy, road-ready bike at the end of winter. From detailed inspections to battery maintenance and fluid top-ups, each item contributes to minimizing repair costs and maximizing reliability. You don’t need to be a pro to implement these strategies—just a careful eye, willingness to follow a checklist, and a few essential tools. If you hit a snag, consult resources or reach out to local specialists for tailored support specific to your make and riding environment. Protecting Moving Parts with Proper Winter Motorcycle Maintenance Identifying vulnerable moving parts during motorcycle winterization Best lubricants for freezing temperatures The key to a truly resilient motorcycle winterization checklist is safeguarding every moving part. Focus especially on exposed or high-stress components: chain drive, brake lever pivots, side stands, control cables, and suspension linkages. Cold, dry winter air can sap lubricants or leave metal parts prone to rust and binding. Apply a top-tier lubricant formulated for cold temperatures—these products resist freezing, maintain protective barriers, and prevent the stiffness that can plague moving parts after months in storage. Don’t forget: the effort spent now directly prevents major repairs later. Vulnerable moving parts left dry and exposed over an extended period are at higher risk for corrosion, warping, or outright seizure. Reference your winter motorcycle maintenance checklist to ensure every part gets attention. Using the best products and methods keeps your ride ready for safe, smooth performance next season. Using a Motorcycle Cover: Shield Against Winter Damage Benefits of a breathable, weather-resistant motorcycle cover Avoiding moisture buildup and corrosion The final shield in any solid winter motorcycle maintenance checklist is a high-grade motorcycle cover. Breathability and waterproofing are equally important: covers should allow moisture to escape but block rain, snow, and dust. A good cover not only prevents scratches, UV fading, and bird droppings but also keeps condensation from settling on your gas tank, engine, and moving parts. Avoid plastic tarps or tight-fitting linens—they trap water and promote mold. Instead, invest in a cover with reinforced grommets, elastic hems, and weather-resistant panels. This layer of protection dramatically reduces the risk of silent corrosion while your motorcycle sleeps through winter, ensuring your efforts in lubricating and prepping every component don’t go to waste. Table: Winter Motorcycle Maintenance Checklist Overview Task Description Recommended Timing Required Tools/Products Wash & dry motorcycle Remove all dirt, salt, and debris to prevent corrosion Before winter storage Gentle soap, water, microfiber cloths Inspect moving parts Check for rust, damage, or wear on chain, controls, pivot points Before and after storage Inspection light, lubricant, basic tools Lubricate all moving parts Apply cold-weather lubricant to chains, controls, kickstand, suspension Before storage; as needed during storage Motorcycle lubricant, gloves, cleaning rags Change engine oil Replace old oil to avoid corrosion Before storage Engine oil, oil filter, drain pan Top off brake fluid/coolant Fill fluids to prevent moisture and freezing Before winter; check monthly Brake fluid, coolant, funnel Battery maintenance Remove battery or use trickle charger to keep charged Before storage; monitor monthly Trickle charger/battery tender Fuel system prep Add fuel stabilizer and fill tank, or drain as needed Before winter storage Fuel stabilizer, gas can (if draining) Tire care Check pressure, elevate or rotate to prevent flat spots Before and during storage (monthly checks) Tire gauge, motorcycle stand Exhaust & intake protection Cover/plug openings to deter pests and moisture Before storage; inspect during winter Rags or pipe covers Cover motorcycle Use a breathable, weather-resistant motorcycle cover After all other steps, before storage Quality motorcycle cover Demonstration: Battery Maintenance With a Trickle Charger This step-by-step video demonstrates how to safely disconnect your motorcycle battery, store it in a temperature-controlled environment, and use a trickle charger or battery tender. Watch for clear close-ups of the tools, connectors, and charger settings you’ll need to keep your battery healthy and fully charged all winter long. People Also Ask: Winter Motorcycle Maintenance Checklist How to take care of a motorcycle during winter? Comprehensive winter motorcycle maintenance includes cleaning and covering your motorcycle, stabilizing fuel, lubricating moving parts, maintaining tire pressure, and regularly monitoring battery charge. By following this winter motorcycle maintenance checklist, you reduce the likelihood of spring repairs and extend your bike's lifespan. What is the 12 second rule for motorcycles? The 12 second rule suggests scanning the road ahead at least 12 seconds ahead of your current position. This practice is critical for safe winter riding, ensuring enough time to react to hazards amid slippery conditions. What to check on a motorcycle after winter? Post-winter, inspect the battery, tires, all fluid levels, moving parts, and test brakes before riding. Reference your winter motorcycle maintenance checklist to reverse winterization steps safely. Is it bad to leave gas in a motorcycle over winter? Stale gas can cause varnish and clog fuel systems. Either fully drain your tank or fill it and add fuel stabilizer for optimal winter motorcycle maintenance. FAQs: Winter Motorcycle Maintenance Checklist Can I start my motorcycle occasionally during storage? Yes, but do so occasionally and let it reach full operating temperature. However, keeping a smart trickle charger connected is more effective for battery health during long-term storage. How often should you check tire pressure in winter? Inspect tire pressure at least monthly, as cold temperatures can cause significant pressure drops, risking deformation and flat spots. Do I need to change brake fluid every winter? It’s a good idea to check brake fluid for discoloration or contamination annually and replace if necessary. For motorcycles ridden heavily or stored in humidity, annual fluid changes are best practice. What’s the best way to prevent rodent damage during storage? Block exhaust pipe and intake openings with rags or specialized covers, tidy storage areas, and avoid storing food nearby. Some riders also use natural or electronic repellents as added security. Key Takeaways from the Winter Motorcycle Maintenance Checklist Thorough winter motorcycle maintenance prevents expensive repairs Focus on battery, fluids, moving parts, and winter storage conditions Proper use of a cover and trickle charger is essential for long-term care Prepare Your Motorcycle for Winter: Next Steps Review the checklist before winter rides or storage Consult local experts for advanced winter motorcycle maintenance Expert advice on implementing the winter motorcycle maintenance checklist at home Learn from seasoned experts as they share their best practices for winterizing your motorcycle at home: from using the right lubricants for cold weather to DIY tricks for secure long-term storage and pest prevention. Conclusion: Why Every Rider Needs a Winter Motorcycle Maintenance Checklist "Investing a few hours now saves hundreds in repairs next season. Don’t skip the checklist!" Mastering winter motorcycle maintenance is just one piece of the puzzle for keeping your ride in peak condition all year long. If you’re ready to elevate your approach and discover how to adapt your care routine for every season, don’t miss the comprehensive guide on seasonal bike care secrets every rider must know. This resource reveals expert strategies for transitioning your maintenance habits as temperatures shift, helping you avoid common pitfalls and maximize your bike’s performance no matter the weather. Take the next step in your motorcycle care journey and ensure your machine is always ready for the road ahead. Call Now for Expert Winter Motorcycle Maintenance Call Nasty Performance Motorcycle Shop Today: 847-458-4858

Terms of Service

Privacy Policy

Core Modal Title

Sorry, no results found

You Might Find These Articles Interesting

T
Please Check Your Email
We Will Be Following Up Shortly
*
*
*