
Did you know? According to the Motorcycle Industry Council, up to 30% of mechanical failures in spring could be prevented with proper winter storage. If you think a simple cover or garage spot is enough, think again: improperly stored motorcycles are far more likely to face costly repairs, fuel system issues, and battery failures. Whether you’re a first-year rider or a seasoned pro, mastering the essentials of motorcycle winter prep service is the difference between a top-shape spring start and a trip to your mechanic.
An Unexpected Reality: Why Motorcycle Winter Prep Service is Essential
Winter is more than just a chilly inconvenience for motorcycle owners—it’s a season that reveals whether your maintenance routine holds up under pressure. Many riders underestimate how cold weather, fluctuating temperatures, and winter storage neglect can silently sabotage your motorcycle’s fuel system, electronics, and even the gas tank. In fact, skipping a professional motorcycle winter prep service can introduce flat spots into tires, foul brake fluid, and drain your battery dry long before the first thaw.
Your motorcycle thrives when attention to detail is part of your storage process. Leaving your bike unprepared through the winter months is a good idea gone wrong — you risk issues like corrosion, starter failures, and a host of cold-weather mechanical headaches. The truth is, prepping your motorcycle for winter is not just about preserving performance, but also about preventing costly repairs, extending the lifespan of critical parts, and ensuring your bike is ready to ride when spring brings the next riding season. Investing in comprehensive winter storage now sets you up for a flawless ride when warm weather returns.
“According to the Motorcycle Industry Council, up to 30% of mechanical failures in spring could be prevented with proper winter storage.”
What You'll Learn about Motorcycle Winter Prep Service
- Key steps for winter storage and protection
- Common motorcycle winter prep service mistakes and how to avoid them
- Expert tips for indoor storage and outdoor solutions
- How to ensure your motorcycle is ready to ride when spring arrives
- Cost breakdowns and professional recommendations
Understanding the Motorcycle Winter Prep Service Process
The Importance of Motorcycle Winter Storage
Winter storage isn’t just about keeping your paint job clean—it’s a holistic approach to preserving the mechanical and structural integrity of your motorcycle over an extended period of inactivity. Snow, ice, and cold temperatures create the perfect environment for rust, battery drain, and stale fuel. Left unchecked, problems like low tire pressure, improper tension in the chain drive, and condensation in the gas tank become expensive to fix once riding season returns. A thoughtful motorcycle winter prep service is designed to handle these challenges before they become springtime regrets. Consider this process as putting your motorcycle into hibernation: all vital systems are stabilized, protected, and primed to wake up in top condition when the thaw hits.
Neglecting comprehensive winter storage exposes your ride to unnecessary risks—especially in regions where temperature swings can be severe. Brake fluid must be topped off, chain drive lubricated, and battery tender hooked up to guarantee your machine remains in top shape. Even indoor storage isn’t foolproof; humidity, dust, and rodents present unique hazards that only proper prep can mitigate. Following a professional winter storage protocol offers a safeguard against flat spots on tires, leaks, and electrical gremlins, setting you up for a safer and more enjoyable start to your next riding adventure.
For riders interested in a deeper dive into the specifics of seasonal motorcycle care, exploring additional resources can help you avoid common pitfalls and ensure your bike is protected year-round. While this guide focuses on winterization, you may also want to review our comprehensive motorcycle maintenance tips for a broader perspective on keeping your ride in peak condition.
Protecting Your Motorcycle in Cold Weather Conditions
Your bike’s greatest enemies during the winter months are moisture, freezing surfaces, and rapid temperature fluctuations. If you ignore the essentials of a thorough motorcycle winter prep service, cold weather can wear down seals, damage the fuel system, and even lead to costly corrosion inside the engine or on electrical connectors. It’s not just about tossing a motorcycle cover over your bike; you must protect motorcycle components from environmental stressors that can erode their lifespan. Simple steps, such as using a quality fuel stabilizer, bringing tires to the recommended pressure, and storing your ride on a dedicated mat, prevent cold-induced deterioration and keep your ride ready for the road come spring.
Don’t underestimate how much damage can occur over just a few winter months. Frozen brake fluid lines can compromise safety. Deteriorating tire rubber from cold weather or low tire pressure can force replacements. Protecting your battery is critical, too—disconnect, remove, or maintain it with a trickle charger or battery tender to avoid complete discharge. By prioritizing system checks and preventive maintenance, you effectively boost the motorcycle’s lifespan and reduce the risk of unexpected breakdowns. All of these actions work together to ensure your motorcycle remains in top condition no matter how severe the winter gets.
Winter Storage: Options and Best Practices for Every Rider
Indoor Storage vs Outdoor Storage for Motorcycle Winter Prep
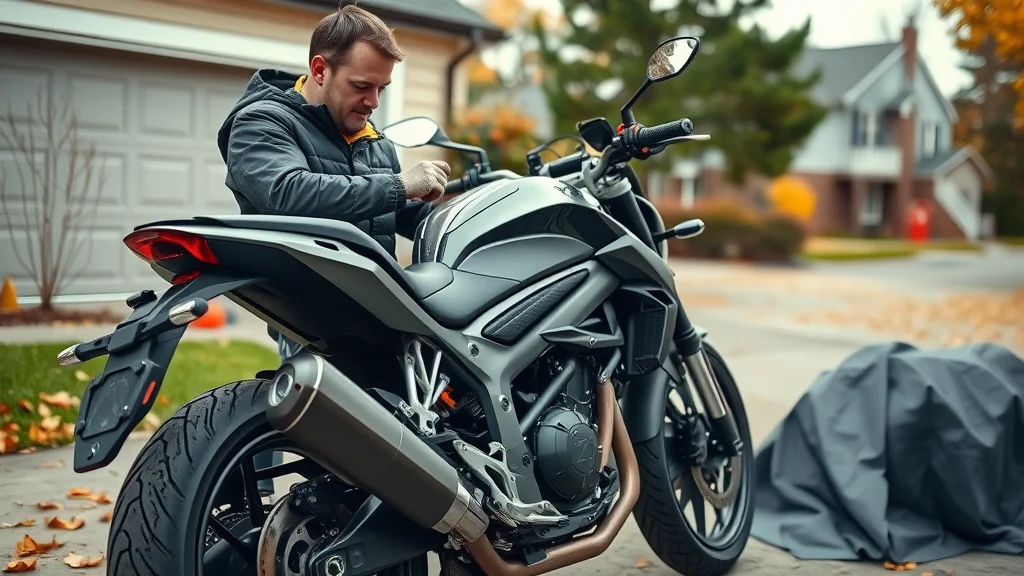
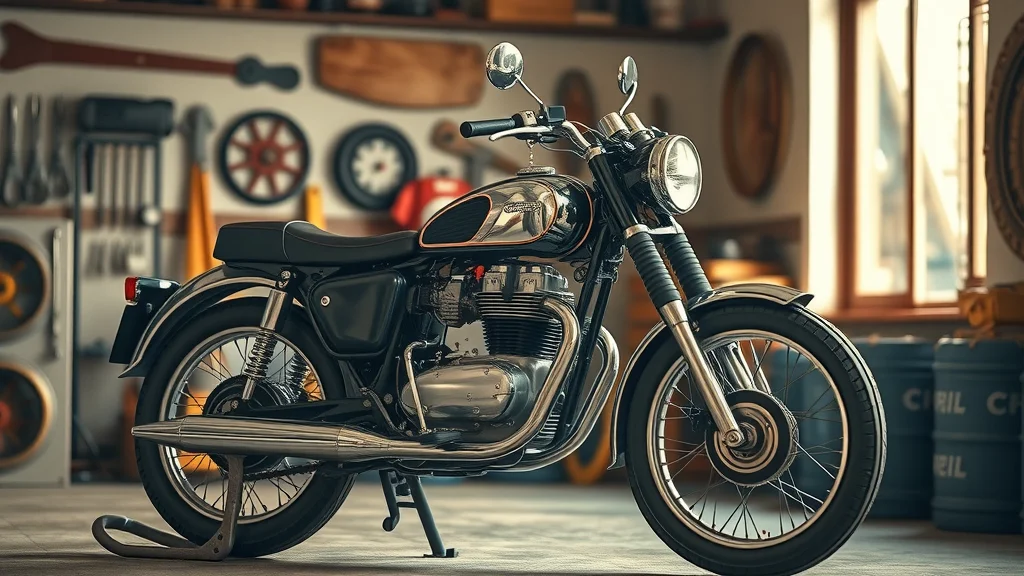
When deciding where to keep your bike during the winter months, the debate between indoor storage and outdoor storage is critical. Indoor storage, particularly in climate-controlled spaces, offers the highest level of protection, safeguarding your motorcycle from the harshest cold weather threats, such as moisture build-up, drastic temperature swings, and potential theft. Garages and professional storage facilities minimize the risk of rust, maintain tire health by reducing the chance for flat spots, and allow greater control over humidity and pests. On the other hand, not every rider has access to indoor storage and may need to rely on weatherproof motorcycle covers for outdoor options. While outdoor storage is economical and convenient, it exposes your motorcycle to winter elements, making comprehensive preparation even more essential—including protecting the gas tank, sealing exhaust openings, and attentive use of premium covers.
No matter your storage decision, the key takeaway is that the level of preparation should match the condition of your storage environment. For those using outdoor options, investing in a commercial-grade motorcycle cover, elevating tires off cold ground, and vigilant periodic checks are mandatory. For indoor setups, ensure that your garage or shed is clean, dry, and pest-free, and regularly monitor humidity levels. Either way, focus on readiness; your motorcycle winter prep service should be tailored—protecting your ride’s investment value and keeping you ready for that first ride when temperatures climb again.
| Feature | Indoor Storage | Outdoor Storage |
|---|---|---|
| Security | High (locked, monitored) | Moderate (subject to theft, tampering) |
| Cost | Higher (rent, utilities) | Lower (cost of cover only) |
| Protection Level | Excellent (weather, humidity, pests) | Moderate (subject to weather and pests) |
| Accessibility | Less convenient; seasonal access only | High; can check or move bike as needed |
Choosing the Right Motorcycle Cover for Cold Weather
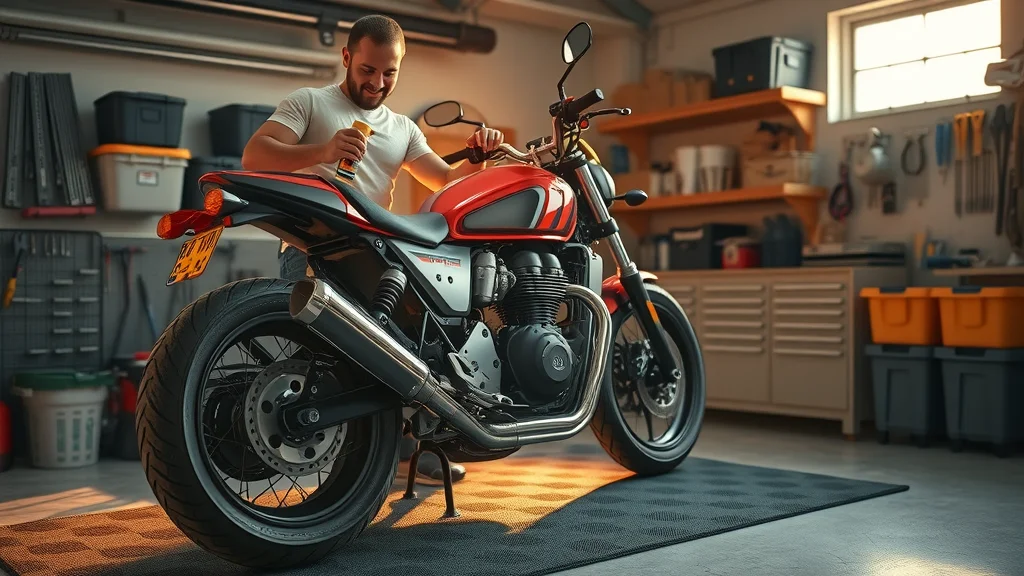
A motorcycle cover is your front line of defense against harsh winter weather. Premium covers designed for winter storage provide a range of essential benefits: they block moisture, dust, and UV rays, deter rodents, and help prevent corrosion on exposed parts. The right motorcycle cover features multi-layer construction, reinforced seams, and breathable materials to keep condensation from accumulating under the cover. When selecting a cover, consider fit, durability, and weather resistance. Avoid cheap, ill-fitting covers that trap moisture; instead, invest in one tailored for your bike’s dimensions with securing straps and heat-resistant panels around the exhaust area.
- Benefits of premium covers for winter storage: Maximum protection against snow, rain, and sun; minimize scratching and chafing; extend paint and chrome longevity.
- Features to look for in motorcycle winter covers: Reinforced weatherproof seams, snug fit (elastic hems, buckle straps), breathable mesh panels, heat shields for exhausts, and easy-lock grommets for added security.
Proper use of your cover is as important as choice—always clean the motorcycle before covering and verify no sharp objects could tear the fabric. Regularly inspect the cover for damage during the winter months to keep your motorcycle in top shape until spring.

Step-by-Step Motorcycle Winter Prep Service Checklist
- Clean, dry, and lubricate all essential motorcycle components
- Inspect, maintain, and prepare the battery for winter storage
- Fuel system protection and additives for winter storage
- Check and top off fluids (oil, coolant, brake fluid)
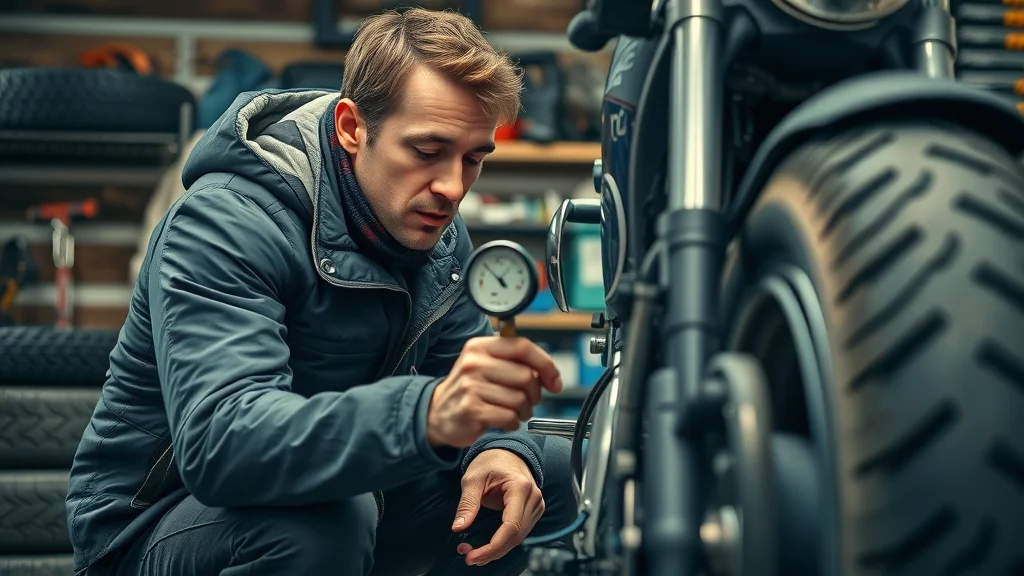
- Tire maintenance and pressure checks for motorcycle winter storage
- Plug intake and exhaust openings to prevent pests during cold weather
- Final check before storing and covering your motorcycle
Following these steps ensures your motorcycle is truly ready to ride once the next riding season arrives. Let’s break down each step further for maximum protection during those cold months, focusing on your motorcycle battery, brake fluid, chain drive, and fuel system. Each action mitigates risks associated with an extended period of storage, from preventing flat spots by rotating the wheels to topping off fluids to minimize moisture intrusion. Don’t overlook any component—greater attention to detail today means fewer surprises and costly repairs tomorrow.
| Task | Required Tools | Estimated Time | Difficulty | Notes |
|---|---|---|---|---|
| Wash & Dry Motorcycle | Soap, water, microfiber cloths | 30-45 min | Easy | Prevent corrosion; clean before storage |
| Lubricate Chain Drive | Chain lube, gloves | 10 min | Medium | Ensure proper tension; prevents rust |
| Battery Maintenance | Battery tender or trickle charger | 5 min set-up | Easy | Maintains charge during storage |
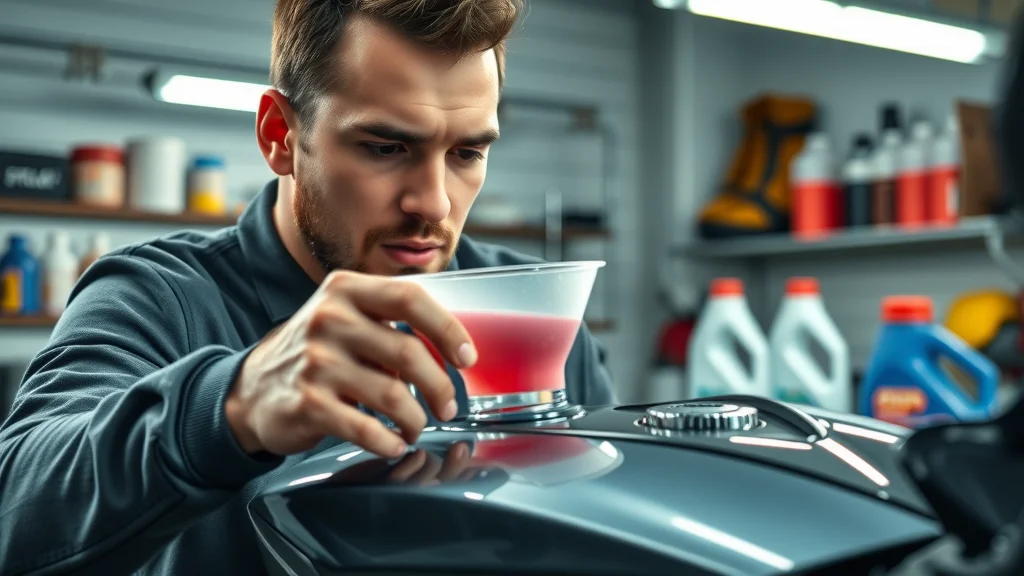
| Fuel Stabilization | Fuel stabilizer, funnel | 15 min | Easy | Add to gas tank, run engine 5-10 min |
| Fluids Top-Off (Brake, Coolant) | Brake fluid, coolant, tools | 20 min | Medium | Prevents condensation & freezing |
| Tire Pressure Check | Tire gauge, air pump | 5 min | Easy | Pump to recommended pressure; rotate to avoid flat spots |
| Plug Intake/Exhaust | Clean cloth, shop tape | 5 min | Easy | Keeps pests out during winter months |
Fuel System Preservation During Motorcycle Winter Prep Service
Proper Fuel Stabilization for Winter Storage
One of the most overlooked parts of motorcycle winter prep service is proper care of the fuel system. Stale gasoline can clog injectors, gum up carburetors, and corrode the gas tank—leaving your bike far from ready to ride in spring. Today’s ethanol-blended fuels are particularly prone to absorbing moisture and separating over time. Adding a quality fuel stabilizer to a full tank before storage is the best way to preserve your fuel system. Once the stabilizer is added, run the engine for a few minutes to circulate treated fuel throughout the system, reaching injectors and carburetor jets.
This straightforward step prevents condensation inside the gas tank by minimizing exposed air space, and it keeps seals lubricated, reducing the risk of cracking and leaks. If left untreated, stale fuel can be the source of costly repairs and sluggish starts. Make this step a non-negotiable in your winter motorcycle storage protocol to avoid a challenging start to your next riding season.
Draining the Fuel System vs. Fuel Additives
Some riders consider draining the entire fuel system for winter storage. While this can prevent gum and varnish buildup inside lines and carburetors, it’s often unnecessary (and even risky) for modern motorcycles, especially if your owner’s manual recommends against it. For most motorcycles, using a fuel stabilizer offers robust protection with less hassle. However, if you plan on storing your motorcycle for an extended period—longer than six months—it may be worth consulting a professional to determine the best course of action based on your model, location, and riding schedule.
Regardless of method, always ensure that your gas tank is protected from internal rust and that lines are free from stagnant, untreated fuel. Combine stabilizers with a regular engine run—ideally every few weeks if feasible—or rely on a professional motorcycle winter prep service for the most tailored, reliable approach. This detail is critical if you want your bike to remain in top condition during and after winter.
Indoor Storage Solutions for Safe Motorcycle Winterization
Climate-Controlled Storage: Pros and Cons
Climate-controlled indoor storage is considered the gold standard for motorcycle winter prep service. These professional facilities regulate temperature and humidity, eliminating many weather-related risks: battery drain, tire flat spots, and moisture-based corrosion. The downside? Higher storage fees and less convenience if you need occasional access to your motorcycle. On the plus side, climate control keeps every system—engine, electrics, and frame—preserved in top shape, reducing re-commissioning time and ensuring your motorcycle is truly ready to ride once cold temperatures lift.
For many, at-home garage storage is a sufficient and much more affordable alternative—as long as basic winter prep protocols are followed. Either way, using a premium motorcycle cover, placing the bike on a stand to relieve tires, and adding a battery tender are musts for effective indoor storage. Remember, no storage solution is set-it-and-forget-it. Checking on your ride periodically during the winter months will safeguard your investment from preventable surprises.
Using Motorcycle Winter Prep Services at Professional Shops
Even the most diligent DIY rider can benefit from professional motorcycle winter prep service. Shops like Nasty Performance offer specialized packages: comprehensive cleaning, fuel system stabilizing, trickle charger installation, tire rotation, and precise fluid checks. Technicians understand the nuances of preparing different makes and models, minimizing the risk of oversight. A key benefit is the peace of mind—knowing your motorcycle is protected, stored, and monitored by experts who put your bike’s longevity and safety first.
“A professional motorcycle winter prep service not only extends the life of your bike but ensures it's ready to ride on the first warm day.” — Nasty Performance Lead Technician
If you’re pressed for time, lack proper indoor storage, or want the assurance of a thorough job (especially for new bikes or high-value models), professional prep is a sound investment. The cost is often offset by avoided repairs and downtime, making it the best way to guarantee your ride will be in top condition next spring.
Cold Weather Motorcycle Maintenance Tips
- Checking tire pressure and tread during cold weather: Tires lose air as temperatures fall, creating a serious risk of flat spots and poor handling. Keep tires at recommended pressure and move your motorcycle a quarter turn every few weeks.
- Protecting electrical systems in winter storage: Cold weather accelerates battery drain and corrosion at terminals. Disconnect or maintain your battery with a battery tender or trickle charger to ensure reliable starts come spring.
- Lubricating moving parts for optimal spring performance: All pivot points, chain drives, and cables should be lubricated before storage. This reduces the chance of sticking, freezing, or rusting during the winter months.
Applying these tips ensures your motorcycle is in top shape after the cold passes, without costly repairs or unexpected downtime.
How to Ensure Your Motorcycle is Ready to Ride After Winter Storage
Spring Inspection and Safety Checklist
Before you hit the pavement after a long winter, a comprehensive spring inspection is a must. Begin by re-checking all fluids—especially oil and brake fluid—for correct levels and any signs of contamination. Examine tires for proper inflation and any signs of flat spots. Assess the chain drive tension and lubricate again if needed. Reinstall and test your battery, confirming voltage and connections, and check all controls for smooth operation. Make sure the gas tank is free from condensation or rust. Start your engine while monitoring for unusual sounds or warning lights. Don’t forget to test brakes and lights to ensure your motorcycle is fully ready to ride.
This inspection not only confirms the effectiveness of your winter prep but also helps catch any minor issues before they become major repairs. If anything seems off, address it with a professional promptly—safety comes first, especially after a season of storage.
Addressing Common Motorcycle Winterization Issues Before Riding
Even with the best winter prep service, certain issues may arise. Common post-storage problems include weak batteries, low tire pressure, sticky throttle cables, and moisture in the gas tank or electronics. Don’t overlook small problems—promptly resolving them protects your investment and ensures you enjoy a safe, smooth ride all season. A quick ride around the block can highlight any lingering issues: listen for odd noises, test brake response, and make sure all indicators are working. This attention to detail keeps your bike in top condition and reinforces the importance of comprehensive winter storage protocols.

People Also Ask: Motorcycle Winter Prep Service
What to do to prepare a motorcycle for winter?
Detailed answer outlining preparation steps, referencing core components of the motorcycle winter prep service and winter storage advice.
To prepare your motorcycle for winter, start by giving it a thorough wash and dry to remove road grime and salt, which can cause corrosion. Next, lubricate all moving parts, especially the chain drive, to prevent rust and sticking. Top off or change engine oil, brake fluid, and coolant to ensure that your motorcycle stays in top shape. Add a fuel stabilizer to a full gas tank, then run the engine a few minutes so the stabilizer circulates through the fuel system. Remove or maintain your battery with a battery tender, inflate tires to the recommended pressure, and plug the exhaust and intake with clean cloths to keep out pests. Finally, store your ride indoors or use a premium weatherproof motorcycle cover if outdoor storage is the only option. Following these steps means your motorcycle will be ready to ride when spring returns.
What is the 2 4 12 second rule on a motorcycle?
Explanation and relevance of the 2-4-12 second rule to safe riding practices and wintertime preparations.
The 2-4-12 second rule refers to a safe riding technique: look 2 seconds ahead for immediate dangers, 4 seconds ahead for anticipated needs (like slowing or lane changes), and 12 seconds ahead to plan for hazards or road changes. While this rule is most relevant to actual riding, it impacts winter prep by reminding you to think ahead during storage: spot potential risks, plan your maintenance with foresight, and act early to keep your motorcycle in top condition. Good vision and anticipation allow you to prepare your bike for the season and quickly address hazards that may have developed over the winter months.
How much does it cost to winterize a motorcycle?
Breakdown of costs associated with professional motorcycle winter prep service, DIY options, and storage.
The cost to winterize your motorcycle varies by approach. DIY methods can be inexpensive—primarily the cost of materials like fuel stabilizer, oil, tire pressure gauge, and a quality motorcycle cover (totaling $50–$150). Using a professional motorcycle winter prep service typically ranges from $120–$400, depending on your bike and the level of service. Indoor storage at a professional facility can add $50–$150 per month. Investing in quality prep pays off by reducing the risks of unwanted surprises and costly repairs during and after the winter months.
What does 2 fingers up mean on a motorcycle?
Explanation of common motorcycle hand signals and etiquette, including relevance during group rides in winter.
The gesture of “2 fingers up” is a popular motorcycle hand signal that symbolizes camaraderie, respect, and a wish for safe travels among riders. While commonly used during the riding season, it also applies to group rides in winter or the beginning of spring. Hand signals are a crucial part of motorcycle etiquette—especially when road conditions are less than ideal due to lingering cold weather or gravel. Always use clear signals with proper glove fit to foster communication and safe group riding, whether during winter storage rides or your next spring adventure.
Frequently Asked Questions: Motorcycle Winter Prep Service
- How long should a motorcycle be stored for winter? Most motorcycles are stored for 3–6 months depending on regional climate. Prepare for an extended period to prevent battery drain and fluid degradation.
- Is professional motorcycle winter prep service necessary for new bikes? Yes, new motorcycles benefit as much as older ones from winter prep, safeguarding factory components and maintaining warranty conditions.
- What are the biggest risks if I skip motorcycle winter prep service? Skipping prep can cause corrosion, battery failure, contaminated fuel, brake fluid issues, and flat spots on tires—leading to costly repairs or unsafe rides.
- Will motorcycle winter prep help maintain the bike’s value? Absolutely—regular prep minimizes wear, prevents mechanical failures, and keeps documentation complete for future resale or trade-in value.
Key Takeaways from Your Motorcycle Winter Prep Service Guide
- Effective motorcycle winter prep service extends the lifespan of your motorcycle
- Proper winter storage guards against mechanical failures and costly repairs
- A well-executed motorcycle winter prep leaves your bike ready to ride when spring arrives
Get Professional Motorcycle Winter Prep Service Today
“Don’t let your investment deteriorate in the cold. Call Nasty Performance Motorcycle Shop Today: 847-458-4858 for professional motorcycle winter prep service!”
Act now: A smart winter prep routine is the most important upgrade you can make for your ride’s safety, value, and reliability this year.
If you’re ready to take your motorcycle care to the next level, don’t stop with winterization—explore our broader range of expert advice and service offerings at Nasty Performance’s main resource hub. There, you’ll find advanced maintenance strategies, seasonal riding tips, and the latest updates to keep your bike performing at its best all year long. Whether you’re planning for spring, summer, or beyond, our insights can help you maximize your motorcycle’s longevity and enjoyment. Continue your journey toward expert-level motorcycle ownership and discover new ways to protect and enhance your ride.


Write A Comment