Nasty Performance ~ 847-458-4858 

  • Blog Home
  • Categories
    • Motorcycle Maintenance
    • Riding Tips & Preps
    • Safety & Inspection
    • Customizations & Upgrades
    • DIY Motorcycle Repairs
    • Motocycle Audio Systems
    • Motocycle Seasonal Care & Storage
    • Engine, Electrical Performance
  • Bike Night
  • Nasty Performance Motorcycle Shop
October 24.2025
1 Minute Read

Motorcycle Paint Jobs That Turn Heads Instantly

Have you ever wondered which motorcycle paint jobs truly command attention—and why some motorcycles leave everyone else in the dust at the stoplight?

Picture this: you pull up at a stoplight and every set of eyes swings your way—not because of a roaring engine, but because your motorcycle’s paint job is nothing short of show-stopping. What makes certain bikes instant conversation starters while others fade into the background? Motorcycle paint jobs —when executed with artful design and daring vision—aren’t just about color. They’re about self-expression, pride, and pure showmanship . In this article, you’ll discover the game-changing trends in custom motorcycle paint, tips for choosing the perfect style, and expert advice on what elevates a good paint job into an unforgettable one.

  • Why stunning motorcycle paint jobs make a bike unforgettable

  • The hottest custom paint trends—matte, metallic, chameleon—and when to choose them

  • How to find the right motorcycle painter and the aftermarket parts that complement your look

  • Costs, maintenance, and expert insights into getting the most jaw-dropping results

How Motorcycle Paint Jobs Become Instant Eye-Catchers

  • Explore why first impressions matter with motorcycle paint jobs

  • Get insider opinions on what sets an unforgettable motorcycle paint job apart

  • Understand the fusion of art and engineering in motorcycle paint

  • Why style, color, and creativity trump conventional choices

First impressions on the road are often made before a word is spoken—your motorcycle’s paint job is your calling card. Beyond its protective function, the finish is a form of nonverbal storytelling. Paint jobs that turn heads combine technical mastery with creativity, merging color science, body set design, and the rider’s personality. Experienced motorcycle painters know that the difference between forgettable and showstopping comes down to bold choices; think dazzling neon paint, a perfectly applied base coat, or a metallic flake that pops in sunlight.

When it comes to custom motorcycle paint , style matters as much as innovation. While stock paint jobs have their appeal, they rarely reflect the rider’s true essence. Custom paint—ranging from chameleon to classic matte paint jobs—infuses bikes with unforgettable character. Owners and pros alike agree: the right combination of color, finish, and imaginative application will always outshine a cookie-cutter look. In custom motorcycle culture, conformity is the enemy of attention.

The artistry doesn’t stop at paint; it’s where engineering and vision meet. High-quality body sets, precision-fit sissy bar details, and tastefully selected aftermarket parts can amplify even the boldest paintwork. This fusion of art and mechanics is why some bikes are admired long after they leave the stoplight—while others are quickly forgotten.
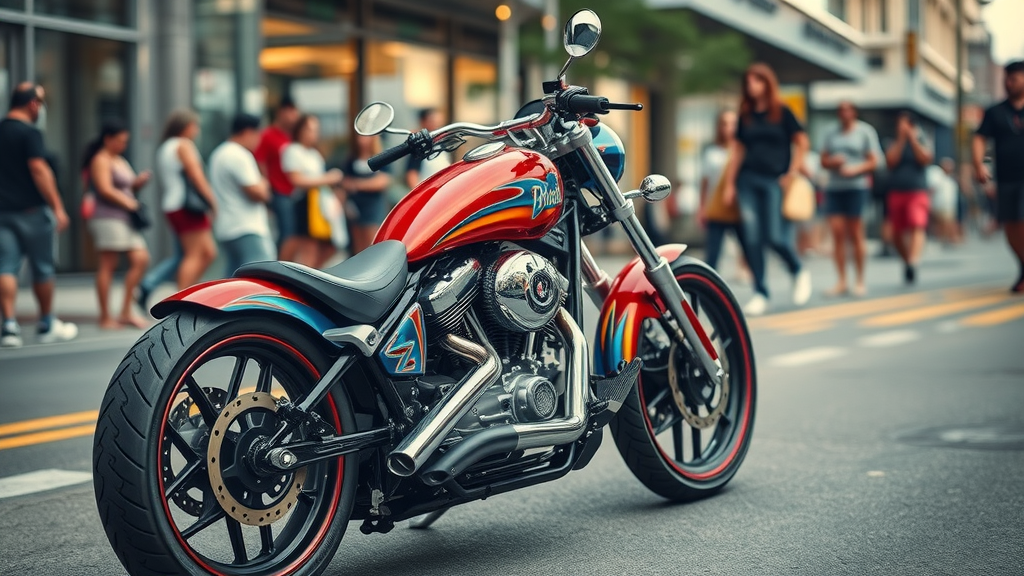
Vibrant custom-painted motorcycle gleaming outdoors with metallic reds and blues, drawing attention on an urban street - motorcycle paint jobs

Top Trends and Iconic Styles in Custom Motorcycle Paint Jobs

The evolution of motorcycle paint jobs is driven by innovation and the relentless pursuit of distinction. Modern riders crave more than traditional black or basic glossy finishes. They want custom paint jobs that break boundaries—matte paint, metallic paint, and chameleon paint being favorites among those who want to push the envelope. Leading custom paint shops now experiment with unique combinations, such as metallic base coats and iridescent overlays, to create paint jobs that are as much about personal branding as they are about aesthetics.

Iconic styles aren’t merely products of their time; they reflect broader shifts in design. Matte paint jobs offer understated elegance, while metallic paint jobs shimmer with exuberance. These trends are not only about looking good—they’re about evoking emotion and commanding respect at every bike meet. Choosing between these custom finishes involves considering your personality, the message you want to send, and even practical concerns like maintenance and durability.

Chameleon Paint, Matte Paint, and Metallic Paint: Bold Choices for Modern Riders

  • Compare the visual impact of a chameleon paint job versus a matte paint job

  • How a metallic paint job adds instant allure to any custom motorcycle

  • When to consider matte paint or metallic paint for your own motorcycle paint job

Chameleon paint jobs are at the cutting edge of custom motorcycle painting—they shift hues depending on the angle and light, constantly demanding a second glance. These intricate art forms rely on iridescent layering, giving your motorcycle a living, breathing sense of movement. While chameleon paint is dramatic and futuristic, some riders prefer the smokey sophistication of a matte paint job .

Matte paint offers a velvety, light-absorbing quality. It stands out without the glitter of metallic paint, projecting minimalist luxury. In contrast, a metallic paint job features glittering metal flake or micro-beads that catch and reflect sunlight for a dazzling display. The trick is not just in the color selection, but also in understanding how your paint job will interact with light throughout the day.

Choosing between these finishes is about matching your personality and maintenance preferences. Chameleon paint jobs are instant showstoppers but require expertise to maintain. Matte paint jobs hide minor imperfections but may require special cleaners. Metallic paint jobs are bold and vivid but demand a perfectly smooth base coat for full effect. No matter which you choose, a daring color technique ensures your motorcycle joins the ranks of unforgettable custom motorcycle paint jobs .

"A custom paint job isn't just a look—it’s a signature. Your motorcycle should turn heads before the engine even roars."
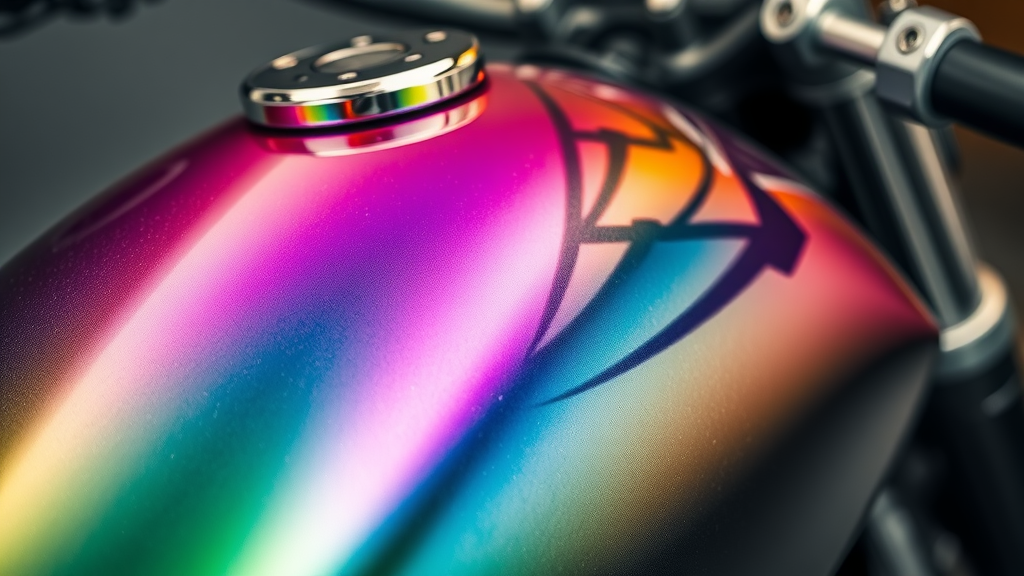
Close-up of motorcycle gas tank with iridescent chameleon paint transitioning colors under light - chameleon paint job

Showcase: 5 Unforgettable Custom Paint Jobs That Broke All The Rules

Rank

Style

Standout Feature

Color Technique

Rider Reaction

1

Chameleon Paint Job

Ever-changing color

Iridescent layering

Stuns at every angle

2

Matte Paint Job

Smooth, understated sheen

Flat base coat

Understated luxury appeal

3

Metallic Paint Job

Glittering highlights

Metallic flake

Catches sunlight brilliantly

4

Custom Airbrushed Scene

Detailed storytelling

Multi-hue airbrush

Individual artistry

5

Vintage Pinstriping

Hand-laid designs

Contrasting lines

Classic, timeless wow-factor

These iconic custom motorcycle paint jobs have become legends among enthusiasts. The dramatic impact of a chameleon finish captures attention from all directions, while pinstriping harks back to motorcycle history, offering both class and artistry. Airbrushed scenes tell stories unique to each rider, pushing the idea of a motorcycle beyond transportation—making each ride a canvas.

The striking contrast between metallic and matte finishes, and the playfulness of color-changing paints, prove that conventional choices simply can’t compete with creativity. These five standouts all share one trait: they don’t just enhance a bike—they claim its spot in the annals of unforgettable design.
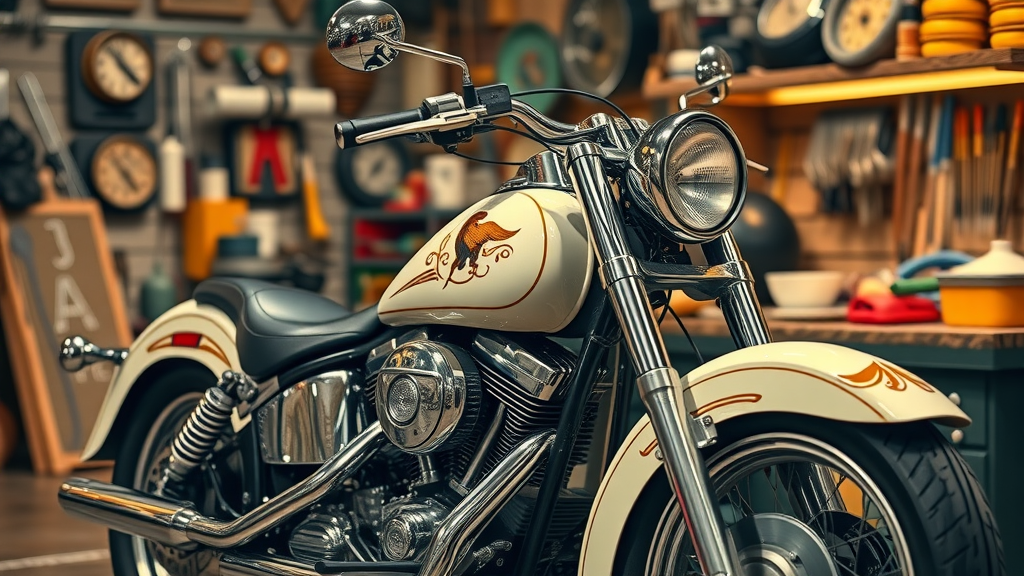
Classic motorcycle with elegant vintage pinstriping, retro garage vibe with an artist hand painting detail - custom paint job

What to Look for in a Motorcycle Painter and Aftermarket Parts for Paint Jobs

  • How to choose a top-tier motorcycle painter

  • Selecting aftermarket parts for a standout custom motorcycle

  • Why experience and style matter as much as technique

Finding the right motorcycle painter is as crucial as selecting your custom paint style. You’ll want an experienced artist who understands the complexities of body set materials, base coats, and finishing options like clear coats and metallic flake. Look for a portfolio filled with variety: exceptional paint jobs on custom motorcycles, creative uses of color, and word-of-mouth endorsements from previous clients. A truly skilled painter brings innovation, reliability, and the kind of intuition that knows when to go bold and when to keep it classic.

Aftermarket parts play a vital supporting role. Swapping out or customizing body sets, installing a sleek new sissy bar, or upgrading the rear fender—all these can help your new paint job stand out while ensuring the longevity and structural integrity of your ride. Reliable painters will work with your unique combination of original and aftermarket parts, ensuring fit and finish that last.

Don’t underestimate the importance of experience. The world’s greatest design won’t matter if the painter can’t produce the flawless finish or fails to anticipate problems with body sets or repair work. Experience, style, and a willingness to push boundaries—these are what set the best motorcycle painters apart in the competitive world of motorcycle paint jobs .

Professional motorcycle painter inspects a custom-painted part in clean workshop with color swatches - motorcycle painter

Expert Opinion: Custom Paint Jobs vs. Stock Paint Jobs

  • When a custom paint job is worth the investment for your motorcycle

  • The difference custom paint jobs make on resale value and personal satisfaction

  • Advantages of choosing custom paint and working with skilled painters

Investing in a custom motorcycle paint job transforms your bike from mass-produced to one-of-a-kind. While stock finishes are factory-perfect, they can’t compete with the individuality—a custom job imbues your motorcycle with your story. Experts agree that a high-quality custom paint job, especially when paired with well-chosen aftermarket parts, can boost both personal satisfaction and resale value. Whether you opt for bold chameleon paint or understated matte, the wow-factor and attention at shows—or simply your own driveway—are worth every penny.

Additionally, custom jobs often involve techniques and color palettes unavailable on the assembly line. Skilled painters create effects with neon paint, creative metal flake, or iridescent layering that will never be replicated on another bike. That exclusivity translates directly into value for serious collectors and casual riders alike.

The relationship with your motorcycle painter becomes a collaboration, pushing the boundaries of what a paint job can bring. Engaging with talented professionals not only guarantees a durable, long-lasting finish but also ensures your investment becomes a rolling work of art—one that’s uniquely yours.

Take a virtual tour inside a professional custom paint shop, and watch how master painters transform ordinary motorcycles into jaw-dropping masterpieces. See the meticulous prep work, learn about the science behind base coats and clear coats, and witness the attention to detail that sets premium motorcycle paint jobs apart.

From mixing custom hues to the delicate airbrushing and final clear coat polish, the process is as much performance as it is craft. This deeper appreciation empowers you to ask smarter questions and seek the results you really want when calling or contacting your painter.

People Also Ask – Real Questions About Motorcycle Paint Jobs

What's the average cost to paint a motorcycle?

  • The cost of motorcycle paint jobs varies widely based on complexity, finish (chameleon paint, matte paint, metallic paint), and the expertise of the motorcycle painter. Expect to pay anywhere from $300 for a simple paint job to over $3,000 for custom paint jobs with detailed artwork.

Pricing can also be impacted by factors such as whether repair work is needed, the condition of your body set, and if specialty products like neon paint or particular metallic flakes are used. Always request a comprehensive estimate breaking down labor, materials, and any associated aftermarket parts before proceeding with your custom paint job .

How much is a motorbike paint job?

  • A standard motorcycle paint job typically ranges from $400 to $1,500. Custom paint jobs, especially those using specialty finishes like metallic paint or intricate custom paint, demand higher pricing due to the labor and skill involved.

Keep in mind that the final cost may vary due to unique requirements such as pinstriping, detailed airbrush work, or coordination with aftermarket parts and sissy bars. For those seeking to paint a motorcycle themselves, factor in the price of body sets and paint supplies—sometimes the DIY route can rival professional pricing depending on scope.

Is it cheaper to paint or wrap a motorcycle?

  • Wrapping a motorcycle is sometimes more affordable for solid colors and patterns, ranging from $500 to $3,000. However, professionals argue the depth and vibrancy of true motorcycle paint jobs—especially custom motorcycle paint jobs—can’t be matched by a wrap.

Wraps do offer quick turnaround and temporary protection, but they may lack the shimmer of metallic paint jobs and the flawless transitions possible with airbrushing. Long-term, custom paint adds both resale and emotional value—a key consideration if your motorcycle is more than just transportation.
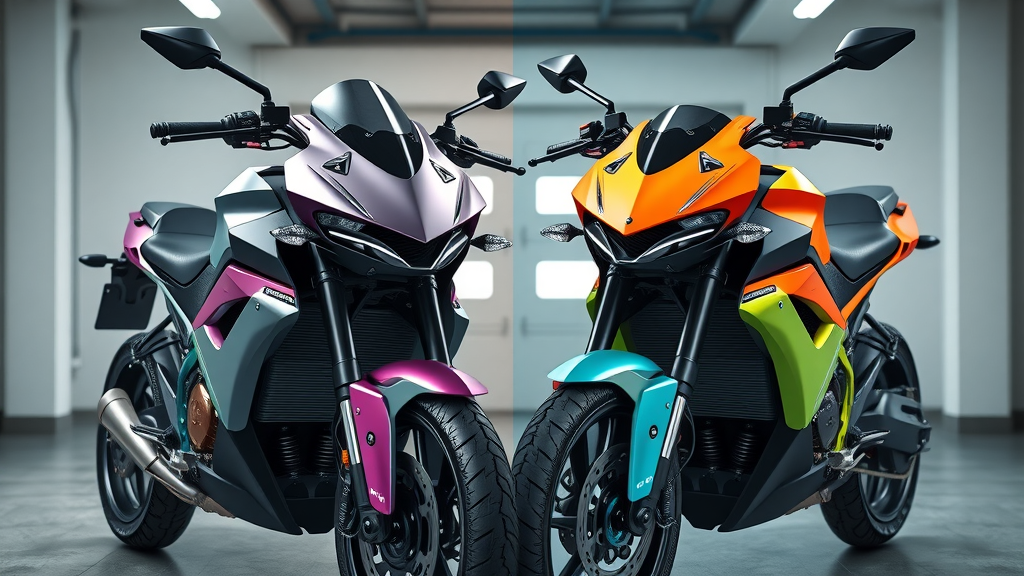
Modern motorcycle split-view comparison, metallic custom paint versus vibrant wrap - motorcycle paint jobs

Is it better to powder coat or paint a motorcycle?

  • Powder coating offers durability and is often used on specific parts, but professional motorcycle paint jobs (including chameleon paint or matte paint) provide intricate finishes with more color options and artistic depth for a custom motorcycle look.

While powder coating shines in harsh environments—protecting frames or wheels—custom paint jobs bring the artistry and attention that earn double-takes at every traffic stop. For complete creative control over your motorcycle body sets and design, high-quality paint will always reign supreme.

Your Motorcycle Paint Job: Factors to Consider Before You Choose

  • Budgeting for a professional motorcycle paint job (standard vs. custom paint jobs)

  • Assessing your motorcycle’s aftermarket parts needs

  • Why the right motorcycle painter is crucial

  • Planning for long-term durability and maintenance

Before diving into a new motorcycle paint job , set a reasonable budget by comparing standard versus custom options. Custom finishes such as chameleon paint or metallic paint jobs command a higher price tag, but their impact and durability justify the investment. Ensure there’s room in your budget for necessary aftermarket parts and possible repair work, as a flawless paint job starts with a solid foundation—body sets in top shape, properly prepped sissy bars, and correctly fitted rear fenders.

Selecting the right painter is non-negotiable. Consult portfolios, visit previous clients, and prioritize clear communication throughout the project. Clarify whether you want a standard finish or something bolder, and make sure your painter understands the ambition of your vision.

Finally, factor in maintenance and long-term durability. Some custom paint jobs require specific care—particularly chameleon or neon finishes—while others are more forgiving. If you ride hard in all conditions, opt for a motorcycle paint job that balances beauty with staying power.

Motorcycle owner inspecting a freshly painted part, reflecting on the decision - motorcycle paint job

Get a crash course in paint job best practices. Learn when to choose a pro, which products extend clear coat life, and common mistakes to avoid—especially if you plan to paint a motorcycle yourself or integrate aftermarket parts.

These quick tips ensure your time, effort, and investment are rewarded with a result that leaves ordinary bikes in the dust.

Quick Reference: Essential FAQs for Motorcycle Paint Jobs

  • How long does a motorcycle paint job last? With proper maintenance and premium clear coats, most custom paint jobs last 5-10 years or more, especially with garage storage and regular cleaning.

  • What’s included in a full custom paint job? A thorough custom paint job typically involves body set stripping, base coat and color application, multiple clear coats, and final polish to ensure depth and durability.

  • Can I paint a motorcycle myself, or should I always use a professional motorcycle painter? DIY jobs are doable for smaller projects, but professionals offer expertise, equipment, and a flawless finish—especially for intricate designs or difficult surfaces.

  • Are chameleon paint jobs difficult to maintain? Chameleon finishes require careful cleaning and dedicated products to preserve the effect. Regular waxing and avoiding abrasive materials are essential.

  • Do aftermarket parts affect the price or quality of motorcycle paint jobs? Yes, the fit and finish of body sets and aftermarket parts can increase labor and planning; always share full specs with your painter to avoid surprises.

Ready to Transform Your Ride? Make Your Motorcycle Paint Job One That Turns Heads

Your motorcycle is your signature. Choose daring colors, skilled painters, and the right aftermarket parts to ensure your next motorcycle paint job leaves a lasting impression, wherever the journey takes you.

To further enhance your understanding of motorcycle paint jobs that captivate attention, consider exploring the following resources:

  • “Custom Motorcycle Painter Job Description (Updated 2023 With Examples)” : This article provides a comprehensive overview of the responsibilities and skills required for custom motorcycle painters, offering insights into the artistry and technical expertise involved in creating standout paint jobs. ( jobbank.artsusa.org )

  • “Custom Motorcycle Painter Job Description [Updated for 2025]” : This resource outlines the experience and educational requirements for custom motorcycle painters, highlighting the importance of formal training and hands-on experience in achieving exceptional paint finishes. ( interviewguy.com )

If you’re serious about transforming your motorcycle into a head-turning masterpiece, these resources will provide valuable insights into the skills and techniques that define exceptional custom paint jobs.
Customizations & Upgrades

0 Comments

Write A Comment

*
*
Please complete the captcha to submit your comment.
Related Posts All Posts

How to Install Windscreen Replacements Like a Pro

Did you know? According to automotive safety experts, installing your car windscreen incorrectly can reduce your vehicle’s structural integrity by up to 30%. This means that learning how to install windscreen replacements properly isn’t just about saving money—it's about protecting your life and your passengers. An Unexpected Fact: How to Install Windscreen Replacements Can Transform Your Vehicle's Safety When it comes to how to install windscreen replacements, most drivers underestimate just how much this process impacts the overall safety of their vehicle. The car windscreen is not just a barrier against wind and debris—it’s a vital part of your car’s structure, playing a crucial role during a collision by providing support to the roof and helping to deploy airbags correctly. Ensuring your windscreen replacement is performed precisely guarantees visibility, improves the integrity of the windshield frame, and drastically reduces risks from leaks, system errors, and future windshield replacement needs. Improper or rushed car windscreen installation can result in dangerous cracks or chips, water intrusion, wind noise, or even full glass detachment in a crash. That’s why every step of the windshield replacement process, from tool selection to final inspection, is critical. Whether you're a DIY enthusiast or considering replacing a windshield through a professional service, understanding the right process for installing a replacement car windscreen transforms not only your vehicle’s condition but your confidence and peace of mind. What You’ll Learn About How to Install Windscreen Replacements Like a Professional Essential tools for how to install windscreen replacements Step-by-step process for DIY car windscreen replacement Techniques to ensure a secure windshield replacement Expert advice for safety and quality Understanding Car Windscreen Types and Materials Before you dive into how to install windscreen replacements, it’s important to recognize the variety of car windscreen options and materials. Windscreens, or windshields, today are designed for optimized safety, clarity, and strength. You'll most commonly encounter laminated glass, a specially bonded material that prevents shattering and reduces the risk of injurious glass fragments in an accident. Knowing the type of replacement car windscreen your vehicle requires is fundamental to ensuring a proper fit and long-term durability. With modern cars increasingly loaded with technology—think cameras and sensors for driver assistance systems—the challenge is not only to install the right windscreen but also to ensure all integrated systems continue working perfectly after replacement. The right materials and installation techniques can mean the difference between a seamless upgrade and an expensive system error due to a poorly installed windshield. Difference Between Windscreen vs. Windshield Replacement The terms "windscreen" and "windshield" are often used interchangeably—especially in automotive circles. Typically, “windscreen” is the term favored in British and Commonwealth countries, while “windshield” is used in American English. Regardless of terminology, both refer to the main front glass panel protecting you inside the car. Replacing a windshield involves removing the damaged glass and carefully installing a replacement car windscreen using specialized adhesives and precise mounting methods. Key considerations are the architecture of the windshield frame, compatibility with technologies like rain sensors or heating elements, and adherence to service manual guidelines to prevent damaging the car or triggering a system error. Overview of Modern Car Windscreen Materials Today’s car windscreens are generally made from laminated safety glass, which consists of two pieces of glass with a polyvinyl butyral (PVB) layer in between. This design prevents the glass from shattering during impact—vital for occupant safety and for maintaining the structure of your car windscreen frame. Some vehicles may use toughened glass for rear or side panels, but front windscreen replacement almost always involves laminated glass for safety reasons. If your replacement car windscreen supports advanced driver assistance systems (ADAS), selecting OEM-approved materials and following your service manual is critical. The right choice of materials directly impacts the safe, long-term operation of your replacement car windscreen and any related system functionalities. As you prepare for your windscreen replacement, remember that seasonal factors can also impact your vehicle’s maintenance needs. For additional tips on keeping your ride in top condition throughout the year, check out these seasonal bike care secrets every rider should know—many principles apply to both cars and motorcycles. How to Install Windscreen Replacements: Preparing Your Tools and Work Area Proper preparation is the first step in mastering how to install windscreen replacements. Equipping yourself with the correct tools and setting up a clean, organized workspace ensures the process runs smoothly without damaging the car or making installation errors. Start by reviewing your vehicle’s service manual to identify specific requirements or sensor placement notes. Create an uncluttered work area—preferably indoors or in a sheltered garage—to keep dust, debris, and temperature fluctuations from compromising the adhesive bond. Having all your tools and materials close at hand eliminates the risk of introducing contaminants just as you’re handling your new car windscreen. Your checklist should include specialized suction cups for glass handling, a trim removal tool, gloves, a utility knife, a caulking gun for adhesive application, and high-quality urethane or butyl adhesives. A clean microfiber cloth is essential for wiping the glass and frame before and after installation. Good lighting is a must, as even tiny spots of old adhesive can impact the bond between your replacement car windscreen and the frame. And always have backup wiper blades ready, as worn wiper blade parts installed after replacement can scratch your new windscreen. Suction cups Trim removal tools Safety gloves Utility knife or automotive glass cutter Microfiber cleaning cloth Caulking gun Urethane (preferred) or butyl adhesive tubes New/replacement wiper blades Protective tape Service manual for your car windscreen installation reference Car Windscreen Removal: Step-by-Step Guide Removing your damaged car windscreen requires care and the right sequence to avoid damaging the car or causing a system error. First, remove the windshield wiper blades and any trim or molding around the glass. Carefully insert the blade of your trim tool between the glass and the frame to release fasteners or clips, being cautious not to scratch the paint. Once the trim is off, use an automotive glass cutter or utility wire to gently cut through the adhesive bonding the old windscreen to the frame. Move slowly and use even pressure—excess force can chip or crack surrounding panels, causing future leaks or squeaks inside the car. Once the adhesive is cut, use suction cups to lift the old windscreen out and set it aside. Wear gloves to avoid injury and minimize glass smudging. If you encounter stubborn spots, double-check for hidden clips or adhesive beads. After removing the glass, thoroughly clean the frame. Any remaining adhesive or debris can compromise bonding for your replacement car windscreen and may trigger leaks or a system error due to improper alignment with sensors. Always refer to your vehicle’s service manual for guidance during removal to ensure you’re not disturbing airbag, camera, or sensor wiring. Careful removal prevents future problems and leaves your windshield frame ready for flawless installation. Removing trim and wipers Cutting through existing adhesive Handling glass safely Comparison of Adhesives for How to Install Windscreen Replacements Adhesive Type Application Time Advantages Urethane Fast (1-2 hours initial cure) Superior strength, safe for airbags, OEM standard for most cars Butyl Slower (up to 24 hours) Easy to apply, flexible, suitable for classic/older vehicles How to Install Windscreen Replacements: Applying Adhesive and Positioning the Glass The next step in how to install windscreen replacements is applying automotive adhesive and positioning your replacement car windscreen for a secure, weatherproof fit. First, dry-fit the new windscreen by placing it gently over the frame to check alignment and confirm the fit matches the vehicle specifications listed in your service manual. This prevents surprises later and ensures any integrated hardware or sensors line up flawlessly. Once confirmed, remove the windscreen and prepare to apply adhesive, keeping the work area dust-free and tools within easy reach. Using your caulking gun, apply a continuous, even bead of urethane or butyl adhesive around the cleaned and primed windshield frame. Focus on steady, overlapping strokes to eliminate weak spots or gaps, taking extra care in corners and critical load zones where leaks or future cracks or chips are most likely. Refer to the adhesive manufacturer’s guidance (often found on product packaging at your parts store) for correct bead height and setting times. If your car windscreen features built-in electronics, leave the protective tape in place until all wiring is correctly routed. The goal is to achieve a bond strong enough to pass crash standards and long-lived enough to resist leaks, temperature shifts, and regular wiper blade action. Techniques for Applying Windshield Replacement Adhesive The adhesive application process can make or break your windscreen replacement. Begin by donning gloves and using a caulking gun to lay down an even bead, starting from one corner of the frame. Maintain a steady hand and consistent pressure to avoid thin or skipped sections that can lead to water ingress or poor bonding. The best practice is to use a zig-zag or figure-eight motion for extra contact, especially on modern car windscreen frames with variable depths or curves. Be mindful not to touch the adhesive with bare hands, as oils can compromise its strength and set off a system error if electronics are involved. If using urethane (the most recommended car windscreen adhesive), act swiftly since the initial cure begins within an hour. Position the replacement car windscreen promptly, aligning tabs and edges carefully to avoid smearing the bead or contaminating the bond. Firm pressure along the perimeter helps seat the glass snugly against the frame, and you may need a helper for larger windscreens to ensure even placement. Clean any adhesive run-off before it cures, and inspect the fitment again as described in your service manual. Once satisfied, avoid disturbing the installation as the adhesive reaches its full set time for maximum safety and integrity. Placing the New Car Windscreen Correctly With adhesive freshly applied, immediately position the replacement car windscreen using suction cups for control. Lower it gently into the frame, making sure every edge seats flush against the urethane bead. Begin pressing from the middle and work outward, maintaining even contact to prevent gaps and avoid misalignment with integrated sensors or guides. It's critical to avoid sudden movements or overcorrecting once the glass is settled—any disturbance can affect the seal, attract contaminants, or lead to a future leak. Secure the windscreen temporarily using soft tape on the perimeter if needed, but do not open or slam car doors as this can disturb the uncured adhesive. Check that the windshield sits evenly against the bodywork and reference the service manual for any installation marks or sensor calibration notes. Inspect all couplings, connectors, and bracket alignments for rain sensors, cameras, or heating elements. Only reinstall trim and wiper blade components after the adhesive has cured, as premature pressure can crack the glass or disturb the bond. As one industry expert wisely notes: “The key to a long-lasting windscreen replacement is careful prep and patience with the adhesive set time.” — Industry Expert Final Checks and Curing After Car Windscreen Installation The final stage for how to install windscreen replacements is curing and inspection. Follow the adhesive manufacturer’s guidelines for set and cure time—most urethanes recommend at least one hour before handling and up to 24 hours for complete bonding. Do not expose the vehicle to extreme temperatures or drive immediately, as this can weaken the bond or set off a system error. Meanwhile, inspect the windscreen from both inside and outside the car, looking for gaps, air bubbles, or uneven pressure along the edge. Check for visible leaks using a gentle spray of water and note any signs of moisture intrusion. Reattach all external trim, install fresh wiper blades, and test all affected systems such as cameras, sensors, or heating elements according to your service manual. A successful car windscreen installation prevents leaks, drafts, and system errors, and ensures the windscreen provides structural support and optimal visibility. Final checks safeguard your replacement car windscreen from early failure and confirm your work meets professional safety standards. Always schedule recalibration of any advanced driver assist features if your vehicle is so equipped. Inspect adhesive bead for gaps or air pockets Check glass alignment and flush mount to frame Water test for leaks—spray lightly at all edges Ensure electronics and sensors work flawlessly Reinstall new wiper blades and trim Video Walkthrough: How to Install Windscreen Replacements in Real Time Sometimes, seeing the process makes all the difference. Watch this comprehensive video to observe a professional windscreen replacement from start to finish. You'll see real-world techniques for tool prep, damage assessment, adhesive application, glass positioning, and meticulous safety checks inside an advanced workshop setup. People Also Ask: Is it Easy to Install Your Own Windshield? Short Answer: DIY vs. Professional Windshield Replacement While it’s possible to install a replacement car windscreen yourself, the task demands attention, patience, and the right materials. DIY installation can save money if you have automotive skills and access to proper tools, but mistakes such as misaligned glass or improper adhesive use can introduce system error messages, leaks, or safety issues. Professional installers have specialized equipment, comprehensive knowledge, and can offer a warranty for their work. If your car includes advanced features or insurance requirements, professional windshield replacement is often the safest path, though DIY is feasible for mechanically inclined drivers following their service manual meticulously. People Also Ask: What Adhesive Do I Use to Install a Windshield? Detailed Answer: Choosing and Applying Suitable Car Windscreen Adhesives For modern car windscreens, urethane adhesive is the industry standard thanks to its rapid curing and high-strength properties. Urethane ensures a tight seal, critical for vehicles with airbags, rain sensors, or advanced driver assist systems. Butyl adhesive is sometimes used for classic cars, but it does not offer the same strength or crash protection as urethane. When purchasing from a parts store, always select OEM-approved adhesives that match your vehicle’s requirements. Proper adhesive choice, combined with clean application and full cure time, guarantees your replacement car windscreen stays secure—even in harsh driving conditions or emergency stops. People Also Ask: How Are Windshields Affixed in Place? Technical Explanation: The Science Behind Windshield Replacement Adhesion Windshields are bonded to the car with high-strength adhesives, typically urethane, which creates a strong, flexible seal between the glass and the windshield frame. This chemical bond is designed to absorb impacts, prevent moisture intrusion, and support airbag deployment. The process involves thoroughly cleaning the frame, applying primer for better adhesion, and laying a continuous bead of adhesive before carefully positioning the replacement car windscreen. Once set and cured as per the service manual, the adhesive forms a watertight and structurally supportive connection that allows the windscreen to serve its dual role of protection and rigidity for the entire car windscreen assembly. People Also Ask: Can You Replace Your Windscreen Yourself? Considerations for DIY Car Windscreen Installers Yes, you can replace your windscreen yourself if you follow proper safety protocols, have the right tools and materials, and take the time to do a careful installation. Be aware that mistakes such as improper adhesive application, uneven glass alignment, or skipped final checks can lead to leaks, system error notifications, or inadequate structural support in a crash. Always consult your vehicle's service manual, use approved adhesives from a reputable parts store, and take all recommended curing precautions. If your car is equipped with advanced safety systems, professional recalibration may be needed to ensure all electronics function as intended after your replacement car windscreen is installed. FAQs: How to Install Windscreen Replacements How long does windscreen adhesive take to cure? Most urethane adhesives require at least one hour to set for safe handling, but complete curing can take 24 hours. Always refer to product instructions and avoid driving until full cure is achieved. Do I need to replace my wiper blades after installing a new windscreen? Yes, always install fresh wiper blades on a new car windscreen to prevent scratches and ensure optimal visibility. Can I use universal adhesives for all windscreen replacements? No, always use adhesives designed for automotive use and recommended by your car’s manufacturer to avoid leaks, poor bonding, or system errors. How do I prevent leaks after a replacement car windscreen installation? Perform a thorough inspection, check for gaps in the adhesive, and test with water before driving. If leaks are detected, do not postpone repairs. Is recalibration required after windshield replacement? If your car has ADAS or camera-based safety systems, recalibration by a professional may be necessary after installation. Key Takeaways: Mastering How to Install Windscreen Replacements Proper installation of your replacement car windscreen is critical for safety, comfort, and system performance. Use manufacturer-approved adhesives and always follow your vehicle’s service manual. Careful prep, clean application, and patience during curing set the foundation for a long-lasting, trouble-free windscreen replacement. When in doubt, consult a professional for advanced features or sensor calibrations. Conclusion: Why Proper Car Windscreen Installation Matters Getting your car windscreen replacement right protects you from structural failure, costly leaks, and dangerous system errors—making every moment invested in the process worth it for lasting safety and peace of mind. If you’re passionate about keeping your vehicle in peak condition, there’s always more to learn beyond windscreen installation. Explore our guide on seasonal maintenance strategies to discover how proactive care can extend the life of your ride, whether it’s a car or a motorcycle. These expert insights will help you anticipate challenges, adapt your maintenance routine to changing weather, and ensure your vehicle performs at its best year-round. Take your automotive knowledge to the next level and enjoy the confidence that comes with a well-maintained machine. Ready to Upgrade? Call Nasty Performance Motorcycle Shop Today: 847-458-4858 If you want your car windscreen installed with precision and care, or need professional advice, call Nasty Performance Motorcycle Shop at 847-458-4858. Our expert team will get back to you shortly to schedule your windscreen replacement and ensure you drive away safely.

Guide to Choosing Custom Turn Signals for Better Visibility

Did you know? Research shows that many accidents happen simply because a turn signal went unnoticed. Upgrading your vehicle’s turn signals is not just about style—it’s a crucial step in preventing accidents and making sure you are seen by others on the road. This guide to choosing custom turn signals will equip you with everything you need to know to drive safer, brighter, and with greater peace of mind. Startling Trends: Why Custom Turn Signals Matter for Safe Driving It’s easy to overlook the impact that something as small as a turn signal can have on your daily drive. However, recent data highlights that inadequate signal lights contribute to a significant portion of collisions, especially in low-light or heavy-traffic conditions. By investing in custom turn signals, you’re making a proactive choice to safeguard yourself, your passengers, and others sharing the road. Improved visibility is at the heart of accident prevention. Standard signal bulbs often fade over time or fail to stand out, particularly during daylight or inclement weather. Modern LED turn signal lights and upgraded signal bulbs utilize advanced technology, emitting brighter, clearer signals that get noticed—even from greater distances and in poor visibility. In high-density traffic, where split-second decisions can prevent costly and dangerous incidents, custom signal lights serve as your most reliable communicator, letting everyone know your intentions well in advance. What You'll Learn in This Guide to Choosing Custom Turn Signals Key factors for selecting the right turn signal light Differences between LED turn signal lights and traditional bulbs Installation process and maintenance tips Enhancing both safety and style via custom turn signals Understanding the Basics: What Are Turn Signals and Signal Lights? Functions of Turn Signal Lights and Signal Bulbs Turn signals—sometimes called signal lights or signal bulbs—are essential tools for communicating your next move on the road. By flashing left, right, or warning with your hazard signals, you’re broadcasting your intentions to everyone around you—drivers, cyclists, and pedestrians alike. In busy intersections and highway merges, the timely use of a turn signal can literally save lives. A high-quality turn signal bulb ensures that each flicker of your indicator stands out, cutting through fog, rain, or bright sunlight with ease. Whether you’re driving a car, motorcycle, or truck, these simple yet critical components are your first line of defense against miscommunications and surprise maneuvers. When choosing a custom turn signal light, you elevate not only functionality but the sense of security that comes with being distinctly seen. Reliable signal bulbs and advanced LED turn signal lights further enhance this communication, lowering the risk of dangerous misunderstandings on the road. While upgrading your turn signals is a significant step toward safer driving, it's equally important to maintain your entire bike or vehicle throughout the year. For practical advice on keeping your ride in top condition across all seasons, check out these seasonal bike care secrets every rider should know. Types of Custom Turn Signals: From LED Turn Signals to Signal Bulbs Comparing LED Turn Signal Lights and Traditional Bulbs Choosing between LED turn signal lights and traditional turn signal bulbs is one of the first decisions you’ll face when customizing your vehicle’s signal system. LED turn signals have become increasingly popular for drivers seeking improved brightness, faster illumination, and higher energy efficiency. Unlike standard incandescent or halogen bulbs, LEDs emit a crisp, vibrant light that is much more noticeable in all lighting conditions. Traditional turn signal bulbs, which rely on a heated filament, tend to offer a warm, familiar glow but are less energy-efficient and may dim or fail quicker with extended use. Custom LED turn signal lights outlast their halogen and incandescent counterparts, requiring fewer replacements and offering a more consistent performance. For anyone aiming to balance cost, reliability, and technological advancement, LEDs are widely regarded as a smart investment in both safety and style. However, it’s important to verify compatibility with your vehicle’s electrical system, as some LED upgrades require additional resistors or relays to function properly. Comparison of LED Turn Signal Lights vs. Standard Signal Bulbs Feature LED Turn Signal Lights Standard Signal Bulbs Brightness Very high; crisp, sharp illumination Moderate; warm glow, less visible in bright conditions Longevity Up to 50,000 hours or more Shorter lifespan; frequent replacement needed Energy Efficiency Minimal power draw More energy consumption Cost Higher upfront, long-term saving Lower upfront, higher over time from replacement Compatibility: Ensuring the Right Turn Signal Fit for Your Vehicle Choosing Turn Signal Lights for Motorcycles, Cars, and Trucks Check model and year compatibility Considerations for LED turn signals and signal lights by vehicle type Color and size matching Not every custom turn signal fits every vehicle, and selecting the wrong bulb could lead to installation headaches or reduced performance. Start by verifying your vehicle’s make, model, and year—these details ensure the turn signal lights and bulbs you choose are an exact match for your car, motorcycle, or truck’s electrical and housing requirements. For example, some vehicles are factory-wired for LED lights, while others will need additional components like resistors. When choosing LED turn signal lights or signal bulbs for motorcycles, compact design and high brightness are priorities, since space is often limited and visibility is even more critical. Cars and trucks may offer more flexibility in terms of size, shape, and even signal light position, so matching color temperature, lens color, and fixture style becomes essential for a seamless look and maximum performance. Key Considerations: Brightness, Visibility, and Color Temperature in Turn Signal Lights How Brightness and Color Temperature Impact LED Turn Signal Performance When it comes to custom turn signals, two factors stand above all: brightness and color temperature. High brightness ensures that your signal lights are seen clearly, even during daylight or adverse weather conditions, vastly improving visibility. Brightness and visibility are especially important for motorcycles, where turn signals need to penetrate through traffic and a variety of visual distractions. The color temperature of your LED turn signal lights also matters. Most legal signal lights are amber, but the shade varies from a warm yellow to a crisp, cool white. Amber turn signals offer the best recognition for other drivers, while white or blue-tinted bulbs may run afoul of the law or prove less effective. Always choose custom turn signal bulbs with the appropriate color temperature to maximize safety and meet regulatory guidelines. Balancing these elements ensures that your upgrade isn’t just about looks—it’s a meaningful step towards safer driving. Style vs. Safety: Balancing Aesthetic Customization with Reliable Performance Choosing stylish turn signals without sacrificing safety Color options, shapes, and finishes for signal light customization Discussing covers and smoked lenses for turn signal lights It’s tempting to focus solely on visual flair when selecting custom signal lights, but safety must always come first. Today’s market offers a dazzling selection: clear, smoked, and colored lenses; unique shapes for cafe racer fans; and even programmable LED turn signals in dynamic patterns. Still, it’s vital that any design chosen does not diminish brightness and visibility. Covers or smoked finishes should maintain high output so that your intentions are unmistakable to everyone on the road. Expert vehicle owners often opt for custom turn signal lights that blend style with reliability, using advanced LEDs, robust housings, and weather-resistant seals. Aesthetic choices like matching your signal bulb color temperature to your headlamps or picking a sleek lens finish can personalize your ride, but double-check all upgrades remain legal and safe. Signal light customization is about making a statement—ensure that statement is clear, bright, and unmistakably safe. Plug and Play Installation: Upgrading to Custom Turn Signals Made Simple Step-by-Step Led Turn Signal Light Installation Guide The upgrade process for LED turn signal lights is designed to be straightforward—even for those with limited mechanical experience. Many brands now offer “plug and play installation,” meaning you can directly replace old signal bulbs with new custom signals using basic tools, with no wire splicing or advanced electrical knowledge needed. Begin by turning off your vehicle and removing the old turn signal bulb or housing. Next, fit your new LED turn signal light into the socket, making sure it aligns and connects securely. Some vehicles may display a rapid “hyper-flash” with LED upgrades, caused by the lower power draw compared to incandescent or halogen bulbs. If this happens, simply install the supplied resistor or switch the flasher relay to an LED-compatible version as directed by your manufacturer. Test your new signals for proper function—left, right, and hazards—before finishing. For extra peace of mind, professional installers can ensure all turn signal lights work perfectly and comply with electrical system requirements. Legal and Regulatory Considerations for Custom Turn Signal Lights Regional differences in color and brightness requirements Inspection guidelines for aftermarket turn signals Ensuring compliance with traffic laws Before hitting the road with your new custom turn signal lights, be sure they meet the legal requirements of your region. Laws on brightness, color temperature, and allowable lens colors can vary significantly between states and countries. For example, most places require amber turn signals, while others may permit red or white only in certain positions. Failing a vehicle inspection or being pulled over for non-compliant signals is both inconvenient and costly. Many aftermarket signal lights are labeled “for off-road use only,” so always check product certifications and request clarification from manufacturer official websites if unsure. During inspections, officers verify not just brightness but whether the location, operation, and color of your turn signals match local codes. By ensuring your turn signal light selections and installations comply from the outset, you maintain safety, avoid fines, and enjoy your custom lights with complete peace of mind. Maintenance and Troubleshooting Custom Turn Signals Checking and Replacing Turn Signal Bulbs and Signal Lights Common issues with signal bulbs and LED turn signal lights How to prolong the life of your custom turn signals Even the best turn signal bulbs eventually wear out, and the latest LED turn signals are not immune to issues if installed improperly. Common problems include flickering, dimming, complete failure, and, for LEDs, hyper-flashing linked to electrical system mismatches. To keep your turn signal lights in top shape, inspect them regularly, ensuring covers are clean, bulbs are tight in their sockets, and seals remain weatherproof. When replacement is needed, match the new signal bulb type, wattage, and color temperature to your current setup for best results. Prolong the life of your custom turn signals by protecting electrical connections from corrosion and using bulbs specifically designed for your vehicle. With these simple checks and maintenance, your upgraded signal lights can deliver reliable performance and safety for years to come. Expert Insights: Why LED Turn Signal Lights Are Becoming the Standard “LED turn signals outperform traditional bulbs in visibility and longevity, making them the first choice for safety-focused drivers.” – Lighting Systems Expert Comparing Signal Light Brands and Manufacturer Options Popular LED Turn Signal Light Brands: Warranty & Customer Ratings Brand LED Turn Signal Options Warranty Period Customer Rating Brand A Standard, smoked, slim-line 2 years 4.7/5 Brand B High-output, sequential, dynamic 3 years 4.5/5 Brand C Plug-and-play, custom housings 1 year 4.6/5 People Also Ask: Custom Turn Signals FAQ What are the benefits of upgrading to LED turn signals? LED turn signals offer greater efficiency, durability, and much brighter illumination compared to traditional bulbs. This enhanced visibility significantly reduces the risk of accidents, especially in low-light or adverse weather. Additionally, the longer lifespan of LEDs means fewer replacements, saving time and resources in the long run. Are custom turn signal lights legal for all vehicles? The legality of custom turn signal lights depends on local, state, and national regulations. Always check your area’s specific rules regarding allowed colors, brightness levels, and installation methods. In most places, amber lights are standard for safety and recognition, but requirements may differ—research before you install. How do I select the right signal bulb for my car or motorcycle? To choose the correct signal bulb, refer to your vehicle’s owner manual or manufacturer’s guide. Match the recommended size, wattage, and color temperature. If you’re unsure, consult with professional installers or trusted auto parts specialists who can verify fitment and compatibility for optimal performance. Do LED turn signal bulbs require additional resistors or adapters? Many LED turn signal bulbs do require load resistors or compatible flasher relays to avoid hyper-flashing, which is caused by the lower energy draw of LEDs compared to traditional incandescent or halogen bulbs. Always review manufacturer instructions and consult with installers if necessary to ensure proper function. Key Takeaways: Guide to Choosing Custom Turn Signals Select signal lights that match your vehicle’s specifications Prioritize visibility and safety in turn signal light choices Consider longevity and energy savings of LED turn signal lights Verify legal compliance before customizing signal lights Ready to Upgrade? Call Nasty Performance Motorcycle Shop Today: 847-458-4858 Upgrading your turn signal lights enhances safety, style, and confidence on the road. Don’t wait—consult a trusted expert, choose quality LEDs or custom bulbs, and enjoy a brighter, safer drive. If you’re committed to maximizing your safety and the longevity of your ride, there’s even more you can do beyond upgrading your turn signals. Discover how proactive seasonal maintenance can protect your investment and keep your vehicle performing at its best, no matter the weather. Explore the essential strategies in Seasonal Bike Care Secrets Every Rider Must Know for expert tips that go hand-in-hand with your lighting upgrades. By combining smart customization with year-round care, you’ll enjoy a safer, smoother, and more reliable journey every time you hit the road.

Benefits of Motorcycle Suspension Upgrades That Improve Your Ride

Ever wondered why some riders seem to glide effortlessly over potholes and twisty roads while others struggle with every bump? The secret could be in their suspension. Discover how the benefits of motorcycle suspension upgrades go far beyond just absorbing bumps—they can transform your riding experience, comfort, and confidence on every journey. If you’re aiming for smoother rides, greater control, and a custom fit for your unique riding style, you’re in the right place. Unlocking the Benefits of Motorcycle Suspension Upgrades Motorcycle enthusiasts know that suspension upgrades can mean the difference between an average ride and an unforgettable, confidence-inspiring adventure. Stock suspension, while designed to suit the general rider, rarely matches the demands of diverse riding styles, various road conditions, or specialty needs like performance riding. By upgrading your motorcycle suspension system, you open a world of possibilities—whether you’re craving smoother handling on city streets, more stability on track days, or added comfort on long rides. The benefits of motorcycle suspension upgrades include improved handling and stability, enhanced safety, and a noticeable boost in rider comfort. A quality suspension system that’s properly set up for your weight, riding style, and typical road conditions delivers a better bike feel and increases your contact with the road for unmatched confidence. Don’t underestimate the impact of technologies like adjustable rebound damping, spring rates, and custom rear shocks—these upgrades can dramatically redefine what your bike can do, keeping you safer and more comfortable mile after mile. Curious How Suspension Upgrades Transform Your Ride? If you’ve ever questioned the performance of your bike’s stock shock or felt discomfort during long rides, you’re not alone. Upgraded suspension systems absorb bumps more efficiently and allow for precise adjustments tailored to your riding demands. This isn’t just about comfort—advanced rear shocks and forks dramatically improve the bike’s responsiveness, increase stability during aggressive maneuvers, and help you achieve a properly set ride height and sag setting for your individual needs. In short, suspension upgrades turn a good bike into a great one. Why Riders Should Reconsider Their Stock Suspension Many riders stick with their stock suspension simply because it comes standard with their motorcycle. However, stock setups are built for average rider weight and generic road conditions, often resulting in a compromise between cost and universal appeal. But every motorcyclist and every ride is unique. By reconsidering and upgrading your suspension system—especially the rear shock and rear suspension—you’ll experience custom-tuned handling and comfort. Don’t settle for one-size-fits-all when you can have a motorcycle suspension system perfectly matched to your riding style and expectations. What You'll Learn About the Benefits of Motorcycle Suspension Upgrades The fundamentals of motorcycle suspension systems Why stock suspension often falls short Impact of rear shock and rear suspension upgrades Custom suspension options for every riding style The real-world advantages of suspension upgrades for safety, comfort, and performance Understanding Motorcycle Suspension Systems To fully appreciate the benefits of motorcycle suspension upgrades, it’s crucial to understand how your bike’s suspension system works. At its core, the suspension system manages how your wheels respond to bumps, bends, and changes in speed. Properly functioning motorcycle suspension ensures your tires maintain contact with the road, balancing rider weight, and absorbing shocks to deliver that all-important smoother ride. Whether you commute daily or chase long rides, understanding these components is the first step toward a more comfortable and controlled ride. How a Motorcycle Suspension System Works The motorcycle suspension system is made up of several key components: the front forks, rear shock, springs, and dampers. The front forks absorb impacts from the front wheel, while the rear shock manages the back end. Springs are responsible for supporting the rider’s weight and maintaining proper ride height. Dampers control the speed at which the suspension compresses and rebounds, keeping the bike composed over bumps, in corners, or when braking. An aftermarket or upgraded suspension system typically offers adjustable features such as spring rate, damping adjustment, and preload. These features allow you to tailor the ride to your specific needs, resulting in a properly set, highly responsive, and confidence-inspiring motorcycle. The Role of Rear Shock, Front Forks, and Rear Suspension Rear shock and rear suspension are critical for delivering stability, especially when carrying additional weight or riding on uneven surfaces. The front forks absorb bumps at the front; the rear shock supports the rear, and together they work as a complete suspension system. Upgraded rear suspension components often offer higher-quality materials, progressive spring rates, and sophisticated damping control. This means that whether you’re traversing city streets or attacking a racetrack, your bike feels properly set, your tire contact with the road is maximized, and your riding experience is elevated. The right combination of suspension upgrades changes everything—from reducing harshness on rough roads to offering more precise bike feel in corners. Common Motorcycle Suspension Terms Explained Understanding suspension terminology will help you make the most of your upgrades: Sag Setting: Adjusts how much the suspension compresses under your weight. Spring Rate: Refers to how stiff the suspension spring is; it must match your rider weight and riding style. Rebound Damping: Controls the speed at which the suspension returns to its normal position after compression. Compression: Refers to how fast the suspension compresses when hitting a bump. Damping Adjustment: Fine-tunes how the suspension absorbs and controls movement for a custom ride experience. These concepts are foundational for anyone looking to achieve the benefits of motorcycle suspension upgrades. Comparison of Stock Suspension vs. Upgraded Suspension Feature Stock Suspension Upgraded Suspension Damping Control Basic Tunable Comfort Limited Enhanced Performance Standard Improved Why Upgrade? Benefits of Motorcycle Suspension Upgrades So, why should you consider a suspension upgrade? It’s simple: enhanced safety, improved ride quality, and a finely tuned bike that responds to your every input. Unlike the limitations of a stock suspension, an upgraded suspension system offers adjustability to match your preferred riding style and local road conditions. You’ll stop worrying about bumpy streets, potholes, or sudden swerves because your bike will feel planted and predictable. Whether you want better handling for daily commuting or specialized performance for track days, the benefits of motorcycle suspension upgrades are undeniable. Improved Handling and Stability With Advanced Suspension Systems When you install an upgraded suspension, the immediate difference you’ll notice is in cornering and overall ride stability. The advanced control offered by adjustable rear shocks and front forks keeps your tires firmly in contact with the road, even during aggressive maneuvers. No more squatting or nose-diving—just a smoother ride and increased confidence through every curve. Whether it’s a custom suspension setup or a high-quality aftermarket shock, the correct spring rate and properly set sag settings will maximize grip, enhance feedback, and allow you to push your bike further with safety and control. Enhanced Safety: How Suspension Upgrades Reduce Braking Distance Safety is paramount, and a proper suspension system significantly reduces your stopping distance. With upgraded suspension, your tires maintain better contact with the surface—even under heavy-braking situations—because the damping and rebound characteristics are optimized for your weight and riding style. You’ll experience less front-end dive, more predictable responses, and greater control when maneuvering in emergencies. Improved suspension upgrades can make a meaningful difference, especially on unpredictable roads, enhancing your safety and bike feel every time you ride. Better Comfort on Every Ride: Suspension Upgrade Advantages Comfort is often overlooked but critical—especially on longer rides. An aftermarket shock or upgraded suspension system absorbs bumps and vibrations, drastically reducing rider fatigue. Quality suspension upgrades use superior materials and sophisticated damping systems that smooth out the roughest surfaces, making every journey—long or short—much more enjoyable. The impact is immediate: less soreness, more stamina, and greater enjoyment, mile after mile. "When you invest in the benefits of motorcycle suspension upgrades, every mile becomes more enjoyable and secure." Personalizing Performance: Matching Suspension Upgrades to Your Riding Style Not all riders are alike, and neither are their needs from a motorcycle suspension system. Personalizing your custom suspension setup ensures maximum performance, whether you’re touring across states, commuting daily, or chasing adrenaline on a track. The correct suspension upgrades, properly adjusted for your riding style, rider weight, and typical road conditions, unlock your bike’s potential and elevate every ride. How Riding Style Influences Suspension Choices Every riding style requires a different approach to motorcycle suspension upgrades. For example, long-distance touring demands plush damping and comfort-oriented settings, while aggressive track riding benefits from firmer spring rates and stiffer damping for stability. Adventure riders need flexibility to handle rough, variable terrain, while commuters may prioritize both maneuverability and a smoother ride over city streets. No matter your preference, a custom or upgraded suspension system can be tailored to fit your individual expectations. Touring Commuting Track days Adventure riding Custom Suspension Solutions for Every Type of Rider Custom suspension options include adjustable shocks, variable spring rates, and advanced damping controls, all designed to create a suspension system matched to your habits and needs. Whether you’re lighter or heavier than average, carry a passenger, or carry gear, custom suspension upgrades ensure your bike is properly set for ideal sag, ride height, and response. The flexibility to fine-tune your setup, from rebound damping to compression adjustments, results in a smoother ride, less fatigue, and more enjoyment. For many, investing in aftermarket suspension or tailored rear shock solutions is one of the best ways to improve riding experience and confidence. The Impact of Compression and Rebound Damping on Riding Experience Two of the most crucial adjustments for motorcycle suspension systems are compression and rebound damping. Compression damping controls how quickly the suspension compresses under a bump—essential for absorbing shocks and maintaining control. Rebound damping determines how rapidly the suspension returns to its original position after being compressed. Fine-tuning these settings, especially on an upgraded rear shock or rear suspension, leads to significant improvements in stability, comfort, and the bike’s responsiveness. Mastering these adjustments ensures your bike feels correct for your weight, pace, and riding style, leading to a safer and more predictable riding experience. seasonal bike care strategies Rear Shock and Rear Suspension: Key Upgrades for Maximum Impact When it comes to maximum impact, focusing on the rear shock and rear suspension yields big results. The rear end of your motorcycle takes much of the load, especially under acceleration, when carrying passengers, or with extra cargo. Upgrading the rear suspension—from progressive-rate springs to adjustable aftermarket shocks—improves traction, stability, and comfort on any road surface. Riders who experience instability, excessive bouncing, or unpredictable bike feel often find that rear suspension upgrades completely transform their motorcycle’s behavior and their confidence as a result. Stock vs. Upgraded Rear Suspension: What Changes? The main difference between stock and upgraded rear suspension is the quality and adjustability of the components. Stock shocks are built for average loads and cost-efficiency, offering limited adjustment for sag, spring rates, and damping. Upgraded rear suspension uses higher-quality materials and more precise valving, allowing you to fine-tune settings for your weight, gear, and riding style. The result? Better traction, less bottoming out, superior response over rough surfaces, and customizable ride height and sag. Investing in an aftermarket shock or custom rear suspension ensures your bike feels dialed in, safer, and more enjoyable no matter the scenario. Understanding Rebound Damping in Rear Shock Adjustments Rebound damping is vital to the rear shock’s performance. Too little damping and your suspension rebounds too quickly, causing the bike to feel bouncy and unsettled; too much, and your rear suspension could pack down, making it harsh and unresponsive. A properly adjusted aftermarket or custom shock with well-set rebound damping delivers a smoother ride, greater traction, and a more predictable bike feel. By understanding and tuning rebound damping, you take control of your riding experience, whether on uneven city streets or twisty mountain passes. The Installation Process for Suspension Upgrades Considering a suspension upgrade and wondering if you can tackle it yourself? While some upgrades, like adjusting preload or sag settings, are DIY-friendly, installing advanced rear shocks or front forks often requires special tools and mechanical expertise. Proper installation ensures that your new suspension system performs as intended and keeps you safe on the road. Following the manufacturer’s specifications for spring rates, damping adjustment, and torque settings is crucial for a successful upgrade. Can You Upgrade Motorcycle Suspension Yourself? With a bit of mechanical know-how, basic upgrades—such as swapping springs or making minor damping adjustments—can be done at home with common tools. However, for full suspension replacements or advanced upgrades (like new rear shocks, upgraded forks, or custom suspension systems), professional installation is recommended. This guarantees that every component is properly set, torque specifications are met, and your new suspension system is correctly calibrated for your weight and riding style—giving you peace of mind for every ride. Professional Suspension System Setup: What to Expect Bringing your motorcycle to a professional shop for suspension upgrades comes with several benefits. Experts will assess your rider weight, ask about your typical riding style, and set your new shocks and forks to achieve the correct sag settings, spring rates, and damping adjustments. They’ll also check for any issues, such as worn bushings or leaking seals, to ensure your new system runs smoothly. Expect a detailed walk-through of your new setup and advice on how to fine-tune as your needs evolve, ensuring you enjoy all the benefits of motorcycle suspension upgrades from day one. How Suspension Upgrades Improve Long-Term Riding Experience The long-term benefits of motorcycle suspension upgrades extend beyond day-to-day riding. With the right upgrades, you’ll experience reduced fatigue, less wear and tear on your bike, and a prolonged lifespan for your entire suspension system. Investing in quality suspension components and professional setup pays dividends in both the quality and reliability of your motorcycle adventures. Reduced Rider Fatigue on Extended Journeys Few things are as exhausting as fighting an uncomfortable, bouncy bike over long distances. Suspension upgrades take the sting out of rough roads and long rides, absorbing impacts and reducing vibrations that fatigue muscles and joints. Riders who tackle cross-country adventures, challenging commutes, or group rides quickly notice how a well-tuned motorcycle suspension system supports their posture, keeps them fresher, and allows them to focus on the road ahead. A smoother ride means more time enjoying the journey and less time nursing aches afterward. Increasing the Lifespan of Your Motorcycle Suspension System Upgraded suspension doesn’t just improve ride comfort; it also increases the durability of your bike’s critical components. High-quality springs, dampers, and bushings resist wear, retain their performance longer, and reduce stress on the frame, wheels, and tires. With regular maintenance and professional setup, your suspension system will deliver consistent performance and protect your investment for years, making it one of the smartest ways to enhance your long-term riding experience. Visual Guide: Frequently Asked Questions About Motorcycle Suspension Upgrades What is the 4 second rule on a motorcycle? The 4 second rule is a safety guideline to maintain a safe following distance behind another vehicle. You pick a fixed point, like a signpost, and ensure it takes at least 4 seconds to reach it after the vehicle ahead passes it. A properly set suspension system helps you react more quickly and efficiently, contributing to safer braking and smoother handling for your motorcycle, especially during sudden stops. Is upgrading your suspension worth it? Absolutely! Upgrading your suspension brings immediate benefits such as enhanced comfort, better handling, and increased safety. Whether it's a smoother ride, more precise steering, or reduced rider fatigue, investing in a quality suspension system pays off for every rider. Custom or aftermarket shocks tailored to your riding style and weight transform not just your motorcycle, but your entire riding experience. Which bike is most liked by girls? There isn’t a single answer, as motorcycle preferences vary widely. Many female riders appreciate bikes that are lightweight, have adjustable seat heights, and offer a comfortable ride—qualities enhanced by a good suspension system. Suspension upgrades can make a bike more accessible and comfortable, increasing confidence for any rider, regardless of gender. Is it better to have higher or lower preload? The ideal preload depends on your weight, gear, and riding style. Higher preload is used to compensate for added weight (like passengers or luggage) while lower preload is comfortable for solo riding. It’s essential to properly set your preload—too much can make the ride harsh, and too little can cause the bike to sag excessively and handle poorly. Upgraded suspension systems provide the adjustments needed to perfectly match your needs. Essentials to Remember: Key Takeaways on the Benefits of Motorcycle Suspension Upgrades Suspension upgrades deliver real improvements in handling, comfort, and safety. Tailoring your motorcycle suspension system to your riding style maximizes performance benefits. Rear shock and rear suspension upgrades make a significant difference for demanding riders. Ready to Transform Your Motorcycle Ride? Call Nasty Performance Motorcycle Shop Today: 847-458-4858 Invest in your ride. From improved safety to unmatched comfort, the benefits of motorcycle suspension upgrades await. Contact our team and take the first step toward a better ride today! seasonal bike care secrets every rider must know

© 2026 Nasty Performance All Rights Reserved. 2035 S. Eastwood Dr., Woodstock, IL 60098 . Contact Us . Terms of Service . Privacy Policy

eyJjb21wYW55IjoiTmFzdHkgUGVyZm9ybWFuY2UiLCJhZGRyZXNzIjoiMjAzNSBTLiBFYXN0d29vZCBEci4iLCJjaXR5IjoiV29vZHN0b2NrIiwic3RhdGUiOiJJTCIsInppcCI6IjYwMDk4IiwiZW1haWwiOiJuYXRlQG5hc3R5cGVyZm9ybWFuY2UuY29tIiwidG9zIjoiUEhBK1BITjBjbTl1Wno0OFpXMCtWMmhsYmlCNWIzVWdjMmxuYmkxcGJpQjNhWFJvSUhWekxDQjViM1VnWVhKbElHZHBkbWx1WnladVluTndPeUI1YjNWeUlIQmxjbTFwYzNOcGIyNGdZVzVrSUdOdmJuTmxiblFnZEc4Z2MyVnVaQ0I1YjNVZ1pXMWhhV3dnWVc1a0wyOXlJRk5OVXlCMFpYaDBJRzFsYzNOaFoyVnpMaUJDZVNCamFHVmphMmx1WnlCMGFHVWdWR1Z5YlhNZ1lXNWtJRU52Ym1ScGRHbHZibk1nWW05NElHRnVaQ0JpZVNCemFXZHVhVzVuSUdsdUlIbHZkU0JoZFhSdmJXRjBhV05oYkd4NUlHTnZibVpwY20wZ2RHaGhkQ0I1YjNVZ1lXTmpaWEIwSUdGc2JDQjBaWEp0Y3lCcGJpQjBhR2x6SUdGbmNtVmxiV1Z1ZEM0OEwyVnRQand2YzNSeWIyNW5Qand2Y0Q0S0NqeHdQanhoSUdoeVpXWTlJbWgwZEhBNkx5OTNkM2N1WjI5dloyeGxMbU52YlNJK2FIUjBjRG92TDNkM2R5NW5iMjluYkdVdVkyOXRQQzloUGp3dmNENEtDanh3UGladVluTndPend2Y0Q0S0NqeHdQanh6ZEhKdmJtYytVMFZTVmtsRFJUd3ZjM1J5YjI1blBqd3ZjRDRLQ2p4d1BsZGxJSEJ5YjNacFpHVWdZU0J6WlhKMmFXTmxJSFJvWVhRZ1kzVnljbVZ1ZEd4NUlHRnNiRzkzY3lCNWIzVWdkRzhnY21WalpXbDJaU0J5WlhGMVpYTjBjeUJtYjNJZ1ptVmxaR0poWTJzc0lHTnZiWEJoYm5rZ2FXNW1iM0p0WVhScGIyNHNJSEJ5YjIxdmRHbHZibUZzSUdsdVptOXliV0YwYVc5dUxDQmpiMjF3WVc1NUlHRnNaWEowY3l3Z1kyOTFjRzl1Y3l3Z1pHbHpZMjkxYm5SeklHRnVaQ0J2ZEdobGNpQnViM1JwWm1sallYUnBiMjV6SUhSdklIbHZkWElnWlcxaGFXd2dZV1JrY21WemN5QmhibVF2YjNJZ1kyVnNiSFZzWVhJZ2NHaHZibVVnYjNJZ1pHVjJhV05sTGlCWmIzVWdkVzVrWlhKemRHRnVaQ0JoYm1RZ1lXZHlaV1VnZEdoaGRDQjBhR1VnVTJWeWRtbGpaU0JwY3lCd2NtOTJhV1JsWkNBbWNYVnZkRHRCVXkxSlV5WnhkVzkwT3lCaGJtUWdkR2hoZENCM1pTQmhjM04xYldVZ2JtOGdjbVZ6Y0c5dWMybGlhV3hwZEhrZ1ptOXlJSFJvWlNCMGFXMWxiR2x1WlhOekxDQmtaV3hsZEdsdmJpd2diV2x6TFdSbGJHbDJaWEo1SUc5eUlHWmhhV3gxY21VZ2RHOGdjM1J2Y21VZ1lXNTVJSFZ6WlhJZ1kyOXRiWFZ1YVdOaGRHbHZibk1nYjNJZ2NHVnljMjl1WVd4cGVtRjBhVzl1SUhObGRIUnBibWR6TGp3dmNENEtDanh3UGxsdmRTQmhjbVVnY21WemNHOXVjMmxpYkdVZ1ptOXlJRzlpZEdGcGJtbHVaeUJoWTJObGMzTWdkRzhnZEdobElGTmxjblpwWTJVZ1lXNWtJSFJvWVhRZ1lXTmpaWE56SUcxaGVTQnBiblp2YkhabElIUm9hWEprSUhCaGNuUjVJR1psWlhNZ0tITjFZMmdnWVhNZ1UwMVRJSFJsZUhRZ2JXVnpjMkZuWlhNc0lFbHVkR1Z5Ym1WMElITmxjblpwWTJVZ2NISnZkbWxrWlhJZ2IzSWdZMlZzYkhWc1lYSWdZV2x5ZEdsdFpTQmphR0Z5WjJWektTNGdXVzkxSUdGeVpTQnlaWE53YjI1emFXSnNaU0JtYjNJZ2RHaHZjMlVnWm1WbGN5d2dhVzVqYkhWa2FXNW5JSFJvYjNObElHWmxaWE1nWVhOemIyTnBZWFJsWkNCM2FYUm9JSFJvWlNCa2FYTndiR0Y1SUc5eUlHUmxiR2wyWlhKNUlHOW1JR1ZoWTJnZ1UwMVRJSFJsZUhRZ2JXVnpjMkZuWlNCelpXNTBJSFJ2SUhsdmRTQmllU0IxY3k0Z1NXNGdZV1JrYVhScGIyNHNJSGx2ZFNCdGRYTjBJSEJ5YjNacFpHVWdZVzVrSUdGeVpTQnlaWE53YjI1emFXSnNaU0JtYjNJZ1lXeHNJR1Z4ZFdsd2JXVnVkQ0J1WldObGMzTmhjbmtnZEc4Z1lXTmpaWE56SUhSb1pTQlRaWEoyYVdObElHRnVaQ0J5WldObGFYWmxJSFJvWlNCVFRWTWdkR1Y0ZENCdFpYTnpZV2RsY3k0Z1YyVWdaRzhnYm05MElHTm9ZWEpuWlNCaGJua2dabVZsY3lCbWIzSWdaR1ZzYVhabGNua2diMllnWlcxaGFXd2diM0lnVTAxVExpQlVhR2x6SUdseklHRWdabkpsWlNCelpYSjJhV05sSUhCeWIzWnBaR1ZrSUdKNUlIVnpMaUJJYjNkbGRtVnlMQ0J3YkdWaGMyVWdZMmhsWTJzZ2QybDBhQ0I1YjNWeUlHbHVkR1Z5Ym1WMElITmxjblpwWTJVZ2NISnZkbWxrWlhJZ1lXNWtJR05sYkd4MWJHRnlJR05oY25KcFpYSWdabTl5SUdGdWVTQmphR0Z5WjJWeklIUm9ZWFFnYldGNUlHbHVZM1Z5SUdGeklHRWdjbVZ6ZFd4MElHWnliMjBnY21WalpXbDJhVzVuSUdWdFlXbHNJR0Z1WkNCVFRWTWdkR1Y0ZENCdFpYTnpZV2RsY3lCMGFHRjBJSGRsSUdSbGJHbDJaWElnZFhCdmJpQjViM1Z5SUc5d2RDMXBiaUJoYm1RZ2NtVm5hWE4wY21GMGFXOXVJSGRwZEdnZ2IzVnlJR1Z0WVdsc0lHRnVaQ0JUVFZNZ2MyVnlkbWxqWlhNdUlGbHZkU0JqWVc0Z1kyRnVZMlZzSUdGMElHRnVlU0IwYVcxbExpQktkWE4wSUhSbGVIUWdKbkYxYjNRN1UxUlBVQ1p4ZFc5ME95QjBieVp1WW5Od096eG9hV2RvYkdsbmFIUWdZMnhoYzNNOUltTnZiWEJoYm5sVFRWTlFhRzl1WlZWd1pHRjBaU0krYm5Wc2JEd3ZhR2xuYUd4cFoyaDBQaTRnUVdaMFpYSWdlVzkxSUhObGJtUWdkR2hsSUZOTlV5QnRaWE56WVdkbElDWnhkVzkwTzFOVVQxQW1jWFZ2ZERzZ2RHOGdkWE1zSUhkbElIZHBiR3dnYzJWdVpDQjViM1VnWVc0Z1UwMVRJRzFsYzNOaFoyVWdkRzhnWTI5dVptbHliU0IwYUdGMElIbHZkU0JvWVhabElHSmxaVzRnZFc1emRXSnpZM0pwWW1Wa0xpQkJablJsY2lCMGFHbHpMQ0I1YjNVZ2QybHNiQ0J1YnlCc2IyNW5aWElnY21WalpXbDJaU0JUVFZNZ2JXVnpjMkZuWlhNZ1puSnZiU0IxY3k0OEwzQStDZ284Y0Q0OGMzUnliMjVuUGxsUFZWSWdVa1ZIU1ZOVVVrRlVTVTlPSUU5Q1RFbEhRVlJKVDA1VFBDOXpkSEp2Ym1jK1BDOXdQZ29LUEhBK1NXNGdZMjl1YzJsa1pYSmhkR2x2YmlCdlppQjViM1Z5SUhWelpTQnZaaUIwYUdVZ1UyVnlkbWxqWlN3Z2VXOTFJR0ZuY21WbElIUnZPand2Y0Q0S0NqeHZiRDRLQ1R4c2FUNXdjbTkyYVdSbElIUnlkV1VzSUdGalkzVnlZWFJsTENCamRYSnlaVzUwSUdGdVpDQmpiMjF3YkdWMFpTQnBibVp2Y20xaGRHbHZiaUJoWW05MWRDQjViM1Z5YzJWc1ppQmhjeUJ3Y205dGNIUmxaQ0JpZVNCMGFHVWdVMlZ5ZG1salpTWWpNems3Y3lCeVpXZHBjM1J5WVhScGIyNGdabTl5YlNBb2MzVmphQ0JwYm1admNtMWhkR2x2YmlCaVpXbHVaeUIwYUdVZ0puRjFiM1E3VW1WbmFYTjBjbUYwYVc5dUlFUmhkR0VtY1hWdmREc3BJR0Z1WkR3dmJHaytDZ2s4YkdrK2JXRnBiblJoYVc0Z1lXNWtJSEJ5YjIxd2RHeDVJSFZ3WkdGMFpTQjBhR1VnVW1WbmFYTjBjbUYwYVc5dUlFUmhkR0VnZEc4Z2EyVmxjQ0JwZENCMGNuVmxMQ0JoWTJOMWNtRjBaU3dnWTNWeWNtVnVkQ0JoYm1RZ1kyOXRjR3hsZEdVdUlFbG1JSGx2ZFNCd2NtOTJhV1JsSUdGdWVTQnBibVp2Y20xaGRHbHZiaUIwYUdGMElHbHpJSFZ1ZEhKMVpTd2dhVzVoWTJOMWNtRjBaU3dnYm05MElHTjFjbkpsYm5RZ2IzSWdhVzVqYjIxd2JHVjBaU3dnYjNJZ2QyVWdhR0YyWlNCeVpXRnpiMjVoWW14bElHZHliM1Z1WkhNZ2RHOGdjM1Z6Y0dWamRDQjBhR0YwSUhOMVkyZ2dhVzVtYjNKdFlYUnBiMjRnYVhNZ2RXNTBjblZsTENCcGJtRmpZM1Z5WVhSbExDQnViM1FnWTNWeWNtVnVkQ0J2Y2lCcGJtTnZiWEJzWlhSbExDQjNaU0JvWVhabElIUm9aU0J5YVdkb2RDQjBieUJ6ZFhOd1pXNWtJRzl5SUR4emRISnZibWMrUEhOd1lXNGdjM1I1YkdVOUltTnZiRzl5T2lOR1JqQXdNREE3SWo1MFpYSnRhVzVoZEdVZ2VXOTFjaUJoWTJOdmRXNTBMM0J5YjJacGJHVWdZVzVrSUhKbFpuVnpaU0JoYm5rZ1lXNWtJR0ZzYkNCamRYSnlaVzUwSUc5eUlHWjFkSFZ5WlNCMWMyVWdiMllnZEdobElGTmxjblpwWTJVZ0tHOXlJR0Z1ZVNCd2IzSjBhVzl1SUhSb1pYSmxiMllwTGp3dmMzQmhiajQ4TDNOMGNtOXVaejQ4TDJ4cFBnbzhMMjlzUGdvS1BIQStKbTVpYzNBN1BDOXdQZ284YUdsbmFHeHBaMmgwSUdOc1lYTnpQU0pqYjIxd1lXNTVUbUZ0WlZWd1pHRjBaU0krVG1GemRIa2dVR1Z5Wm05eWJXRnVZMlU4TDJocFoyaHNhV2RvZEQ0OFluSWdMejRLUEdocFoyaHNhV2RvZENCamJHRnpjejBpWTI5dGNHRnVlVUZrWkhKbGMzTlZjR1JoZEdVaVBqSXdNelVnVXk0Z1JXRnpkSGR2YjJRZ1JISXVMQ0JYYjI5a2MzUnZZMnNzSUVsTUlEWXdNRGs0UEM5b2FXZG9iR2xuYUhRK1BHSnlJQzgrQ2p4b2FXZG9iR2xuYUhRZ1kyeGhjM005SW1OdmJYQmhibmxRYUc5dVpWVndaR0YwWlNJK0tEZzBOeWtnTkRVNExUUTROVGc4TDJocFoyaHNhV2RvZEQ0OFluSWdMejRLUEdocFoyaHNhV2RvZENCamJHRnpjejBpWTI5dGNHRnVlVVZ0WVdsc1ZYQmtZWFJsSWo1dVlYUmxRRzVoYzNSNWNHVnlabTl5YldGdVkyVXVZMjl0UEM5b2FXZG9iR2xuYUhRKyIsInByaXZhY3kiOiJQSEErUEhOMGNtOXVaejVRVWtsV1FVTlpQQzl6ZEhKdmJtYytQQzl3UGdvS1BIQStQSE4wY205dVp6NVVhR1VnYVc1bWIzSnRZWFJwYjI0Z2NISnZkbWxrWldRZ1pIVnlhVzVuSUhSb2FYTWdjbVZuYVhOMGNtRjBhVzl1SUdseklHdGxjSFFnY0hKcGRtRjBaU0JoYm1RZ1kyOXVabWxrWlc1MGFXRnNMQ0JoYm1RZ2QybHNiQ0J1WlhabGNpQmlaU0JrYVhOMGNtbGlkWFJsWkN3Z1kyOXdhV1ZrTENCemIyeGtMQ0IwY21Ga1pXUWdiM0lnY0c5emRHVmtJR2x1SUdGdWVTQjNZWGtzSUhOb1lYQmxJRzl5SUdadmNtMHVJRlJvYVhNZ2FYTWdiM1Z5SUdkMVlYSmhiblJsWlM0OEwzTjBjbTl1Wno0OEwzQStDZ284Y0Q0OGMzUnliMjVuUGtsT1JFVk5Ua2xVV1R3dmMzUnliMjVuUGp3dmNENEtDanh3UGp4bGJUNVpiM1VnWVdkeVpXVWdkRzhnYVc1a1pXMXVhV1o1SUdGdVpDQm9iMnhrSUhWekxDQmhibVFnYVhSeklITjFZbk5wWkdsaGNtbGxjeXdnWVdabWFXeHBZWFJsY3l3Z2IyWm1hV05sY25Nc0lHRm5aVzUwY3l3Z1kyOHRZbkpoYm1SbGNuTWdiM0lnYjNSb1pYSWdjR0Z5ZEc1bGNuTXNJR0Z1WkNCbGJYQnNiM2xsWlhNc0lHaGhjbTFzWlhOeklHWnliMjBnWVc1NUlHTnNZV2x0SUc5eUlHUmxiV0Z1WkN3Z2FXNWpiSFZrYVc1bklISmxZWE52Ym1GaWJHVWdZWFIwYjNKdVpYbHpKaU16T1RzZ1ptVmxjeXdnYldGa1pTQmllU0JoYm5rZ2RHaHBjbVFnY0dGeWRIa2daSFZsSUhSdklHOXlJR0Z5YVhOcGJtY2diM1YwSUc5bUlFTnZiblJsYm5RZ2VXOTFJSEpsWTJWcGRtVXNJSE4xWW0xcGRDd2djbVZ3Ykhrc0lIQnZjM1FzSUhSeVlXNXpiV2wwSUc5eUlHMWhhMlVnWVhaaGFXeGhZbXhsSUhSb2NtOTFaMmdnZEdobElGTmxjblpwWTJVc0lIbHZkWElnZFhObElHOW1JSFJvWlNCVFpYSjJhV05sTENCNWIzVnlJR052Ym01bFkzUnBiMjRnZEc4Z2RHaGxJRk5sY25acFkyVXNJSGx2ZFhJZ2RtbHZiR0YwYVc5dUlHOW1JSFJvWlNCVVQxTXNJRzl5SUhsdmRYSWdkbWx2YkdGMGFXOXVJRzltSUdGdWVTQnlhV2RvZEhNZ2IyWWdZVzV2ZEdobGNpNDhMMlZ0UGp3dmNENEtDanh3UGp4emRISnZibWMrUkVsVFEweEJTVTFGVWlCUFJpQlhRVkpTUVU1VVNVVlRQQzl6ZEhKdmJtYytQQzl3UGdvS1BIQStQSE4wY205dVp6NVpUMVVnUlZoUVVrVlRVMHhaSUZWT1JFVlNVMVJCVGtRZ1FVNUVJRUZIVWtWRklGUklRVlE2UEM5emRISnZibWMrUEM5d1Bnb0tQRzlzUGdvSlBHeHBQbGxQVlZJZ1ZWTkZJRTlHSUZSSVJTQlRSVkpXU1VORklFbFRJRUZVSUZsUFZWSWdVMDlNUlNCU1NWTkxMaUJVU0VVZ1UwVlNWa2xEUlNCSlV5QlFVazlXU1VSRlJDQlBUaUJCVGlBbWNYVnZkRHRCVXlCSlV5WnhkVzkwT3lCQlRrUWdKbkYxYjNRN1FWTWdRVlpCU1V4QlFreEZKbkYxYjNRN0lFSkJVMGxUTGlBc0xpQkJUa1FnVlZNc0lFbFVKaU16T1R0VElFTlZVMVJQVFVWU1V5d2dSVmhRVWtWVFUweFpJRVJKVTBOTVFVbE5VeUJCVEV3Z1YwRlNVa0ZPVkVsRlV5QlBSaUJCVGxrZ1MwbE9SQ3dnVjBoRlZFaEZVaUJGV0ZCU1JWTlRJRTlTSUVsTlVFeEpSVVFzSUVsT1EweFZSRWxPUnl3Z1FsVlVJRTVQVkNCTVNVMUpWRVZFSUZSUElGUklSU0JKVFZCTVNVVkVJRmRCVWxKQlRsUkpSVk1nVDBZZ1RVVlNRMGhCVGxSQlFrbE1TVlJaTENCR1NWUk9SVk5USUVaUFVpQkJJRkJCVWxSSlExVk1RVklnVUZWU1VFOVRSU0JCVGtRZ1RrOU9MVWxPUmxKSlRrZEZUVVZPVkM0OEwyeHBQZ29KUEd4cFBrMUJTMFZUSUU1UElGZEJVbEpCVGxSWklGUklRVlFnS0drcElGUklSU0JUUlZKV1NVTkZJRmRKVEV3Z1RVVkZWQ0JaVDFWU0lGSkZVVlZKVWtWTlJVNVVVeXdnS0dscEtTQlVTRVVnVTBWU1ZrbERSU0JYU1V4TUlFSkZJRlZPU1U1VVJWSlNWVkJVUlVRc0lGUkpUVVZNV1N3Z1UwVkRWVkpGTENCUFVpQkZVbEpQVWkxR1VrVkZMQ0FvYVdscEtTQlVTRVVnVWtWVFZVeFVVeUJVU0VGVUlFMUJXU0JDUlNCUFFsUkJTVTVGUkNCR1VrOU5JRlJJUlNCVlUwVWdUMFlnVkVoRklGTkZVbFpKUTBVZ1YwbE1UQ0JDUlNCQlEwTlZVa0ZVUlNCUFVpQlNSVXhKUVVKTVJTd2dRVTVFSUNocGRpa2dRVTVaSUVWU1VrOVNVeUJKVGlCVVNFVWdVMDlHVkZkQlVrVWdWMGxNVENCQ1JTQkRUMUpTUlVOVVJVUXVQQzlzYVQ0S0NUeHNhVDVCVGxrZ1RVRlVSVkpKUVV3Z1JFOVhUa3hQUVVSRlJDQlBVaUJQVkVoRlVsZEpVMFVnVDBKVVFVbE9SVVFnVkVoU1QxVkhTQ0JVU0VVZ1ZWTkZJRTlHSUZSSVJTQlRSVkpXU1VORklFbFRJRVJQVGtVZ1FWUWdXVTlWVWlCUFYwNGdSRWxUUTFKRlZFbFBUaUJCVGtRZ1VrbFRTeUJCVGtRZ1ZFaEJWQ0JaVDFVZ1YwbE1UQ0JDUlNCVFQweEZURmtnVWtWVFVFOU9VMGxDVEVVZ1JrOVNJRUZPV1NCRVFVMUJSMFVnVkU4Z1dVOVZVaUJEVDAxUVZWUkZVaUJUV1ZOVVJVMGdUMUlnVEU5VFV5QlBSaUJFUVZSQklGUklRVlFnVWtWVFZVeFVVeUJHVWs5TklGUklSU0JFVDFkT1RFOUJSQ0JQUmlCQlRsa2dVMVZEU0NCTlFWUkZVa2xCVEM0OEwyeHBQZ29KUEd4cFBrNVBJRUZFVmtsRFJTQlBVaUJKVGtaUFVrMUJWRWxQVGl3Z1YwaEZWRWhGVWlCUFVrRk1JRTlTSUZkU1NWUlVSVTRzSUU5Q1ZFRkpUa1ZFSUVKWklGbFBWU0JHVWs5TklFOVNJRlJJVWs5VlIwZ2dUMUlnUmxKUFRTQlVTRVVnVTBWU1ZrbERSU0JUU0VGTVRDQkRVa1ZCVkVVZ1FVNVpJRmRCVWxKQlRsUlpJRTVQVkNCRldGQlNSVk5UVEZrZ1UxUkJWRVZFSUVsT0lGUklSU0JVVDFNdVBDOXNhVDRLUEM5dmJENEtDanh3UGp4emRISnZibWMrVEVsTlNWUkJWRWxQVGlCUFJpQk1TVUZDU1V4SlZGazhMM04wY205dVp6NDhMM0ErQ2dvOGNENVpUMVVnUlZoUVVrVlRVMHhaSUZWT1JFVlNVMVJCVGtRZ1FVNUVJRUZIVWtWRklGUklRVlFnUVU1RUlGTklRVXhNSUU1UFZDQkNSU0JNU1VGQ1RFVWdSazlTSUVGT1dTQkVTVkpGUTFRc0lFbE9SRWxTUlVOVUxDQkpUa05KUkVWT1ZFRk1MQ0JUVUVWRFNVRk1MQ0JEVDA1VFJWRlZSVTVVU1VGTUlFOVNJRVZZUlUxUVRFRlNXU0JFUVUxQlIwVlRMQ0JKVGtOTVZVUkpUa2NnUWxWVUlFNVBWQ0JNU1UxSlZFVkVJRlJQTENCRVFVMUJSMFZUSUVaUFVpQk1UMU5USUU5R0lGQlNUMFpKVkZNc0lFZFBUMFJYU1V4TUxDQlZVMFVzSUVSQlZFRWdUMUlnVDFSSVJWSWdTVTVVUVU1SFNVSk1SU0JNVDFOVFJWTWdLRVZXUlU0Z1NVWWdTRUZUSUVKRlJVNGdRVVJXU1ZORlJDQlBSaUJVU0VVZ1VFOVRVMGxDU1V4SlZGa2dUMFlnVTFWRFNDQkVRVTFCUjBWVEtTd2dVa1ZUVlV4VVNVNUhJRVpTVDAwNlBDOXdQZ29LUEc5c1Bnb0pQR3hwUGxSSVJTQlZVMFVnVDFJZ1ZFaEZJRWxPUVVKSlRFbFVXU0JVVHlCVlUwVWdWRWhGSUZORlVsWkpRMFU3UEM5c2FUNEtDVHhzYVQ1VVNFVWdRMDlUVkNCUFJpQlFVazlEVlZKRlRVVk9WQ0JQUmlCVFZVSlRWRWxVVlZSRklFZFBUMFJUSUVGT1JDQlRSVkpXU1VORlV5QlNSVk5WVEZSSlRrY2dSbEpQVFNCQlRsa2dSMDlQUkZNc0lFUkJWRUVzSUVsT1JrOVNUVUZVU1U5T0lFOVNJRk5GVWxaSlEwVlRJRkJWVWtOSVFWTkZSQ0JQVWlCUFFsUkJTVTVGUkNCUFVpQk5SVk5UUVVkRlV5QlNSVU5GU1ZaRlJDQlBVaUJVVWtGT1UwRkRWRWxQVGxNZ1JVNVVSVkpGUkNCSlRsUlBJRlJJVWs5VlIwZ2dUMUlnUmxKUFRTQlVTRVVnVTBWU1ZrbERSVHM4TDJ4cFBnb0pQR3hwUGxWT1FWVlVTRTlTU1ZwRlJDQkJRME5GVTFNZ1ZFOGdUMUlnUVV4VVJWSkJWRWxQVGlCUFJpQlpUMVZTSUZSU1FVNVRUVWxUVTBsUFRsTWdUMUlnUkVGVVFUczhMMnhwUGdvSlBHeHBQbE5VUVZSRlRVVk9WRk1nVDFJZ1EwOU9SRlZEVkNCUFJpQkJUbGtnVkVoSlVrUWdVRUZTVkZrZ1QwNGdWRWhGSUZORlVsWkpRMFU3SUU5U1BDOXNhVDRLQ1R4c2FUNUJUbGtnVDFSSVJWSWdUVUZVVkVWU0lGSkZURUZVU1U1SElGUlBJRlJJUlNCVFJWSldTVU5GTGp3dmJHaytDand2YjJ3K0NnbzhjRDQ4ZFQ1Q2VTQnlaV2RwYzNSbGNtbHVaeUJoYm1RZ2MzVmljMk55YVdKcGJtY2dkRzhnYjNWeUlHVnRZV2xzSUdGdVpDQlRUVk1nYzJWeWRtbGpaU3dnWW5rZ2IzQjBMV2x1TENCdmJteHBibVVnY21WbmFYTjBjbUYwYVc5dUlHOXlJR0o1SUdacGJHeHBibWNnYjNWMElHRWdZMkZ5WkN3Z0puRjFiM1E3ZVc5MUlHRm5jbVZsSUhSdklIUm9aWE5sSUZSRlVrMVRJRTlHSUZORlVsWkpRMFVtY1hWdmREc2dZVzVrSUhsdmRTQmhZMnR1YjNkc1pXUm5aU0JoYm1RZ2RXNWtaWEp6ZEdGdVpDQjBhR1VnWVdKdmRtVWdkR1Z5YlhNZ2IyWWdjMlZ5ZG1salpTQnZkWFJzYVc1bFpDQmhibVFnWkdWMFlXbHNaV1FnWm05eUlIbHZkU0IwYjJSaGVTNDhMM1UrUEM5d1Bnb0tQSEErSm01aWMzQTdQQzl3UGdvOGFHbG5hR3hwWjJoMElHTnNZWE56UFNKamIyMXdZVzU1VG1GdFpWVndaR0YwWlNJK1RtRnpkSGtnVUdWeVptOXliV0Z1WTJVOEwyaHBaMmhzYVdkb2RENDhZbklnTHo0S1BHaHBaMmhzYVdkb2RDQmpiR0Z6Y3owaVkyOXRjR0Z1ZVVGa1pISmxjM05WY0dSaGRHVWlQakl3TXpVZ1V5NGdSV0Z6ZEhkdmIyUWdSSEl1TENCWGIyOWtjM1J2WTJzc0lFbE1JRFl3TURrNFBDOW9hV2RvYkdsbmFIUStQR0p5SUM4K0NqeG9hV2RvYkdsbmFIUWdZMnhoYzNNOUltTnZiWEJoYm5sUWFHOXVaVlZ3WkdGMFpTSStLRGcwTnlrZ05EVTRMVFE0TlRnOEwyaHBaMmhzYVdkb2RENDhZbklnTHo0S1BHaHBaMmhzYVdkb2RDQmpiR0Z6Y3owaVkyOXRjR0Z1ZVVWdFlXbHNWWEJrWVhSbElqNXVZWFJsUUc1aGMzUjVjR1Z5Wm05eWJXRnVZMlV1WTI5dFBDOW9hV2RvYkdsbmFIUSsifQ==

Terms of Service

Privacy Policy

Core Modal Title

Sorry, no results found

You Might Find These Articles Interesting

T
Please Check Your Email
We Will Be Following Up Shortly
*
*
*