cropper
update

Nasty Performance ~ 847-458-4858 

update
  • Blog Home
  • Categories
    • Motorcycle Maintenance
    • Riding Tips & Preps
    • Safety & Inspection
    • Customizations & Upgrades
    • DIY Motorcycle Repairs
    • Motocycle Audio Systems
    • Motocycle Seasonal Care & Storage
    • Engine, Electrical Performance
  • Bike Night
  • Nasty Performance Motorcycle Shop
March 26.2026
1 Minute Read

Local Motorcycle Suspension Repair That Keeps You Riding Smooth

Did you know that poorly maintained motorcycle suspension ranks among the top causes of preventable accidents and subpar ride quality worldwide? Many riders overlook local motorcycle suspension repair, but this crucial service does so much more than just cushioning your ride. It directly impacts how your bike handles, how safe you stay on the road, and—ultimately—how much you actually enjoy the journey. Whether you rip through winding highways or commute on city streets, understanding and investing in a proper bike suspension service can be the key to both your motorcycle’s longevity and your peace of mind. Read on to discover why suspension service cannot be put off—and how expert local repair keeps you riding smooth, safe, and with confidence.

A Shocking Statistic: The Crucial Role of Local Motorcycle Suspension Repair

Did you know that over 40% of handling-related motorcycle accidents are linked to neglected suspension components? This statistic underlines the invaluable role of local motorcycle suspension repair in every rider’s safety. Professional suspension services don't just protect you from the jolt of potholes; they fine-tune your ride so every curve, stop, and go feels in control. Suspension systems are engineered for stability, precise steering, and safe braking—all of which decline when service is skipped. Ignoring the condition of your bike’s fork tube, shock absorbers, or other suspension parts not only degrades ride quality, but also exposes you to real-world risk each time you start your engine.

Investing in a high-quality, local motorcycle suspension repair shop ensures your riding style and terrain are always supported by the right suspension setup. Expert technicians can diagnose problems, recommend the best service, and return your ride to peak performance. Regular maintenance means fewer shocks (pun intended), more reliable rides, consistent tire wear, and, crucially, the peace of mind that comes with professional care. With stakes this high, local motorcycle suspension repair is not just an upgrade—it's a necessity for any serious rider.

Dynamic close-up of a motorcycle navigating a winding road, suspension working—showcasing local motorcycle suspension repair benefits

Why Suspension Service Matters for Every Rider

Whether you are an urban commuter or an off-road enthusiast, the benefits of regular suspension service are transformative. Well-maintained motorcycle suspension adapts to bumps and turns, keeping your tires firmly on the asphalt and your control absolute. The difference in comfort and handling becomes instantly noticeable after a thorough bike suspension service. Suspension isn’t just about comfort—it’s about safety: every part of your suspension system, from the fork tube to internal parts, directly affects how your motorcycle responds in emergencies. Riders who service their suspension regularly report fewer handling surprises, improved shock performance, and greater long-term bike value. Neglecting these components shortens their lifespan and can lead to more extensive—and expensive—repairs down the line.

In short, local motorcycle suspension repair is a crucial investment for every rider who values safety, stability, and the pure thrill of the open road. It offers a wide range of benefits, including enhanced ride quality, extended component life, and the confident control you need for any adventure. Don’t wait until your next bump feels too rough; schedule your suspension service today to stay ahead of the road and ensure every ride is as smooth as it is safe.

For riders looking to maximize the longevity and performance of their bikes, understanding how seasonal changes affect your motorcycle is just as important as regular suspension maintenance. Discover practical tips for keeping your ride in top shape year-round in this guide to essential seasonal bike care.

How Neglected Bike Suspension Leads to Real-World Risks

Neglecting your motorcycle’s suspension system can quickly turn a dream ride into a nightmare. A worn or leaky fork tube or fatigued shock absorber doesn't just dampen comfort—it can severely impact your bike’s handling and compromise braking efficiency. This is especially alarming during sudden stops or evasive maneuvers, where even a split-second delay in suspension response can lead to lost traction or a dangerous skid.

Over time, neglected suspension components—like fork tubes, seals, and internal parts—can cause uneven tire wear, putting excess strain on other systems including your wheels, brakes, and steering. This chain reaction often results in a harsher ride and mounting repair bills, but worse, it may cause you to lose confidence in your motorcycle. Missing regular suspension service also means you’re missing out on custom tuning opportunities that match your riding style and terrain, further diminishing performance. Staying vigilant about local motorcycle suspension repair keeps you safe, comfortable, and in command, no matter how unpredictable the road ahead becomes.

What You'll Learn About Local Motorcycle Suspension Repair

  • Key benefits of local motorcycle suspension repair for your riding style
  • When to seek professional suspension services
  • Features that set apart top bike suspension services
  • What to expect from a suspension service appointment
  • How to extend your suspension component life

Understanding Local Motorcycle Suspension Repair and Its Impact

What Is Local Motorcycle Suspension Repair?

Local motorcycle suspension repair refers to specialized services performed by expert technicians who understand how suspension systems function across a wide range of bikes and riding styles. Unlike a basic check-up, proper suspension repair involves diagnosing, servicing, rebuilding, and sometimes upgrading key components such as fork tubes, shock absorbers, and bushings. Local shops offer the highest quality parts and precision care not always found in general motorcycle repair facilities.

What makes these services “local” isn’t just proximity—it’s the shop’s commitment to riders in the community. A reputable local motorcycle suspension repair center understands common road surfaces and climate factors, tailoring repairs to match your local riding experience and needs. By choosing a specialized repair shop, you receive not only expert attention but also advice on ongoing maintenance and custom suspension tuning. This helps maximize the life of your internal parts, boost your safety, and ensure your bike feels just right every time you hit the road.

The Difference Between Suspension Repair and Suspension Service

Many riders mistakenly use “suspension repair” and “suspension service” interchangeably, but each serves a different purpose. Suspension service is usually a scheduled maintenance regimen—inspecting, cleaning, lubricating, and replacing fluids and seals to keep every suspension component in optimal condition. This routine maintenance prevents wear before it starts, extends the life of fork tubes and shock absorbers, and keeps your ride smooth.

Suspension repair, on the other hand, tackles issues after they arise. This may include leaking fork seals, bent or scored fork tubes, failing shock absorbers, or broken internal parts. Repair involves disassembly, diagnosis, and replacement or rebuilding with quality parts. Both services are vital in their own right, but combining regularly scheduled bike suspension service with timely repairs ensures your bike is ready for anything, offering maximum safety and a consistently high ride quality.

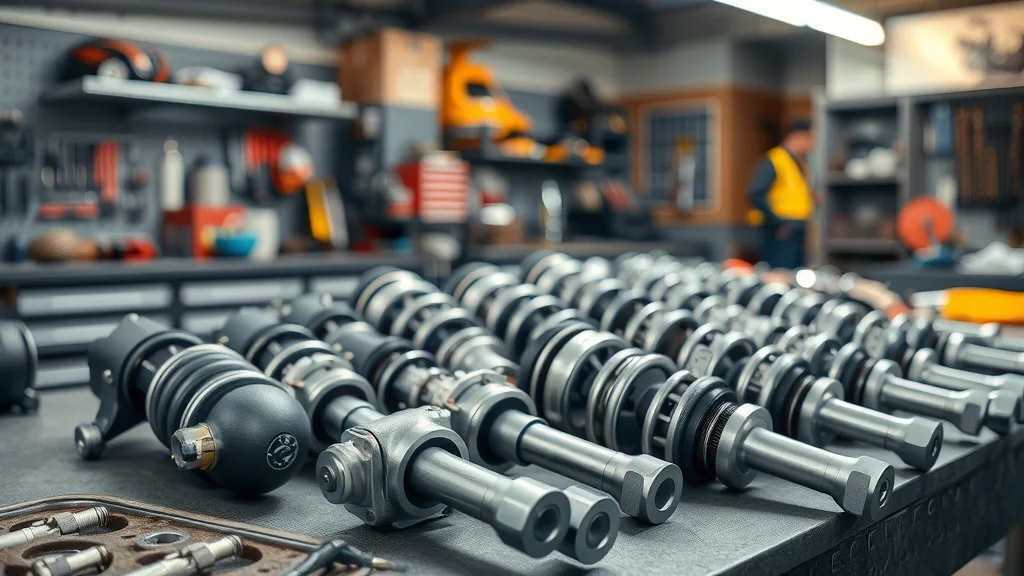
Core Suspension Components: Fork Tubes, Shock Absorbers, and More

Your motorcycle’s suspension system is an engineering marvel whose parts all work in harmony to provide a stable and enjoyable ride. The primary components—fork tubes in the front and shock absorbers in the rear—are responsible for absorbing bumps and keeping tires glued to the road. Internal parts like bushings, seals, springs, and fluids within fork and shock assemblies are crucial for smooth motion and proper shock performance.

Neglecting a single part can affect the entire bike suspension setup. When dirt, moisture, or wear compromise these internals, the result is diminished ride quality, erratic handling, and accelerated wear on both the tires and the motorcycle’s frame. Professional suspension services not only fix what’s broken but also inspect every ancillary component, ensuring you’ll never be caught off guard by an unexpected failure. With local motorcycle suspension repair, you benefit from expert knowledge, the right tools, and direct access to the highest quality parts that are guaranteed to match your riding style and needs.

Detailed display of motorcycle suspension parts—key internal components for superior bike suspension service

Comparing Local Motorcycle Suspension Services: Features and Benefits

Comparison of Local Motorcycle Suspension Service Options
Service Option Features Estimated Price Range Inclusions Estimated Time
Standard Fork Service Cleaning, replacing fork seals, fluid change $150 – $400 Fork tubes, internal parts inspection 2–4 hours
Shock Absorber Rebuild Seal replacement, fluid & nitrogen recharge $100 – $250 Shock disassembly, internal parts check 2–3 hours
Custom Suspension Tuning Adjust preload, compression, rebound $50 – $200 Sag set to match riding style 1–2 hours
Complete Suspension Overhaul Both fork and shock service, full component check $400 – $900 Replacement of critical parts, fluids, and seals 1 day

Industry Leaders in Motorcycle Suspension Services

When it comes to motorcycle suspension expertise, local industry leaders typically offer a wide range of services and highest quality parts. They stay ahead of the latest advances in suspension tuning and repair, supporting popular brands and customizing solutions to match your riding style. Look for shops known for their experienced technicians, dedicated customer support, and consistent positive reviews. These businesses rely on customer trust and build their reputation with every bike they service, ensuring complete transparency regarding price, process, and outcomes.

Many respected shops not only service standard motorcycles but also cater to heavy or specialized riding, offering custom solutions for advanced suspension setups. If you want peace of mind that your suspension components are in expert hands, choose a shop that invests in technician certification, advanced diagnostic tools, and feedback from the local riding community. That’s the surest way to count on top-tier local motorcycle suspension repair every time.

Welcoming independent motorcycle repair shop with expert staff, trusted for local motorcycle suspension repair

What Makes a Trusted Bike Suspension Service?

A trusted bike suspension service stands out by combining expert technical skills with genuine care for your riding experience. High-quality shops use premium parts, clear communication, and tailor their services to your riding style and terrain. Certification matters—look for shops whose technicians hold manufacturer or industry credentials, and who stay current on evolving suspension systems.

The best suspension services are transparent about what’s included, explain each step, and encourage questions. They offer a wide range of service options, from basic fork services to advanced custom tuning, so you never overpay for unnecessary repairs. Most of all, they treat your motorcycle as if it were their own—inspecting beyond just obvious issues like leaky fork tubes or shock absorbers, and looking for anything that could affect ride quality or safety. In the words of one local expert:

“Properly serviced motorcycle suspension isn’t a luxury—it’s a necessity for safety and performance.” – Local Suspension Expert

How Local Motorcycle Suspension Repair Is Performed

Inspection: Diagnosing Suspension Component Issues

The process always begins with a thorough inspection by an expert technician. High-quality local motorcycle suspension repair uses precise tools and a keen eye to look for oil leaks, damaged fork tubes, uneven spring tension, or signs of worn internal parts. Technicians examine the visible and hidden aspects of your suspension, checking for contamination, excessive play, or abnormal noises during compression and rebound.

This level of detailed diagnosis helps catch small issues before they escalate, saving you both time and money. If the inspection reveals leaking seals, dented fork tubes, or failing shock absorbers, immediate action is recommended to avoid further wear or unsafe handling. The benefit of choosing a local repair shop is direct access to diagnostics specific to our area’s riding conditions—ensuring every service is tailored to your bike’s unique needs.

Mechanic diagnosing front suspension—critical inspection during local motorcycle suspension repair

Fork Tube Rebuilds and Shock Absorber Repairs

When inspection points to more than just routine maintenance, many riders opt for a full fork tube rebuild or shock absorber repair. This involves disassembling the fork or shock, ultrasonically cleaning components, replacing worn seals and bushings, and installing new fluid and internal parts for optimal performance. High-level shops will always use the highest quality parts to ensure long life and smooth operation.

Fork and shock repair isn’t just about replacing worn items; it’s about restoring peak ride quality. Professional technicians test the performance of each unit before reinstallation, making fine adjustments to match your riding style and terrain. Many local shops offer a wide variety of upgrade options that further enhance your suspension setup, from adjustable damping rods to fully-tunable aftermarket shocks.

Custom Tuning: Adjusting for Your Riding Style

One major advantage of local motorcycle suspension repair is custom suspension tuning. This optional service involves personalizing your suspension settings through adjustments to preload, compression, and rebound damping, ensuring your bike suspension is perfectly matched to your body weight, gear, and typical ride locations. Riders with specific needs—such as touring, racing, or heavy dual-sport riding—can benefit from custom spring rates and damping profiles.

Custom tuning is more than a luxury; it optimizes performance and comfort, reduces fatigue on long rides, and helps prevent component failures. Shops offering suspension tuning can also accommodate special requests, such as lowering kits or stiffer springs, making sure every adjustment fits your unique riding style. With each detail tailored, your motorcycle becomes an extension of yourself, enabling you to push your limits safely.

Step-by-Step Local Motorcycle Suspension Repair Process

Curious about what actually happens during a local motorcycle suspension repair appointment? Here’s a typical process: 1. Initial consultation and ride assessment 2. Full inspection of all suspension components, including fork tubes and shock absorbers 3. Removal of necessary parts for cleaning, rebuilding, or replacement 4. Detailed measurements to match suspension setup with rider profile and style 5. Installation of new seals, fluids, and internal parts (as needed) 6. Complete reassembly and system tuning (using sag, preload, and damping adjustments) 7. Test ride and final customer review This step-wise precision ensures every ride is as smooth and safe as possible.

Identifying When Your Motorcycle Suspension Needs Repair

Common Signs of Suspension Component Failure

Recognizing problems early prevents major breakdowns and saves money in the long run. Watch for these tell-tale signs that your suspension needs professional attention:

  • Unstable ride or excessive bouncing
  • Leaky fork tubes
  • Difficulty in handling during turns
  • Uneven tire wear
  • Reduced braking performance

If any of these symptoms sound familiar, it’s time to book a local motorcycle suspension repair. Addressing issues promptly can prevent a cascade of further suspension component failures, protect your tires and brakes, and restore the ride quality you expect from your machine. It’s much easier—and often cheaper—to fix small problems before they become big ones. Don’t gamble with your safety. Stay alert and act fast.

Realistic motorcycle tire with uneven wear—a sign suspension repair is needed

The Benefits of Timely Local Motorcycle Suspension Repair

Long-Term Savings: Prevent Costly Suspension Component Replacement

Routine suspension service goes a long way toward preventing expensive, large-scale repairs. By regularly inspecting and maintaining fork tubes, shock absorbers, and internal parts, you can avoid catastrophic failure that might otherwise require a complete suspension overhaul—or worse, replacement of major components. This preventative approach stretches your maintenance dollars further over the years.

In addition to saving on parts, proactive service catches small leaks, bushings, or oil decreases before they degrade performance. With local motorcycle suspension repair, technicians are able to catch all stages of wear, ensuring you only pay for what’s necessary at the time, rather than for a rushed, emergency repair. Ultimately, attentive care today prevents major repair bills tomorrow—making it a smart investment for both new and older bikes alike.

Enhanced Riding Experience and Safety for All Riding Styles

A properly maintained motorcycle suspension isn’t just about comfort—it’s a fundamental contributor to safety and fun, regardless of your experience level or riding style. Smooth, well-balanced suspension enhances road grip, keeps your tires planted through sharp corners, and shortens stopping distances. It also reduces fatigue, letting you enjoy more hours of riding with less effort.

Suspension tuning can tailor your bike to your exact ride preferences, whether you prefer firm, precise control for sport riding or plush, forgiving dampening for touring. This personalized adjustment transforms the riding experience and lets every journey become more enjoyable. When your suspension system responds perfectly, you’ll gain the confidence to explore twisty roads and challenging surfaces, always knowing your bike is responding exactly how you want.

Satisfied rider on a well-maintained bike after top-notch local motorcycle suspension repair

Boosting Bike Value—Why Proper Suspension Service Pays Off

One of the most overlooked benefits of regular suspension service is its effect on your bike’s resale value. Prospective buyers—and dealerships—are far more likely to pay a premium for motorcycles with documented, high-quality local suspension repairs. A recent service record demonstrates not only mechanical soundness but also care and attention to detail.

Proper suspension maintenance reduces visible wear on tires and frames, which can tip the scales when it’s time to sell or trade in your motorcycle. Buyers know they’re choosing a safer, more reliable vehicle—and that confidence lets you command the best possible price. In short, investing in local motorcycle suspension repair today can pay off tomorrow, both on the road and in your wallet.

People Also Ask About Local Motorcycle Suspension Repair

How much does it cost to rebuild motorcycle forks?

The cost to rebuild motorcycle forks during a suspension service generally ranges from $150 to $400, depending on parts, labor, and your bike suspension setup.

What is the life expectancy of a motorcycle suspension?

A well-maintained motorcycle suspension can last from 20,000 to 50,000 miles, but regular suspension services are needed to reach higher mileage and preserve fork tubes and other components.

How much does a shock rebuild cost?

Shock rebuilds as part of local motorcycle suspension repair typically range between $100 and $250 depending on the complexity and type of shock absorber.

How to know if motorcycle suspension is bad?

Symptoms of bad motorcycle suspension include oil leaks, unsteady ride, difficulty controlling the motorcycle, and odd noises from suspension components or fork tubes.

How to Choose the Best Local Motorcycle Suspension Repair Shop

Questions to Ask Before You Book Suspension Services

  • What is included in the suspension service?
  • Do you offer custom tuning for different riding styles?
  • Are technicians certified for bike suspension repair?
  • What brands do you service?

Reading Reviews and Comparing Local Suspension Services

Before booking your next local motorcycle suspension repair, take time to research. Reviews and word of mouth are often the best indicators of quality and customer satisfaction. Look for consistent feedback praising a shop’s expertise, transparency, and turnaround time. Compare service packages—does the shop offer a wide range of options, clear pricing, and explanations tailored to your bike?

Another smart move: visit the shop in person if possible. Check for cleanliness, organization, and positive technician-customer interactions. The best shops welcome your questions and offer to show you examples of past repairs or upgrades. Don’t settle for one-size-fits-all solutions. Choose a team dedicated to providing tailored service—after all, your safety and enjoyment are riding on their expertise.

FAQs About Local Motorcycle Suspension Repair

How often should I schedule bike suspension service?

Most experts recommend a full bike suspension service every 12,000–15,000 miles or annually, whichever comes first. If you frequently ride in extreme conditions or notice changes in ride quality, increase your check frequency.

Is local motorcycle suspension repair worth the investment for older bikes?

Absolutely! Aging bikes benefit even more from professional suspension services, as small upgrades and fresh components can totally renew ride stability and safety. Investing in proper repair can add years of enjoyment.

Can suspension services be customized for heavy or specialized riding styles?

Yes. Reputable shops offer personalized adjustments—such as stiffer springs or advanced shock absorber tuning—so your suspension set matches your weight, cargo, or aggressive performance needs. Always ask about customization options.

What are signs that suspension components need immediate attention?

Oil leaks, bottoming out, excessive fork bounce, or changes in steering/handling are all red flags. Book a professional evaluation if you spot any of these symptoms to prevent further—and more expensive—damage to your suspension setup and ride quality.

Key Takeaways: The Value of Local Motorcycle Suspension Repair

  • Professional suspension service extends bike life
  • Expert local motorcycle suspension repair boosts safety and ride quality
  • Timely maintenance prevents major repair bills
  • Custom tuning adapts to your riding style

Ready for a Smoother Ride? Contact Your Local Motorcycle Suspension Repair Experts

Call Nasty Performance Motorcycle Shop Today: 847-458-4858

Don’t wait until the next bump slows you down—schedule your local motorcycle suspension repair appointment today and experience the difference expert technicians and highest quality parts can make. Your safety, comfort, and ride quality are worth it!

If you’re committed to keeping your motorcycle in peak condition, there’s even more you can do beyond suspension care. Explore the full spectrum of maintenance strategies that every rider should know by checking out these essential seasonal bike care secrets. You’ll discover how proactive, year-round attention can prevent costly surprises, extend your bike’s lifespan, and ensure you’re always ready for the next adventure. Take your maintenance routine to the next level and ride with confidence in every season.

Motorcycle Maintenance

0 Comments

Write A Comment

*
*
Please complete the captcha to submit your comment.
Related Posts All Posts

Common Mistakes In Motorcycle Brake Pad Replacement

Did you know that over 35% of DIY brake pad replacements end up with follow-up repairs due to simple mistakes? While changing brake pads on your motorcycle can save you money and offer a sense of accomplishment, a single overlooked step could put your safety at risk. Understanding and avoiding brake pad replacement mistakes is not just about saving costs—it’s about ensuring every ride is safe, smooth, and reliable. Whether you're an experienced do-it-yourselfer or just starting out with DIY brake pad replacement, this comprehensive guide will help you sidestep common pitfalls and master the art of changing brake pads safely. Understanding Brake Pad Replacement Mistakes Overview of brake pad replacement mistakes and their consequences: Even the most enthusiastic DIY brake pad replacement can go awry if critical steps are skipped. Common mistakes like improper pad alignment, failing to fully retract caliper pistons, or mismatching brake pads can lead to uneven wear, poor braking performance, and even brake system failure. These errors may not only damage the braking system but could also put you and others on the road in danger. Mistakes during pad replacement can translate to costly repairs and jeopardize the braking system’s reliability. Importance of avoiding common mistake in DIY brake pad replacement: Safety should always be the top priority when tackling brake jobs. Simple oversights—like not cleaning caliper guide pins or using incompatible friction material—can lead to squealing brakes, uneven pedal feel, or danger in emergency stops. Knowing the most frequent brake pad replacement mistakes empowers you to avoid them from the outset, ensuring each changing brake job boosts your motorcycle’s overall performance and secures your peace of mind. What You'll Learn About Brake Pad Replacement Mistakes Identifying typical brake pad mistakes: Pinpoint the most frequent slip-ups that plague DIY brake pad replacement jobs. Why pad replacement precision matters: Understand how every detail in changing brake pads contributes to your motorcycle’s safety and performance. How to improve your DIY brake pad replacement process: Gain actionable advice so you avoid brake pad replacement mistakes on your next brake job. Why Attention to Brake Pad Replacement Mistakes is Critical Impact of brake pad replacement mistakes on your motorcycle’s safety and braking system: A single common mistake, such as failing to secure brake pads or neglecting to lubricate caliper guide pins, can compromise your entire braking system. DIY brake jobs done incorrectly may cause uneven wear, noisy brakes, or even lead to brake fluid leaks. Each part of the braking system relies on proper pad replacement procedures—overlooking one can reduce braking performance, extend stopping distances, and cause unpredictable pedal feel that threatens safe riding. A quote from a trusted mechanic discussing common mistake in brake pad jobs: "One overlooked step in a brake pad replacement can compromise your entire braking system. Always double-check every component before hitting the road." – Certified Motorcycle Technician Table: Overview of the Most Frequent Brake Pad Replacement Mistakes Common Mistake Impact on Braking System How to Avoid Estimated DIY Difficulty Rating Not Retracting Caliper Pistons Fully Prevents new pads from fitting correctly and causes uneven wear. Use a proper tool to compress pistons fully before installing new pads. Moderate Improper Brake Pad Positioning Results in brake noise, vibration, and loss of braking performance. Align pads carefully and ensure proper seating in the caliper. Easy Skipping Lubrication Leads to stiff caliper movement and squeaky brakes. Apply brake grease to caliper guide pins and backs of pads. Easy Mismatched Brake Pads Inconsistent wear, reduced effectiveness, and potential caliper damage. Verify compatibility and always install matching pad sets. Easy For those looking to take their maintenance skills further, understanding how seasonal changes can impact your motorcycle’s performance is just as important as mastering brake pad replacement. You can discover practical tips for year-round care in this guide to seasonal bike care secrets every rider must know, which complements your DIY brake work with broader maintenance strategies. Preparation Steps: Avoiding Brake Pad Replacement Mistakes Before You Start Gathering proper tools for DIY brake pad replacement: Before tackling any brake job, ensure you have all the right tools on hand. This typically includes a torque wrench, caliper tool, brake pad spreader, high-quality gloves, and cleaning products. Using proper tools reduces the risk of damaging lug nuts, caliper guide pins, or the brake pad itself. Be sure to lay out all necessary equipment on a clear, organized workspace to streamline your pad replacement and help you avoid common mistakes that can arise from being unprepared. Inspecting brake pads and braking system before pad replacement: Before starting your DIY brake pad replacement, carefully inspect the current pads, brake rotors, and calipers. Check for uneven wear or signs of brake fluid leakage, as these can indicate underlying braking system issues. Ensuring components are in good condition reduces the risk of new pad replacement mistakes and helps you address problems that could affect your brake job’s effectiveness. Checking compatibility of replacement brake pads: Not all brake pads are created equal. Confirm that your replacements match your motorcycle’s make, model, and braking system specifications. Using mismatched pads can lead to inconsistent braking, excessive wear of the brake rotor, and increased risk for future brake pad replacement mistakes—so double-check before installing. Step-by-Step Guide: Correct Brake Pad Replacement Safely elevate your motorcycle and remove the wheels. Loosen lug nuts and detach the caliper, taking care not to hang the brake by the hose. This avoids strain on the brake hose and prevents brake fluid leaks. Completely retract the caliper pistons using a proper caliper tool. Ensure there is enough clearance for the new brake pads—don't force the pads, as this can damage the piston or caliper guide pin. Remove the old brake pads and carefully clean the caliper, guide pin, and rotor surface. Use brake cleaner to eliminate debris and old lubricant for a smooth pad replacement. Align the new brake pads properly in the caliper, ensuring they fit flush against the contact surface. Double-check their position to avoid common mistakes like uneven wear or noise. Apply a high-quality brake lubricant to the caliper guide pins and pad backing plates. This step is vital for smooth operation and to prevent squealing. Reinstall the brake caliper and torque all bolts to manufacturer specifications. Secure all components and ensure the brake pad is properly seated. Pump the brake lever or pedal several times to restore proper brake pad contact and pedal feel before riding. Monitor the system for leaks or warning lights. Proper brake pad alignment and installation tips: Always ensure pads sit flush against the rotor and check for any gaps or misalignment. Improper positioning can lead to reduced braking system performance and uneven pad wear. Key braking system checks during brake pad replacement: Examine caliper movement, rotor condition, and brake fluid level after each step. Resolve any abnormalities before continuing your brake job. Common DIY Brake Pad Replacement Mistakes Not fully retracting caliper pistons: A frequent error in DIY brake pad replacement, this prevents new pads from fitting and causes the brake caliper to bind or rub against the rotor, leading to reduced performance and uneven wear. Improper brake pad positioning: Incorrectly aligned pads can cause contact surface issues, brake squeal, and inefficient stopping power. Careful alignment is crucial for optimal braking system function. Skipping brake pad lubrication steps: Not lubricating caliper guide pins or pad backs results in sticky movement and persistently noisy brakes. Mismatched brake pads: Installing the wrong type or unevenly worn pads can cause inconsistent pedal feel, faster deterioration, and even damage to the caliper or rotor. Brake Pad Replacement Mistakes and the 30 30 30 Rule Explanation of the 30 30 30 break-in rule and its relevance to DIY brake pad jobs: The 30 30 30 rule is a proven break-in method after brake pad replacement: complete 30 gradual stops from 30 mph, spacing each stop about 30 seconds apart. This process evenly beds new pads into your disc brakes while ensuring proper friction material transfer. How improper brake pad replacement can make it difficult to implement the 30 30 30 rule: If pads are mismatched, installed incorrectly, or not properly lubricated, the break-in phase—critical to maximizing pad and rotor life—will not be effective. Skipping steps increases the risk of uneven wear and brake rotor damage, making even the best break-in routine much less effective. Signs You've Made a Brake Pad Replacement Mistake Common symptoms after DIY brake pad replacement mistakes: If you hear squealing, grinding, feel a pulsing brake pedal, or notice inconsistent pedal feel, your brake job may have gone wrong. These warning signs often indicate issues like sticking caliper guide pins, misplaced brake pads, or uneven contact with the rotor. Braking system warning indications: Look out for dashboard warning lights, visible brake fluid leaks around the caliper, or excessive brake dust shortly after pad replacement. Ignoring these warning signals can accelerate disc brakes and rotor damage. When to revisit your pad replacement job: If you experience any of the above or hear grinding/scraping shortly after DIY brake pad replacement, stop riding and re-examine every step. It’s better to redo a brake job than risk your safety or compromise the braking system further. How to Fix Brake Pad Replacement Mistakes and Ensure Safety Safely lift the motorcycle and remove the wheel and caliper as you did initially. Retract caliper pistons fully using a proper tool to ensure room for fitting new pads. Thoroughly clean the caliper guide pins, pad slots, and brake rotor surface with approved brake cleaner. Carefully realign new brake pads, ensuring both sides are seated evenly on the contact surface. Apply the correct lubricant to caliper guide pins and pad backs to prevent squealing and binding. Torque all bolts to the manufacturer’s specs for a secure fit and check all components for proper installation. Pump the brake lever or brake pedal to restore system pressure and check for leaks before test riding. Ensuring braking system integrity after brake pad replacement: Always check brake pedal or lever feel, inspect for leaks, and confirm pads and calipers move freely. Address warning lights on your dash immediately to protect your disc brakes and overall braking performance. When to seek professional help after a bad DIY brake job: If repeated attempts result in spongy pedal feel, persistent noises, or leakage, consult a certified mechanic. Some pad replacement issues, like damaged brake rotors or a compromised braking system, require specific expertise and diagnostic equipment. Expert Quote on the Dangers of Overlooking Brake Pad Replacement Mistakes "One overlooked step in a brake pad replacement can compromise your entire braking system. Always double-check every component before hitting the road." – Certified Motorcycle Technician People Also Ask: Brake Pad Replacement Mistakes What are common mistakes when installing brake pads? Skipping lubrication of caliper guide pins and pad backs, not seating pads correctly in the caliper, and ignoring torque specifications are some of the most frequent errors. Missing these steps leads to brake noise, uneven wear, and poor braking system performance—issues avoidable with careful attention during your pad replacement. What is the 30 30 30 rule for brakes? The 30 30 30 rule describes the break-in process for new brake pads: perform 30 gradual stops from 30 mph, each spaced about 30 seconds apart. This bedding-in routine allows friction material to transfer properly and ensures even contact surface wear, maximizing pad replacement effectiveness and disc brakes longevity. Does Les Schwab bleed brakes? Les Schwab shops generally include brake bleeding service during brake pad replacement if necessary to maintain optimal braking system function. Always confirm with your service provider when booking a brake job. How much do brake pads cost for a Mazda CX-5? Brake pad costs for a Mazda CX-5 can vary by location and product. Always consult certified shops or your dealership for accurate pad replacement estimates. Essential Tools and Products to Prevent Brake Pad Replacement Mistakes Recommended equipment for DIY brake pad replacement: Ensure you have a reliable torque wrench, caliper piston tool, brake cleaner, quality gloves, and a jack stand. Having the right gear makes your pad replacement smoother and minimizes the risk of damaging the braking system. Top-rated lubricants and cleaning products for brake pads and braking system: Use silicones or high-temp disc brakes grease for guide pins, and an approved, non-oil-based brake cleaner for rotors and calipers to keep everything moving smoothly and cleanly. Checklist for successful pad replacement job: New, compatible brake pads Brake cleaner and high-temp grease Torque wrench and piston retractor Gloves and eye protection Detailed shop manual for your specific model FAQs: Brake Pad Replacement Mistakes Can I drive after a DIY brake pad replacement if I suspect a mistake? It is strongly recommended not to drive until you’ve identified and corrected any possible brake pad replacement mistakes. Continuing to ride may worsen damage or compromise your safety. Always double-check your work if anything seems off. What if my braking system feels spongy after pad replacement? A spongy brake pedal or lever often signals air in the brake lines or insufficient pad contact. Re-bleed your brakes carefully, check all pad and caliper alignments, and ensure no brake fluid leaks are present. Persistent issues require professional inspection. How often should brake pads be checked and replaced? Brake pads should be checked as part of every major motorcycle maintenance schedule or at least every 5,000-7,000 miles, depending on usage. Replace pads when friction material is below minimum thickness, or sooner if uneven wear or performance loss is detected. Key Takeaways to Avoid Brake Pad Replacement Mistakes Always double-check alignment after changing brake pads to ensure perfect seating and avoid uneven wear. Follow the 30 30 30 break-in procedure after every DIY brake pad replacement for optimal bedding and longevity. Don’t overlook the braking system inspection after pad replacement—catch issues before they become safety hazards. Conclusion: Mastering Brake Pad Replacement and Avoiding Mistakes To prevent brake pad replacement mistakes, follow every step with care, check and double-check your work, and don’t hesitate to review your brake job if anything feels off. Consistent practice and a focus on learning are key to mastering DIY brake pad replacement and ensuring safety every ride. Keep honing your skills—confident, mistake-free brake jobs are within every DIY mechanic’s reach! If you’re committed to keeping your motorcycle in peak condition, don’t stop at just the brakes. Expanding your knowledge to include seasonal maintenance can help you anticipate issues before they arise and extend the life of every component. Explore seasonal bike care secrets every rider must know for expert advice on preparing your bike for changing weather, optimizing performance, and ensuring safe rides all year long. By integrating these advanced care strategies with your brake maintenance routine, you’ll be equipped to handle both everyday upkeep and the unique challenges each season brings. Take the next step in your DIY journey and make your motorcycle maintenance truly comprehensive. Ready to Safely Replace Your Pads? Call Nasty Performance Motorcycle Shop Today: 847-458-4858

Common Mistakes with Motorcycle Tire Pressure

While understanding the basics of tire pressure is essential, many riders overlook the importance of adjusting their approach as the seasons change. For a deeper dive into how temperature shifts and seasonal factors can impact your motorcycle’s performance and tire health, explore our guide on seasonal bike care strategies every rider should know. This resource offers practical tips for adapting your maintenance routine year-round. If you’re ready to take your motorcycle maintenance to the next level, don’t stop at tire pressure. Expanding your knowledge of comprehensive bike care—especially as the seasons change—can dramatically improve your ride’s reliability, safety, and longevity. Discover expert insights on preparing your motorcycle for every climate, from winter storage to spring tune-ups, by visiting our in-depth article on seasonal bike care secrets. Investing in a holistic maintenance approach ensures you’re always ready for the road ahead, no matter what the weather brings.

When To Conduct a Motorcycle Clutch Inspection

Did you know most unexpected breakdowns on the road can be traced back to neglected motorcycle clutch inspection? For riders, understanding when and how to check your clutch can mean the difference between a smooth cruise and being stranded unexpectedly. In this complete guide, we reveal why clutch inspection is an essential habit for every motorcycle owner, how to recognize early warning signs, and vital tips for maximizing your bike’s performance and safety. Unveiling the Importance of Motorcycle Clutch Inspection The motorcycle clutch is a vital component responsible for transferring power from the engine to the rear wheel, allowing smooth gear shifts and controlled acceleration. If overlooked, hidden clutch problems often escalate into serious mechanical issues and sudden breakdowns. A timely clutch inspection protects your investment, prevents costly repairs, and ensures the safety of you and your bike. Recognizing the importance of regular inspection is crucial. Clutch problems may begin subtly, with symptoms like a stiff clutch lever or odd vibrations. Many riders ignore these signs, only to face bigger problems later such as clutch slippage, sticking, or total loss of acceleration. By scheduling regular inspections and staying attentive to early warning signs, you greatly extend your clutch’s—and your bike’s—lifespan. "Did you know that neglecting regular motorcycle clutch inspection is one of the leading causes of unexpected breakdowns on the road?" What You'll Learn About Motorcycle Clutch Inspection The key signs indicating the need for a motorcycle clutch inspection Step-by-step process for conducting a clutch inspection How to identify clutch problems before they escalate When to involve a professional versus DIY Expert tips for optimizing clutch lever response and performance Understanding the Role of the Motorcycle Clutch The motorcycle clutch isn’t just a lever—it’s a sophisticated mechanism that manages the delicate transfer of engine power to the road, allowing smooth starts, effortless shifts, and controlled stops. Without the clutch, shifting gears or coming to a stop would be abrupt and potentially damaging. Understanding its role is the first step towards mastering clutch maintenance, helping you prevent clutch problems and optimize performance. Across all types of motorcycles, from dirt bikes to street bikes, the clutch assembly includes multiple crucial parts—clutch plates, friction plates, steel plates, clutch basket, pressure plate, clutch hub, and more. Each plays a pivotal role in the transfer of power and the ride quality. By grasping how the clutch works and recognizing how different components interact, riders become empowered to detect subtle issues before they evolve into major repairs. How the Motorcycle Clutch Functions The clutch operates by compressing or releasing clutch discs and friction plates between the clutch basket and pressure plate. When you pull the clutch lever, the plates separate, breaking the connection between the engine and rear wheel. This action allows you to change gears safely. When you release the lever, the plates re-engage, transmitting power again. Components such as the clutch hub, needle bearing, clutch spring, and clutch basket fingers must be in harmony for seamless operation. Any wear or warping of these parts may trigger issues like clutch drag (when the plates fail to fully disengage) or slippage (when friction plates fail to transfer full power). For hydraulic systems, the clutch’s operation depends on hydraulic fluid pressure. Both mechanical (cable) and hydraulic clutches require regular inspection to avoid progressive damage. Motorcycle Clutch Problems: Common Triggers and Impacts Clutch problems arise from several common sources. Worn clutch plates, warping due to excessive heat, poor cable adjustment, or contaminated hydraulic fluid can all lead to troublesome symptoms. Dirt bikes, for example, often suffer clutch wear from aggressive riding in off-road conditions, while street bikes may see clutch disc glazing from frequent stop-and-go traffic. The impacts of overlooked clutch issues are serious: reduced acceleration, strange noises during shifting, increased lever stiffness, and a slipping clutch that struggles under load. Over time, if the pressure plate and clutch hub are not inspected, you risk damaging the clutch basket or warping steel plates, leading to expensive repairs and compromised safety. Understanding these triggers is vital for effective inspection and preventative maintenance. Essential Timing: When To Conduct a Motorcycle Clutch Inspection Knowing when to conduct a motorcycle clutch inspection is as important as understanding how to perform one. Manufacturers generally recommend inspection intervals based on mileage and riding style, but attentive riders should always be alert to symptoms that demand immediate attention. Regular inspection ensures the clutch plate, friction plate, clutch discs, and related parts remain in proper working order, preserving both safety and motorcycle performance. Inspections aren’t just about distance traveled. They help identify subtle warning signs, prevent breakdowns, and can catch issues such as free play anomalies, cable tension problems, or the onset of rattling sounds. Monitoring your mileage and listening to your bike ensures you address problems before they escalate into larger, more costly repairs. Mileage-Based Motorcycle Clutch Inspection Intervals Most modern motorcycles benefit from a clutch inspection every 6,000 to 12,000 miles. However, your ideal interval varies depending on riding habits and bike type. Aggressive riders, racers, or those who commute frequently in heavy traffic often require more frequent inspections as clutch components wear faster. Dirt bikes may need checked every few months due to tougher conditions, while touring bikes typically have longer intervals. Always consult your owner’s manual for your motorcycle’s recommended service schedule. It’s best to err on the side of caution; if you notice symptoms like a spongy clutch lever, difficulty shifting, or changes in clutch engagement, conduct an inspection regardless of your last service date. Remember, a minor investment of time now can save you from a major repair bill later. Symptoms Suggesting Immediate Clutch Inspection Immediate inspection is warranted whenever you observe notable changes in clutch performance. Classic red flags include suddenly increased clutch lever travel, the presence of gear crunching, a feeling of the clutch slipping (where power delivery is inconsistent), or the emergence of rattling sounds near the clutch cover. Sticky or hard-to-pull levers, vibration under load, or visible clutch disc overheating are further warning signs that demand prompt attention. Pay attention to both how your bike rides and how it sounds. If a once-smooth shift now jerks, or you detect hesitation in power, these may indicate friction plate glazing, warped plates, or issues with the clutch basket or pressure plate. Swift diagnosis helps prevent further damage and ensures safer, more reliable rides. Comparison of Recommended Inspection Intervals by Motorcycle Type Motorcycle Type Recommended Inspection Interval Special Notes Standard/Commuter 6,000–8,000 miles Typical mixed-use conditions Dirt Bike/Off-Road Every 3–6 monthsor after every major ride Check more often due to harsher operating environments Sport Bike (Street) 8,000–10,000 miles More frequent for aggressive riders Touring/Cruiser 10,000–12,000 miles Less stress due to steady, long rides Custom/Performance Varies Inspect after tuning or track events How to Tell if Your Clutch is Bad on a Motorcycle Knowing how to identify a failing clutch can help you act fast and avoid being stranded. Here are common warning signs that indicate serious clutch problems: Difficulty shifting gears A spongy or tight clutch lever Slipping or sticking clutch Strange noises or vibrations Loss of acceleration When the clutch lever becomes hard to operate, or you feel the clutch fails to engage or disengage smoothly, it’s time to inspect for worn clutch plates, stretched cables, low hydraulic fluid, or warping in the pressure plate and clutch hub. Ignoring these problems may worsen wear on internal clutch discs, basket fingers, and may even damage the clutch basket itself. Always treat these symptoms as critical warnings to conduct immediate clutch inspection. What Does a Motorcycle Clutch Inspection Involve? A proper motorcycle clutch inspection consists of various steps, from general checks of the lever and cable to detailed examination of the clutch plates themselves. Both manual and hydraulic system motorcycles require careful assessment to catch issues early and maintain smooth clutch engagement. Inspectors begin by assessing free play at the clutch lever, cable adjustment, and inspecting for leaks or color change if the system is hydraulic. Next, they're looking for excessive play, unusual resistance, or changes in the feel of the lever—key indicators of internal clutch problems. A thorough inspection might include removing the clutch cover for a hands-on check of the clutch plates, friction plate, and basket. Preliminary Checks: Clutch Lever, Cable, and Fluid Start your clutch inspection by checking the free play at the clutch lever. There should be a small, but definite, amount of loose play—too much or too little indicates a need for cable adjustment. Check cable tension for signs of wear or fraying and lubricate as necessary. For bikes with hydraulic clutches, inspect the hydraulic fluid reservoir for proper levels and evidence of contamination or discoloration. Evaluate the smoothness of clutch lever movement. Any sponginess, excessive stiffness, or inconsistent resistance may signal deeper clutch problems. Don't forget to check for leaks in the hydraulic system, as low fluid or air contamination can drastically affect clutch engagement and performance. These preliminary checks set the stage for more detailed inspections if abnormalities are found. Step-by-Step Clutch Plate Inspection on a Motorcycle To check the health of your clutch plates and related components, you need basic tools, patience, and a methodical approach. Begin by ensuring your motorcycle is safely parked, turned off, and the engine is completely cool. Remove the clutch cover to access the clutch basket, pressure plate, clutch discs, and steel plates. Examine each clutch disc and friction plate for visible signs of wear, overheating (discoloration), warping, or grooves on the clutch basket fingers. Using a micrometer, measure the thickness of the plates and compare with manufacturer specifications—any plate thickness below spec means the component must be replaced. Note any uneven wear, chips, or signs of burnt friction surfaces which may indicate improper clutch spring tension or hydraulic problems. Reassemble carefully, ensuring the pressure plate and clutch hub are aligned and all components are torqued to the correct specs. How to Inspect Clutch Plates on a Motorcycle Here is a simplified outline for inspecting the clutch plates on your motorcycle. Always consult your owner’s manual for details specific to your model: Ensure the motorcycle is secured and cool Remove the clutch cover Examine clutch plates for wear, burning, or warping Measure plate thickness and compare to manufacturer specifications Reassemble with proper torque settings "Regular motorcycle clutch inspection helps riders avoid costly emergency repairs and ensures performance and safety on every ride." Top 5 Symptoms of a Bad Motorcycle Clutch Dragging clutch Clutch slippage under load Noisy operation during shifting Stiff or loose clutch lever Irregular clutch engagement If you encounter any of these symptoms, consider them urgent signals for a detailed clutch inspection. Address these issues before they lead to further damage of the clutch hub, basket, or pressure plate components. Expert Tips for Addressing Motorcycle Clutch Problems Handling clutch issues proactively is vital for every responsible rider. Here are actionable tips from seasoned professionals: First, establish a regular schedule for clutch lever and cable inspection. Lubricate moving parts regularly and monitor hydraulic fluid levels for any color or viscosity changes. Store your motorcycle properly and always allow the bike to warm up before demanding rides to prevent thermal shock and warping of the clutch discs and friction plate. When in doubt, consult a trusted mechanic familiar with your motorcycle type. When to Seek Professional Motorcycle Clutch Inspection DIY inspection can handle routine checks and maintenance, but certain issues—such as persistent clutch problems, rattling sounds, or apparent damage to the clutch basket or hub—require a trained eye. If you lack proper tools or are unsure about measurement specs, don’t hesitate to visit a reputable shop. Remember, clutch systems have little room for error, and improper inspection or assembly may worsen the problem. Seek professional inspection if you’re dealing with chronic slippage, noisy operation, excessive free play that cannot be adjusted out, or if you suspect hydraulic system leaks or contamination. It’s always better to be safe and seek help, especially with complex or performance motorcycles. Maintenance Best Practices for Preventing Clutch Problems Prevention is the best cure for clutch issues. Prioritize regular oil changes (especially for wet clutches), keep the cable and lever system free of debris, and follow manufacturer guidelines for clutch adjustment. Periodically check the basket fingers, pressure plate, and friction plate for scoring or grooves. In dry clutches, monitor dust buildup, since excess grime accelerates plate wear and clutch engagement issues. Riding habits also influence clutch longevity. Avoid riding the clutch unnecessarily (such as holding the lever at traffic lights), use smooth and deliberate gear shifts, and refrain from excessive aggressive acceleration. Proper storage and regular cleaning further extend clutch spring, clutch hub, and clutch basket lifespan, translating into smoother, more reliable performance. FAQs: Motorcycle Clutch Inspection and Clutch Problems How often should I inspect my motorcycle clutch? Most manufacturers suggest inspecting your motorcycle’s clutch every 6,000 to 12,000 miles, or more often for aggressive riding, harsh conditions, or older bikes. Always check your owner's manual for your specific model. Can I inspect the clutch myself, or should I go to a professional? Many preliminary checks (like free play and lever movement) and simple inspections can be done at home with basic tools. However, if you notice advanced symptoms like slippage, noise, or suspect internal wear, it’s best to consult a professional mechanic. What clutch problems are most common in modern motorcycles? The most common issues include worn or glazed friction plates, stretched cables, low or dirty hydraulic fluid, and warped steel plates or clutch basket fingers. Is clutch inspection different for dirt bikes versus street bikes? Yes—dirt bikes often require more frequent clutch inspections due to the harsher operating conditions and increased wear from aggressive off-road riding. Street and touring bikes may maintain longer intervals but require equal attention to detail. Key Takeaways from Your Motorcycle Clutch Inspection Timely inspections prolong clutch lifespan Recognizing early symptoms of clutch problems is critical DIY inspection is possible but professional help may be required for complex issues A well-maintained clutch lever ensures safety and smoother rides Contact Trusted Professionals for Your Next Motorcycle Clutch Inspection Ready to keep your bike running smoothly? Protect your investment and never compromise on safety—Call Nasty Performance Motorcycle Shop Today: 847-458-4858 "Protect your investment and never compromise on safety—Call Nasty Performance Motorcycle Shop Today: 847-458-4858" Conclusion: Proactive motorcycle clutch inspections guarantee safer, longer, and more enjoyable rides. Listen to your bike, follow inspection intervals, and trust professionals when in doubt for ultimate peace of mind. While understanding clutch inspection intervals is crucial, it's equally important to adapt your maintenance routine to the changing seasons. For practical advice on how weather and seasonal shifts can impact your bike’s performance and what steps you should take, explore these essential seasonal bike care secrets every rider should know. Mastering clutch inspection is just one part of keeping your motorcycle in peak condition year-round. To truly safeguard your ride and enjoy worry-free journeys, consider how comprehensive seasonal care can further enhance your bike’s reliability and longevity. Discover expert strategies for adapting your maintenance routine to every season and unlock advanced tips that go beyond the basics by visiting our in-depth guide on seasonal motorcycle care. Your next level of riding confidence starts with a holistic approach to maintenance.

Terms of Service

Privacy Policy

Core Modal Title

Sorry, no results found

You Might Find These Articles Interesting

T
Please Check Your Email
We Will Be Following Up Shortly
*
*
*