cropper
update

Nasty Performance ~ 847-458-4858 

update
  • Blog Home
  • Categories
    • Motorcycle Maintenance
    • Riding Tips & Preps
    • Safety & Inspection
    • Customizations & Upgrades
    • DIY Motorcycle Repairs
    • Motocycle Audio Systems
    • Motocycle Seasonal Care & Storage
    • Engine, Electrical Performance
  • Bike Night
  • Nasty Performance Motorcycle Shop
May 12.2026
1 Minute Read

Discover the Hidden Power of Custom Paint Jobs to Transform Your Ride

Custom paint jobs – A proud car owner stands beside their brilliantly colored car, showcasing a gleaming finish and rich, bold tones on a city street under clear daylight.

Did you know that a vehicle with a professionally applied custom paint job can gain not only attention on the streets but also command a noticeably higher resale value? Custom paint jobs are more than just a splash of color—they represent a blend of artistry, advanced technology, and personal expression that can transform any plain ride into a truly head-turning masterpiece. This article dives deep into the world of custom paint jobs, breaking down their impact, the intricate process behind them, their long-term value, and how to make the smartest decision for your next automotive upgrade.

Unveiling the Impact of Custom Paint Jobs: More Than Just Looks

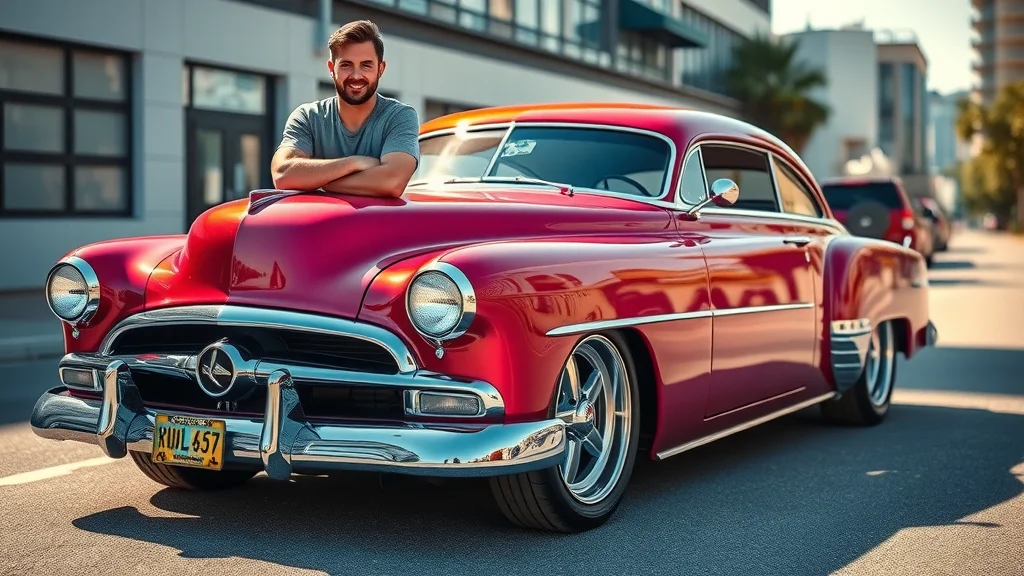
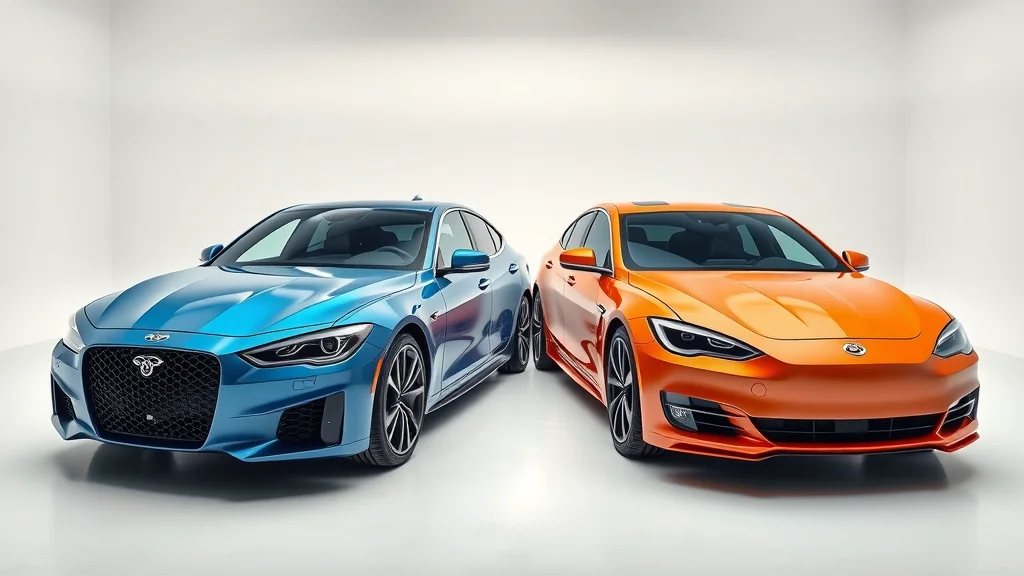
When it comes to custom paint jobs, the benefits go far beyond simple aesthetics. While the visual transformation is the most obvious, investing in a high-quality paint job can also dramatically increase your vehicle’s resale value and make every drive a source of pride. In fact, one of the main reasons car owners consider custom jobs is the sense of uniqueness it brings. Each color choice, finish, and design element distinguishes your car from the rest—and that’s a quality buyers notice too.

"A distinctive custom paint job can elevate not only your vehicle's appearance but also its resale value and your sense of pride in ownership."

A great paint job also plays a crucial role in protecting your car’s exterior. Today’s best paint jobs involve layers of premium materials that form a resilient barrier against the elements. This extra protection helps prevent small dents and unsightly scratches, ensuring the finish resists chipping and fading from UV rays or harsh weather. Plus, with expert auto body prep work and top-tier finishes, the transformation is both beautiful and long-lasting—making a custom paint job worth every dollar of your investment.

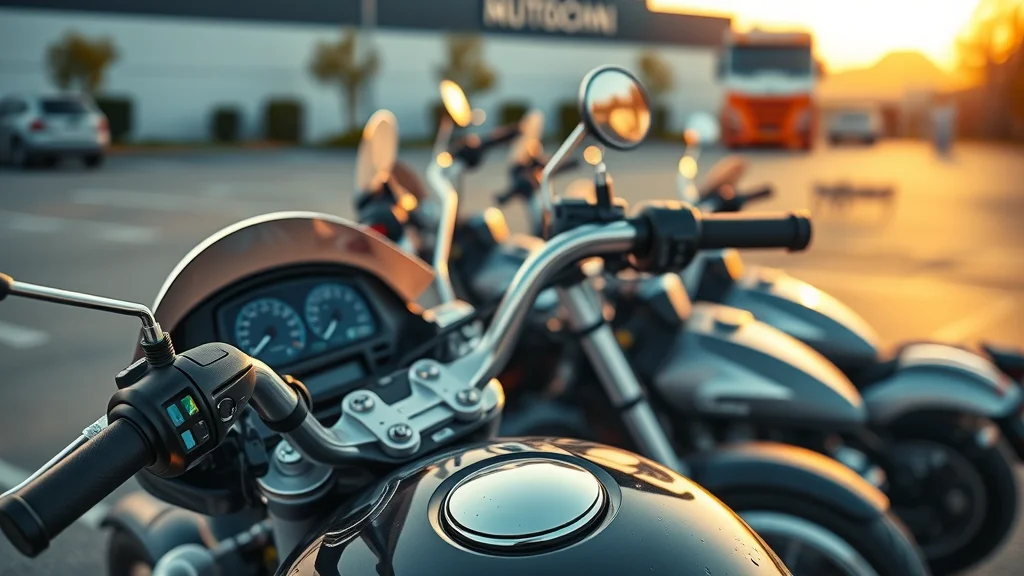
For those interested in how custom paint jobs can make an immediate impact, especially on two wheels, exploring motorcycle paint jobs that turn heads instantly offers a closer look at the techniques and styles that set standout bikes apart from the crowd.

What You’ll Learn About Custom Paint Jobs

  • The extensive benefits of custom paint jobs
  • Key features to look for in a custom paint job
  • Step-by-step process of a professional custom paint job
  • How to make an informed purchasing decision for custom paint jobs

The Rise of Custom Paint Jobs in Automotive Culture

Historical Perspective: Origins and Evolution of Custom Paint Jobs

Retro custom car paint shop – Mechanics in vintage attire working on a classic car with early custom paint, all set in a nostalgic mid-20th-century garage environment.

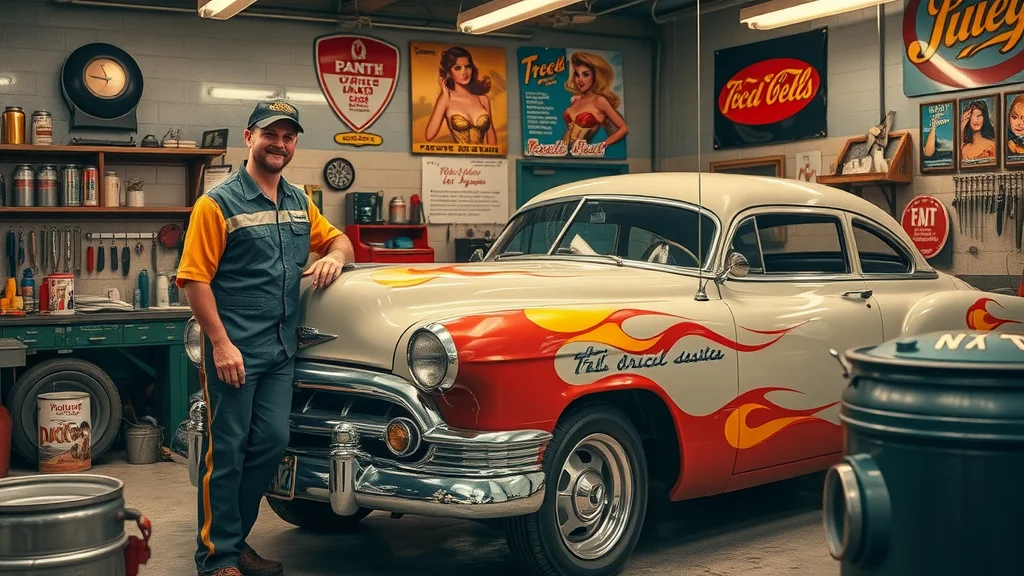
The tradition of creating standout rides with custom paint jobs can be traced back to the early days of hot-rodding. In the mid-20th century, car enthusiasts started experimenting with metallic and candy paints, pinstriping, and hand-applied graphics. These pioneers set a new standard for personalization, transforming basic surfaces into rolling works of art. The trend quickly caught on, inspiring generations of drivers to seek ways to express their individual style. Over time, advances in auto painting materials and technology made creative paint jobs more accessible and durable, fueling an entire industry dedicated to one-of-a-kind color and finish.

As auto body skills improved and new paint job methods evolved, the demand for unique designs surged. Custom shops thrived, offering everything from flashy flames and pearls to sophisticated color-shift and matte finishes. Today, thanks to digital design tools and high-precision equipment, virtually any vision can become a reality on your vehicle—making modern custom paint jobs a true blend of tradition, innovation, and customer ambition.

Modern Trends: Popular Styles and Demand for Custom Paint Jobs

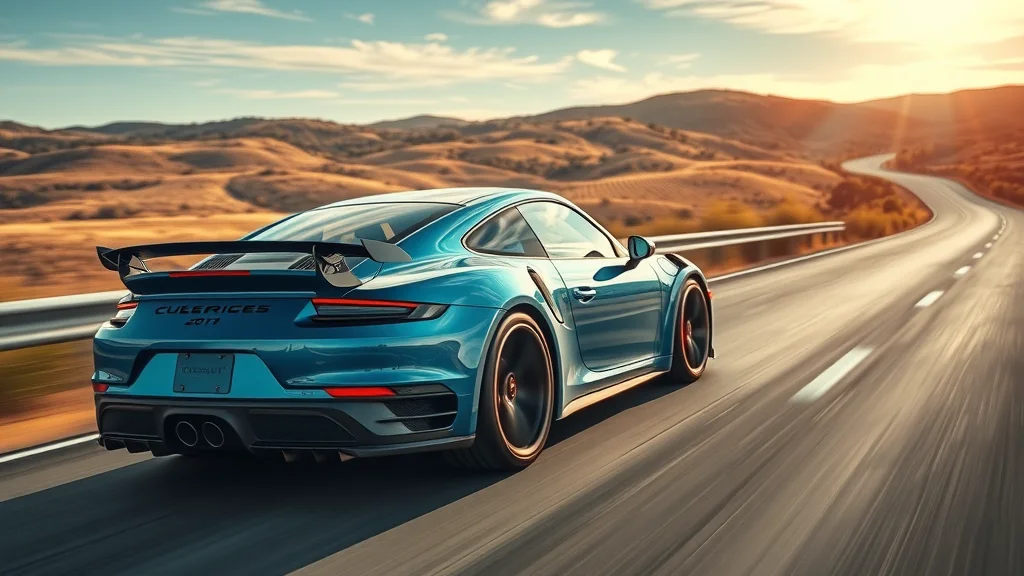
Modern custom paint jobs are defined by bold styles and advanced finishing techniques. Some of the most popular options today include color-shifting pearls, high-gloss or satin finishes, intricate airbrushing artwork, and carbon fiber effects. These styles allow vehicle owners to make statements that reflect their tastes and values. Custom metallics and vibrant color matches are especially in demand, with clients seeking unique hues that stand apart from factory versions.

The impact of social media and car shows has made standing out more important than ever. Many customers now request paint jobs that not only capture attention in person but also photograph beautifully for sharing online. Thanks to growing interest and technological developments, professional shops can now offer faster turnaround times, richer colors, and more complex patterns with greater durability. This surge in demand means more technicians are honing their craft, raising the industry standard for finish quality and customer experience.

Why Choose Custom Paint Jobs for Your Vehicle?

  • Personalization for Unique Expression
    A custom paint job offers total creative control. Whether you want an eye-catching hue, personalized graphics, or a finish no one else has, customization makes your vehicle a direct reflection of your personality and taste.
  • Increased Resale Value
    Vehicles adorned with quality custom paint jobs often fetch higher prices in the used market. Buyers are willing to pay a premium for uniqueness—especially when the finish is flawless and head-turning.
  • Enhanced Durability with Quality Paints
    Modern custom jobs involve layers of high-performance paint and specialized primers. This approach boosts resistance against dents and unsightly scratches, meaning your investment stays fresher, longer.
  • Protection Against Elements
    Professional auto body shops use clear coats and advanced finishes that shield against chips, sun, rain, and road debris. This protection is essential for keeping a consistent shine long after the job is done.

Key Features to Evaluate in Custom Paint Jobs

  • Type of Paint and Finish
    From glossy to matte, metallic to pearlescent, the specific paint and sheen you choose will impact color depth, reflection, and durability.
  • Artistic Techniques and Effects
    The best shops offer advanced airbrushing, pinstriping, or layered effects. These require experience and a steady hand to achieve a smoothest finish and highest visual impact.
  • Clear Coat Protection
    A thick, professionally applied clear coat is vital. It preserves color brilliance and helps keep a consistent shine for years, while protecting against scratches and fading.
  • Professional Expertise
    Look for technicians with proven success, as the job deserves great attention to prep work, color match, and flawless application.

Custom paint jobs – Close-up of craftsman airbrushing a vibrant blue car panel with shimmering metallic sheen in a clean workshop.

The Step-by-Step Process of a Custom Paint Job

  1. Initial Consultation and Design
    The journey begins by meeting with an expert to discuss preferences, desired finishes, color match needs, and your inspiration. Shops may use digital design tools to create a preview, ensuring the final result aligns exactly with your vision.
  2. Surface Preparation
    Thorough prep work is essential. Technicians provide detailed surface repair, remove small dents and unsightly scratches, and use sanding to create an even base. This step prevents uneven color and gloss.
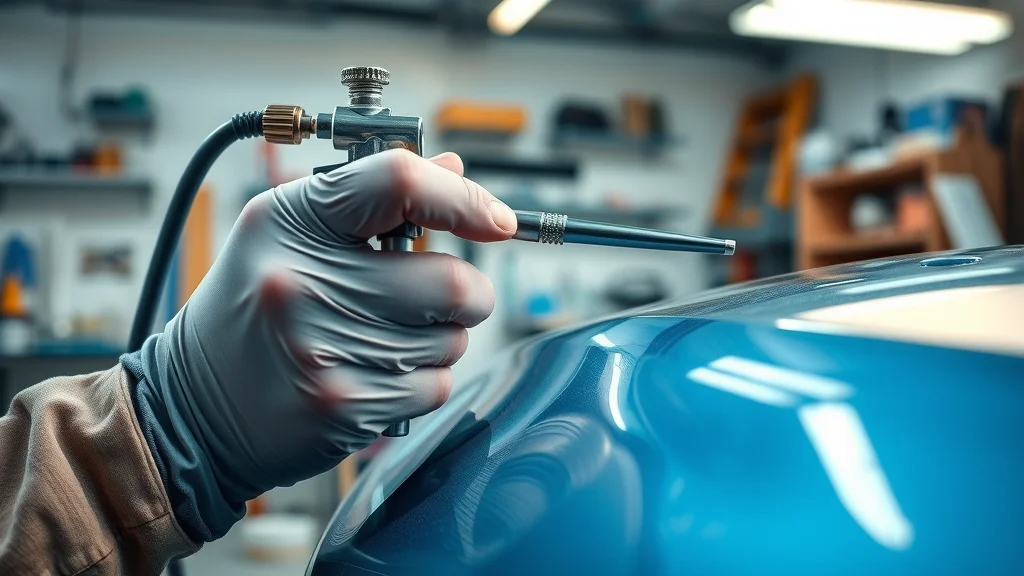
  3. Priming and Base Coating
    A premium primer is sprayed on, followed by the chosen base color. The accurate color match is vital here, as it forms the canvas for all custom work, ensuring a seamless and solid foundation.
  4. Custom Artwork and Detailing
    This phase brings artistry to life. Advanced airbrushing, taping, or freehand designs are applied, layer by layer, with meticulous attention to detail for a smooth finish.
  5. Protective Clear Coating
    Multiple clear layers are added to protect the entire painted surface. This not only enhances gloss and accurate color match but also resists chipping, weathering, and daily wear for a consistent shine long term.
  6. Final Quality Inspection
    A careful review ensures everything—from color uniformity to surface smoothness—meets the highest standards. A great paint job deserves a flawless inspection before delivery.

Paint Shop Spotlight: What Makes a Great Custom Paint Job Provider?

Auto body shop – Friendly expert technicians showcasing a stunning custom paint job portfolio around a vividly painted car in a clean, bright workspace.
  • Experienced Technicians
    Seasoned professionals with a track record in auto painting deliver best results. Consistent training and skill ensure every painted surface meets expectations for gloss and accurate color.
  • Portfolio of Previous Work
    A reputable shop will have a robust gallery of completed projects—showcasing range, creativity, and finish quality.
  • Use of Industry-Leading Products
    Premier paint brands and modern equipment are non-negotiable for a lasting, high-gloss paint job that resists chipping.
  • Customer Testimonials and Reviews
    Positive feedback highlights both the technical skill and customer service a company offers. Look for reviews mentioning accurate color match, prep work, and long-lasting finishes.
  • Warranty and Satisfaction Guarantees
    Shops with confidence in their craft stand behind their work, offering robust warranties and satisfaction guarantees as part of their service offer.

Maintenance and Care Tips for Custom Paint Jobs

Custom paint jobs – Car owner gently hand-washes a luxury sports car with a deep, reflective finish in a leafy residential setting.
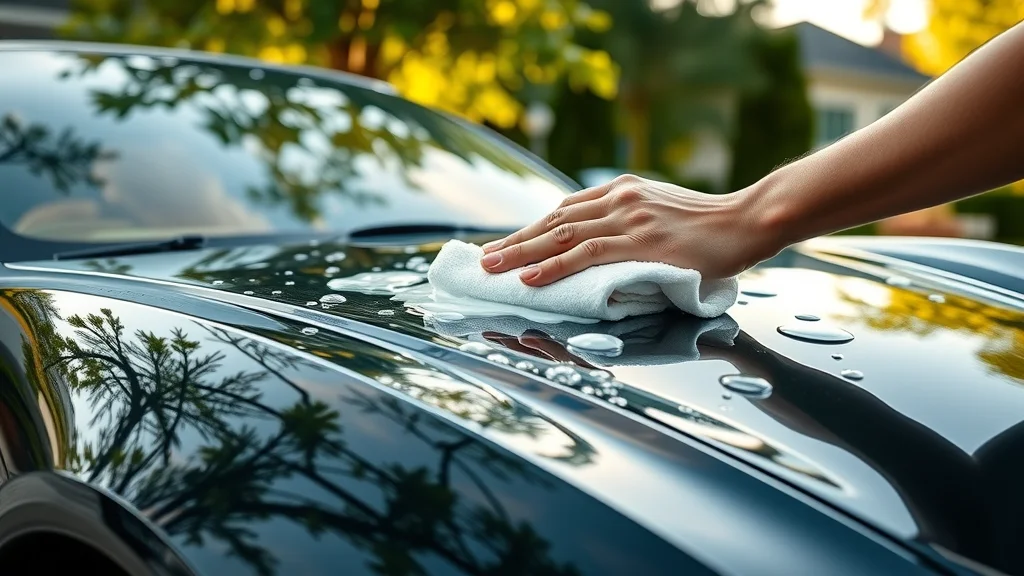
  • Regular Gentle Washing
    Use soft microfiber cloths, gentle soaps, and plenty of water to safely remove debris without scratching or dulling your paint job.
  • Protective Waxing
    Waxing at regular intervals restores shine and creates a sacrificial layer that shields from contaminants and light scratches.
  • Avoid Harsh Chemicals
    Avoid aggressive cleaners which can break down clear coat and impact the finish. Stick to pH-balanced products recommended by your paint provider.
  • Store Indoors When Possible
    Garaging your vehicle or covering it when parked outdoors minimizes exposure to sun, rain, and pollutants, helping to maintain that consistent shine long term.

How to Decide: Is a Custom Paint Job Right for You?

  • Assessing Your Goals for Customization
    Are you seeking standout looks, increased car show appeal, or personal satisfaction? Define your goals before contacting a shop.
  • Budgeting Considerations
    While a custom paint job is an investment, quality can be tailored to different needs—from subtle enhancements to full transformations. Reputable providers may offer financing options.
  • Long-Term Plans for Your Vehicle
    Think about whether you plan to keep, sell, or show your vehicle. High-quality paint jobs can aid resale or collector value, making the expense worthwhile.

People Also Ask: How much would a custom paint job on a car cost?

Understanding the Cost Factors for Custom Paint Jobs

Custom paint job costs can vary widely depending on the complexity of the design, the type of paint and finish used, the size and model of the vehicle, and the level of prep work involved—including repairs to small dents and unsightly scratches. In general, more intricate graphics, multi-layer effects, and superior materials will increase the price. Labor costs reflect the skill and experience of the technicians as well as the thoroughness of surface repair.

It’s important to get a clear estimate from your provider, understand what’s included in the quoted price, and compare portfolios and reviews before making a decision. The best paint jobs balance artistry, protection, and cost for lasting results. Some shops even provide affordable price tiers and financing options to make the experience more accessible.

People Also Ask: What's the average cost to paint a 2000 square foot house?

Is There a Connection Between Home and Vehicle Custom Paint Jobs?

While painting a house and a vehicle both require professional attention to color match, surface repair, and durability, the processes are actually quite different. Residential painting is usually focused on broad wall surfaces, while custom paint jobs for vehicles demand meticulous prep work, specialized equipment, and intricate detailing. The variety of paints, the need for flawless gloss, and the artistic skills required make auto body painting a specialized craft. Even though costs may seem similar on paper, the value you receive from a custom vehicle paint job is tied to the expertise of technicians and the ability to provide a truly unique, durable finish.

This comparison highlights the importance of choosing providers skilled in your desired area—just as you’d find a location skilled in house painting for your home, make sure to choose an auto painting shop with a strong record and satisfied customers.

People Also Ask: Is it cheaper to get a wrap or a paint job?

Cost and Longevity: Comparing Custom Paint Jobs and Vehicle Wraps

When considering a new look for your car, both custom paint jobs and professional vinyl wraps are popular options. Wraps can be less expensive upfront, with the added benefit of changing your vehicle’s appearance temporarily and offering protection to the underlying paint. However, they typically do not last as long as a high-quality custom paint job, which can retain a consistent shine and durability for many years.

The decision ultimately depends on your goals: if you want something permanent, with deep color depth and a smooth, seamless finish, custom paint is the best investment. Vehicle wraps are a good fit for frequently changing styles or temporary uses. Regardless, only a professional shop can guarantee the best results, whether you choose a wrap or a traditional paint job.

Custom paint job vs. vinyl wrap – Two cars side-by-side in a studio, one with a glossy painted surface and the other with a vinyl wrap, both brightly colored under soft studio lighting.
Feature Custom Paint Job Vinyl Wrap
Longevity 5+ years with proper care 2-4 years, then may peel or fade
Finish Quality Seamless, deep, consistent shine Limited by film, may show edges
Repair Options Can repair and respray as needed Individual panels can be replaced
Personalization Level Unlimited (any style, any finish) Patterns limited to wrap materials
Resale Considerations Adds long-term value Temporary protection, less impact

People Also Ask: How much do custom paint shops charge an hour?

Hourly Rates and What They Include for Custom Paint Jobs

Custom paint shop hourly rates typically reflect technician experience, facility standards, and job complexity. Most hourly quotes include prep work, surface repair, paint application, drying time, and finishing procedures. Premium shops may charge more but often deliver a higher level of detail, accurate color match, and consistent shine. When comparing rates, ask about what’s included—some shops might bundle basic service prep or detail work in their hourly charge, while others bill these separately.

It’s important to remember that a great paint job is the result of both time and expertise. Always choose quality and proven results over the lowest price, as the entire painted surface will reflect the care and precision put into it. A shop committed to making clients happy provides clarity on costs, delivers smoothest finishes, and stands behind their work with solid guarantees.

Frequently Asked Questions About Custom Paint Jobs

  • How long does a custom paint job typically last?
    With proper care—including gentle washing and regular waxing—a high-quality custom paint job can last more than five years, keeping an accurate color match and consistent shine.
  • Can you repaint over an existing custom paint job?
    Yes, skilled auto body professionals can repaint over an existing custom finish if the prep work and surface repair are handled thoroughly to remove defects and ensure good adhesion.
  • Do custom paint jobs come with warranties?
    Many reputable shops offer warranties on their work, which may cover finish durability, color fade, and protection against unsightly scratches and dents.
  • How do I find a reputable shop for custom paint jobs?
    Look for a provider with positive reviews, an extensive portfolio, skilled technicians, and clear satisfaction guarantees – in other words, a company that offers transparency and proven results.

Key Takeaways: Making the Most Out of Your Custom Paint Jobs

Custom paint jobs boost your vehicle’s style, protection, and value. Focus on proven expertise, proven materials, and diligent aftercare to enjoy a finish that stands out and stands the test of time.

If you’re inspired by the possibilities of custom paint and want to explore even more ways to make your ride unforgettable, consider how specialized motorcycle paint jobs can instantly elevate your presence on the road. Delve into the artistry and innovation behind motorcycle paint jobs that turn heads instantly for a fresh perspective on color, technique, and creative expression. Whether you’re customizing a car or a bike, the right paint job is your ticket to standing out and making a lasting impression. Take the next step in your customization journey and discover how expert craftsmanship can transform any vehicle into a true work of art.

Ready to Transform Your Ride? Call Nasty Performance Motorcycle Shop Today: 847-458-4858

Customizations & Upgrades

0 Comments

Write A Comment

*
*
Please complete the captcha to submit your comment.
Related Posts All Posts

Unlock the Magic of Performance Exhaust Systems—Here’s Your Guide

Did you know that a well-chosen performance exhaust system can increase horsepower by up to 10%—sometimes even more? That’s the difference between a car that blends in and a machine that commands attention on the road. Whether you want that head-turning rumble or a true edge in power, this guide to choosing performance exhaust systems will walk you through every vital decision, so your next upgrade is your best move yet. What You'll Gain from This Guide to Choosing Performance Exhaust Systems How performance exhaust systems can transform your vehicle’s power and personality Every component explained: from exhaust manifolds to tips The differences between OEM and aftermarket systems—and when to upgrade How to match materials and design to your driving goals Tips for installation, testing, and maintenance for lasting performance Expert advice and answers to the most asked questions about performance exhaust upgrades A Startling Fact: How Performance Exhaust Systems Transform Your Ride Imagine turning the ignition of a standard car, and suddenly, your vehicle delivers not just power, but a symphony of sound and performance reminiscent of a race car. That’s what the right performance exhaust system can achieve. It’s not just about louder exhaust pipes or shinier tips—it’s about unlocking hidden horsepower and torque, optimizing exhaust gas flow, and minimizing back pressure, all while fine-tuning the exhaust note to your personal preference. This means a transformation in how your car breathes, sounds, and ultimately performs on the road. For muscle car enthusiasts and everyday drivers alike, upgrading your exhaust system isn’t just a cosmetic choice—it can be a game changer. Studies show that aftermarket exhaust systems can improve engine efficiency, deliver a more aggressive sound profile, and even enhance fuel economy when matched correctly to the engine. Whether you’re driving a daily commuter, a muscle car, or something in between, understanding the impact of performance exhaust systems is the first step in taking control of your ride’s future. Why Every Enthusiast Should Understand Exhaust System Upgrades If you’re passionate about cars or motorcycles, gaining a thorough understanding of exhaust system upgrades is essential. An upgraded performance exhaust isn’t only about seeking louder sounds or racing aesthetics—it’s a calculated upgrade that changes the relationship between your vehicle and its environment. Knowing how exhaust systems influence exhaust flow, back pressure, and sound quality gives you power as a consumer to make informed decisions that align with your driving goals. Every part of an exhaust system—from the exhaust manifold and pipes to mufflers and exhaust tips—contributes to the car exhaust’s performance. By understanding the intricacies of exhaust systems, car owners and enthusiasts can maximize their vehicle’s output and longevity. Whether your goal is enhanced exhaust note, better fuel efficiency, or dominating on the track, a deep dive into performance exhaust systems is the best way forward. As you explore the ins and outs of performance exhaust upgrades, it's important to remember that regular care and seasonal maintenance play a crucial role in preserving your system's longevity and effectiveness. For a comprehensive look at how to keep your ride in peak condition throughout the year, check out these seasonal bike care secrets every rider must know. Understanding the Basics: Exhaust Systems and Their Purpose To begin your journey with this guide to choosing performance exhaust systems, it’s crucial to grasp what an exhaust system does for your vehicle. In its simplest form, an exhaust system channels exhaust gases away from your engine, minimizes harmful emissions, and manages the sound produced during combustion. Its primary role is to ensure that your engine runs smoothly and efficiently while adhering to noise and emissions regulations needed for everyday driving. At the heart of every muscle car, race car, or commuter, the exhaust system is an unsung hero. It consists of a series of exhaust components—like the exhaust manifold, catalytic converter, mufflers, resonators, and exhaust pipes—each with a job to optimize performance and keep your ride in top condition. By directing and controlling the exhaust gas flow, these systems prevent back pressure, increase overall efficiency, and inject a personality into your vehicle through its unique exhaust note. The Anatomy of an Exhaust System The exhaust system might seem straightforward from the outside, but it’s a collection of precision-engineered parts working together. Starting at the exhaust manifold—where spent gases leave the engine cylinders—exhaust gases then travel through pipes to the catalytic converter, which reduces emissions by cleaning exhaust gas. From there, the gases continue to mufflers and resonators that tune sound quality and noise levels. The exhaust tip delivers the final exit for gases while adding a visual accent to your vehicle’s rear end. Understanding these exhaust components is key when exploring types of exhaust system upgrades, whether you seek performance benefits or a particular back exhaust sound. With knowledge of each part’s purpose, you’re better equipped to select the right aftermarket exhaust that meets your aspirations for power, aesthetics, or both. Types of Exhaust System Designs and Functions There’s no one-size-fits-all solution in exhaust systems. Depending on your vehicle and goals, you’ll encounter different designs: single vs. dual exhaust, cat-back systems, axle-back systems, header-back systems, and more. Each is defined by how much of the original system is replaced and the unique path exhaust gases take—impacting both performance and sound quality. Cat-back and axle-back systems are popular for their balance of performance, cost, and ease of installation. Additionally, aftermarket exhaust system designs vary in materials and layout to optimize for reduced back pressure or tuned exhaust note. Select a design with an understanding of how it changes the dynamics of your car exhaust—from increased horsepower and torque to that signature growl or purr you crave from a performance exhaust system. What Makes Performance Exhaust Systems Stand Out? So, what sets performance exhaust systems apart from the stock parts your car arrived with? The answer lies in engineering that’s driven by results. Performance systems are crafted to maximize the flow of exhaust gases while minimizing restrictions—unlocking better horsepower and a richer exhaust note than a stock or OEM system ever could. From larger diameter pipes to high-flow catalytic converters and meticulously designed mufflers, every detail is tailored to boost output and enrich your driving experience. Aftermarket exhaust makers go above and beyond to offer systems that are lighter, more durable (thanks to stainless steel or even titanium), and much more expressive in terms of sound profile. The end result isn’t just cosmetic—performance systems offer the performance benefits, improved fuel efficiency (for specific engines), and that coveted exhaust note that sets your vehicle apart on any street. Performance Benefits of Upgrading to Aftermarket Exhaust Upgrading to a performance exhaust system isn’t just a “style” choice—it’s a proven way to unleash your vehicle’s true potential. By reducing restrictions and managing back pressure, these systems enhance exhaust flow, resulting in measurable gains in both horsepower and torque. Many enthusiasts notice livelier throttle response and improved top-end speed, giving their car or motorcycle a race car edge—even in daily driving scenarios. Moreover, properly selected aftermarket exhaust systems can make your ride more fuel-efficient by allowing your engine to expel exhaust gases more freely. The blend of functionality, aesthetics, and signature exhaust note makes these upgrades an enduring favorite among drivers looking for genuine performance benefits and a dramatic improvement in driving engagement. Performance and Sound: Finding the Right Balance A core challenge with performance exhaust systems is striking the ideal balance between outright power gains and pleasing sound quality. For some, the ultimate goal is a thunderous, straight pipe race car roar, while others want a subtle, refined growl that suits a street-driven muscle car. The key is understanding how your choices—pipe diameter, muffler type, and back system design—influence both performance and sound characteristics. Remember, personal preference matters just as much as the numbers. When selecting a back exhaust setup, match your goals for sound, performance, and appearance. There are options for every taste, from stealthy sleepers to head-turning show cars, ensuring your system doesn't just perform—it’s a reflection of your automotive identity. Comparing OEM vs. Aftermarket Exhaust System Options If you’re debating between sticking with your factory exhaust system (OEM) or choosing a performance aftermarket exhaust, it’s essential to weigh both sides. OEM exhaust systems prioritize emissions, cost, and acoustic compliance, offering a reliable but typically conservative driving experience. By contrast, aftermarket exhaust systems open up more choices—improved flow, richer sounds, higher grade materials, and custom back system configurations tailored to enthusiasts. This section of the guide to choosing performance exhaust systems clarifies which path suits your driving habits, expectations, and legal/regulatory requirements. Upgrading can be transformative, but it pays to know what you’re getting—and what you might lose. Why Choose Aftermarket Exhaust Systems? Advantages and Considerations Choosing an aftermarket exhaust system usually comes down to wanting more—more power, improved looks, and a distinct sound. These systems often feature larger diameter exhaust pipes, high-flow mufflers, and reduced restrictions, all contributing to enhanced power and a more dramatic exhaust note. Materials such as stainless steel or titanium further boost durability, giving your vehicle a performance edge for years. The real value, however, is in personalizing your driving experience. An aftermarket exhaust means you can select the type of system (like a cat-back or axle-back system) that best matches your needs, whether it’s aggressive performance, improved aesthetics, or the perfect exhaust note. The options are vast, empowering you to achieve a unique balance of sound quality and performance benefits. Potential Drawbacks of Aftermarket Exhaust Upgrades Despite their appeal, aftermarket exhaust systems bring some considerations you need to keep in mind. Not all upgrades are legal in every jurisdiction, since some states have strict emissions and noise laws. Poorly chosen or installed systems can also lead to engine warning lights, excessive cabin drone, or even a decrease in performance if back pressure is not optimized for your specific engine. Another consideration is the impact on your car’s warranty. Examine the terms of your vehicle warranty and check with your manufacturer or dealer before you install a non-OEM performance exhaust system. For many, the benefits outweigh the drawbacks, but an educated approach ensures you don’t run into troubleshootable issues down the road. Types of Performance Exhaust Systems: A Comprehensive List Choosing among the many types of exhaust systems can feel overwhelming, but understanding each will make your decision simple and effective. From modest upgrades to full-scale performance transformations, each system is designed with different drivers in mind. Cat-back Systems: Replace the exhaust system from the catalytic converter to the exhaust tip, balancing sound and power. Axle-back Systems: Install from the rear axle to the exhaust tip, offering easy installation and sound tuning. Turbo-back Systems: Swap out everything from the turbocharger back, perfect for turbocharged engines chasing serious gains. Header-back Systems: Replace the entire system from exhaust headers to the tip; ideal for total performance overhauls. Mufflers: Available as stand-alone upgrades, adjust exhaust tone and volume. Resonators: Fine-tune exhaust drone and harmonics for a customizable sound experience. Which Type of Back Exhaust System Fits Your Vehicle's Needs? The ideal back system for your vehicle really comes down to your expectations and requirements. For daily drivers aiming for a modest sound and moderate gains, an axle-back system is a cost-effective and reliable choice. For performance enthusiasts chasing every last bit of power, a turbo-back or header-back system is likely the best fit, optimizing exhaust flow from the engine to the tailpipe and maximizing power while delivering a commanding exhaust note. Consider factors like installation complexity, legal compliance, sound quality, and future modifications when deciding on a back exhaust. Your guide to choosing performance exhaust systems recommends matching your selection with your usage patterns, from weekend track days to daily commutes, for results you’ll appreciate every time you drive. Key Factors in Choosing the Right Performance Exhaust System A successful upgrade starts with knowing what to look for in a performance exhaust system. The best guide to choosing performance exhaust systems takes you beyond just make and model—considering everything from material strengths to your aesthetic goals and sound preferences. Materials, back pressure design, and even the look of the exhaust tip factor into both the system’s performance and how it fits with your vehicle’s personality. It's about more than just bolting on a new part; it’s about an informed decision that shapes your entire driving experience. Material Choices: Steel, Stainless, Titanium, and More Material is one of the most important choices when selecting an aftermarket exhaust. Mild steel systems are affordable but prone to rust—suitable for warm, dry climates or those on a tight budget. Stainless steel is a popular upgrade, offering resistance to corrosion, longevity, and a polished look that often outlasts the vehicle itself. At the top end, titanium provides a lightweight, high-performance alternative that combines strength, corrosion resistance, and a race-inspired appearance—making it a favorite among enthusiasts and professionals alike. When reviewing types of exhaust system in your vehicle, consider the weight, longevity, and environmental conditions you’ll be driving in. The best material balances cost, function, and final sound quality—key elements in any guide to choosing performance exhaust systems. Match Your Goals: Sound Quality, Power Gains, and Aesthetics No two drivers want the same outcome from their performance exhaust system. For some, aesthetics are paramount—a set of polished dual exhaust tips or a color-shifting titanium finish can complete the look of a custom vehicle. For others, all that matters is the decibel of the exhaust note and the bump in horsepower and torque upon acceleration. To find harmony among power gains, sound quality, and visual impact, define your goals before making a purchasing decision. Consult reviews and expert opinions to discover which exhaust systems deliver the performance benefits you want and fit your vision for your vehicle’s presence on the road. Installation: What to Know Before Upgrading Your Exhaust System When you’re ready to make the leap, installation is a critical aspect of your guide to choosing performance exhaust systems. The process can be straightforward or intensive, depending on the system type and your DIY experience. While some axle-back or cat-back systems can be installed with basic garage tools and a jack, others (particularly header-back or turbo-back systems) may require welding, specialty tools, or advanced mechanical skills. Know your limits before tearing into your existing exhaust system and always prioritize safety—and legal compliance—during any upgrade. DIY vs. Professional Installation: What Suits Your Situation? When considering DIY vs. professional installation, take your tools, workspace, and technical know-how into account. The simplest exhaust upgrades, like axle-back or cat-back systems, often come with detailed instructions for enthusiasts eager for a weekend project. These bolt-on systems typically use factory mount points and minimize the need for specialized equipment, making at-home installation accessible to many. For more complex upgrades—such as header-back systems involving the exhaust manifold, or systems that change critical exhaust component locations—it’s wise to turn to a professional. They’ll ensure optimal alignment, sealing, and welding for reliability and safety. This leaves you with peace of mind and factory-like fitment, especially when chasing maximum performance benefits or tackling ambitious aftermarket exhaust system projects. Common Pitfalls When Installing Performance Exhaust Systems Many upgrades stumble due to missed details: improper gaskets/fasteners, incorrect pipe alignment, or using the wrong parts for your car exhaust make and model. Leaks, annoying cabin drone, rattles, or loss of power often result when installation guides aren’t followed or shortcuts are taken. Before beginning, review the bolt pattern, check clearances (especially around the exhaust manifold and pipes), and ensure you have every necessary tool. If you’re unsure—or want your exhaust system to deliver on both sound quality and performance—seek out a specialist known for aftermarket exhaust systems. It guarantees a result that looks, sounds, and performs exactly as you intend. Performance and Sound Testing: Measuring Your Results Once your system is installed, the real test is in the results—both in performance metrics and in your driving satisfaction. You’ll want to measure whether your performance exhaust delivers on its promises: improved horsepower, distinctive exhaust note, and perhaps even better fuel efficiency. Take time to test drive under various conditions, listen for droning or unwanted resonance in the cabin, and look for any signs of leaks around welds or connections in the system. Professional dyno or decibel tests can give you concrete, scientific feedback on just how much your upgrade has changed your ride. Sound Quality and Emission Considerations While a deep, aggressive exhaust note is often the most noticeable benefit of system upgrades, legal sound limits remain a critical factor. Municipal and state regulations tightly control noise emissions, and going too loud can lead to fines or failed inspections. Many high-quality performance exhaust systems balance a throaty, muscular tone with street-legal sound levels, so do your research—especially if you’re using your vehicle on public roads. Additionally, be sure your new aftermarket exhaust incorporates emissions-compliant exhaust components like catalytic converters. This keeps you on the right side of the law and ensures your car remains environmentally responsible. Maintaining Your Aftermarket Exhaust System for Top Performance Your investment in a performance exhaust system will serve you for years if you arm yourself with simple maintenance habits. Routinely check for rust, loose mounts, or signs of leaks. Stainless steel and titanium systems tend to offer superior longevity, but even they benefit from cleaning—especially in climates where road salt can accelerate corrosion. Preventative maintenance goes beyond just the pipes. Keeping an eye on hangers, fasteners, and exhaust tips ensures every piece works together for lasting reliability. A maintained system also keeps your exhaust note crisp and your vehicle’s performance at its peak. Routine Care Tips for Long-Lasting Exhaust Systems Adopt a seasonal schedule: inspect before and after winter, and clean any grime, tar, or salt buildup as soon as possible. Use appropriate cleaners for stainless steel or titanium, and gently polish exhaust tips to maintain their shine. Address any odd rattling, excessive noise, or visible leaks immediately—often, small issues left unchecked can lead to more significant problems later. Don’t forget to monitor the health of your catalytic converter and have your system checked by a pro yearly, especially if you notice changes in your exhaust sound, fuel efficiency, or visible rust. With proactive care, your aftermarket exhaust system will look and perform like new for years to come. Expert Thoughts: In-Depth Quotes from Performance Exhaust Professionals Selecting an exhaust system isn’t just about louder sound—it’s about optimizing airflow for better performance and longevity. – Industry Specialist People Also Ask: Expert Answers to Common Performance Exhaust Questions [[paa_question_1]] Performance exhaust systems differ from stock options by maximizing exhaust flow and reducing back pressure. This results in more efficient engine operation, increased horsepower, and a more distinct exhaust note. Upgrading can significantly alter both your vehicle’s performance benefits and sound profile, delivering a driving experience tailored to your personal preference. [[paa_question_2]] While most aftermarket exhaust systems are designed for easy installation, choosing the correct system for your vehicle ensures the best results. Always match system type—such as cat-back or axle-back—to your make, model, and driving goals. Consulting a guide to choosing performance exhaust systems like this and professional installers ensures the upgrade meets your expectations for power and sound quality. [[paa_question_3]] Sound quality in a performance exhaust system is a balance between muffler design, pipe diameter, and overall system length. Some choose straight pipe setups for a race car-like roar, while others prefer resonator-equipped systems for a more refined sound. Your ideal exhaust note comes down to tuning the system that best matches your personal preference and legal requirements. [[paa_question_4]] Legalities around aftermarket exhaust upgrades depend on your state or country’s regulations. Many areas set maximum decibel levels or require emissions-compliant exhaust components like catalytic converters. Always research local rules before upgrading and opt for a street-legal exhaust system if your vehicle is used on public roads. FAQs: Your Guide to Choosing Performance Exhaust Systems How does a performance exhaust system increase power? By streamlining exhaust flow and reducing restrictions, performance exhaust systems allow your engine to operate with less back pressure, translating into more available horsepower and torque. Is a performance exhaust system legal everywhere? Not always; legality depends on local emissions and noise regulations. It’s vital to check your area’s requirements and ensure your upgrade includes any required emissions components. Do performance exhaust systems affect fuel economy? Yes, they can—reduced back pressure and improved flow often result in better fuel efficiency, although results will vary by vehicle and driving style. Tables: Comparing Popular Performance Exhaust Systems and Key Features System Type Material Weight Performance Benchmark Sound Profile Ease of Installation Cat-back System Stainless Steel Moderate Balanced; noticeable power and sound boost Moderate to aggressive DIY-friendly Axle-back System Stainless Steel / Mild Steel Light Sound upgrade; minimal power gain Customizable Very easy Header-back System Titanium / Stainless Steel Lightest Max power and performance Loud / race-inspired Professional recommended Muffler Upgrade Stainless Steel / Aluminized Steel Very light Minimal performance; sound focused Varies widely DIY possible Key Takeaways: How to Succeed with Your Performance Exhaust Upgrade Understand your primary goals—power, sound, looks, or all three? Research system compatibility—ensure it fits your car’s make and model. Consider sound and legal restrictions—make sure your system meets local standards. Rely on professional guidance if needed—especially for complex or custom back systems. Ready to Boost Performance? Call Nasty Performance Motorcycle Shop Today: 847-458-4858 For expert advice, professional installation, and a hand-picked selection of performance exhaust systems, contact Nasty Performance Motorcycle Shop at 847-458-4858—your trusted partner in unlocking your vehicle’s true potential. Conclusion: Mastering Your Guide to Choosing Performance Exhaust Systems With the knowledge and tips from this guide, you’re well equipped to choose, install, and maintain a performance exhaust system that delivers power, sound, and satisfaction. Upgrade with confidence—your next ride awaits! If you’re eager to take your vehicle’s performance and reliability to the next level, don’t stop at just the exhaust system. Embracing a holistic approach to maintenance—especially as the seasons change—can make a world of difference in how your ride feels and performs. Discover expert strategies for year-round care and learn how proactive upkeep can extend the life of your upgrades by exploring seasonal bike care secrets every rider must know. This deeper dive will help you protect your investment and ensure every drive is as exhilarating as the first.

Your Guide to Choosing USB Charger Installation for Motorcycles

Did you know? Over 75% of modern riders now rely on motorcycle USB chargers to keep their devices operational during long rides. As mobile technology integrates further into our daily journeys, having the right USB ports and charging solutions on your bike isn’t just a luxury—it’s a necessity for navigation, communication, and safety. This guide reveals must-know insights for anyone considering a motorcycle USB charger installation, ensuring you can stay connected, charge multiple devices, and ride with confidence, no matter your destination. A Surprising Look at Motorcycle USB Needs: Why Every Rider Should Care If you believe a smartphone is the only device that requires charging on the open road, think again. Today’s riders juggle GPS units, action cameras, Bluetooth intercoms, and more. As technology evolves, the need for reliable motorcycle USB charger solutions has exploded. Understanding how to choose and install the right USB ports is central to modern riding, offering convenience, safety, and real-time access to information. For long rides or adventurous touring, dead batteries can mean lost directions or missed emergency calls. The modern motorcycle USB charger bridges this gap, acting as a lifeline in unexpected situations. As more bikes offer built-in accessory power, installing or upgrading your own USB charging solution provides you with options tailored to your unique rides and devices. When planning your installation, it's also helpful to consider how seasonal changes can impact your motorcycle's electrical system and charging reliability. For a deeper dive into keeping your bike in peak condition year-round, check out these seasonal bike care secrets every rider must know—they offer practical tips that complement your USB charger setup. Startling Facts About Motorcycle USB Charger Demand It's not uncommon for riders to underestimate just how frequently they’ll use their motorcycle USB charger. A recent motorcycling survey revealed that most riders don’t leave home without at least two devices, and nearly 60% of those devices require on-the-go charging. Riders on extended trips, in particular, report relying on USB ports to keep GPS units and action cameras powered for navigation, recording adventures, and staying in touch. What’s more, advances in charging speed and power output mean that today’s motorcycle USB chargers can safely power multiple devices at once—eliminating the need for multiple power outlets or risky portable batteries. With such high demand and dedicated solutions available, understanding the guide to choosing USB charger installation for motorcycles is essential before you set out on your next journey. How Modern Riders Depend on USB Chargers and USB Ports Modern riders are no longer content with simply staying on the road—they demand seamless connectivity and the ability to keep multiple devices charged simultaneously. For instance, using a phone mount paired with a direct-to-dashboard USB charger allows real-time GPS navigation without the risk of battery drain. Motorcycle USB ports power action cameras for recording scenic routes, and passenger charging solutions keep everyone’s tech energized. An integrated motorcycle USB charger also supports critical safety devices, such as Bluetooth-enabled helmets, emergency location beacons, and smart gloves. Riders equipped with robust USB ports report higher satisfaction with long rides and fewer technical interruptions, highlighting why the right motorcycle USB charger is now a must-have accessory—not just a ‘nice-to-have’ upgrade. What You'll Learn in This Guide to Choosing USB Charger Installation for Motorcycles Understand how to match chargers to your motorcycle USB needs Discover the most reliable USB charger installation practices Learn to compare USB charging solutions based on power output and compatibility Get tips on maximizing your motorcycle USB charger for on-the-go reliability Understanding the Basics: Motorcycle USB Charger Types and Functions What is a Motorcycle USB Charger and Why is it Essential? A motorcycle USB charger is a rugged device designed to supply steady electricity to your devices—smartphones, GPS units, action cameras, or Bluetooth headsets—while you’re riding. Installed on handlebars, under seats or integrated into dashboards, these chargers convert the bike’s electrical current into safe power output for USB ports. Essential for longer trips and everyday commutes alike, a motorcycle USB charger ensures that navigation systems remain functional, emergency apps stay active, and you’re never without communication tools. Whether you’re using your phone as a GPS or capturing footage with an action cam, the right USB charging solution elevates your ride, optimizes convenience, and boosts your safety while on the move. Types of Motorcycle USB Ports: Fixed vs. Removable There are two primary types of motorcycle USB ports: fixed and removable. Fixed USB ports are hardwired directly to the electrical system, offering a reliable, always-available power source that stays on your bike year-round. They are ideal for frequent riders who need constant charging and don’t want to disconnect accessories. Removable motorcycle USB chargers and USB ports, on the other hand, can be plugged in or detached based on need, often connecting via the auxiliary power outlet or a designated accessory power plug. This flexibility suits riders who share bikes, travel occasionally, or want to move their charging solution between vehicles. Considering your riding style, power needs, and how much you value easy install and weatherproofing will help determine which type suits you best. Common Power Output Options for USB Chargers Power output is a crucial factor when choosing your motorcycle USB charger. Most USB chargers for motorcycles offer outputs between 1A to 2. 4A per port, with some advanced models supporting quick charge capabilities or power delivery up to 3A or higher. The total output of a USB charger dictates how fast and efficiently multiple devices can be charged at once. It’s essential to match the power output of your USB ports to your devices’ requirements. Devices with higher battery capacities, such as tablets or modern smartphones, need higher output for effective charging. Some USB chargers feature intelligent circuit protection, safeguarding against short circuits or overcharging—making them safe long-term additions to your motorcycle electrical system. Key Factors in Choosing USB Charger Installation for Motorcycles Assessing Your Charging Needs and USB Devices Start by listing the devices you routinely use on long rides—think smartphones, GPS units, go-pros, or Bluetooth accessories. Each device may have unique power requirements, and understanding them helps in selecting a motorcycle USB charger or port with appropriate voltage and amperage. Always factor in current and future needs. Riders adding more tech over time benefit from multiple device USB ports or chargers with higher total output. Additionally, consider whether you’ll charge several devices at once or primarily use a single connection. This assessment directs you to the most efficient and scalable charging solution, preventing the hassle of frequent upgrades or unreliable power supply on the road. Power Output and Charging Efficiency Explained Understanding power output is critical for effective device charging. Each USB port’s output is measured in amps (A), and chargers labeled as ‘smart’ or ‘intelligent’ automatically detect and deliver optimal power output for each connected device—reducing charging time while protecting battery health. A high-output motorcycle USB charger means simultaneous charging of multiple devices won’t lead to slowdowns or overheating. Riders relying on GPS units, action cameras, or power-hungry smartphones will notice considerable benefits from quick charge-capable USB ports. Ultimately, matching the right power output with charging needs ensures your devices stay powered—no matter how long the ride or adverse the conditions. Weatherproofing, Durability, and Build Quality of Motorcycle USB Chargers Since motorcycles face rain, dust, vibration, and temperature swings, the motorcycle USB charger you select must be rugged and weatherproof. Look for USB ports with rubber gaskets, sealed connectors, and durable casings rated for water and dust resistance (look for IP67 or IP68 ratings). Build quality is equally important: secure housings and robust mounting hardware prevent failures during rough trails or high-speed touring. Devices crafted from heavy-duty plastics or metals, featuring reinforced cable sleeves and reliable weather seals, reduce the risk of a short circuit or water ingress—delivering long-term, safe accessory power for all your rides. USB Ports: Multi-Device Charging Solutions Having multiple device USB ports isn't just about convenience—it's about ensuring efficient charging speed for all gadgets. When comparing charging solutions, look for dual or triple port USB chargers featuring independent circuits, allowing you to charge your phone, action cameras, and GPS units simultaneously. Charging solutions with multi-port designs often have safety features, such as heat shrink or circuit protection, to prevent overheating or short circuits. This not only maintains the longevity of your charger but also protects your electrical system from accidental faults, making multi-port USB chargers a staple in modern motorcycle accessory kits. Installation Process: How to Install a Motorcycle USB Charger Tools and Supplies Required for USB Charger Installation Before installation, gather crucial tools: a screwdriver set, wire cutters, electrical tape, multimeter, zip ties, and (for added durability) heat shrink tubing. Some setups may require soldering kits or sided tape for additional stability during mounting. Shrink tubing and heat shrink seal, together with proper zip ties, ensure weatherproofed connections and protect against vibration-related failures. Organize your workspace on a clean bench and double-check your XML wiring diagram (if available) for compatibility with your motorcycle’s electrical system. Having all the right supplies at hand increases installation speed, guarantees a neat result, and minimizes downtime due to missing parts or incorrect connections. Step-by-Step Motorcycle USB Charger Installation Guide Step 1: Disconnect the motorcycle battery to avoid accidental short circuit or shock. Step 2: Select a mounting location within comfortable reach—typically the handlebars or dashboard—ensuring the USB port won't interfere with riding controls. Step 3: Route wires along the existing harness, securing with zip ties and heat shrink tubing to protect from abrasion. Step 4: Connect the positive and negative leads to the accessory power or directly to the battery, according to manufacturer instructions. Use a multimeter to verify correct power output at the port. Step 5: Attach the USB charger housing securely, check all connections, and re-connect the motorcycle battery. Step 6: Test charging solutions by plugging in your device to confirm stable power delivery. Following these steps ensures an easy install and reliable performance throughout your riding season. Always consult your bike’s service manual or seek professional assistance if unsure. Common Mistakes to Avoid with USB Charger Installations One of the most frequent installation errors is connecting the charger to a non-switched power source, resulting in battery drain even with the engine off. Always use the accessory power circuit when possible. Other mistakes include using substandard electrical tape instead of heat shrink or neglecting weather sealing components, which increases risk during rain or off-road excursions. Failing to secure wiring with zip ties or neglecting to test power output can also lead to intermittent charging issues or short circuit risks. Carefully double-check each connection and never exceed the recommended power output for your devices; doing so maximizes reliability and extends the life of your USB charger and bike’s electrical system. Comparing the Best Motorcycle USB Chargers and USB Ports on the Market Top-Rated Motorcycle USB Charging Solutions for Riders The market offers a wide range of motorcycle USB charger options, from simple single-port chargers to high-tech, quick charge multi-port USB charging solutions. Leading brands focus on weatherproof designs, robust casing, and advanced circuit protection to ensure efficient, safe charging on off-road adventures and urban commutes alike. Look for chargers that support both high and low power output, have easy-to-use mounting hardware, and feature clearly marked USB ports for plug-and-play reliability. Riders consistently praise those models that balance quick installation with real on-the-road durability, offering value across a range of motorcycle makes and models. Comparison Table: Leading Motorcycle USB Chargers, Power Output, and Features Model Ports Power Output Waterproof Rating Mounting Style Notable Features RidePro USB Fast Charger 2 5V/2.4A per port IP67 Handlebar clamp Quick charge, circuit protection TourMaster Modular USB Port 1 (removable) 5V/2.1A IP68 Dashboard mount LED power indicator, removable MaxCharge Blade USB 3 5V/2.4A per port IP66 Under-seat factory fit Multiple device, smart power delivery What Makes a USB Charger Suitable for Motorcycles? Not all USB chargers are built for motorcycles. The best motorcycle USB charger options combine waterproof or weather-resistant enclosures, secure mounting hardware, and robust internal circuit protection. They should be able to handle engine vibration, adverse weather, and repeated connections. Features like cover flaps for unused USB ports, built-in fuse protection, and compatibility with various electrical systems (such as CAN bus or direct battery connection) further distinguish motorcycle-ready charging solutions from ordinary car or wall chargers. Always prioritize those with comprehensive weatherproofing and ensure your choice matches your riding style and device requirements. Special Considerations for Different Motorcycle Makes and Models Custom vs. Universal Motorcycle USB Charger Options Motorcycle USB chargers come in custom and universal variants. Universal chargers suit most motorcycle models by utilizing standard mounting brackets and wire connections. These are ideal for DIY enthusiasts or riders who may transfer their setup between bikes. Custom chargers, on the other hand, are designed to blend seamlessly into specific models—matching factory styling and connecting directly to dedicated power outlets in the electrical system. Riders seeking a factory-look installation or handling unique motorcycle requirements benefit most from these tailored solutions. Integration with Existing Electrical Systems Integrating a USB charger involves understanding your motorcycle’s electrical system. Some bikes have accessory power circuits while others require direct battery connection or a piggyback on the existing fuse box. Ensuring compatibility avoids electrical issues and maximizes safety. Use the correct wiring and connectors, and never overload your bike’s system—especially if it powers heated gear or other high-draw accessories. For motorcycles with advanced CAN bus systems, choose chargers designed for minimal interference, and always confirm your installation doesn’t trigger unintended warnings. Whenever in doubt, consult professional technicians to safeguard both bike and devices. "A properly installed motorcycle USB charger is a lifeline for today’s connected rider — ensuring your devices stay powered wherever your journey leads." Expert Insights: Preventing Common Motorcycle USB Charger Issues Routine Maintenance and Troubleshooting USB Ports Routine inspections help ensure all USB ports and chargers are working optimally. Check for corrosion, frayed wires, or loose mounting after riding in harsh conditions. Clean debris from port covers, test power output with a multimeter, and monitor charging speed to avoid surprises mid-journey. Proactive maintenance, such as replacing weather seals or damaged cables, can prevent short circuits and guarantee steady charging solution performance year-round. Proper care extends the life of both device batteries and your motorcycle USB charger investment. How to Recognize Failing USB Chargers and Power Output Problems Signs of a failing motorcycle USB charger include intermittent charging, excessive heat, or unexplained battery drain when devices aren’t connected. Be alert for reduced power output, slower charging speed, or repeated need to wiggle cables to maintain connection. Consistently low charging speed or devices shutting off unexpectedly point to either a deteriorating port, internal corrosion, or faults in wiring. Replace suspect parts promptly—never risk your ride for a faulty charger. If symptoms persist, consult a technician to troubleshoot your motorcycle’s accessory power system. People Also Ask: Key Questions About Motorcycle USB Charger Installations [[paa]] Answer: In-depth explanation addressing the PAA query When it comes to motorcycle USB charger installation, riders frequently ask about compatibility, safety precautions, and the effects of multi-port charging solutions. The fundamental answer lies in understanding your bike’s electrical system, picking a charger with suitable power output, and following installation best practices. Proper integration ensures reliable device charging, while robust weatherproofing and circuit protection prevent accidental faults, giving riders peace of mind regardless of weather or trip length. Comprehensive FAQs on Motorcycle USB Charger Installation and USB Ports FAQ: Is any motorcycle compatible with USB charger installations? Most motorcycles can accommodate aftermarket USB charger installations, but the process varies by model, electrical system design, and available accessory power. Universal kits fit almost any bike, while custom installations often require professional input to integrate seamlessly. Always check your service manual or ask an expert to confirm compatibility and avoid damaging your bike’s wiring. FAQ: How can I tell if my USB port offers the correct power output? Use a multimeter to measure voltage and amperage at your USB ports, or refer to the product’s specifications. Modern chargers sometimes include indicator lights to confirm charging status and power output—ensure your output matches the needs of your devices for safe, efficient charging every time. FAQ: Are there waterproof motorcycle USB charger options? Yes, many of the latest motorcycle USB charger models are specifically designed to be waterproof, with ratings like IP67 or IP68. Features such as rubber covers, sealed connectors, and weatherproof casings protect both your charger and bike's electrical system—critical for all-weather riding and off-road adventures. FAQ: How do multi-port USB chargers affect device charging time? Multi-port motorcycle USB chargers divide the total power output among connected devices. If each port is independently powered (with smart current regulation), simultaneous charging doesn’t slow down charging speed significantly. However, overloading with too many high-draw gadgets can lead to slower charging and reduced efficiency. Always check your charger's total output and device requirements to optimize performance. Best Practices for Safe and Efficient USB Charger Use on Your Motorcycle Regular checks of USB charging solutions Choosing durable, certified motorcycle USB chargers Protecting exposed USB ports from weather and debris Consulting professionals for complex installations Key Takeaways: A Quick Recap of Choosing and Installing Motorcycle USB Chargers Evaluate your device and power needs Select the appropriate motorcycle USB charger model Ensure professional-level installation for safety Make the Right Choice for Your Ride Call Nasty Performance Motorcycle Shop Today: 847-458-4858 Choose your motorcycle USB charger wisely—regular maintenance, quality parts, and correct installation ensure safety and reliable performance with every ride. As you enhance your motorcycle with a reliable USB charging solution, remember that true riding confidence comes from a holistic approach to bike care. Beyond electrical upgrades, maintaining your motorcycle through every season is key to long-term performance and safety. For expert advice on protecting your ride from weather extremes and keeping every component in top shape, explore our comprehensive guide on seasonal bike care secrets. Discover how proactive maintenance and smart upgrades work together to deliver the ultimate riding experience—no matter where the road takes you.

Guide to Choosing Custom Turn Signals for a Stylish Ride

Did you know that upgrading from stock motorcycle turn signals to custom turn signals can dramatically boost your visibility—making your ride not just safer, but a reflection of your unique style? In today’s world of aftermarket motorcycle customization, your turn signals are much more than just a legal requirement; they’re an expression of your identity and an essential upgrade for both form and function. This comprehensive guide will help you navigate the world of custom turn signals, whether you crave a cutting-edge look with motorcycle LED turn signals or want to restore a classic bike with retro indicators. Get ready to discover what really matters when choosing the right turn signals for your motorcycle, so you can steer every journey with style and safety. Discover Why Custom Turn Signals Matter for Your Motorcycle Startling fact: Upgrading to custom turn signals or motorcycle LED turn signals can increase your motorcycle's visibility on the road, significantly enhancing safety and showcasing personal style. Modern riders are swapping out their stock motorcycle turn signals for sleek led turn signals, whether it’s for improved function, catching more attention, or creating a truly personalized look. The clumsy stock motorcycle indicators of the past—with their boring and clunky style—are increasingly replaced by slim, bright, and energy-efficient alternatives that set your bike apart on the street. Choosing the right custom turn signals isn’t just about looking good—visibility is a game-changer. A well-chosen pair of LED turn signals not only broadcasts your intention to other vehicles on the road, but also distinguishes your bike from the rest of the pack. Motorcycle LED turn signals are leading the charge, thanks to their advanced brightness and long lifespan. Even classic bikes and big twin motorcycle owners are discovering how a tasteful lighting upgrade can elevate safety and style. If you’re ready to replace those made out of cheap materials stock motorcycle turn signals, you’re in the right place—read on to find your perfect match. When considering a turn signal upgrade, it's also smart to think about how your lighting choices fit into your overall bike maintenance routine. For a step-by-step approach to keeping your motorcycle in top shape throughout the year, check out these seasonal bike care secrets every rider should know—they’ll help you protect your investment and ensure your customizations last. What You'll Learn About Custom Turn Signals How custom turn signals stand apart from factory and aftermarket motorcycle turn signals—so you can spot quality and true customization at a glance. The key pros and cons of LED turn signal technology versus traditional bulbs—helping you pick the right light for your riding needs. Which features should you prioritize? We’ll explore what matters most for style, safety, fit, and compatibility—ensuring you get high-performing and lasting value from your signal upgrade. Custom Turn Signal Features: What Sets Them Apart? Material and Durability in Custom Motorcycle Turn Signals Should you opt for lightweight aluminum, classic steel, or cost-effective plastics in your motorcycle’s turn signals? Reliability, finish, and ruggedness matter whether you're riding a big twin or hitting the city streets daily. Table: Material Comparison for Custom Turn Signals Material Weight Durability Finish Aluminum Lightweight Excellent (corrosion-resistant) Polished, Anodized, or Brushed Steel Moderate High (heavier, very tough) Chrome, Painted, or Powder-coated Plastic Very light Variable (can be brittle in cold/weathered over time) Clear, Tinted, or Black Matte Choosing the right material impacts both style and longevity. For instance, an aluminum-bodied custom turn signal is prized for being lightweight and corrosion-resistant—making it ideal for sportbikes and daily commuters. Steel turn signals are perfect for classic motorcycles or cruisers that need a rugged, vintage feel. Plastics are cost-effective and come in a vast array of shapes and colors, but may not outlast metal, especially on harsh rides. So whether you ride a lovely bike that gets pampered or a big twin motorcycle that braves the weather, picking the right material is a worthy thing for both durability and eye-catching style. LED Turn Signal Technology Explained Upgrading to motorcycle LED turn signals offers substantial benefits: they’re ultra-bright, last much longer, and draw less power than standard bulb turn signals—ideal for both modern motorcycles and vintage bikes needing a stylish revamp. Traditional bulbs—also known as filament bulbs—are found in most stock motorcycle turn signal assemblies. While they get the job done, they often fail early and can make your signals look dated or boring and clunky. In contrast, LED turn signals emit a much brighter and sharper light. The energy efficiency of LEDs means less stress on your battery and electrical system. Custom LED turn signals also come with extended lifespans, providing tens of thousands of hours of reliable operation. When you replace your stock motorcycle turn signal the first time for LEDs, you’ll instantly notice the “pop” of color and clarity, especially at dusk or in foggy conditions. Style and Design Options for Motorcycle Turn Signal Upgrades Whether you ride a big twin or a performance sportbike, design matters. Choose from minimalist mini turn signals, flush mount indicators, or integrated turn signals that blend lighting into mirrors or fairings. Each style gives you a different profile—mini signals keep things sleek, flush mounts reduce wind drag, and integrated types offer all-in-one functionality for the ultimate streamlined appearance. “Custom turn signals are one of the first things riders upgrade—bright, well-designed LED turn signals can improve both visibility to other drivers and your bike’s curb appeal. Remember, changing your signals is a simple, high-impact modification that influences how you’re seen and how your bike stands out. ” — Mark Reyes, Custom Motorcycle Specialist, Shift Garage Styling isn’t just about appearance. The design of your motorcycle turn signals can signal intention to other vehicles more clearly, protecting you from close calls while letting your personality shine through. Regardless of whether you own a sporty modern model or a vintage motorcycle, picking the right lights can instantly upgrade your ride’s overall image. How to Choose the Right Custom Turn Signals for Your Ride Assessing Compatibility With Your Motorcycle Model Compatibility is essential. When shopping for custom turn signals, check mounting styles and wiring needs specific to your bike’s make and model. Classic motorcycles may need brackets or adapters, while sportbikes often use direct-fit kits to match their factory wiring. Cruisers—including popular big twin motorcycle models—frequently require custom-length wires or bullet connectors for seamless integration. Many aftermarket motorcycle turn signal sets claim universal fit, but it’s always a good idea to double-check measurements, stock mounting points, and whether additional hardware will be needed. Pay attention to bulb sockets and flasher relay compatibility, which can allow for “plug and play” installations—or not. For example, motorcycle LED turn signals may require a resistor pack to prevent hyper-flashing, while some bikes like the big twin motorcycle models might need upgrades to both front and rear to ensure synchronized operation. Proper fit guarantees a professional look, reliable function, and easy to install upgrade. Understanding Legal Requirements for Turn Signals Just because a set of custom turn signals looks fantastic doesn’t mean it’s legal. U.S. motorcycles must meet Department of Transportation (DOT) standards for brightness, color, and positioning. Some states have additional regulations about signal spacing and proper mounting height. Ensure your new motorcycle LED turn signals are clearly visible from a distance. LED turn signals are often brighter and easier to spot, which can help with compliance, but running super slim mini signals or smoked lens upgrades can sometimes reduce visibility below DOT thresholds. Check your state’s requirements, and always place your signals in a location that’s clearly visible to other drivers. This way, you not only meet legal standards, but you also ensure your intention to other vehicles is seen—maximizing your safety every ride. Installation Tips for Custom Turn Signals Step-by-Step Installation Guide: Remove your stock motorcycle turn signal using the appropriate wrench. Match up the mounting hardware of your new custom turn signals. Connect the wiring: for LED turn signals, remember polarity (+/–) matters. Install resistors or load equalizers if upgrading from filament to LEDs (to avoid rapid flashing). Secure all connections with waterproof connectors and test the lights. Mount and tighten signal bodies; ensure all wiring is neatly tucked or zip-tied away from moving parts. Test each turn signal, front and back, to confirm operation before your first ride. Popular Types of Custom Turn Signals Reviewed Best Performing LED Turn Signal and Motorcycle LED Options Top Designs: Smoked sequential LED strips, compact bullet-shaped indicators, and integrated tail light-turn signals are fan favorites. Customers rave about their ease of installation, robust waterproofing, and unbeatable brightness. When reading customer reviews, many report that swapping from stock motorcycle turn signals to LED turn signals transformed their bike’s look and made it much easier for cars to spot them—especially in low-light or stormy weather. The consensus is clear: premium motorcycle LED turn signals are among the most worthy things you can add for both looks and safety, whether you ride a big twin, sportbike, or lovely bike you use to cruise up north Idaho roads. Retro and Vintage Style Turn Signals for a Classic Look Classic turn signals with chrome or brushed metal housings bring nostalgic charm to vintage motorcycles and restoration projects. These are especially popular for cafe racers and classic cruisers, letting you keep an authentic appearance while improving reliability with updated internals—often swapping in LED bulbs for that period-correct look without sacrificing modern performance. Popular retro models mimic the design of stock motorcycle turn signals from decades past, but offer far better weather resistance and often far outlast made out of cheap materials original units. They’re ideal for restoring older bikes, preserving value, or just adding a bit of timeless class to any ride. Must-Consider Custom Turn Signals by Motorcycle Type: Sport: Mini LED flush mount signals, integrated mirror signals Cruiser: Bullet-shaped LEDs, retro metal-body turn signals Touring: Sequential LED strips, high-visibility large-format signals Retro/Vintage: Chrome body signals, bullet and teardrop designs Adventure: Waterproof, ruggedized LED pods or stalk-mounted signals People Also Ask About Custom Turn Signals How do I install custom turn signals on my motorcycle? Answer: Begin by removing your old signals and disconnecting the wiring. Position the new custom turn signals or LED turn signals, matching the terminal colors and ensuring correct polarity (+/–). Use crimp connectors or soldered joints covered by heat shrink for weather resistance. Install any required resistors for LEDs, then secure everything to the frame or fairing. Double-check operation before riding. Are LED turn signals better than traditional bulbs? Answer: Yes. LED turn signals are typically much brighter, last far longer, and are more energy efficient than filament bulbs. For modern motorcycles and safety-conscious riders, LED technology is the premium choice for turn signal upgrades, reducing the need for frequent replacements and drawing less power from your electrical system. Do custom turn signals fit all motorcycle types? Answer: Not every set of custom turn signals is universal. Always check your motorcycle’s make and model for compatibility, including mounting style, wiring requirements, and space around the mounting area. Custom signals are available for virtually all models, but some adaptation may be needed for classic or highly customized bikes. Key Takeaways for Selecting the Best Custom Turn Signals Prioritize safety and compliance to ensure visibility and legality on every ride. Choose a design that fits your motorcycle’s unique style—mini, integrated, or vintage style. Opt for LED technology whenever possible for maximum brightness and reliability. Always verify compatibility before purchasing—no two bikes are truly identical! Frequently Asked Questions About Custom Turn Signals Should I upgrade to LED turn signals for my motorcycle? LED signals provide clear advantages in brightness, energy efficiency, and longevity. They’re an ideal upgrade for nearly all motorcycles, improving both style and safety. How long do custom LED turn signals last? High-quality motorcycle LED turn signals can last up to tens of thousands of hours—often outlasting your bike’s ownership—thanks to their durable, solid-state construction. Are there any legal concerns with custom turn signals? Yes. Always make sure your chosen signals meet DOT and state requirements for visibility, color, and placement. Proper fitment ensures your motorcycle remains street legal. Can I install custom turn signals myself or should I visit a professional? Many riders can perform a DIY installation with basic tools and wiring kits. For complex wiring or integrated signals, or if you’re unsure, professional installation by a trusted shop is recommended. Ready to Customize Your Ride? Elevate your motorcycle’s style and safety—Call Nasty Performance Motorcycle Shop Today: 847-458-4858 Conclusion: Selecting the right custom turn signals means balancing safety, compliance, style, and fit. Upgrade your ride with quality motorcycle LED turn signals for the ultimate combination of form and function—because your next adventure deserves both visibility and flair. If you’re passionate about keeping your motorcycle in peak condition, your journey doesn’t end with custom lighting. Explore our expert guide on seasonal bike care secrets to discover how proactive maintenance can extend the life of your upgrades and keep your ride looking sharp year-round. From prepping for winter storage to getting your bike ready for spring adventures, these tips will help you ride with confidence in any season. Take your motorcycle ownership to the next level by combining smart customization with essential care—because a truly stylish ride is one that performs as good as it looks.

Terms of Service

Privacy Policy

Core Modal Title

Sorry, no results found

You Might Find These Articles Interesting

T
Please Check Your Email
We Will Be Following Up Shortly
*
*
*