Nasty Performance ~ 847-458-4858 

  • Blog Home
  • Categories
    • Motorcycle Maintenance
    • Riding Tips & Preps
    • Safety & Inspection
    • Customizations & Upgrades
    • DIY Motorcycle Repairs
    • Motocycle Audio Systems
    • Motocycle Seasonal Care & Storage
    • Engine, Electrical Performance
  • Bike Night
  • Nasty Performance Motorcycle Shop
October 04.2025
1 Minute Read

Discover Expert Motorcycle Engine Tuning Services Near You

"Did you know: According to industry experts, professional motorcycle engine tuning services can boost your bike’s horsepower by up to 20%—unlocking superior speed, responsiveness, and ride quality."

Imagine your motorcycle responding instantly to your every command, delivering perfected power and astonishing acceleration when you twist the throttle. Motorcycle engine tuning services aren't just for racers—they're for any rider ready to experience the next level of performance, efficiency, and reliability. In this comprehensive guide, you'll discover how expert dyno tuning unlocks your bike's true potential, why precision matters with fuel injected models, and exactly how to get professional tuning tailored for your own riding style. Curious about performance gains and value? Keep reading, because we're revealing everything you need to know—plus, how to book your premium tuning service today!

Discover the Benefits of Motorcycle Engine Tuning Services Near You

Choosing motorcycle engine tuning services near you provides a range of impressive advantages beyond basic maintenance. Unlike standard garage tune-ups, professional tuning services measure and adjust every parameter—fuel injection, air-fuel ratio, ignition timing—to optimize engine power and efficiency for your specific bike. Many riders report not just a smoother engine running , but sharper throttle response, increased horsepower, and better fuel economy. By using advanced dyno tuning methods, your local pro can identify power and torque weaknesses, then create a custom map perfectly adapted to your unique riding style and the peculiarities of your engine.

The real appeal of expert motorcycle engine tuning services is in their tailoring: whether you’re piloting a vintage cruiser or high-tech sportbike, experienced technicians use diagnostic tools to ensure your ride is safer, more reliable, and more enjoyable every time you hit the road. Moreover, professional tuning can significantly extend your motorcycle’s lifespan by reducing internal wear, keeping engine temperature and air-fuel mix in check, and helping prevent mechanical breakdowns. If extra performance and peace of mind matter to you, investing in qualified tuning is a must.
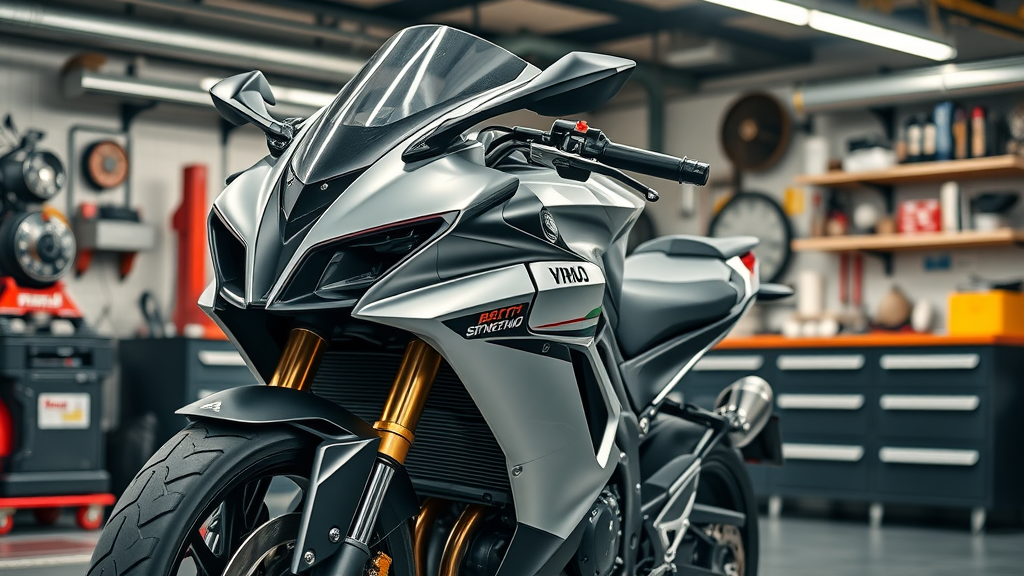
high-performance motorcycle engine tuning services at reputable dyno tuning shop, urban garage setting, shiny equipment
  • Enhanced performance and fuel economy

  • Extended engine lifespan

  • Customized solutions for your riding style

  • Increased resale value

Leading Dyno Tuning and Motorcycle Dyno Tuning Solutions

To get the most from your machine, cutting-edge dyno tuning and motorcycle dyno tuning services offer unparalleled precision. Unlike traditional adjustments, these modern tuning services use sophisticated computer-operated dyno testing to provide real-time data about your engine’s air-fuel mixture, power output, and rear wheel torque. This technology allows for pinpoint fine-tuning—even for advanced fuel injected bikes—ensuring every ounce of performance is safely unlocked for the road or track.

Championing accuracy, professional dyno tuning service providers use state-of-the-art diagnostic systems to evaluate your engine under simulated riding conditions. By measuring air-fuel ratio, engine run cycles, and throttle response, dyno specialists custom-tailor your bike’s engine map. The result? Maximum reliable power, smoother acceleration, and improved efficiency whether you’re commuting daily or pushing limits on weekends. This hands-on approach to motorcycle dyno tuning is why more riders are moving beyond basic garage work and choosing data-driven upgrades.

How Dyno Tuning Maximizes Motorcycle Performance
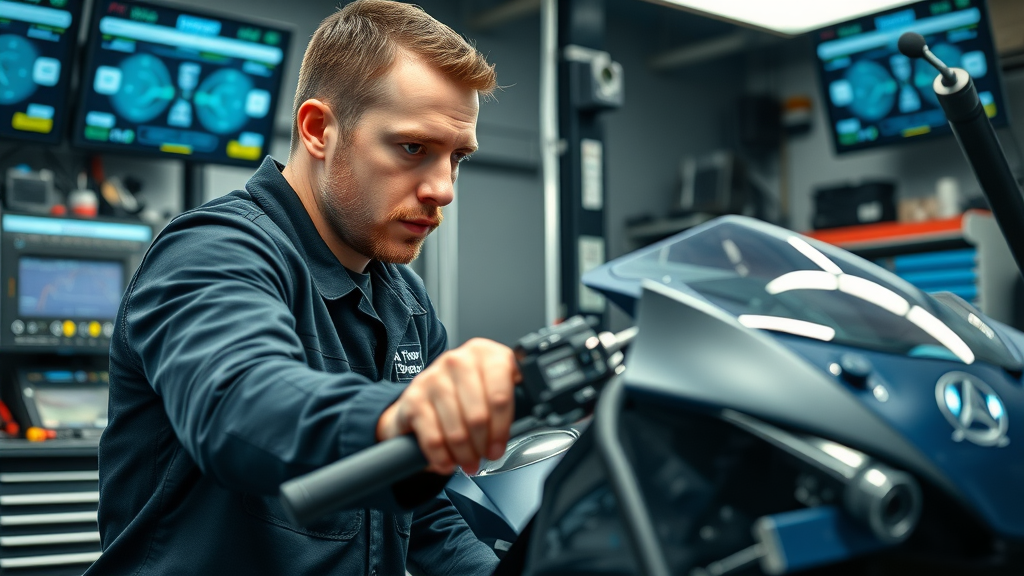
technician performing dyno tuning on motorcycle engine using advanced dyno tuning service technology

During a motorcycle dyno tuning session, the technician mounts your bike to a dyno machine—a device that measures torque, horsepower, and fuel efficiency while the engine runs through variable speeds. The process begins by establishing a performance baseline, recording how your current setup handles air-fuel ratio, ignition timing, and engine run cycles. Using this data, a custom mapping—often for a power commander or ECU flash—is created to adjust how fuel and air is delivered throughout RPM ranges.

With access to real-time analytics, dyno tune specialists can instantly spot inefficiencies, dialing in adjustments that optimize both low and high-end power. This means you won’t just see higher peak numbers on a chart—the improvements are felt in every gear, every ride. Especially critical for modern, fuel injected motorcycles, this precision tuning ensures your engine delivers optimal performance and longevity with every mile.

Motorcycle Dyno Tuning vs. Traditional Motorcycle Service

Many riders wonder if there's a noticeable difference between motorcycle dyno tuning and standard motorcycle service . The answer is simple—dyno-based methods provide measurable, real-world performance gains that traditional service cannot match. Instead of relying on generic manufacturer settings, dyno tuning allows for:

  • Precision adjustments with real-time feedback

  • Safer, more reliable performance improvements

  • Better tuning accuracy for fuel injected bikes

The careful analysis during a dyno tuning service enables your technician to fine-tune parameters for current environmental conditions and your specific modifications. This custom approach unlocks the hidden power while respecting the limits of longevity and reliability. Especially if you ride a newer model with advanced electronics, dyno-based tuning services ensure your motorcycle services truly align with your goals.

Feature

Dyno Tuning

Traditional Tuning

Accuracy

High

Moderate

Real-time Data

Yes

No

Fuel Injected Support

Yes

Limited

Customization

Advanced

Basic

Our Premium Tuning Service: The Complete Motorcycle Engine Tuning Experience

At Nasty Performance Motorcycle Shop, our mission is to provide a complete motorcycle engine tuning experience —using only state-of-the-art technology, proven methodology, and passionate expertise. Our tuning process is engineered to maximize your bike’s power and efficiency, with transparent results you can feel on the road and see on the dyno graph. We've tuned countless models, from the latest fuel injected sportbikes to classic V-twins—and every service is tailored to your goals.

Our dyno tuning service starts with diagnostics to identify your engine's strengths and weaknesses. From there, we run detailed dyno testing to develop a custom map or advanced power commander tuning . Every phase is explained to you with clear, actionable feedback, so you understand how improvements in air-fuel ratio, ignition timing, and ECU flash result in smoother, more powerful engine running . This hands-on approach, combined with decades of experience, is what makes our motorcycle dyno tuning service second to none.

Innovative Motorcycle Dyno and Dyno Tuning Service Technologies

modern motorcycle dyno testing equipment and advanced dyno tuning service workshop

We utilize tools like advanced motorcycle dyno platforms, high-fidelity monitoring screens, and dynamic power commander interfaces to deliver the most detailed, accurate tuning services available. Our open workshop and transparent communication mean you’re actively involved in the tuning process —even viewing live data as we fine-tune your bike for peak power and safety. This blend of technology and expertise guarantees results that exceed your expectations, whether your goal is day-to-day efficiency or track-ready domination.

Our investment in modern equipment doesn't just optimize power and torque : it safeguards engine life and efficiency for the long haul. Dyno tune services like ours continuously innovate, ensuring that even as motorcycles become more sophisticated, your tuning service stays a step ahead. See your bike’s power output rise and explore the limits of professional tuning services right here.

The Tuning Process: Step-by-Step Overview

Every successful motorcycle dyno tuning journey begins with a detailed diagnostic. Here, our seasoned technicians utilize advanced sensors and software to evaluate your bike’s current configuration—measuring air-fuel ratio, cylinder performance, and existing ECU mappings. This data-driven approach pinpoints what needs attention so adjustments can be precisely targeted for the biggest impact.

Next, your motorcycle undergoes rigorous dyno testing , simulating real-life rides while closely monitoring engine output, throttle response, and fuel consumption. Based on the dyno’s readings, we then develop a custom map —often using tools like a power commander —to achieve your desired performance gains, whether that's all-out horsepower, improved efficiency, or optimal throttle delivery for city commuting or spirited canyon rides.

  • Comprehensive diagnostics

  • Motorcycle dyno testing

  • Custom mapping for your power commander

  • Post-tune performance verification

The process concludes with a post-tune verification: we test the bike again to ensure all settings achieve their intent, guaranteeing maximum reliability and satisfaction from your engine tuning investment. This careful, step-by-step method transforms your ride—backed by data you can trust.

Watch: Behind the Scenes of a Professional Motorcycle Engine Tuning Service

Why Trust Nasty Performance Motorcycle Shop with Your Tuning Services?

Choosing the right provider for your motorcycle engine tuning services is crucial to safeguarding your investment and achieving optimal results. At Nasty Performance, we separate ourselves with an uncompromising commitment to quality and customer satisfaction. Our certified dyno tuning professionals possess decades of direct experience with everything from classic carbureted bikes to cutting-edge fuel injected powerhouses and proprietary power commander systems.

Every tuning service we provide at Nasty Performance Motorcycle Shop is built on core values: precision, reliability, and transparency. Our technicians walk you through each step, openly discussing dyno data, recommended upgrades, and realistic performance goals. We believe no question is too small and every rider deserves complete visibility—the foundation of trust before ever adjusting your bike.

  • Certified dyno tuning professionals

  • Decades of experience with fuel injected motorcycles and more

  • Customer-first service approach and transparency

"Our mission is clear: deliver motorcycle engine tuning services that transform your ride—and exceed expectations every time."

Whether you're seeking more excitement on the daily commute, prepping for a cross-country adventure, or chasing championship podiums, our motorcycle dyno tuning delivers results that matter. Partner with the pros who put riders first—and watch your bike reach new heights.

Common Questions about Motorcycle Engine Tuning Services

Wondering about pricing, value, or how custom dyno tuning can impact your bike’s longevity? Here are the top questions answered by our expert crew.

How much does it cost to tune a motorcycle engine?
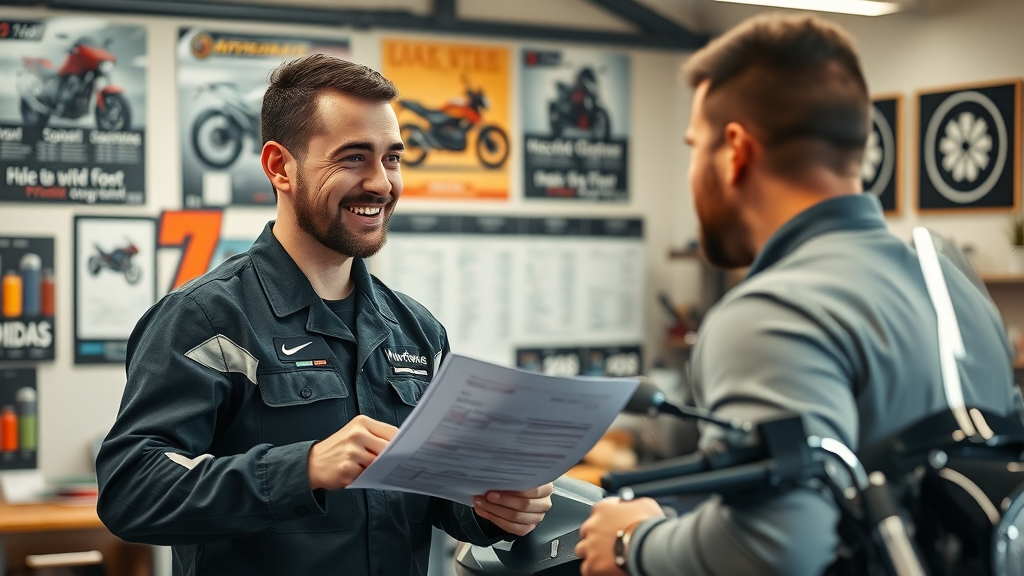
mechanic explaining motorcycle engine tuning services cost to owner in professional dyno tuning shop

Professional motorcycle engine tuning services typically range from $200 to $600, depending on your bike’s model, the depth of required dyno tuning , and whether advanced custom mapping is included. More complex jobs—like those involving extensive data logging or multiple custom maps for different riding styles —may reach the higher end. Precise pricing always reflects the expertise, time, and high-tech tools that fuel injected and performance-oriented bikes demand.

How much should a motorcycle tune up cost?

A basic motorcycle tune up generally costs between $75 and $200, focusing on routine checks and small adjustments. However, advanced engine tuning services —which include dyno tuning , power commander adjustments, and custom map programming—carry higher costs to match the greater value delivered. Advanced tuning services extend far beyond spark plug changes, delivering noticeable gains in power output, throttle response, and engine efficiency.

Always confirm what’s included in your service, as a true motorcycle dyno tuning appointment uses far more sophisticated tools and training than a standard tune-up. This ensures both safety and performance for every mile.

Is it worth tuning a motorcycle?
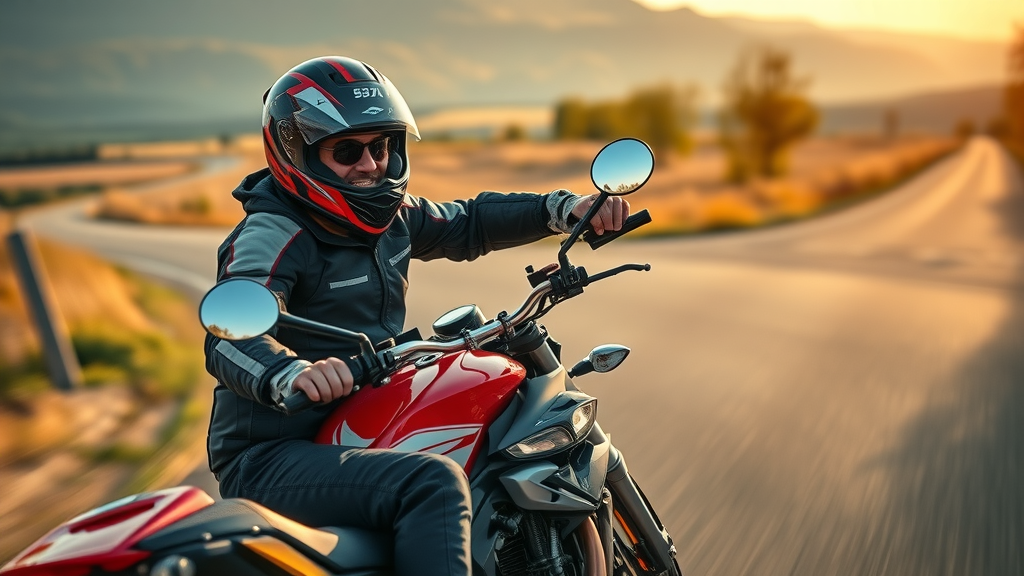
enthusiastic motorcycle rider enjoying performance boost after engine tuning service

Absolutely—professional motorcycle engine tuning services deliver quantifiable improvements in horsepower, throttle response, and fuel efficiency. Most importantly, expert tuning helps prevent costly mechanical issues and promotes longer engine life by monitoring air-fuel ratios and optimizing ignition timing. Riders commonly report more enjoyable, responsive rides and peace of mind knowing their bike’s internals are in prime working order.

How much does it cost to get a motorcycle remapped?

Remapping your motorcycle—especially when handled through expert motorcycle engine tuning services —usually ranges from $300 to $700. This cost reflects the sophistication of dyno testing , custom software mapping, and the personalized follow-up adjustments required to ensure every change delivers on its promise. Pricing is influenced by bike model, existing performance upgrades, and the level of customization you require, but the gains in power and torque easily justify the investment for most riders.

Watch: Customer Testimonials on our Motorcycle Engine Tuning Services

How to Get Started with Professional Motorcycle Engine Tuning Services Today
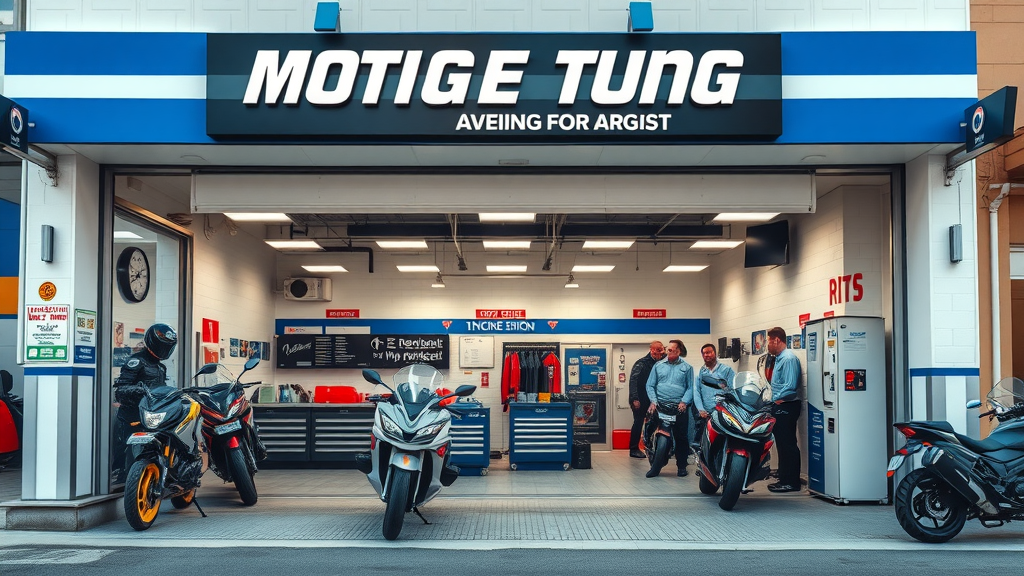
organized motorcycle tuning shop offering dyno tuning service with friendly team and modern display bikes

Ready for a serious upgrade in riding performance? Engaging with a certified shop specializing in motorcycle dyno tuning is straightforward—and the best way to experience the true benefits of tailored engine tuning services . With Nasty Performance, you can conveniently book your dyno tuning service online or by phone, ensuring a seamless, no-pressure experience from consultation to final ride.

  • Book your dyno tuning service online or by phone

  • Schedule a free initial consultation

  • Experience the full power of custom motorcycle dyno tuning

Our team will answer every question, evaluate your goals, and help you choose the best package—whether you need a single engine run evaluation or a comprehensive mapping overhaul. Let our experts transform your ride, boost your confidence, and make every mile more thrilling.

"Your bike deserves the best—don’t settle for less than expert motorcycle engine tuning services tailored to your unique needs."

Watch: Step-by-Step Overview of the Motorcycle Engine Tuning Process

Unlock Peak Performance: Contact Nasty Performance Motorcycle Shop for Expert Motorcycle Engine Tuning Services

  • Reach out today at 847-458-4858 to:

  • Schedule your tuning service

  • Ask about our dyno tuning packages

  • Receive a personalized performance assessment

Call Nasty Performance Motorcycle Shop Today: 847-458-4858

Take the next step—unlock your bike’s ultimate power and reliability with professional motorcycle engine tuning services tailored just for you.

Enhancing your motorcycle’s performance through professional engine tuning can lead to significant improvements in power, efficiency, and ride quality. For instance, Professional Dyno Tuning for Motorcycles in Orange County | SoCal Superbikes details how expert dyno tuning optimizes engine output, resulting in increased horsepower, improved throttle response, and enhanced fuel efficiency. Similarly, Expert Motorcycle Dyno Tuning in Sandusky, OH emphasizes the benefits of precision tuning, including smoother engine operation and tailored performance enhancements. If you’re serious about unlocking your bike’s full potential, these resources provide valuable insights into the advantages of professional engine tuning services.
Customizations & Upgrades

0 Comments

Write A Comment

*
*
Please complete the captcha to submit your comment.
Related Posts All Posts

Best Options for Upgraded Brake Systems You Can’t Miss

Ever wondered what truly separates a stock braking system from the high-performance brakes used by racing pros—or if upgrading your brakes could be the smartest safety move you’ll make this year? Whether you’re preparing for your first track day, craving shorter stopping distances, or simply seeking peace of mind on your daily drive, understanding the best options for upgraded brake systems can transform your time behind the wheel. In this comprehensive guide, you’ll discover everything you need to know about brake upgrades—why they matter, what makes them different, and how to pick the perfect system for your vehicle and driving style. Unveiling the Best Options for Upgraded Brake Systems: Why Improving Your Braking Matters Your vehicle’s brakes are its most important safety feature, so it’s no surprise that more drivers than ever are asking about the best options for upgraded brake systems. Factory-installed, or stock brake systems, often balance cost, noise, and comfort, but may not deliver the consistent braking performance or fade resistance needed for spirited drives, high-speed conditions, or loaded vehicles. Upgrading your braking system can significantly boost your stopping power, improve pedal feel, and reduce stopping distance—making every drive safer and more confidence-inspiring. When considering the right brake upgrades, it’s critical to align expectations with your goals. Are you looking for improved daily driving, prepping for a track day, or hauling heavier loads? Brake kits, big brake kits, and specialized performance brake pads all offer different benefits. In this article, you’ll learn the differences between these options, gain expert insight into component upgrades like slotted rotors or stainless steel lines, and unlock the secrets to making your next brake upgrade a lasting investment in safety and control. What You'll Learn About the Best Options for Upgraded Brake Systems Key features and components of upgraded brake kits and brake systems Differences among performance brake pads, slotted rotors, and big brake kits How to choose the best brake upgrade for your vehicle’s needs Expert tips for maximizing safety and stopping power Understanding Brake Systems: The Foundation of Every Brake Upgrade Before selecting the best options for upgraded brake systems, it’s crucial to understand what sets an upgraded system apart from stock setups. The brake system’s job is to convert your vehicle’s momentum into heat, bringing you safely to a stop through the combined action of brake pads, rotors, calipers, lines, and sometimes more advanced components, like big brake kits. How these parts work together directly influences stopping power, pedal feel, and overall durability. Many drivers overlook the true complexity of a brake upgrade. It’s not just about swapping out worn pads or rotors; it’s about designing a system where every element—whether it’s a slotted rotor, performance brake pad compound, or upgraded brake fluid—works in harmony. Only then can you unlock the reliable brake performance that helps avoid accidents and boosts driver confidence, especially during emergency stops or under repeated heavy use. When planning your brake system upgrade, it’s also helpful to understand how seasonal factors can impact your vehicle’s performance and safety. For a deeper dive into maintaining your ride throughout the year, check out these essential seasonal bike care secrets every rider should know—these tips can help you get the most from your upgraded brakes in any weather. What Defines Upgraded Brake Systems? Upgraded brake systems typically go beyond standard replacement by using specialized parts designed for better heat management, higher friction, or increased durability. This might mean installing a full brake kit—which usually includes rotors, pads, and supporting hardware—or selecting a big brake kit with larger rotors and multi-piston calipers for maximum effect. Unlike most original equipment, these components are engineered for improved performance and fade resistance, reducing brake fade during repeated or heavy braking. The hallmark of any brake upgrade is efficiency in dissipating heat. High-performance rotors like the slotted rotor or drilled and slotted rotor often replace solid discs. Paired with performance brake pads, upgraded systems deliver responsive pedal feel, shorter stopping distances, and superior modulation. These advantages become most noticeable when driving demands push beyond the modest limits of stock setups—think mountain descents, spirited back roads, or competitive motorsports. Core Elements: Brake Pads, Brake Kits, and Rotors Explained In every braking system, brake pads create the interface with the rotors, transforming pressure into friction for stopping. Performance brake pads utilize advanced materials—like carbon-ceramic or semi-metallic compounds—to provide enhanced bite, longevity, and resistance to heat-induced fade. Upgrading pads alone can deliver a notable improvement in everyday and spirited driving by raising the temperature at which fade occurs. Brake rotors disperse the heat generated in braking. The choice between slotted, drilled, or composite rotors depends on use—slotted rotors clear dust and gases efficiently, while drilled and slotted rotors balance heat dissipation and wet-weather performance. A full brake kit bundles these with pads and hardware, ensuring matched performance. Meanwhile, a big brake kit increases both rotor diameter and pad contact area, multiplying stopping power and reducing heat buildup for extreme applications like track days or heavy towing. Brake pads vs. brake kits vs. big brake kit: Key differences Performance brake pads and their role Brake rotor varieties: slotted rotor, drilled and slotted rotor The Science Behind the Best Options for Upgraded Brake Systems The effectiveness of the best options for upgraded brake systems comes down to the science of friction, heat transfer, and energy dissipation. High-performance brake kits and big brake kits are engineered to overcome the limitations often faced by factory systems—namely, heat-induced brake fade and uneven wear. By upgrading, you’re not just changing components; you’re enhancing the entire energy management process to guarantee stopping power when it matters most. Every critical part—from larger rotors and competition-grade pads to stainless steel brake lines or synthetic brake fluid—plays a role in maintaining brake effectiveness across changing temperatures and loads. Drivers experience this as shorter stopping distances, improved pedal modulation, and consistent performance during aggressive driving or on demanding routes. Upcredible mechanical engineering, precise materials, and innovative design merge in each brake upgrade, ensuring you stay in command of your vehicle in any scenario. How Brake Upgrades Improve Performance Upgraded components, like a performance brake kit, directly affect heat dissipation and the overall surface area in contact with the rotor. This prevents brake fade during extended heavy use, enabling repeated stops without loss of braking force. For daily drivers, upgrading the brake pads and rotors greatly improves pedal feel and confidence. For track enthusiasts, a comprehensive brake kit delivers larger rotors, higher performance pads, and sometimes multi-piston calipers for the ultimate in modulation and feedback. The difference is tangible: stopping distance decreases, fade resistance rises, and the car remains more stable even under sudden, full-force braking. These improvements are crucial for spirited driving, performance vehicles, and in emergency situations where every foot counts. Upgrading to big brake kits opens the door to even greater braking performance, as they are designed to handle significantly higher loads and temperatures than standard or entry-level performance options. Why Performance Brake Kits and Big Brake Kits Make a Difference The primary advantage of performance and big brake kits is their ability to offer superior heat capacity and even pad wear under stress. A big brake kit extends the rotor diameter and often increases the number of caliper pistons, spreading clamping force more evenly and allowing for larger pads. This increase in mechanical leverage, combined with advanced materials and designs in rotors—like the slotted rotor or drilled and slotted rotor—delivers enhanced stopping power with greater fade resistance. Additionally, performance brake kits are carefully matched so that every component—from the pads and rotors to hardware—works together. The result is maximum efficiency, minimized brake noise, smoother pedal feel, and, in many cases, longer component life. Whether you’re seeking consistent lap times or peace of mind in daily conditions, choosing a well-designed kit from a reputable brand is essential for real-world improvement. Choosing Between Brake Kits and Individual Components One of the most common questions for those investigating the best options for upgraded brake systems revolves around whether to purchase a complete brake kit or upgrade only select components. A complete brake kit is engineered for seamless compatibility and optimized braking performance; it’s typically the simplest way to guarantee all parts work in perfect harmony. However, some enthusiasts may choose to upgrade individual parts—like pads and rotors—according to specific needs or budget constraints. Upgrading just one component—say, slotted rotors or performance pads—can yield meaningful improvements, but maximum benefit comes when the entire system is designed for higher loads and temperatures as found in a comprehensive brake kit. For track users or those with demanding performance needs, a big brake kit is often the preferred solution, providing a step-change in heat capacity and pedal feel. Meanwhile, targeted upgrades are best for drivers seeking incremental gains or with vehicles not intended for hard use. Brake Pads, Brake Rotors, and Brake Kits: Breaking Down the Best Choices Navigating the selection of brake components isn’t just about brand names or the size of your rotors. The best options for upgraded brake systems come down to understanding what each part brings to your car’s stopping abilities. Different performance brake pads, rotor types, and kit configurations address unique scenarios, from spirited canyon driving to the rigors of track day events. In this section, we’ll break down the primary options available across performance brake pads, rotors—such as slotted, drilled and slotted, or solid steel brake rotors—and give you key considerations for picking a complete brake kit or going for a big brake kit upgrade. Performance Brake Pads: Enhanced Stopping Power The right performance brake pad is fundamental to any brake upgrade. Engineered to maintain friction at higher temperatures, these pads are less prone to brake fade and offer sharper bite than standard pads. Compounds range from ceramic and organic to advanced semi-metallic and carbon-ceramic formulas. For daily drivers seeking longevity and low dust, ceramic pads are popular, while aggressive compounds serve those expecting hard stops or repeated high-speed braking. Swapping out stock brake pads for a high-performance alternative is often the first and most cost-efficient brake upgrade, yielding faster response and a direct, firm pedal feel. Track-focused compounds do create more dust and may squeal when cold, so balance your choice against your daily and spirited driving needs. Types of Brake Rotors for Brake Upgrades Brake rotors come in several flavors, each delivering different benefits across driving conditions. Slotted rotors channel gas and dust away from the pad’s surface, maintaining a clean contact area—ideal for both spirited street and track day use. The drilled and slotted rotor combines cooling holes with slots, offering both water dispersion and superior heat management, though they can be prone to cracking in heavy motorsports use. Solid rotors, commonly found in factory applications, offer durability but can’t match the cooling prowess of their slotted or vented counterparts. Steel brake rotors provide robust stopping at a lower cost, while stainless steel brake rotors enhance corrosion resistance and lifespan, making them a compelling option for drivers in harsh climates or who demand lasting performance from their brake upgrade. Slotted rotor options Drilled and slotted rotor: Pros and cons Steel brake and stainless steel brake rotors Brake Kit Essentials: What to Look for in a Complete Brake Kit An effective brake kit should include more than just replacement pads and rotors. Look for kits that provide hardware, shims, anti-squeal grease, and detailed instructions—ensuring a seamless installation and a quiet, reliable system. The best kits pair performance brake pads with rotors specifically designed for their compound and size, sometimes incorporating multi-piston calipers when higher force distribution or a big brake kit upgrade is required. Leading manufacturers offer brake kits customized to vehicle and application, allowing buyers to match their driving style—be it daily commutes, towing, or track days. Seek complete kits from trusted brands for an upgrade experience that delivers both enhanced safety and peace of mind from the driveway to the racetrack. Big Brake Kits: Are They Right for Your Needs? Big brake kits go a step further by integrating larger diameter rotors and multi-piston calipers, engineered to dissipate vastly more heat and support aggressive pad compounds. These kits are ideal for drivers who participate in track day events, run powerful vehicles, or simply demand the highest level of brake performance possible. While they come at a higher upfront cost, the benefits include dramatically shorter stopping distances, reduced fade, and the ability to run repeated sessions without loss of efficiency. However, not every driver will need a big brake kit. For most daily and spirited drivers, a matched performance brake kit with slotted rotors and advanced pads will suffice. Reserve big brake kits for those building vehicles for competition, heavy towing, or extreme driving environments where factory systems reach their performance limit. Details Matter: Additional Upgrades for the Best Brake System Performance Beyond the basics of pads, rotors, and calipers, the world's best options for upgraded brake systems focus on every detail, ensuring consistent braking power and system longevity. Don’t overlook supporting components like brake fluid and brake lines—they are critical in getting the most from your investment. Modern synthetic brake fluid resists boiling at higher temperatures, maintaining a firm pedal even after repeated hard stops. Meanwhile, replacing OE rubber lines with stainless steel brake lines sharpens pedal response, reduces swelling under pressure, and heightens driver feedback—a vital but often hidden enhancement for any serious brake upgrade. Upgrading Brake Fluid and Brake Lines The right brake fluid dramatically alters how your braking system performs under stress. High-performance fluids, especially those rated for DOT 4 or racing applications, include advanced formulas that resist moisture absorption and boiling. This gives drivers confidence during aggressive street runs or hot laps on a track day. Pair this with braided brake lines for a complete overhaul that keeps your brake pedal consistent and firm—mile after mile, stop after stop. Upgrading the last foot between the caliper and the master cylinder means you’ll enjoy a firmer pedal feel, quicker response, and minimized sponginess. For those considering serious brake upgrades, both stainless steel brake lines and high-performance fluids are must-adds for reliability and performance. Stainless Steel Brake Lines: The Hidden Difference Stainless steel brake lines replace the flexible rubber lines fitted to most stock cars, which can expand under pressure—especially when hot or during repeated heavy use. By resisting this expansion, stainless steel lines ensure more of your pedal pressure reaches the caliper, enhancing feedback and precision. This upgrade is especially popular with those who routinely push their vehicles—such as on mountain roads or in motorsport environments. The improvement in pedal feel and resistance to pressure-induced degradation elevates even the most basic brake systems, making stainless steel lines a staple of many brake upgrade packages. Pads and Rotors: Coordinating Upgrades for Maximum Effect Mixing and matching brake components can produce unpredictable results. Upgrading pads and rotors in tandem ensures that both components are designed to work at the same temperature ranges, with matched friction characteristics for maximum effect. For example, pairing a slotted rotor with a compatible performance pad means more even wear, stronger bite, and less noise. For best results, opt for brake kits that come with pre-selected pads and rotors, or closely follow manufacturer recommendations for component compatibility—especially when planning on hitting the track day circuit or towing heavier loads. The sum is always greater than the parts when your upgrades are coordinated for harmony and optimal performance. Best Options for Upgraded Brake Systems for Track Day and High-Performance Use For track enthusiasts and performance-minded drivers, standard pads and rotors simply aren’t enough. The best options for upgraded brake systems for hardcore use involve advanced compounds, specialized rotor designs, and, often, a leap in size thanks to big brake kits designed for endurance, repeated heavy stops, and razor-sharp control lap after lap. Preparation here isn’t just for glory—it’s for safety. High temperatures, repeated hard braking, and the need to keep consistency across races or spirited driving means every upgrade should be deliberate and fully matched. Track Day Preparation: Selecting Performance Brake Kits A successful track day begins with brake preparation. Choose performance brake kits featuring large, vented, or slotted rotors, high-temperature pad compounds, and quality installation hardware. This guarantees that, as the laps mount up and heat builds, your braking performance remains sharp—not dull or unpredictable as factory systems tend to become. Many track day participants also upgrade to higher boiling point fluids and braided stainless steel lines, insulation for caliper pistons, or even heat-resistant rotor coatings. The goal is to leave nothing to chance when it comes to stopping power and fade resistance. Balancing Street and Track Brake Upgrades Not everyone wants a dedicated race setup. The key to balancing street and track brake upgrades is choosing parts that can cool quickly, deliver confident stops in all weather, and offer a quiet, comfortable ride when not at the limit. Many brands now offer hybrid kits—or options within a brake kit line—designed to straddle this line, with pad and rotor combos that excel both on daily commutes and during weekend canyon runs. Adjustable components, like staged pads or rotors with different slot patterns, let drivers fine-tune their systems for any situation. Consult with brake specialists or performance shops to determine which brake upgrades make the most sense for how—and where—you drive. "Upgrading your brake system isn’t just about stopping faster—it’s about driving confidence every time you’re behind the wheel." Comparing Top Brands: Which Big Brake Kit Rises Above? When it comes to choosing the best options for upgraded brake systems, brand reputation, engineering prowess, and real-world performance matter. Industry leaders like Wilwood and Brembo have set the standard for big brake kits and comprehensive brake kits, but other companies like StopTech and EBC offer exceptional solutions that may be better tailored to specific needs or budgets. Remember, the top brands invest heavily in research, ensuring every kit offers balanced performance, compatibility, and durability. Their kits often arrive pre-assembled, feature premium hardware, and include clear instructions—making installation and long-term maintenance significantly easier for enthusiasts and professionals alike. Wilwood vs. Brembo: Performance Brake Comparison Wilwood is known for its versatility, wide product range, and custom-caliper solutions ideal for both motorsport and pro-touring builds. Their big brake kits frequently offer modularity, letting drivers select caliper and rotor combinations that best match vehicle use and style. Brembo, on the other hand, is synonymous with world-class auto and motorcycle racing, supplying OEM and performance kits for everything from supercars to motorcycles. Their brake kits emphasize advanced metallurgy, unrivaled heat resistance, and the smoothest pedal modulation. Both brands offer exceptional brake upgrades, but the right choice depends on your car’s requirements and your personal preferences for performance and style. Leading Options for Comprehensive Brake Upgrades Besides Wilwood and Brembo, StopTech and EBC have earned their stripes with performance-oriented brake kits that focus on direct-fit upgrades, ease of installation, and excellent value. StopTech targets the enthusiast who tracks their car but still needs daily usability, while EBC leans into advanced pad compounds and versatile rotor selections suitable for any climate. When selecting the best options for upgraded brake systems, it’s smart to examine features like rotor composition, pad compatibility, fitment, and real-world reviews to ensure you’re investing in a kit that matches your precise needs. Comparison of Major Brake Kit Brands Brand Pad Composition Rotor Type Kit Compatibility Performance Rating Brembo Ceramic/Semi-Metallic/Carbon Slotted, Drilled, Composite OEM & Performance ★★★★★ Wilwood Metallic/Specialized Compounds Slotted, Drilled, Custom Custom/Performance ★★★★☆ StopTech Semi-Metallic/Ceramic Slotted, Drilled, Vented OEM Replacement & Performance ★★★★☆ EBC Semi-Metallic, Ceramic, Kevlar Slotted, Drilled, Smooth Direct-Fit/Performance ★★★★☆ Installation Tips and Best Practices for Brake Upgrade Success Even the best options for upgraded brake systems can underperform if improperly installed. Whether you choose the DIY route or work with a professional, good installation is critical for safety, longevity, and optimal performance. Factor in time for a careful bedding-in process—especially with high-performance pads and rotors—and don’t skip the essential safety checks after installation. Installation specifics vary by kit and vehicle, but always follow the manufacturer’s instructions meticulously. Use high-quality tools, replace all hardware as recommended, and don’t ignore warning signs like noisy brakes, vibrations, or soft pedal feel. Consistent post-upgrade inspections keep your brake system performing at its best. DIY or Professional Installation: What to Know Many brake kits are designed with the enthusiast in mind, offering clear directions and pre-packaged hardware. If you have solid mechanical skills and tools, tackling your own brake upgrades is possible and rewarding. However, given the critical role of brakes in safety, professional installation remains the safest bet—especially for complex big brake kits or when working with brake fluid and lines. An experienced technician ensures that torque specifications, pad bedding, and bleed procedures are correctly completed. This not only guarantees reliability but also validates warranties and fitsment guarantees that come with reputable brake kit brands. Maintaining Your Upgraded Brake System Care for your upgraded system by regularly inspecting brake pads, rotors, and fluid. Replace pads at recommended intervals—especially after heavy track or performance use. Keep an eye out for signs like increased brake dust, decreased pedal feel, or auditory warnings. Bleed fluid annually or as specified, which is especially important if you regularly push your system’s limits. Maintenance is integral to keeping your best options for upgraded brake systems at peak performance. Don’t let neglect undo your investment or sacrifice safety! People Also Ask: Expert Answers on Upgraded Brake Systems What is the 70 30 brake rule? Answer: Explanation of the 70 30 brake rule, its relevance to brake kits and overall brake upgrades. The 70 30 brake rule refers to the general principle that approximately 70% of a vehicle’s stopping power comes from the front brakes, with the rear brakes providing the remaining 30%. This ratio is crucial when selecting brake kits or planning brake upgrades, as the front system usually requires higher capacity and may benefit more from upgrades like slotted rotors or a big brake kit. Do upgraded brakes make a difference? Answer: Detailing how the best options for upgraded brake systems significantly improve braking performance compared to original equipment. Upgraded brakes can make a substantial difference in your vehicle’s stopping power, fade resistance, and pedal feel. The best options for upgraded brake systems often translate to reduced stopping distances, improved modulation, and greater confidence in emergency situations compared to stock brake setups. What is the 30 30 30 rule for brakes? Answer: Defining the 30 30 30 rule in relation to performance brake pads, brake rotors, and overall brake system longevity. The 30 30 30 rule advises drivers to perform 30 moderate stops from 30 mph with 30 seconds of cooling in between. This method helps bed in performance brake pads and rotors, ensuring a reliable mating surface and extending brake system longevity after an upgrade. Is Wilwood or Brembo better? Answer: Comparative insights into Wilwood vs. Brembo for best options in upgraded brake systems. Both Wilwood and Brembo are considered leaders in brake upgrades, but each has unique strengths. Wilwood offers customizability for performance applications, making it great for modified vehicles and motorsports. Brembo, highly regarded for its OE and high-end performance kits, stands out for consistency, advanced technology, and supercar pedigree. The “better” option comes down to your vehicle, driving needs, and preferred features. Frequently Asked Questions: Best Options for Upgraded Brake Systems What are the warning signs I need a brake upgrade? Look for soft pedal feel, noisy brakes, increased stopping distance, or excessive brake dust as indicators your current system may not be keeping up with your driving demands. Which is better for high-speed driving: slotted rotor or drilled and slotted rotor? Slotted rotors handle sustained heat and debris better for track and spirited use, while drilled and slotted provide enhanced wet-weather performance—choose based on your primary driving environment. How do performance brake kits affect daily driving? Most performance brake kits improve pedal response and safety, with some increasing noise or dust. For best results, pick a kit designed for your blend of daily and sporty use. Can I install a big brake kit on any vehicle? Fitment depends on your vehicle’s wheel size and suspension. Always check compatibility with your car and consult an expert before purchase. How often should pads and rotors be replaced after an upgrade? Replacement intervals vary by usage: regularly check depth, surface condition, and replace as soon as you notice degradation or reduced performance. Key Takeaways: Choosing the Best Options for Upgraded Brake Systems The best options for upgraded brake systems are tailored to needs—whether for daily commutes or track day. Choosing between brake kits, big brake kits, and performance brake pads depends on your priorities. Expert installation and quality components ensure safety and durability. Major brands like Wilwood and Brembo provide top-tier choices in brake upgrades. Ready to Upgrade? Contact Our Experts About the Best Options for Upgraded Brake Systems Call Nasty Performance Motorcycle Shop Today: 847-458-4858 Drive smarter, brake stronger. Your next upgrade starts with a call—don’t settle for less safety or performance! Upgrading your brake system is just one part of a holistic approach to vehicle safety and performance. If you’re committed to keeping your ride in peak condition year-round, consider exploring comprehensive maintenance strategies that go beyond the brakes. Our guide on seasonal bike care secrets reveals expert tips for protecting your investment through every season. By combining advanced brake upgrades with smart, proactive care, you’ll enjoy unmatched confidence and reliability on every journey—no matter the weather or road ahead.

How to Install Custom Saddlebag Options for Maximum Storage

Did you know? Installing the right saddlebags can instantly triple your motorcycle’s storage capacity, transforming road trips and daily rides alike. For riders looking to maximize both function and style, understanding how to install custom saddlebag options isn’t just a skill—it’s the key to safer, more enjoyable journeys. Whether you crave the classic look of tanned leather or the security of a hard mount, mastering these install choices makes all the difference. This guide will take you step-by-step through everything you need to know, from prepping your gear to final alignment checks, ensuring your saddlebags are as ready for adventure as you are. Unlocking Maximum Storage: Why Learning How to Install Custom Saddlebag Options Matters When it comes to maximizing your motorcycle’s utility, few upgrades offer as much versatility as custom saddlebag options. Riders are often surprised at how much additional storage thoughtful installation can provide—making room not just for daily essentials but also for extended travel gear. Properly learning how to install custom saddlebag options allows you to tailor your ride's storage precisely to your needs, be it a secure hard mount setup for adventure touring or a premium tanned leather model for weekend cruises. If your mounting system isn’t up to par, you may deal with shifting saddlebags, obstructed turn signals, or even safety hazards when the road gets rough. This guide simplifies the process from start to finish, focusing on practical choices such as mounting system compatibility, hard mount adjustability, and essential features like signal relocation. With the right approach, you won’t just add storage—you’ll do it safely and with lasting style. What You'll Learn Essential steps for how to install custom saddlebag options Key considerations for choosing a mounting system and hard mount setup Insights into turn signal relocation processes Maintenance advice for tanned leather saddlebags Getting Started: Essential Tools and Pre-Installation Tips for How to Install Custom Saddlebag Options Before diving into the installation, assembling the right tools and preparing your motorcycle properly is vital. The correct tools will make the process smoother and reduce the risk of damaging your saddlebag options or your motorcycle. Begin by reviewing compatible mounting system types for your specific model. Some motorcycles require unique hard mount hardware, while others are compatible with a variety of rail tube mounted bags or basic leather straps. Gather basic tools such as metric wrenches, hex keys, and a torque wrench, along with any specialty hardware included in your saddlebag kit—this can be particularly important for hard saddlebags or custom fit leather bags. Equally crucial is having installation instructions on hand, as products are designed differently by each manufacturer. In addition, ensure your motorcycle is parked on a stable surface and that you’ve cleaned the rear fender and mounting points thoroughly. Careful prep makes it easier to securely install the saddlebags, position your lowest option if needed, and avoid pitfalls like misalignment or blocked turn signals later on. As you prepare your tools and review your mounting system, it’s also helpful to understand the nuances of maintaining your motorcycle’s storage solutions over time. For a deeper dive into keeping your saddlebags and bike in top condition throughout the year, check out these seasonal bike care secrets every rider must know for practical maintenance tips and expert advice. Reviewing compatible mounting system types Basic and specialty tools required for installation Checklist for prepping your motorcycle for new saddlebag options Comparing Saddlebag Types: Hard Mounts, Tanned Leather, and Custom Options Selecting the ideal saddlebag type hinges on lifestyle, visual preferences, and your typical use case. Hard mount saddlebags, constructed from durable plastics or metals, are preferred for their ruggedness and security—perfect for those seeking a more permanent setup for daily commutes or long-haul journeys. Conversely, tanned leather and vegetable tanned leather options remain popular for riders wanting a classic, lightweight look that’s both flexible and easy to detach. Custom options offer the ultimate in personalized fit and design, though they may involve more complex mounting and frequent adjustments. To help visualize your decision, consider matching your saddlebag size to the luggage frame or lowest position possible for stability, sequencing with parallel or leather straps as the mounting system requires. Each option has its trade-offs—hard saddlebags might need periodic hardware checks, while tanned leather options demand routine care, especially if exposed to the elements on scenic rides or cafe racer journeys. Use the table below to compare at a glance which option serves your needs best. Saddlebag TypeMaterialProsCons Hard MountPlastic/MetalDurable, secureHeavier, less flexible Tanned LeatherLeatherClassic look, lightweightRequires care Custom OptionsVariousPersonalized fit, styleMay need additional installation steps Step-by-Step Guide: How to Install Custom Saddlebag Options Step 1: Reviewing the Mounting System It’s crucial to understand your motorcycle’s mounting system before performing any modifications. Most motorcycles come with mounting points above the rear fender or along the rail tube, specifically designed for a set of slots or brackets. Begin by consulting your vehicle manual or any installation instructions provided by your saddlebag manufacturer. Hard mount systems often utilize dedicated bolts, while tanned leather or custom bags might work with a combination of parallel straps or leather straps threaded through the luggage frame. Evaluate each mounting option thoroughly for compatibility with your motorcycle model. Double-check the position for future adjustments, ensuring no interference with the rear wheel, exhaust, or turn signal. This assessment forms the foundation for a safe, reliable installation—one that will stay secure whether you’re tackling city commutes or heading out for a cross-country ride. Step 2: Positioning Hard Mount Saddlebag Hardware With the correct mounting points identified, the next task is aligning your hard mount hardware. Position the mount so the bags rest at your desired height—typically, the lowest position that doesn’t obstruct the rear fender or touch the rear wheel. Using a torque wrench, fasten the mounting hardware securely, ensuring even pressure and alignment across both sides. Many kits include a set of slots or adjustable brackets to help fit a wide range of motorcycle models and bag sizes. Test the hard mount’s stability by gently applying downward pressure; a well-installed mount will not budge or rattle. Aligning hard mount options may also require temporarily removing or adjusting the rear turn signal. Following these steps minimizes installation errors and maximizes storage without compromising on safety or balance, making your pair of saddlebags ready for any load. Step 3: Installing and Adjusting Tanned Leather Saddlebags For those installing tanned leather saddlebags, begin by carefully threading the leather straps or nylon cords through the luggage frame, rail tube, or dedicated set of slots. Leather bags need a snug fit—not too tight to prevent stretching or deformation, but close enough to avoid flopping during travel. Adjust the bag’s position, ensuring a symmetrical and stylish appearance that aligns with the bike’s profile. Once both sides are secured, double-check for any contact between the vegetable tanned leather and hot components like the exhaust. If the leather saddlebag is too close to heat sources, it may warp, fade, or degrade more quickly. Consider using additional hardware or adjusters if included in the saddlebag kit to fine-tune placement. For added security, periodically check the tightness of the straps, especially after long rides or weather exposure. Step 4: Ensuring Secure Fit and Alignment After initial placement, take time to ensure your custom saddlebag options are mounted perfectly. Use a measuring tape to verify equal spacing between each saddlebag and the motorcycle’s centerline, and between the bag and rear wheel. Small misalignments can lead to operational problems, such as worn tires or difficult handling, especially with larger or hard saddlebags. Double-check that all fasteners, leather straps, and mounting hardware remain tight as you move or adjust the bags. Make minor corrections for an exact fit, testing that the saddlebags clear critical moving parts like the suspension and do not obstruct the turn signal. By following these detailed checks, you enhance both the security and style of your motorcycle, ensuring your bags stay in place—regardless of the terrain or cargo load. Turn Signal and Signal Relocation: Everything You Need to Know A frequently overlooked detail of how to install custom saddlebag options is the impact on your motorcycle’s turn signals. Many mount options or hard saddlebags, particularly those installed in the lowest position, may obstruct OEM turn signals or require relocation to maintain safety and legal compliance. It’s vital to understand your motorcycle model’s wiring and intended signal location before proceeding with any changes. Use the specific tools outlined in your installation instructions—typically screwdrivers, pliers, and occasionally soldering equipment—to carefully detach the turn signal from the stock position. Avoid forcing wires; use nylon cords or zip ties to route cables cleanly. Reposition and fasten the turn signal in its new slot or bracket, ensuring the angle and illumination remain visible from behind. Pay attention to common mistakes, like pinched wires or loose bolts, as these issues can result in signal failure or malfunction during rides. Understanding turn signal and signal relocation requirements Tools for successful turn signal relocation Common mistakes to avoid Expert Insights: Quotes from Seasoned Motorcycle Installers "Properly installing your custom saddlebag options ensures long-term security and stylish functionality on the road." - Alex Turner, Motorcycle Customization Specialist Maintenance Tips for Tanned Leather and Hard Mount Saddlebags Keeping your saddlebags in top condition involves periodic maintenance tailored to the bag’s material and mount style. For tanned leather or vegetable tanned leather saddlebags, regular cleaning and conditioning are essential. Use a pH-balanced leather cleaner and occasionally apply a weatherproofing balm, focusing on seams and high-wear areas. This routine ensures your leather bags retain their classic look and resist the elements, especially on frequently ridden cafe racer or touring motorcycles. With hard mount saddlebag options, perform periodic checks for stability. Examine nuts, bolts, and the luggage frame’s structural integrity after long rides—the vibration from the road or repeated installations can loosen hardware over time. Address any concerns promptly to prevent the saddlebags from shifting into the rear wheel or coming loose unexpectedly. Troubleshooting early helps protect both your gear and your motorcycle’s finish, keeping your storage solutions ready for whatever comes next. Leather care best practices Periodic checks for hard mount stability Troubleshooting: what to watch out for post-installation Top Mistakes to Avoid When Learning How to Install Custom Saddlebag Options While the installation process may appear straightforward, some common pitfalls can undermine your hard work and compromise storage safety. Foremost among these is neglecting turn signal relocation; obstructed signals not only diminish safety but may get you in trouble during vehicle inspections. Another frequent error is poorly matching your mounting system to your motorcycle model, leading to an insecure fit or even damage to the rear fender or luggage frame. Improper sealing or maintenance of tanned leather saddlebags is another avoidable mistake. Failing to care for leather can result in premature wear, water damage, or a sagging appearance that detracts from your ride’s style. Careful planning, the right hardware, and regular checks are your safeguards against these issues—helping your saddlebag installation stand the test of time. Neglecting turn signal relocation Poor selection of mounting system Improper sealing of tanned leather saddlebags Video Tutorial: How to Install Custom Saddlebag Options for Maximum Storage Watch this step-by-step visual guide for installing custom motorcycle saddlebags, including mounting system selection, hardware fitting, leather bag care, and final bag alignment. Presented in full 1080p clarity with close-ups and hands-on demonstrations for every step. People Also Ask: How to Install Custom Saddlebag Options [Insert PAA question 1 here] Comprehensive Answer When you’re learning how to install custom saddlebag options, the first thing to check is whether your motorcycle requires a specific mounting system or is compatible with universal hardware. Each motorcycle model offers different attachment points—look for rail tubes, a set of slots, or dedicated brackets near the rear fender. Begin by following any installation instructions supplied with your saddlebag, making sure all hardware fits cleanly and the saddlebag is centered on both sides. Double-check turn signal positioning, especially if hard mounts block visibility, and test for secure fit by gently rocking each saddlebag after installation. [Insert PAA question 2 here] Comprehensive Answer You’ll often find that tanned leather and hard saddlebags have unique requirements for installation and care. Hard mount bags generally need alignment with the luggage frame and tight hardware, while vegetable tanned leather bags benefit from careful strap placement and periodic adjustments. For both, always ensure there’s adequate clearance between the bag and rear wheel, and conduct frequent inspections for wear, especially after long rides or rough terrain. Address loose bolts or worn leather straps immediately to maintain the safest and longest-lasting setup. FAQs About How to Install Custom Saddlebag Options and Mounting Systems What is the most secure mounting system for custom saddlebags? Hard mount systems fastened directly to the luggage frame or rail tube are usually the most secure, providing a durable hold for daily use and heavy loads. Do I need to always perform turn signal relocation? Turn signal relocation is often required when custom saddlebag options block the original signals. Always check your local laws and the placement on your specific motorcycle model. How do I maintain my tanned leather saddlebags? Clean with a leather-specific solution, treat with conditioner, and store away from direct sun when possible. Regularly inspect for cracks or sagging and recondition the leather as needed. Key Takeaways: Mastering How to Install Custom Saddlebag Options Choosing the right saddlebag and mounting system, performing proper installation, and regular maintenance will maximize your motorcycle’s storage and keep your ride safe and stylish. Now that you’ve mastered the essentials of installing custom saddlebag options, consider how ongoing care can extend the life and performance of your upgrades. Proactive maintenance not only preserves your saddlebags’ appearance but also ensures your motorcycle is always ready for the next adventure. For riders who want to go beyond installation and truly protect their investment, exploring expert strategies for year-round bike care can make all the difference. Discover more ways to keep your ride in peak condition by exploring seasonal bike care secrets every rider must know—your next level of motorcycle mastery starts with the right knowledge. Take the Next Step Toward Enhanced Storage – Call Nasty Performance Motorcycle Shop Today: 847-458-4858

Cost of Motorcycle Fairing Upgrades: What You Need to Budget

Hook: Did you know that many riders spend more on motorcycle fairing upgrades than on their annual bike maintenance? Yet, surprisingly few enthusiasts realize where the real costs come from, making budgeting tricky and sometimes leading to costly surprises down the road. "Did you know? Many riders spend more on fairing upgrades than on their annual bike maintenance—yet few realize where the real costs come from." Unlocking the True Cost of Motorcycle Fairing Upgrades Motorcycle fairing upgrades are a top investment for those seeking both style and performance, but unlocking the true cost of these enhancements can be complex. Whether you're a seasoned rider or new to the motorcycle world, unexpected expenses—from materials and installation to add-ons—can surprise even the most budget-conscious enthusiast. The cost of motorcycle fairing upgrades isn’t just about the sticker price; it’s a combination of material choices, professional or DIY installation, and extra customization. Understanding these variables helps you set realistic expectations and avoid hidden fees, leading to a smoother budgeting process. Riders look for full kits for total bike coverage or opt for partial fairing kit upgrades for style and wind protection without a massive upfront cost. Before making a decision, it’s crucial to understand what influences cost and the features different motorcycle fairings offer. When considering a fairing upgrade, think beyond appearance. The right motorcycle fairing can bring aerodynamic benefits, enhance safety with guaranteed fitment, and even boost your bike’s resale value. By breaking down the cost factors, you’re empowered to make informed buying decisions and maximize your budget. In this detailed guide, you’ll learn about the key elements impacting costs, material options like ABS plastic and carbon fiber, differences between OEM and aftermarket motorcycle fairing kits, and essential budgeting steps to get the most value from your upgrade. As you weigh the pros and cons of different fairing materials and installation methods, it’s also helpful to consider how seasonal factors can impact your upgrade decisions and long-term maintenance. For practical tips on keeping your bike in top shape throughout the year, check out these essential seasonal bike care strategies that every rider should know. Understanding Why the Cost of Motorcycle Fairing Upgrades Matters Unexpected spends can lead to long-term savings or costly mistakes The right motorcycle fairing enhances both function and aesthetics Choosing quality motorcycle fairings impacts safety and resale value What You'll Learn About the Cost of Motorcycle Fairing Upgrades What influences the cost of motorcycle fairing upgrades Types of fairing kits and their price ranges Comparison of OEM vs aftermarket motorcycle fairings Material breakdown: carbon fiber, ABS plastic, and more How to budget for installation and additional upgrades Frequently asked questions about motorcycle fairing costs Motorcycle Fairing Upgrades: Components Affecting Pricing The actual cost of motorcycle fairing upgrades is driven largely by factors like material, coverage, and customization. Many riders are drawn in by the visual appeal and aerodynamic enhancements bike fairings provide, but the total spend goes well beyond appearance. The type of fairing kit—whether full or partial—will directly affect your budget. Full kits offer comprehensive coverage for maximum wind protection, while partial upgrades focus on specific zones. Additionally, accessories, mounting hardware, and even shipping fees can nudge your final invoice higher. When comparing your options, it’s key to identify both the practical needs (like crash protection and guaranteed fitment) and the aesthetic upgrades that suit your taste. Materials play a pivotal role as well. ABS plastic, carbon fiber, and fiberglass all offer unique blends of lightweight durability, aesthetics, and cost. And when choosing between OEM and aftermarket motorcycle fairing kits, pricing is affected by factors like manufacturing quality, guaranteed fitment, and available customization. Ultimately, assessing the right blend of material, coverage, and style helps you achieve the ideal balance between value and performance. Breakdown of Motorcycle Fairing Materials: ABS Plastic, Carbon Fiber, and More ABS plastic has become the industry standard for affordable, durable fairings. Its lightweight construction and flexibility make it a popular option for both OEM and aftermarket motorcycle fairing kits, especially for beginners. Carbon fiber fairings, however, command a much higher price for their unrivaled combination of ultra-lightweight and unmatched strength, appealing to riders seeking racing-grade performance and a premium look. Fiberglass offers a mid-range compromise, balancing weight and durability at a moderate cost but sometimes requiring more precise fitment during installation. Each material has strengths and serves a different rider need—ABS plastic for reliable daily use, carbon fiber for those willing to pay extra for a performance edge, and fiberglass for versatile coverage with easier repairs. The right material not only affects the purchase price but also ongoing maintenance and replacement costs. ABS fairings are easier to source and install but may not have the bespoke quality of custom carbon fiber. And while carbon fiber impresses with its aesthetics and strength, any damage can lead to higher repair costs. An informed decision ensures you get the best value out of your budget for motorcycle fairing upgrades. Comparison Table: ABS Plastic vs Carbon Fiber vs Fiberglass Motorcycle Fairings Material Durability Weight Aesthetics Cost ABS Plastic High (impact-resistant, flexible) Medium Good, many color options Low to Moderate Carbon Fiber Very High (extremely strong, rigid) Ultra-Lightweight Excellent, premium weave look High Fiberglass Moderate to High (repairable) Moderate Custom paint friendly Moderate How Full Fairing vs Partial Fairing Affects the Cost of Motorcycle Fairing Upgrades When it comes to the cost of motorcycle fairing upgrades, the decision between full fairing and partial options stands out as one of the most important. Full kits deliver comprehensive protection, streamlining the bike’s profile and shielding more components from wind and debris. These packages are ideal for those prioritizing aerodynamics and premium style—but the tradeoff is a noticeably higher price due to increased material and accessory requirements. Full fairings also generally promise a more “factory” fit, especially if they come with guaranteed fitment, minimizing labor during installation. Partial fairing or bike fairing upgrades, in contrast, focus on front-end or select sections of your motorcycle. They’re a smart solution for those wanting to change their bike’s look, add moderate wind protection, or work around a limited budget. Partial fairings often integrate with stock components and reduce overall expense while still significantly altering your motorcycle’s appearance. However, buyers should ensure compatibility for easier installation and avoid lower-quality kits that might require extensive adjustment. Ultimately, your choice depends on desired aesthetics, riding habits, and how much protection you’re seeking for your motorcycle fairings and bodywork. Full kits for comprehensive coverage Partial and bike fairing options for targeted protection Integration with existing motorcycle fairings Comparing OEM and Aftermarket Motorcycle Fairing Kit Prices One of the key questions for budgeting is whether to invest in genuine OEM fairings or explore the expanding market of aftermarket motorcycle fairing kits. OEM fairings are designed by the original bike manufacturer and ensure perfect fit, color matching, and an unchanged silhouette—a popular option for those wanting to restore motorcycles to showroom specs. This level of quality and compatibility, however, often demands significantly higher prices as well as potentially longer shipping times and fewer style choices. Aftermarket motorcycle fairings have become increasingly attractive due to their more accessible pricing, broader array of designs, and modern advances in guaranteed fitment. These kits allow for customization, custom finishes, and performance tweaks while allowing cost-conscious buyers to stay on budget. However, be aware that some aftermarket kits may cut corners with mounting hardware or use thinner plastics, so careful selection is vital. Reputable brands offering guaranteed fitment and good customer support minimize installation headaches and future compatibility issues, making them a savvy pick for most riders seeking both savings and style. Definition and Differences: OEM vs Aftermarket Motorcycle Fairings OEM (Original Equipment Manufacturer) motorcycle fairings are made by, or for, the bike's manufacturer. They offer guaranteed fitment, certified durability, and factory-matched paint, ensuring your bike retains its original look and feel. These attributes are highly valued by riders aiming for a “factory finish” or those restoring classic models. However, OEM fairing kits commonly come with higher prices, making aftermarket options more tempting for budget-focused riders. In contrast, aftermarket motorcycle fairing kits are created by third-party manufacturers, often with more affordable pricing and fresh style options. Over the years, innovations in manufacturing and increased demand for guaranteed fitment have prompted reputable aftermarket brands to stand behind their kits, rivaling OEM standards while retaining cost advantages. The biggest differences come down to finish options, mounting hardware quality, and warranty coverage. Evaluate whether you value factory authenticity and are willing to pay for it, or if a reputable aftermarket kit delivers the savings and features you seek for your motorcycle fairing upgrades. Pros and Cons of Aftermarket Fairing Kits Guaranteed fitment: why it matters Cost advantages of aftermarket motorcycle fairing kits Potential drawbacks and considerations when choosing aftermarket fairings Aftermarket fairing kits are often lauded for providing more cost-efficient solutions, especially for riders eager to upgrade styling or performance on a budget. Riders can enjoy free shipping incentives, access a broader product listing, or choose unique graphic options not available in OEM lines. The competitive pricing and the ease of sourcing replacement parts make aftermarket kits a practical choice, particularly for newer bike models and those not requiring classic authenticity. However, not all aftermarket motorcycle fairing options meet the same standards. Lower-tier kits may compromise on paint finish or use less durable plastics, complicating installation or requiring additional mounting hardware. For peace of mind, choose kits with strong customer support, guaranteed fitment, and clear return policies. When sourced wisely, aftermarket options deliver savings without compromising the visual or functional appeal of your motorcycle fairings. Installation Costs for Fairing Kits and Motorcycle Fairings Installation forms a critical component of the cost of motorcycle fairing upgrades, often surprising riders new to comprehensive upgrades. Deciding between DIY installation and professional service will directly affect your total bill. Many fairing kits are marketed for “plug and play” installation, with thorough instructions and mounting hardware included for confident home assembly. Still, DIY projects can be time-consuming, require special tools, and risk imperfect results if you’re inexperienced. On the other hand, professional installation offers concise, guaranteed results—especially for complex full fairing installations or when integrating premium accessories. Labor charges can add a significant amount, but they provide long-term value by preventing improper fit, alignment issues, or potential warranty voids due to self-install errors. When evaluating a fairing kit, factor in local shop rates and be prepared for potential extra costs, such as mounting additional performance or LED accessories. DIY vs Professional Installation: Budgeting for Your Fairing Kit Choosing to install your motorcycle fairing kit on your own can be a satisfying project, especially if you’re handy with tools and comfortable following step-by-step manuals. DIY installation saves money on labor but can demand hours of effort and meticulous attention to detail. Quality aftermarket motorcycle fairing kits often advertise easier installation, but aligning panels, securing mounting hardware, and achieving a professional finish will be easier for some bike models than others. If you’ve chosen a kit with guaranteed fitment, your installation time and frustration will be minimized, offering greater peace of mind. Still, professional installation remains the safest and quickest route for riders wanting flawless results without the hassle. Installation fees may seem like a higher price upfront, but you gain tangible benefits—warranty security, expert guidance, and a supported install process. Shop around for a reputable, motorcycle-based customer service team and always confirm what the installation fee covers (like paintwork blending, accessory integration, or detailing). In many cases, the added labor charge is more affordable than correcting mistakes down the road. Full Kits and Accessory Installation: What to Expect If you’re investing in a full fairing kit or complex bodywork overhaul, expect installation costs to reflect the additional steps and expertise required. Full kits necessitate careful removal of existing body panels, cleaning, swapping wiring and brackets, and ensuring every fairing is designed to mesh perfectly with your bike’s frame and components. Accessories like aerodynamic windshields, LED lighting, or integrated turn signals require extra time for proper fitment and safe operation—further impacting the final labor cost. It’s wise to discuss the scope of the job with your installer beforehand, including any aftermarket fairing upgrades or add-ons that could influence cost and turnaround time. For riders tackling their own installs, look for fairing kits with exceptional customer support, clear product listing details, and comprehensive guides. Shipping include features, mounting hardware, and support number access are bonuses that ensure a stress-free experience from purchase to ride. "Budgeting beyond the price tag: Labor charges for motorcycle fairing upgrades can surprise even seasoned riders." Enhancing Your Ride: Value-Add Upgrades Beyond Motorcycle Fairings Fairing upgrades are only the starting point for most passionate riders. Many invest in paintwork and custom wraps to create a one-of-a-kind look. Whether it’s a simple full-body color change, metallic pearl, or complex graphic wraps, these services extend your fairing kit’s aesthetics and may influence resale value. Advanced graphics, decals, and finish upgrades further personalize your ride, while performance accessories—like frame sliders, upgraded lighting, or aerodynamic mirrors—complement the new fairings’ style and function. Adding these enhancements to your budgeting plan ensures you cover every detail, from the initial bike fairing installation to the finishing touches. Discuss your vision with your installer or supplier to align accessory compatibility with your chosen fairing kit and avoid unexpected fitment issues later on. It’s these tailored final flourishes that truly make your motorcycle stand out on the road or at shows! Paintwork and custom motorcycle fairing wraps Graphics, decals, and finish upgrades Performance accessories to complement new fairings People Also Ask: The Cost of Motorcycle Fairing Upgrades and Related Expenses How much do motorcycle fairings cost? Answer: The cost of motorcycle fairing upgrades varies widely based on material, brand, coverage (full vs partial), and whether you choose OEM or aftermarket kits. Entry-level ABS plastic fairings are more affordable, while high-end carbon fiber and complete fairing kits come at a premium. Why are motorcycle fairings so expensive? Answer: Motorcycle fairings are engineered for aerodynamics, durability, and aesthetics. Premium materials (like carbon fiber) and guaranteed fitment specifications drive up production costs, impacting retail prices for both OEM and aftermarket motorcycle fairings. How much does it cost to get motorcycle fairings wrapped? Answer: Wrapping motorcycle fairings is a customizable process, typically more cost-effective than repainting. Costs fluctuate depending on the complexity of the fairing kit, the finish chosen, and professional service fees. How much should you charge to detail a motorcycle? Answer: Detailing a motorcycle, especially after installing new motorcycle fairings or fairing kits, depends on motorcycle size, service thoroughness, and specific detailing requirements. Professional detailing fees will vary by location and package inclusions. How to Budget for Your Next Motorcycle Fairing Upgrade Identify your desired fairing kit style: OEM or aftermarket motorcycle fairings Choose material-grade: ABS plastic, carbon fiber, or fiberglass Decide on full kits or partial fairing upgrades Factor in DIY or professional installation costs Include wrap, paint, and accessory options in your budgeting FAQs About the Cost of Motorcycle Fairing Upgrades What are the most affordable fairing kits for beginners? Entry-level ABS plastic fairing kits are the most budget-friendly option and are highly recommended for new riders due to their durability, ease of installation, and wide availability. How important is guaranteed fitment with aftermarket motorcycle fairings? Guaranteed fitment ensures the fairing kit is designed specifically for your model, reducing installation headaches and potential safety or compatibility issues. It is a decisive factor when choosing aftermarket options. Are carbon fiber fairing kits worth the extra investment? Carbon fiber fairing kits offer unparalleled lightweight durability and elite aesthetics, making them worthwhile for riders focusing on high performance or unique visual appeal—though they do demand a higher price. Can I install a fairing kit on any motorcycle model? Most well-known motorcycle models have compatible fairing kits, both OEM and aftermarket. Always check with your supplier or manufacturer to confirm fit before purchasing, especially with older or custom bikes. Key Takeaways for Motorcycle Fairing Upgrade Costs The cost of motorcycle fairing upgrades depends on material, installation, and customization choices. Aftermarket motorcycle fairing kits offer more affordability but require research to ensure fitment. Budget for additional enhancements, such as wraps, detailing, and performance accessories. Ready to Upgrade? Consult the Motorcycle Fairing Experts "Explore your options and clarify your fairing kit needs before purchasing—it’s the smartest way to get value from your cost of motorcycle fairing upgrades." Call Nasty Performance Motorcycle Shop Today: 847-458-4858 If you’re serious about maximizing the value of your motorcycle investment, understanding fairing upgrade costs is just the beginning. True bike longevity and performance come from a holistic approach—combining smart upgrades with proactive care throughout every season. For deeper insight into protecting your ride year-round and unlocking advanced maintenance strategies, explore our comprehensive guide on seasonal bike care secrets every rider must know. This resource will help you safeguard your upgrades, extend your bike’s lifespan, and ensure every mile is as smooth as your new fairings look.

© 2026 Nasty Performance All Rights Reserved. 2035 S. Eastwood Dr., Woodstock, IL 60098 . Contact Us . Terms of Service . Privacy Policy

eyJjb21wYW55IjoiTmFzdHkgUGVyZm9ybWFuY2UiLCJhZGRyZXNzIjoiMjAzNSBTLiBFYXN0d29vZCBEci4iLCJjaXR5IjoiV29vZHN0b2NrIiwic3RhdGUiOiJJTCIsInppcCI6IjYwMDk4IiwiZW1haWwiOiJuYXRlQG5hc3R5cGVyZm9ybWFuY2UuY29tIiwidG9zIjoiUEhBK1BITjBjbTl1Wno0OFpXMCtWMmhsYmlCNWIzVWdjMmxuYmkxcGJpQjNhWFJvSUhWekxDQjViM1VnWVhKbElHZHBkbWx1WnladVluTndPeUI1YjNWeUlIQmxjbTFwYzNOcGIyNGdZVzVrSUdOdmJuTmxiblFnZEc4Z2MyVnVaQ0I1YjNVZ1pXMWhhV3dnWVc1a0wyOXlJRk5OVXlCMFpYaDBJRzFsYzNOaFoyVnpMaUJDZVNCamFHVmphMmx1WnlCMGFHVWdWR1Z5YlhNZ1lXNWtJRU52Ym1ScGRHbHZibk1nWW05NElHRnVaQ0JpZVNCemFXZHVhVzVuSUdsdUlIbHZkU0JoZFhSdmJXRjBhV05oYkd4NUlHTnZibVpwY20wZ2RHaGhkQ0I1YjNVZ1lXTmpaWEIwSUdGc2JDQjBaWEp0Y3lCcGJpQjBhR2x6SUdGbmNtVmxiV1Z1ZEM0OEwyVnRQand2YzNSeWIyNW5Qand2Y0Q0S0NqeHdQanhoSUdoeVpXWTlJbWgwZEhBNkx5OTNkM2N1WjI5dloyeGxMbU52YlNJK2FIUjBjRG92TDNkM2R5NW5iMjluYkdVdVkyOXRQQzloUGp3dmNENEtDanh3UGladVluTndPend2Y0Q0S0NqeHdQanh6ZEhKdmJtYytVMFZTVmtsRFJUd3ZjM1J5YjI1blBqd3ZjRDRLQ2p4d1BsZGxJSEJ5YjNacFpHVWdZU0J6WlhKMmFXTmxJSFJvWVhRZ1kzVnljbVZ1ZEd4NUlHRnNiRzkzY3lCNWIzVWdkRzhnY21WalpXbDJaU0J5WlhGMVpYTjBjeUJtYjNJZ1ptVmxaR0poWTJzc0lHTnZiWEJoYm5rZ2FXNW1iM0p0WVhScGIyNHNJSEJ5YjIxdmRHbHZibUZzSUdsdVptOXliV0YwYVc5dUxDQmpiMjF3WVc1NUlHRnNaWEowY3l3Z1kyOTFjRzl1Y3l3Z1pHbHpZMjkxYm5SeklHRnVaQ0J2ZEdobGNpQnViM1JwWm1sallYUnBiMjV6SUhSdklIbHZkWElnWlcxaGFXd2dZV1JrY21WemN5QmhibVF2YjNJZ1kyVnNiSFZzWVhJZ2NHaHZibVVnYjNJZ1pHVjJhV05sTGlCWmIzVWdkVzVrWlhKemRHRnVaQ0JoYm1RZ1lXZHlaV1VnZEdoaGRDQjBhR1VnVTJWeWRtbGpaU0JwY3lCd2NtOTJhV1JsWkNBbWNYVnZkRHRCVXkxSlV5WnhkVzkwT3lCaGJtUWdkR2hoZENCM1pTQmhjM04xYldVZ2JtOGdjbVZ6Y0c5dWMybGlhV3hwZEhrZ1ptOXlJSFJvWlNCMGFXMWxiR2x1WlhOekxDQmtaV3hsZEdsdmJpd2diV2x6TFdSbGJHbDJaWEo1SUc5eUlHWmhhV3gxY21VZ2RHOGdjM1J2Y21VZ1lXNTVJSFZ6WlhJZ1kyOXRiWFZ1YVdOaGRHbHZibk1nYjNJZ2NHVnljMjl1WVd4cGVtRjBhVzl1SUhObGRIUnBibWR6TGp3dmNENEtDanh3UGxsdmRTQmhjbVVnY21WemNHOXVjMmxpYkdVZ1ptOXlJRzlpZEdGcGJtbHVaeUJoWTJObGMzTWdkRzhnZEdobElGTmxjblpwWTJVZ1lXNWtJSFJvWVhRZ1lXTmpaWE56SUcxaGVTQnBiblp2YkhabElIUm9hWEprSUhCaGNuUjVJR1psWlhNZ0tITjFZMmdnWVhNZ1UwMVRJSFJsZUhRZ2JXVnpjMkZuWlhNc0lFbHVkR1Z5Ym1WMElITmxjblpwWTJVZ2NISnZkbWxrWlhJZ2IzSWdZMlZzYkhWc1lYSWdZV2x5ZEdsdFpTQmphR0Z5WjJWektTNGdXVzkxSUdGeVpTQnlaWE53YjI1emFXSnNaU0JtYjNJZ2RHaHZjMlVnWm1WbGN5d2dhVzVqYkhWa2FXNW5JSFJvYjNObElHWmxaWE1nWVhOemIyTnBZWFJsWkNCM2FYUm9JSFJvWlNCa2FYTndiR0Y1SUc5eUlHUmxiR2wyWlhKNUlHOW1JR1ZoWTJnZ1UwMVRJSFJsZUhRZ2JXVnpjMkZuWlNCelpXNTBJSFJ2SUhsdmRTQmllU0IxY3k0Z1NXNGdZV1JrYVhScGIyNHNJSGx2ZFNCdGRYTjBJSEJ5YjNacFpHVWdZVzVrSUdGeVpTQnlaWE53YjI1emFXSnNaU0JtYjNJZ1lXeHNJR1Z4ZFdsd2JXVnVkQ0J1WldObGMzTmhjbmtnZEc4Z1lXTmpaWE56SUhSb1pTQlRaWEoyYVdObElHRnVaQ0J5WldObGFYWmxJSFJvWlNCVFRWTWdkR1Y0ZENCdFpYTnpZV2RsY3k0Z1YyVWdaRzhnYm05MElHTm9ZWEpuWlNCaGJua2dabVZsY3lCbWIzSWdaR1ZzYVhabGNua2diMllnWlcxaGFXd2diM0lnVTAxVExpQlVhR2x6SUdseklHRWdabkpsWlNCelpYSjJhV05sSUhCeWIzWnBaR1ZrSUdKNUlIVnpMaUJJYjNkbGRtVnlMQ0J3YkdWaGMyVWdZMmhsWTJzZ2QybDBhQ0I1YjNWeUlHbHVkR1Z5Ym1WMElITmxjblpwWTJVZ2NISnZkbWxrWlhJZ1lXNWtJR05sYkd4MWJHRnlJR05oY25KcFpYSWdabTl5SUdGdWVTQmphR0Z5WjJWeklIUm9ZWFFnYldGNUlHbHVZM1Z5SUdGeklHRWdjbVZ6ZFd4MElHWnliMjBnY21WalpXbDJhVzVuSUdWdFlXbHNJR0Z1WkNCVFRWTWdkR1Y0ZENCdFpYTnpZV2RsY3lCMGFHRjBJSGRsSUdSbGJHbDJaWElnZFhCdmJpQjViM1Z5SUc5d2RDMXBiaUJoYm1RZ2NtVm5hWE4wY21GMGFXOXVJSGRwZEdnZ2IzVnlJR1Z0WVdsc0lHRnVaQ0JUVFZNZ2MyVnlkbWxqWlhNdUlGbHZkU0JqWVc0Z1kyRnVZMlZzSUdGMElHRnVlU0IwYVcxbExpQktkWE4wSUhSbGVIUWdKbkYxYjNRN1UxUlBVQ1p4ZFc5ME95QjBieVp1WW5Od096eG9hV2RvYkdsbmFIUWdZMnhoYzNNOUltTnZiWEJoYm5sVFRWTlFhRzl1WlZWd1pHRjBaU0krYm5Wc2JEd3ZhR2xuYUd4cFoyaDBQaTRnUVdaMFpYSWdlVzkxSUhObGJtUWdkR2hsSUZOTlV5QnRaWE56WVdkbElDWnhkVzkwTzFOVVQxQW1jWFZ2ZERzZ2RHOGdkWE1zSUhkbElIZHBiR3dnYzJWdVpDQjViM1VnWVc0Z1UwMVRJRzFsYzNOaFoyVWdkRzhnWTI5dVptbHliU0IwYUdGMElIbHZkU0JvWVhabElHSmxaVzRnZFc1emRXSnpZM0pwWW1Wa0xpQkJablJsY2lCMGFHbHpMQ0I1YjNVZ2QybHNiQ0J1YnlCc2IyNW5aWElnY21WalpXbDJaU0JUVFZNZ2JXVnpjMkZuWlhNZ1puSnZiU0IxY3k0OEwzQStDZ284Y0Q0OGMzUnliMjVuUGxsUFZWSWdVa1ZIU1ZOVVVrRlVTVTlPSUU5Q1RFbEhRVlJKVDA1VFBDOXpkSEp2Ym1jK1BDOXdQZ29LUEhBK1NXNGdZMjl1YzJsa1pYSmhkR2x2YmlCdlppQjViM1Z5SUhWelpTQnZaaUIwYUdVZ1UyVnlkbWxqWlN3Z2VXOTFJR0ZuY21WbElIUnZPand2Y0Q0S0NqeHZiRDRLQ1R4c2FUNXdjbTkyYVdSbElIUnlkV1VzSUdGalkzVnlZWFJsTENCamRYSnlaVzUwSUdGdVpDQmpiMjF3YkdWMFpTQnBibVp2Y20xaGRHbHZiaUJoWW05MWRDQjViM1Z5YzJWc1ppQmhjeUJ3Y205dGNIUmxaQ0JpZVNCMGFHVWdVMlZ5ZG1salpTWWpNems3Y3lCeVpXZHBjM1J5WVhScGIyNGdabTl5YlNBb2MzVmphQ0JwYm1admNtMWhkR2x2YmlCaVpXbHVaeUIwYUdVZ0puRjFiM1E3VW1WbmFYTjBjbUYwYVc5dUlFUmhkR0VtY1hWdmREc3BJR0Z1WkR3dmJHaytDZ2s4YkdrK2JXRnBiblJoYVc0Z1lXNWtJSEJ5YjIxd2RHeDVJSFZ3WkdGMFpTQjBhR1VnVW1WbmFYTjBjbUYwYVc5dUlFUmhkR0VnZEc4Z2EyVmxjQ0JwZENCMGNuVmxMQ0JoWTJOMWNtRjBaU3dnWTNWeWNtVnVkQ0JoYm1RZ1kyOXRjR3hsZEdVdUlFbG1JSGx2ZFNCd2NtOTJhV1JsSUdGdWVTQnBibVp2Y20xaGRHbHZiaUIwYUdGMElHbHpJSFZ1ZEhKMVpTd2dhVzVoWTJOMWNtRjBaU3dnYm05MElHTjFjbkpsYm5RZ2IzSWdhVzVqYjIxd2JHVjBaU3dnYjNJZ2QyVWdhR0YyWlNCeVpXRnpiMjVoWW14bElHZHliM1Z1WkhNZ2RHOGdjM1Z6Y0dWamRDQjBhR0YwSUhOMVkyZ2dhVzVtYjNKdFlYUnBiMjRnYVhNZ2RXNTBjblZsTENCcGJtRmpZM1Z5WVhSbExDQnViM1FnWTNWeWNtVnVkQ0J2Y2lCcGJtTnZiWEJzWlhSbExDQjNaU0JvWVhabElIUm9aU0J5YVdkb2RDQjBieUJ6ZFhOd1pXNWtJRzl5SUR4emRISnZibWMrUEhOd1lXNGdjM1I1YkdVOUltTnZiRzl5T2lOR1JqQXdNREE3SWo1MFpYSnRhVzVoZEdVZ2VXOTFjaUJoWTJOdmRXNTBMM0J5YjJacGJHVWdZVzVrSUhKbFpuVnpaU0JoYm5rZ1lXNWtJR0ZzYkNCamRYSnlaVzUwSUc5eUlHWjFkSFZ5WlNCMWMyVWdiMllnZEdobElGTmxjblpwWTJVZ0tHOXlJR0Z1ZVNCd2IzSjBhVzl1SUhSb1pYSmxiMllwTGp3dmMzQmhiajQ4TDNOMGNtOXVaejQ4TDJ4cFBnbzhMMjlzUGdvS1BIQStKbTVpYzNBN1BDOXdQZ284YUdsbmFHeHBaMmgwSUdOc1lYTnpQU0pqYjIxd1lXNTVUbUZ0WlZWd1pHRjBaU0krVG1GemRIa2dVR1Z5Wm05eWJXRnVZMlU4TDJocFoyaHNhV2RvZEQ0OFluSWdMejRLUEdocFoyaHNhV2RvZENCamJHRnpjejBpWTI5dGNHRnVlVUZrWkhKbGMzTlZjR1JoZEdVaVBqSXdNelVnVXk0Z1JXRnpkSGR2YjJRZ1JISXVMQ0JYYjI5a2MzUnZZMnNzSUVsTUlEWXdNRGs0UEM5b2FXZG9iR2xuYUhRK1BHSnlJQzgrQ2p4b2FXZG9iR2xuYUhRZ1kyeGhjM005SW1OdmJYQmhibmxRYUc5dVpWVndaR0YwWlNJK0tEZzBOeWtnTkRVNExUUTROVGc4TDJocFoyaHNhV2RvZEQ0OFluSWdMejRLUEdocFoyaHNhV2RvZENCamJHRnpjejBpWTI5dGNHRnVlVVZ0WVdsc1ZYQmtZWFJsSWo1dVlYUmxRRzVoYzNSNWNHVnlabTl5YldGdVkyVXVZMjl0UEM5b2FXZG9iR2xuYUhRKyIsInByaXZhY3kiOiJQSEErUEhOMGNtOXVaejVRVWtsV1FVTlpQQzl6ZEhKdmJtYytQQzl3UGdvS1BIQStQSE4wY205dVp6NVVhR1VnYVc1bWIzSnRZWFJwYjI0Z2NISnZkbWxrWldRZ1pIVnlhVzVuSUhSb2FYTWdjbVZuYVhOMGNtRjBhVzl1SUdseklHdGxjSFFnY0hKcGRtRjBaU0JoYm1RZ1kyOXVabWxrWlc1MGFXRnNMQ0JoYm1RZ2QybHNiQ0J1WlhabGNpQmlaU0JrYVhOMGNtbGlkWFJsWkN3Z1kyOXdhV1ZrTENCemIyeGtMQ0IwY21Ga1pXUWdiM0lnY0c5emRHVmtJR2x1SUdGdWVTQjNZWGtzSUhOb1lYQmxJRzl5SUdadmNtMHVJRlJvYVhNZ2FYTWdiM1Z5SUdkMVlYSmhiblJsWlM0OEwzTjBjbTl1Wno0OEwzQStDZ284Y0Q0OGMzUnliMjVuUGtsT1JFVk5Ua2xVV1R3dmMzUnliMjVuUGp3dmNENEtDanh3UGp4bGJUNVpiM1VnWVdkeVpXVWdkRzhnYVc1a1pXMXVhV1o1SUdGdVpDQm9iMnhrSUhWekxDQmhibVFnYVhSeklITjFZbk5wWkdsaGNtbGxjeXdnWVdabWFXeHBZWFJsY3l3Z2IyWm1hV05sY25Nc0lHRm5aVzUwY3l3Z1kyOHRZbkpoYm1SbGNuTWdiM0lnYjNSb1pYSWdjR0Z5ZEc1bGNuTXNJR0Z1WkNCbGJYQnNiM2xsWlhNc0lHaGhjbTFzWlhOeklHWnliMjBnWVc1NUlHTnNZV2x0SUc5eUlHUmxiV0Z1WkN3Z2FXNWpiSFZrYVc1bklISmxZWE52Ym1GaWJHVWdZWFIwYjNKdVpYbHpKaU16T1RzZ1ptVmxjeXdnYldGa1pTQmllU0JoYm5rZ2RHaHBjbVFnY0dGeWRIa2daSFZsSUhSdklHOXlJR0Z5YVhOcGJtY2diM1YwSUc5bUlFTnZiblJsYm5RZ2VXOTFJSEpsWTJWcGRtVXNJSE4xWW0xcGRDd2djbVZ3Ykhrc0lIQnZjM1FzSUhSeVlXNXpiV2wwSUc5eUlHMWhhMlVnWVhaaGFXeGhZbXhsSUhSb2NtOTFaMmdnZEdobElGTmxjblpwWTJVc0lIbHZkWElnZFhObElHOW1JSFJvWlNCVFpYSjJhV05sTENCNWIzVnlJR052Ym01bFkzUnBiMjRnZEc4Z2RHaGxJRk5sY25acFkyVXNJSGx2ZFhJZ2RtbHZiR0YwYVc5dUlHOW1JSFJvWlNCVVQxTXNJRzl5SUhsdmRYSWdkbWx2YkdGMGFXOXVJRzltSUdGdWVTQnlhV2RvZEhNZ2IyWWdZVzV2ZEdobGNpNDhMMlZ0UGp3dmNENEtDanh3UGp4emRISnZibWMrUkVsVFEweEJTVTFGVWlCUFJpQlhRVkpTUVU1VVNVVlRQQzl6ZEhKdmJtYytQQzl3UGdvS1BIQStQSE4wY205dVp6NVpUMVVnUlZoUVVrVlRVMHhaSUZWT1JFVlNVMVJCVGtRZ1FVNUVJRUZIVWtWRklGUklRVlE2UEM5emRISnZibWMrUEM5d1Bnb0tQRzlzUGdvSlBHeHBQbGxQVlZJZ1ZWTkZJRTlHSUZSSVJTQlRSVkpXU1VORklFbFRJRUZVSUZsUFZWSWdVMDlNUlNCU1NWTkxMaUJVU0VVZ1UwVlNWa2xEUlNCSlV5QlFVazlXU1VSRlJDQlBUaUJCVGlBbWNYVnZkRHRCVXlCSlV5WnhkVzkwT3lCQlRrUWdKbkYxYjNRN1FWTWdRVlpCU1V4QlFreEZKbkYxYjNRN0lFSkJVMGxUTGlBc0xpQkJUa1FnVlZNc0lFbFVKaU16T1R0VElFTlZVMVJQVFVWU1V5d2dSVmhRVWtWVFUweFpJRVJKVTBOTVFVbE5VeUJCVEV3Z1YwRlNVa0ZPVkVsRlV5QlBSaUJCVGxrZ1MwbE9SQ3dnVjBoRlZFaEZVaUJGV0ZCU1JWTlRJRTlTSUVsTlVFeEpSVVFzSUVsT1EweFZSRWxPUnl3Z1FsVlVJRTVQVkNCTVNVMUpWRVZFSUZSUElGUklSU0JKVFZCTVNVVkVJRmRCVWxKQlRsUkpSVk1nVDBZZ1RVVlNRMGhCVGxSQlFrbE1TVlJaTENCR1NWUk9SVk5USUVaUFVpQkJJRkJCVWxSSlExVk1RVklnVUZWU1VFOVRSU0JCVGtRZ1RrOU9MVWxPUmxKSlRrZEZUVVZPVkM0OEwyeHBQZ29KUEd4cFBrMUJTMFZUSUU1UElGZEJVbEpCVGxSWklGUklRVlFnS0drcElGUklSU0JUUlZKV1NVTkZJRmRKVEV3Z1RVVkZWQ0JaVDFWU0lGSkZVVlZKVWtWTlJVNVVVeXdnS0dscEtTQlVTRVVnVTBWU1ZrbERSU0JYU1V4TUlFSkZJRlZPU1U1VVJWSlNWVkJVUlVRc0lGUkpUVVZNV1N3Z1UwVkRWVkpGTENCUFVpQkZVbEpQVWkxR1VrVkZMQ0FvYVdscEtTQlVTRVVnVWtWVFZVeFVVeUJVU0VGVUlFMUJXU0JDUlNCUFFsUkJTVTVGUkNCR1VrOU5JRlJJUlNCVlUwVWdUMFlnVkVoRklGTkZVbFpKUTBVZ1YwbE1UQ0JDUlNCQlEwTlZVa0ZVUlNCUFVpQlNSVXhKUVVKTVJTd2dRVTVFSUNocGRpa2dRVTVaSUVWU1VrOVNVeUJKVGlCVVNFVWdVMDlHVkZkQlVrVWdWMGxNVENCQ1JTQkRUMUpTUlVOVVJVUXVQQzlzYVQ0S0NUeHNhVDVCVGxrZ1RVRlVSVkpKUVV3Z1JFOVhUa3hQUVVSRlJDQlBVaUJQVkVoRlVsZEpVMFVnVDBKVVFVbE9SVVFnVkVoU1QxVkhTQ0JVU0VVZ1ZWTkZJRTlHSUZSSVJTQlRSVkpXU1VORklFbFRJRVJQVGtVZ1FWUWdXVTlWVWlCUFYwNGdSRWxUUTFKRlZFbFBUaUJCVGtRZ1VrbFRTeUJCVGtRZ1ZFaEJWQ0JaVDFVZ1YwbE1UQ0JDUlNCVFQweEZURmtnVWtWVFVFOU9VMGxDVEVVZ1JrOVNJRUZPV1NCRVFVMUJSMFVnVkU4Z1dVOVZVaUJEVDAxUVZWUkZVaUJUV1ZOVVJVMGdUMUlnVEU5VFV5QlBSaUJFUVZSQklGUklRVlFnVWtWVFZVeFVVeUJHVWs5TklGUklSU0JFVDFkT1RFOUJSQ0JQUmlCQlRsa2dVMVZEU0NCTlFWUkZVa2xCVEM0OEwyeHBQZ29KUEd4cFBrNVBJRUZFVmtsRFJTQlBVaUJKVGtaUFVrMUJWRWxQVGl3Z1YwaEZWRWhGVWlCUFVrRk1JRTlTSUZkU1NWUlVSVTRzSUU5Q1ZFRkpUa1ZFSUVKWklGbFBWU0JHVWs5TklFOVNJRlJJVWs5VlIwZ2dUMUlnUmxKUFRTQlVTRVVnVTBWU1ZrbERSU0JUU0VGTVRDQkRVa1ZCVkVVZ1FVNVpJRmRCVWxKQlRsUlpJRTVQVkNCRldGQlNSVk5UVEZrZ1UxUkJWRVZFSUVsT0lGUklSU0JVVDFNdVBDOXNhVDRLUEM5dmJENEtDanh3UGp4emRISnZibWMrVEVsTlNWUkJWRWxQVGlCUFJpQk1TVUZDU1V4SlZGazhMM04wY205dVp6NDhMM0ErQ2dvOGNENVpUMVVnUlZoUVVrVlRVMHhaSUZWT1JFVlNVMVJCVGtRZ1FVNUVJRUZIVWtWRklGUklRVlFnUVU1RUlGTklRVXhNSUU1UFZDQkNSU0JNU1VGQ1RFVWdSazlTSUVGT1dTQkVTVkpGUTFRc0lFbE9SRWxTUlVOVUxDQkpUa05KUkVWT1ZFRk1MQ0JUVUVWRFNVRk1MQ0JEVDA1VFJWRlZSVTVVU1VGTUlFOVNJRVZZUlUxUVRFRlNXU0JFUVUxQlIwVlRMQ0JKVGtOTVZVUkpUa2NnUWxWVUlFNVBWQ0JNU1UxSlZFVkVJRlJQTENCRVFVMUJSMFZUSUVaUFVpQk1UMU5USUU5R0lGQlNUMFpKVkZNc0lFZFBUMFJYU1V4TUxDQlZVMFVzSUVSQlZFRWdUMUlnVDFSSVJWSWdTVTVVUVU1SFNVSk1SU0JNVDFOVFJWTWdLRVZXUlU0Z1NVWWdTRUZUSUVKRlJVNGdRVVJXU1ZORlJDQlBSaUJVU0VVZ1VFOVRVMGxDU1V4SlZGa2dUMFlnVTFWRFNDQkVRVTFCUjBWVEtTd2dVa1ZUVlV4VVNVNUhJRVpTVDAwNlBDOXdQZ29LUEc5c1Bnb0pQR3hwUGxSSVJTQlZVMFVnVDFJZ1ZFaEZJRWxPUVVKSlRFbFVXU0JVVHlCVlUwVWdWRWhGSUZORlVsWkpRMFU3UEM5c2FUNEtDVHhzYVQ1VVNFVWdRMDlUVkNCUFJpQlFVazlEVlZKRlRVVk9WQ0JQUmlCVFZVSlRWRWxVVlZSRklFZFBUMFJUSUVGT1JDQlRSVkpXU1VORlV5QlNSVk5WVEZSSlRrY2dSbEpQVFNCQlRsa2dSMDlQUkZNc0lFUkJWRUVzSUVsT1JrOVNUVUZVU1U5T0lFOVNJRk5GVWxaSlEwVlRJRkJWVWtOSVFWTkZSQ0JQVWlCUFFsUkJTVTVGUkNCUFVpQk5SVk5UUVVkRlV5QlNSVU5GU1ZaRlJDQlBVaUJVVWtGT1UwRkRWRWxQVGxNZ1JVNVVSVkpGUkNCSlRsUlBJRlJJVWs5VlIwZ2dUMUlnUmxKUFRTQlVTRVVnVTBWU1ZrbERSVHM4TDJ4cFBnb0pQR3hwUGxWT1FWVlVTRTlTU1ZwRlJDQkJRME5GVTFNZ1ZFOGdUMUlnUVV4VVJWSkJWRWxQVGlCUFJpQlpUMVZTSUZSU1FVNVRUVWxUVTBsUFRsTWdUMUlnUkVGVVFUczhMMnhwUGdvSlBHeHBQbE5VUVZSRlRVVk9WRk1nVDFJZ1EwOU9SRlZEVkNCUFJpQkJUbGtnVkVoSlVrUWdVRUZTVkZrZ1QwNGdWRWhGSUZORlVsWkpRMFU3SUU5U1BDOXNhVDRLQ1R4c2FUNUJUbGtnVDFSSVJWSWdUVUZVVkVWU0lGSkZURUZVU1U1SElGUlBJRlJJUlNCVFJWSldTVU5GTGp3dmJHaytDand2YjJ3K0NnbzhjRDQ4ZFQ1Q2VTQnlaV2RwYzNSbGNtbHVaeUJoYm1RZ2MzVmljMk55YVdKcGJtY2dkRzhnYjNWeUlHVnRZV2xzSUdGdVpDQlRUVk1nYzJWeWRtbGpaU3dnWW5rZ2IzQjBMV2x1TENCdmJteHBibVVnY21WbmFYTjBjbUYwYVc5dUlHOXlJR0o1SUdacGJHeHBibWNnYjNWMElHRWdZMkZ5WkN3Z0puRjFiM1E3ZVc5MUlHRm5jbVZsSUhSdklIUm9aWE5sSUZSRlVrMVRJRTlHSUZORlVsWkpRMFVtY1hWdmREc2dZVzVrSUhsdmRTQmhZMnR1YjNkc1pXUm5aU0JoYm1RZ2RXNWtaWEp6ZEdGdVpDQjBhR1VnWVdKdmRtVWdkR1Z5YlhNZ2IyWWdjMlZ5ZG1salpTQnZkWFJzYVc1bFpDQmhibVFnWkdWMFlXbHNaV1FnWm05eUlIbHZkU0IwYjJSaGVTNDhMM1UrUEM5d1Bnb0tQSEErSm01aWMzQTdQQzl3UGdvOGFHbG5hR3hwWjJoMElHTnNZWE56UFNKamIyMXdZVzU1VG1GdFpWVndaR0YwWlNJK1RtRnpkSGtnVUdWeVptOXliV0Z1WTJVOEwyaHBaMmhzYVdkb2RENDhZbklnTHo0S1BHaHBaMmhzYVdkb2RDQmpiR0Z6Y3owaVkyOXRjR0Z1ZVVGa1pISmxjM05WY0dSaGRHVWlQakl3TXpVZ1V5NGdSV0Z6ZEhkdmIyUWdSSEl1TENCWGIyOWtjM1J2WTJzc0lFbE1JRFl3TURrNFBDOW9hV2RvYkdsbmFIUStQR0p5SUM4K0NqeG9hV2RvYkdsbmFIUWdZMnhoYzNNOUltTnZiWEJoYm5sUWFHOXVaVlZ3WkdGMFpTSStLRGcwTnlrZ05EVTRMVFE0TlRnOEwyaHBaMmhzYVdkb2RENDhZbklnTHo0S1BHaHBaMmhzYVdkb2RDQmpiR0Z6Y3owaVkyOXRjR0Z1ZVVWdFlXbHNWWEJrWVhSbElqNXVZWFJsUUc1aGMzUjVjR1Z5Wm05eWJXRnVZMlV1WTI5dFBDOW9hV2RvYkdsbmFIUSsifQ==

Terms of Service

Privacy Policy

Core Modal Title

Sorry, no results found

You Might Find These Articles Interesting

T
Please Check Your Email
We Will Be Following Up Shortly
*
*
*