
Did you know nearly half of distinctive motorcycle audio issues stem from simple wire or connection faults—problems that most riders can fix themselves with a methodical approach? From wind-whipped highways to city commutes, your motorcycle audio experience is as vital as your engine’s purr. This comprehensive guide unveils the essential best practices for motorcycle audio system troubleshooting—turning frustrating silence or distortion into great sound that elevates every ride. Whether you’re a weekend enthusiast or daily rider, learn how to transform your sound system’s performance and maximize every note on the open road.
Unlocking Superior Motorcycle Audio: Why System Troubleshooting Matters
The pursuit of optimal sound doesn’t stop at installing a premium motorcycle stereo or high-end motorcycle speakers. Even the most advanced audio systems designed for motorcycles encounter issues: sudden crackling, absent bass, or intermittent shutdowns can disrupt your riding experience. Troubleshooting isn’t just about solving what’s broken—it's about maximizing audio system performance and ensuring your stereo consistently delivers clear sound at any sound level. Whether you’ve invested in a custom range speaker setup or simply tweaked your factory motorcycle audio system, addressing problems early means enjoying uninterrupted music, navigation prompts, and richer soundscapes while you ride. Following best practices for motorcycle audio system troubleshooting empowers riders to pinpoint and resolve problems before they escalate, saving both time and money. Master the art of diagnosing your audio setup, and every journey—be it on the open road or through winding city lanes—is powered by the great sound your bike deserves.

Startling Audio System Performance Facts Every Rider Should Know
Consider this: Studies and technician reports agree that up to 70% of motorcycle audio system failures are due to issues that could have been avoided with simple inspections and routine system checks. Poor connections, faulty ground wires, or misconfigured settings can degrade audio quality—even with advanced components like Bluetooth connectivity or digital signal processors in your system. Audio performance is not just about hardware—environmental factors like background noise, weather, and vibration also play crucial roles. Most motorcycle audio systems are specifically designed for motorcycle environments, but improper troubleshooting and maintenance can negate these design benefits. Implementing systematic checks and upgrades isn’t just recommended—it’s fundamental if you want to preserve high volume and audio quality for the long haul.
What You'll Learn in This Motorcycle Audio System Troubleshooting Guide
- The fundamentals of motorcycle audio system functionality
- Systematic approaches to diagnosing audio system issues
- Expert advice on best practices for motorcycle audio system troubleshooting
- How to boost sound quality and prolong your motorcycle stereo and speakers
- Maintenance steps to maximize audio system life and performance
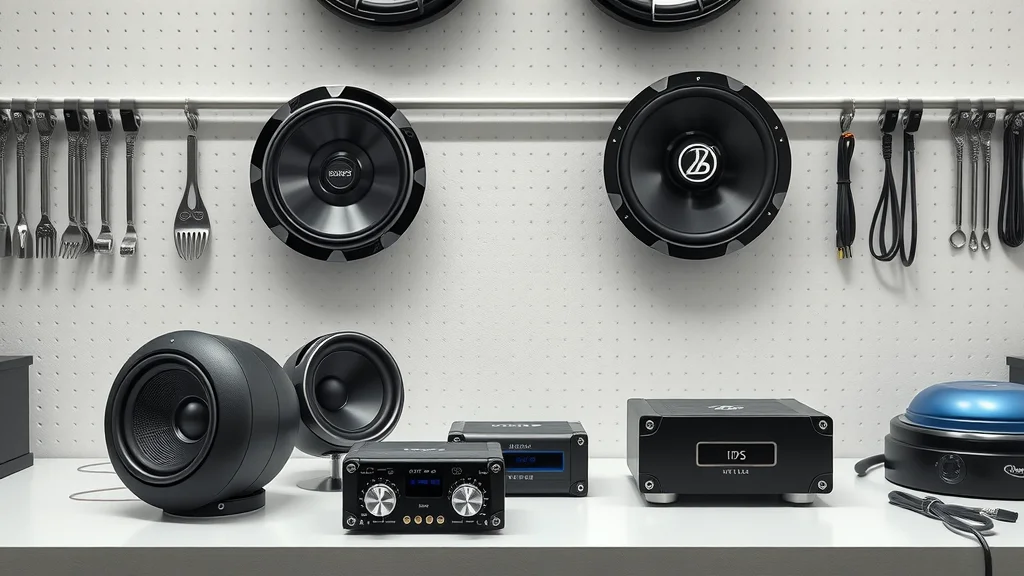
Understanding Your Motorcycle Audio System: Core Components and Functions
To confidently apply best practices for motorcycle audio system troubleshooting, you must first grasp the essential components and their roles in shaping your audio experience. Modern motorcycle audio setups are far more complex than simple radios: they comprise digital signal processors, amplifiers, high-sensitivity motorcycle speakers, and streaming modules—each component affecting your ride’s acoustics. Identifying whether you have a stock motorcycle stereo or an upgraded range speaker system is the first step toward targeted troubleshooting and timely repairs.
As you explore the differences between stock and upgraded audio setups, it's also helpful to understand how regular maintenance and seasonal care can prevent many common audio issues. For a deeper dive into keeping your entire bike in peak condition throughout the year, check out the essential seasonal bike care secrets every rider should know.
Overview of Motorcycle Audio System Architecture
The backbone of any motorcycle audio system is an interconnected web of electronic modules, wiring, and audio sources. A typical architecture includes a head unit (or stereo), amplifiers for driving power, dedicated motorcycle speakers designed for outdoor and high-noise environments, and supportive components such as Bluetooth receivers or USB interfaces. Stock systems, while reliable, are often limited in power and frequency response—they’re designed for mass appeal rather than customized audio quality. In contrast, aftermarket or upgraded systems might include weather-resistant range speakers or high-power amplifiers that can withstand the rigors of the open road. Understanding these architectural differences is crucial for diagnosing problems accurately and tailoring solutions specific to your motorcycle’s configuration.

Key Motorcycle Audio and Speaker Technologies
Audio technology for motorcycles has evolved to keep pace with riders’ demands for high fidelity and versatility under challenging conditions. Most motorcycle speakers are water and dust-resistant by design. Digital signal processing (DSP) electronics manage equalization and reduce distortion caused by wind or background noise. Amplifiers drive higher sound pressure levels, while advanced materials—such as polycone speaker diaphragms and Kevlar surrounds—improve frequency response and durability. Bluetooth connectivity, another breakthrough, now lets riders stream their favorite music, podcasts, or GPS instructions directly from a smartphone, with minimal signal loss. Choosing a sound system that has been specifically designed for motorcycle environments ensures both compatibility and longevity, minimizing common issues like connectivity dropouts or blown speakers at high volume.
Common Audio System Setups: Stock vs. Upgraded
The choice between stock and upgraded audio setups dramatically affects your troubleshooting journey. Factory-installed systems offer baseline dependability, but often lack the wattage, frequency response, and overall audio quality enthusiasts crave on the open road. Upgraded systems commonly include improved speaker placement, higher sound quality, and advanced controls—leading to a richer audio experience but potentially more complex troubleshooting due to added components. When evaluating issues, always note whether modifications or aftermarket gear may introduce unique faults not found in OEM systems—such as mismatched impedance or loose wiring harnesses from custom installs.
| Feature | Stock System | Aftermarket System | Range Speaker Systems |
|---|---|---|---|
| Speaker Material | Plastic/Paper Cone | Polycone, Kevlar, Aluminum | High-grade Polycone/Kevlar |
| Frequency Response | Basic (<20Hz–15kHz) | Wide (20Hz–22kHz+) | Optimized, extended range |
| Maximum Output | Moderate | High Volume Level | Extreme SPL |
| Weatherproof? | Limited | Yes (most models) | Yes (specifically designed) |
| Bluetooth Connectivity | Rare | Common | Optional |
| Customization | None | High (component swaps) | Very High (tuning, placement) |
Preparing for Troubleshooting: Safety and Essential Tools
Before diving into the electrical web beneath your seat or fairing, set yourself up for safe and productive audio system repair. Safety isn’t just a formality—it protects both you and your investment in quality motorcycle audio. Best practices for motorcycle audio system troubleshooting start with assembling the right tools and establishing systematic checkpoints to diagnose, not guess, at the issue.
Safety Best Practices for Motorcycle Audio System Troubleshooting
Always disconnect the battery before probing wiring or connectors to prevent accidental shorts or electric shocks. Wear insulated safety gloves and avoid troubleshooting in wet or poorly lit environments. If your bike was recently running, let it cool before handling any internal components—especially near the amplifier or fuse panel. Avoid using metal tools near exposed terminals and only use manufacturer-recommended test probes or multimeters. If you’re testing with the battery connected, turn the sound system off first to reduce the risk of damaging sensitive digital signal components. Adopting these practices ensures your motorcycle audio system repair process is effective and accident-free.
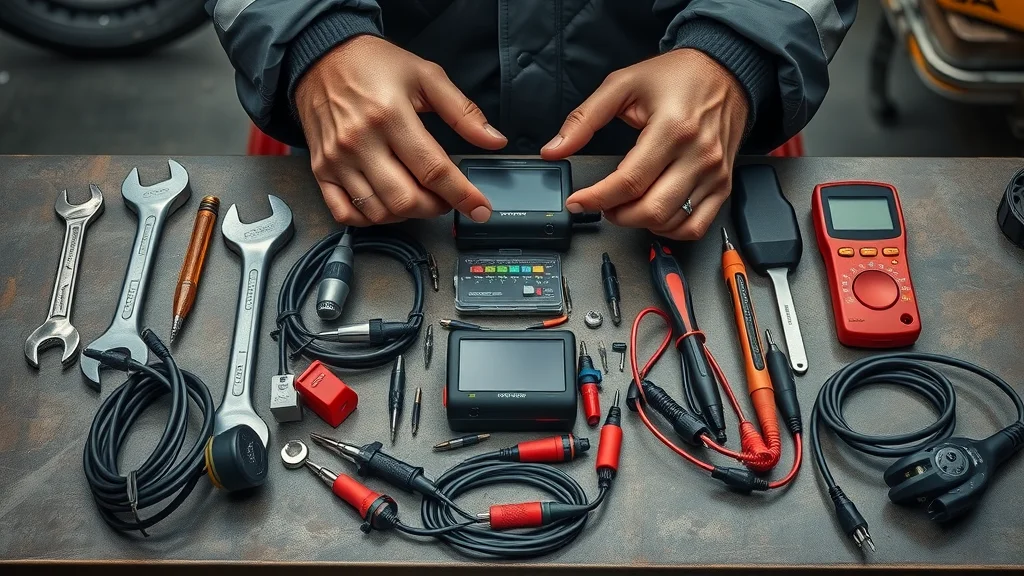
Recommended Diagnostic Tools for Audio Systems
Every successful audio system troubleshooting mission begins with a well-equipped toolbox. At a minimum, you’ll need a quality digital multimeter (for continuity and voltage checks), a set of insulated screwdrivers, wire strippers, crimpers, and a portable test speaker or headphone adapter. Labeling tape and a flashlight also come in handy, particularly when tracing wiring harnesses inside tight fairings or dark corners. Advanced troubleshooting may require an oscilloscope to monitor real-time audio signals, or Bluetooth diagnostic tools for wireless audio systems. Most importantly, always consult the motorcycle stereo or audio system manual for schematics and fuse locations—a simple reference that’s invaluable when identifying signal paths or power faults.
Initial Visual and Functional Checkpoints
Systematic troubleshooting begins with an exterior inspection—look for frayed wires, unsecured connectors, water ingress, or scorched insulation near the amplifier or speaker terminals. Test all audio input sources, from Bluetooth to auxiliary jacks, and check for anomalies (such as missing channels or persistent static). Functionally, confirm the system powers on and off as expected, monitor for overheating, and listen for any inconsistencies in sound quality or volume level across different inputs. Identifying physical flaws or irregular operation during this phase often shortens the entire diagnostic process—spotting faulty connections or broken wires before dismantling the entire audio system.
Step-by-Step Guide: Best Practices for Motorcycle Audio System Troubleshooting
A methodical, stepwise approach is essential—the difference between minutes and hours spent restoring optimal performance to your motorcycle audio system. The following step-by-step troubleshooting practices are drawn from technician field experience and industry recommendations, applicable to stock, upgraded, and custom audio setups alike.
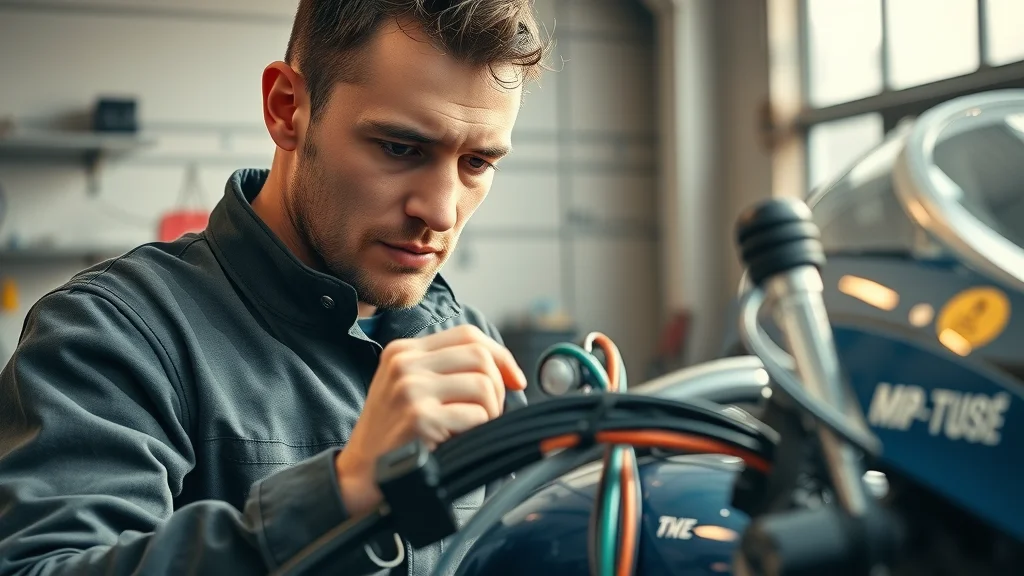
Visual Inspection of Motorcycle Stereo, Wiring, and Connectors
Start with a thorough visual review of all visible stereo and speaker wires. Examine the back of the head unit, amplifier installation, and speaker terminals for corrosion, kinks, fraying, or loose connectors. Water stains, rust, or frayed insulation around connectors often indicate a source of shorts or intermittent audio loss. Gently tug connections to check for hidden breaks and follow wiring harness routing to spot pinched or crushed sections beneath seats or fairing panels. Special attention should be focused on after-market installations, where improper grounding or mismatched connectors are frequent culprits behind persistent motorcycle audio system faults.
Testing Motorcycle Speakers for Sound Quality & Electrical Continuity
Remove or loosen speaker grills to access the wiring directly. Use a digital multimeter to check for electrical continuity between speaker terminals, ensuring readings match expected resistance (typically 2–8 ohms for most motorcycle speakers). Out-of-range values can signal blown drivers or shorted windings. Next, play familiar music or a test tone across the system—and vary the volume level to listen for distortion, crackling, or dead spots. Swap suspected faulty speakers with a known-good test speaker where possible. If the sound is inconsistent, trace backward: the fault might originate from the amplifier, sound system head unit, or connections rather than the speaker system itself.

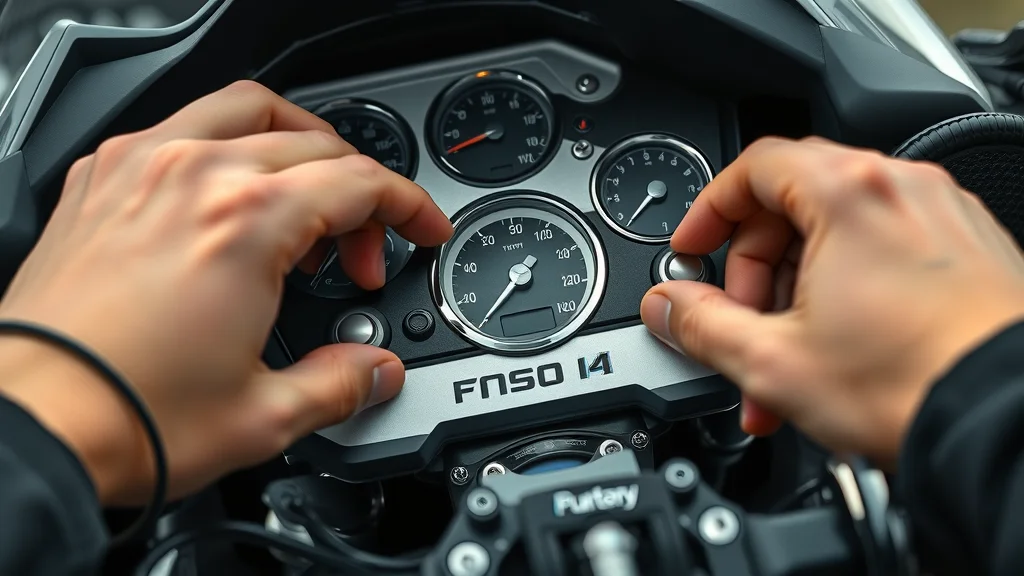
Diagnosing Amplifier, Receiver, and Head Unit Issues
Verify the amplifier and head unit are securely powered and grounded. Cycle through power and volume controls to test for sudden dropouts, flickering displays, or overheat warnings. Use the multimeter to verify expected input and output voltages. If the amplifier is equipped, inspect for reset buttons or circuit breakers—modern digital amps often cut power to protect internal circuits during faults. Disconnect input sources (Bluetooth, USB, auxiliary) and see if the problem persists—isolating the issue can clarify if the fault resides within the audio source or the amplifier/receiver chain. If signals remain weak or the system shuts down at high volume, inspect for compatibility issues, overloaded channels, or incorrect firmware settings in digital units.
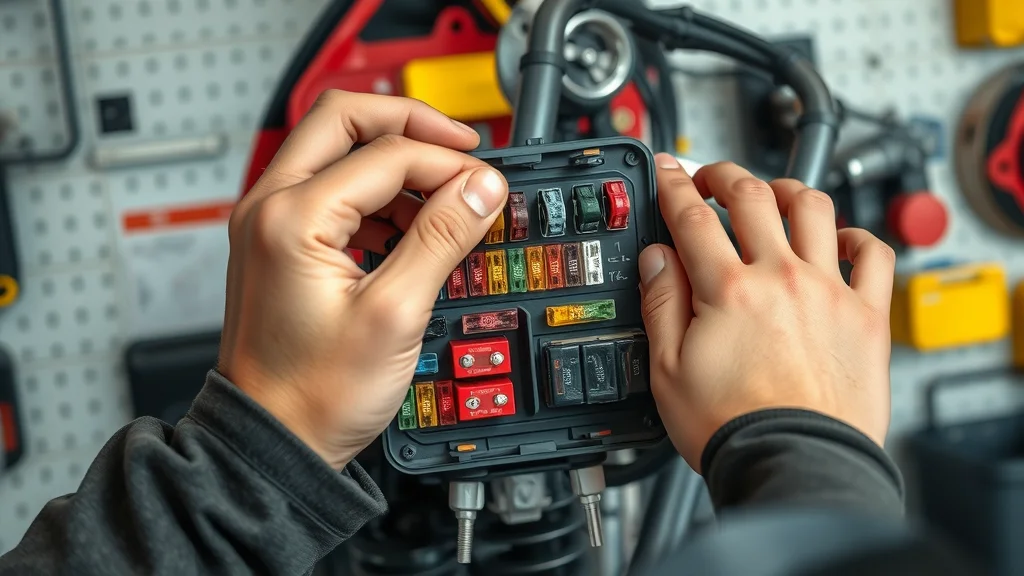
Assessing Motorcycle Audio System Power Supply and Fuses
Persistent audio system failure—even after a visual and functional check—often traces back to the power supply or blown fuses. Locate your fuse box, referencing your owner’s manual if necessary, and visually inspect all audio-related fuses for blackening, fogging, or breaks in the filament. Swap out blown or suspect fuses for new ones of OEM rating. Check battery terminals for corrosion and ensure accessory power lines are secure. In some cases, audio glitches may point to an unstable battery—older batteries often cause system resets, muted audio, or digital signal dropouts especially at startup or under heavy electrical load.
Identifying and Addressing Common Motorcycle Audio System Problems
Troubleshooting can reveal recurring issues that affect motorcycle audio system owners across all makes and models. Here’s how to recognize and fix the most prevalent faults encountered in daily riding—with solutions for both stock and enthusiast-level setups.
Crackling, Distortion, and Other Sound Quality Issues
Symptoms like crackling, muted highs, distorted bass, or unpredictable volume jumps often signal underlying hardware anomalies. Moisture intrusion in connectors, poor speaker placement, or incompatible impedance levels can all degrade sound quality. Tackle these by drying out connectors, re-seating all stereo and speaker wires, and verifying correct phase and polarity between speakers. If distortion only occurs at high volume, consider upgrading wiring gauge or amplifier rating—stock setups are frequently underpowered for modern sound system loads or high-demand range speakers.

Motorcycle Speaker Failure: Primary Causes and Solutions
The chief culprits in motorcycle speaker breakdown are continuous moisture exposure and electrical overloading—both can lead to rapid diaphragm fatigue or outright coil burnout. Inspect speakers for visible tears in the cone, crumbling surrounds, or fuzziness that persists regardless of audio source. Resolving speaker failure usually requires replacing the damaged component and tracing upstream for the original cause—such as leaky seals or mismatched amplifier power. Upgrading to motorcycle speakers that are designed for motorcycle use adds insurance against future failure thanks to improved environmental resistance and power handling.
Motorcycle Stereo No-Sound Scenarios
Dead silence from your motorcycle stereo points to either a power delivery issue (blown fuse, dead battery, or faulty ignition feed), or an audio path fault (disconnected inputs, failed amp, or mute/standby setting enabled). Start at the fuse box, then sequentially test playback from each available input—a working display with no sound often hints at muted outputs or a cooked amplifier channel. For digital or Bluetooth units, reboot the head unit or try pairing with a different device. If all system outputs remain silent, engage a professional technician to check for logic board or firmware corruption—especially if you’ve recently updated system software or firmware.
Expert Insights: Quotes from Leading Motorcycle Audio Technicians
"A systematic approach to troubleshooting not only finds the root cause but often reveals simple solutions that save your audio system."
Enhancing Your Sound System: Tips for Maximizing Audio Experience
- Optimal speaker placement for motorcycle sound systems
- Balancing audio system components for best sound quality
- Regularly scheduled maintenance practices
Positioning your motorcycle speakers for maximum clarity—typically facing toward your ears and away from engine or wind obstructions—heightens both sound quality and effective volume even at highway speeds. Whenever you upgrade or replace a component, recalibrate the system equalizer and volume to ensure the new gear operates in harmony with your setup, securing an optimal sound signature. Establish a routine: visually check connections and wiring every few months, clean exposed connectors, and confirm all input sources work seamlessly—Bluetooth dropouts and static are often the first signs of emerging system issues. Consistent maintenance is the best practice for long-term audio system reliability.
People Also Ask: Best Practices for Motorcycle Audio System Troubleshooting
How to troubleshoot audio systems?
Effective troubleshooting begins with a visual check of your motorcycle audio system and connections, followed by testing each component separately, from speakers to stereo units. Diagnose systematically, eliminating one possible fault at a time for clear results.
What two reasons usually cause speaker failure?
The most common reasons for speaker failure in motorcycle audio systems are exposure to moisture and electrical overload or short circuits. Both factors can damage internal components and degrade performance.
What are the most common motorcycle test fails?
Common test fails include non-functioning speakers, poor sound quality due to incorrect wiring, and system power issues related to battery or fuse faults.
How to reset motorcycle electrical system?
Resetting your motorcycle’s electrical system often involves disconnecting the battery for a few minutes, then reconnecting and checking the audio system for restored function.
FAQs: Best Practices for Motorcycle Audio System Troubleshooting
-
How often should I service my motorcycle audio system?
Every 3-6 months, especially after wet rides or long trips, inspect connections, clean contacts, and run audio tests to catch potential failures early. -
Can aftermarket speakers improve sound quality significantly?
Yes, aftermarket motorcycle speakers are designed for motorcycles and often deliver higher power handling and sound quality compared to OEM units. -
What are common signs my motorcycle audio system needs attention?
Signs include distortion at normal volume, static, channel loss, frequent audio dropouts, or difficulty pairing with Bluetooth sources.
Key Takeaways for Effective Motorcycle Audio System Troubleshooting
- A methodical approach prevents misdiagnosis and ensures long-term reliability
- Regular inspections and timely repairs maximize motorcycle audio performance
- Investing in quality audio system components pays off in sound quality and durability
Ready to Restore Premium Sound? Call Nasty Performance Motorcycle Shop Today: 847-458-4858
Conclusion: Utilize these best practices for motorcycle audio system troubleshooting for consistently high audio quality, a safer ride, and a more memorable riding experience.
For riders who want to go beyond troubleshooting and truly elevate their motorcycle experience, integrating seasonal care into your maintenance routine is a game changer. By understanding how weather and riding conditions impact not just your audio system but your entire bike, you can prevent issues before they start and enjoy peak performance year-round. Discover expert strategies and actionable tips in Seasonal Bike Care Secrets Every Rider Must Know—your next step toward a smoother, safer, and more enjoyable ride in every season.


Write A Comment