cropper
update

Nasty Performance ~ 847-458-4858 

update
  • Blog Home
  • Categories
    • Motorcycle Maintenance
    • Riding Tips & Preps
    • Safety & Inspection
    • Customizations & Upgrades
    • DIY Motorcycle Repairs
    • Motocycle Audio Systems
    • Motocycle Seasonal Care & Storage
    • Engine, Electrical Performance
  • Bike Night
  • Nasty Performance Motorcycle Shop
July 19.2025
1 Minute Read

Tire Maintenance for Motorcycles: Avoid Costly Failures

Did you know that over 50% of motorcycle breakdowns are linked to poor tire maintenance? This easily preventable issue leads to expensive repairs and, more importantly, puts your safety at risk every time you ride. Understanding and practicing proper tire maintenance for motorcycles not only saves you money but ensures every journey is smooth and incident-free. In this comprehensive guide, you’ll discover how routine tire care is your first line of defense against unexpected blowouts, costly damage, and hazardous riding conditions.

Startling Facts About Tire Maintenance for Motorcycles and Preventable Failures

"It’s estimated that over 50% of motorcycle breakdowns are linked to poor tire maintenance—an easily avoidable risk with routine checks and care."

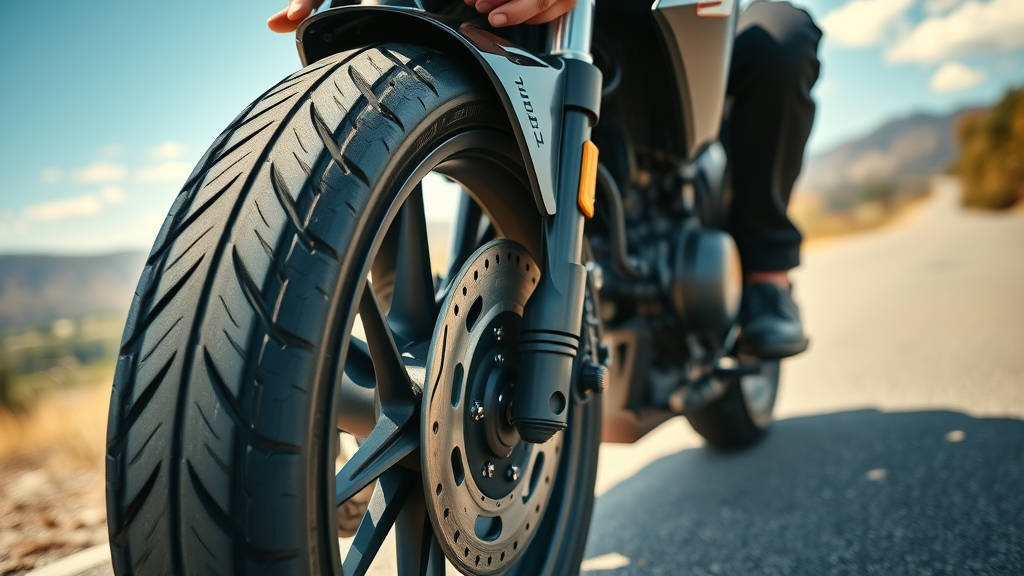
Motorcycle tires are a rider’s only contact point with the road, yet they are often overlooked in regular maintenance routines. Tire maintenance is not simply about extending the life of your tires; it is a cornerstone of rider safety and performance. Countless accidents and sudden tire failures can be traced back to issues like improper tire pressure, uneven tread depth , or unnoticed wear and tear —all preventable with consistent inspection and care. These are not isolated incidents: industry research shows neglected tire maintenance is a primary reason behind tire blowouts and loss of control, often resulting in costly damages and avoidable injuries.

Taking simple, proactive steps—like regularly checking tire pressure, inspecting the sidewall of the tire for cracks, and monitoring tread wear indicators —can dramatically reduce your risk of breakdowns and keep your motorcycle tires in top condition . The good news? These habits are easy to adopt and invaluable for both everyday riders and enthusiasts alike. So, let’s dig into why regular tire checks could be the smartest maintenance routine you add to your riding checklist.

motorcycle tire maintenance modern motorcycle on scenic road rider inspecting front tire

Why Tire Maintenance for Motorcycles is Vital: Safety, Longevity, and Performance

When it comes to motorcycle tire maintenance , every rider’s ultimate goals are safety , prolonged tire life , and consistent performance . Tires that are properly inflated and regularly inspected offer a much better grip on various surfaces, reducing the risk of skidding or sudden loss of control—especially at high speeds or during wet weather. Equally important, diligent tire maintenance ensures a smoother, more controlled ride by minimizing uneven wear, flat spots, or unpredictable handling.

Overlooking basic tasks such as monitoring tread depth or using the correct tire size for your bike model can lead to dangerous conditions or accelerate tire wear. Inadequate care increases the likelihood of experiencing a tire failure at the worst possible moment, endangering both the rider and others on the road. In contrast, regular tire checks add years to your tire’s lifespan, optimize fuel consumption , and help maintain the intended performance characteristics engineered into your motorcycle.

To clarify how crucial these steps are, let’s break down common motorcycle tire maintenance tasks alongside the consequences of neglect, so you see just how much is riding on your attention:

Common Tire Maintenance for Motorcycles Tasks vs. Consequences of Neglect
Maintenance Task Benefits Neglect Consequence
Check tire pressure Improved safety, longer tire life Increased blowout risk
Monitor tread depth Enhanced grip, reduces skidding Loss of traction/wear and tear
Inspect for wear and tear Early issue detection Sudden failures, unsafe riding
Correct tire size Stable handling Unpredictable performance

Comprehensive Guide: Tire Maintenance for Motorcycles

Routine tire maintenance for motorcycles is a process every rider should approach methodically. Start with a thorough inspection—visually and manually—of each tire, paying special attention to the presence of embedded debris, surface cracks, or flat spots . Next, check tire pressure using an accurate gauge at least every couple of weeks, making sure your readings align with manufacturer recommendations for both front tire and rear tire .

Measuring tread depth is equally vital: use a tread depth gauge on several points around the tire to detect any uneven wear patterns or reach the legal minimums. When assessing wear and tear , look for visible cords, sidewall of the tire bubbles, or signs of dry rot—any of which indicate it’s time for outright replacement. Always confirm you’re using the proper tire size for your bike model, as incorrect sizing affects stability and can accelerate uneven wear. Finally, monitor your tire replacement intervals and keep a watchful eye for changes in your bike’s handling that could signal hidden tire issues.

  • Inspecting motorcycle tires: visual and manual checks
  • Checking tire pressure: methods and frequency
  • Measuring tread depth: when and how
  • Identifying and addressing wear and tear
  • Ensuring correct tire size for your motorcycle
  • Tire replacement intervals and what to watch for

motorcycle tire pressure gauge pressed against tire valve with gloved hand

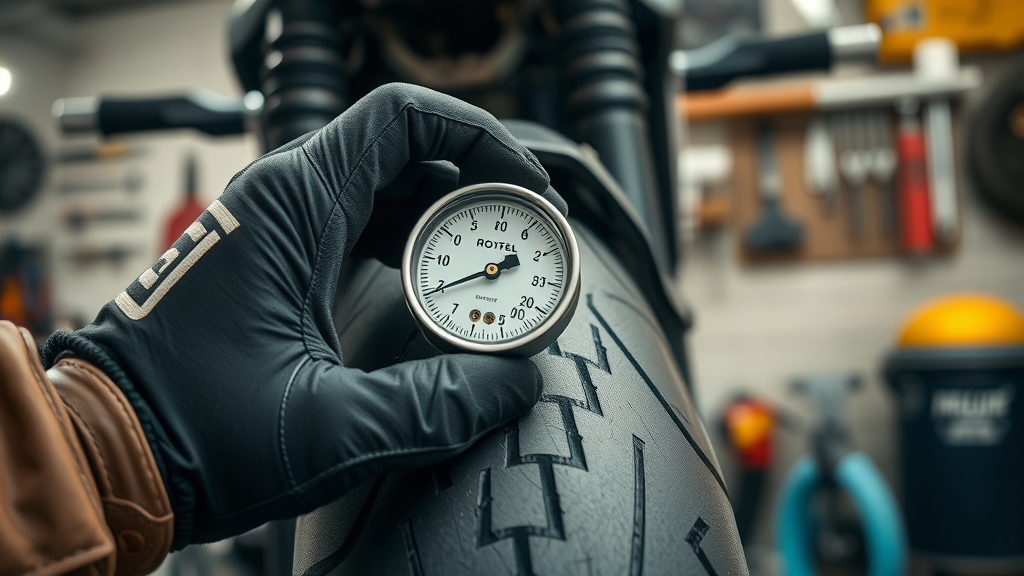
Tire Pressure and Motorcycle Tire Maintenance: Best Practices

Maintaining proper tire pressure is one of the easiest yet most effective tire maintenance steps. Both overinflation and underinflation can have severe impacts—from reducing tire grip and increasing fuel consumption to causing irreversible damage and elevating the risk of a sudden tire failure . Make it a habit to inspect your tire pressure regularly, as even minor changes in temperature or riding style can cause fluctuations.

When checking your tires, always use a quality gauge to ensure accuracy, and adjust inflation to align with the speed rating and load requirements specified for your bike model. Never overlook these seemingly small details: a tire just a few PSI above or below the recommended level may react unpredictably at high speed or under heavy braking, putting a safe ride at stake. Investing in a portable pressure gauge and learning how to use it properly will pay dividends for your bike’s performance and your safety.

How to Check and Maintain Tire Pressure for Motorcycle Tires

"Riding with underinflated motorcycle tires can increase fuel consumption by up to 5%—and drastically decrease your bike’s safe handling capabilities."

Start tire pressure maintenance by letting your motorcycle sit for several hours—measuring pressure on cold tires yields the most reliable readings. Remove the valve cap and use your gauge to record the pressure of both front tire and rear tire . Refer to the owner’s manual or the info sticker on your bike for the proper PSI for your tire size and type. If the pressure is too low, add air in small increments, checking the gauge after each addition. For overinflation, release small amounts of air until you’re within the optimal range.

Remember: tires regularly lose small amounts of pressure, so add this check to your pre-ride routine. Riding with balanced tire pressure improves traction, supports comfortable handling, and minimizes uneven tread wear, ultimately extending the life of your motorcycle tire .

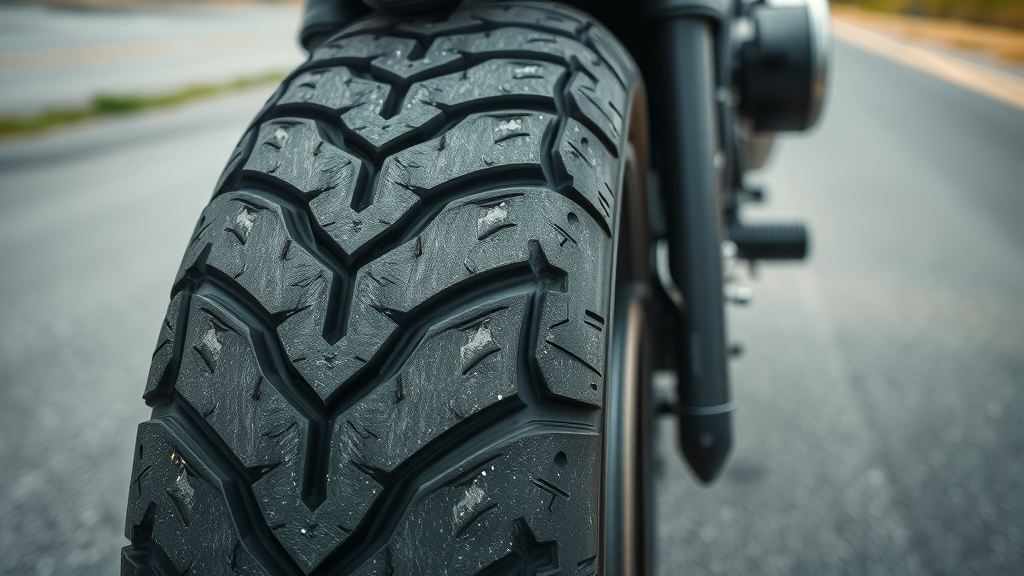
Tread Depth and Wear and Tear: Identifying When Motorcycle Tire Replacement is Needed

Proper monitoring of tread depth and signs of wear and tear are critical for motorcycle safety and top tire performance. Consistent tread depth across the tire provides necessary grip during acceleration, braking, and cornering—especially on wet or slippery surfaces. Once your tread diminishes below 2/32", the risk of tire failure , skidding, or hydroplaning increases substantially, making tire replacement an urgent matter.

Wear and tear come in many forms: check for uneven patches in the tread pattern, exposed cords, bulges on the sidewall of the tire , or visible cracks. These are telltale signs the structural integrity of your motorcycle tires has been compromised. Replacing tires at the first sign of danger is the only way to guarantee a safe ride , so never hesitate if any of these symptoms arise. Remember, preventative action is always less costly than repairs after a blowout.

How to Spot Wear and Tear on Motorcycle Tires

  • Uneven tread patterns
  • Visible cords or sidewall bubbles
  • Tread depth less than 2/32"
  • Dry rot or cracking on sidewalls

worn motorcycle tire showing uneven tread sidewall crack close-up

If you notice any of these symptoms on your tires, schedule an inspection as soon as possible. Ignoring the warning signs for tread wear , dry rot, and bubbles can result in dangerous sudden tire failures . Routinely monitoring your tread depth and acting quickly at the first signs of irregularity will preserve your motorcycle tire investment—and more importantly, your safety.

Determining Correct Tire Size and Ensuring Rear Tire Safety

Selecting the right tire size is essential to achieving reliable, stable handling and avoiding sudden performance issues. The wrong size (or ignoring speed and weight ratings) can strain the rear tire , particularly on powerful or heavily loaded bikes. Consult your owner’s manual or a reputable dealer to match tire size not only to your bike model but also to your typical riding style .

Using a larger or smaller rear tire than recommended can create unpredictable behavior during acceleration and high-speed riding, put excessive wear on the sidewall of the tire , and increase the risk of a sudden tire failure . It’s equally important to pay attention to both speed rating and load capacities—going beyond safe limits can lead to blowouts or rapid tire degradation.

Understanding Rear Tire Requirements and Load Matching

For riders who frequently carry passengers or cargo, ensuring the rear tire matches your bike’s load specifications is critical. Always check the sidewall for the correct speed rating and weight rating. If you mount tires without regard to these engineering requirements, you risk instability and rapid, uneven tread wear , making even a short trip hazardous. Adhering to proper tire sizing, inflation, and load guidelines helps guarantee your motorcycle tires deliver dependable traction and handling, every mile.

Proactively investing in the right tire size for your motorcycle isn’t just about performance—it’s a foundational element of motorcycle tire maintenance . This attention to detail ensures you’ll enjoy a safe ride and avoid the hidden dangers of poor tire selection.

Scheduling Tire Maintenance for Motorcycles: Checklists and Intervals

Establishing a scheduled approach to tire maintenance for motorcycles boosts your odds of catching problems before they become dangerous or expensive. A tire maintenance calendar helps you track routine checks, from tire pressure to full tire replacement . As a rule of thumb, integrate these checks with other routine maintenance tasks—such as oil changes—to make your inspection process efficient and foolproof.

Below is a recommended schedule that balances attentiveness with practicality, ensuring your tires remain in top condition and supporting your safe ride goals. Stick to these intervals to maximize your tire life and reduce the risk of sudden tire failure .

Tire Maintenance for Motorcycles Schedule
Task Minimum Frequency
Tire pressure check Every 1-2 weeks
Tread depth check Monthly
Full tire inspection At every oil change
Tire replacement Every 5,000-12,000 miles

People Also Ask: Tire Maintenance for Motorcycles

How to maintain motorcycle tires?

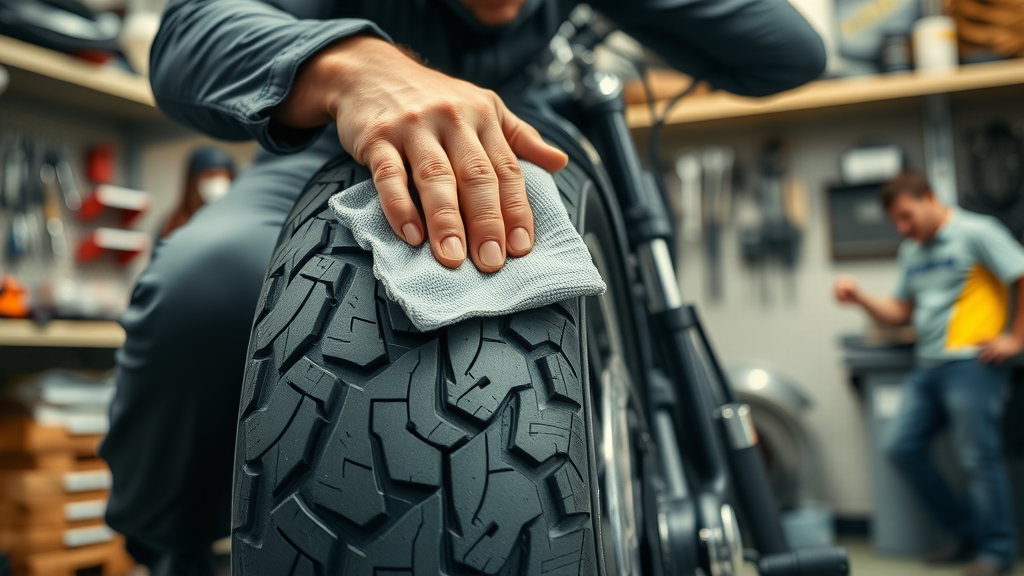
To maintain motorcycle tires, perform regular inspections for punctures, cracks, or bulges; check and adjust tire pressure frequently; monitor tread depth ; clean tires to remove debris; and store the motorcycle in a cool, dry place to prevent degradation. Promptly address any signs of wear or damage —from the sidewall of the tire to the tire’s contact patch—to prevent sudden tire failure . Consistent habits mean your motorcycle tires provide safer rides and better performance.

motorcycle tire cleaning with microfiber cloth in professional workshop

How often are you supposed to change your tires on a motorcycle?

Change motorcycle tires every 5,000 to 12,000 miles , or sooner if there is visible wear , tread depth falls below legal minimums, or if you spot signs of tire damage like dry rot , bulges, or punctures. Frequent riders or those who often ride at high speed may need more frequent tire replacement to maintain a safe ride .

How often do you need to put air in motorcycle tires?

Ideally, check and, if necessary, adjust the air pressure in your motorcycle tires every one to two weeks , since tire pressure can fluctuate with temperature and regular use. Maintaining proper tire inflation supports performance, fuel efficiency, and safety.

How to keep motorcycle tires from dry rotting?

Keep motorcycle tires from dry rotting by storing your bike in a cool, dry environment, using tire covers if the vehicle is outdoors, avoiding prolonged sun exposure, and riding regularly to keep the rubber flexible. Cleaning your tires and keeping them free of chemicals or road salts also helps extend tire life and delays the onset of wear and tear .

covered motorcycle tires parked in cool dry garage environment

Proactive Tire Maintenance for Motorcycles: Preventative Strategies and Tools

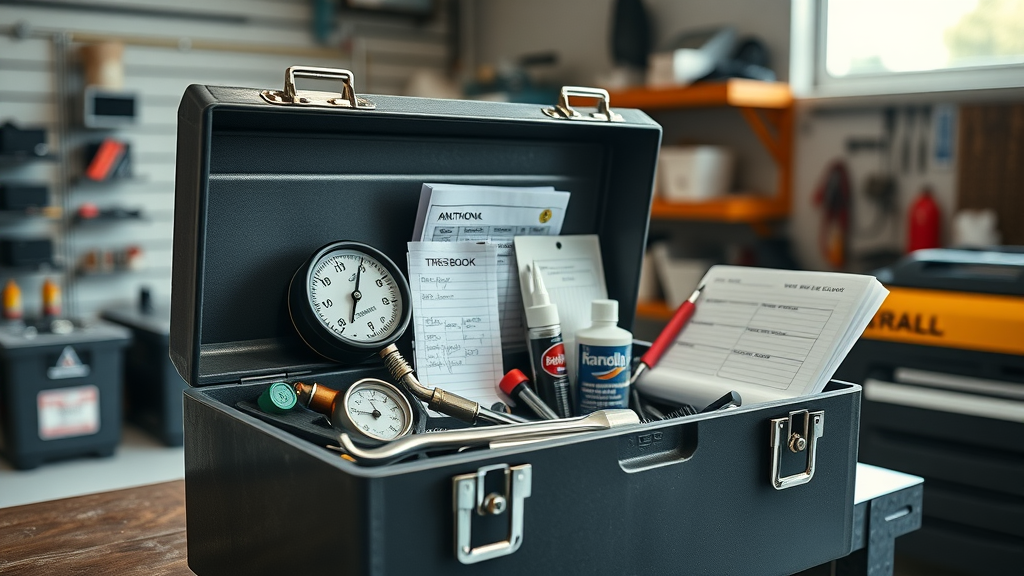
Mastering tire maintenance for motorcycles involves more than routine checks—it also means equipping yourself with the right tools and proactive habits. Invest in a precise tire pressure gauge and a tread depth gauge for accurate measurements. Tire sealants can provide valuable protection against unexpected punctures while on the road, buying you precious time to arrange for a permanent fix.

Keep a written maintenance log, noting every check or change involving your motorcycle tires . This not only helps establish a consistent schedule but also offers insight into patterns of wear and tear , helping you catch small issues before they result in sudden tire failure or unsafe conditions. These simple strategies are the key to maximizing the safety, lifespan, and outright enjoyment of every ride.

  • Use a precise tire pressure gauge for accuracy
  • Invest in a tread depth gauge
  • Consider tire sealants to guard against punctures
  • Follow a written motorcycle tire maintenance log

motorcycle tire maintenance tools pressure gauge tread gauge sealant logbook

Key Expert Insights on Motorcycle Tire Maintenance and Safety

"No matter your bike’s horsepower, tire maintenance for motorcycles stands as your number one defense against accidents caused by unexpected blowouts or slides."

Experienced riders and mechanics agree: neglect in motorcycle tire maintenance is one of the most frequent pre-cursors to on-road emergencies, whether that’s a minor slip or a major blowout. Regardless of your style—whether you cruise leisurely or push the limits at high speed—consistently checking and maintaining the front tire and rear tire is what prevents your ride from becoming tomorrow’s cautionary tale.

Your best insurance policy is proactive action: check tire pressure before every outing, visually inspect all surfaces for wear and tear , and never gamble with tires that show signs of aging or damage. Experts underscore, time and again, that these habits deliver the best possible defense against sudden tire failure —keeping every ride safe and every mile enjoyable.

Frequently Asked Questions About Tire Maintenance for Motorcycles

  • Can you repair a punctured motorcycle tire or should it always be replaced?
  • What signs indicate immediate tire replacement?
  • How does climate affect tire maintenance for motorcycles?

Can you repair a punctured motorcycle tire or should it always be replaced?
Minor punctures in the tread area can often be repaired using a plug or patch, but if the damage is to the sidewall or if the puncture is large, replacement is the safest course. Always follow manufacturer or professional mechanic advice regarding tire repair versus replacement to avoid the risk of sudden failure.

What signs indicate immediate tire replacement?
Replace your motorcycle tires immediately if you see exposed cords, sidewall bulges, any sign of dry rot or severe cracks, tread depth below 2/32", or if the tire repeatedly loses pressure. Also, change tires if the ride feels unstable or if irregular patterns are visible during your inspection.

How does climate affect tire maintenance for motorcycles?
Hot climates can accelerate the breakdown of rubber compounds, leading to quicker development of cracks, while cold weather lowers tire pressure faster. Humid or wet conditions encourage quicker development of dry rot. Adjust your inspection schedule if you ride or store your bike in extreme climates for maximum safety.

Summary: Tire Maintenance for Motorcycles and Next Steps

  • Regular checks of tire pressure, tread depth, and wear and tear are crucial
  • Understand tire size requirements for safety
  • Replace motorcycle tires as soon as damage or significant wear is identified
  • Keep a maintenance schedule to prevent failures and ensure maximum performance

Ready to Master Tire Maintenance for Motorcycles? Call Us Today: 847-458-4858

Take action today: commit to regular tire maintenance for motorcycles , equip yourself with the right tools, and never overlook the signs of trouble. Your best ride starts with safe, well-maintained tires—reach out to our expert team for help or advice at 847-458-4858.

Maintaining your motorcycle’s tires is crucial for safety and performance. For a comprehensive overview, consider reading Wheels & Tires: A Guide to Essential Motorcycle Maintenance , which offers detailed insights into tire pressure, tread depth, and damage inspection. Additionally, Motorcycle Tire Maintenance provides practical advice on tire pressure, tread depth, and overall tire condition. These resources will equip you with the knowledge to keep your motorcycle tires in optimal condition, ensuring a safer and more enjoyable riding experience.

Motorcycle Maintenance

0 Comments

Write A Comment

*
*
Please complete the captcha to submit your comment.
Related Posts All Posts

Common Mistakes with Motorcycle Tire Pressure

While understanding the basics of tire pressure is essential, many riders overlook the importance of adjusting their approach as the seasons change. For a deeper dive into how temperature shifts and seasonal factors can impact your motorcycle’s performance and tire health, explore our guide on seasonal bike care strategies every rider should know. This resource offers practical tips for adapting your maintenance routine year-round. If you’re ready to take your motorcycle maintenance to the next level, don’t stop at tire pressure. Expanding your knowledge of comprehensive bike care—especially as the seasons change—can dramatically improve your ride’s reliability, safety, and longevity. Discover expert insights on preparing your motorcycle for every climate, from winter storage to spring tune-ups, by visiting our in-depth article on seasonal bike care secrets. Investing in a holistic maintenance approach ensures you’re always ready for the road ahead, no matter what the weather brings.

When To Conduct a Motorcycle Clutch Inspection

Did you know most unexpected breakdowns on the road can be traced back to neglected motorcycle clutch inspection? For riders, understanding when and how to check your clutch can mean the difference between a smooth cruise and being stranded unexpectedly. In this complete guide, we reveal why clutch inspection is an essential habit for every motorcycle owner, how to recognize early warning signs, and vital tips for maximizing your bike’s performance and safety. Unveiling the Importance of Motorcycle Clutch Inspection The motorcycle clutch is a vital component responsible for transferring power from the engine to the rear wheel, allowing smooth gear shifts and controlled acceleration. If overlooked, hidden clutch problems often escalate into serious mechanical issues and sudden breakdowns. A timely clutch inspection protects your investment, prevents costly repairs, and ensures the safety of you and your bike. Recognizing the importance of regular inspection is crucial. Clutch problems may begin subtly, with symptoms like a stiff clutch lever or odd vibrations. Many riders ignore these signs, only to face bigger problems later such as clutch slippage, sticking, or total loss of acceleration. By scheduling regular inspections and staying attentive to early warning signs, you greatly extend your clutch’s—and your bike’s—lifespan. "Did you know that neglecting regular motorcycle clutch inspection is one of the leading causes of unexpected breakdowns on the road?" What You'll Learn About Motorcycle Clutch Inspection The key signs indicating the need for a motorcycle clutch inspection Step-by-step process for conducting a clutch inspection How to identify clutch problems before they escalate When to involve a professional versus DIY Expert tips for optimizing clutch lever response and performance Understanding the Role of the Motorcycle Clutch The motorcycle clutch isn’t just a lever—it’s a sophisticated mechanism that manages the delicate transfer of engine power to the road, allowing smooth starts, effortless shifts, and controlled stops. Without the clutch, shifting gears or coming to a stop would be abrupt and potentially damaging. Understanding its role is the first step towards mastering clutch maintenance, helping you prevent clutch problems and optimize performance. Across all types of motorcycles, from dirt bikes to street bikes, the clutch assembly includes multiple crucial parts—clutch plates, friction plates, steel plates, clutch basket, pressure plate, clutch hub, and more. Each plays a pivotal role in the transfer of power and the ride quality. By grasping how the clutch works and recognizing how different components interact, riders become empowered to detect subtle issues before they evolve into major repairs. How the Motorcycle Clutch Functions The clutch operates by compressing or releasing clutch discs and friction plates between the clutch basket and pressure plate. When you pull the clutch lever, the plates separate, breaking the connection between the engine and rear wheel. This action allows you to change gears safely. When you release the lever, the plates re-engage, transmitting power again. Components such as the clutch hub, needle bearing, clutch spring, and clutch basket fingers must be in harmony for seamless operation. Any wear or warping of these parts may trigger issues like clutch drag (when the plates fail to fully disengage) or slippage (when friction plates fail to transfer full power). For hydraulic systems, the clutch’s operation depends on hydraulic fluid pressure. Both mechanical (cable) and hydraulic clutches require regular inspection to avoid progressive damage. Motorcycle Clutch Problems: Common Triggers and Impacts Clutch problems arise from several common sources. Worn clutch plates, warping due to excessive heat, poor cable adjustment, or contaminated hydraulic fluid can all lead to troublesome symptoms. Dirt bikes, for example, often suffer clutch wear from aggressive riding in off-road conditions, while street bikes may see clutch disc glazing from frequent stop-and-go traffic. The impacts of overlooked clutch issues are serious: reduced acceleration, strange noises during shifting, increased lever stiffness, and a slipping clutch that struggles under load. Over time, if the pressure plate and clutch hub are not inspected, you risk damaging the clutch basket or warping steel plates, leading to expensive repairs and compromised safety. Understanding these triggers is vital for effective inspection and preventative maintenance. Essential Timing: When To Conduct a Motorcycle Clutch Inspection Knowing when to conduct a motorcycle clutch inspection is as important as understanding how to perform one. Manufacturers generally recommend inspection intervals based on mileage and riding style, but attentive riders should always be alert to symptoms that demand immediate attention. Regular inspection ensures the clutch plate, friction plate, clutch discs, and related parts remain in proper working order, preserving both safety and motorcycle performance. Inspections aren’t just about distance traveled. They help identify subtle warning signs, prevent breakdowns, and can catch issues such as free play anomalies, cable tension problems, or the onset of rattling sounds. Monitoring your mileage and listening to your bike ensures you address problems before they escalate into larger, more costly repairs. Mileage-Based Motorcycle Clutch Inspection Intervals Most modern motorcycles benefit from a clutch inspection every 6,000 to 12,000 miles. However, your ideal interval varies depending on riding habits and bike type. Aggressive riders, racers, or those who commute frequently in heavy traffic often require more frequent inspections as clutch components wear faster. Dirt bikes may need checked every few months due to tougher conditions, while touring bikes typically have longer intervals. Always consult your owner’s manual for your motorcycle’s recommended service schedule. It’s best to err on the side of caution; if you notice symptoms like a spongy clutch lever, difficulty shifting, or changes in clutch engagement, conduct an inspection regardless of your last service date. Remember, a minor investment of time now can save you from a major repair bill later. Symptoms Suggesting Immediate Clutch Inspection Immediate inspection is warranted whenever you observe notable changes in clutch performance. Classic red flags include suddenly increased clutch lever travel, the presence of gear crunching, a feeling of the clutch slipping (where power delivery is inconsistent), or the emergence of rattling sounds near the clutch cover. Sticky or hard-to-pull levers, vibration under load, or visible clutch disc overheating are further warning signs that demand prompt attention. Pay attention to both how your bike rides and how it sounds. If a once-smooth shift now jerks, or you detect hesitation in power, these may indicate friction plate glazing, warped plates, or issues with the clutch basket or pressure plate. Swift diagnosis helps prevent further damage and ensures safer, more reliable rides. Comparison of Recommended Inspection Intervals by Motorcycle Type Motorcycle Type Recommended Inspection Interval Special Notes Standard/Commuter 6,000–8,000 miles Typical mixed-use conditions Dirt Bike/Off-Road Every 3–6 monthsor after every major ride Check more often due to harsher operating environments Sport Bike (Street) 8,000–10,000 miles More frequent for aggressive riders Touring/Cruiser 10,000–12,000 miles Less stress due to steady, long rides Custom/Performance Varies Inspect after tuning or track events How to Tell if Your Clutch is Bad on a Motorcycle Knowing how to identify a failing clutch can help you act fast and avoid being stranded. Here are common warning signs that indicate serious clutch problems: Difficulty shifting gears A spongy or tight clutch lever Slipping or sticking clutch Strange noises or vibrations Loss of acceleration When the clutch lever becomes hard to operate, or you feel the clutch fails to engage or disengage smoothly, it’s time to inspect for worn clutch plates, stretched cables, low hydraulic fluid, or warping in the pressure plate and clutch hub. Ignoring these problems may worsen wear on internal clutch discs, basket fingers, and may even damage the clutch basket itself. Always treat these symptoms as critical warnings to conduct immediate clutch inspection. What Does a Motorcycle Clutch Inspection Involve? A proper motorcycle clutch inspection consists of various steps, from general checks of the lever and cable to detailed examination of the clutch plates themselves. Both manual and hydraulic system motorcycles require careful assessment to catch issues early and maintain smooth clutch engagement. Inspectors begin by assessing free play at the clutch lever, cable adjustment, and inspecting for leaks or color change if the system is hydraulic. Next, they're looking for excessive play, unusual resistance, or changes in the feel of the lever—key indicators of internal clutch problems. A thorough inspection might include removing the clutch cover for a hands-on check of the clutch plates, friction plate, and basket. Preliminary Checks: Clutch Lever, Cable, and Fluid Start your clutch inspection by checking the free play at the clutch lever. There should be a small, but definite, amount of loose play—too much or too little indicates a need for cable adjustment. Check cable tension for signs of wear or fraying and lubricate as necessary. For bikes with hydraulic clutches, inspect the hydraulic fluid reservoir for proper levels and evidence of contamination or discoloration. Evaluate the smoothness of clutch lever movement. Any sponginess, excessive stiffness, or inconsistent resistance may signal deeper clutch problems. Don't forget to check for leaks in the hydraulic system, as low fluid or air contamination can drastically affect clutch engagement and performance. These preliminary checks set the stage for more detailed inspections if abnormalities are found. Step-by-Step Clutch Plate Inspection on a Motorcycle To check the health of your clutch plates and related components, you need basic tools, patience, and a methodical approach. Begin by ensuring your motorcycle is safely parked, turned off, and the engine is completely cool. Remove the clutch cover to access the clutch basket, pressure plate, clutch discs, and steel plates. Examine each clutch disc and friction plate for visible signs of wear, overheating (discoloration), warping, or grooves on the clutch basket fingers. Using a micrometer, measure the thickness of the plates and compare with manufacturer specifications—any plate thickness below spec means the component must be replaced. Note any uneven wear, chips, or signs of burnt friction surfaces which may indicate improper clutch spring tension or hydraulic problems. Reassemble carefully, ensuring the pressure plate and clutch hub are aligned and all components are torqued to the correct specs. How to Inspect Clutch Plates on a Motorcycle Here is a simplified outline for inspecting the clutch plates on your motorcycle. Always consult your owner’s manual for details specific to your model: Ensure the motorcycle is secured and cool Remove the clutch cover Examine clutch plates for wear, burning, or warping Measure plate thickness and compare to manufacturer specifications Reassemble with proper torque settings "Regular motorcycle clutch inspection helps riders avoid costly emergency repairs and ensures performance and safety on every ride." Top 5 Symptoms of a Bad Motorcycle Clutch Dragging clutch Clutch slippage under load Noisy operation during shifting Stiff or loose clutch lever Irregular clutch engagement If you encounter any of these symptoms, consider them urgent signals for a detailed clutch inspection. Address these issues before they lead to further damage of the clutch hub, basket, or pressure plate components. Expert Tips for Addressing Motorcycle Clutch Problems Handling clutch issues proactively is vital for every responsible rider. Here are actionable tips from seasoned professionals: First, establish a regular schedule for clutch lever and cable inspection. Lubricate moving parts regularly and monitor hydraulic fluid levels for any color or viscosity changes. Store your motorcycle properly and always allow the bike to warm up before demanding rides to prevent thermal shock and warping of the clutch discs and friction plate. When in doubt, consult a trusted mechanic familiar with your motorcycle type. When to Seek Professional Motorcycle Clutch Inspection DIY inspection can handle routine checks and maintenance, but certain issues—such as persistent clutch problems, rattling sounds, or apparent damage to the clutch basket or hub—require a trained eye. If you lack proper tools or are unsure about measurement specs, don’t hesitate to visit a reputable shop. Remember, clutch systems have little room for error, and improper inspection or assembly may worsen the problem. Seek professional inspection if you’re dealing with chronic slippage, noisy operation, excessive free play that cannot be adjusted out, or if you suspect hydraulic system leaks or contamination. It’s always better to be safe and seek help, especially with complex or performance motorcycles. Maintenance Best Practices for Preventing Clutch Problems Prevention is the best cure for clutch issues. Prioritize regular oil changes (especially for wet clutches), keep the cable and lever system free of debris, and follow manufacturer guidelines for clutch adjustment. Periodically check the basket fingers, pressure plate, and friction plate for scoring or grooves. In dry clutches, monitor dust buildup, since excess grime accelerates plate wear and clutch engagement issues. Riding habits also influence clutch longevity. Avoid riding the clutch unnecessarily (such as holding the lever at traffic lights), use smooth and deliberate gear shifts, and refrain from excessive aggressive acceleration. Proper storage and regular cleaning further extend clutch spring, clutch hub, and clutch basket lifespan, translating into smoother, more reliable performance. FAQs: Motorcycle Clutch Inspection and Clutch Problems How often should I inspect my motorcycle clutch? Most manufacturers suggest inspecting your motorcycle’s clutch every 6,000 to 12,000 miles, or more often for aggressive riding, harsh conditions, or older bikes. Always check your owner's manual for your specific model. Can I inspect the clutch myself, or should I go to a professional? Many preliminary checks (like free play and lever movement) and simple inspections can be done at home with basic tools. However, if you notice advanced symptoms like slippage, noise, or suspect internal wear, it’s best to consult a professional mechanic. What clutch problems are most common in modern motorcycles? The most common issues include worn or glazed friction plates, stretched cables, low or dirty hydraulic fluid, and warped steel plates or clutch basket fingers. Is clutch inspection different for dirt bikes versus street bikes? Yes—dirt bikes often require more frequent clutch inspections due to the harsher operating conditions and increased wear from aggressive off-road riding. Street and touring bikes may maintain longer intervals but require equal attention to detail. Key Takeaways from Your Motorcycle Clutch Inspection Timely inspections prolong clutch lifespan Recognizing early symptoms of clutch problems is critical DIY inspection is possible but professional help may be required for complex issues A well-maintained clutch lever ensures safety and smoother rides Contact Trusted Professionals for Your Next Motorcycle Clutch Inspection Ready to keep your bike running smoothly? Protect your investment and never compromise on safety—Call Nasty Performance Motorcycle Shop Today: 847-458-4858 "Protect your investment and never compromise on safety—Call Nasty Performance Motorcycle Shop Today: 847-458-4858" Conclusion: Proactive motorcycle clutch inspections guarantee safer, longer, and more enjoyable rides. Listen to your bike, follow inspection intervals, and trust professionals when in doubt for ultimate peace of mind. While understanding clutch inspection intervals is crucial, it's equally important to adapt your maintenance routine to the changing seasons. For practical advice on how weather and seasonal shifts can impact your bike’s performance and what steps you should take, explore these essential seasonal bike care secrets every rider should know. Mastering clutch inspection is just one part of keeping your motorcycle in peak condition year-round. To truly safeguard your ride and enjoy worry-free journeys, consider how comprehensive seasonal care can further enhance your bike’s reliability and longevity. Discover expert strategies for adapting your maintenance routine to every season and unlock advanced tips that go beyond the basics by visiting our in-depth guide on seasonal motorcycle care. Your next level of riding confidence starts with a holistic approach to maintenance.

Signs You Need Spark Plug Replacement on Your Motorcycle

Did you know that just one worn spark plug can cause your motorcycle’s fuel efficiency to drop by up to 30% and lead to unexpected breakdowns on the road? Unfortunately, many riders overlook simple, inexpensive motorcycle spark plug replacement—a maintenance task that’s absolutely critical for keeping your bike running smoothly, efficiently, and safely. In this guide, you’ll discover why paying attention to your spark plugs is one of the best ways to avoid frustration and costly repairs down the road. A Surprising Fact: The Crucial Role of Motorcycle Spark Plug Replacement While it might seem minor, the motorcycle spark plug is the unsung hero of your bike’s engine. It’s responsible for igniting the air-fuel mixture inside each cylinder, kickstarting powerful combustion and propelling you forward. Yet, most riders don’t realize that a worn or failing spark plug can transform a high-performance machine into a stuttering, temperamental shadow of itself. More alarming, motorcycle spark plug replacement is often overlooked in basic maintenance tasks and only addressed once problems like poor starting, engine misfires, or sluggish acceleration appear. Even modern EFI bikes aren’t immune—sophisticated electronics rely just as heavily on reliable spark plugs. Skipping timely replacement increases overall engine wear, jeopardizes the health of related components like the coil stick and plug wire, and could ultimately result in more extensive repairs. Recognizing the warning signs early and learning the basics of spark plug inspection and replacement can extend your bike’s lifespan, maximize performance, and save money in the long run. Why Motorcycle Spark Plug Replacement Should Never Be Overlooked Neglecting motorcycle spark plug replacement can set off a chain of problems that affect your bike, your wallet, and your safety. When a spark plug fails or starts to degrade, the entire process of combustion falters—causing your engine to run rough, emit strange noises, and even fail at critical moments. Poor spark plug maintenance can also mask underlying issues, like a clogged air filter or improper spark plug gap. Dirty or fouled spark plugs can strain your bike’s fuel delivery, particularly in gas tank systems and EFI bikes. This not only hinders your ride but accelerates wear to expensive parts such as the cylinder head, plug wires, and ground strap. Timely replacement and regular inspection are simple, effective ways to safeguard your investment and ensure every ride is as enjoyable and safe as possible. While spark plug health is vital, it’s just one aspect of keeping your motorcycle in top shape. For a comprehensive approach to maintenance, including how to adapt your care routine throughout the year, check out these seasonal bike care secrets every rider should know for practical tips that go beyond the basics. What You'll Learn About Motorcycle Spark Plug Replacement How to identify symptoms of failing motorcycle spark plugs Why regular motorcycle spark plug replacement is essential for performance Step-by-step methods to check and replace motorcycle spark plugs Expert tips for extending the life of your motorcycle spark plugs Understanding Motorcycle Spark Plug Replacement: What Are Motorcycle Spark Plugs? Motorcycle spark plugs are more than just simple parts—they are engineered to endure intense temperatures and provide a consistent spark at lightning speed with every turn of your engine. Placed on the cylinder head, each spark plug has a central center electrode, a threaded shell, and a precise spark plug gap set between the center and ground electrodes. This gap is where the magic happens: a high-voltage arc jumps, igniting the air-fuel mixture so the engine can run smoothly. Choosing the correct spark plug and keeping it in top condition directly impacts everything from fuel efficiency to engine longevity. Incorrect plug gap or poor installation can lead to misfires, weak combustion, or even damage to your bike’s engine management systems—especially in high-performance and modern EFI motorcycles. Learning how your spark plug functions is the first step to maintaining peak performance. Key Functions of a Motorcycle Spark Plug Ignition of the air-fuel mixture: Spark plugs create the spark necessary to ignite the compressed fuel-and-air blend in your bike’s engine. Maintaining engine efficiency: Consistent, reliable sparks ensure smooth engine operation, balanced fuel burn, and reduced emissions. Contribution to overall motorcycle performance: Well-maintained spark plugs reduce engine vibration, prevent stalling, and help deliver peak horsepower—all critical for a satisfying ride. The Importance of Proper Motorcycle Spark Plug Maintenance Regular motorcycle spark plug maintenance is a key factor in the longevity and power of your engine. Over time, combustion deposits, heat cycling, and improper installation can all impact the ability of a spark plug to transmit voltage efficiently. That’s why checking the plug’s condition—including the spark plug gap, color, and signs of wear—needs to be a routine maintenance practice for every rider. Not only does this help avoid engine trouble, but it also maximizes your investment by preventing unnecessary strain on other maintenance tasks—like air filters, plug boot, and coil stick. Frequent checks with a gap gauge or feeler gauge provide reassurance and ensure your spark plug’s plug gap is neither too wide nor too tight. Adhering to your bike’s service manual for motorcycle spark plug replacement intervals keeps your ride in top shape, reduces emissions, and can even improve your gas mileage—making it a good idea for all riders. Common Signs You Need Motorcycle Spark Plug Replacement Spotting the early warning signs can be the difference between a brisk morning ride and a frustrating day stranded by the roadside. The following symptoms indicate it’s time to check your motorcycle spark plugs and consider a timely replacement: Engine Misfires and Poor Performance If you feel your motorcycle jerking unexpectedly, hesitating under acceleration, or outright misfiring, a worn spark plug could be at fault. Misfires often occur when the plug gap is too wide or coated in carbon, preventing the spark from jumping reliably. This not only affects your motorcycle’s performance but also increases emissions, overworks crucial parts like the coil stick and plug wire, and can cause stubborn engine knock or ping. For both EFI bikes and carbureted engines, smooth power delivery relies on clean, well-gapped spark plugs. Ignoring these symptoms may lead to long-term harm for other sensitive components. Replacing motorcycle spark plugs as soon as misfires are noticed will restore lost power, smooth your ride, and prevent further issues down the line. Trouble Starting Your Motorcycle Difficulty starting your bike—especially in the morning or after long periods of storage—can signal failing motorcycle spark plugs. A weak, corroded, or dirty plug often struggles to ignite the fuel mix, resulting in long cranking times, multiple attempts to start, or complete failure to start. On modern EFI bikes, electronic systems may compensate slightly, but a faulty spark is still a primary culprit for unreliable startups. Another related sign is an engine that stalls immediately after starting or runs very rough until it warms up. Whether you ride a sportbike, cruiser, or a commuter, reliable spark plug performance is essential for consistent starting and safe operation. Decreased Fuel Efficiency Notice that your bike’s gas mileage has suddenly dropped or that you’re filling up more frequently? Decreased fuel efficiency is a classic sign of a spark plug past its prime. When a spark plug misfires or becomes inefficient due to a poor plug gap or carbon buildup, unburnt fuel gets wasted—leaving you with less distance per tank and more frequent stops at the pump. On EFI bikes in particular, sensors will try to compensate for poor combustion, but eventually, inefficient spark will still cost you at the gas station. Regular motorcycle spark plug replacement restores optimal fuel burn, improving economics and extending the life of other precious engine components. Don’t ignore this telltale symptom—it’s your bike’s way of asking for help. Unusual Engine Noises Linked to Motorcycle Spark Plugs Sharp popping, rough idling, or loud backfiring hurts more than just your ears—they’re also warnings that something is wrong with your spark plugs. Chronic fouling or an incorrect spark plug gap can disrupt the firing order and timing, producing clangs, bangs, and unpredictable power delivery. If you hear persistent noise changes after starting, accelerating, or at idle, an immediate inspection and spark plug change is a smart move. These sounds might also signal problems with the plug boots or plug wires, which should always be checked together with the spark plug itself. Early intervention preserves engine health and prevents inconvenient breakdowns. How to Inspect Motorcycle Spark Plugs Before Replacement What to look for when checking spark plug wear: Examine the ceramic insulator for cracks, chips, and discoloration. Carbon or oil deposits on the tip can indicate incomplete combustion or worn engine parts. Watch the ground electrode—excessive wear, melted edges, or a rounded tip means it’s time to replace. Understanding carbon deposits and residue: Carbon fouling appears as thick, sooty deposits on the plug’s tip, often the result of a rich fuel mixture, short trips, or a worn air filter. Oil residue points to internal oil leaks or worn piston rings, while a clean, tan or grayish tip signals good combustion. Color and gap inspection tips for motorcycle spark plug replacement: Always use a gap gauge to check the distance between the center and ground electrodes. Deviations from the manufacturer’s plug gap recommendation can prompt misfiring and reduced efficiency. Adjust carefully—never force or bend the ground strap excessively. Step-by-Step Motorcycle Spark Plug Replacement Guide Taking the leap to replace your own motorcycle spark plugs can feel intimidating, but with preparation and the right tools, it’s a straightforward maintenance task. Follow these essential steps: Tools and Safety Tips for Motorcycle Spark Plug Replacement Before you begin, gather the right equipment: Spark plug socket (sometimes called a plug socket) and compatible ratchet Gap gauge or feeler gauge for checking the plug gap Torque wrench (for proper installation torque) Gloves and safety glasses to protect your hands and eyes Compressed air or canned air to clear debris around the plug well Your bike’s service manual for specifications and procedures Work on a cool engine to avoid burns. Use compressed air to blow dirt away from the spark plug area—prevents debris from falling into the cylinder head when removing the plugs. Never work without gloves or eye protection; debris can dislodge quickly, especially in older bikes or those with recessed plugs. Always ensure a good connection with the plug boot and avoid overtightening the new spark plug—using a torque wrench is the best way to apply just the right pressure without damaging delicate threads or the cylinder head. Removing Old Motorcycle Spark Plugs 1. Disconnect the plug boot or coil stick gently (in modern EFI bikes). 2. Use a clean, dry cloth or canned air to clear dust and particles around the old plug. 3. Fit your spark plug socket over the plug and twist counterclockwise to unscrew. 4. Pull the plug out and observe its tip for deposits, oil, or abnormal wear. Grip the plug firmly but avoid using excessive force that could damage threads or the cylinder head. If you encounter resistance, add a small bit of penetrating oil and wait a few minutes before trying again. Be mindful of access to the plug—on some models, parts like the tank or fairings may need to be loosened or removed. Installing New Motorcycle Spark Plugs Correctly 1. Compare the new spark plug with the old to verify type, length, and thread pattern. 2. Use a gap gauge to check the gap. Gently bend the ground electrode if needed, following the specification in your bike’s service manual. 3. Thread the new spark plug by hand into the cylinder head—avoid cross-threading. 4. Once finger-tight, use the spark plug socket and torque wrench to snug the plug to the correct torque specification. 5. Reconnect the plug boot or coil stick, ensuring a solid connection. Don’t forget to inspect and clean plug wires or replace them if they show signs of wear. Double-check that all tools are removed from the work area before starting the engine. Finally, test start the bike—listen for smooth idle, and verify there are no engine warning lights or unusual noises. Expert Quotes on Motorcycle Spark Plug Replacement "Regular motorcycle spark plug replacement is critical for smooth rides and engine longevity. Neglecting this simple component can lead to costly repairs down the line." — Motorcycle Engine Specialist Motorcycle Spark Plug Replacement Maintenance Table Signs of Faulty Spark Plug Inspection Frequency Recommended Action Difficulty Starting Every 3,000 miles Replace if worn Rough Idling Every 5,000 miles Clean or replace Drop in Power Every 5,000 miles Inspect for carbon buildup List of Top Tips to Extend Motorcycle Spark Plug Life Use manufacturer-recommended motorcycle spark plugs Stick to regular maintenance intervals listed in your service manual Avoid short, infrequent trips—engines run best when fully warmed up Always check for proper plug gap and careful installation Watch: High-Resolution Motorcycle Spark Plug Replacement Walkthrough Video demonstration features a professional mechanic inspecting, removing, and installing spark plugs in a clean workshop with close-up detail and slow-motion highlights. See first-hand exactly how the process should look for your own bike. Motorcycle Spark Plug Replacement: FAQs How often should spark plugs be changed on a motorcycle? Most motorcycle manufacturers recommend changing spark plugs every 5,000 to 10,000 miles, but this interval can vary by model and riding style. Always refer to your owner’s manual for the exact schedule, and inspect motorcycle spark plugs regularly for early signs of wear. Which bike is most liked by girls? Bikes such as the Honda Activa, Royal Enfield Classic 350, and Yamaha Fascino are popular among women riders due to their approachable seat heights, ease of handling, and stylish design. Preferences can vary greatly—comfort and confidence often play the biggest roles. What is the most sold motorcycle of all time? The Honda Super Cub holds the record as the world’s most sold motorcycle, known for its reliability, outstanding fuel efficiency, and massive global presence. Is it easy to change a motorcycle spark plug? With the right tools, a little know-how, and proper safety precautions, changing a motorcycle spark plug is a manageable DIY task. Always follow your bike’s service manual, use a spark plug socket, and ensure the gap is set accurately for the best results. People Also Ask How often should spark plugs be changed on a motorcycle? Answer to: How often should spark plugs be changed on a motorcycle? For most street bikes, spark plugs should be inspected every 5,000 miles and replaced as needed—especially if you notice starting trouble, rough idling, or performance dips. For high-performance models or those under heavy use, check them more frequently. Which bike is most liked by girls? Answer to: Which bike is most liked by girls? The most liked bike among girls often includes user-friendly, lightweight scooters like Honda Activa or Yamaha Fascino, followed closely by style-conscious models such as the Royal Enfield Classic series. Comfort and ease of handling tend to guide choices for many female riders. What is the most sold motorcycle of all time? Answer to: What is the most sold motorcycle of all time? Globally, the Honda Super Cub is recognized as the top-selling motorcycle, beloved for its simplicity and dependability across generations of riders. Is it easy to change a motorcycle spark plug? Answer to: Is it easy to change a motorcycle spark plug? Yes—if you have basic mechanical skills and access to simple tools like a spark plug socket, gap gauge, and your bike’s service manual, replacing your spark plug is a practical DIY project for most owners. Key Takeaways for Motorcycle Spark Plug Replacement Recognize early warning signs of spark plug trouble Follow inspection and maintenance schedules consistently Always use the right tools and methods for replacement Don’t hesitate to seek expert help if unsure Ready for Your Motorcycle Spark Plug Replacement? Call Nasty Performance Motorcycle Shop Today: 847-458-4858 If you’re committed to keeping your motorcycle running at its best, don’t stop with spark plug maintenance alone. Expanding your knowledge of seasonal care can help you anticipate issues before they arise and ensure your bike is always ready for the road, no matter the weather. Discover expert strategies for year-round reliability and performance by exploring essential seasonal bike care tips. With the right approach, you’ll not only extend the life of your spark plugs but also protect every aspect of your ride for the long haul.

Terms of Service

Privacy Policy

Core Modal Title

Sorry, no results found

You Might Find These Articles Interesting

T
Please Check Your Email
We Will Be Following Up Shortly
*
*
*