cropper
update

Nasty Performance ~ 847-458-4858 

update
  • Blog Home
  • Categories
    • Motorcycle Maintenance
    • Riding Tips & Preps
    • Safety & Inspection
    • Customizations & Upgrades
    • DIY Motorcycle Repairs
    • Motocycle Audio Systems
    • Motocycle Seasonal Care & Storage
    • Engine, Electrical Performance
  • Bike Night
  • Nasty Performance Motorcycle Shop
October 27.2025
1 Minute Read

Motorcycle Tire Check Autumn: Spot Issues Before It’s Too Late

Did you know that over 50% of motorcycle accidents in autumn are related to tire issues ? As the crisp air of autumn settles in, so do unique hazards: wet leaves, varying temperatures, and unpredictable road surfaces. This changing landscape makes a thorough motorcycle tire check autumn not just wise—but essential. In this comprehensive guide, you’ll discover practical steps, must-know checklists, and expert tips to safeguard every autumn ride.

Autumn Motorcycle Tire Check: Essential for Safe Riding

The autumn months present motorcycle riders with beautiful scenery but also sudden risks such as slippery due to wet leaves and shifting road surface conditions. Performing a detailed motorcycle tire check autumn is your first line of defense. Let’s face it—when temperatures drop and daylight hours shorten, the combination of cold weather and damp roads increases the chance for loss of traction. Practical examples show that something as minor as under-inflated tires or missed signs of wear can turn a scenic ride into a hazardous journey. To ensure safer riding through the ever-changing conditions of the season, a comprehensive check is a non-negotiable part of your autumn routine.

Consider the impact of early morning dew and falling leaves —both of which can swiftly alter the state of the road surface . Proper tire care is crucial not only for maintaining grip in wet conditions but also for prolonging the life and performance of your motorcycle tires . By giving attention to your tires at the start of the riding season, you proactively minimize risks, sidestepping roadside emergencies and ensuring that every ride is a pleasure. Make this autumn the season you prioritize tire safety on every ride.
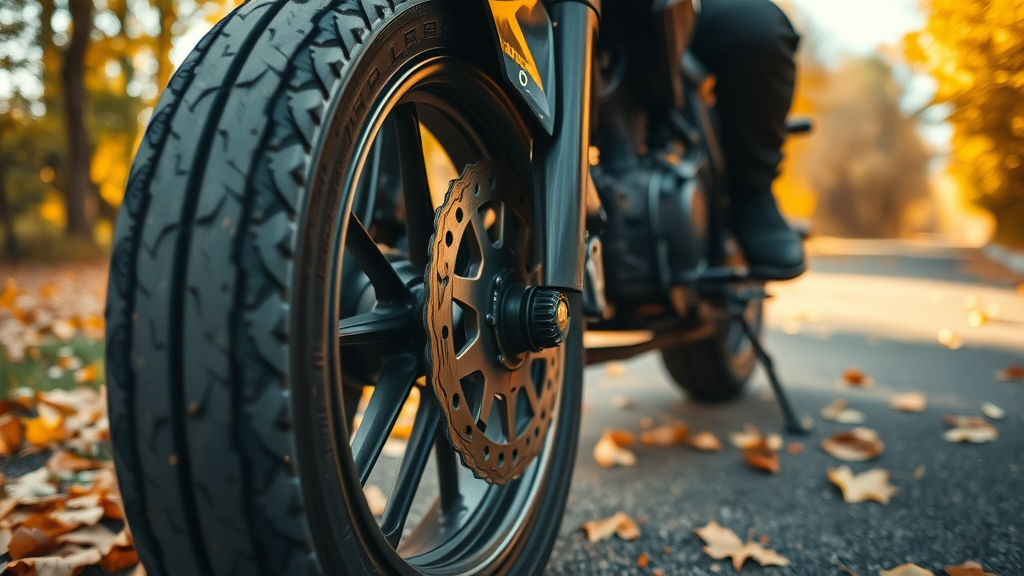
motorcycle tire check autumn, close-up of motorcycle’s front tire, attentive rider inspecting tire, vivid autumn landscape, crisp tire tread detail

Did You Know? Over 50% of Motorcycle Accidents in Autumn Involve Tire Issues

Startling as it may sound, a significant percentage of all autumn motorcycle accidents are traced back to avoidable tire problems. This alarming fact underlines why tire pressure , tread depth, and sidewall condition are more than just maintenance—they’re a matter of safety and even survival. By recognizing the unique risks of the time of year , you gain the compelling motivation to act before it’s too late.

Prevention is always preferable to recovery, especially when it comes to a critical safety component like your motorcycle tire. Riders who regularly check your tire in autumn report fewer accidents and smoother, more predictable rides. Take this seriously—not just for yourself, but for everyone who shares your route.

Why a Motorcycle Tire Check in Autumn Matters

Autumn brings a perfect storm of factors that challenge even the most experienced riders. From the accumulation of wet leaves to cooler days that can cause tire pressure to fluctuate, the need for a routine motorcycle tire check autumn becomes increasingly important. During this season, your tires must adapt to varying temperatures, moisture, and sometimes unseen debris, which can compromise performance or safety if left unchecked.

Neglecting tire care during the autumn riding season is risky. Low motorcycle tire pressure can reduce both traction and responsiveness, especially as pavement cools. Likewise, tires with worn treads are more prone to slipping on damp or leaf-littered road conditions . Making a habit of checking your tires before every ride isn’t just for peace of mind—it can be the critical difference between a smooth stop and a dangerous slide.

  • Improved safety and stability in unpredictable autumn weather

  • Enhanced tire pressure retention for optimal handling

  • Detection of signs of wear and early tire aging

  • Extended lifespan for motorcycle tires due to proactive maintenance

  • Reduced risk of breakdowns in remote locations
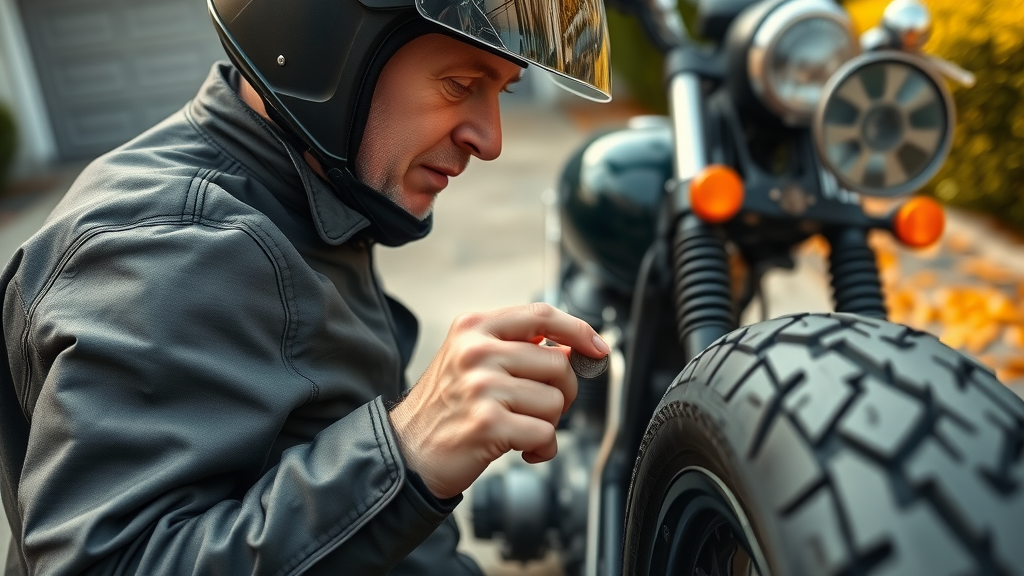
motorcycle tire check autumn, mature rider checking tire tread with coin, autumn driveway setting, sense of safety and inspection

Motorcycle Tire Safety: The Fundamentals for Autumn

The foundation of autumn motorcycle safety begins with understanding core tire care fundamentals. Every rider, regardless of experience or riding style , needs to know how to objectively assess tire condition and performance. This means knowing the signs of tire aging, monitoring for physical damage, and maintaining the ideal tire pressure for your specific motorcycle.

Changes in weather conditions —like colder temperature swings between day and night—demand regular checks. A little diligence goes a long way. Get into the routine of inspecting before each trip, focusing on critical areas like tread wear, tire sidewalls, and valve stems. With proper maintenance and a systematic approach, you’ll enjoy longer-lasting tires and a much safer autumn riding experience.

Key Motorcycle Tire Check Autumn Point Checklist

Check Point

What to Look For

Tread Depth

Minimum 2/32” depth; visible tread wear indicators

Tire Pressure

Refer to owner’s manual; check when cold

Inflation

Consistent PSI in both tires, adjust for temperature changes

Age

Replace tires older than 5-6 years

Sidewall Condition

Look for cracks, cuts, or bulges

Valve Integrity

No leaks, cracks, or valve stem rot

How to Check Your Tire Pressure for Autumn Rides

Checking your motorcycle tire pressure is the simplest step you can take for autumn safety. Tire pressure directly influences your grip, braking, and ability to navigate unexpected hazards like wet conditions or sudden drops in temperature. A well-inflated tire provides maximum surface contact with the road, giving you reliable traction whether you’re cruising on open highways or winding through suburban neighborhoods.

To ensure accuracy, always check your tire pressure when the tires are cold—that is, before you start riding. This ensures you get an accurate reading, as pressure rises once the tires heat up during use. Use a high-quality, motorcycle-specific gauge and always follow your motorcycle manufacturer’s recommended PSI for both front and rear tires. Checking tire pressure should be a routine step, not an afterthought, especially as temperatures shift throughout the autumn riding season.
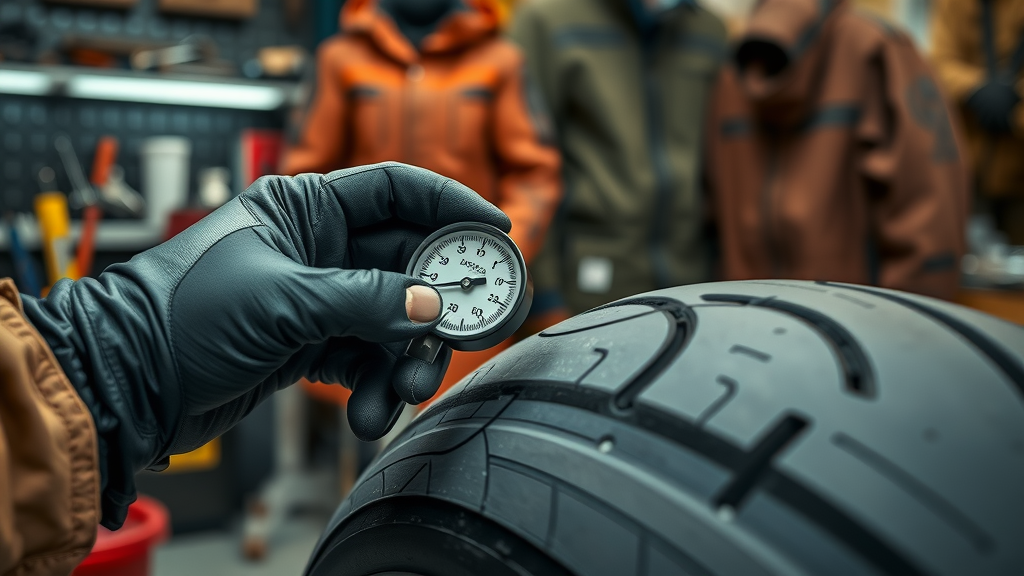
motorcycle tire check autumn, gloved hand using tire pressure gauge on motorcycle tire in autumn garage setting

Correct Tire Pressure Guidelines for Different Motorcycle Tires

Different motorcycles require different tire pressures. For example, sport bikes may need anywhere from 32-42 PSI, while cruiser or touring models might require slightly lower or higher values, depending on load and manufacturer specifications. Don’t rely solely on the tire’s sidewall marking; check your owner’s manual for precise numbers. Remember, improperly inflated tires—either over or under—can lead to uneven wear, poor braking, and a higher risk of losing control on damp or leaf-littered roads.

Ignoring proper inflation can cause tires to wear prematurely along the edges (under-inflation) or in the center (over-inflation). Both conditions can increase your risk, particularly during autumn weather changes. When in doubt, *consult a trusted professional* before embarking on longer journeys.

Practical Steps: How to Check Your Tire Pressure Accurately

Before every ride, follow these steps for a spot-on motorcycle tire pressure check:

  1. Park your motorcycle on level ground. Let the tires cool down for at least an hour if you've just returned from a ride.

  2. Remove the valve cap and use a digital or analog pressure gauge suited for motorcycles. Press firmly, ensuring no hissing or escaping air for the most accurate reading.

  3. Compare your gauge’s reading to the PSI range listed in your owner’s manual, not what’s printed on the tire’s sidewall.

  4. Adjust as necessary. If the tire pressure is too low, add air in small increments. If it’s too high, deflate until you reach the target PSI. Always double-check your work.

  5. Replace the valve cap tightly and repeat the process for the second tire.

Maintaining proper tire pressure, especially in autumn’s fluctuating weather conditions , is one of the easiest and most effective ways to ensure a safe ride.

The Importance of Tire Inflation for Autumn Motorcycle Safety

Maintaining proper tire inflation is equally important as checking pressure. Under-inflated tires build up excess heat, which weakens structural integrity and increases your risk of a blowout. Over-inflated tires reduce the amount of tire surface that contacts the pavement, which can spell disaster when traversing road surfaces littered with slick leaves.

Many autumn accidents can be traced back to neglected tire inflation checks. Tire pressure naturally decreases as temperatures drop, so a reading that was perfect in summer may be dangerously low in October. Take two minutes before each ride to prioritize inflation, especially during this time of year. Prevention is always easier than dealing with a roadside repair in fading daylight hours.

"A neglected tire in autumn is a risk to every ride. Prevention starts with a simple pressure check." – Motorcycle Safety Expert

How to Check Your Tire for Wear, Damage, and Aging in Autumn

Tire aging and physical wear are silent threats—easy to miss but catastrophic if left unchecked. Begin by visually inspecting the tread for uneven wear patterns, cracks, or foreign objects. Sidewall bulges, dry rot, and embedded debris are warning signs that your motorcycle tires need attention immediately.

With each passing season, tire rubber becomes less elastic and more prone to stress fractures or punctures. If you ride year-round or store your motorcycle during the off-season, always inspect for flat spots or dry rot before venturing out. By establishing a habit of motorcycle tire check autumn at the start of every season, you greatly reduce the risk of tire-related breakdowns and accidents.

Identifying Tread Depth: Understanding the Penny Test for Motorcycle Tires

One of the simplest ways to determine if your tire has enough tread for safe autumn riding is the classic ‘penny test.’ Insert a penny into several tread grooves across the tire, with Lincoln’s head facing down. If you see the top of Lincoln’s head at any point, your tread is too shallow—replace the tire. Tread below 2/32” is inadequate for handling wet conditions and poor road surfaces common in fall.

Riding in autumn’s unpredictability with insufficient tread is asking for trouble. Adequate tread channels water away from the tire, helping maintain grip even when crossing wet leaves or early morning dew. And don’t forget—if the penny test signals new tires, act before the next ride. Waiting is a gamble not worth taking.
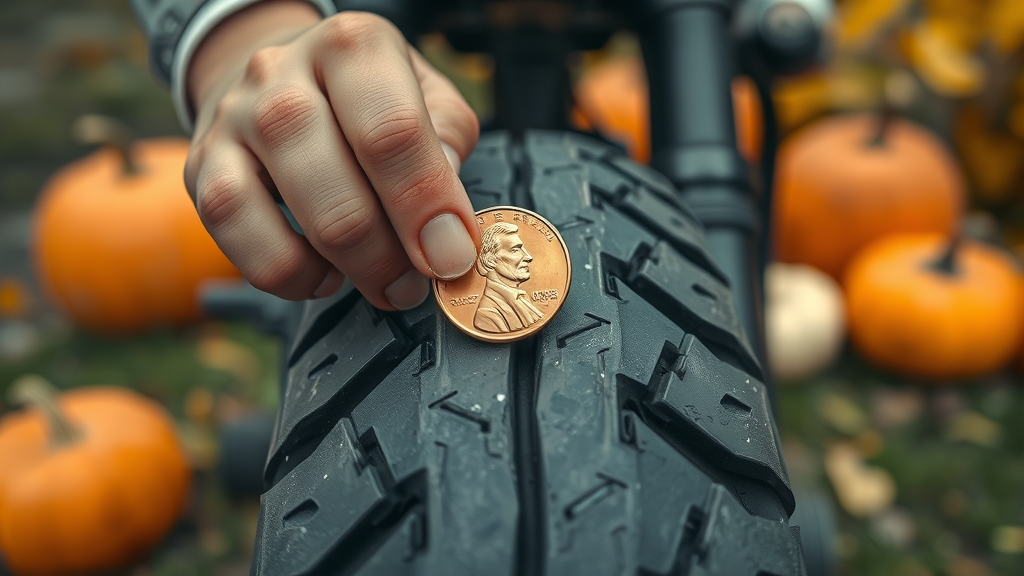
check your tire, penny inserted into motorcycle tire groove, autumn setting, tread depth test

Checking the Year and Age of Your Motorcycle Tire

A tire’s age plays a pivotal role in its safety, even if it appears visually sound. Hidden in the sidewall is the DOT code, which ends with a four-digit number indicating manufacture week and year. For example, ‘2519’ means the tire was produced in the 25th week of 2019. Motorcycle tires are recommended for replacement every five or six years, regardless of visible wear, due to rubber degradation.

This check is particularly vital if the motorcycle is used primarily during the riding season and stored for an extended period. Rubber loses flexibility over the years, especially when subjected to alternating warm days and cold nights typical of autumn. Don’t take chances—replace tires that have aged out, even if the tread appears sufficient.

How to Prepare Your Motorcycle Tire and Riding Gear for Falling Temperatures

Tire checks go hand-in-hand with preparing your riding gear for the colder season. The shift in temperature doesn’t just affect tire performance—it can also compromise your comfort and alertness. Equip yourself with insulated gloves, moisture-resistant jackets, and boots with strong grip for wet or leaf-strewn ground. A clear visor or anti-fog solution is vital for those early morning rides where humidity and chill meet.

Prepare your motorcycle for autumn's cold by checking your brakes, brake pads , and brake fluid level . Don’t overlook these components; a comprehensive check of both your bike and personal gear not only extends their lifespan, but maximizes your safety and enjoyment on every autumn ride.

  • Inspect helmet, gloves, boots, and jackets for insulation and weather resistance

  • Ensure all reflective surfaces and lights are clean and working

  • Check heated grips or liners, if equipped, for proper function

  • Replace or repair any worn-out or missing riding gear elements

  • Test brake pads and brake fluid before departing

riding gear, motorcycle gear preparation for autumn, helmets, gloves, boots, jackets, colorful garage

Electrical System and Related Safety Checks for Autumn Riding

While tires are top priority, don’t underestimate the importance of your motorcycle’s electrical system when autumn arrives. Shorter days and unpredictable weather conditions demand reliable headlights, taillights, and turn signals. Check all bulbs, replace any that are dim or not working, and confirm that high and low beams function correctly, especially during low-visibility conditions common this time of year.

Batteries can lose charge quicker in lower temperatures, so test your battery’s voltage and ensure it’s secured tightly. Loose connections or frayed wires can lead to electrical failures at the worst possible times. Finally, confirm that heated grips, auxiliary lighting, and other electronic accessories function as expected—each plays a role in keeping every autumn ride safe and comfortable.

Top 5 Signs Your Motorcycle Tire Needs Attention This Autumn

Stay alert for these key warning signs that your motorcycle tire demands immediate action. Ignoring the subtle signals can amplify risk, particularly during autumn’s unpredictable shifts in temperature and road quality.

  1. Uneven Tread Wear – Indicates improper tire pressure or misalignment, which can compromise handling on slick autumn roads.

  2. Visible Damage – Cuts, punctures, or foreign objects embedded in the tire can lead to sudden deflation or a dangerous blowout.

  3. Cracks – Age-related stress shows as cracks on sidewalls or between treads, warning the tire is at the end of its safe life.

  4. Loss of Pressure – Repeated need to add air suggests a slow leak, which can worsen on colder days or longer rides.

  5. Aged Tires – Even with good tread, tires older than 5-6 years are prone to sudden failure. Check the DOT code to confirm manufacturing date.

Watch as an expert mechanic walks you through an autumn-focused tire inspection—identifying crucial check points and demonstrating practical, real-world safety techniques. This video shows close-ups of tire tread, valve testing, and tips for maximizing motorcycle tire safety throughout the autumn season.

Learn the correct way to use a tire pressure gauge—get accurate readings every time, no matter the outdoor temperature. This step-by-step video is perfect for both new riders and seasoned pros aiming for top-notch autumn tire care.

FAQs About Motorcycle Tire Check Autumn

When should you check your motorcycle tires?

You should check your tire before every ride—especially during autumn, when temperature shifts, wet conditions, and falling leaves can rapidly change road surface safety. Adding this five-minute check to your routine helps keep you ahead of potential problems, reduces the risk of tire failure, and promotes safer riding all season long.

How to check the year on a motorcycle tire?

Examining your tire’s sidewall, locate the DOT code. The last four digits represent the week and year the tire was manufactured (e.g., "2318" means 23rd week of 2018). If your tire is over 5-6 years old, regardless of tread, it’s time to replace it—especially before autumn rides, which demand peak performance.

Should your tire be cold when checking?

Yes, always check your tire pressure when the tires are cold—that means before you’ve ridden or at least an hour after your last ride. Warm tires yield higher pressure readings, so a cold check gives the most accurate and meaningful results for fall weather.

What is the penny test on motorcycle tires?

The penny test is a quick way to assess tread depth on motorcycle tires . Insert a penny, Lincoln’s head down, into the center tread groove. If you can see the top of Lincoln’s head, your tread is too low for safe autumn riding and you should replace the tire without delay.

Key Takeaways for Your Next Motorcycle Tire Check Autumn

  1. Tire Pressure: Check before every autumn ride for reliable grip and braking power.

  2. Tread Depth: Use the penny test; replace if below 2/32”.

  3. Inflation: Adjust for lower temperatures and fluctuating weather conditions.

  4. Year-Age Check: Replace tires older than 5-6 years, regardless of mileage.

  5. Autumn-Specific Care: Prepare both bike and riding gear for cold, wet, and early nightfall.

Risk Reduction: Motorcycle Tire Check Autumn and Accident Prevention

Thoroughly checking your tires each autumn slashes your risk of unexpected accidents, keeping you alert, stable, and responsive no matter how unpredictable the changing road conditions become. Motorcycle tire failure—be it from low tread, improper tire pressure , or age—remains one of the top causes of autumn riding incidents. Make the commitment: a simple investment of attention every autumn pays off every single time you ride.

As the days shorten and weather conditions become more challenging, riders who prioritize motorcycle tire check autumn not only dodge danger—they set a higher standard for proper maintenance and personal safety all year long. Be the rider who arrives safely, every time.

motorcycle tire check autumn, rider with well-maintained motorcycle, scenic rural autumn road, safety appreciation, golden hour lighting

"Regularly inspecting your motorcycle tires every autumn is an investment in your safety and the performance of your ride." – Industry Leader

Contact for Personalized Motorcycle Tire Check Autumn Advice

Ready for a comprehensive, personalized tire check?

Call Nasty Performance Motorcycle Shop Today: 847-458-4858 . Let our experts guide you through every detail—because your autumn ride should always be memorable for the right reasons.

As autumn approaches, ensuring your motorcycle tires are in optimal condition is crucial for safe riding. The article “Essential Fall Riding Maintenance Checklist for Motorcyclists” provides comprehensive guidance on tire maintenance during the fall season, emphasizing the importance of checking tread depth, tire pressure, and signs of wear to adapt to changing road conditions. ( twowheeltribe.com ) Additionally, “Maintaining Motorcycle Tires: Tips for Longevity and Safety” offers valuable insights into regular inspections for wear and tear, proper cleaning techniques, and the significance of maintaining optimal tire pressure to enhance both safety and tire lifespan. ( hongyuantyre.com ) By consulting these resources, riders can equip themselves with the knowledge needed to navigate autumn roads safely and effectively.

Motocycle Seasonal Care & Storage

0 Comments

Write A Comment

*
*
Please complete the captcha to submit your comment.
Related Posts All Posts

How to Store a Retro Motorcycle Long-Term Without Damage

Did you know that “up to 60% of retro motorbikes experience preventable degradation after just six months in improper storage”? The difference between a pristine classic and a costly restoration is in the way you store your bike.If you love your vintage Royal Enfield, Triumph Bonneville, Ducati Scrambler, or any modern classic, this guide breaks down the proven steps to protect your investment—and your ride’s legacy—season after season.Startling Facts: Why Long-Term Storage is Critical for Retro MotorbikesStoring retro motorbikes is not as simple as putting them away and forgetting about them. As the Motorcycle Preservation Institute highlights, “up to 60% of retro motorbikes experience preventable degradation after just six months in improper storage.” Vintage bikes, like the renowned Royal Enfield or a classic Triumph Speed Twin, are susceptible to issues unique to their era—think carburetor blockages, battery leaks, or rusty chrome. Many were built years ago using materials and finishes that demand a different preservation approach than today’s modern classics, which benefit from modern tech and new coatings.“Up to 60% of retro motorbikes experience preventable degradation after just six months in improper storage.” – Motorcycle Preservation InstituteIf you own a café racer or any bike from the classic range, you’re not just preserving a vehicle; you’re safeguarding a piece of history. Failing to follow expert long-term storage can transform a cherished ride into winter’s biggest regret. Let’s dive into what makes storage for retro motorcycles critical—and the essential methods for ensuring your modern classic emerges next season as the real deal.What You’ll Learn About Retro Motorbikes and StorageWhy proper storage is essential for retro motorcyclesStep-by-step preparation of retro motorbikesRecommended products for preserving modern classic bikesExpert-approved tips for preserving classic componentsTable: Top Storage Concerns for Retro Motorbikes Compared to Modern ClassicsStorage FactorRetro MotorbikesModern ClassicsFuel SystemCarburetor issues commonEFI needs different careCorrosion RiskHigher on vintage metalsNew coatings helpBattery CareRisk of older batteries leakingModern AGM lasts longerPaint & ChromeProne to fadingModern finishes more durableThe 12-Step Retro Motorbikes Storage Checklist1. Clean and Detail Your Retro Motorcycle (inc. Royal Enfield & Triumph Bonneville)Before you tuck your retro motorbikes away for the season, a full cleaning is more than cosmetic—it’s your first defense against corrosion and fading. Dirt, road grime, and brake dust can trap moisture against paint, chrome, and key components of classic bikes like the Triumph Bonneville or Royal Enfield. Wash every surface, taking special care with wire wheels and under the fenders. Use a pH-neutral soap and finish with a microfiber towel to avoid scratches. For added protection—especially for bikes with high-gloss chrome or exposed fasteners like café racers and the speed twin—finish with a dedicated chrome polish and an automotive wax. Cleaning now means you’ll spot potential issues like paint chips or leaks before they worsen during long-term storage.2. Change All Fluids in Retro Motorbikes Before StorageOld fluids break down and can become corrosive if left sitting for months. Drain and replace both engine oil and the transmission fluid—especially important for bikes with a shared oil sump or older classic range engines. Don’t neglect the brake and clutch hydraulic fluids, as aged fluid absorbs moisture and can cause corrosion in disc brake systems. For modern classic bikes with separate oil reservoirs and cc parallel twin engines like certain BMW Moto or Ducati Scrambler models, follow your manual’s guidance on fluid type and quantities. Always swap coolant if your bike is liquid-cooled. Keeping fresh fluids inside your retro motorcycles ensures that internal surfaces are protected from the inside out until you’re ready to ride again.3. Protect the Fuel System: Modern Classics and Twin Engine TipsFuel left stagnant in the tank or lines can degrade, especially in older bike carburetors, leading to clogged jets and sticky floats. If storing a twin engine or parallel twin bike, fill the fuel tank completely to prevent rust, then add a high-quality fuel stabilizer—something formulated for ethanol-blend fuels, common in modern classics like the Ducati Scrambler or Triumph Bonneville. Run the engine briefly to distribute the stabilizer throughout the system and carburetor. For fuel-injected bikes with EFI, consult your manual for specific procedures, as some recommend periodic cycling. The fuel system is one of the most vulnerable aspects of any retro motorcycle—proper prep now is critical for reliable starts next riding season.4. Disconnect or Remove the Battery from Retro MotorcyclesVintage battery tech, especially original or low-maintenance types found in many British motorcycle or classic Japanese models, can be temperamental. Disconnect the negative lead to prevent “parasitic drain.” For long-term storage—especially during cold, humid winters—remove the battery altogether and keep it inside, connected to a trickle charger or maintenance tender. For modern AGM or lithium batteries used in the latest modern classic range, check manufacturer guidelines. Neglecting your battery could result in permanent damage, expensive replacements, or even electrolyte leakage—a risk to both the machine and your workspace. Maintaining battery health guarantees your retro motorbikes remain the real deal when it’s time to ride.5. Lubricate Moving Parts on Retro Motorbikes, Including the Chain and CablesProper lubrication is crucial for defending against moisture and rust on exposed metal surfaces, especially for bmw motorrad, triumph speed twin, and Royal Enfield models with classic open chains and mechanical cables. Apply a quality chain lube evenly, being sure to spin the rear wheel for full coverage. Use spray or drop lube for throttle, clutch, and brake cables, and don’t forget the pivot points on the brake and shift levers. This step is fundamental for classic chrome and vintage transmission designs, protecting crucial elements like slipper clutch mechanisms and disc brake linkages. Well-lubed bikes ward off wear caused by condensation and inactivity, keeping your ride safe and responsive for the next season.6. Elevate Tires on Retro Motorbikes: Why It MattersFlat spots can develop when a retro motorcycle sits in one position for months, especially with vintage bias-ply tires. To prevent this, elevate the bike using a center stand, paddock stands or, at minimum, move the bike periodically. Elevation alleviates tire pressure, reduces the risk of sidewall cracks, and preserves correct seat height and riding position for when you next take out your café racer, speed twin, or modern classic. For bikes equipped with tube-type wheels or vintage-style whitewalls, using stands also helps avoid unnecessary strain on aging suspension and fork seals. Tire care is one of the simplest and most overlooked steps for preserving performance and handling in classic and modern classics alike.7. Cover All Intakes and Exhausts on Retro MotorbikesRodents and insects love warm, dark spaces, making your classic parallel twin exhaust pipes or open carb intakes a target during long storage. Use foam plugs, rubber caps, or even thick plastic bags secured with rubber bands to cover all open engine intakes and exhaust outlets. This simple step prevents nesting, moisture, and internal rust—especially important for modern classic bikes with complex emissions systems or the classic bmw moto twin engine. Always leave a checklist/reminder so you don’t forget to remove these before restarting!8. Prevent Rust on Classic Chrome – Speed Twin & Ducati Scrambler CareClassic chrome, as found on Speed Twin, Royal Enfield, and Ducati Scrambler motorcycles, demands extra vigilance to keep rust at bay. After polishing, apply a corrosion inhibitor or store in a dry environment using a dehumidifier if possible. Pay close attention to chrome fenders, wire spoke nipples, and handlebar hardware. Condensation and leaks can encourage pitting and oxidization, so periodic checks are vital, especially for models built years ago with less advanced metallurgy. Preserving the shine on your classic chrome distinguishes your retro motorcycles from the rest come riding season.9. Use the Right Motorcycle Cover: Vintage vs. Modern Classic ConsiderationsNot all covers are created equal. A breathable, water-resistant motorcycle cover shields your retro motorbikes from dust and humidity, while permitting trapped moisture to escape. Avoid plastic tarps that can trap condensation and accelerate corrosion. Fit is important—a loose cover may flap and abrade paint, while tight covers can cause condensation. Classic bikes like the Triumph Bonneville or café racers may need covers shaped to accommodate their upright handlebars or taller seat height. Modern classics with fairings or luggage require a different fit. Choose a cover that caters to your bike’s unique profile and ensures total, snag-free security during storage.10. Choose the Best Storage Location for Retro MotorbikesYour bike’s home during its hibernation is almost as important as any single step in the checklist. Opt for a dry, climate-controlled garage or storage area, away from direct sunlight or wide swings in temperature and humidity. A finished garage with sealed concrete floors, insulation, and even a portable dehumidifier is ideal. Avoid outdoor sheds or spaces where rodents can enter, and do not store under tarps in the backyard, as frost and damp can wreak havoc on vintage seat material, electronics, and classic chrome. For true peace of mind, riding clubs and modern shops like Nasty Performance Motorcycle Shop offer purpose-built motorcycle storage solutions for retro motorcycles of all makes and generations.11. Periodically Inspect Retro Motorcycles in StorageSet a reminder to check your bike at least once a month. Inspect for leaks, condensation, rodent intrusion, or signs of dust and corrosion. If you’re nearby, rotate the wheels and gently rock the bike to keep suspension fluid and brakes moving. If possible, briefly power up the battery (if left in place) to maintain charge and test key electronics. Regular check-ins prevent minor issues from turning into costly restoration projects, ensuring your retro motorcycle or modern classic remains road-ready.12. Document Storage Details for Modern Classics and Retro MotorbikesKeep a notebook or digital file documenting each step you took for storage—date of last maintenance, battery removal, fuel additives, specific covers used, and storage conditions. This record not only helps when it’s time to wake your bmw motorrad or triumph speed twin from hibernation, but can even add value if you ever decide to sell. Being able to show a detailed log of care preserves the status of your bike as a true modern classic or vintage collectible.Video Guide: Retro Motorbikes Storage—A Step-by-Step TutorialPeople Also Ask About Storing Retro MotorbikesHow do you prepare a retro motorbike for long-term storage?Proper preparation involves cleaning, fluid changes, protecting the battery and fuel, elevating tires, covering intakes, and using a breathable cover to prevent dust and moisture buildup.What is the best way to prevent rust on retro motorcycles?Apply corrosion inhibitors to all exposed chrome and metal surfaces, store in a dry environment, and periodically check for condensation or leaks.Expert Tips: Retro Motorbikes Storage from Enthusiasts of Triumph Speed Twin, Ducati Scrambler, and Royal EnfieldEven with advances in modern tech, experts agree that the fundamentals matter most for retro motorcycles. Owners and mechanics of the Triumph Speed Twin, Ducati Scrambler, and Royal Enfield recommend regular inspections, prioritized lubrication of exposed parts, and sharp attention to battery health—even while the bike is in storage. Storage checklists tailored for the particular quirks of your model, especially those with unique cylinder engine configurations or fully adjustable suspensions, maximize the life and performance of your investment.“Vintage bikes need more than just a cover—they thrive with regular maintenance even during storage.” – Alex Turner, Lead TechnicianWhether it’s ensuring seat height stays comfortable, riding position feels natural, or maintaining the snappy traction control found in modern classics, enthusiasts stress being proactive about care. Leverage owner forums, manufacturer bulletins, and specialized shops for advice related to your model—especially if you ride rarer café racers or classic BMW moto machines.FAQs: Retro Motorbikes StorageHow long can retro motorbikes be stored without starting?Most experts recommend not leaving bikes untouched for more than six months. For longer periods, periodic checks and cranking by hand or a short run every few months protect internal systems and keep fluids from settling.Should you leave fuel in the tank of a retro motorcycle?Yes—fill the tank completely and add a stabilizer. Partially full tanks invite rust.What’s the best temperature for storing modern classics or retro motorcycles?Aim for dry, stable conditions between 55°F–70°F (13°C–21°C) with low humidity.Can you store retro motorcycles outdoors?It’s not ideal. If you must, invest in a robust, weatherproof, and breathable cover, and check the bike frequently for effects from weather or pests.Mechanic's Perspective: Common Mistakes Storing Retro MotorbikesKey Takeaways for Retro Motorbikes Storage SuccessAlways clean retro motorcycles before storagePrioritize fluid and battery maintenancePrevent rust on all exposed componentsChoose storage environments wiselyConsult experts for model-specific guidelinesConclusion: Protect Your Retro Motorbikes with ConfidenceCareful storage today keeps your retro motorbikes legendary tomorrow. Follow these steps to enjoy vintage performance and classic style for years to come.Ready to Safeguard Your Retro Motorbikes? Call Nasty Performance Motorcycle Shop Today: 847-458-4858

Motorcycle Battery Care Spring: Prevent Dead Starts This Season

Ever wondered why so many riders return to dead batteries in spring? Discover the essential motorcycle battery care spring steps that every rider should master and never get caught off guard again.Spring is here, and that means the open road is calling. But there's one thing that can instantly spoil your first ride: a dead battery. Imagine eagerly prepping your motorcycle, only to hear a sad click when you press the starter. Avoiding this scenario isn’t just about luck; it’s about knowledge and routine. This guide reveals step-by-step motorcycle battery care spring techniques —from the right way to inspect and maintain your battery to leveraging trickle chargers and verifying your full electrical system before that exhilarating first ride. Let’s break down these expert-backed practices so you’ll ride out with confidence, whether you’re in the cold climates of the East Coast or tackling early spring adventures elsewhere.Motorcycle Battery Care Spring: Essential Routine for a Reliable StartWhen it comes to motorcycle battery care spring , your approach during those first warm weeks can mean the difference between a smooth, powerful start and a frustrating morning of troubleshooting. After months of winter storage, your motorcycle’s battery—like the rest of your bike—needs attention. Cold climate storage can sap a battery’s power, with chemical reactions slowing and condensation inside the engine potentially creeping into sensitive electronics. That’s why prepping your battery for spring is more than just habit; it’s a safety and reliability step recommended for every rider.Begin by recognizing how cold temperatures and inactivity over winter storage may have affected battery performance. Residual drain—even if you remembered to disconnect the battery —can leave voltage lower than the ideal 12.6 volts. This makes it crucial to test and, if needed, trickle charge your battery before the first real road test. In fact, using devices like a battery tender or trickle charger is widely regarded as the key to spring readiness; these devices slowly top up the battery, avoiding overcharge and ensuring the lifespan of your power source extends well beyond a single season. Finally, a short test ride doesn’t just shake off rust, but also helps confirm the complete system health—serving both as a confidence booster and as a diagnostic of your starter, lights, and charging system.Recognizing the impact of winter storage on battery performanceWhy trickle charge and trickle chargers are key for spring readinessUsing a test ride to ensure complete system health after storageSpring Motorcycle Battery Care: Key Steps and ToolsRoutineReasonRecommended ToolNotesInspect battery terminalsPrevents connectivity issuesWrench, terminal brushWear glovesCheck battery voltageDetects low charge or damageMultimeterIdeal voltage: 12.6V+Apply trickle chargeMaintains optimal chargeTrickle chargerDon’t exceed recommended charge timeReplace if neededPrevents future dead startsNew batteryRecycle old battery properlyOptimizing Motorcycle Battery Care Spring with Trickle Charge TechniquesProperly maintaining your motorcycle’s battery is about more than just recharging it after a long winter rest. Trickle charging your battery throughout the season ensures it retains optimal health and reduces the risk of being stranded. The process isn’t merely about juicing up a flat battery; it’s about extending the lifespan of your battery and keeping all your electronics—from the ignition to the most advanced LED light setups—functioning with peak efficiency.With battery technology advancing and more riders keeping their bikes in storage over winter, the need to optimize your trickle charge routine becomes obvious. Accidental overcharging can be as damaging as neglect—impacting battery chemistry, resulting in swelling or even permanent failure. Learning the ins-and-outs of safe trickle charge procedures, integrally tied into motorcycle battery care spring , helps you maximize performance, especially if you ride only once a week or store your motorcycle in a cold climate garage.Understanding Trickle Chargers: How and When to Use ThemA trickle charger is an indispensable tool for any motorcyclist, yet it's often misunderstood or misused. Unlike rapid chargers, a trickle charger works by delivering a slow, steady current. The key benefit is that it charges the battery at the same rate that power naturally dissipates when the bike is not in use—meaning you won’t accidentally overheat or damage your battery during winter storage or spring tune-ups. These devices are especially helpful for riders dealing with the unpredictable conditions found on the East Coast, where cold snaps and spring storms can delay the riding season.When preparing for spring, it’s crucial to follow all manufacturer instructions regarding connecting and disconnecting the trickle charger. Always connect positive to positive and negative to a grounded frame point to avoid accidental sparking. Don’t leave the charger on indefinitely unless it’s a smart battery tender with an automatic shut-off to prevent dangerous overcharging. Overcharging can manifest as heat, swelling, or—worst case—leakage, leaving you with an unusable battery just when riding season starts.What is a trickle charger and its benefits in spring preparationProper procedures for connecting and disconnecting trickle chargersRisks of overcharging and how to avoid them"A battery maintained on a trickle charger can last up to twice as long as a neglected one." — Battery Care ExpertsWinter Storage Effects and Spring RecoveryStorage conditions over winter can silently impact battery durability and performance. During winter storage , a battery can gradually lose its charge even when disconnected, especially in a cold climate garage. If moisture is present, condensation inside the engine and near electronics can further increase the rate of natural discharge. When it’s time for spring recovery, riders may notice symptoms like sluggish cranking or unresponsive dashboard lights—classic signs that battery care was overlooked.Spring protocols for recovering from winter storage start with a comprehensive inspection. Remove the battery if needed to closely check for corrosion around terminals, swelling, or unexpected residue—evidence of chemical breakdown. Use a multimeter to check voltage; if the reading falls below 12.4V, a controlled trickle charge is recommended. Thoroughly clean terminal contacts and ensure all wiring connections are tight before reinstalling the battery. For many, the difference between a fully warm engine and a stubborn starter boils down to this essential pre-ride battery protocol.To avoid battery headaches in future winters, consider investing in a premium battery tender that intelligently maintains battery charge. Pair this with preventative measures: store your motorcycle in a dry location away from dramatic cold snaps, periodically charge the bike once a week if possible, or remove the battery entirely if you plan to winterize your motorcycle for extended inactivity.Battery wear during winter storage and its springtime symptomsStep-by-step spring protocols for recovering stored batteriesPreventative storage solutions for next winterTest Ride and Full System Check for Motorcycle Battery Care SpringAfter following essential motorcycle battery care spring steps, nothing verifies your maintenance like a real-world test ride. A short, deliberate route not only gets your engine to fully warm operating temperature—burning off any combustion byproducts and condensation—but also offers the first chance to test your battery and electrical system under load. Always conduct this ride after battery maintenance and before planning any long spring adventures.A test ride helps spot issues missed at the workbench. During your ride, carefully monitor how the bike responds to ignition, especially if you notice the starter lagging or accessory lights flickering. These can warn of deeper battery or charging system problems needing immediate attention. Additionally, pay attention to the consistency and brightness of headlight and dashboard indicators, and check if any starter issues persist when the bike is fully warm at a traffic stop.Conducting a Test Ride: Verifying Electrical and Charging SystemsA focused test ride is the final exam for spring battery care. Begin by checking battery voltage before starting—ideally above 12.6V. As you ride, assess how the starter engages, listen for smooth cranking, and see if accessories function properly under load. Notice headlights for dimming when you use electronic accessories or the starter; subtle cues can point to issues with either the battery or the charging system, both of which are critical for reliable performance.Create a spring test ride checklist so you don’t miss a thing. Examine every system that relies on battery power: from the starter motor to auxiliary lights and even GPS or other add-ons. After the ride, touch the battery housing (careful—don’t burn yourself) to check if it’s abnormally hot or swollen, both red flags. Testing the system with the bike fully warm will expose potential hidden problems that might not appear while stationary in the garage.Why a test ride reveals battery and charging system healthChecklist for monitoring lights, starter, and accessoriesIdentifying early warning signs during your first spring rideCheck voltage before the rideTest starter engagementMonitor headlight dimming and electronic accessory functionReview battery after the ride for heat and swellingAnswers to Your Spring Motorcycle Battery Care QuestionsHow to prep a motorcycle for spring?Prepping your motorcycle for spring means more than topping off fluids or inflating the tires. Start with a detailed inspection of your battery: clean the terminals, check for corrosion, and use a multimeter to confirm voltage. Apply a trickle charge if needed, and reinstall the battery securely. Don’t forget to inspect the exhaust system for any signs of animal nesting or blockage from winter storage, and verify all electronics, lights, and starter performance before hitting the road. Take your time to fully warm the engine and look for any condensation inside the engine or unusual smells when you first start up.What part of the battery should be on the spring?The key part of the battery to focus on for spring is the terminal area. Ensure connections are clean, tight, and free of corrosion to allow maximum current flow. The battery housing should be checked for cracks or bulges, while the top surface should remain dry and free of dirt or acid residue. For many riders, simply removing the battery for a closer inspection is the most effective way to prevent spring surprises—and always check the vent tubes (where applicable) for blockages from winter storage.Is it okay to leave a motorcycle on a trickle charger?Yes, it is safe to leave your motorcycle battery connected to a modern trickle charger, provided it has an automatic shut-off or battery tender functionality. These chargers are designed to sense full charge and cut power or switch to float mode automatically, preventing overcharge and extending battery life. However, avoid leaving basic non-smart chargers connected for long durations, as they may damage the battery over time.How long can a motorcycle battery sit unused?A motorcycle battery can typically sit unused for one to three months without major issue, depending on battery age, health, and climate. Extended periods of inactivity—especially in cold climates—lead to charge loss and can cause sulphation on the plates, shortening battery life. If you plan to winterize your motorcycle or store your motorcycle for several months, it's best to remove the battery and keep it on a battery tender or trickle charger to maintain optimal health.Frequently Asked QuestionsHow often should I inspect my battery during spring? Perform a quick inspection before each ride for the first month of the season.Do all motorcycles need a trickle charger in winter? Most modern bikes benefit from one, especially if stored in cold or unused for weeks.Can a bad battery damage my bike? Yes, a failing battery can overwork the charging system and cause electrical malfunctions.Video Resource: Step-by-step guide to prepping your motorcycle battery for spring: how to inspect, clean, charge, and test for a confident first ride of the season.Take Action Today and Avoid Spring SurprisesDon’t wait until your first ride is spoiled by a dead battery. Make motorcycle battery care spring routines part of your regular maintenance, and enjoy every mile this season. Call Nasty Performance Motorcycle Shop Today: 847-458-4858To ensure your motorcycle is ready for the spring riding season, it’s crucial to focus on comprehensive battery maintenance. The article “Essential Spring Maintenance for Your Motorcycle” provides a detailed checklist, including battery assessment and charging, fluid checks, and other vital tasks to prepare your bike after winter storage. ( blog.carolinacycle.com ) Additionally, “Motorcycle Battery Maintenance Tips” emphasizes the importance of keeping your battery charged, maintaining clean connections, and proper storage practices to extend battery life and ensure reliable performance. ( bmwdetroit.com ) By following these expert recommendations, you can prevent dead starts and enjoy a confident ride throughout the season.

Here's How to Start Your Motorcycle After Winter Storage

Did you cover all the crucial steps before restarting your motorcycle, or could one overlooked detail leave you stranded this spring? Did Winter Storage Leave Your Motorcycle Out in the Cold? Opening Hook: Should You Follow Standard Advice to Start Your Motorcycle After Winter? As motorcycle enthusiasts eager for the first ride of spring, we’ve all faced the frustration of twisting the ignition and hearing its fruitless click after a long winter break. Should you just follow the same old advice, or are there vital steps you’re missing? Restarting your bike after a period of time in cold storage isn’t just about hitting the starter; neglecting details like a drained battery, stale fuel, or contaminated spark plug can create unnecessary headaches—or worse, lasting damage. Before you pull your prized machine back onto the open road, this guide will walk you through proven, mechanic-backed strategies to start your motorcycle after winter efficiently and safely. By addressing everything from fluid levels to tire pressure, you’ll avoid common pitfalls, minimize risk of engine knock or rough starting, and maximize your ride’s performance for the entire season. Let’s break down what you need to know before your first throttle twist, so your journey starts with confidence — not complications. What You'll Learn When You Start Your Motorcycle After Winter Storage Understand why winter affects your motorcycle performance Step-by-step process to start your motorcycle after winter Expert tips on spark plugs, fluid level, and tire pressure Proactive maintenance for a smooth riding season The Impacts of Winter Storage on Your Motorcycle How Extended Inactivity Affects Your Motorcycle During winter months, your motorcycle faces a barrage of challenges that can quietly erode its performance. The most pressing factor is battery drain. If you didn’t use a smart charger over the winter, your bike’s battery may be too weak to turn the engine. This is especially true for newer models with onboard electronics that draw power even at rest. Inactivity also accelerates fuel system deterioration; old gasoline can degrade, clog fuel lines, gunk up the fuel pump, or even cause varnish buildup that affects starts and idling. Spark plugs can collect moisture or become fouled, making ignition unreliable. Flat spots may develop on tires, critical fluid levels—from engine oil to brake fluid—may drop, and rubber components such as belts and seals can show signs of dry rot. Recognizing these potential pitfalls is the first step in ensuring your motorcycle doesn’t just start but runs like a bad boy when you need it most. By preparing for these specific challenges, you minimize the risk of damage and avoid costly, frustrating setbacks. If you want to take your post-winter maintenance a step further, consider exploring additional seasonal care tips that can help you prevent common issues before they arise. For a deeper dive into practical strategies, check out these essential seasonal bike care secrets every rider should know. Essential Preparations Before Trying to Start Your Motorcycle After Winter Inspecting and Charging the Battery How to safely access your motorcycle battery Best practices for battery charging Before you try to start your motorcycle after winter, assessing the battery is non-negotiable. Begin by locating the battery—often under the seat or a side cover—and visually check for corrosion or loose cables. Remove the battery with gloves to avoid acid contact, and use a smart charger, not a jump start, since sudden surges can damage sensitive electronics found in modern bikes. A voltage reading below 12.5V indicates a weak battery; charge it for several hours (or preferably overnight) until fully topped off. If your battery won’t hold a charge, it’s best to replace it to prevent early season headaches. While reinstalling, clean terminals with a wire brush and apply dielectric grease to ward off corrosion. Always reconnect the positive terminal first. If your motorcycle has sat for an extended period of time, a healthy battery is your insurance against electrical gremlins. Skipping this step risks more than a no-start—it could leave you stranded and damage your workhorse’s starting circuit. Check the Oil and Fluid Levels Before You Start Your Motorcycle After Winter Checking your oil level is crucial after months of hibernation. Contaminants, moisture, and degraded oil can jeopardize piston rings, bearings, and the engine’s longevity. Use a clean dipstick or sight glass to check the level and look for discoloration or milkiness—signs of water intrusion or old oil. Top off with fresh oil if needed, but an outright oil change (including a new oil filter) is best for most riders at season’s start. Don’t forget other fluids. Inspect brake fluid reservoirs for clarity and adequate level, remembering that dark fluid may indicate a needed flush. Double-check coolant level in liquid-cooled bikes, as freezing or evaporation may lower the mark. Transmission and clutch fluid, if separate, should remain clear with no burnt odor. Neglecting these areas can compromise safety and function, making fluid checks one of the most fundamental yet overlooked tasks when you start your motorcycle after winter. Examining the Spark Plug and Spark Plugs for Reliable Starting How to inspect and clean spark plugs When to replace a spark plug before starting your motorcycle Your spark plug (and on multi-cylinder bikes, the spark plugs) sit at the heart of reliable ignition. Begin by pulling the plugs with a dedicated tool, examining them for carbon deposits, oil fouling, or signs of corrosion. Clean light deposits with a wire brush; severe fouling or worn electrode tips suggest it’s time to replace them. When reinstalling, apply anti-seize to the threads and ensure each plug hole is dry and free from debris to avoid misfires. Upgrading to a fresh spark plug can make a night-and-day difference, reducing starting effort and smoothing idle. If your model requires a gapped plug, measure and adjust to spec; improper gap can sabotage new plugs’ performance. Investing time in these checks prevents elusive starting problems and reduces strain on your battery and starter. Fuel System Checks: Cleaning, Refilling, and Preventing Issues Signs of old fuel in the system How to safely drain and refill the fuel tank Additives and treatments for fuel system health The fuel system is a notorious trouble spot following winter storage. Stale fuel loses combustibility and can gum up the fuel pump, carburetor jets, or injectors. Signs of old gas include sour odor, dark color, and visible residue in the tank or line. If you spot these, carefully drain the tank (off-bike preferred), safely dispose of the bad gas, and refill with fresh gas. Use a funnel to avoid spillage and inspect fuel lines for brittleness or leaks. To fend off future buildup, consider a fuel stabilizer or cleaning additive. These help clear varnishes and prevent water absorption. Run the fuel through by starting the bike; periodic use keeps the fuel system in optimal health, especially important for carbureted or older models. A proactive approach here can save you expensive repairs down the road. Ensuring Correct Tire Pressure After Winter Storage Recommended tire pressure for safe operation Spotting signs of tire damage post-winter Checking your tire pressure is not just routine—it’s life-saving. Tires often lose air pressure during cold months, and underinflation invites flat spots, compromised handling, and increased wear. Use a reliable pressure gauge to check both front and rear tires, inflating to the specification listed on your swingarm decal or owner’s manual. Carefully inspect the sidewalls and tread for signs of dry rot, cracking, or embedded debris. Look for signs of damage like bubbles, odd bulges, or excessive signs of wear. If you spot problems, it’s time to consider replacement before that first spring trip. Ensuring correct tire pressure and sound tire condition boosts safety, maintains grip, and smooths out your initial rides after winter slumber. Step-by-step walkthrough: How to start your motorcycle after winter (battery, spark plugs, fuel system) Step-by-Step Guide: How to Start Your Motorcycle After Winter Confirm your workspace is safe and ventilated Charge and install the battery Check the oil and top off fluid levels Inspect the spark plug and replace if needed Address fuel system by draining or treating old fuel Check tire pressure and inflate as necessary Turn the ignition and monitor engine response Let the engine idle and listen for unusual noises Meticulously following this checklist ensures your motorcycle transitions safely from storage to street. Each step addresses the most common culprits of no-starts and rough initial rides. When you start your motorcycle after winter this way, you not only safeguard its systems but also establish a solid foundation for a fun, worry-free season on the road. Expert Insights: Common Issues When You Start Your Motorcycle After Winter "Many riders overlook the importance of fresh fuel and clean spark plugs after winter, leading to starting troubles and rough idling." – Certified Motorcycle Mechanic, John Randall "A little proactive battery maintenance goes a long way to avoid early season headaches." – Nasty Performance Motorcycle Shop Tech Team Ignoring preventative steps can leave even the baddest bike in the shop instead of on the street. Mechanics consistently report that sludge in the fuel system, old spark plugs, and neglected fluid levels are top culprits for early season service calls. By carefully addressing these issues up front, you greatly reduce the chances of unexpected problems or expensive repairs as you get back in the saddle. Maintenance Tips for Smooth Riding All Season Routine motorcycle maintenance schedule post-winter Keeping an eye on fluid levels, spark plugs, and battery charge Best practices for off-season motorcycle storage A proactive maintenance schedule prevents small issues from escalating into major headaches. Check your bike monthly for fluid levels (oil, coolant, brake fluid), clean and inspect spark plugs, and keep the battery charge topped up. If you have belt drive or chain drive, inspect and lubricate them along with regular tire inspection for pressure and signs of damage. While storing your motorcycle off-season, stabilize the fuel system, disconnect and trickle-charge the battery, and keep tires off cold concrete with paddock stands or boards to avoid flat spots. Cover the bike to protect from dust and rodents, and periodically rotate the wheels. Good off-season habits lead to easy starts and fewer surprises year after year. Task What to Check/Do Recommended Frequency Battery Charge, inspect, clean terminals Before first start, monthly if stored Spark Plug(s) Inspect, clean, replace if worn Before first start, every 5,000-8,000 miles Fluid Levels Check oil, brake fluid, coolant Before first start, every month Tire Pressure Inflate to spec, inspect for dry rot/signs of damage Before first ride, every month Fuel System Drain/refill tank, add stabilizer, check lines Before first start, stabilizer every storage period People Also Ask About Starting Your Motorcycle After Winter How to start a motorcycle after winter? To start your motorcycle after winter, begin by removing the bike from storage and inspecting it for any obvious damage. Fully charge and install the battery, check all fluid levels (oil, coolant, brake fluid), and replace or clean the spark plug. Drain any old fuel from the fuel system and refill with fresh gas, adding a fuel system cleaner if necessary. Check tire pressure and look for signs of dry rot or flat spots. Start the engine, let it idle, and listen for any odd noises before riding. How long can a motorcycle sit without starting? A motorcycle can typically sit for about one to three months without major consequences, as long as the battery is maintained and fluid levels (especially oil and brake fluid) are correct. Longer storage without proper preparation—such as draining the fuel system and stabilizing gas—can result in battery drain, fuel varnish, and tire flat spots. If a bike sits more than a period of time (like a full winter), always check these critical areas before attempting to restart. What is the 12 second rule on a motorcycle? The 12 second rule is a safety guideline for riders: you should scan the road ahead so that you always see at least 12 seconds in the future. This gives ample time to react to unexpected hazards, especially when resuming your riding routine after a long season off. It helps you maintain the correct following distance, anticipate traffic flow, and ride defensively—crucial points after your motorcycle emerges from storage when both you and your bike may need a warmup period. Is it okay to leave gas in a motorcycle over winter? Leaving untreated gas in your motorcycle’s tank over winter can lead to problems like fuel breakdown, gummed-up carburetors or injectors, and corrosion in the fuel system. The best practice is to add a fuel stabilizer to fresh gas and run the engine for several minutes before storage. This ensures stabilized fuel circulates throughout the system, preventing separation and preserving internal components for easy spring starts. Expert tips: Troubleshooting common problems when you start your motorcycle after winter Frequently Asked Questions about How to Start Your Motorcycle After Winter What signs indicate my spark plug or spark plugs need replacing after storage? If the electrode is worn, covered in sooty carbon, or the ceramic insulator is cracked, replace your spark plug. Any sign of persistent engine misfire or hard starts can also indicate plug trouble. How do I check my fuel system for clogs or build-up after winter? Inspect the fuel lines for stiffness or leaks, open the fuel tank for residue or bad odor, and, if possible, drain a small amount from the carburetor or injector for clarity. Running the bike on fresh gas with additive for a short while may help clean out minor build-up, but persistent trouble could mean a deeper clean is needed. Which fluid levels are critical for post-winter starting? Engine oil, brake fluid, and coolant (for water-cooled bikes) must all be at correct levels and in good condition. Contaminants or low levels can result in poor performance or even engine damage. Tips for preserving tire pressure during winter? Inflate tires slightly above recommended pressure before storage and check regularly. Move your motorcycle occasionally or use stands to avoid flat spots, and keep tires off cold concrete to minimize air loss and dry rot. Key Takeaways for Starting Your Motorcycle After Winter Prioritize battery, fuel system, spark plug, and fluid level inspections Address any mechanical issues before riding Follow a proactive maintenance routine for longevity Ready for the Road? Start Your Motorcycle After Winter with Confidence By carefully checking your battery, fluids, spark plugs, and fuel system, you’ve set the stage for a safer, smoother return to the open road this season. If you’re looking to elevate your motorcycle care beyond just the basics of post-winter starting, there’s a wealth of knowledge waiting for you. Discover how to protect your ride year-round, extend its lifespan, and enjoy peak performance in every season by exploring seasonal bike care secrets every rider must know. These expert insights go beyond routine checklists, offering advanced tips and strategies to keep your motorcycle in top shape no matter the weather. Take the next step in your maintenance journey and ensure your bike is always ready for the adventures ahead. Action: Call Nasty Performance Motorcycle Shop Today: 847-458-4858

Terms of Service

Privacy Policy

Core Modal Title

Sorry, no results found

You Might Find These Articles Interesting

T
Please Check Your Email
We Will Be Following Up Shortly
*
*
*