Add Row
Add Element
cropper
update

Nasty Performance ~ 847-458-4858 

update
Add Element
  • Blog Home
  • Categories
    • Motorcycle Maintenance
    • Riding Tips & Preps
    • Safety & Inspection
    • Customizations & Upgrades
    • DIY Motorcycle Repairs
    • Motocycle Audio Systems
    • Motocycle Seasonal Care & Storage
    • Engine, Electrical Performance
  • Bike Night
  • Nasty Performance Motorcycle Shop
August 12.2025
1 Minute Read

Motorcycle Tire and Brake Care Tips to Ride Safe

Did you know? Proper motorcycle tire and brake care could reduce your risk of an accident by over 40%! No matter how experienced a rider you are, neglecting your motorcycle tires and brakes can turn a minor issue into a major hazard. Ready to transform your routine and ensure every ride is as safe as possible? Dive in to learn must-know maintenance tips that go way beyond the basics.

dynamic close-up of motorcycle tire and brake disc for motorcycle tire and brake care

Fact: Proper Motorcycle Tire and Brake Care Reduces Accident Risk by Over 40%

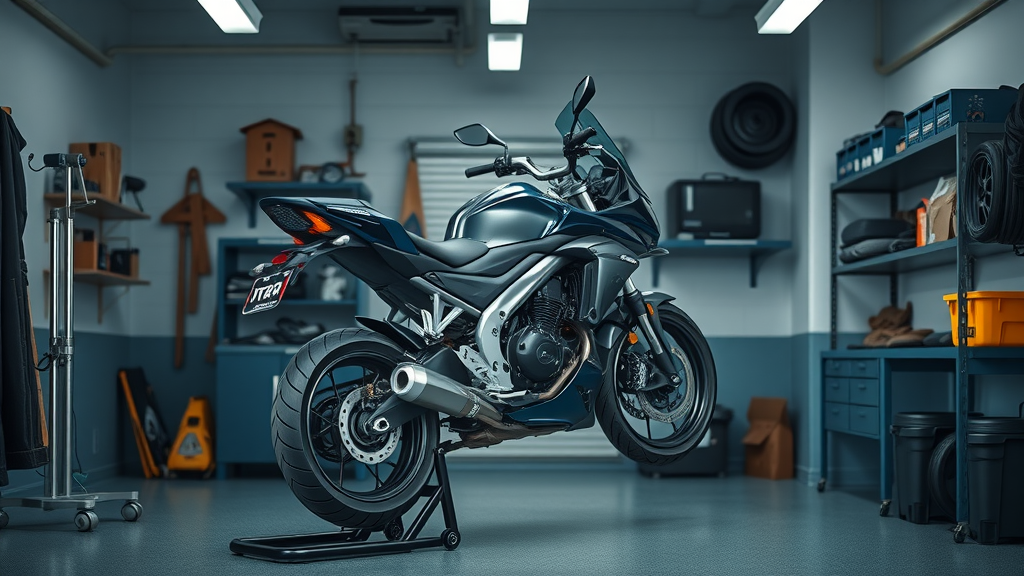
Nothing outweighs rider safety , and the statistics speak for themselves: attentive motorcycle tire and brake care lowers the likelihood of accidents by a staggering margin. When you commit to regular tire maintenance and consistent check-ups of your motorcycle brakes , you’re not just extending the life of your ride—you’re protecting yourself and others on the road. A well-maintained motorcycle reacts better in emergencies, providing superior grip, reliable stopping power, and predictable handling.

The heart of motorcycle maintenance is prevention. Issues like improper tire pressure , worn-out brake pads , or unnoticed wear and tear can lead to poor handling or even complete brake failure—making every journey riskier. Through this guide, you’ll find actionable, step-by-step tips for safeguarding every critical component, ensuring each ride starts and ends with confidence.

Understanding the Importance of Motorcycle Tire and Brake Care

Grasping the significance of motorcycle tire and brake care is fundamental for any rider. Tires are your motorcycle’s sole contact with the pavement, and brakes provide the control you need to stop safely. If these systems are flawed, even a straight highway or a simple turn can become dangerous. For those who love long rides or frequently commute, the consistent assessment of tire pressure, tread depth, and brake pads becomes even more essential—small lapses can rapidly escalate into serious risks.

Motorcycle tires that show uneven wear or are underinflated compromise both comfort and reaction time. Likewise, brakes with thinning pads or degraded brake fluid don’t just reduce stopping power, they can unexpectedly fail. Prioritizing the right tire size and promptly replacing worn components is crucial for both protection and performance. Your investment in regular inspections delivers peace of mind and makes safer adventures possible.

What You’ll Learn in This Guide

  • Key motorcycle tire care techniques for longevity and safety

  • Crucial motorcycle brake maintenance steps

  • How tire pressure, tread depth, and brake pads impact performance

  • Signs of wear and tear and how to address them

  • Answers to real riders’ frequently asked questions

Motorcycle Tire Care: Fundamentals for Every Rider

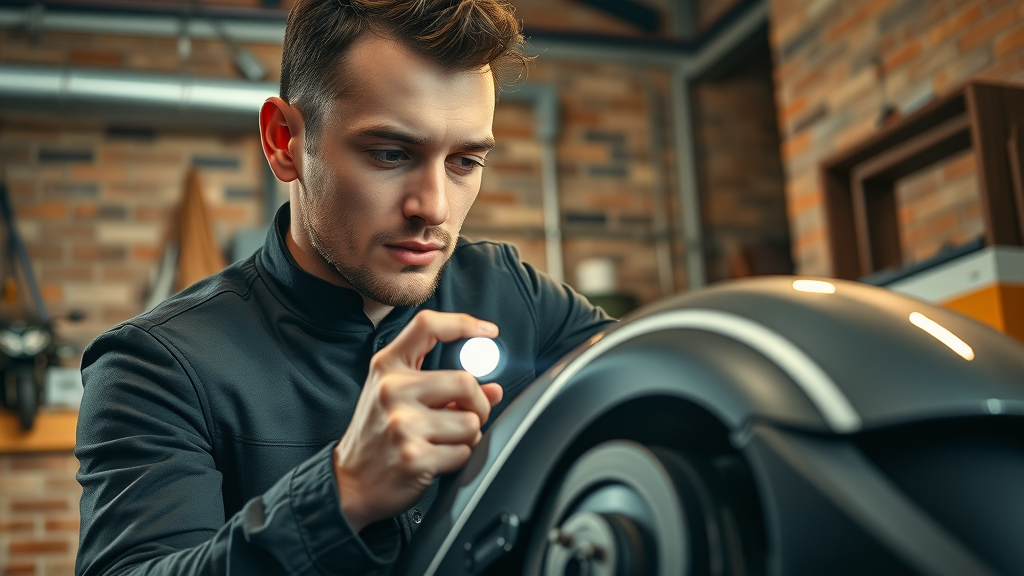
Your motorcycle tires are the foundation of your safety and riding experience. Regardless of your bike’s make or model, dedicating time to tire maintenance ensures optimal contact with the road, responsive handling, and extended tire life. Inattentive care leads to hazards like tire failure or unpredictable loss of grip, particularly during a long ride or sudden stop. That’s why every rider must embrace a habit of thorough inspections, proper tire inflation, and timely replacements.

With the growing variety of tires—from sport to touring to off-road options—understanding the essentials of tire service is more valuable than ever. Each tire has unique lifespan benchmarks, pressure requirements, and compatibility factors. Neglecting tire checks can result in irregular wear, air leaks around valve stems, and performance bottlenecks. Prioritizing consistent maintenance means you’re not just preserving your tires; you’re proactively amplifying the safety and reliability of your entire ride.

Regular Tire Maintenance Checklist

  • Visual inspections

  • Pressure checks

  • Tread depth and wear observations

  • Assessing tire size and compatibility

mechanic inspecting motorcycle tire tread and brake system for motorcycle tire and brake care

Building a tire maintenance routine into your ride prep makes a massive difference. Start with visual inspections for cracks, embedded debris, or bulges. Tire pressure should be checked before every ride, ideally when the tires are cool—use a reliable gauge for accuracy. Don’t overlook tread depth; worn treads equate to poor water displacement and higher chances of sliding in wet conditions. Finally, confirm tire size and compatibility, referencing the recommendations from your tire manufacturer or motorcycle manual to optimize safety and handling.

Tire Pressure: The Foundation of Motorcycle Tire and Brake Care

“Incorrect tire pressure can reduce grip, increase wear, and jeopardize braking efficiency.”

Proper tire inflation directly impacts your motorcycle tire and brake care regimen. Under- or over-inflated tires alter your bike’s feel—affecting how you corner, accelerate, and most importantly, stop. Incorrect air pressure can also lead to premature tread wear, uneven wear , or even catastrophic tire failure. Always match your tire pressure to the guidelines specified in your owner’s manual, accounting for factors such as temperature changes and load.

Don’t forget to check valve stems and replace them if you notice cracks or leaks. If your tire pressure frequently dips, inspect for slow leaks at the valve stem or the bead and consider consulting a tire service professional. Correct inflation improves brake pad contact with the road surface, ensuring both your motorcycle tires and brakes are working at peak performance levels.

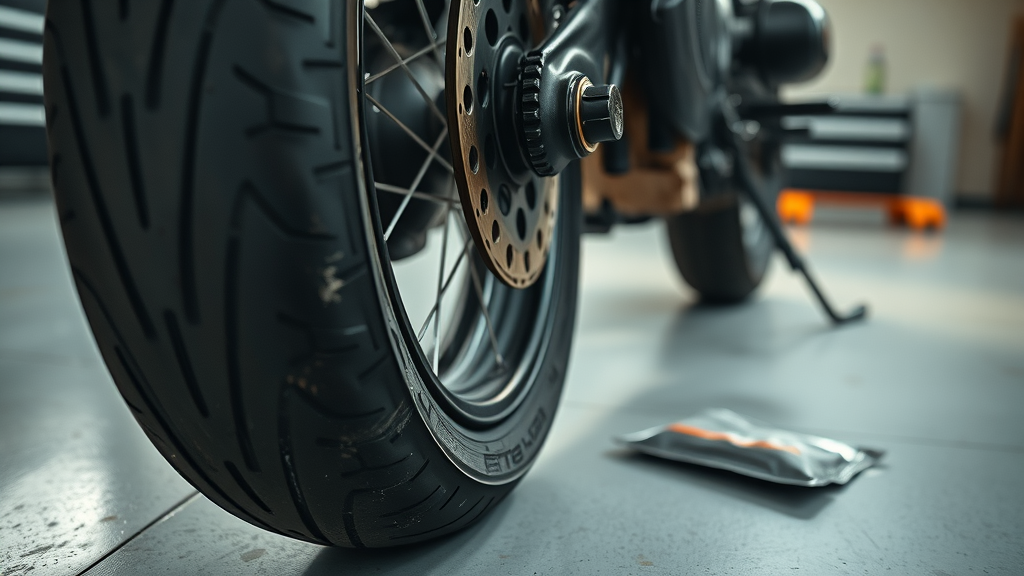
Evaluating Tread Depth and Detecting Unusual Wear and Tear

Your safety on two wheels heavily depends on tread depth. Tire treads displace water and debris, maintain grip, and allow the brakes to engage the road efficiently. Insufficient tread depth leads to poor handling and increases stopping distances—especially in wet conditions. Use a tread gauge as part of your tire maintenance and inspect at several points around both the front tire and the rear tire, not just the center.

Tire Tread Depth Guidelines and Replacement Indicators

Tread Depth

Condition

Recommended Action

>4mm

Good

Visual checks

2-4mm

Monitor

More frequent checks

<2mm

Worn

Replace tire

Watch for unusual patterns of wear and tear: flat spots, cupping, or scalloping can signal suspension or alignment issues. Uneven wear on your rear tire or front tire could mean suspension misalignment, overloading, or improper tire inflation. Promptly replacing a worn tire forestalls poor grip and supports reliable motorcycle brakes performance—vital for every long ride and unpredictable weather.

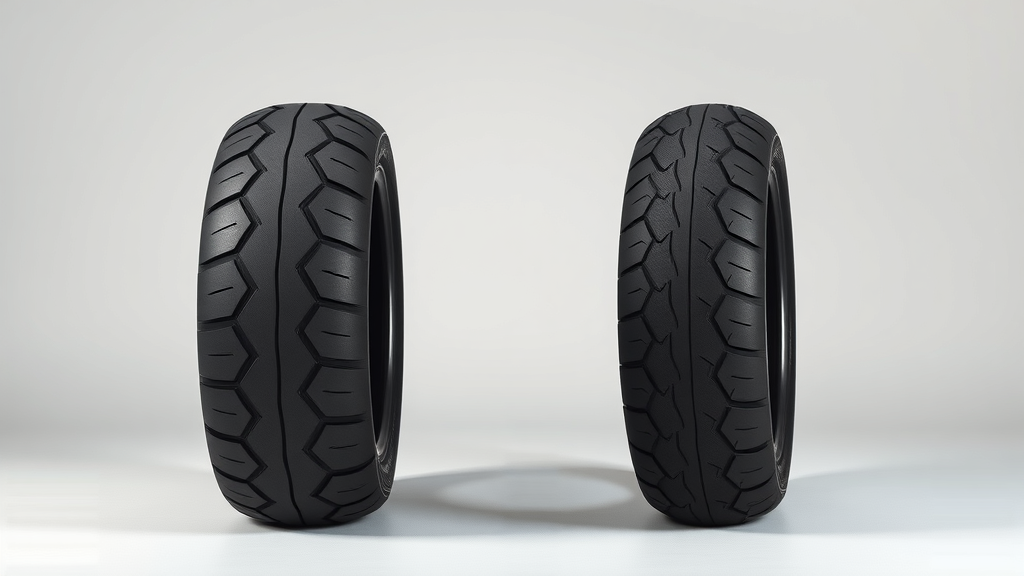
Choosing the Right Tire Size and Profile for Motorcycle Performance

display of different motorcycle tire sizes and profiles for motorcycle tire and brake care

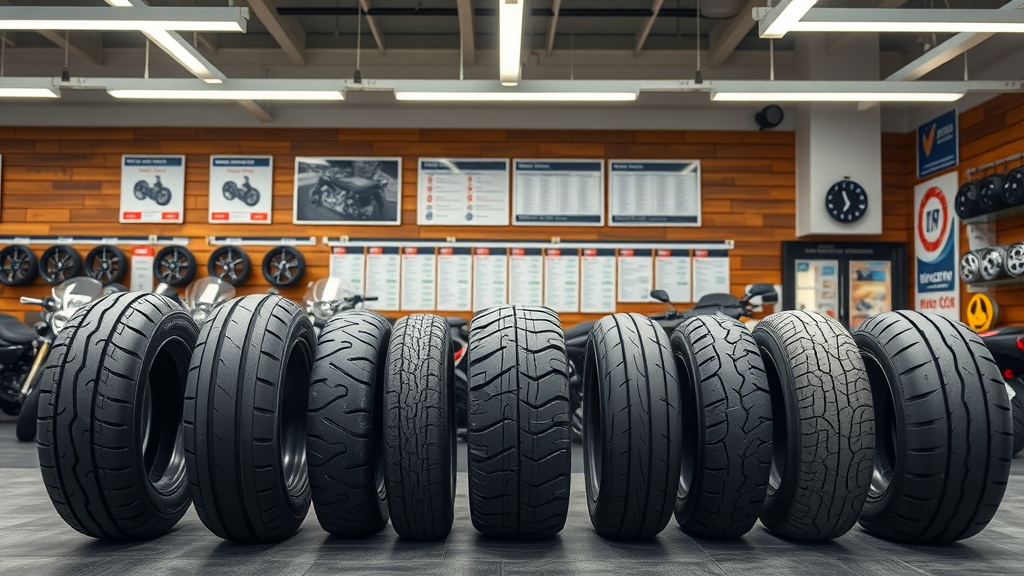
Selecting the proper tire size and profile is not just a matter of fit—it impacts how your motorcycle responds to steering, braking, and acceleration. The wrong size can hinder the action of your motorcycle brakes or even cause tire failure during extremes. Always consult your motorcycle manufacturer’s guidelines for tire specifications and avoid mixing brands or types without a professional’s input.

Performance-oriented riders may opt for specific profiles that offer sportier handling or longer mileage. Remember, the rear tire and front tire may require different tire sizes and profiles for optimal balance. Matching your tire characteristics with your riding style and conditions delivers the best mix of safety, mileage, and fun on the road.

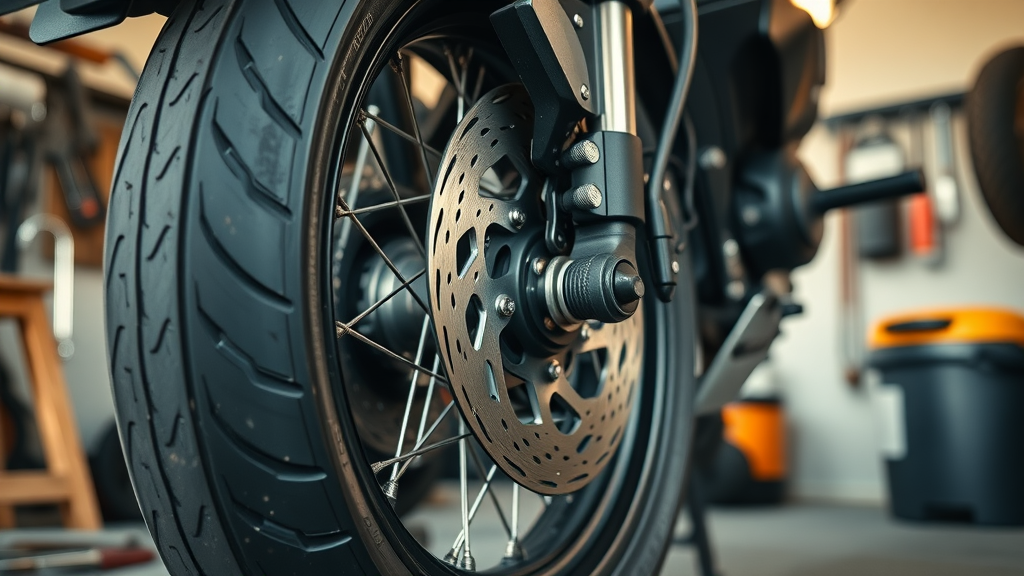
Motorcycle Brake Care: Reliable Stopping Power Starts Here

Your motorcycle brake system is your lifeline in emergencies and everyday riding alike. Brake components like brake pads, rotors, and brake fluid endure substantial stress mile after mile. Ignoring routine brake maintenance can swiftly lead to poor performance or outright failure. Riders should learn to recognize symptoms of declining brake health, commit to scheduled inspections, and never hesitate to replace components that show significant wear and tear.

The interplay between motorcycle tires and brakes is crucial: poor tire condition will reduce braking effectiveness, while faulty brakes can’t deliver optimal stopping power, even with perfect tires. Together, these systems reinforce each other in the quest for safe riding. Commit to both tire maintenance and brake care for holistic motorcycle maintenance—your ability to react swiftly in split-second scenarios depends on it.

Routine Brake Pad and Brake Pads Inspections

  • Checking brake pad thickness

  • Identifying brake pad glazing or scoring

  • Scheduling timely replacements

Brake pads are the critical point where hydraulic force meets friction to slow your motorcycle. Regularly inspect your brake pad thickness; if it’s less than the manufacturer’s minimum, it’s time for replacement. Look out for signs of glazing (a shiny, glass-like finish) or scoring (deep grooves) on the pads, which can cause a dramatic drop in braking efficiency.

Neglect may result in metal-on-metal contact, irreparably damaging rotors and rendering your motorcycle brakes unreliable. Set a reminder to peek at the brake pads every month or during tire service, and never postpone replacements—timely action can save your brakes, your wallet, and possibly your life.

Ensuring Fresh and Effective Brake Fluid

“Neglecting brake fluid replacement is one of the top causes of brake failure.”

Brake fluid is often overlooked but absolutely vital. It transfers your input from the brake lever or pedal to the caliper and pads, enabling effective stopping. Over time, brake fluid absorbs moisture, reducing its boiling point and leading to spongy brakes or complete brake failure—especially critical during a long ride or aggressive riding.

Most experts recommend replacing brake fluid every 1–2 years, or sooner if you notice cloudiness or a drop in lever firmness. Always select fluid that matches your motorcycle manufacturer’s recommendations, avoiding contamination or mixing incompatible types. During every service, check fluid reservoirs and look for leaks—especially around the rear brake and front brake master cylinders.

Warning Signs of Motorcycle Brake and Motorcycle Brakes Issues

rider checking motorcycle brake caliper for motorcycle tire and brake care

Your motorcycle brakes communicate their needs through specific symptoms: squealing or grinding noises, spongy lever feel, longer stopping distances, and visible rotor grooves. If your brake pads appear thin or the rotor surface feels rough or deeply scored, don’t dismiss these warning signs. Vibrations while braking can indicate warped rotors, while leaks or a sudden drop in fluid suggest it’s urgent to check the master cylinder and calipers.

Never wait until performance deteriorates drastically—addressing these signs early can prevent far more extensive and expensive repairs. If you’re unsure, schedule a comprehensive braking system evaluation as part of your routine motorcycle maintenance to guarantee consistent, predictable stopping power.

Watch this in-depth walkthrough as a certified expert explains how to systematically inspect every component of your motorcycle brake system, highlighting what to look for and when to seek professional service.

Integrated Motorcycle Maintenance: Combining Tire Maintenance and Brake Checks

One of the secrets to exceptional motorcycle tire and brake care is integrating both systems into your maintenance schedule. Both tire condition and brake health complement each other, and incorporating checks for each ensures that nothing is overlooked. Many modern riders develop a pre-ride checklist—reviewing tire pressure, inspecting wear patterns, checking brake fluid, and ensuring brake pads meet standards.

Motorcycle maintenance is most effective when it becomes a habit. Frequency and timing matter: from daily pre-ride checks to in-depth inspections every season or after a particularly long ride. Proactive maintenance not only increases component life but significantly bolsters your confidence when out on the open road.

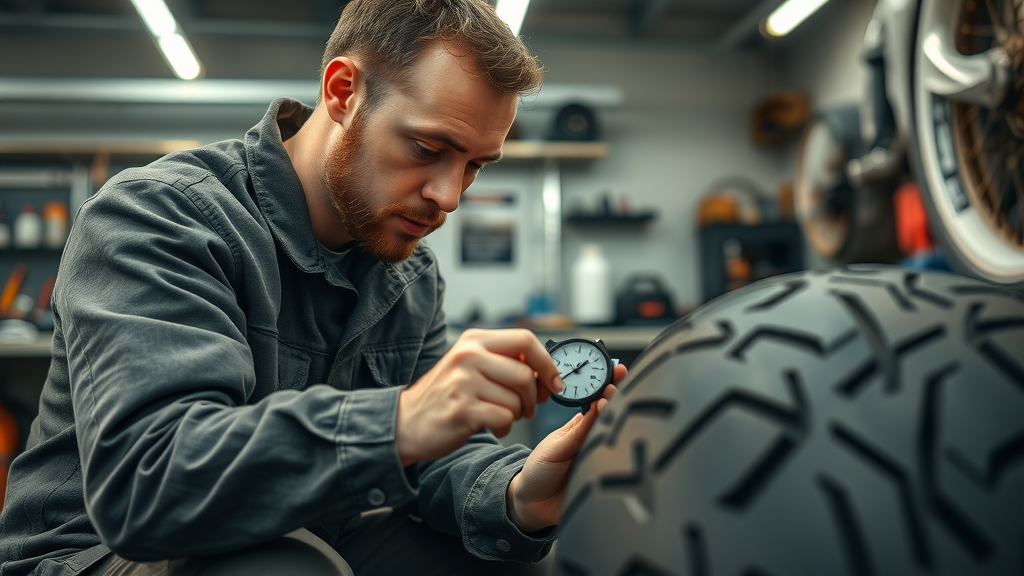
The Schedule: How Often to Service Motorcycle Tires, Brake Pads, and Brake Fluid

Recommended Motorcycle Tire and Brake Care Intervals

Maintenance Item

Recommended Interval

Tire pressure

Every ride

Tread depth

Monthly

Brake pads

Every 6,000–12,000 miles

Brake fluid

Every 1–2 years, or as needed

Adhering to these maintenance intervals is vital for staying ahead of both visible and hidden issues. Establishing a schedule—ideally with reminders—will help you regularly check and maintain optimal tire pressure, measure tread depth, inspect brake pads, and replace brake fluid before problems arise. Tracking maintenance gives you better control over your motorcycle and can even boost resale value down the line.

Follow along as an industry professional guides you through a live demonstration of a complete tire and brake care routine, offering practical advice for every rider—new and experienced alike.

Motorcycle Tire and Brake Care Tips from Industry Experts

Leading mechanics agree: consistency is the hallmark of effective motorcycle tire and brake care . Habits like checking tire pressure before every ride, storing your motorcycle in a temperature-controlled environment, and selecting only manufacturer-approved parts dramatically lower your odds of mechanical failure. Expert advice often centers on prevention—replace items at the first sign of wear rather than waiting until the next scheduled visit.

Many riders make the mistake of mixing tire brands or ignoring climate’s impact on tire inflation and brake fluid viscosity. Instead, invest in a simple maintenance toolkit, document your service history, and stay alert to subtle shifts in handling or braking performance. When in doubt, quick consultations with a seasoned mechanic can spare you from costly mishaps.

Top Preventative Maintenance Actions for Tires and Brakes

  • Use manufacturer-recommended tire pressure and brake fluid

  • Store your motorcycle properly

  • Avoid mixing tire brands/types

  • Recognize and replace worn components proactively

organized motorcycle home garage setup for motorcycle tire and brake care

Setting up a dedicated space for your maintenance supplies will keep you organized and ready for every inspection. Having your tire gauge, fluid tester, and replacement parts stored neatly means you won’t skip crucial steps due to inconvenience. This level of preparedness is what separates casual riders from truly safety-conscious motorcyclists.

Quote from a Professional Mechanic: The Value of Consistency

“Consistent motorcycle tire and brake care can mean the difference between a close call and an accident.”

That regular attention not only helps detect issues before they escalate but also instills the peace of mind necessary for pure riding enjoyment. Adopt a routine—your motorcycle and your adventures will thank you for it.

People Also Ask About Motorcycle Tire and Brake Care

What is the 70 30 rule on a motorcycle?

The 70/30 rule refers to using 70% of your front brake and 30% of your rear brake during normal stops. This technique maximizes stopping power while maintaining control, especially during motorcycle tire and brake care routines.

How often should I change the brake fluid in my motorcycle?

Most manufacturers recommend changing motorcycle brake fluid every 1–2 years as part of routine motorcycle maintenance. Regularly replacing brake fluid ensures optimal motorcycle brake performance and safety.

How to take care of motorcycle brakes?

To take care of motorcycle brakes, inspect brake pads for wear, replace brake fluid as needed, clean rotor surfaces, and check for uneven wear or scoring. Promptly address any squealing, reduced stopping power, or visual decay.

Is it worth patching a motorcycle tire?

Patching a motorcycle tire is only acceptable for small punctures in the tread area—never in the sidewall. For maximum safety, most experts recommend replacing damaged motorcycle tires rather than patching them.

motorcycle tire with visible tread puncture for motorcycle tire and brake care

Frequently Asked Questions About Motorcycle Tire and Brake Care

What are the signs I need new motorcycle tires?

Common indicators include reduced tread depth, visible cracks, bulges, irregular wear patterns, or the motorcycle tires reaching their recommended mileage limit.

Can I mix different brands of motorcycle tires or brake pads?

For optimal performance, always use matching brands, types, and sizes as advised in your motorcycle manual. Mismatched components can negatively affect handling and braking.

How do temperature changes affect motorcycle tire pressure and brake fluid?

Cold temperatures decrease tire pressure and can cause brake fluid to thicken. Regular adjustments as the seasons change help maintain safety and performance.

comparison of low and fully inflated motorcycle tires for motorcycle tire and brake care

Key Motorcycle Tire and Brake Care Takeaways for Safe Riding

  1. Inspect motorcycle tire and brake components every ride.

  2. Prioritize timely replacement of worn items.

  3. Use quality materials for maintenance.

  4. Follow the manufacturer’s service schedule closely.

  5. When in doubt, consult a professional mechanic.

professional mechanic teaching motorcycle tire and brake care maintenance

Discover top professional tips for keeping your motorcycle in peak shape throughout every season, emphasizing the critical overlap between tire maintenance, brake care, and smart riding.

Stay Safe on Every Journey with Trusted Motorcycle Tire and Brake Care

By prioritizing motorcycle tire and brake care, you’re not only following safety guidelines but protecting your most valued investment—yourself. Make maintenance a habit and the road ahead becomes far more predictable, enjoyable, and safe.

Contact Our Motorcycle Maintenance Experts for Personalized Support: Call Us Today: 847-458-4858

Ready to schedule a comprehensive checkup or need tips tailored to your motorcycle? Call Us Today: 847-458-4858 —our team is here to put your safety first.

Maintaining your motorcycle’s tires and brakes is crucial for safety and performance. For comprehensive guidance, consider the article “ Tips for Motorcycle Brake Maintenance ,” which offers detailed advice on brake fluid management and pad inspections. Additionally, “ Tips to Take Care of Motorcycle Tires ” provides essential tire maintenance practices to ensure optimal traction and longevity. By integrating these expert recommendations into your routine, you can enhance your riding experience and safety.

Motorcycle Maintenance

0 Comments

Write A Comment

*
*
Related Posts All Posts

How to Clean an Old-School Motorcycle Carburetor Like a Pro

Did you know nearly 35% of old school motorcycle performance problems are caused by neglected carburetor cleaning? Despite being one of the simplest maintenance tasks, most classic bike owners overlook it—and they pay the price in sluggish rides and unreliable starts. Whether you’re restoring a vintage Janus Motorcycle, tuning up a Harley Davidson, or keeping your Super Cub in peak condition, mastering carburetor cleaning is the secret to experiencing your machine’s modern classic power as it was meant to be. This guide walks you through every step, mixing timeless wisdom with professional technique, so your bike runs as smoothly as it did years ago.Riding the Legacy: Why Old School Motorcycle Maintenance MattersMaintaining an old school motorcycle isn’t just about mechanical reliability—it’s about preserving a cultural legacy of modern classic engineering and iconic style. The heart of every café racer, desert sled, or vintage-inspired sport bike lies in its meticulously crafted components, with the carburetor playing a starring role. Regular cleaning ensures these beautiful machines remain fun to ride and easy to ride, delivering the kind of thrilling to ride performance that defines the classic line. Ignoring such fundamental upkeep can lead to frustrating problems and costly repairs, reducing both the bike’s collectability and the rider’s enjoyment. Investing time into the details, from disc brake inspection to testing lb ft of torque, guarantees your motorcycle retains its classic design and vintage style allure for years to come.What You'll Learn About Old School Motorcycle Carburetor CleaningThe essential tools and supplies for old school motorcycle carburetor cleaningStep-by-step process to professionally clean and reassemble your carburetorClassic models—like Janus Motorcycle, Indian Motorcycle, and the Super Cub—and their unique carburetor considerationsExpert tips for optimal performance and longevityWhat is an Old School Motorcycle? Exploring Modern Classic and Vintage AppealOld school motorcycles stand at the crossroads of mechanical artistry and timeless adventure. Unlike modern sport bikes equipped with electronic traction control and complicated fuel injection systems, old school motorcycles, like the iconic Janus Motorcycle or the legendary Harley Davidson, maintain a hands-on approach. These bikes are revered for their upright parallel or flat twin engine configurations, classic design elements, and a vintage style that makes every ride feel like a trip down memory lane. Collecting and riding these machines, whether it’s an original café racer or a utilitarian Super Cub, is about honoring mechanical simplicity and the joys of DIY maintenance. Over the years, models such as the Indian Motorcycle and Janus Motorcycles have become symbols of enduring quality and beautiful machine aesthetics, making them highly sought-after by collectors and riders alike.The Difference Between Old School and Modern Classic MotorcyclesUnderstanding the distinctions between old school bikes and modern classics is crucial for both restoration and maintenance. While old school motorcycles are defined by carbureted engines, minimalist technology, and hands-on mechanics, modern classic motorcycles combine old-school style with contemporary engineering—think fuel injection, improved suspension, and disc brakes. For example, Janus Motorcycle is renowned for hand-crafted, small-batch production that maintains vintage charm, whereas Indian Motorcycle and Harley Davidson's modern lines embrace updated tech without sacrificing the classic look. Both styles remain beautiful machines, but owners must pay close attention to the requirements of their chosen model. Whether you prefer the parallel twin of a café racer or the flat twin of a desert sled, knowing what sets your motorcycle apart ensures it receives the care—and fun to ride performance—it deserves.Notable Classic Models: From Janus Motorcycles to Harley DavidsonSome motorcycles have set the standard for what we call “old school” today. The Janus Motorcycle offers a truly unique vintage experience, hand-assembled using classic engineering principles. Indian Motorcycle stands as an American legend, celebrated for its original café racer silhouette and thunderous lb ft of torque. The Honda Super Cub, meanwhile, continues to charm riders with its easy-to-ride, reliable nature—accounting for more units sold than any other motorcycle in history. Harley Davidson remains a household name known for both its vertical twin and v-twin engine bikes, offering a blend of modern classic and pure old-school appeal. Each model boasts distinct engine configurations, carburetor setups, and collectability, shaping the nostalgia and popularity of vintage motorcycle ownership over the years.Comparison Table: Janus Motorcycle vs. Indian Motorcycle vs. Super Cub vs. Harley DavidsonModelYear ReleasedKey FeaturesCarburetor TypeCollectabilityJanus Motorcycle2011Hand-built, small business, cafe racer lookClassic Slide CarburetorHigh (Custom-built, limited run)Indian Motorcycle1901Flat twin/vertical twin, high lb ft of torqueMechanical CarburetorVery High (Historic, original cafe racer lineage)Super Cub1958Iconic design, easy to ride, extremely reliableCV CarburetorHigh (Most produced motorcycle ever)Harley Davidson1903V-twin, sport pro heritage, beautiful machineBendix or CV CarburetorVery High (Collector favorite, iconic style)Why Carburetor Cleaning Matters for Your Old School Motorcycle’s PerformanceThe carburetor is the beating heart of your old school motorcycle—it mixes fuel and air so your engine delivers peak lb ft of torque, robust acceleration, and that classic sound. But dirt, varnish, and debris can easily clog this crucial system, causing poor starts, sluggish throttle, and even a loss of that fun to ride experience. For treasured models like Continental GT and twin engine café racers, regular cleaning prevents expensive repairs and keeps your vintage bike thrilling to ride. Moreover, a clean carburetor improves fuel efficiency, reduces emissions, and preserves the original café racer personality that made these motorcycles easy to ride and admired for their classic design. Taking carb care seriously means honoring the legacy of your machine and enjoying beautiful machine performance for years to come.The Role of the Carburetor in Vintage MotorcyclesIn old school motorcycles, the carburetor is more than a mechanical component; it’s an emblem of analog precision and simplicity. Before modern fuel injection and traction control systems, skilled riders—and tuners—depended on meticulous carburetor adjustment to achieve the right engine configuration for varied riding positions, environments, and riding styles. A well-maintained carb not only preserves the iconic style and classic line of Indian Motorcycles and Janus Motorcycles, but it also grants riders access to reliable powerbands and strong ft of torque. For popular models spanning from the upright parallel engines of Super Cub to the powerful vertical twin layout of Harley Davidson classic bikes, carburetor tuning and cleaning remain a must for anyone looking to restore or preserve their motorcycle’s original performance and charm.Essential Tools & Supplies for Cleaning Your Old School Motorcycle CarburetorQuality results require quality tools—and cleaning an old school motorcycle carburetor is no exception. Whether you’re working on a Janus Motorcycle, Indian Motorcycle, Harley Davidson, or the reliable Super Cub, assemble a comprehensive kit to tackle carbon buildup and residue. A dedicated carburetor cleaner spray dissolves deposits inside narrow jets, while a compressed air canister ensures passages are free of obstructions. Screwdrivers and soft brushes are vital for gentle disassembly and cleaning, especially for delicate gasket and O-ring surfaces common on classic engines. Safety gloves protect you from solvents, and acquiring model-specific gasket and O-ring kits is vital for expert reassembly, particularly for Harley Davidson and Continental GT bikes. Investing in professional-grade supplies tailored to your motorcycle’s unique needs not only safeguards intricate parts but also maximizes restoration outcomes for these beautiful machines.Carburetor cleaner sprayScrewdrivers and soft brushesCompressed air canisterGasket and O-ring kits for Harley Davidson and Continental GT modelsSafety gloves"Janus motorcycles, for example, feature unique carburetors. Cleanliness here is crucial—especially for riders looking for that authentic old school motorcycle feel," notes a technician at Nasty Performance.Step-by-Step Guide: Cleaning Your Old School Motorcycle Carburetor Like a ProPreparation: Removing and Disassembling the CarburetorBefore beginning, ensure your motorcycle is on stable ground and fueled off. Carefully remove the seat and tank, exposing the carburetor. Take photos during each step—these visuals are invaluable during reassembly. Unscrew mounting brackets and gently disconnect fuel lines, throttle cables, and choke linkages. For Janus Motorcycles and Super Cub models, pay special attention to unique fastener types and mounting configurations. Once freed, bring the carburetor to your workbench. Using soft brushes and screwdrivers, remove the float bowl, main jet, pilot jet, and float itself. Place all loose components in a labeled tray to prevent confusion—especially with classic models where part symmetry can be misleading. By working methodically, you protect delicate parts from damage and ensure a smooth, frustration-free reassembly later on.Deep Cleaning Techniques for Twin Engine and Super Cub ModelsStart by liberally applying carburetor cleaner spray to every metal component, especially where stubborn varnish and fuel residue accumulate. Use small, soft brushes to gently dislodge carbon deposits, being extra attentive to the tiny passageways in Super Cub carburetors. Compressed air ensures passages are clear, crucial for optimal air/fuel mixture—if not thoroughly cleaned, even a beautiful machine like a Janus Motorcycle can suffer idle problems or stalling. For twin engine bikes or multi-carb setups (as seen on classic Harley Davidson and Indian Motorcycles), soak parts in a dedicated ultrasonic cleaner for best results; this technology vibrates residue away without risking delicate surfaces. Focus on gaskets and O-rings, checking for wear or cracks. Replace them with new kits designed for your model to prevent leaks after reassembly. Attention to detail now guarantees reliability and keeps your ride fun to ride for many more years.Troubleshooting: Common Issues in Old School Motorcycle CarburetorsAfter cleaning, inspect each part for wear. Common culprits—warped float bowls, blocked jets, or cracked O-rings—can lead to erratic fuel flow, loss of lb ft torque, and unpredictable throttle response. For Super Cub and twin engine café racer setups, ensure the float moves freely and all jets are completely clear. Persistent overflow, hot starting difficulties, or rough idle can often be traced to debris still lodged in passageways or misaligned floats. If your Harley Davidson or Janus Motorcycle hesitates at speed, consider the possibility of air leaks on carb intake boots or improperly seated O-rings. Don’t be tempted to reuse old gaskets—investing in new, model-specific replacements ensures your carburetor is airtight and running like new. Careful troubleshooting and reinspection prevent repeat issues and help your vintage ride stay beautiful and easy to ride.Reassembly & Post-Cleaning Steps: Ensuring Optimal Performance on Modern Classic BikesTesting air/fuel mixtureTuning for different models (Harley Davidson, Janus Motorcycles, Indian Motorcycle)Once all parts are clean and dry, carefully reassemble the carburetor by reversing your disassembly steps. Replace worn O-rings and gaskets as you go. Before reinstalling, set the float height using model-specific specs—incorrect settings can sabotage even the best cleaning job. After refitting the carburetor to your motorcycle, tighten all clamps and ensure throttle/choke linkages work smoothly. Fill the tank with fresh fuel and start the engine. Test the air/fuel mixture screw—adjust until idle is smooth and response is sharp. For Harley Davidson and Janus Motorcycles, tuning may vary by model, so refer to specifications or consult your manual. Listen for smooth operation and consistent idle; these are signs your cleaning has restored optimal performance. By investing care in these finishing touches, your old school motorcycle will deliver the iconic, fun to ride experience it was built for—every time you turn the key.Expert Tips for Maintaining Your Old School Motorcycle’s Carburetor"Routine upkeep transforms your classic motorcycle from a weekend relic to a reliable ride," says classic bike restorer Alex Long.Monthly cleaning checklist for vintage motorcyclesLong-term storage tips for old school motorcycle carbsTo make carburetor care second nature, adopt a monthly cleaning routine. Begin by visually inspecting for leaks and residue, especially around gaskets. Run the engine and listen for irregular idle or delayed throttle—these often signal dirt or air leaks. On a quarterly basis, remove and clean jets, and adjust mixture screws for optimal running. For long-term storage, always drain the fuel from the carburetor and tank—a critical step for a sport pro machine or beautiful machine like a Continental GT. Fogging the engine, applying light oil to internal carb surfaces, and storing your motorcycle in a dry, climate-controlled environment prevent rust and ensure a smooth restart after months of rest. By following these simple, proactive steps, you’ll spend less time troubleshooting and more time experiencing the iconic style and thrilling performance your old school motorcycle was built to deliver.Old School Motorcycle Carburetor Cleaning: Product Reviews & Purchasing GuideBest Carb Cleaner Brands for Old School MotorcyclesChoosing the right cleaner can make a world of difference, especially when you’re restoring unique carburetor types as found in Janus Motorcycles, Indian Motorcycle, or Honda Super Cub. Top recommended brands among classic bike enthusiasts include Berryman Chem-Dip, known for its strong solvent action, and Gumout Carburetor Cleaner, praised for its fast-acting spray. Liquid Wrench and CRC Carb & Choke Cleaners are also highly rated for their compatibility with older gasket materials and their ability to remove varnish from delicate carburetor settings. For twin engine setups, investing in an ultrasonic cleaner is worthwhile, as it provides deep, residue-free cleaning with minimal risk. Always use products recommended by small business restoration shops or model-specific forums for the best outcome.Tools and Kits: From Janus Motorcycles to Indian MotorcycleA comprehensive cleaning kit goes beyond just a can of cleaner. Look for sets that include precision screwdrivers, soft nylon and brass brushes, and an assortment of picks for cleaning stubborn jets. Replacement gasket and O-ring kits specifically for Harley Davidson, Continental GT, and Janus models are widely available online or through classic motorcycle specialist shops. Additionally, a small parts tray and magnetic mat prevent loss of screws and springs during disassembly. When in doubt, opt for tools used by professional shops like Nasty Performance, as their experience with classic line and sport bike restoration ensures you have everything required for a successful, stress-free cleaning session.People Also Ask: Old School Motorcycle FAQsWhat are old school motorcycles called?Old school motorcycles are often called “modern classics,” “vintage motorcycles,” “retro bikes,” or simply “classic motorcycles.” Popular examples include Indian Motorcycle, Janus Motorcycles, Harley Davidson, and Honda Super Cub.What is the most classic motorcycle?The most classic motorcycles often cited by enthusiasts are the Harley Davidson Knucklehead, Indian Chief, Honda Super Cub, and the Royal Enfield Continental GT. Each of these models exemplifies the appeal and influence of old school motorcycles.What is the 1% rule on motorcycles?The “1% rule” refers to the notion that 99% of motorcyclists are law-abiding citizens, while 1% are “outlaws”—a term that originated following statements by the American Motorcyclist Association. It is a concept tied closely to motorcycle club culture, especially among old school motorcycle communities.What is the best vintage motorcycle to buy?The best vintage motorcycle to buy depends on your needs, but favorites include the Honda Super Cub for reliability, Indian Scout for historical value, and Janus Motorcycles for custom, small-batch craftsmanship. Harley Davidson and Royal Enfield Continental GT also remain sought-after models for old school motorcycle enthusiasts.Key Takeaways: Cleaning and Maintaining Your Old School Motorcycle CarburetorRegular cleaning preserves value and performance of your old school motorcycleChoose tools and cleaners suited for classic enginesFollow model-specific guidance for best resultsFrequently Asked Questions About Old School Motorcycle CarburetorsHow often should I clean my old school motorcycle carburetor?For optimal performance, clean your carburetor every 3,000–5,000 miles or at the start and end of the riding season. If you notice poor idle or hard starts, clean immediately.Can improper cleaning damage my classic motorcycle?Yes, using harsh chemicals or metal tools carelessly can strip delicate passages, damage soft gaskets, or cause leaks. Always use gentle brushes and model-appropriate cleaners.What are signs of carburetor clogging in Janus Motorcycles or Indian Motorcycle models?Common signs include rough idle, sputtering, fuel overflow, poor throttle response, and a decrease in easy to ride feeling or acceleration. Address promptly for safe, reliable riding.Conclusion: Experience the Thrill of Riding and Restoring an Old School MotorcycleWith the right tools, techniques, and routine care, every old school motorcycle owner can enjoy reliable, exhilarating rides that preserve timeless style and legacy.Call Nasty Performance Motorcycle Shop Today: 847-458-4858Ready to restore or upgrade your classic motorcycle? Call Nasty Performance Motorcycle Shop at 847-458-4858 for expert advice, carburetor repair, and premium parts tailored to your old school bike.

Motorcycle Maintenance Guide for Beginners: What You Need to Know

There’s nothing quite like the freedom of the open road on two wheels—but that sense of adventure comes with responsibility. As a new rider, learning to maintain your own motorcycle is both a rite of passage and a ticket to safer, more enjoyable rides. Imagine cruising under a sunny sky, each part of your bike humming in harmony because you took the time to learn its care. This motorcycle maintenance guide for beginners delivers the confidence and capability to keep your ride running smoothly—starting now.Start Your Journey: Why Every Rider Needs a Motorcycle Maintenance Guide for BeginnersThe road calls to every rider, but staying safe and enjoying each ride depends on how well you know your machine. For beginners, a motorcycle maintenance guide for beginners is more than just a collection of tips—it’s your first layer of protection, ensuring your motorcycle remains reliable and safe. Learning the basics of motorcycle maintenance sparks a sense of ownership, keeps repair costs down, and connects you more deeply to your bike’s mechanics. This guide is designed to help you master essential maintenance tasks and build a strong foundation, so you’re safe on the road and prepared for any journey that lies ahead."Maintaining your bike isn't just about performance—it’s about freedom and safety on the open road."What You'll Learn from This Motorcycle Maintenance Guide for BeginnersFoundational motorcycle maintenance tasks every beginner can masterHow proper tire pressure, air filter, and chain upkeep extends your bike's lifeEssential checks and troubleshooting techniquesUnderstanding Motorcycle Maintenance: The BasicsWhy Is Regular Motorcycle Maintenance Important for Beginners?Getting started with the basics of motorcycle maintenance leads to enormous long-term benefits. Routine inspections and following your bike maintenance schedule help you identify potential problems before they become serious—and expensive—issues. New riders often underestimate how quickly signs of wear can surface, from brake pads thinning to tire pressure dropping. Regular attention to maintenance tasks boosts both performance and rider safety, ensuring your machine is always in working order.Understanding these maintenance tasks also makes troubleshooting much easier. If your motorcycle won’t start or feels “off,” being able to check your oil, tire pressure, and battery terminals empowers you to fix small problems quickly. Most importantly, a habit of double check —whether that’s for fluid levels or the condition of moving parts—means you’re less likely to be caught off-guard, making calamity far less likely when you least expect it.As you build your maintenance routine, it's helpful to understand how seasonal changes can impact your motorcycle's condition and the specific care it requires. For a deeper dive into preparing your bike for different weather conditions and maximizing its longevity year-round, check out these seasonal bike care secrets every rider must know.Motorcycle Maintenance Guide for Beginners: Safety FirstSafety is the foundation of every great ride. This motorcycle maintenance guide for beginners puts safety at the forefront by breaking down each key component check and why it matters. For starters, properly maintained brake pads and brake fluid offer peace of mind when you need to stop quickly, while regular checks on tire pressure and tread depth keep handling sharp in all road conditions. Always follow instructions in your motorcycle’s service manual and pay attention to the manufacturer’s guidance for each maintenance task.Neglecting routine tasks not only shortens your bike’s life, but can also put you and others at risk. Remember, most safety issues are preventable with simple habit-building: always check your tire pressure, check your oil, and inspect your brakes before each ride. These habits reinforce safe riding and keep you confident wherever your wheels may take you.Essential Tools Needed for Your Motorcycle Maintenance GuideHaving the right tools makes any maintenance task simpler and safer for beginners. You don’t need fancy professional gear—just a well-stocked kit. Start with a socket set for bolts and adjustments, a torque wrench for precise tightening, and a motorcycle stand to safely elevate your bike, especially the rear wheel. A chain brush makes cleaning your chain and sprocket straightforward, and pliers come in handy for various tweaks and fixes.Socket setTorque wrenchMotorcycle standChain brushPliersWhile these are core tools, always consult your motorcycle’s service manual for any model-specific needs. Having reliable tools not only helps in executing maintenance tasks but also builds your confidence as you develop your mechanical skills and knowledge.Motorcycle Maintenance Guide for Beginners: Pre-Ride ChecksVisual Inspection: Tires, Frame, and Fluid LeaksEvery ride should start with a hands-on visual inspection. Examine your tires—look for uneven wear, cuts, or embedded objects. Tire pressure is critical, so check your tire pressure against your service manual’s recommended range before each ride. Inspect the frame for cracks, rust, or bends. Small leaks under your motorcycle often mean it’s time to check your oil filter or fluid levels. If you spot any drops or stains, double check the source and address it before riding.Don’t overlook your fluid reservoirs either: brake fluid, coolant, and engine oil all need to be topped off and inspected. Spotting a drop in any of these could hint at a slow leak or component issue. Taking the time for this pre-ride ritual supports your bike maintenance and keeps your journey safe and worry-free.Understanding Tire Pressure and Its SignificanceYour tire pressure directly impacts how your motorcycle handles—it affects grip, stopping power, and the overall lifespan of your tires. Too low, and your tires wear unevenly or heat up dangerously on long rides. Too high, and you lose valuable traction. The manufacturer’s recommendations found in your manual or on the swingarm sticker are your best guide for maintaining optimal tire pressure.Regularly checking tire pressure should be as routine as fastening up your helmet. Most tire pressure gauges are easy to use and portable. Make a habit of checking before every ride—especially when temperatures fluctuate—so you never lose control due to under-inflated or over-inflated tires. Proper care helps you avoid unnecessary wear and keeps your ride feeling just right.Step-by-Step Guide: Checking Tire Pressure for BeginnersStart with cold tires for an accurate reading. Unscrew the valve cap, press your gauge firmly onto the valve, and note the reading.Compare it to the recommended PSI (pounds per square inch) in your service manual.If the level is low, use an air compressor to fill the tire. If it’s too high, gently release air with your gauge until it matches the target pressure.Repeat for front and rear tires, then double check each for leaks or damage before replacing the valve caps.Monitoring Lights, Controls, and ElectronicsFunctioning electrical systems keep you visible and safe on the road. Test your headlights, tail lights, brake lights, and turn signals—making sure bulbs illuminate brightly and blink at the correct intervals. Don’t ignore warning lights on your dashboard; they often signal low oil levels, battery issues, or urgent maintenance needs.Move on to controls: ensure the throttle turns smoothly, the clutch engages properly, and all switches are responsive. Electronics, like the horn and starter, should respond promptly when activated. Keeping these systems in working order means you’re ready for any ride—whether it's around town or out on an open highway.Motorcycle Maintenance Guide for Beginners: Engine CareChecking and Changing OilOil is the lifeblood of your engine. For peak performance, regularly check your oil level and clarity with the dipstick or sight glass. If the oil appears dark or gritty, it’s time for an oil change, following your motorcycle’s maintenance schedule for intervals. Always replace the oil filter as well—dirty filters let contaminants harm your engine.Changing oil is straightforward: warm up the engine, place a pan beneath the drain bolt, and carefully remove it. Allow oil to drain completely, then replace the bolt and swap out the oil filter. Fill with fresh oil, run the engine briefly, then double check the oil level and add as needed. Routine oil changes protect your engine from wear, overheating, and costly breakdowns.Inspecting and Replacing Air FiltersYour air filter keeps grit and debris from entering the engine. Over time, air filters become clogged, starving your motorcycle of air and causing poor performance, sluggish starts, or increased fuel use. Check your air filter at regular intervals or as recommended in your service manual—and replace sooner if you ride often in dusty or urban environments.A clean air filter boosts horsepower, improves fuel efficiency, and helps your motorcycle run smoothly every day. If you notice your bike running rough or hear unusual engine sounds, inspecting or changing the filter is a quick way to restore normal operation. Follow your manual for exact locations and requirements for your specific model.How to Properly Clean and Replace an Air FilterRemove your seat and locate the air filter casing as detailed in your service manual.Carefully take out the filter. If it’s reusable foam or cotton, clean with the recommended cleaner—otherwise, dispose and replace with a new filter.Let it dry completely before reinstalling, assuring a snug fit to block dirt and debris.Reassemble the airbox and seat, ensuring all components are securely fastened.Motorcycle Maintenance: Battery Upkeep and Charging TipsMotorcycle batteries demand attention, especially if you store the bike through winter or infrequently ride. Inspect for corrosion around your battery terminals, and clean as needed. If your starter sounds weak, check voltage with a multimeter and recharge or replace the battery if necessary.Keeping battery terminals free of corrosion and checking electrolyte levels (if applicable) helps prevent electrical faults. For longer storage, use a smart charger or tender to maintain battery health and extend its life—saving you from the frustration of a motorcycle that won’t start on a beautiful riding day.Chain and Sprocket Care in Motorcycle Maintenance Guide for BeginnersCleaning, Lubricating, and Adjusting Chain and SprocketYour chain and sprocket transfer power from the engine to the rear wheel. Clean, lubricated, and properly tensioned chains operate smoothly, extend sprocket life, and reduce risk of breakdowns or accidents. For everyday riders, aim to chain clean every 500 miles (or after riding in the rain). Use a dedicated chain brush to remove built-up grime, then apply motorcycle-specific lubricant to the chain.Adjusting chain tension is crucial. A too-tight chain can damage bearings and moving parts, while a loose one can slip off unexpectedly. Your service manual specifies the best slack for your model. Routine care of your chain and sprocket underscores all good bike maintenance habits and keeps your ride feeling strong and responsive.Cleaning frequencyLubrication typesChain tensioning basicsBrakes and Suspension: Motorcycle Maintenance Guide for BeginnersInspecting Brake Pads and FluidSafe stopping power comes from healthy brake pads and fresh brake fluid. Begin every inspection by checking your brake pad thickness—worn pads can damage brake discs and severely lengthen stopping distances. Look for grooves, cracks, or uneven wear, and replace brake pads if they look thin or damaged.Check brake fluid levels and color in the master cylinder reservoir. If fluid appears dark or murky, or if it’s below the minimum line, flush and refill per your service manual. Inspect visible sections of brake lines for cracks, bulges, or leaks. Consistent brake maintenance ensures you’re always in control—no surprises at the next red light.Suspension Checks: What to Look ForA well-checked suspension means smoother rides and safer handling. Examine your fork tubes for signs of oil leakage or pitting, and double check the rear shocks for compression and rebound. Wiggle the handlebars with your front wheel off the ground; excess play or knocking could indicate the need for bearing or bushing replacements.If your ride feels excessively bouncy, bottom-out over bumps, or “wanders” during turns, schedule a more detailed suspension inspection or service. Suspension health ensures tires stay firmly on the road and absorbs the worst road imperfections, giving you confidence every time you twist the throttle.Long-Term Motorcycle Maintenance Guide for BeginnersSeasonal Motorcycle Storage TipsPutting your bike away for the winter or after a long trip? Correct storage techniques prevent costly repairs and corroded components. Wash and dry your bike to remove road salts and dirt, lubricate all moving parts, and fill your tank with fuel stabilizer to prevent gumming. Disconnect or remove the battery, and keep it on a smart charger to preserve its life. Cover your motorcycle with a breathable, fitted cover to protect from moisture and dust.Store your motorcycle in a dry, well-ventilated area away from harsh sunlight or freezing temperatures. Bundle your riding gear, keep maintenance tools nearby, and give your motorcycle a quick visual check every few weeks. These habits make spring startups effortless and undramatic.Regular Service Intervals and Record KeepingA detailed maintenance log enhances your bike maintenance practices and provides dealers or mechanics with a clear history for resale or troubleshooting. Use your service manual to set reminders for oil changes, chain and sprocket care, brake pad replacements, and air filter checks. Recording mileage and what maintenance tasks you completed empowers you to spot trends, plan repairs, and avoid costly surprises.TaskRecommended IntervalOil ChangeEvery 3,000 milesChain MaintenanceEvery 500 milesBrake InspectionMonthlyAir Filter ReplacementAnnually or 12,000 milesTire Pressure CheckBefore Every RideCommon Mistakes in a Motorcycle Maintenance Guide for Beginners and How to Avoid ThemNeglecting regular tire pressure checksSkipping air filter replacementsImproper chain and sprocket careIgnoring brake wearThese mistakes can turn minor maintenance tasks into major problems. Regular attention to each step in this motorcycle maintenance guide for beginners ensures your safety, maximizes performance, and saves money on avoidable repairs."A little regular attention now can save you from expensive repairs later."People Also Ask: Key Motorcycle Maintenance QuestionsWhat is the 2 4 12 second rule on a motorcycle?Answer: The 2-4-12 second rule refers to safe following distances and hazard detection—2 seconds for immediate following distance, 4 seconds for potential hazards ahead, and 12 seconds for scanning your path and anticipating traffic movements.How to do basic maintenance on a motorcycle?Answer: Basic motorcycle maintenance includes checking tire pressure, oil and fluid levels, inspecting lights, cleaning and lubricating the chain, ensuring brakes function, and regular air filter care. Always follow your motorcycle's maintenance schedule.What is rule number 5 for motorcycles?Answer: 'Rule number 5' is commonly interpreted as always keeping your focus and attention on the road, practicing defensive riding at all times to minimize risk.What does 2 fingers up mean on a motorcycle?Answer: A gesture of camaraderie, '2 fingers up' is a traditional motorcycle wave to acknowledge fellow riders and share safe travels.Frequently Asked Questions: Motorcycle Maintenance Guide for BeginnersHow often should a beginner perform motorcycle maintenance? Most maintenance tasks like tire pressure checks, fluid level inspections, and visual checks should be done before every ride. Full services—such as oil changes, chain cleaning, and air filter replacements—should be performed according to your manual (typically every few hundred to a couple thousand miles).What is the first thing to check when troubleshooting a motorcycle? Start with basics: battery health, fuel availability, and correct fluid levels. Check the kill switch and ensure all electronics function. If the bike still doesn’t start, review your service manual for next steps.How do I know when to replace my air filter or brake pads? Replace air filters when they appear dirty, clogged, or as recommended by the manual. Brake pads should be swapped out when thickness falls below 2-3mm or you experience decreased stopping power.Key Takeaways from This Motorcycle Maintenance Guide for BeginnersStart with routine safety checks: tire pressure, brakes, fluid levelsMaintain a clean chain and regularly replace air filtersKeep detailed maintenance records to prolong the life of your bikeReady to Ride? Connect with the Experts"Trust your motorcycle maintenance to passionate professionals—every mile matters."Call Nasty Performance Motorcycle Shop Today: 847-458-4858Conclusion: Consistent, simple motorcycle maintenance helps every beginner become a more confident, safer, and happier rider.Motorcycle maintenance is a journey that evolves as you gain experience and confidence. If you’re ready to take your skills to the next level, exploring advanced care strategies and learning how to adapt your maintenance routine for every season can make a world of difference in your bike’s performance and reliability. Discover expert tips on protecting your motorcycle through temperature swings, rain, and storage periods by visiting our comprehensive guide on seasonal bike care secrets every rider must know. With the right knowledge, you’ll be prepared for every mile—no matter what the weather brings. Keep building your expertise and enjoy the ride with confidence all year long.

How to Find the Best Local Motorcycle Suspension Repair Shop

Did you know? Nearly 40% of motorcycle accidents are linked to improper suspension setups—don’t let your ride become a statistic. That single number highlights how crucial it is to prioritize professional motorcycle suspension service and repair. Whether you ride a sport bike, dirt bike, or mountain bike, your suspension system impacts not just performance and comfort but also your safety on the road or trail. As a rider, finding the best local motorcycle suspension repair shop can be the difference between confidence in every corner and costly, dangerous surprises.Why Choosing the Best Local Motorcycle Suspension Repair Matters"Nearly 40% of motorcycle accidents are linked to improper suspension setups—don’t let your ride become a statistic."Selecting the best local motorcycle suspension repair provider is more than a matter of convenience—it’s about securing your safety and maximizing the lifespan of your bike. An expertly maintained suspension system directly affects how your motorcycle responds under braking, cornering, and on rough surfaces. Whether you own a dirt bike for the track, a mountain bike for trails, or a road motorcycle for daily commutes, a well-tuned suspension system means better control and less wear on other components like fork tubes and rear shocks.A bike suspension service performed by certified mechanics ensures optimal performance and safety. Top shops use specialized diagnostic tools for precise click suspension and rear shock adjustments, tailoring the ride to your weight, riding style, and local conditions. Cutting corners with an unqualified shop can lead to poor spring rates, misdiagnosis of internal components, and ultimately higher costs or even crashes. Ensuring your chosen provider is recognized—ideally with OEM or ASE certifications—offers peace of mind and helps prevent your motorcycle from becoming another accident statistic.What You'll Learn About the Best Local Motorcycle Suspension RepairKey features and services to expect from leading local motorcycle suspension repair shopsHow to assess local shop reputations and compare optionsTypical costs: what influences the price of suspension servicesWhat questions to ask before committing to a repairKey Features of the Best Local Motorcycle Suspension Repair ShopsCertified suspension expertsComprehensive bike suspension service optionsLatest tools for click suspension tuningExpertise across motorcycle, dirt bike, and mountain bike platformsQuality parts for rear shock and rebuild serviceServices Offered: From Suspension Service to Rebuild ServiceClick suspension tuningFront and rear shock inspectionComplete suspension rebuild serviceRoutine motorcycle suspension maintenanceSpecialty services for dirt bike and mountain bike suspensionWhen evaluating a shop’s service menu, it’s also helpful to understand the importance of regular maintenance and how it can prevent costly repairs down the line. For a deeper dive into seasonal care routines that keep your bike’s suspension and other components in peak condition, check out these essential seasonal bike care secrets every rider should know.Leading shops go beyond generic maintenance, offering click suspension settings for personalized ride comfort, inspection of vital internal parts, and rebuild service for both motorcycle and mountain bike shocks. Routine services often include fork and shock service, seal replacement, and upgrades based on your bike’s needs—ensuring each component, from the fork tube to the shock body, meets the highest quality standards. Technicians specializing in these tasks have deep experience with multiple brands and models, understanding the nuances between road, off-road, and race track applications. These differentiators make a shop stand out in servicing both casual rides and high-performance machines.Comparing the Best Local Motorcycle Suspension Repair ShopsShop NameCertificationsClick Suspension ServiceRear Shock RebuildLocationCustomer RatingNasty PerformanceASE, OEMYesYesChicago, IL4.9/5Cycle ClinicOEMYesYesEvanston, IL4.7/5MotoMastersASELimitedYesAurora, IL4.5/5Not all motorcycle suspension service shops are created equal. Top-rated shops invest heavily in ongoing training and the latest technology for click suspension and rear shock servicing. Customer ratings reflect the quality of work and the attention to detail offered, such as using genuine or high-quality aftermarket parts, and delivering reliable results for every fork rebuild or major upgrade. When comparing options, it’s worth asking which brands and models they commonly service and whether they specialize in performance or OEM setups. Some shops might cater more to specific disciplines like dirt bikes, race track machines, or even Santa Cruz mountain bikes—critical for those with specialized needs.A helpful tip: Look for shops with a consistently high rating, robust certifications (ASE, OEM), and detailed service descriptions. Shops that offer both click suspension tuning and rear shock rebuild services often display a higher degree of technical capability, especially compared to smaller, generic bike shops. If possible, visit each shop, ask to see their diagnostic tools (such as click suspension calibrators), and request references from the local riding community to ensure you are choosing the best local motorcycle suspension repair provider.What Influences the Cost of Motorcycle Suspension Service?Type of suspension service required (basic vs. rebuild service)Brand and quality of replacement partsComplexity of click suspension adjustmentsModel of motorcycle, mountain bike, or dirt bikeThe cost for suspension service or a full rebuild service can vary widely based on several factors. Basic click suspension tuning is less involved and costs less than a full rear shock or fork rebuild, which often requires a comprehensive teardown, seal replacements, new oil, and sometimes custom valving. On dirt bikes and mountain bikes, specialized components like lighter springs or custom valving may add to the overall price. Brand reputation also impacts price—premium replacement parts or specific models (like those popular for race track use or Santa Cruz mountain bikes) can drive the cost higher due to availability and technical requirements.Don’t forget to factor in the labor for suspension upgrades or rebuilding shock bodies and internal components. The best local motorcycle suspension repair shops are transparent about these variables and will outline the exact work included—from click suspension calibration to full suspension component replacements. Always ask for a written estimate, and confirm if a warranty is provided on the parts and labor for peace of mind.Sample Pricing for Best Local Motorcycle Suspension RepairServiceAverage Price RangeClick Suspension Adjustment$60–$120Rear Shock Rebuild Service$150–$400Full Suspension Service$200–$500The above averages will fluctuate depending on your local market, the sophistication of the services offered, and the shop's expertise level. For those in more competitive regions—like the Bay Area or metropolitan zones—pricing may trend higher, but often reflects superior customer service and the use of higher quality parts.Signs You Need Suspension Services: When to Visit the Best Local Motorcycle Suspension Repair ShopNoticeable decrease in riding comfort or stabilityVisible leaks around shock absorbersUnusual noises during ridesDifficulty controlling bike suspension on varied terrainBike or rear shock bottoming out under normal loadsRecognizing when your bike needs professional suspension services is essential to maintaining optimal performance and safety. If your ride begins to feel harsh, lacks stability during corners, or bottoms out over minor bumps, these are clear signs that your fork and shock may require service. Oil leaks from the fork tube or shock body, increased noise, or visible wear on seal components also indicate it’s time for an expert assessment. Mountain bike and dirt bike riders should pay particular attention, as the varied and rough terrain accelerates wear on internal parts compared to regular road use.Don’t ignore these warning signs. Regularly scheduling a suspension service with the best local shop ensures that any minor concern—like a leaking seal or dampening issue—is fixed before escalating into a catastrophic failure that could jeopardize your safety or cause expensive secondary damage.How to Assess Reputation: Finding a Trustworthy Motorcycle Suspension ServiceVerify online reviews and customer ratingsAsk about technician certificationsInspect the shop for specialty tools (e.g., click suspension calibrators)Request referrals from local mountain bike and dirt bike communitiesVideo Tour: Inside a Top-Rated Motorcycle Suspension ShopTake a virtual walk-through of a leading suspension service provider: Experience their well-equipped workstations, see how certifications are displayed, and check the tools and machinery used for precise click suspension adjustment and rear shock rebuilds. The best shops also proudly showcase awards, trophies, and positive community feedback—proof of their dedication to quality and their specialized standing in the motorcycle, dirt bike, and mountain bike repair sectors.A shop’s reputation in your riding community—on forums, social media, and in local groups—can be a powerful measure of their expertise. Look for consistent positive feedback, especially from riders with similar bikes or needs, whether you’re locking in service for a Bay Area dirt bike or a Santa Cruz–branded mountain bike. Authentic recommendations reflect long-term customer satisfaction and technical skills across routine and specialty repairs.People Also Ask: Top Questions About Best Local Motorcycle Suspension RepairIs it okay to use WD-40 on bike front suspension?It is not recommended to use WD-40 on bike front suspension as it can degrade the seals and reduce performance. Specialized suspension oils and cleaners should always be used.How much does shock rebuild cost?Shock rebuilds for motorcycles typically range from $150–$400, depending on bike type, parts required, and the level of suspension service needed.How often should you service a motorcycle suspension?As a rule of thumb, plan for professional motorcycle suspension service every 10,000–20,000 miles or at least once a year for optimum performance and safety.How to find a good motorcycle mechanic?Look for mechanics with reputable certifications in suspension service, positive local reviews, and specialized expertise in services such as click suspension and rear shock repairs.Frequently Asked Questions About Best Local Motorcycle Suspension RepairWhat are the most common suspension issues found in motorcycles?Can I perform suspension service at home or should I visit the shop?What’s the benefit of click suspension over traditional setups?Do mountain bike and dirt bike suspensions share similar maintenance schedules?Key Takeaways for Finding the Best Local Motorcycle Suspension RepairPrioritize shops that offer specialized bike suspension and rebuild service optionsAsk about click suspension and rear shock expertiseReview shop ratings and service historiesUnderstand cost factors before booking your serviceReady For the Best Local Motorcycle Suspension Repair? Contact the ExpertsCall Nasty Performance Motorcycle Shop Today: 847-458-4858Conclusion: Choose the best local motorcycle suspension repair shop by seeking certified pros, comparing offerings, and checking reputation—your safety and ride quality depend on it.As you continue your journey toward a smoother, safer ride, remember that expert suspension repair is just one piece of the puzzle. To truly maximize your bike’s longevity and performance, it’s wise to adopt a holistic approach to maintenance that adapts with the seasons. Discover how proactive care throughout the year can prevent issues before they start and keep every ride feeling fresh—explore our guide to seasonal bike care secrets every rider must know for actionable tips and advanced strategies that go beyond the basics.

Terms of Service

Privacy Policy

Core Modal Title

Sorry, no results found

You Might Find These Articles Interesting

T
Please Check Your Email
We Will Be Following Up Shortly
*
*
*