Add Row
Add Element
cropper
update

Nasty Performance ~ 847-458-4858 

update
Add Element
  • Blog Home
  • Categories
    • Motorcycle Maintenance
    • Riding Tips & Preps
    • Safety & Inspection
    • Customizations & Upgrades
    • DIY Motorcycle Repairs
    • Motocycle Audio Systems
    • Motocycle Seasonal Care & Storage
    • Engine, Electrical Performance
  • Bike Night
  • Nasty Performance Motorcycle Shop
September 03.2025
1 Minute Read

Motorcycle Maintenance Schedule: Never Miss a Crucial Step

Did you know that over 50% of motorcycle breakdowns happen because riders ignore or forget their maintenance schedules? Whether you’re a daily commuter or a weekend adventurer, your motorcycle maintenance schedule is the invisible line between smooth rides and sudden breakdowns. In this no-nonsense guide, you’ll uncover everything you need to master maintenance, boost safety, and enjoy a worry-free journey every time you hit the road. Read on to safeguard your ride and avoid those costly surprises!

pristine modern motorcycle in professional garage with maintenance tools - motorcycle maintenance schedule

Understanding the Importance of a Motorcycle Maintenance Schedule

  • Did you know that over 50% of motorcycle breakdowns are linked to ignored maintenance schedules? Learn how a well-structured motorcycle maintenance schedule can prevent unexpected repairs and keep you safer on the road.

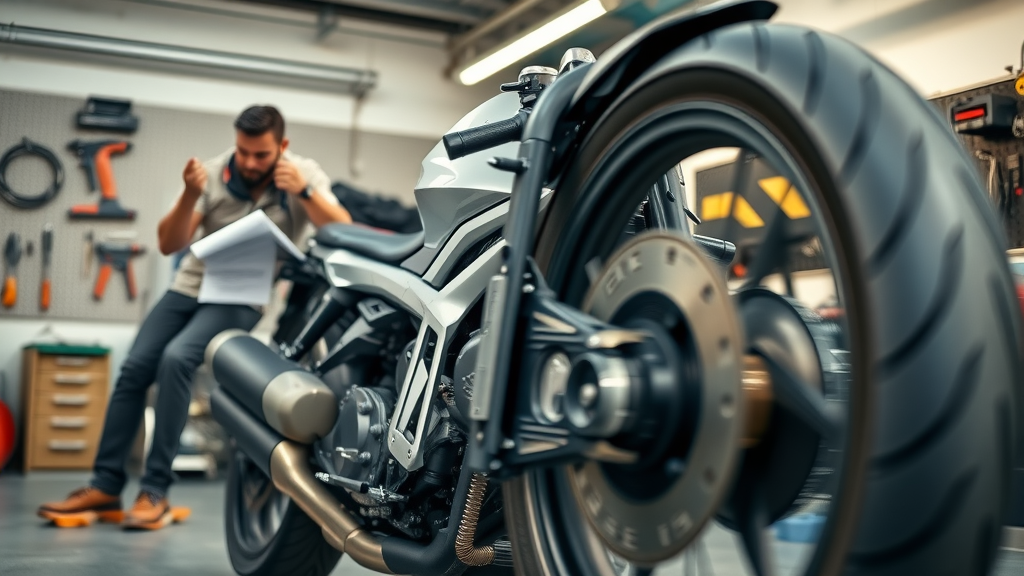
A meticulous motorcycle maintenance schedule is your strongest defense against mechanical failures and expensive repairs. It doesn’t just keep your engine healthy—it’s also pivotal for your safety. Every moving part, from the drive belt to the brake pads and fork oil, relies on timely attention to avoid unexpected issues.

Most riders neglect regular checks, but maintaining a consistent maintenance schedule means your brake fluid won’t be running low, your engine oil will do its job, and every filter change will help your bike breathe easier.

Imagine the confidence of knowing your bike’s maintenance checklist is up to date! With proper scheduling, you reduce the risk of minor issues escalating into major failures that leave you stranded. Whether you ride a dirt bike or a touring machine, following your maintenance interval protects more than just the bike—it safeguards your adventures and peace of mind.

vigilant motorcyclist reviewing checklist - motorcycle maintenance schedule

Maximize Safety and Longevity with the Right Motorcycle Maintenance Schedule

  • Explore the big-picture: why following a detailed motorcycle maintenance schedule drastically improves safety, longevity, and performance for all riders.

Staying loyal to your motorcycle maintenance schedule is the best way to guarantee your ride’s maximum lifespan and optimal performance. Every skipped maintenance task—whether an oil filter change or a simple brake pad inspection—chips away at your motorcycle’s reliability. Safety isn’t just about riding technique; it’s also about ensuring the foundation of your bike is strong.

Regularly checking the maintenance checklist keeps all systems go—from air filter changes that maximize fuel efficiency, to chain and sprocket inspections that prevent sudden breakdowns on the open road. A well-maintained bike responds better, feels more stable, and inspires more confidence in every scenario, whether in city traffic or on mountain twisties.

Over the long time you own your motorcycle, adhering to a carefully planned maintenance schedule reduces cumulative wear, stopping expensive damage before it happens. Regular inspections catch small issues—like worn brake pads or under-lubricated chain and sprockets—before they affect your safety or wallet. The result? Your motorcycle stays new for longer, and every journey is as smooth as the first.

What You’ll Gain from This Motorcycle Maintenance Schedule Guide

  • How to customize your motorcycle maintenance schedule for different motorcycle types

  • Critical service intervals you can't afford to miss

  • Expert-backed maintenance checklists for every season

  • Tips for keeping consistent with your motorcycle maintenance routine

diverse group of riders examining motorcycles with tools - motorcycle maintenance schedule

Key Elements of a Motorcycle Maintenance Schedule

What Makes an Effective Motorcycle Maintenance Schedule?

  • Manufacturer guidelines vs. real-world riding demands

  • Frequency of service intervals and critical inspections

  • Typical maintenance checklist items included in schedules

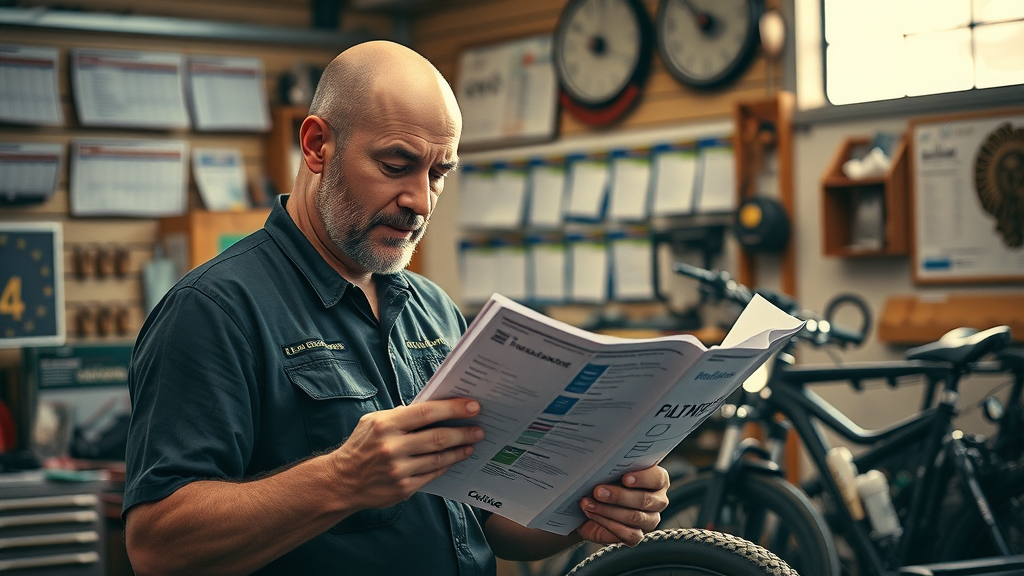
Every motorcycle maintenance schedule starts with a solid foundation: the manufacturer’s service manual. While factory recommendations are essential, they may not always match your unique riding style or environment. For example, a dirt bike tackling muddy trails will have different fork oil and air filter needs compared to a sport bike cruising city streets. Real-world conditions will often require you to adjust your maintenance interval up or down to match these realities.

“ An effective motorcycle maintenance schedule is your best protection against both dangerous failures and costly repairs. ”

The core of any maintenance schedule involves critical elements: routine oil and oil filter changes, checking brake pads and brake fluid, adjusting chain and sprockets, and periodic inspection of the engine oil and cooling system. Service intervals—both mileage-based and time-based—dictate how frequently you should check or replace vital components. Following a maintenance checklist tailored to your motorcycle makes it easy to stay on top of these tasks and never skip a beat.

mechanic referencing manufacturer manual in garage - motorcycle maintenance schedule

Essential Motorcycle Maintenance Checklist for Every Rider

  1. Inspect and replace oil filter and oil change at recommended service intervals

  2. Regularly check and replace brake pads and brake fluid

  3. Ensure spark plug and air filter are clean and functional

  4. Check and lubricate chain and sprocket regularly

  5. Tire inspection for pressure, wear and balance

This maintenance checklist forms the backbone of every motorcycle maintenance plan. At each service interval, check your oil filter and perform a full oil change using fully synthetic or manufacturer-approved engine oil. This keeps internal moving parts clean and lubricated, fending off the buildup of contaminants that cause wear.

Don’t neglect your brake system—inspect your brake pads for wear, check the brake fluid, and watch for signs of fading stopping power. Air filters require cleaning or replacement to maintain consistent airflow and fuel efficiency, while a healthy spark plug ensures strong ignition. Lastly, keep your chain and sprockets free from debris, well-lubricated, and correctly tensioned to avoid breakage and maximize efficiency.

Tires are your only connection to the road. A part of your routine maintenance task should always be a tire check—look for uneven wear, proper inflation, and check wheel balance. This simple but critical habit extends tire life, improves handling, and drastically reduces the chance of blowouts or slips.

organized hand holding clean spark plug by engine - motorcycle maintenance schedule

Recommended Service Intervals in Your Motorcycle Maintenance Schedule

Understanding Service Intervals for Longevity

  • What service interval really means for your motorcycle maintenance

  • Choosing the right service intervals based on riding style and environment

  • Typical mileage/time-based benchmarks

Service intervals are the heartbeat of your motorcycle maintenance schedule . Defined by either elapsed mileage or time, these tell you when critical maintenance tasks must be performed. For most motorcycles, an oil change and oil filter swap is needed every 3,000–6,000 miles or every 6–12 months—whichever comes first. However, real-life factors like daily commuting, exposure to harsh climates, or off-road adventures may necessitate a shorter service interval.

Manufacturers typically recommend servicing things like your chain and sprocket, brake pad, and brake fluid at set intervals. Yet, for aggressive riders or bikes exposed to dusty environments, the maintenance interval shrinks. Properly understanding and adapting these service intervals is vital for stretching the life of your drive belt, rear shock, and even your spark plug.

The service manual is always your starting point—but keep a close eye on symptoms between scheduled inspections. Any change in handling, braking, or starting could indicate it’s time to check items outside the normal maintenance checklist. Adapting your schedule keeps your motorcycle performing its best, regardless of how or where you ride.

How to Track Your Motorcycle's Maintenance Schedules Efficiently

  • Digital and paper tracking methods

  • Why detailed record keeping saves money and avoids missed maintenance tasks

Sticking to a motorcycle maintenance schedule is much easier with reliable tracking. Use a smartphone app dedicated to motorcycle care or a simple logbook; both methods have their merits. Apps can send reminders for each maintenance interval and store digital copies of your service manual, while a physical logbook—kept near your bike—helps you quickly reference completed tasks, from oil changes to last chain and sprocket service.

Good records are more than just organized—they’re money-savers. A meticulous maintenance checklist ensures nothing is overlooked, and every oil filter change and brake pad swap is on record. This helps you avoid repeating or missing services that could impact performance or void your warranty.

Whether you’re managing one bike or an entire family fleet, consistent documentation boosts resale value and makes troubleshooting easier if issues arise. It puts you in charge of the maintenance schedule, not at its mercy.

Sample Motorcycle Maintenance Schedule Table (Task vs. Mileage/Months)

Maintenance Task

Every 500 mi/1 month

Every 3,000 mi/6 months

Every 6,000 mi/12 months

Check Tire Pressure & Condition

✔️

✔️

✔️

Change Oil & Replace Oil Filter

✔️

✔️

Check & Adjust Chain/Sprocket

✔️

✔️

✔️

Inspect Brake Pads/Fluid

✔️

✔️

Replace Air Filter & Spark Plug

✔️

Motorcycle Maintenance: Critical Tasks Explained

Oil Change and Oil Filter: The Lifeblood of Motorcycle Maintenance

  • Why regular oil changes and timely oil filter replacement matter

  • Consequences of stretching intervals

  • Recommended oil types and best practices

An oil change and fresh oil filter are vital for protecting your engine’s moving parts. Engine oil lubricates, cools, and cleans internal components, while the oil filter captures harmful contaminants. Stretching these intervals allows grime to build up, wearing out your engine prematurely and possibly resulting in a costly overhaul.

Using fully synthetic oil can extend the interval between oil changes, but you should always consult your service manual for the correct specification. Change the oil and oil filter according to your maintenance schedule—don’t wait for performance to dip. The reward: a happy engine, consistent power delivery, and more miles between major repairs.

Brake Pads and Brake System Inspection in Maintenance Schedules

  • Spotting signs of brake pad wear

  • Best practices for brake fluid maintenance and bleed intervals

Regular brake pad and brake fluid checks are an essential safety step in your motorcycle maintenance schedule. Brake pads wear gradually, often without you noticing until braking performance drops off. If the friction material is worn close to the backing plate—or you hear a metallic scraping sound—it’s time for immediate replacement.

Your brake fluid should be clear and at the recommended level in the reservoir. Over time, moisture can creep in, degrading performance and possibly damaging internal brake system parts. Flushing and replacing brake fluid at factory-specified intervals—usually every 1 to 2 years—guarantees safe stopping whatever the conditions.

Chain and Sprocket Maintenance: Maximizing Efficiency

  • Inspection, cleaning, and lubrication cycles in your maintenance schedule

  • How to identify worn sprockets and chain stretch

The chain and sprocket system transfers power from your engine to the back wheel, making it crucial to include these components in your regular maintenance checklist. Neglecting lubrication or tension checks leads to a noisy, jerky ride—or even catastrophic failure at speed. Clean and lubricate your chain frequently; use a dedicated chain cleaner and a high-quality lube recommended in your service manual.

During inspections, look for kinks, tight spots, and excessive stretch. Worn sprockets can be spotted by hooked or pointed teeth. Replacing both clutch and driven sprockets together with the chain is best practice during maintenance intervals.

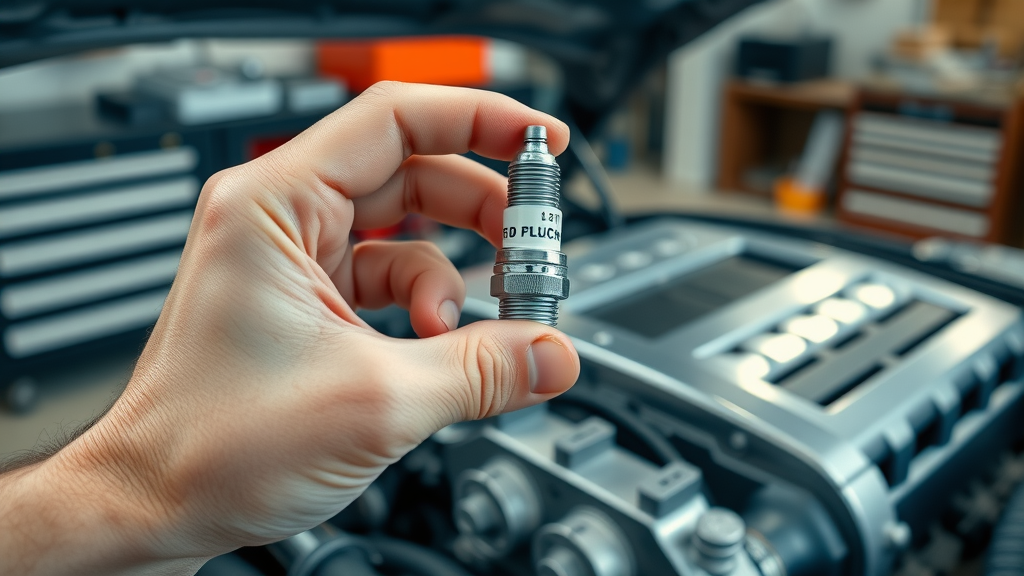
Air Filter and Spark Plug Care for Reliable Performance

  • Recommended inspection and replacement intervals

  • Symptoms of clogged air filter and worn spark plug

The air filter and spark plug are key to your motorcycle starting, idling, and running reliably. Clogged air filters restrict air flow, leading to poor fuel economy, sluggish acceleration, and even engine damage if left unchecked.

Spark plugs should be checked and cleaned or replaced according to your maintenance schedule. Symptoms of a failing spark plug include hard starting, rough running, or misfires. Always use the correct plug type from your manufacturer’s guidance for optimal performance and efficiency.

focused rider checking tire pressure with digital gauge - motorcycle maintenance schedule

Seasonal and Annual Maintenance Tasks

  1. Pre-season motorcycle maintenance checklist

  2. Post-season motorcycle storage and protection routines

  3. Annual service intervals not to overlook

Seasonal changes can quietly impact your motorcycle maintenance schedule . At the start of each riding season, inspect the battery, test lights, check fluid levels (including coolant and fork oil), and ensure the tires are up to pressure. During winter storage, clean and lubricate all moving parts, fill the tank, and connect a battery tender.

Annual checks—regardless of mileage—should address less frequently serviced items: coolant level, valve adjustments, head bearings, rear shock inspection, and a complete maintenance checklist review. These rare but vital steps keep your motorcycle ready for riding any time of year.

How to Perform a Complete Motorcycle Maintenance Checklist (visual demo)

Advanced Motorcycle Maintenance Schedule: Going Beyond the Basics

Fluid Checks: Coolant and Hydraulic Systems

  • Consequences of skipping coolant and hydraulic fluid inspection

  • Signs of wear and when to replace fluids

The cooling system and hydraulic fluids play a vital but often overlooked role in your motorcycle maintenance schedule . Without routine checks, coolant level can drop below safe thresholds, leading to overheating or engine failure. Inspect coolant for clarity and the recommended strength or color; murky or rusty liquid indicates immediate attention is needed.

Likewise, hydraulic clutch or brake systems require fluid flushes at intervals recommended by your manufacturer, or when the fluid appears cloudy. Skipping these checks can cause poor shifting, spongy brakes, or system leaks—problems that are both preventable and expensive if neglected for a long time.

Electrical System Checks in Your Maintenance Schedules

  • Battery inspection, charging system, and lighting checks

  • Common electrical faults and how a maintenance schedule can help avoid them

A healthy battery and robust charging system are non-negotiable parts of your routine maintenance task list. Inspect the battery for clean terminals, secure mounting, and check the voltage regularly. Dim lights or repeated dead batteries point to deeper charging issues.

Regularly inspect all electrical connectors, relays, and fuses for signs of wear or corrosion. By including these checks in your maintenance intervals, you’ll catch electrical faults early—and enjoy reliable starting and lighting on every ride.

Professional vs. DIY Motorcycle Maintenance

  • Which maintenance tasks should be left to professionals

  • When DIY servicing can complement scheduled maintenance

While a dedicated enthusiast can tackle many items on the maintenance checklist , some procedures—like valve clearance checks or advanced diagnostics—are best left to a trusted professional. Involving an expert for complex work maintains your warranty, guarantees safety, and helps catch issues even diligent owners might miss.

Everyday tasks such as oil changes, chain adjustment, and basic inspections are perfectly suited to DIY. Knowing your limits and the boundaries of each maintenance task ensures every job is done safely and correctly, maximizing the value of your motorcycle maintenance schedule.

enthusiastic DIYer changing coolant at home - motorcycle maintenance schedule

Troubleshooting Common Motorcycle Maintenance Mistakes

  1. Missing service intervals and overdue service intervals

  2. Overlooking maintenance checklist details

  3. Forgetting seasonal motorcycle maintenance tasks

  • Solutions for catching up on lapsed motorcycle maintenance schedules

One of the most common pitfalls riders face is missing a scheduled service interval or neglecting items on the maintenance checklist . Forgetting routine checks causes a ripple effect—outdated brake fluid, worn-out air filters, slack chains, and even neglected spark plugs. Over time, these overlooked maintenance tasks accelerate wear, reduce performance, and risk total breakdown.

If you’ve missed maintenance intervals, don’t panic. Catch up by following your service manual’s recommended tasks, prioritizing immediate safety items (brakes, oil, tires), and then performing a thorough catch-up maintenance. Consistency from this point forward will keep you and your motorcycle safe and reliable.

worried rider looking at neglected motorcycle - motorcycle maintenance schedule

Comparing Motorcycle Maintenance Schedules Across Various Brands

Brand-Specific Service Interval Comparisons

Brand

Oil Change

Brake Pads

Chain and Sprocket

Air Filter

Spark Plug

Honda

Every 4,000 mi / 6 mo

Check every 4,000 mi

Every 4,000 mi

Every 8,000 mi

Every 8,000 mi

Yamaha

Every 3,000 mi / 6 mo

Check every 3,000 mi

Every 3,000 mi

Every 6,000 mi

Every 6,000 mi

Harley-Davidson

Every 5,000 mi / 12 mo

Check every 5,000 mi

Belt: check every 5,000 mi

Every 10,000 mi

Every 10,000 mi

BMW

Every 6,000 mi / 12 mo

Check every 6,000 mi

Shaft: inspect every 6,000 mi

Every 12,000 mi

Every 12,000 mi

Kawasaki

Every 3,000 mi / 6 mo

Check every 3,000 mi

Every 3,000 mi

Every 6,000 mi

Every 6,000 mi

comparison table of motorcycles Honda Yamaha Harley-Davidson BMW Kawasaki - motorcycle maintenance schedule

Brand Comparison: How Service Intervals Differ and What to Watch Out For

Mastering Your Motorcycle Maintenance Schedule: Proactive Tips for Success

  • Apps and reminders for service intervals

  • Finding trusted mechanics

  • Recording your maintenance schedule and maintenance task completions

Take charge of your motorcycle maintenance schedule with the right blend of technology and traditional methods. Smartphone apps like MyRide or service interval reminders can alert you ahead of time when maintenance is due. Pair this with a physical maintenance log to double your coverage.

Equally important? Build a relationship with a reputable mechanic—someone who knows your bike and can spot upcoming issues before they become problems. Meticulously recording every maintenance task creates a bulletproof history that enhances resale value and keeps you safe.

motivated rider using smartphone app in garage - motorcycle maintenance schedule

People Also Ask: What is the service schedule for a motorcycle?

A motorcycle service schedule is a structured calendar or mileage-based plan, usually recommended by the manufacturer, which outlines when critical components need inspection, servicing, or replacement. Service intervals typically cover oil changes, brake checks, chain maintenance, and other essential items.

People Also Ask: What regular maintenance does a motorcycle need?

Regular motorcycle maintenance should include oil and oil filter replacement, brake inspection (pads and fluid), chain and sprocket lubrication and adjustment, tire checking, air filter and spark plug replacement, and battery inspection.

People Also Ask: How often should I have my motorcycle serviced?

Motorcycles should typically be serviced every 3,000 to 6,000 miles, or every 6-12 months, depending on usage and manufacturer recommendations. However, your maintenance schedule should always be tailored to your personal riding habits and motorcycle make/model.

People Also Ask: What is a full service on a motorcycle?

A full service includes all routine checks and replacements: oil and filter change, complete brake system inspection, chain tightening and lubrication, coolant top-up, electrical system test, tire and wheel check, and an overall assessment of the motorcycle’s condition.

Frequently Asked Questions About Motorcycle Maintenance Schedules

  • How do I know which maintenance schedule applies to my motorcycle?

  • Are aftermarket maintenance checklists reliable?

  • How can I quickly tell if my motorcycle needs unscheduled maintenance?

"Sticking to a detailed maintenance schedule means fewer surprises, whether you ride daily or only on weekends."

Best Practices for Sticking with Your Motorcycle Maintenance Schedule

  • Keep a visible logbook or tracking app

  • Block recurring time on your calendar for service intervals

  • Build a relationship with a reputable mechanic

mechanic shaking hands with owner in bike shop - motorcycle maintenance schedule

Start Your Proactive Motorcycle Maintenance Schedule Now

  • Don't risk costly repairs or dangerous breakdowns—take charge of your motorcycle maintenance schedule. For personalized plans and professional servicing, Call Us Today: 847-458-4858

Take immediate action: review your maintenance checklist, track your service intervals, and partner with a trusted mechanic to keep your ride safe, smooth, and adventure-ready all year!

Maintaining a consistent motorcycle maintenance schedule is crucial for ensuring your bike’s longevity and your safety on the road. For a comprehensive checklist that covers pre-ride inspections, routine maintenance tasks, and seasonal upkeep, refer to the “Motorcycle Maintenance Checklist: Keep Your Bike in Peak Condition” provided by Moto News Blog. This resource offers detailed guidance on essential maintenance practices to keep your motorcycle performing optimally.

Additionally, for brand-specific maintenance schedules, “Motorcycle Maintenance 101: Harley-Davidson® Scheduled Maintenance” by Barnes Harley-Davidson® outlines the recommended service intervals and tasks tailored for Harley-Davidson models. This guide ensures that owners adhere to the manufacturer’s guidelines for optimal performance and safety.

By consulting these resources, you can develop a tailored maintenance plan that suits your motorcycle’s specific needs and your riding habits, ensuring a safe and enjoyable riding experience.

Motorcycle Maintenance

0 Comments

Write A Comment

*
*
Related Posts All Posts

How to Clean an Old-School Motorcycle Carburetor Like a Pro

Did you know nearly 35% of old school motorcycle performance problems are caused by neglected carburetor cleaning? Despite being one of the simplest maintenance tasks, most classic bike owners overlook it—and they pay the price in sluggish rides and unreliable starts. Whether you’re restoring a vintage Janus Motorcycle, tuning up a Harley Davidson, or keeping your Super Cub in peak condition, mastering carburetor cleaning is the secret to experiencing your machine’s modern classic power as it was meant to be. This guide walks you through every step, mixing timeless wisdom with professional technique, so your bike runs as smoothly as it did years ago.Riding the Legacy: Why Old School Motorcycle Maintenance MattersMaintaining an old school motorcycle isn’t just about mechanical reliability—it’s about preserving a cultural legacy of modern classic engineering and iconic style. The heart of every café racer, desert sled, or vintage-inspired sport bike lies in its meticulously crafted components, with the carburetor playing a starring role. Regular cleaning ensures these beautiful machines remain fun to ride and easy to ride, delivering the kind of thrilling to ride performance that defines the classic line. Ignoring such fundamental upkeep can lead to frustrating problems and costly repairs, reducing both the bike’s collectability and the rider’s enjoyment. Investing time into the details, from disc brake inspection to testing lb ft of torque, guarantees your motorcycle retains its classic design and vintage style allure for years to come.What You'll Learn About Old School Motorcycle Carburetor CleaningThe essential tools and supplies for old school motorcycle carburetor cleaningStep-by-step process to professionally clean and reassemble your carburetorClassic models—like Janus Motorcycle, Indian Motorcycle, and the Super Cub—and their unique carburetor considerationsExpert tips for optimal performance and longevityWhat is an Old School Motorcycle? Exploring Modern Classic and Vintage AppealOld school motorcycles stand at the crossroads of mechanical artistry and timeless adventure. Unlike modern sport bikes equipped with electronic traction control and complicated fuel injection systems, old school motorcycles, like the iconic Janus Motorcycle or the legendary Harley Davidson, maintain a hands-on approach. These bikes are revered for their upright parallel or flat twin engine configurations, classic design elements, and a vintage style that makes every ride feel like a trip down memory lane. Collecting and riding these machines, whether it’s an original café racer or a utilitarian Super Cub, is about honoring mechanical simplicity and the joys of DIY maintenance. Over the years, models such as the Indian Motorcycle and Janus Motorcycles have become symbols of enduring quality and beautiful machine aesthetics, making them highly sought-after by collectors and riders alike.The Difference Between Old School and Modern Classic MotorcyclesUnderstanding the distinctions between old school bikes and modern classics is crucial for both restoration and maintenance. While old school motorcycles are defined by carbureted engines, minimalist technology, and hands-on mechanics, modern classic motorcycles combine old-school style with contemporary engineering—think fuel injection, improved suspension, and disc brakes. For example, Janus Motorcycle is renowned for hand-crafted, small-batch production that maintains vintage charm, whereas Indian Motorcycle and Harley Davidson's modern lines embrace updated tech without sacrificing the classic look. Both styles remain beautiful machines, but owners must pay close attention to the requirements of their chosen model. Whether you prefer the parallel twin of a café racer or the flat twin of a desert sled, knowing what sets your motorcycle apart ensures it receives the care—and fun to ride performance—it deserves.Notable Classic Models: From Janus Motorcycles to Harley DavidsonSome motorcycles have set the standard for what we call “old school” today. The Janus Motorcycle offers a truly unique vintage experience, hand-assembled using classic engineering principles. Indian Motorcycle stands as an American legend, celebrated for its original café racer silhouette and thunderous lb ft of torque. The Honda Super Cub, meanwhile, continues to charm riders with its easy-to-ride, reliable nature—accounting for more units sold than any other motorcycle in history. Harley Davidson remains a household name known for both its vertical twin and v-twin engine bikes, offering a blend of modern classic and pure old-school appeal. Each model boasts distinct engine configurations, carburetor setups, and collectability, shaping the nostalgia and popularity of vintage motorcycle ownership over the years.Comparison Table: Janus Motorcycle vs. Indian Motorcycle vs. Super Cub vs. Harley DavidsonModelYear ReleasedKey FeaturesCarburetor TypeCollectabilityJanus Motorcycle2011Hand-built, small business, cafe racer lookClassic Slide CarburetorHigh (Custom-built, limited run)Indian Motorcycle1901Flat twin/vertical twin, high lb ft of torqueMechanical CarburetorVery High (Historic, original cafe racer lineage)Super Cub1958Iconic design, easy to ride, extremely reliableCV CarburetorHigh (Most produced motorcycle ever)Harley Davidson1903V-twin, sport pro heritage, beautiful machineBendix or CV CarburetorVery High (Collector favorite, iconic style)Why Carburetor Cleaning Matters for Your Old School Motorcycle’s PerformanceThe carburetor is the beating heart of your old school motorcycle—it mixes fuel and air so your engine delivers peak lb ft of torque, robust acceleration, and that classic sound. But dirt, varnish, and debris can easily clog this crucial system, causing poor starts, sluggish throttle, and even a loss of that fun to ride experience. For treasured models like Continental GT and twin engine café racers, regular cleaning prevents expensive repairs and keeps your vintage bike thrilling to ride. Moreover, a clean carburetor improves fuel efficiency, reduces emissions, and preserves the original café racer personality that made these motorcycles easy to ride and admired for their classic design. Taking carb care seriously means honoring the legacy of your machine and enjoying beautiful machine performance for years to come.The Role of the Carburetor in Vintage MotorcyclesIn old school motorcycles, the carburetor is more than a mechanical component; it’s an emblem of analog precision and simplicity. Before modern fuel injection and traction control systems, skilled riders—and tuners—depended on meticulous carburetor adjustment to achieve the right engine configuration for varied riding positions, environments, and riding styles. A well-maintained carb not only preserves the iconic style and classic line of Indian Motorcycles and Janus Motorcycles, but it also grants riders access to reliable powerbands and strong ft of torque. For popular models spanning from the upright parallel engines of Super Cub to the powerful vertical twin layout of Harley Davidson classic bikes, carburetor tuning and cleaning remain a must for anyone looking to restore or preserve their motorcycle’s original performance and charm.Essential Tools & Supplies for Cleaning Your Old School Motorcycle CarburetorQuality results require quality tools—and cleaning an old school motorcycle carburetor is no exception. Whether you’re working on a Janus Motorcycle, Indian Motorcycle, Harley Davidson, or the reliable Super Cub, assemble a comprehensive kit to tackle carbon buildup and residue. A dedicated carburetor cleaner spray dissolves deposits inside narrow jets, while a compressed air canister ensures passages are free of obstructions. Screwdrivers and soft brushes are vital for gentle disassembly and cleaning, especially for delicate gasket and O-ring surfaces common on classic engines. Safety gloves protect you from solvents, and acquiring model-specific gasket and O-ring kits is vital for expert reassembly, particularly for Harley Davidson and Continental GT bikes. Investing in professional-grade supplies tailored to your motorcycle’s unique needs not only safeguards intricate parts but also maximizes restoration outcomes for these beautiful machines.Carburetor cleaner sprayScrewdrivers and soft brushesCompressed air canisterGasket and O-ring kits for Harley Davidson and Continental GT modelsSafety gloves"Janus motorcycles, for example, feature unique carburetors. Cleanliness here is crucial—especially for riders looking for that authentic old school motorcycle feel," notes a technician at Nasty Performance.Step-by-Step Guide: Cleaning Your Old School Motorcycle Carburetor Like a ProPreparation: Removing and Disassembling the CarburetorBefore beginning, ensure your motorcycle is on stable ground and fueled off. Carefully remove the seat and tank, exposing the carburetor. Take photos during each step—these visuals are invaluable during reassembly. Unscrew mounting brackets and gently disconnect fuel lines, throttle cables, and choke linkages. For Janus Motorcycles and Super Cub models, pay special attention to unique fastener types and mounting configurations. Once freed, bring the carburetor to your workbench. Using soft brushes and screwdrivers, remove the float bowl, main jet, pilot jet, and float itself. Place all loose components in a labeled tray to prevent confusion—especially with classic models where part symmetry can be misleading. By working methodically, you protect delicate parts from damage and ensure a smooth, frustration-free reassembly later on.Deep Cleaning Techniques for Twin Engine and Super Cub ModelsStart by liberally applying carburetor cleaner spray to every metal component, especially where stubborn varnish and fuel residue accumulate. Use small, soft brushes to gently dislodge carbon deposits, being extra attentive to the tiny passageways in Super Cub carburetors. Compressed air ensures passages are clear, crucial for optimal air/fuel mixture—if not thoroughly cleaned, even a beautiful machine like a Janus Motorcycle can suffer idle problems or stalling. For twin engine bikes or multi-carb setups (as seen on classic Harley Davidson and Indian Motorcycles), soak parts in a dedicated ultrasonic cleaner for best results; this technology vibrates residue away without risking delicate surfaces. Focus on gaskets and O-rings, checking for wear or cracks. Replace them with new kits designed for your model to prevent leaks after reassembly. Attention to detail now guarantees reliability and keeps your ride fun to ride for many more years.Troubleshooting: Common Issues in Old School Motorcycle CarburetorsAfter cleaning, inspect each part for wear. Common culprits—warped float bowls, blocked jets, or cracked O-rings—can lead to erratic fuel flow, loss of lb ft torque, and unpredictable throttle response. For Super Cub and twin engine café racer setups, ensure the float moves freely and all jets are completely clear. Persistent overflow, hot starting difficulties, or rough idle can often be traced to debris still lodged in passageways or misaligned floats. If your Harley Davidson or Janus Motorcycle hesitates at speed, consider the possibility of air leaks on carb intake boots or improperly seated O-rings. Don’t be tempted to reuse old gaskets—investing in new, model-specific replacements ensures your carburetor is airtight and running like new. Careful troubleshooting and reinspection prevent repeat issues and help your vintage ride stay beautiful and easy to ride.Reassembly & Post-Cleaning Steps: Ensuring Optimal Performance on Modern Classic BikesTesting air/fuel mixtureTuning for different models (Harley Davidson, Janus Motorcycles, Indian Motorcycle)Once all parts are clean and dry, carefully reassemble the carburetor by reversing your disassembly steps. Replace worn O-rings and gaskets as you go. Before reinstalling, set the float height using model-specific specs—incorrect settings can sabotage even the best cleaning job. After refitting the carburetor to your motorcycle, tighten all clamps and ensure throttle/choke linkages work smoothly. Fill the tank with fresh fuel and start the engine. Test the air/fuel mixture screw—adjust until idle is smooth and response is sharp. For Harley Davidson and Janus Motorcycles, tuning may vary by model, so refer to specifications or consult your manual. Listen for smooth operation and consistent idle; these are signs your cleaning has restored optimal performance. By investing care in these finishing touches, your old school motorcycle will deliver the iconic, fun to ride experience it was built for—every time you turn the key.Expert Tips for Maintaining Your Old School Motorcycle’s Carburetor"Routine upkeep transforms your classic motorcycle from a weekend relic to a reliable ride," says classic bike restorer Alex Long.Monthly cleaning checklist for vintage motorcyclesLong-term storage tips for old school motorcycle carbsTo make carburetor care second nature, adopt a monthly cleaning routine. Begin by visually inspecting for leaks and residue, especially around gaskets. Run the engine and listen for irregular idle or delayed throttle—these often signal dirt or air leaks. On a quarterly basis, remove and clean jets, and adjust mixture screws for optimal running. For long-term storage, always drain the fuel from the carburetor and tank—a critical step for a sport pro machine or beautiful machine like a Continental GT. Fogging the engine, applying light oil to internal carb surfaces, and storing your motorcycle in a dry, climate-controlled environment prevent rust and ensure a smooth restart after months of rest. By following these simple, proactive steps, you’ll spend less time troubleshooting and more time experiencing the iconic style and thrilling performance your old school motorcycle was built to deliver.Old School Motorcycle Carburetor Cleaning: Product Reviews & Purchasing GuideBest Carb Cleaner Brands for Old School MotorcyclesChoosing the right cleaner can make a world of difference, especially when you’re restoring unique carburetor types as found in Janus Motorcycles, Indian Motorcycle, or Honda Super Cub. Top recommended brands among classic bike enthusiasts include Berryman Chem-Dip, known for its strong solvent action, and Gumout Carburetor Cleaner, praised for its fast-acting spray. Liquid Wrench and CRC Carb & Choke Cleaners are also highly rated for their compatibility with older gasket materials and their ability to remove varnish from delicate carburetor settings. For twin engine setups, investing in an ultrasonic cleaner is worthwhile, as it provides deep, residue-free cleaning with minimal risk. Always use products recommended by small business restoration shops or model-specific forums for the best outcome.Tools and Kits: From Janus Motorcycles to Indian MotorcycleA comprehensive cleaning kit goes beyond just a can of cleaner. Look for sets that include precision screwdrivers, soft nylon and brass brushes, and an assortment of picks for cleaning stubborn jets. Replacement gasket and O-ring kits specifically for Harley Davidson, Continental GT, and Janus models are widely available online or through classic motorcycle specialist shops. Additionally, a small parts tray and magnetic mat prevent loss of screws and springs during disassembly. When in doubt, opt for tools used by professional shops like Nasty Performance, as their experience with classic line and sport bike restoration ensures you have everything required for a successful, stress-free cleaning session.People Also Ask: Old School Motorcycle FAQsWhat are old school motorcycles called?Old school motorcycles are often called “modern classics,” “vintage motorcycles,” “retro bikes,” or simply “classic motorcycles.” Popular examples include Indian Motorcycle, Janus Motorcycles, Harley Davidson, and Honda Super Cub.What is the most classic motorcycle?The most classic motorcycles often cited by enthusiasts are the Harley Davidson Knucklehead, Indian Chief, Honda Super Cub, and the Royal Enfield Continental GT. Each of these models exemplifies the appeal and influence of old school motorcycles.What is the 1% rule on motorcycles?The “1% rule” refers to the notion that 99% of motorcyclists are law-abiding citizens, while 1% are “outlaws”—a term that originated following statements by the American Motorcyclist Association. It is a concept tied closely to motorcycle club culture, especially among old school motorcycle communities.What is the best vintage motorcycle to buy?The best vintage motorcycle to buy depends on your needs, but favorites include the Honda Super Cub for reliability, Indian Scout for historical value, and Janus Motorcycles for custom, small-batch craftsmanship. Harley Davidson and Royal Enfield Continental GT also remain sought-after models for old school motorcycle enthusiasts.Key Takeaways: Cleaning and Maintaining Your Old School Motorcycle CarburetorRegular cleaning preserves value and performance of your old school motorcycleChoose tools and cleaners suited for classic enginesFollow model-specific guidance for best resultsFrequently Asked Questions About Old School Motorcycle CarburetorsHow often should I clean my old school motorcycle carburetor?For optimal performance, clean your carburetor every 3,000–5,000 miles or at the start and end of the riding season. If you notice poor idle or hard starts, clean immediately.Can improper cleaning damage my classic motorcycle?Yes, using harsh chemicals or metal tools carelessly can strip delicate passages, damage soft gaskets, or cause leaks. Always use gentle brushes and model-appropriate cleaners.What are signs of carburetor clogging in Janus Motorcycles or Indian Motorcycle models?Common signs include rough idle, sputtering, fuel overflow, poor throttle response, and a decrease in easy to ride feeling or acceleration. Address promptly for safe, reliable riding.Conclusion: Experience the Thrill of Riding and Restoring an Old School MotorcycleWith the right tools, techniques, and routine care, every old school motorcycle owner can enjoy reliable, exhilarating rides that preserve timeless style and legacy.Call Nasty Performance Motorcycle Shop Today: 847-458-4858Ready to restore or upgrade your classic motorcycle? Call Nasty Performance Motorcycle Shop at 847-458-4858 for expert advice, carburetor repair, and premium parts tailored to your old school bike.

Motorcycle Maintenance Guide for Beginners: What You Need to Know

There’s nothing quite like the freedom of the open road on two wheels—but that sense of adventure comes with responsibility. As a new rider, learning to maintain your own motorcycle is both a rite of passage and a ticket to safer, more enjoyable rides. Imagine cruising under a sunny sky, each part of your bike humming in harmony because you took the time to learn its care. This motorcycle maintenance guide for beginners delivers the confidence and capability to keep your ride running smoothly—starting now.Start Your Journey: Why Every Rider Needs a Motorcycle Maintenance Guide for BeginnersThe road calls to every rider, but staying safe and enjoying each ride depends on how well you know your machine. For beginners, a motorcycle maintenance guide for beginners is more than just a collection of tips—it’s your first layer of protection, ensuring your motorcycle remains reliable and safe. Learning the basics of motorcycle maintenance sparks a sense of ownership, keeps repair costs down, and connects you more deeply to your bike’s mechanics. This guide is designed to help you master essential maintenance tasks and build a strong foundation, so you’re safe on the road and prepared for any journey that lies ahead."Maintaining your bike isn't just about performance—it’s about freedom and safety on the open road."What You'll Learn from This Motorcycle Maintenance Guide for BeginnersFoundational motorcycle maintenance tasks every beginner can masterHow proper tire pressure, air filter, and chain upkeep extends your bike's lifeEssential checks and troubleshooting techniquesUnderstanding Motorcycle Maintenance: The BasicsWhy Is Regular Motorcycle Maintenance Important for Beginners?Getting started with the basics of motorcycle maintenance leads to enormous long-term benefits. Routine inspections and following your bike maintenance schedule help you identify potential problems before they become serious—and expensive—issues. New riders often underestimate how quickly signs of wear can surface, from brake pads thinning to tire pressure dropping. Regular attention to maintenance tasks boosts both performance and rider safety, ensuring your machine is always in working order.Understanding these maintenance tasks also makes troubleshooting much easier. If your motorcycle won’t start or feels “off,” being able to check your oil, tire pressure, and battery terminals empowers you to fix small problems quickly. Most importantly, a habit of double check —whether that’s for fluid levels or the condition of moving parts—means you’re less likely to be caught off-guard, making calamity far less likely when you least expect it.As you build your maintenance routine, it's helpful to understand how seasonal changes can impact your motorcycle's condition and the specific care it requires. For a deeper dive into preparing your bike for different weather conditions and maximizing its longevity year-round, check out these seasonal bike care secrets every rider must know.Motorcycle Maintenance Guide for Beginners: Safety FirstSafety is the foundation of every great ride. This motorcycle maintenance guide for beginners puts safety at the forefront by breaking down each key component check and why it matters. For starters, properly maintained brake pads and brake fluid offer peace of mind when you need to stop quickly, while regular checks on tire pressure and tread depth keep handling sharp in all road conditions. Always follow instructions in your motorcycle’s service manual and pay attention to the manufacturer’s guidance for each maintenance task.Neglecting routine tasks not only shortens your bike’s life, but can also put you and others at risk. Remember, most safety issues are preventable with simple habit-building: always check your tire pressure, check your oil, and inspect your brakes before each ride. These habits reinforce safe riding and keep you confident wherever your wheels may take you.Essential Tools Needed for Your Motorcycle Maintenance GuideHaving the right tools makes any maintenance task simpler and safer for beginners. You don’t need fancy professional gear—just a well-stocked kit. Start with a socket set for bolts and adjustments, a torque wrench for precise tightening, and a motorcycle stand to safely elevate your bike, especially the rear wheel. A chain brush makes cleaning your chain and sprocket straightforward, and pliers come in handy for various tweaks and fixes.Socket setTorque wrenchMotorcycle standChain brushPliersWhile these are core tools, always consult your motorcycle’s service manual for any model-specific needs. Having reliable tools not only helps in executing maintenance tasks but also builds your confidence as you develop your mechanical skills and knowledge.Motorcycle Maintenance Guide for Beginners: Pre-Ride ChecksVisual Inspection: Tires, Frame, and Fluid LeaksEvery ride should start with a hands-on visual inspection. Examine your tires—look for uneven wear, cuts, or embedded objects. Tire pressure is critical, so check your tire pressure against your service manual’s recommended range before each ride. Inspect the frame for cracks, rust, or bends. Small leaks under your motorcycle often mean it’s time to check your oil filter or fluid levels. If you spot any drops or stains, double check the source and address it before riding.Don’t overlook your fluid reservoirs either: brake fluid, coolant, and engine oil all need to be topped off and inspected. Spotting a drop in any of these could hint at a slow leak or component issue. Taking the time for this pre-ride ritual supports your bike maintenance and keeps your journey safe and worry-free.Understanding Tire Pressure and Its SignificanceYour tire pressure directly impacts how your motorcycle handles—it affects grip, stopping power, and the overall lifespan of your tires. Too low, and your tires wear unevenly or heat up dangerously on long rides. Too high, and you lose valuable traction. The manufacturer’s recommendations found in your manual or on the swingarm sticker are your best guide for maintaining optimal tire pressure.Regularly checking tire pressure should be as routine as fastening up your helmet. Most tire pressure gauges are easy to use and portable. Make a habit of checking before every ride—especially when temperatures fluctuate—so you never lose control due to under-inflated or over-inflated tires. Proper care helps you avoid unnecessary wear and keeps your ride feeling just right.Step-by-Step Guide: Checking Tire Pressure for BeginnersStart with cold tires for an accurate reading. Unscrew the valve cap, press your gauge firmly onto the valve, and note the reading.Compare it to the recommended PSI (pounds per square inch) in your service manual.If the level is low, use an air compressor to fill the tire. If it’s too high, gently release air with your gauge until it matches the target pressure.Repeat for front and rear tires, then double check each for leaks or damage before replacing the valve caps.Monitoring Lights, Controls, and ElectronicsFunctioning electrical systems keep you visible and safe on the road. Test your headlights, tail lights, brake lights, and turn signals—making sure bulbs illuminate brightly and blink at the correct intervals. Don’t ignore warning lights on your dashboard; they often signal low oil levels, battery issues, or urgent maintenance needs.Move on to controls: ensure the throttle turns smoothly, the clutch engages properly, and all switches are responsive. Electronics, like the horn and starter, should respond promptly when activated. Keeping these systems in working order means you’re ready for any ride—whether it's around town or out on an open highway.Motorcycle Maintenance Guide for Beginners: Engine CareChecking and Changing OilOil is the lifeblood of your engine. For peak performance, regularly check your oil level and clarity with the dipstick or sight glass. If the oil appears dark or gritty, it’s time for an oil change, following your motorcycle’s maintenance schedule for intervals. Always replace the oil filter as well—dirty filters let contaminants harm your engine.Changing oil is straightforward: warm up the engine, place a pan beneath the drain bolt, and carefully remove it. Allow oil to drain completely, then replace the bolt and swap out the oil filter. Fill with fresh oil, run the engine briefly, then double check the oil level and add as needed. Routine oil changes protect your engine from wear, overheating, and costly breakdowns.Inspecting and Replacing Air FiltersYour air filter keeps grit and debris from entering the engine. Over time, air filters become clogged, starving your motorcycle of air and causing poor performance, sluggish starts, or increased fuel use. Check your air filter at regular intervals or as recommended in your service manual—and replace sooner if you ride often in dusty or urban environments.A clean air filter boosts horsepower, improves fuel efficiency, and helps your motorcycle run smoothly every day. If you notice your bike running rough or hear unusual engine sounds, inspecting or changing the filter is a quick way to restore normal operation. Follow your manual for exact locations and requirements for your specific model.How to Properly Clean and Replace an Air FilterRemove your seat and locate the air filter casing as detailed in your service manual.Carefully take out the filter. If it’s reusable foam or cotton, clean with the recommended cleaner—otherwise, dispose and replace with a new filter.Let it dry completely before reinstalling, assuring a snug fit to block dirt and debris.Reassemble the airbox and seat, ensuring all components are securely fastened.Motorcycle Maintenance: Battery Upkeep and Charging TipsMotorcycle batteries demand attention, especially if you store the bike through winter or infrequently ride. Inspect for corrosion around your battery terminals, and clean as needed. If your starter sounds weak, check voltage with a multimeter and recharge or replace the battery if necessary.Keeping battery terminals free of corrosion and checking electrolyte levels (if applicable) helps prevent electrical faults. For longer storage, use a smart charger or tender to maintain battery health and extend its life—saving you from the frustration of a motorcycle that won’t start on a beautiful riding day.Chain and Sprocket Care in Motorcycle Maintenance Guide for BeginnersCleaning, Lubricating, and Adjusting Chain and SprocketYour chain and sprocket transfer power from the engine to the rear wheel. Clean, lubricated, and properly tensioned chains operate smoothly, extend sprocket life, and reduce risk of breakdowns or accidents. For everyday riders, aim to chain clean every 500 miles (or after riding in the rain). Use a dedicated chain brush to remove built-up grime, then apply motorcycle-specific lubricant to the chain.Adjusting chain tension is crucial. A too-tight chain can damage bearings and moving parts, while a loose one can slip off unexpectedly. Your service manual specifies the best slack for your model. Routine care of your chain and sprocket underscores all good bike maintenance habits and keeps your ride feeling strong and responsive.Cleaning frequencyLubrication typesChain tensioning basicsBrakes and Suspension: Motorcycle Maintenance Guide for BeginnersInspecting Brake Pads and FluidSafe stopping power comes from healthy brake pads and fresh brake fluid. Begin every inspection by checking your brake pad thickness—worn pads can damage brake discs and severely lengthen stopping distances. Look for grooves, cracks, or uneven wear, and replace brake pads if they look thin or damaged.Check brake fluid levels and color in the master cylinder reservoir. If fluid appears dark or murky, or if it’s below the minimum line, flush and refill per your service manual. Inspect visible sections of brake lines for cracks, bulges, or leaks. Consistent brake maintenance ensures you’re always in control—no surprises at the next red light.Suspension Checks: What to Look ForA well-checked suspension means smoother rides and safer handling. Examine your fork tubes for signs of oil leakage or pitting, and double check the rear shocks for compression and rebound. Wiggle the handlebars with your front wheel off the ground; excess play or knocking could indicate the need for bearing or bushing replacements.If your ride feels excessively bouncy, bottom-out over bumps, or “wanders” during turns, schedule a more detailed suspension inspection or service. Suspension health ensures tires stay firmly on the road and absorbs the worst road imperfections, giving you confidence every time you twist the throttle.Long-Term Motorcycle Maintenance Guide for BeginnersSeasonal Motorcycle Storage TipsPutting your bike away for the winter or after a long trip? Correct storage techniques prevent costly repairs and corroded components. Wash and dry your bike to remove road salts and dirt, lubricate all moving parts, and fill your tank with fuel stabilizer to prevent gumming. Disconnect or remove the battery, and keep it on a smart charger to preserve its life. Cover your motorcycle with a breathable, fitted cover to protect from moisture and dust.Store your motorcycle in a dry, well-ventilated area away from harsh sunlight or freezing temperatures. Bundle your riding gear, keep maintenance tools nearby, and give your motorcycle a quick visual check every few weeks. These habits make spring startups effortless and undramatic.Regular Service Intervals and Record KeepingA detailed maintenance log enhances your bike maintenance practices and provides dealers or mechanics with a clear history for resale or troubleshooting. Use your service manual to set reminders for oil changes, chain and sprocket care, brake pad replacements, and air filter checks. Recording mileage and what maintenance tasks you completed empowers you to spot trends, plan repairs, and avoid costly surprises.TaskRecommended IntervalOil ChangeEvery 3,000 milesChain MaintenanceEvery 500 milesBrake InspectionMonthlyAir Filter ReplacementAnnually or 12,000 milesTire Pressure CheckBefore Every RideCommon Mistakes in a Motorcycle Maintenance Guide for Beginners and How to Avoid ThemNeglecting regular tire pressure checksSkipping air filter replacementsImproper chain and sprocket careIgnoring brake wearThese mistakes can turn minor maintenance tasks into major problems. Regular attention to each step in this motorcycle maintenance guide for beginners ensures your safety, maximizes performance, and saves money on avoidable repairs."A little regular attention now can save you from expensive repairs later."People Also Ask: Key Motorcycle Maintenance QuestionsWhat is the 2 4 12 second rule on a motorcycle?Answer: The 2-4-12 second rule refers to safe following distances and hazard detection—2 seconds for immediate following distance, 4 seconds for potential hazards ahead, and 12 seconds for scanning your path and anticipating traffic movements.How to do basic maintenance on a motorcycle?Answer: Basic motorcycle maintenance includes checking tire pressure, oil and fluid levels, inspecting lights, cleaning and lubricating the chain, ensuring brakes function, and regular air filter care. Always follow your motorcycle's maintenance schedule.What is rule number 5 for motorcycles?Answer: 'Rule number 5' is commonly interpreted as always keeping your focus and attention on the road, practicing defensive riding at all times to minimize risk.What does 2 fingers up mean on a motorcycle?Answer: A gesture of camaraderie, '2 fingers up' is a traditional motorcycle wave to acknowledge fellow riders and share safe travels.Frequently Asked Questions: Motorcycle Maintenance Guide for BeginnersHow often should a beginner perform motorcycle maintenance? Most maintenance tasks like tire pressure checks, fluid level inspections, and visual checks should be done before every ride. Full services—such as oil changes, chain cleaning, and air filter replacements—should be performed according to your manual (typically every few hundred to a couple thousand miles).What is the first thing to check when troubleshooting a motorcycle? Start with basics: battery health, fuel availability, and correct fluid levels. Check the kill switch and ensure all electronics function. If the bike still doesn’t start, review your service manual for next steps.How do I know when to replace my air filter or brake pads? Replace air filters when they appear dirty, clogged, or as recommended by the manual. Brake pads should be swapped out when thickness falls below 2-3mm or you experience decreased stopping power.Key Takeaways from This Motorcycle Maintenance Guide for BeginnersStart with routine safety checks: tire pressure, brakes, fluid levelsMaintain a clean chain and regularly replace air filtersKeep detailed maintenance records to prolong the life of your bikeReady to Ride? Connect with the Experts"Trust your motorcycle maintenance to passionate professionals—every mile matters."Call Nasty Performance Motorcycle Shop Today: 847-458-4858Conclusion: Consistent, simple motorcycle maintenance helps every beginner become a more confident, safer, and happier rider.Motorcycle maintenance is a journey that evolves as you gain experience and confidence. If you’re ready to take your skills to the next level, exploring advanced care strategies and learning how to adapt your maintenance routine for every season can make a world of difference in your bike’s performance and reliability. Discover expert tips on protecting your motorcycle through temperature swings, rain, and storage periods by visiting our comprehensive guide on seasonal bike care secrets every rider must know. With the right knowledge, you’ll be prepared for every mile—no matter what the weather brings. Keep building your expertise and enjoy the ride with confidence all year long.

How to Find the Best Local Motorcycle Suspension Repair Shop

Did you know? Nearly 40% of motorcycle accidents are linked to improper suspension setups—don’t let your ride become a statistic. That single number highlights how crucial it is to prioritize professional motorcycle suspension service and repair. Whether you ride a sport bike, dirt bike, or mountain bike, your suspension system impacts not just performance and comfort but also your safety on the road or trail. As a rider, finding the best local motorcycle suspension repair shop can be the difference between confidence in every corner and costly, dangerous surprises.Why Choosing the Best Local Motorcycle Suspension Repair Matters"Nearly 40% of motorcycle accidents are linked to improper suspension setups—don’t let your ride become a statistic."Selecting the best local motorcycle suspension repair provider is more than a matter of convenience—it’s about securing your safety and maximizing the lifespan of your bike. An expertly maintained suspension system directly affects how your motorcycle responds under braking, cornering, and on rough surfaces. Whether you own a dirt bike for the track, a mountain bike for trails, or a road motorcycle for daily commutes, a well-tuned suspension system means better control and less wear on other components like fork tubes and rear shocks.A bike suspension service performed by certified mechanics ensures optimal performance and safety. Top shops use specialized diagnostic tools for precise click suspension and rear shock adjustments, tailoring the ride to your weight, riding style, and local conditions. Cutting corners with an unqualified shop can lead to poor spring rates, misdiagnosis of internal components, and ultimately higher costs or even crashes. Ensuring your chosen provider is recognized—ideally with OEM or ASE certifications—offers peace of mind and helps prevent your motorcycle from becoming another accident statistic.What You'll Learn About the Best Local Motorcycle Suspension RepairKey features and services to expect from leading local motorcycle suspension repair shopsHow to assess local shop reputations and compare optionsTypical costs: what influences the price of suspension servicesWhat questions to ask before committing to a repairKey Features of the Best Local Motorcycle Suspension Repair ShopsCertified suspension expertsComprehensive bike suspension service optionsLatest tools for click suspension tuningExpertise across motorcycle, dirt bike, and mountain bike platformsQuality parts for rear shock and rebuild serviceServices Offered: From Suspension Service to Rebuild ServiceClick suspension tuningFront and rear shock inspectionComplete suspension rebuild serviceRoutine motorcycle suspension maintenanceSpecialty services for dirt bike and mountain bike suspensionWhen evaluating a shop’s service menu, it’s also helpful to understand the importance of regular maintenance and how it can prevent costly repairs down the line. For a deeper dive into seasonal care routines that keep your bike’s suspension and other components in peak condition, check out these essential seasonal bike care secrets every rider should know.Leading shops go beyond generic maintenance, offering click suspension settings for personalized ride comfort, inspection of vital internal parts, and rebuild service for both motorcycle and mountain bike shocks. Routine services often include fork and shock service, seal replacement, and upgrades based on your bike’s needs—ensuring each component, from the fork tube to the shock body, meets the highest quality standards. Technicians specializing in these tasks have deep experience with multiple brands and models, understanding the nuances between road, off-road, and race track applications. These differentiators make a shop stand out in servicing both casual rides and high-performance machines.Comparing the Best Local Motorcycle Suspension Repair ShopsShop NameCertificationsClick Suspension ServiceRear Shock RebuildLocationCustomer RatingNasty PerformanceASE, OEMYesYesChicago, IL4.9/5Cycle ClinicOEMYesYesEvanston, IL4.7/5MotoMastersASELimitedYesAurora, IL4.5/5Not all motorcycle suspension service shops are created equal. Top-rated shops invest heavily in ongoing training and the latest technology for click suspension and rear shock servicing. Customer ratings reflect the quality of work and the attention to detail offered, such as using genuine or high-quality aftermarket parts, and delivering reliable results for every fork rebuild or major upgrade. When comparing options, it’s worth asking which brands and models they commonly service and whether they specialize in performance or OEM setups. Some shops might cater more to specific disciplines like dirt bikes, race track machines, or even Santa Cruz mountain bikes—critical for those with specialized needs.A helpful tip: Look for shops with a consistently high rating, robust certifications (ASE, OEM), and detailed service descriptions. Shops that offer both click suspension tuning and rear shock rebuild services often display a higher degree of technical capability, especially compared to smaller, generic bike shops. If possible, visit each shop, ask to see their diagnostic tools (such as click suspension calibrators), and request references from the local riding community to ensure you are choosing the best local motorcycle suspension repair provider.What Influences the Cost of Motorcycle Suspension Service?Type of suspension service required (basic vs. rebuild service)Brand and quality of replacement partsComplexity of click suspension adjustmentsModel of motorcycle, mountain bike, or dirt bikeThe cost for suspension service or a full rebuild service can vary widely based on several factors. Basic click suspension tuning is less involved and costs less than a full rear shock or fork rebuild, which often requires a comprehensive teardown, seal replacements, new oil, and sometimes custom valving. On dirt bikes and mountain bikes, specialized components like lighter springs or custom valving may add to the overall price. Brand reputation also impacts price—premium replacement parts or specific models (like those popular for race track use or Santa Cruz mountain bikes) can drive the cost higher due to availability and technical requirements.Don’t forget to factor in the labor for suspension upgrades or rebuilding shock bodies and internal components. The best local motorcycle suspension repair shops are transparent about these variables and will outline the exact work included—from click suspension calibration to full suspension component replacements. Always ask for a written estimate, and confirm if a warranty is provided on the parts and labor for peace of mind.Sample Pricing for Best Local Motorcycle Suspension RepairServiceAverage Price RangeClick Suspension Adjustment$60–$120Rear Shock Rebuild Service$150–$400Full Suspension Service$200–$500The above averages will fluctuate depending on your local market, the sophistication of the services offered, and the shop's expertise level. For those in more competitive regions—like the Bay Area or metropolitan zones—pricing may trend higher, but often reflects superior customer service and the use of higher quality parts.Signs You Need Suspension Services: When to Visit the Best Local Motorcycle Suspension Repair ShopNoticeable decrease in riding comfort or stabilityVisible leaks around shock absorbersUnusual noises during ridesDifficulty controlling bike suspension on varied terrainBike or rear shock bottoming out under normal loadsRecognizing when your bike needs professional suspension services is essential to maintaining optimal performance and safety. If your ride begins to feel harsh, lacks stability during corners, or bottoms out over minor bumps, these are clear signs that your fork and shock may require service. Oil leaks from the fork tube or shock body, increased noise, or visible wear on seal components also indicate it’s time for an expert assessment. Mountain bike and dirt bike riders should pay particular attention, as the varied and rough terrain accelerates wear on internal parts compared to regular road use.Don’t ignore these warning signs. Regularly scheduling a suspension service with the best local shop ensures that any minor concern—like a leaking seal or dampening issue—is fixed before escalating into a catastrophic failure that could jeopardize your safety or cause expensive secondary damage.How to Assess Reputation: Finding a Trustworthy Motorcycle Suspension ServiceVerify online reviews and customer ratingsAsk about technician certificationsInspect the shop for specialty tools (e.g., click suspension calibrators)Request referrals from local mountain bike and dirt bike communitiesVideo Tour: Inside a Top-Rated Motorcycle Suspension ShopTake a virtual walk-through of a leading suspension service provider: Experience their well-equipped workstations, see how certifications are displayed, and check the tools and machinery used for precise click suspension adjustment and rear shock rebuilds. The best shops also proudly showcase awards, trophies, and positive community feedback—proof of their dedication to quality and their specialized standing in the motorcycle, dirt bike, and mountain bike repair sectors.A shop’s reputation in your riding community—on forums, social media, and in local groups—can be a powerful measure of their expertise. Look for consistent positive feedback, especially from riders with similar bikes or needs, whether you’re locking in service for a Bay Area dirt bike or a Santa Cruz–branded mountain bike. Authentic recommendations reflect long-term customer satisfaction and technical skills across routine and specialty repairs.People Also Ask: Top Questions About Best Local Motorcycle Suspension RepairIs it okay to use WD-40 on bike front suspension?It is not recommended to use WD-40 on bike front suspension as it can degrade the seals and reduce performance. Specialized suspension oils and cleaners should always be used.How much does shock rebuild cost?Shock rebuilds for motorcycles typically range from $150–$400, depending on bike type, parts required, and the level of suspension service needed.How often should you service a motorcycle suspension?As a rule of thumb, plan for professional motorcycle suspension service every 10,000–20,000 miles or at least once a year for optimum performance and safety.How to find a good motorcycle mechanic?Look for mechanics with reputable certifications in suspension service, positive local reviews, and specialized expertise in services such as click suspension and rear shock repairs.Frequently Asked Questions About Best Local Motorcycle Suspension RepairWhat are the most common suspension issues found in motorcycles?Can I perform suspension service at home or should I visit the shop?What’s the benefit of click suspension over traditional setups?Do mountain bike and dirt bike suspensions share similar maintenance schedules?Key Takeaways for Finding the Best Local Motorcycle Suspension RepairPrioritize shops that offer specialized bike suspension and rebuild service optionsAsk about click suspension and rear shock expertiseReview shop ratings and service historiesUnderstand cost factors before booking your serviceReady For the Best Local Motorcycle Suspension Repair? Contact the ExpertsCall Nasty Performance Motorcycle Shop Today: 847-458-4858Conclusion: Choose the best local motorcycle suspension repair shop by seeking certified pros, comparing offerings, and checking reputation—your safety and ride quality depend on it.As you continue your journey toward a smoother, safer ride, remember that expert suspension repair is just one piece of the puzzle. To truly maximize your bike’s longevity and performance, it’s wise to adopt a holistic approach to maintenance that adapts with the seasons. Discover how proactive care throughout the year can prevent issues before they start and keep every ride feeling fresh—explore our guide to seasonal bike care secrets every rider must know for actionable tips and advanced strategies that go beyond the basics.

Terms of Service

Privacy Policy

Core Modal Title

Sorry, no results found

You Might Find These Articles Interesting

T
Please Check Your Email
We Will Be Following Up Shortly
*
*
*