Nasty Performance ~ 847-458-4858 

  • Blog Home
  • Categories
    • Motorcycle Maintenance
    • Riding Tips & Preps
    • Safety & Inspection
    • Customizations & Upgrades
    • DIY Motorcycle Repairs
    • Motocycle Audio Systems
    • Motocycle Seasonal Care & Storage
    • Engine, Electrical Performance
  • Bike Night
  • Nasty Performance Motorcycle Shop
July 29.2025
1 Minute Read

Motorcycle Engine Maintenance for Longer Bike Life

Did you know? Over 85% of major motorcycle breakdowns can be prevented with routine engine maintenance—saving riders thousands in repairs and maximizing miles on the road.

Imagine cruising down an open highway, confident your motorcycle engine is running smoothly because you’ve mastered essential maintenance. Neglecting basic motorcycle engine maintenance can spell disaster for your bike—leading to breakdowns, costly repairs, and a shortened lifespan. But with the right care, your engine can deliver peak performance year after year, keeping your rides exhilarating and worry-free. In this comprehensive guide, we’ll break down exactly how to maintain your motorcycle engine, boost its longevity, and ensure every mile is just as thrilling as the first.

Unlocking Longevity: Why Motorcycle Engine Maintenance Matters
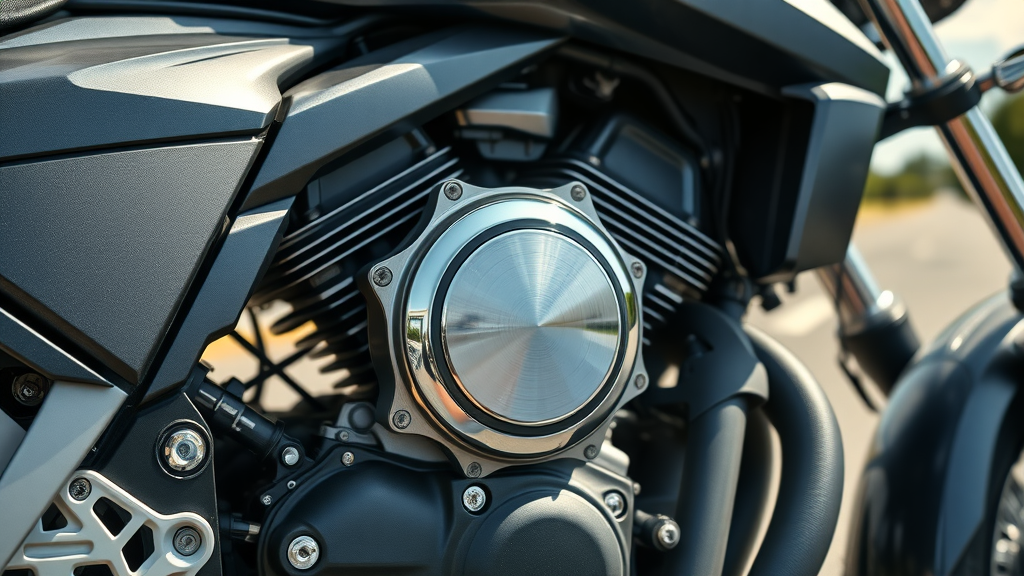
crisp close-up of a modern motorcycle engine, gleaming and well-maintained, resting outdoors on an open road, demonstrating engine maintenance for motorcycle longevity.
  • Discover the direct impact of motorcycle engine maintenance on reliability and resale value.

  • Understand common consequences of neglecting regular engine maintenance, like engine failure and reduced fuel efficiency.

  • Practical example: Compare two bikes—one with routine engine maintenance, one neglected.

Keeping up with motorcycle engine maintenance is a direct investment in your bike’s reliability and value. Regular oil changes, air filter replacements, and spark plug checks not only prevent major engine issues but also keep your riding experience enjoyable and safe. A well-maintained bike consistently commands a higher resale price and avoids the headaches of surprise breakdowns.

On the other hand, neglect leads to engine failure, poor performance, and more frequent repairs—draining your budget and leaving you stranded. For example, consider two identical motorcycles. The owner who follows a strict maintenance schedule enjoys smooth rides, fewer mechanical issues, and a better-looking machine. The other, who ignores warning signs and skips maintenance, faces increased wear, reduced fuel efficiency, and high repair costs. It’s clear: a little preventative care goes a long way in motorcycle maintenance.

How to Maintain a Motorcycle Engine for Optimal Performance

Motorcycle Maintenance Basics: Understand Your Motorcycle Engine

  • Outline motorcycle engine anatomy: parts to know for basic motorcycle engine maintenance.

  • Why familiarizing yourself with motorcycle maintenance schedules is vital.

The first step to maintaining your motorcycle engine is understanding its key components. The engine consists of cylinders, pistons, spark plugs, the oil filter, the cooling system, and more. Each part has a distinct role in keeping your motorcycle running smoothly. By regularly checking these areas—especially the oil level , air filter, and spark plugs—you’ll catch minor issues before they worsen.

Equally important is following your motorcycle’s maintenance schedule as outlined in the owner’s manual. Routine attention to these basic elements ensures your engine’s good condition for the long haul, optimizes engine performance , and reduces the chance of unexpected breakdowns. Embracing regular motorcycle maintenance not only extends engine life but also keeps every ride safer and more fuel-efficient.

Change the Oil: The Foundation of Engine Maintenance
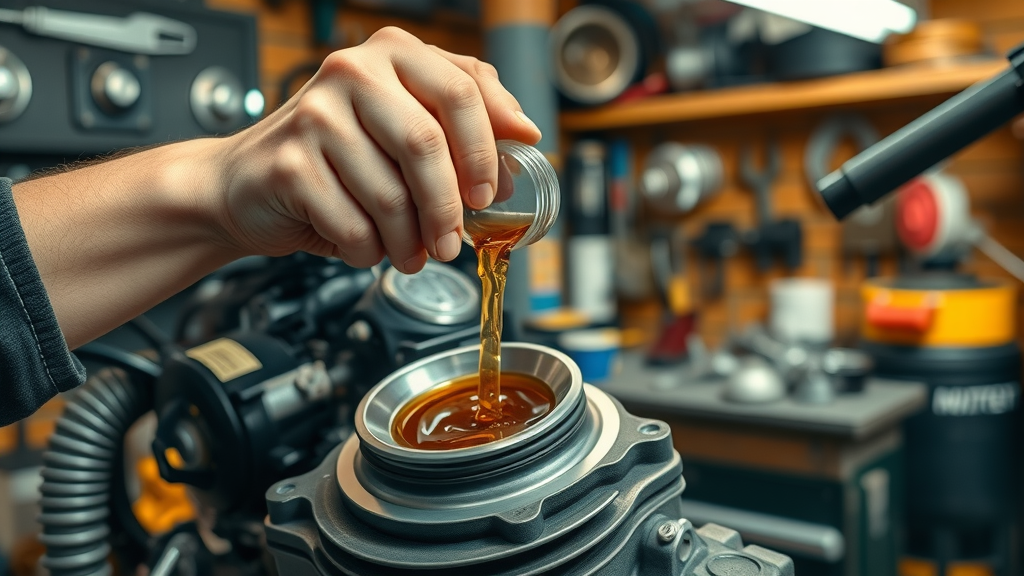
realistic action shot of a hand changing oil on a motorcycle engine, demonstrating the oil change process for motorcycle engine maintenance.
  • When and how to change the oil for engine health.

  • Which engine oil to choose: comparing regular oil vs synthetic.

  • Step-by-step table: Oil change process for motorcycle engine maintenance.

Regular oil changes are vital for any motorcycle engine . According to most experts, you should change the oil every 3,000–5,000 miles, or as recommended by your manual. This removes contaminants that cause wear and ensures your engine oil remains effective at lubricating, cooling, and cleaning internal parts.

When it comes to choosing oils, both regular oil and synthetic options have their benefits. Synthetic oil offers superior temperature stability and longer life, making it ideal for performance-oriented bikes or those used in extreme conditions. On the other hand, regular oil is often sufficient for older or less demanding motorcycles. Changing the oil filter during each oil change is just as crucial, as a clogged filter can restrict oil flow and reduce engine longevity.

Oil Change Frequency by Motorcycle Model and Use Case

Motorcycle Type

Riding Style

Recommended Oil Change Interval

Sport Bike

Aggressive / High RPM

3,000 miles / 3 months

Cruiser

Moderate / Leisure

4,000 miles / 6 months

Adventure/Touring

Long Distance / Highway

5,000 miles / 6 months

Commuter

City Traffic

3,000 miles / 4 months

The oil change process includes draining old oil (using the drain plug), replacing the oil filter, installing the drain plug, and adding new engine oil. Consult your manual for engine oil type, and never skip these steps to ensure your bike remains in top condition.

Check Oil Level Regularly for Prolonged Engine Life

  • How to measure oil level regularly and interpret changes.

  • Risks of running with improper oil level—wear, overheating, and breakdown

Keeping your oil at the right level is one of the simplest yet most effective motorcycle engine maintenance tasks. Check the oil level regularly, ideally before each ride or once a week, using your bike’s dipstick or sight glass. Low oil is a leading cause of premature engine wear and overheating, while overfilling can damage the engine running smoothly.

If you notice your oil level dropping quickly—beyond normal consumption—it could indicate a leak or internal engine issue. Address these concerns promptly, as improper oil levels can result in catastrophic engine failure and leave your motorcycle running poorly or not at all. Make these checks routine, and your motorcycle engine will repay you with reliable performance mile after mile.

Air Filter, Fuel Efficiency, and Engine Health

Why Replace the Air Filter: Better Performance and Fuel Efficiency

  • Signs your air filter needs replacement.

  • Step-by-step list: How to replace the air filter as a key aspect of motorcycle engine maintenance.
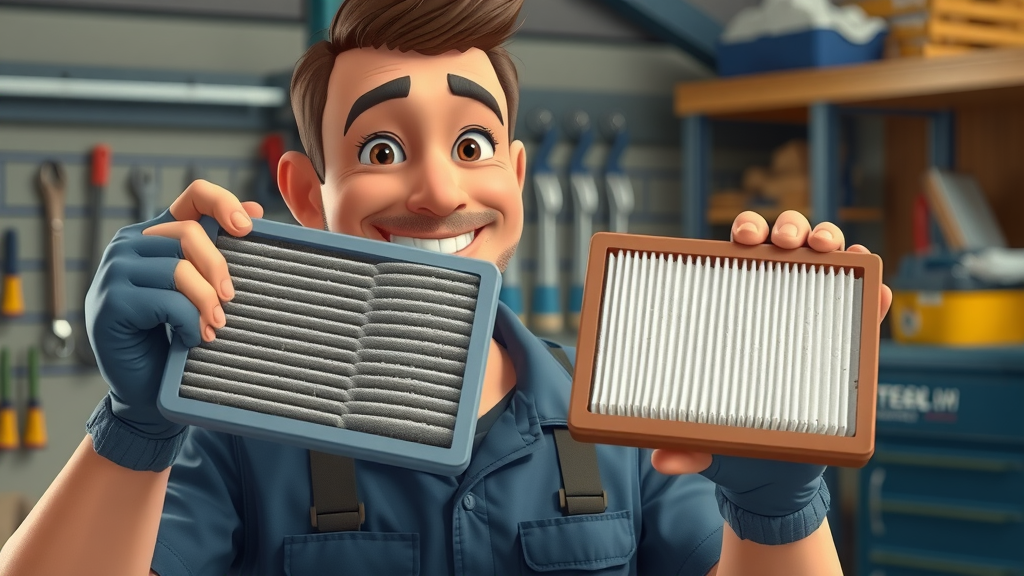
detailed shot of a mechanic comparing a dirty and clean air filter, illustrating air filter maintenance for motorcycle engines.

The air filter plays a critical role in protecting your engine. It filters out dust, debris, and pollutants from the air before it enters the combustion chamber, which helps maintain optimal engine performance and fuel efficiency . Signs your air filter needs replacement include reduced acceleration, poor fuel economy, unusual engine sounds, or visible dirt and debris. On average, replace the air filter every 10,000–15,000 miles or more frequently if you ride in dusty conditions.

  1. Locate the air filter housing—often under the seat or a side cover.

  2. Open the housing and carefully remove the old air filter.

  3. Inspect the filter for dirt, dark color, or visible damage.

  4. Insert a new or cleaned filter, ensuring the seal is tight to prevent any debris from entering.

  5. Close the housing securely before starting your motorcycle.

Regularly replace the air filter as part of your motorcycle maintenance routine. This simple step will help your bike run efficiently, increase engine life, and keep you enjoying the open road with fewer interruptions.

Spark Plugs: The Essential Component in Motorcycle Engine Maintenance

How to Inspect and Replace Spark Plugs

  • Symptoms of faulty spark plugs: Poor ignition, engine misfires, reduced fuel efficiency.

  • Simple checklist for spark plug maintenance during routine motorcycle engine care.
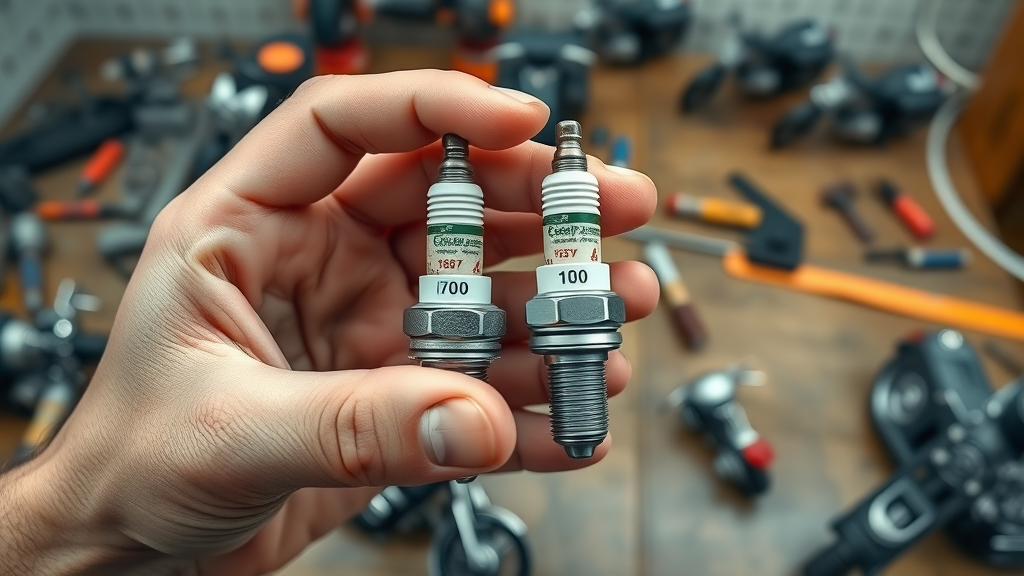
close-up of a hand holding a worn versus new spark plug, highlighting spark plug inspection for motorcycle engine maintenance.

Your motorcycle’s spark plugs are crucial for consistent ignition and smooth engine running. Faulty spark plugs often lead to poor ignition, frequent engine misfires, higher fuel consumption, and a rougher riding experience. Check your spark plugs every 5,000–10,000 miles or at the intervals specified in your owner’s manual.

  • Allow the engine to cool before inspecting spark plugs.

  • Remove the spark plug caps and use a spark plug socket to take them out.

  • Examine the electrode for wear, carbon buildup, or oil fouling. Replace if necessary.

  • Install new spark plugs (gap them if required), and tighten them to spec before reattaching the caps.

Consistent spark plug care not only boosts engine performance but also helps maintain reliable starts and smooth running. Including spark plug checks in your regular motorcycle maintenance keeps your engine firing on all cylinders.

The Role of Tire Pressure in Motorcycle Engine Maintenance

  • Why proper tire pressure is crucial for motorcycle engine efficiency and safety.

  • Checklist: How to monitor tire pressure for fuel efficiency and reduced engine stress.
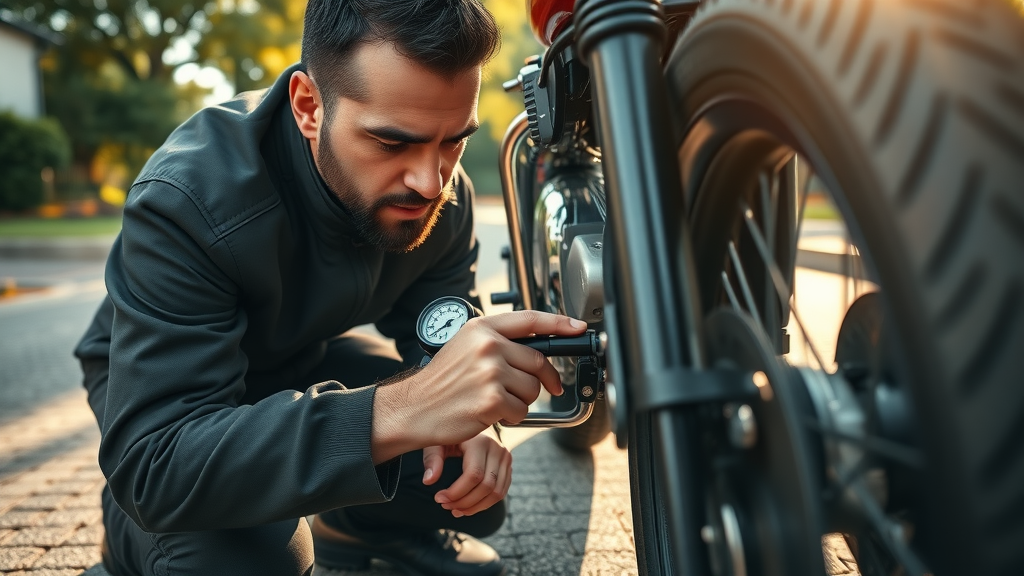
focused shot of a biker checking tire pressure with a digital gauge, emphasizing tire pressure’s role in motorcycle engine maintenance.

While not part of the engine itself, tire pressure significantly impacts your motorcycle’s fuel efficiency and overall engine stress. Underinflated tires require more energy to move, making the engine work harder and reducing its lifespan. Overinflation, on the other hand, can compromise safety and traction—two things every rider values.

  • Check tire pressure every 1–2 weeks with a reliable digital gauge.

  • Refer to your owner’s manual for the recommended PSI for front and rear tires.

  • Adjust pressure when tires are cold, and look for signs of uneven wear that may signal alignment or suspension issues.

Properly maintained tires help you save on fuel, reduce the load on your motorcycle engine, and ensure a smoother, safer ride. Add tire pressure checks to your motorcycle maintenance checklist to keep your bike running smoothly.

Schedule Regular Motorcycle Maintenance: Creating a Long-Term Plan

  • How to create a tailored maintenance schedule using your owner's manual.

  • Digital tools and apps for reminders on oil changes, air filter replacement, and spark plug checks.

Creating a regular maintenance plan ensures nothing slips through the cracks. Use your owner’s manual to develop a personalized schedule for tasks like oil changes, changing the air filter, spark plug inspections, and checking coolant level. Keeping a log or using digital maintenance apps can send timely reminders and track your service history—helping busy riders stay proactive.

Many apps allow you to input your motorcycle’s data, set recurring alerts, and store service receipts. Staying ahead of engine maintenance not only boosts reliability but also helps you budget for upgrades and repairs. A long-term maintenance plan is a powerful way to protect your investment and enjoy stress-free riding.

Expert Tips to Prevent Motorcycle Engine Trouble

  • Store your motorcycle indoors or use a cover to protect from elements.

  • Add fuel stabilizer before long-term storage to prevent fuel breakdown.

  • Conduct seasonal checks—battery, coolant system, brakes, chain lubrication—before and after periods of heavy use.

  • Maintain proper coolant levels and inspect the radiator cap for leaks.

  • Warm up your motorcycle engine before aggressive riding.
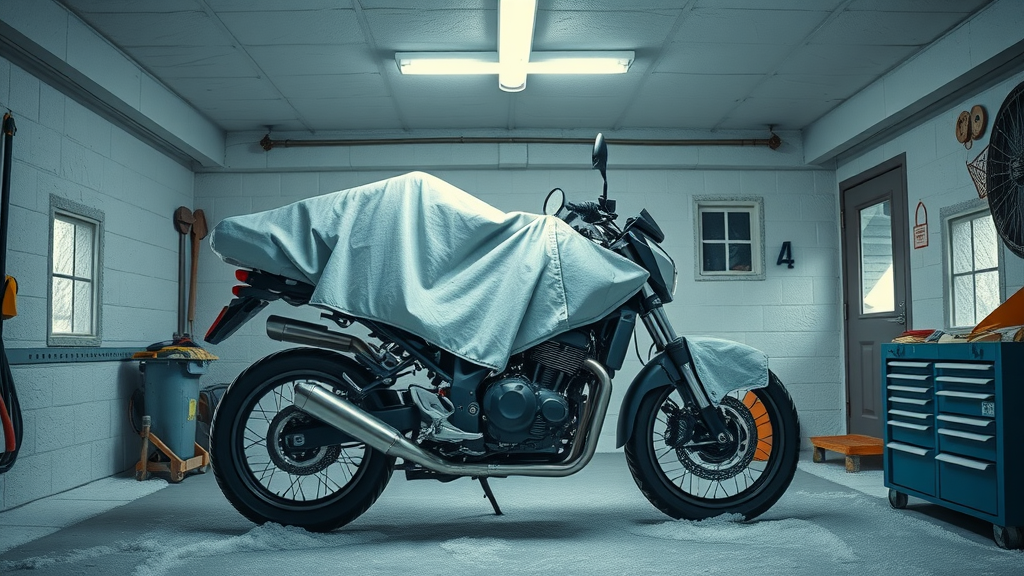
composed overview of a motorcycle in winter storage, demonstrating motorcycle maintenance during the off-season.

"Routine engine maintenance is the cheapest insurance you’ll ever buy for your motorcycle." – Veteran Mechanic, Jim Ortega

Following these pro tips can extend your engine’s life and keep you safer on the road. From proper winter storage to using recommended lubricants and inspecting fluid levels regularly, attention to detail keeps your motorcycle engine in good condition and ready for any journey.

People Also Ask: Motorcycle Engine Maintenance Insights

How to maintain a motorcycle engine?

  • Regular oil and air filter changes, checking spark plugs, monitoring tire pressure, and periodic engine inspections form the backbone of motorcycle engine maintenance . Diligence in these areas prevents premature wear, keeps your motorcycle running efficiently, and ensures each ride is as good as the last.

How often should you change engine oil in a motorcycle?

  • Change the oil every 3,000–5,000 miles or as recommended in your owner’s manual, considering usage conditions and oil type. Factors such as riding style, temperature, and city traffic can affect the ideal interval for changing the oil in your motorcycle.

What regular maintenance does a motorcycle need?

  • Regular tasks include oil changes, replacing the air filter, inspecting/replacing spark plugs, checking tire pressure, chain lubrication, and brake inspection. These actions keep your bike in good condition and help to prevent breakdowns and poor performance over time.

How often should you run your motorcycle engine?

  • Start and run your motorcycle engine weekly if it’s stored for long periods, helping keep fluids circulating and preventing part seizures. Running your engine also keeps your battery charged and identifies any potential issues before they become major problems.

FAQs on Motorcycle Engine Maintenance

  • Q: What engine maintenance can I do at home?
    A: Oil changes, air filter and spark plug replacement, tire pressure checks, and visual inspections can be performed in your garage with basic tools. Familiarizing yourself with these tasks ensures your bike is always in top shape.

  • Q: Can ignoring engine maintenance harm my motorcycle?
    A: Absolutely. Neglecting maintenance increases wear, risks breakdowns, reduces safety, and lowers your bike's value. Regular attention is essential for long-term performance and a satisfying riding experience.

Key Steps in Motorcycle Engine Maintenance for Maximum Longevity

  • Check and change the oil at regular intervals, including the oil filter and monitoring oil level regularly.

  • Replace the air filter as needed for better engine performance and fuel efficiency .

  • Inspect and replace spark plugs to maintain smooth ignition.

  • Verify and maintain proper tire pressure to reduce engine stress.

  • Build and follow a long-term maintenance schedule using reminders and logs.

Take the First Step Toward Better Motorcycle Engine Maintenance

  • Ready to boost your bike’s performance and lifespan? Call Us Today: 847-458-4858

Conclusion: Commit to regular motorcycle engine maintenance —check fluids, inspect key parts, and follow a maintenance schedule for a reliable, high-performance ride.

Maintaining your motorcycle engine is crucial for ensuring its longevity and optimal performance. For a comprehensive understanding of essential maintenance practices, consider exploring the following resources:

  • “The Complete Guide to Motorcycle Maintenance: Keep Your Bike in Top Shape” ( motoworkschicago.com )

This guide offers detailed instructions on regular maintenance tasks, including oil changes, chain tension adjustments, and brake system upkeep, tailored to various motorcycle models and riding conditions.

  • “Essential Guide to Motorcycle Maintenance” ( lawtigers.com )

This resource provides practical tips on tire pressure maintenance, oil changes, air filter replacement, and other fundamental maintenance tasks to keep your motorcycle running smoothly.

By consulting these guides, you’ll gain valuable insights into effective maintenance routines that can enhance your motorcycle’s reliability and extend its lifespan.

Motorcycle Maintenance

0 Comments

Write A Comment

*
*
Please complete the captcha to submit your comment.
Related Posts All Posts

Benefits Of Motorcycle Brake Pad Replacement

Have you ever wondered if overlooking your motorcycle brake pads could secretly sabotage your ride’s safety and performance? Many riders underestimate the critical role brake pads play in both protection and riding experience. This guide cuts through the noise and reveals everything you need to know about motorcycle brake pad replacement benefits, setting you on the path for safer, smoother, and more cost-effective adventures on two wheels. Unlocking Motorcycle Brake Pad Replacement Benefits: Why It Matters “Neglecting your brake pads not only jeopardizes safety but undermines your motorcycle’s performance and longevity.” Motorcycle brake pad replacement benefits go far beyond just stopping your bike on time. Your brake pads are essential not only for halting your motorcycle in critical situations, but also for preserving the integrity of vital components like your brake discs and calipers. Failing to keep up with pad replacement can lead to increased pad wear, diminished stopping power, and rapidly declining overall handling—especially in heavy traffic or during high speed maneuvers. The truth is: worn brake pads aren’t just dangerous, they’re expensive. When brake pads wear down too much, they can irreversibly damage your rotors, compromising your motorcycle brake system’s functionality. Regularly changing your brake pads ensures each ride is as safe as possible and that maintenance costs are kept to a minimum. Remember, investing a little time in regular checks and timely brake pad replacement can extend the overall life of your motorcycle and keep you confidently in control on the road. What You'll Learn About Motorcycle Brake Pad Replacement Benefits Key advantages of motorcycle brake pad replacement How proper brake pad maintenance affects safety Signs your brake pads need replacing The role of rear brake and pad material Answering common rider questions Understanding Brake Pads: How They Impact Your Motorcycle What Are Motorcycle Brake Pads and How Do They Work? Motorcycle brake pads are specialized pieces of friction material designed to press against the brake disc (or rotor) when the brake lever or pedal is engaged. This friction is what slows and ultimately stops the motorcycle. Each time you squeeze the lever or press your foot down, these pads convert moving energy into heat, slowing down the disc attached to your wheel. The efficiency and safety of your ride depend heavily on the quality, thickness, and overall health of these small yet mighty components. Proper maintenance of your brake pads impacts not only your ability to stop swiftly but also protects your brake disc from excessive wear. If you allow your pads to wear out over time, metal-on-metal contact occurs, resulting in costly rotor damage. Thus, understanding how motorcycle brake pads work—and how they degrade during routine rides on various road conditions—is the first step toward unlocking maximum braking performance and equipment longevity. The Role of Brake Pad Material and Riding Style The type of pad material used in your brake pads has a direct impact on pad life, braking efficiency, heat management, and compatibility with your riding habits. Organic pads, for instance, are quieter and gentler on rotors but may wear out faster in heavy traffic or during aggressive riding styles. Sintered pads offer superior stopping power and longer brake pad life, making them a top choice for riders tackling high speed or challenging road conditions. Your unique riding style—whether you’re a commuter facing frequent stops or a weekend warrior chasing winding open roads—influences how quickly your brake pads wear. Some pads are designed for high-performance bikes and rapid stops, while others are suited for comfortable, everyday use. Choosing the right pad material optimizes not just stopping power, but also ensures your brakes match your expectations regardless of the conditions. In addition to selecting the right pad material, it's important to consider how seasonal changes can affect your motorcycle's braking system. For a deeper dive into how weather and temperature shifts impact brake pad performance and overall bike care, check out these seasonal bike care secrets every rider should know. Pad Wear, Pad Thickness, and Road Conditions Pad wear is inevitable; every time you engage the brakes, the friction material is abraded. Over time, the pad thickness shrinks, and once it dips below the manufacturer’s minimum—usually around 2-3mm—your ability to stop safely plummets. Factors accelerating pads wear include riding in heavy traffic, frequent stops, adverse road conditions like rain or dirt, and high-performance riding. Regular checks for pad thickness are crucial to detect thinning before it compromises your stopping power. Modern brake pad compounds are engineered to withstand a variety of environments, but even the toughest pads will show accelerated wear in mud, grit, or during extended descents that generate extra heat. Mastering this balance is key to maximizing both brake pad life and your own safety. The Safety and Performance Benefits of Motorcycle Brake Pad Replacement Pad Replacement for Enhanced Braking Response Timely motorcycle brake pad replacement means instant, confident braking every time you need it. Fresh brake pads deliver immediate grip when pressed against the brake disc, translating to short stopping distances and firm lever feel. When pad wear progresses past a certain limit, braking can become sluggish or uneven, leaving you struggling to regain control in emergency situations. For riders who regularly push the pace or encounter unpredictable road conditions, having responsive, high-quality brake pads is non-negotiable. Not only does pad replacement maximize your stopping power, but it also restores your trust in your bike’s ability to handle both everyday commutes and high speed cornering alike. Avoiding Brake Fade and Improving Stopping Power One prevalent but overlooked threat is brake fade—a loss of effectiveness due to overheated friction material during sustained braking. Old or low-quality brake pads are more prone to overheating, especially during aggressive riding or when navigating steep declines. Replacing your pads frequently helps keep braking performance sharp, ensuring consistent and reliable stops regardless of speed or terrain. The benefit is not just theoretical: upgraded or maintained brake pads resist heat build-up better, preserving your bike’s stopping power over repeated braking intervals. Keeping both your front and rear brake pads fresh guarantees that braking is evenly distributed, making your motorcycle easier to handle and more predictable on all surfaces. How Motorcycle Brake Pad Replacement Extends Equipment Lifespan One of the chief motorcycle brake pad replacement benefits is the protection it offers to other expensive brake components. When brake pads wear down excessively, their metal backing plate can contact the brake disc, scoring or warping the rotor. This not only decreases pad life further but can necessitate replacing rotors altogether—an avoidable and costly repair. Routine pad replacement ensures your brake discs, calipers, and even the hydraulic systems face less strain and heat. Protecting these parts extends the usable life of your entire braking system, allowing you to spend more time riding and less time and money on major repairs. Preserving Rotors and Rear Brake Efficiency While many riders focus solely on the front brakes, the rear brake also plays a pivotal role. Balanced, well-maintained brake pads across both wheels prevent uneven pad wear, reduce rotor scoring, and guarantee smooth, stable braking on both highways and city streets. The rear pad’s condition can easily affect your ability to slow down or stabilize the motorcycle during tight maneuvers or sudden stops. By ensuring both front and rear brake pads are regularly checked and replaced, you maintain harmony in your brake system. This approach not only increases your motorcycle’s reliability, but also ensures every lever press or pedal tap delivers precise, predictable results. Recognizing When Motorcycle Brake Pads Need Replacement Common Signs: Brake Pads Wear, Squealing, and Pad Thickness Identifying brake pads wear before it becomes dangerous is essential. Key indicators include a noticeable screeching or squealing sound when braking—a built-in warning designed to alert you before the pad thickness reaches critical lows. If you see visible grooves, uneven surfaces, or anything less than the minimum recommended thickness (usually indicated by a wear indicator or measured via inspection), it’s time for pad replacement. Don’t overlook reduced braking effectiveness or a “spongy” feeling at the brake lever. And if your motorcycle doesn’t slow as quickly—especially under high speed or in wet road conditions—immediate inspection and prompt change of your brake pads are non-negotiable. Regular checks keep you proactive, not reactive. How to Inspect and Change Your Brake Pads Begin by locating the brake caliper on both the front and rear wheels. Most models allow you to visually check pad thickness without removing the wheel—shine a flashlight to see how much friction material remains. When inspecting, compare current thickness against manufacturer recommendations. If the pads are thin, uneven, or contaminated by oil/dirt, it’s time to replace your brake pads. Changing your brake pads is usually straightforward for DIY enthusiasts. Make sure to use compatible pad materials—and don’t forget to inspect the brake discs, retaining clips, and caliper pins, cleaning or replacing parts as needed. If in doubt, seek expert assistance, as installation should always align with safety best practices. Step-by-Step Guide to Safe Motorcycle Brake Pad Replacement Preparation: Tools, Pad Material Selection, and Safety Measures Before you begin brake pad replacement, gather all necessary tools: socket wrenches, Allen keys, caliper spreaders, new brake pads suited for your bike’s make and model, and safety gear like gloves and safety glasses. Selecting the correct pad material for your riding style is crucial—whether you prefer organic brake pads for quiet, city commuting or sintered pads for their longevity in sportier settings. Always prioritize safety by supporting your motorcycle securely, typically with a center stand or paddock stand, and double-checking your workspace for adequate lighting. Consulting your owner’s manual or a reputable technical guide can help you avoid common pitfalls and ensure the process is smooth from start to finish. Preparation is key to safe, effective brake pad replacement. Replacing Your Brake Pads: Detailed Instructions 1. Loosen and, if needed, remove the caliper bolts to slide the caliper off the brake disc. 2. Carefully remove the old brake pads, taking note of their orientation and placement. 3. Inspect the caliper piston and clean any debris with a brake-specific cleaner. Push the piston back carefully to accommodate the thickness of the new pads. 4. Install the new pads, ensuring the friction material faces the disc. 5. Reinstall and tighten the caliper, following torque specifications from your service manual. 6. Before riding, test the brake lever or pedal slowly to ensure proper engagement and bed in your new pads carefully (often via the 30 30 30 rule—30 stops from 30 mph with 30 seconds between each). If the process feels overwhelming or if you notice anything amiss, contact a professional. Ensuring correct installation is fundamental for maximizing motorcycle brake pad replacement benefits and keeping you safely on the road. Myths vs. Facts: Motorcycle Brake Pad Replacement Myth: All brake pads are the sameFact: Pad material affects performance Myth: Only front brakes matterFact: Rear brake plays a crucial role Myth: You can ignore wear until brakes failFact: Worn brake pads reduce safety significantly Tables: Comparing Pad Wear, Replacement Intervals, and Pad Materials Pad Material Average Wear Rate Recommended Replacement Interval Notable Characteristics Ideal Riding Style Organic Pads Faster wear 5,000 – 10,000 miles Quiet, gentle on rotors, less dust City commuting, light riders Sintered Pads Slower wear 10,000 – 20,000 miles Exceptional in wet, high temperature resistance Sport, touring, high speed Semi-Metallic Pads Moderate wear 7,000 – 15,000 miles Good heat dissipation, increased rotor wear Mixed riding, aggressive stops Ceramic Pads Very slow wear Up to 25,000 miles Low dust, consistent feel, premium price Performance, all-weather Expert Insights on Motorcycle Brake Pad Replacement Benefits “Routine brake pad replacement is the cornerstone of motorcycle safety—never underestimate its impact.” — Certified Motorcycle Technician Lists: Top Motorcycle Brake Pad Replacement Benefits Maximized braking power Greater riding control and safety Prolonged rotor life Consistent braking in various road conditions Cost-effective motorcycle maintenance Adaptability to your riding style People Also Ask: Motorcycle Brake Pad Replacement Questions How often should motorcycle brake pads be changed? Most experts recommend inspecting your brake pads regularly and replacing them when the pad thickness drops below the manufacturer’s specified limit. Depending on riding style and road conditions, intervals may vary. What is the 30 30 30 rule for brakes? The 30 30 30 rule refers to bedding in new brake pads—30 gentle stops from 30 mph with 30 seconds between each to ensure optimal pad and rotor contact. What is the 4 second rule on a motorcycle? The 4 second rule provides adequate following distance for safe braking: pick a marker, and ensure four seconds elapse after the vehicle ahead passes it before you do. Can rotors last 100,000 miles? While some rotors can reach high mileage if well-maintained, routine brake pad replacement is essential to prevent premature rotor wear or damage. FAQs on Motorcycle Brake Pad Replacement Benefits What are the risks of not replacing worn brake pads? Is it safe to replace brake pads yourself? How does brake pad material affect longevity? Do weather and road conditions accelerate pad wear? Can new brake pads improve motorcycle resale value? Key Takeaways: Motorcycle Brake Pad Replacement Benefits Regular motorcycle brake pad replacement maintains optimal safety and control. Choosing the right pad material maximizes performance based on your riding style. Early replacement protects rotors and saves on costly repairs. Following manufacturer guidelines ensures a smoother, safer ride. Find Expert Motorcycle Brake Pad Replacement Help Ensure your motorcycle’s safety—Call Nasty Performance Motorcycle Shop Today: 847-458-4858 As you continue to refine your motorcycle maintenance routine, remember that brake pad replacement is just one aspect of comprehensive bike care. For those looking to elevate their maintenance strategy and adapt to changing riding conditions throughout the year, our guide on seasonal bike care secrets offers valuable insights to keep your ride performing at its best, no matter the season. Explore advanced tips and discover how proactive care can help you enjoy safer, smoother journeys all year long.

Signs Your Motorcycle Needs Suspension Tuning

Did you know that studies show improper suspension tuning can contribute to nearly 30% of motorcycle handling-related accidents? Most riders focus on power and tires, but fail to recognize early signs that their motorcycle suspension needs tuning—a silent factor that could transform your ride’s safety and comfort. This comprehensive guide brings you everything you need to spot, diagnose, and address suspension issues, ensuring your motorcycle suspension setup is truly set correctly for every journey. Why Motorcycle Suspension Tuning Matters Motorcycle suspension tuning isn't just a performance upgrade—it's a core safety requirement. The suspension setup on your bike controls how the motorcycle responds to the road, manages weight transfer during acceleration and braking, and supports both comfort and stability while you ride. Many riders overlook the complexity of adjusting suspension, assuming the factory settings will suit every scenario or riding style—this can’t be further from the truth. Factory suspension set configurations are intentionally generic, intended for an average weight and street bike usage profile. But your suspension setup needs to match your body weight, preferred riding style, and even changing cargo or passenger loads. When your motorcycle suspension is not tuned for your actual riding conditions, you risk not just discomfort but potential danger: poor traction, unpredictable handling, and increased risk of sudden instability in critical moments. Suspensions are not a “set and forget” element—attentive tuning means improved safety, better control, and a more enjoyable ride every time you hit the road. The Impact of Motorcycle Suspension on Safety and Comfort An optimally tuned suspension acts like a shock absorber for every aspect of your ride—it helps your front end and rear shock maintain tire contact, absorb road imperfections, and manage cornering forces. If your front fork is set incorrectly, you might experience a harsh ride or excessive front end dive, undermining confidence and precision. The rear shock, meanwhile, counteracts the bumps that could throw off your balance or cause your rear tire to lose grip. Together, front and rear suspension components are the difference between a ride that feels grounded and controlled or one that feels unstable and unpredictable. Poor motorcycle suspension tuning not only reduces comfort—leading to fatigue and less enjoyable journeys—but it can also directly compromise safety through loss of control, especially under heavy braking or aggressive maneuvering. When correctly set, suspension improves handling, maximizes your tire’s lifespan, and ensures rider confidence, making every ride not just smoother, but genuinely safer. What You'll Learn About Motorcycle Suspension Tuning Key signs your motorcycle needs suspension tuning The roles of front end, front fork, and rear shock How to perform or request a suspension setup Answers to common questions on motorcycle suspension tuning Startling Facts: Motorcycle Suspension Tuning and Its Overlooked Importance Motorcycle riders often invest in high-performance tires or exhaust systems but neglect the motorcycle suspension—a key link between the bike and the road. "Many riders underestimate how significantly proper suspension tuning affects both handling and safety. " In reality, a poorly tuned suspension setup can overshadow the benefits of even the best tires or brakes, and improper adjusting suspension can lead to unpredictable handling, especially on rough or unfamiliar roads. While understanding the signs of suspension issues is crucial, it's equally important to recognize how seasonal changes can impact your bike's overall performance. For practical advice on keeping your motorcycle in top shape throughout the year, explore these essential seasonal bike care secrets every rider should know. Recognizing the Signs: When Your Motorcycle Needs Suspension Tuning So, how can you tell when it’s time to check your motorcycle suspension setup? Listening to your bike is the first and most important step. Certain symptoms show up long before more serious mechanical problems emerge. Recognizing these early warnings will keep your suspension set within the ideal range and ensure every component—from the front fork to the rear shock—works in harmony for a confident ride. Riders who learn to spot trouble with the front end or preload adjuster become proactive in their maintenance, often catching small issues before they become expensive or dangerous. The key is to notice how the motorcycle reacts in different scenarios: braking, hitting bumps, or entering a curve. If your bike behaves unpredictably, don’t ignore it—it’s time for a closer look at your suspension setup. Symptoms of Poor Motorcycle Suspension Excessive nose dive during braking Harsh ride over bumps Bottoming out on rough roads Instability in corners These symptoms are telltale signs that your suspension set may not be reacting as it should. Excessive nose dive, for example, indicates weakness in the front fork or incorrect preload set, while a harsh ride signals that damping or compression and rebound settings are off. Bottoming out—when the suspension fully compresses and hits its limit—often points to a low spring rate or insufficient preload, affecting both front and rear. Instability in corners can suggest your front end or rear shock is not set correctly, putting both comfort and control at risk. Front End and Front Fork Issues The front end of your motorcycle—including the front fork and fork legs—bears a significant load, especially during braking and cornering. When the front fork isn’t set correctly, several problems become apparent. You may feel the front wheel chatter or skip over bumps, or the fork may bottom out (“fork bottom”) over sharp impacts, indicating weak springs or inadequate dampening. Issues within the front end can be subtle, such as vague steering or unexpected instability, particularly when the suspension fully extends after a heavy bump. This can result from incorrect static sag—the amount the suspension compresses under the bike’s weight—or worn fork oil, which reduces smoothness and control. Riders should check for oil leaks and ensure the front fork moves cleanly throughout its travel, as sticky or inconsistent motion can indicate critical maintenance is needed. Rear Shock Warning Signs The rear shock is responsible for maintaining contact and control at the rear tire, especially through turns and when carrying extra weight. When the rear shock is worn or out of adjustment, you’ll notice symptoms like excessive squat during acceleration, a bouncy ride over bumps, or the rear end feeling loose and unpredictable. Bottoming out at the rear is a red flag that the preload or spring rate is too low, or damping is not set correctly. On the other hand, if the ride feels harsh or the rear tire skips over bumps, this could result from excessive preload or inappropriate compression and rebound settings. Inspection of the shock for oil leaks and checking the preload adjuster offers clues about the health of your rear suspension setup. Unresponsive Preload Adjuster Problems Most modern motorcycles feature preload adjusters for quick setup. If these become unresponsive or difficult to turn, the problem could run deeper. A seized or stuck preload adjuster could indicate internal rust, worn threads, or insufficient lubrication—all of which threaten the precision of your suspension set and can quickly lead to uneven or unsafe handling. Regularly inspect the adjuster for smoothness and ensure settings can be made with basic tools. If the preload adjuster won’t move despite proper technique, don’t apply excessive force—this is a sign to consult a professional, as forcing the mechanism can damage critical internal components of the front fork or rear shock. How to Check Motorcycle Suspension Setup Routine inspection of your motorcycle suspension ensures you identify problems before they impact safety or ride quality. Performing these checks yourself helps develop a “feel” for your bike and encourages a proactive approach to maintenance. Suspension on your bike should be checked when you notice changes in handling, before and after changing loads (like adding a passenger), or at set service intervals. Remember, even small changes in tire pressure, cargo, or riding style can impact how the suspension behaves. Never neglect regular assessment—check front and rear sag, watch out for oil leaks, inspect the action of your forks and shock, and record your preferred suspension setup settings for quick reference in the future. Step-by-Step: Inspecting Your Front Fork Begin with the motorcycle upright and fully extended—this “unloaded” position is your starting point. Gently press down on the front end, feeling for smooth and consistent movement in the front fork. If you hear squeaks, feel sticky spots, or notice oil residue near the seals, immediate attention is required. Measure the static sag by comparing the length of the fork when fully extended to where it sits under the bike’s weight; this helps determine if your spring rate is within the ideal range. Don’t forget to test fork rebound by compressing and releasing—the fork should return smoothly without bouncing. Check the tightness of every bolt, especially around the axle and triple clamps. If the fork bottom tube shows scuffs or oil, this can indicate worn seals or improper setup. Working through these steps helps you catch early warning signs and maintain a balanced, responsive front end ride. Dialing in the Correct Rear Shock Settings The rear shock is adjusted for both preload and damping. Using a spanner wrench, turn the preload collar so the bike’s static sag sits in the recommended range for your weight and riding style (often around 30–35mm for street bikes). Adjusting suspension settings too far from this range may lead to a harsh ride or too much travel, causing the rear end to feel loose or unpredictable. Next, fine-tune the rebound and compression adjustments to ensure the shock absorbs bumps without causing a pogo effect. Adjust these settings incrementally—a quarter or half turn at a time—then test ride to feel the results. Make note of each change, so you have a precise log of what feels best for your suspension setup. Common Motorcycle Suspension Issues vs. Ideal Suspension Feel Common Motorcycle Suspension Issues vs. Ideal Suspension Feel Symptom Possible Cause Suggested Action Nose dive under braking Weak front fork springs Adjust preload / upgrade springs Harsh over bumps Incorrect damping Tune damping or service suspension Bottoms out Low preload/rear shock Adjust preload / check shock Common Misconceptions About Motorcycle Suspension Tuning Many riders believe that motorcycle suspension tuning is only for professional racers or highly technical enthusiasts. In fact, every motorcycle owner benefits from regular suspension checks and adjustments. "Suspension setup is not just for racers—every rider benefits from proper tuning. " Another myth is that factory settings don’t need adjusting. However, manufacturers set up suspensions for “average” riders, and rarely do these generic setups match your unique riding style, weight, and local road conditions. Neglecting suspension setup can degrade both safety and riding pleasure—regular adjusting suspension is essential maintenance, not just an optional upgrade. Professional vs. DIY: Adjusting Suspension and Suspension Setup There’s a balance between performing basic motorcycle suspension adjustments at home and knowing when to consult the pros. Setting static sag, adjusting basic preload, and minor damping tweaks are manageable for most riders, requiring only a few tools and attention to detail. However, advanced tasks like rebuilding shocks, replacing fork oil, or diagnosing persistent instability should always be left to experienced professionals to ensure safety and proper component performance. Deciding when to trust your own skills versus seeking expert help hinges on the complexity of the issue, available tools, and your mechanical confidence. When in doubt, consulting a suspension specialist prevents expensive mistakes and ensures your suspension fully serves its purpose—connecting you securely to the road. When to Seek Expert Suspension Tuning If you’ve adjusted preload or damping and still encounter instability, excessive wear, or leaks, it’s time to see a qualified technician. Expert tuners possess tools such as dynamometers, precise measuring equipment, and a wealth of experience diagnosing subtle ride issues. Tasks like custom spring selection, full suspension rebuilds, and detailed damping adjustments are best left to those with specialized knowledge, ensuring your bike’s front and rear suspensions are perfectly matched and set correctly. Basic DIY Motorcycle Suspension Adjustments Many adjustments—including setting static sag and minor tweaks to the preload adjuster—can be performed at home. Start by referencing your owner’s manual, ensuring your bike is upright and stabilized before making changes. Use proper tools to avoid damaging components. Gradually adjust preload, compression, and rebound—testing after each turn—until you reach a suspension setup that feels balanced both front and rear. Don't forget to logically document every modification—keep notes of original settings and changes made, so you can easily return to a known good starting point if the results aren’t as expected. If your bike behaves erratically after an adjustment, or the suspension remains unresponsive, revisiting a professional may be necessary. Frequently Asked Questions on Motorcycle Suspension Tuning How often should motorcycle suspension be tuned? Inspect your motorcycle suspension every 6,000–12,000 miles, or anytime you notice a change in handling, add a frequent passenger, or adjust riding style. Regular inspection helps catch problems early and keeps your suspension set within safe limits. What are the most common signs my motorcycle suspension needs adjustment? Look for excessive nose-dive under braking, harshness over bumps, rear end bottoming out, or loss of composure in corners. These symptoms suggest your front fork or rear shock needs attention. Does rider weight affect suspension setup? Absolutely. Your personal and cargo weight directly impacts static sag and spring performance, requiring adjustments to maintain stability and comfort. Heavier or lighter riders must always set sag accordingly for both front and rear. Can improper motorcycle suspension tuning cause damage? Yes—a poorly tuned suspension accelerates wear on tires and bushings, increases fatigue on components, and can compromise safety in emergency scenarios by failing to keep the front wheel and rear tire in consistent contact with the road. People Also Ask: Motorcycle Suspension Tuning What happens if motorcycle suspension is not tuned properly? A motorcycle with untuned suspension can feel unstable, handle poorly, and put both comfort and safety at risk. How do I know if I need to adjust my motorcycle suspension? Watch for symptoms such as instability in turns, excessive bounce, or discomfort over bumps—these are key indicators your motorcycle suspension tuning is required. Is it difficult to perform motorcycle suspension tuning on my own? Basic adjustments are manageable for most riders—with the right tools and guides, simple tuning can be done DIY, but complex tuning should be handled by professionals. Key Takeaways for Motorcycle Suspension Tuning Proper motorcycle suspension tuning enhances safety and ride quality Regular inspection identifies suspension setup issues early Both front fork and rear shock play crucial roles Professional guidance is recommended for complex tuning Take the Next Step: Ensure Your Motorcycle Suspension Is Tuned Right Mastering your motorcycle’s suspension is just one part of a comprehensive maintenance routine that keeps your ride safe and enjoyable all year long. If you’re ready to elevate your bike care beyond the basics, consider how seasonal factors—from temperature swings to road conditions—can influence your maintenance priorities. For a deeper dive into holistic motorcycle upkeep and to uncover expert strategies for every riding season, check out the full guide on seasonal bike care secrets every rider must know. Expanding your knowledge in this area will help you anticipate issues before they arise and ensure your motorcycle performs at its best, no matter the time of year. Call Nasty Performance Motorcycle Shop Today: 847-458-4858

Step-By-Step DIY Motorcycle Maintenance Tips

Did you know? Skipping just one routine motorcycle maintenance task can increase your risk of breakdown or accident by up to 50%. While performance is important, your safety and the longevity of your bike depend on mastering the basics of motorcycle maintenance tips. Unlocking Motorcycle Longevity: Why Motorcycle Maintenance Tips Matter "Motorcycle maintenance isn’t just about performance, it’s about safety and extending the life of your machine." Every rider wants their bike to be safe and enjoyable for as long as possible. With regular motorcycle maintenance tips, you don’t just preserve how your bike looks and runs—you protect yourself, others, and your wallet from costly repairs. Proper care means catching issues before they become serious, whether you ride every day or only for long rides. Staying proactive ensures that each maintenance task—from checking tire pressure to inspecting brake pads—keeps your motorcycle running smoothly, optimizes fuel efficiency, and maintains stopping power every time you hit the brakes. It all starts with understanding why regular maintenance matters and committing to a simple routine that fits into your lifestyle. Ignoring basic maintenance tasks can have a domino effect. For example, something as small as letting your tire pressure drop can affect handling, reduce tread depth, and impact your stopping power. Skipping oil changes can harm the engine, while neglecting the chain and sprocket can leave you stranded on a long ride. By prioritizing these essential maintenance tasks, you gain peace of mind and extend your bike's lifespan, so you’re ready for more adventures on the open road. Surprising Facts That Highlight the Importance of Motorcycle Maintenance Tips You might be surprised to learn that over 60% of breakdowns on the road are due to small, preventable issues. For instance, improperly maintained brake pads or chains account for a significant percentage of loss-of-control incidents. It’s also worth noting that a clogged air filter can drop engine power and speed by up to 10%, not only hurting your bike’s performance but also its resilience on long rides. These facts highlight how implementing a few sensible motorcycle maintenance tips can make the difference between a safe, exhilarating ride, and dealing with frustrating repairs or safety hazards. Many seasoned riders swear by maintenance checklists, claiming their bikes run better and last longer when they regularly check oil levels, tire pressure, and fluid levels. Even small maintenance tasks like cleaning battery terminals or inspecting lights can profoundly affect reliability. Staying on top of the basics puts you firmly in the driver’s seat—never leaving your biking fate to chance. For a more detailed breakdown of each maintenance step and additional hands-on advice, you might find this step-by-step bike servicing guide helpful. It covers practical servicing routines that complement the essential tips outlined here. What You’ll Learn: Mastering Motorcycle Maintenance Tips The most crucial motorcycle maintenance tasks every rider should know Step-by-step breakdowns for essential maintenance items: brake pads, tire pressure, chain and sprocket, air filter, and oil change Real-world insights that keep you—and your ride—safe Frequently asked questions about motorcycle maintenance tips Core Maintenance Tasks: The Foundation of Effective Motorcycle Maintenance Tips The heart of effective motorcycle care is a solid routine of regular maintenance tasks. By learning and sticking to these basics, you ensure your bike remains running smoothly, whether you use it for short trips or long rides. Prioritizing these checks boosts your confidence and reinforces safety for every journey. Essential motorcycle maintenance jobs include checking and adjusting tire pressure, inspecting and replacing brake pads, cleaning and lubricating the chain and sprocket, maintaining the air filter, and performing oil changes on schedule. Each one plays a vital role in transferring power from the engine to the wheels, maintaining stopping power, and maximizing overall efficiency. Consider this your maintenance blueprint: structure your checks according to frequency and use the right tools for best results. Consistency is key. Even a simple weekly look at tire pressure or a monthly brake pad inspection goes a long way toward keeping your bike in top shape. Use this table as your quick reference for routine motorcycle care. Routine Motorcycle Maintenance: Scheduling and Priority Maintenance Task Frequency Tools Needed Tire Pressure Weekly Tire Gauge Brake Pad Inspection Monthly Wrench, Allen Key Chain and Sprocket Weekly Lubricant, Brush Air Filter Check Monthly Screwdriver Oil Change As Specified Oil Pan, Wrench Inspecting and Adjusting Tire Pressure: Motorcycle Maintenance Tips for Safer Rides One of the easiest yet most overlooked motorcycle maintenance tips is managing tire pressure. Correct tire pressure ensures a safe, smooth ride, potent stopping power, and peak fuel efficiency. Whether it’s your first bike or you’re prepping for a long ride, checking tire pressure should be a non-negotiable part of your routine. An under-inflated tire risks overheating and blowouts, while over-inflation reduces grip, especially in wet conditions. Make it a habit to check your tire pressure weekly or before any big trip—using a reliable pressure gauge for accuracy. Never wait for visible signs of trouble. Addressing issues early prevents uneven wear and preserves tread depth, critical for safe handling. Invest a few moments in this step, and you’re rewarded with better control and less chance of being sidelined by unexpected flats or poor performance. Remember, when your tires are properly inflated, the rest of your motorcycle’s systems can function to their full potential. Step 1: How to Check and Adjust Tire Pressure Correctly Why accurate tire pressure matters: It affects stopping power, extends tire life, and boosts fuel efficiency. Signs of under-inflation or over-inflation: Uneven tread depth, wobbling, sluggish handling, or uneven tire wear. Steps for using a tire pressure gauge effectively: Always check when tires are cold. Remove the valve cap, position the gauge onto the stem, and get a quick read. Adjust pressure as needed to match your owner’s manual recommendations. Don’t forget to replace the cap! Brake Pad & Brake Pads: Motorcycle Maintenance Tips for Maximum Stopping Power When it comes to safe riding, few maintenance tasks are as vital as ensuring your brake pads are up to standard. The state of your brake pads directly impacts your bike’s stopping power, especially during emergencies or at high speeds. Regularly inspecting your motorcycle brake system prevents the kind of unexpected failures that can lead to dangerous situations. Even if your rides are mostly short and sweet or you love the thrill of long rides, always check your brake for wear, warping, or reduced performance. To keep your stopping power in peak condition, don’t ignore unusual sounds, increased stopping distances, or a spongy brake lever feel. These are strong indicators that your brake pads—or the entire brake system—need attention. Always use the recommended tools for DIY maintenance and don’t hesitate to replace worn, thin, or cracked pads. It’s a small step that offers massive peace of mind every time you need to stop suddenly or tackle sharp curves. Step 2: Inspecting Brake Pads and Maintaining Braking Efficiency Visual signs your brake pads need attention: Look for thinning material, deep grooves, uneven wear, or squealing sounds during braking. Tools required for basic brake pad maintenance: Most jobs need a wrench or Allen key, gloves, and a good lighting source. Tips for ensuring peak stopping power: Always clean the caliper area when inspecting or changing pads, and never touch pad surfaces with bare hands to prevent contamination. Cleaning and Lubricating Your Chain and Sprocket: Motorcycle Maintenance Tips to Boost Lifespan Your chain and sprocket are responsible for transferring power from the engine to the wheels—making their upkeep a must in your motorcycle maintenance tips routine. If your chain is too tight or loose, or if dirt and rust take hold, your bike won’t perform at its best, and you risk accelerated wear or even mechanical failure. Frequent chain cleaning and lubrication, paired with proper tensioning, keep everything running smoothly and help avoid those annoying squeaks, jumps, or dangerous chain breaks. A clean, properly lubricated chain provides smooth power delivery and keeps your rides safe and enjoyable. Look for buildup, rust, or sagging as clear signals it’s time for attention. Following a careful maintenance schedule boosts overall bike lifespan and makes every ride feel effortless—whether you’re dealing with city commutes or countryside adventures. Step 3: Care Essentials for Optimal Chain and Sprocket Health Indications your chain needs cleaning and lubrication: Presence of dirt, rust, kinks, noise or visible slack in the chain. How to properly tension and lubricate the chain: Use the bike’s center stand if possible, clean the chain using a suitable brush and degreaser, spin the rear tire, and check slack according to the manual. Lubricate evenly along the length—wipe off excess to prevent dust attraction. Importance of sprocket condition in overall motorcycle maintenance: Worn teeth or misalignment impact the whole drive system—if you notice hooked, chipped, or thinning sprocket teeth, it’s time to replace them. Air Filter Maintenance: Critical Motorcycle Maintenance Tips for Engine Performance The air filter is the gatekeeper of a healthy engine, keeping dust, debris, and impurities away from your motorcycle’s heart. A dirty air filter can suffocate performance—resulting in rough running, poor fuel efficiency, and even damage over time. That’s why every list of smart motorcycle maintenance tips always includes checking, cleaning, or replacing your air filter regularly, especially if you frequently ride on dusty roads. Keeping your air filter clean not only protects the engine but also optimizes airflow for maximum combustion power. If your bike feels sluggish, takes several tries to start, or emits more smoke than usual, an air filter check should be your priority. Doing this yourself is straightforward and saves you trips to the mechanic—just follow these simple care instructions for reliable performance in any season. Step 4: How to Inspect, Clean, and Replace Your Air Filter Warning signs your air filter is clogged: Reduced acceleration, black smoke, increased fuel use, or visible dirt on the filter element. DIY cleaning and replacement tips: Remove the filter cover with a screwdriver, gently tap out loose debris, or wash if reusable. If it’s paper and clogged, install a new one—always use the type recommended for your motorcycle. How a well-maintained air filter protects your engine: It ensures proper air-fuel mix for combustion, prevents abrasive debris from entering cylinders, and increases overall engine lifespan. Motorcycle Oil Change: Step-By-Step Motorcycle Maintenance Tips Changing your bike’s oil is an indispensable motorcycle maintenance task that keeps your engine lubricated and running quietly. Regular oil changes ensure moving parts don’t wear prematurely, reduce engine heat, and help catch early signs of trouble like metal shavings or discoloration. Whether you use mineral or synthetic oils, following your manufacturer’s schedule for oil changes is critical to get the most out of every engine revolution. Learning how to change your own oil saves money and gives you control over the quality and cleanliness of what’s inside your engine. With the right tools and a little patience, you can make oil changes a quick, mess-free routine that pays major dividends—especially if you love taking long rides. Always check the oil level after filling, and dispose of old oil responsibly to protect the environment as well as your driveway. Step 5: Performing an Efficient Oil Change at Home How to recognize when it’s time for an oil change: Look for darker color, decreased oil level, unusual engine noise, or exceeding the recommended mileage interval. Choosing the right oil for your motorcycle: Refer to the owner’s manual—different engines require different weights and oil types (mineral vs. synthetic). Environmental tips for oil disposal: Never pour old oil down drains; store it in a sealed container and deliver to an approved recycling center. Beyond the Basics: Preventive Motorcycle Maintenance Tips Inspecting brake and clutch levers for smooth action and minimal play Checking all warning lights for proper function before each ride Monitoring coolant and fluid levels (including brake fluid and coolant level) to prevent overheating or system damage Inspecting suspension and bearings for signs of wear or excessive movement Expert Quotes: Insights on Motorcycle Maintenance Tips "Neglecting simple maintenance tasks can lead to costly repairs and compromised safety. Always check your motorcycle maintenance tasks schedule." — Leading Motorcycle Mechanic Essential Motorcycle Maintenance Tips Checklist Inspect tire pressure before each ride Regularly inspect and replace brake pads as needed Clean and lubricate chain and sprocket once a week Check and replace air filter regularly Change oil as per manufacturer guidelines Visually inspect all cables, lights, and levers Monitor fluid levels for brakes and coolant People Also Ask: Motorcycle Maintenance Tips What is the 4 second rule on a motorcycle? Understanding and Applying the 4 Second Rule for Motorcycle Safety The 4-second rule is a widely recommended following distance for motorcyclists. When riding behind another vehicle, choose a fixed point on the road—once the car ahead passes it, count four full seconds. If you reach the point before finishing the count, you’re too close and should increase your distance. This rule allows enough time to react to sudden stops, potholes, or unexpected obstacles, providing a safe buffer for both long rides and city traffic. Consistently applying this rule can significantly reduce your risk of rear-end collisions and is considered essential for safe, enjoyable riding. What is the most important maintenance on a motorcycle? Breaking Down the Most Important Motorcycle Maintenance Tip Every Rider Should Know While every maintenance task matters, regularly checking and adjusting tire pressure stands out as perhaps the most crucial. Proper tire pressure impacts handling, braking, fuel efficiency, and overall safety. Without correctly inflated tires, even the best-maintained engine or brakes can’t deliver optimal performance. By making tire pressure checks a non-negotiable routine—especially before long rides—you keep your bike in top shape and support every other component, from suspension to brakes and beyond. What does 2 fingers up mean on a motorcycle? Decoding the Motorcycle Hand Gestures: Two Fingers Up Explained When a motorcyclist flashes two fingers up—usually angled downwards—it’s a gesture of camaraderie and respect among riders. This hand signal is a way to say, “stay safe and enjoy the ride,” similar to waving but tailored to motorcycle culture. The gesture reinforces a sense of community on the road, reminding everyone to ride responsibly and take care of their machines with the same attention to detail recommended in all these motorcycle maintenance tips. Which bike is most liked by girls? Popular Motorcycle Models Among Female Riders Female riders often prefer motorcycles that combine manageable size, comfort, and approachable power delivery. Some popular models include the Honda Rebel, Kawasaki Ninja 400, Yamaha MT-03, and Royal Enfield Meteor. These bikes are well-regarded for their friendly ergonomics, lightweight frames, and ease of handling, making them great for newcomers or those who want confidence in city riding or on long rides. Ultimately, personal taste, comfort, and fit trump model—always choose a bike that empowers you and fits your riding style. Frequently Asked Questions About Motorcycle Maintenance Tips How often should I check my tire pressure? At least once a week, or before every long ride, using a reliable tire pressure gauge. What are the signs of worn-out brake pads? Squealing noise, thinning pad material, increased stopping distance, or visible grooves and scoring on the pad surface. How do I know if my chain is too loose or tight? Consult your owner’s manual for the recommended slack; a chain that sags too much, makes noise, or jumps off the sprocket needs attention. When should I replace my air filter? Every 10,000–15,000 miles for most bikes, or sooner in dusty conditions. Replace immediately if it appears dirty, torn, or obstructed. What’s the difference between mineral and synthetic oils for motorcycles? Mineral oils are suitable for older engines or less demanding use, while synthetic oils offer better protection, longer change intervals, and enhanced performance in modern or high-output engines. Key Takeaways: Motorcycle Maintenance Tips for Every Rider Regular motorcycle maintenance ensures safety and peak performance Key steps include tire pressure checks, brake pad care, chain and sprocket lubrication, air filter maintenance, and timely oil changes Staying proactive with motorcycle maintenance tips keeps you on the road longer If you’re passionate about keeping your motorcycle in peak condition, there’s always more to discover beyond the basics. For those interested in the unique challenges and rewards of maintaining older bikes, our classic vintage motorcycle maintenance tips offer expert strategies tailored to timeless machines. Exploring these advanced insights can help you master both modern and vintage rides, ensuring every journey is smooth, safe, and full of confidence. Take your maintenance skills to the next level and enjoy the satisfaction that comes from truly understanding your motorcycle inside and out. Ready to Elevate Your Ride? "Call Nasty Performance Motorcycle Shop Today: 847-458-4858 for expert guidance and top-tier motorcycle maintenance!"

© 2025 Nasty Performance All Rights Reserved. 2035 S. Eastwood Dr., Woodstock, IL 60098 . Contact Us . Terms of Service . Privacy Policy

eyJjb21wYW55IjoiTmFzdHkgUGVyZm9ybWFuY2UiLCJhZGRyZXNzIjoiMjAzNSBTLiBFYXN0d29vZCBEci4iLCJjaXR5IjoiV29vZHN0b2NrIiwic3RhdGUiOiJJTCIsInppcCI6IjYwMDk4IiwiZW1haWwiOiJuYXRlQG5hc3R5cGVyZm9ybWFuY2UuY29tIiwidG9zIjoiUEhBK1BITjBjbTl1Wno0OFpXMCtWMmhsYmlCNWIzVWdjMmxuYmkxcGJpQjNhWFJvSUhWekxDQjViM1VnWVhKbElHZHBkbWx1WnladVluTndPeUI1YjNWeUlIQmxjbTFwYzNOcGIyNGdZVzVrSUdOdmJuTmxiblFnZEc4Z2MyVnVaQ0I1YjNVZ1pXMWhhV3dnWVc1a0wyOXlJRk5OVXlCMFpYaDBJRzFsYzNOaFoyVnpMaUJDZVNCamFHVmphMmx1WnlCMGFHVWdWR1Z5YlhNZ1lXNWtJRU52Ym1ScGRHbHZibk1nWW05NElHRnVaQ0JpZVNCemFXZHVhVzVuSUdsdUlIbHZkU0JoZFhSdmJXRjBhV05oYkd4NUlHTnZibVpwY20wZ2RHaGhkQ0I1YjNVZ1lXTmpaWEIwSUdGc2JDQjBaWEp0Y3lCcGJpQjBhR2x6SUdGbmNtVmxiV1Z1ZEM0OEwyVnRQand2YzNSeWIyNW5Qand2Y0Q0S0NqeHdQanhoSUdoeVpXWTlJbWgwZEhBNkx5OTNkM2N1WjI5dloyeGxMbU52YlNJK2FIUjBjRG92TDNkM2R5NW5iMjluYkdVdVkyOXRQQzloUGp3dmNENEtDanh3UGladVluTndPend2Y0Q0S0NqeHdQanh6ZEhKdmJtYytVMFZTVmtsRFJUd3ZjM1J5YjI1blBqd3ZjRDRLQ2p4d1BsZGxJSEJ5YjNacFpHVWdZU0J6WlhKMmFXTmxJSFJvWVhRZ1kzVnljbVZ1ZEd4NUlHRnNiRzkzY3lCNWIzVWdkRzhnY21WalpXbDJaU0J5WlhGMVpYTjBjeUJtYjNJZ1ptVmxaR0poWTJzc0lHTnZiWEJoYm5rZ2FXNW1iM0p0WVhScGIyNHNJSEJ5YjIxdmRHbHZibUZzSUdsdVptOXliV0YwYVc5dUxDQmpiMjF3WVc1NUlHRnNaWEowY3l3Z1kyOTFjRzl1Y3l3Z1pHbHpZMjkxYm5SeklHRnVaQ0J2ZEdobGNpQnViM1JwWm1sallYUnBiMjV6SUhSdklIbHZkWElnWlcxaGFXd2dZV1JrY21WemN5QmhibVF2YjNJZ1kyVnNiSFZzWVhJZ2NHaHZibVVnYjNJZ1pHVjJhV05sTGlCWmIzVWdkVzVrWlhKemRHRnVaQ0JoYm1RZ1lXZHlaV1VnZEdoaGRDQjBhR1VnVTJWeWRtbGpaU0JwY3lCd2NtOTJhV1JsWkNBbWNYVnZkRHRCVXkxSlV5WnhkVzkwT3lCaGJtUWdkR2hoZENCM1pTQmhjM04xYldVZ2JtOGdjbVZ6Y0c5dWMybGlhV3hwZEhrZ1ptOXlJSFJvWlNCMGFXMWxiR2x1WlhOekxDQmtaV3hsZEdsdmJpd2diV2x6TFdSbGJHbDJaWEo1SUc5eUlHWmhhV3gxY21VZ2RHOGdjM1J2Y21VZ1lXNTVJSFZ6WlhJZ1kyOXRiWFZ1YVdOaGRHbHZibk1nYjNJZ2NHVnljMjl1WVd4cGVtRjBhVzl1SUhObGRIUnBibWR6TGp3dmNENEtDanh3UGxsdmRTQmhjbVVnY21WemNHOXVjMmxpYkdVZ1ptOXlJRzlpZEdGcGJtbHVaeUJoWTJObGMzTWdkRzhnZEdobElGTmxjblpwWTJVZ1lXNWtJSFJvWVhRZ1lXTmpaWE56SUcxaGVTQnBiblp2YkhabElIUm9hWEprSUhCaGNuUjVJR1psWlhNZ0tITjFZMmdnWVhNZ1UwMVRJSFJsZUhRZ2JXVnpjMkZuWlhNc0lFbHVkR1Z5Ym1WMElITmxjblpwWTJVZ2NISnZkbWxrWlhJZ2IzSWdZMlZzYkhWc1lYSWdZV2x5ZEdsdFpTQmphR0Z5WjJWektTNGdXVzkxSUdGeVpTQnlaWE53YjI1emFXSnNaU0JtYjNJZ2RHaHZjMlVnWm1WbGN5d2dhVzVqYkhWa2FXNW5JSFJvYjNObElHWmxaWE1nWVhOemIyTnBZWFJsWkNCM2FYUm9JSFJvWlNCa2FYTndiR0Y1SUc5eUlHUmxiR2wyWlhKNUlHOW1JR1ZoWTJnZ1UwMVRJSFJsZUhRZ2JXVnpjMkZuWlNCelpXNTBJSFJ2SUhsdmRTQmllU0IxY3k0Z1NXNGdZV1JrYVhScGIyNHNJSGx2ZFNCdGRYTjBJSEJ5YjNacFpHVWdZVzVrSUdGeVpTQnlaWE53YjI1emFXSnNaU0JtYjNJZ1lXeHNJR1Z4ZFdsd2JXVnVkQ0J1WldObGMzTmhjbmtnZEc4Z1lXTmpaWE56SUhSb1pTQlRaWEoyYVdObElHRnVaQ0J5WldObGFYWmxJSFJvWlNCVFRWTWdkR1Y0ZENCdFpYTnpZV2RsY3k0Z1YyVWdaRzhnYm05MElHTm9ZWEpuWlNCaGJua2dabVZsY3lCbWIzSWdaR1ZzYVhabGNua2diMllnWlcxaGFXd2diM0lnVTAxVExpQlVhR2x6SUdseklHRWdabkpsWlNCelpYSjJhV05sSUhCeWIzWnBaR1ZrSUdKNUlIVnpMaUJJYjNkbGRtVnlMQ0J3YkdWaGMyVWdZMmhsWTJzZ2QybDBhQ0I1YjNWeUlHbHVkR1Z5Ym1WMElITmxjblpwWTJVZ2NISnZkbWxrWlhJZ1lXNWtJR05sYkd4MWJHRnlJR05oY25KcFpYSWdabTl5SUdGdWVTQmphR0Z5WjJWeklIUm9ZWFFnYldGNUlHbHVZM1Z5SUdGeklHRWdjbVZ6ZFd4MElHWnliMjBnY21WalpXbDJhVzVuSUdWdFlXbHNJR0Z1WkNCVFRWTWdkR1Y0ZENCdFpYTnpZV2RsY3lCMGFHRjBJSGRsSUdSbGJHbDJaWElnZFhCdmJpQjViM1Z5SUc5d2RDMXBiaUJoYm1RZ2NtVm5hWE4wY21GMGFXOXVJSGRwZEdnZ2IzVnlJR1Z0WVdsc0lHRnVaQ0JUVFZNZ2MyVnlkbWxqWlhNdUlGbHZkU0JqWVc0Z1kyRnVZMlZzSUdGMElHRnVlU0IwYVcxbExpQktkWE4wSUhSbGVIUWdKbkYxYjNRN1UxUlBVQ1p4ZFc5ME95QjBieVp1WW5Od096eG9hV2RvYkdsbmFIUWdZMnhoYzNNOUltTnZiWEJoYm5sVFRWTlFhRzl1WlZWd1pHRjBaU0krYm5Wc2JEd3ZhR2xuYUd4cFoyaDBQaTRnUVdaMFpYSWdlVzkxSUhObGJtUWdkR2hsSUZOTlV5QnRaWE56WVdkbElDWnhkVzkwTzFOVVQxQW1jWFZ2ZERzZ2RHOGdkWE1zSUhkbElIZHBiR3dnYzJWdVpDQjViM1VnWVc0Z1UwMVRJRzFsYzNOaFoyVWdkRzhnWTI5dVptbHliU0IwYUdGMElIbHZkU0JvWVhabElHSmxaVzRnZFc1emRXSnpZM0pwWW1Wa0xpQkJablJsY2lCMGFHbHpMQ0I1YjNVZ2QybHNiQ0J1YnlCc2IyNW5aWElnY21WalpXbDJaU0JUVFZNZ2JXVnpjMkZuWlhNZ1puSnZiU0IxY3k0OEwzQStDZ284Y0Q0OGMzUnliMjVuUGxsUFZWSWdVa1ZIU1ZOVVVrRlVTVTlPSUU5Q1RFbEhRVlJKVDA1VFBDOXpkSEp2Ym1jK1BDOXdQZ29LUEhBK1NXNGdZMjl1YzJsa1pYSmhkR2x2YmlCdlppQjViM1Z5SUhWelpTQnZaaUIwYUdVZ1UyVnlkbWxqWlN3Z2VXOTFJR0ZuY21WbElIUnZPand2Y0Q0S0NqeHZiRDRLQ1R4c2FUNXdjbTkyYVdSbElIUnlkV1VzSUdGalkzVnlZWFJsTENCamRYSnlaVzUwSUdGdVpDQmpiMjF3YkdWMFpTQnBibVp2Y20xaGRHbHZiaUJoWW05MWRDQjViM1Z5YzJWc1ppQmhjeUJ3Y205dGNIUmxaQ0JpZVNCMGFHVWdVMlZ5ZG1salpTWWpNems3Y3lCeVpXZHBjM1J5WVhScGIyNGdabTl5YlNBb2MzVmphQ0JwYm1admNtMWhkR2x2YmlCaVpXbHVaeUIwYUdVZ0puRjFiM1E3VW1WbmFYTjBjbUYwYVc5dUlFUmhkR0VtY1hWdmREc3BJR0Z1WkR3dmJHaytDZ2s4YkdrK2JXRnBiblJoYVc0Z1lXNWtJSEJ5YjIxd2RHeDVJSFZ3WkdGMFpTQjBhR1VnVW1WbmFYTjBjbUYwYVc5dUlFUmhkR0VnZEc4Z2EyVmxjQ0JwZENCMGNuVmxMQ0JoWTJOMWNtRjBaU3dnWTNWeWNtVnVkQ0JoYm1RZ1kyOXRjR3hsZEdVdUlFbG1JSGx2ZFNCd2NtOTJhV1JsSUdGdWVTQnBibVp2Y20xaGRHbHZiaUIwYUdGMElHbHpJSFZ1ZEhKMVpTd2dhVzVoWTJOMWNtRjBaU3dnYm05MElHTjFjbkpsYm5RZ2IzSWdhVzVqYjIxd2JHVjBaU3dnYjNJZ2QyVWdhR0YyWlNCeVpXRnpiMjVoWW14bElHZHliM1Z1WkhNZ2RHOGdjM1Z6Y0dWamRDQjBhR0YwSUhOMVkyZ2dhVzVtYjNKdFlYUnBiMjRnYVhNZ2RXNTBjblZsTENCcGJtRmpZM1Z5WVhSbExDQnViM1FnWTNWeWNtVnVkQ0J2Y2lCcGJtTnZiWEJzWlhSbExDQjNaU0JvWVhabElIUm9aU0J5YVdkb2RDQjBieUJ6ZFhOd1pXNWtJRzl5SUR4emRISnZibWMrUEhOd1lXNGdjM1I1YkdVOUltTnZiRzl5T2lOR1JqQXdNREE3SWo1MFpYSnRhVzVoZEdVZ2VXOTFjaUJoWTJOdmRXNTBMM0J5YjJacGJHVWdZVzVrSUhKbFpuVnpaU0JoYm5rZ1lXNWtJR0ZzYkNCamRYSnlaVzUwSUc5eUlHWjFkSFZ5WlNCMWMyVWdiMllnZEdobElGTmxjblpwWTJVZ0tHOXlJR0Z1ZVNCd2IzSjBhVzl1SUhSb1pYSmxiMllwTGp3dmMzQmhiajQ4TDNOMGNtOXVaejQ4TDJ4cFBnbzhMMjlzUGdvS1BIQStKbTVpYzNBN1BDOXdQZ284YUdsbmFHeHBaMmgwSUdOc1lYTnpQU0pqYjIxd1lXNTVUbUZ0WlZWd1pHRjBaU0krVG1GemRIa2dVR1Z5Wm05eWJXRnVZMlU4TDJocFoyaHNhV2RvZEQ0OFluSWdMejRLUEdocFoyaHNhV2RvZENCamJHRnpjejBpWTI5dGNHRnVlVUZrWkhKbGMzTlZjR1JoZEdVaVBqSXdNelVnVXk0Z1JXRnpkSGR2YjJRZ1JISXVMQ0JYYjI5a2MzUnZZMnNzSUVsTUlEWXdNRGs0UEM5b2FXZG9iR2xuYUhRK1BHSnlJQzgrQ2p4b2FXZG9iR2xuYUhRZ1kyeGhjM005SW1OdmJYQmhibmxRYUc5dVpWVndaR0YwWlNJK0tEZzBOeWtnTkRVNExUUTROVGc4TDJocFoyaHNhV2RvZEQ0OFluSWdMejRLUEdocFoyaHNhV2RvZENCamJHRnpjejBpWTI5dGNHRnVlVVZ0WVdsc1ZYQmtZWFJsSWo1dVlYUmxRRzVoYzNSNWNHVnlabTl5YldGdVkyVXVZMjl0UEM5b2FXZG9iR2xuYUhRKyIsInByaXZhY3kiOiJQSEErUEhOMGNtOXVaejVRVWtsV1FVTlpQQzl6ZEhKdmJtYytQQzl3UGdvS1BIQStQSE4wY205dVp6NVVhR1VnYVc1bWIzSnRZWFJwYjI0Z2NISnZkbWxrWldRZ1pIVnlhVzVuSUhSb2FYTWdjbVZuYVhOMGNtRjBhVzl1SUdseklHdGxjSFFnY0hKcGRtRjBaU0JoYm1RZ1kyOXVabWxrWlc1MGFXRnNMQ0JoYm1RZ2QybHNiQ0J1WlhabGNpQmlaU0JrYVhOMGNtbGlkWFJsWkN3Z1kyOXdhV1ZrTENCemIyeGtMQ0IwY21Ga1pXUWdiM0lnY0c5emRHVmtJR2x1SUdGdWVTQjNZWGtzSUhOb1lYQmxJRzl5SUdadmNtMHVJRlJvYVhNZ2FYTWdiM1Z5SUdkMVlYSmhiblJsWlM0OEwzTjBjbTl1Wno0OEwzQStDZ284Y0Q0OGMzUnliMjVuUGtsT1JFVk5Ua2xVV1R3dmMzUnliMjVuUGp3dmNENEtDanh3UGp4bGJUNVpiM1VnWVdkeVpXVWdkRzhnYVc1a1pXMXVhV1o1SUdGdVpDQm9iMnhrSUhWekxDQmhibVFnYVhSeklITjFZbk5wWkdsaGNtbGxjeXdnWVdabWFXeHBZWFJsY3l3Z2IyWm1hV05sY25Nc0lHRm5aVzUwY3l3Z1kyOHRZbkpoYm1SbGNuTWdiM0lnYjNSb1pYSWdjR0Z5ZEc1bGNuTXNJR0Z1WkNCbGJYQnNiM2xsWlhNc0lHaGhjbTFzWlhOeklHWnliMjBnWVc1NUlHTnNZV2x0SUc5eUlHUmxiV0Z1WkN3Z2FXNWpiSFZrYVc1bklISmxZWE52Ym1GaWJHVWdZWFIwYjNKdVpYbHpKaU16T1RzZ1ptVmxjeXdnYldGa1pTQmllU0JoYm5rZ2RHaHBjbVFnY0dGeWRIa2daSFZsSUhSdklHOXlJR0Z5YVhOcGJtY2diM1YwSUc5bUlFTnZiblJsYm5RZ2VXOTFJSEpsWTJWcGRtVXNJSE4xWW0xcGRDd2djbVZ3Ykhrc0lIQnZjM1FzSUhSeVlXNXpiV2wwSUc5eUlHMWhhMlVnWVhaaGFXeGhZbXhsSUhSb2NtOTFaMmdnZEdobElGTmxjblpwWTJVc0lIbHZkWElnZFhObElHOW1JSFJvWlNCVFpYSjJhV05sTENCNWIzVnlJR052Ym01bFkzUnBiMjRnZEc4Z2RHaGxJRk5sY25acFkyVXNJSGx2ZFhJZ2RtbHZiR0YwYVc5dUlHOW1JSFJvWlNCVVQxTXNJRzl5SUhsdmRYSWdkbWx2YkdGMGFXOXVJRzltSUdGdWVTQnlhV2RvZEhNZ2IyWWdZVzV2ZEdobGNpNDhMMlZ0UGp3dmNENEtDanh3UGp4emRISnZibWMrUkVsVFEweEJTVTFGVWlCUFJpQlhRVkpTUVU1VVNVVlRQQzl6ZEhKdmJtYytQQzl3UGdvS1BIQStQSE4wY205dVp6NVpUMVVnUlZoUVVrVlRVMHhaSUZWT1JFVlNVMVJCVGtRZ1FVNUVJRUZIVWtWRklGUklRVlE2UEM5emRISnZibWMrUEM5d1Bnb0tQRzlzUGdvSlBHeHBQbGxQVlZJZ1ZWTkZJRTlHSUZSSVJTQlRSVkpXU1VORklFbFRJRUZVSUZsUFZWSWdVMDlNUlNCU1NWTkxMaUJVU0VVZ1UwVlNWa2xEUlNCSlV5QlFVazlXU1VSRlJDQlBUaUJCVGlBbWNYVnZkRHRCVXlCSlV5WnhkVzkwT3lCQlRrUWdKbkYxYjNRN1FWTWdRVlpCU1V4QlFreEZKbkYxYjNRN0lFSkJVMGxUTGlBc0xpQkJUa1FnVlZNc0lFbFVKaU16T1R0VElFTlZVMVJQVFVWU1V5d2dSVmhRVWtWVFUweFpJRVJKVTBOTVFVbE5VeUJCVEV3Z1YwRlNVa0ZPVkVsRlV5QlBSaUJCVGxrZ1MwbE9SQ3dnVjBoRlZFaEZVaUJGV0ZCU1JWTlRJRTlTSUVsTlVFeEpSVVFzSUVsT1EweFZSRWxPUnl3Z1FsVlVJRTVQVkNCTVNVMUpWRVZFSUZSUElGUklSU0JKVFZCTVNVVkVJRmRCVWxKQlRsUkpSVk1nVDBZZ1RVVlNRMGhCVGxSQlFrbE1TVlJaTENCR1NWUk9SVk5USUVaUFVpQkJJRkJCVWxSSlExVk1RVklnVUZWU1VFOVRSU0JCVGtRZ1RrOU9MVWxPUmxKSlRrZEZUVVZPVkM0OEwyeHBQZ29KUEd4cFBrMUJTMFZUSUU1UElGZEJVbEpCVGxSWklGUklRVlFnS0drcElGUklSU0JUUlZKV1NVTkZJRmRKVEV3Z1RVVkZWQ0JaVDFWU0lGSkZVVlZKVWtWTlJVNVVVeXdnS0dscEtTQlVTRVVnVTBWU1ZrbERSU0JYU1V4TUlFSkZJRlZPU1U1VVJWSlNWVkJVUlVRc0lGUkpUVVZNV1N3Z1UwVkRWVkpGTENCUFVpQkZVbEpQVWkxR1VrVkZMQ0FvYVdscEtTQlVTRVVnVWtWVFZVeFVVeUJVU0VGVUlFMUJXU0JDUlNCUFFsUkJTVTVGUkNCR1VrOU5JRlJJUlNCVlUwVWdUMFlnVkVoRklGTkZVbFpKUTBVZ1YwbE1UQ0JDUlNCQlEwTlZVa0ZVUlNCUFVpQlNSVXhKUVVKTVJTd2dRVTVFSUNocGRpa2dRVTVaSUVWU1VrOVNVeUJKVGlCVVNFVWdVMDlHVkZkQlVrVWdWMGxNVENCQ1JTQkRUMUpTUlVOVVJVUXVQQzlzYVQ0S0NUeHNhVDVCVGxrZ1RVRlVSVkpKUVV3Z1JFOVhUa3hQUVVSRlJDQlBVaUJQVkVoRlVsZEpVMFVnVDBKVVFVbE9SVVFnVkVoU1QxVkhTQ0JVU0VVZ1ZWTkZJRTlHSUZSSVJTQlRSVkpXU1VORklFbFRJRVJQVGtVZ1FWUWdXVTlWVWlCUFYwNGdSRWxUUTFKRlZFbFBUaUJCVGtRZ1VrbFRTeUJCVGtRZ1ZFaEJWQ0JaVDFVZ1YwbE1UQ0JDUlNCVFQweEZURmtnVWtWVFVFOU9VMGxDVEVVZ1JrOVNJRUZPV1NCRVFVMUJSMFVnVkU4Z1dVOVZVaUJEVDAxUVZWUkZVaUJUV1ZOVVJVMGdUMUlnVEU5VFV5QlBSaUJFUVZSQklGUklRVlFnVWtWVFZVeFVVeUJHVWs5TklGUklSU0JFVDFkT1RFOUJSQ0JQUmlCQlRsa2dVMVZEU0NCTlFWUkZVa2xCVEM0OEwyeHBQZ29KUEd4cFBrNVBJRUZFVmtsRFJTQlBVaUJKVGtaUFVrMUJWRWxQVGl3Z1YwaEZWRWhGVWlCUFVrRk1JRTlTSUZkU1NWUlVSVTRzSUU5Q1ZFRkpUa1ZFSUVKWklGbFBWU0JHVWs5TklFOVNJRlJJVWs5VlIwZ2dUMUlnUmxKUFRTQlVTRVVnVTBWU1ZrbERSU0JUU0VGTVRDQkRVa1ZCVkVVZ1FVNVpJRmRCVWxKQlRsUlpJRTVQVkNCRldGQlNSVk5UVEZrZ1UxUkJWRVZFSUVsT0lGUklSU0JVVDFNdVBDOXNhVDRLUEM5dmJENEtDanh3UGp4emRISnZibWMrVEVsTlNWUkJWRWxQVGlCUFJpQk1TVUZDU1V4SlZGazhMM04wY205dVp6NDhMM0ErQ2dvOGNENVpUMVVnUlZoUVVrVlRVMHhaSUZWT1JFVlNVMVJCVGtRZ1FVNUVJRUZIVWtWRklGUklRVlFnUVU1RUlGTklRVXhNSUU1UFZDQkNSU0JNU1VGQ1RFVWdSazlTSUVGT1dTQkVTVkpGUTFRc0lFbE9SRWxTUlVOVUxDQkpUa05KUkVWT1ZFRk1MQ0JUVUVWRFNVRk1MQ0JEVDA1VFJWRlZSVTVVU1VGTUlFOVNJRVZZUlUxUVRFRlNXU0JFUVUxQlIwVlRMQ0JKVGtOTVZVUkpUa2NnUWxWVUlFNVBWQ0JNU1UxSlZFVkVJRlJQTENCRVFVMUJSMFZUSUVaUFVpQk1UMU5USUU5R0lGQlNUMFpKVkZNc0lFZFBUMFJYU1V4TUxDQlZVMFVzSUVSQlZFRWdUMUlnVDFSSVJWSWdTVTVVUVU1SFNVSk1SU0JNVDFOVFJWTWdLRVZXUlU0Z1NVWWdTRUZUSUVKRlJVNGdRVVJXU1ZORlJDQlBSaUJVU0VVZ1VFOVRVMGxDU1V4SlZGa2dUMFlnVTFWRFNDQkVRVTFCUjBWVEtTd2dVa1ZUVlV4VVNVNUhJRVpTVDAwNlBDOXdQZ29LUEc5c1Bnb0pQR3hwUGxSSVJTQlZVMFVnVDFJZ1ZFaEZJRWxPUVVKSlRFbFVXU0JVVHlCVlUwVWdWRWhGSUZORlVsWkpRMFU3UEM5c2FUNEtDVHhzYVQ1VVNFVWdRMDlUVkNCUFJpQlFVazlEVlZKRlRVVk9WQ0JQUmlCVFZVSlRWRWxVVlZSRklFZFBUMFJUSUVGT1JDQlRSVkpXU1VORlV5QlNSVk5WVEZSSlRrY2dSbEpQVFNCQlRsa2dSMDlQUkZNc0lFUkJWRUVzSUVsT1JrOVNUVUZVU1U5T0lFOVNJRk5GVWxaSlEwVlRJRkJWVWtOSVFWTkZSQ0JQVWlCUFFsUkJTVTVGUkNCUFVpQk5SVk5UUVVkRlV5QlNSVU5GU1ZaRlJDQlBVaUJVVWtGT1UwRkRWRWxQVGxNZ1JVNVVSVkpGUkNCSlRsUlBJRlJJVWs5VlIwZ2dUMUlnUmxKUFRTQlVTRVVnVTBWU1ZrbERSVHM4TDJ4cFBnb0pQR3hwUGxWT1FWVlVTRTlTU1ZwRlJDQkJRME5GVTFNZ1ZFOGdUMUlnUVV4VVJWSkJWRWxQVGlCUFJpQlpUMVZTSUZSU1FVNVRUVWxUVTBsUFRsTWdUMUlnUkVGVVFUczhMMnhwUGdvSlBHeHBQbE5VUVZSRlRVVk9WRk1nVDFJZ1EwOU9SRlZEVkNCUFJpQkJUbGtnVkVoSlVrUWdVRUZTVkZrZ1QwNGdWRWhGSUZORlVsWkpRMFU3SUU5U1BDOXNhVDRLQ1R4c2FUNUJUbGtnVDFSSVJWSWdUVUZVVkVWU0lGSkZURUZVU1U1SElGUlBJRlJJUlNCVFJWSldTVU5GTGp3dmJHaytDand2YjJ3K0NnbzhjRDQ4ZFQ1Q2VTQnlaV2RwYzNSbGNtbHVaeUJoYm1RZ2MzVmljMk55YVdKcGJtY2dkRzhnYjNWeUlHVnRZV2xzSUdGdVpDQlRUVk1nYzJWeWRtbGpaU3dnWW5rZ2IzQjBMV2x1TENCdmJteHBibVVnY21WbmFYTjBjbUYwYVc5dUlHOXlJR0o1SUdacGJHeHBibWNnYjNWMElHRWdZMkZ5WkN3Z0puRjFiM1E3ZVc5MUlHRm5jbVZsSUhSdklIUm9aWE5sSUZSRlVrMVRJRTlHSUZORlVsWkpRMFVtY1hWdmREc2dZVzVrSUhsdmRTQmhZMnR1YjNkc1pXUm5aU0JoYm1RZ2RXNWtaWEp6ZEdGdVpDQjBhR1VnWVdKdmRtVWdkR1Z5YlhNZ2IyWWdjMlZ5ZG1salpTQnZkWFJzYVc1bFpDQmhibVFnWkdWMFlXbHNaV1FnWm05eUlIbHZkU0IwYjJSaGVTNDhMM1UrUEM5d1Bnb0tQSEErSm01aWMzQTdQQzl3UGdvOGFHbG5hR3hwWjJoMElHTnNZWE56UFNKamIyMXdZVzU1VG1GdFpWVndaR0YwWlNJK1RtRnpkSGtnVUdWeVptOXliV0Z1WTJVOEwyaHBaMmhzYVdkb2RENDhZbklnTHo0S1BHaHBaMmhzYVdkb2RDQmpiR0Z6Y3owaVkyOXRjR0Z1ZVVGa1pISmxjM05WY0dSaGRHVWlQakl3TXpVZ1V5NGdSV0Z6ZEhkdmIyUWdSSEl1TENCWGIyOWtjM1J2WTJzc0lFbE1JRFl3TURrNFBDOW9hV2RvYkdsbmFIUStQR0p5SUM4K0NqeG9hV2RvYkdsbmFIUWdZMnhoYzNNOUltTnZiWEJoYm5sUWFHOXVaVlZ3WkdGMFpTSStLRGcwTnlrZ05EVTRMVFE0TlRnOEwyaHBaMmhzYVdkb2RENDhZbklnTHo0S1BHaHBaMmhzYVdkb2RDQmpiR0Z6Y3owaVkyOXRjR0Z1ZVVWdFlXbHNWWEJrWVhSbElqNXVZWFJsUUc1aGMzUjVjR1Z5Wm05eWJXRnVZMlV1WTI5dFBDOW9hV2RvYkdsbmFIUSsifQ==

Terms of Service

Privacy Policy

Core Modal Title

Sorry, no results found

You Might Find These Articles Interesting

T
Please Check Your Email
We Will Be Following Up Shortly
*
*
*